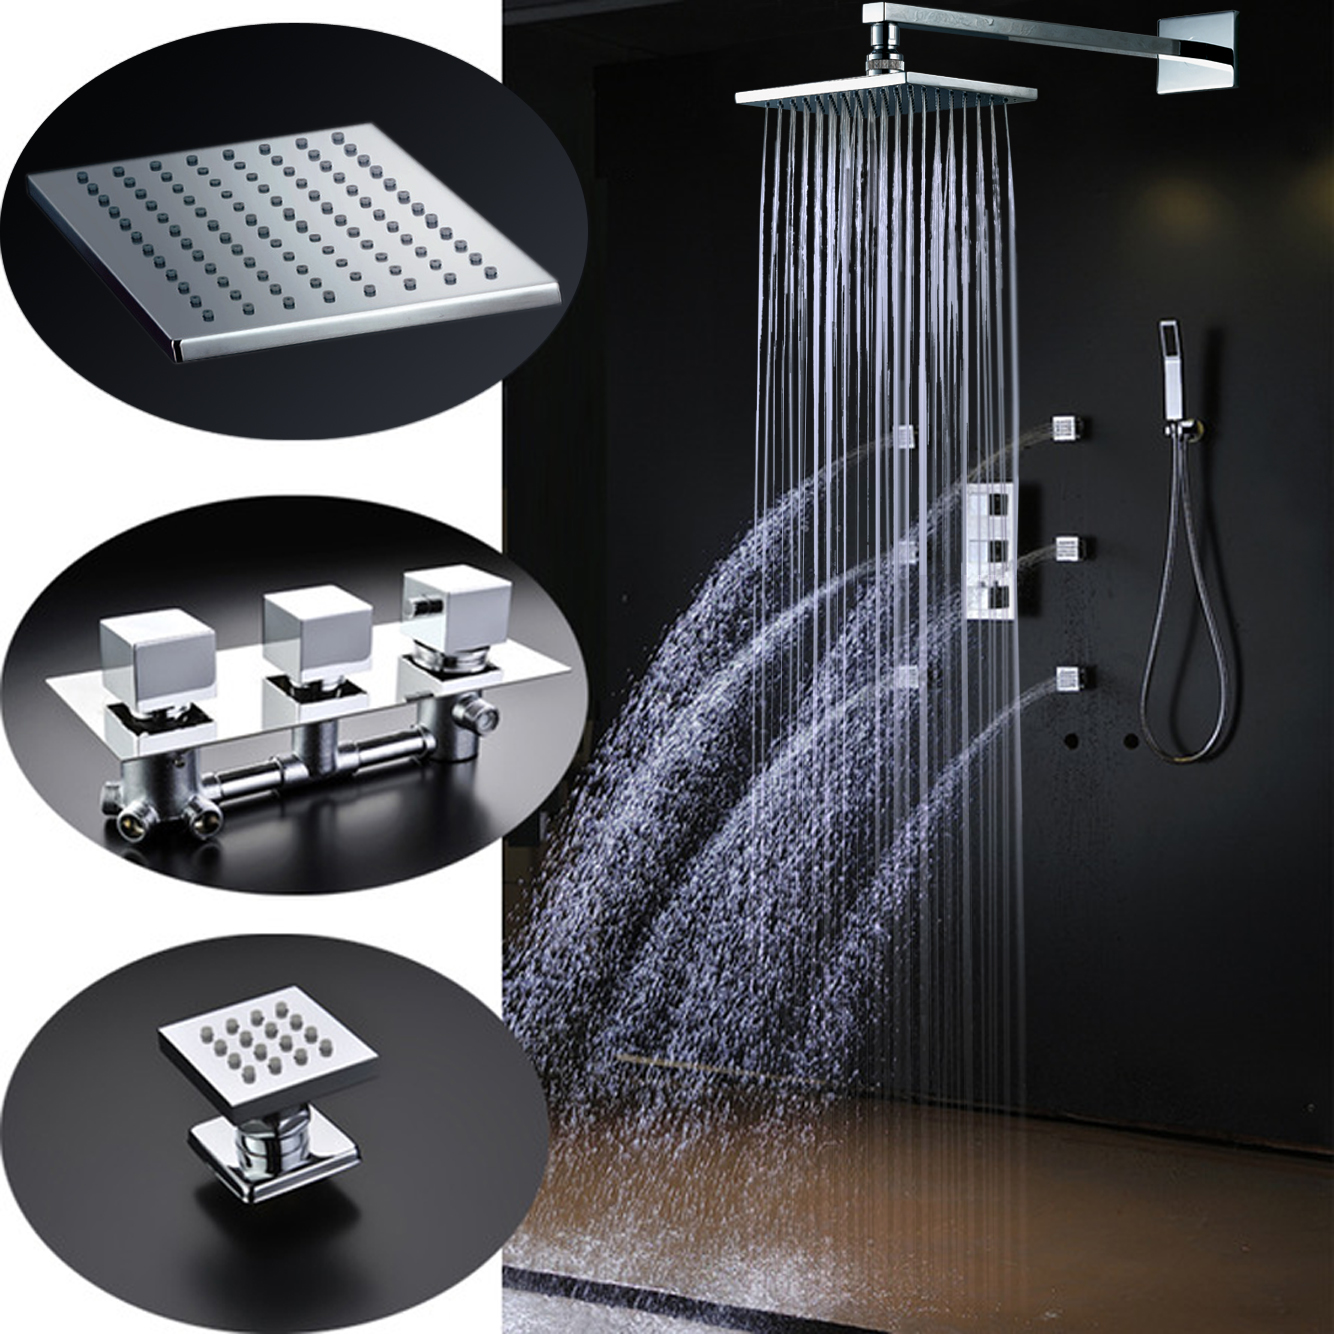
Fontana Lombardy Chrome Large Square Shower Head with Massage Jets
This solid brass, chrome finish showerhead comes with a handheld shower, six massage jets, and three handle mixer. Square rainfall showerhead is available in four sizes to best suit your shower size. The mixer provides water pressure, on/off and thermostatic valve to ensure you get the shower experience you want. Built-in hydro-powered device powers the LED lights, which provide visual shower temperature cues to reduce water waste. The lights will dim and brighten when you lower and raise the pressure so you can set the perfect mood, water, and lighting. When the water temperature is ≤89 °F (≤32 °C), the Blue color will show automatically. When the water temperature is between 97 to 107 °F (36-42 °C), the Green color will show automatically. When the water temperature is between 109 to 122 °F (43-50 °C), Red color will show automatically. When the water temperature is above 122 °F (>50 °C), Red color will flash immediately.
Fontana Lombardy Chrome Large Square Shower Head with Massage Jets Features:
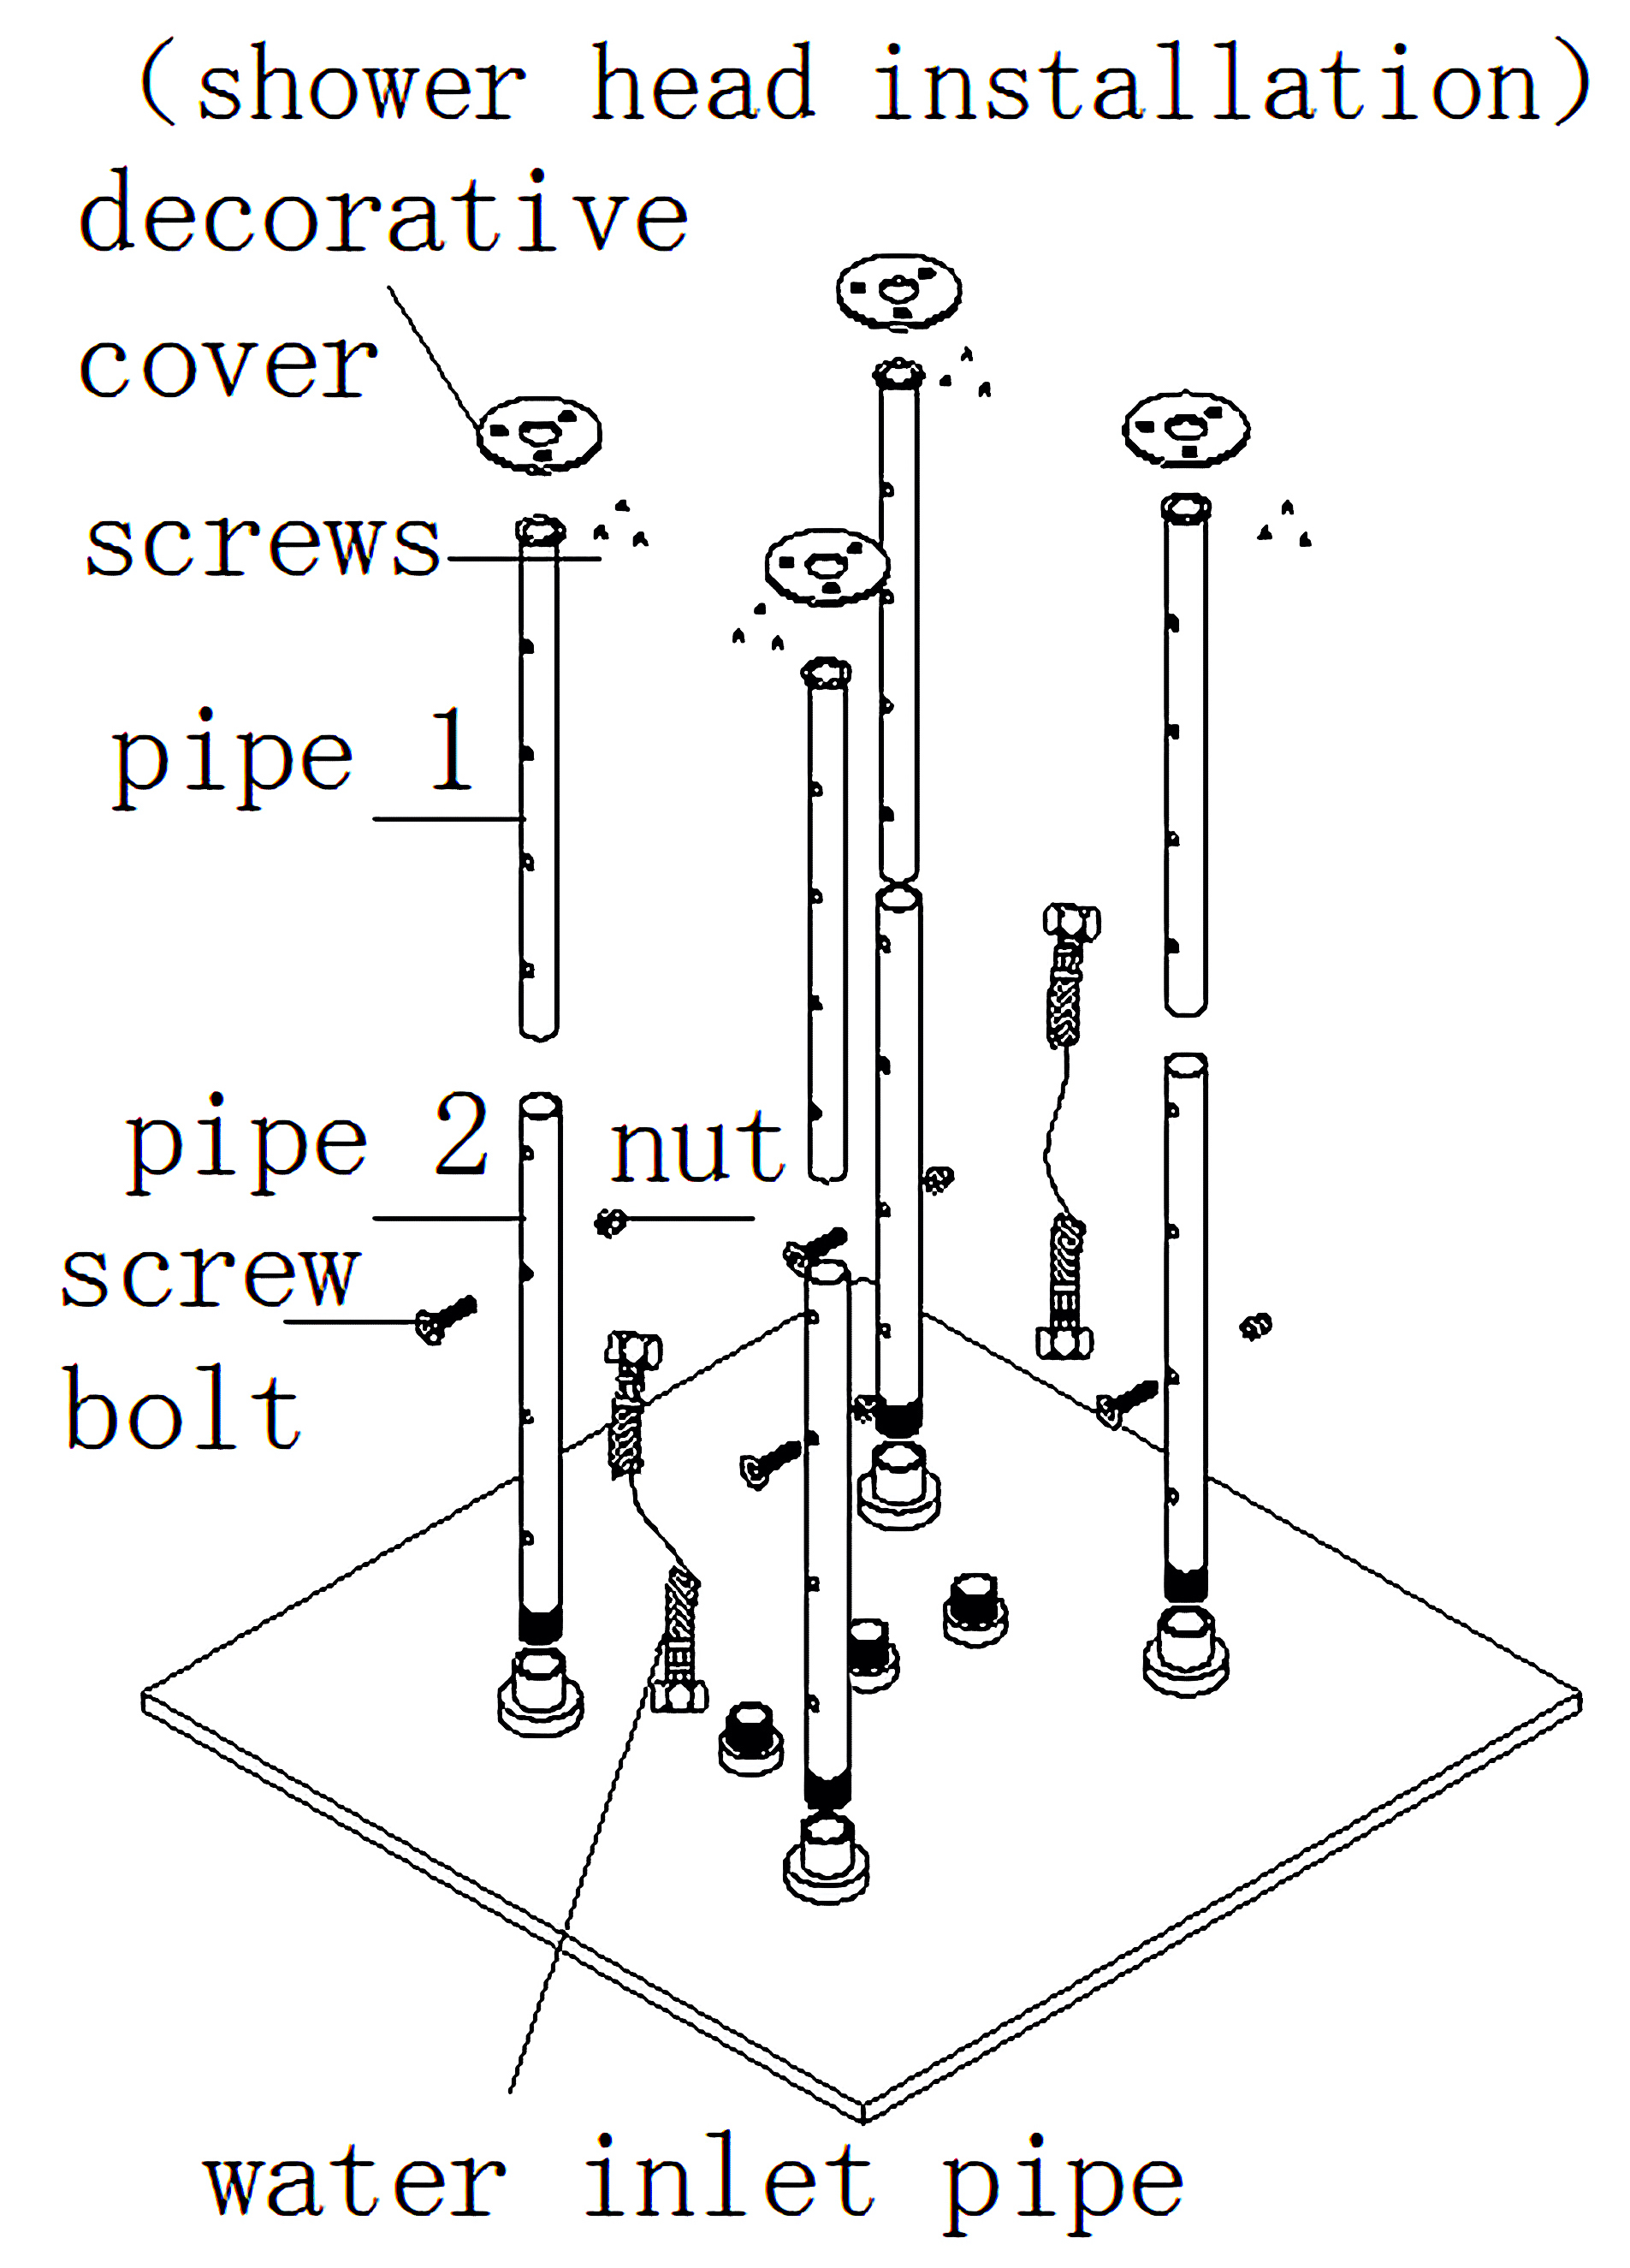
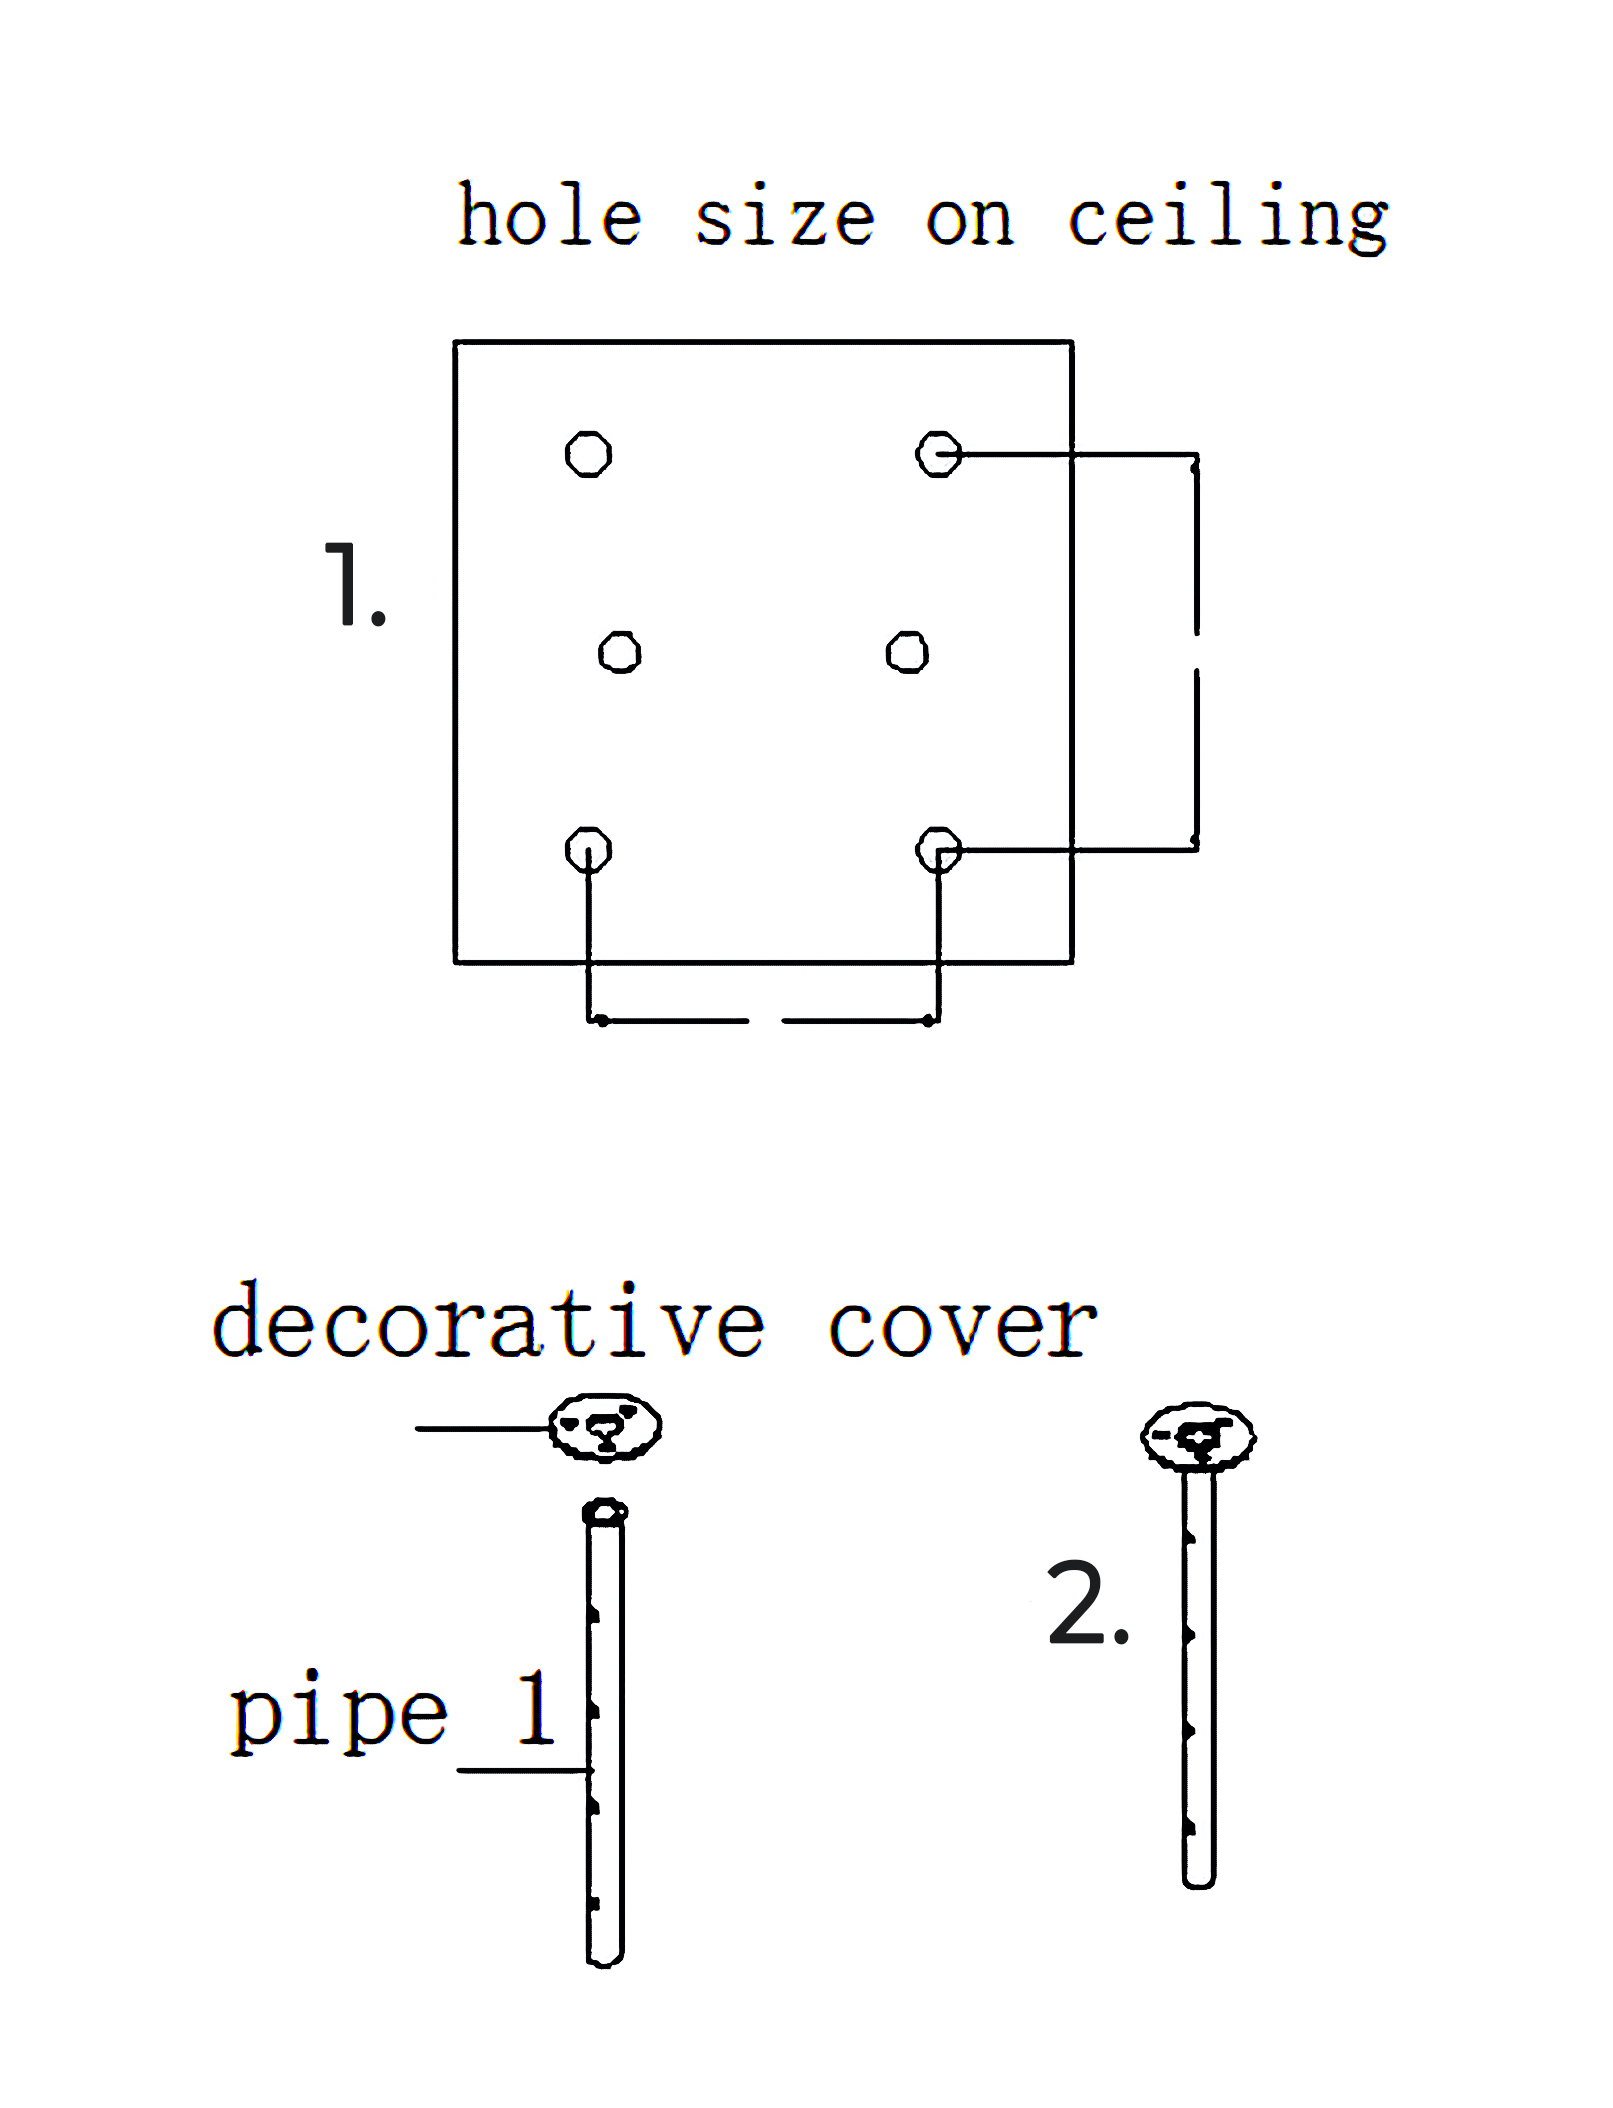
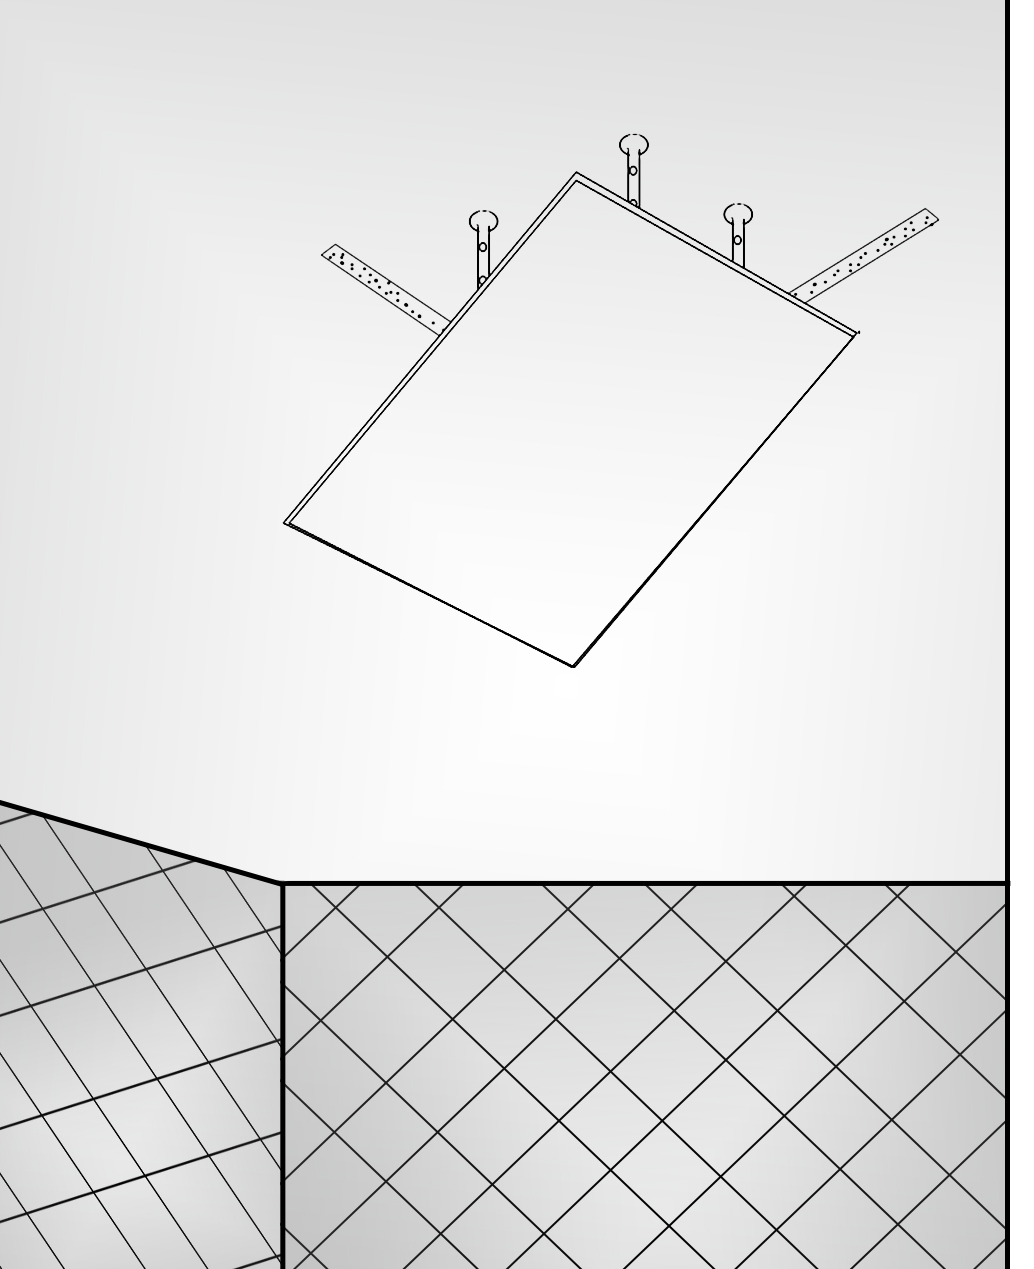
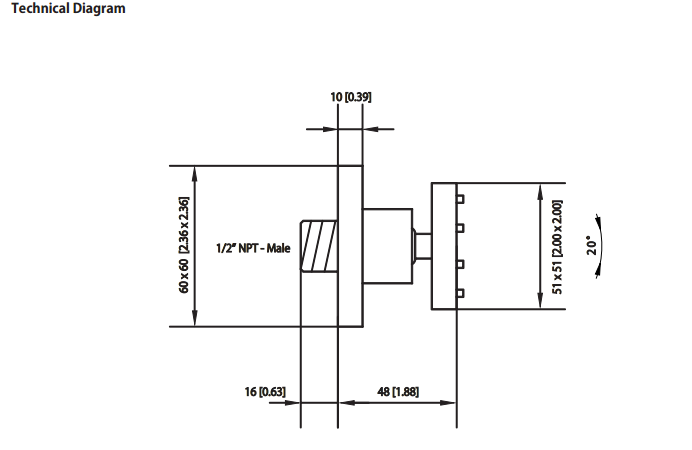
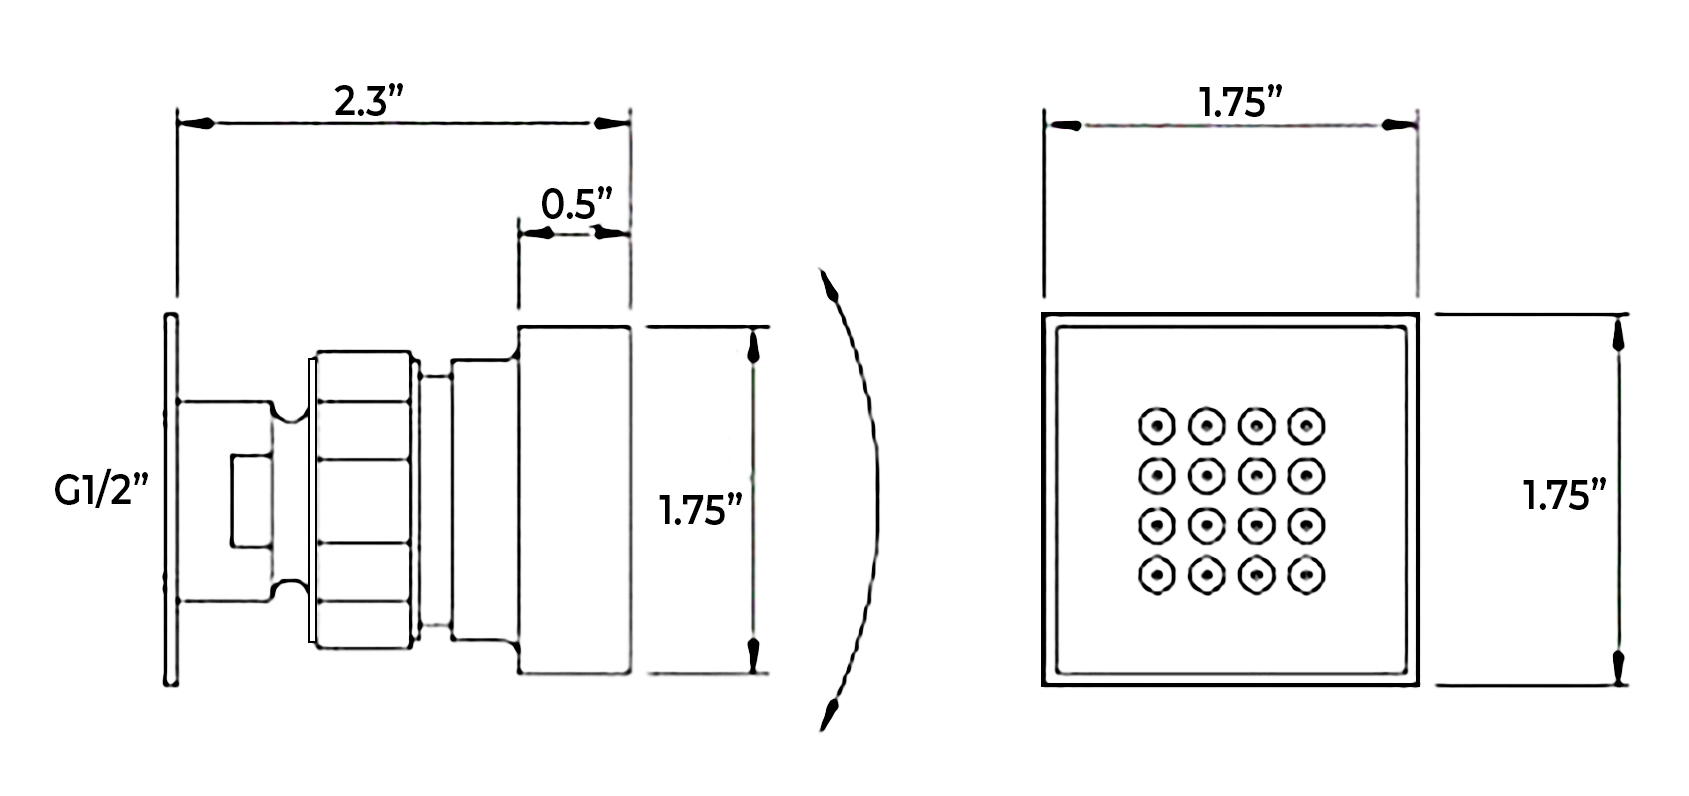
1.Drawing the line on the ceiling according to the above specification ·Decorative Cover ·pipe 1
2.connect pipe 1 with decorative cover
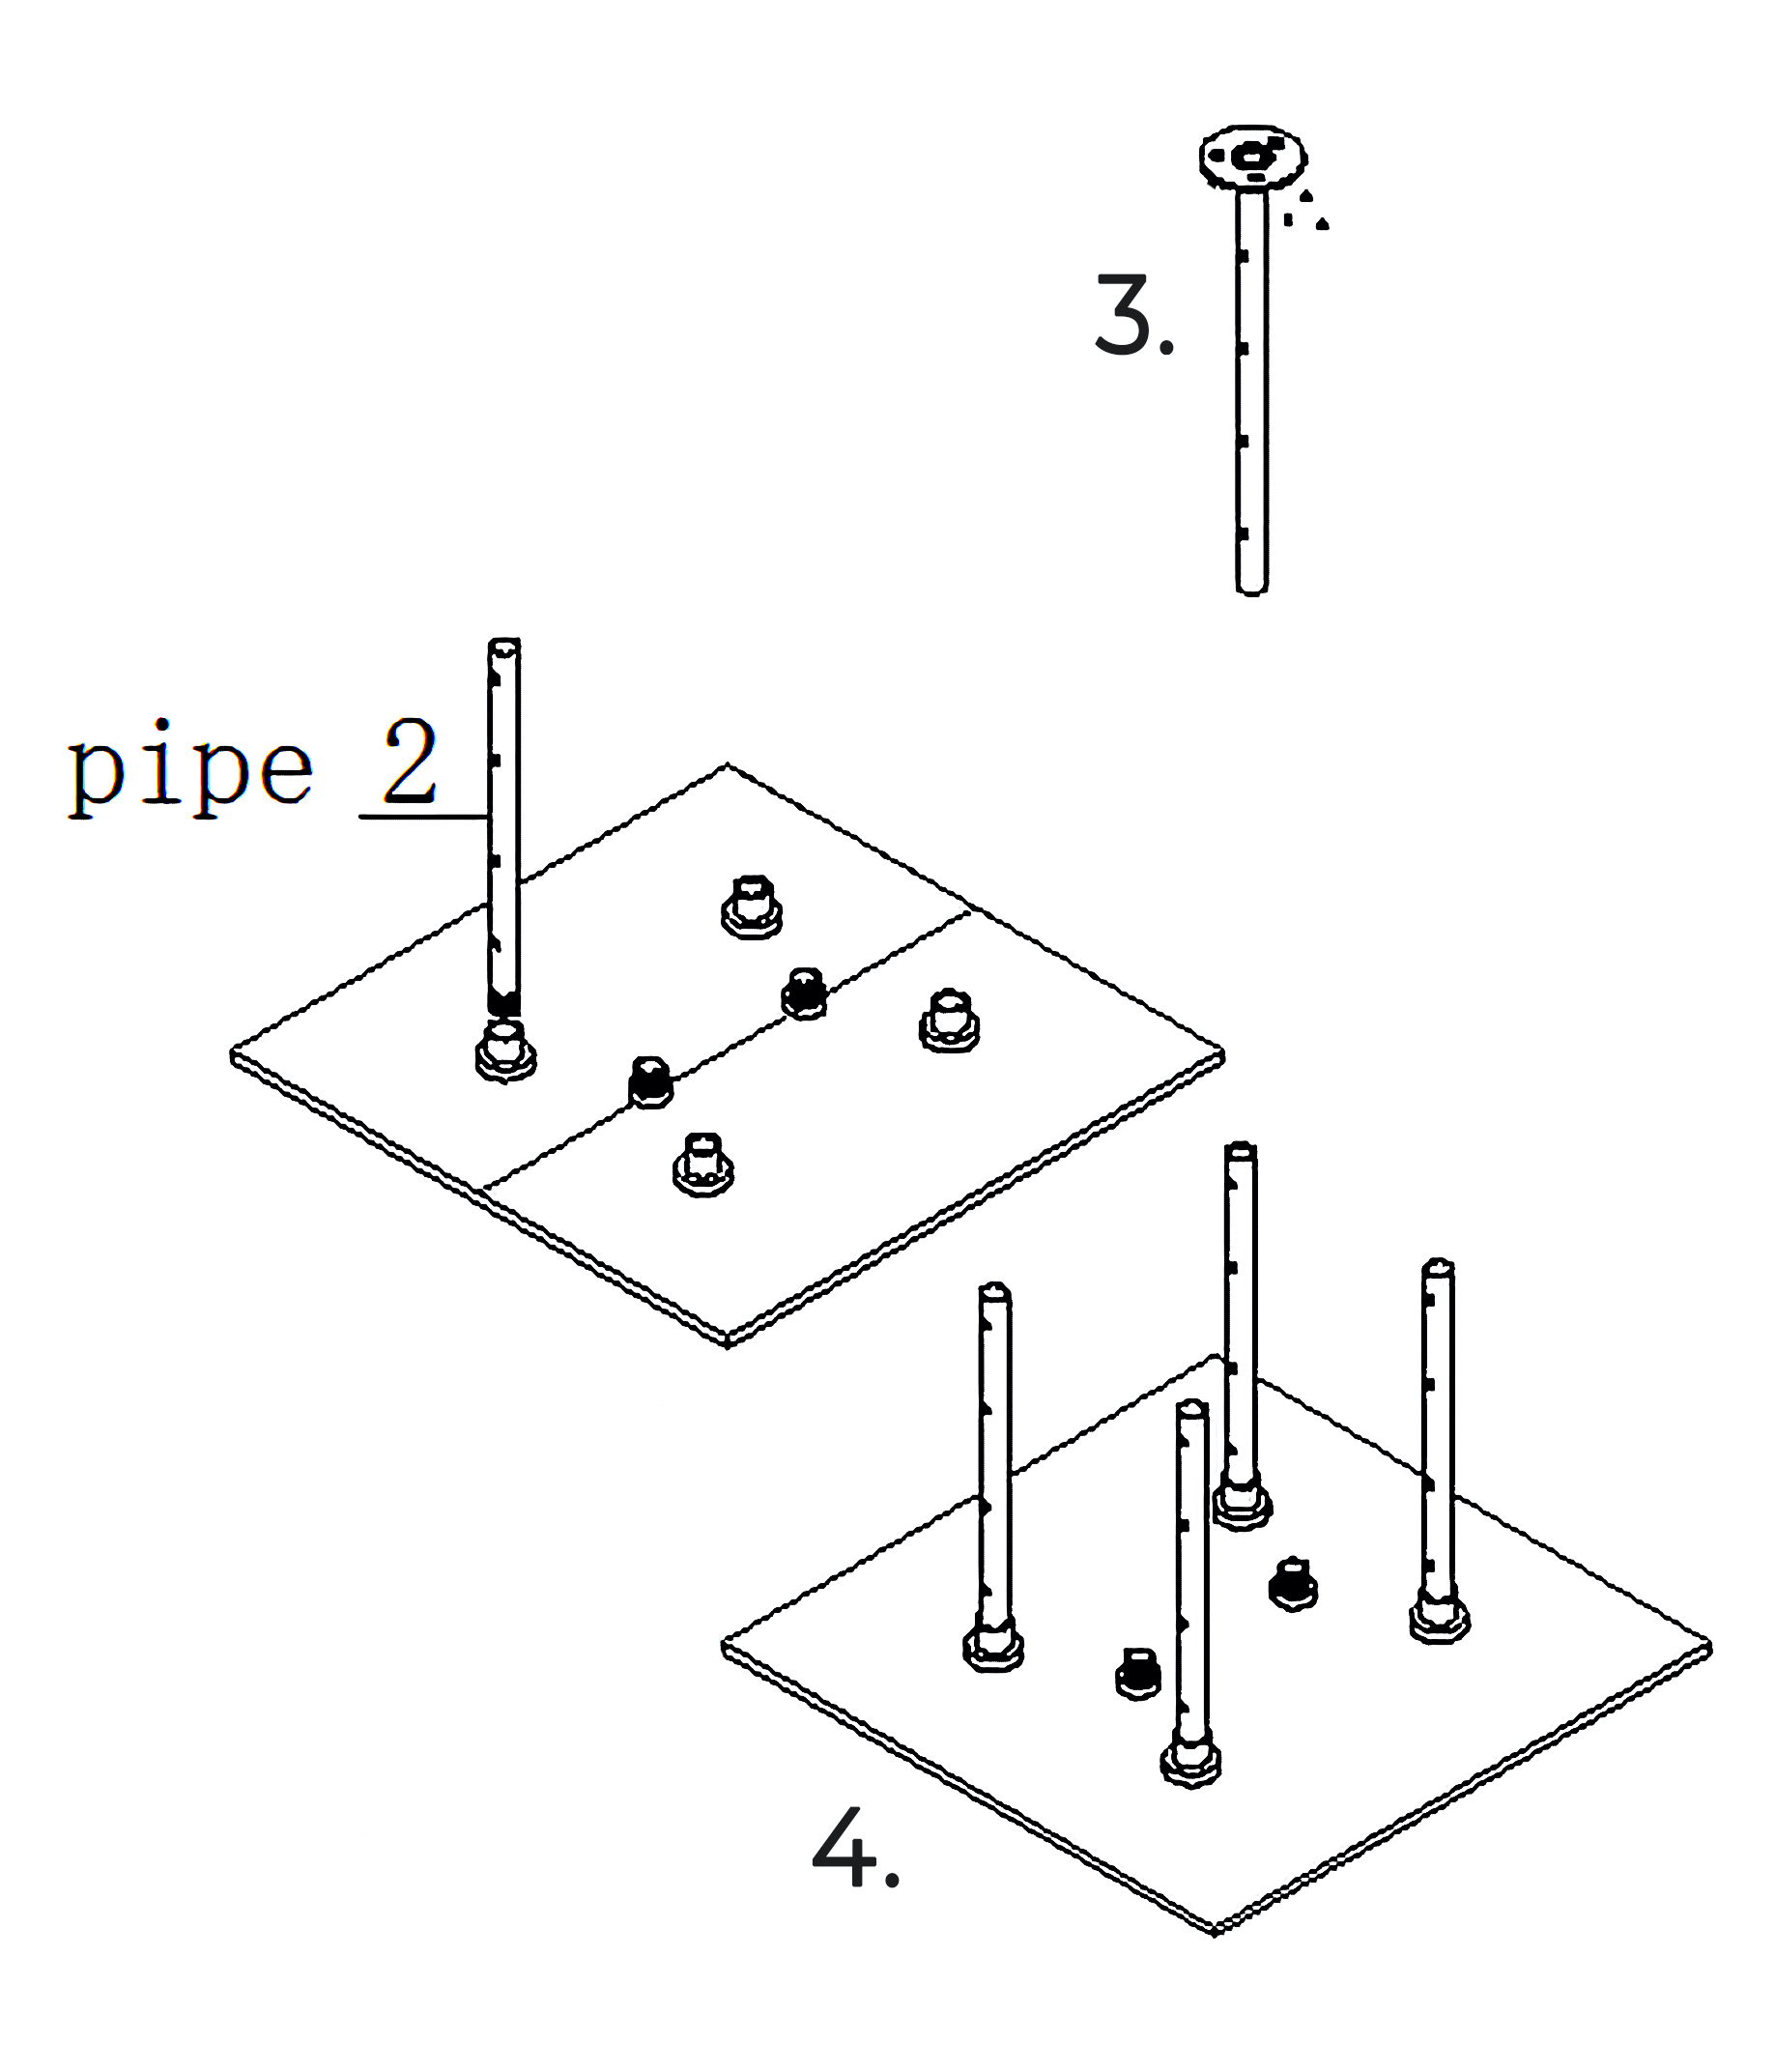
3.Drill the holes on the ceiling according to the above hole specification and install 4 pipes.
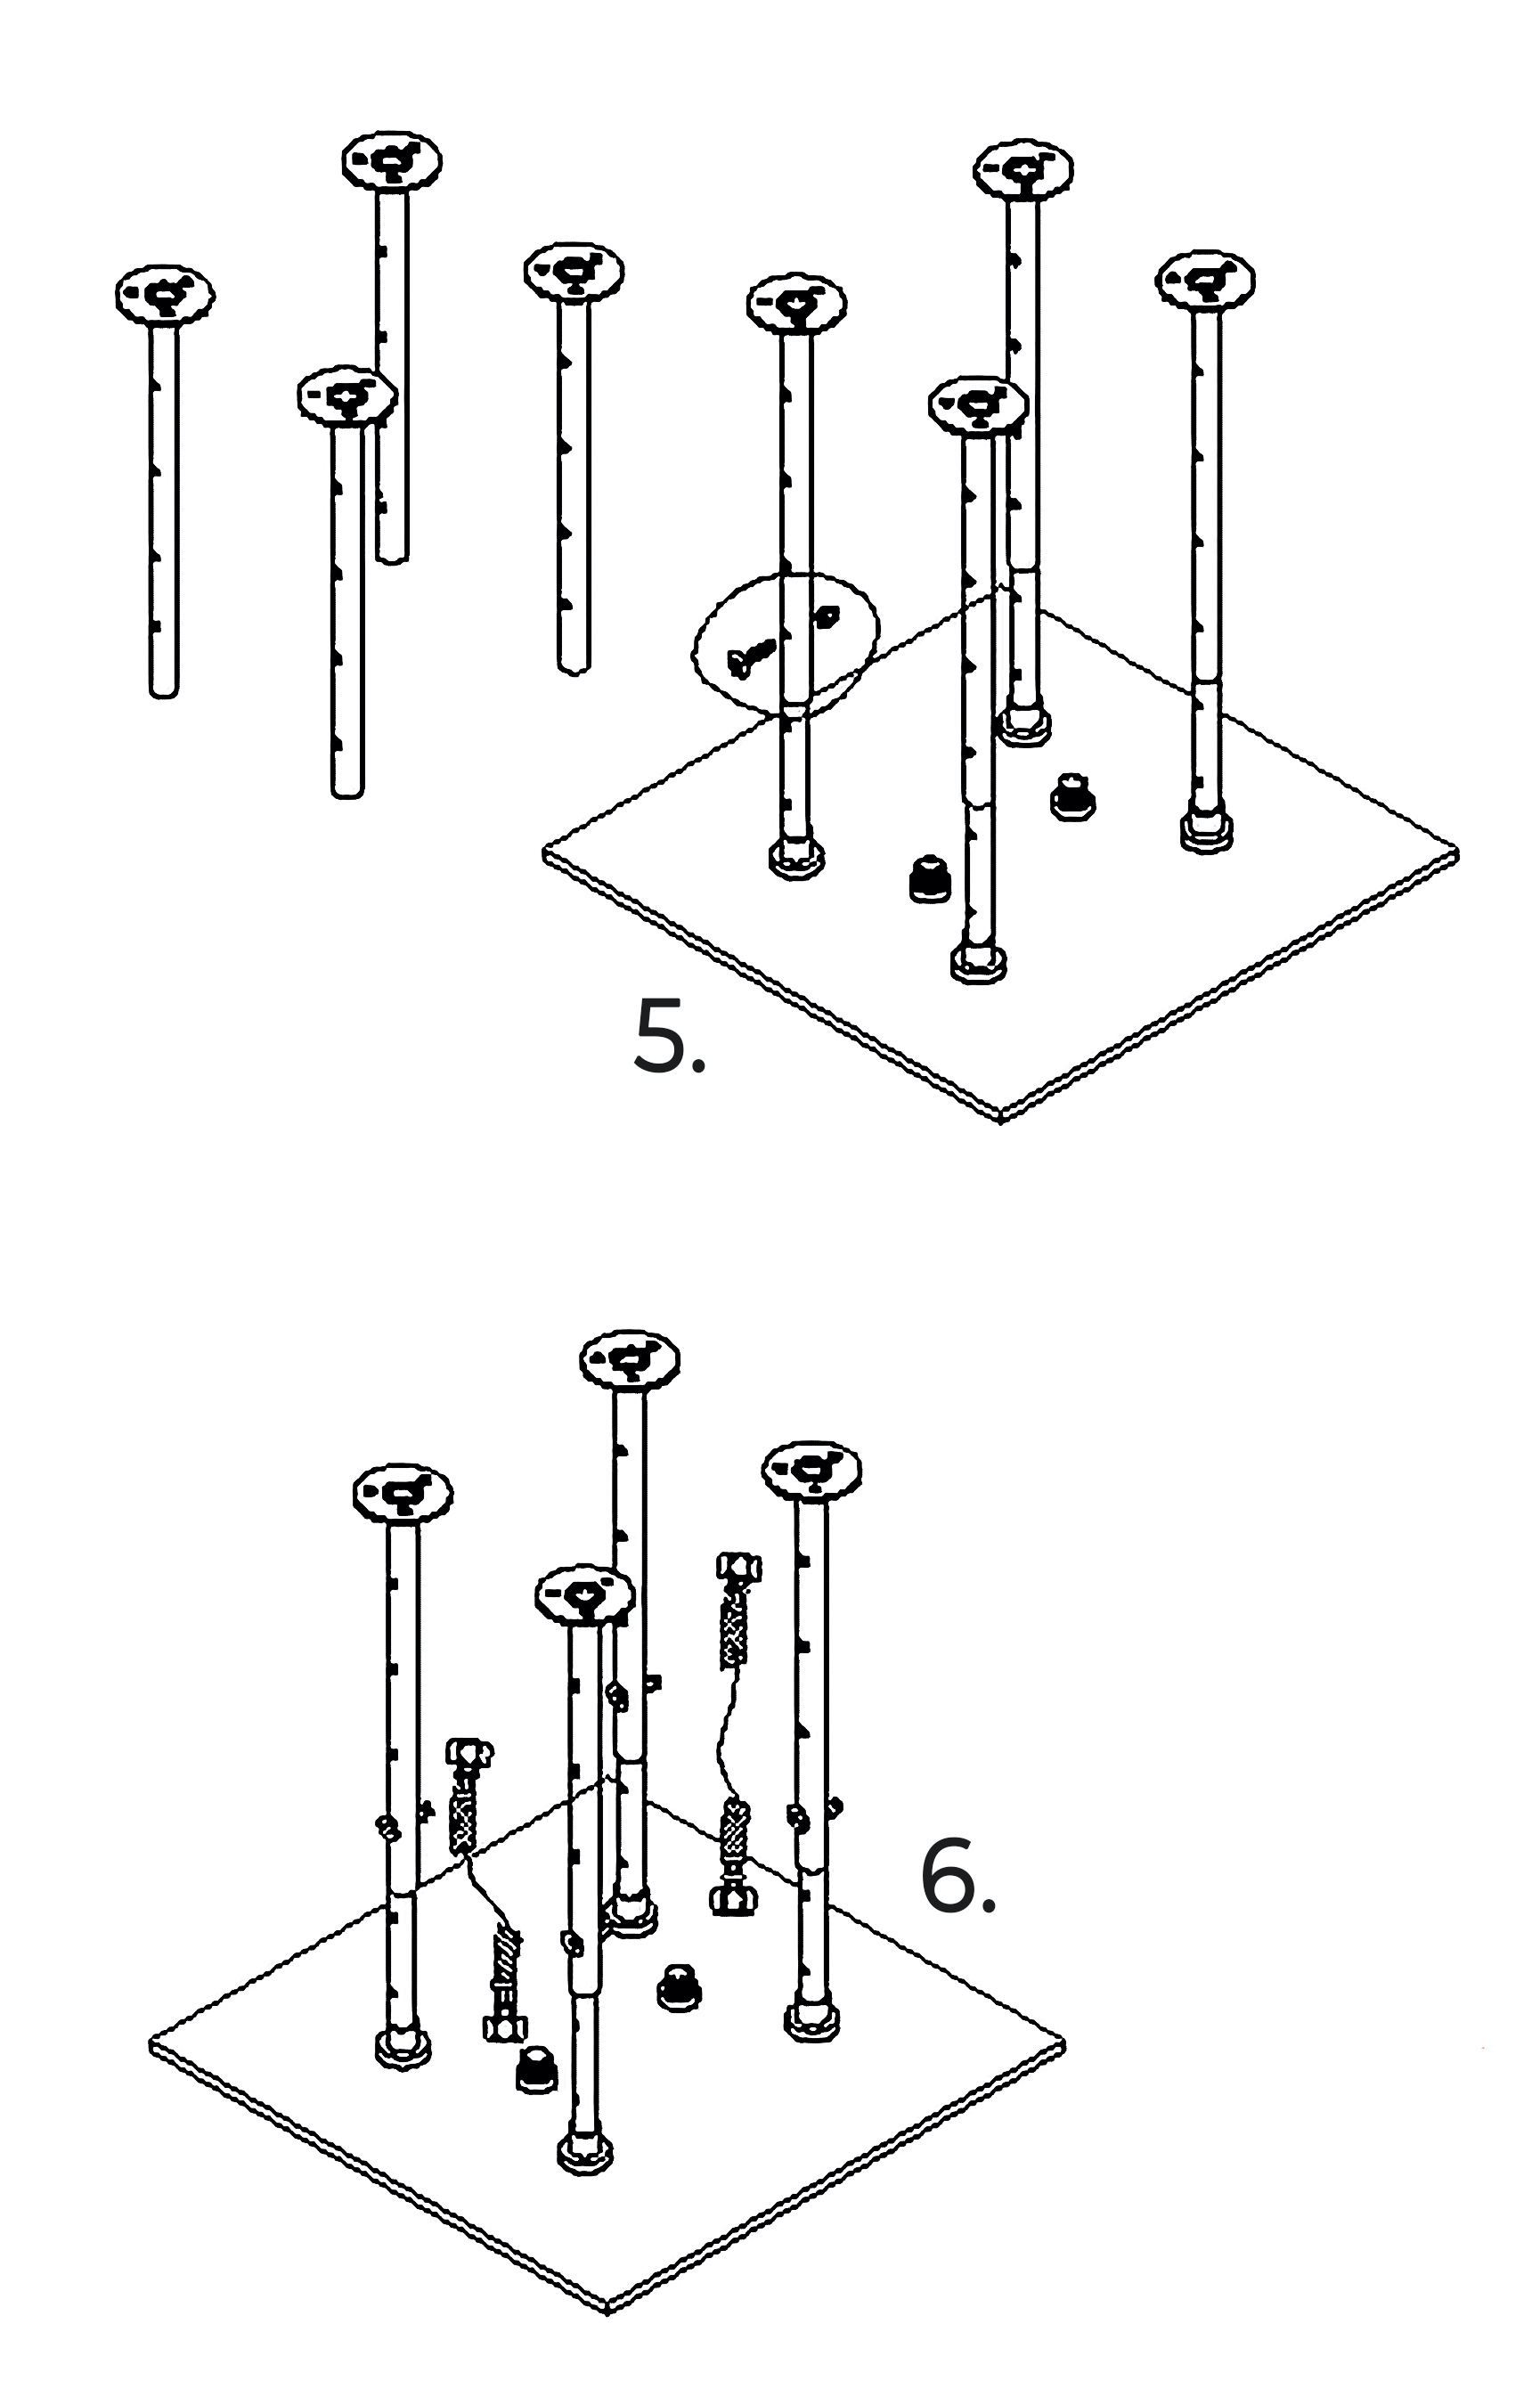
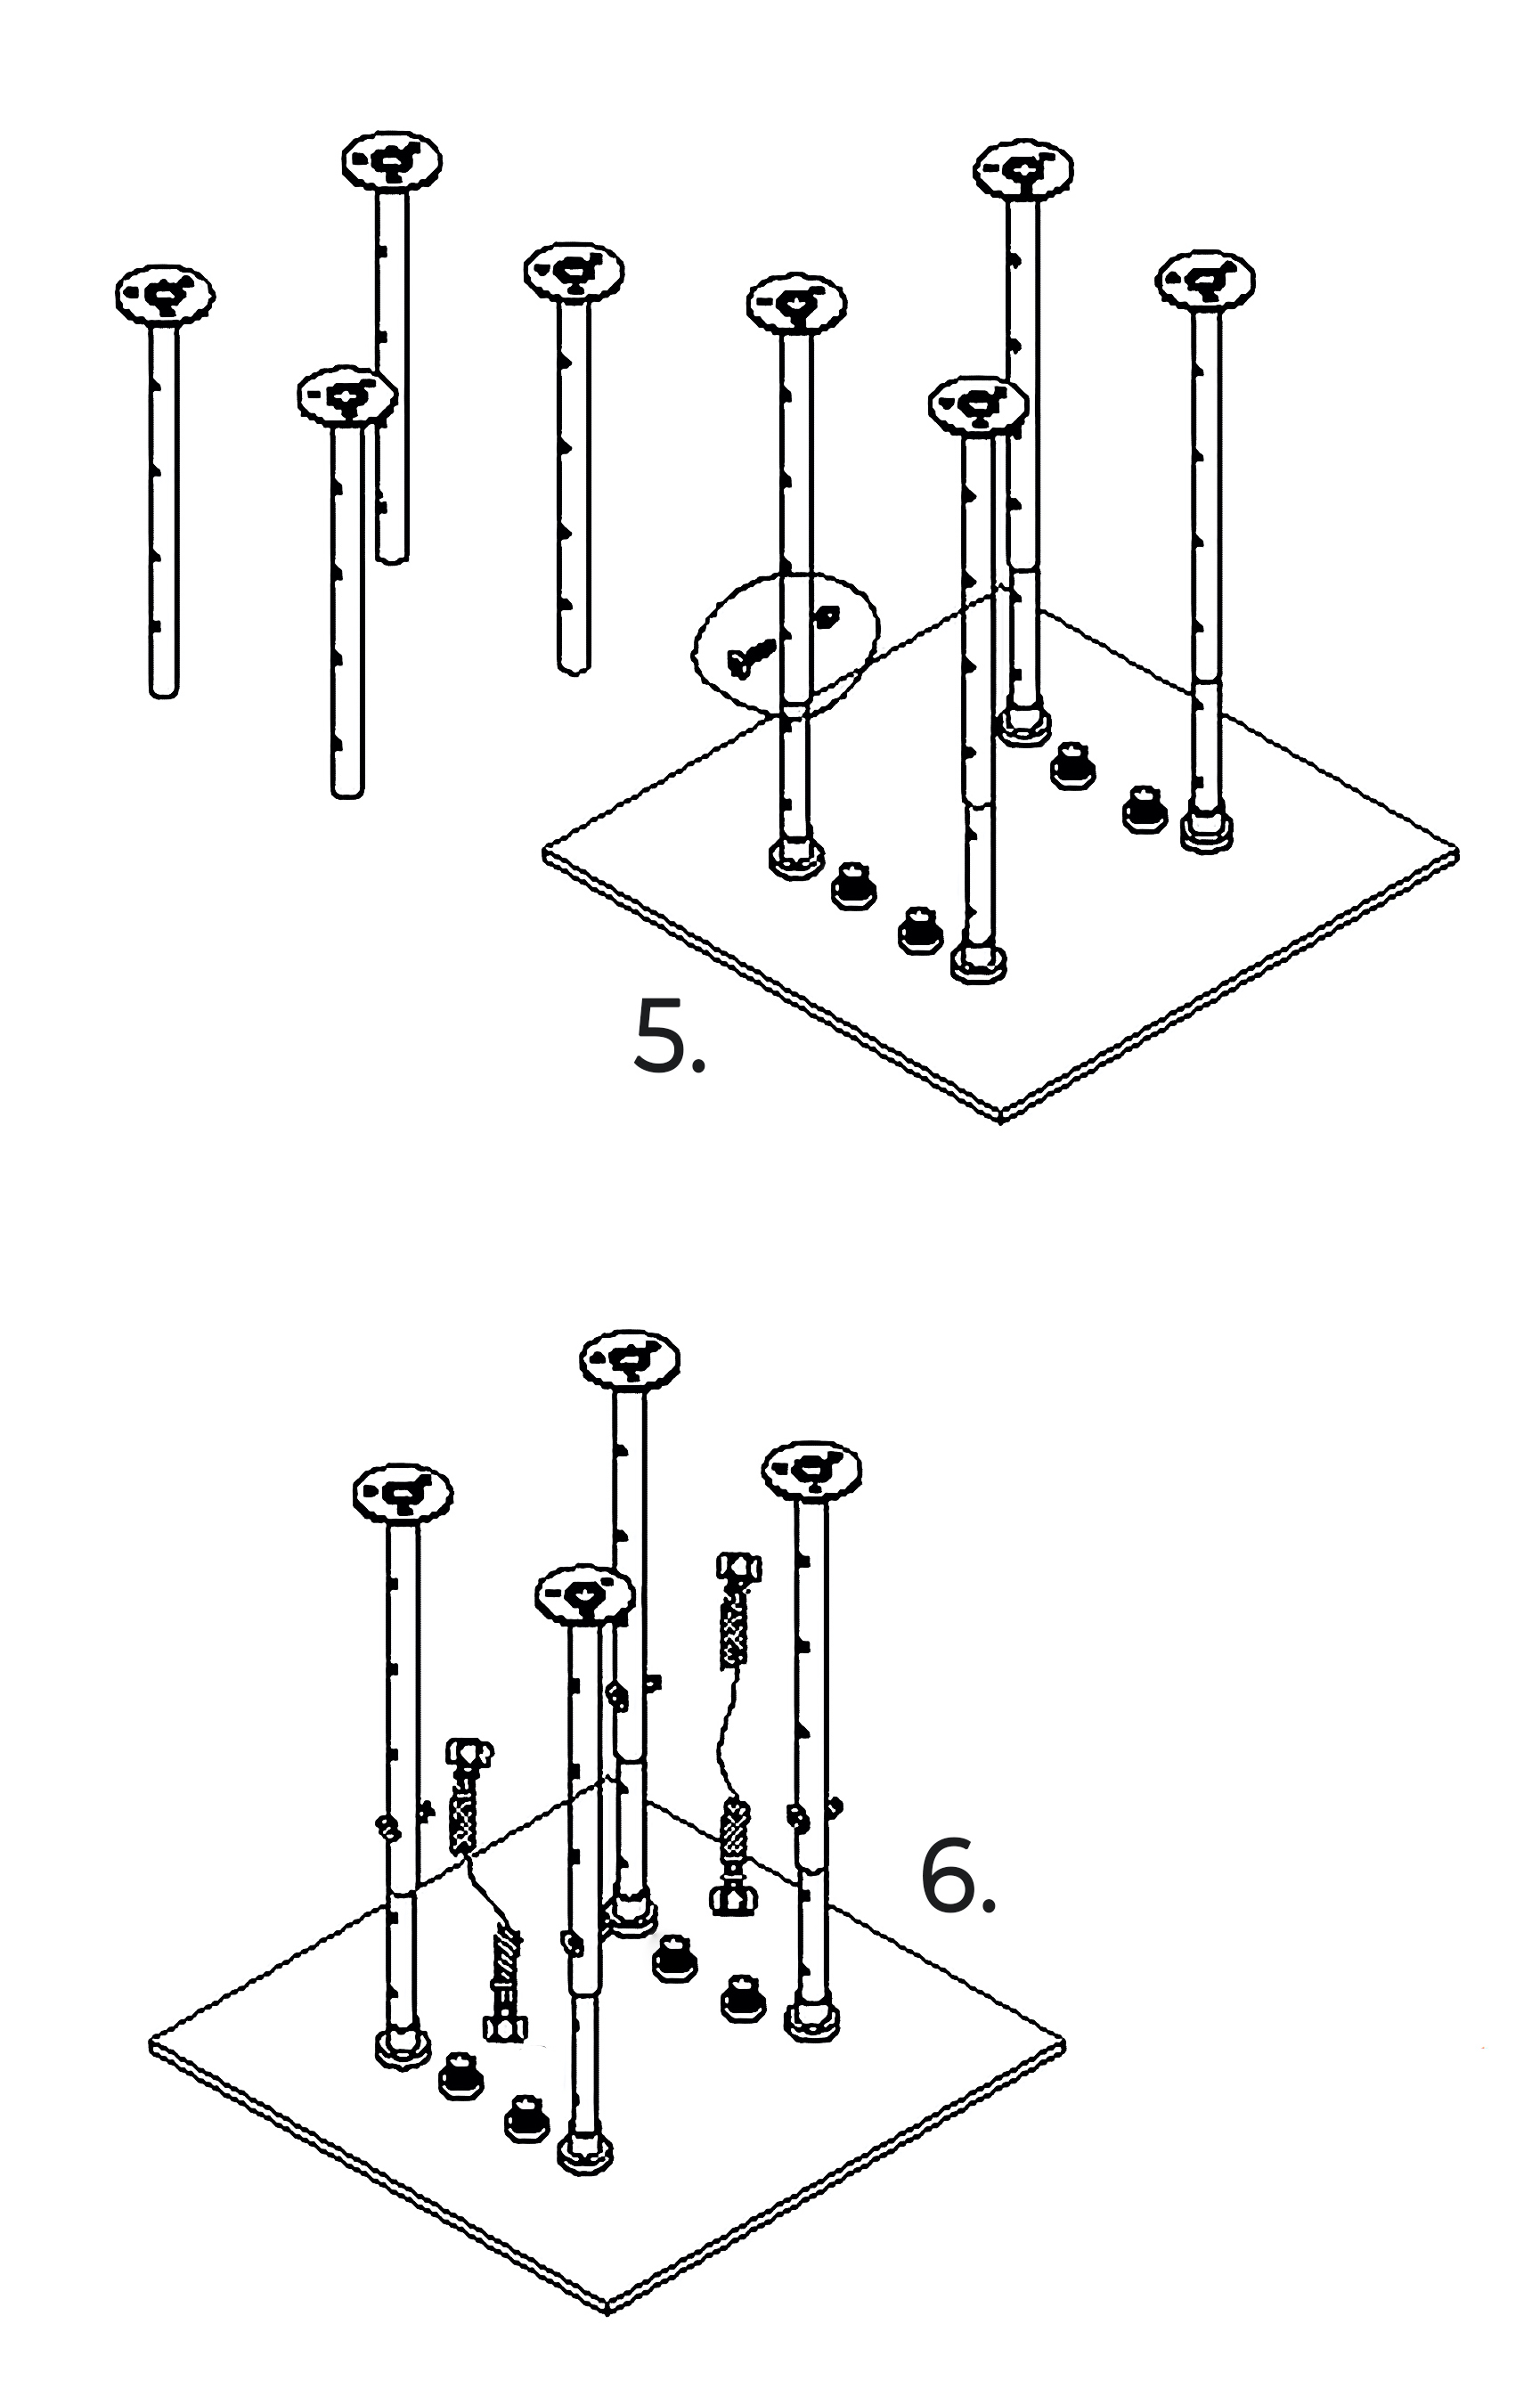
4. According to the right drawing, install four-pipe 2 into pipe 1. Put the screw bolts through the hole on the side to lock pipe 2 with pipe 1.
5.As the right drawing is shown, install four-pipe 2 on the head shower.
6.After fixing the showerhead on the ceiling, connect the showerhose with 2 water inlet on the showerhead back cover. The other end connects with the water outlet pipe in the wall.
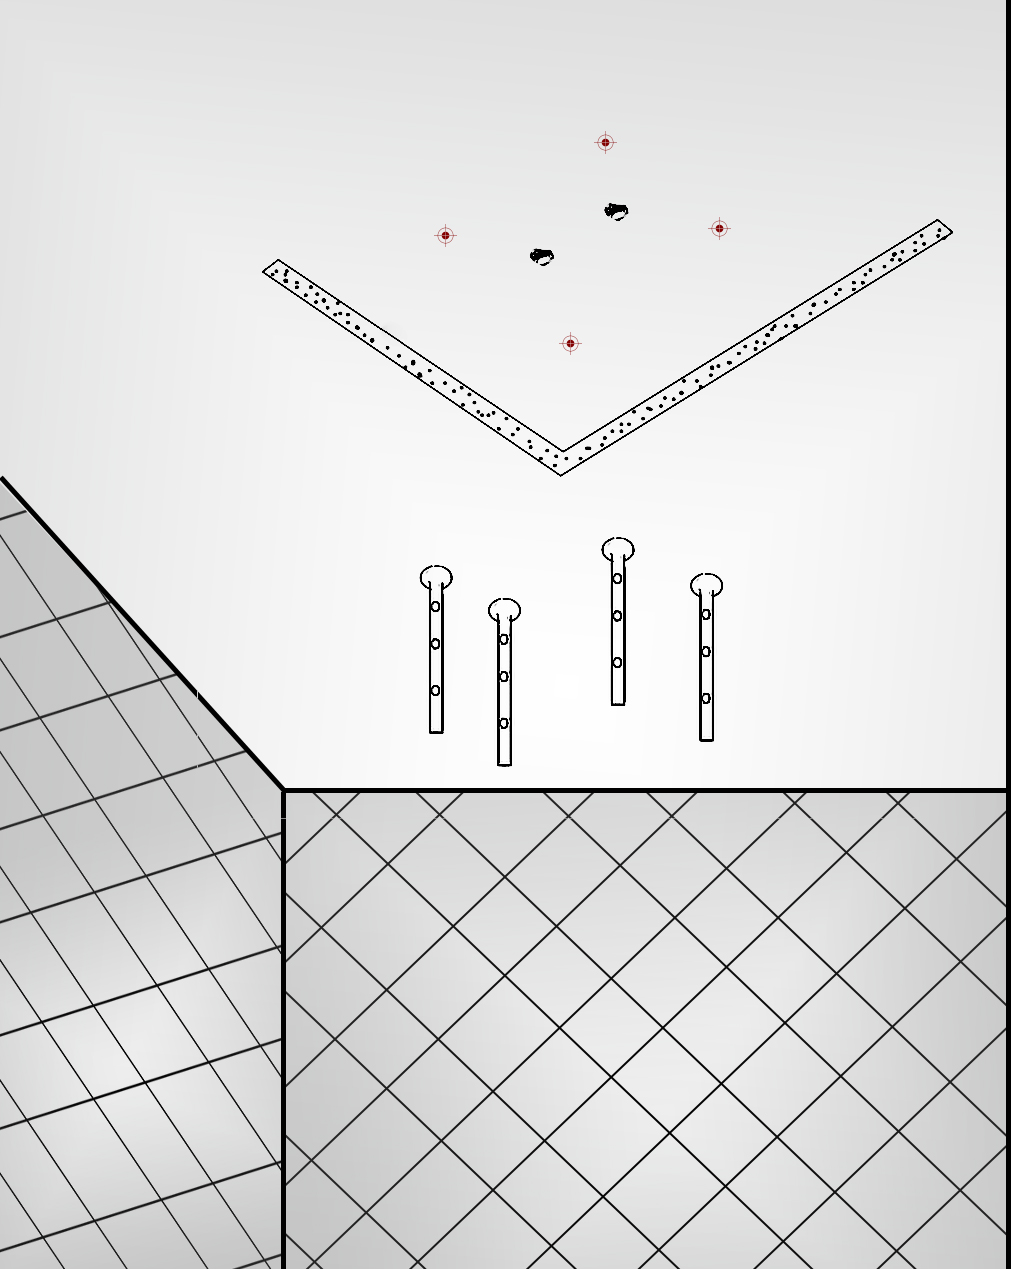
Remarks: Ceiling mounted shower head come with fixing bar installation
1. Draw size on ceiling
2. Install fixing bar on ceiling
3. Install fixing bar on shower head
4. Put shower head bar on ceiling fixing bar. The showerhead installation is now complete.
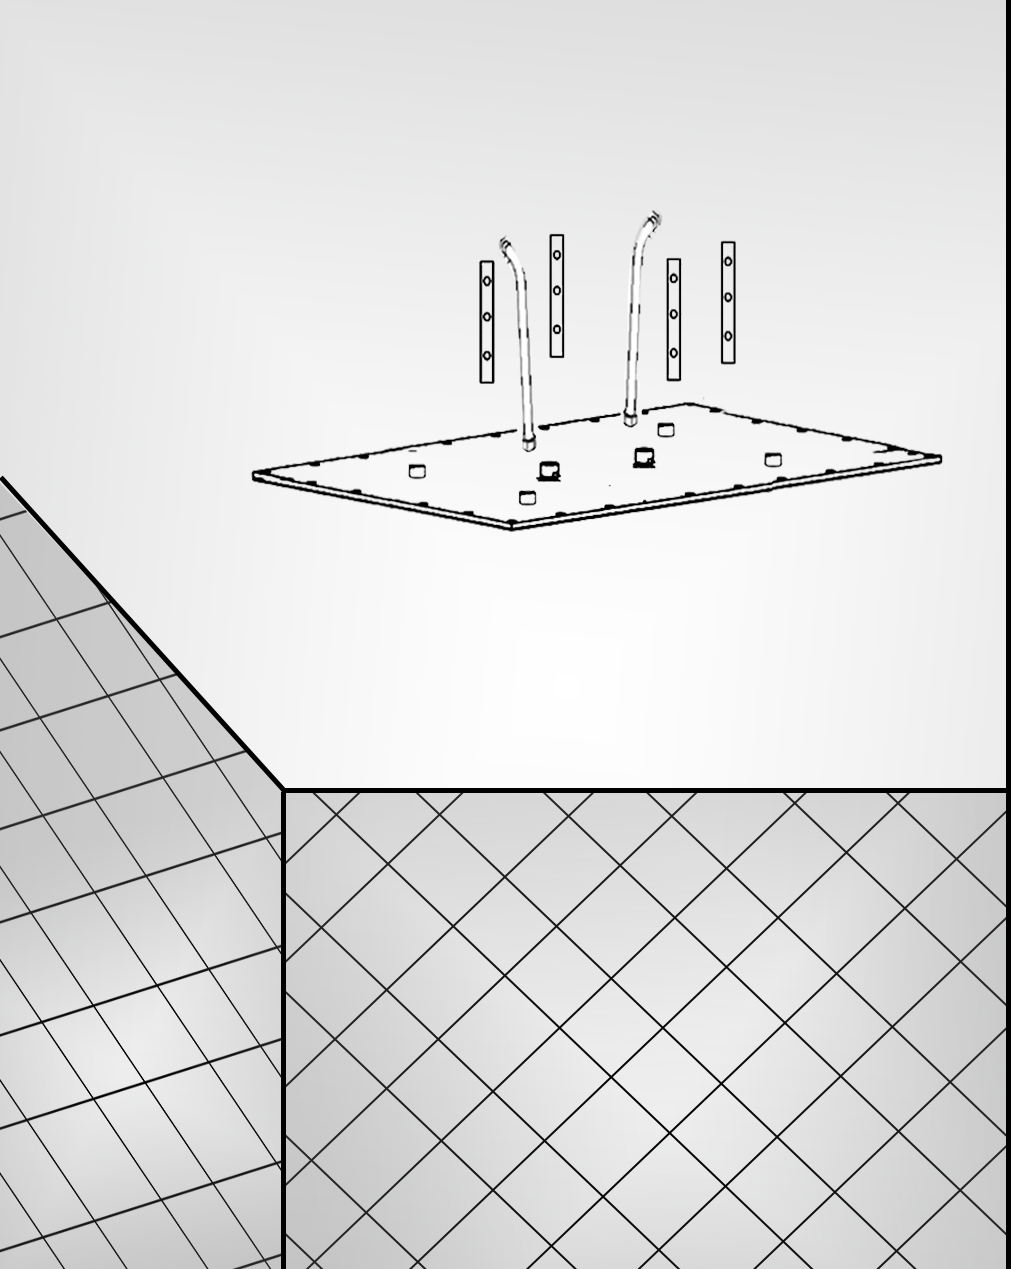
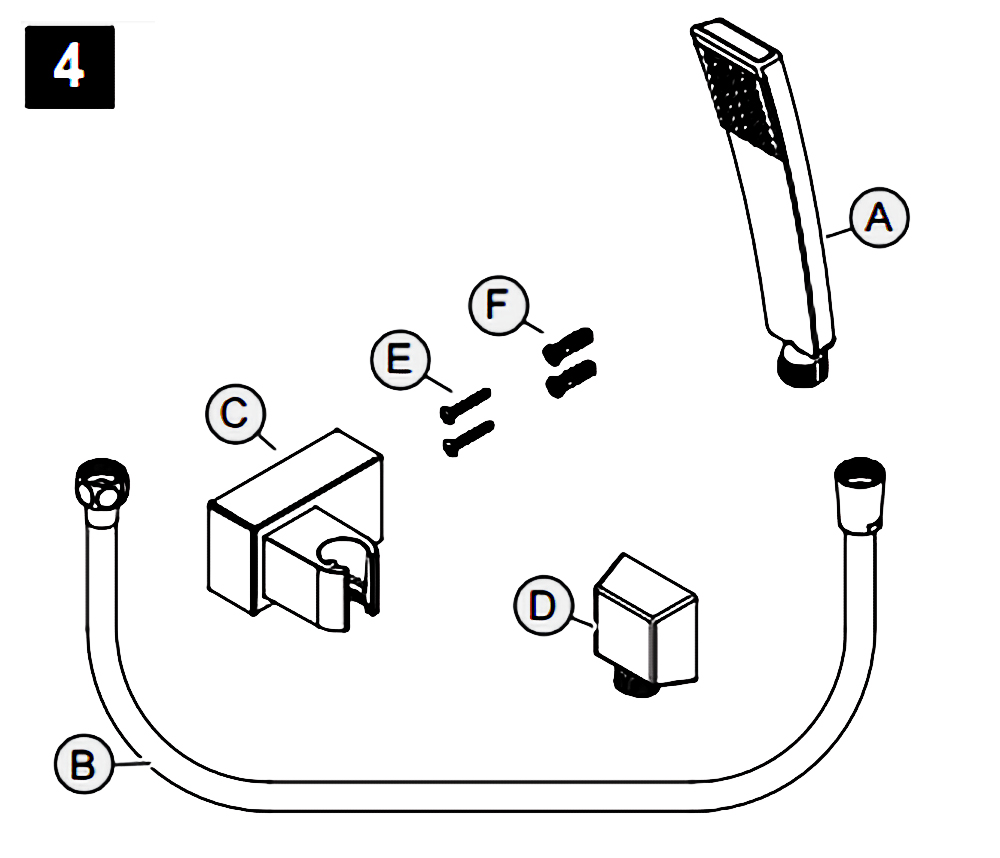
Hand-Held Shower Instructions
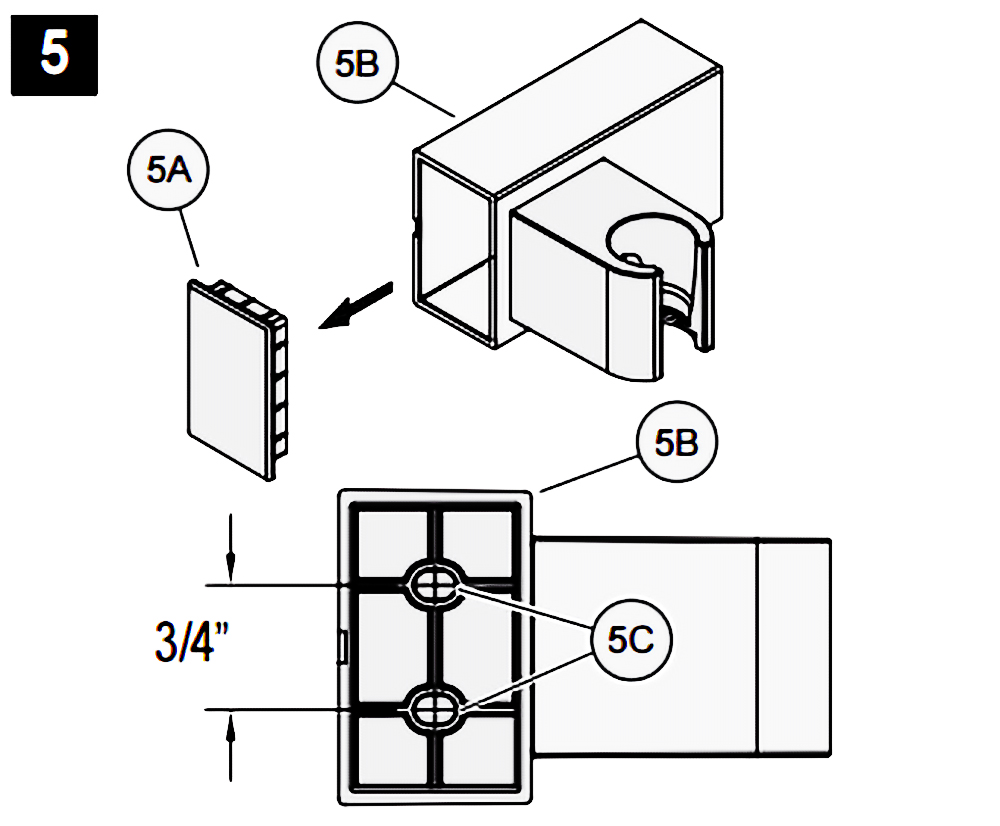
5. HOLE LOCATIONS FOR WALL MOUNT
Remove Front Cover (5A) from Wall Mount (5B). Use Wall Mount Screw Holes (5C) to place the desired location. Using a punch or awl, tap the screw hole locations. Holes must be vertically aligned.
6. ANCHOR INSTALLATION
Drill two 1/4” dia. Holes (6A). If installing into a studs drill two 1/8” dia. holes and do not use Anchors (6B). Insert Anchors (6B) into Holes (6A) and tap flush with wall.
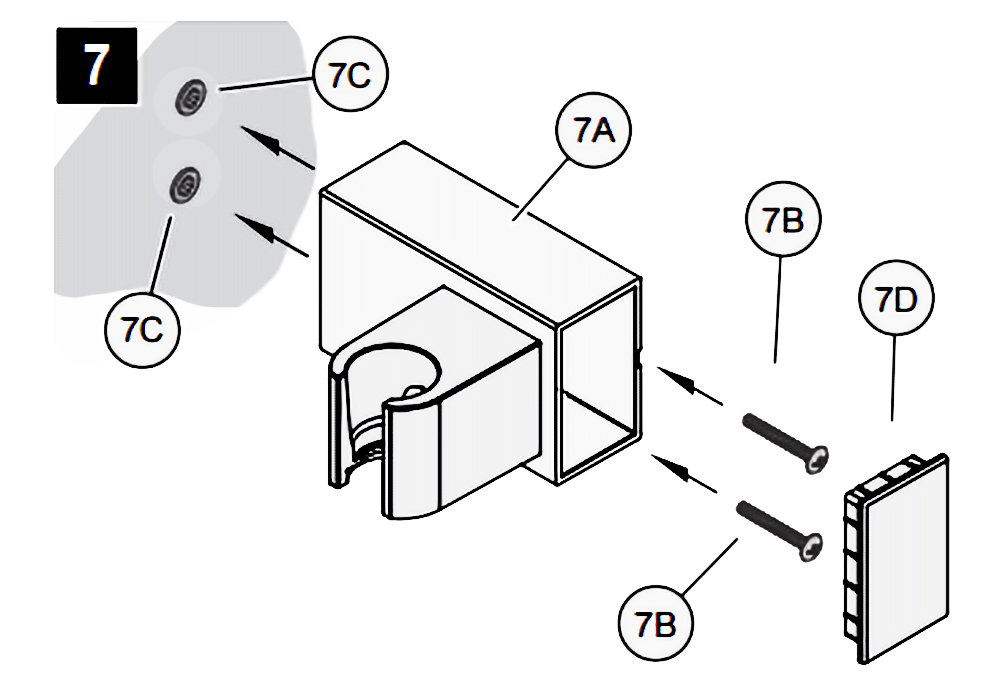
7. WALL MOUNT INSTALLATION
Place Wall Mount (7A) into wall and inset Mounting Screws (7B) through Wall Mount Holes (7C) and tighten until Wall Mount (7A) is flush with the wall. Do Not Over Tighten! Insert Front Cover (7D) into Wall Mount (7A)
8. DROP ELBOW & HOSE INSTALLATION
Apply PTFE plumbers tape on both ends of Pipe Nipple (8A) (not included). Screw Pipe Nipple (8A) into the elbow inside the wall. The Pipe Nipple (8A) is to project 1/4” – 3/4” from the finished wall. Screw Drop Elbow (8B) onto Pipe Nipple (8A) and tighten until Drop Elbow (8B) is property positioned and flush to the finished wall.
Place Rubber Seal (8C) inside Hex Hose Fitting (8D). Connect Hex Hose Fitting (8D) into Drop Elbow Outlet (8E) by turning Hex Hose Fitting (8D).
9. UNIT STARTUP
Turn on hot and cold water supplies, and check all connections for leaks.
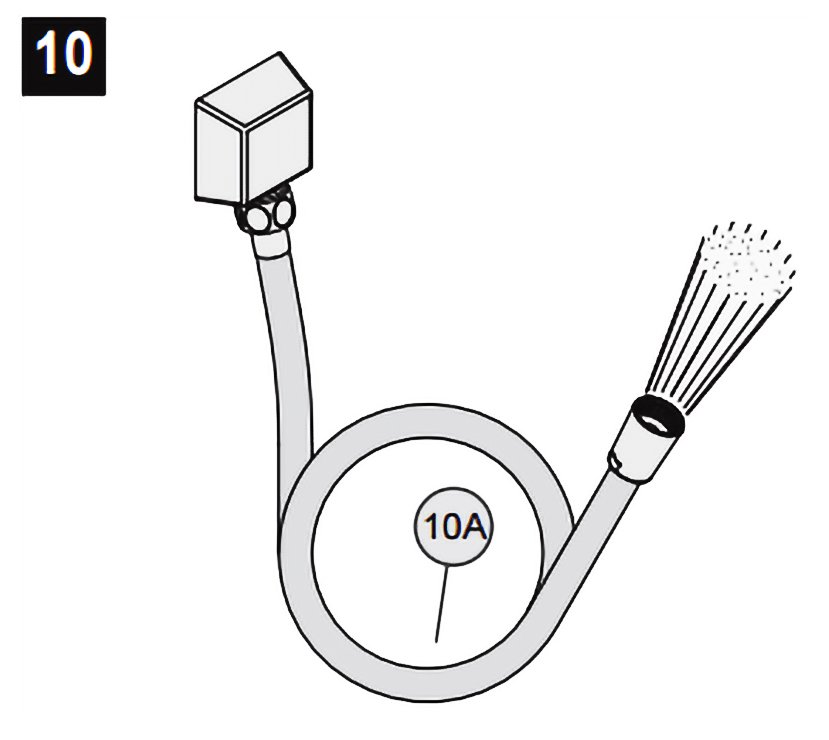
10. FINAL FLUSHING
For final flushing, turn the valve on and allow water to run through the Hose (10A) for several minutes. Allow water to run for several minutes until all foreign matter clears the line.
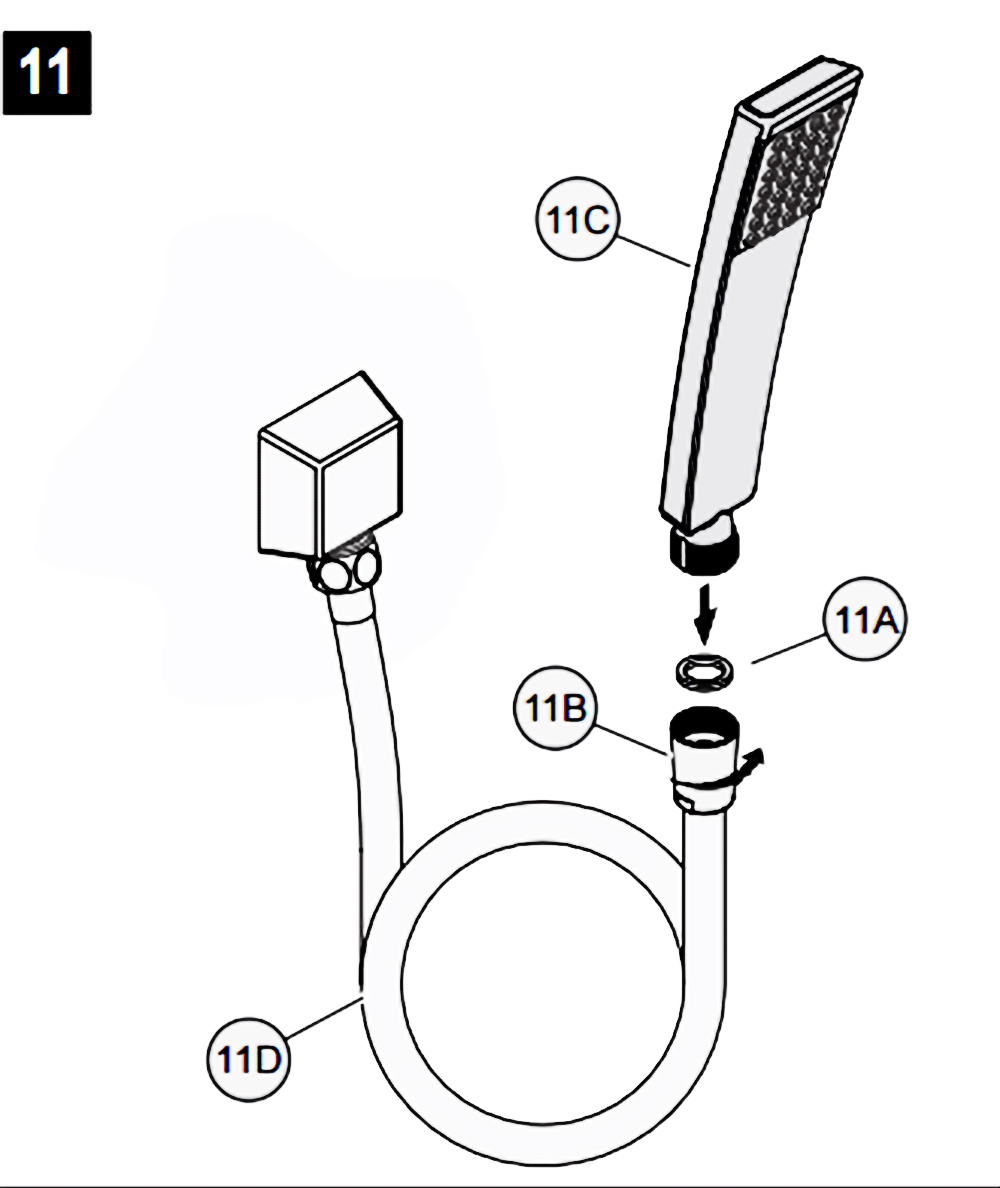
11. SHOWER ARM INSTALLATION Place Rubber Seal (11A) inside Tapered Hose Fitting (11B). Conned Hand Shower (11C) to Hose (11D) by turning Tapered Hose Fitting (118) clockwise.