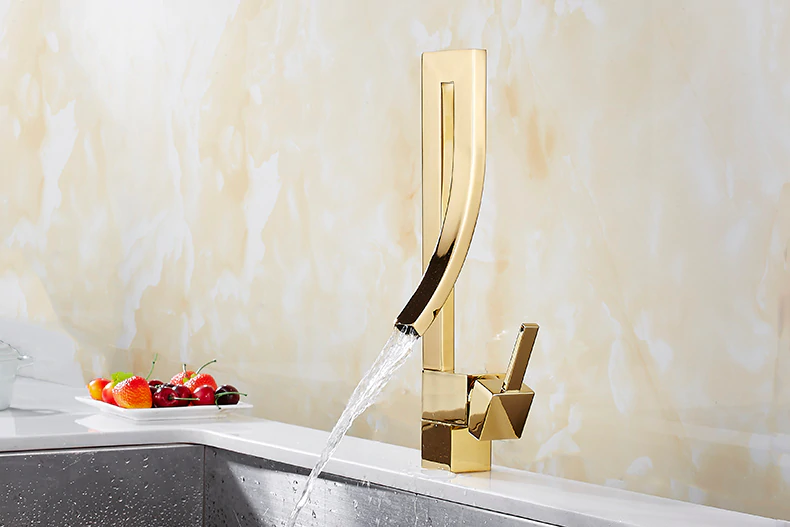
Fontana Verona Deck Mount Single Handle Hot Cold Bathroom Sink Faucet
When it comes to new bathroom sink faucets, FontanaShowers is offering shape, finishes, and styles that you've looking for. Give your bathroom an elegant glance with sink faucets and fixtures. This is one of the trendiest finishes across decor styles in the bathroom. The faucet has elegant flowing ideal for hand washing and other everyday tasks. It is our goal to provide the customer with not only excellent products but also leading lifestyle. This has an elegant design and elevates the appeal of your decor made from the highest quality and for great tastes. It comes super seal technology inside, capable of delivering superior performance with solid construction for long durability that will upgrade your bathroom with a modern and cool look for a long period of time.
Fontana Verona Deck Mount Single Handle Hot Cold Bathroom Sink Faucet Features:
Before you begin, please read the installation instructions below. Observe all local building and safety codes.
Unpack and inspect the product for any shipping damages. If you find damages, do not install.
Please note all showers must be installed by a professional and certified plumber otherwise warranty might be voided.
faucet
Step 1:
sink faucet
Step 2:
faucet
Step 3:
Step 4:
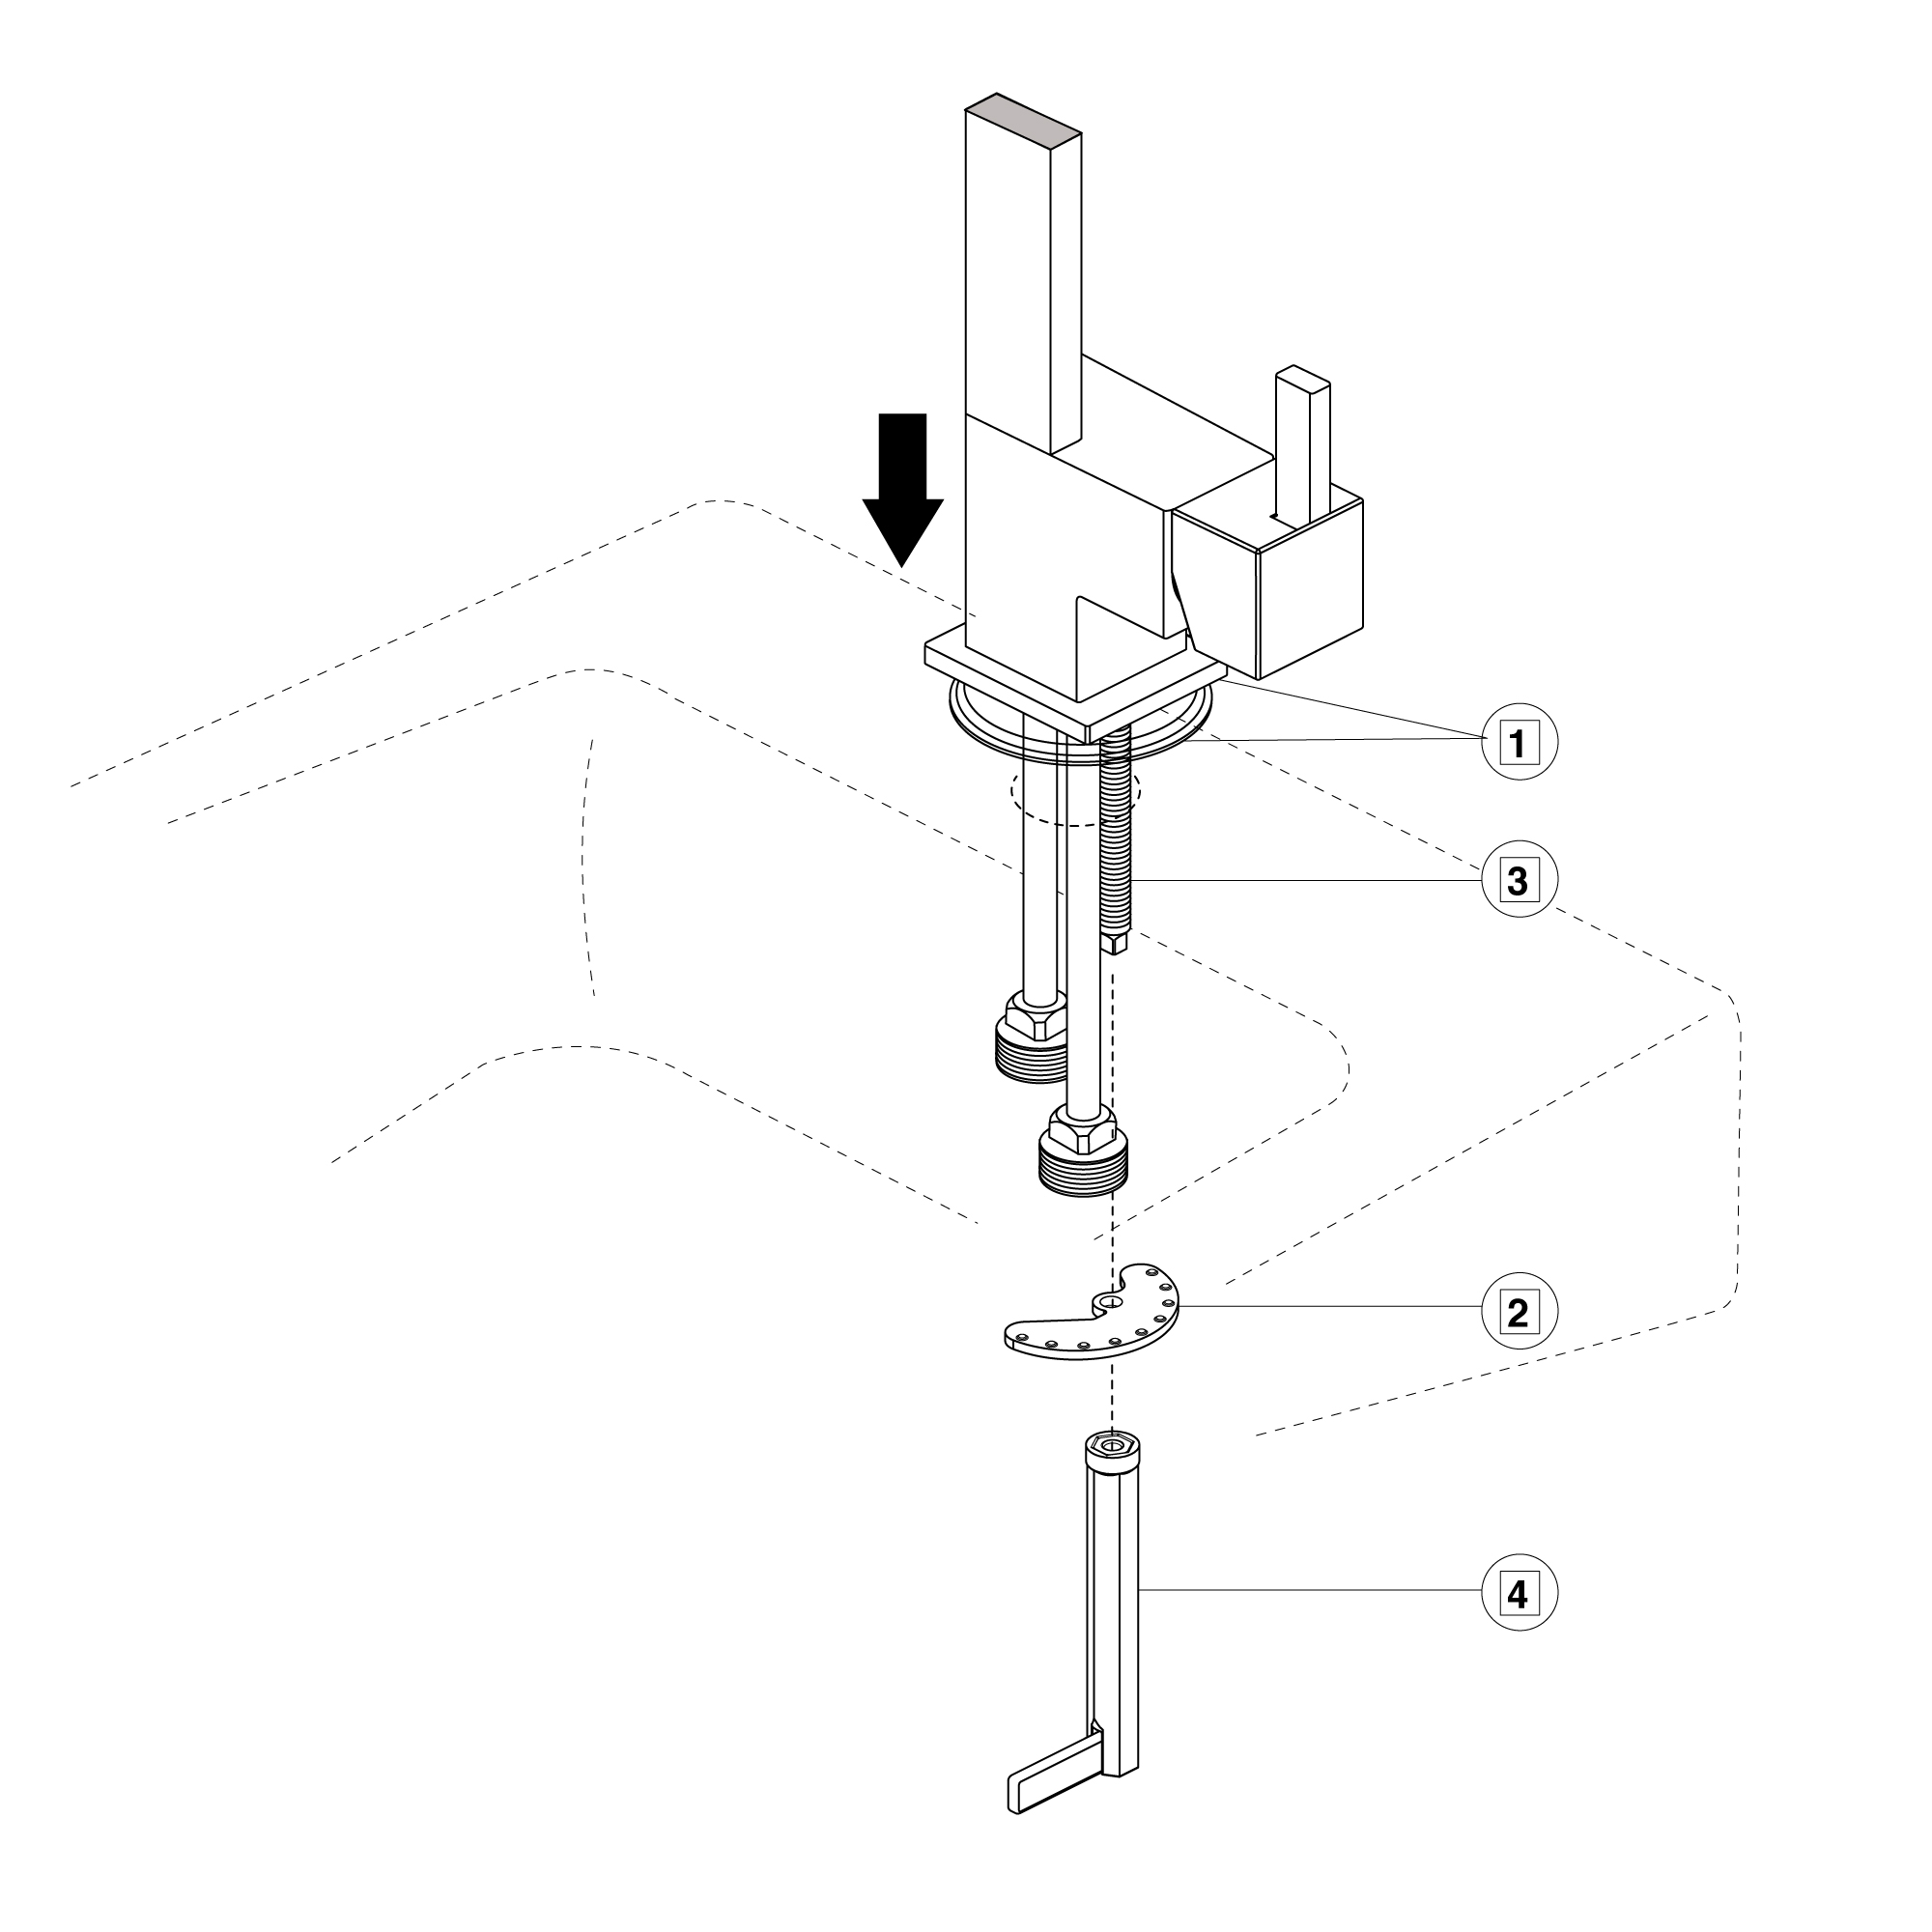
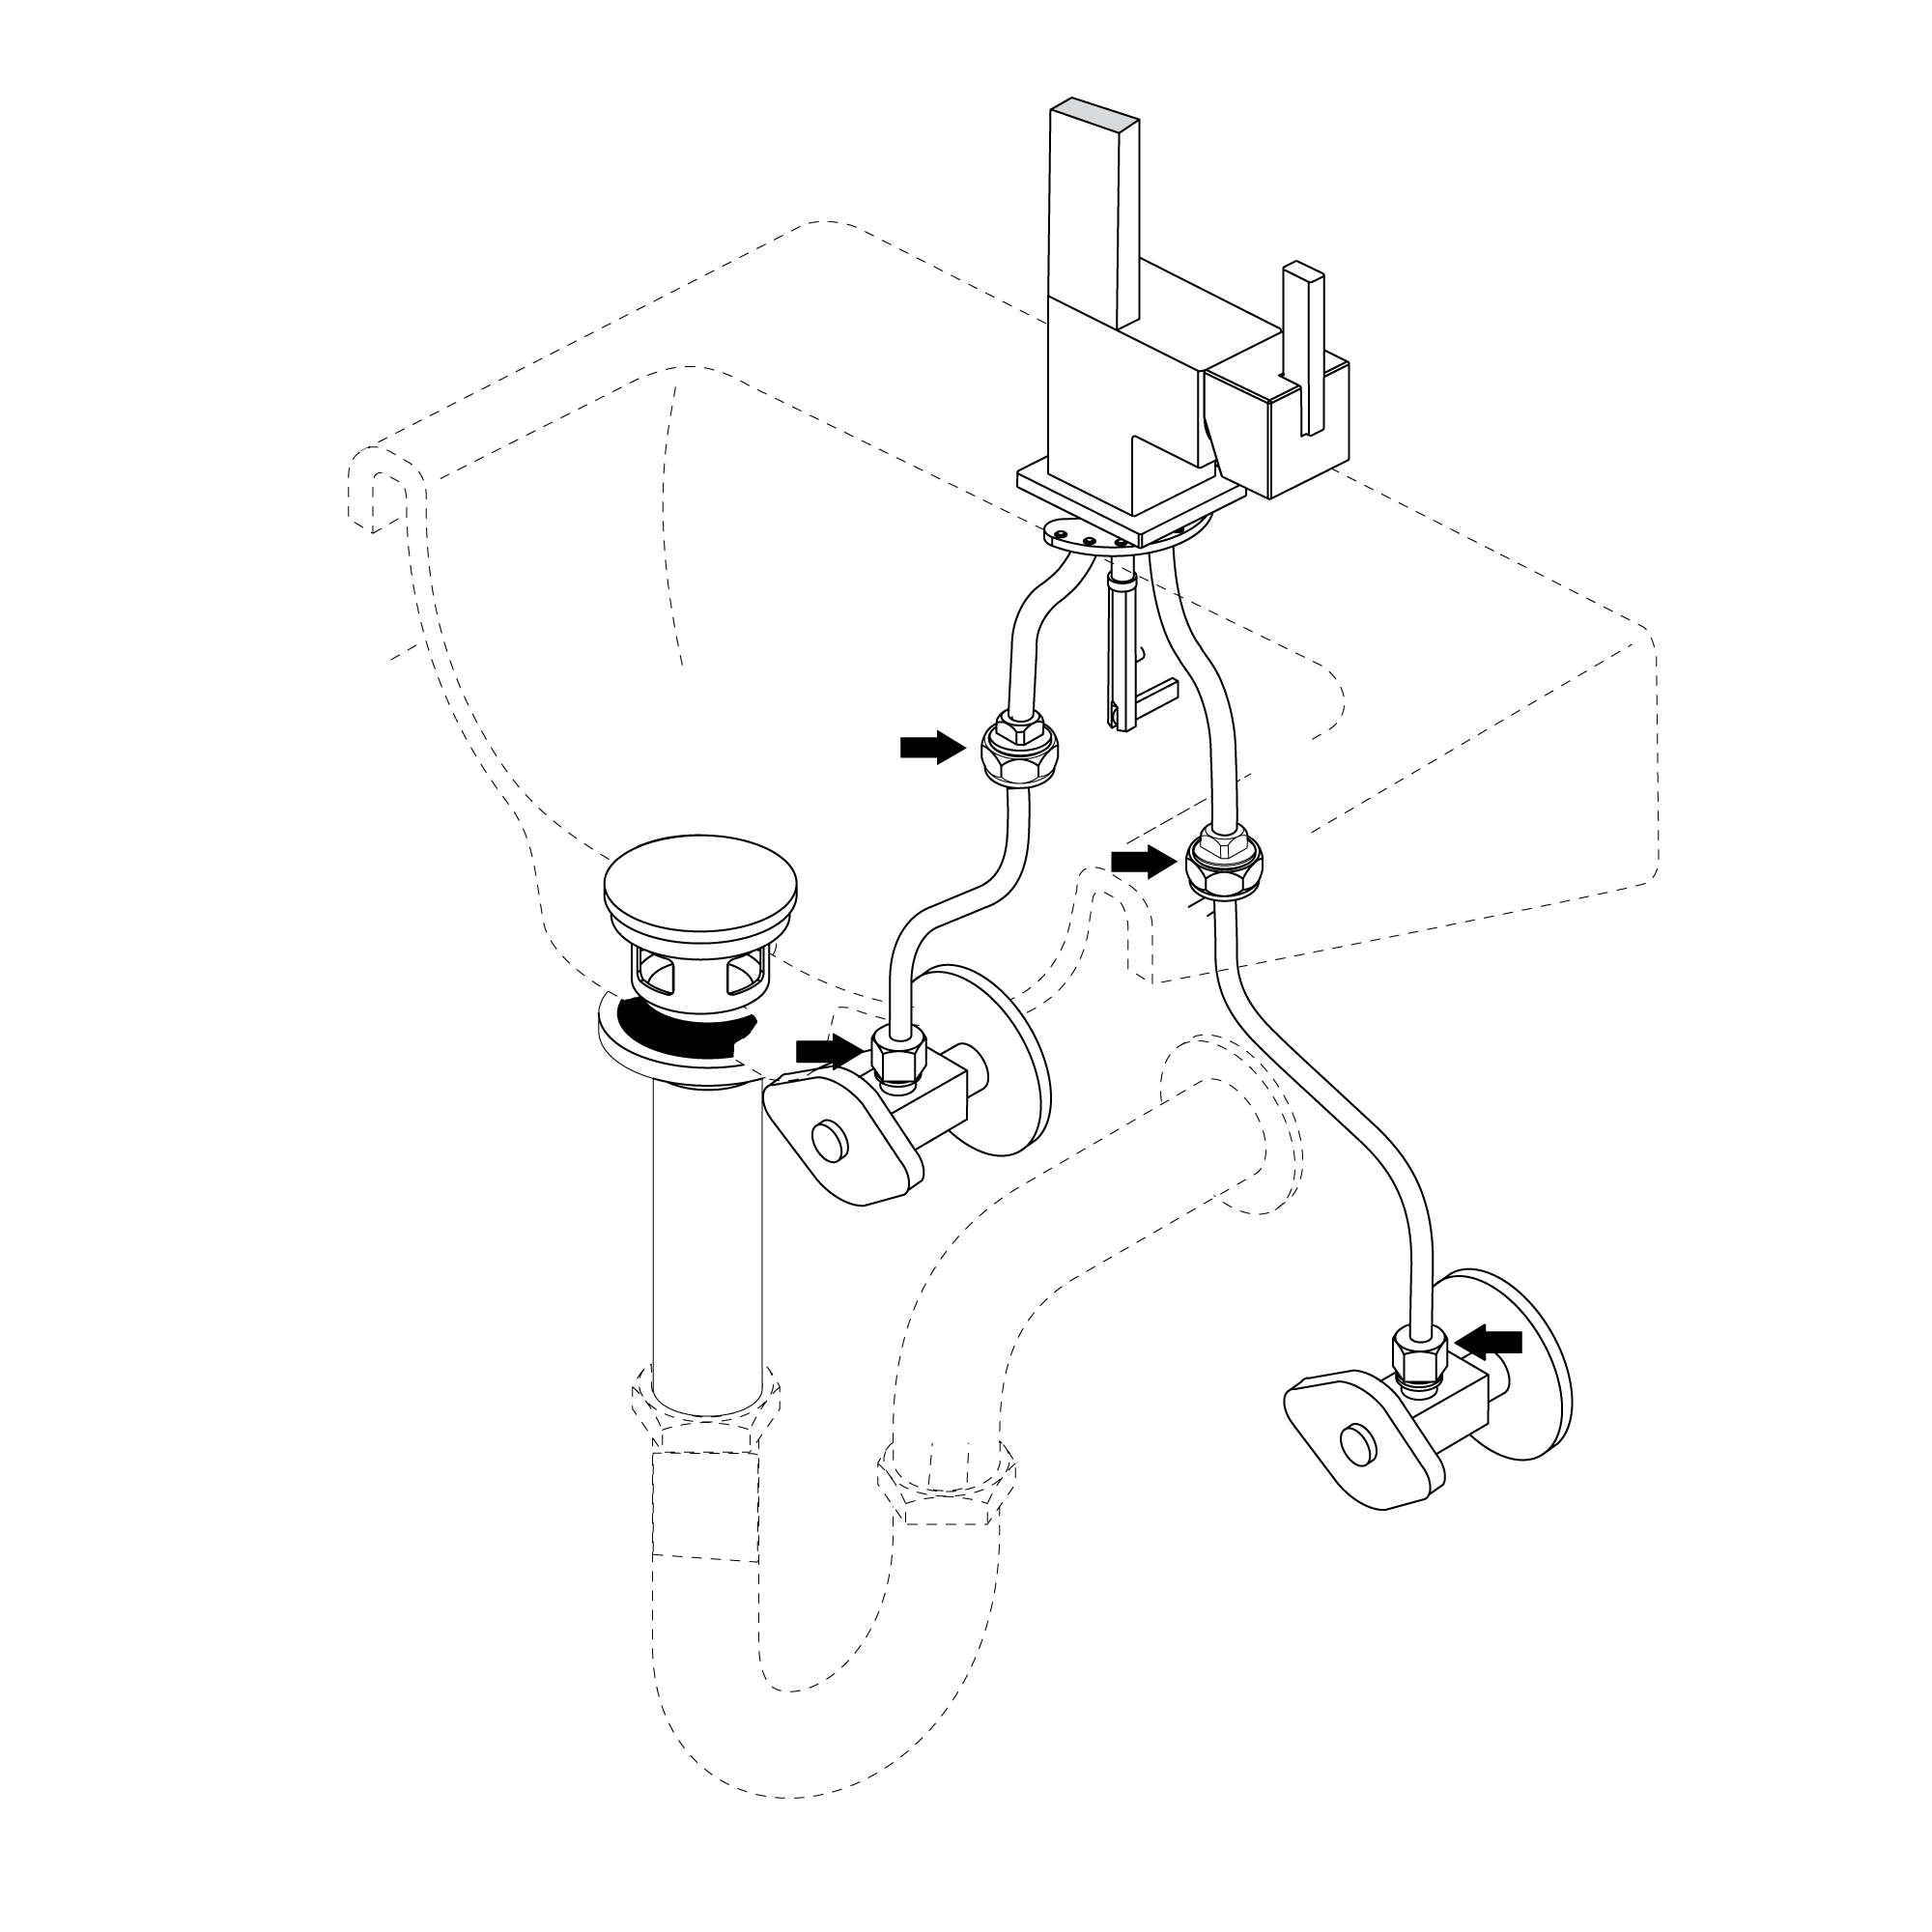
Slide flange and round gasket (1) up over tubes and mounting stud. Slide tubes down through the mounting hole and position faucet assembly on the sink. Option: If the surface is uneven, use silicone under the gasket. Place metal bracket (2) over mounting stud (3) under the sink. Secure with mounting nut / wrench (4).
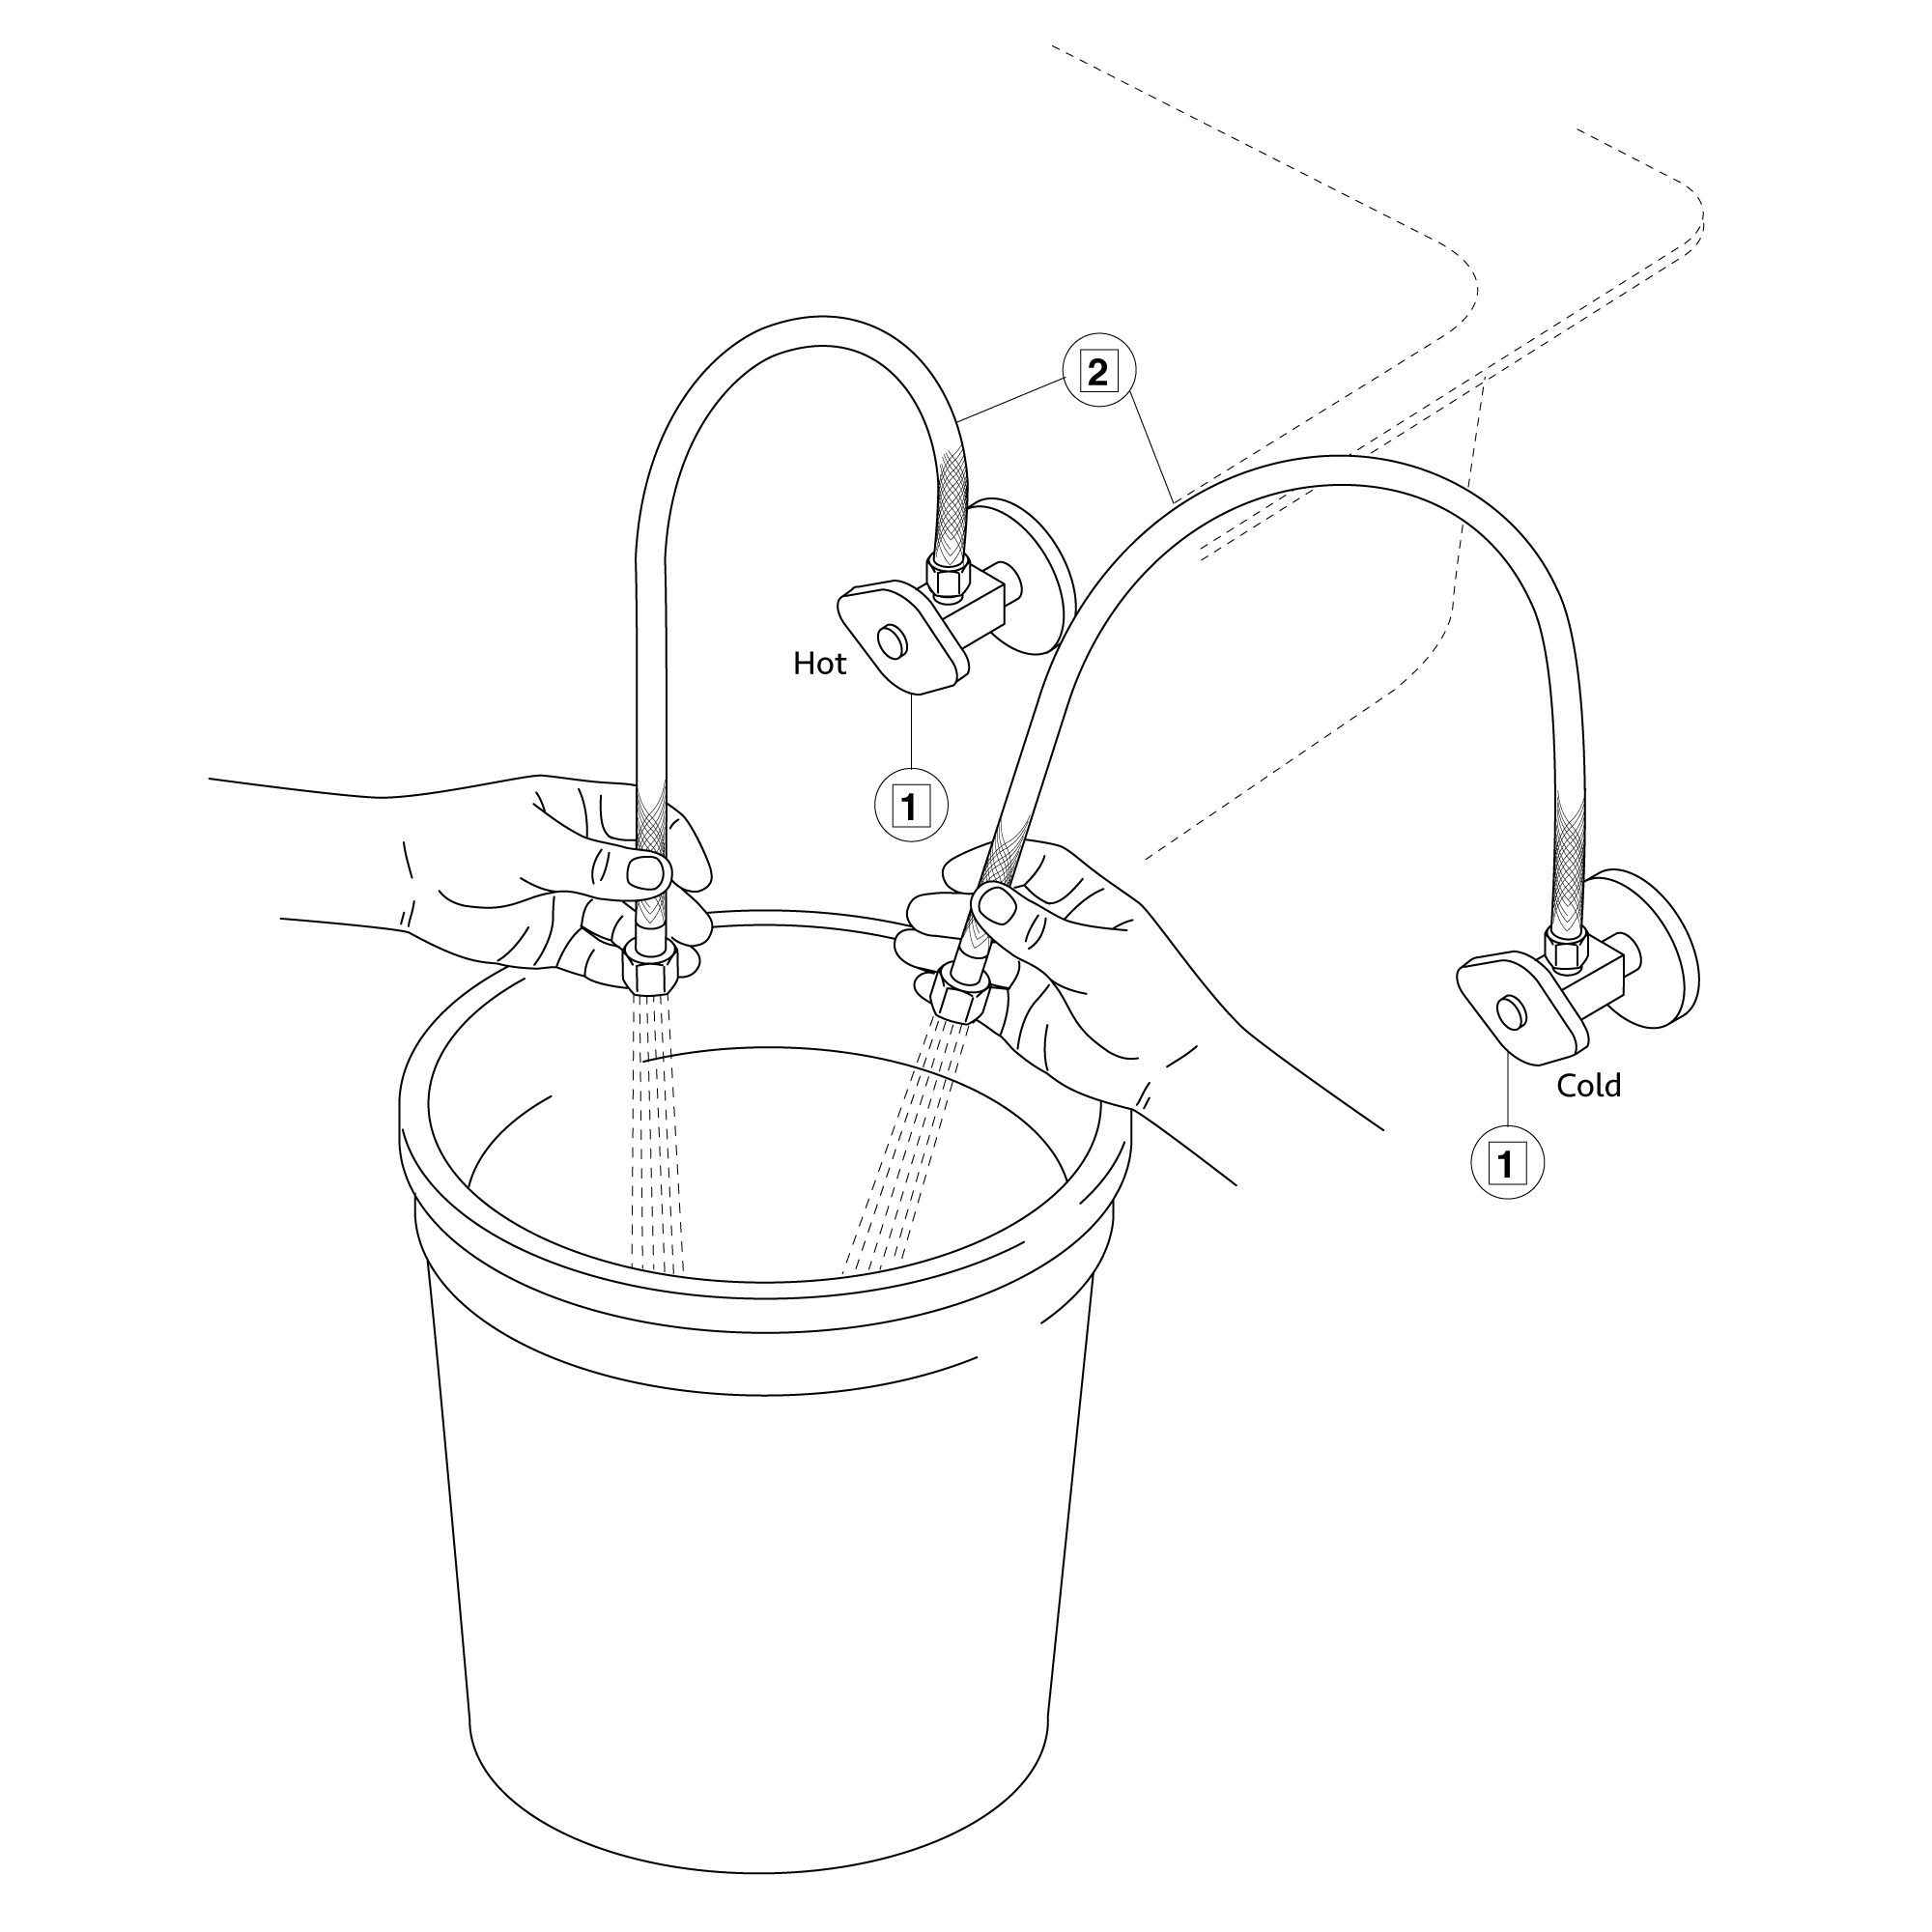
Make Connections to water supplies (1), Use the recommended connectors (2) (not supplied), see step 2B. Turn on hot and cold water supplies and flush water lines into a container for one minute. Important: This flushes away any debris that could cause damage to internal parts.
Step 5:
Step 6:
Slide flange and round gasket (1) up over tubes and mounting stud. Slide tubes down through the mounting hole and position faucet assembly on the sink. Option: If the surface is uneven, use silicone under the gasket. Place metal bracket (2) over mounting stud (3) under the sink. Secure with mounting nut / wrench (4).
Make Connections to water supplies (1), Use the recommended connectors (2) (not supplied), see step 2B. Turn on hot and cold water supplies and flush water lines into a container for one minute. Important: This flushes away any debris that could cause damage to internal parts.
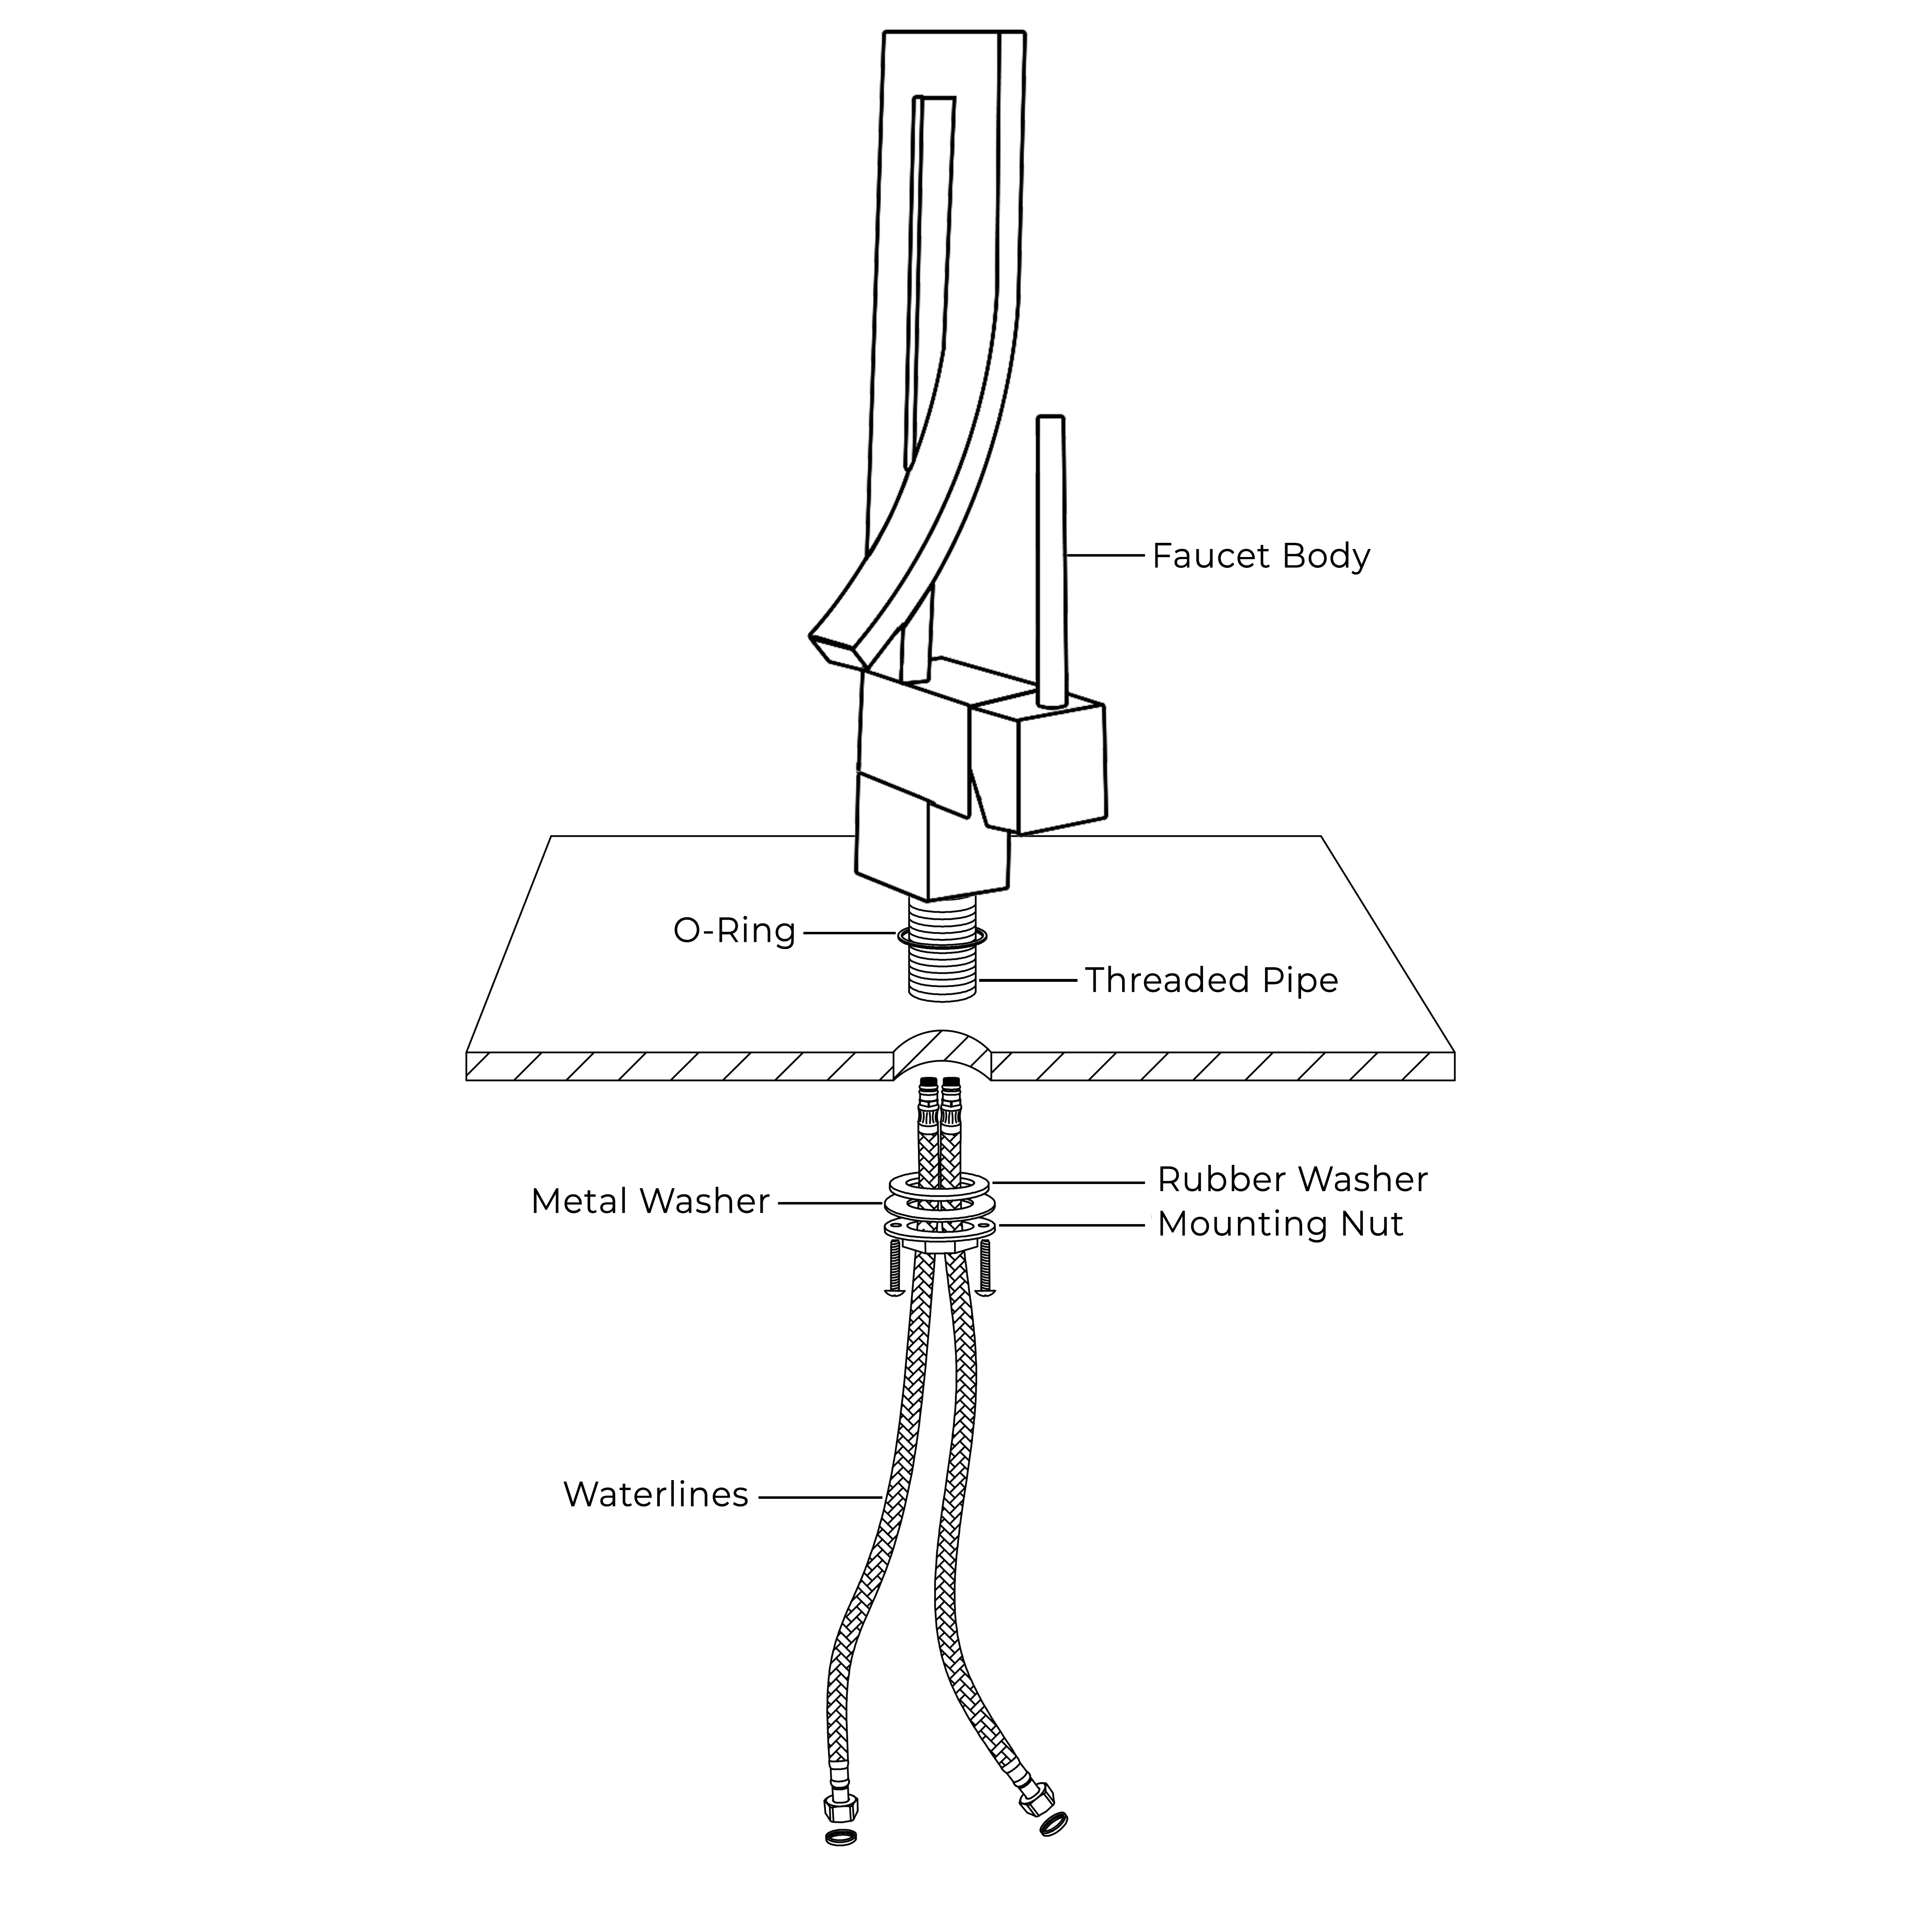
1. Remove the mounting nut, metal washer, and rubber washer from the threaded pipe. 2. Fit the O-ring into the groove of the faucet body. Screw waterlines into the corresponding screw-hole of the faucet body. 3. Insert waterlines and threaded pipe into the hole of the sink. 4. Install rubber washer, metal washer, and mounting nut back to the threaded pipe. Adjust the faucet body correctly and secure with mounting screws tightly. 5. Connect waterlines to angle stops. Turn on the angle stops and check for leaks (DO NOT TURN FAUCET ON). 6. Turn faucet on for 1 minute to flush any debris.