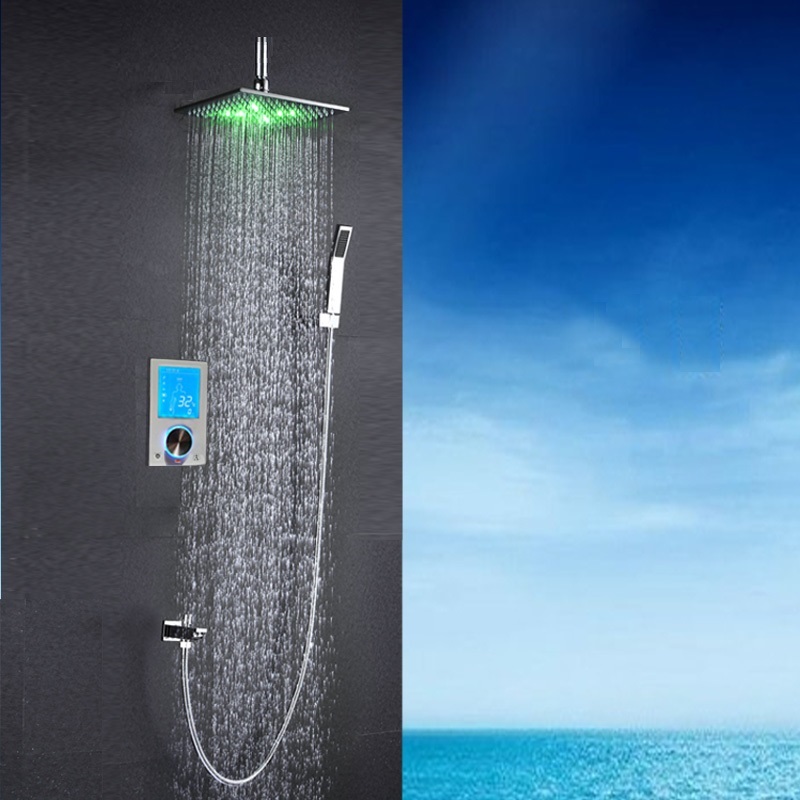
Fontana Flavia Chrome Ceiling Mount Digital Color Changing LED Rainfall Shower Set
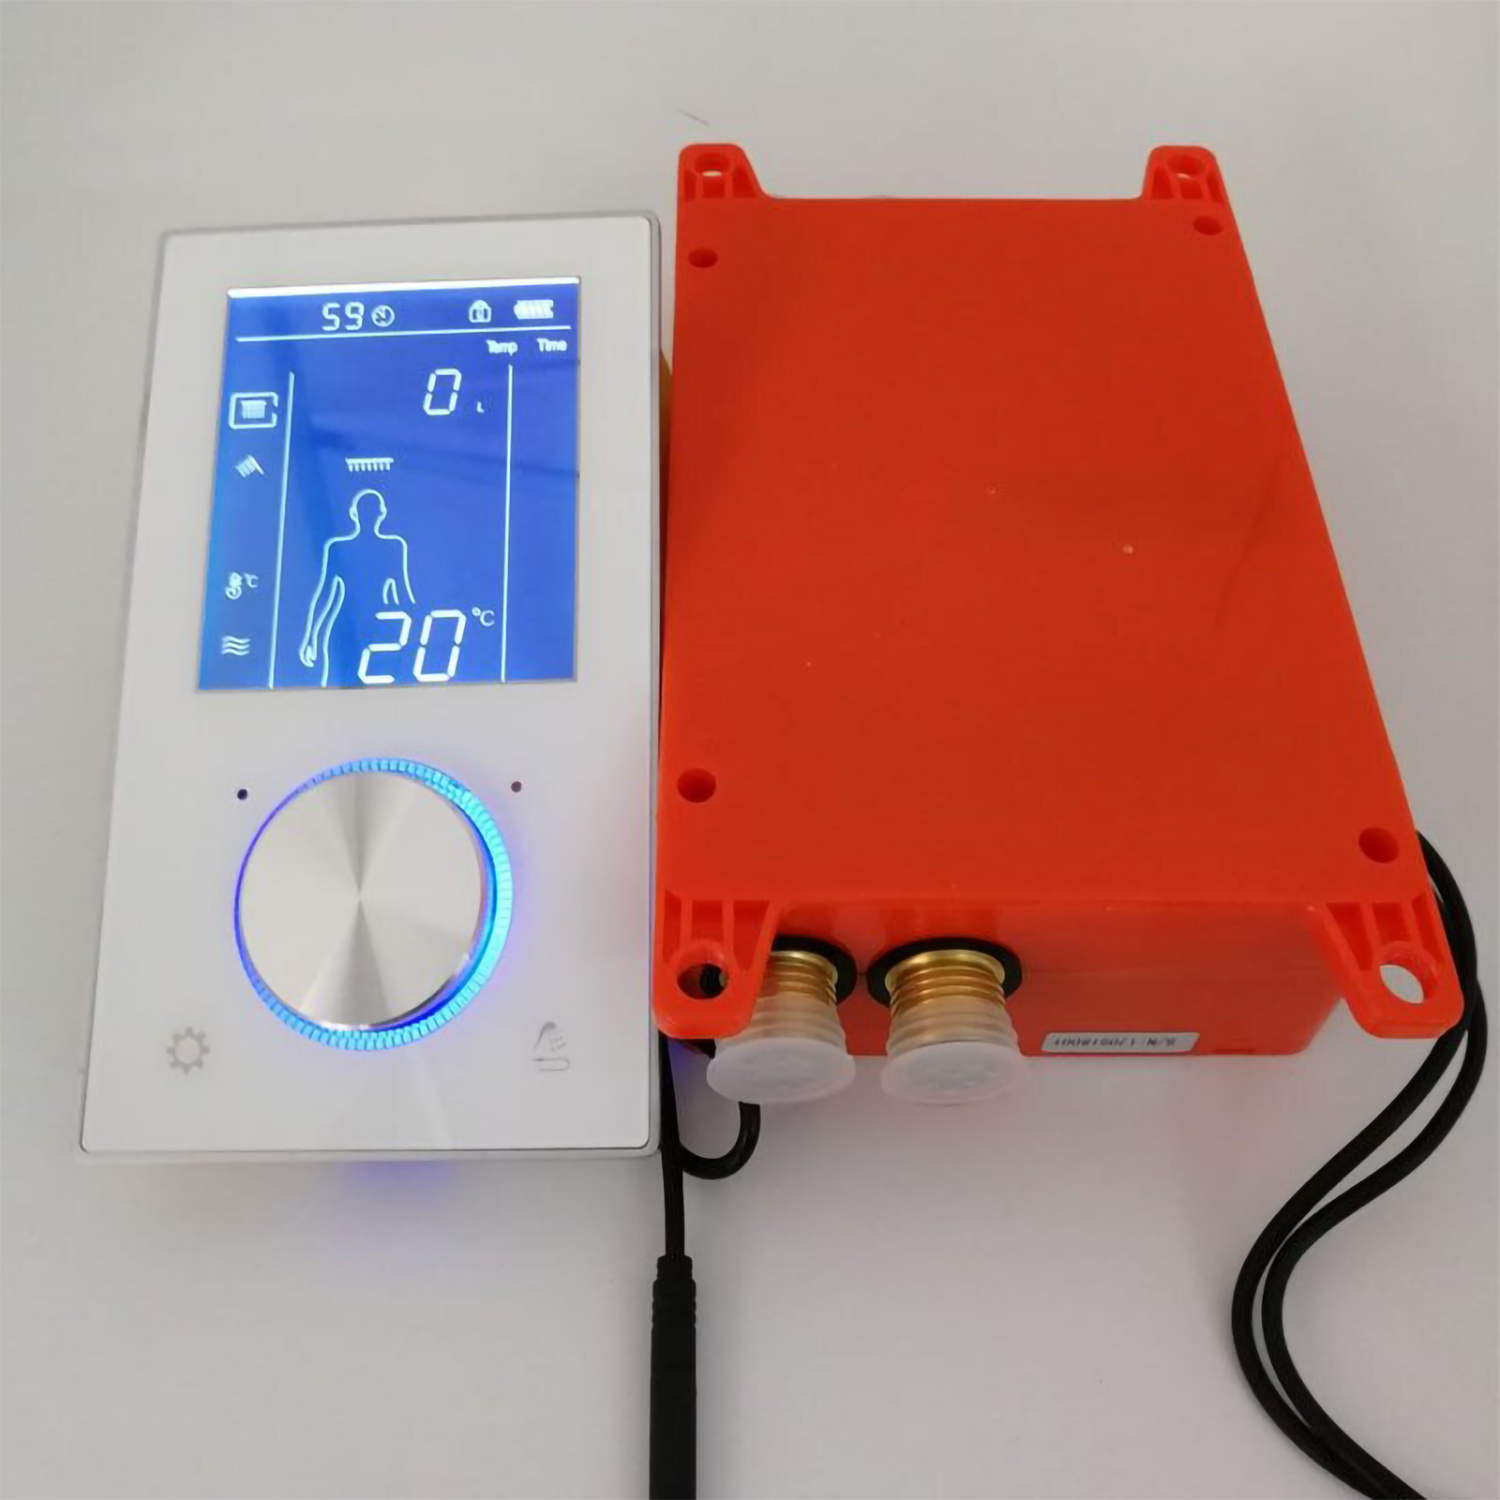
High tech elegance is what the Flavia Rainfall Shower Set brings to your bathing experience. The square rainfall showerhead is available in 5 sizes to fit your existing shower space. Chrome Finish to further customize your unique taste. Handheld shower included and digital display makes finding the perfect temperature - perfectly easy! Built-in hydro-powered device powers the LED lights, which provide visual shower temperature cues to reduce water waste. The lights will dim and brighten when you lower and raise the pressure so you can set the perfect mood, water, and lighting. When water temperature is ≤89 °F (≤32 °C), Blue color will show automatically. When water temperature is between 97 to 107 °F (36-42 °C), Green color will show automatically. When water temperature is between 109 to 122 °F (43-50 °C), Red color will show automatically. When water temperature is above 122 °F (>50 °C), Red color will flash immediately.
Fontana Flavia Chrome Ceiling Mount Digital Color Changing LED Rainfall Shower Set Features:
Before you begin, please read the installation instructions below. Observe all local building and safety codes.
Unpack and inspect the product for any shipping damages. If you find damages, do not install.
Please note all showers must be installed by a professional and certified plumber otherwise warranty might be voided.
shower
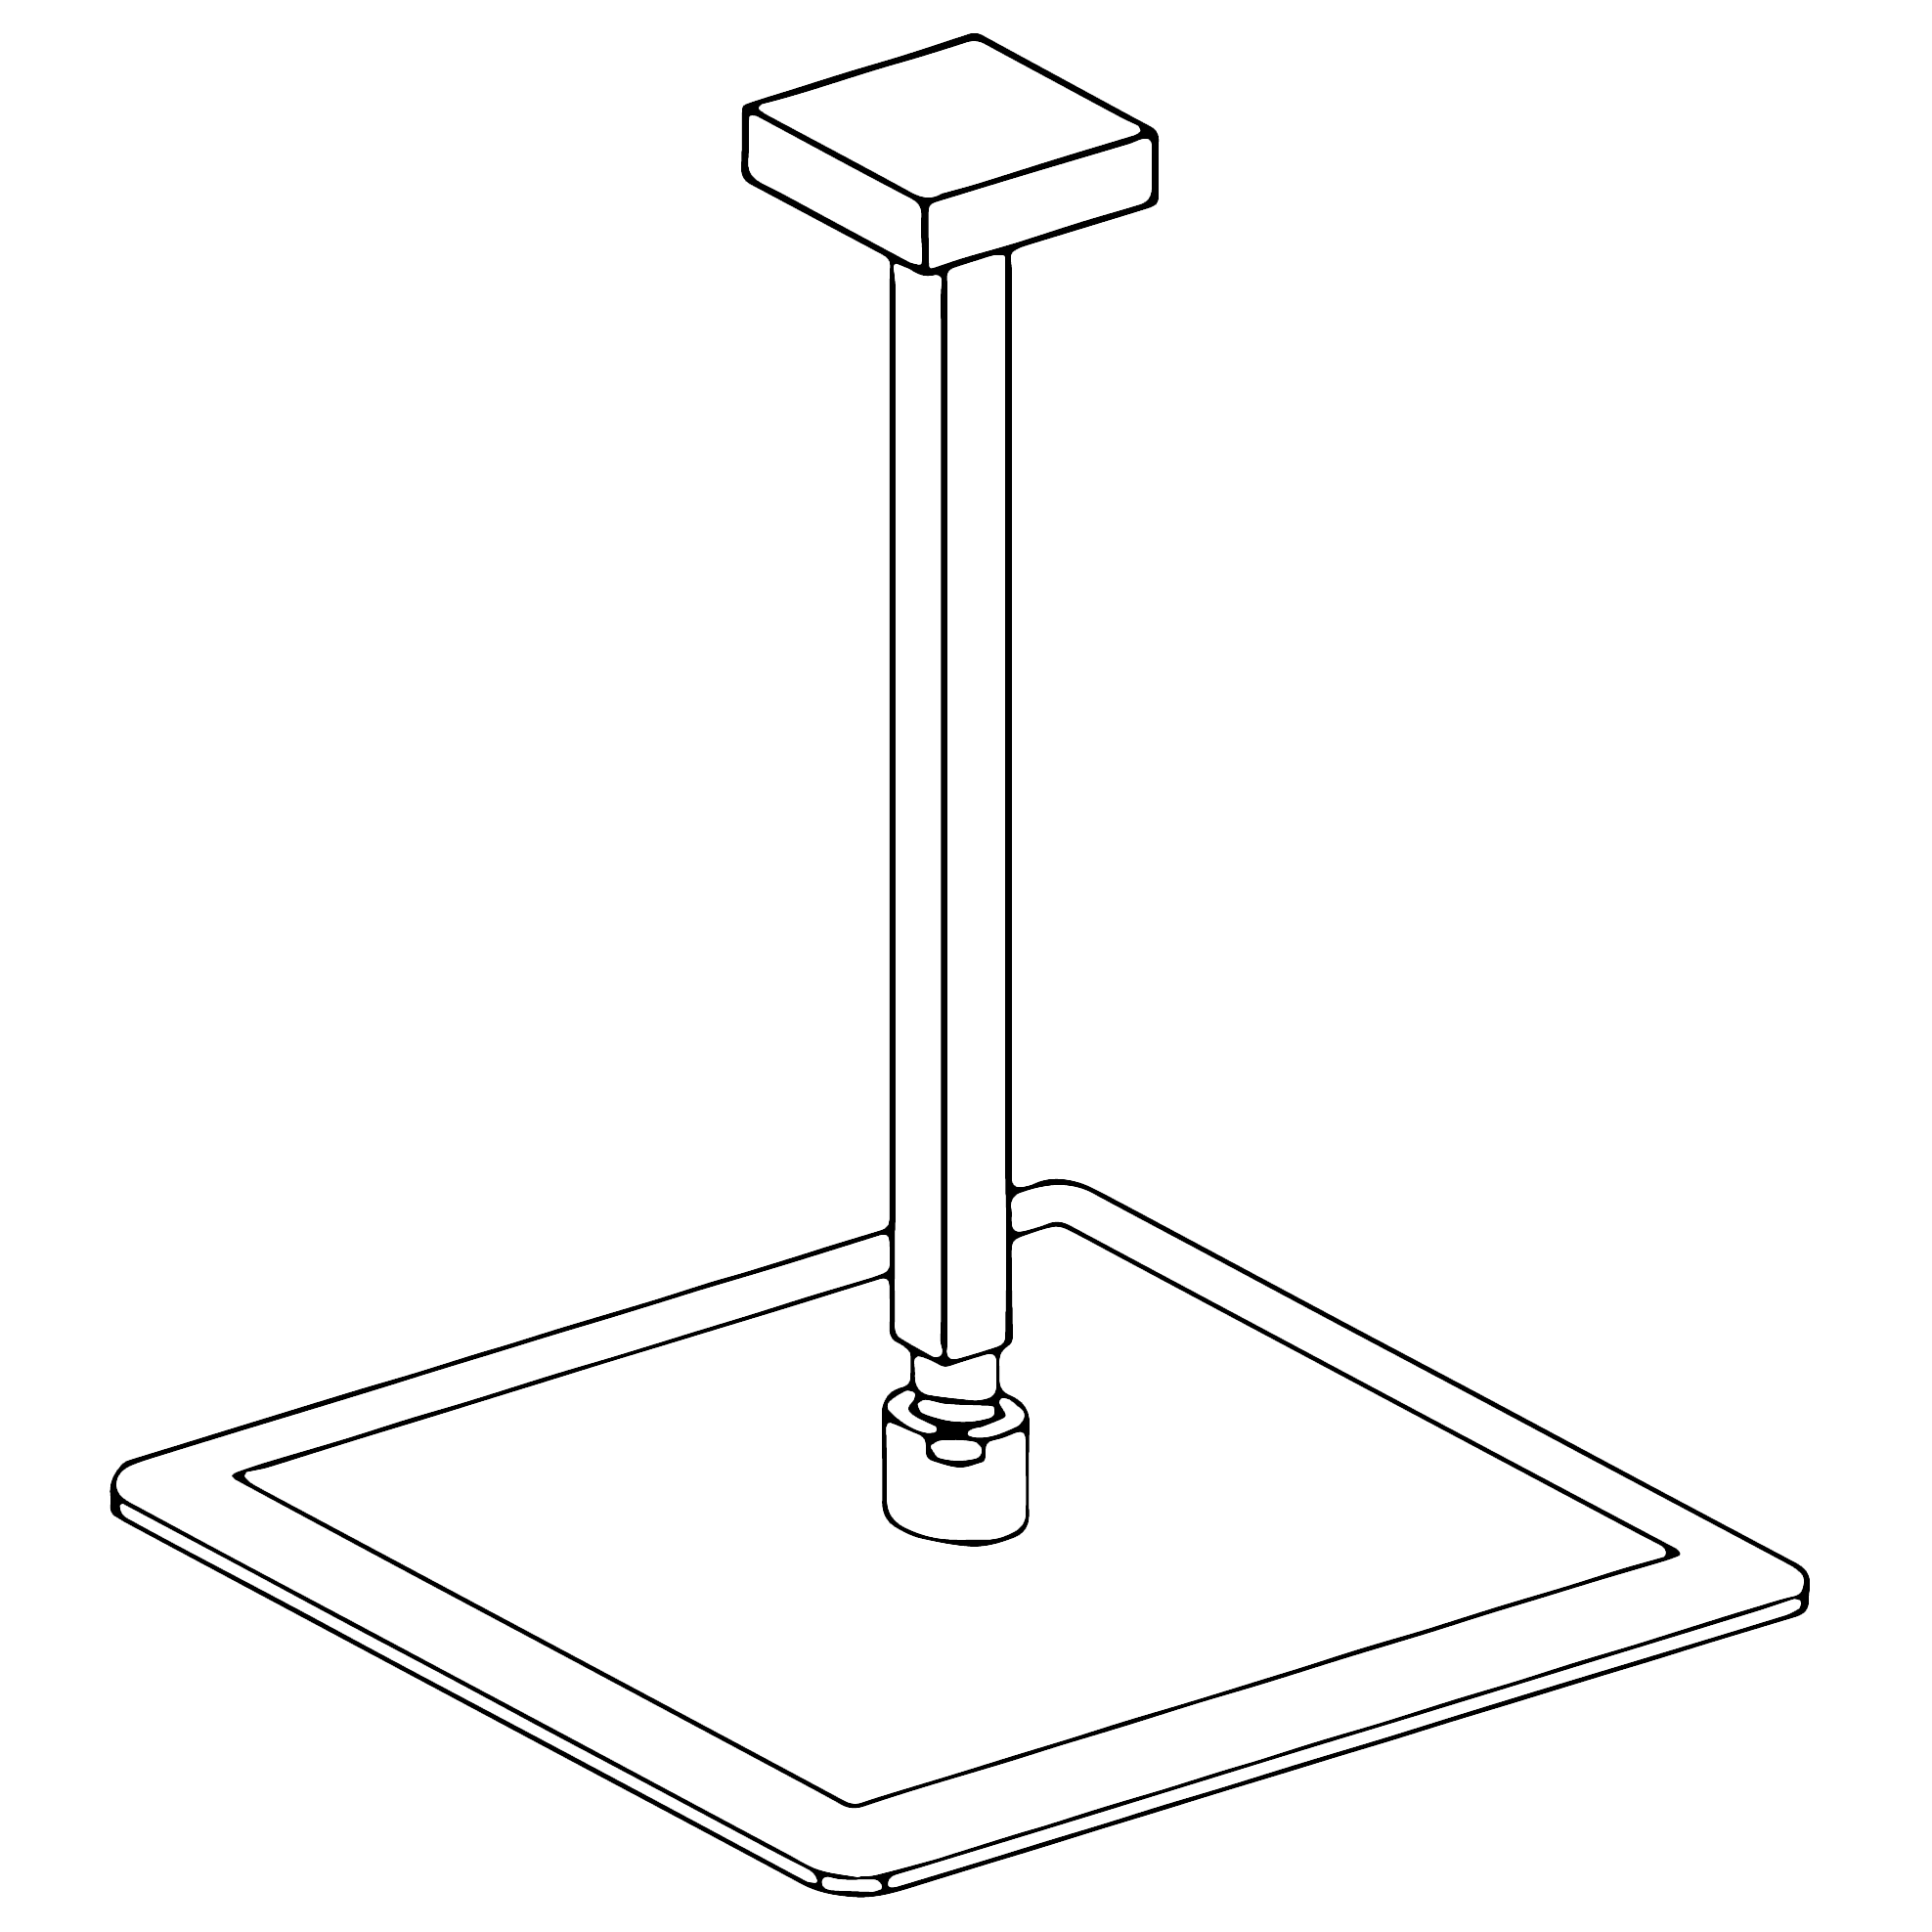
Ceiling Mount Shower Arm Installation Instructions
Step 1:
shower arm
Step 2:
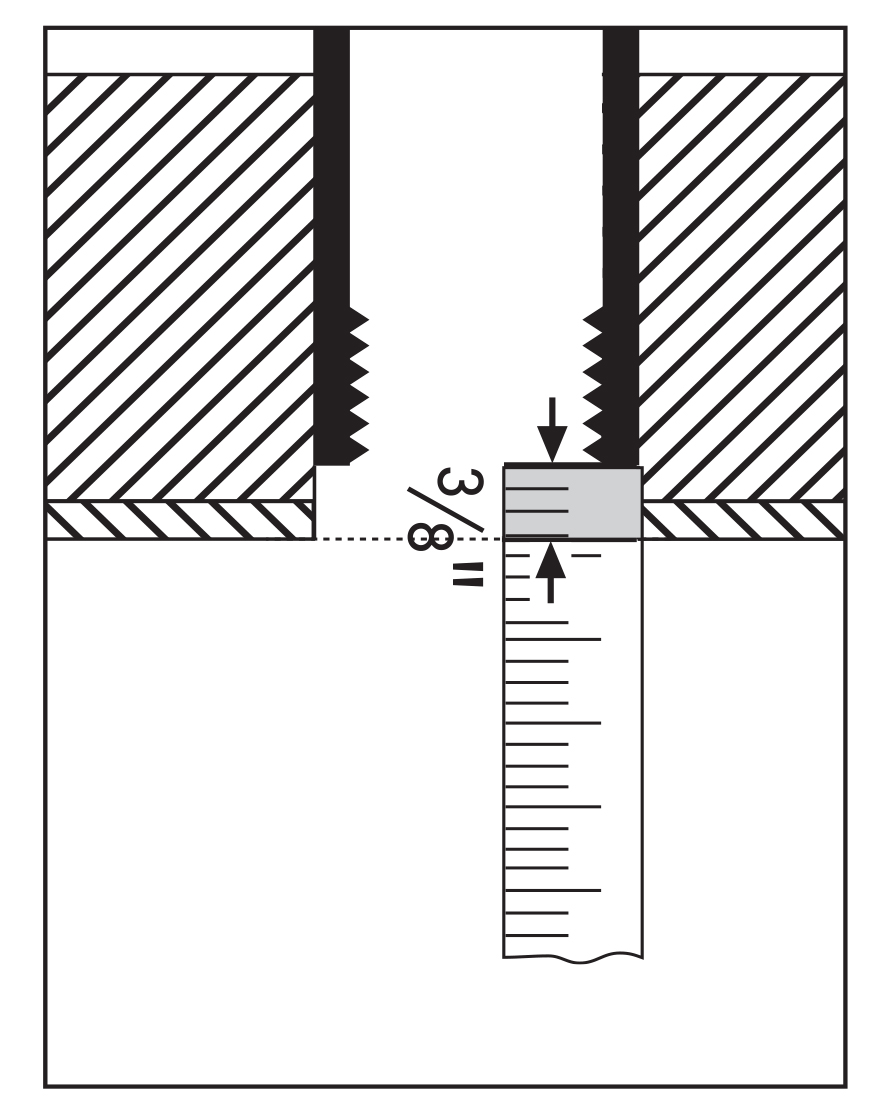
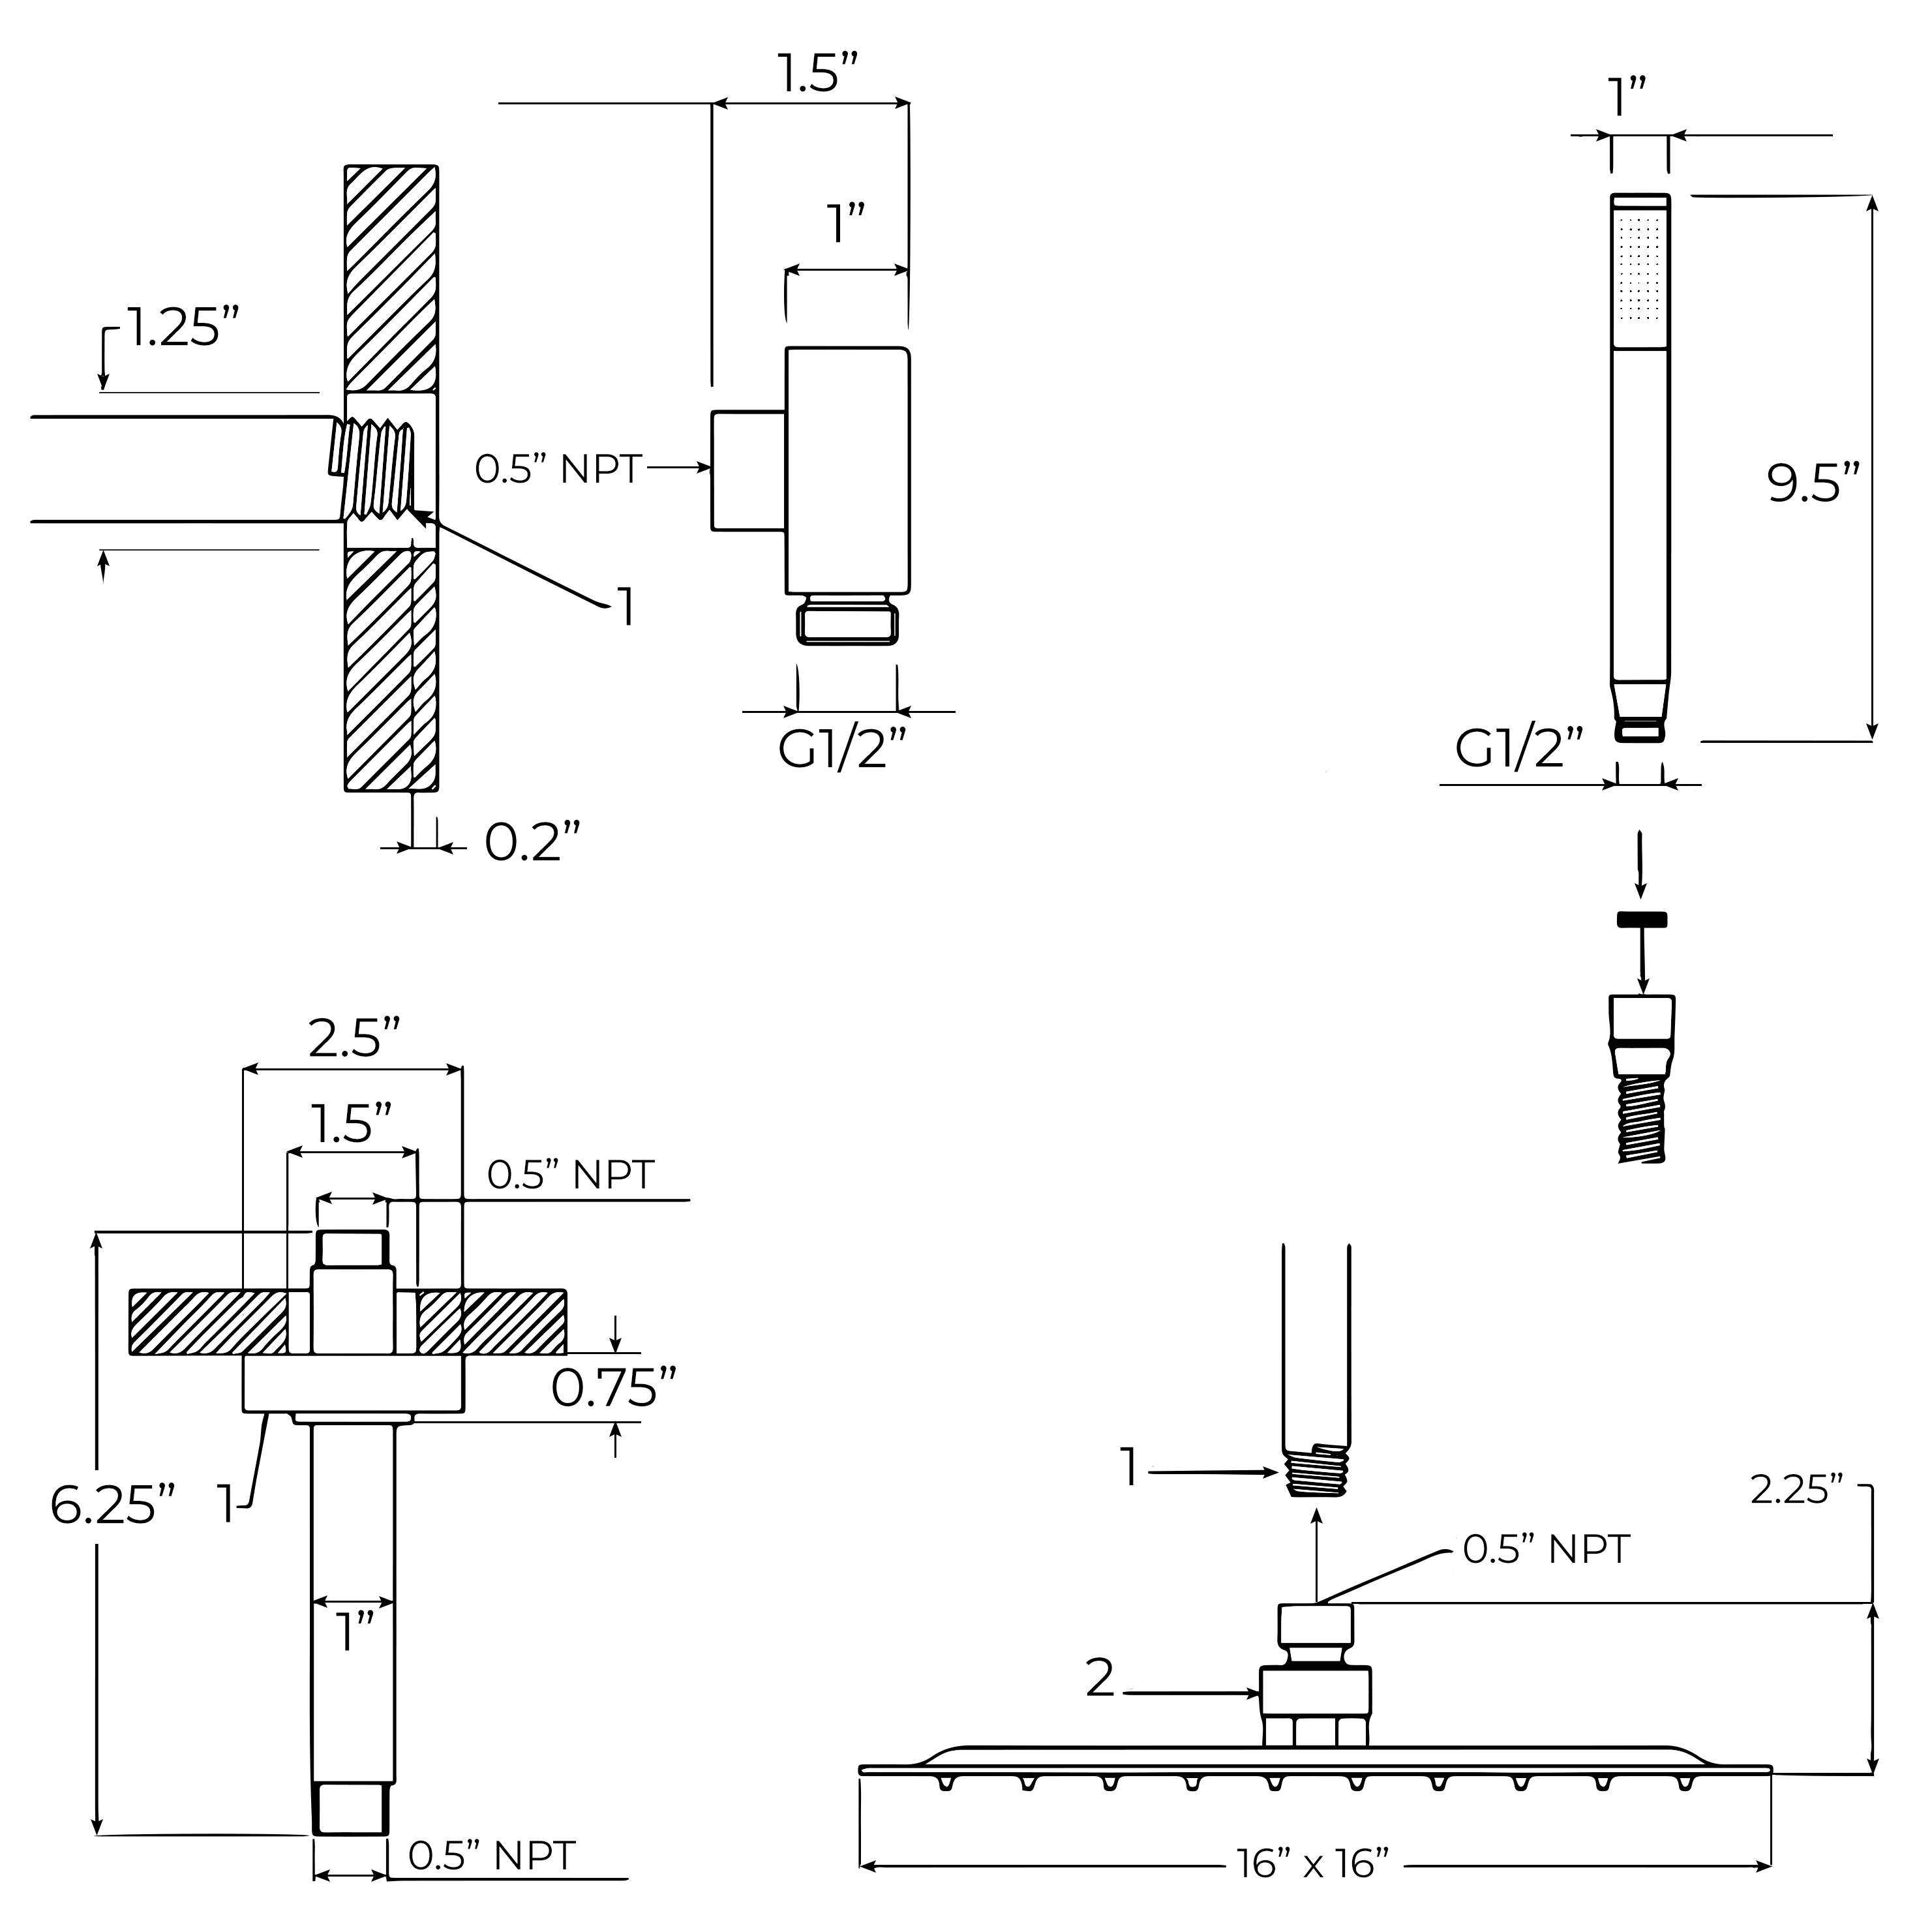
Rough-in: Install a 1/2" NPT female fitting, inside the surface of the finished ceiling.
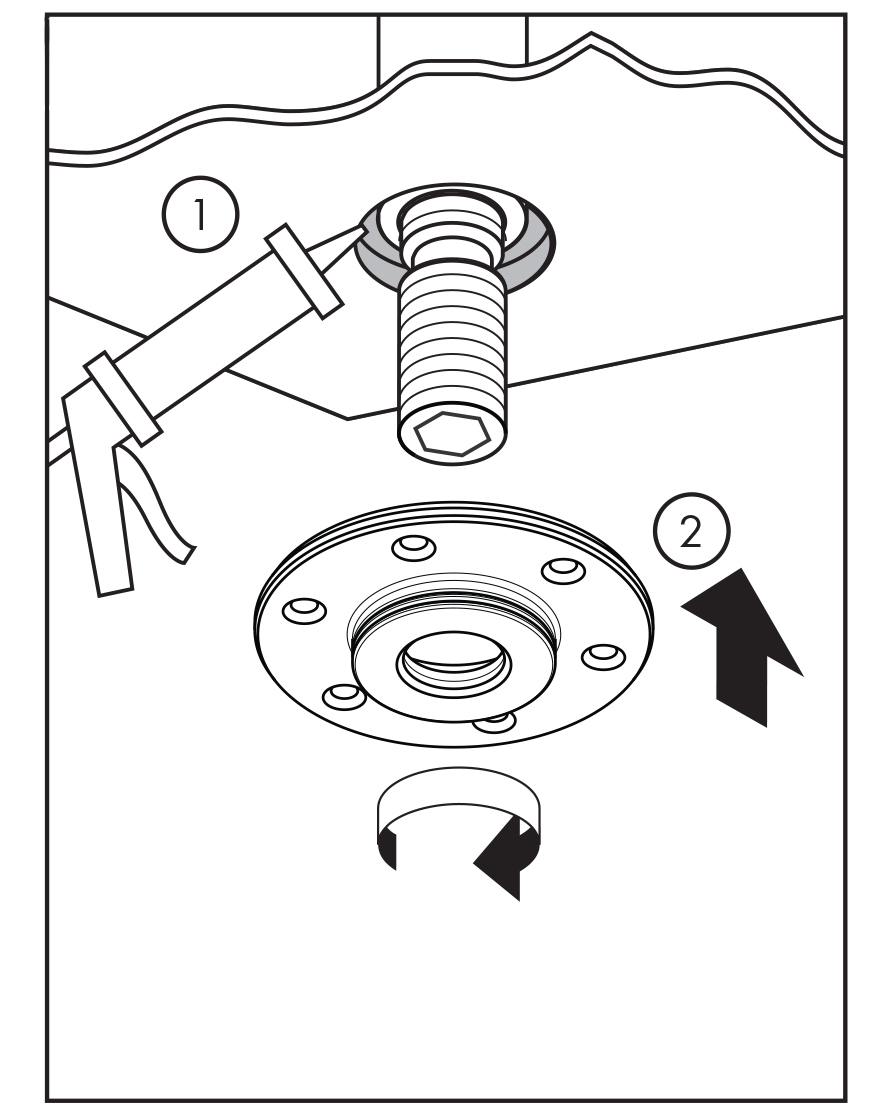
Wrap the threads on '12" NPT part of the nipple with plumber's tape. Install the mounting nipple using a 3/8" Allen wrench (not included).
Step 3:
Step 4:
Seal the ceiling around the nipple using a waterproof sealant. Install the mounting ring.
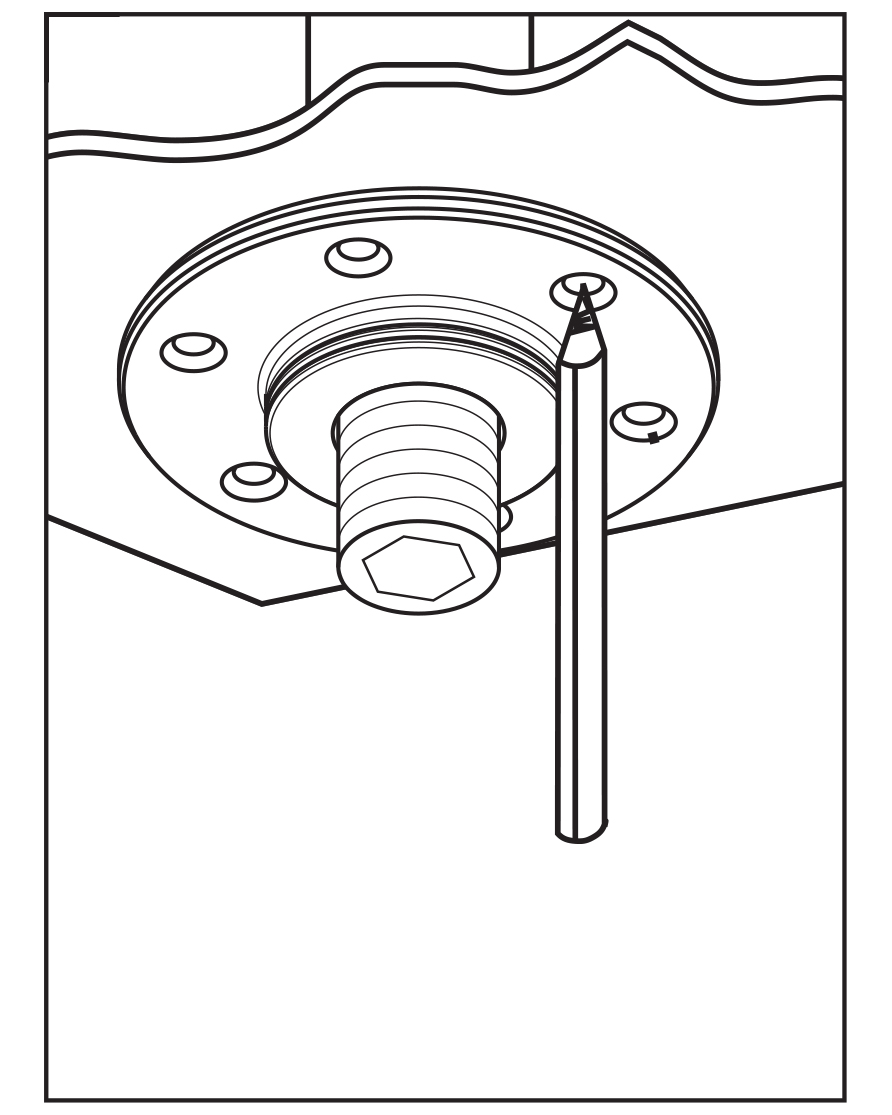
Mark the positions of four screw holes.
Step 5:
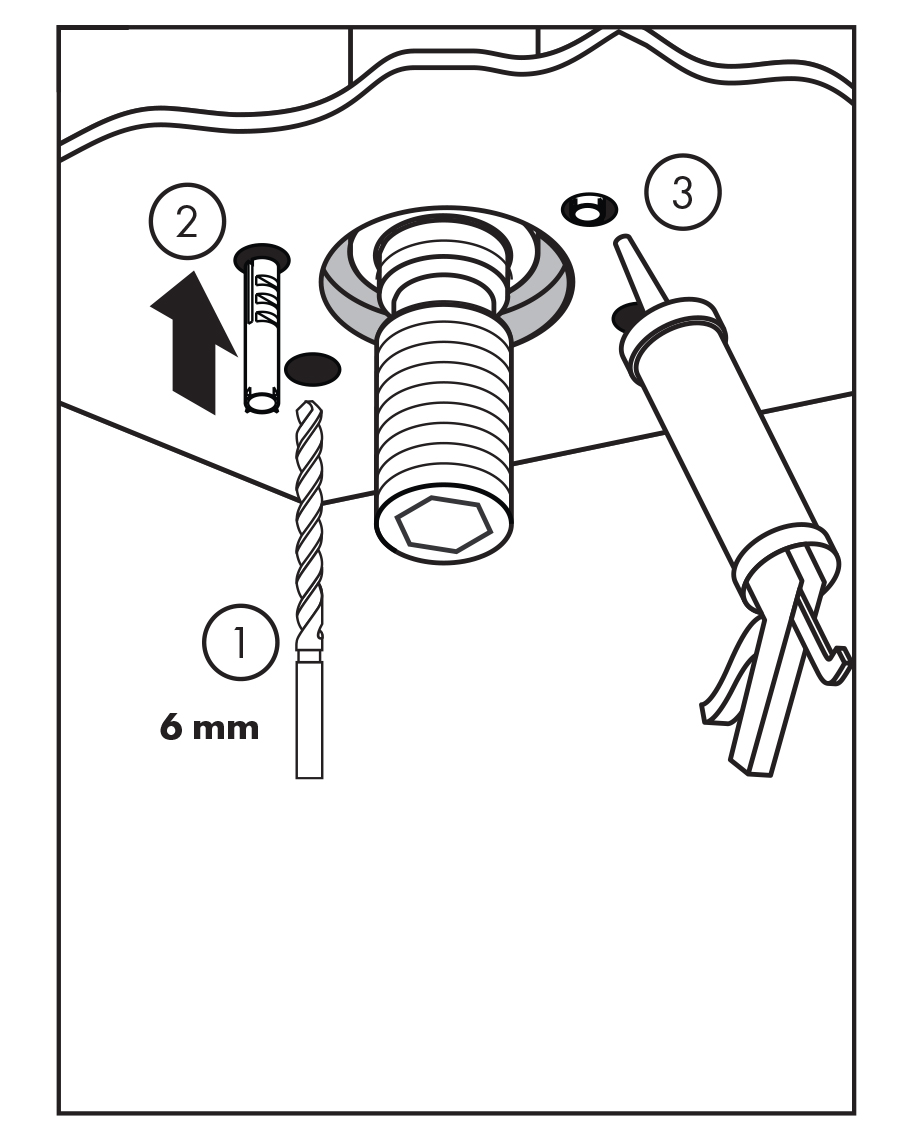
Step 6:
Remove the mounting ring.
Drill the screw holes using a 6 mm bit. Install the anchors. Seal the ceiling around the an-chors using a waterproof sealant.
Step 7:
Step 8:
Install the mounting ring.
Install the screws.
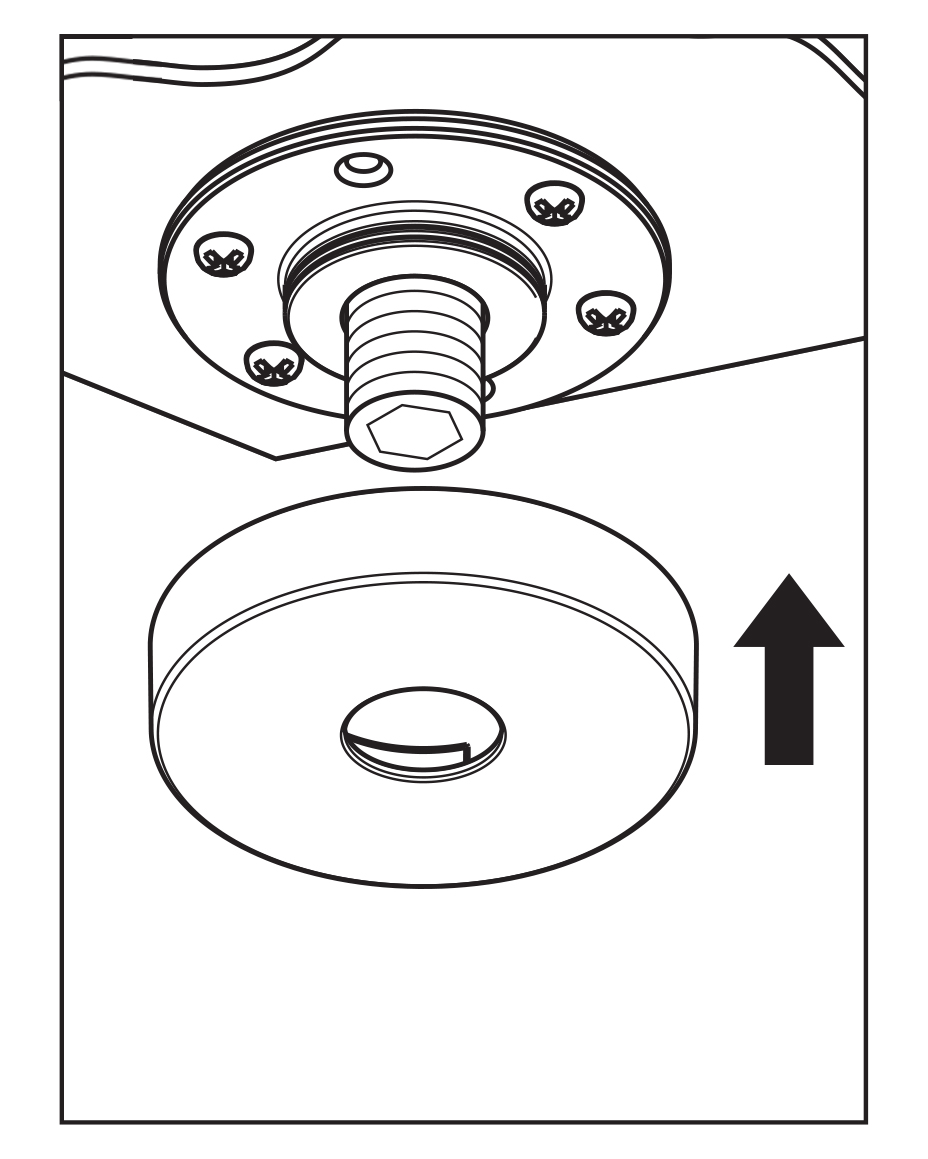
Step 9:
Step 10:
Install the escutcheon.
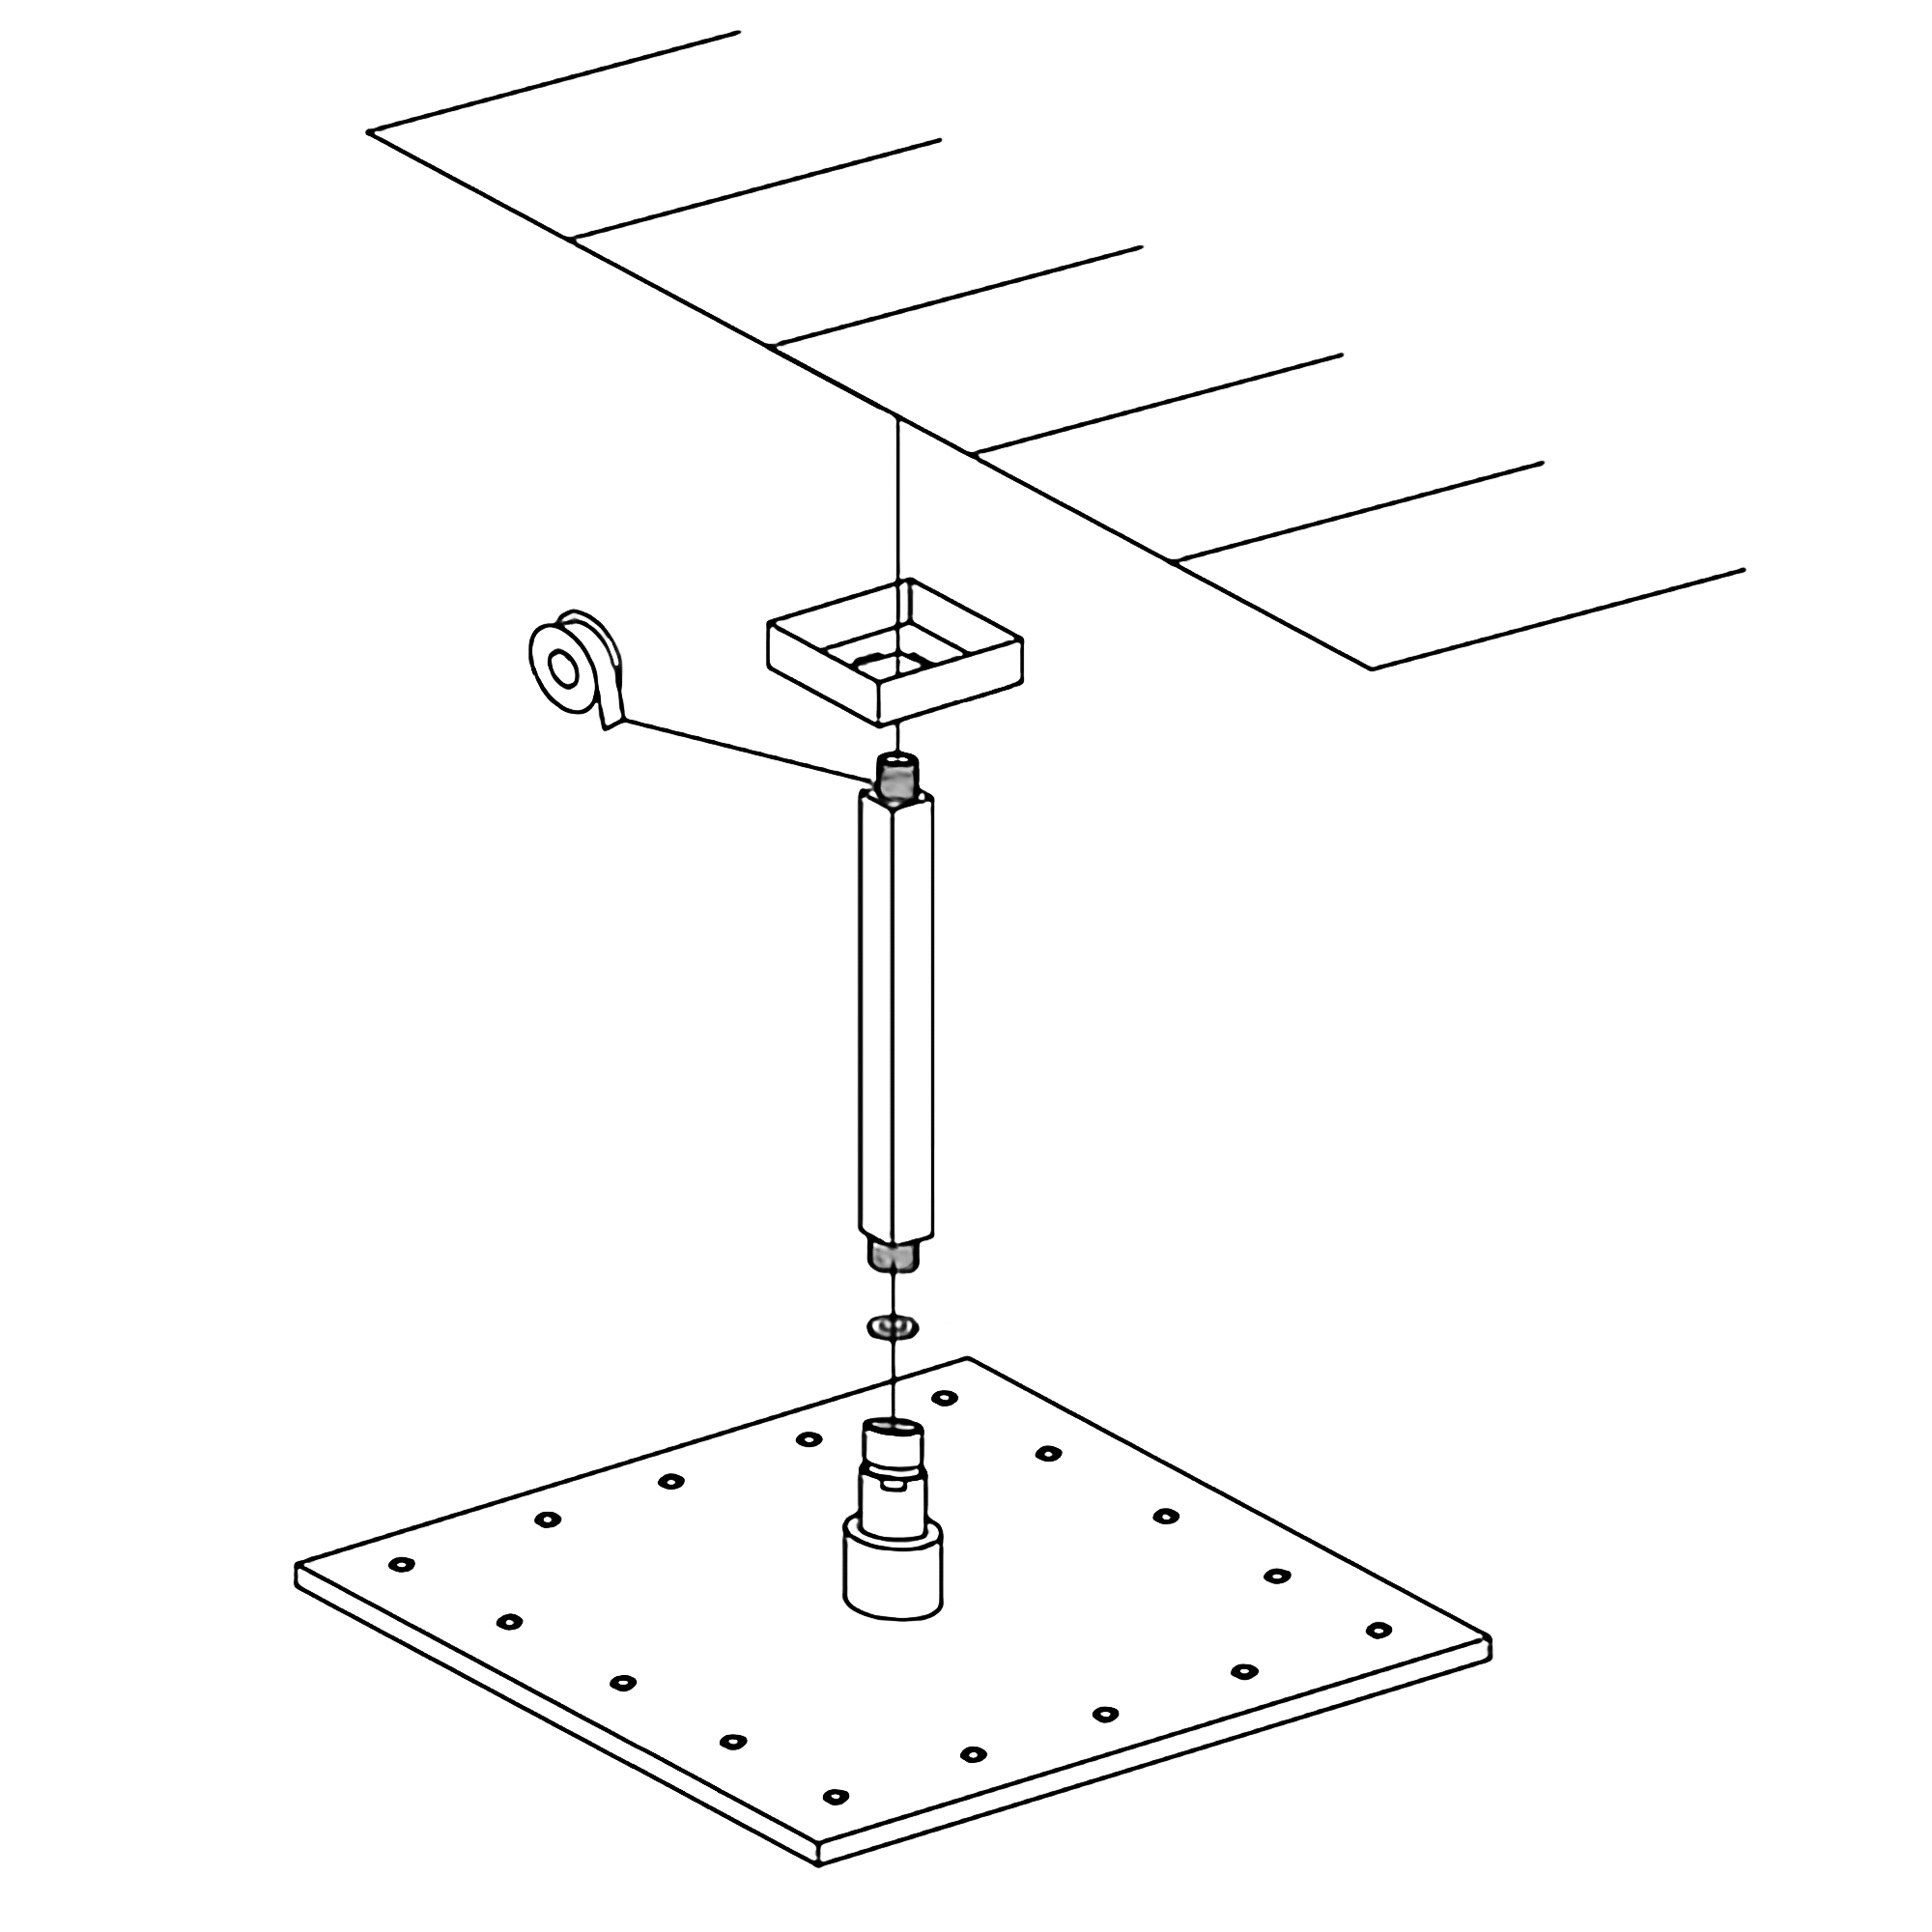
Wrap the threads on the nipple using plumber's tape. Install the extension pipe.
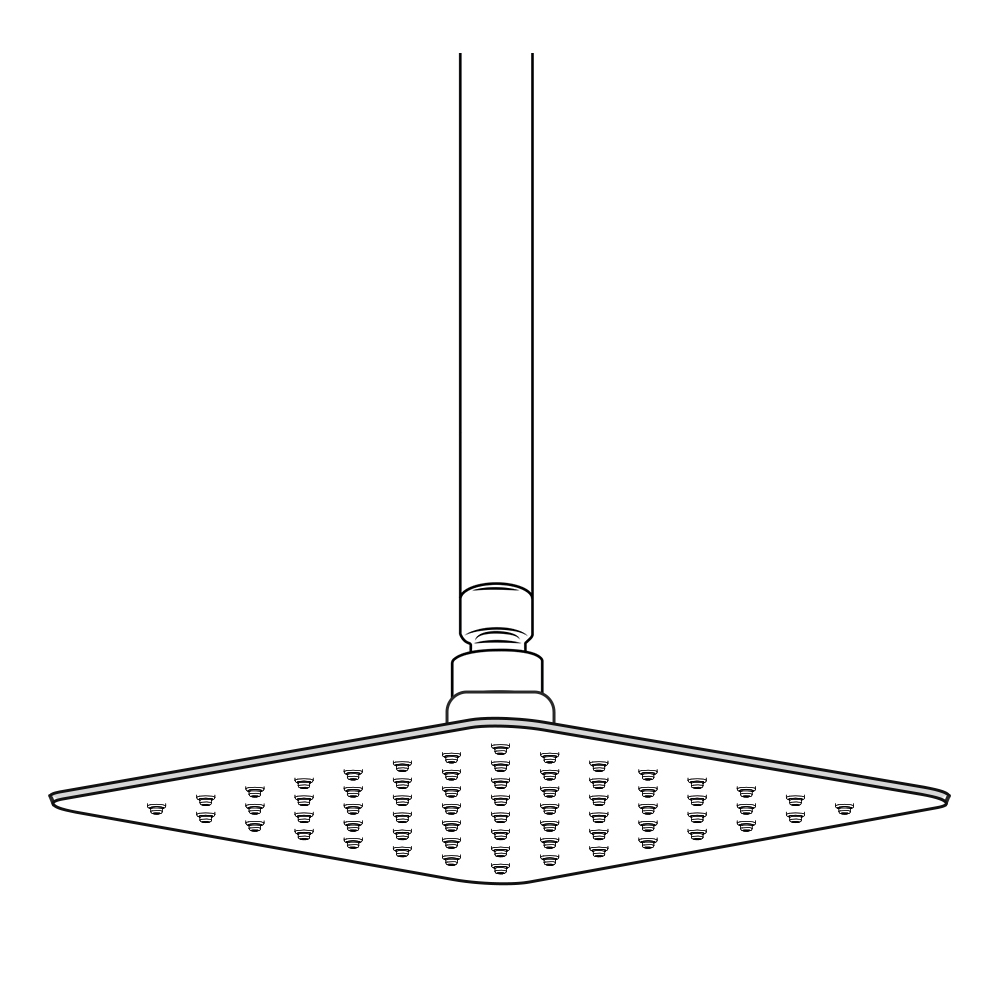
Ceiling Mount Shower Head Installation Instructions
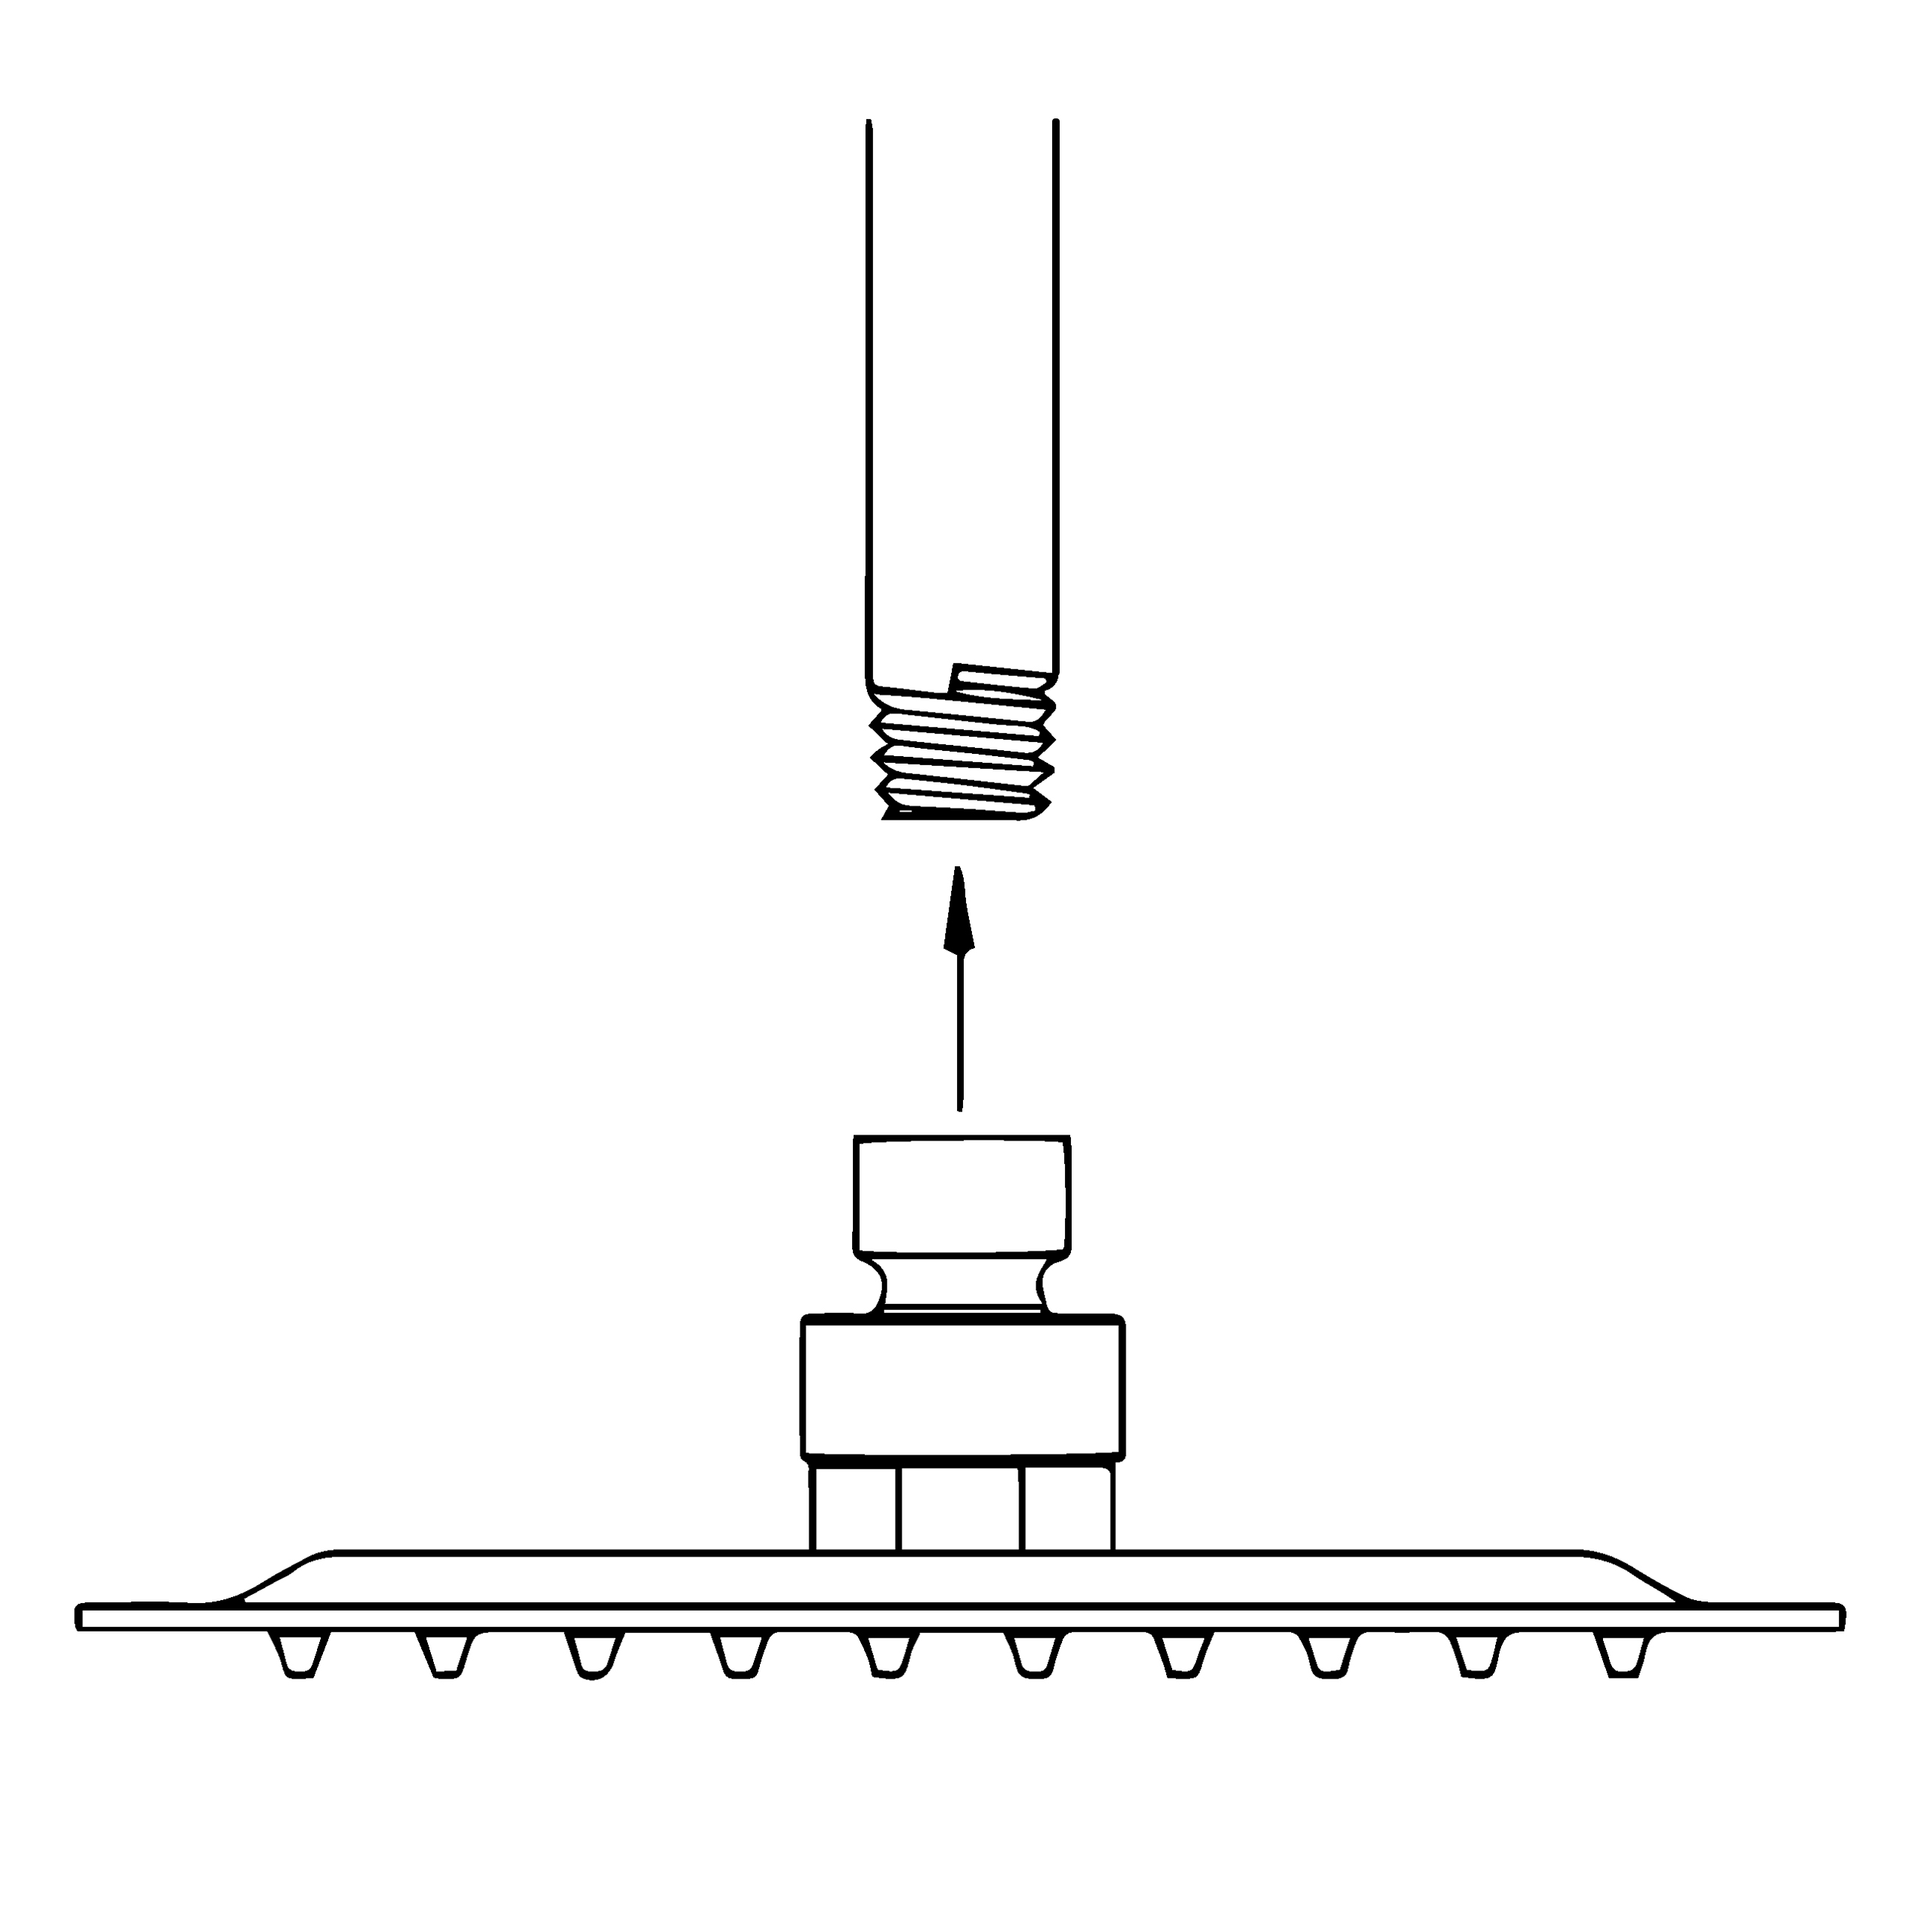
Step 1:
Step 2:
shower
Shower Head Installation Instructions
Step 3:
Step 4:
Step 5:
Step 6:
Step 1: Take Out the Old Shower Head You can easily remove it by hand, but depending on how long the rain showerhead has been installed, you might need to use an adjustable wrench. Hence, if you find it difficult to remove, rotate the showerhead with an adjustable wrench in a counterclockwise direction to unscrew it.
Step 2: Keep the Shower Arm Clean and In Good Shape After you have removed the head, check the shower arm threads for any debris and old Teflon tape. If you find any, remove it and clean them off thoroughly. It’s best to use a microfiber cloth when cleaning the thread because it removes Teflon tape perfectly and works great to pick up tiny grits. Once you’re done cleaning, check if it is corroded or leaking. For damaged threads, it will be best you replace it entirely so you can have a comfortable shower experience any time.
Step 3: Time to Add New Teflon Tape Since you have removed the old Teflon tape, you have to replace it with new ones. The reason is that this tape helps to protect the shower from leaking after installing the showerhead. Now apply the new Teflon tape about 3-5 turns on the thread and tear the end part. Use your hands to smooth it out to keep it leveled to the thread. Keep in mind that when applying the tape, you should go in a clockwise motion so that it doesn’t come off when you attach the head in the same direction.
Step 4: Connect the Showerhead As said earlier in the tools needed, we’re using the rubber sealing washer that comes with the showerhead. This tool helps to make the showerhead stay watertight and secured on to the thread. Ensure you place it properly before installing it. After that, reconnect the shower head and tighten it down with your hands. You can employ a chair or ladder to make things easier for you.
Step 5: Tighten the Showerhead On To the Thread You will need to get the adjustable wrench handy to tighten down the shower very well. But make sure you wrap the threads with a terry cloth, so it doesn’t damage the finish when tightening the showerhead. Once you have done that, now use the adjustable wrench to tighten down the showerhead. However, don’t over-tight or force it so that it’s easier to remove in the future.
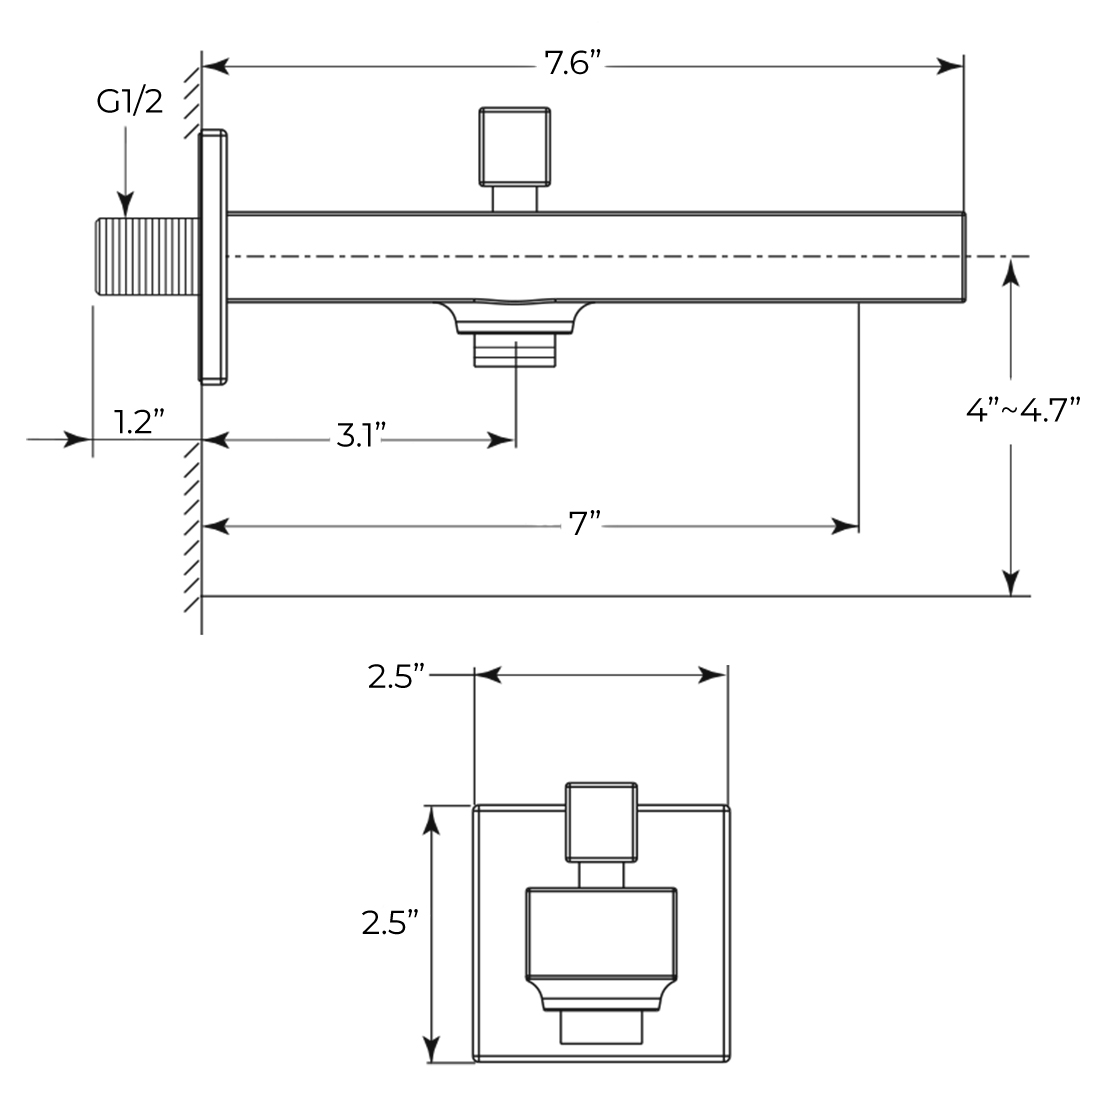
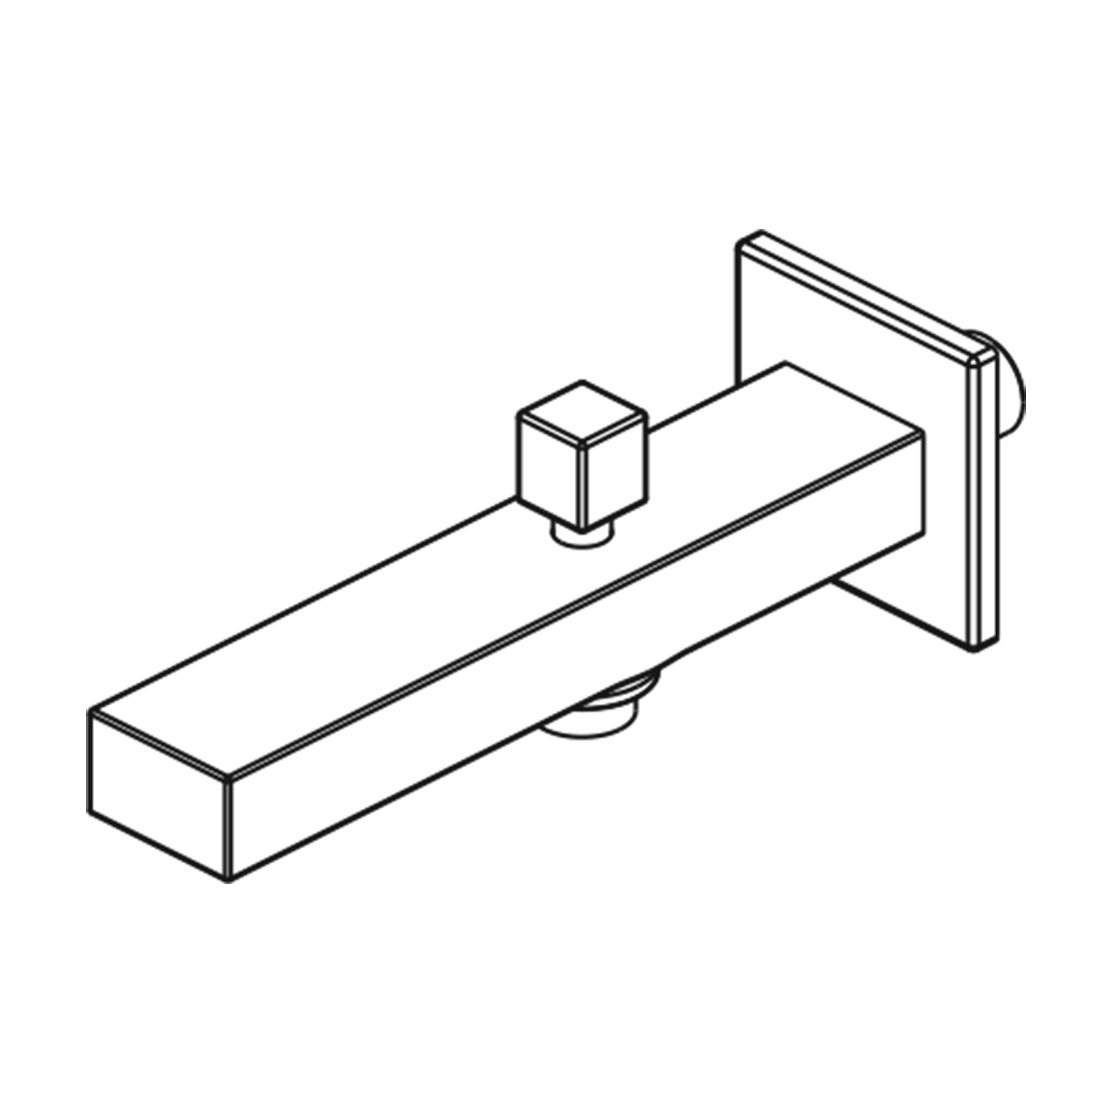
Spout & Hand Held Shower Installation Instructions
Step 1:
Step 2:
HandHeld
Shower
Hand Held Shower
Handheld Shower
Step 3:
Step 4:
Step 5:
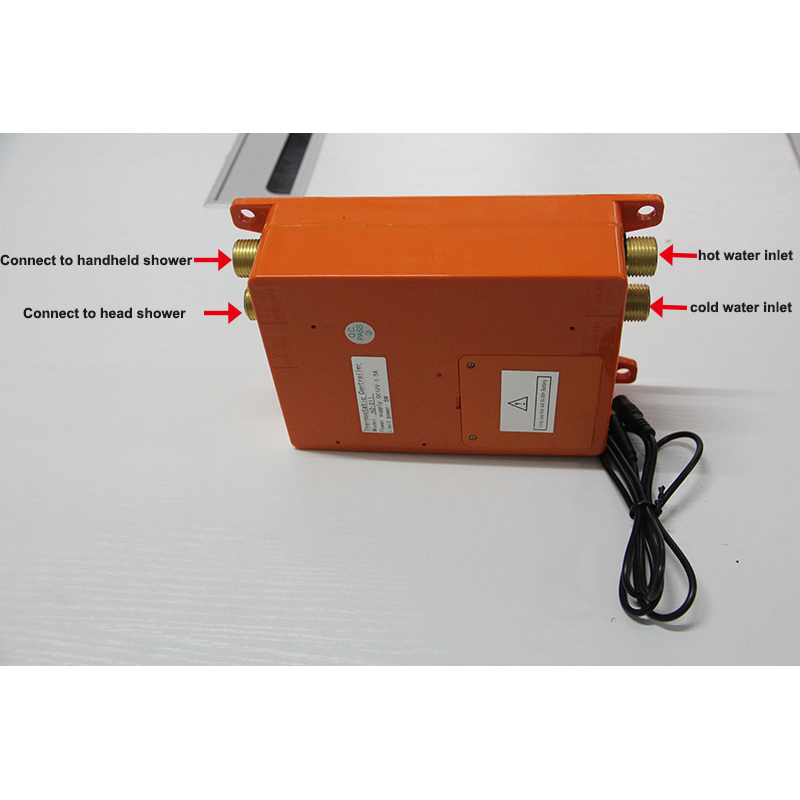
Hand Shower Outlet Installation Complete the outlet pipework ensuring it ends in an appropriate 15mm x 1/2" BSP female thread elbow.
Note: This fitting is not supplied as variations in installations require the selection of a suitable solder or compression fitting. • Install the 'Wall Outlet', thread long male 1/2" BSP into the appropriate female fitting using PTFE tape to give a watertight joint.
Note: The thread can be cut to size if required. Make sure that all debris is removed from the connector and the section that has been cut is dressed correctly, before installation.
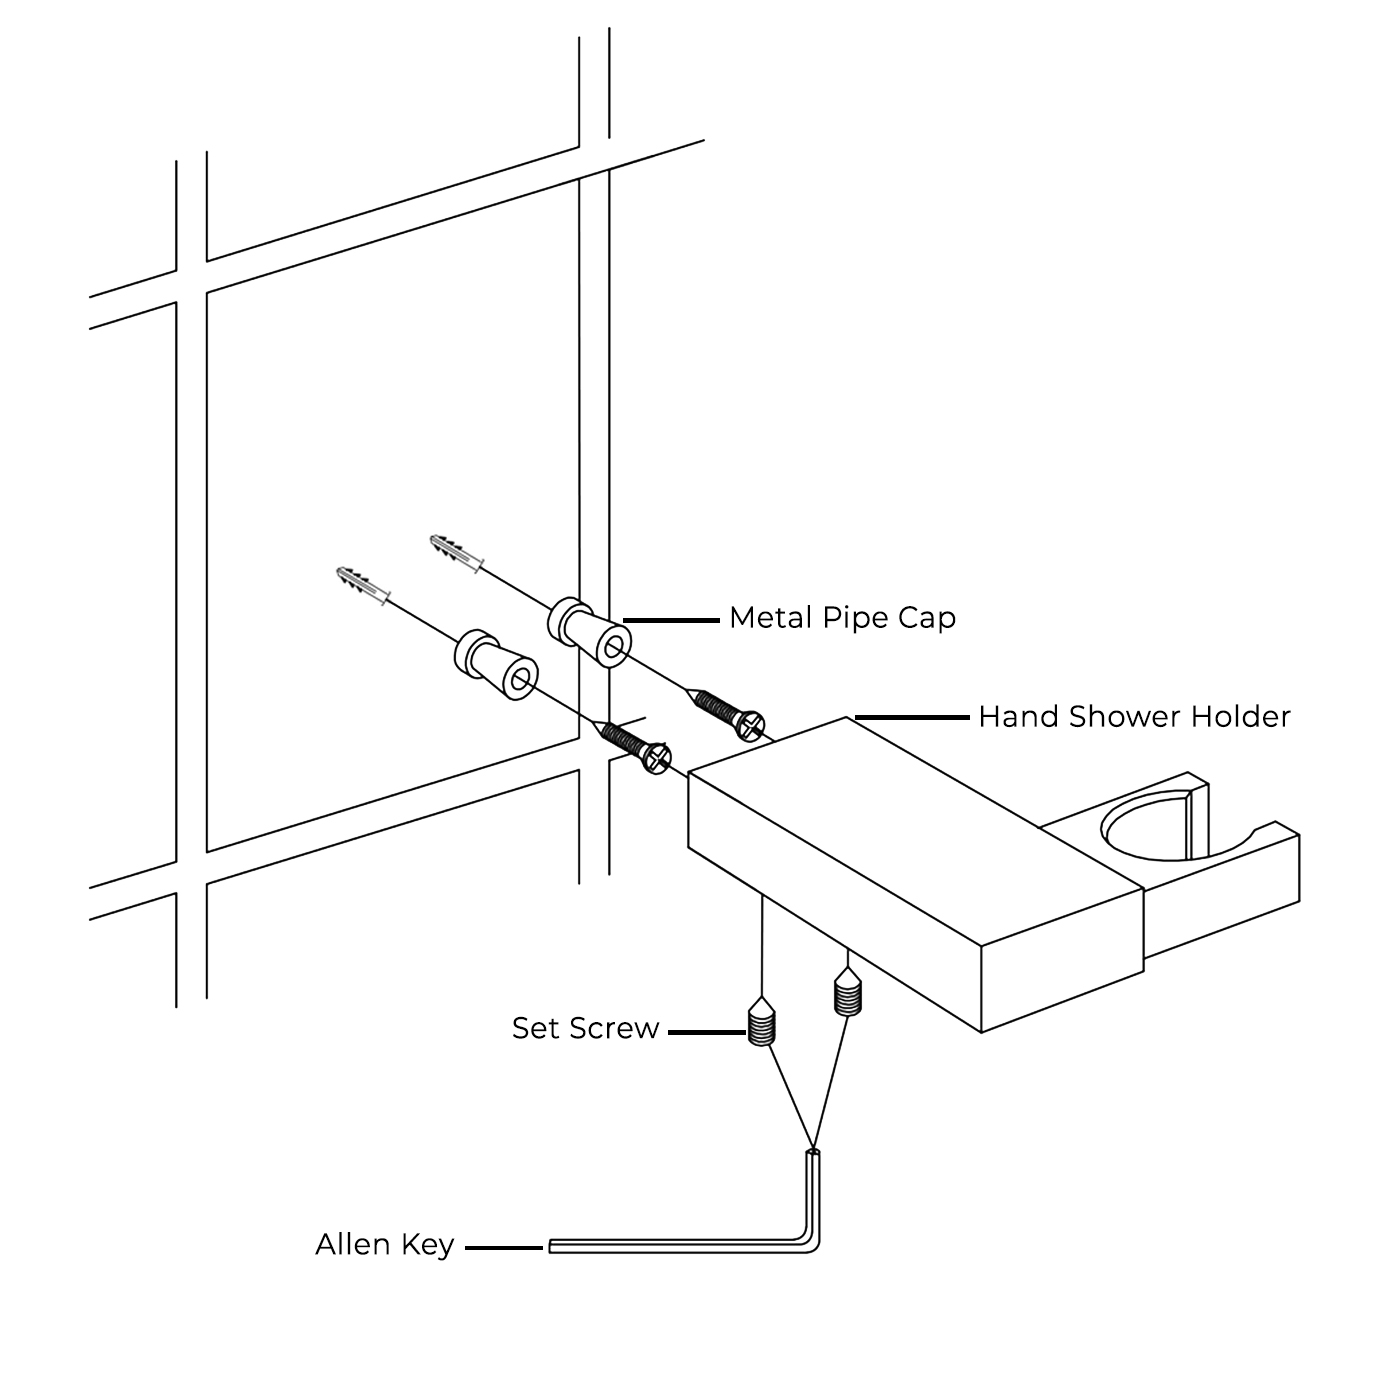
Shower Wall Holder Installation Decide the position for the shower head holder on the wall within the bath showering area and proceed as follows: • Hold the hand shower head holder fixing plate in a suitable position on the wall, mark out the position of the holder. Mark the two locating holes, these are 17mm center. • Drill and plug the wall. Use an appropriate masonary drill, but if the wall is plasterboard or a soft building block, use special wall plugs and an appropriate drill bit. • Slide the inserts onto the screws in the orientation. Secure the inserts by tightening the screws. • Slide the hand shower head holder body onto the inserts and secure by tightening the grub screw facing down.