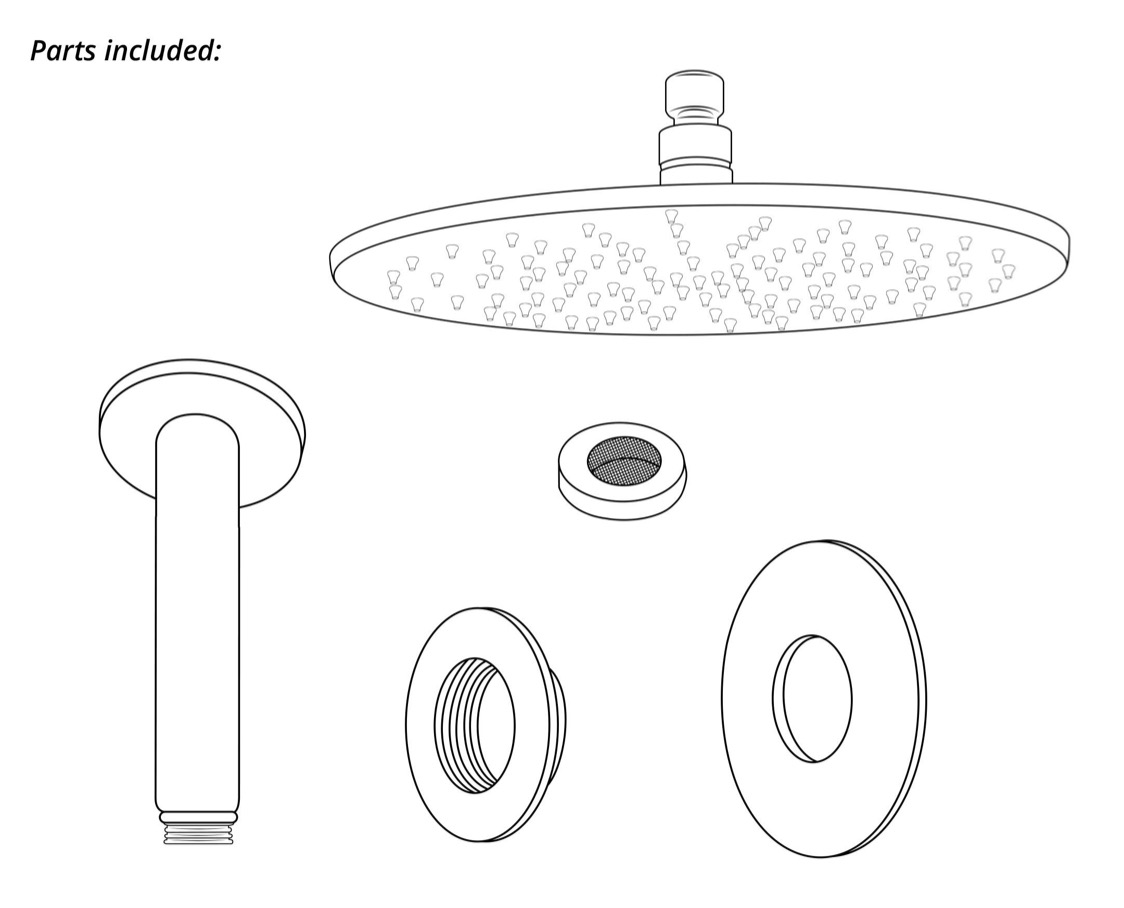
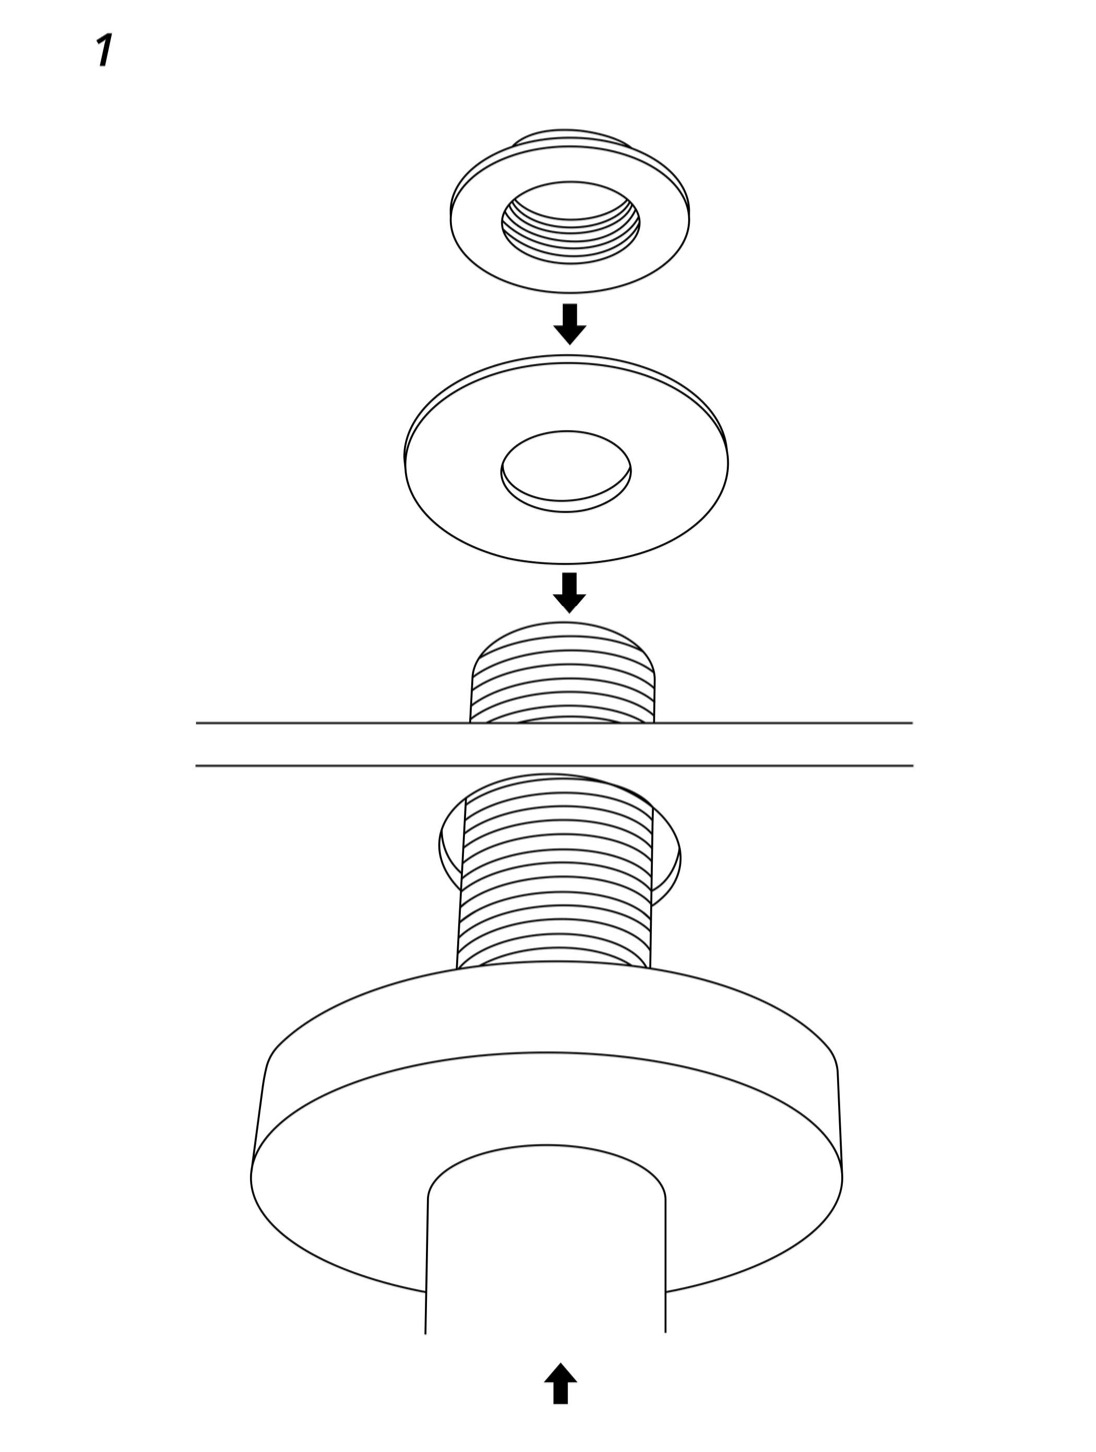
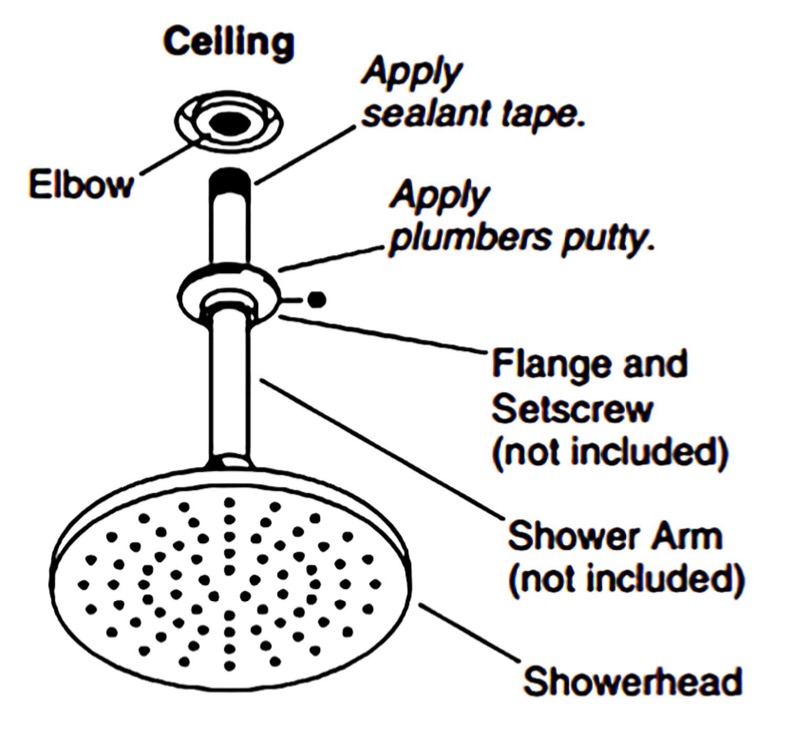
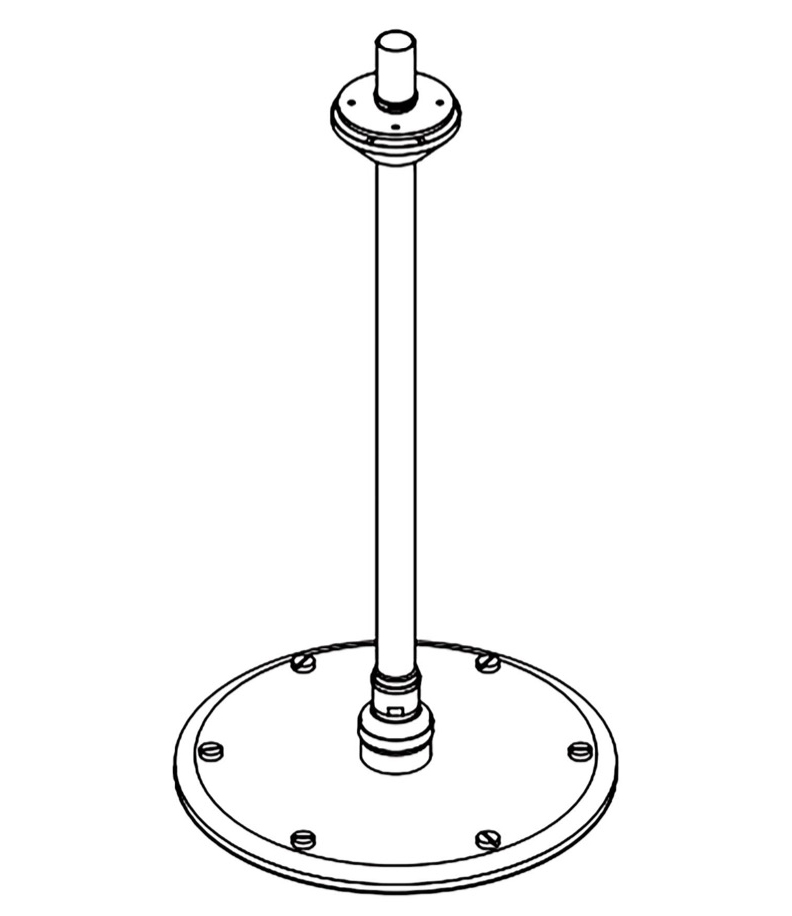
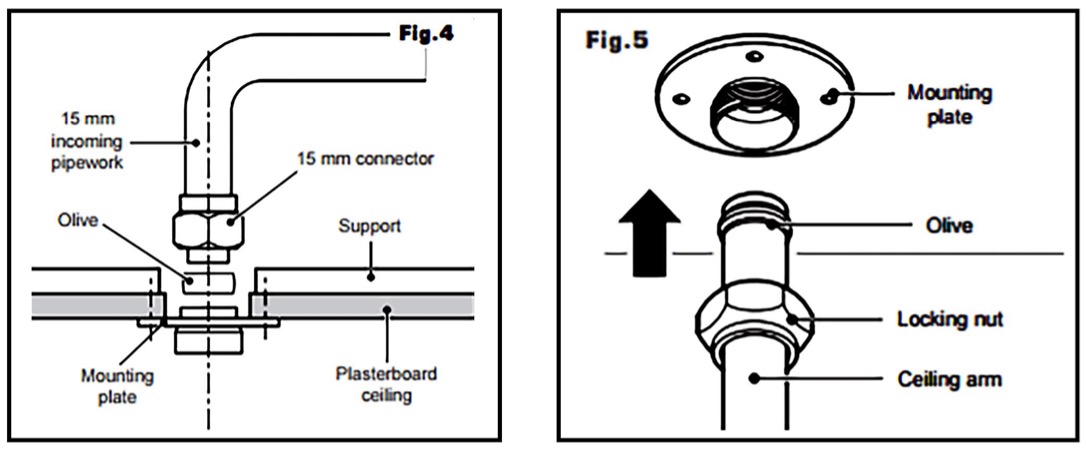
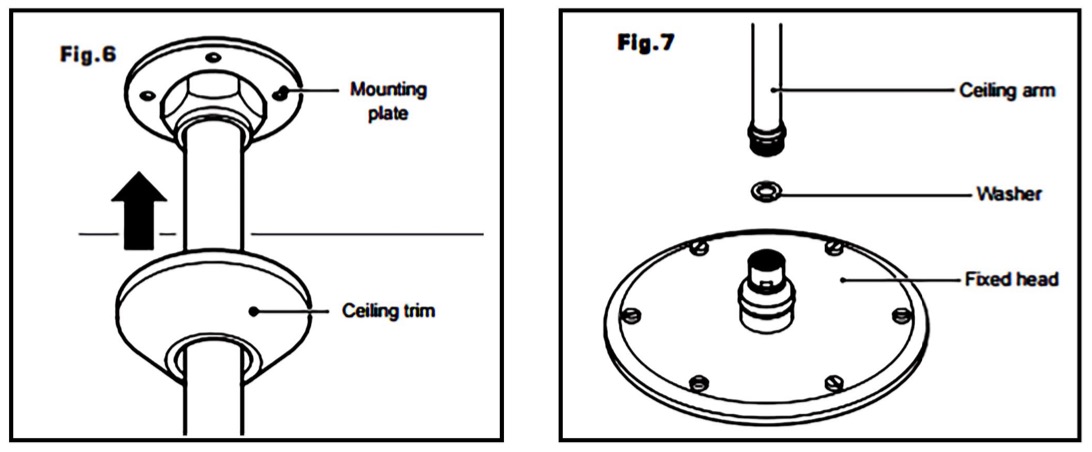
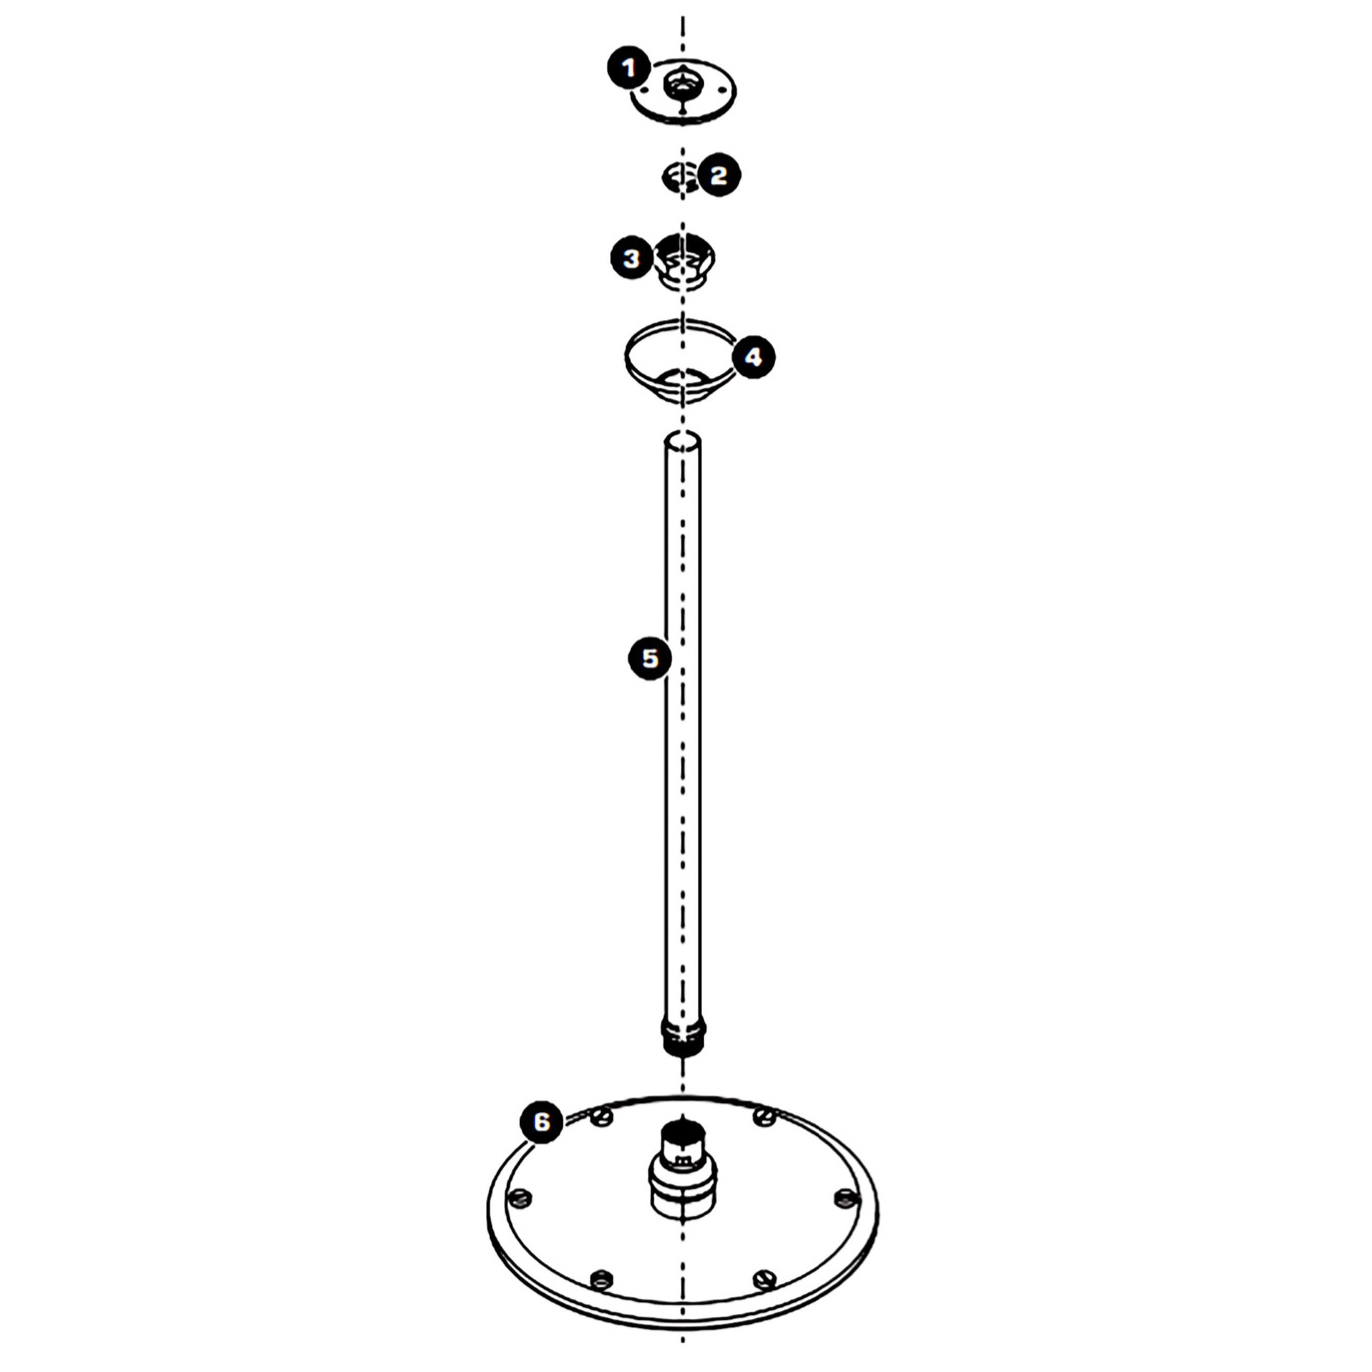
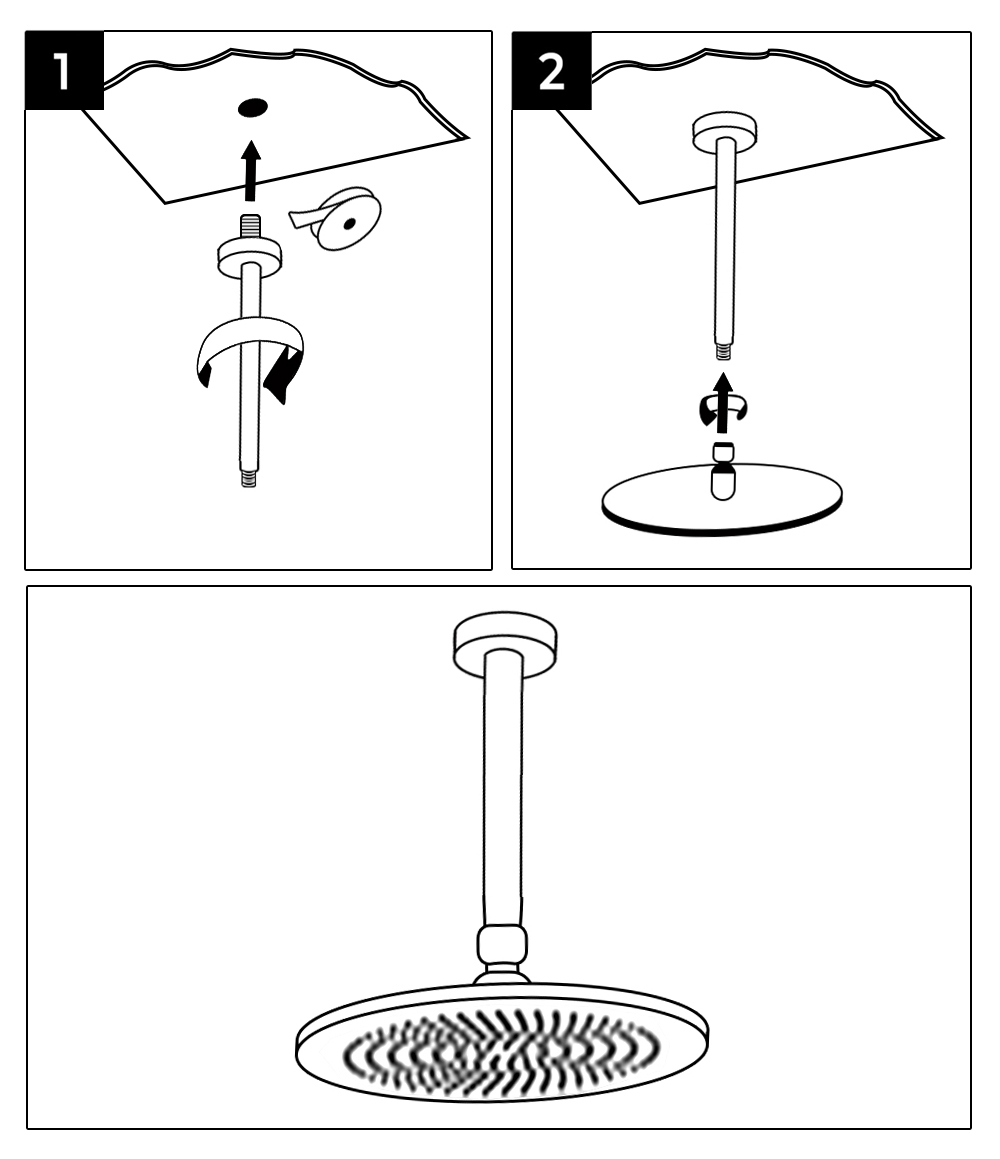
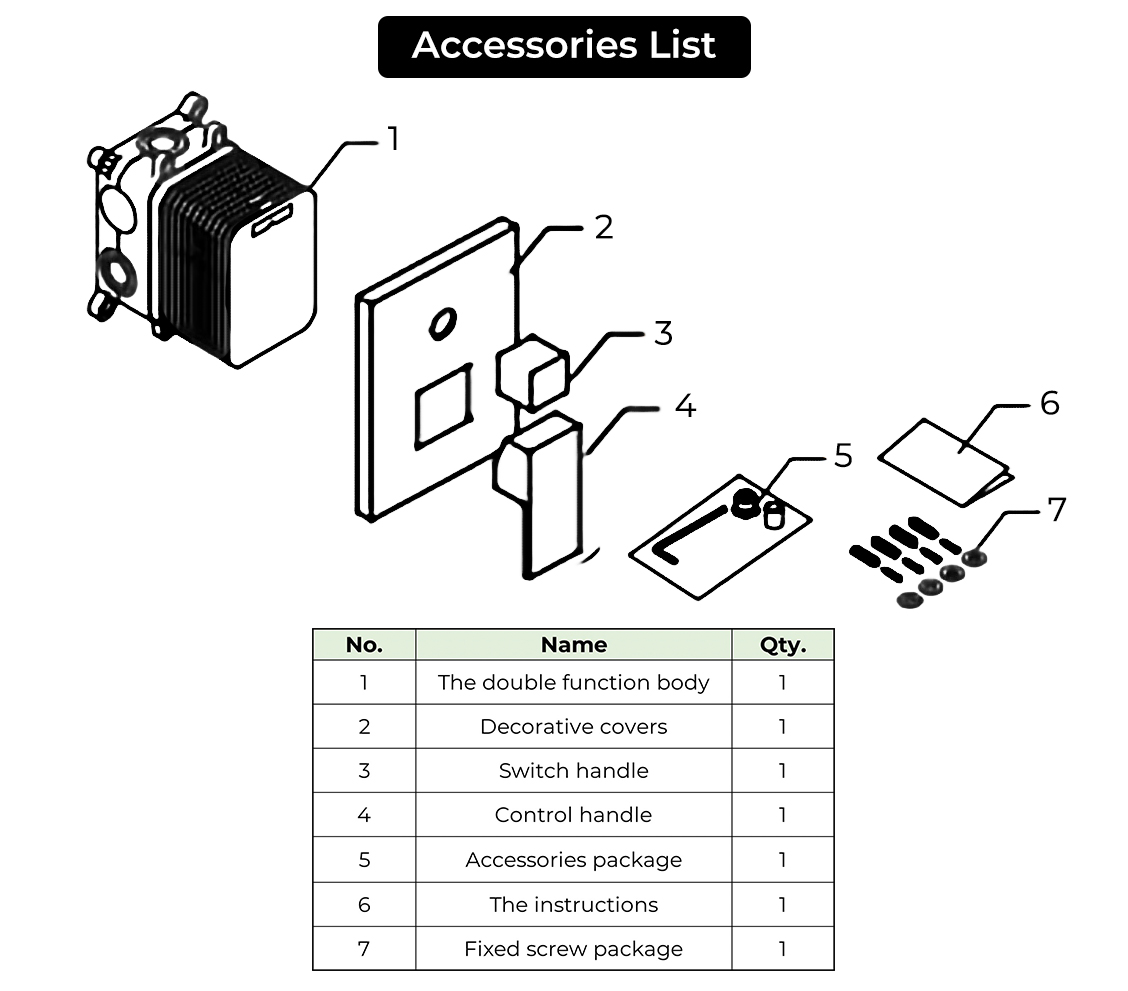
1. Ceiling arm mounting plate 2. Olive 3. Locking nut 4. Ceiling trim 5. Ceiling arm 6. Emily fixed showerhead 7. Fixing screws and wall plugs (not shown)
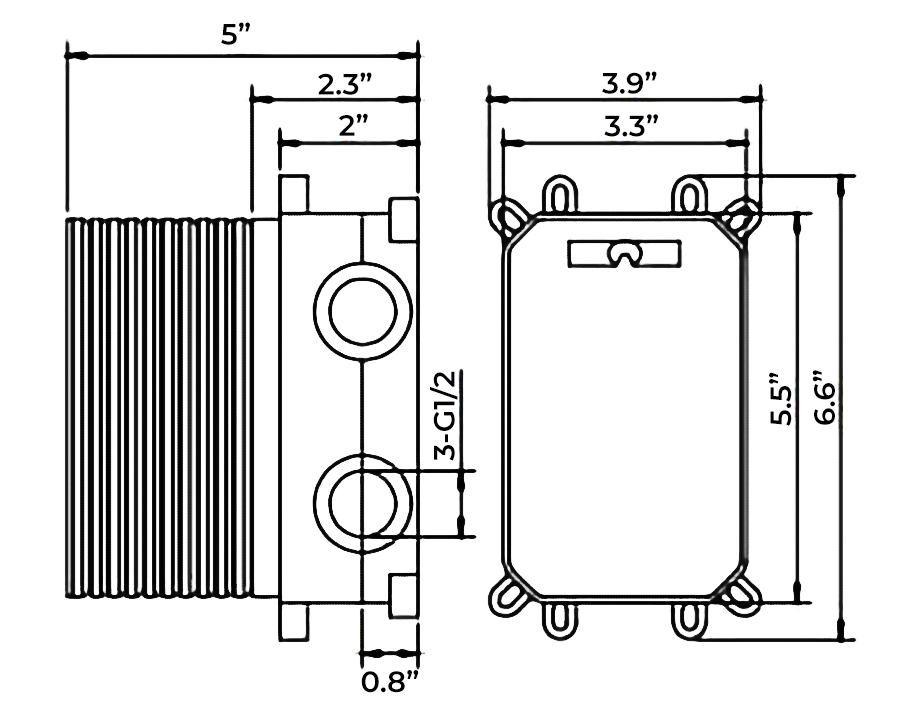
Basic-size, according to the embedded box to open the hole on solid wall, should consider installing the metope of the distance between 60-75mm, for example, after blank wall in the shop, the ceramic tile surface to increase the thickness of the 20 mm, so PiQiang in the depth of the hole should be chosen 40 to 55 mm.
Hole bottom should remain flat so that subsequent adjustment embedded box of vertical and horizontal convenient installation for the principle
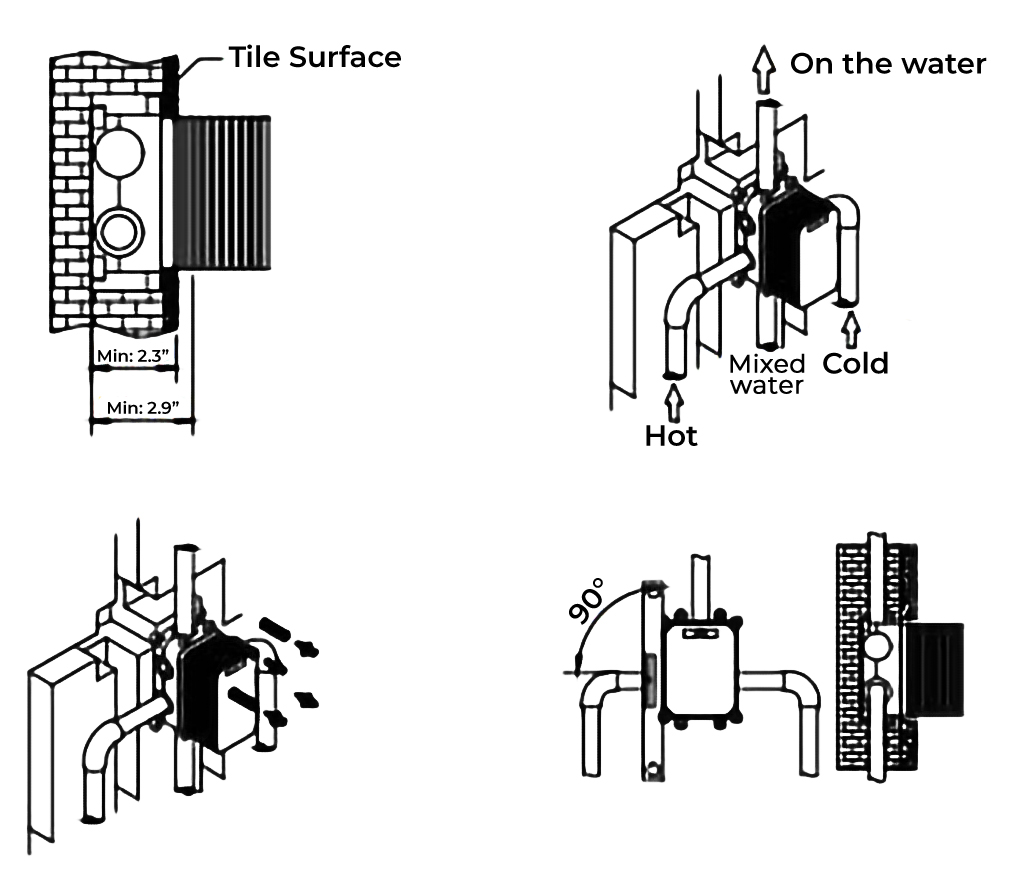
Pay attention to the direction of the up and down or so embedded box, on the left by hot water pipes, right after the cold water pipes, pick up and down the mixed water pipes.
After the pipe connection, according to the pipeline arrangement, and open the corresponding channel slot tube in the blank wall.
Embedded box fixed before, to embed box and trial test and pipe water clean connection pipe, and test before mixing water channels should be open.
Test before opening the switch valve core, open the water to test around inlet pipe is connected closely with no leakage and the water pipe test after dosing open state, weather to test on the mixed water pipe connection without leakage. At the same time clean tube foreign bodies in case of influencing water control valve function.
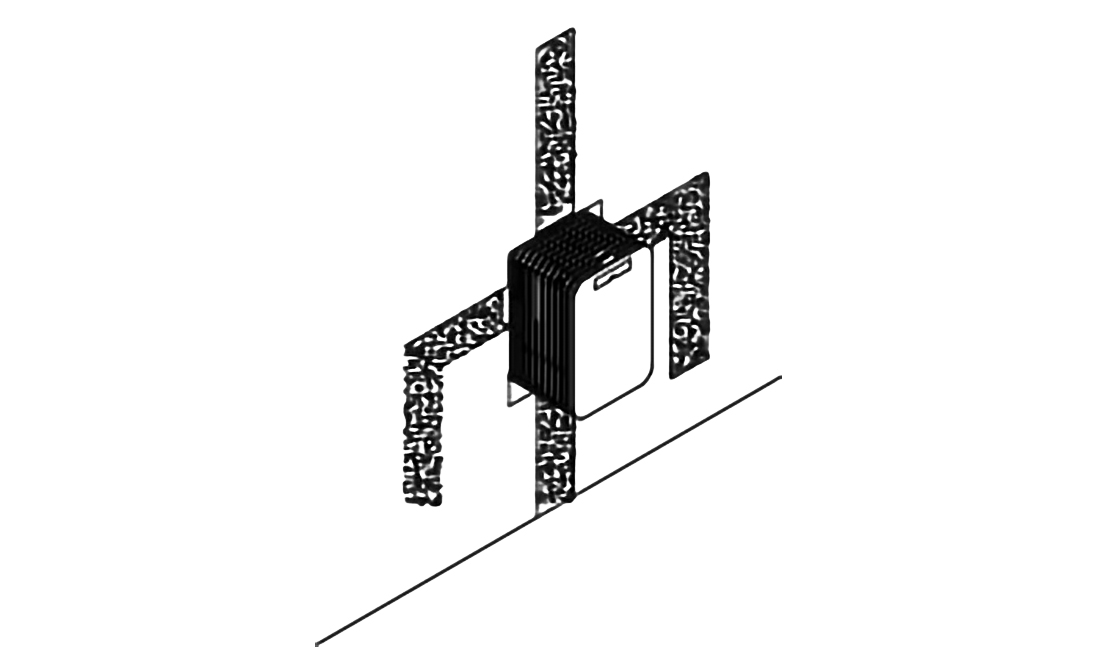
It will be embedded in a box into the solid wall with a self-tapping screw that is fixed on the wall.
With parallel ruler for correction of embedded box of horizontal and vertical direction to embed box into a level with the ground, and metope as 90°. In the absence of good correction will influence the control panel installation effect.
Once again confirm the pipe connection is correct, try no leakage, water shower other embedded with the packing box and pipe joint is fixed. Solid wall embedded box is installed, laid our behind the wall can be a follow-up control valve installation.
The lying of the wall not to embed box is open, lest the box into the packing after solidification effect of control valve installation.
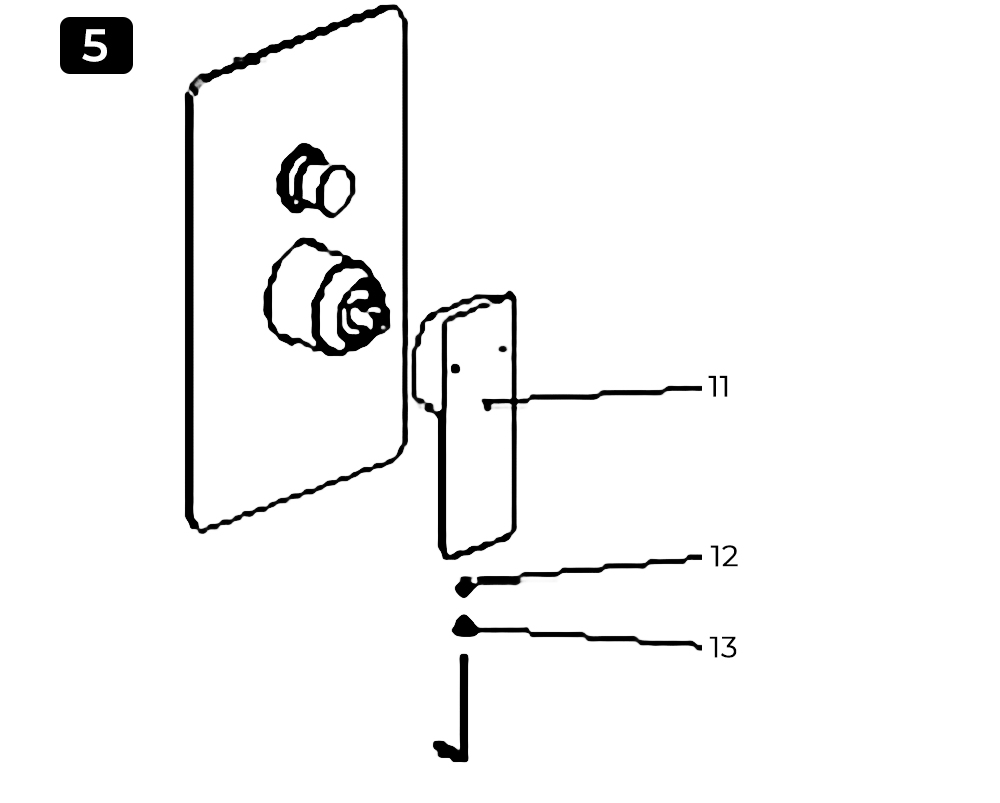
Control valve set surface for plating and smooth surface should be kept inside the original packaging before installation to prevent scratches, corrosion, and lost.
Laid metope ceramic tile or other adornment metope, keep the metope smooth, with embedded box into 90″ vertically.
Along with the embedded highlights, the glass on the edge glue, embedded box to improve waterproof performance prolongs service life.
Cut off using a cutting tool embedded box of highlighting, keep away from the wall 2-4mm highly advisable. Try yo remove embedded lifted the lid plate and water components
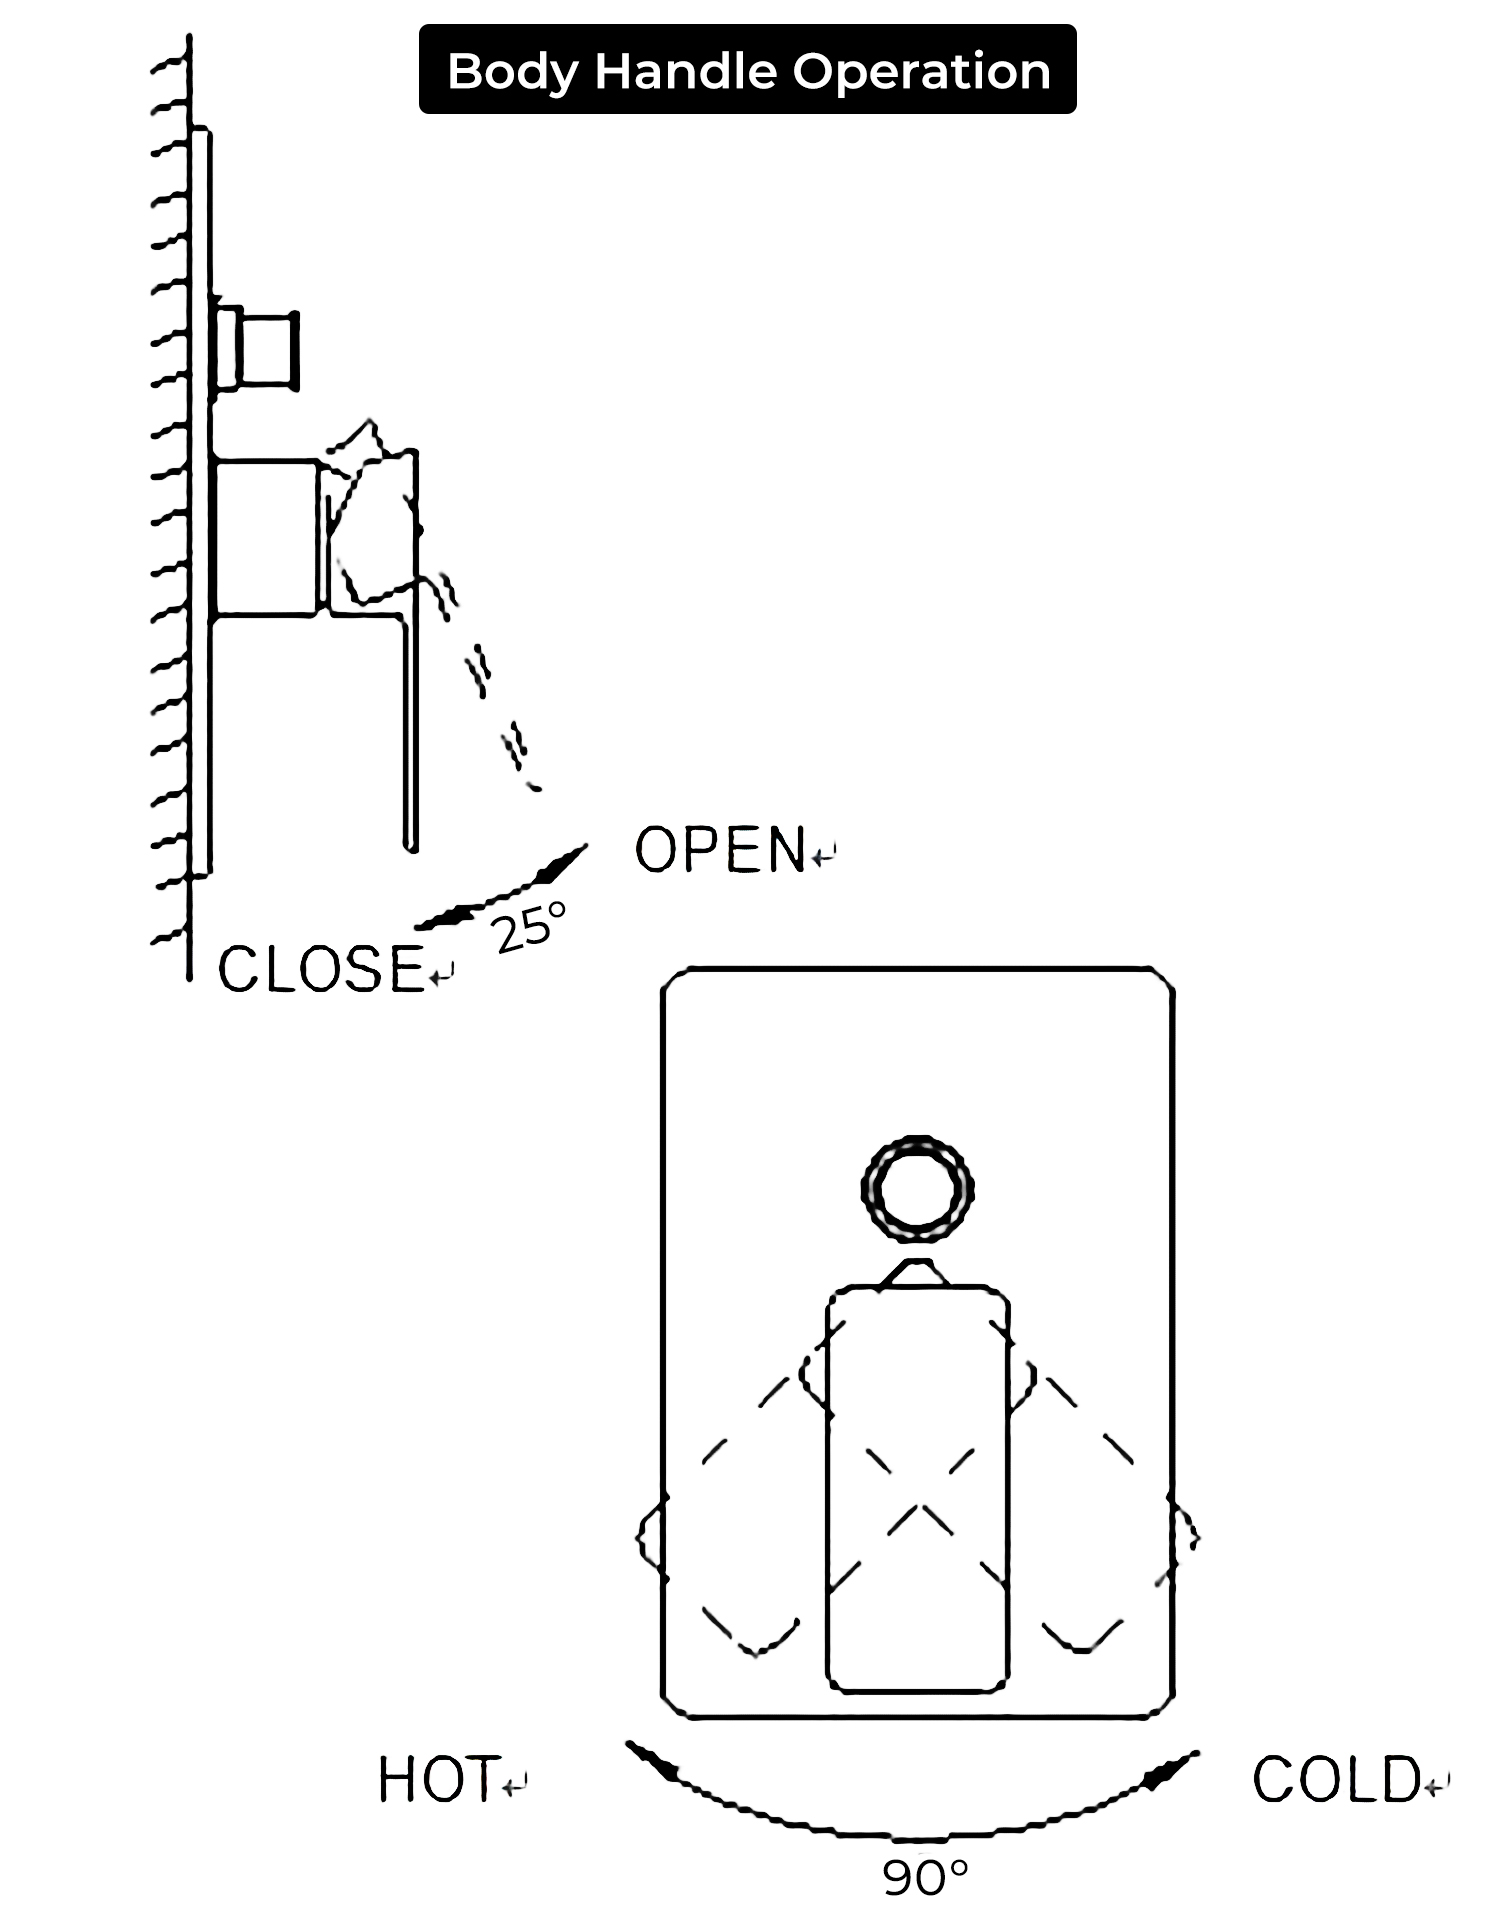
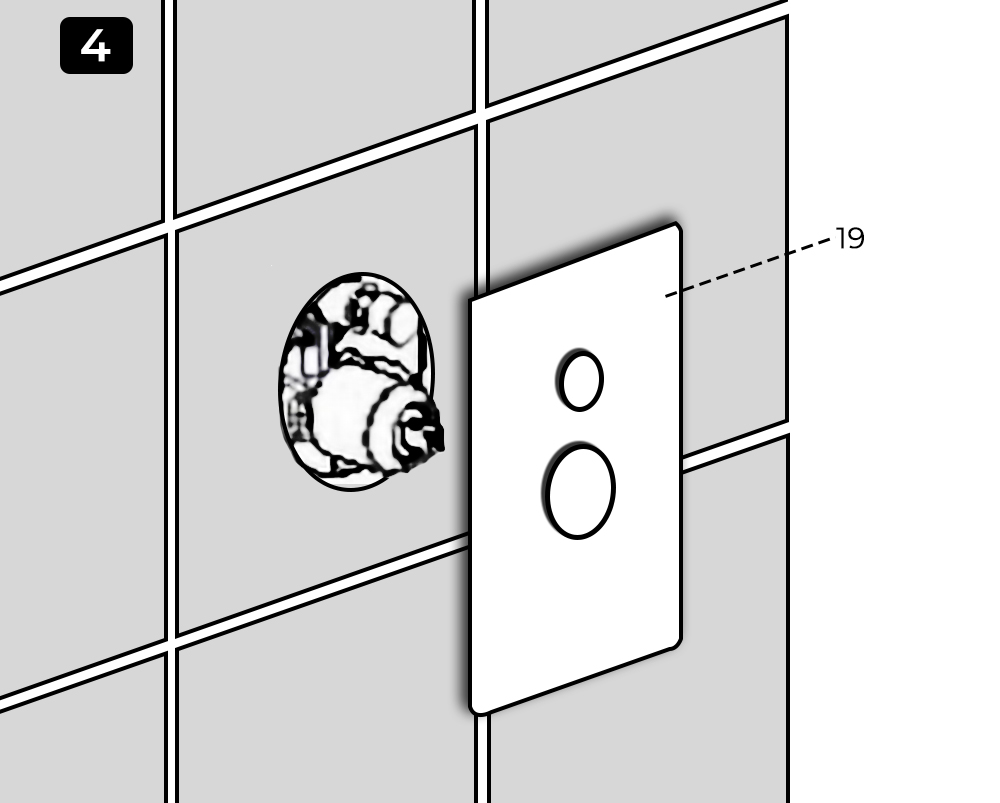
Installed control panel, check on panel hole protecting glue before set cut, such as unprotected glue set directly into the panel is easy to scratch panelInstall the switch handle, with packing with small hexagonal wrench clockwise to switch handle is fixed on a main valve spool control valve in, install decorative rubber plugs.
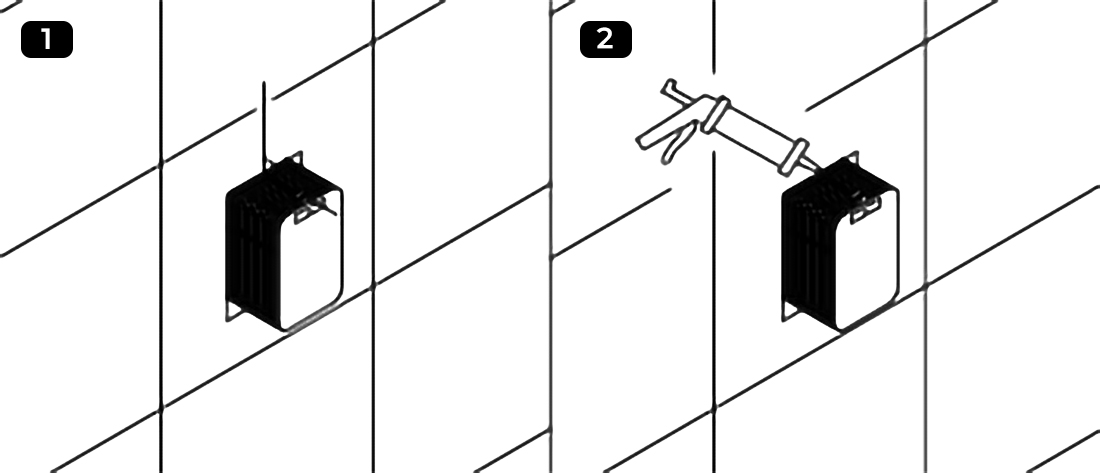
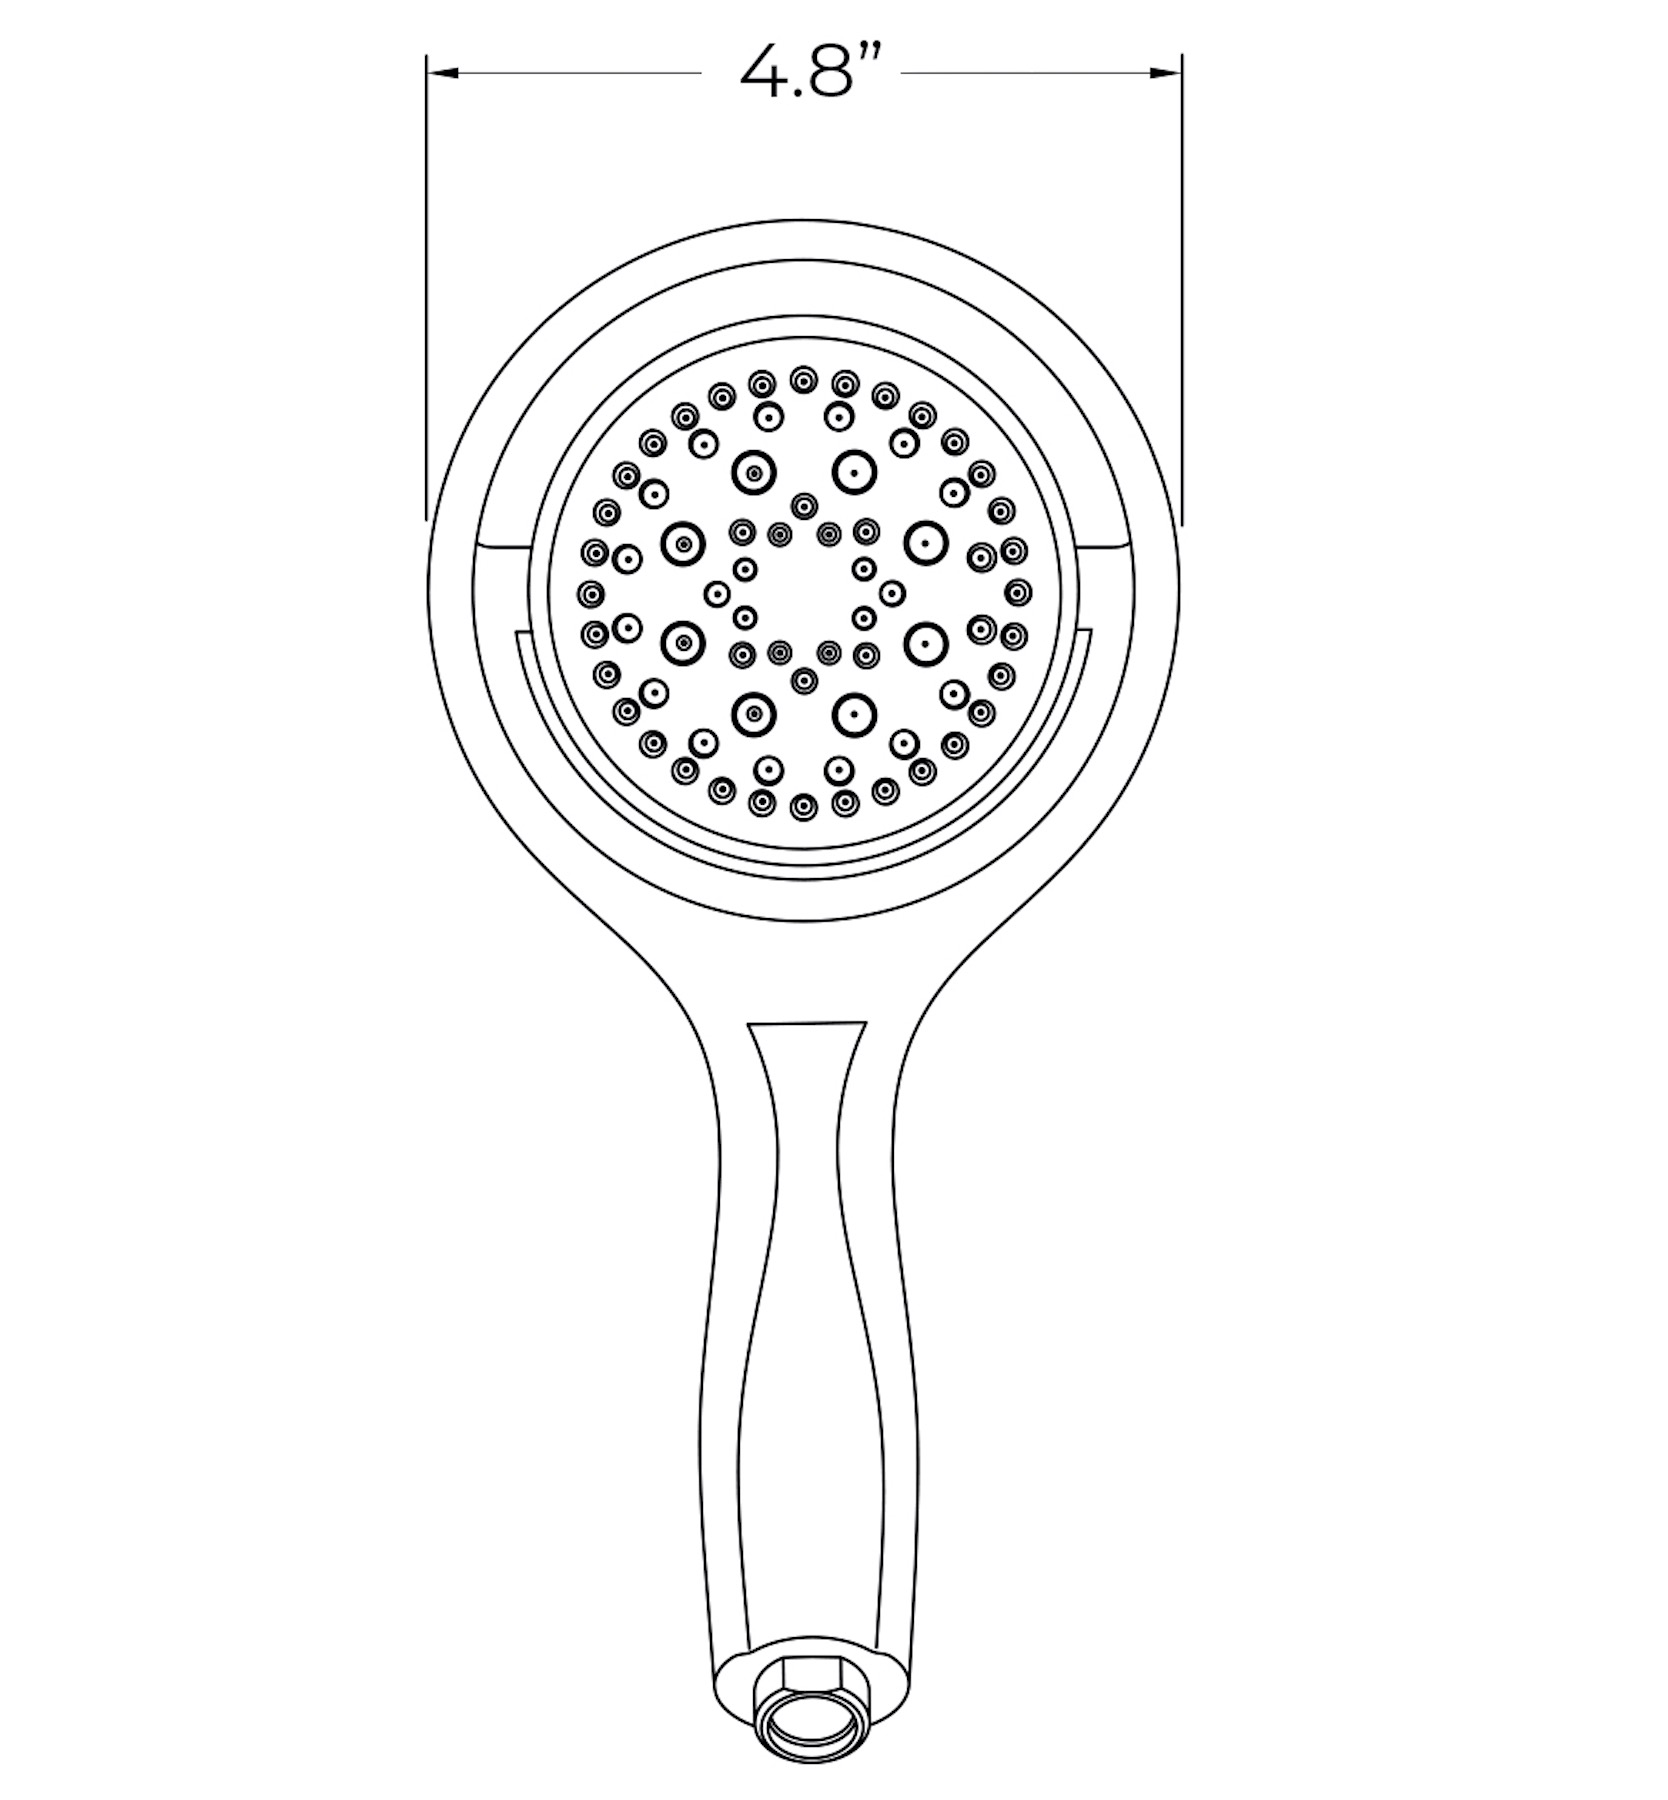
Hand Held Shower Installation
Parts List
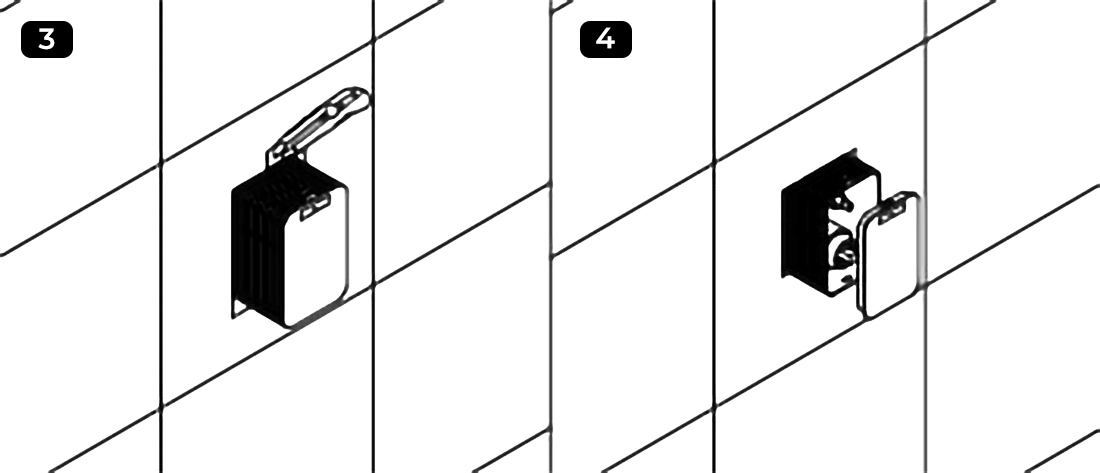
A. Hand Shower
B. Wall Anchors (x2)
C. Screws (x2)
D. Wall Bracket
E. Cap
F. Hose
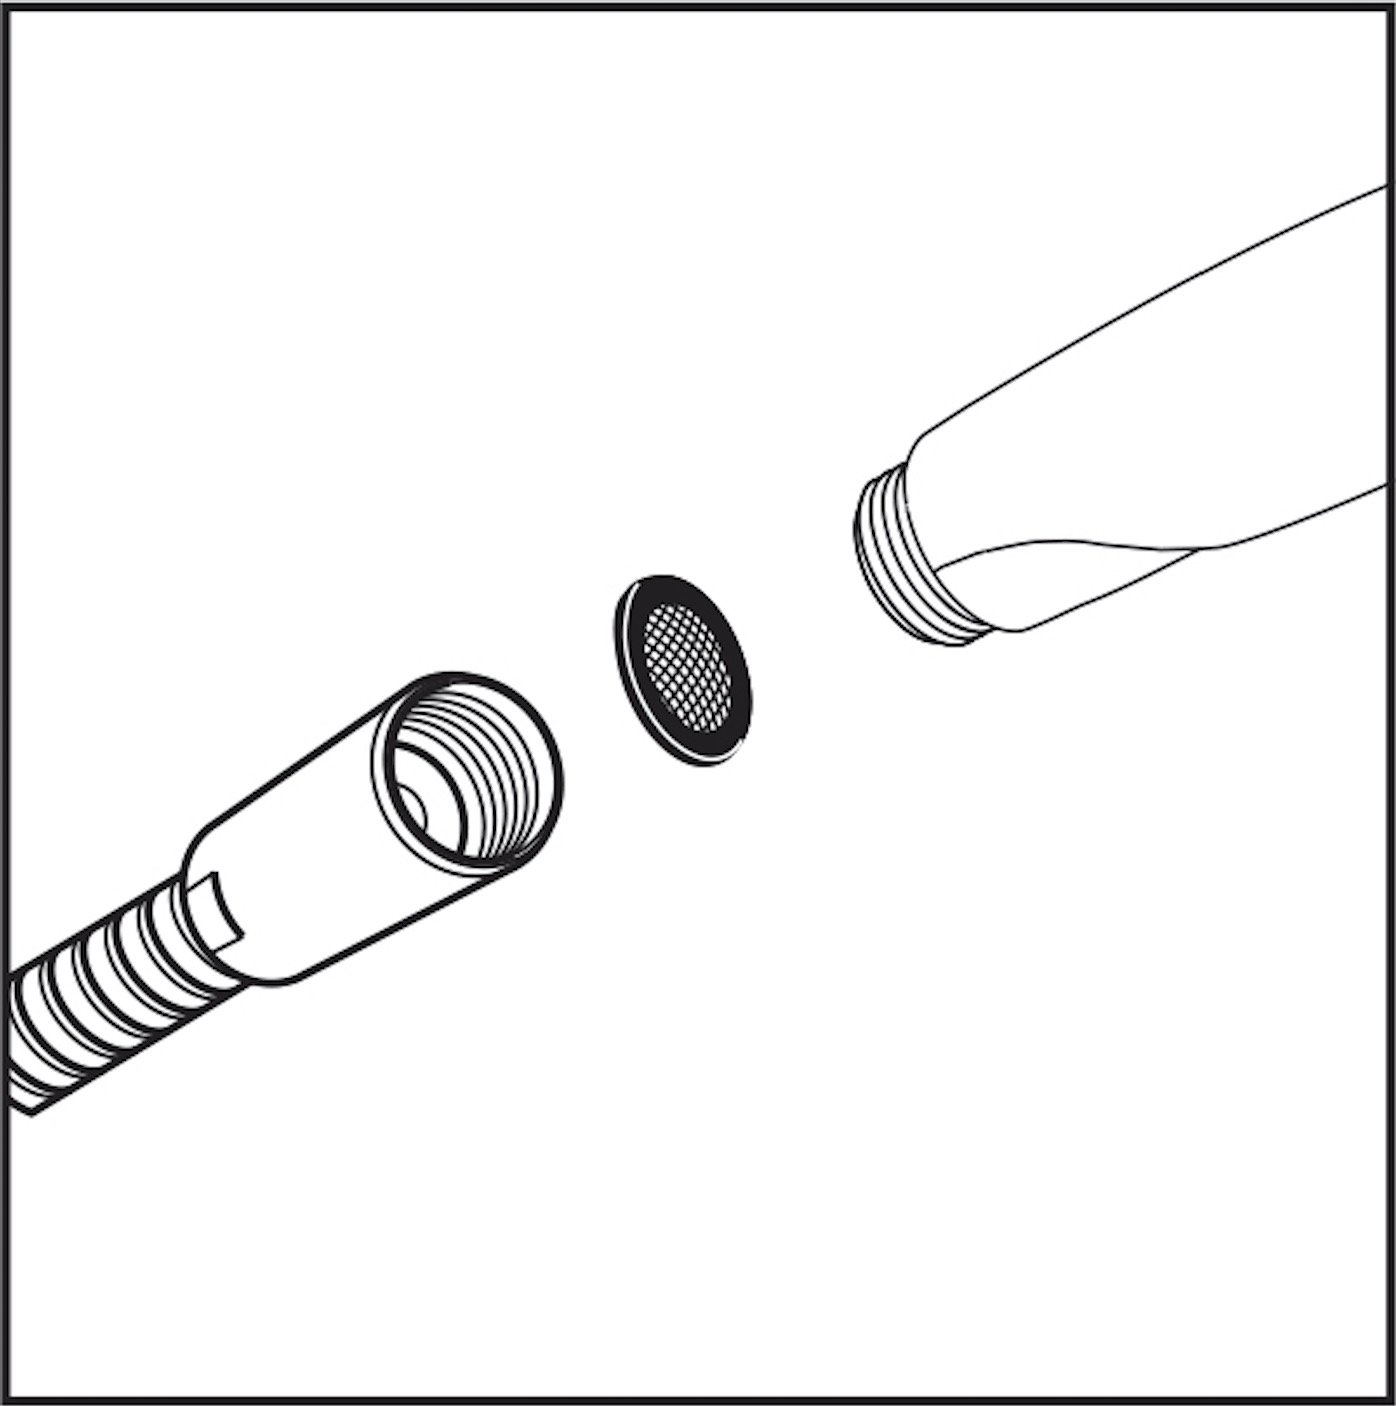
G. Screen Washer
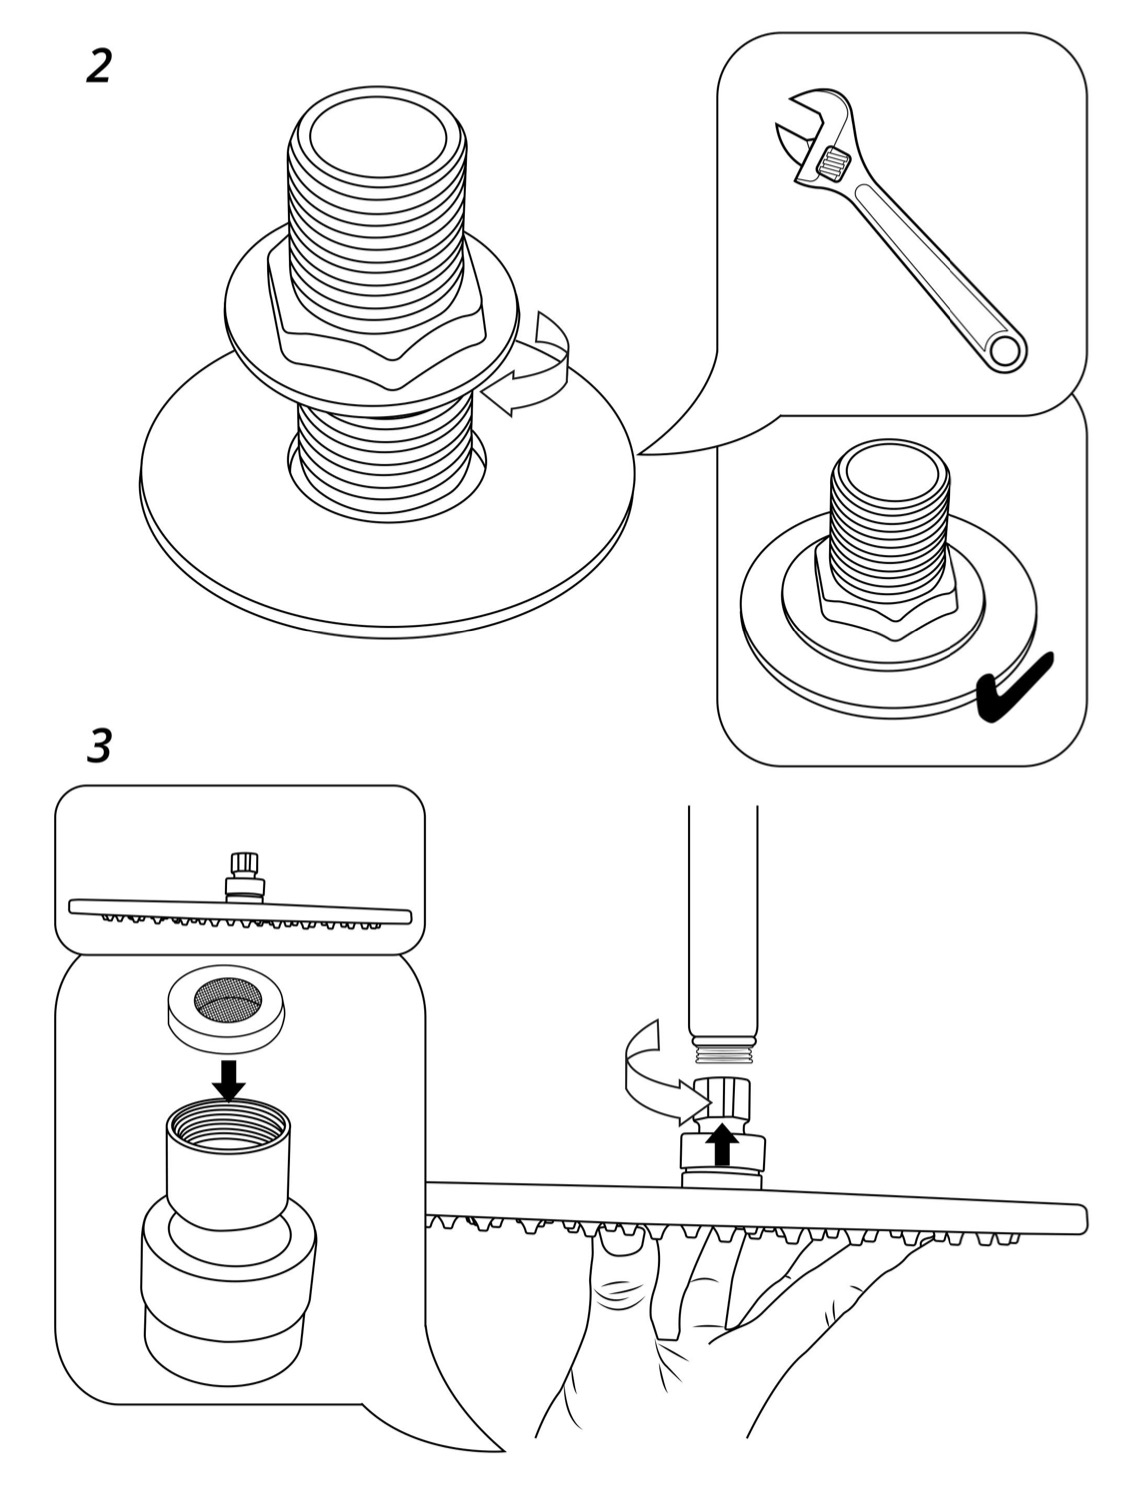
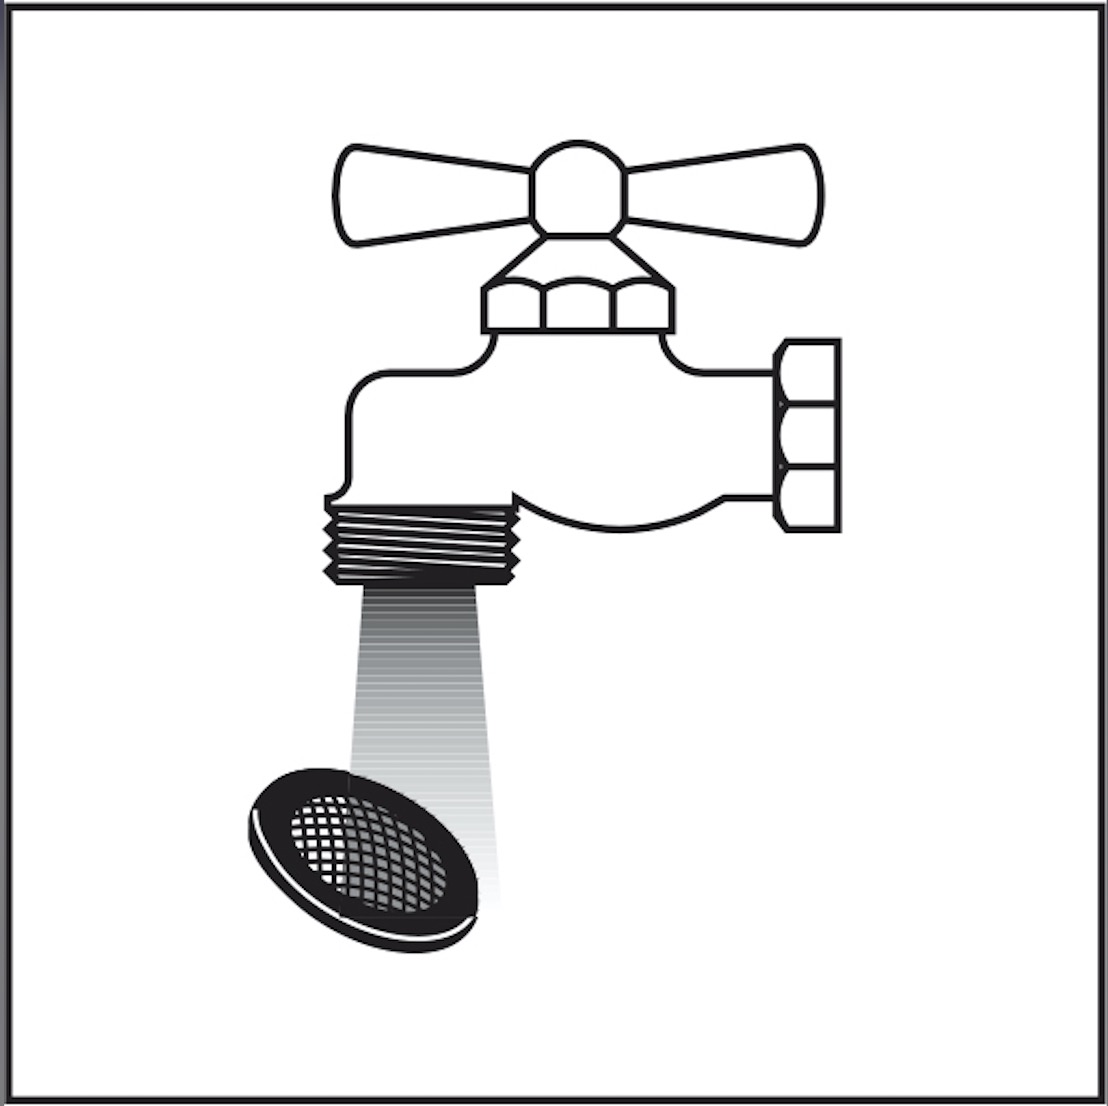
Place the screen washer in the end of the handshower hose. Screw the hose to the handshower.
If the flow of water becomes noticeably less, remove and clean the screen washer.
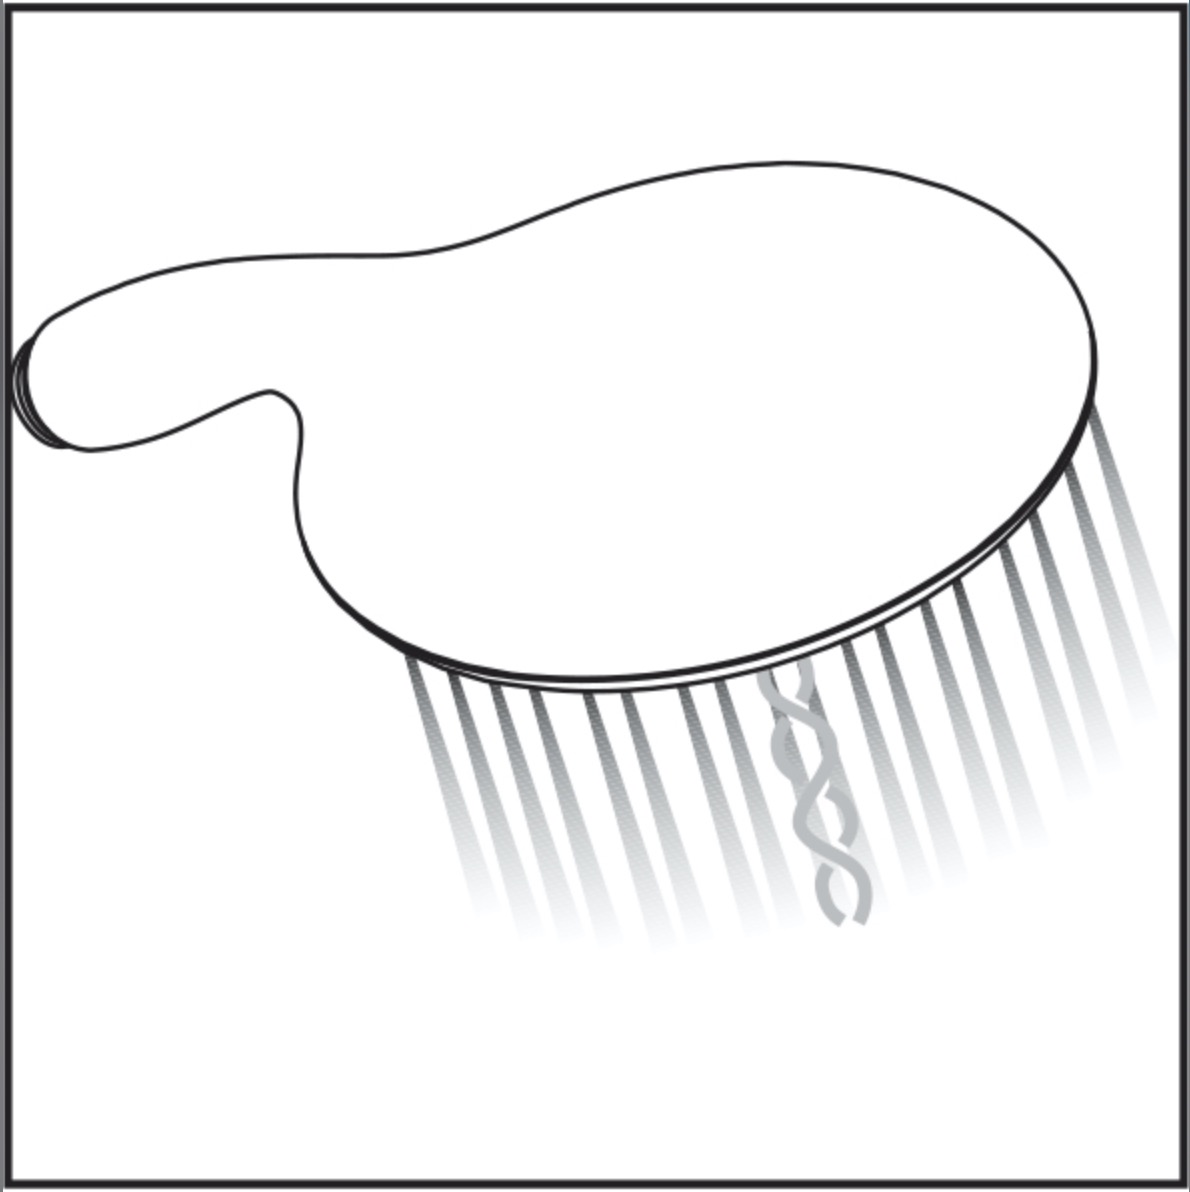
Scale Removal
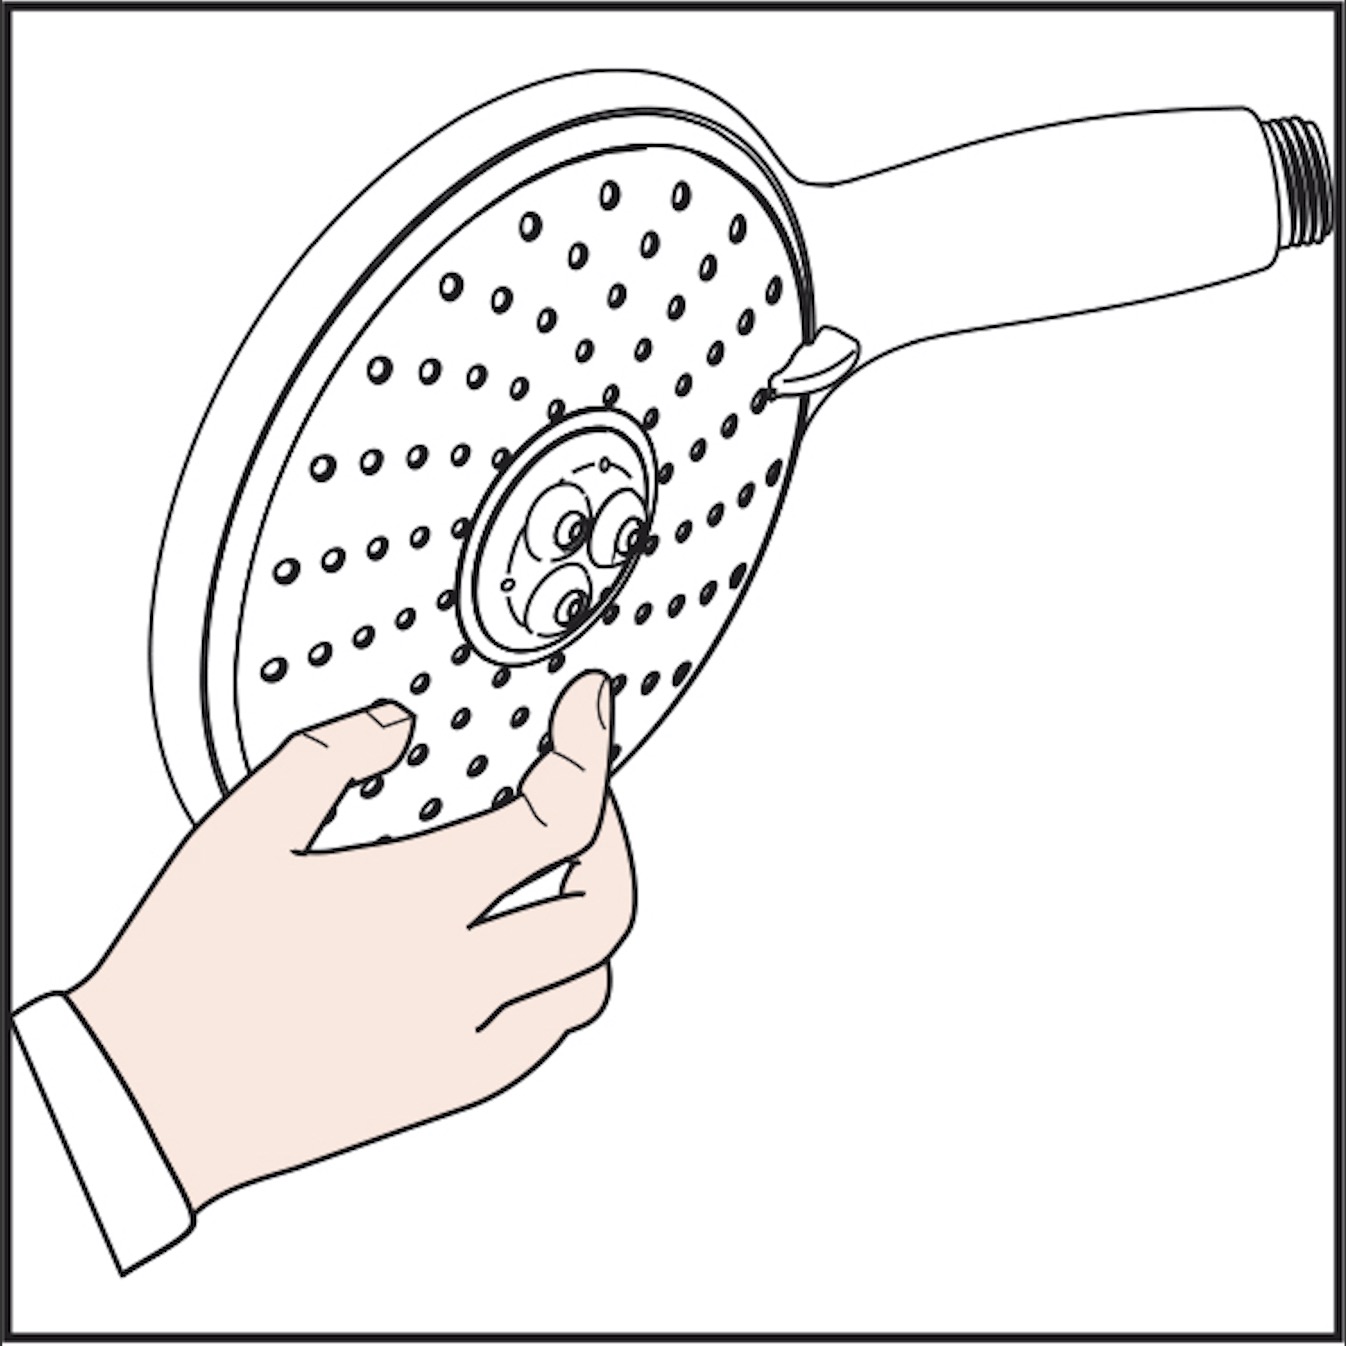
The handshower incorporates the cleaning system. If scale deposits are noticed in the spray channels, turn the water on lightly and rub the spray channels with a finger or a sponge.
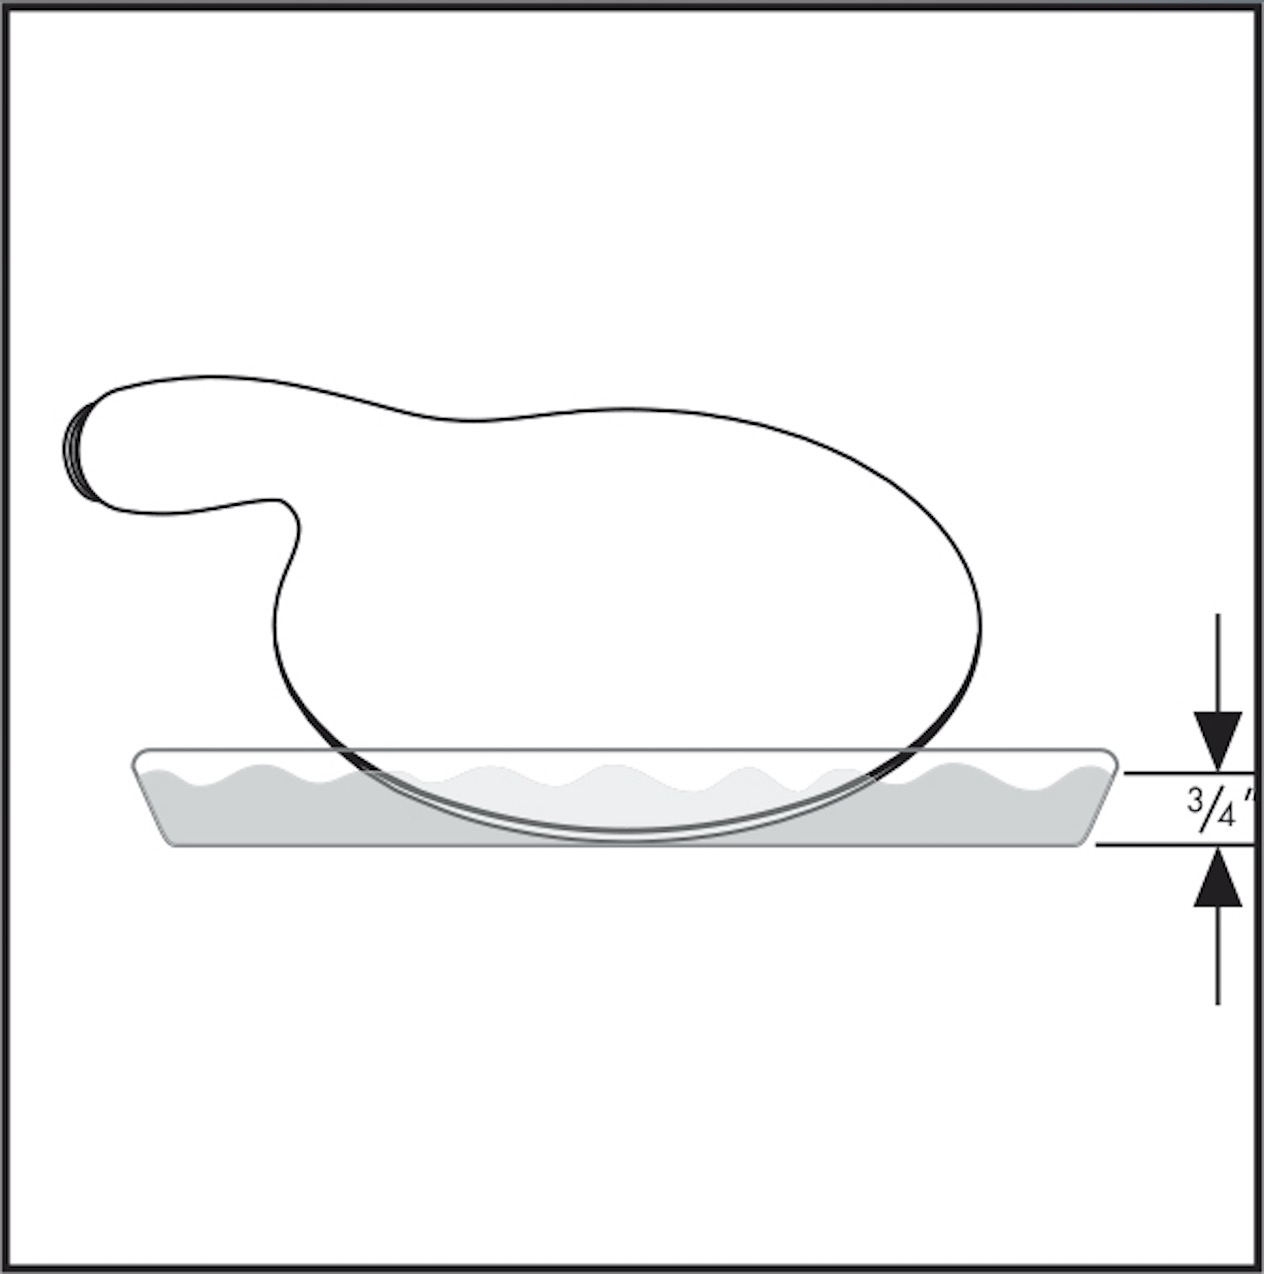
If scale deposits are noticed on the spray face, pour about 3/4" of a commercial scale remover into a shallow dish. Dilute the remover according to the label instructions.
Soak only the spray face in the solution for the amount of time specified on the label.
Rinse the handshower with clear water.
Reinstall the handshower. Turn on the water and al-low the handshower to flush for at least one minute
How to Install a Shower Head, Shower Head Installation, shower head installation, how to install a new shower head, how to install a shower head with handheld, installing new shower head, how to install rain shower head, how to install shower head with hose, install rain shower head