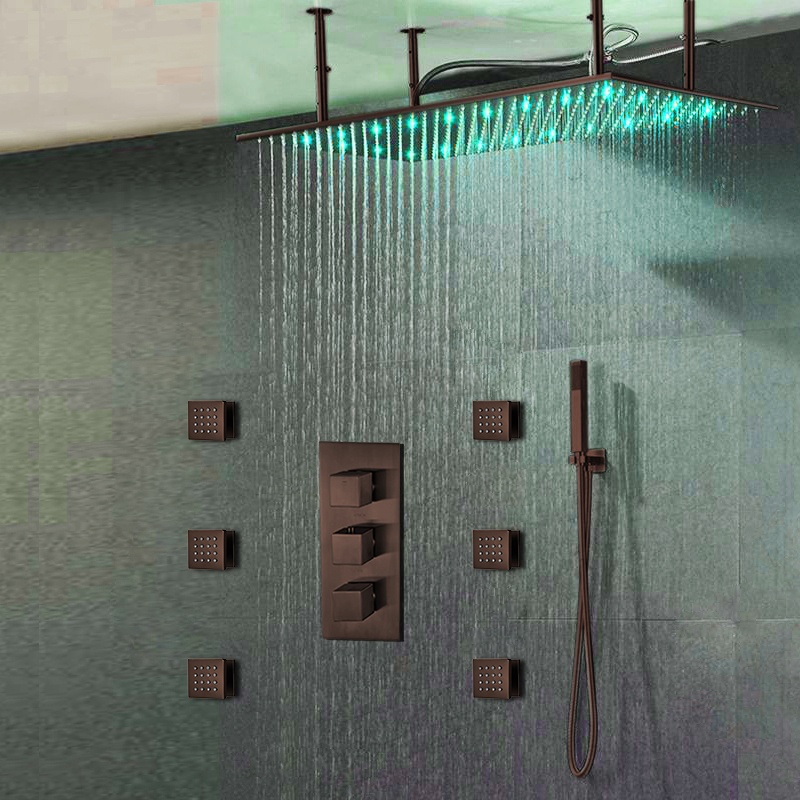
Fontana Diadema 20" * 40" Large Oil Rubbed Bronze Solid Brass LED Rain Shower Head with Body Jets & Handheld Shower
Diadema is a complete shower system that offers all you can dream about for the perfect shower experience. The extra large rainfall shower head is 20”x40” has oil rubbed bronze finish and it comes with matching shower arm. It also incorporates LED lightning that do not require any external source of electrical supply, it is powered and activated by the water flow. The color changes according to the water temperature, so you will never be tacked by surprise and the intensity varies according to that of the water flow. 6 adjustable body jets are included, so you can fully enjoy the benefits of a refreshing water massage. Installation is easy, as everything comes with standard threading. Only the best materials have been used – solid brass and stainless steel, for a long lasting life time. It comes complete with accessories and installation instructions.
Fontana Diadema 20" * 40" Large Oil Rubbed Bronze Solid Brass LED Rain Shower Head with Body Jets & Handheld Shower Features:
Before you begin, please read the installation instructions below. Observe all local building and safety codes.
Unpack and inspect the product for any shipping damages. If you find damages, do not install.
Please note all showers must be installed by a professional and certified plumber otherwise warranty might be voided.
shower
SHOWER HEAD INSTALLATION INSTRUCTIONS
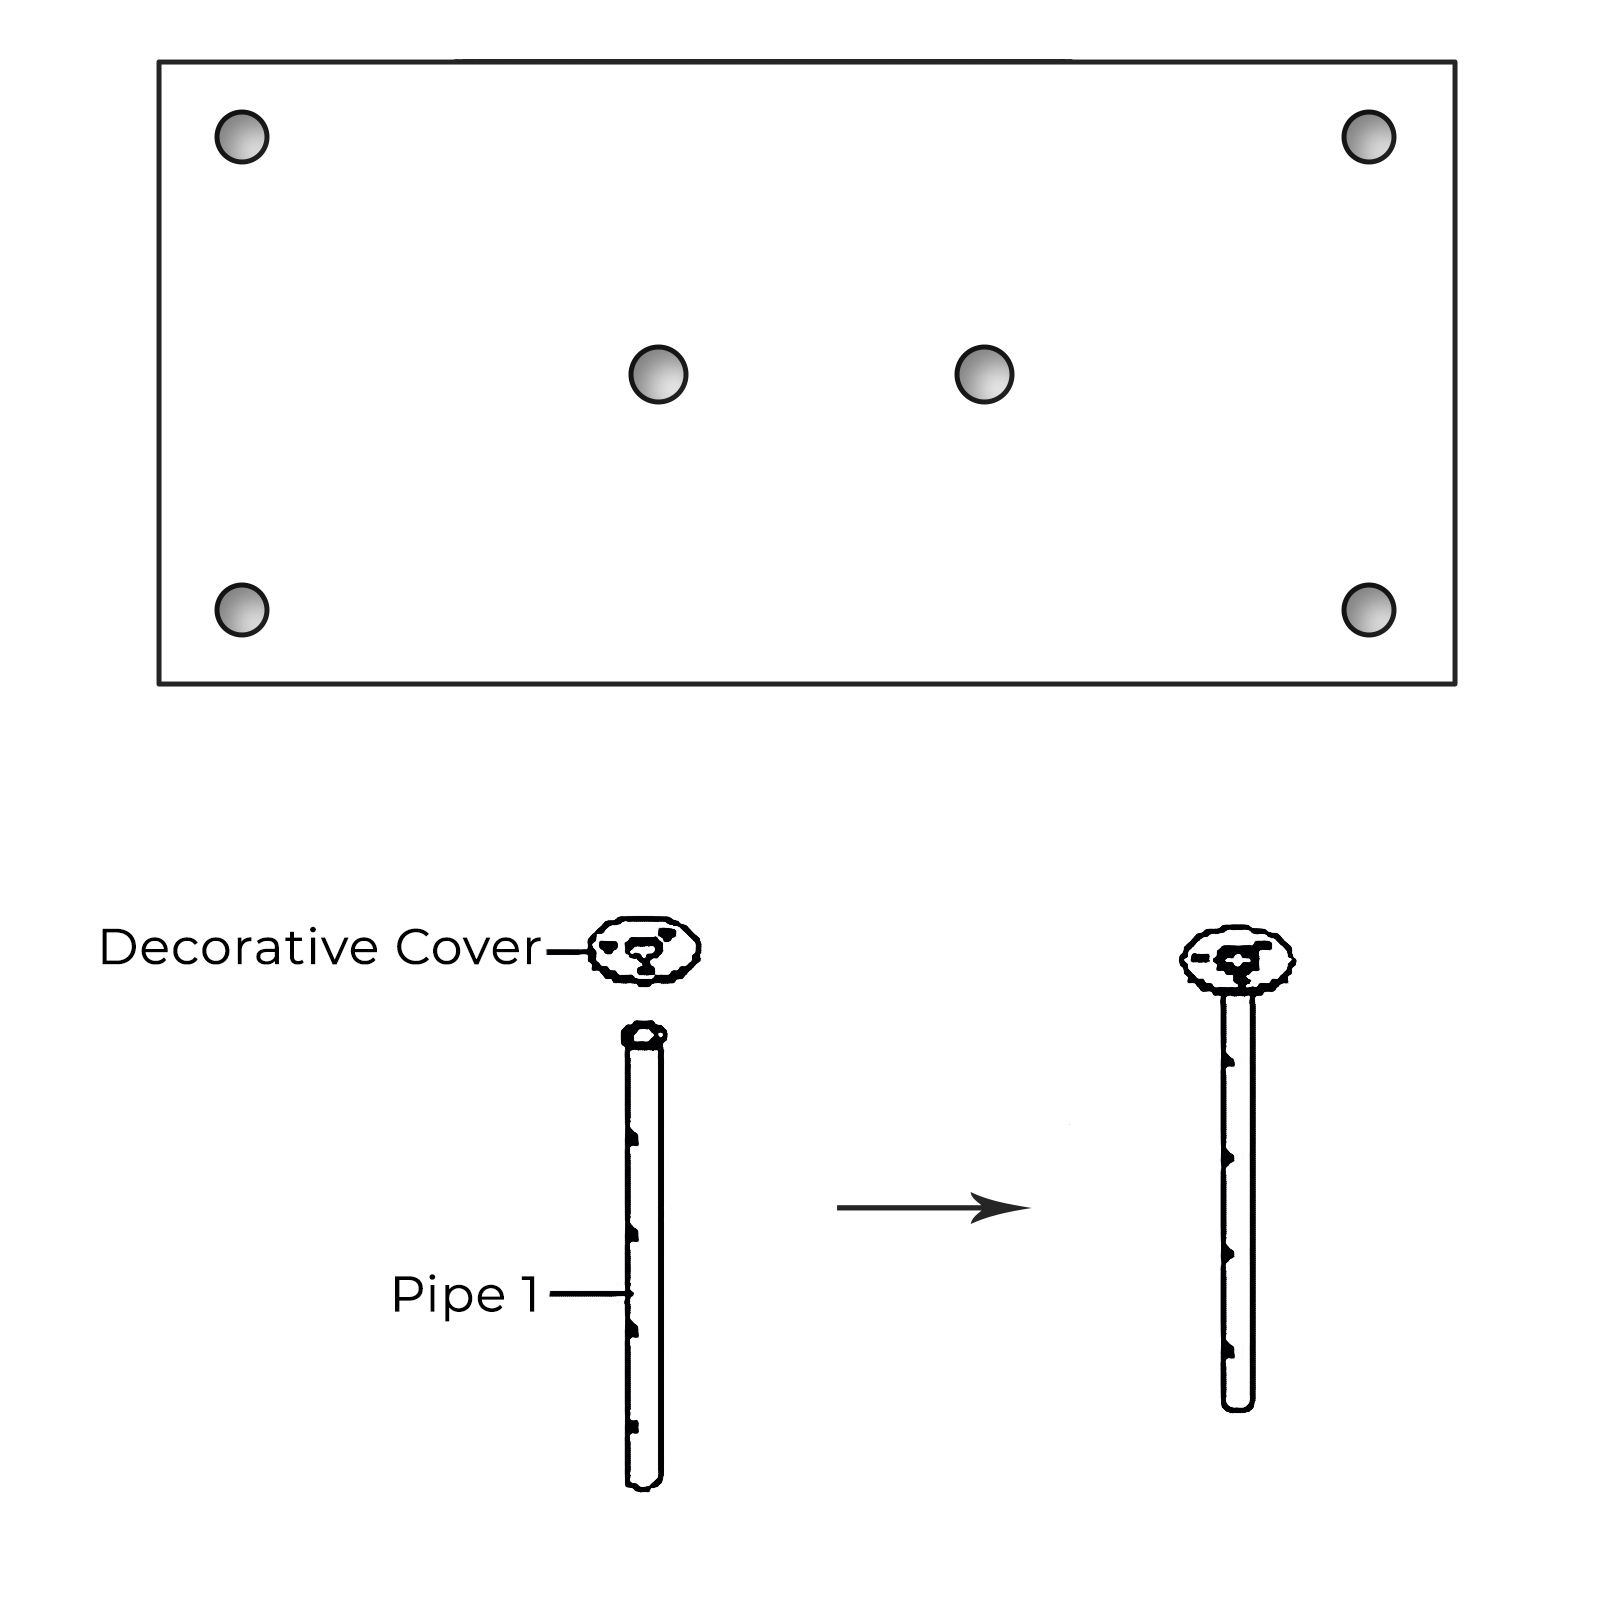
Connect pipe 1 with decorative cover
Shower Head Installation Instructions
Step 1:
shower
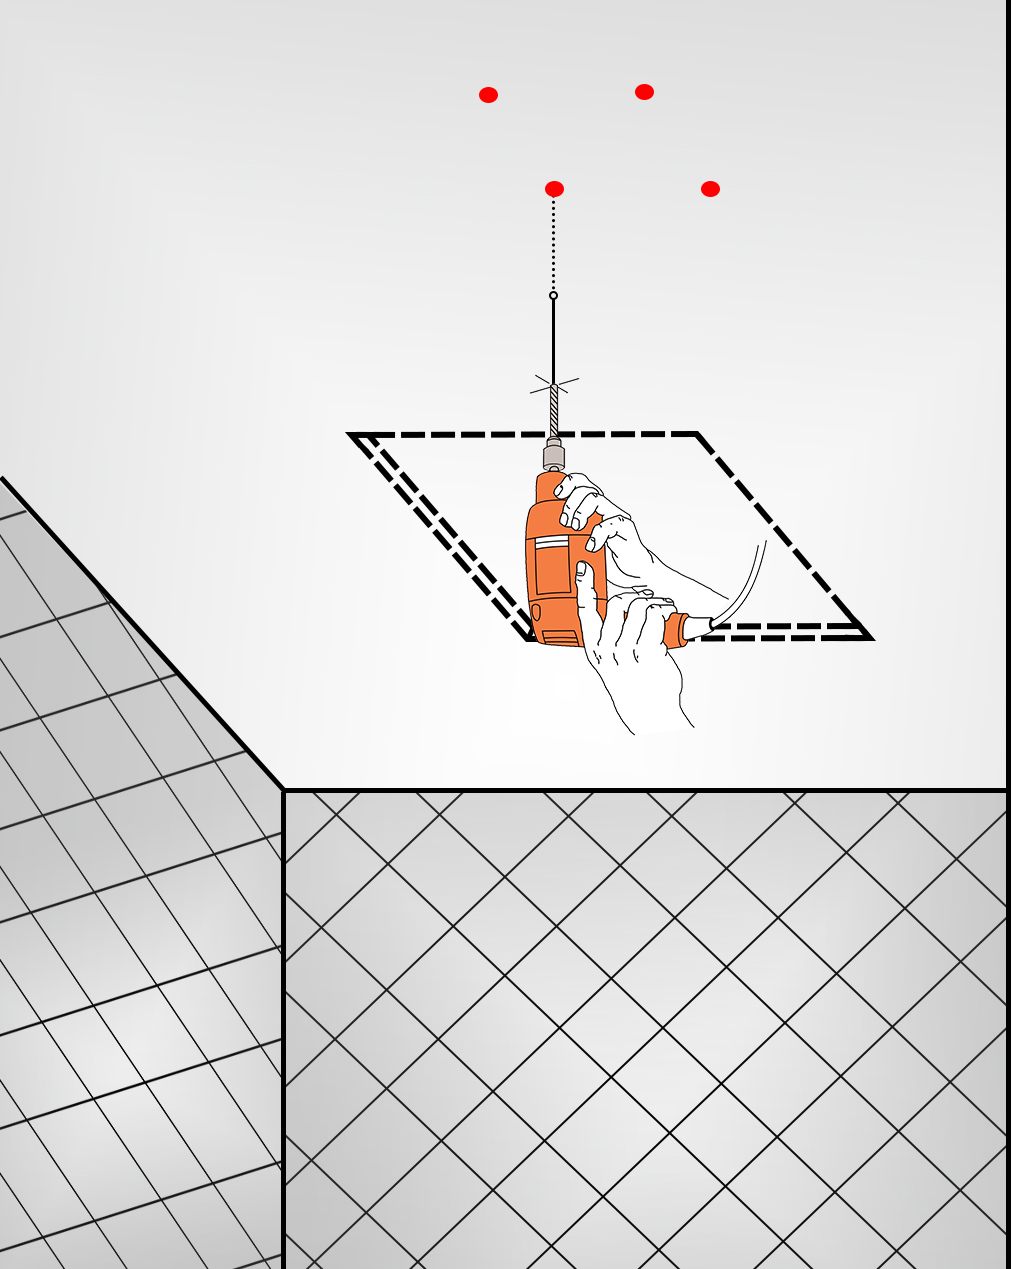
Step 2:
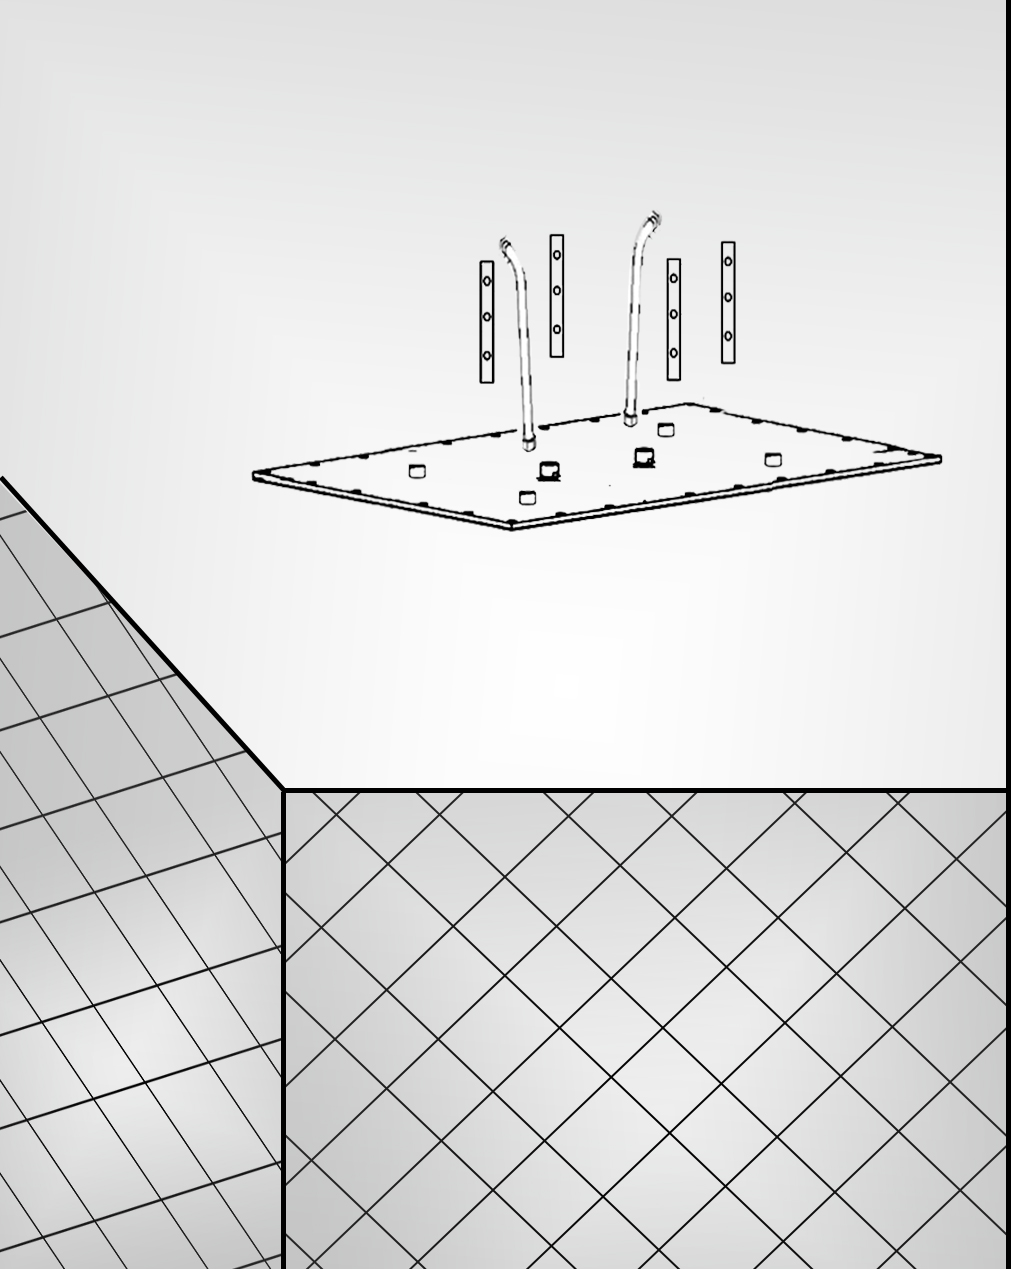
Draw the holes on the ceiling according to the Decorative Cover and pipes.
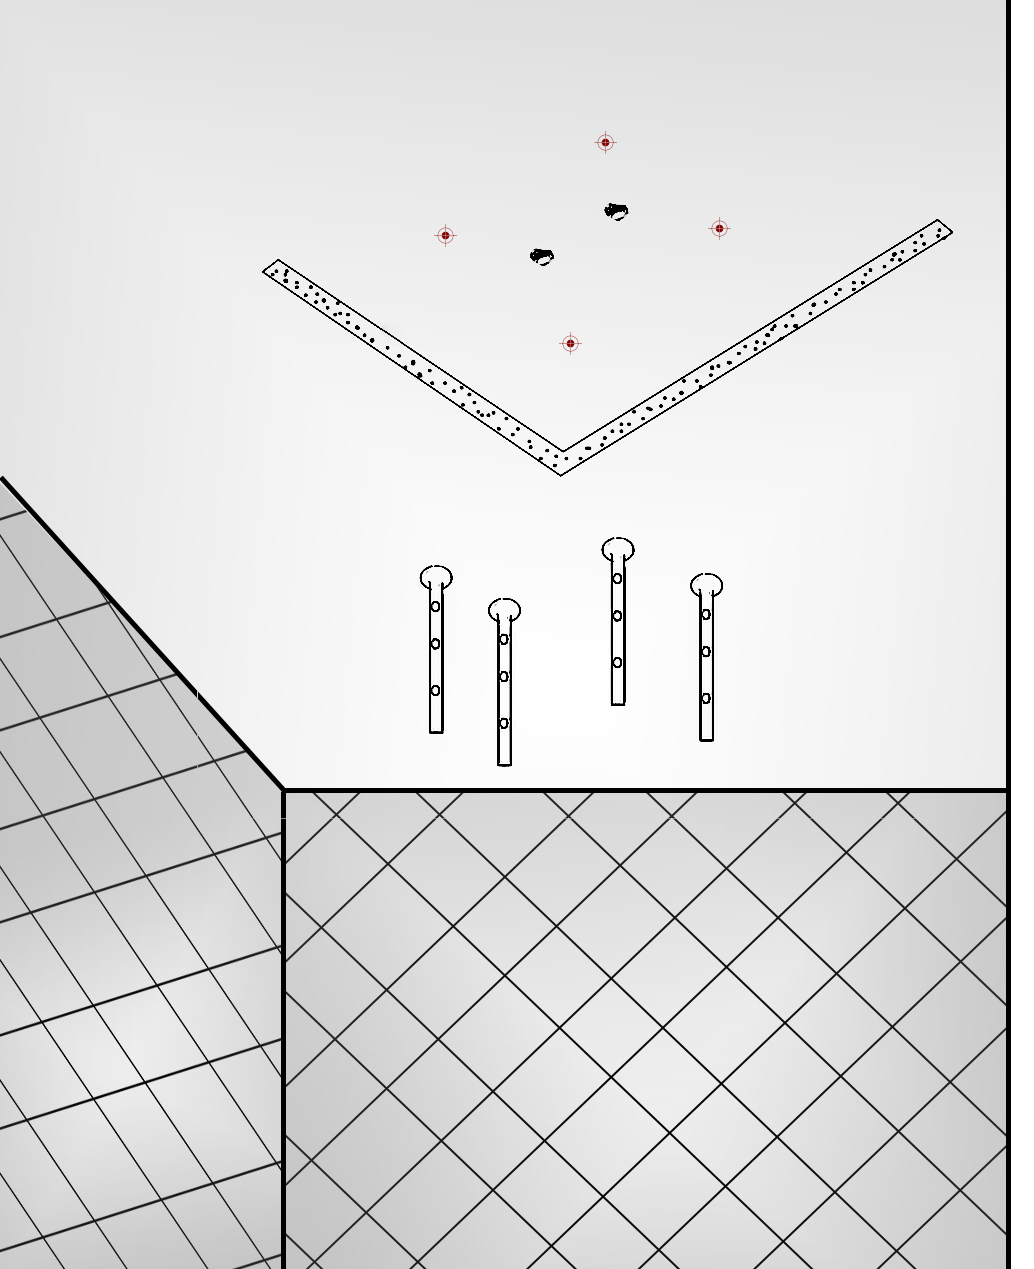
Drill the holes on the ceiling according to the hole specification and install 4 pipes.
Shower Head Installation Instructions
Step 3:
Step 4:
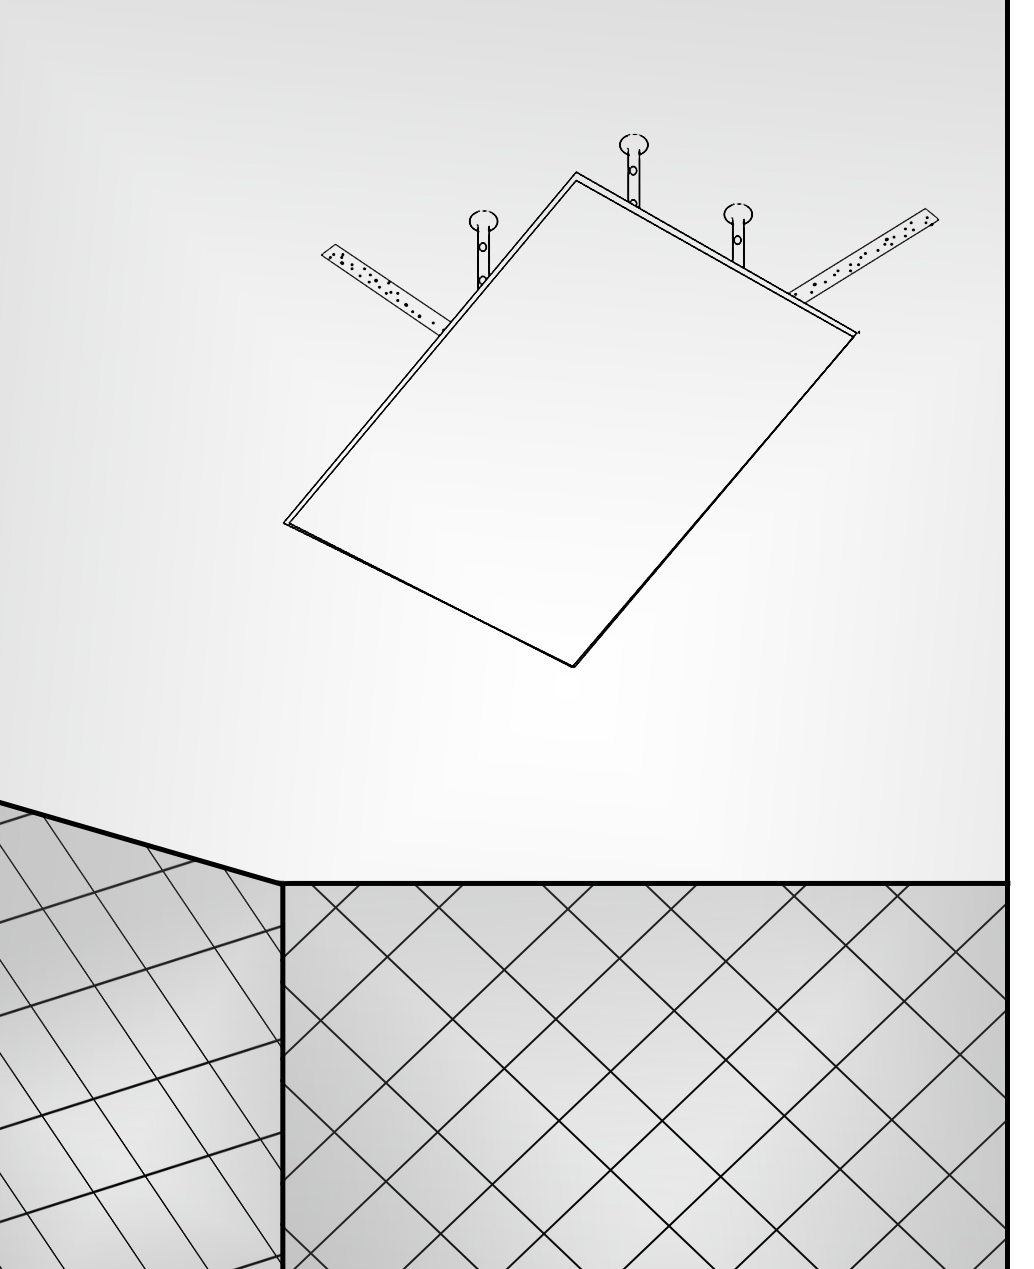
Put the screw bolts through the hole on the side to lock pipes.
Install the four-pipes on the showerhead.
Shower Head Installation Instructions
Step 5:
Step 6:
Shower Head Installation Instructions
1. Mark the fixing positions and drill holes to suit the anchors.
2. Install the anchors and fix the mounting bar to the ceiling with screws.
3. Screw the shower bars into the showerhead tightly.
4. Attach the shower bar to the mounting bar and fix screws and nuts to lock the shower bar with mounting bar at the desired height.
5. Add screen washers. Screw shower hose (not included) to the water inlet on the showerhead and then to the water outlet in the ceiling.
Showerhead Installation Instructions
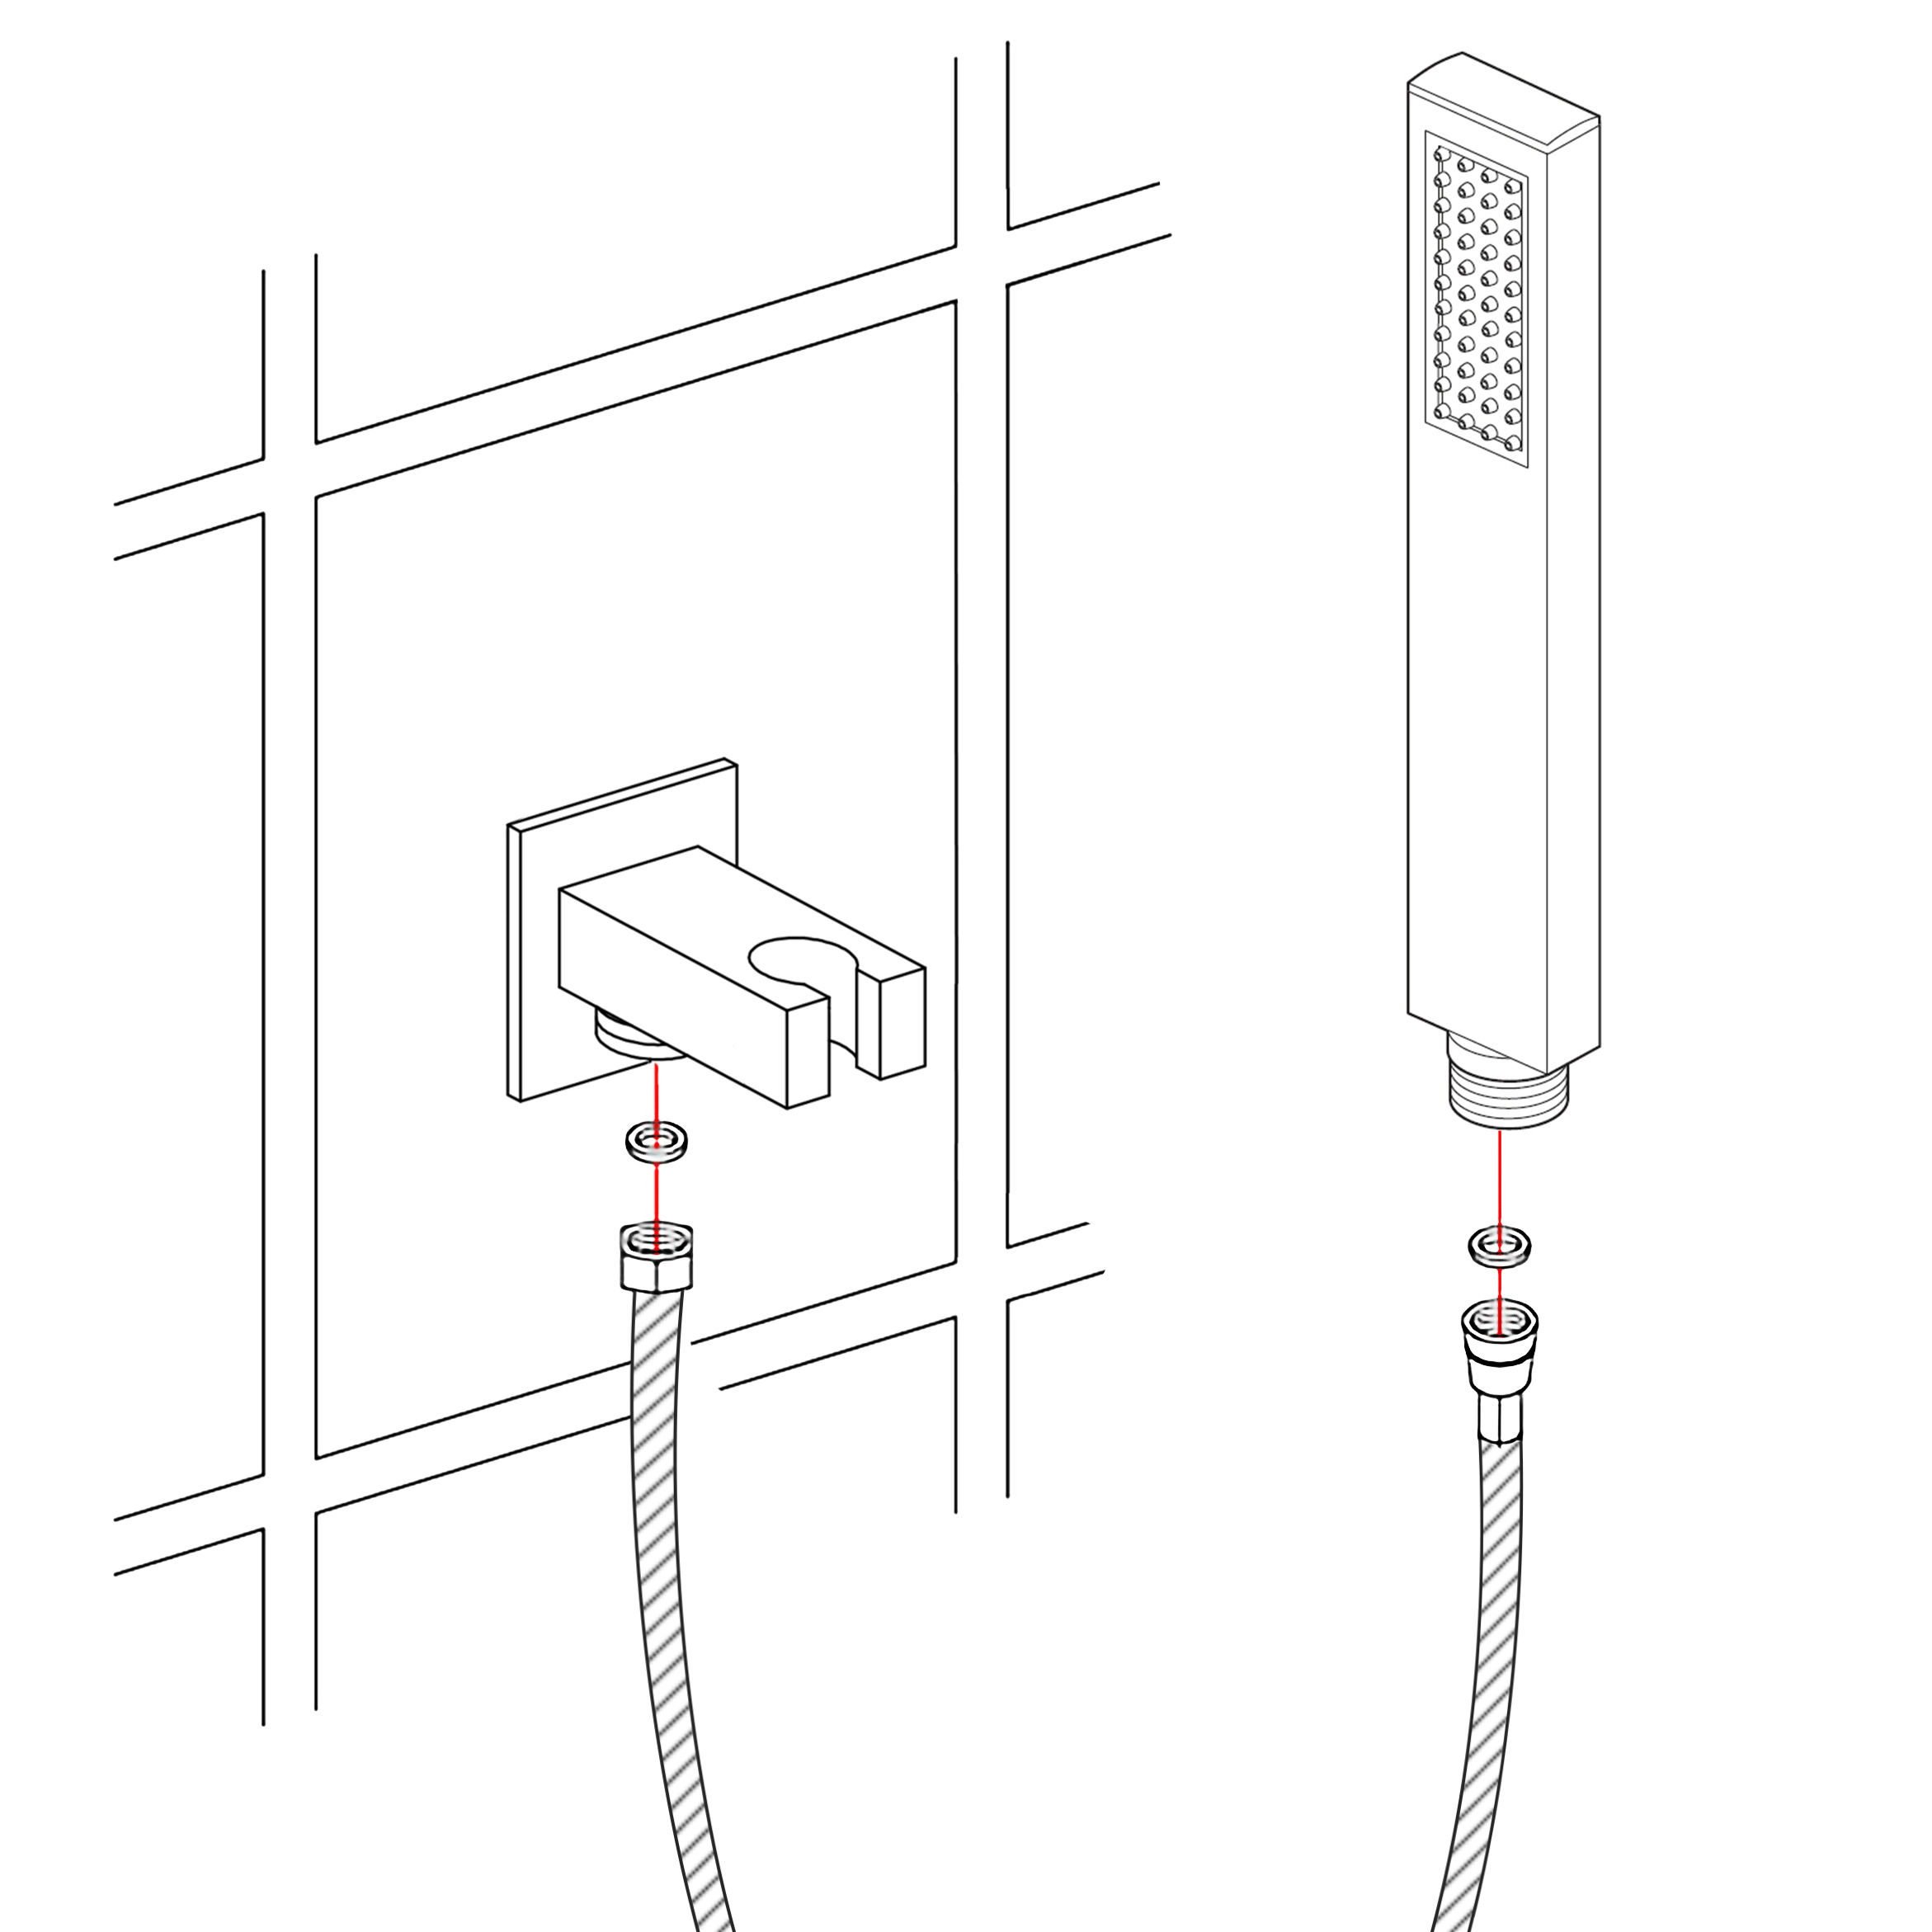
Hand Held Shower Installation Instructions
Step 1:
Step 2:
Hand
Held
Shower
Hand Held Shower
Handheld Shower
Step 3:
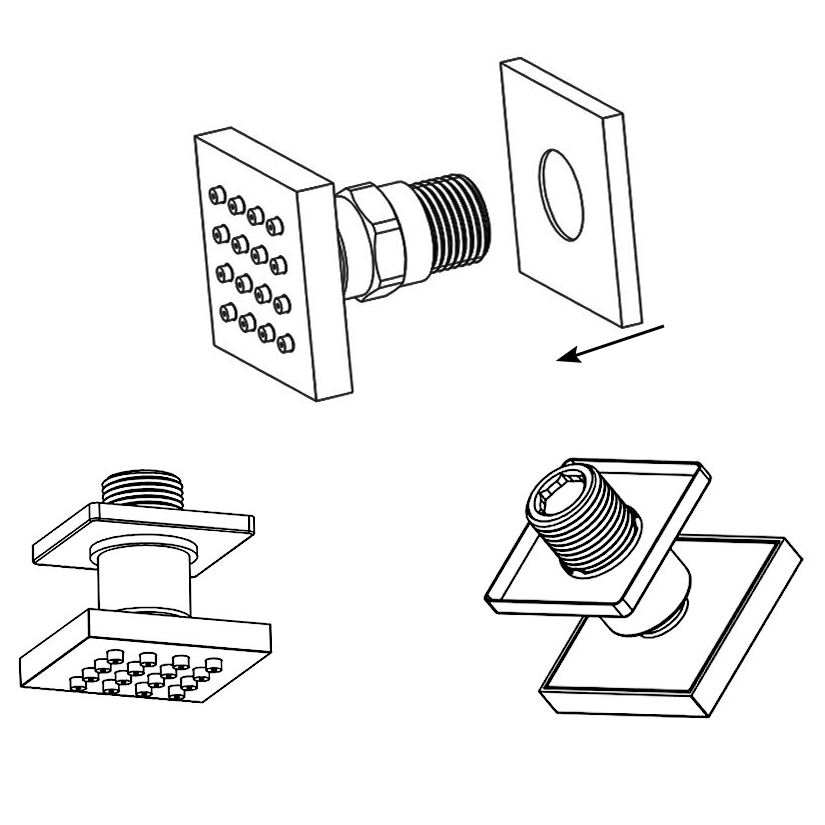
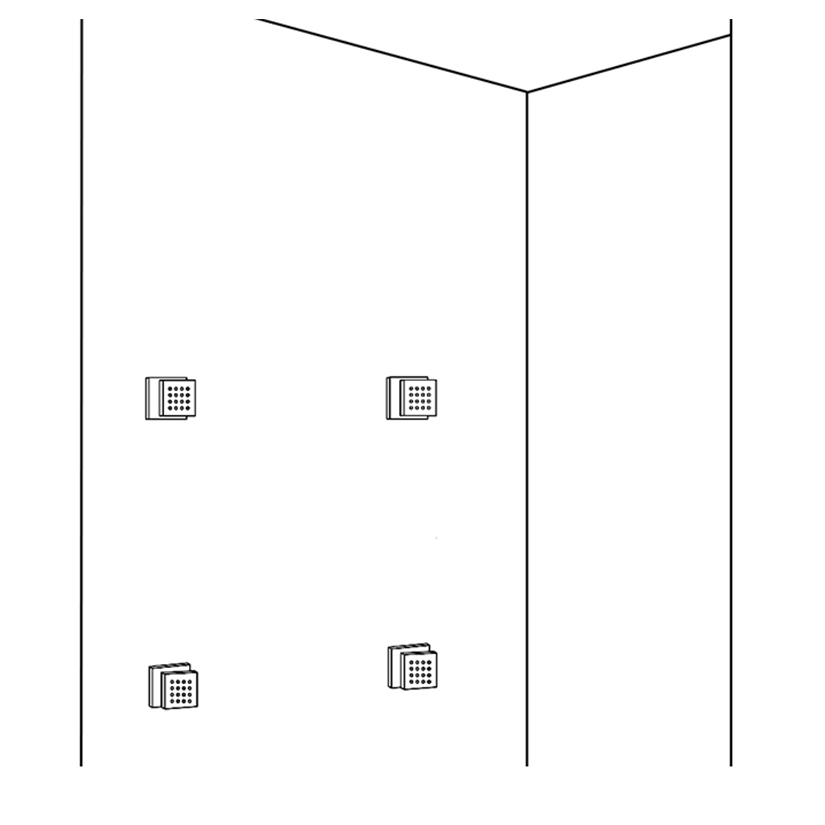
Shower Body Jets Installation Instructions
Body Sprays Installation Instructions
Step 1:
Step 2:
Body
Sprays
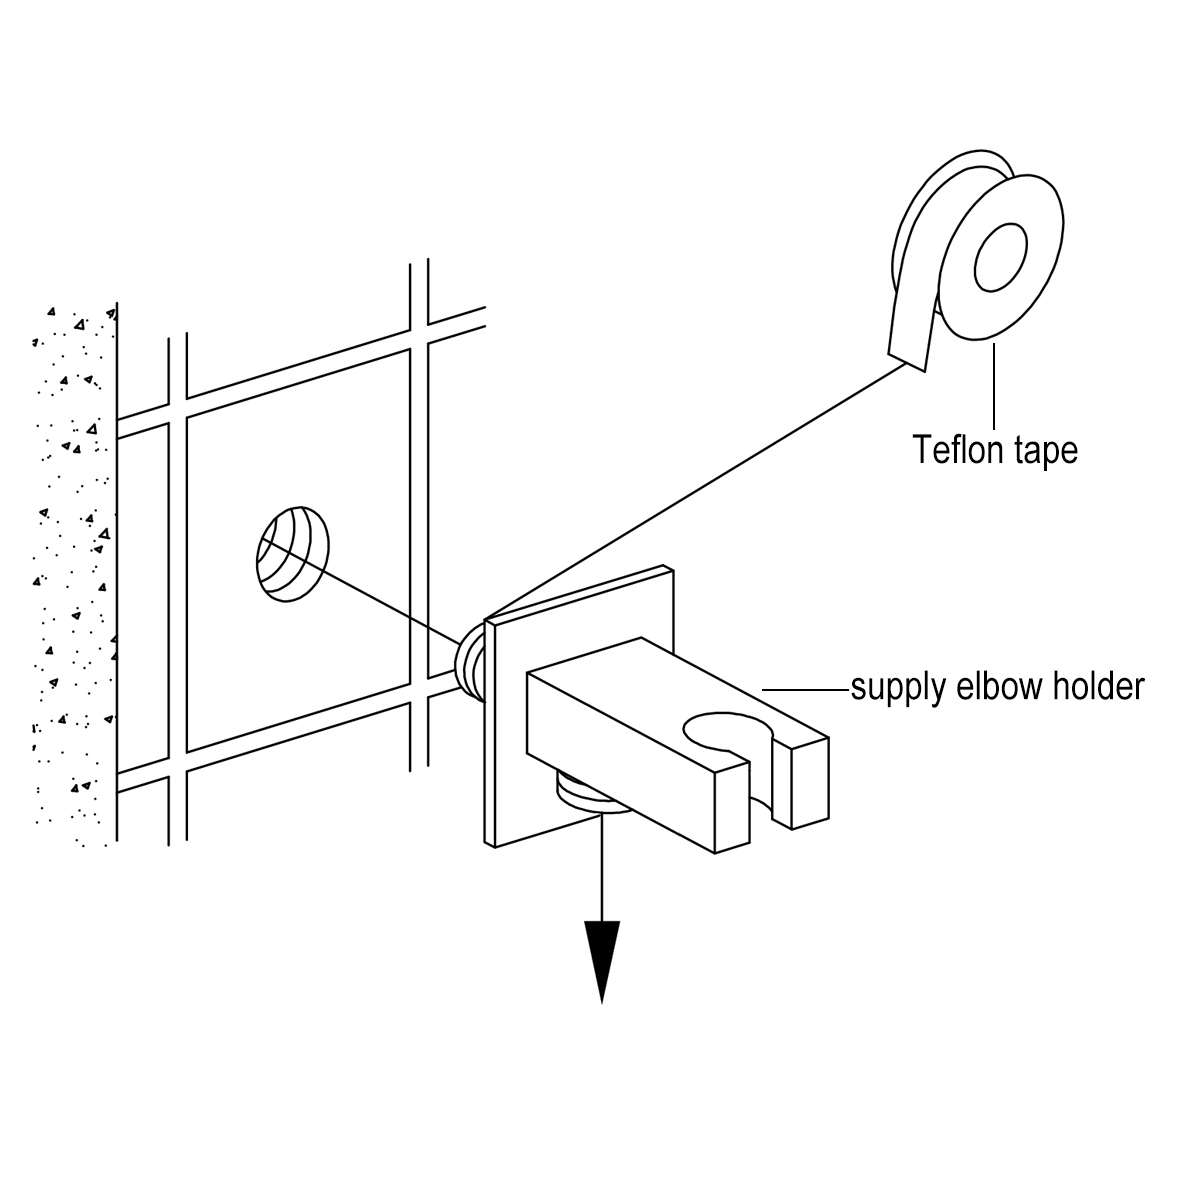
Set the decorative cover on the body jet.
Roll the raw material belt in the thread screws.
Body Sprays Installation Instructions
Step 3:
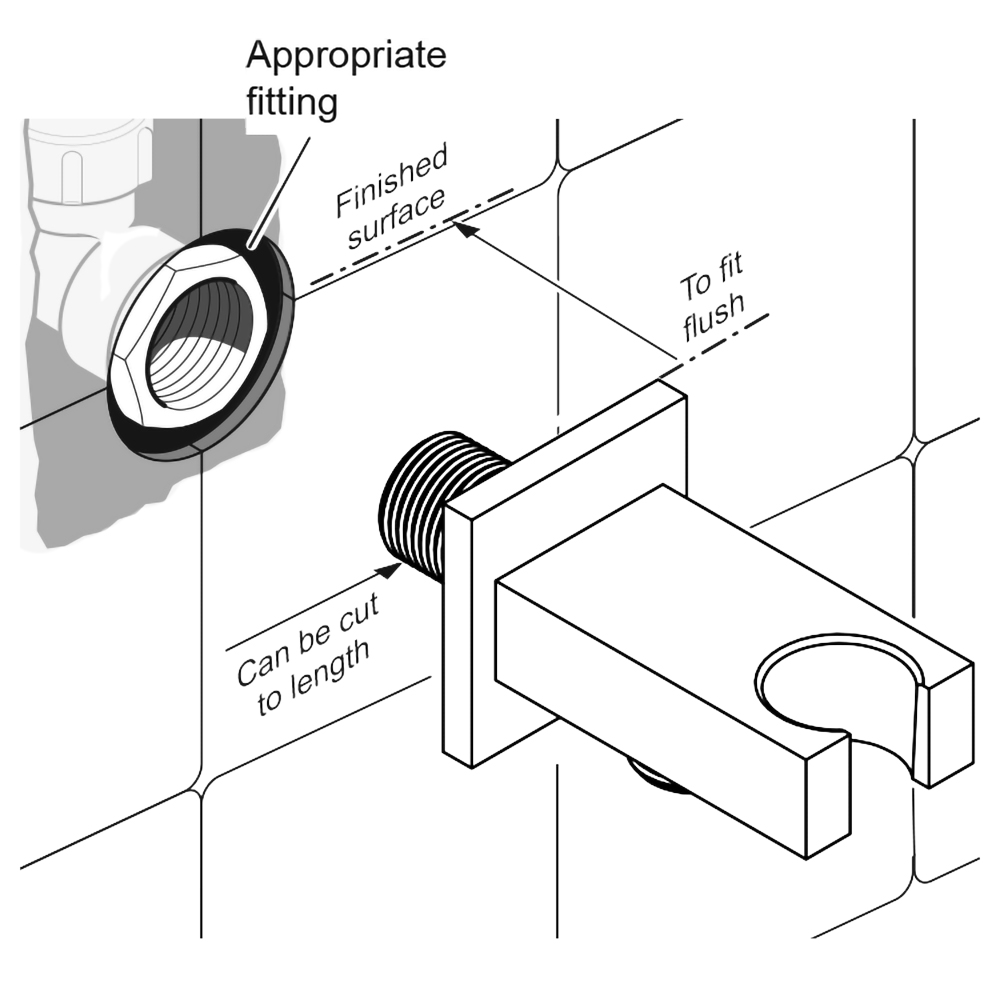
Use a wrench to tighten 6 body jets on the water outlet holes.
Tighten it in a clockwise direction.
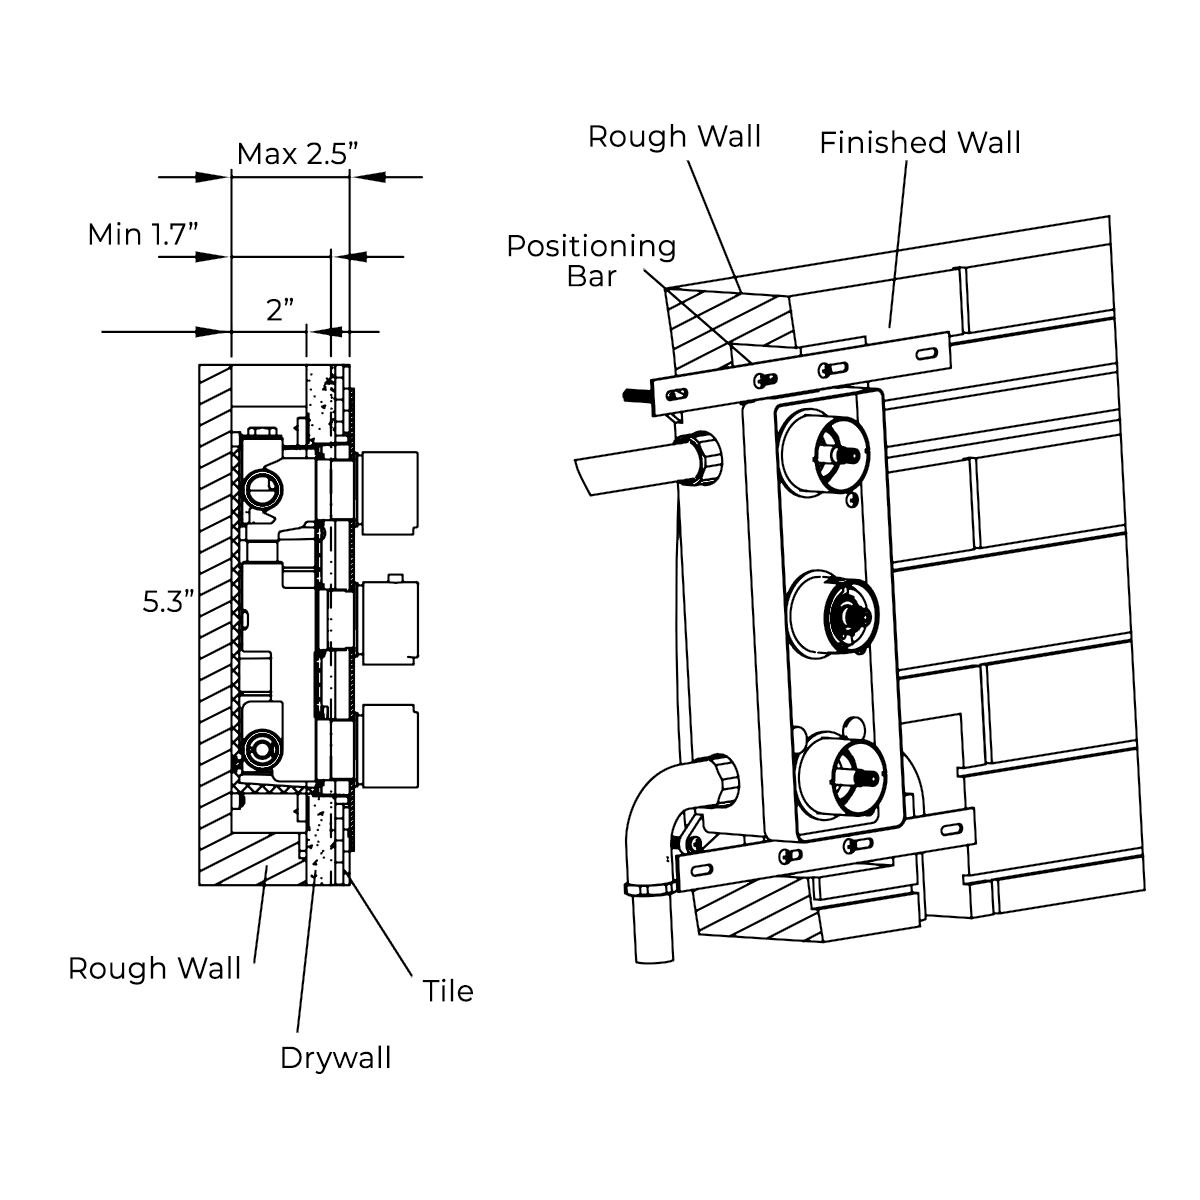
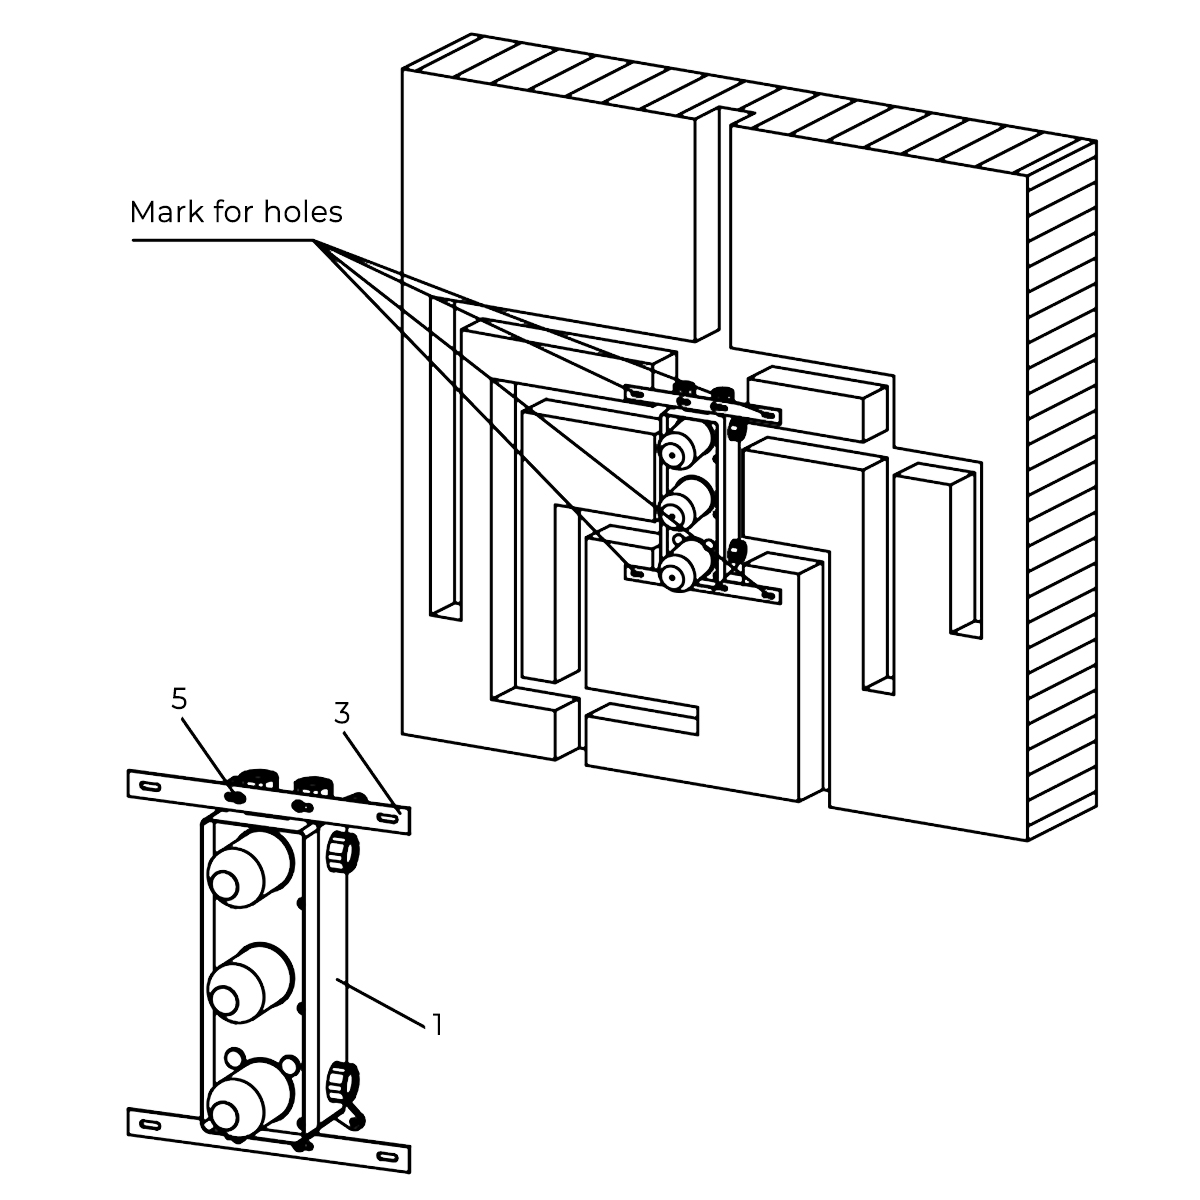
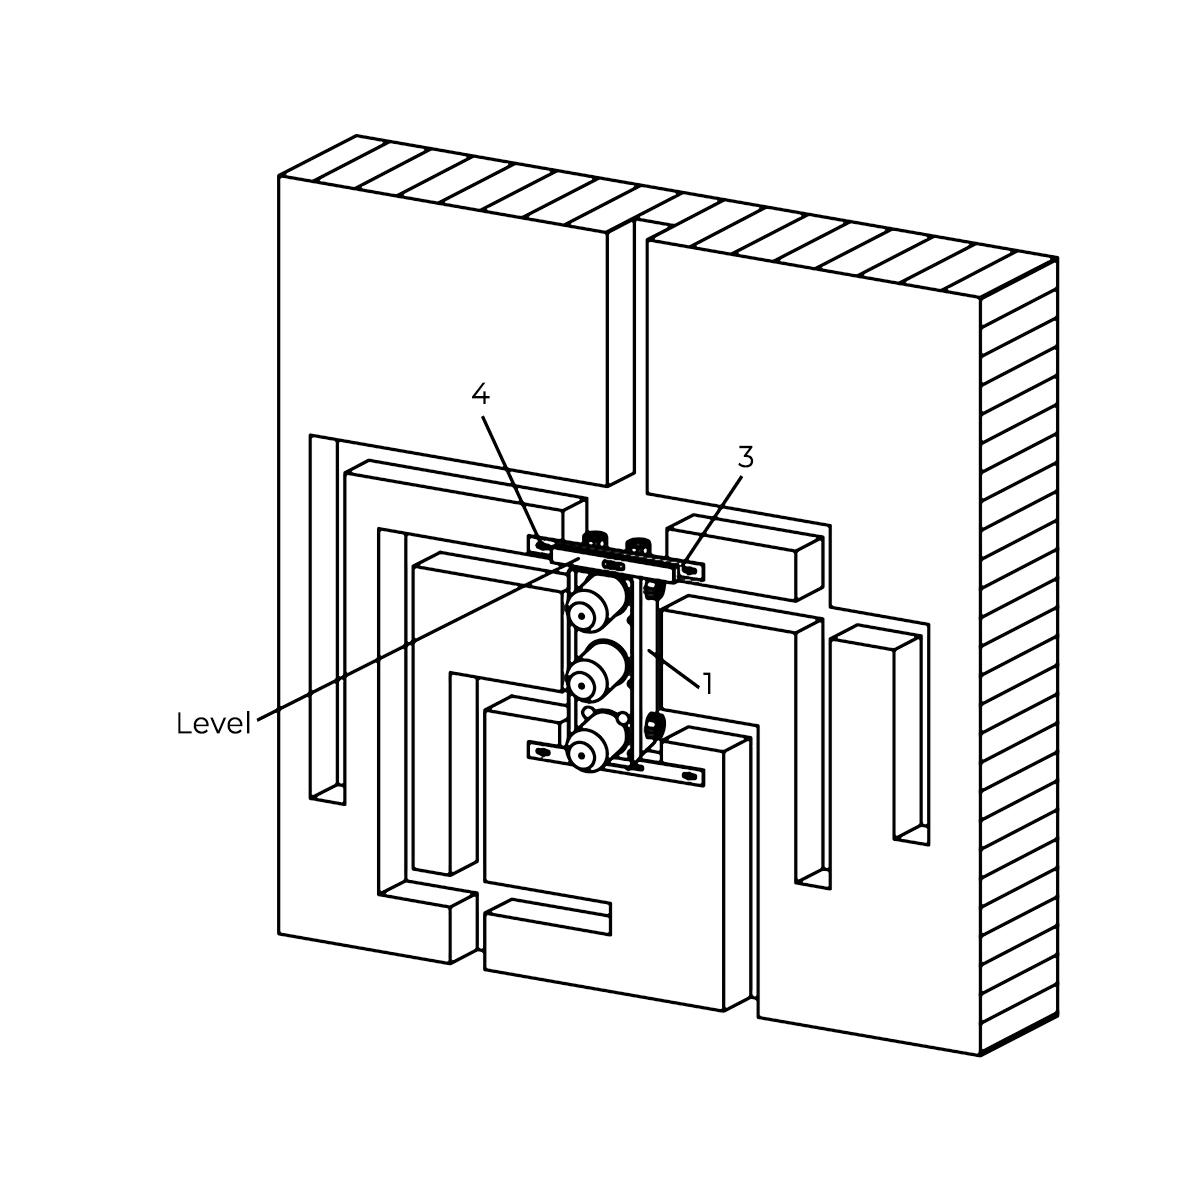
Attach the positioning bar to the rough-in body (4,5) with tapping screws. Mark the location of the mounting holes.
Remove the rough-in body and drill pilot holes at the locations marked in the previous step. Insert anchors.
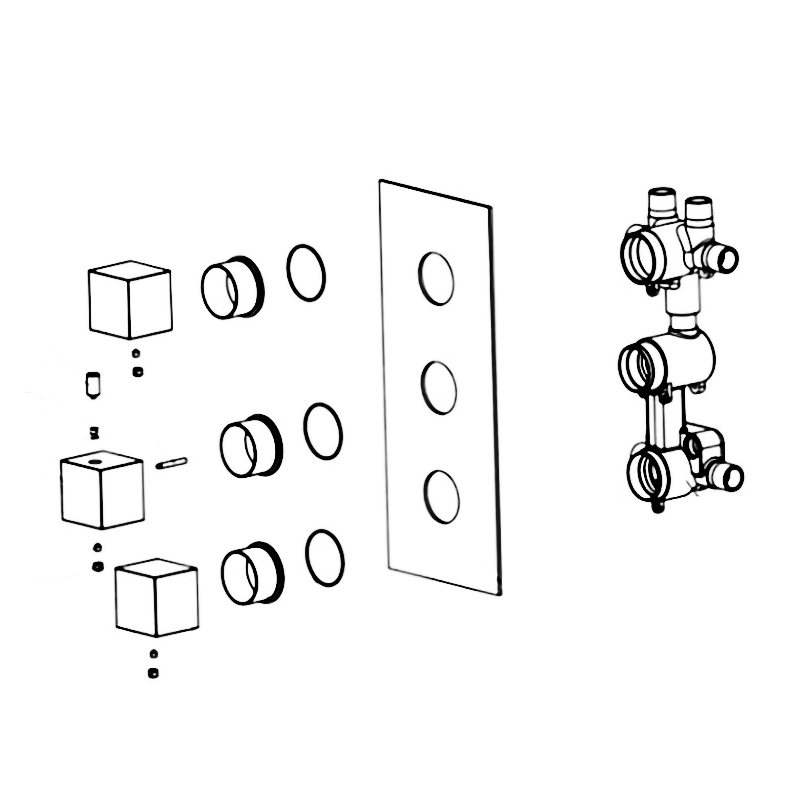
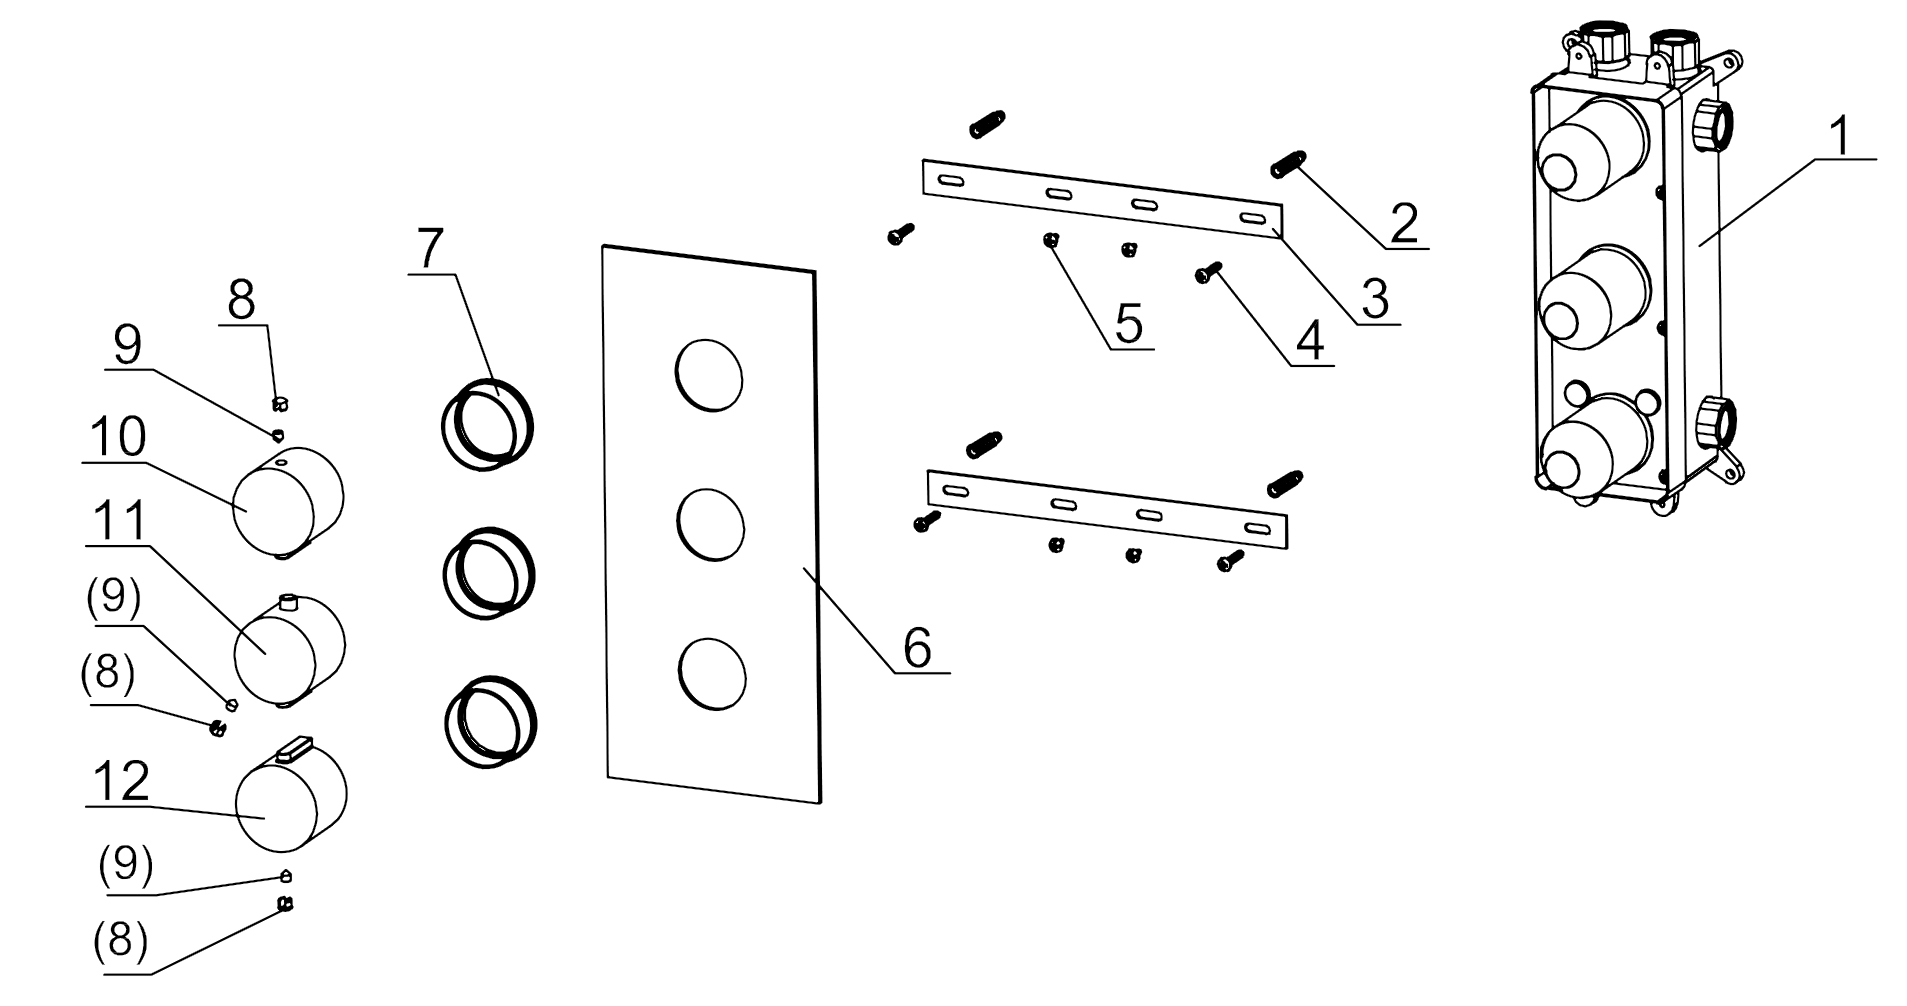
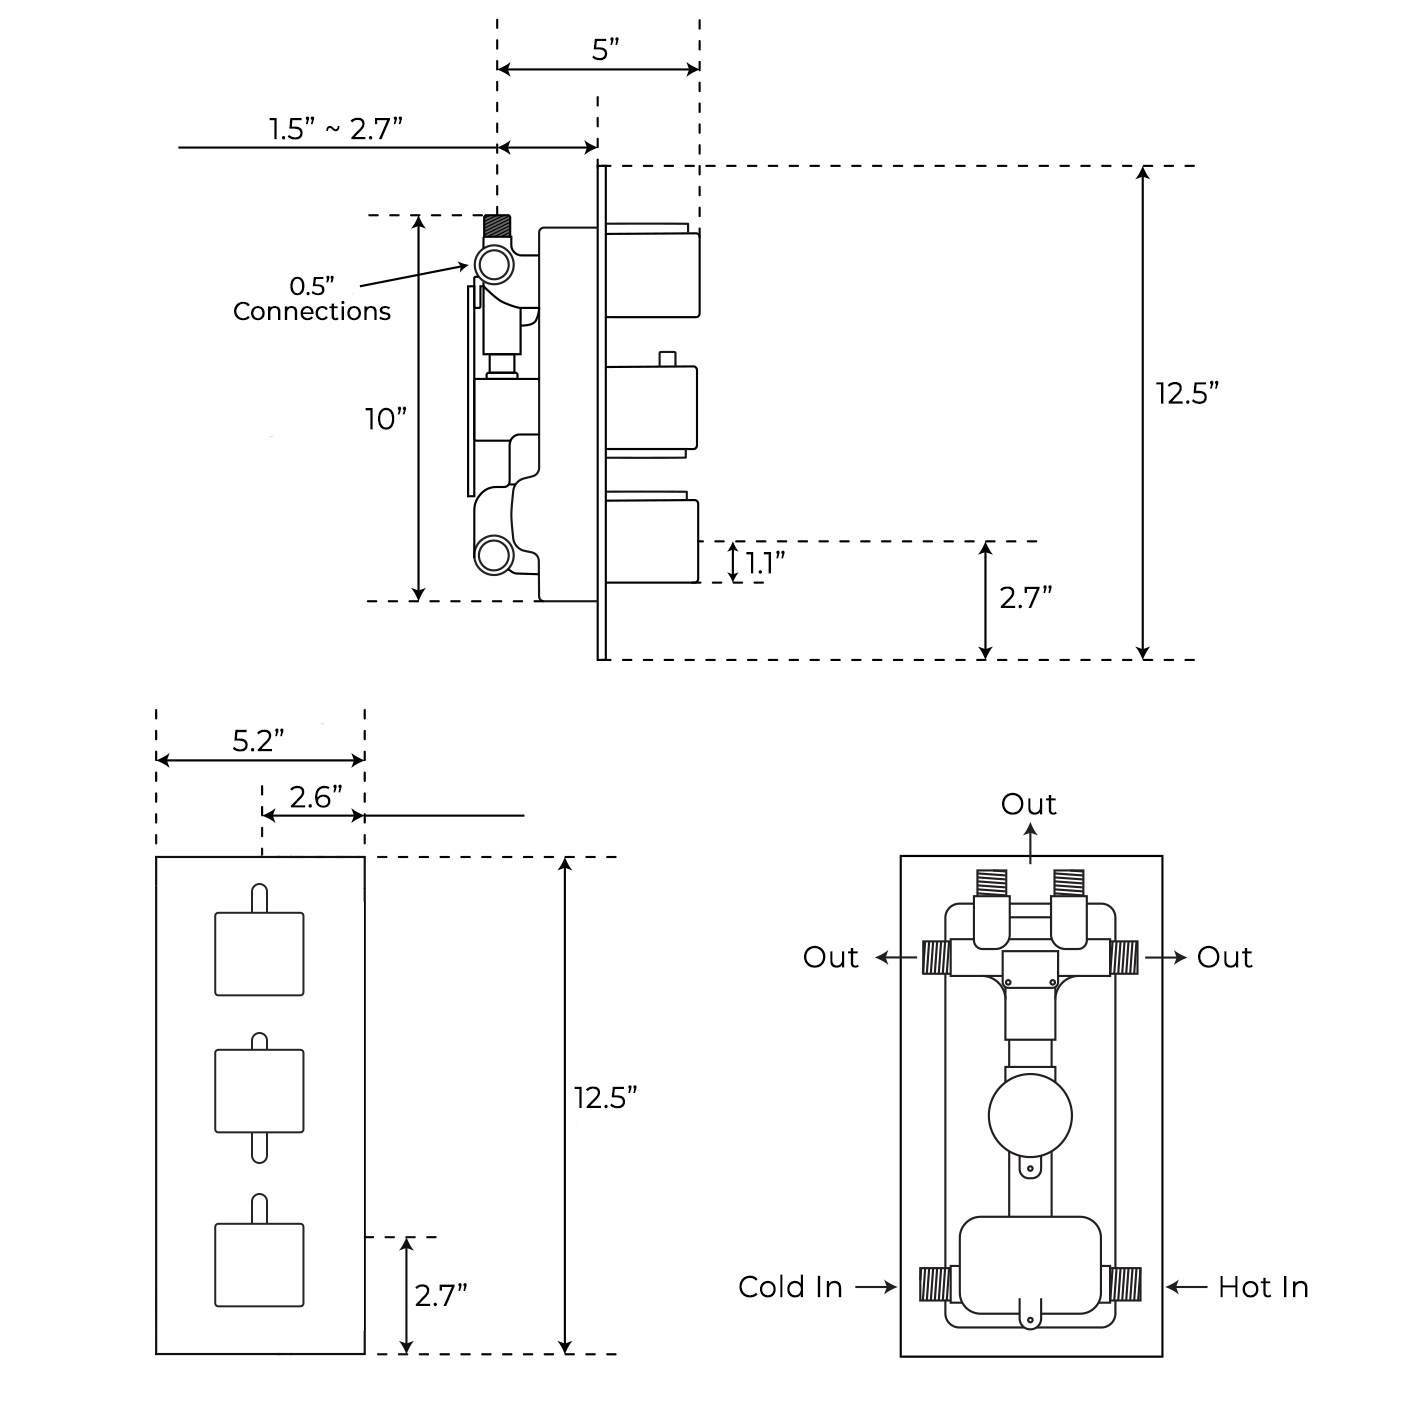
Shower Valve Mixer Installation Instructions
Step 5:
Step 6:
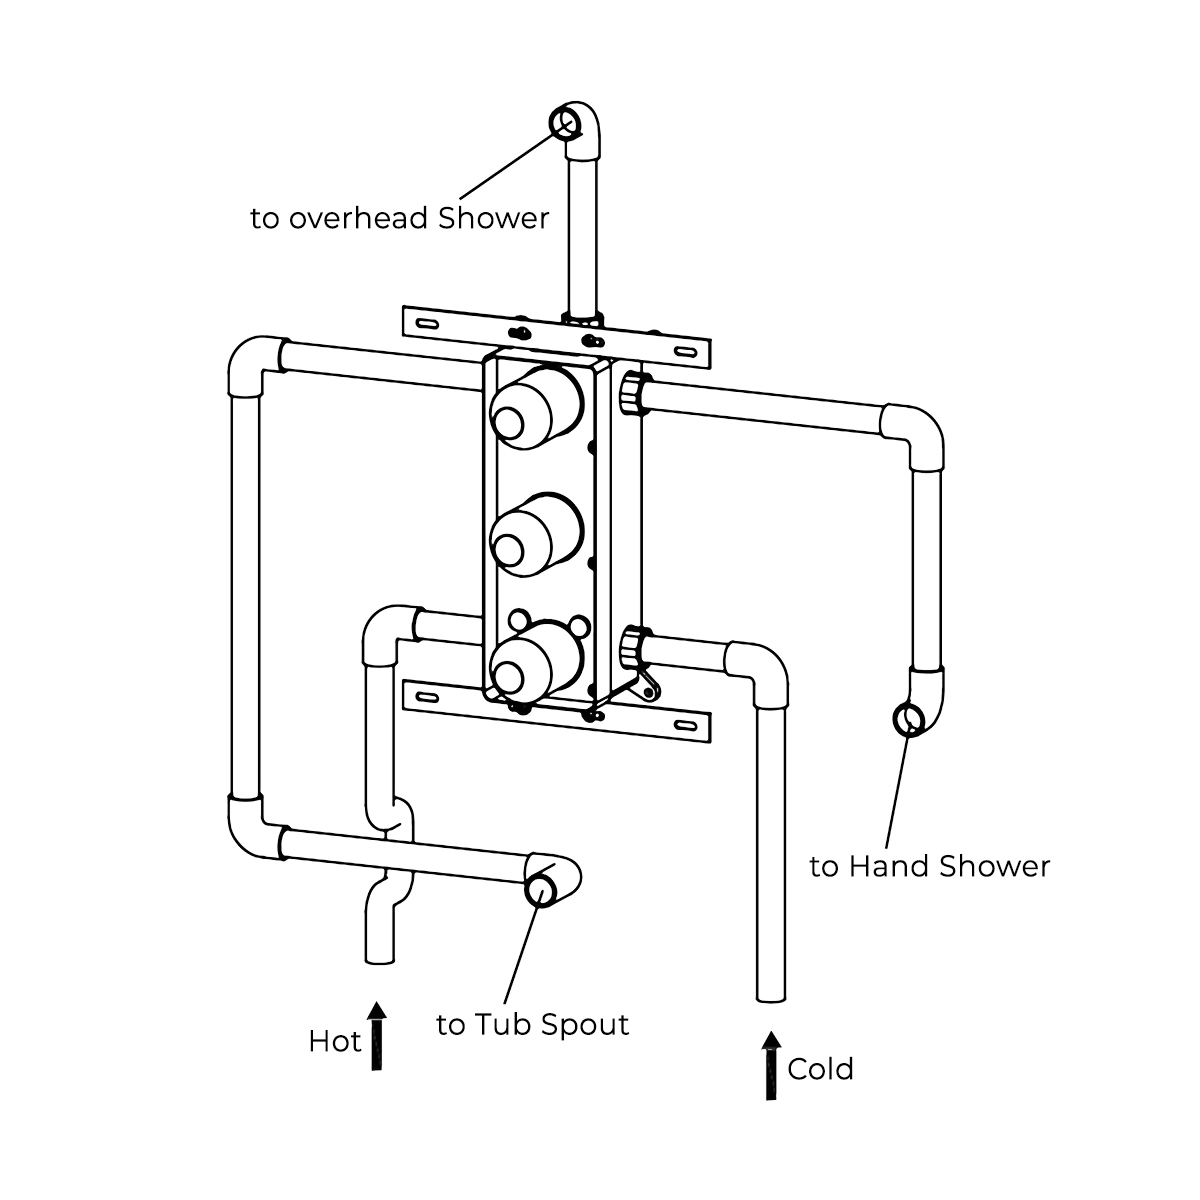
Attach the rough-in body to the wall.
Connect the rough-in body to the water supply pipes according to the diagram.
Shower Valve Mixer Installation Instructions
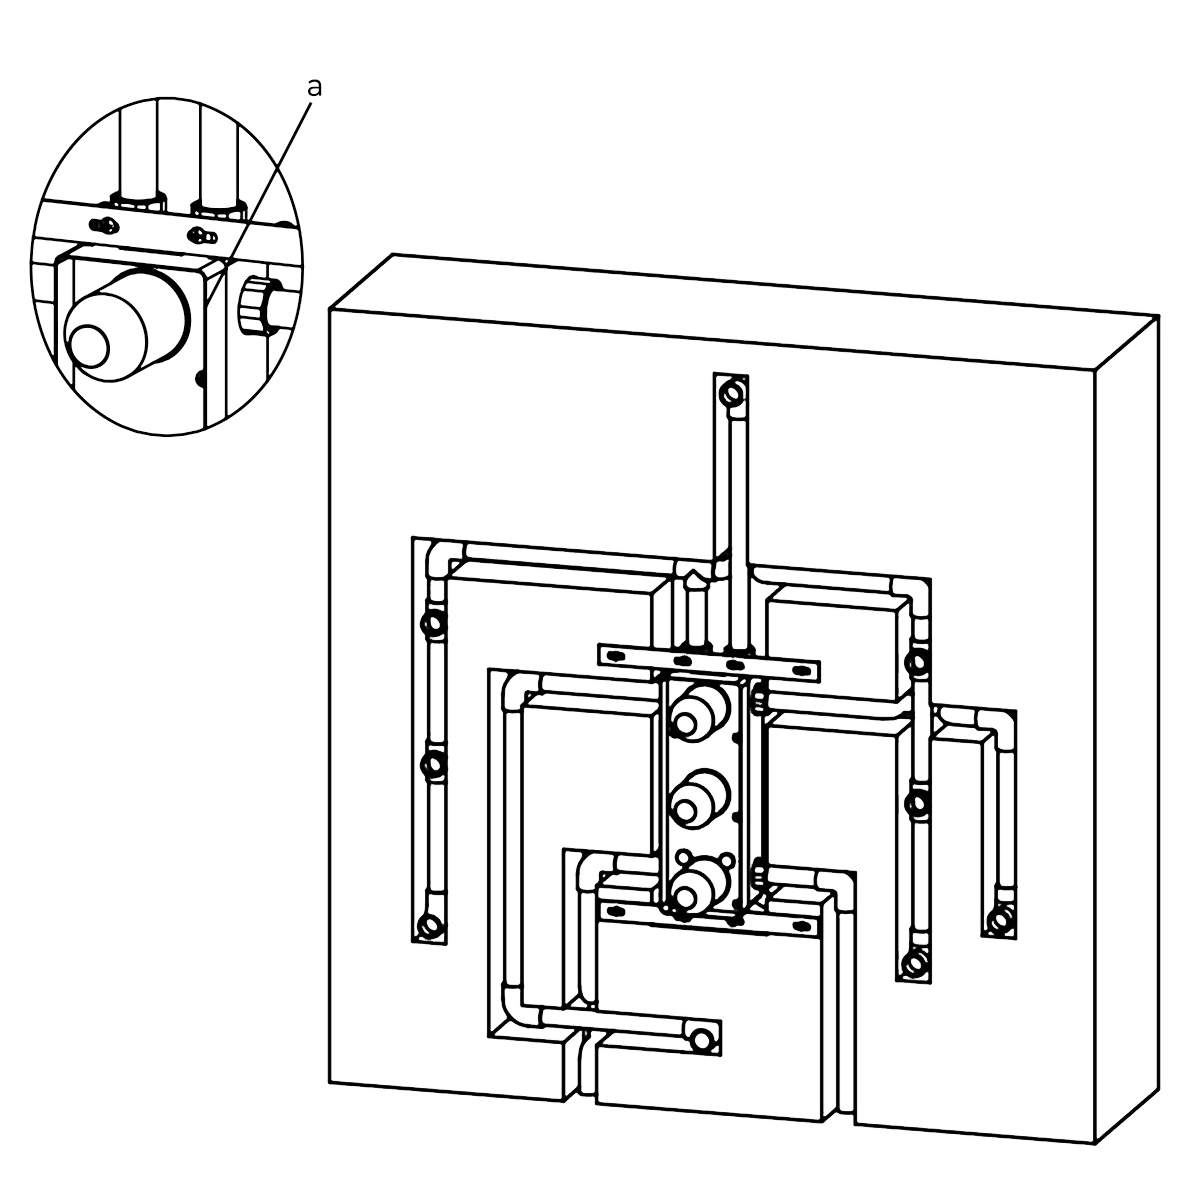
Step 7:
Step 8:
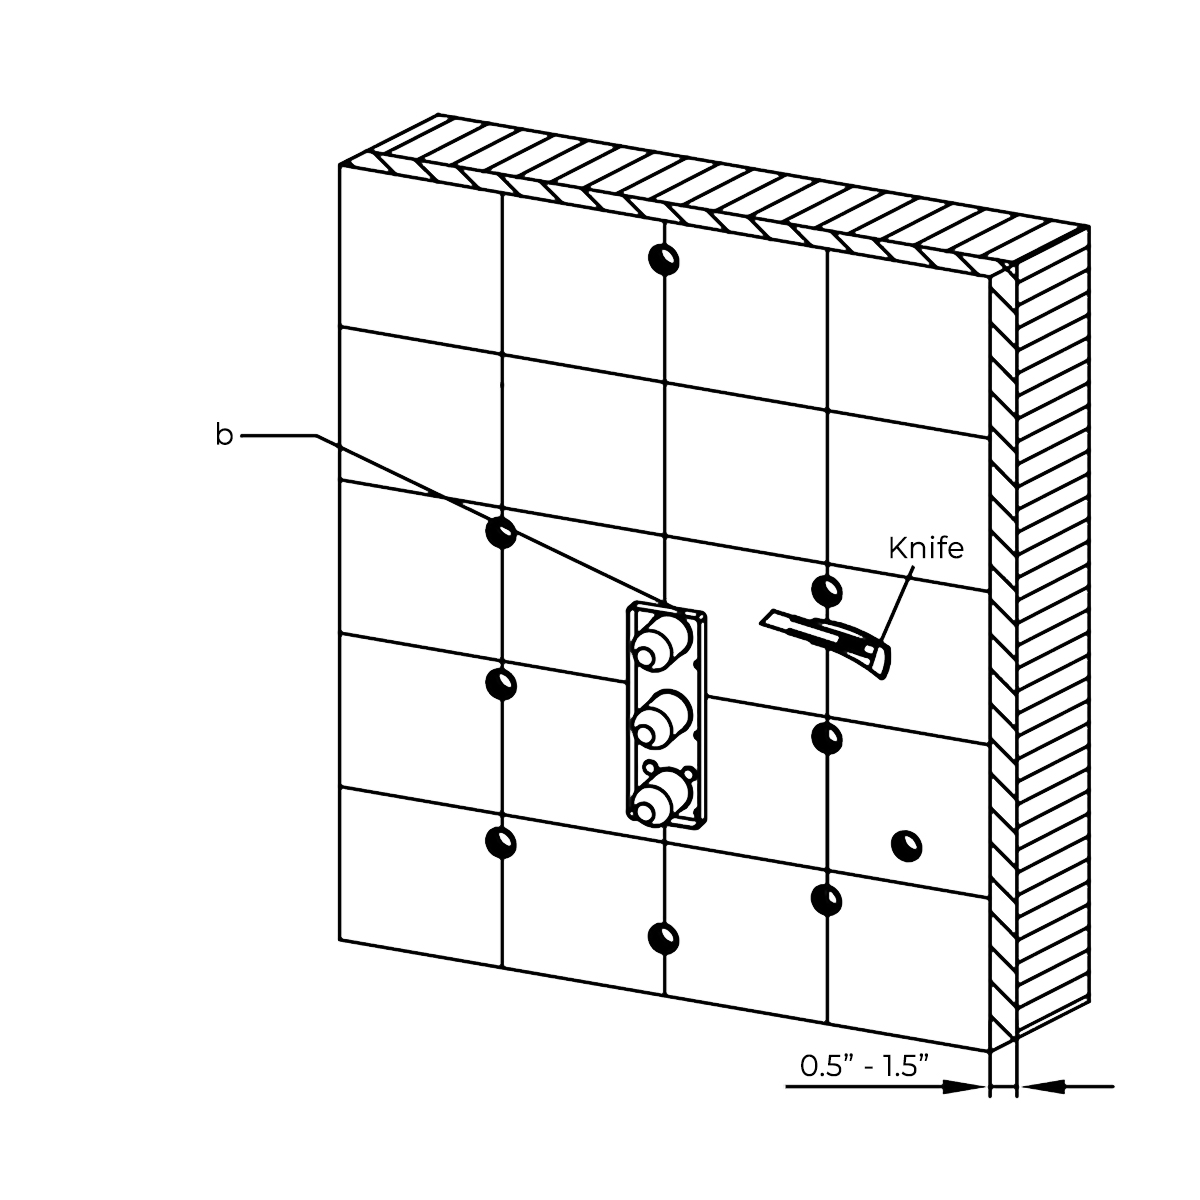
Finish the wall surrounding the shower with a thickness of 1/2"-1-1/2".
a) Finished wall surface should not exceed the upper edge of the installation box.
If the tile exceeds the edges of the installation box, trim the tile as necessary to install the trim plate.
b) Trim the tile around the installation box as necessary.
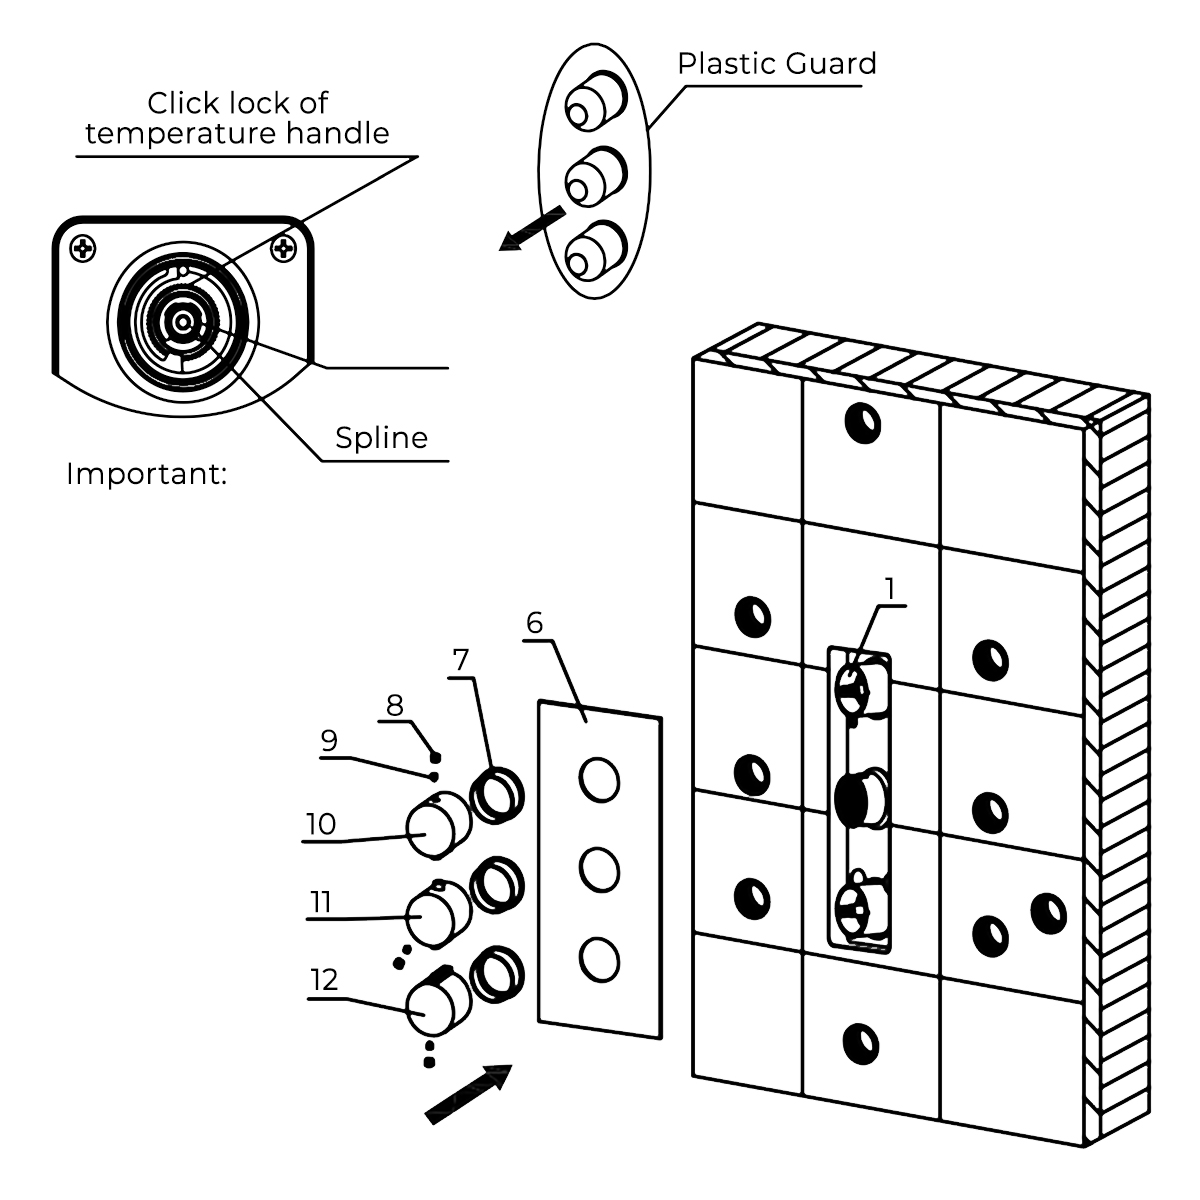
Shower Valve Mixer Installation Instructions
Step 9:
Remove the plastic guard and place the trim plate over the installation box. Install the screws covers, handles and buttons.
Shower Valve Mixer Installation
How to install the Shower Set with Wall Mount Showerhead, Hand Held Shower and Shower Mixer