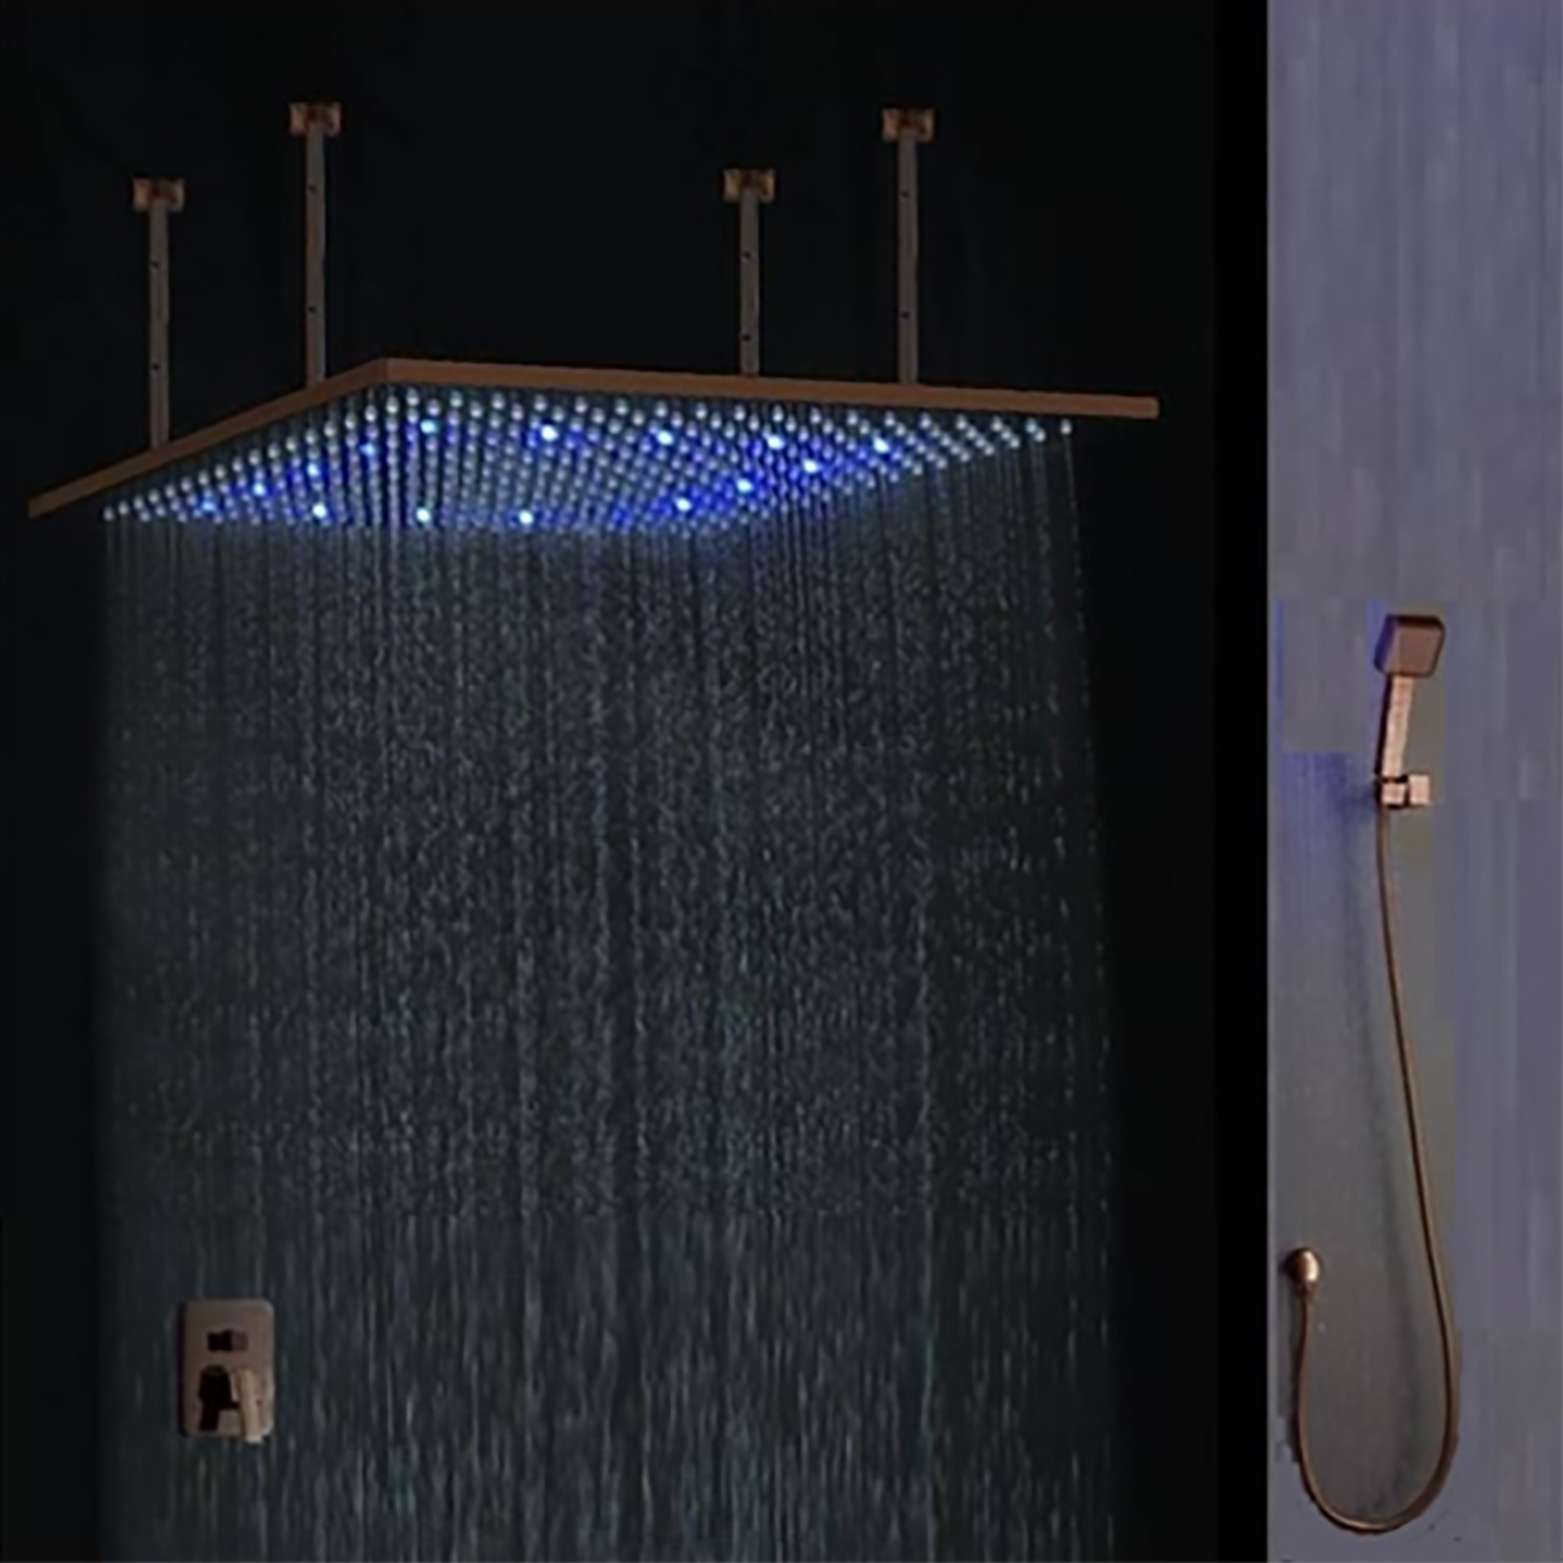
Fontana Oil Rubbed Bronze Square Color Changing LED Rain Shower System
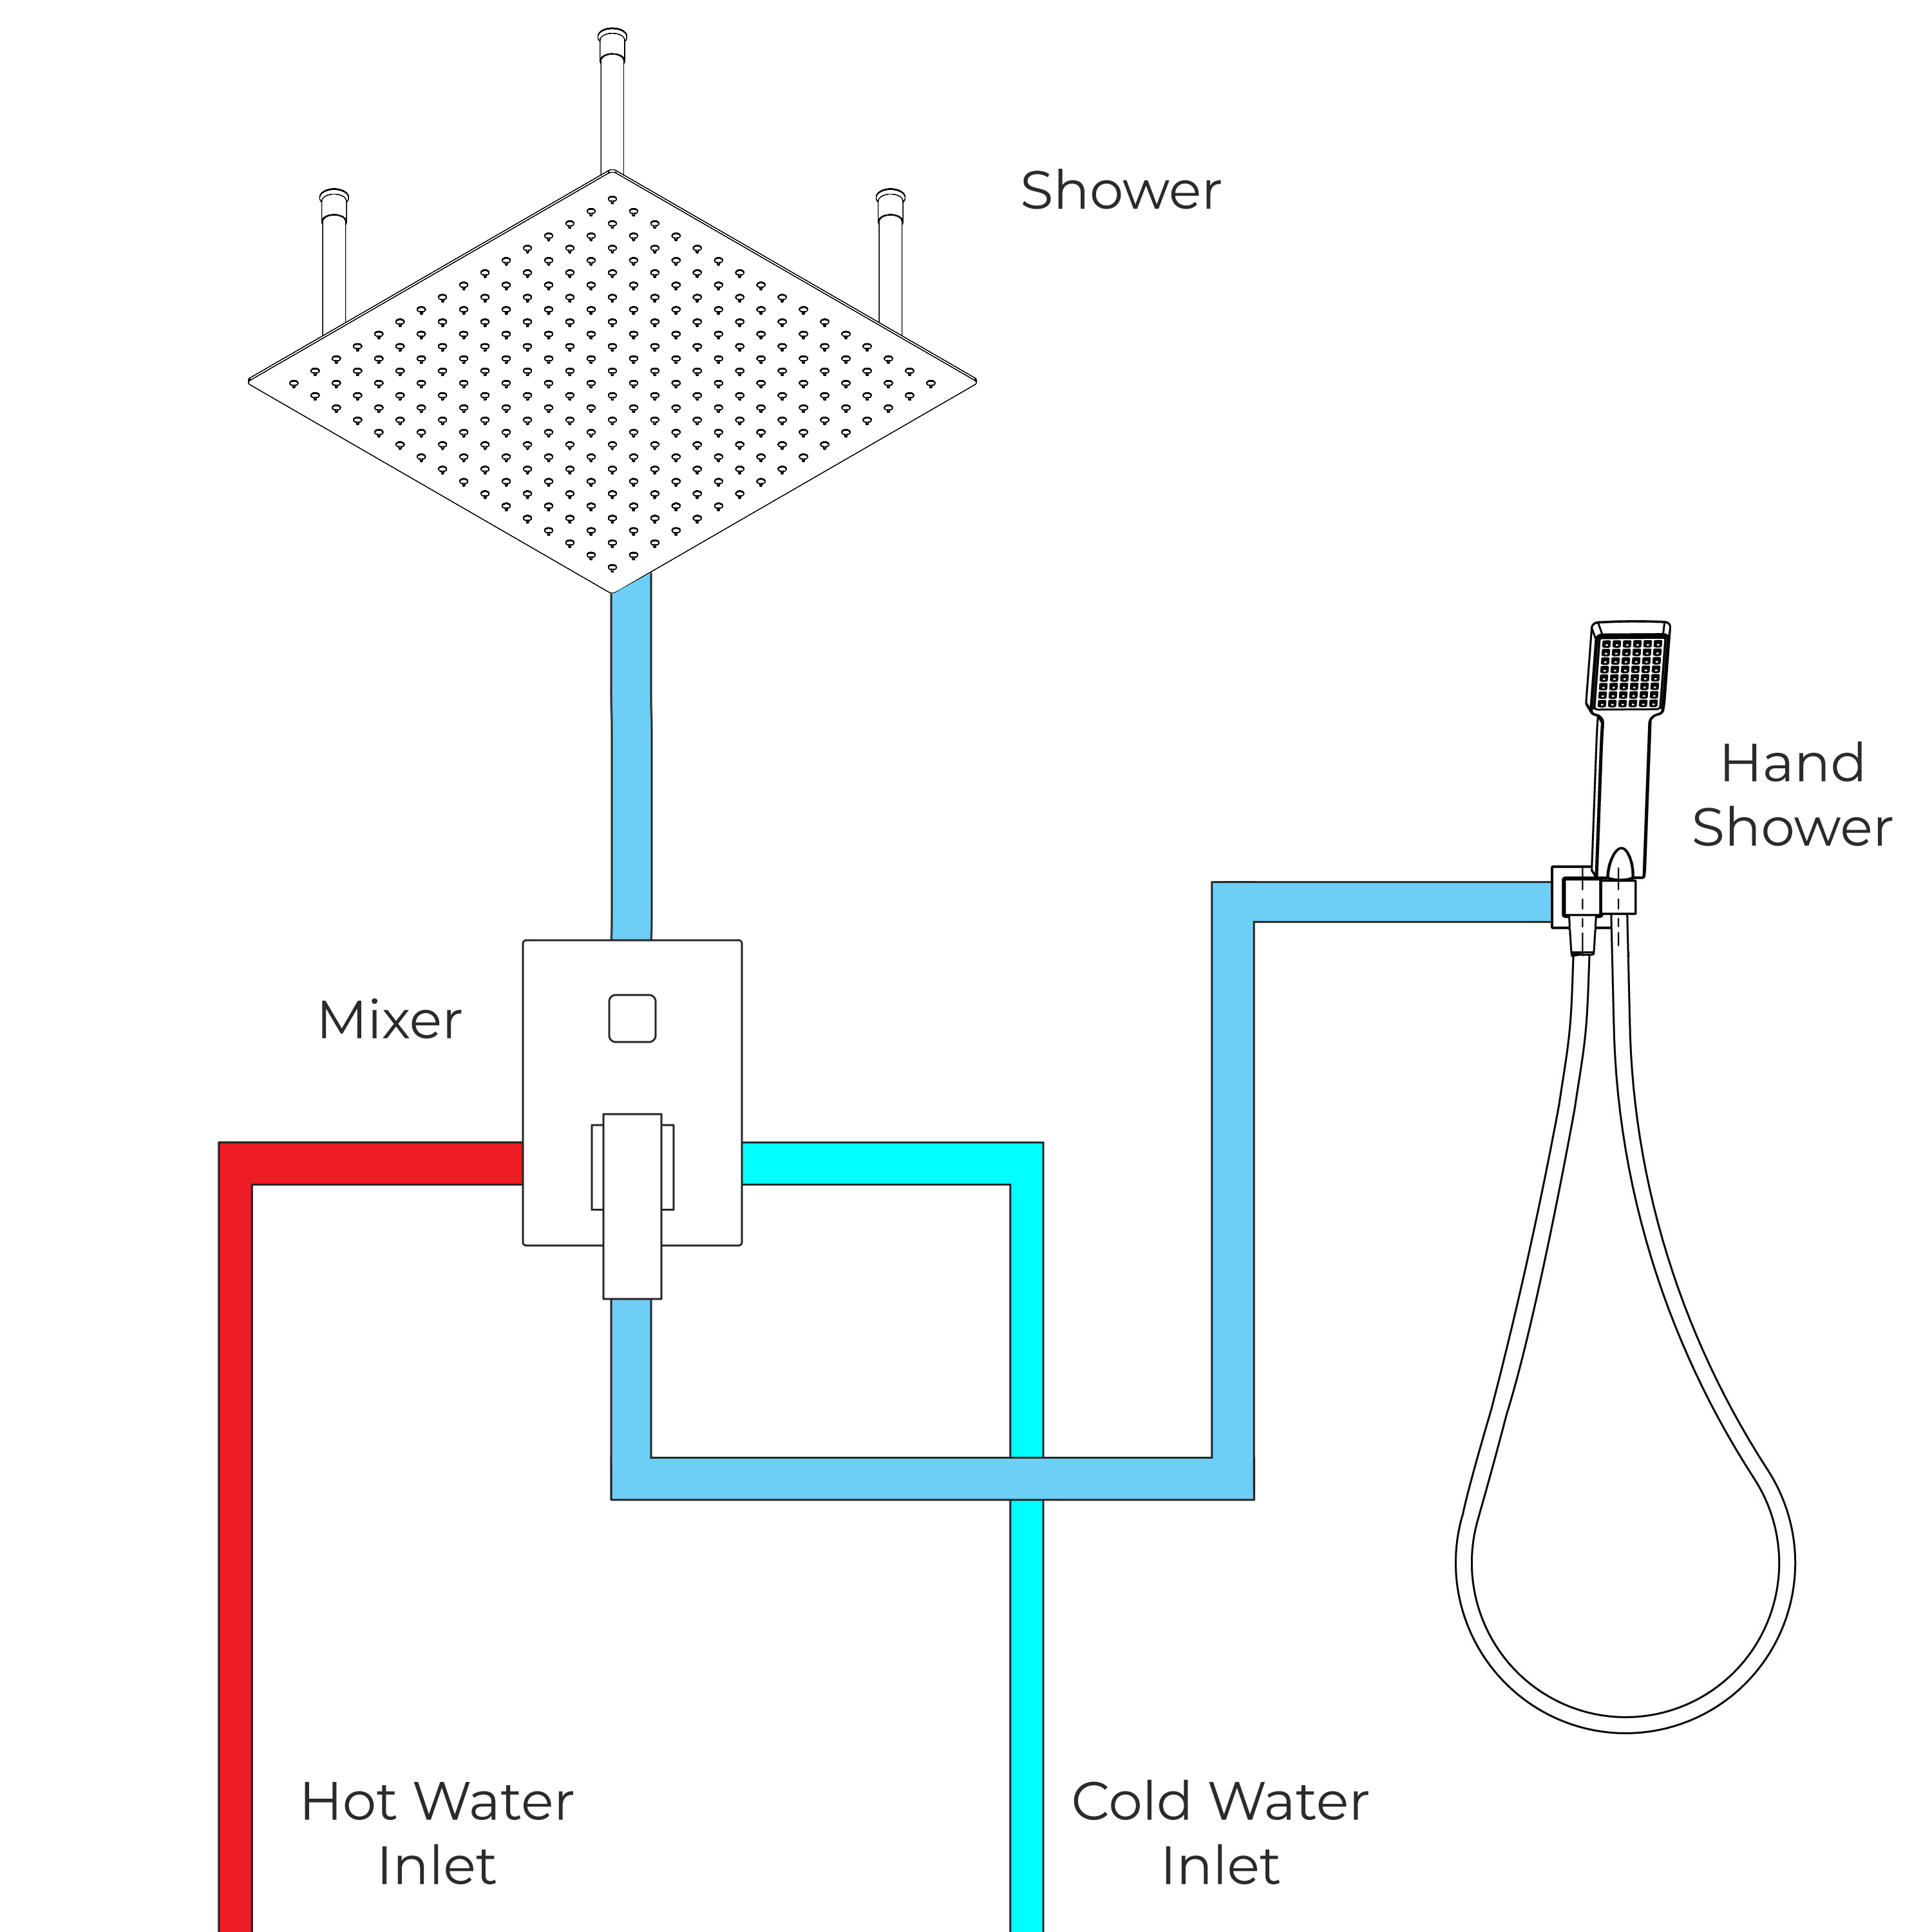
The Fontana Oil Rubbed Bronze LED shower system will turn your shower into one that looks exceptional. If you already have Oil Rubbed Bronze in your bath fixtures, it makes perfect sense to invest in oil rubbed bronze shower head. The modern design comes with a rainfall showerhead, an adjustable shower arm and a handheld shower, cold and hot water shower mixer and an easy-to-use mixer valve, made from high-quality stainless steel material. Turn on the fun in your shower just by turning on the water, the lights will dim and brighten when you lower and raise the pressure so you can set the perfect mood, water, and light. They will even change colors automatically based on the water temperature. All this with no batteries, everything is self-powered by a built-in dynamo that takes advantage of the water pressure to create the energy to light the bulbs. Never be scalded again by entering a shower that is just too hot. The Oil Rubbed Bronze Shower Head comes in a complete set and ready to install (you only need 2 water entries).
Fontana Oil Rubbed Bronze Square Color Changing LED Rain Shower System Features:
Before you begin, please read the installation instructions below. Observe all local building and safety codes.
Unpack and inspect the product for any shipping damages. If you find damages, do not install.
Please note all showers must be installed by a professional and certified plumber otherwise warranty might be voided.
shower
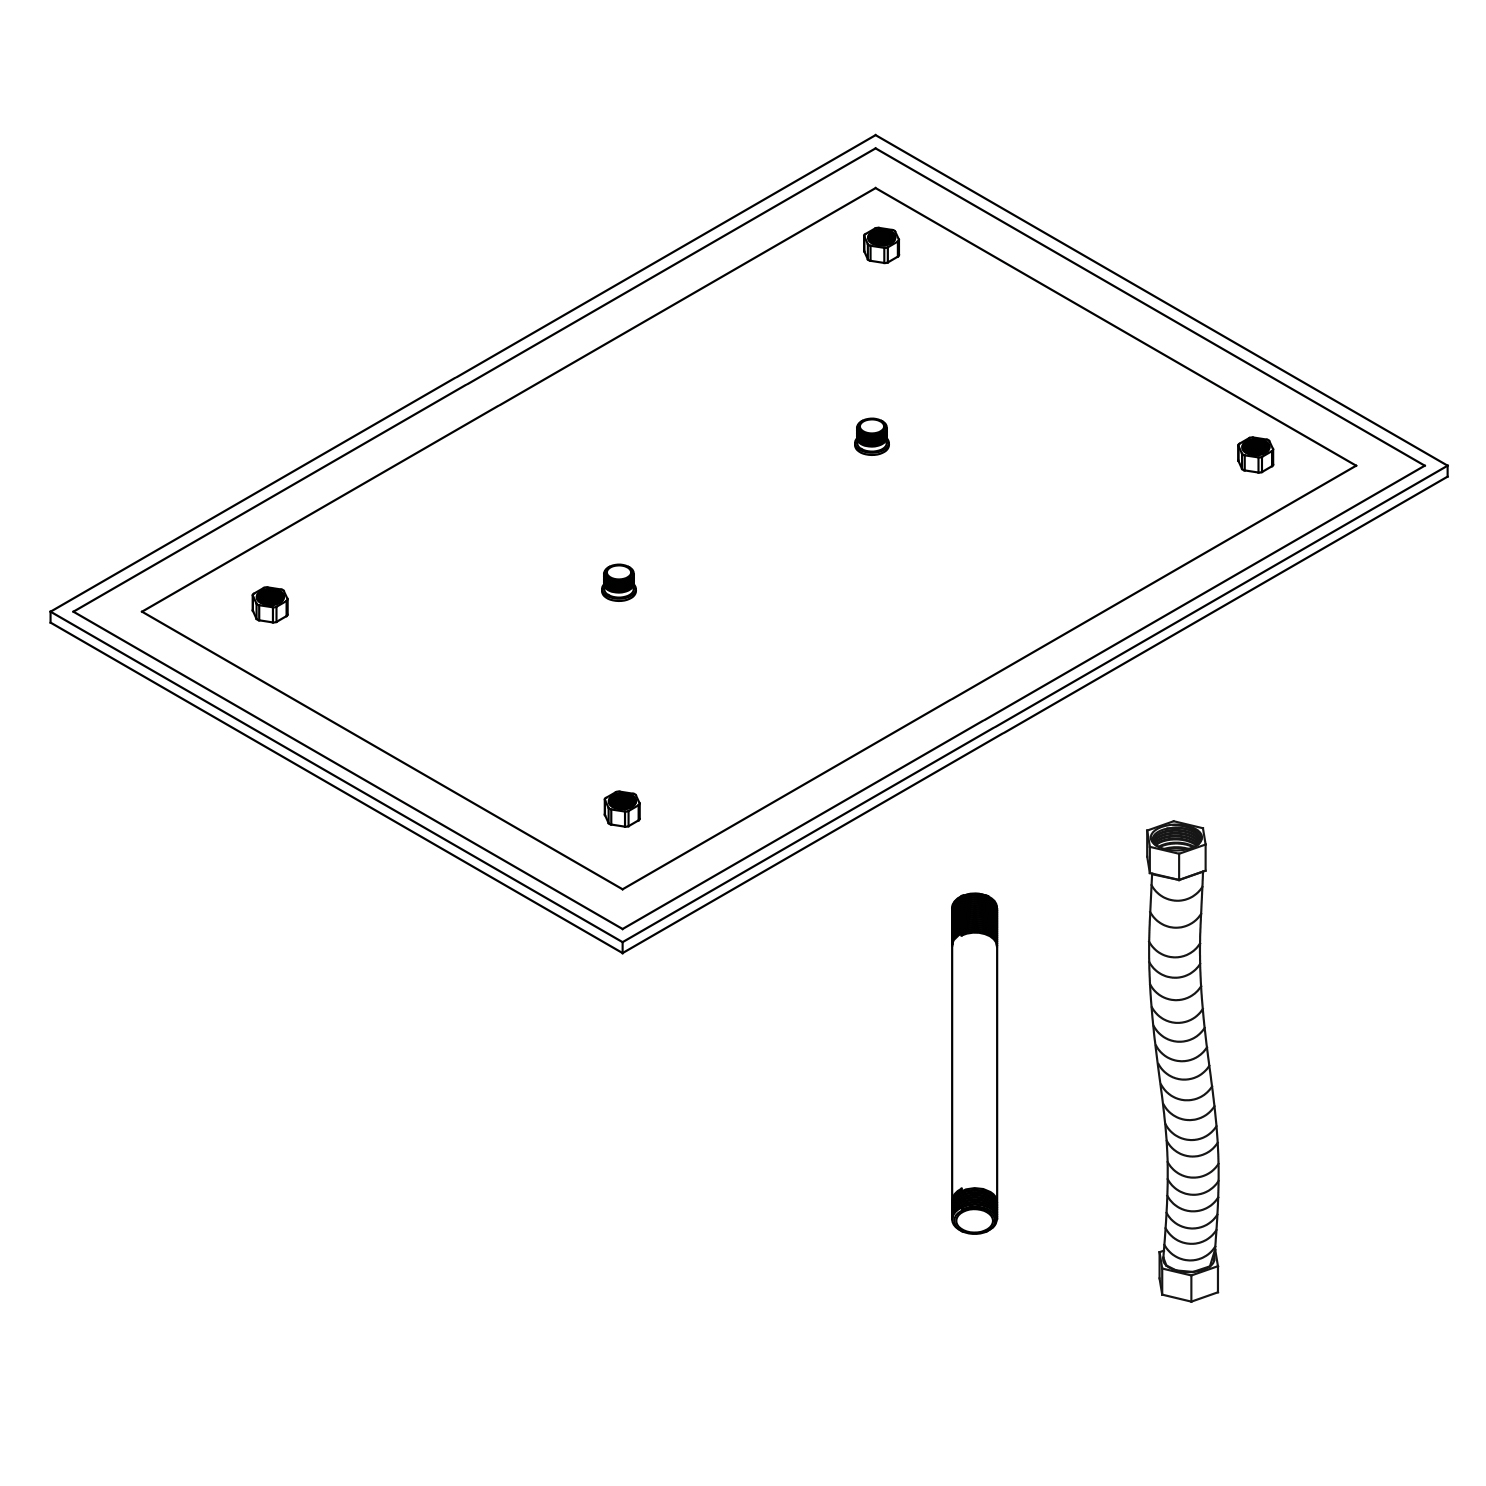
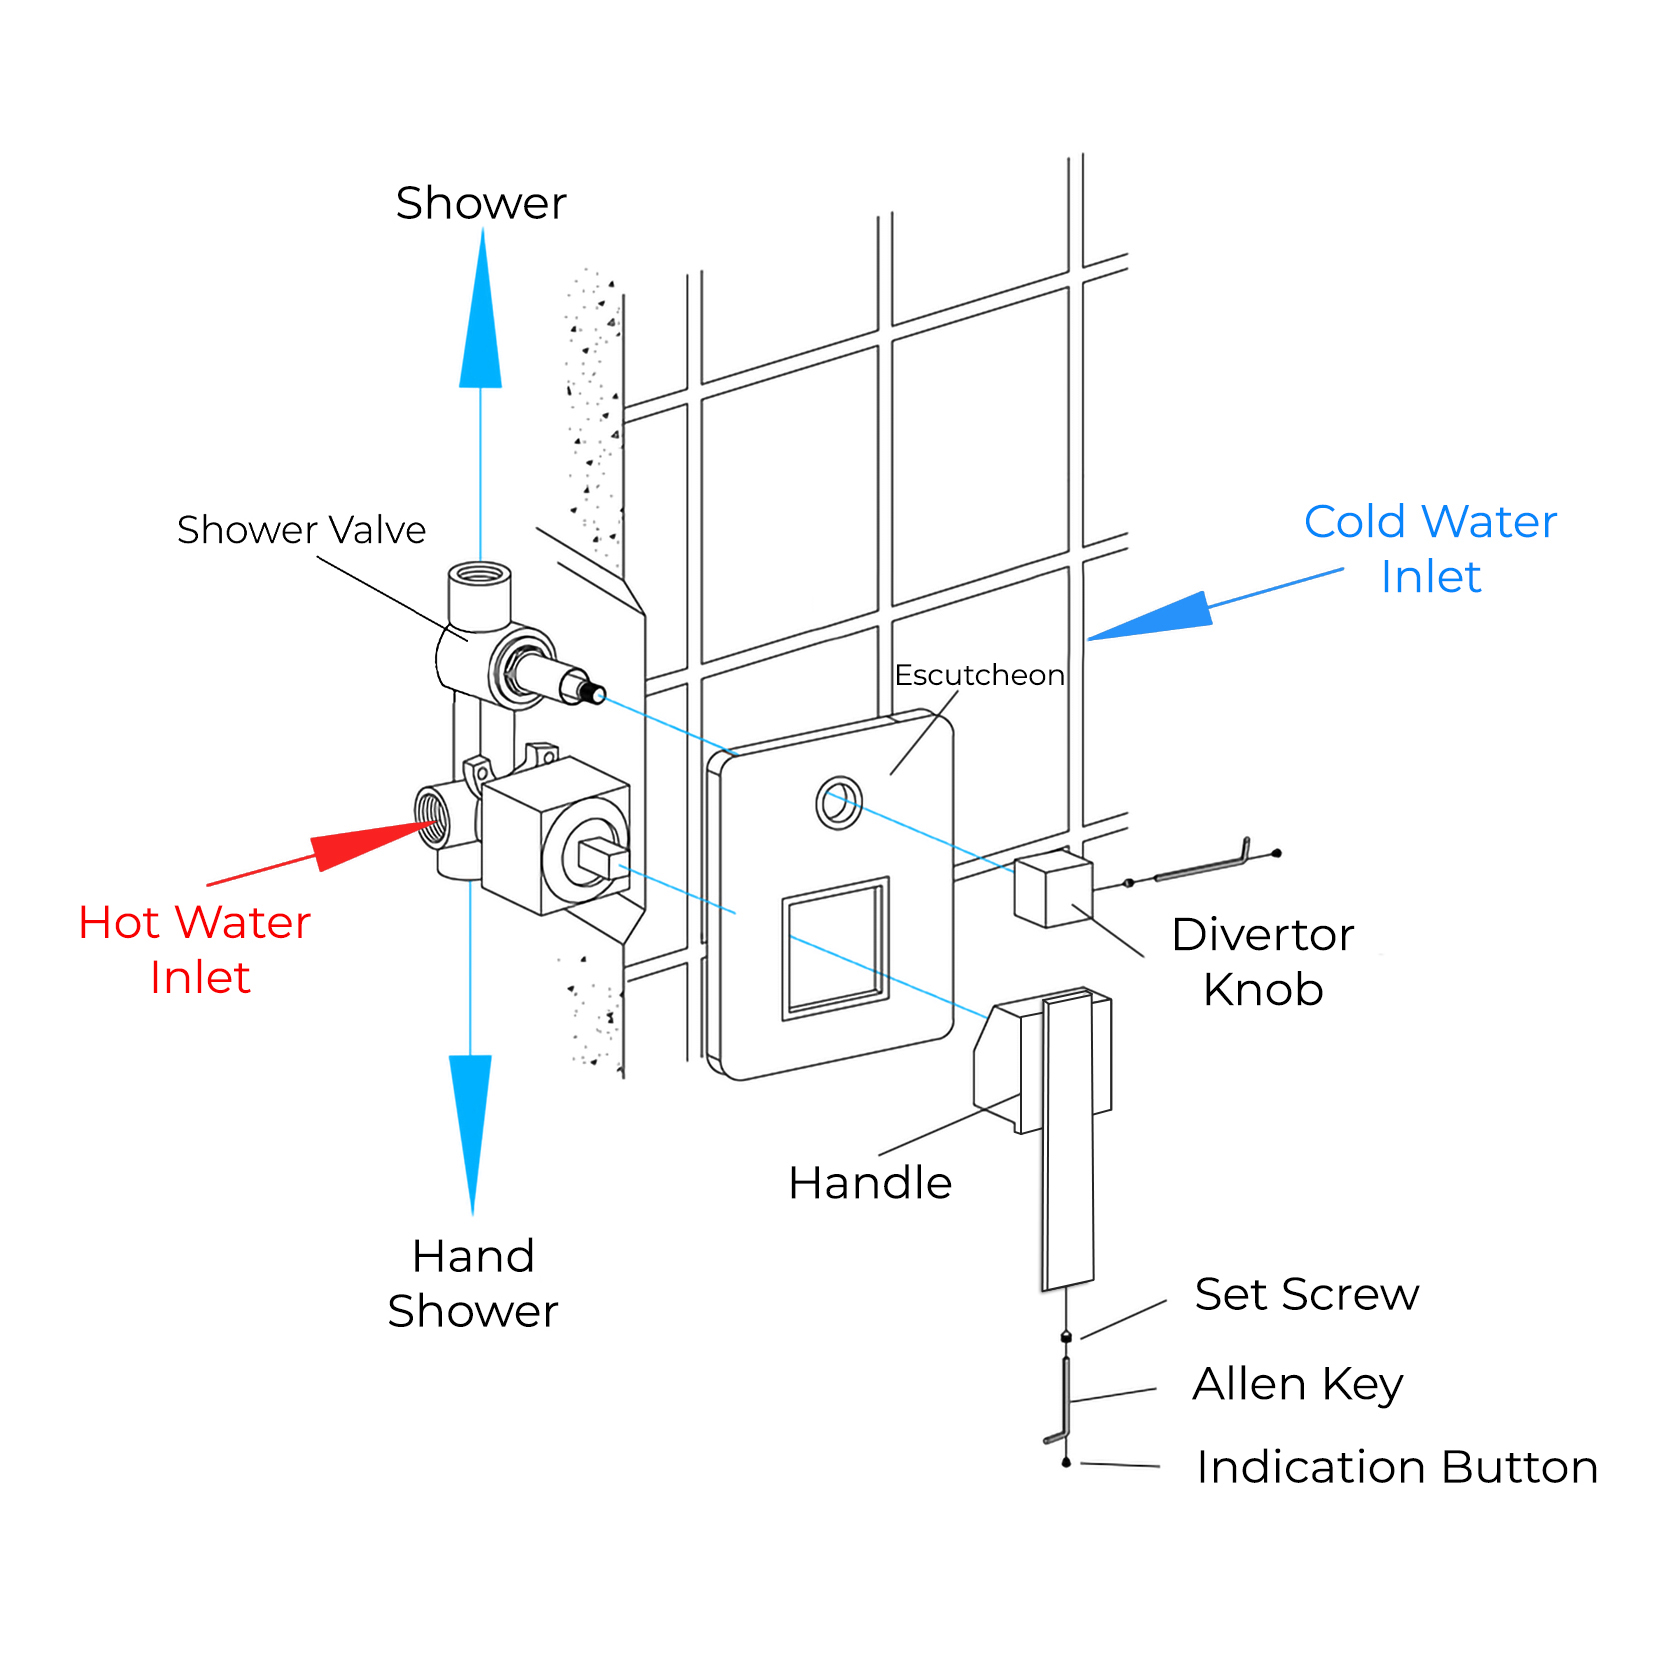
Shower Head Installation Instructions
shower
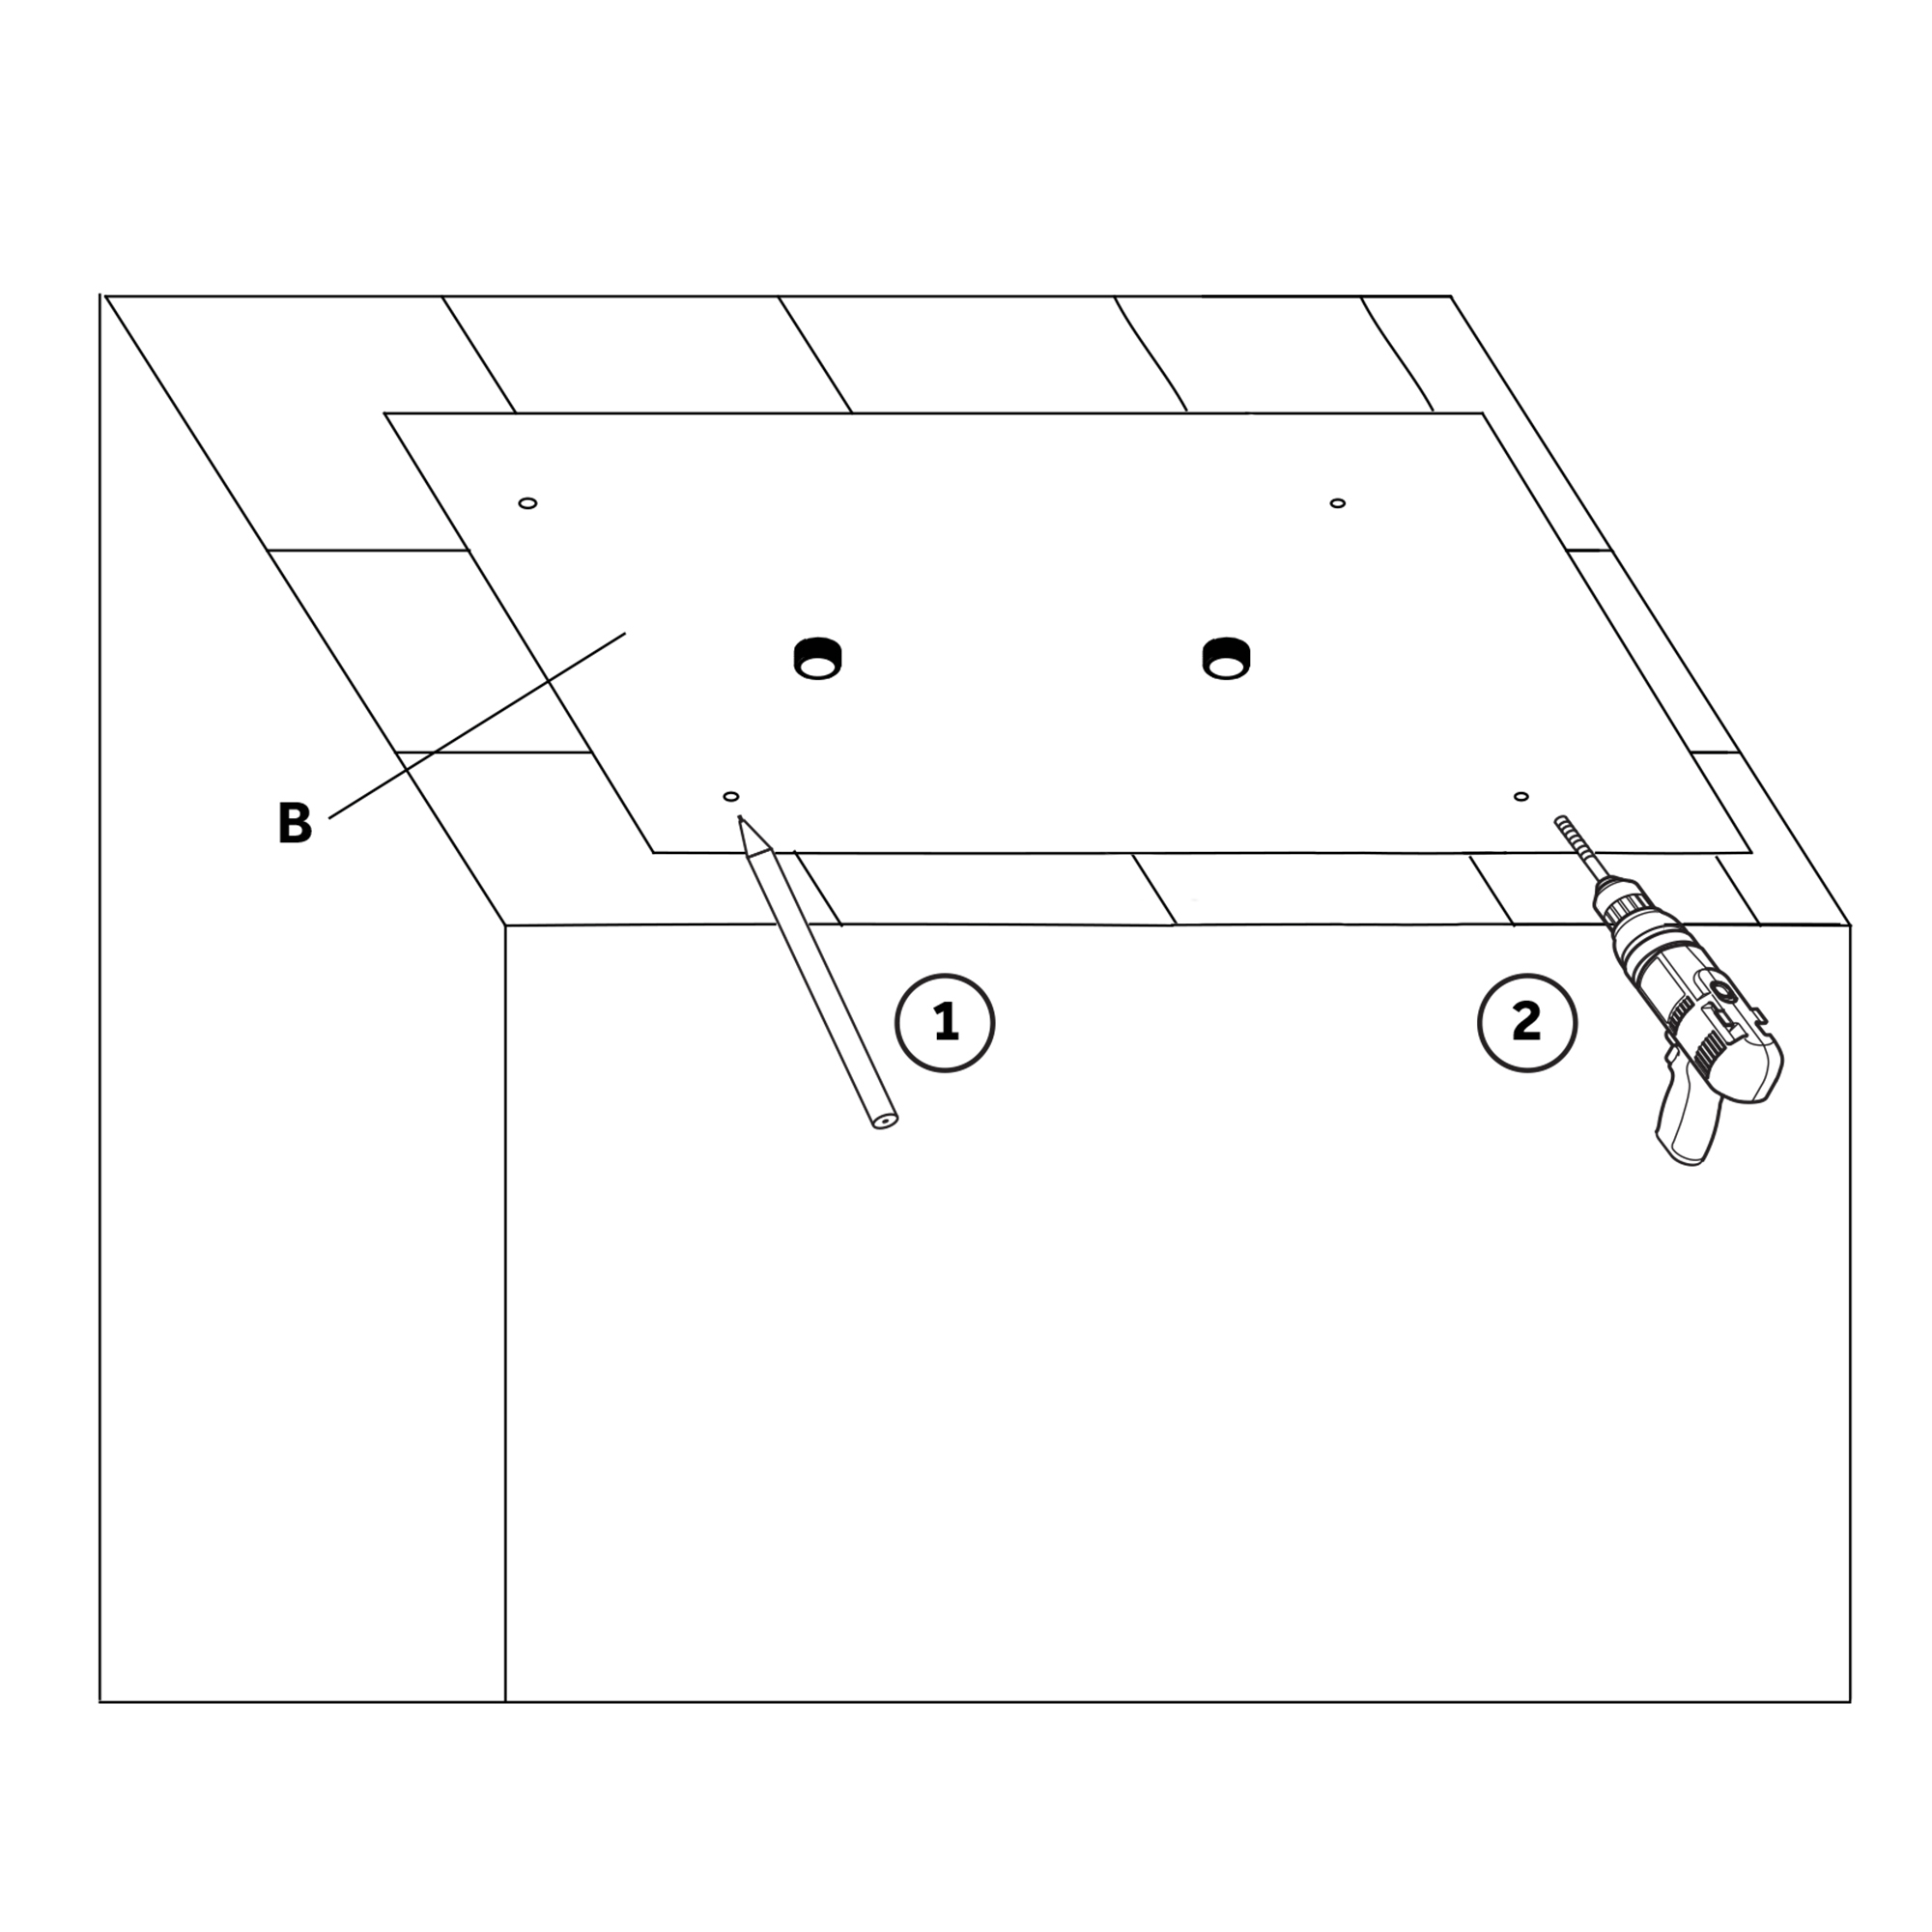
Step 1:
Step 2:
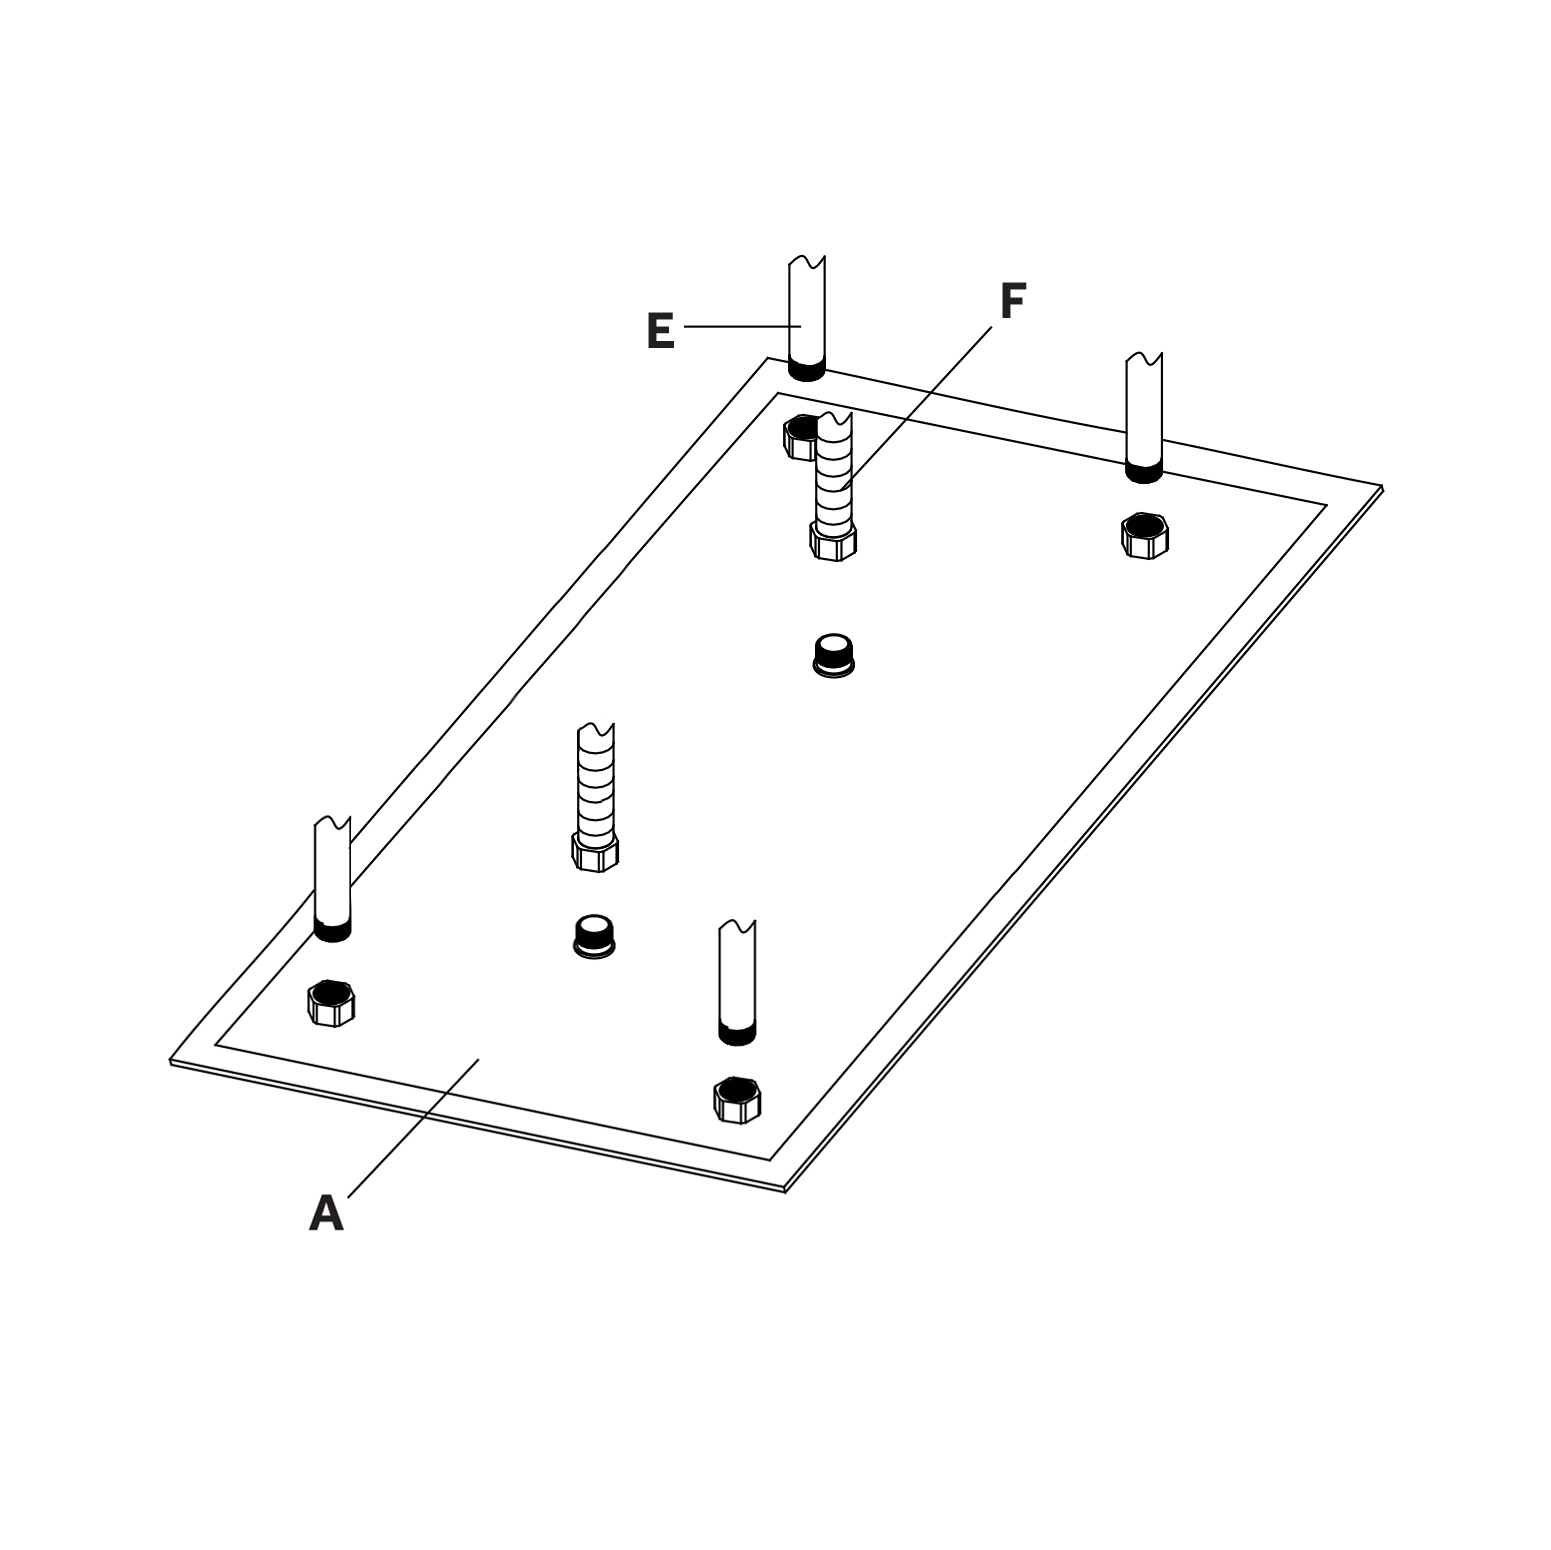
According to the template (B) mark the location of the mounting holes (1). Use a drill with a 6mm bit to drill mounting holes into studs or blocking.
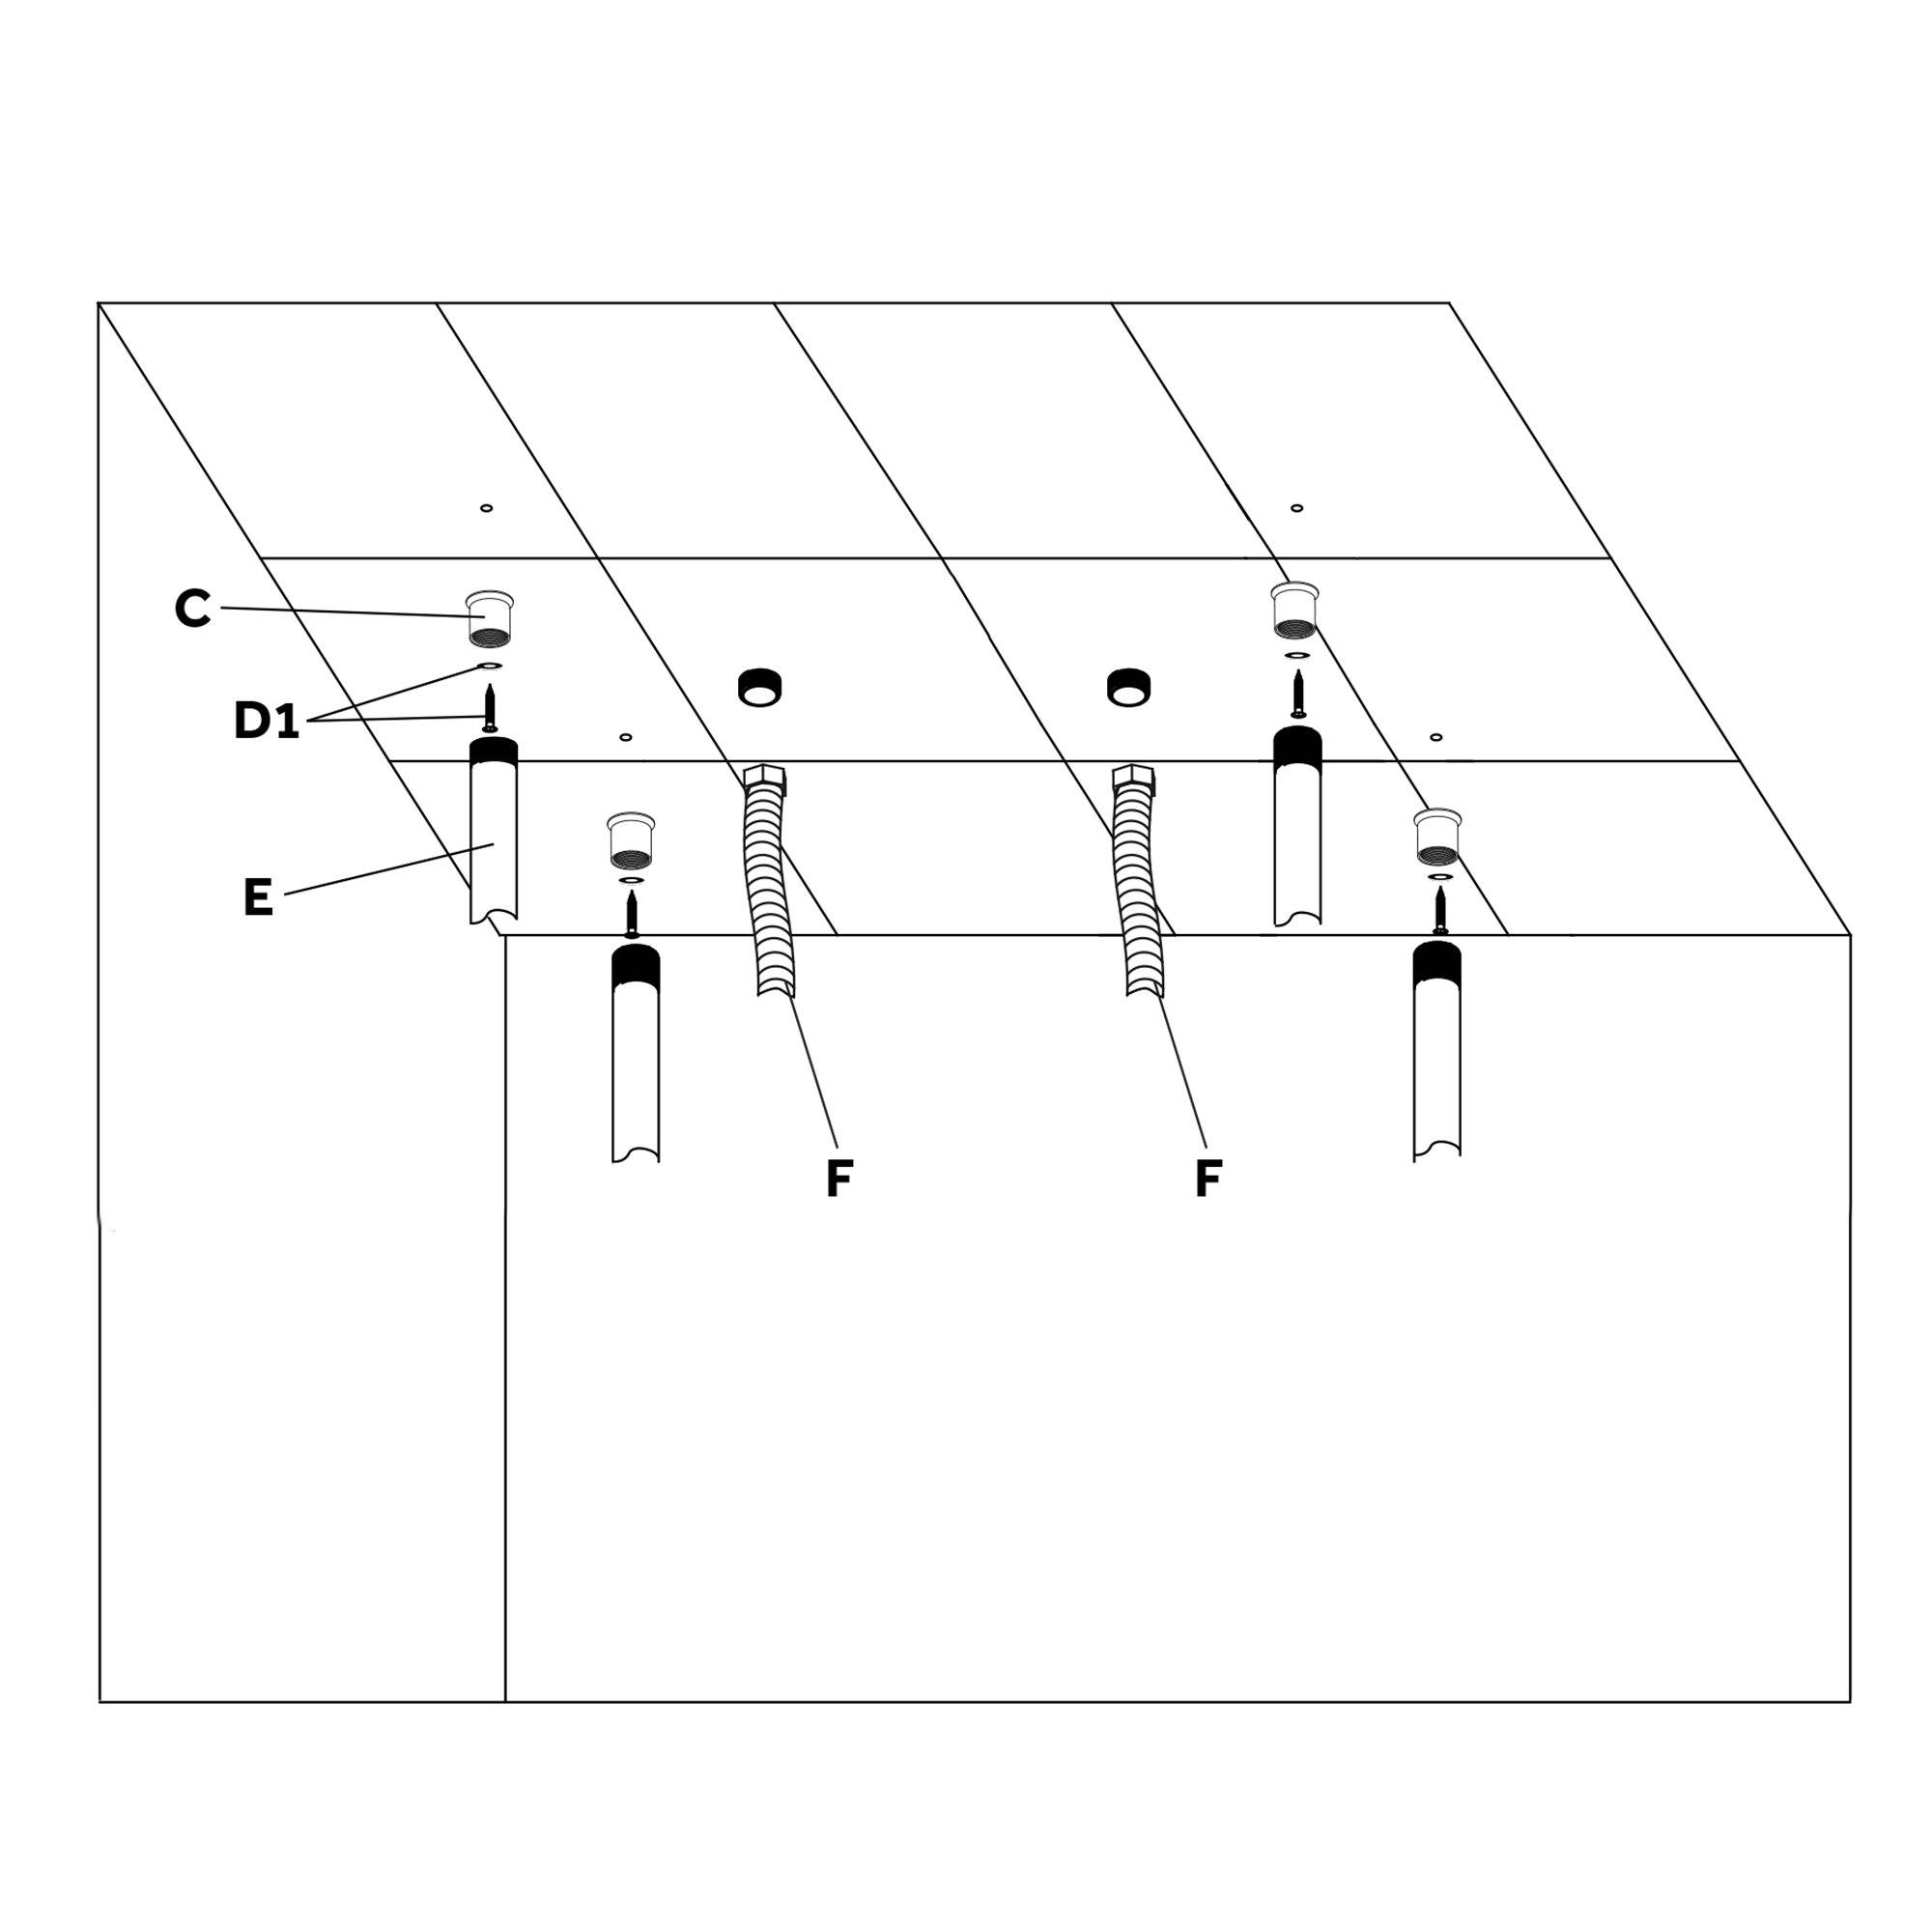
Install the mounting brackets (C) with the tapping screws (D1). Thread the shower bars (E) onto the mounting brackets, and the inlet hose (F) onto the water inlet.
Step 3:
Step 4:
Attach the shower head (A) to the shower bars (E). Connect the inlet hose (F) to the showerhead.
Step 5:
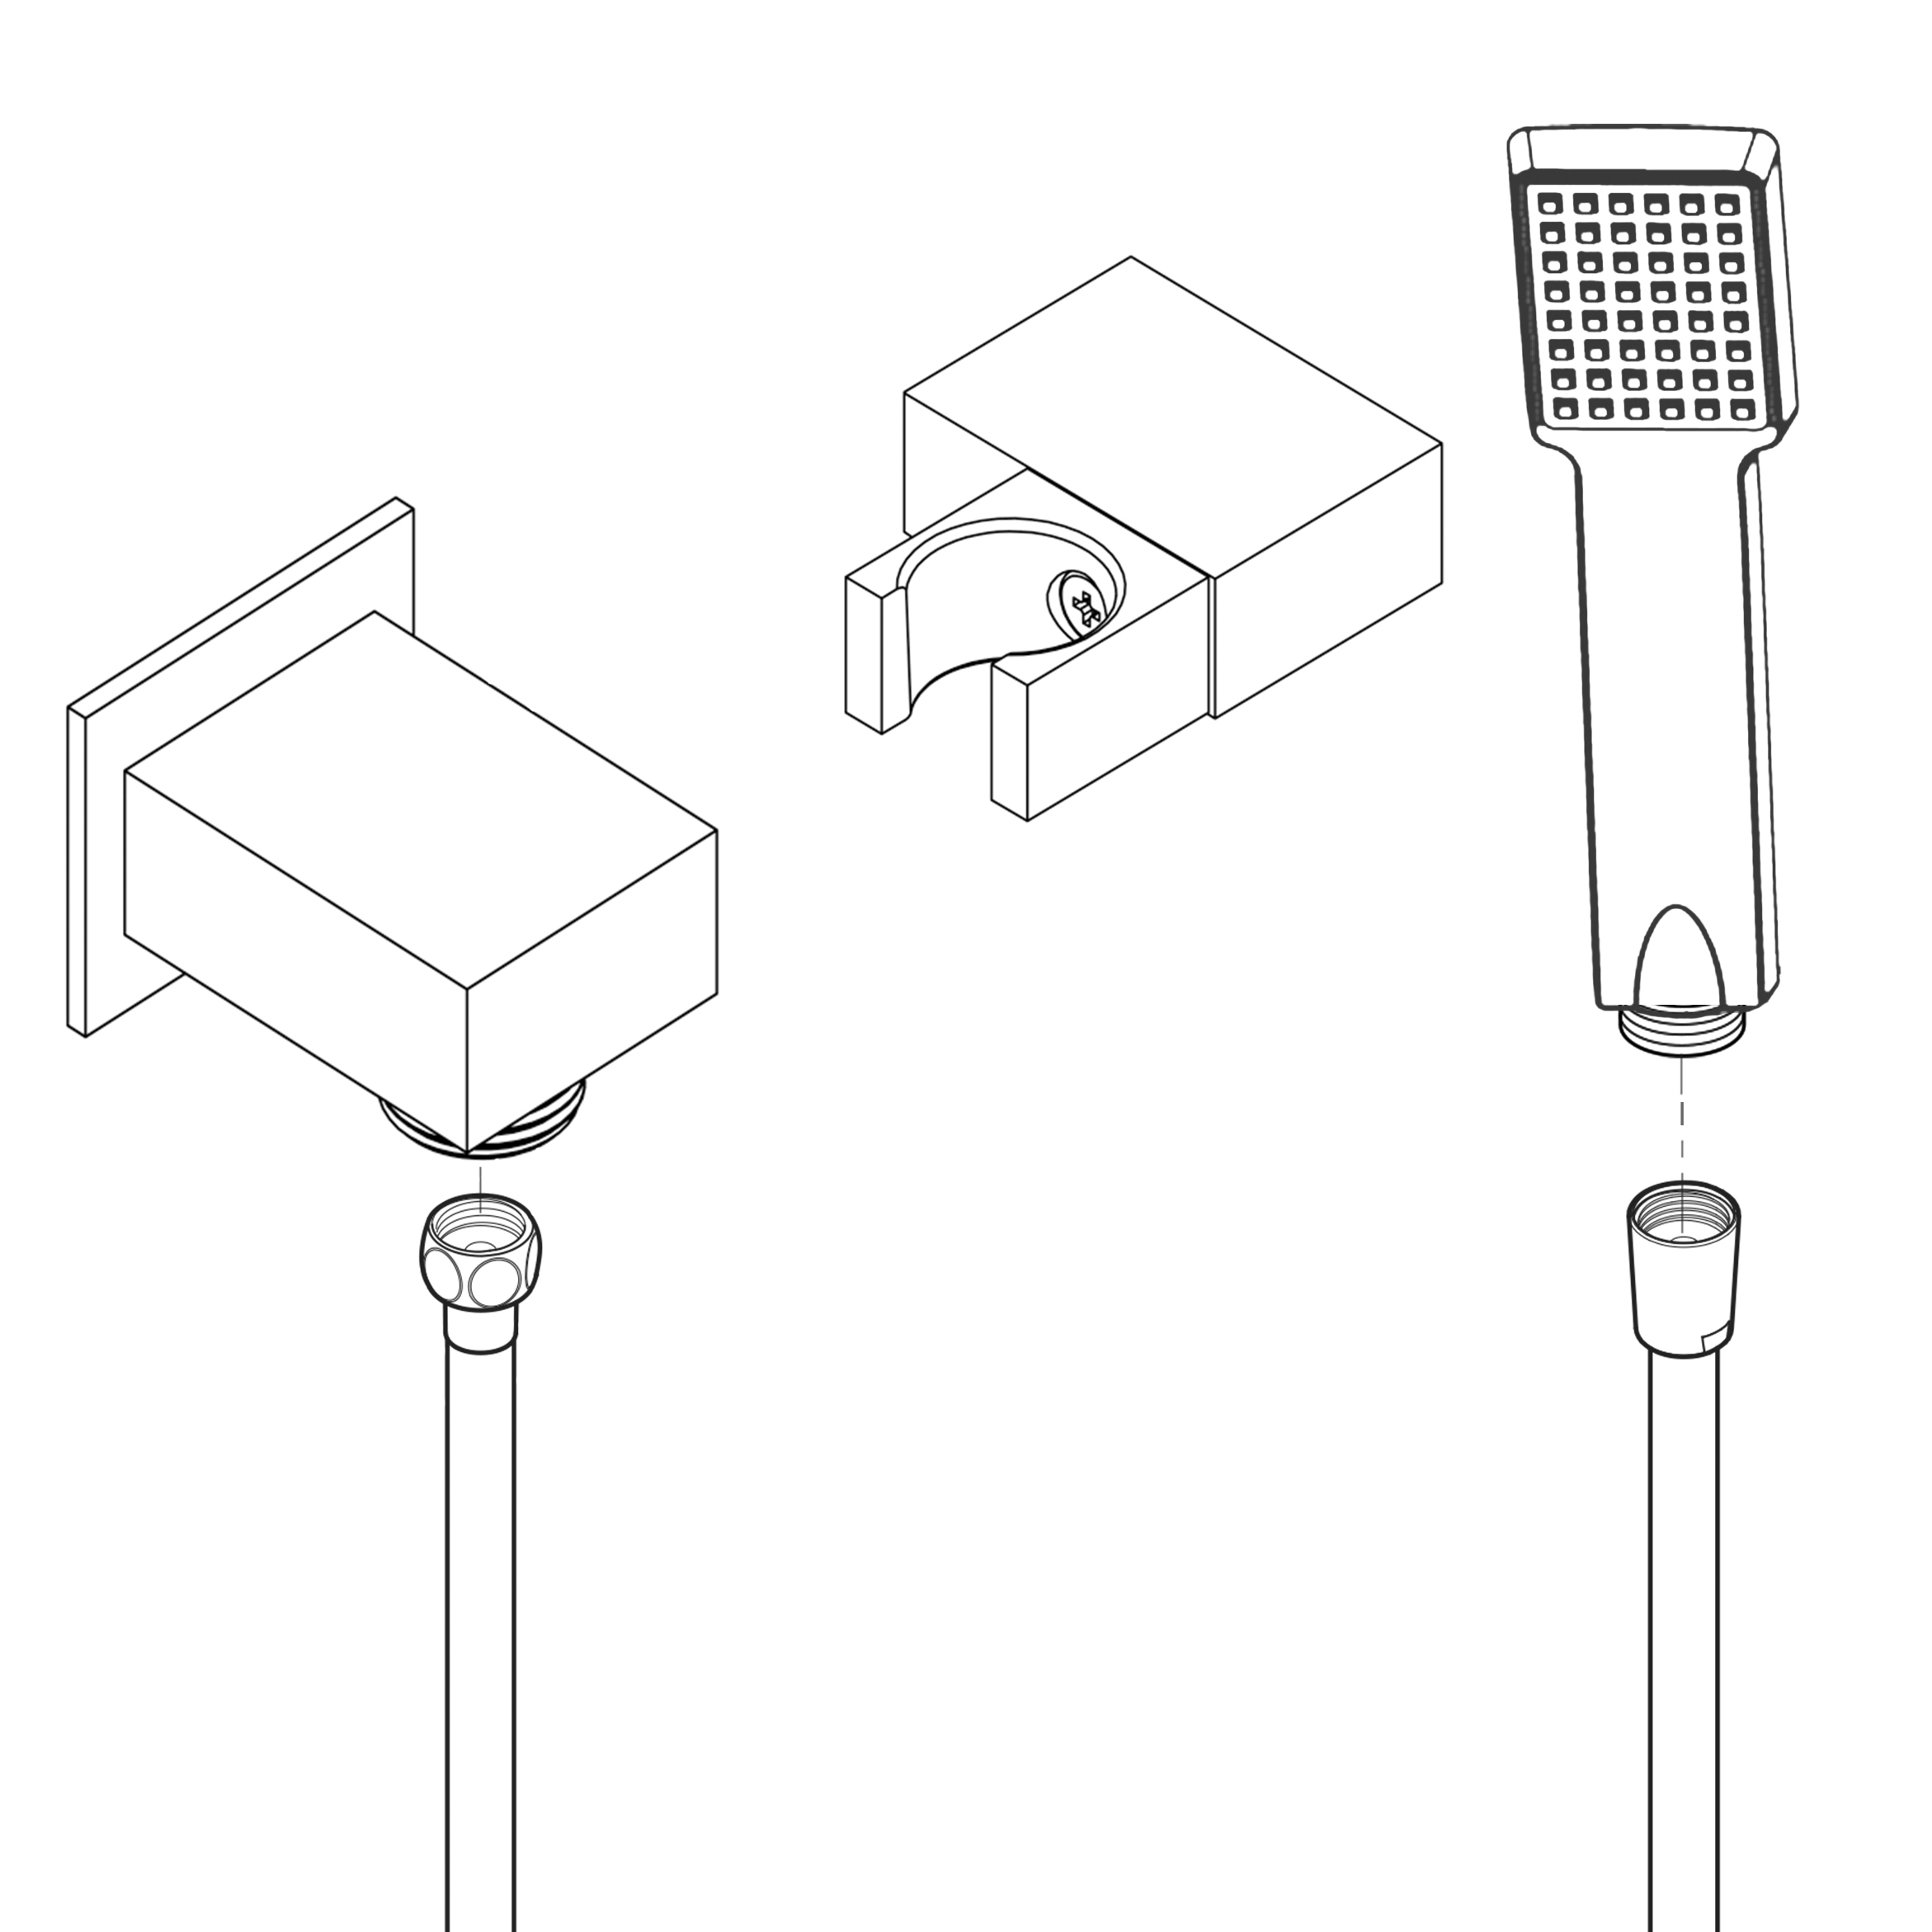
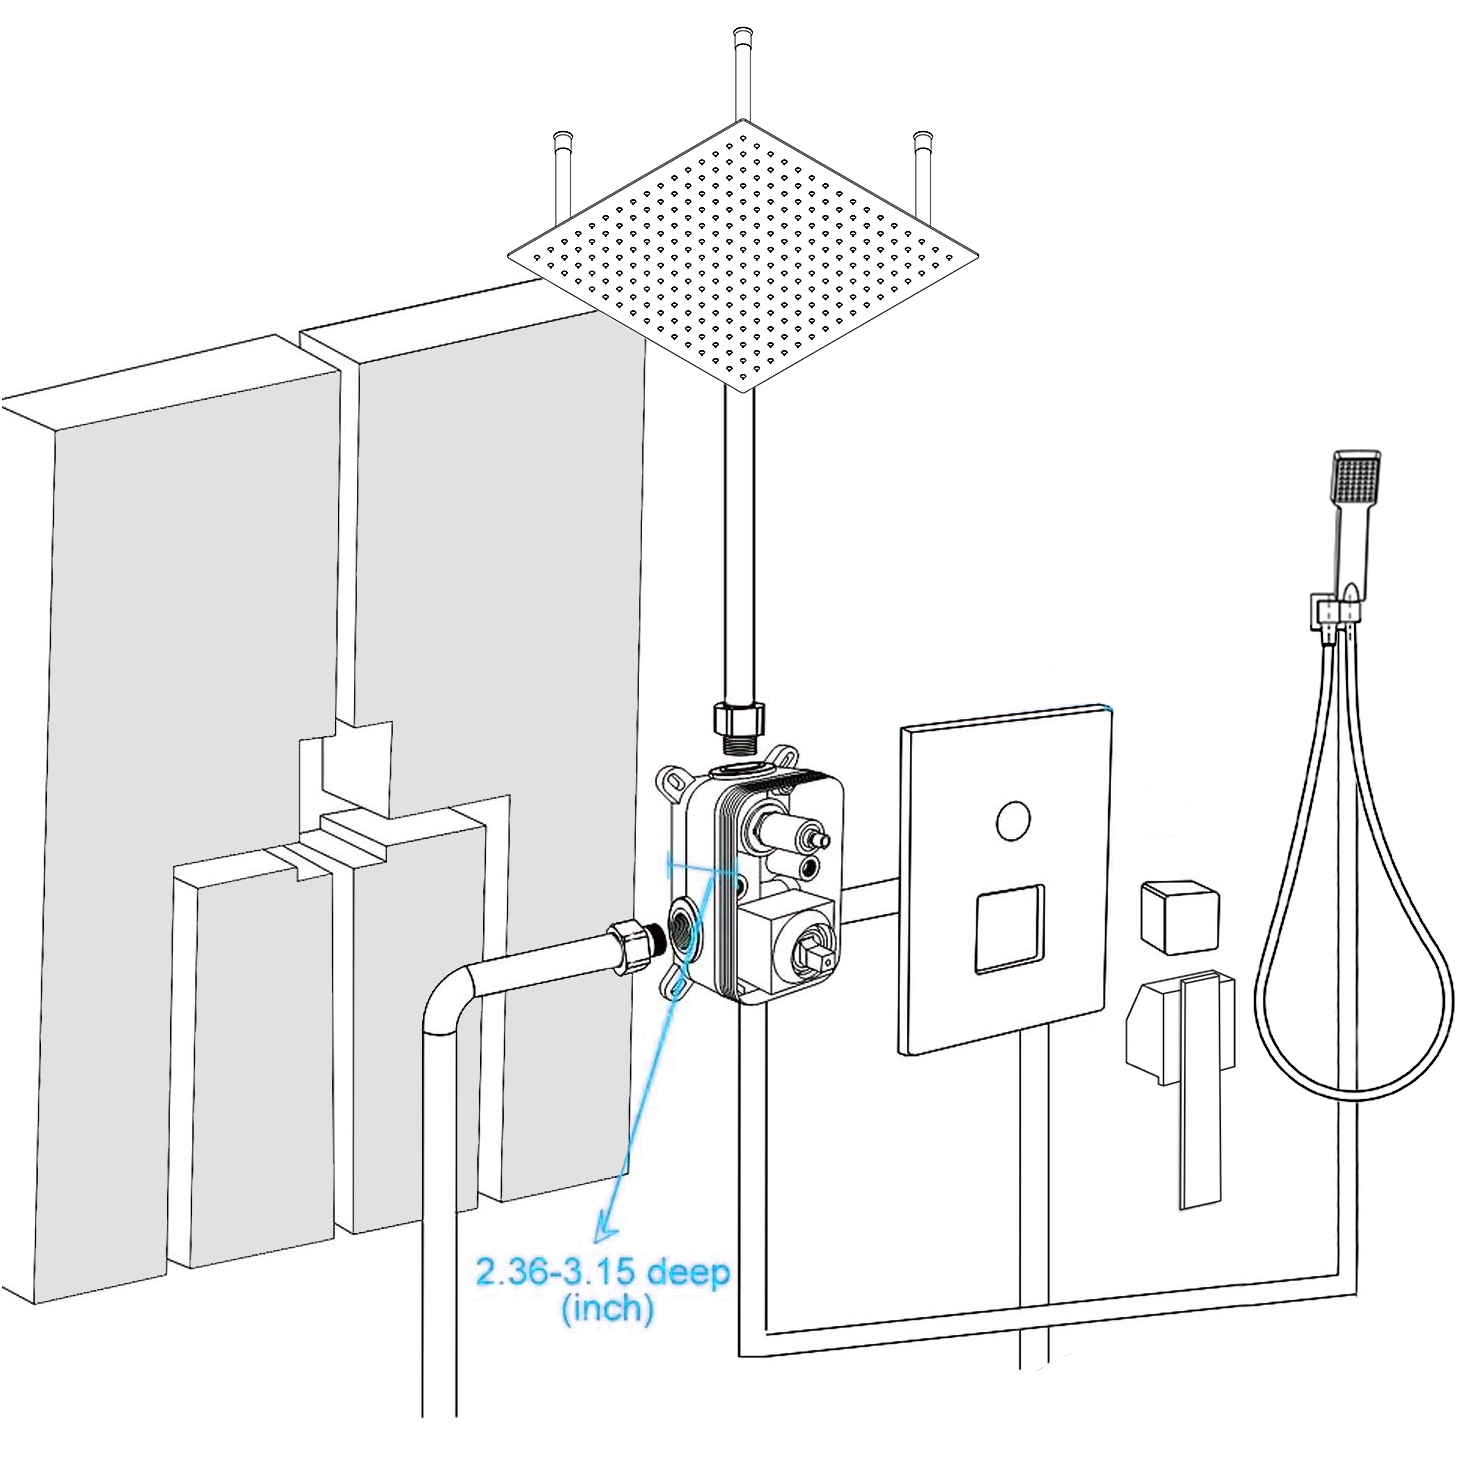
Hand Held Shower Installation Instructions
Step 1:
Step 2:
hand shower
HAND HELD SHOWER
Step 3:
Hand Shower Outlet Installation Complete the outlet pipework ensuring it ends in an appropriate 15mm x 1/2" BSP female thread elbow.
Note: This fitting is not supplied as variations in installations require the selection of a suitable solder or compression fitting. • Install the 'Wall Outlet', thread long male 1/2" BSP into the appropriate female fitting using PTFE tape to give a watertight joint.
Note: The thread can be cut to size if required. Make sure that all debris is removed from the connector and the section that has been cut is dressed correctly, before installation.
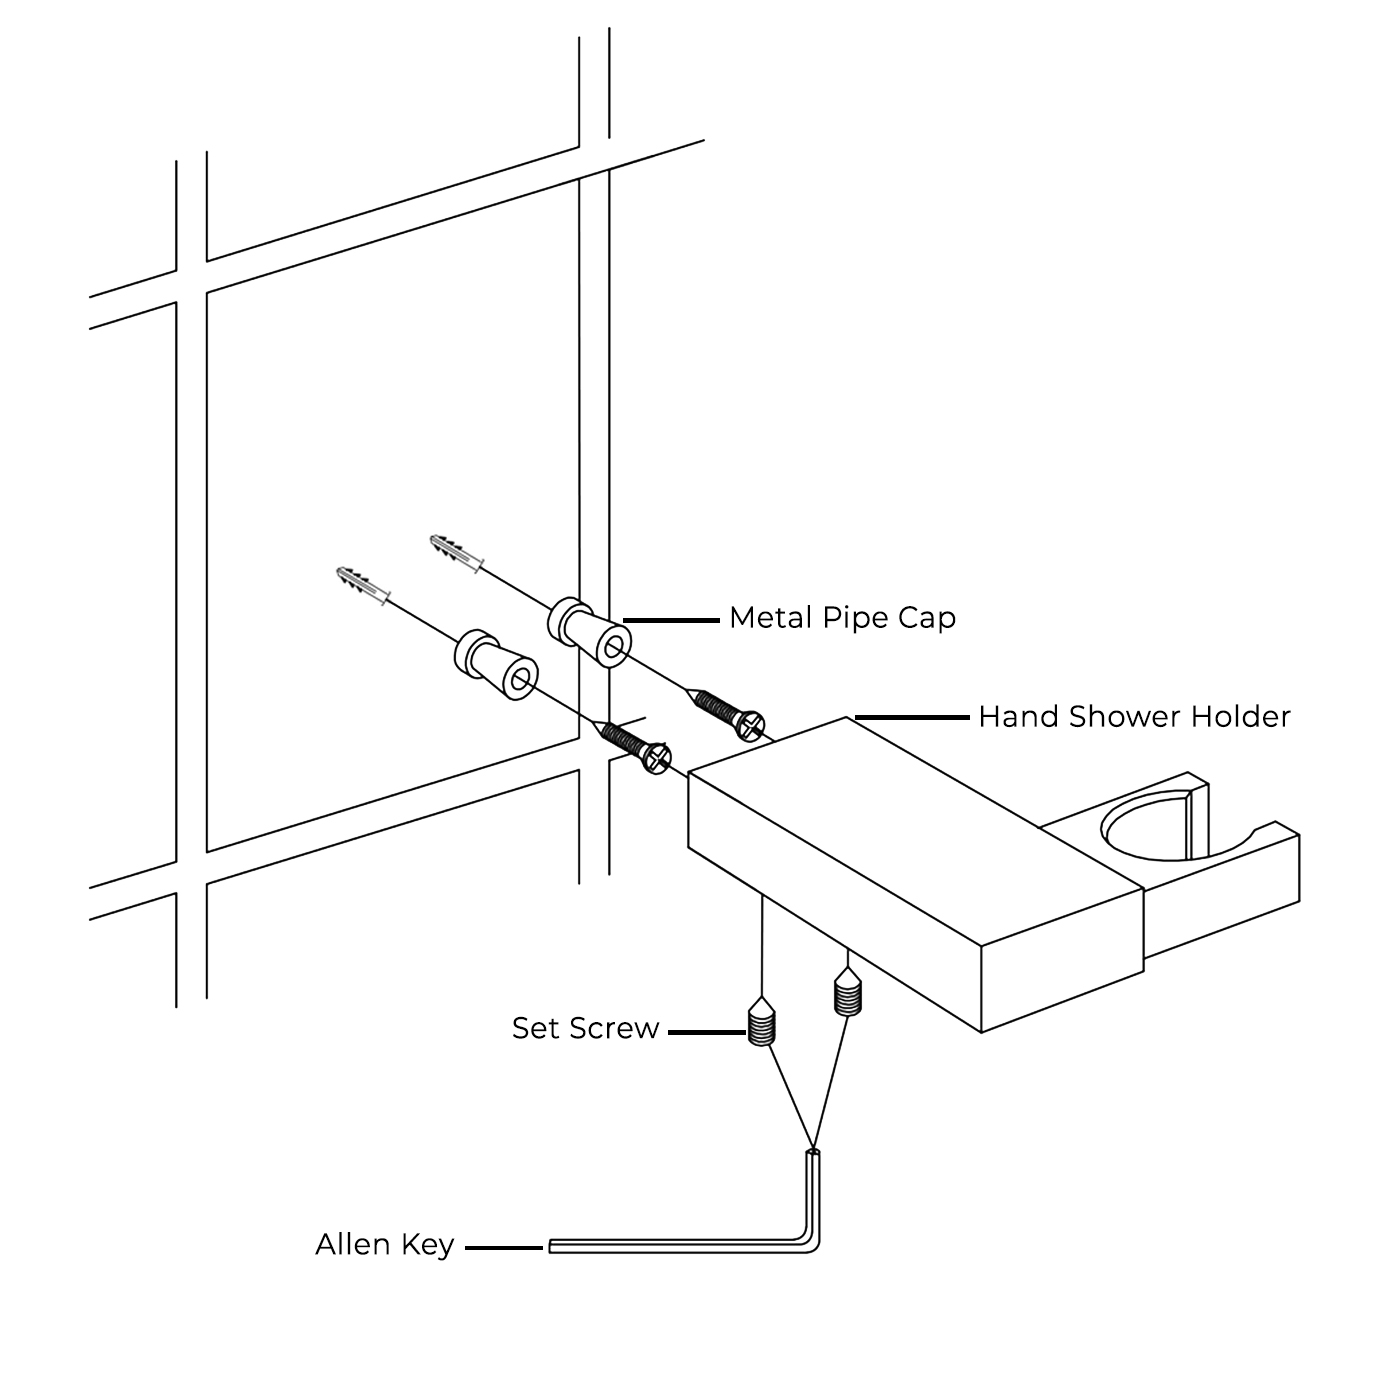
Shower Wall Holder Installation Decide the position for the shower head holder on the wall within the bath showering area and proceed as follows: • Hold the hand shower head holder fixing plate in a suitable position on the wall, mark out the position of the holder. Mark the two locating holes, these are 17mm center. • Drill and plug the wall. Use an appropriate masonary drill, but if the wall is plasterboard or a soft building block, use special wall plugs and an appropriate drill bit. • Slide the inserts onto the screws in the orientation. Secure the inserts by tightening the screws. • Slide the hand shower head holder body onto the inserts and secure by tightening the grub screw facing down.