Fontana Macau Thermostatic Rainfall Shower Set System
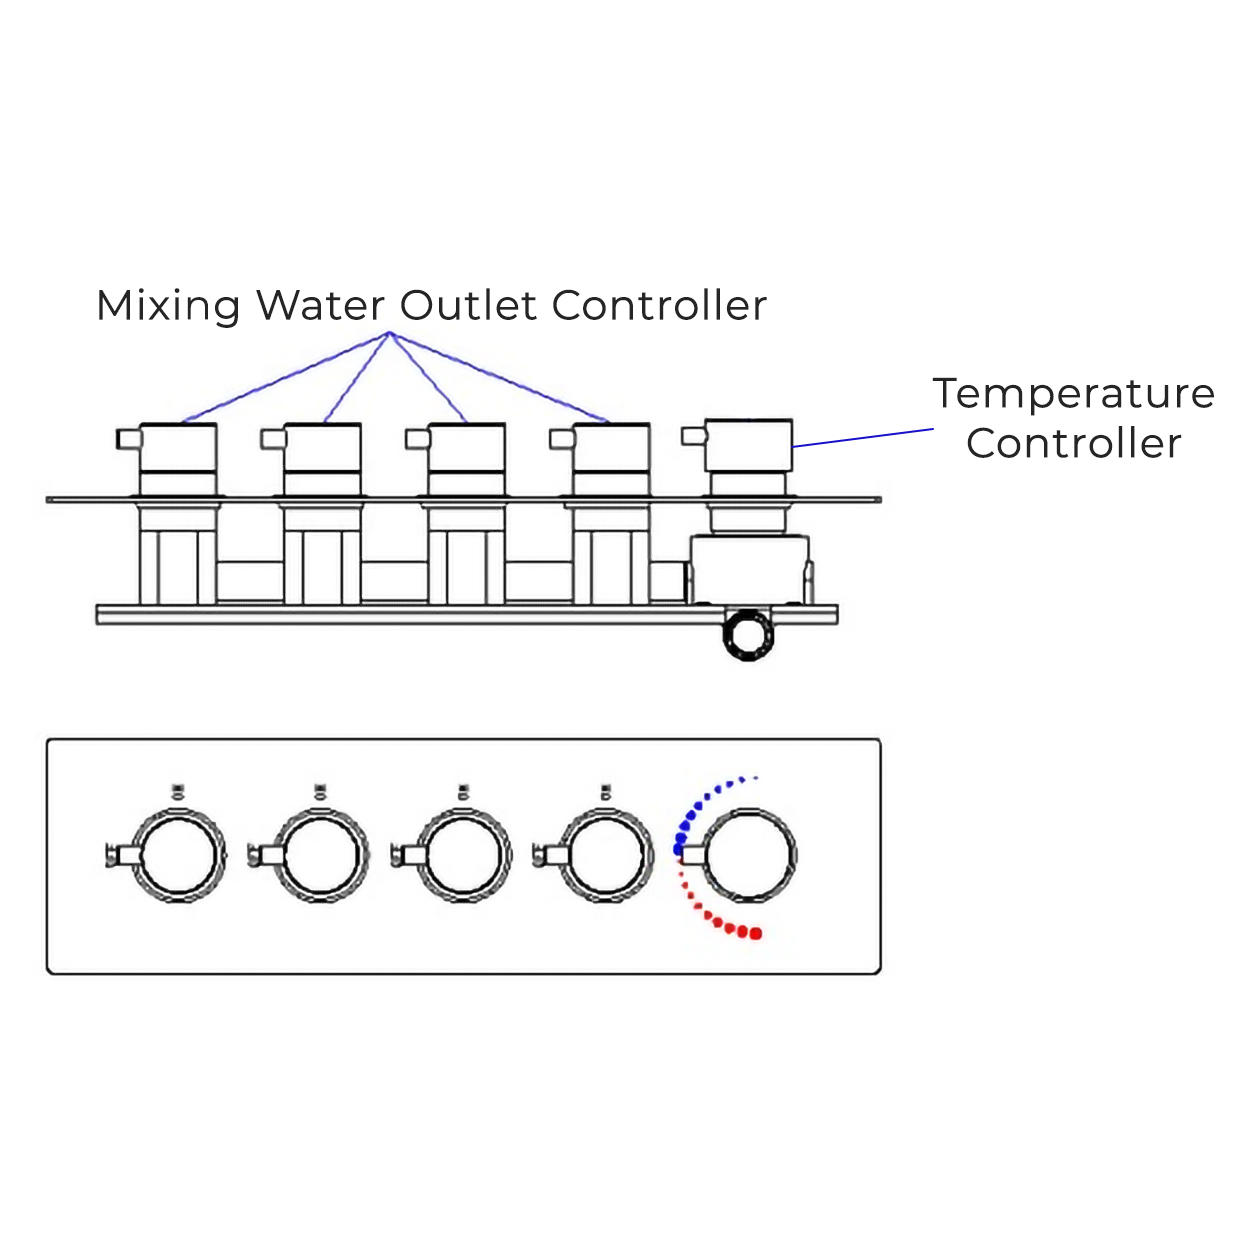
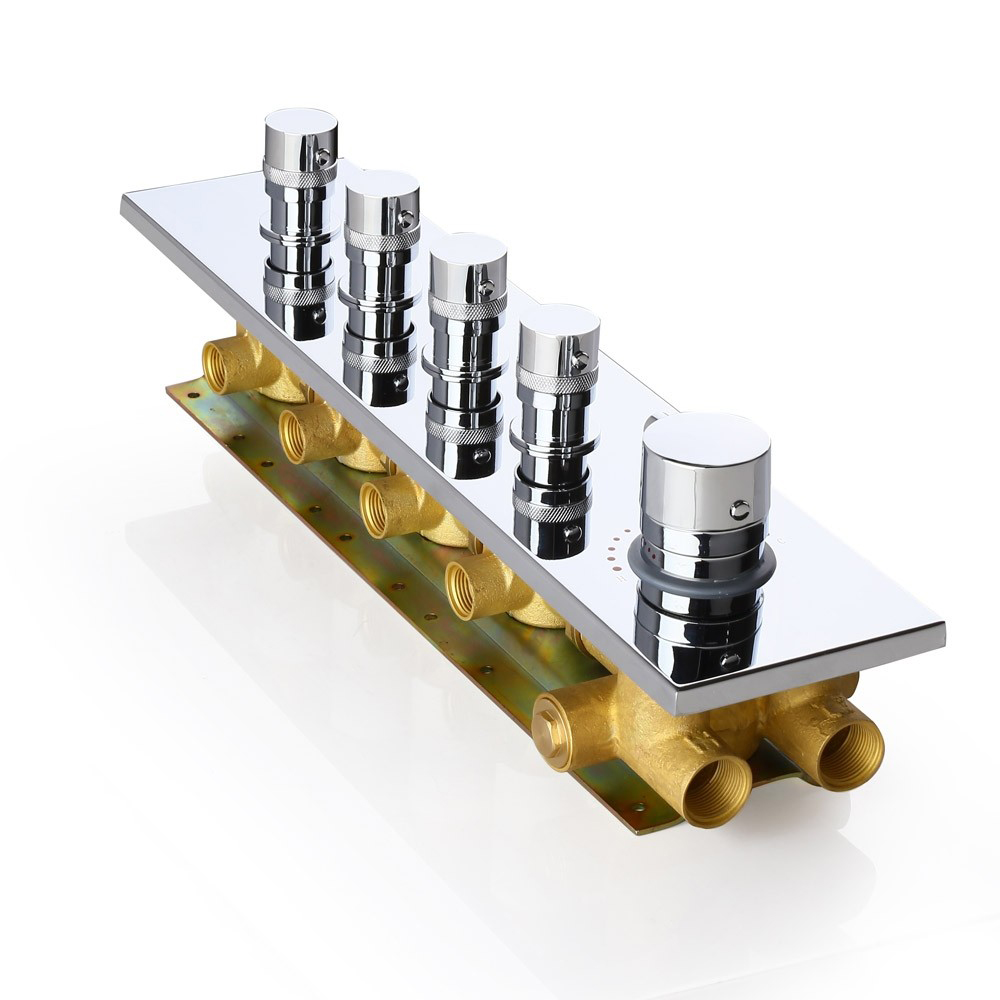
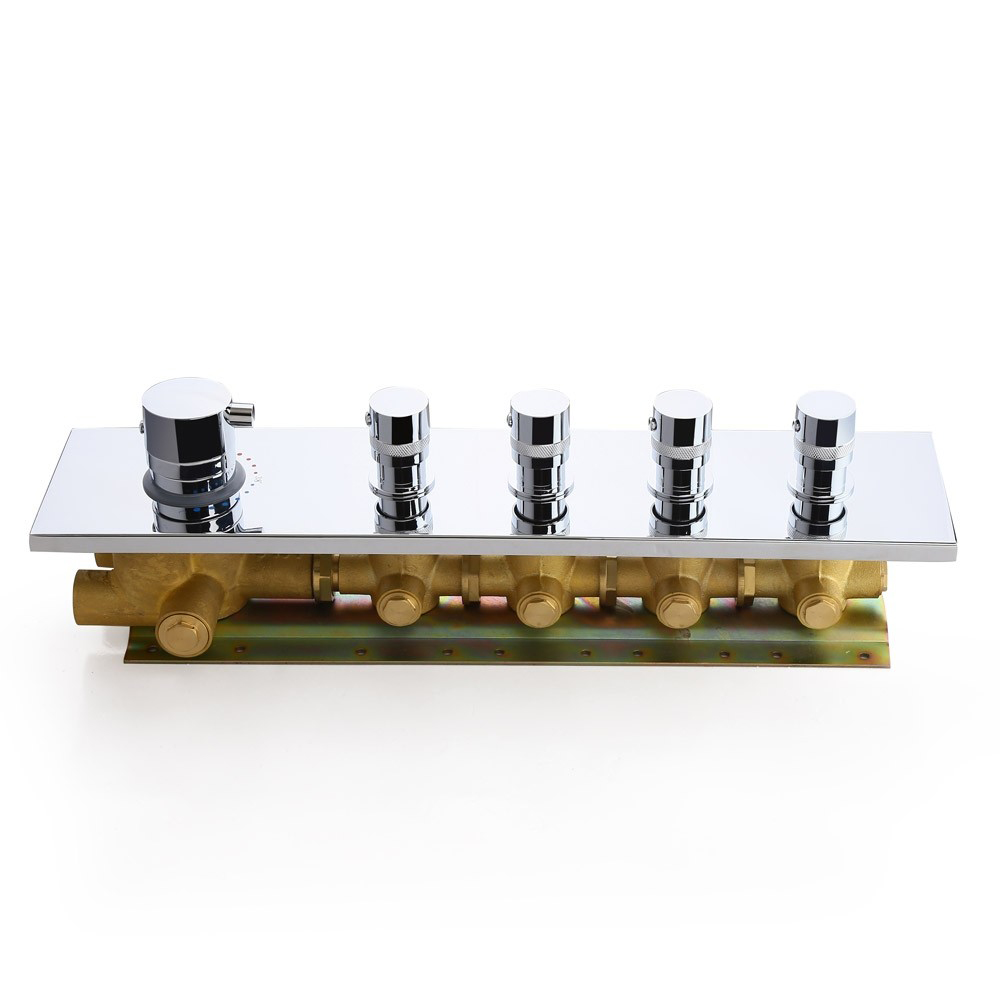
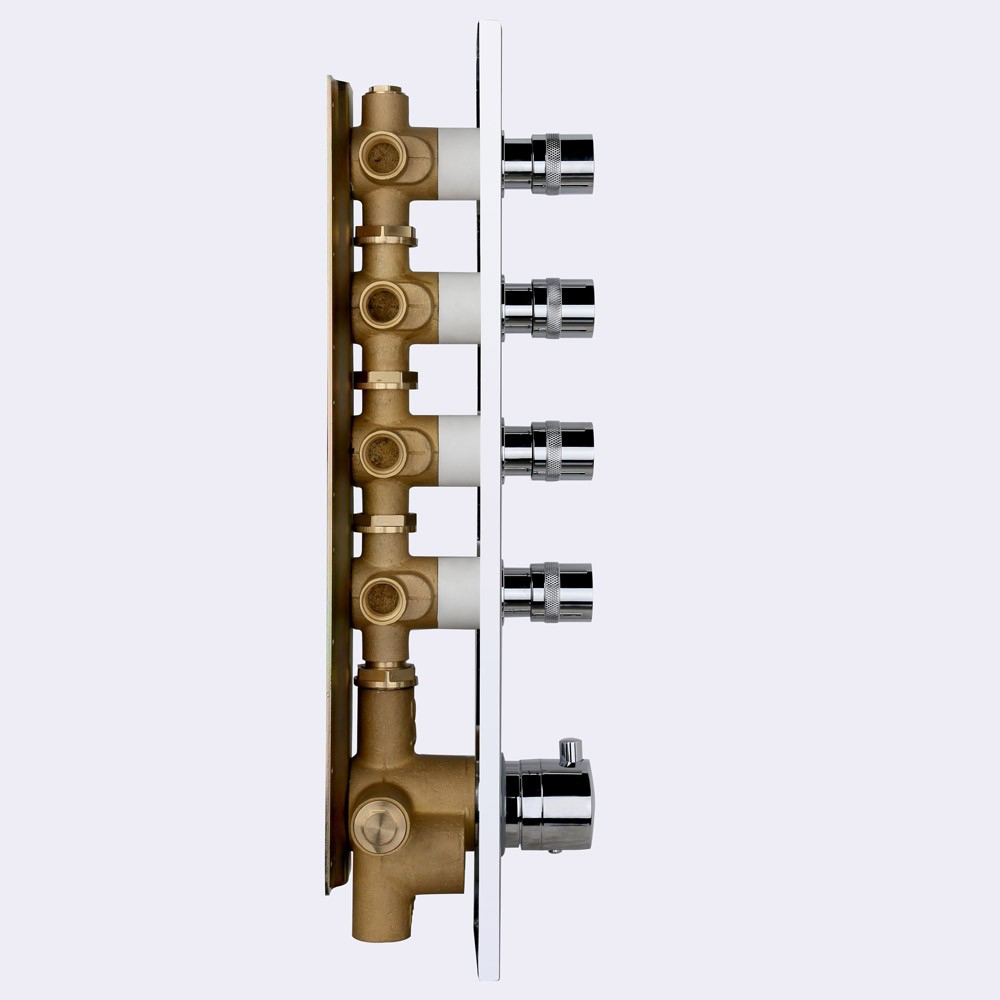
Are you searching for a shower system with sophistication and functionality? Your search is over. This recessed shower system provides a beautiful rainfall shower through a generously sized showerhead. Silica gel nozzles ensure smooth water flow and a handheld shower for a versatile shower experience. Included are six body jets for those who enjoy a massage during their bathing experience. Our five handle thermostatic mixer ensures you are in complete control of your water pressure and temperature. With a sleek and modern design, this shower system will fit any modern and contemporary bathroom.
Fontana Macau Thermostatic Rainfall Shower Set System Features:
Brand Name: Fontana Showers
Model Number: FS6110SS
Style: Contemporary
Hot & Cold: Yes
Surface Treatment: Chrome
Type: Fixed Support Type
Valve Core Material: Ceramic
Bath & Shower type: Shower Set, Hand Shower, Faucet, 6 Body Jet Spray
Unpack and inspect the product for any shipping damages. If you find damages, do not install.
Please note all showers must be installed by a professional and certified plumber otherwise warranty might be voided.
Installation Instructions
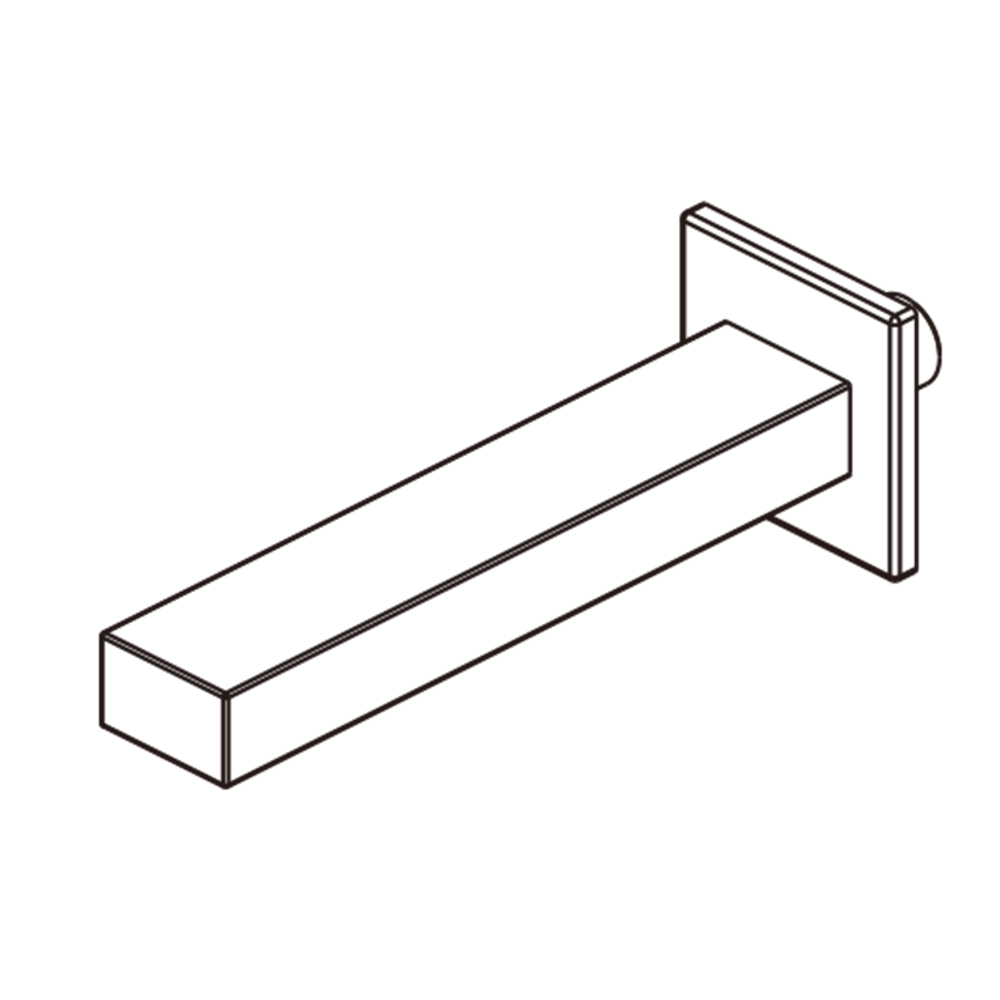
Shower Head Installation Instructions
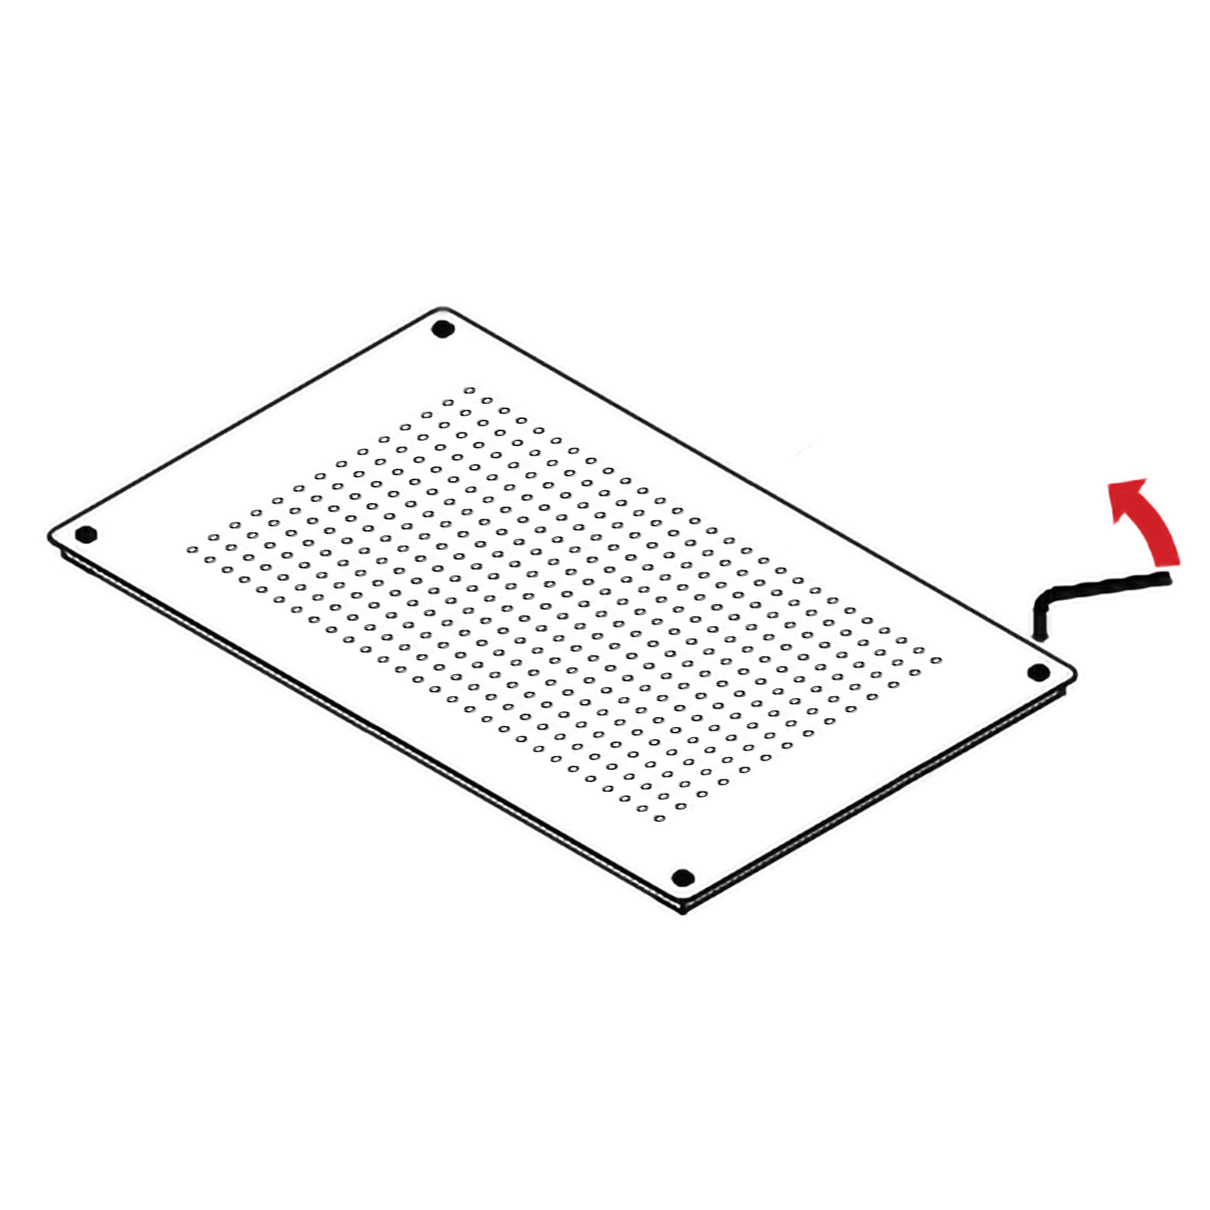
Step 1:
Step 2:
showerhead
Shower Head Installation Instructions
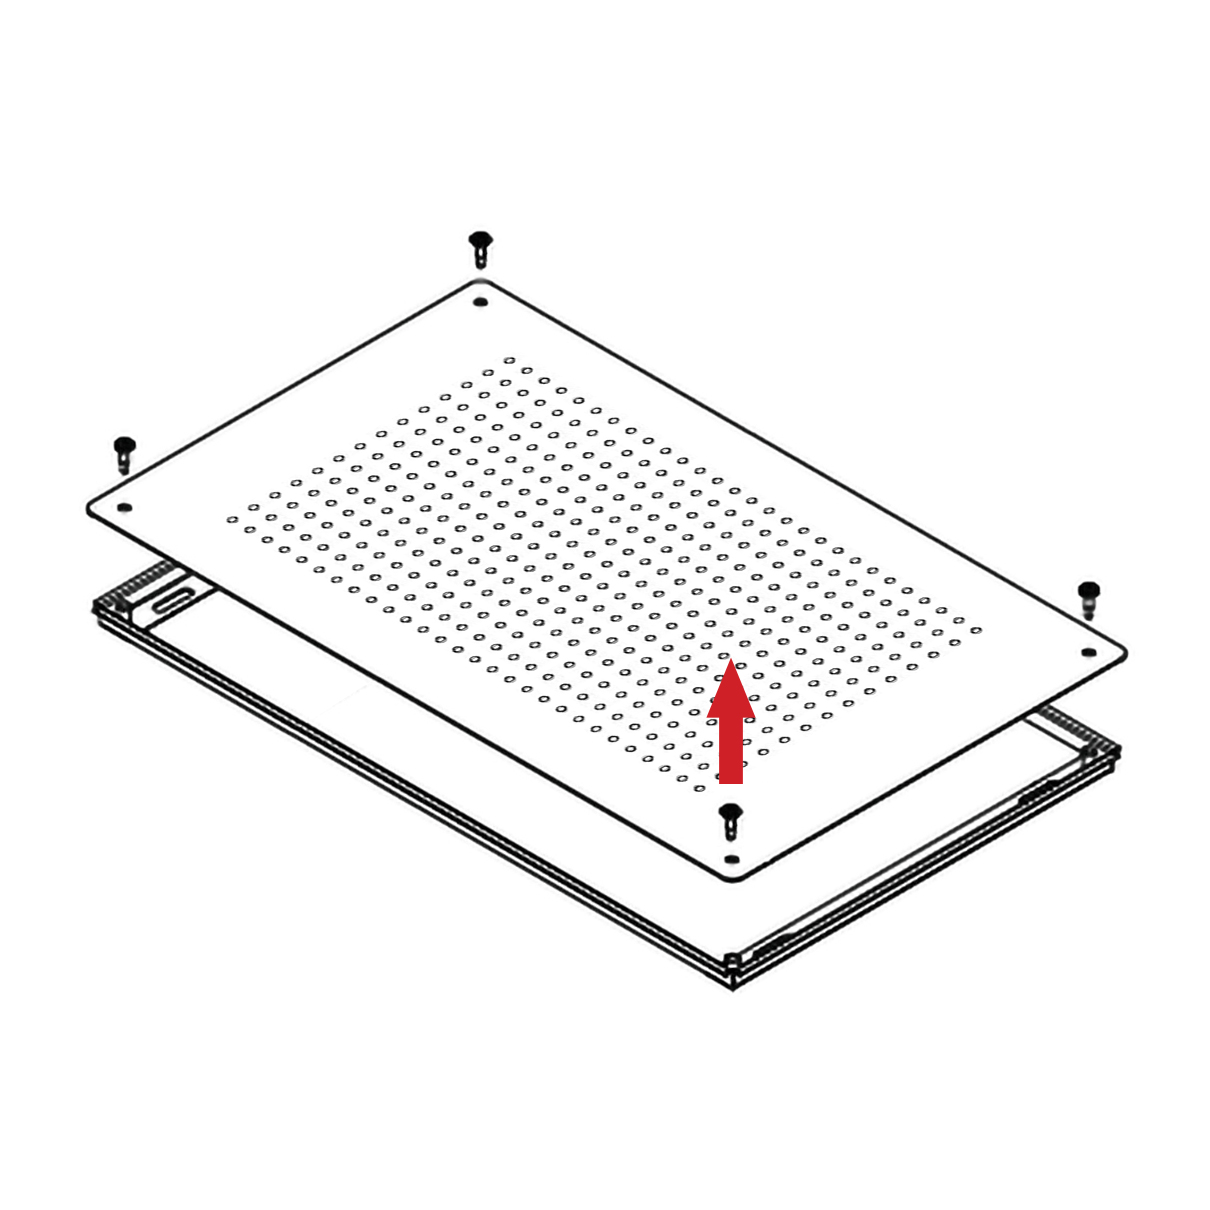
Step 3:
Step 4:
Shower Head Installation Instructions
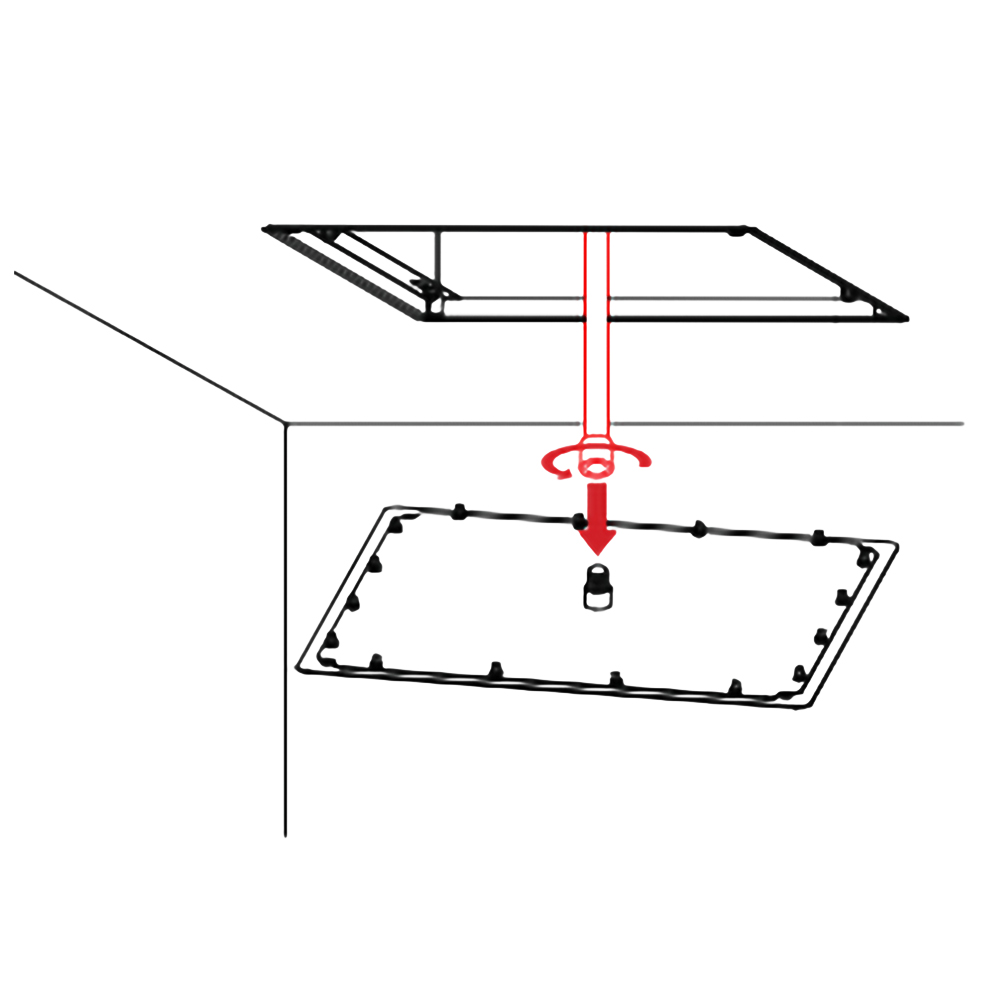
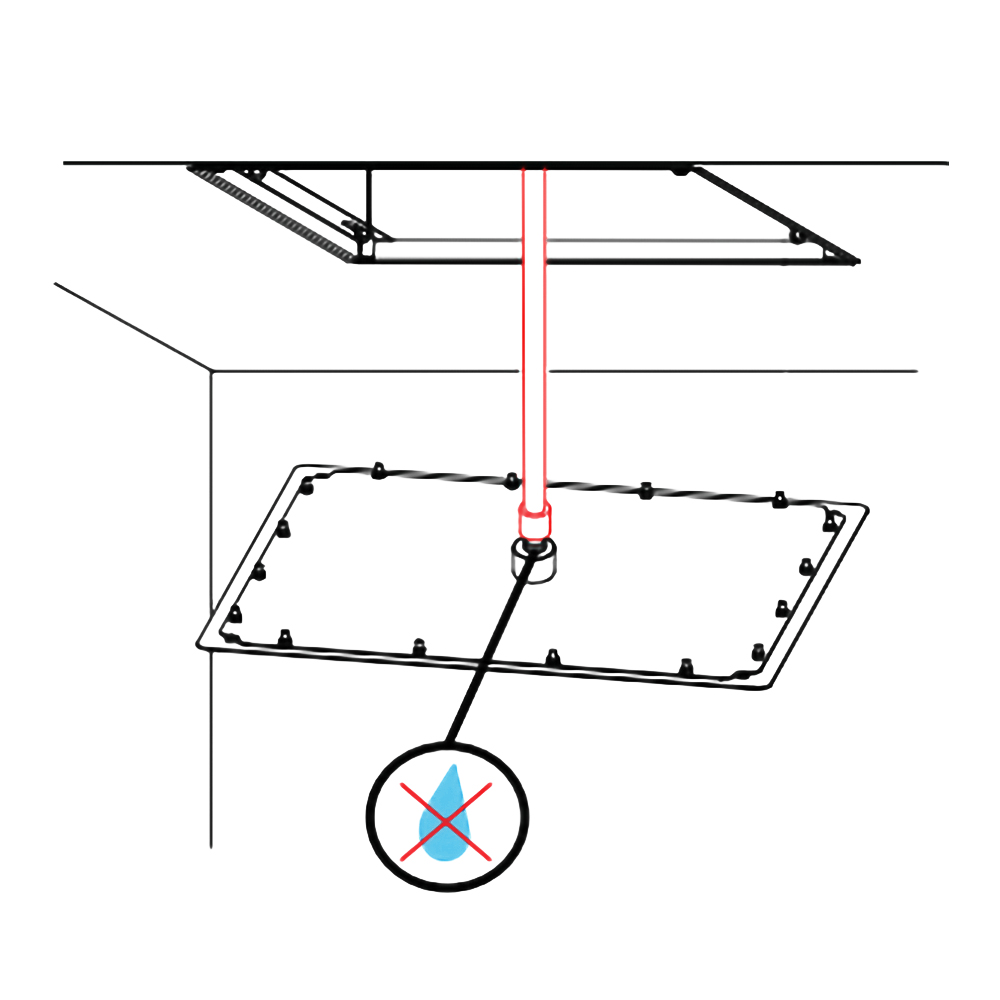
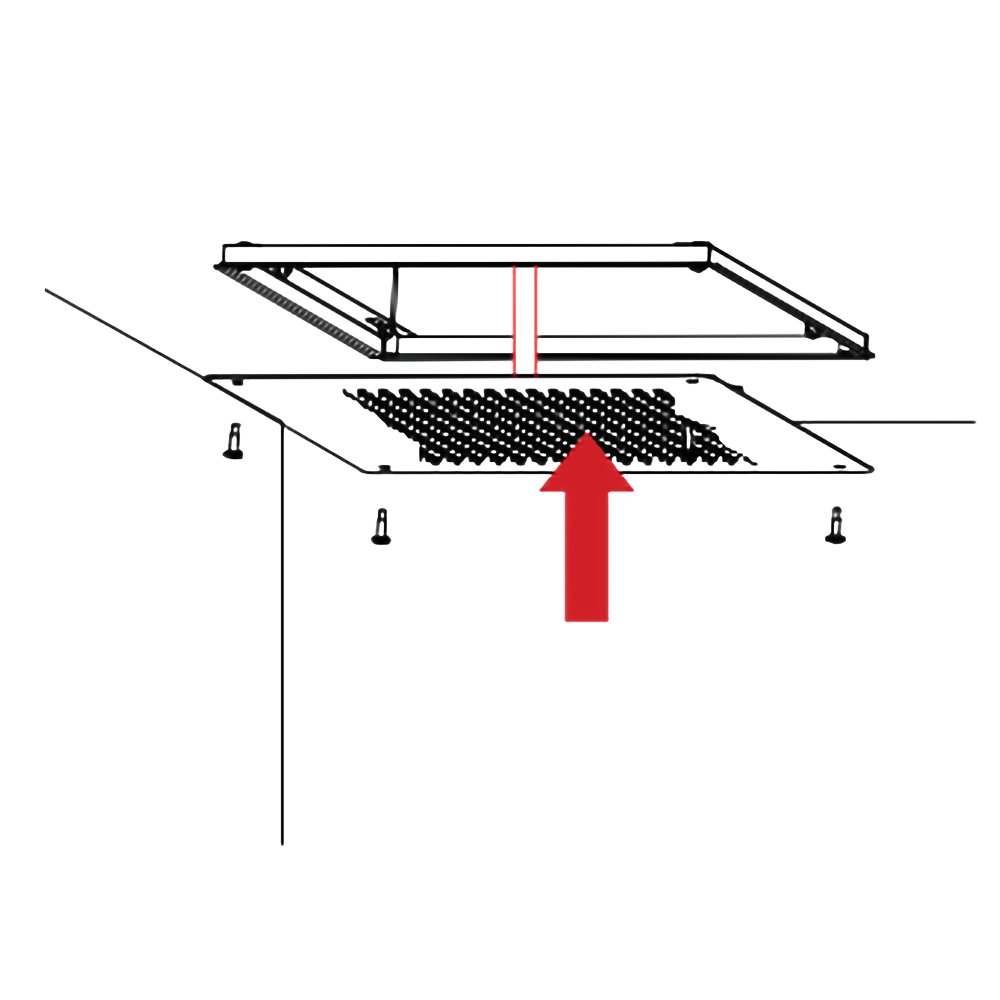
Step 5:
Step 6:
Shower Head Installation Instructions
Hand Held Shower Installation Instructions
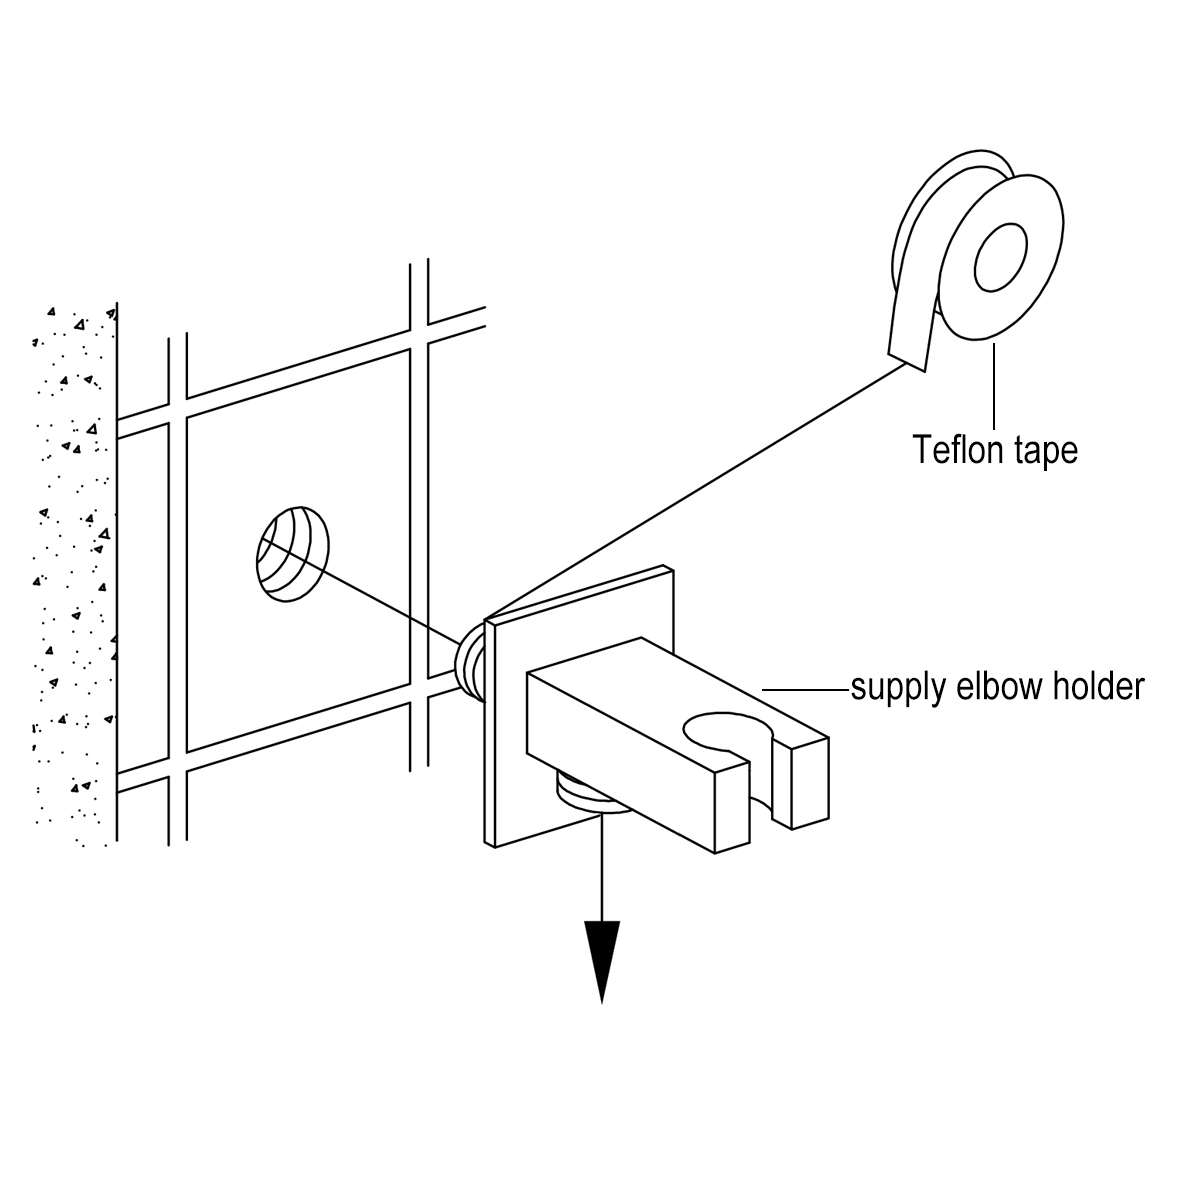
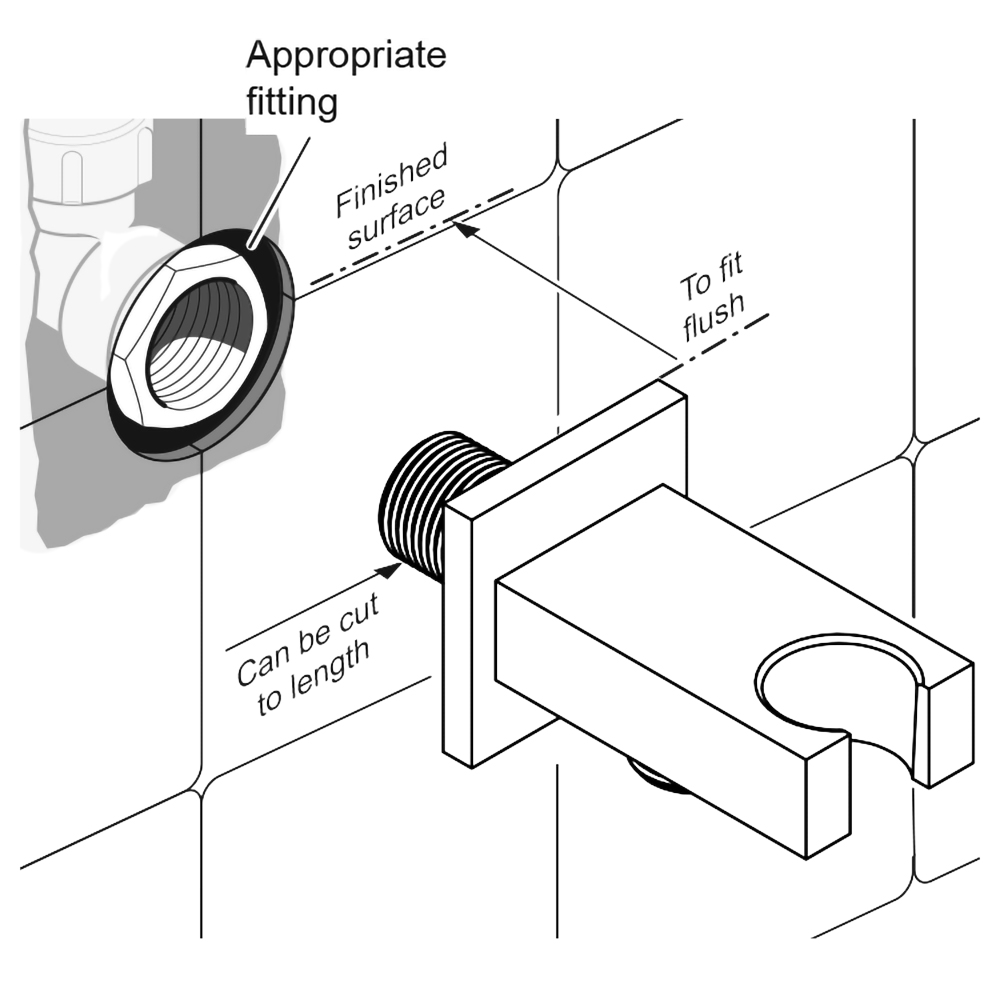
Step 1:
Step 2:
Hand
Held
Shower
Hand Held Shower
Handheld Shower
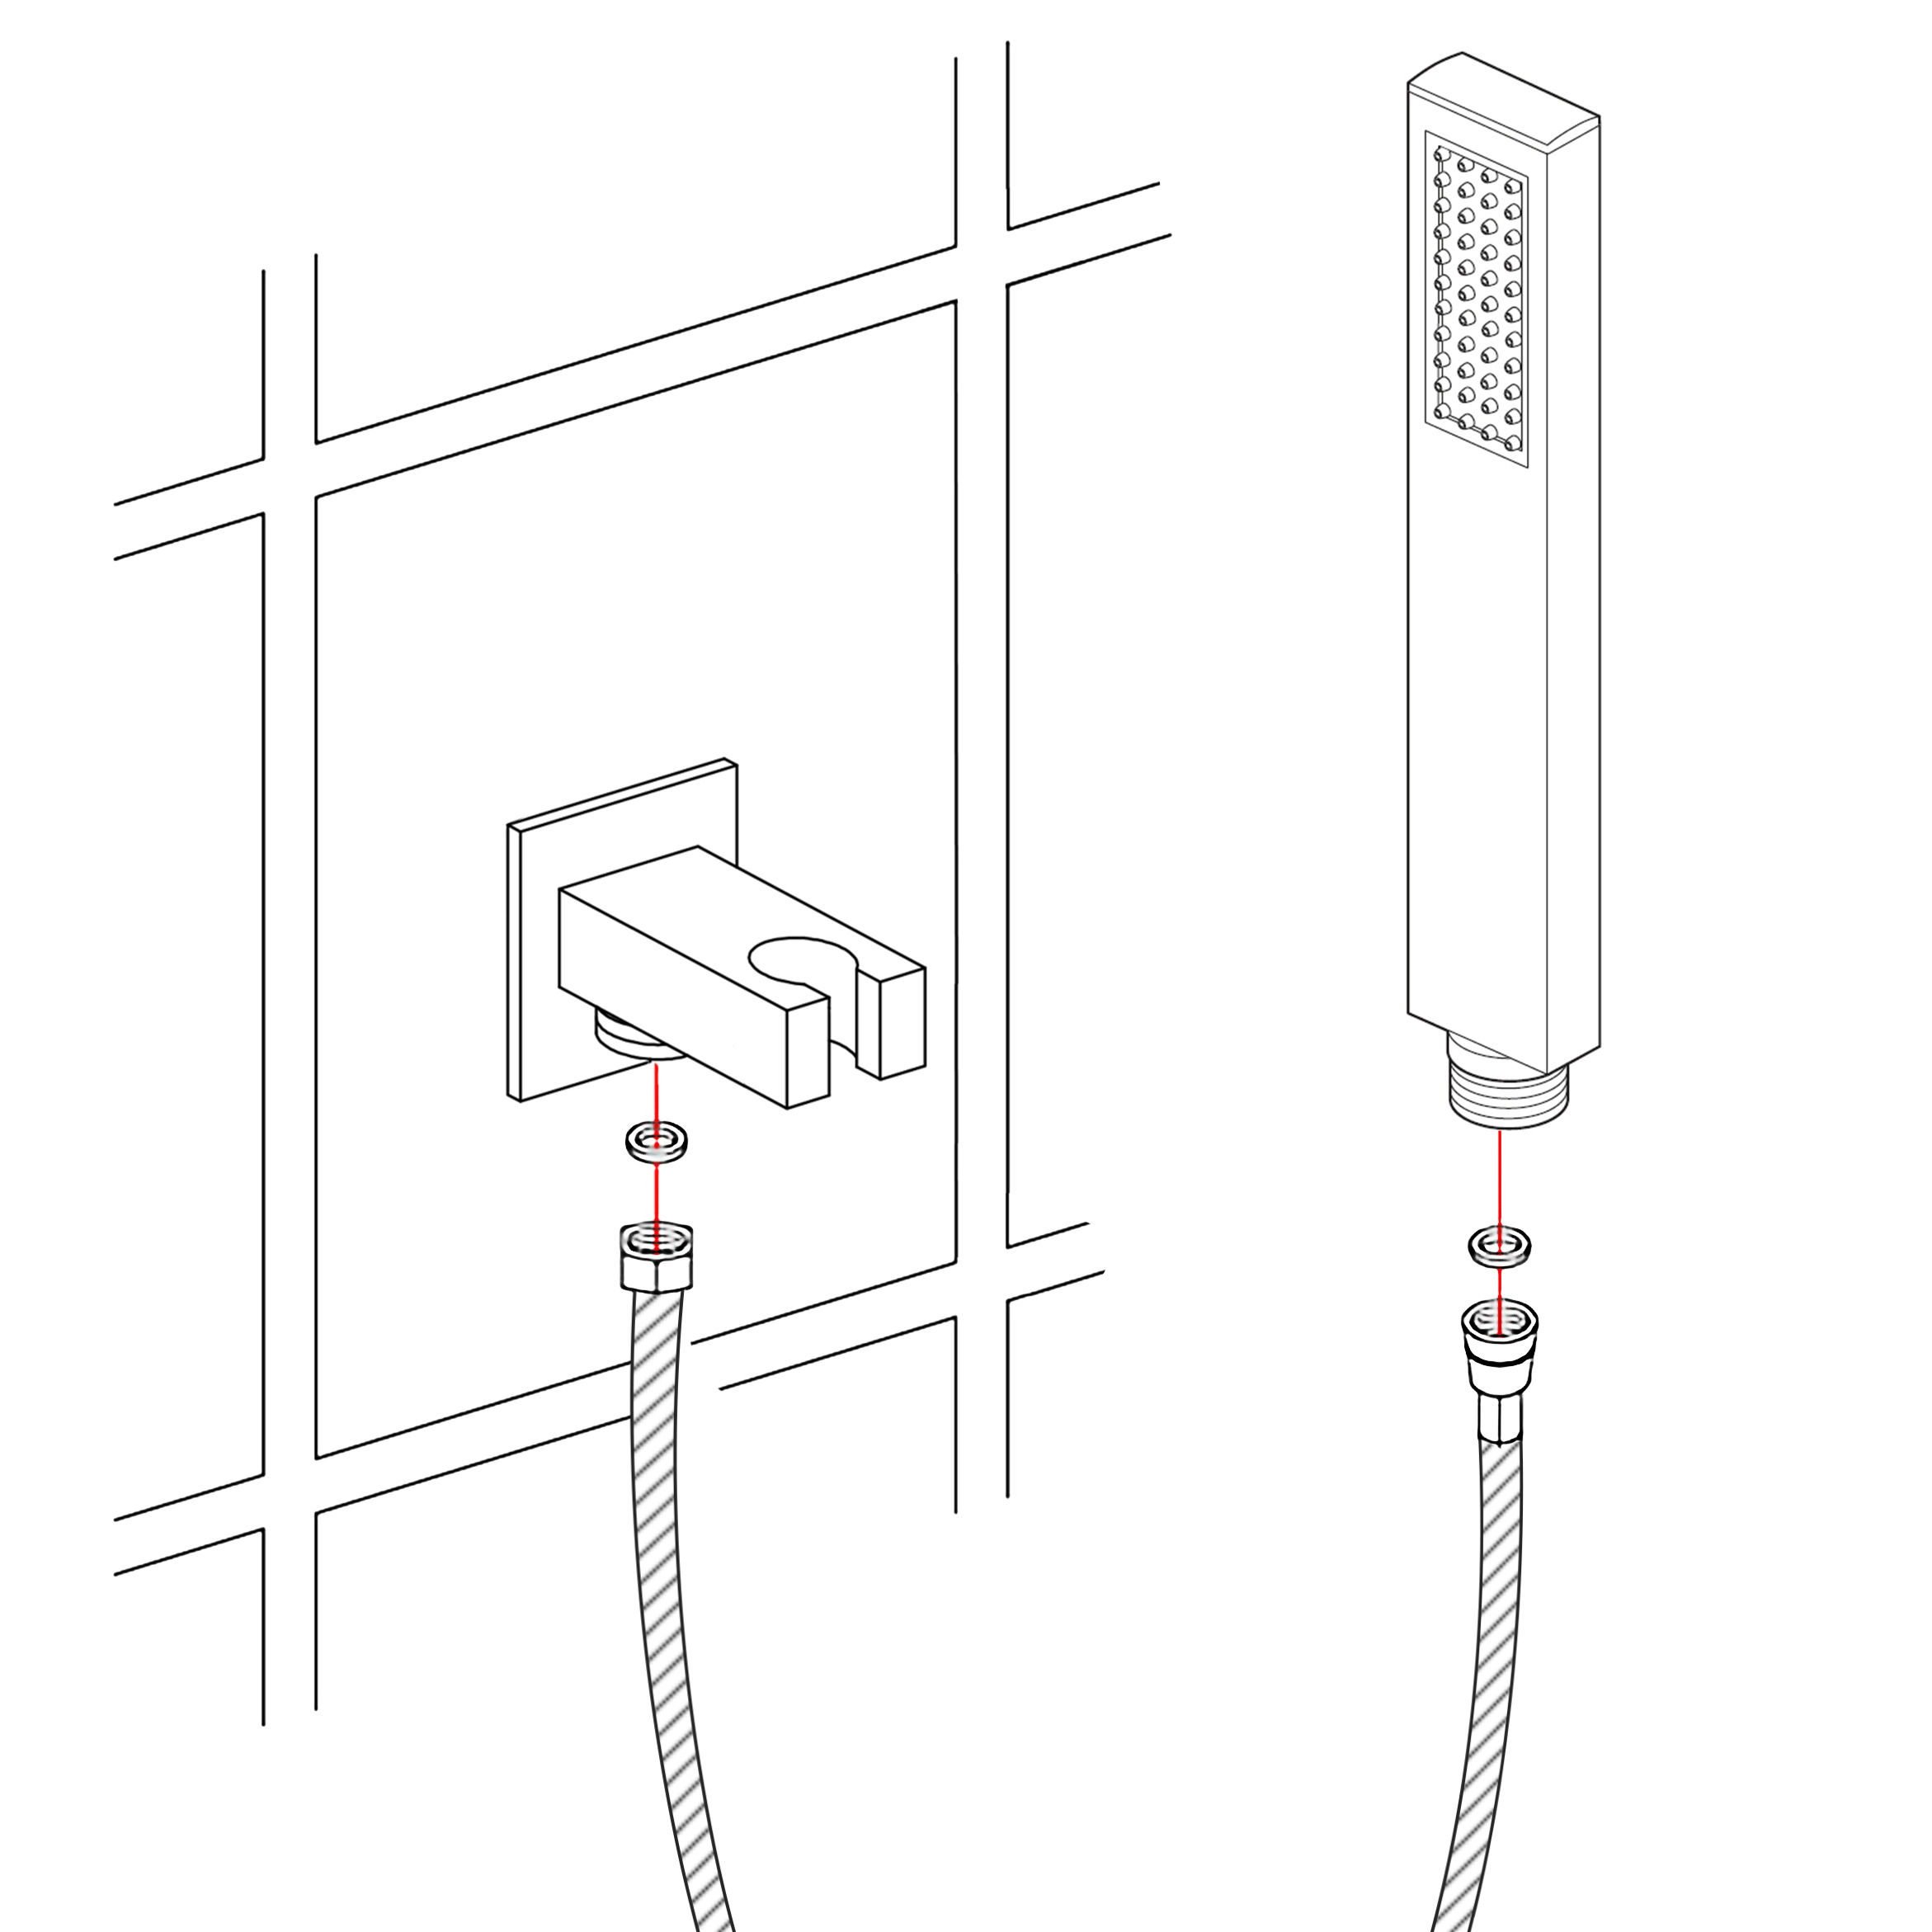
Step 3:
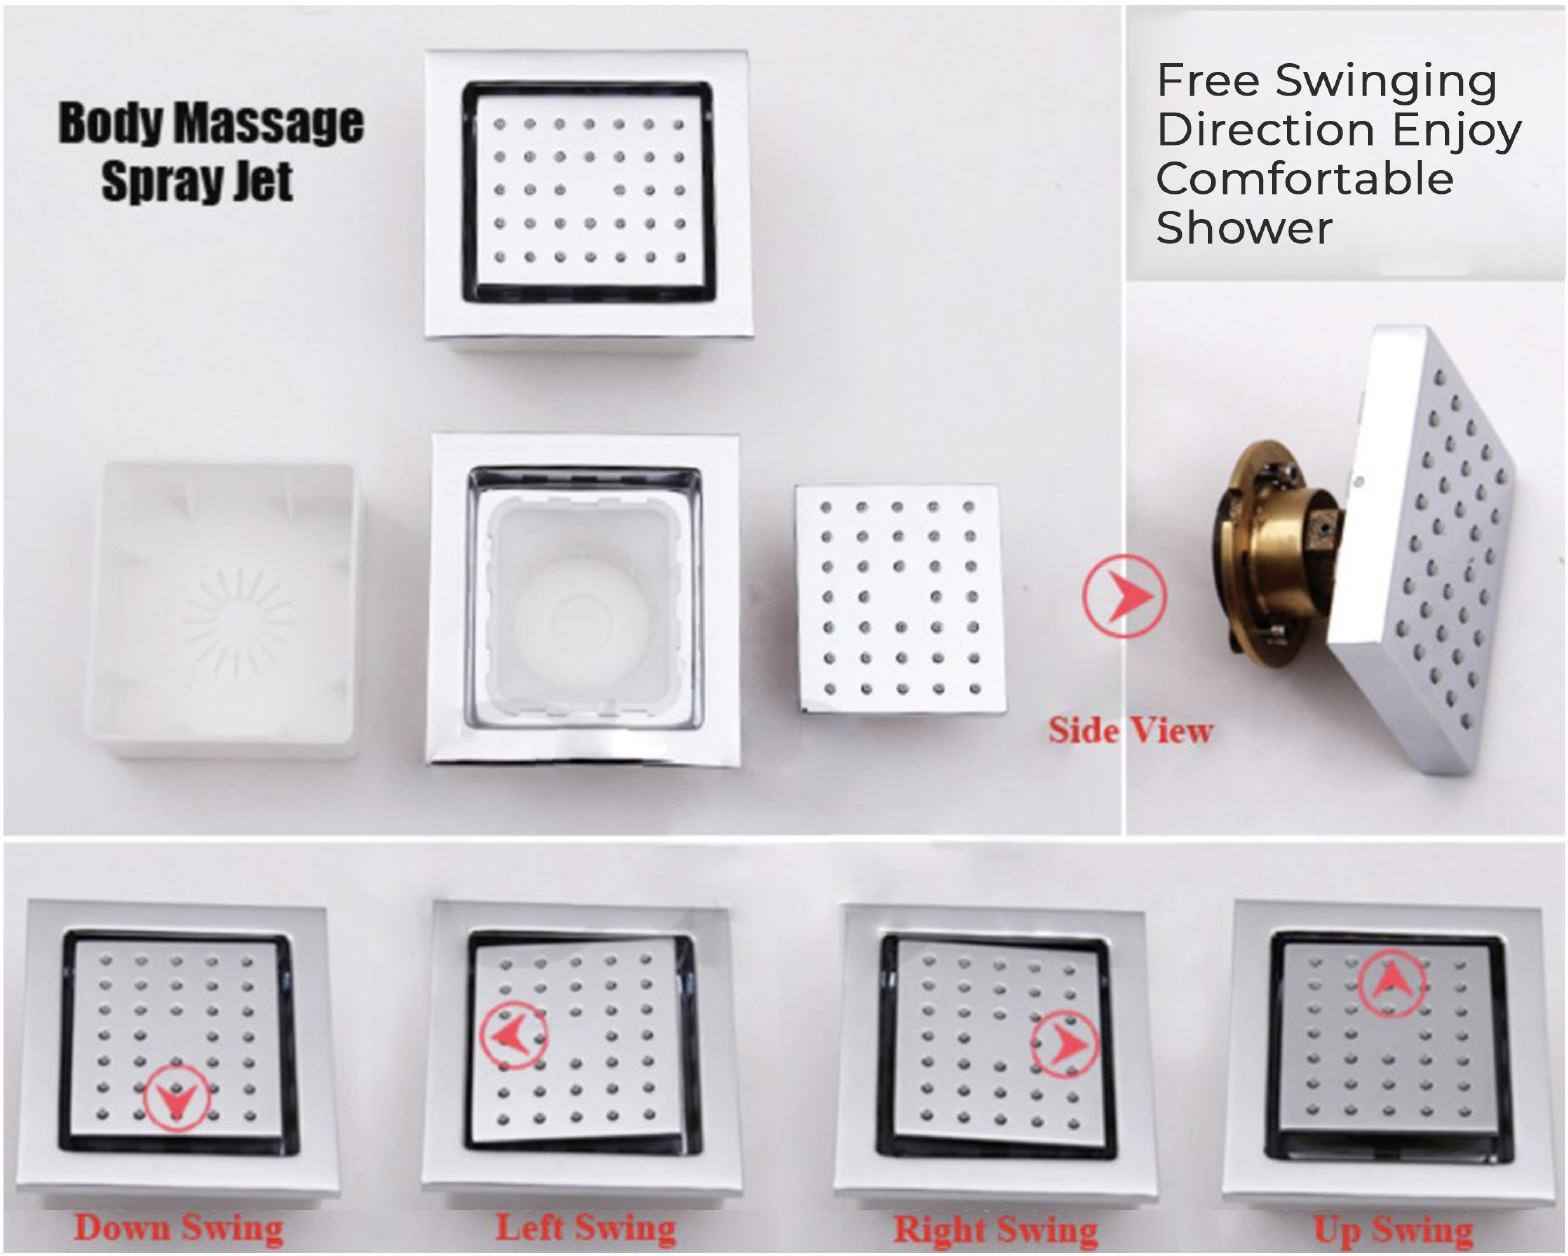
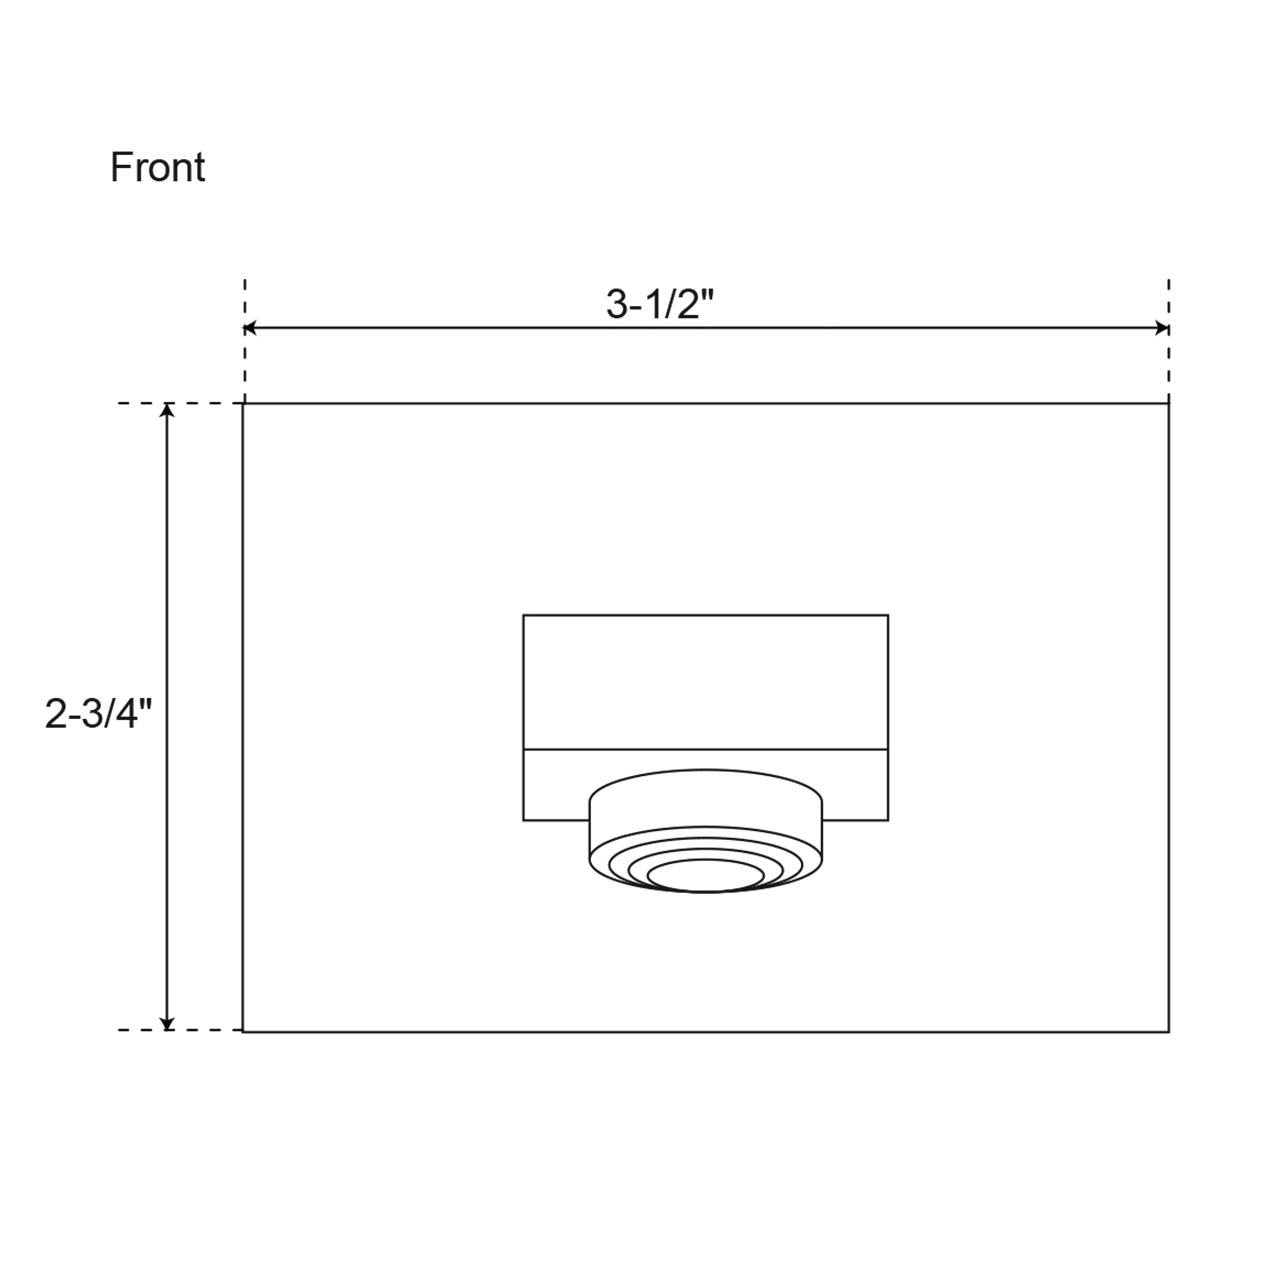
Shower Body Jets Installation Instructions
Step 1:
Step 2:
Body sprays
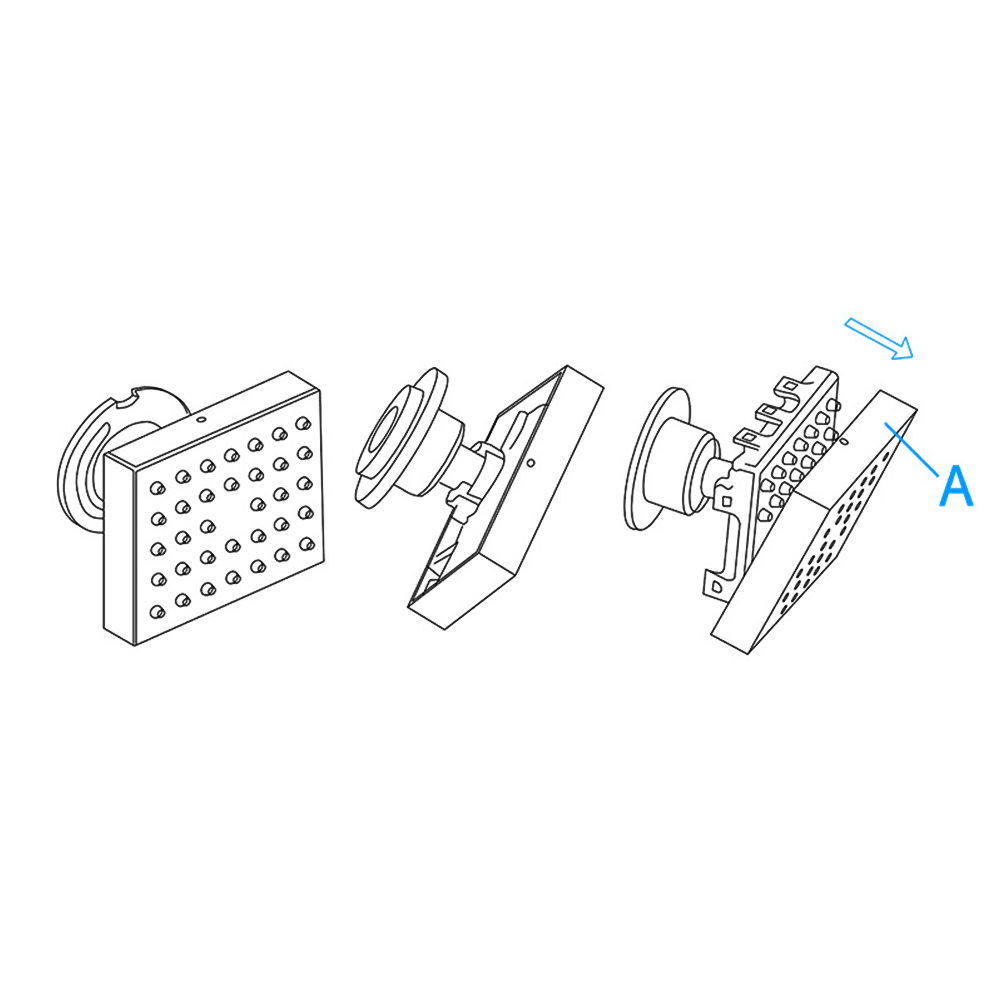
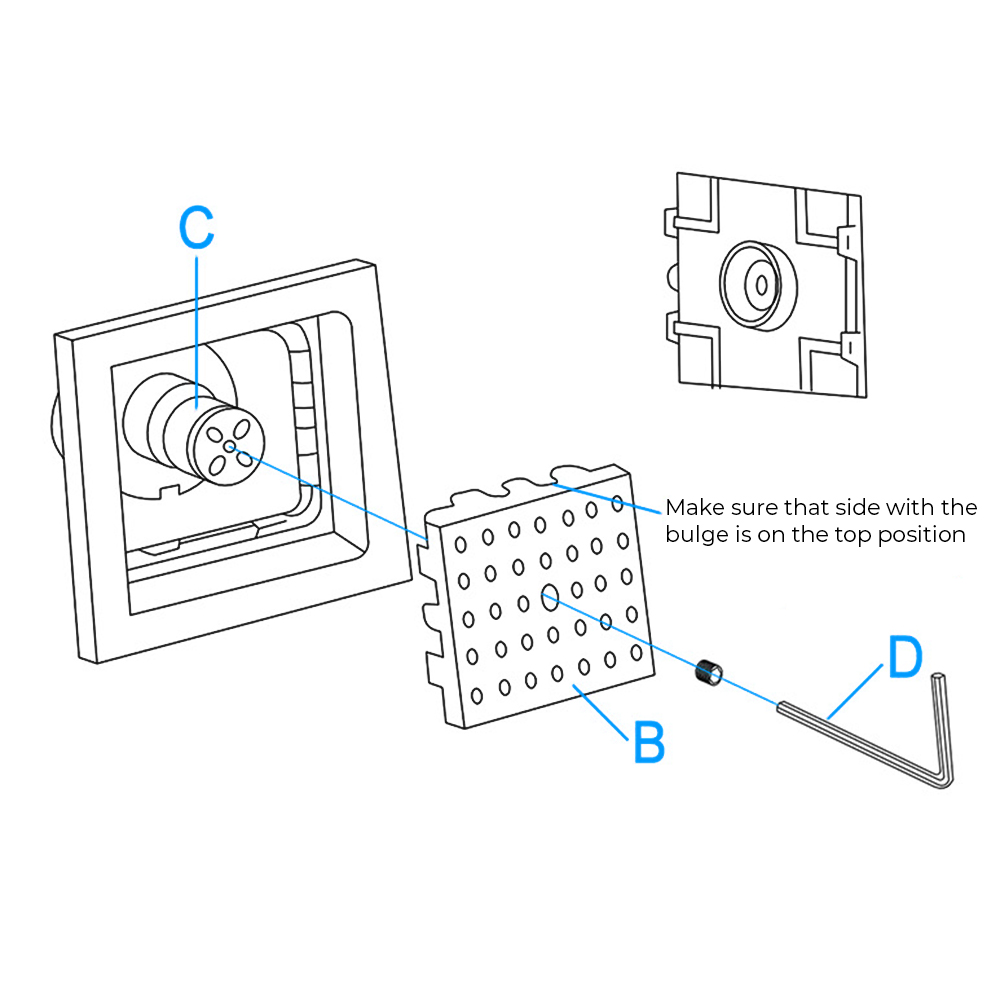
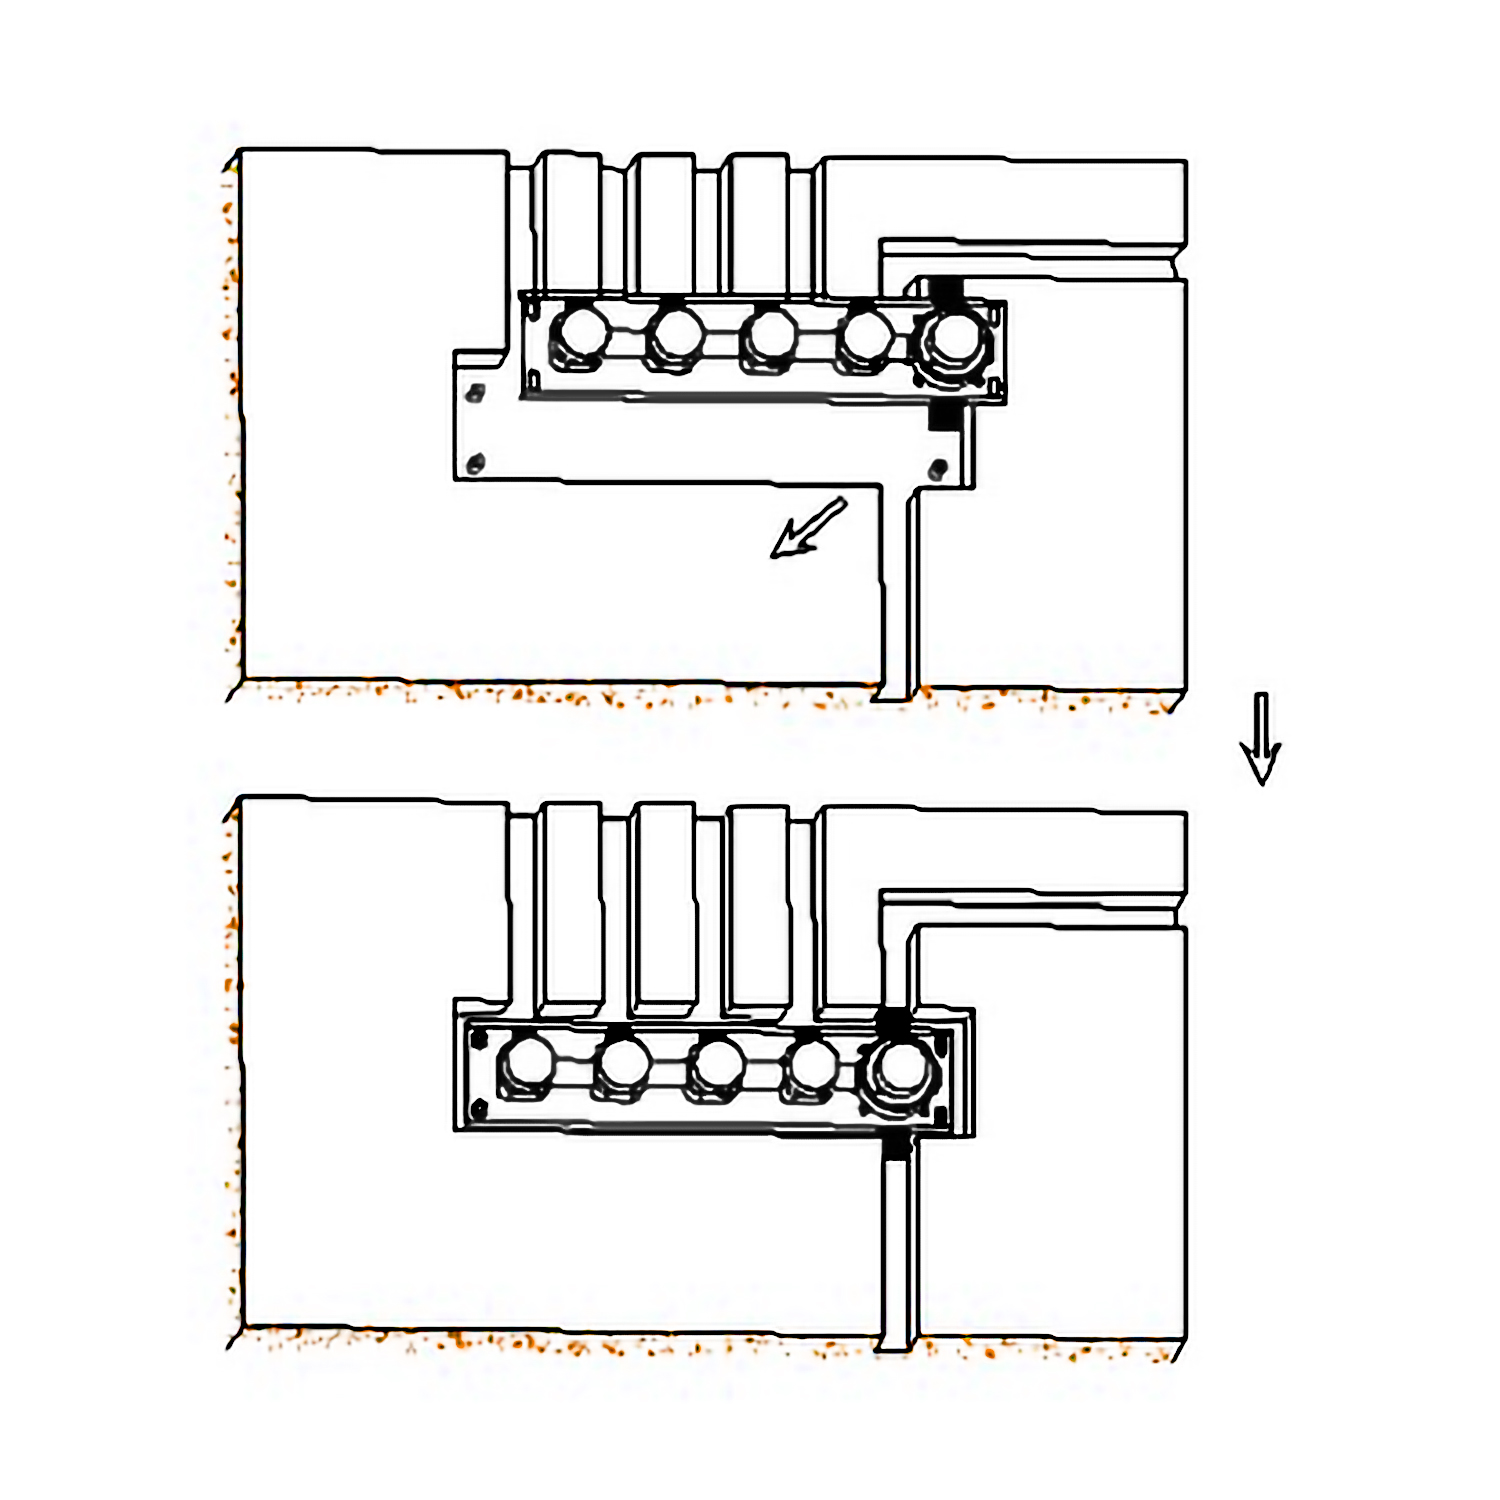
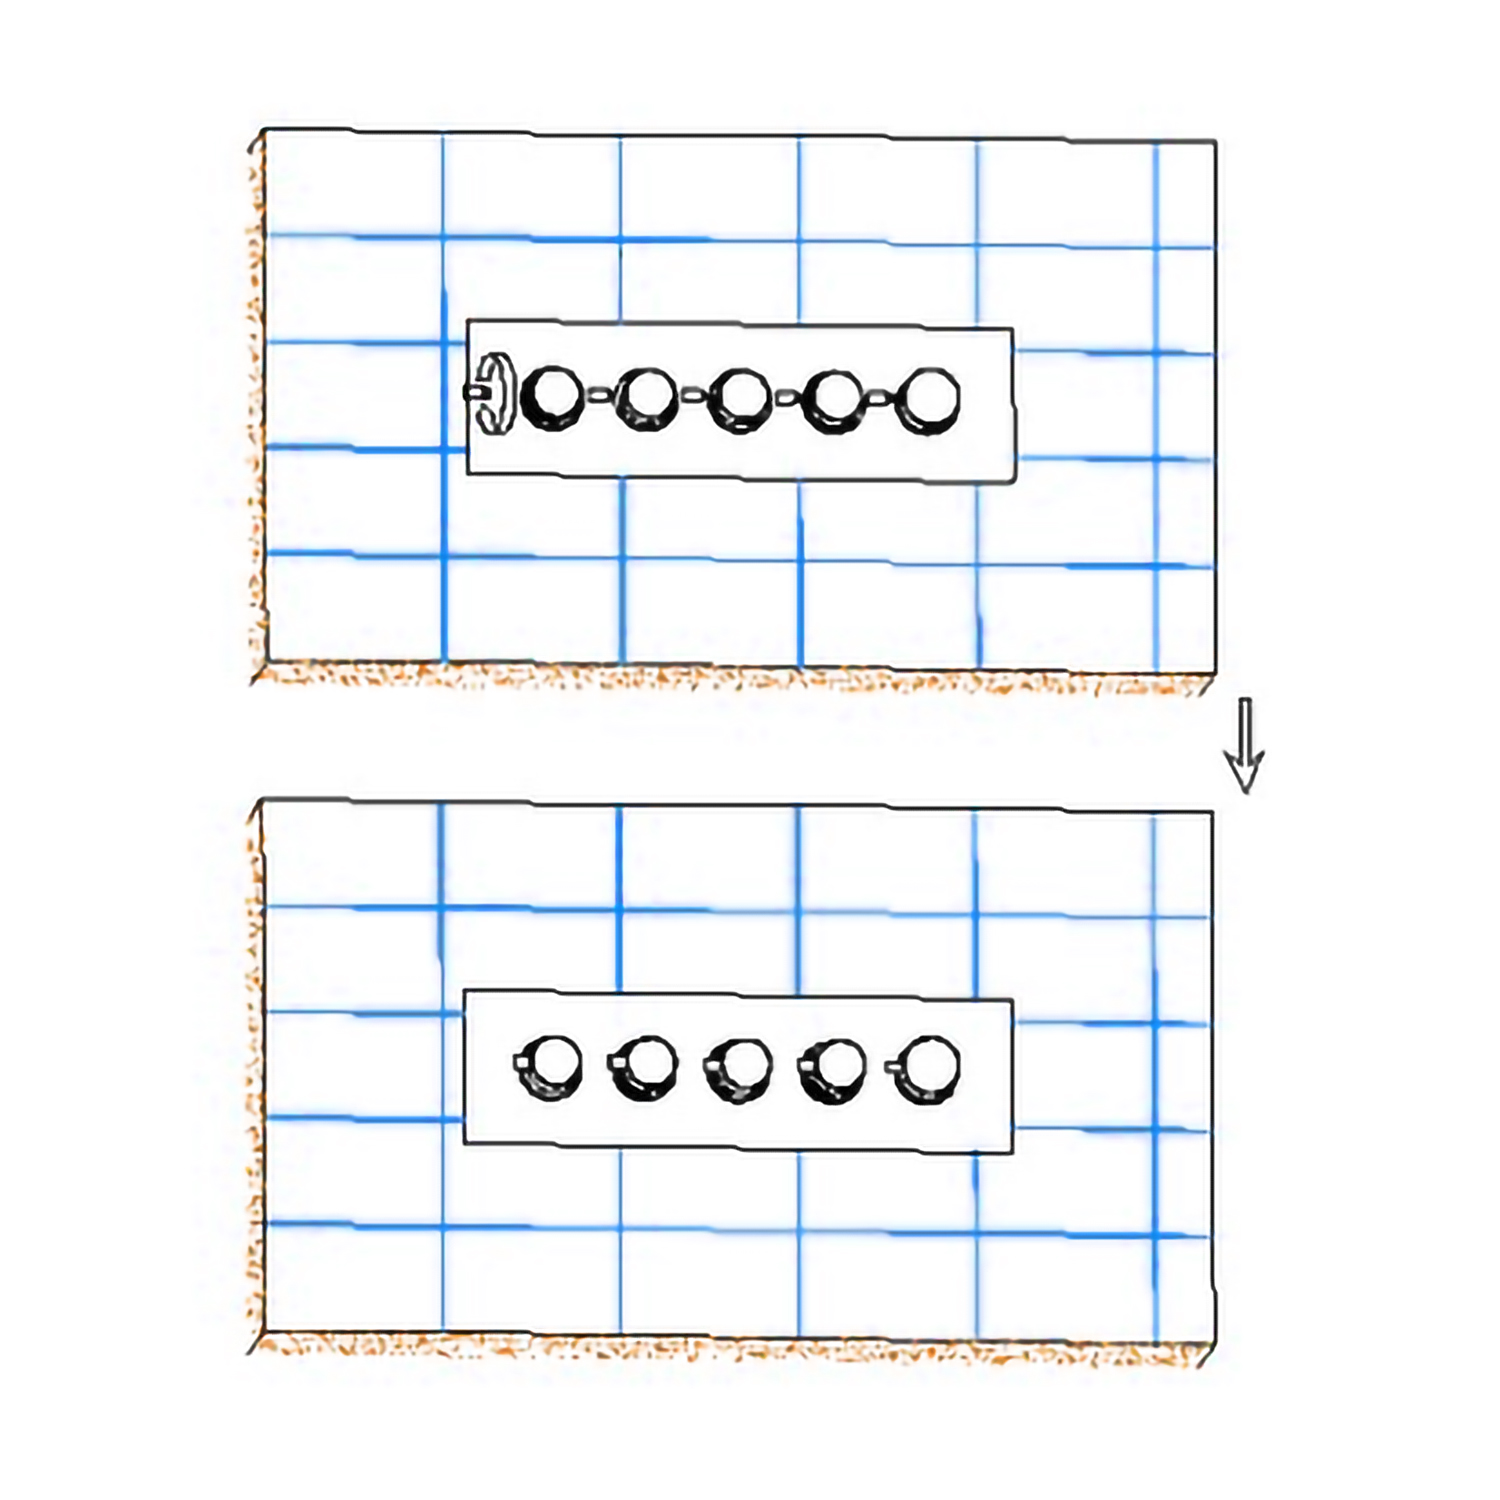
Remove the decorative plate (A) out of the body.
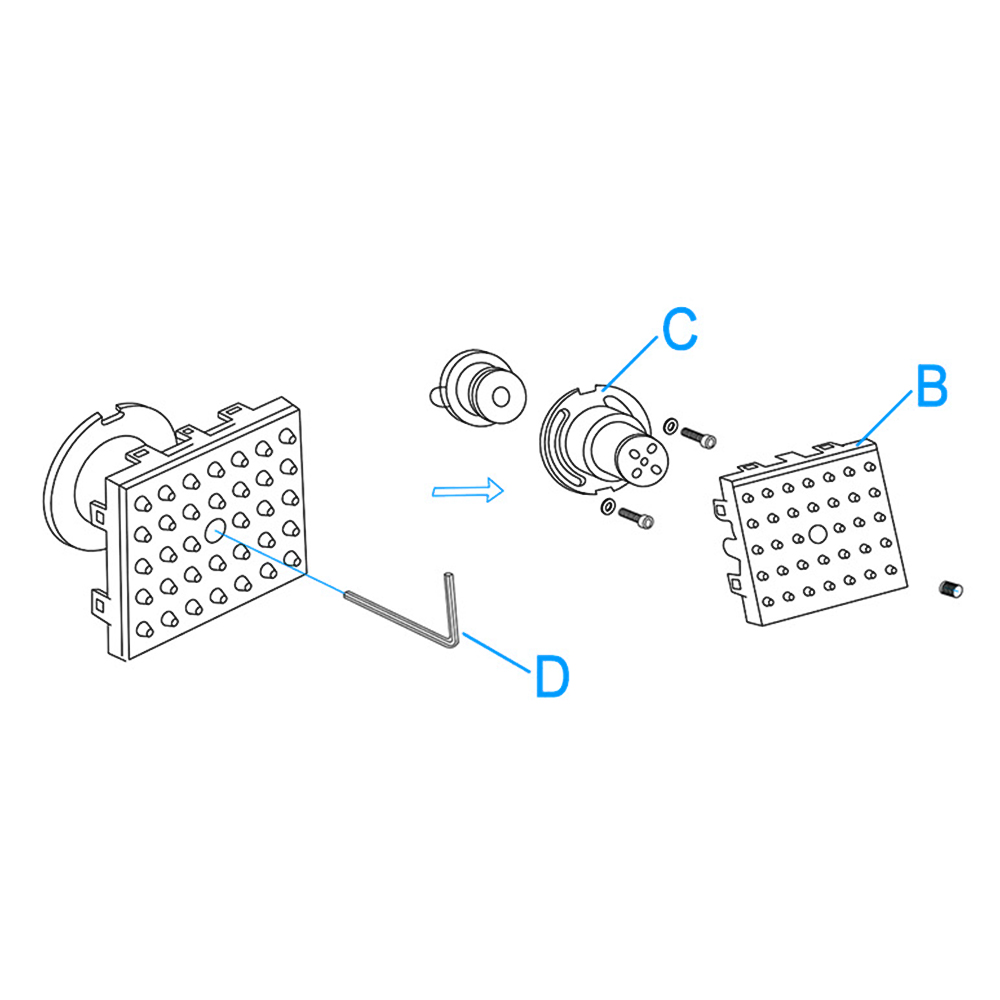
Remove the screws from the outlet face (B) and connector body (C) with the Allen key (D).
Body Spray Installation Instructions
Step 3:
Step 4:
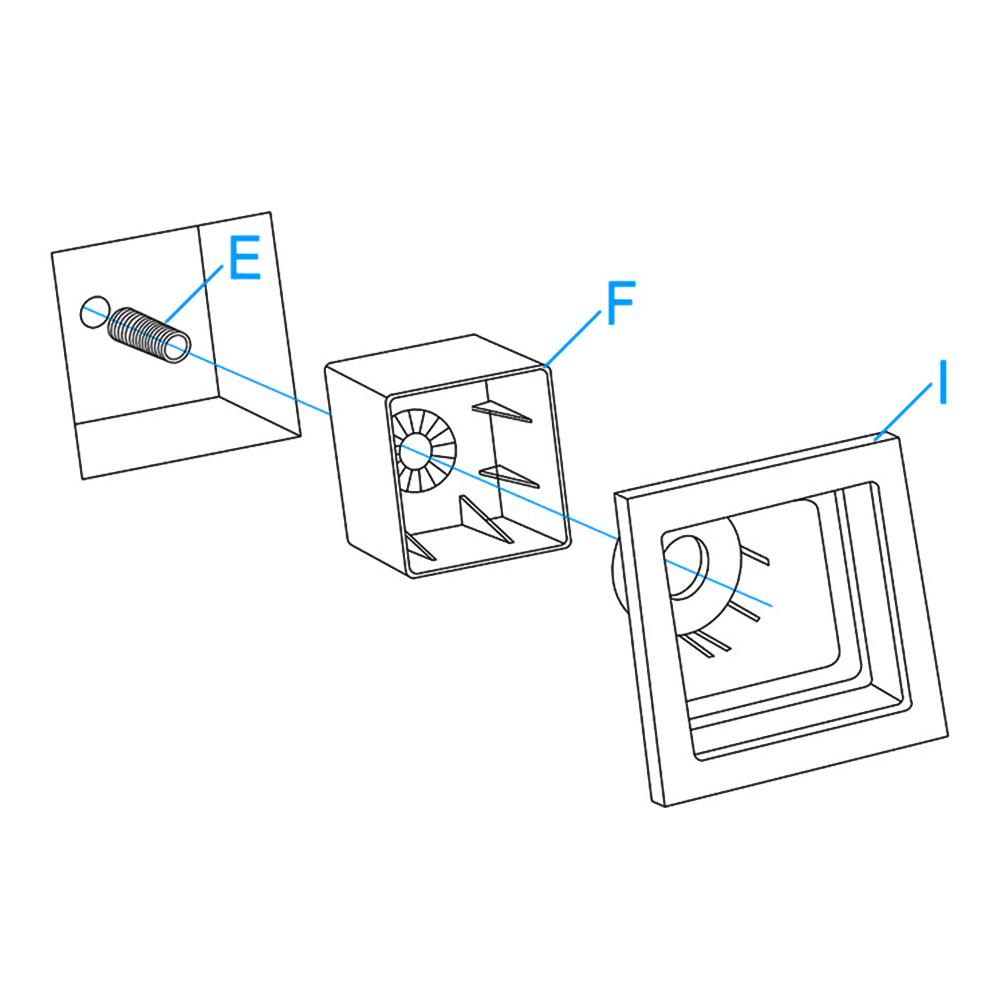
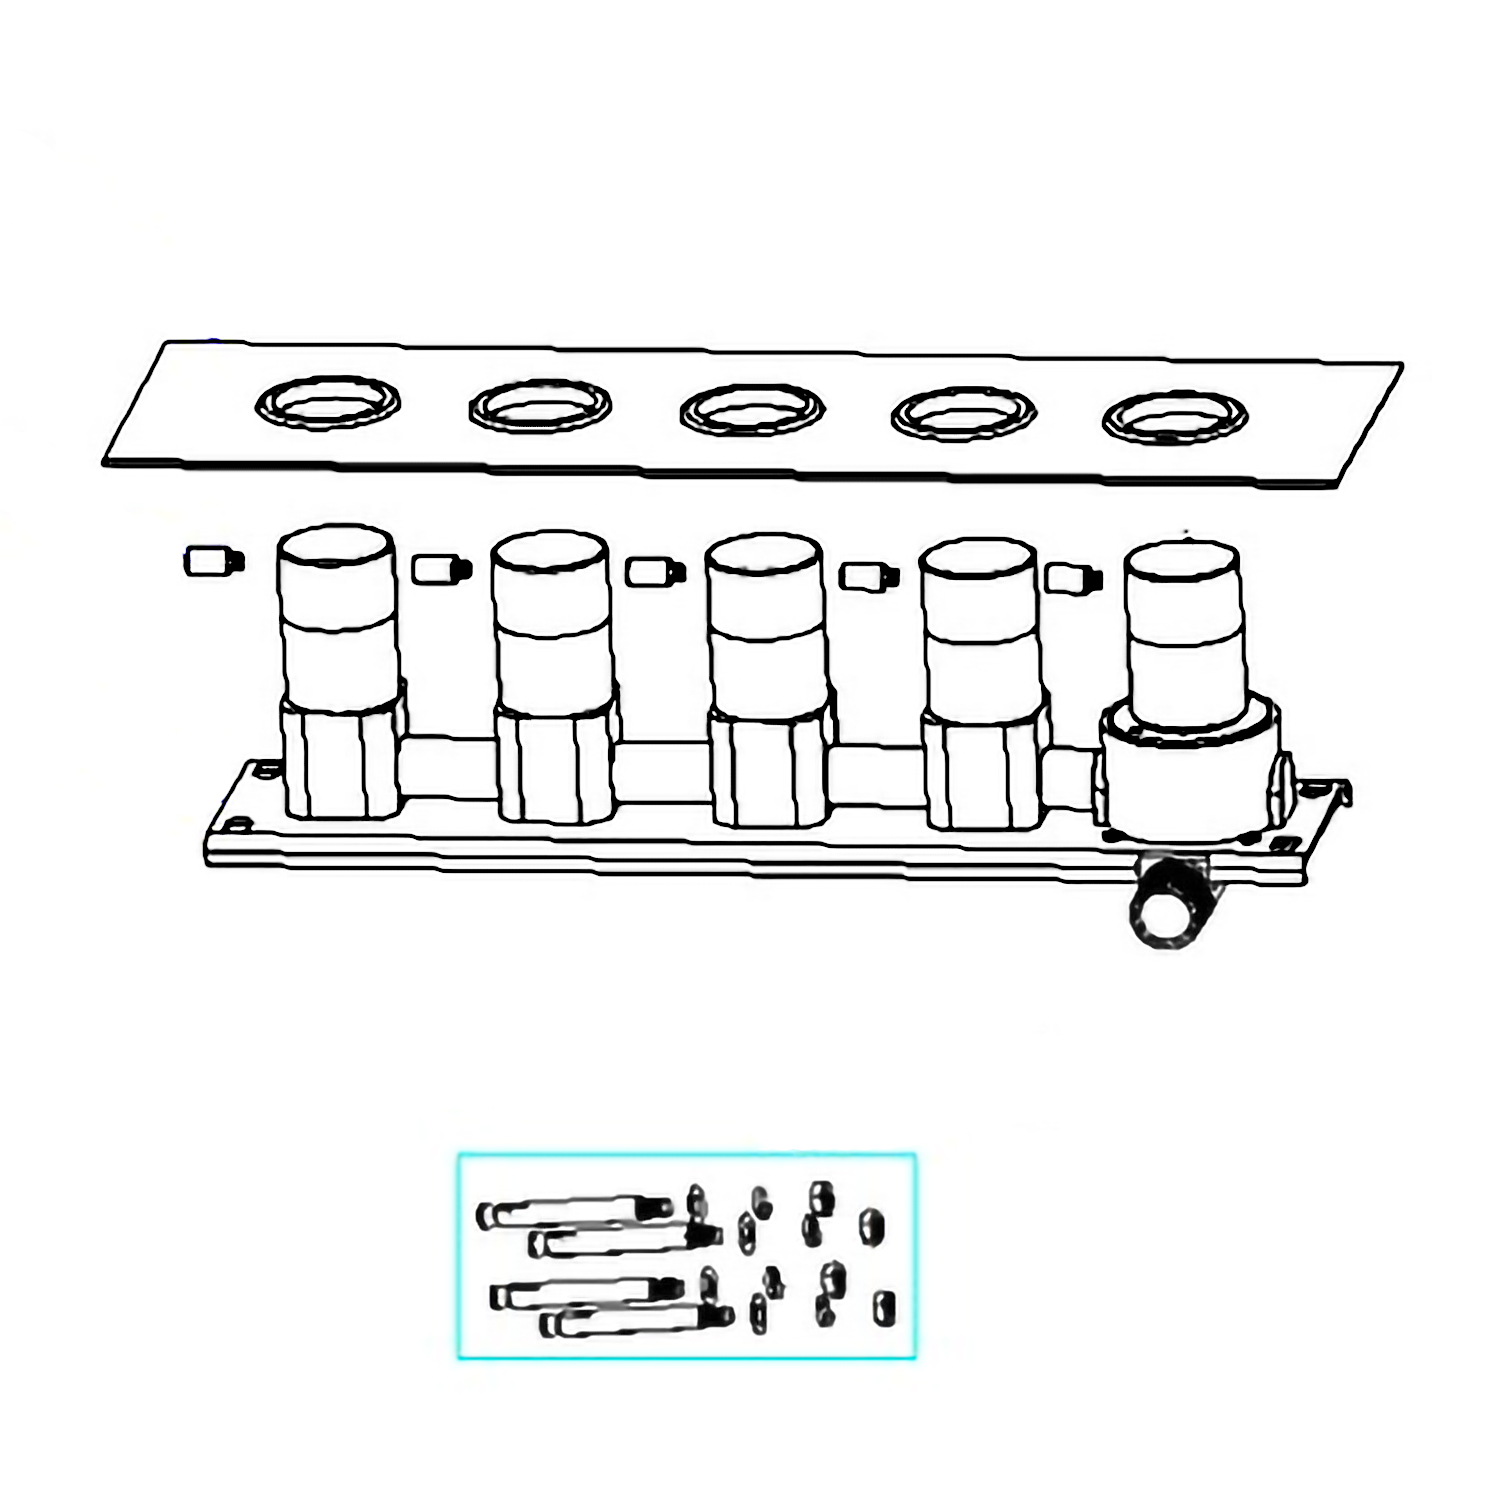
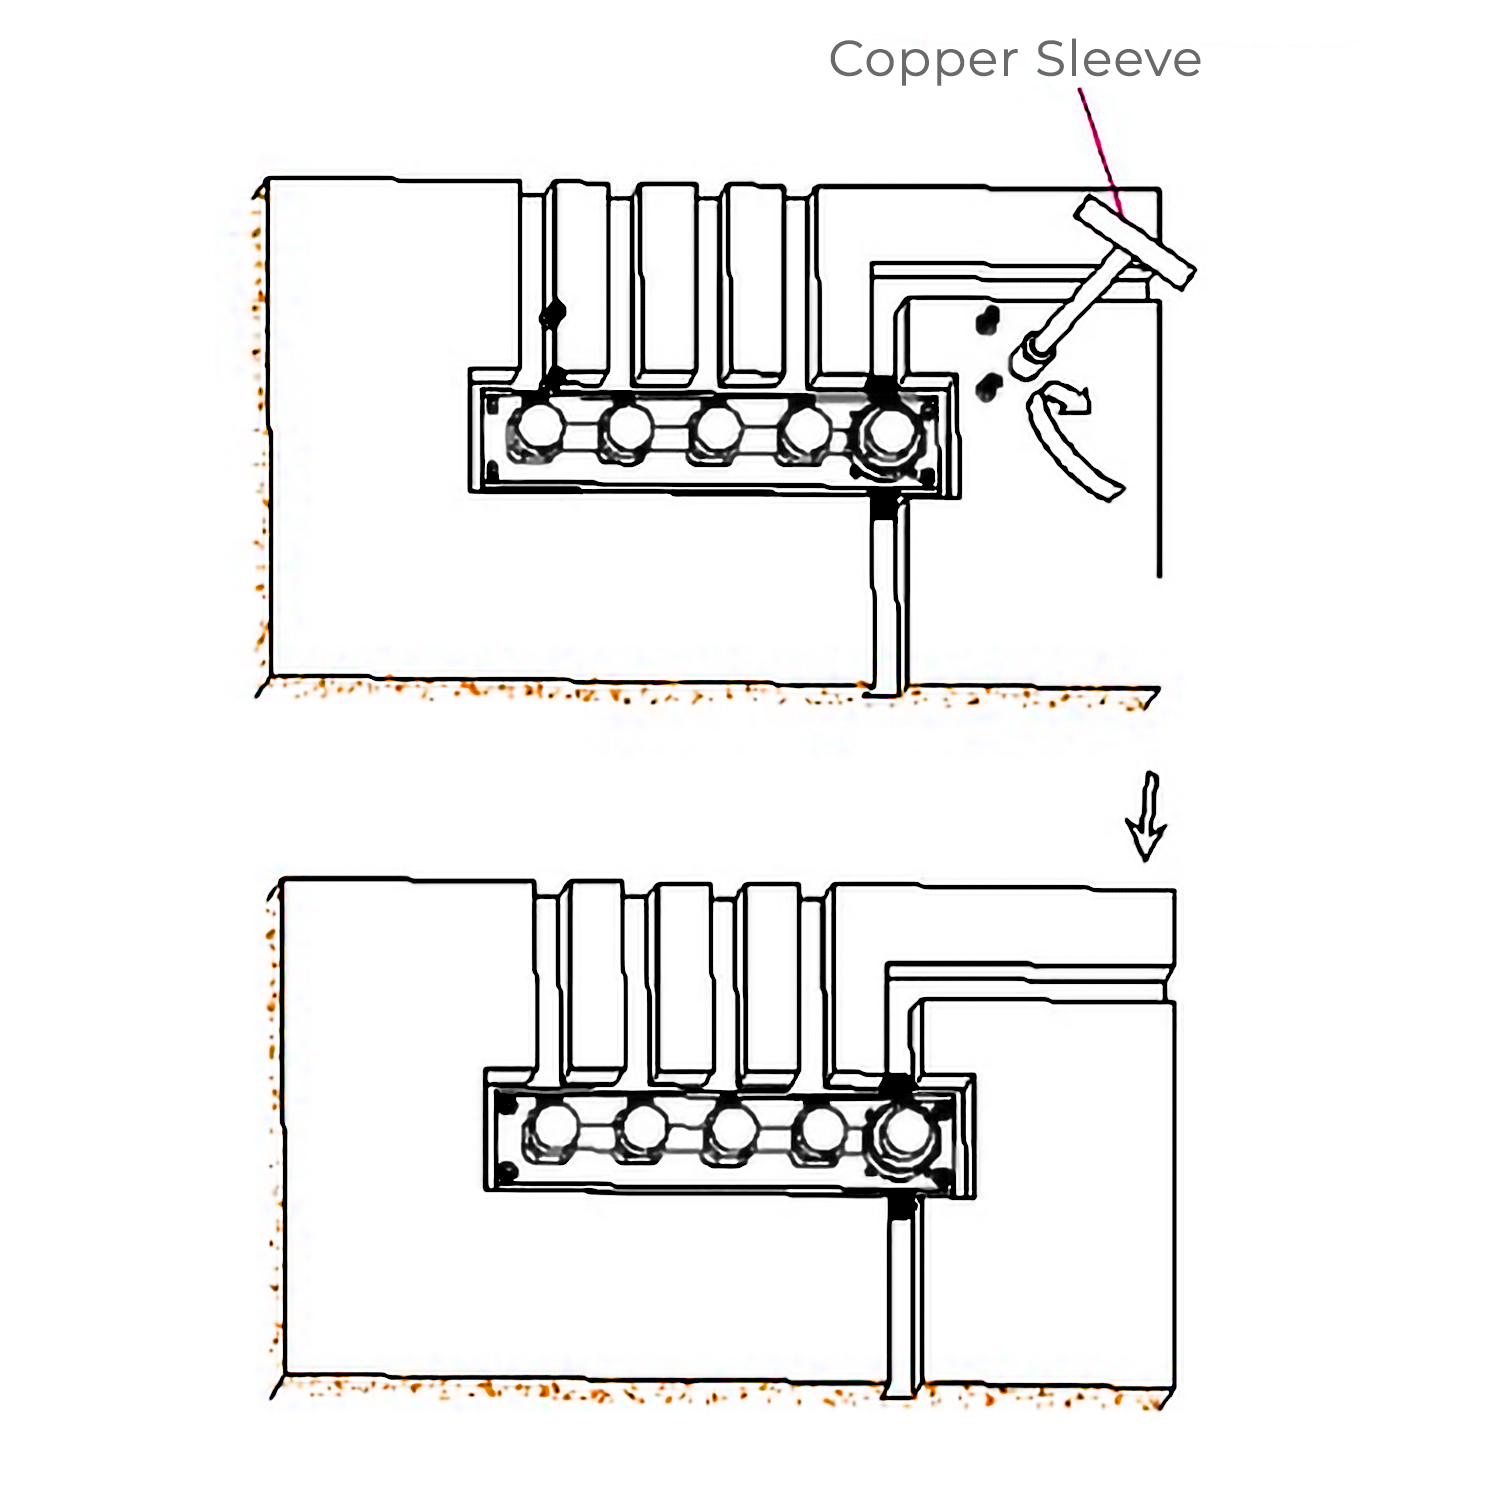
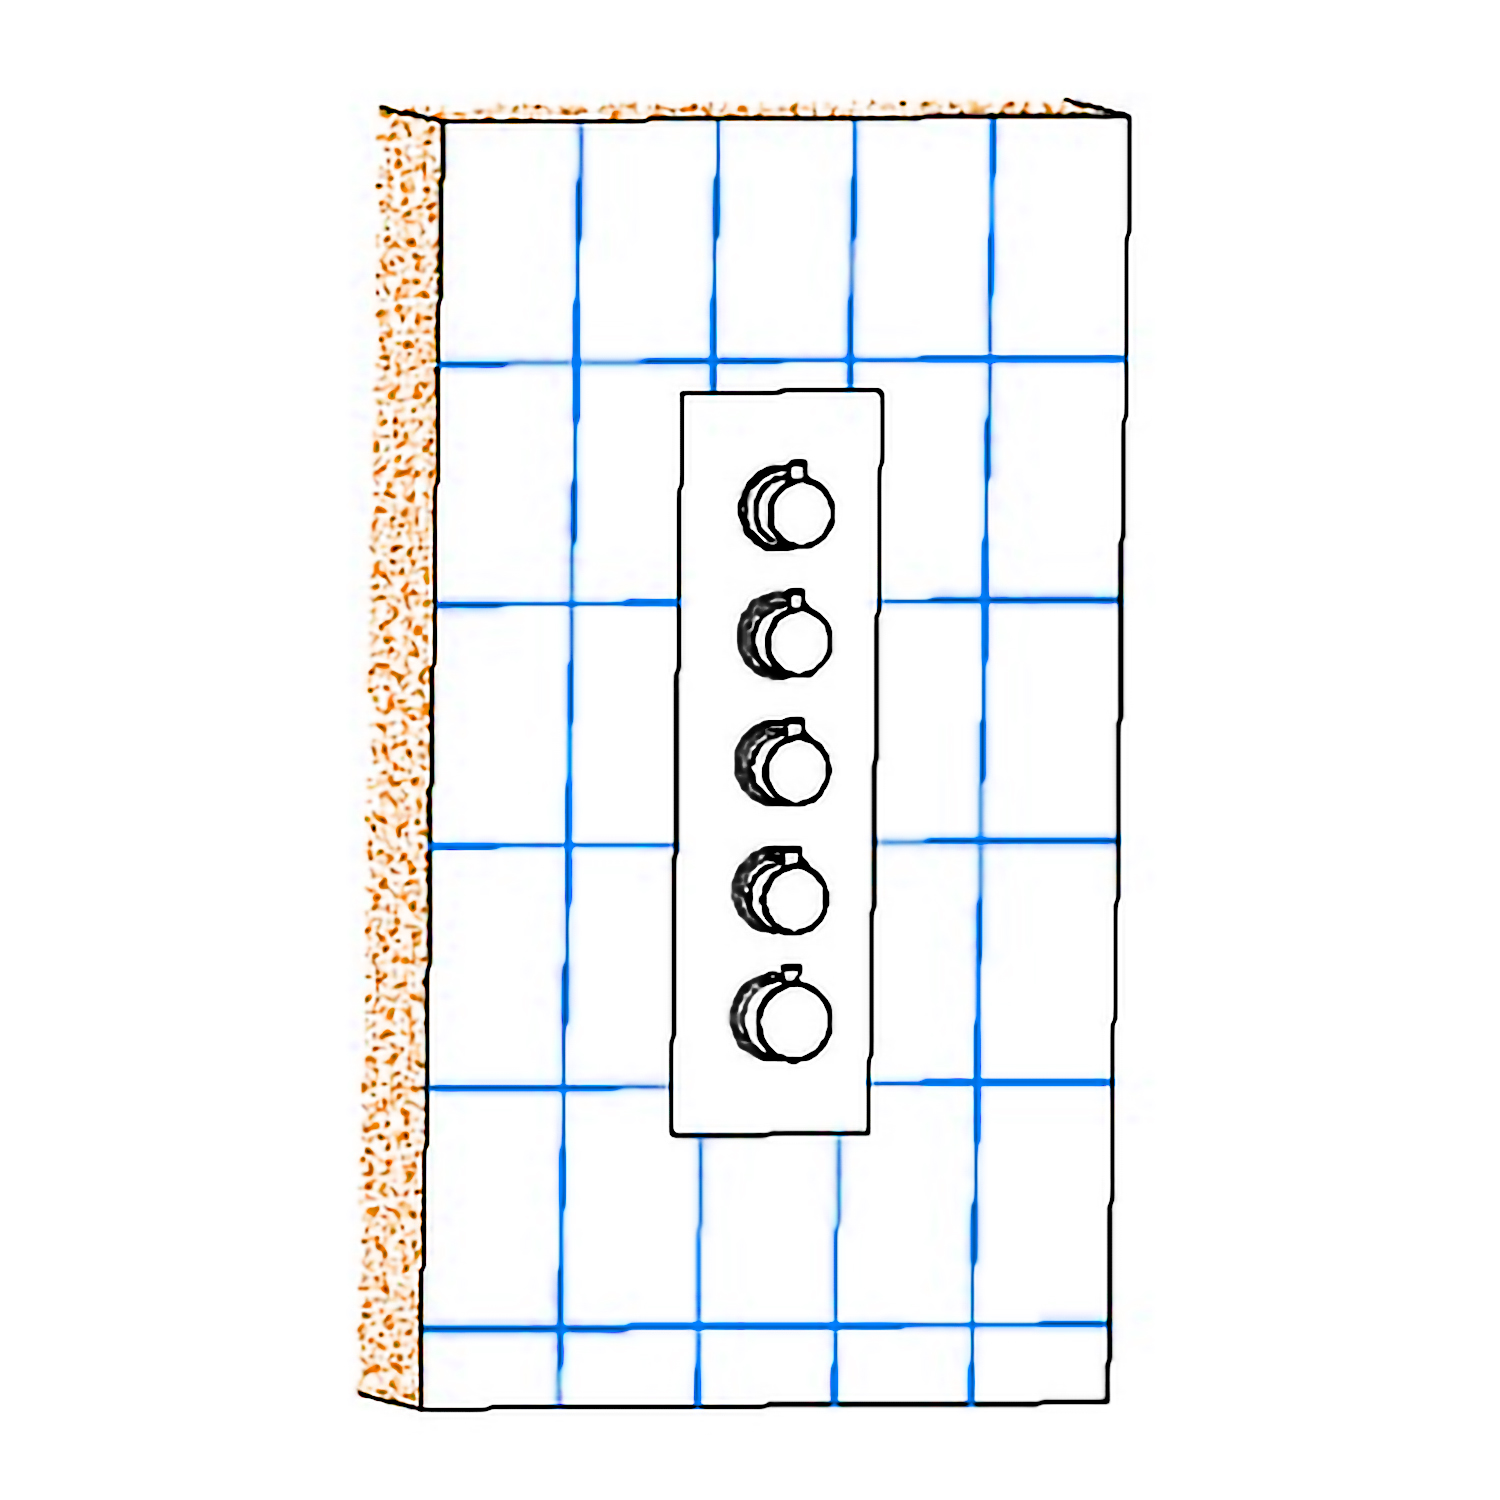
Screw the threaded pipe (E) to the water supply fittings. Push the plastic box (F) into the wall through the threaded pipe (E). Then, install the decorative plate (I) into the plastic box (F). Make sure the position is correct according to the diagram.
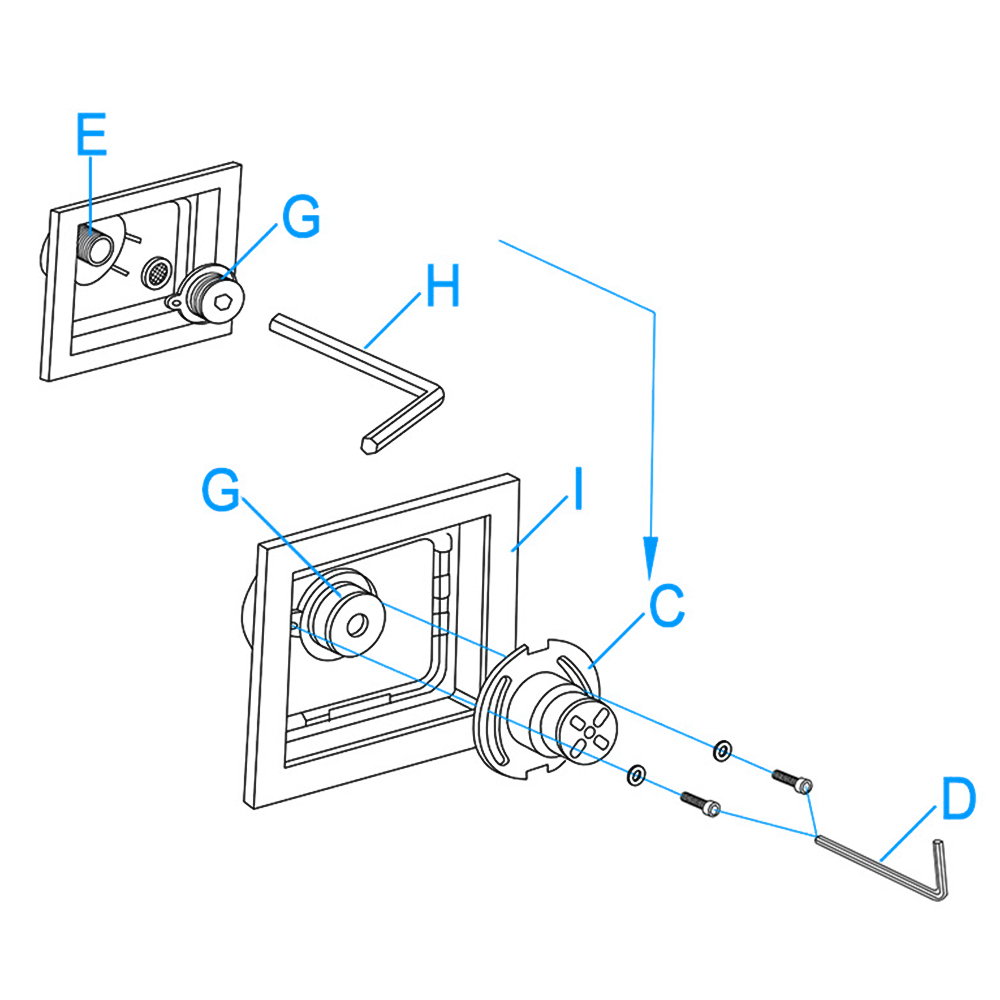
Screw the connector (G) into the threaded pipe (E) with the Allen key (H). Install the connector body (C) to the connector (G). When finish installation, please check to make sure the connection is completed. Then, fix the screws into the body (C) with Allen key (D) and make sure the body (C), connector (G) and decorative plate (I) are tightened. Make sure the one side with the bulge is in the top position.
Body Spray Installation Instructions
Step 5:
Step 6:
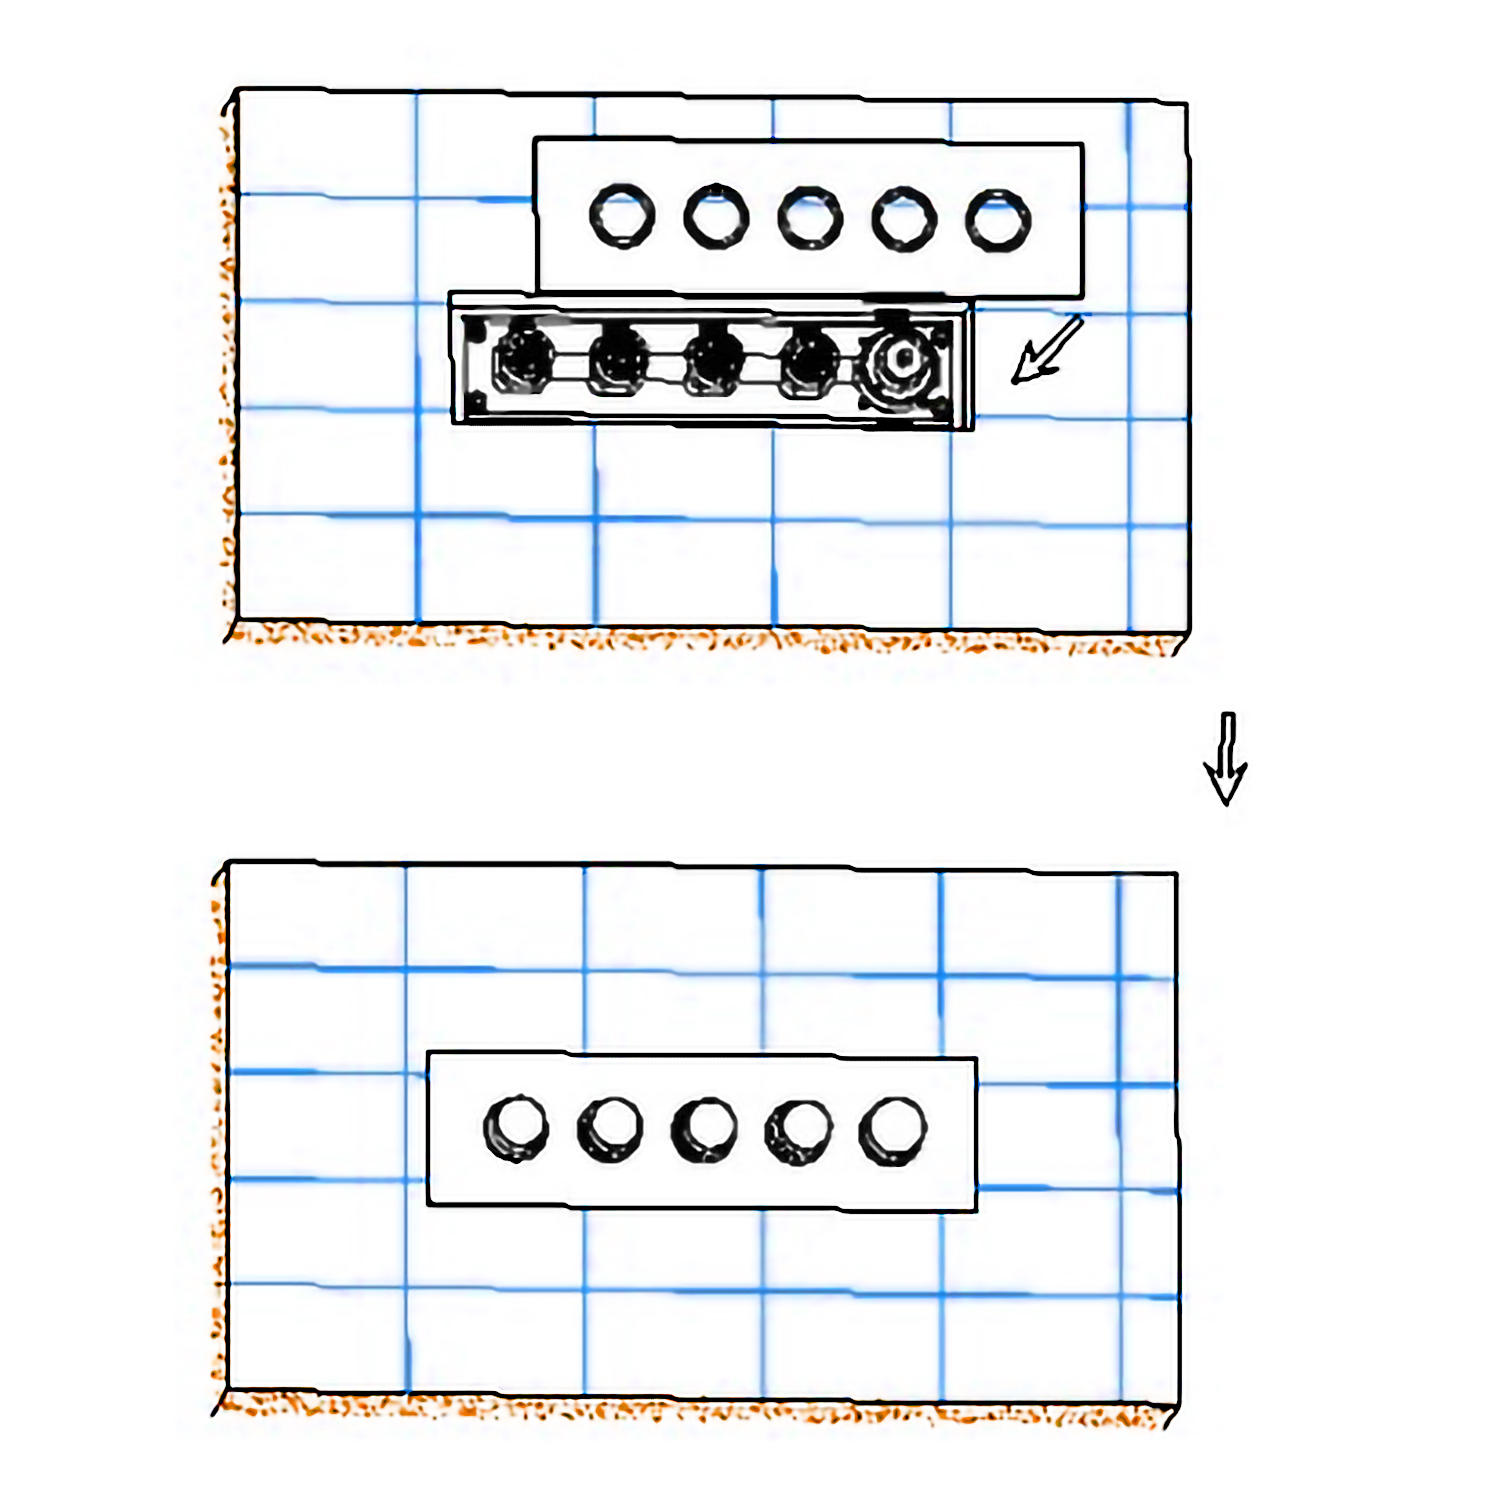
Install the outlet face (B) to the body (C). Make sure the connection of body (C) and outlet face (B) are completed. Tighten the screw through the outlet face (B) into the body (C) with the Allen key (D).
Install the decorative plate (A) into the outlet face (B) tightly. Make sure the hole and the raised dot are in the correct position when you push the decorative plate (A) into the outlet face (B).