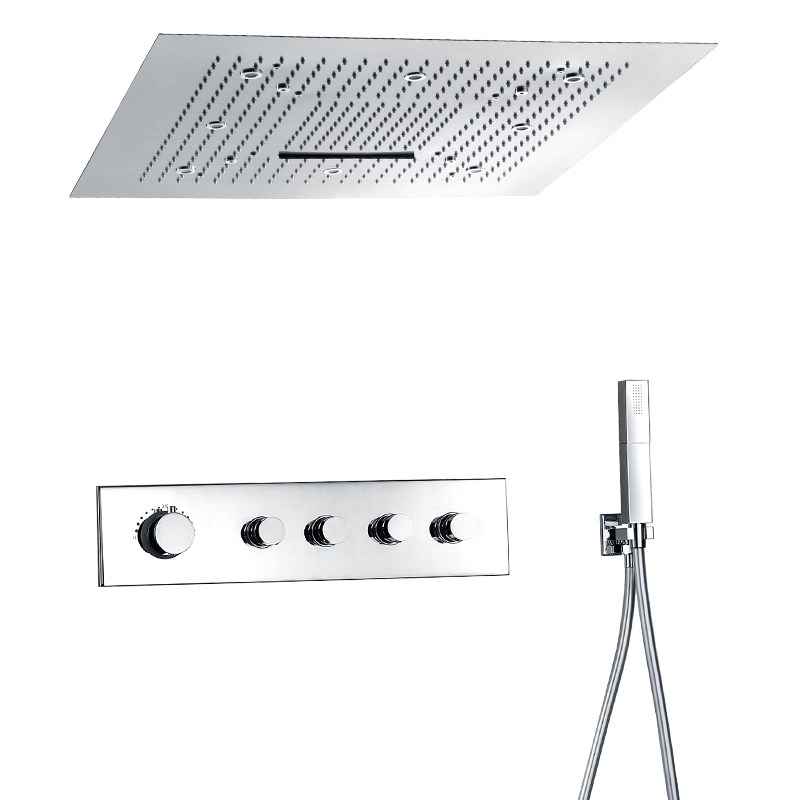
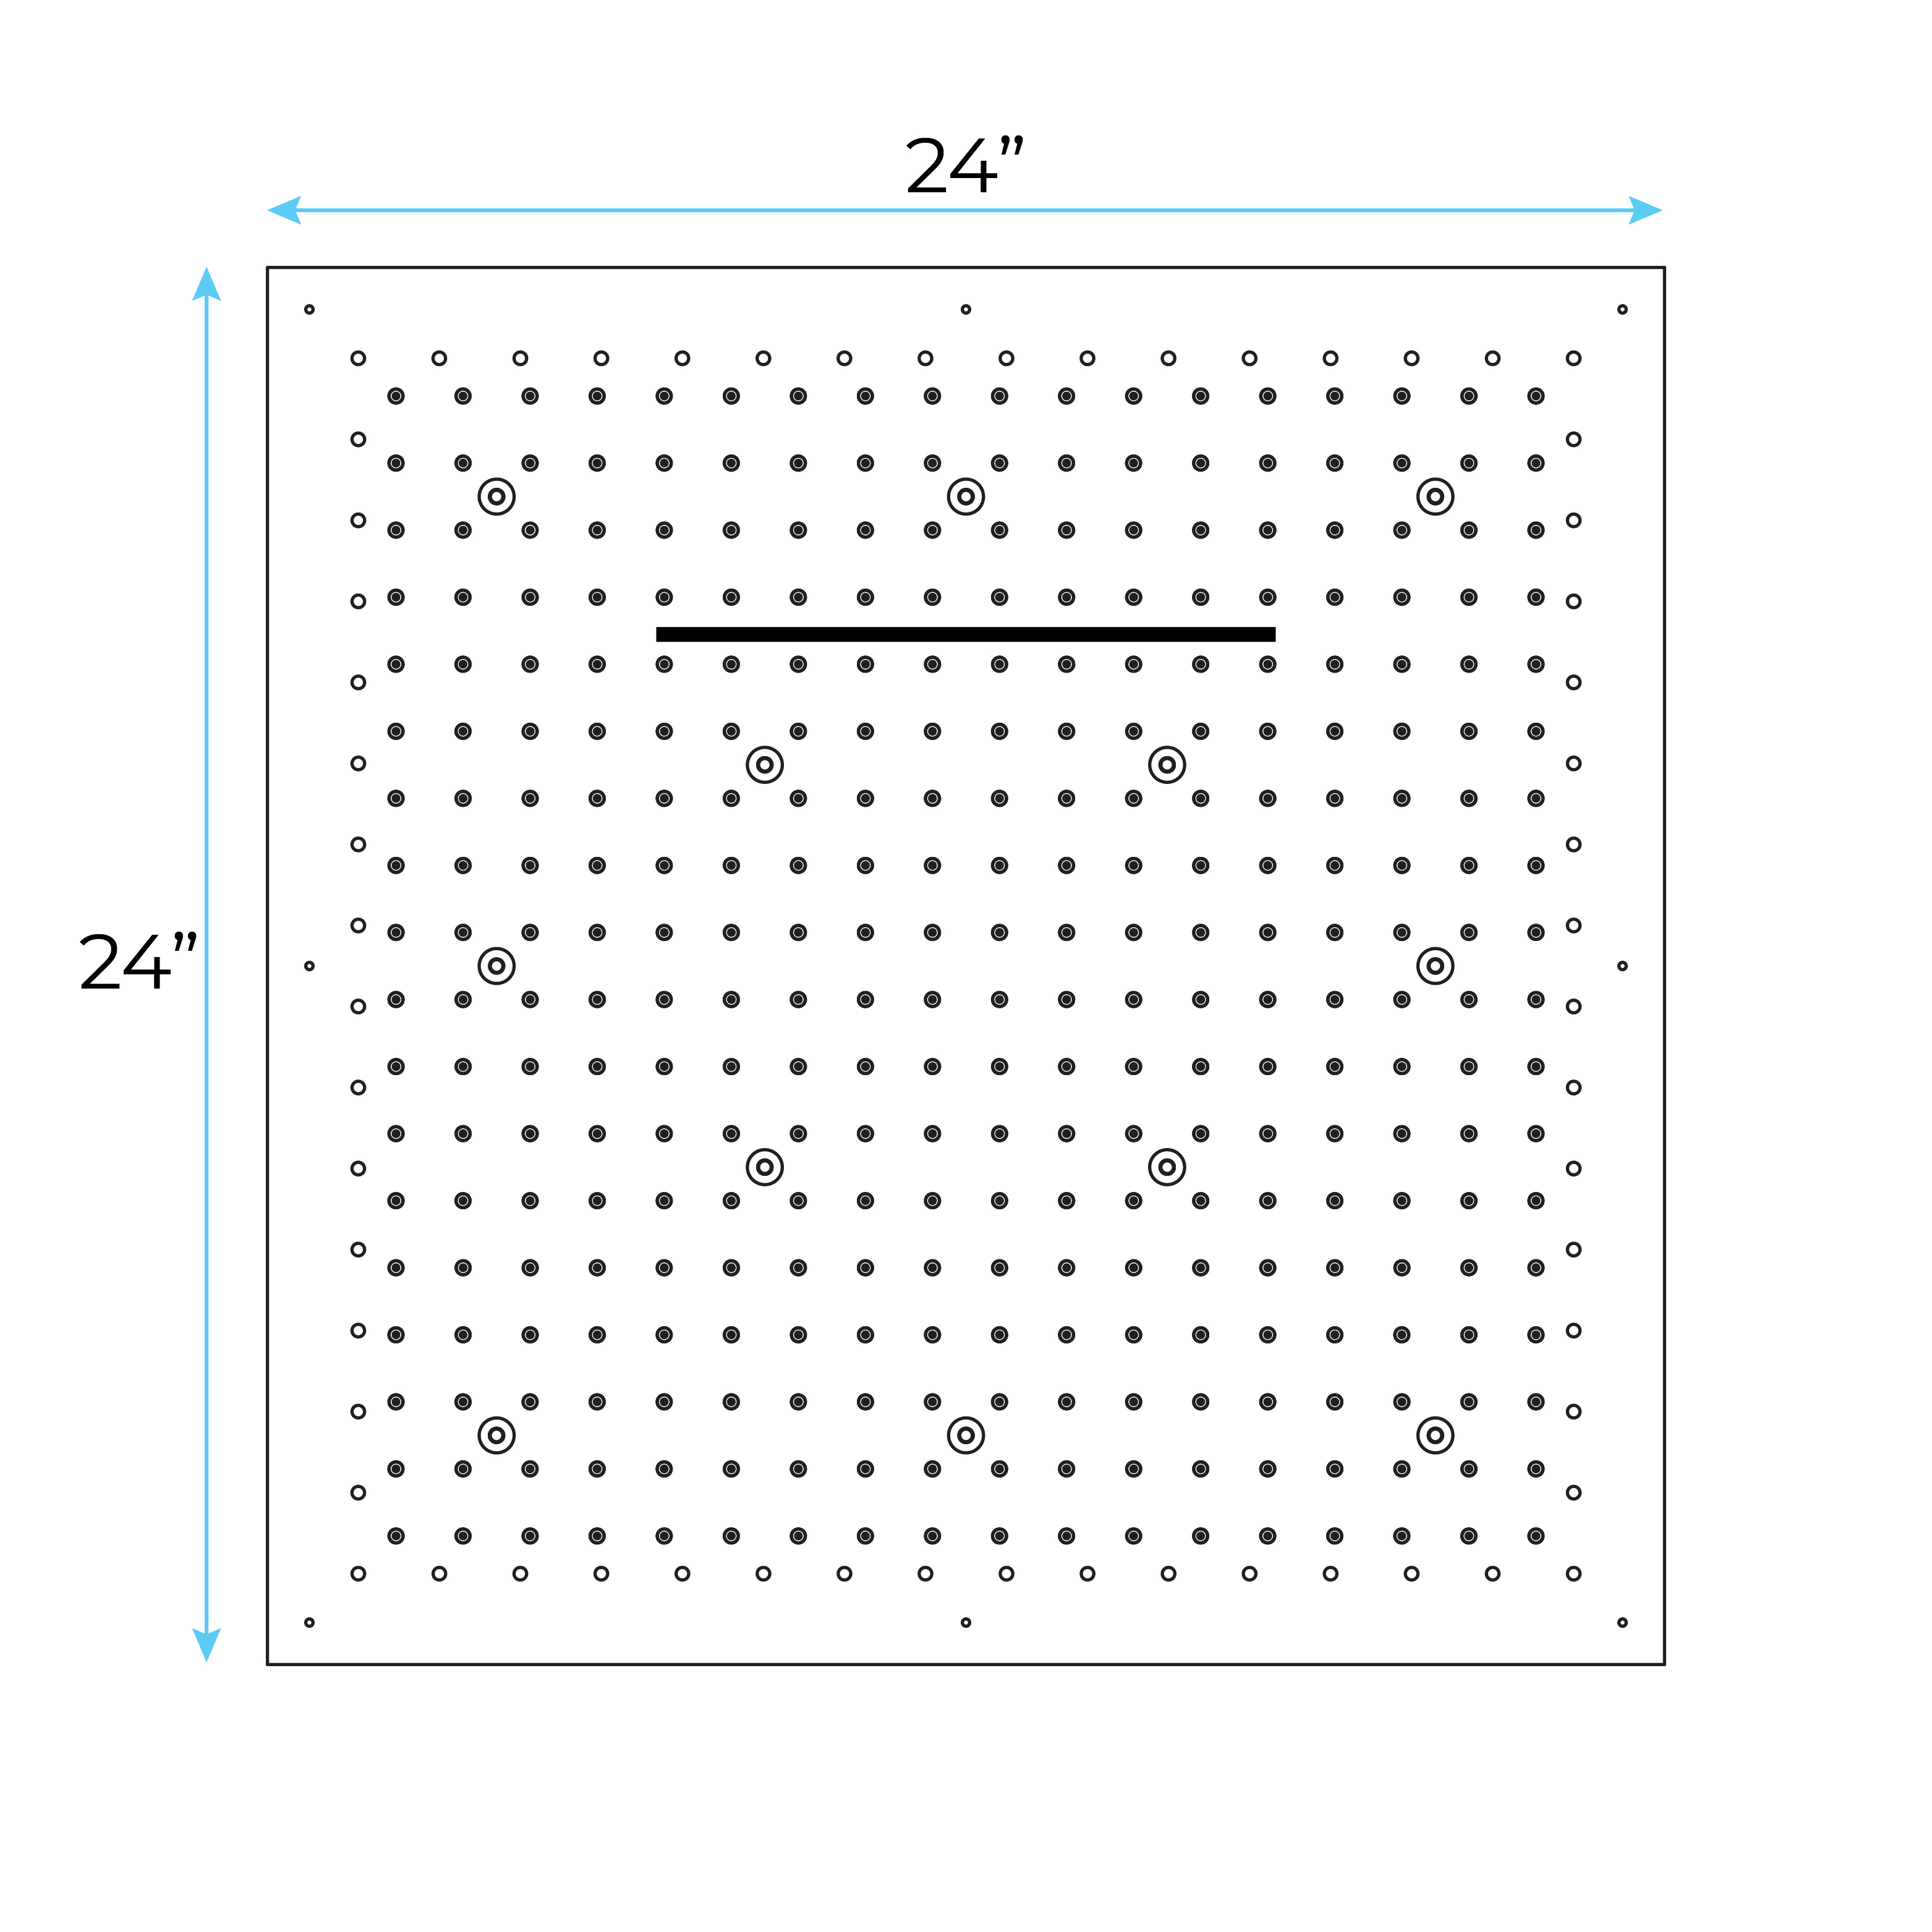
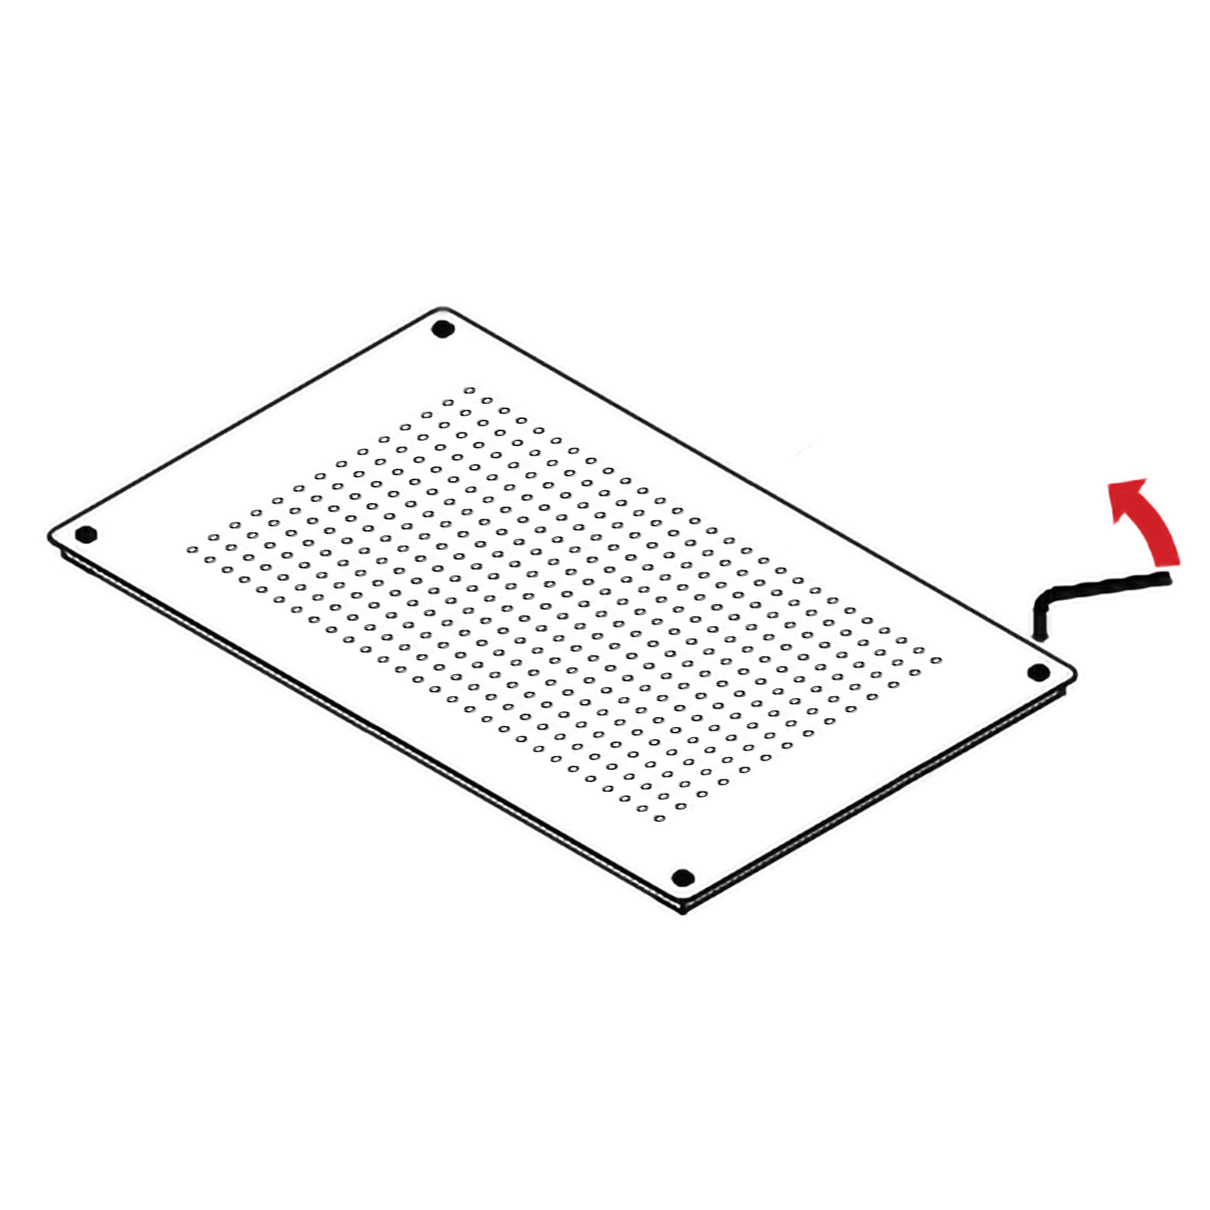
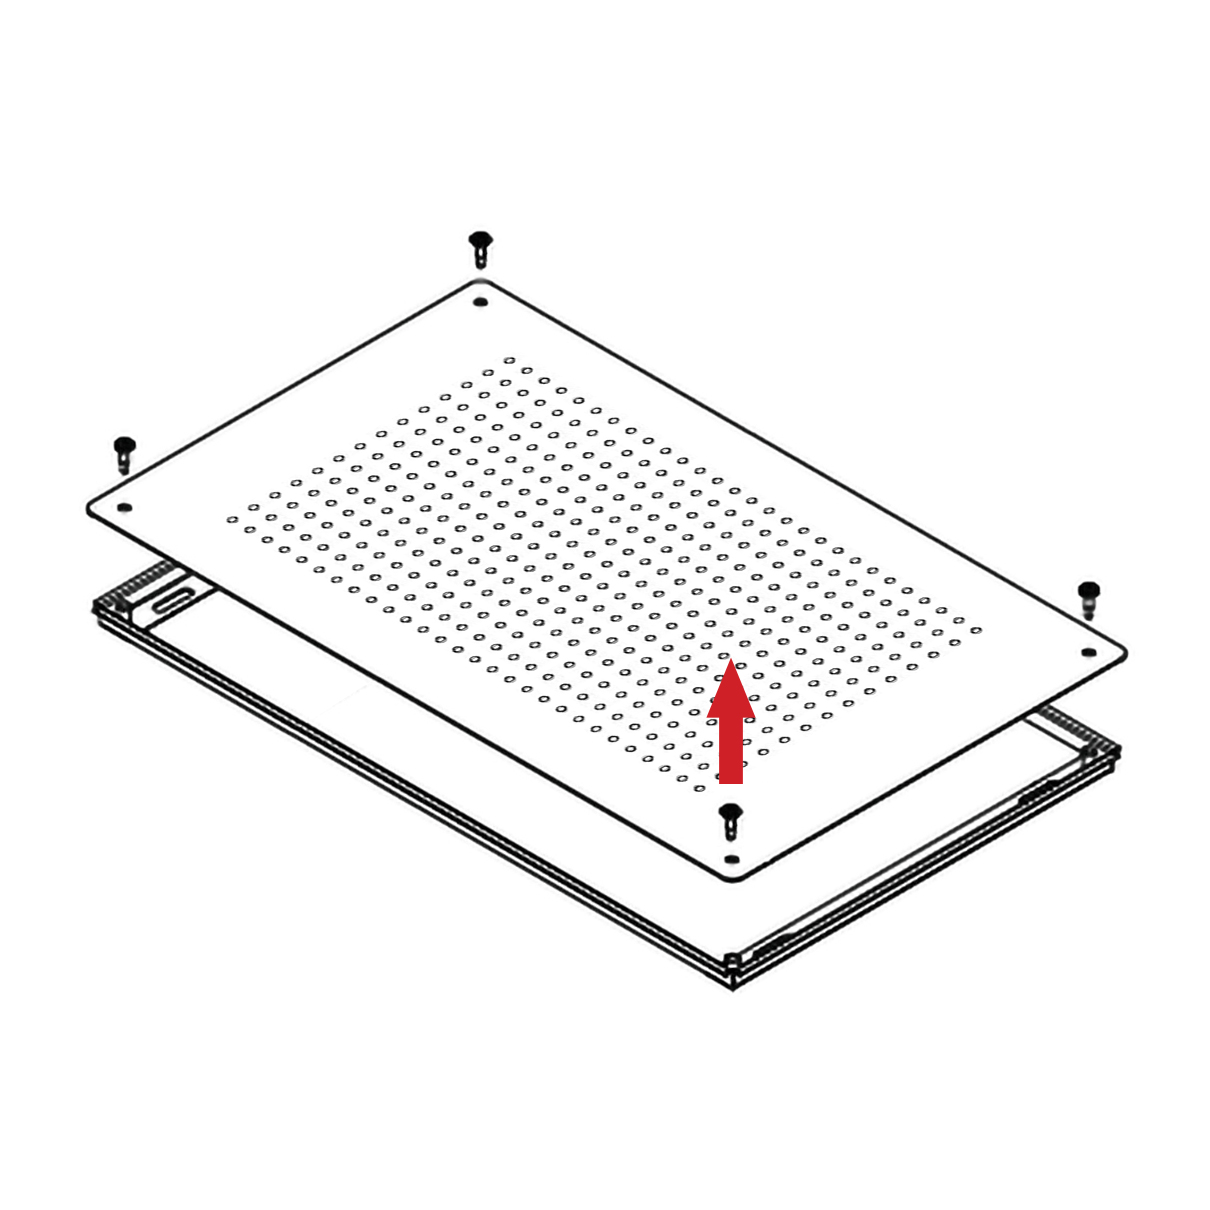
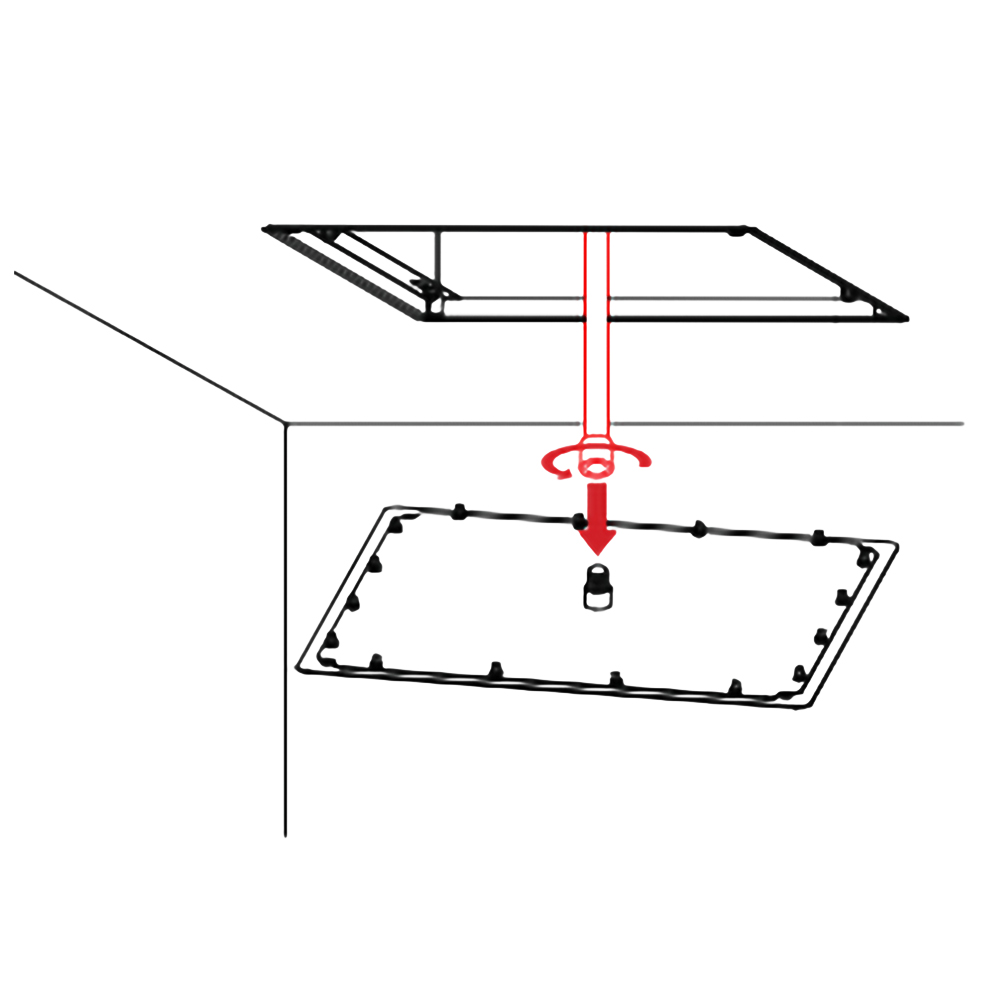
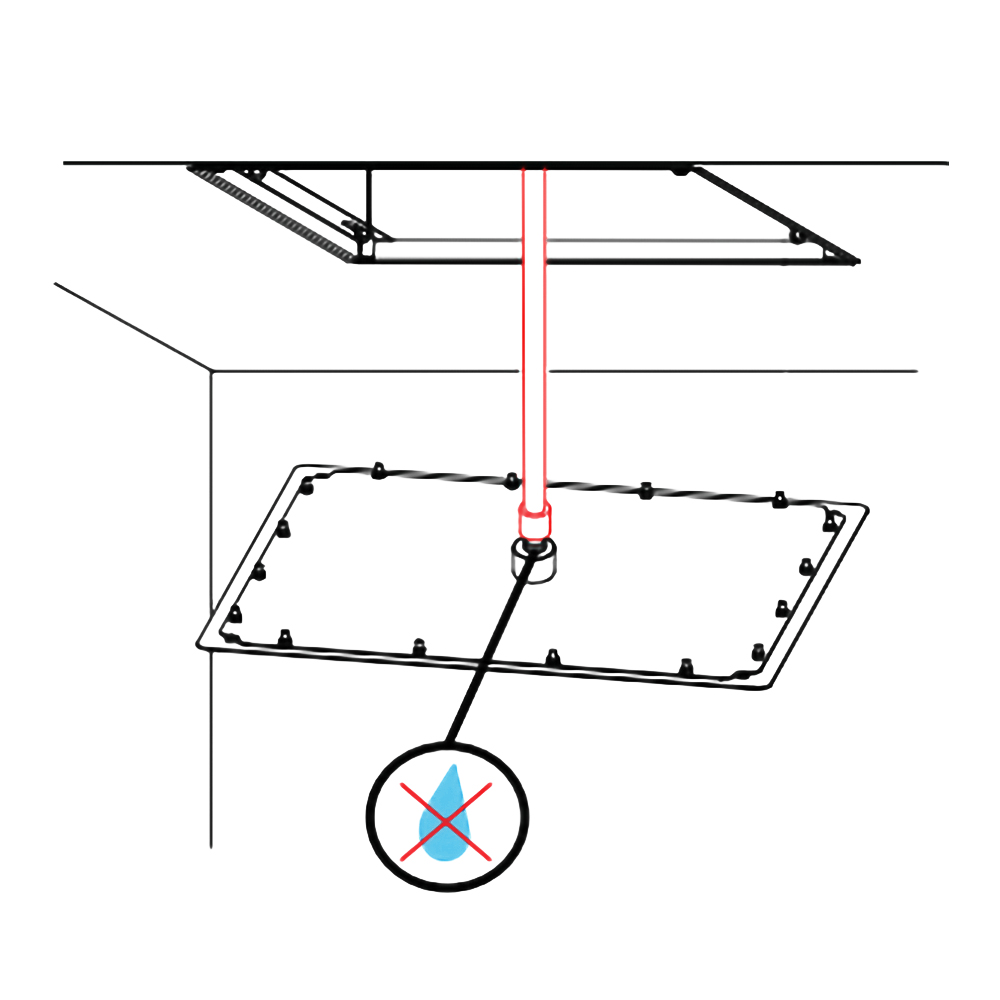
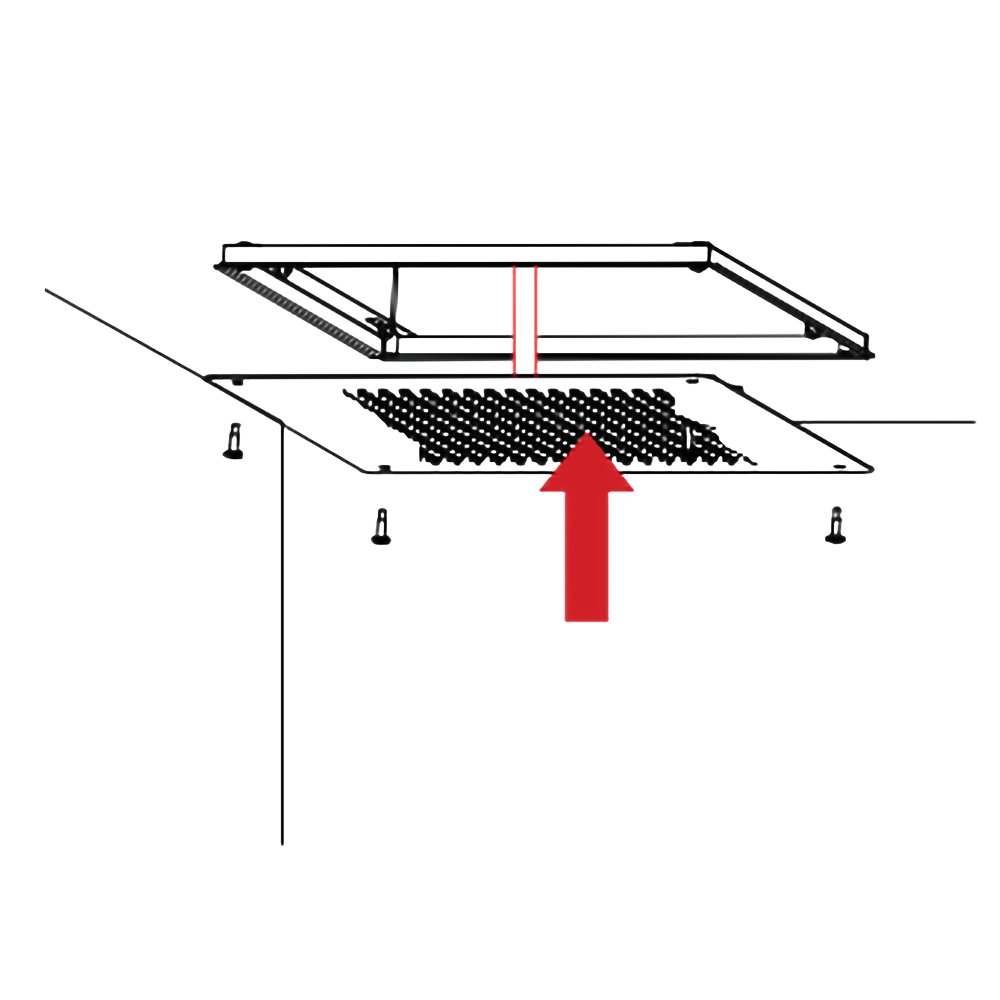
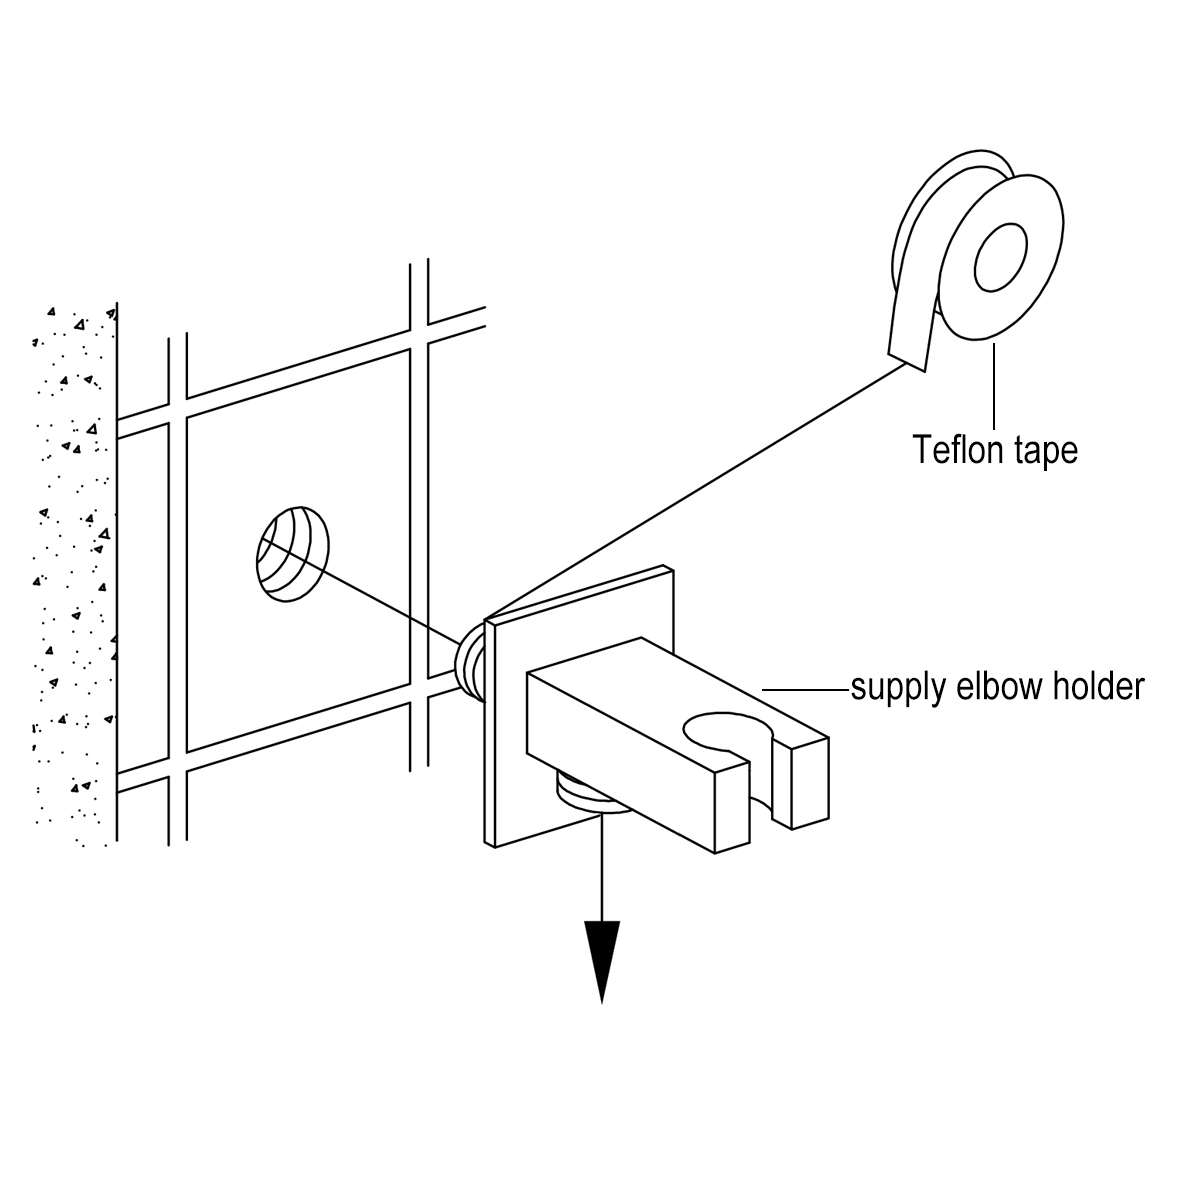
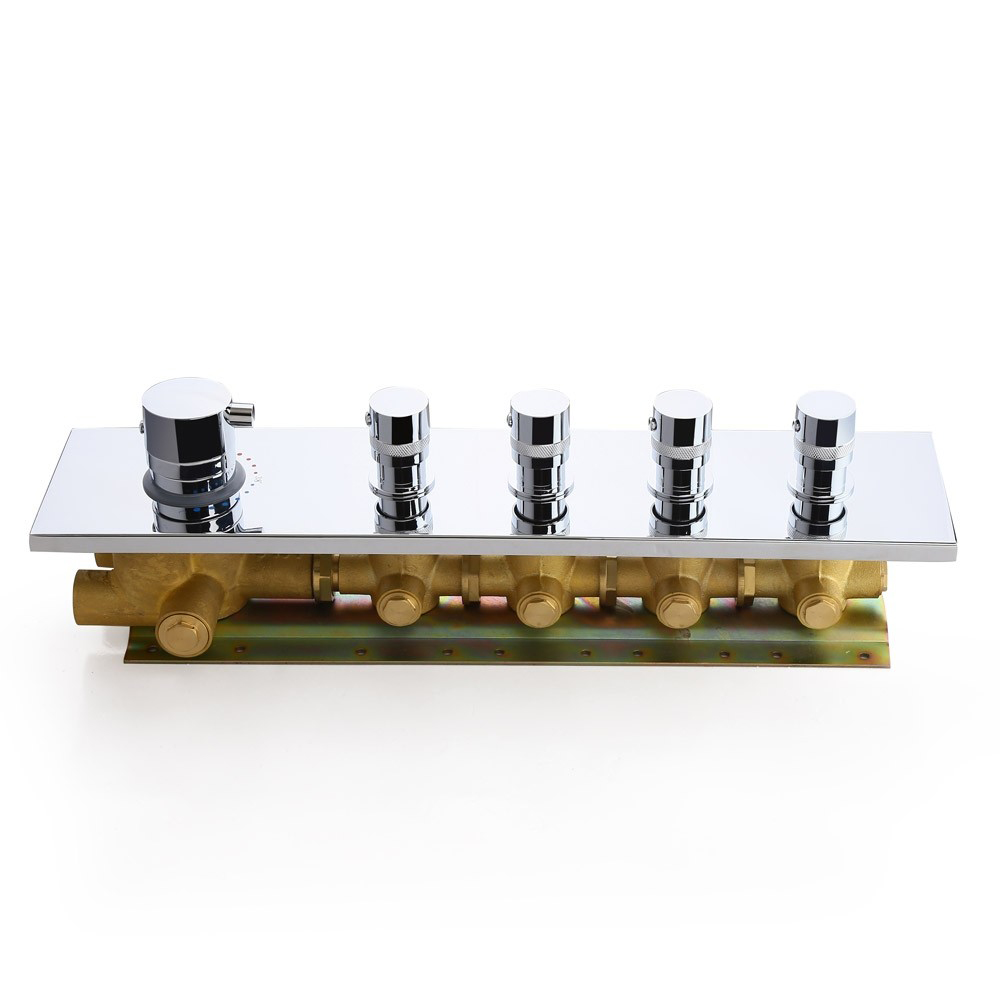
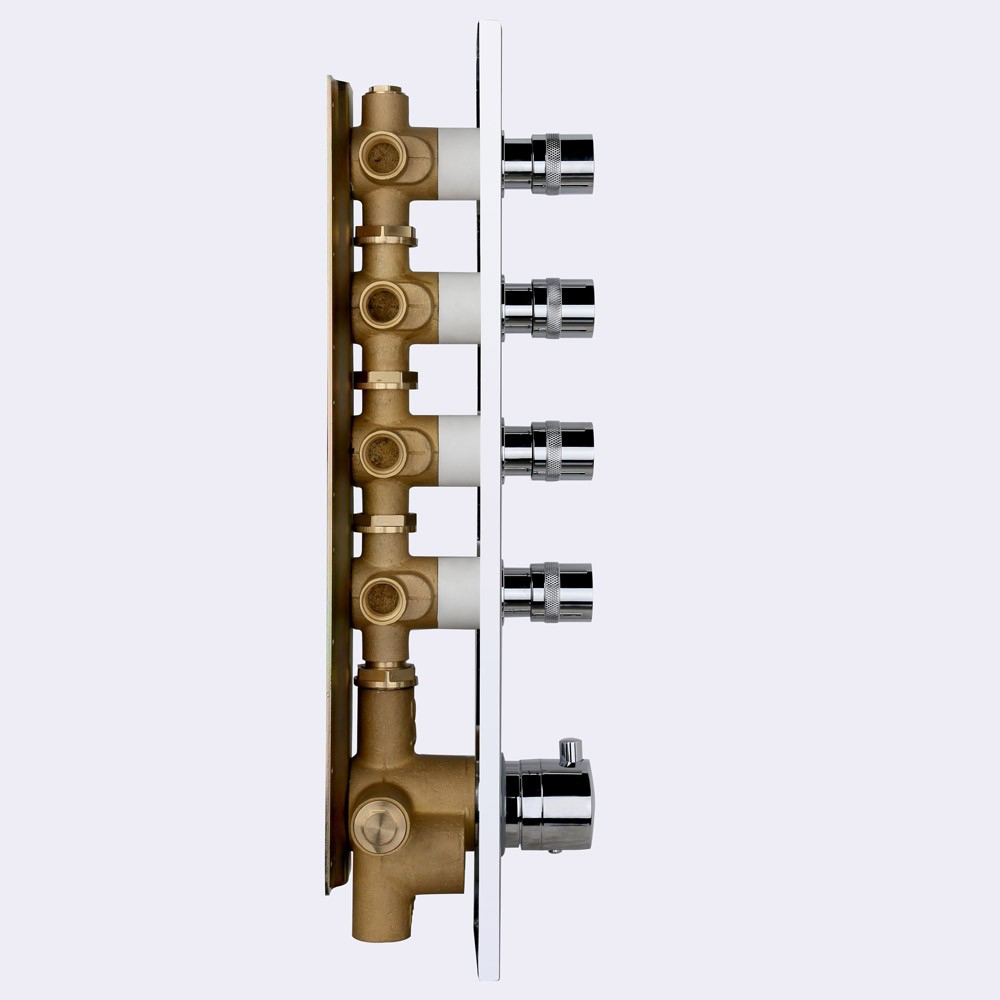
Fontana Platinum Thermostatic Ceiling Mount Bathroom Rain Shower Set
This Fontana Platinum Quality Thermostatic Ceiling Mount Bathroom Rain Shower Set Provides a luxurious showering experience and is the perfect complement to any modern bathroom. An easy-to-use mixer valve, both made from high-quality solid brass. The Fontana Peru Quality Thermostatic Bathroom Rain Shower a modern design of smooth details and sharp edges. The warm, drenching water coverage is the result of a denser water pattern and larger droplets that retain their heat longer to soothe and revitalize. Be sure, when it comes to new bathroom sink faucets, FontanaShowers is offering shape, finish and styles you're looking for.
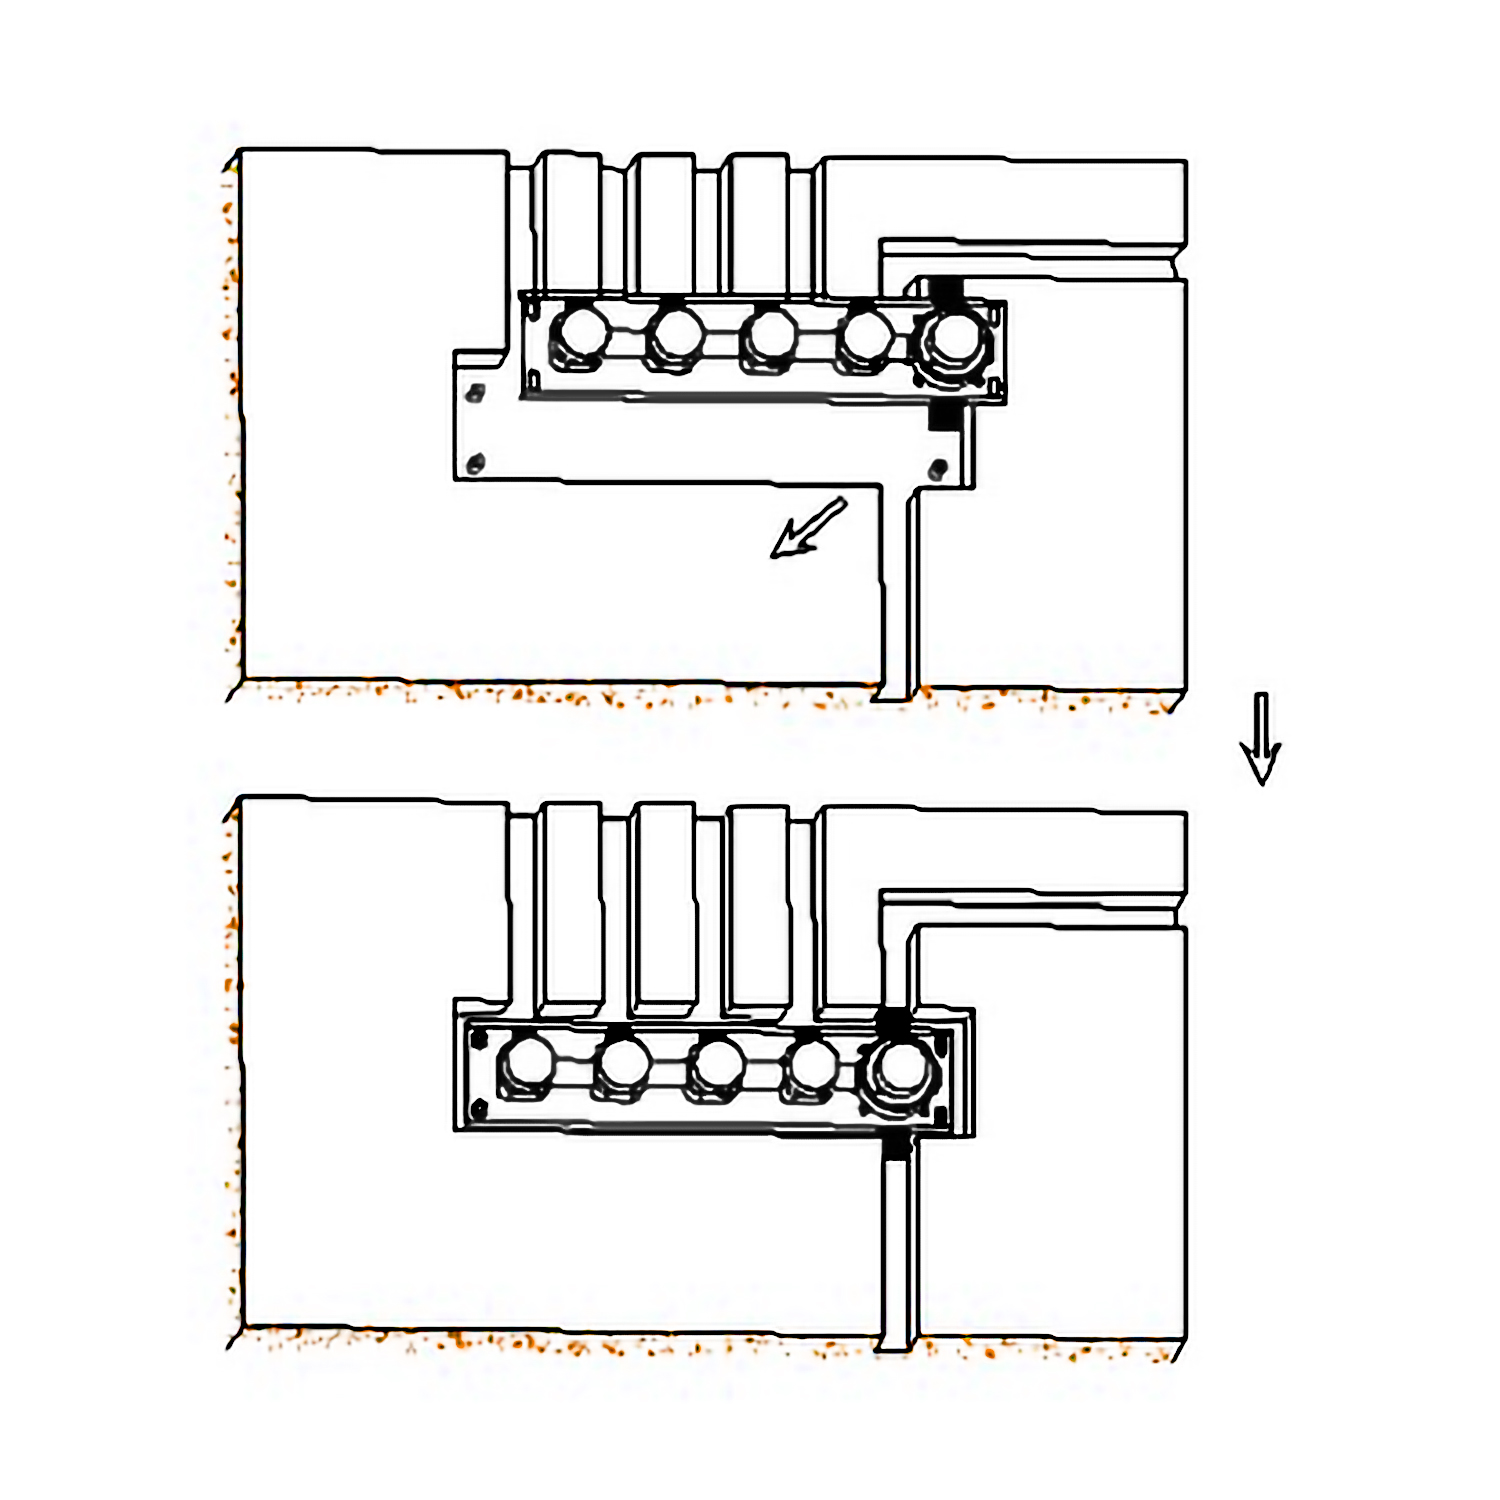
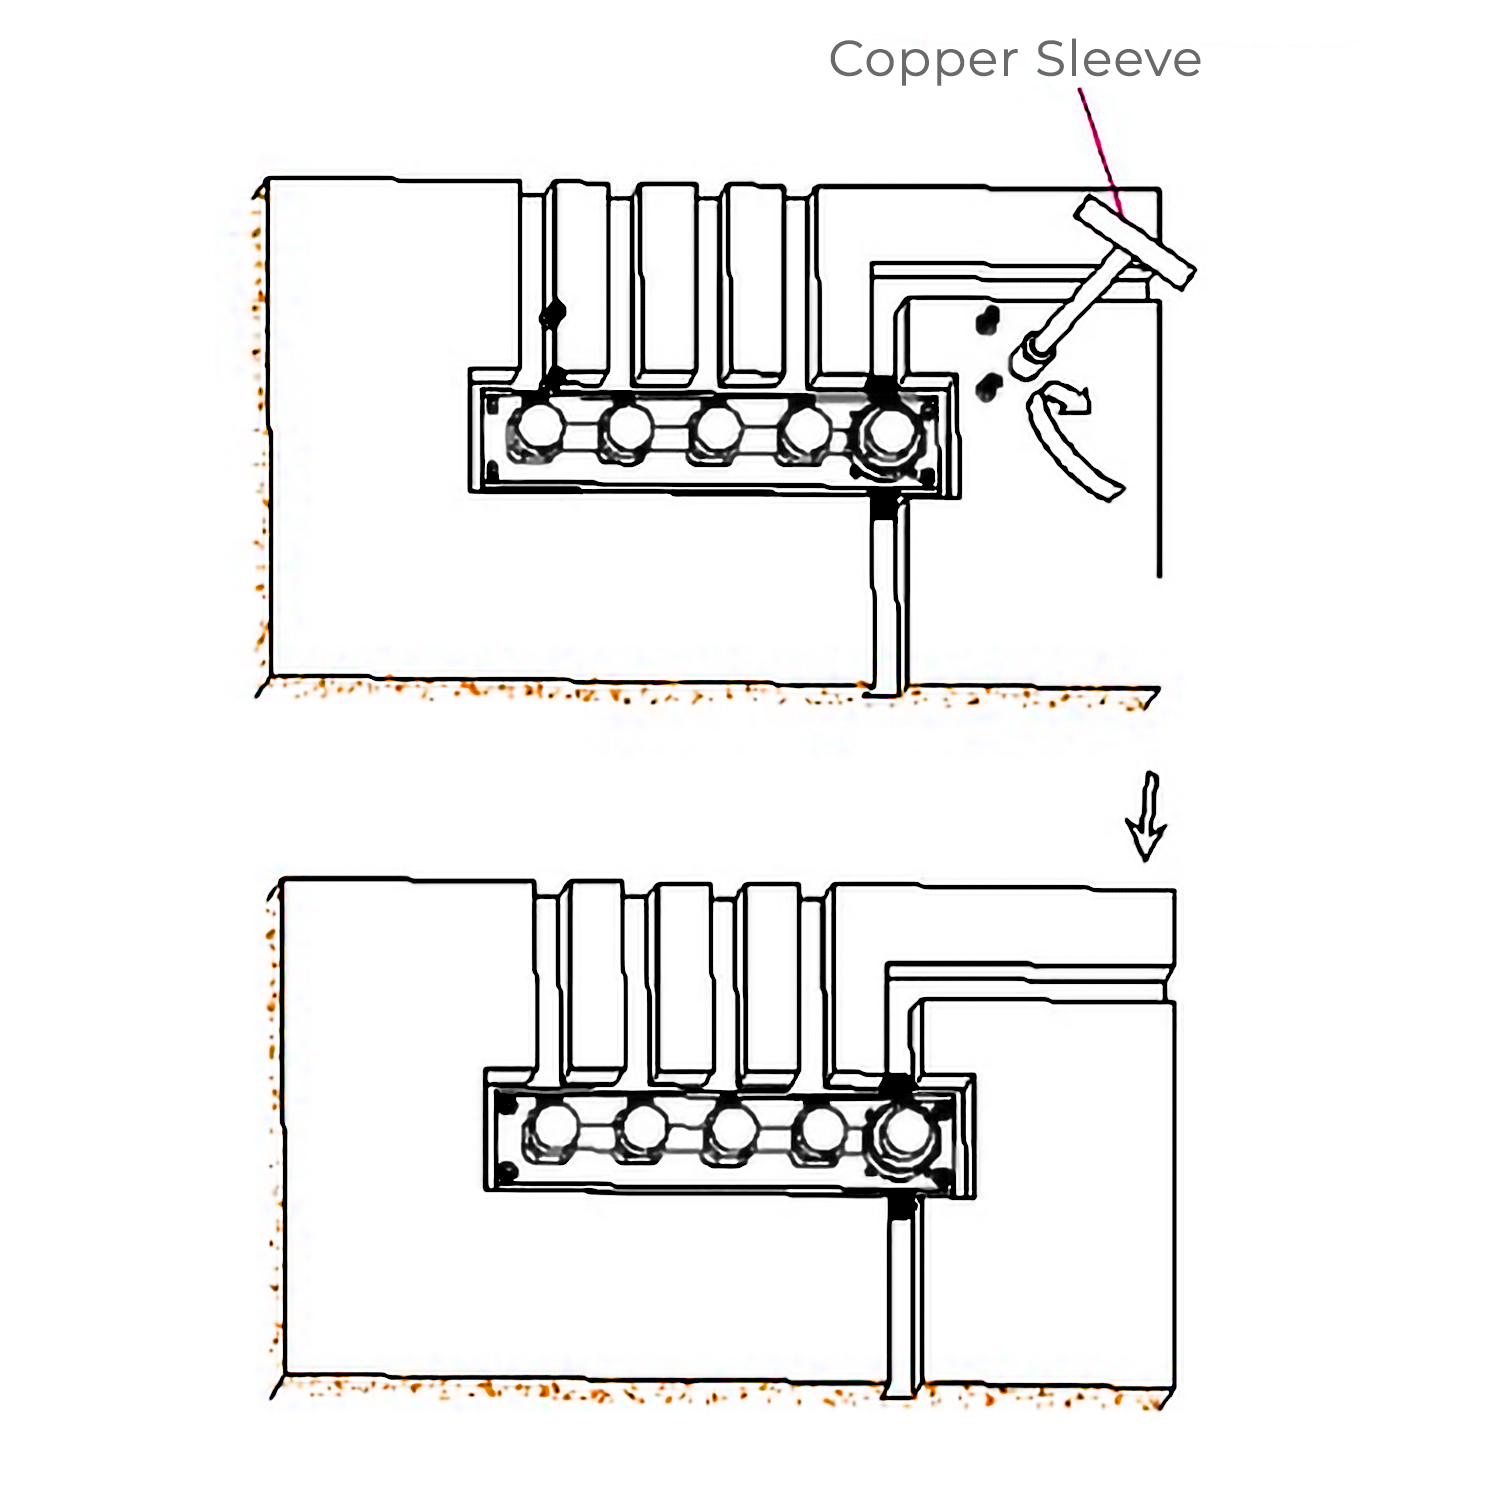
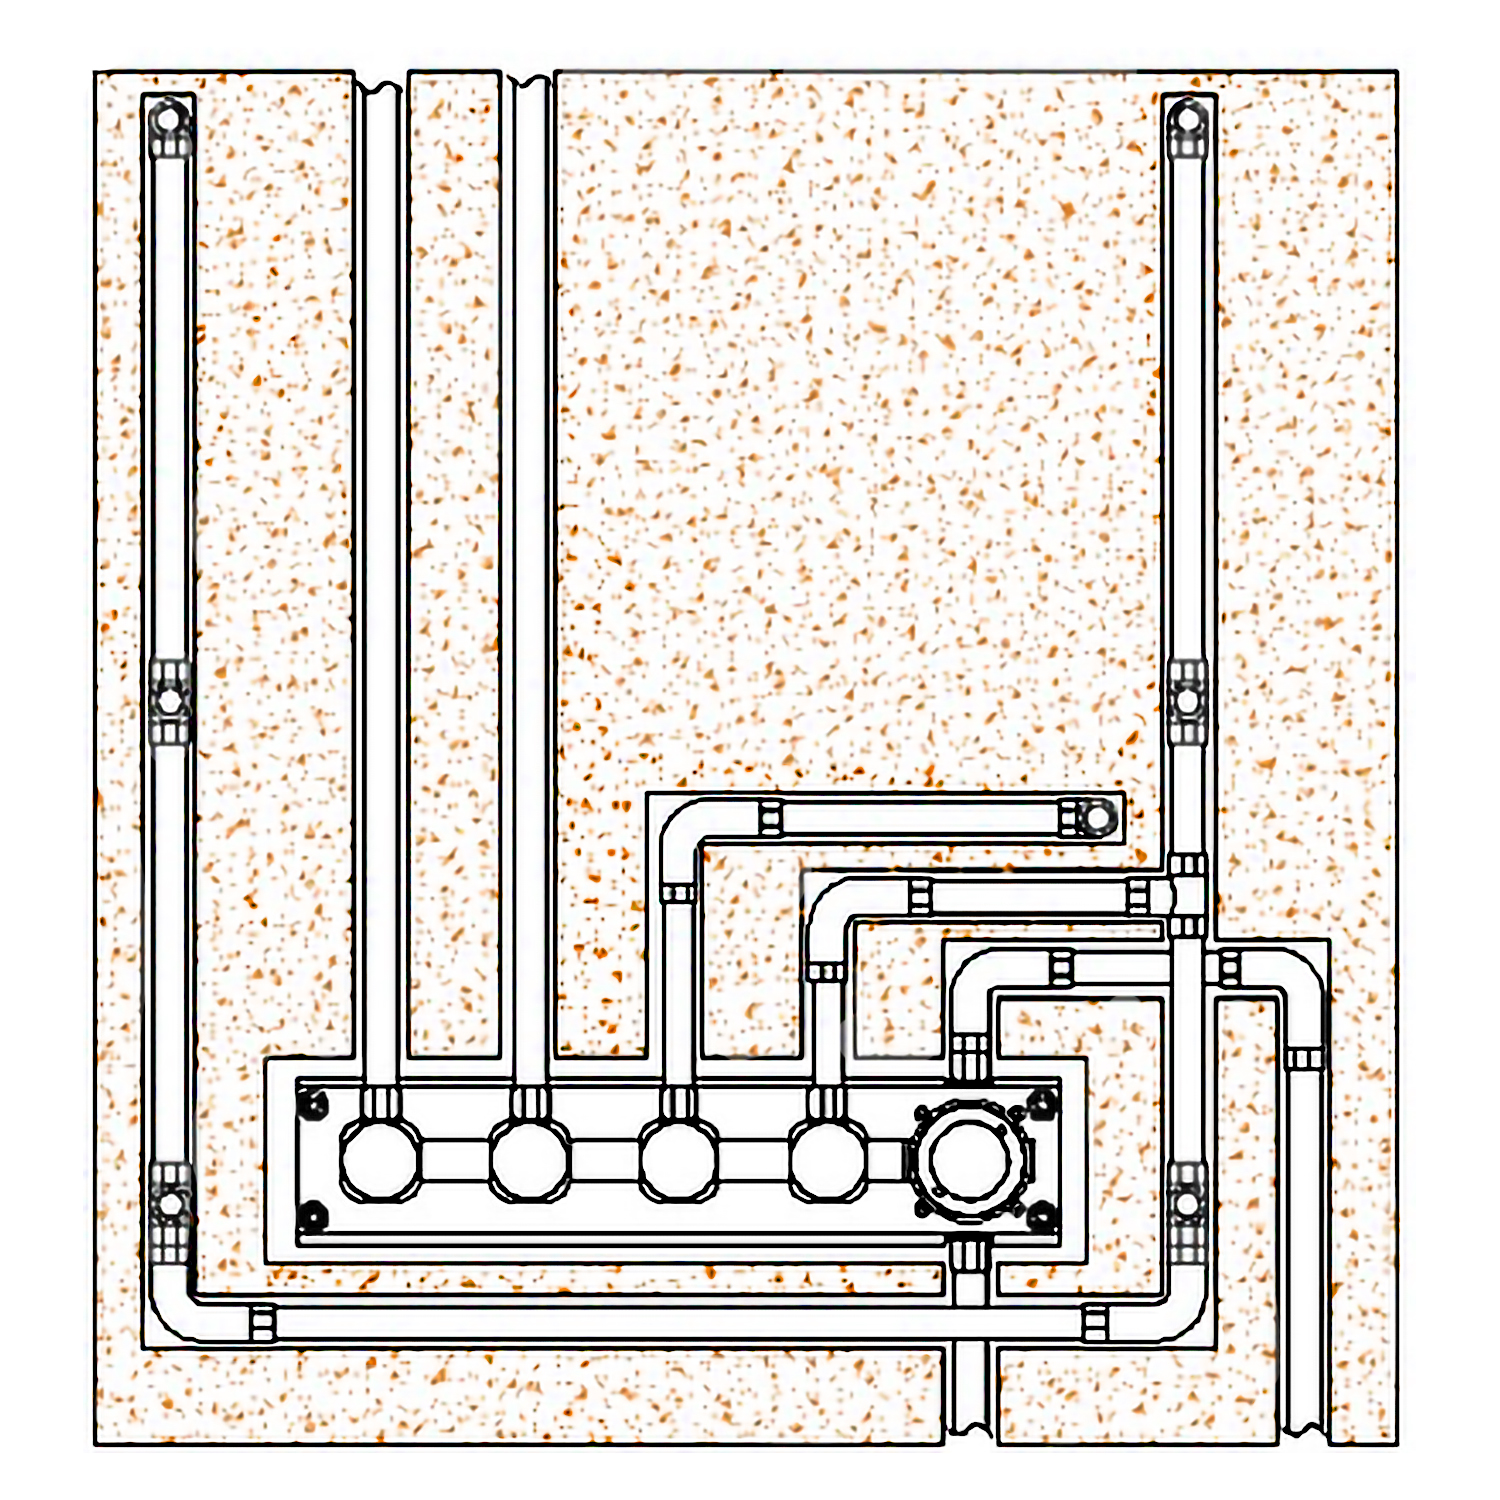
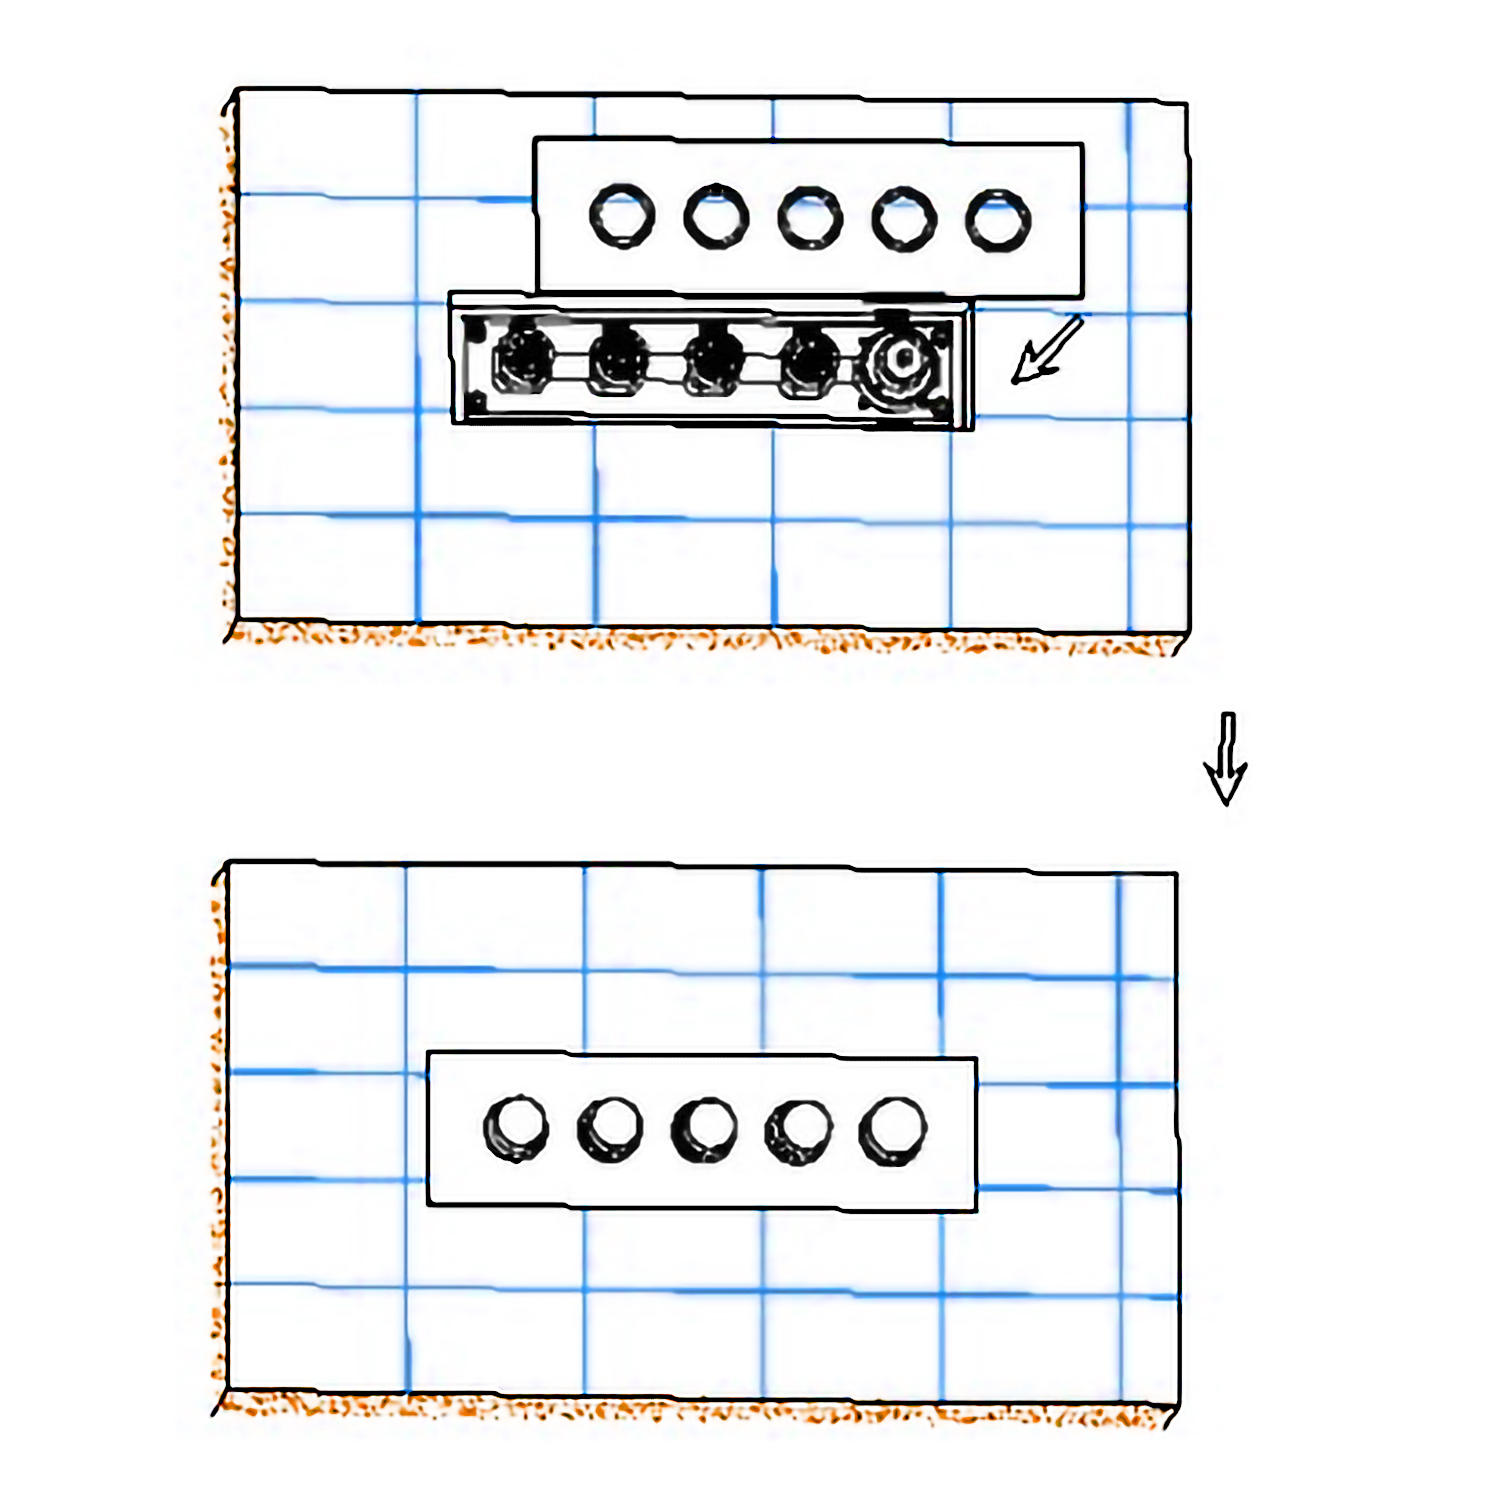
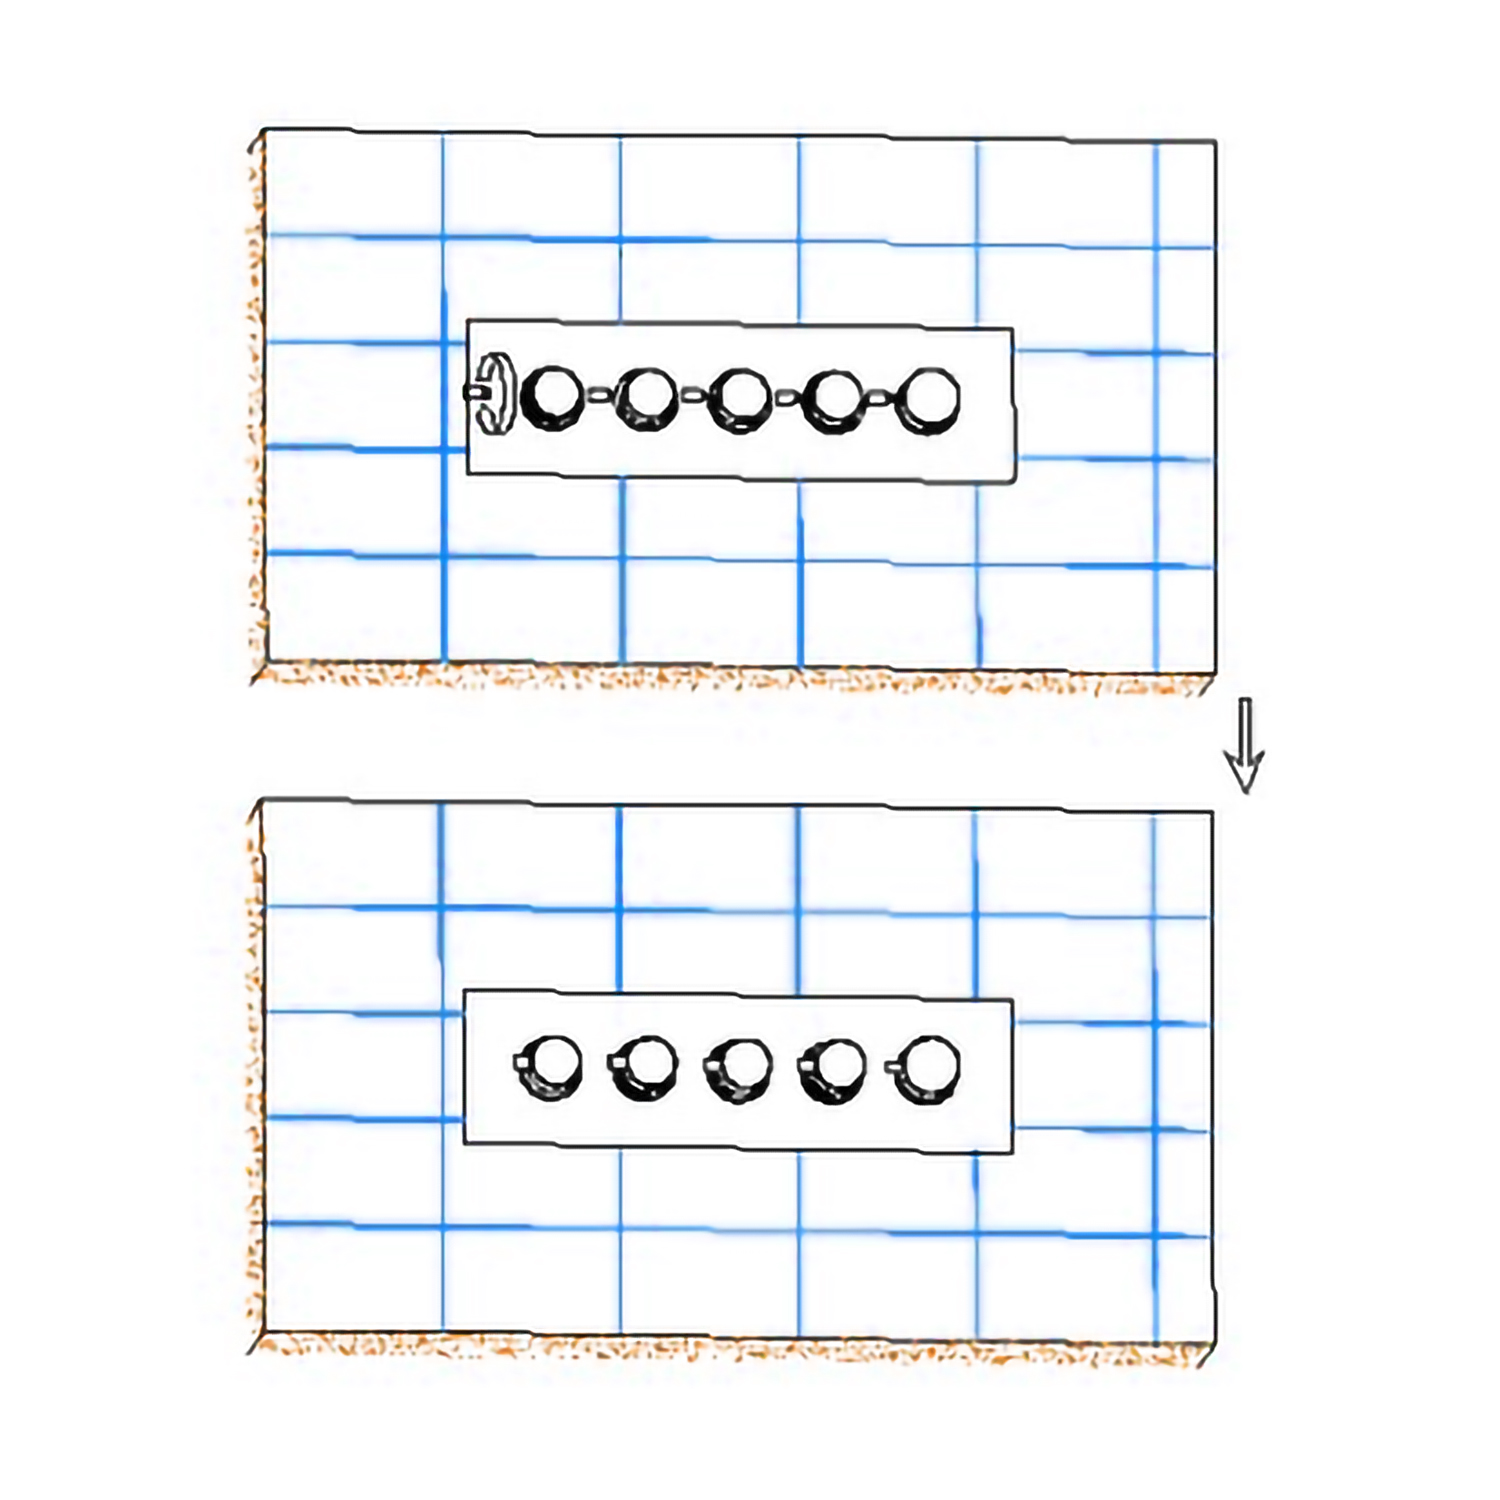
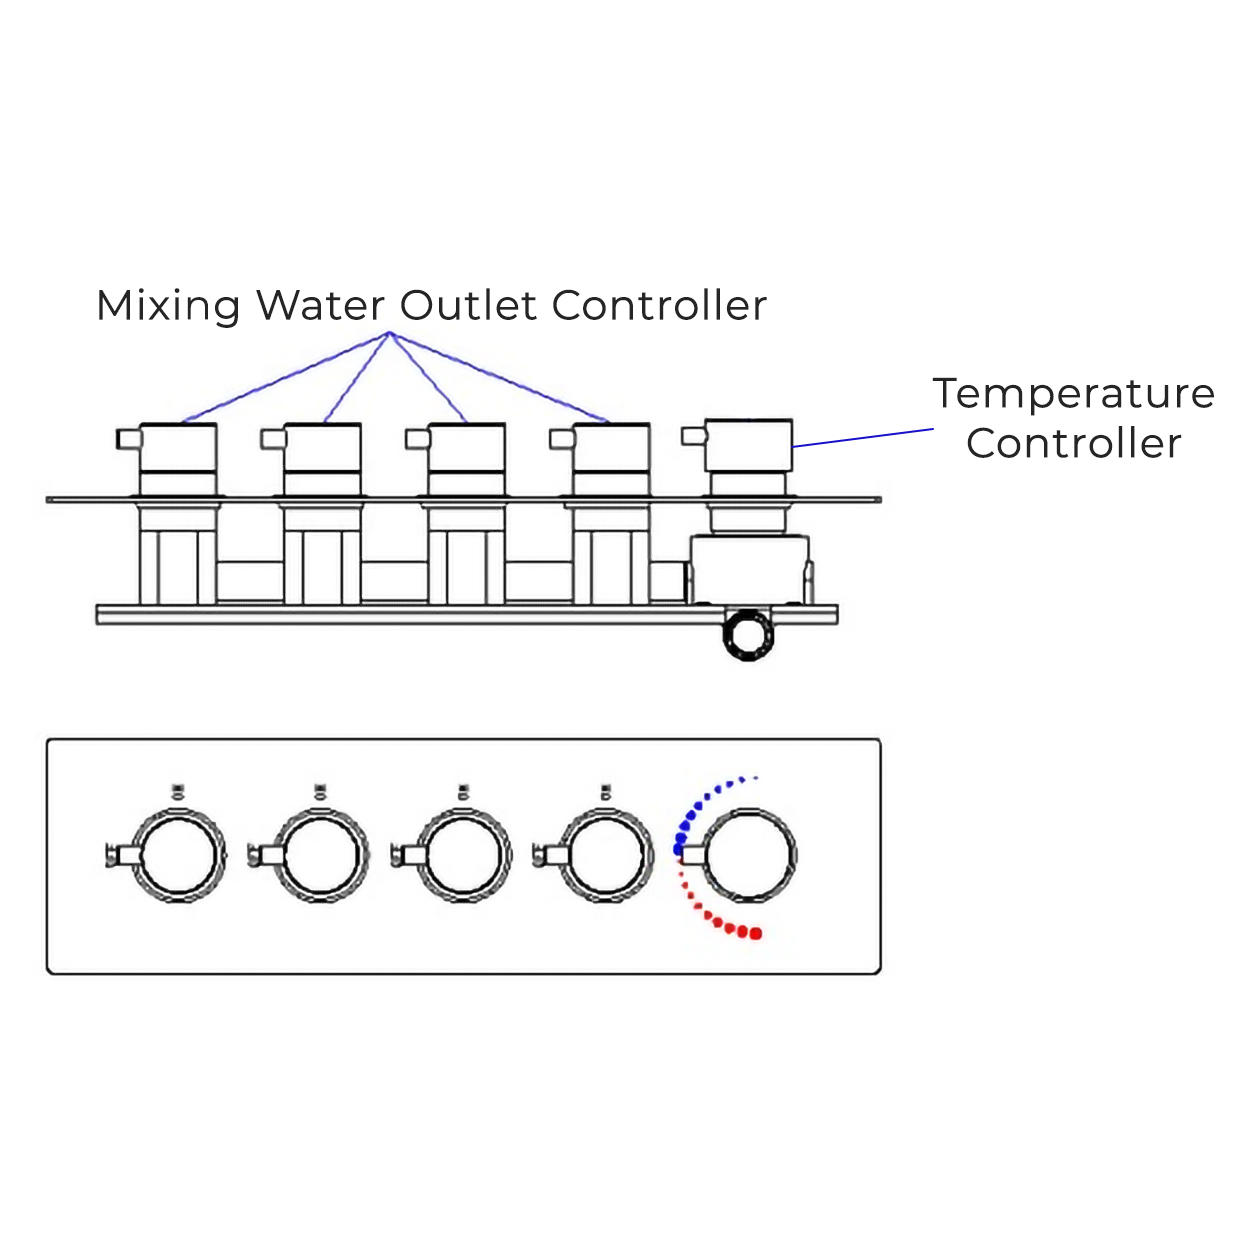
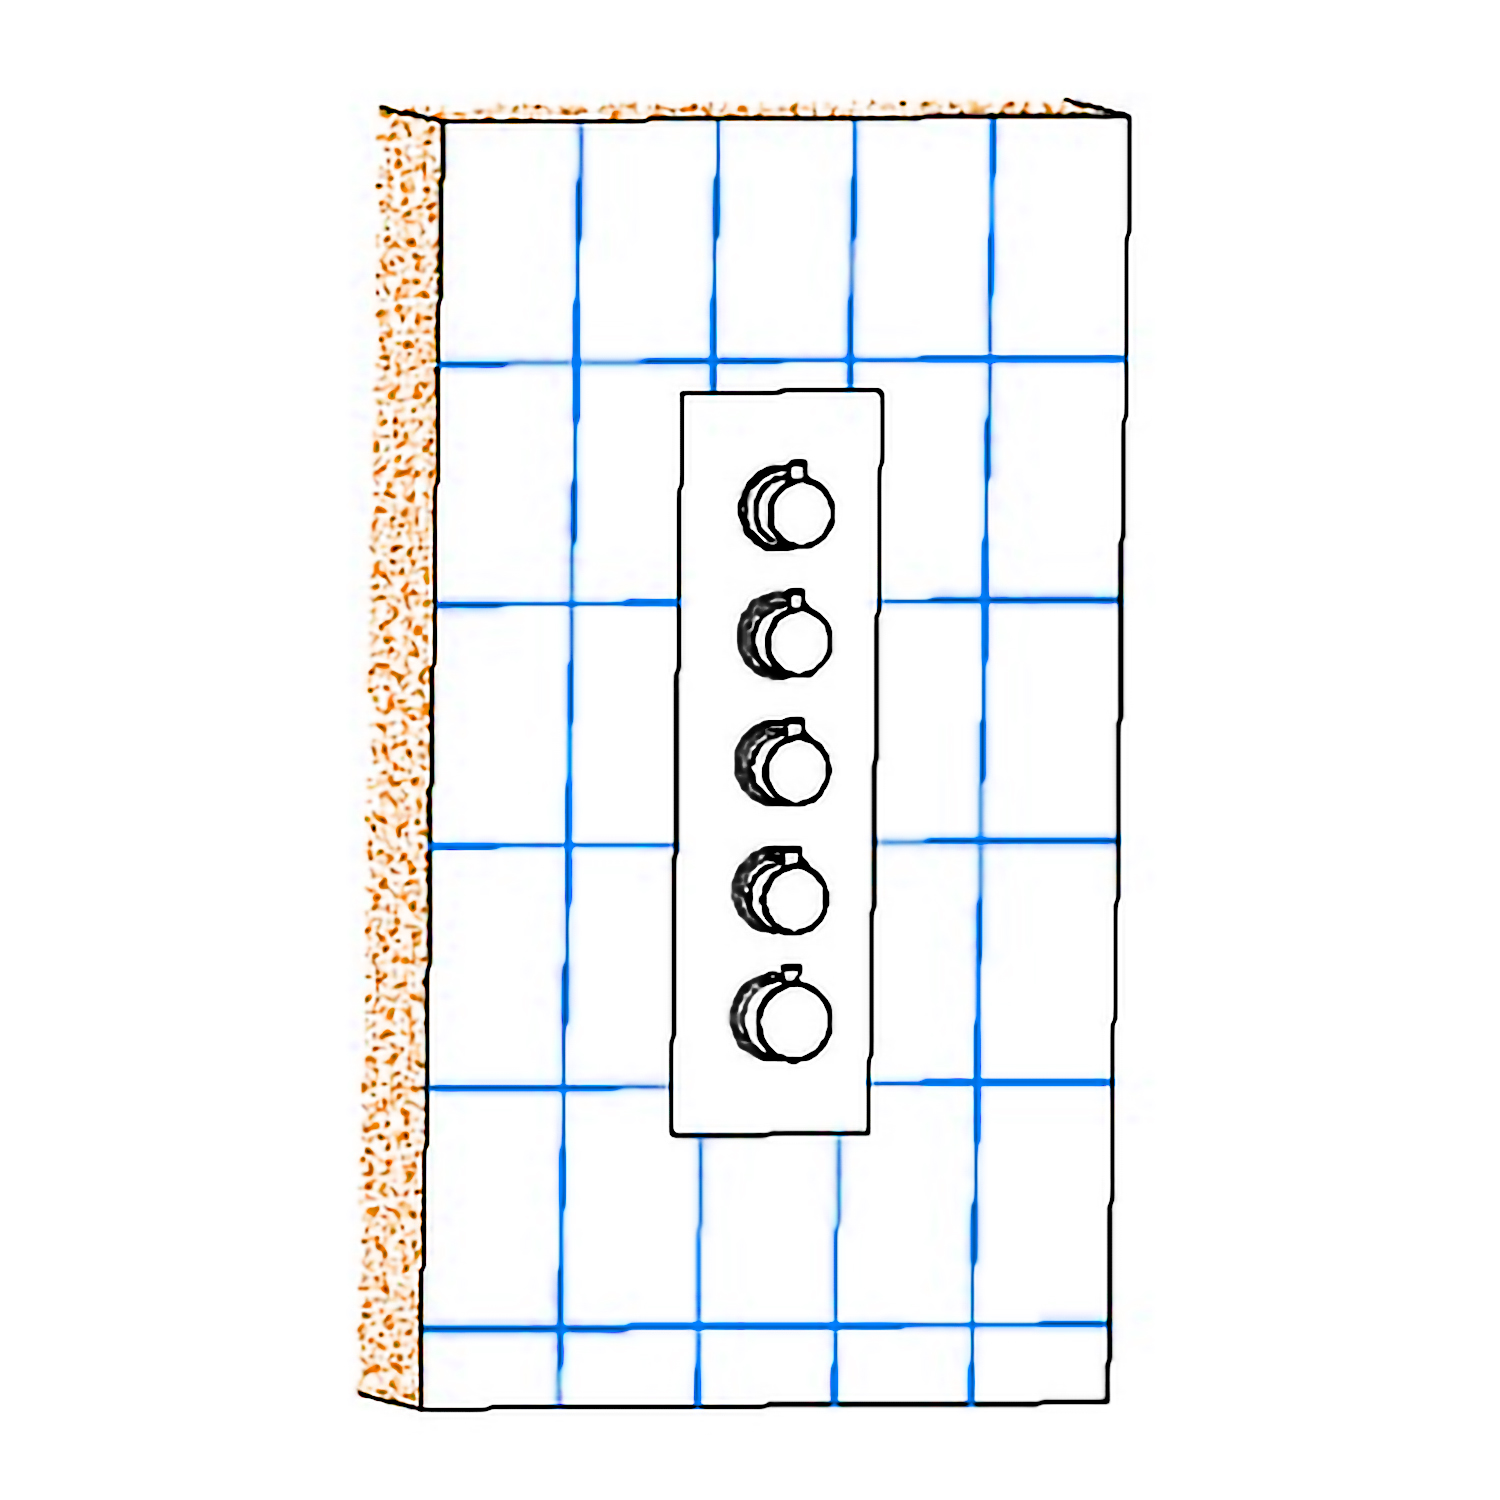
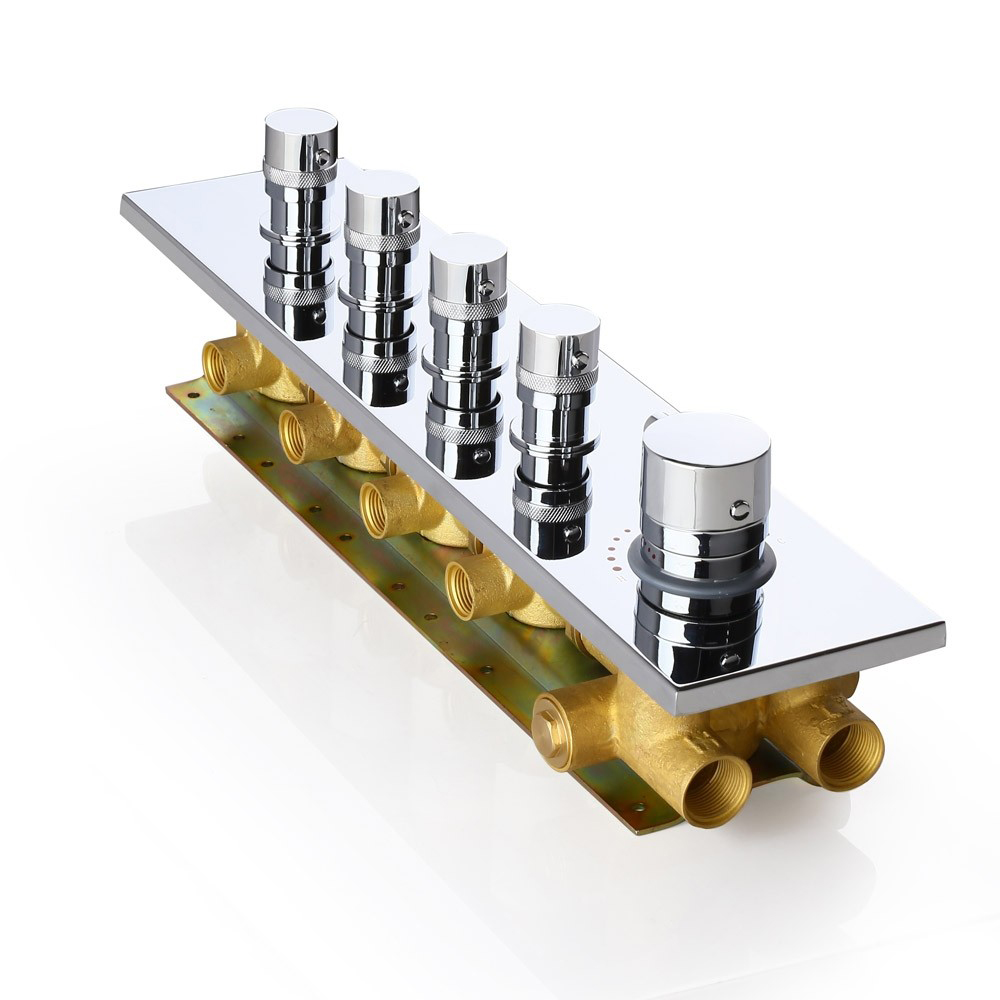
Fontana Platinum Thermostatic Ceiling Mount Bathroom Rain Shower Set Features: