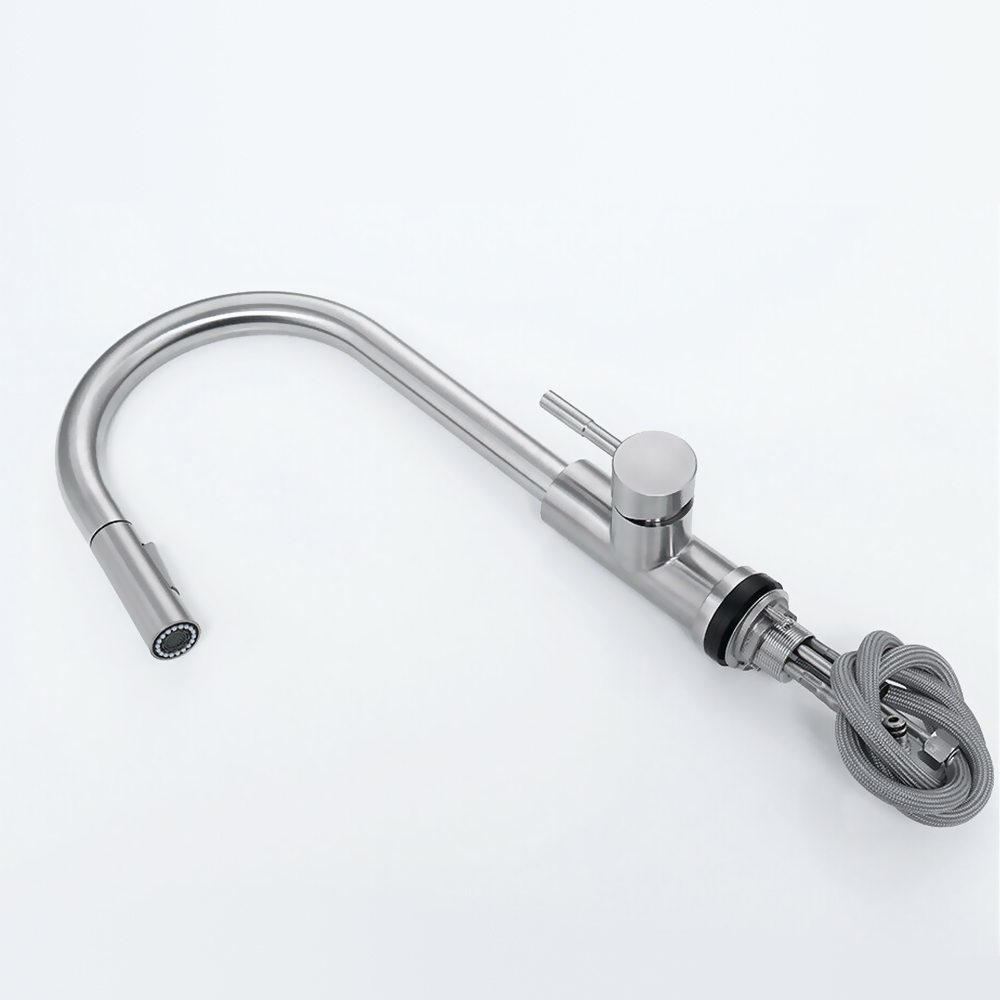
Easy step by steps Installation Instructions for Touchless Sensor Kitchen Faucet
Before you begin, please read the installation instructions below. Observe all local building and safety codes.
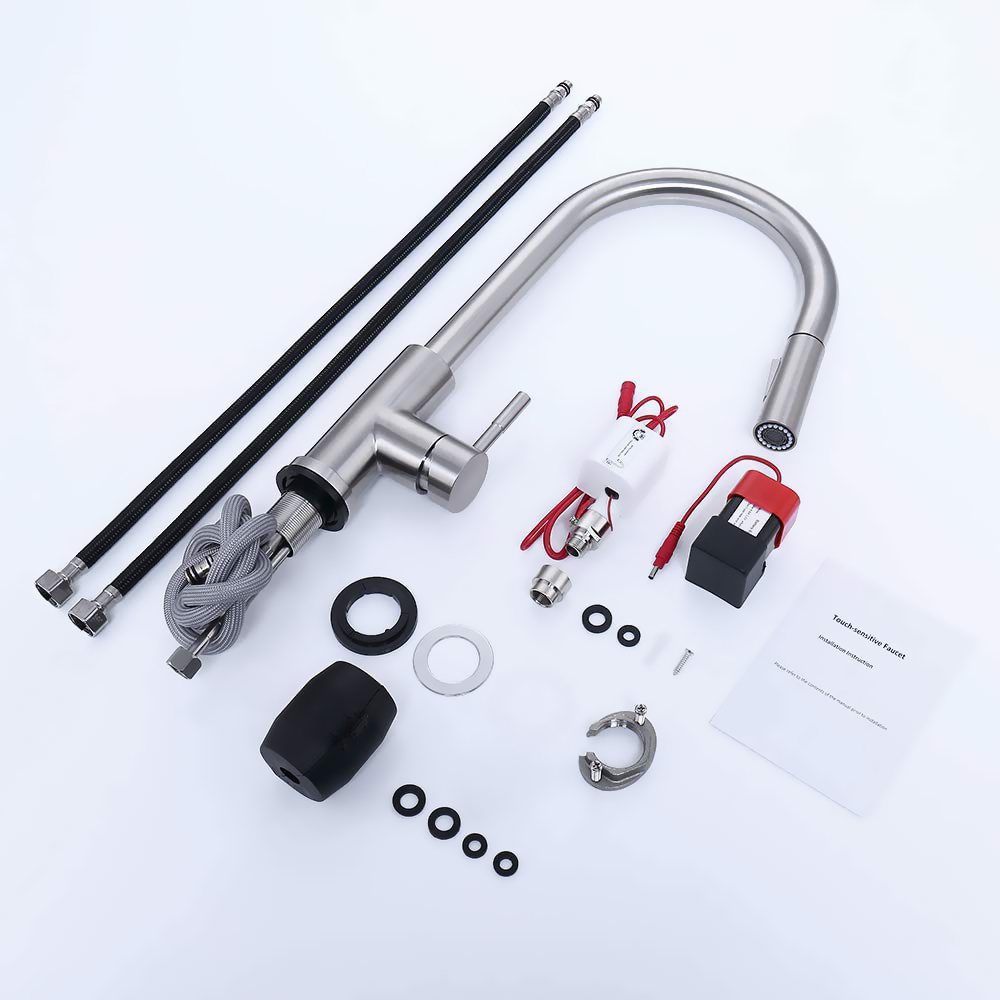
Unpack and inspect the touchless faucet for any shipping damages for any shipping damages. If you find damages, do not install.
Please note all showers must be installed by a professional and certified plumber otherwise warranty might be voided.
sensor
Sensor Faucet Installations Instructions
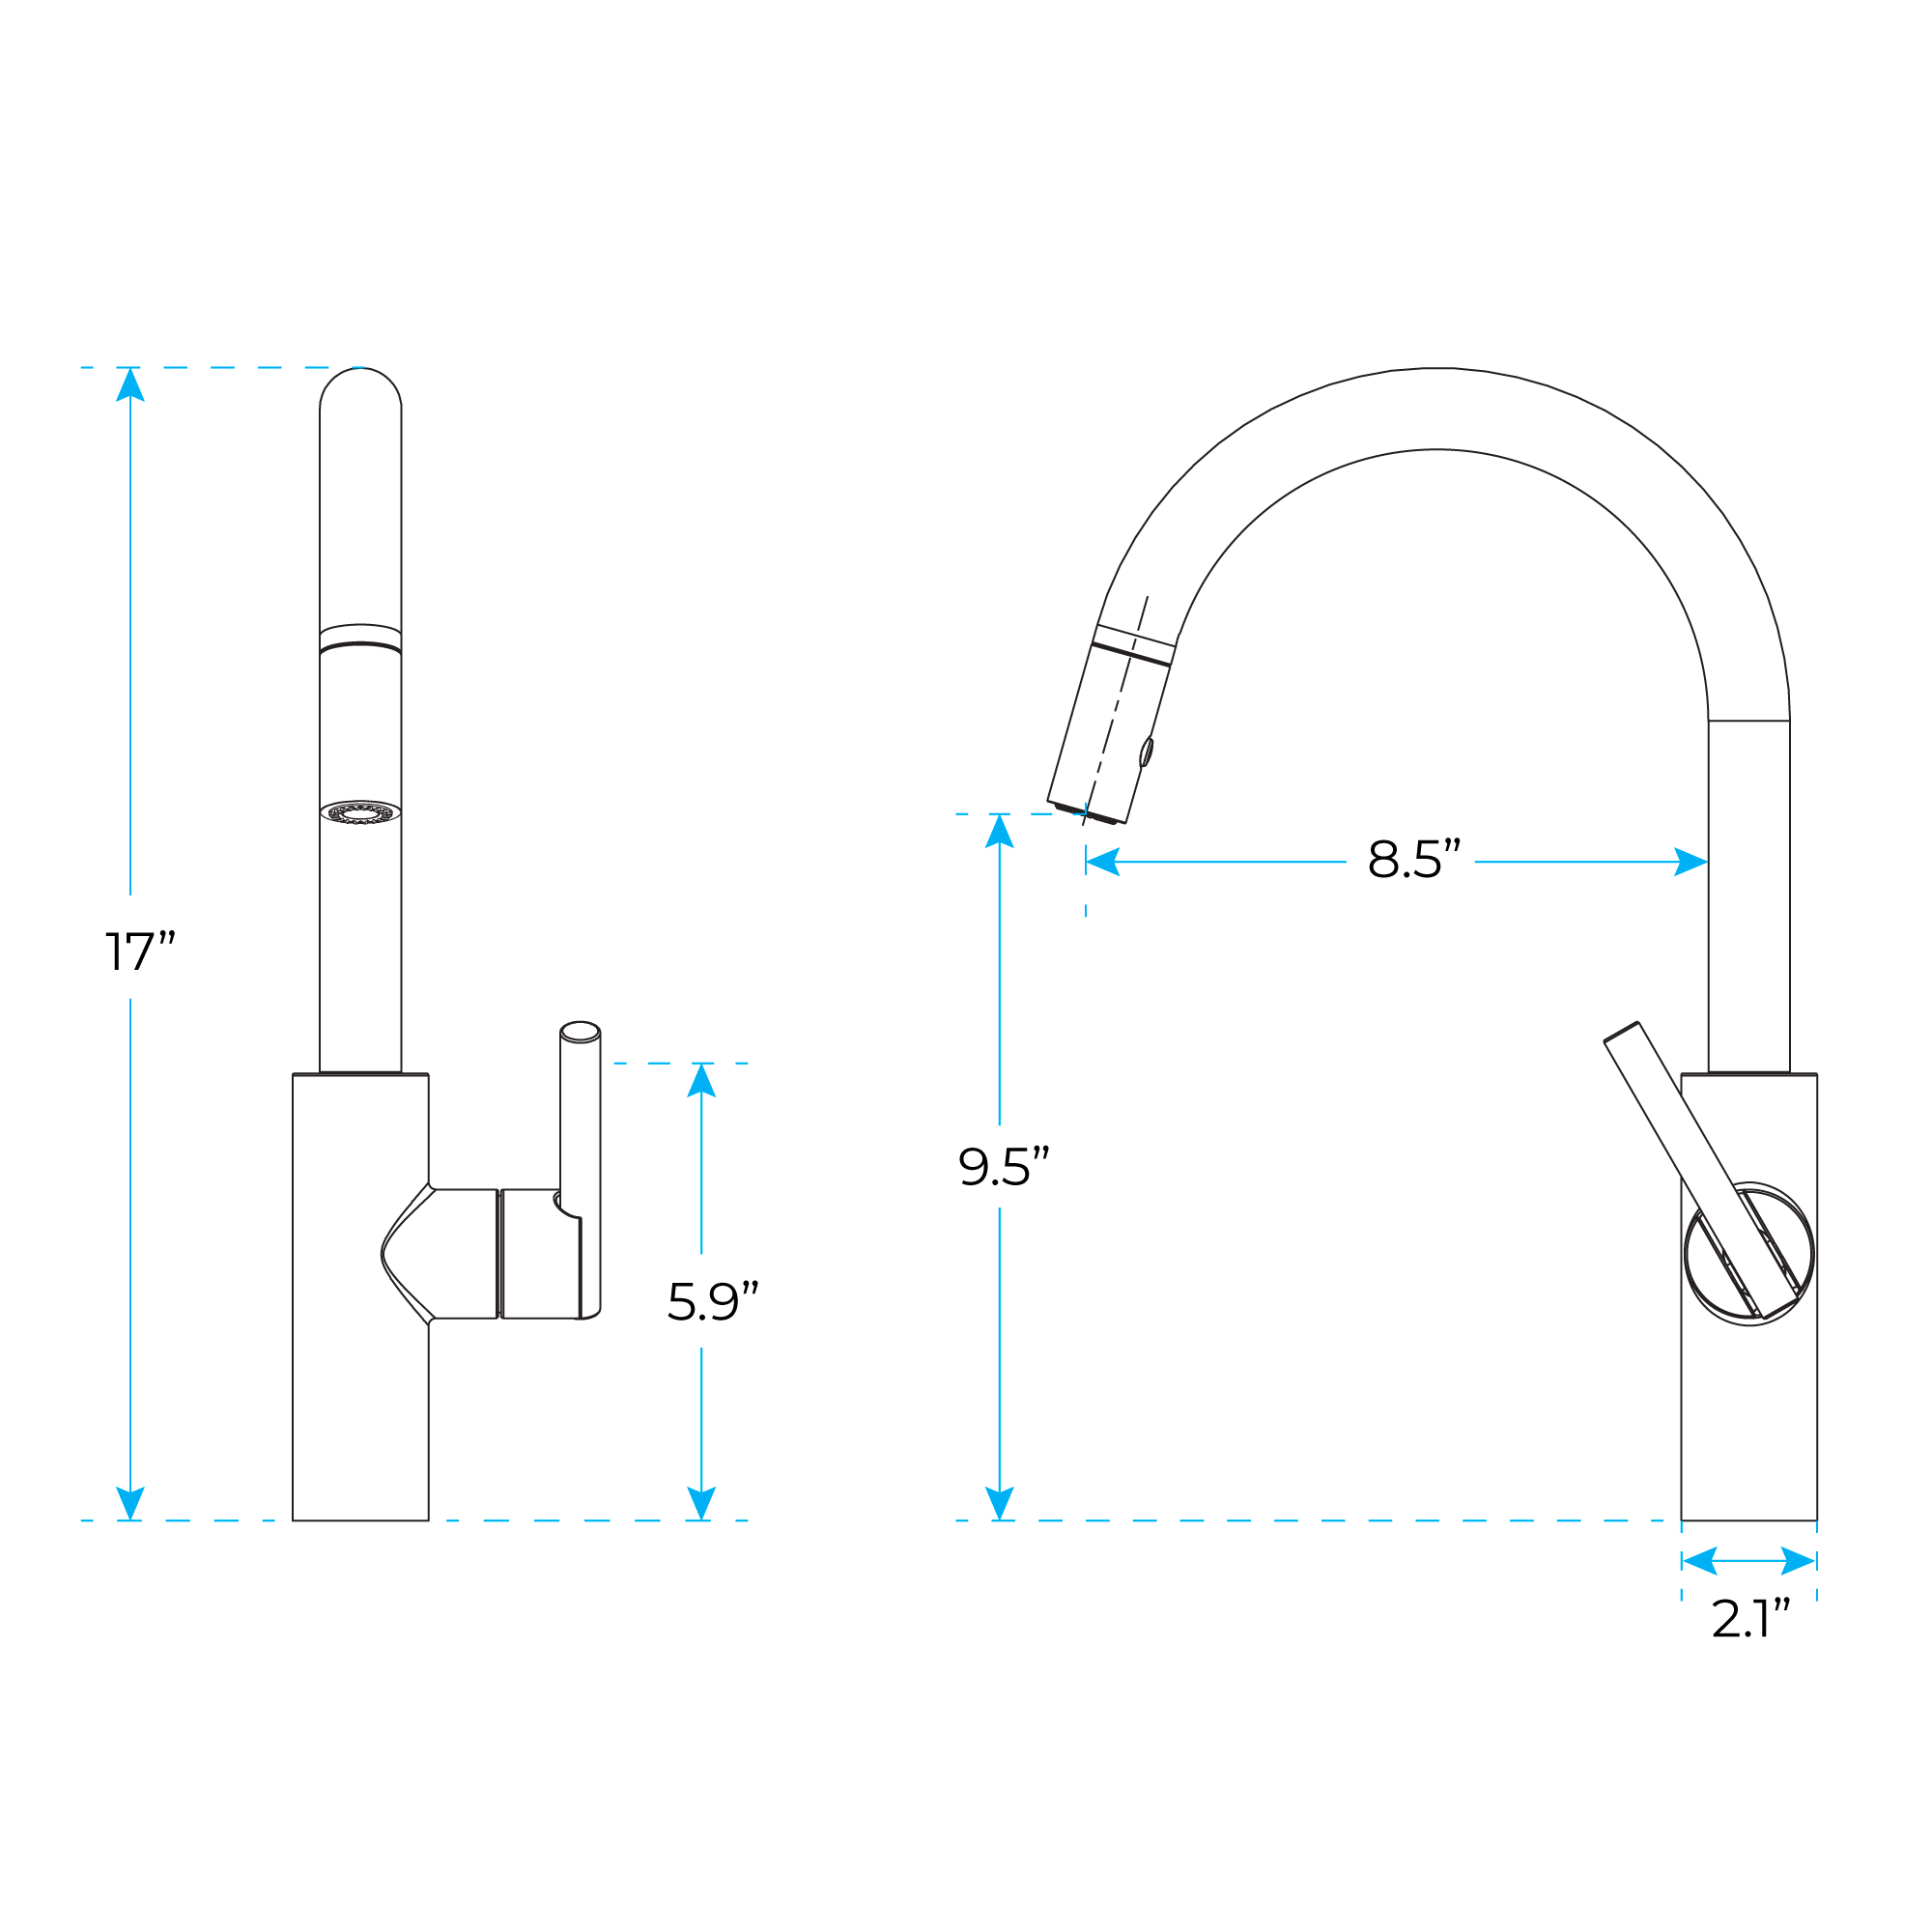
Size:
Step 1:
Step 2:
sensor
Step 3:
Step 4:
Step 5: (Make Hot & Cold Water Connections)
Step 6: (Flush Pipe)
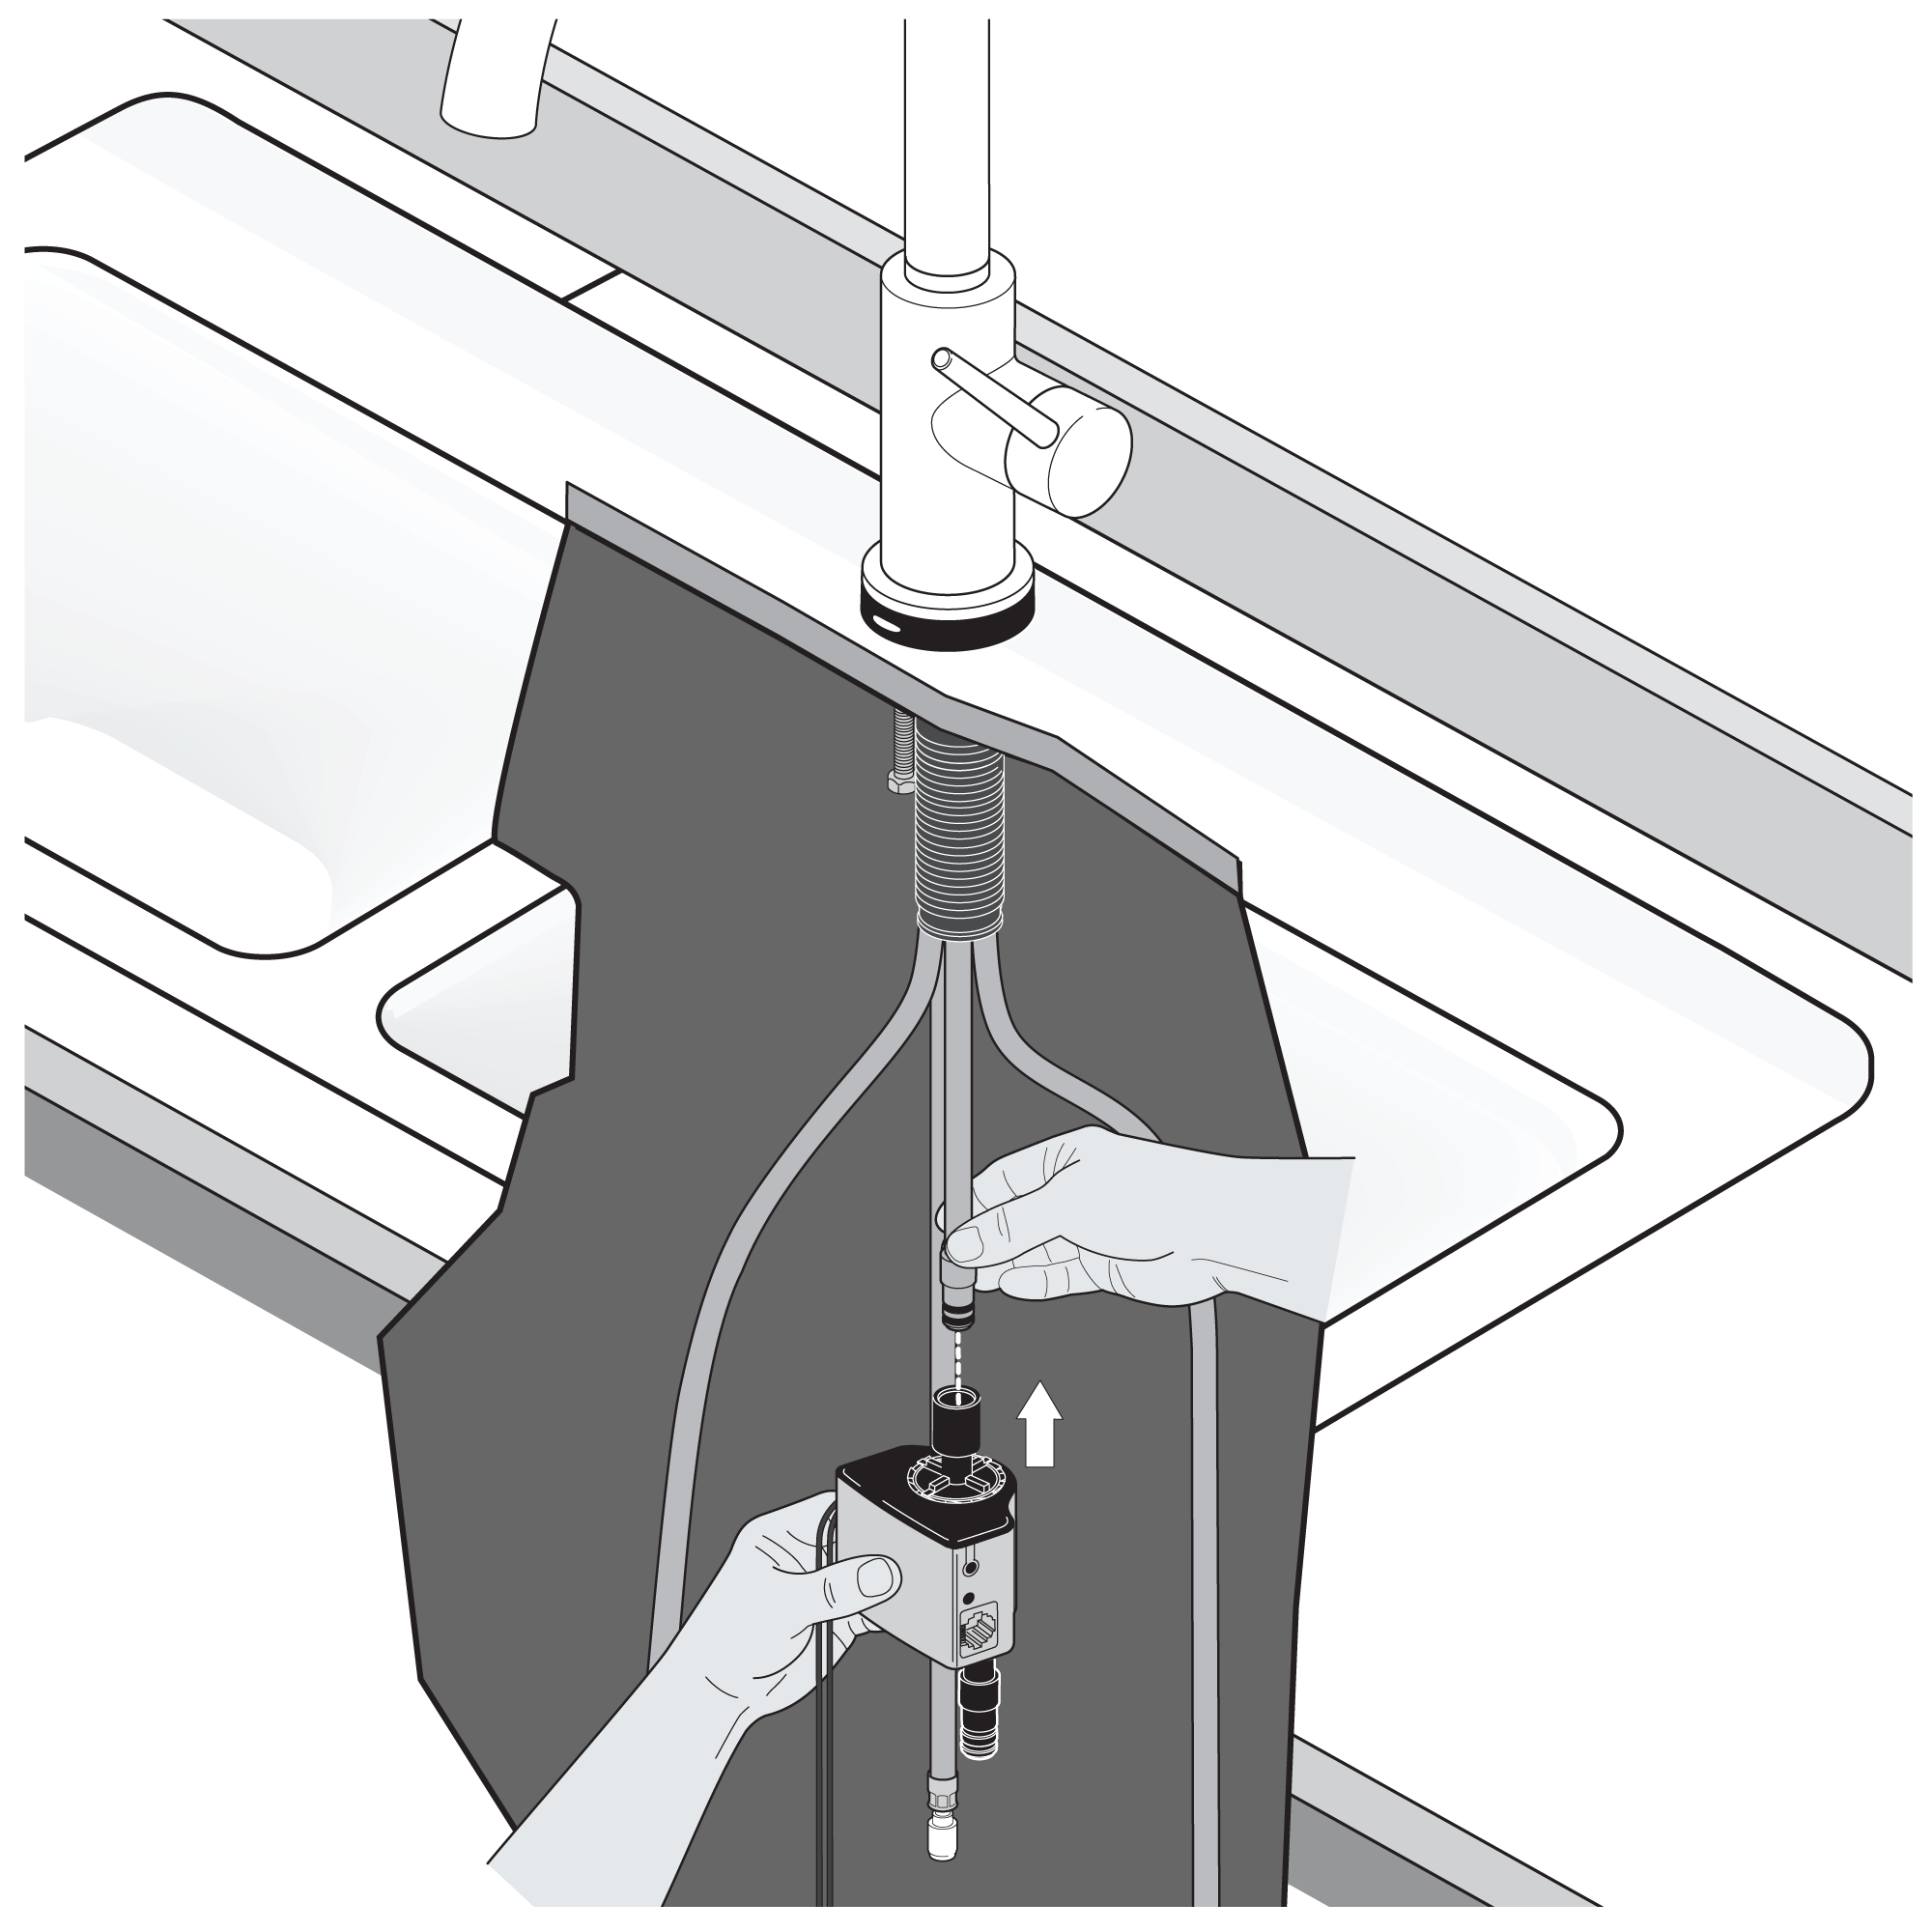
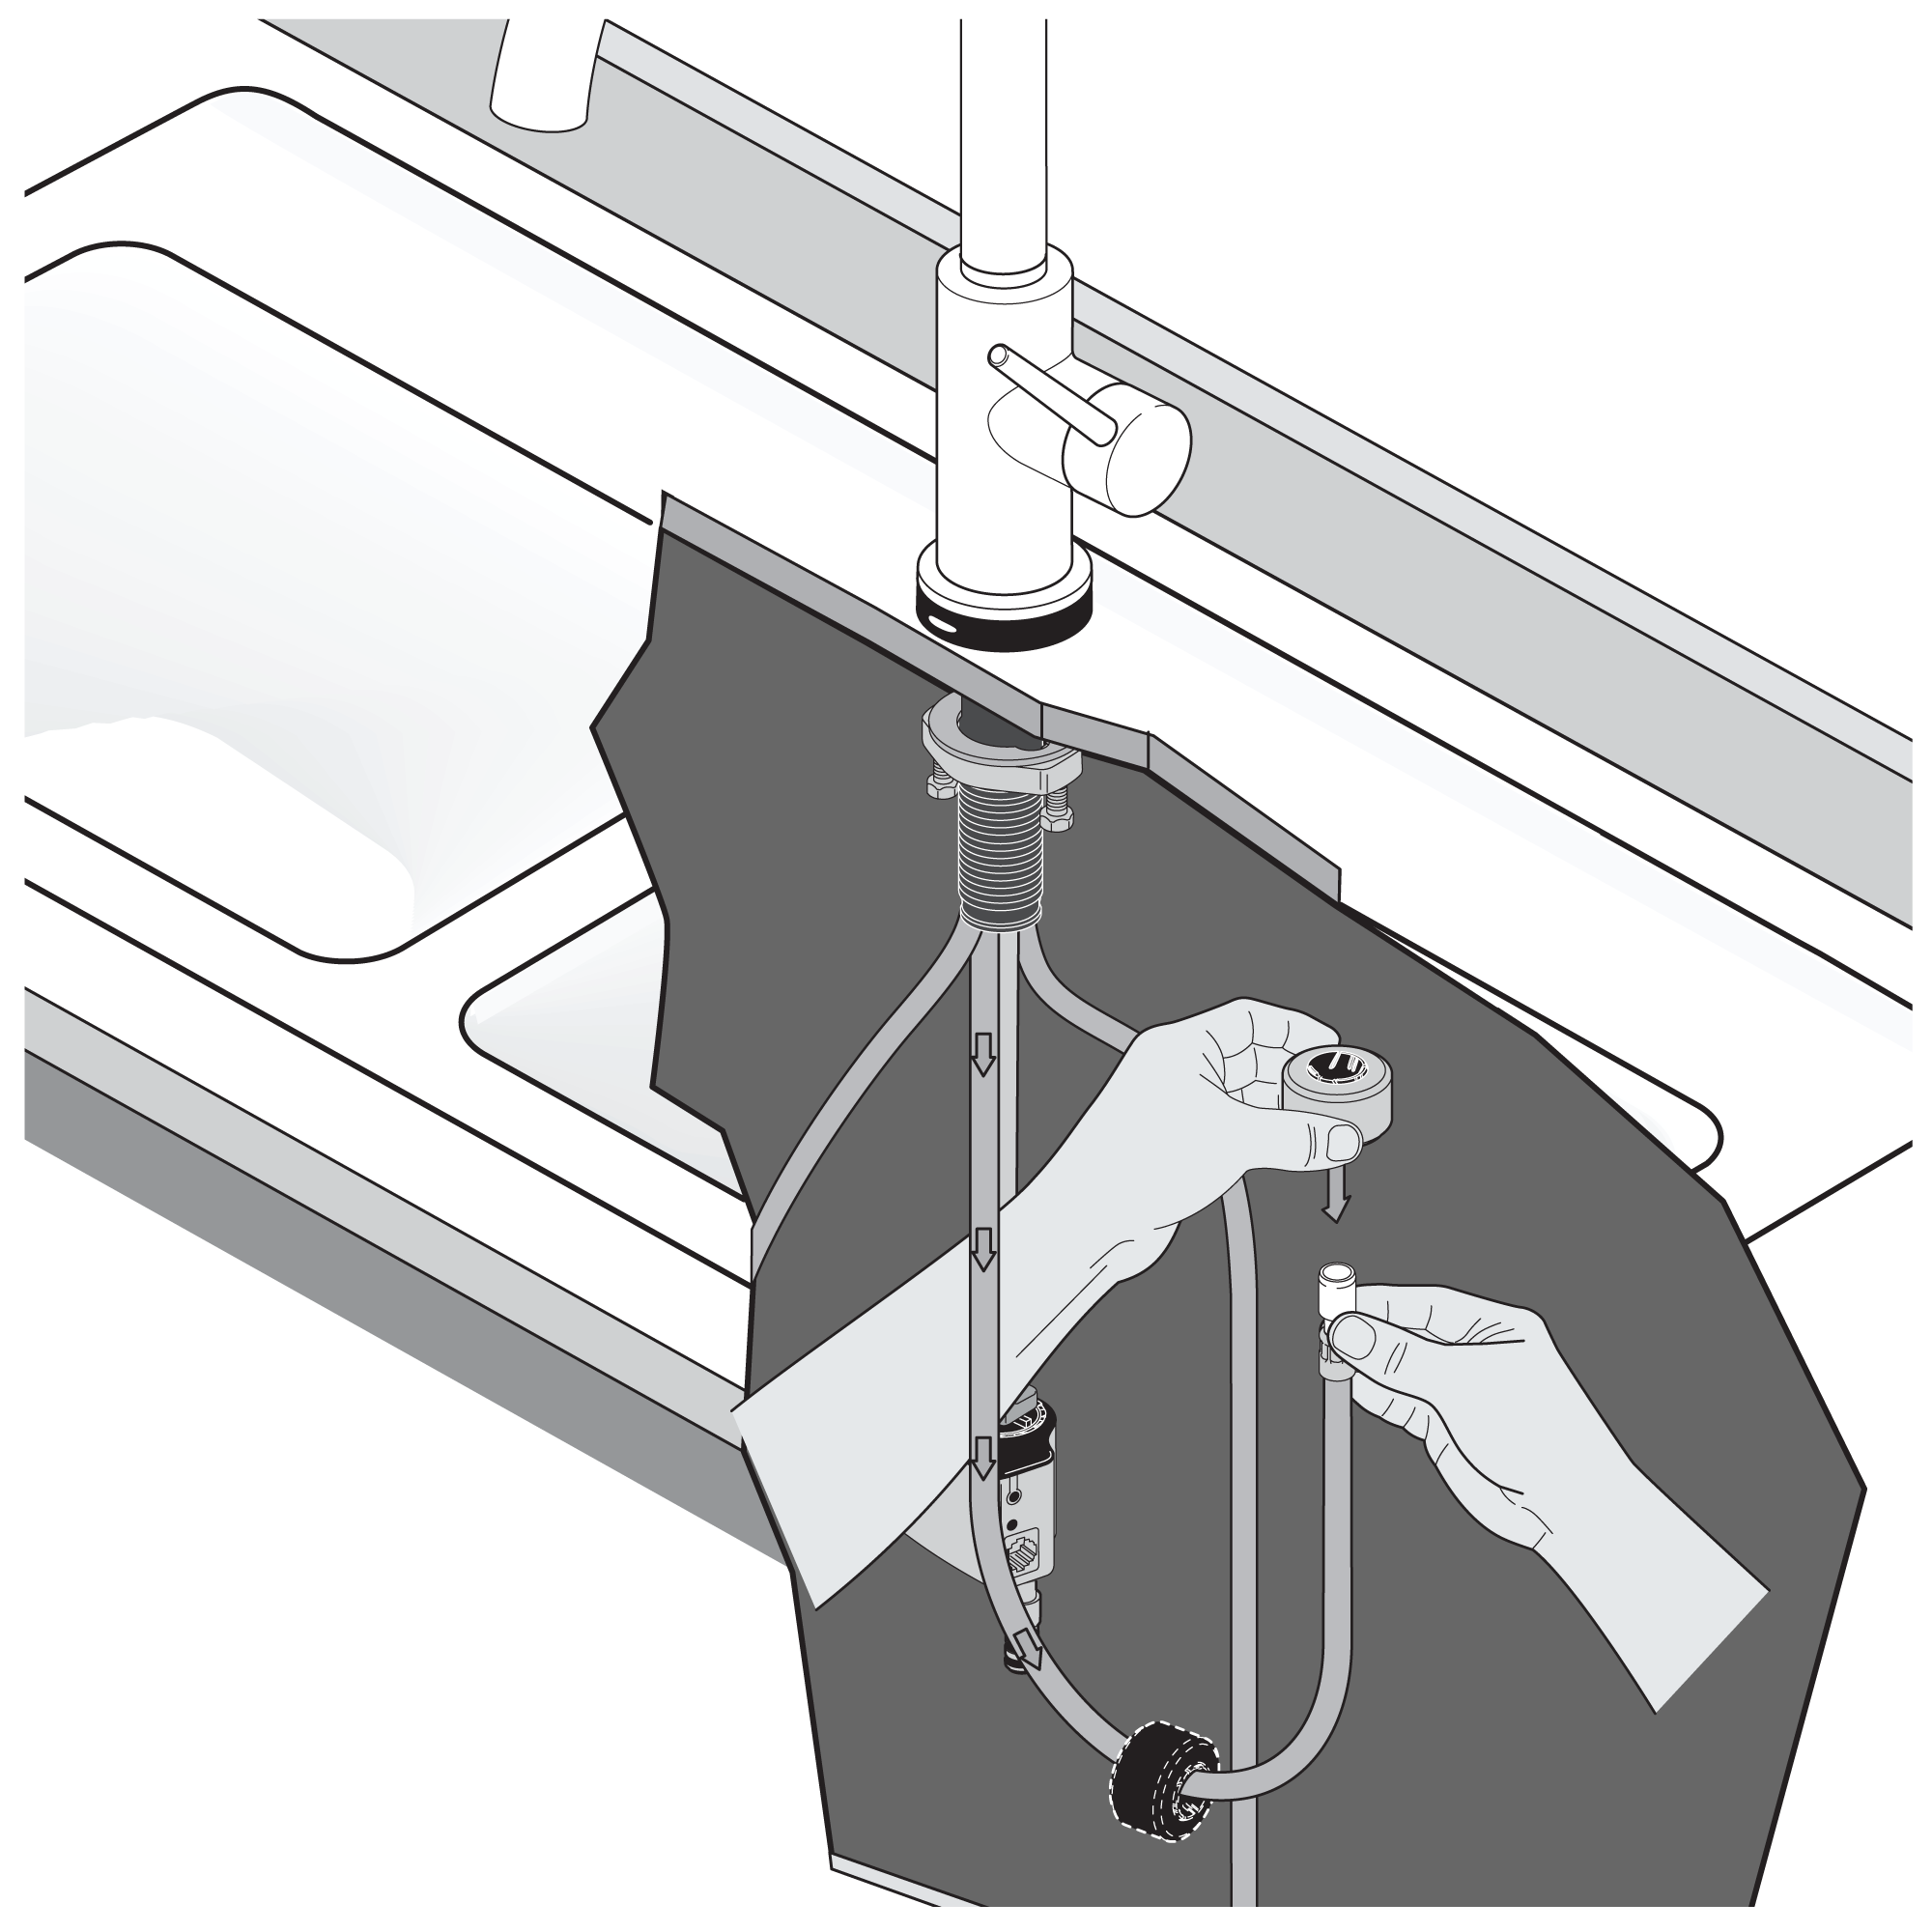
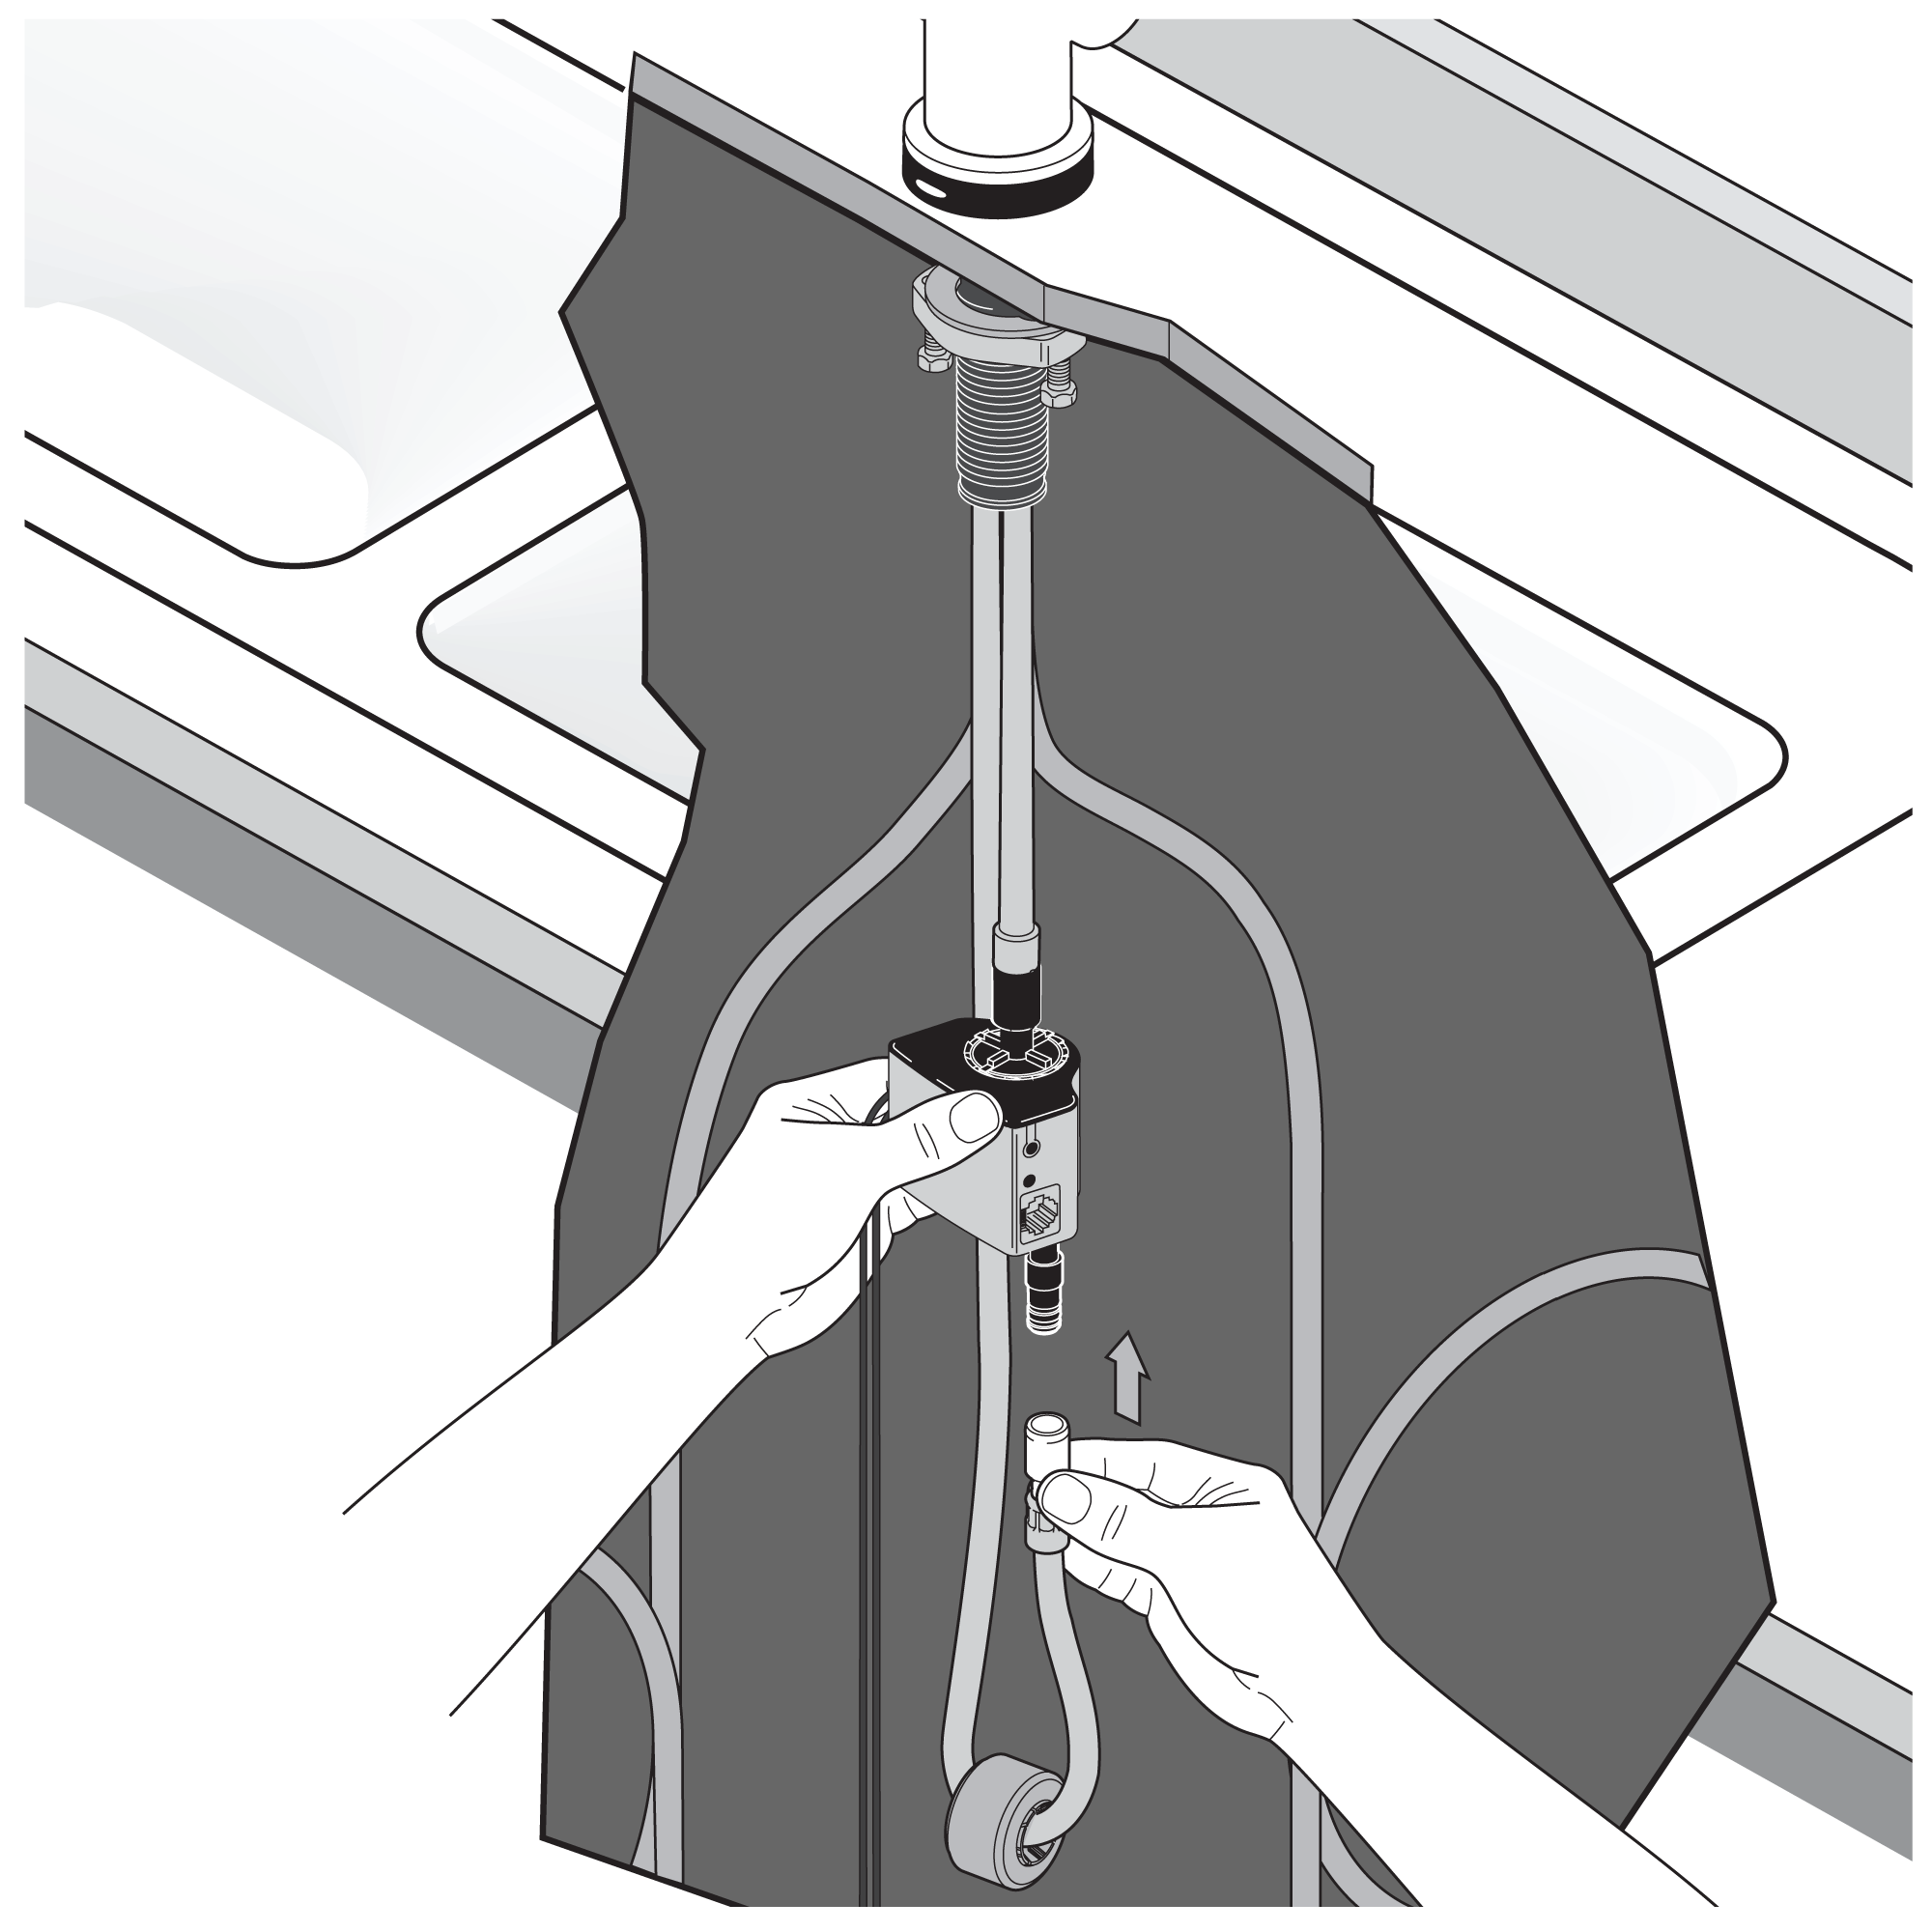
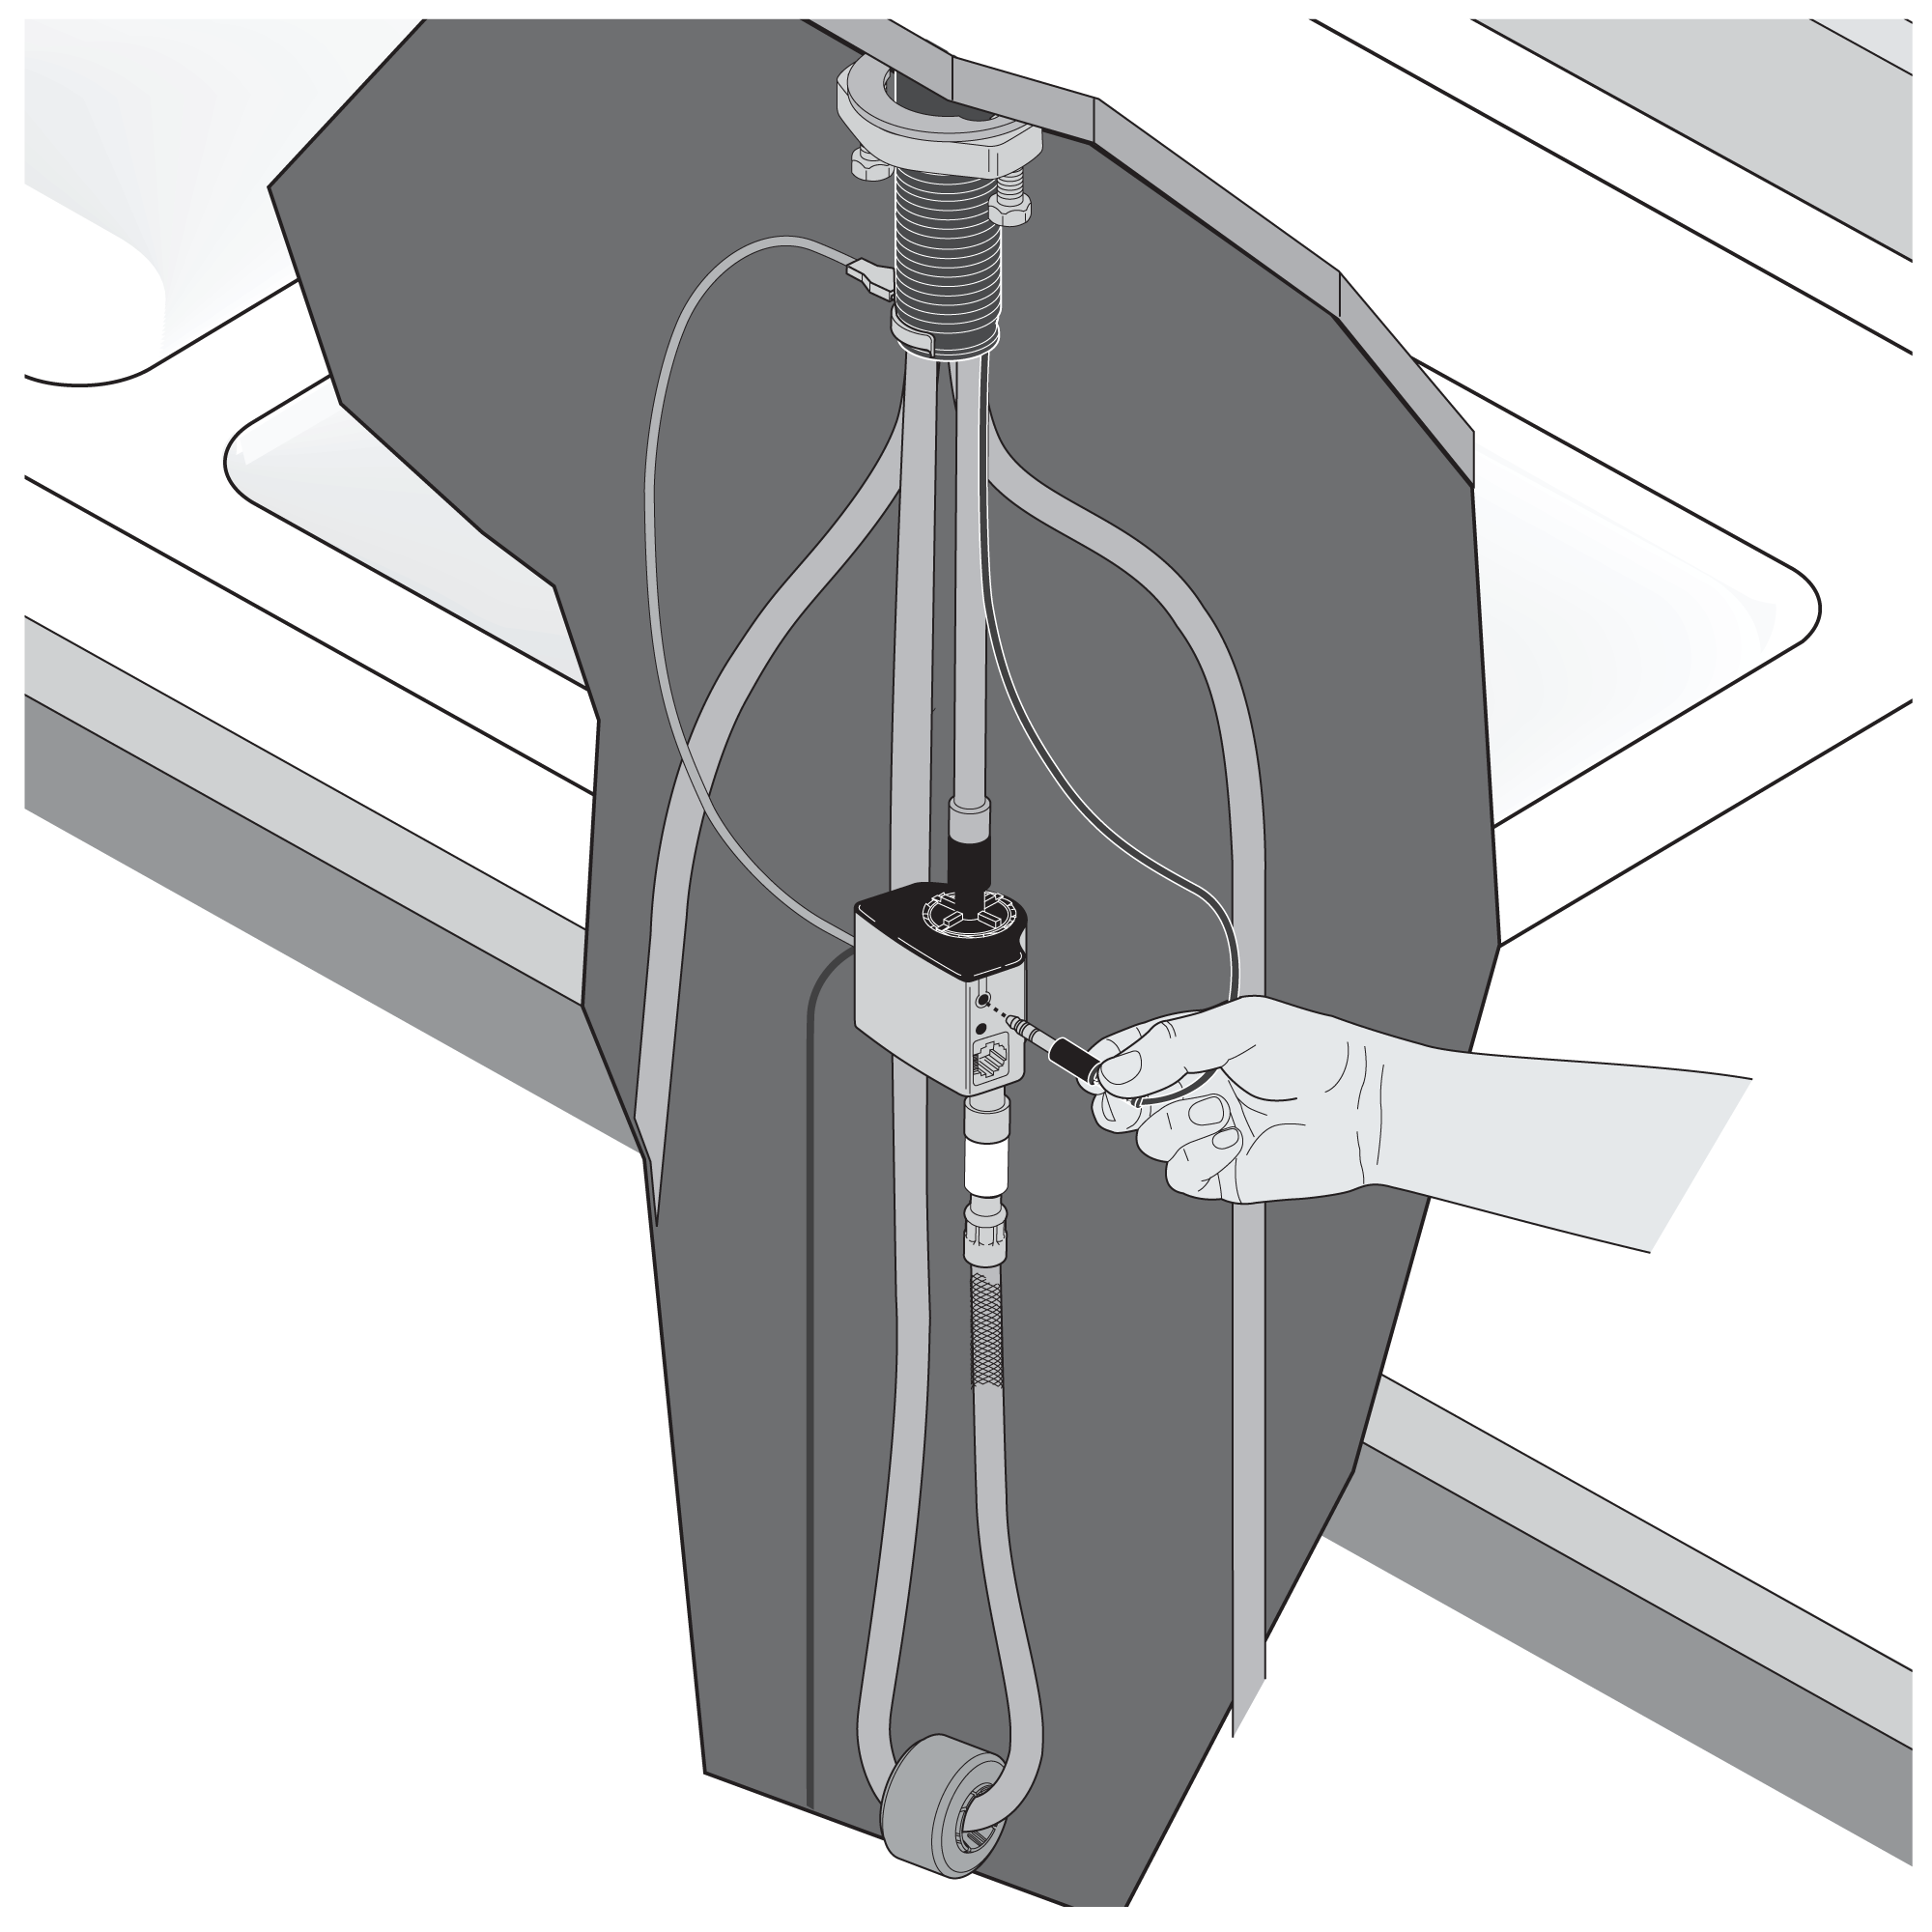
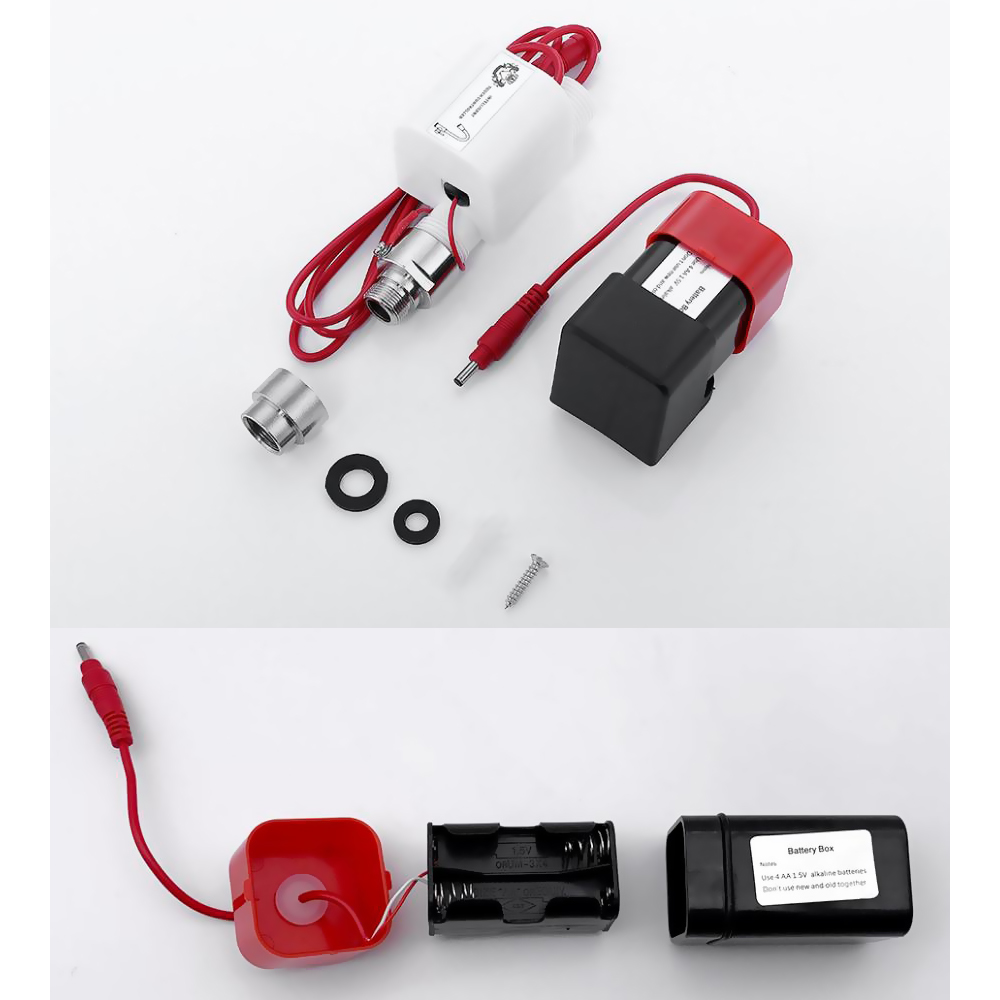
Step 7: (Install Control Box)
Step 8: (Install Hose Weight)
Step 9:
Step 10:
Step 11:
Step 12:
Step 13:
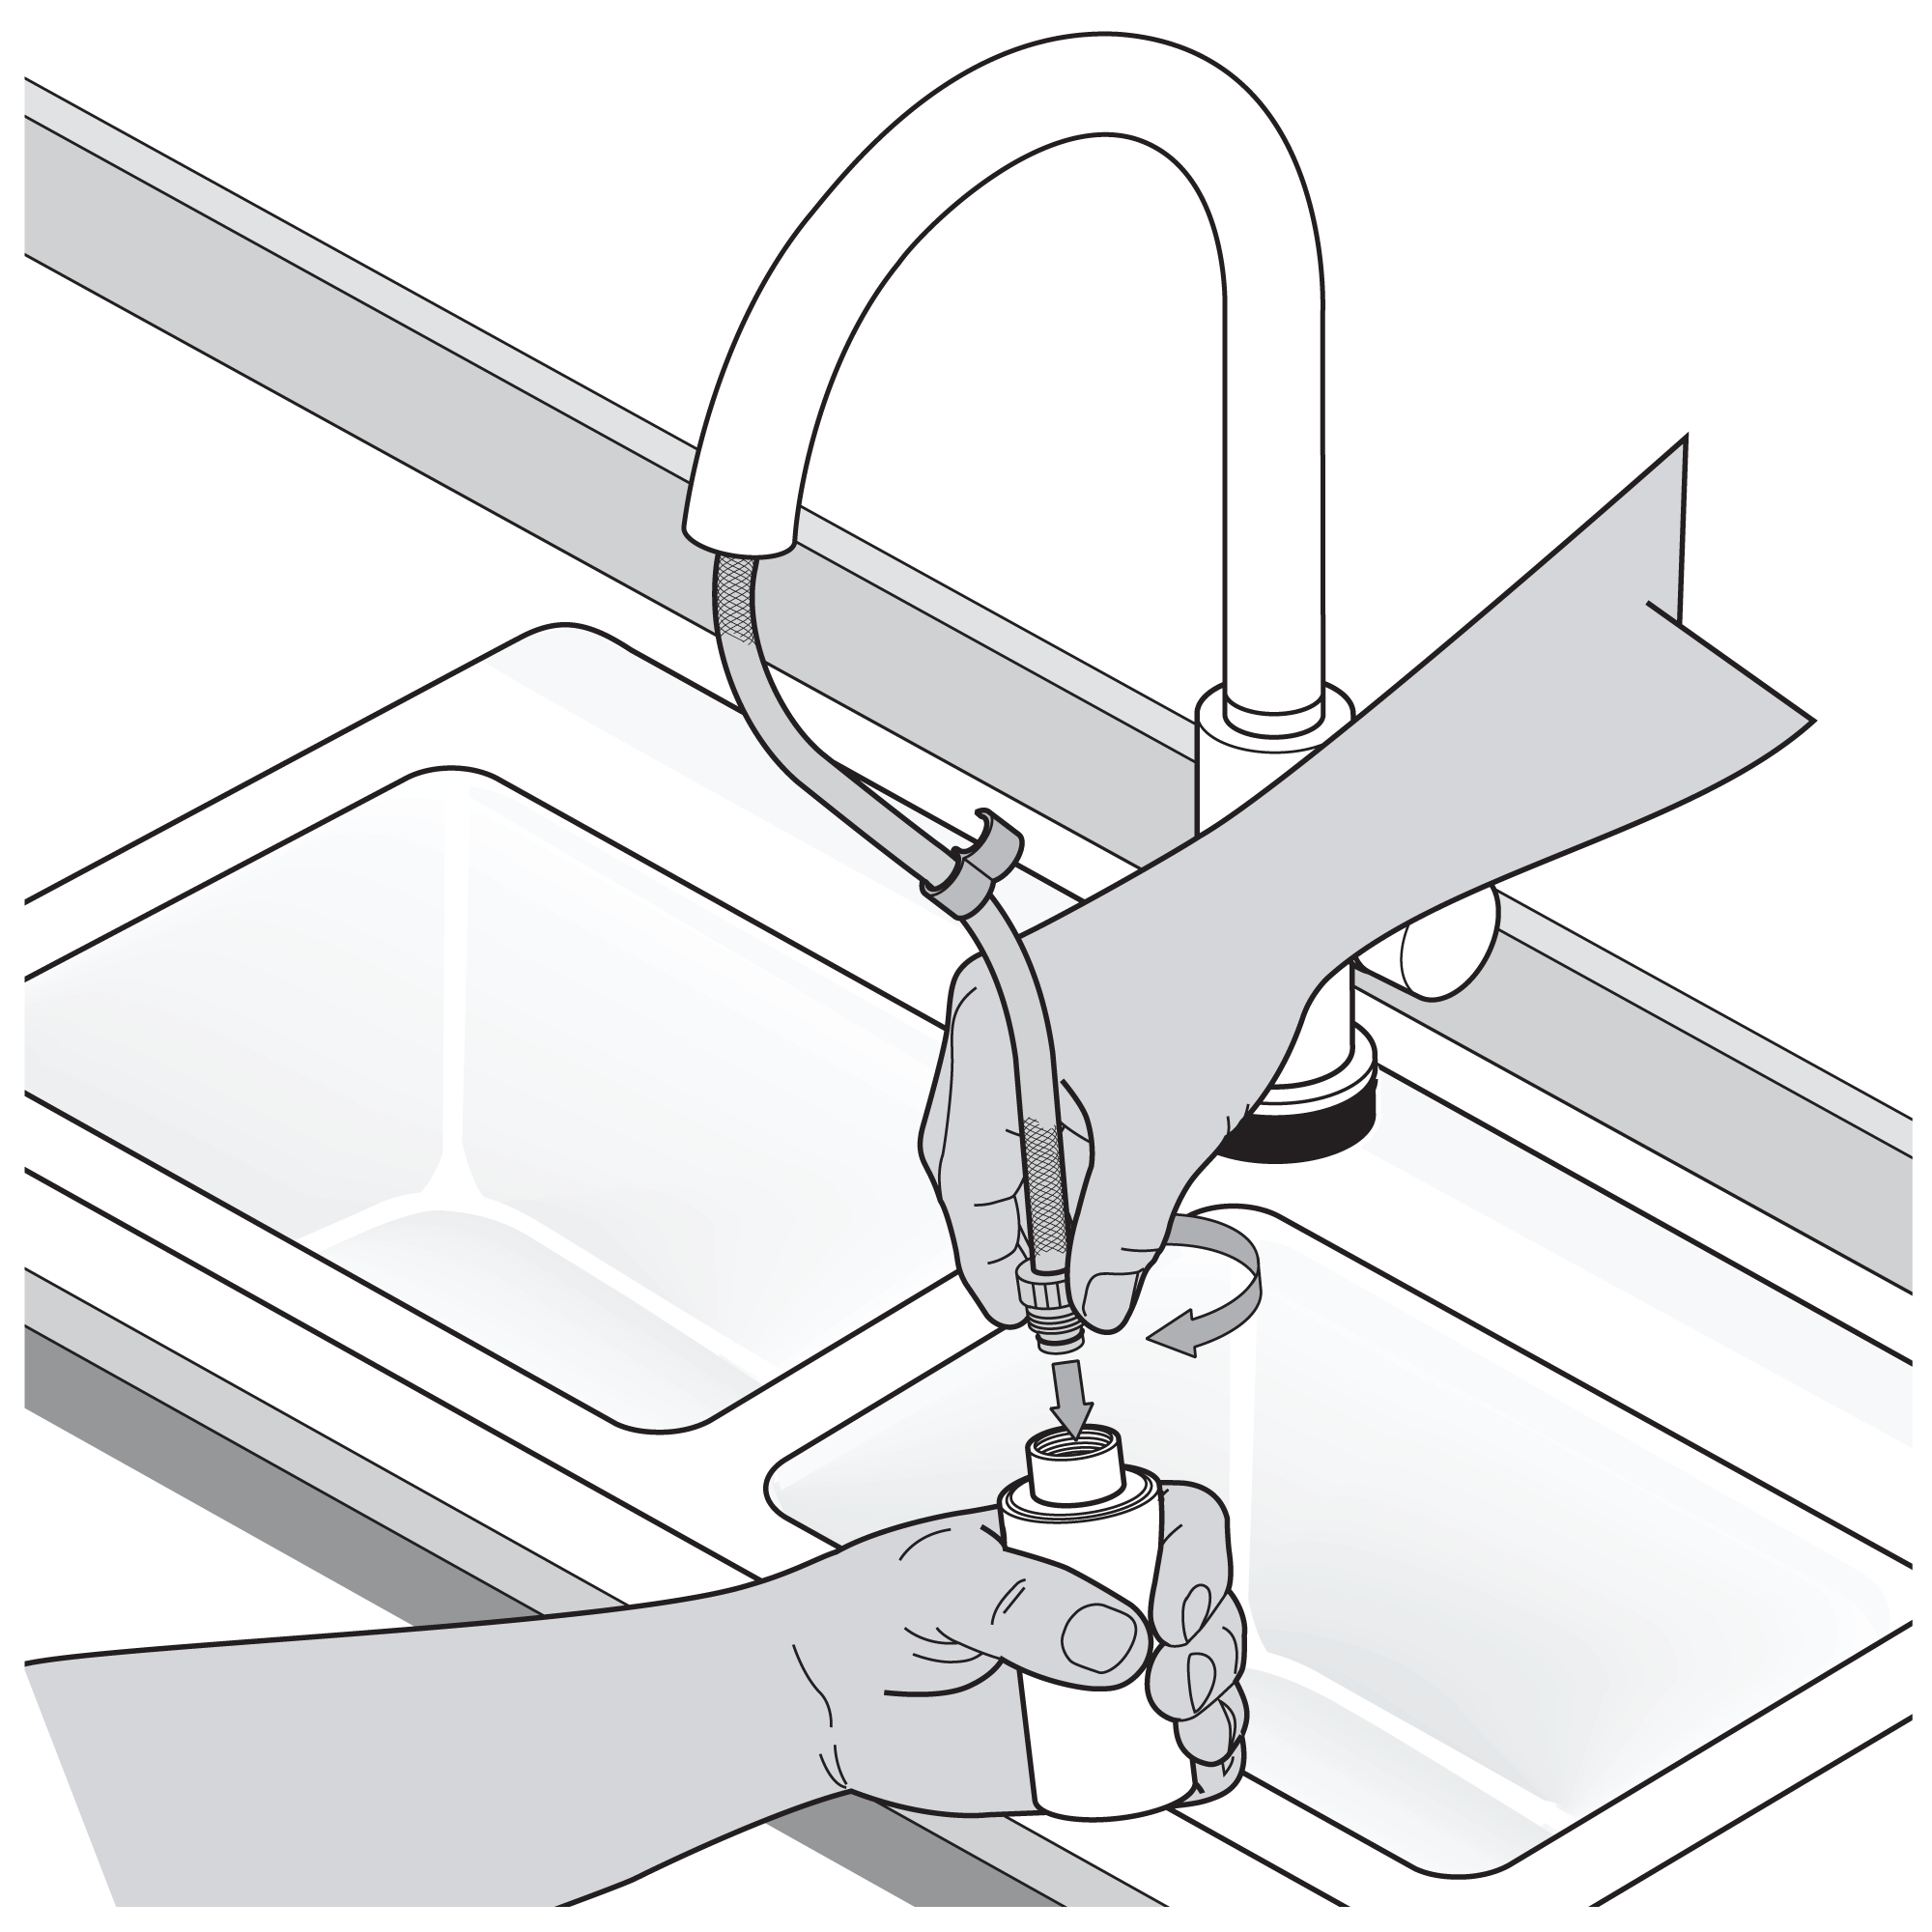
Step 14: (Correct way for Hose)
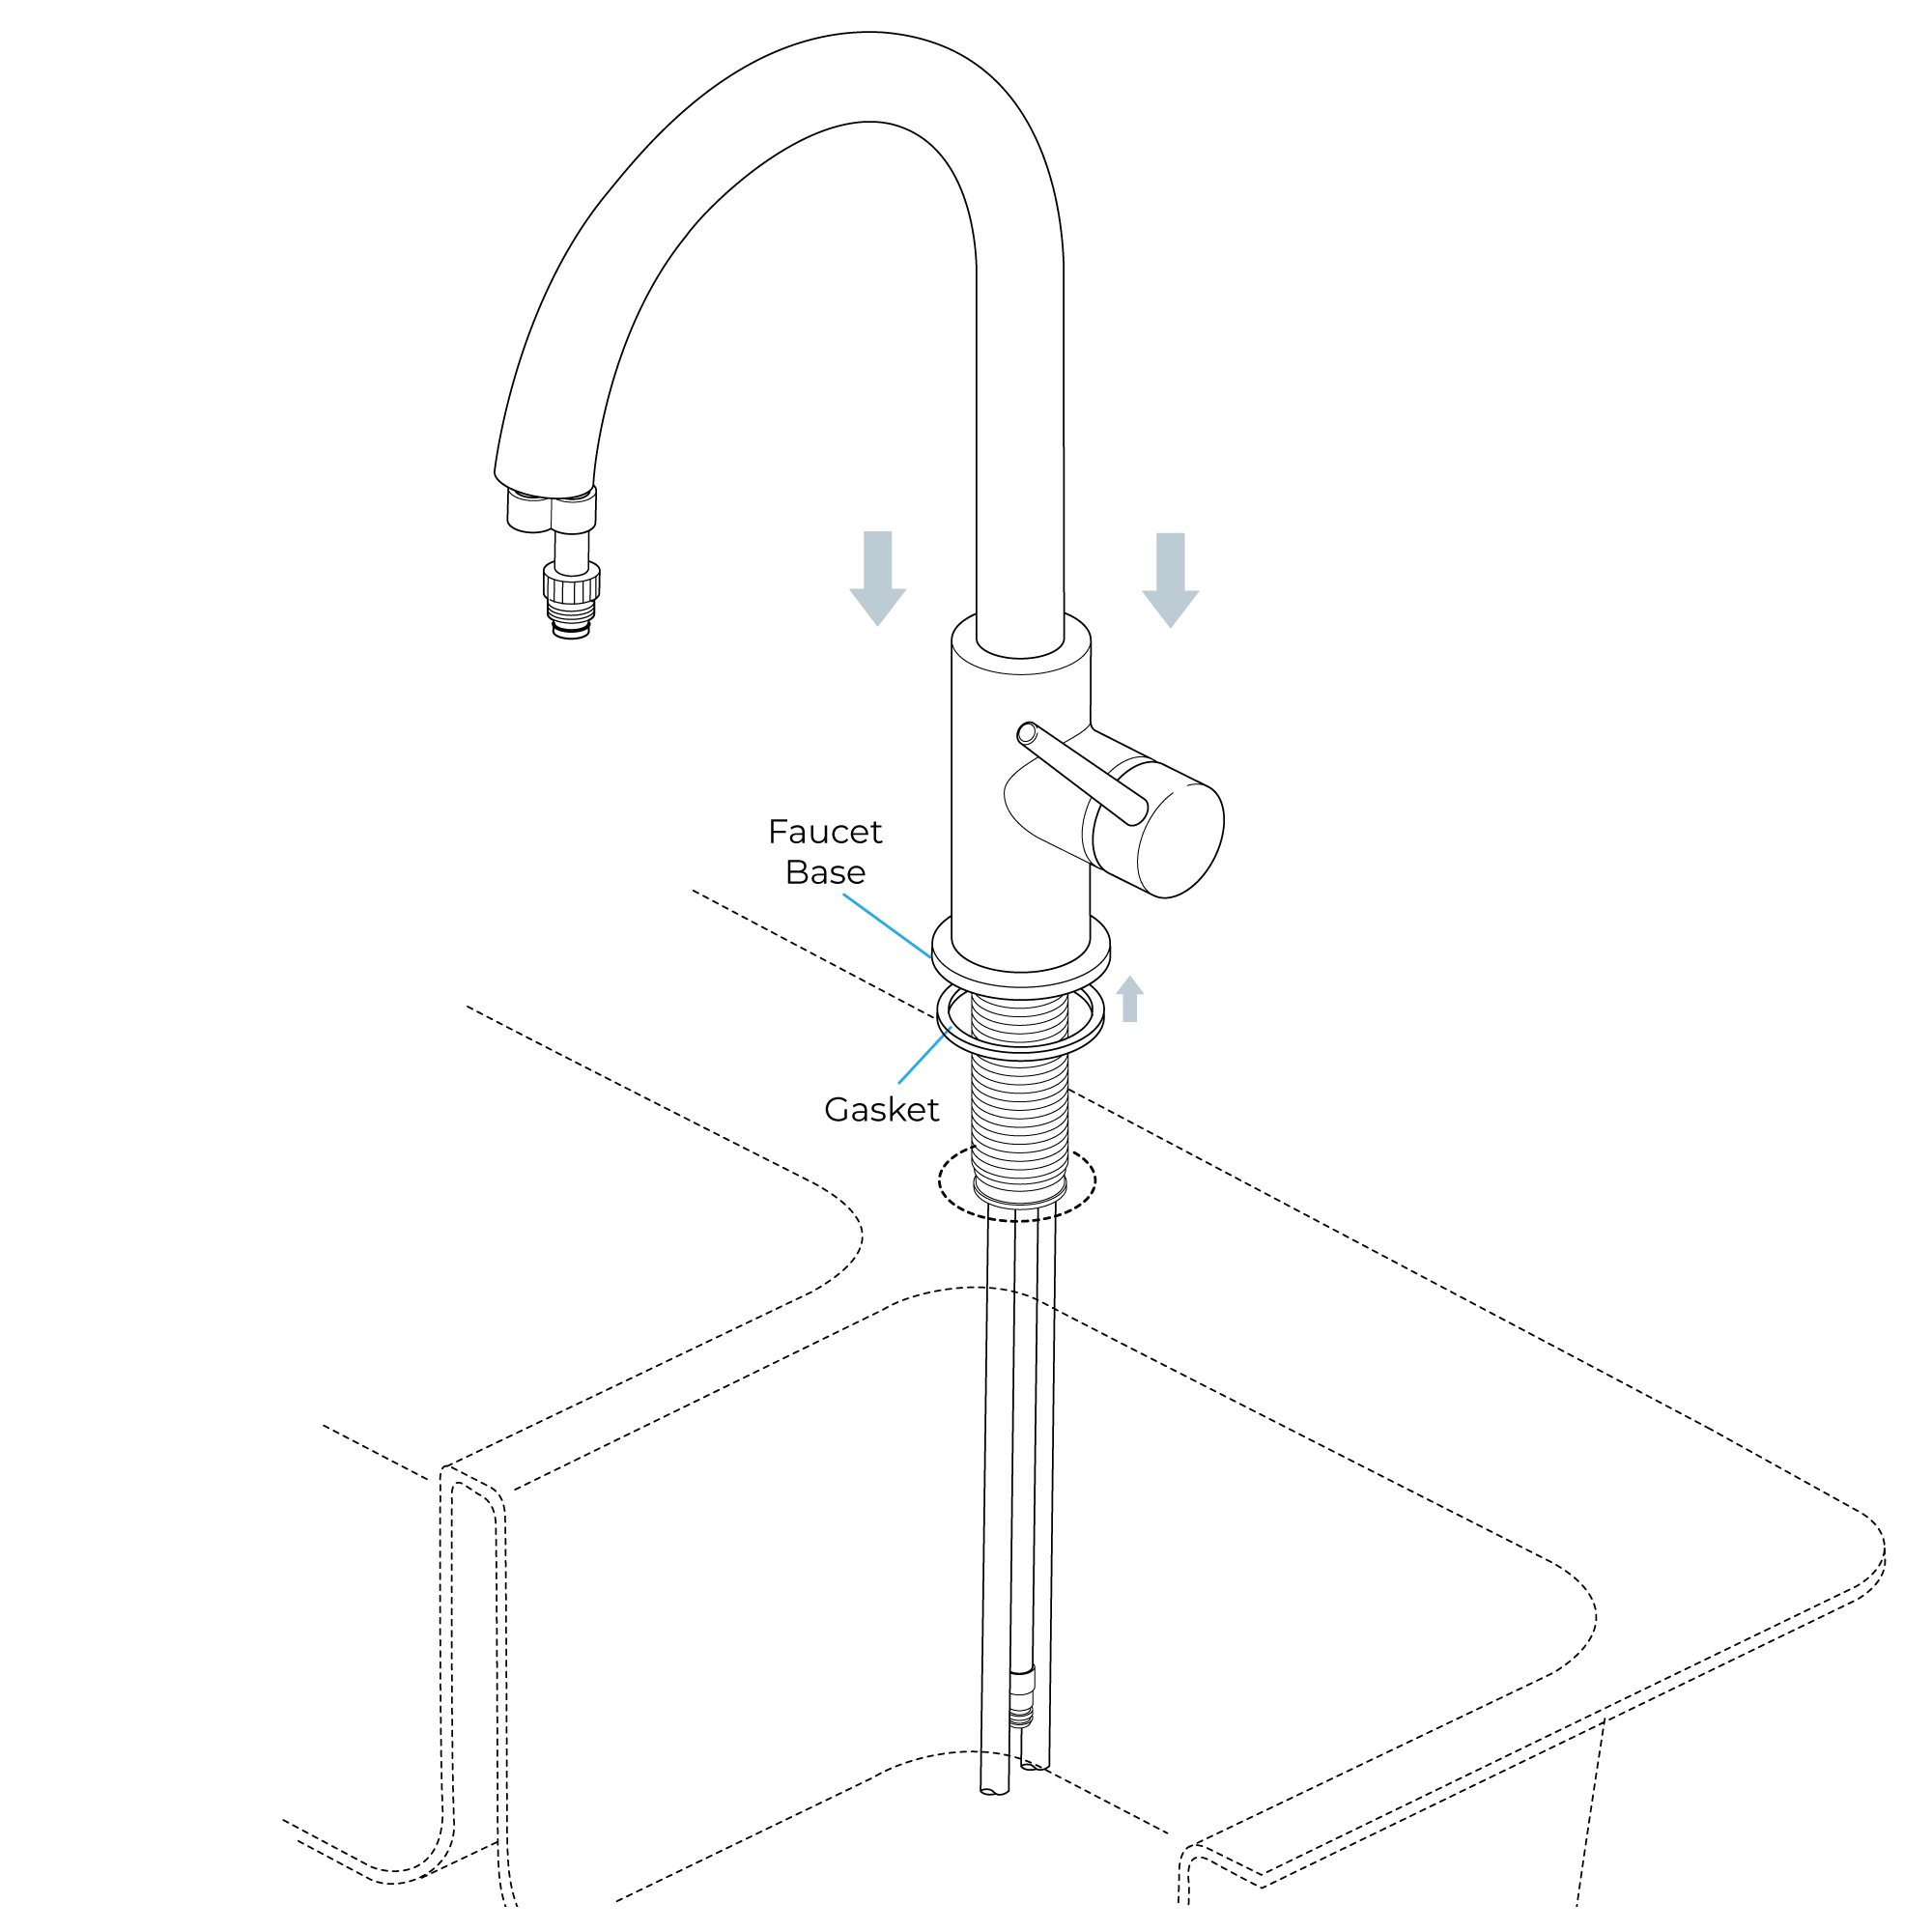
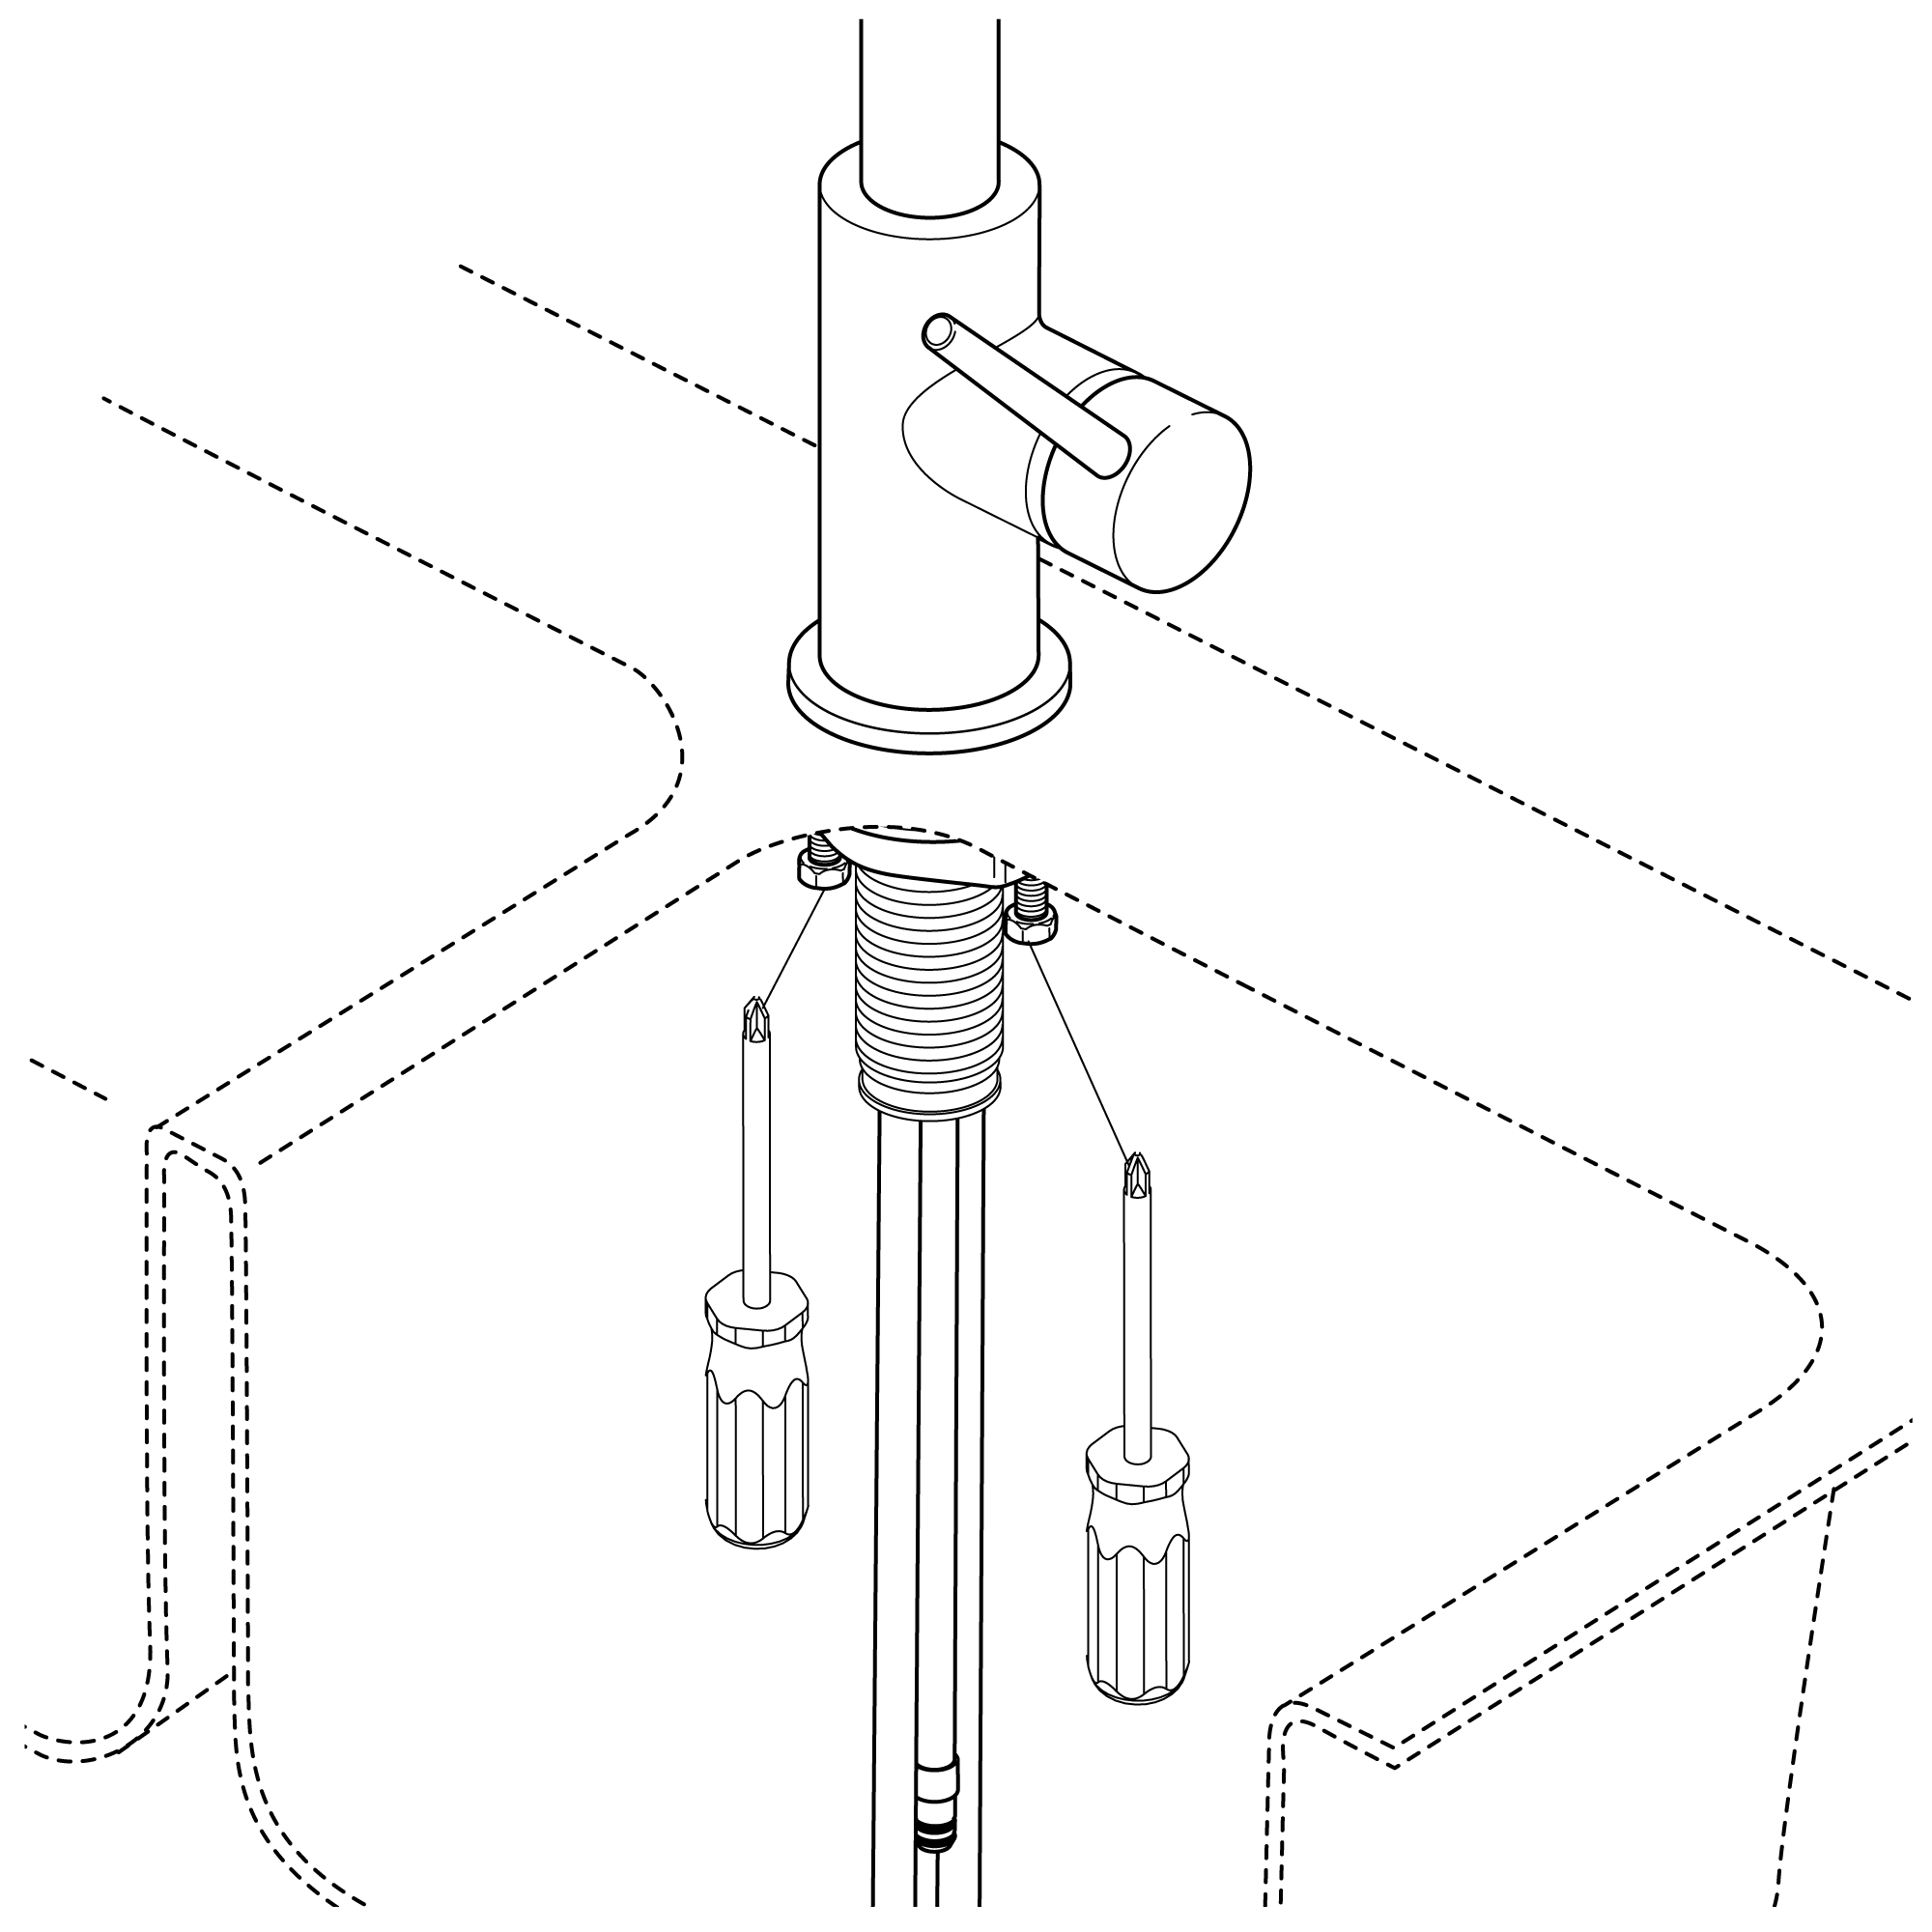
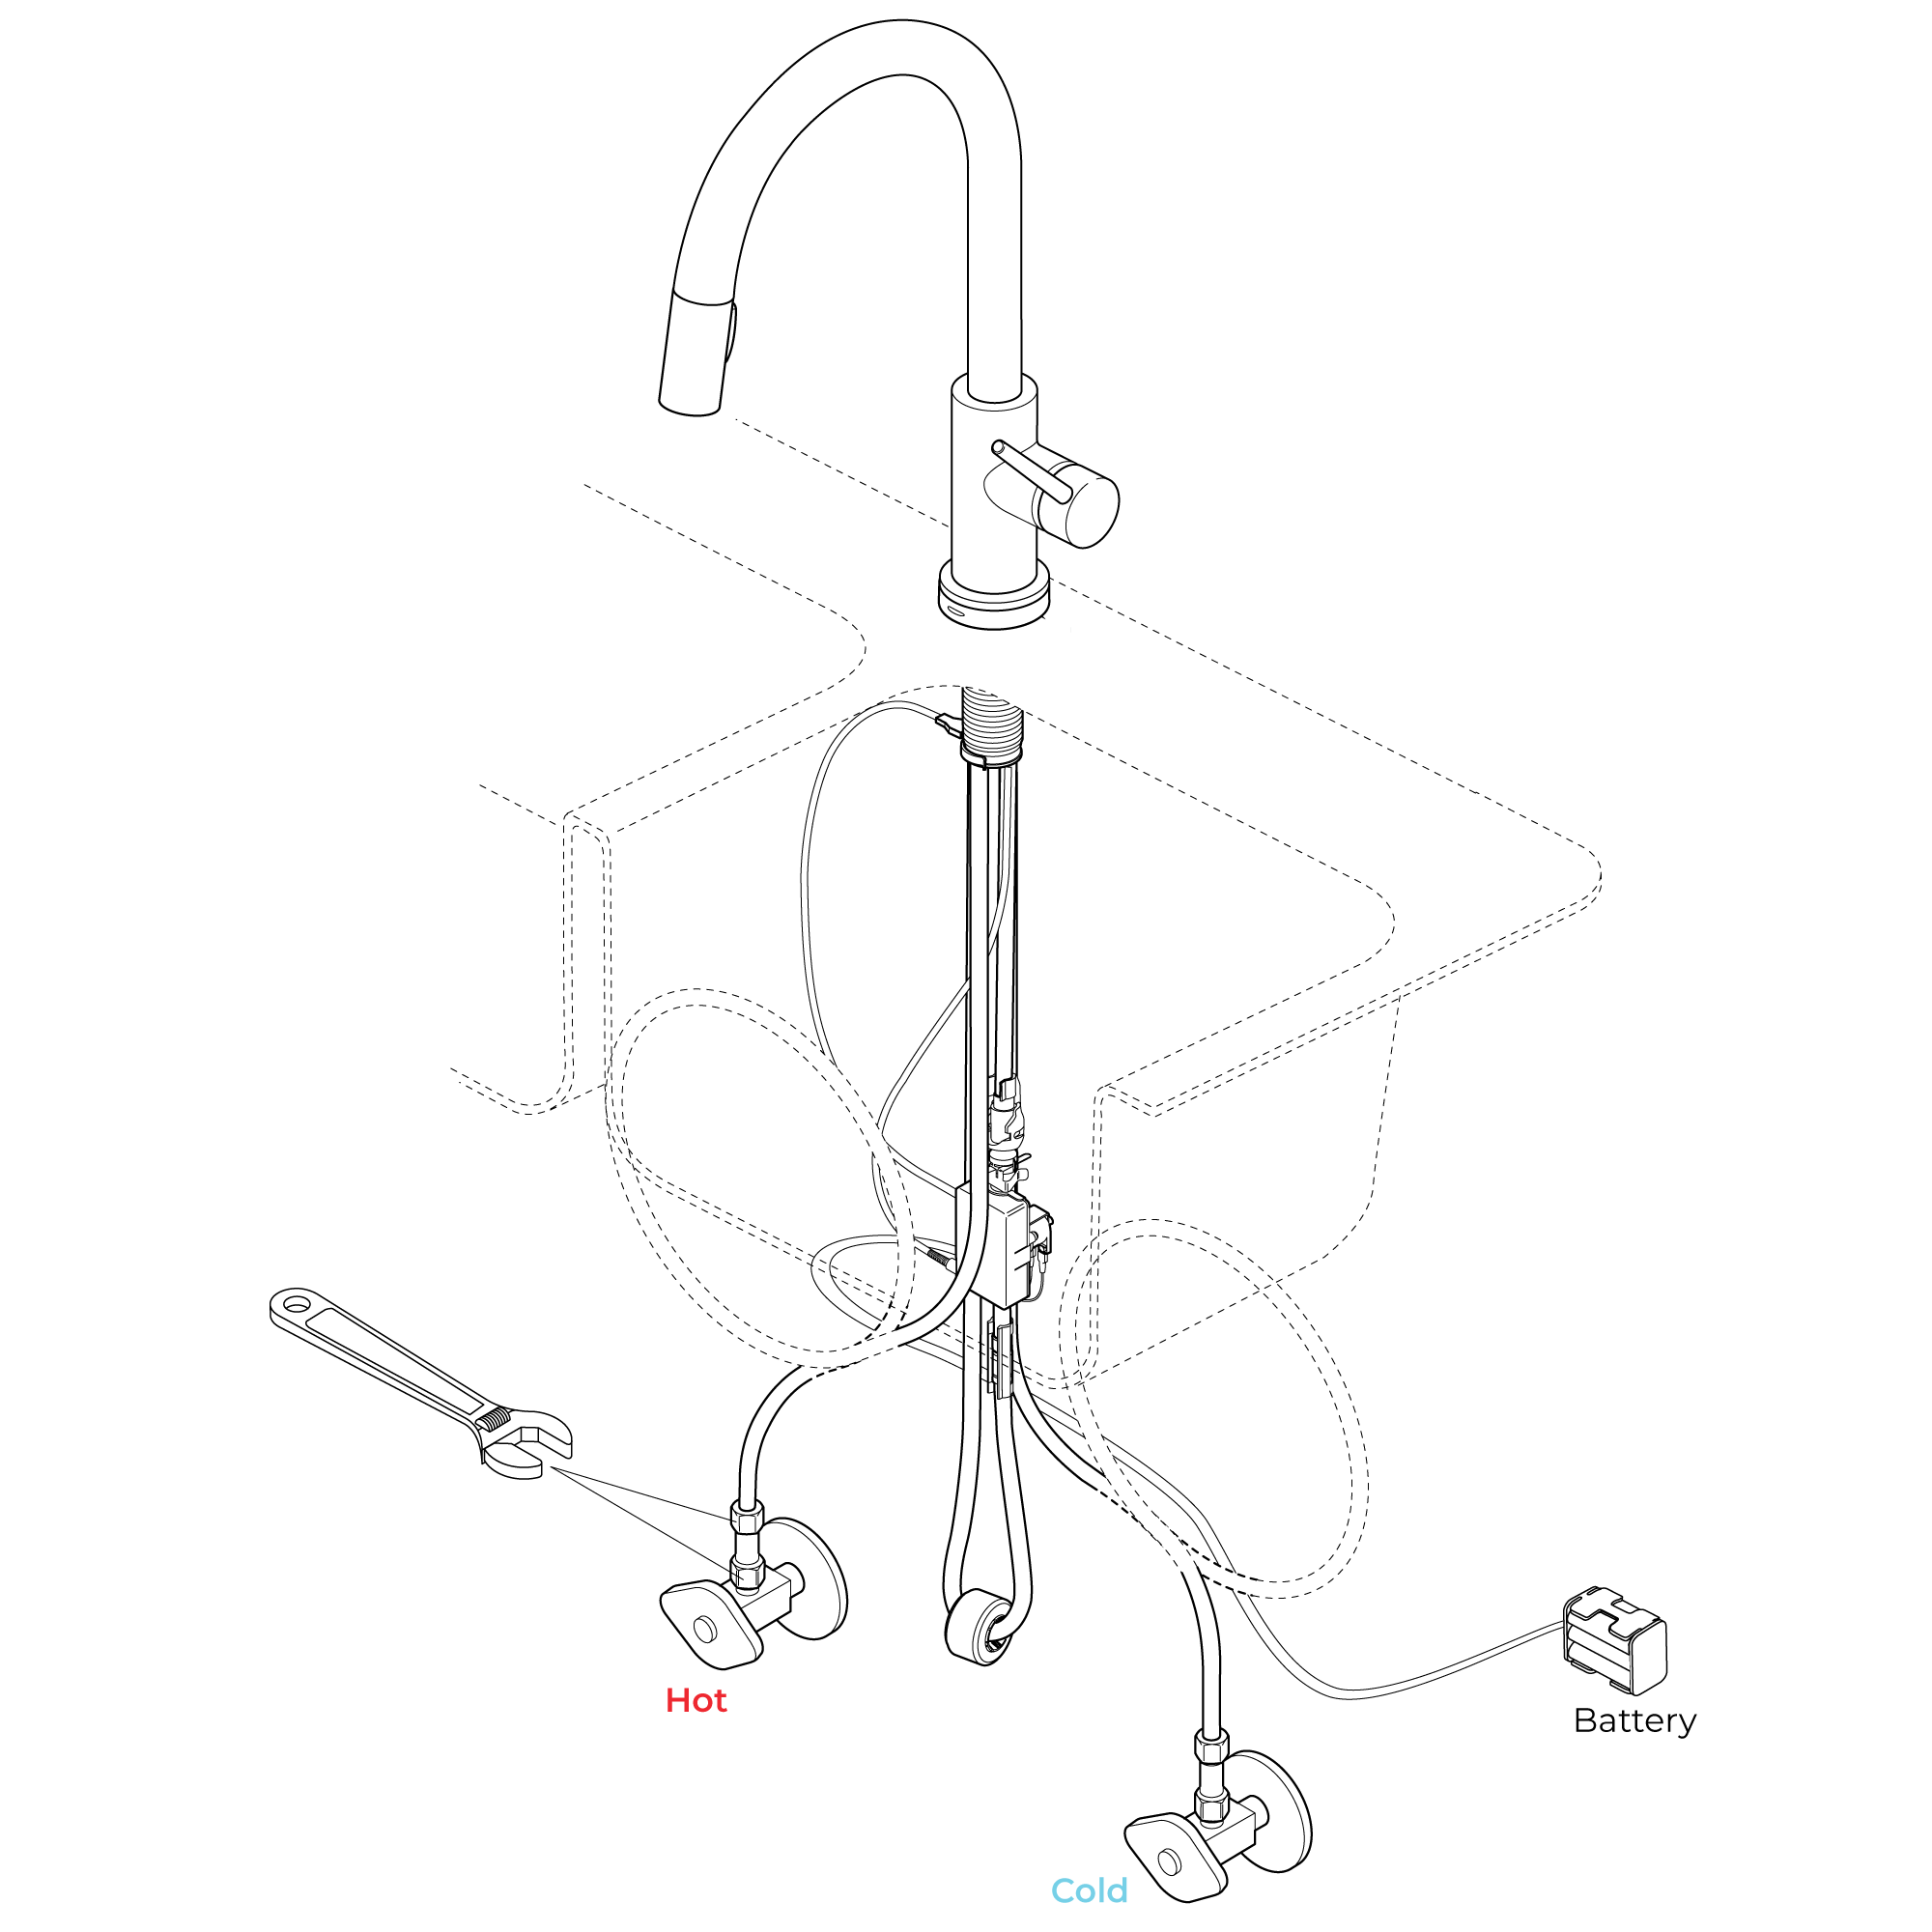
Mount Faucet to Deck Install gasket into the groove under the faucet base. Insert faucet tubes and shank through the mounting hole in the sink; and, place faucet over the mounting hole.
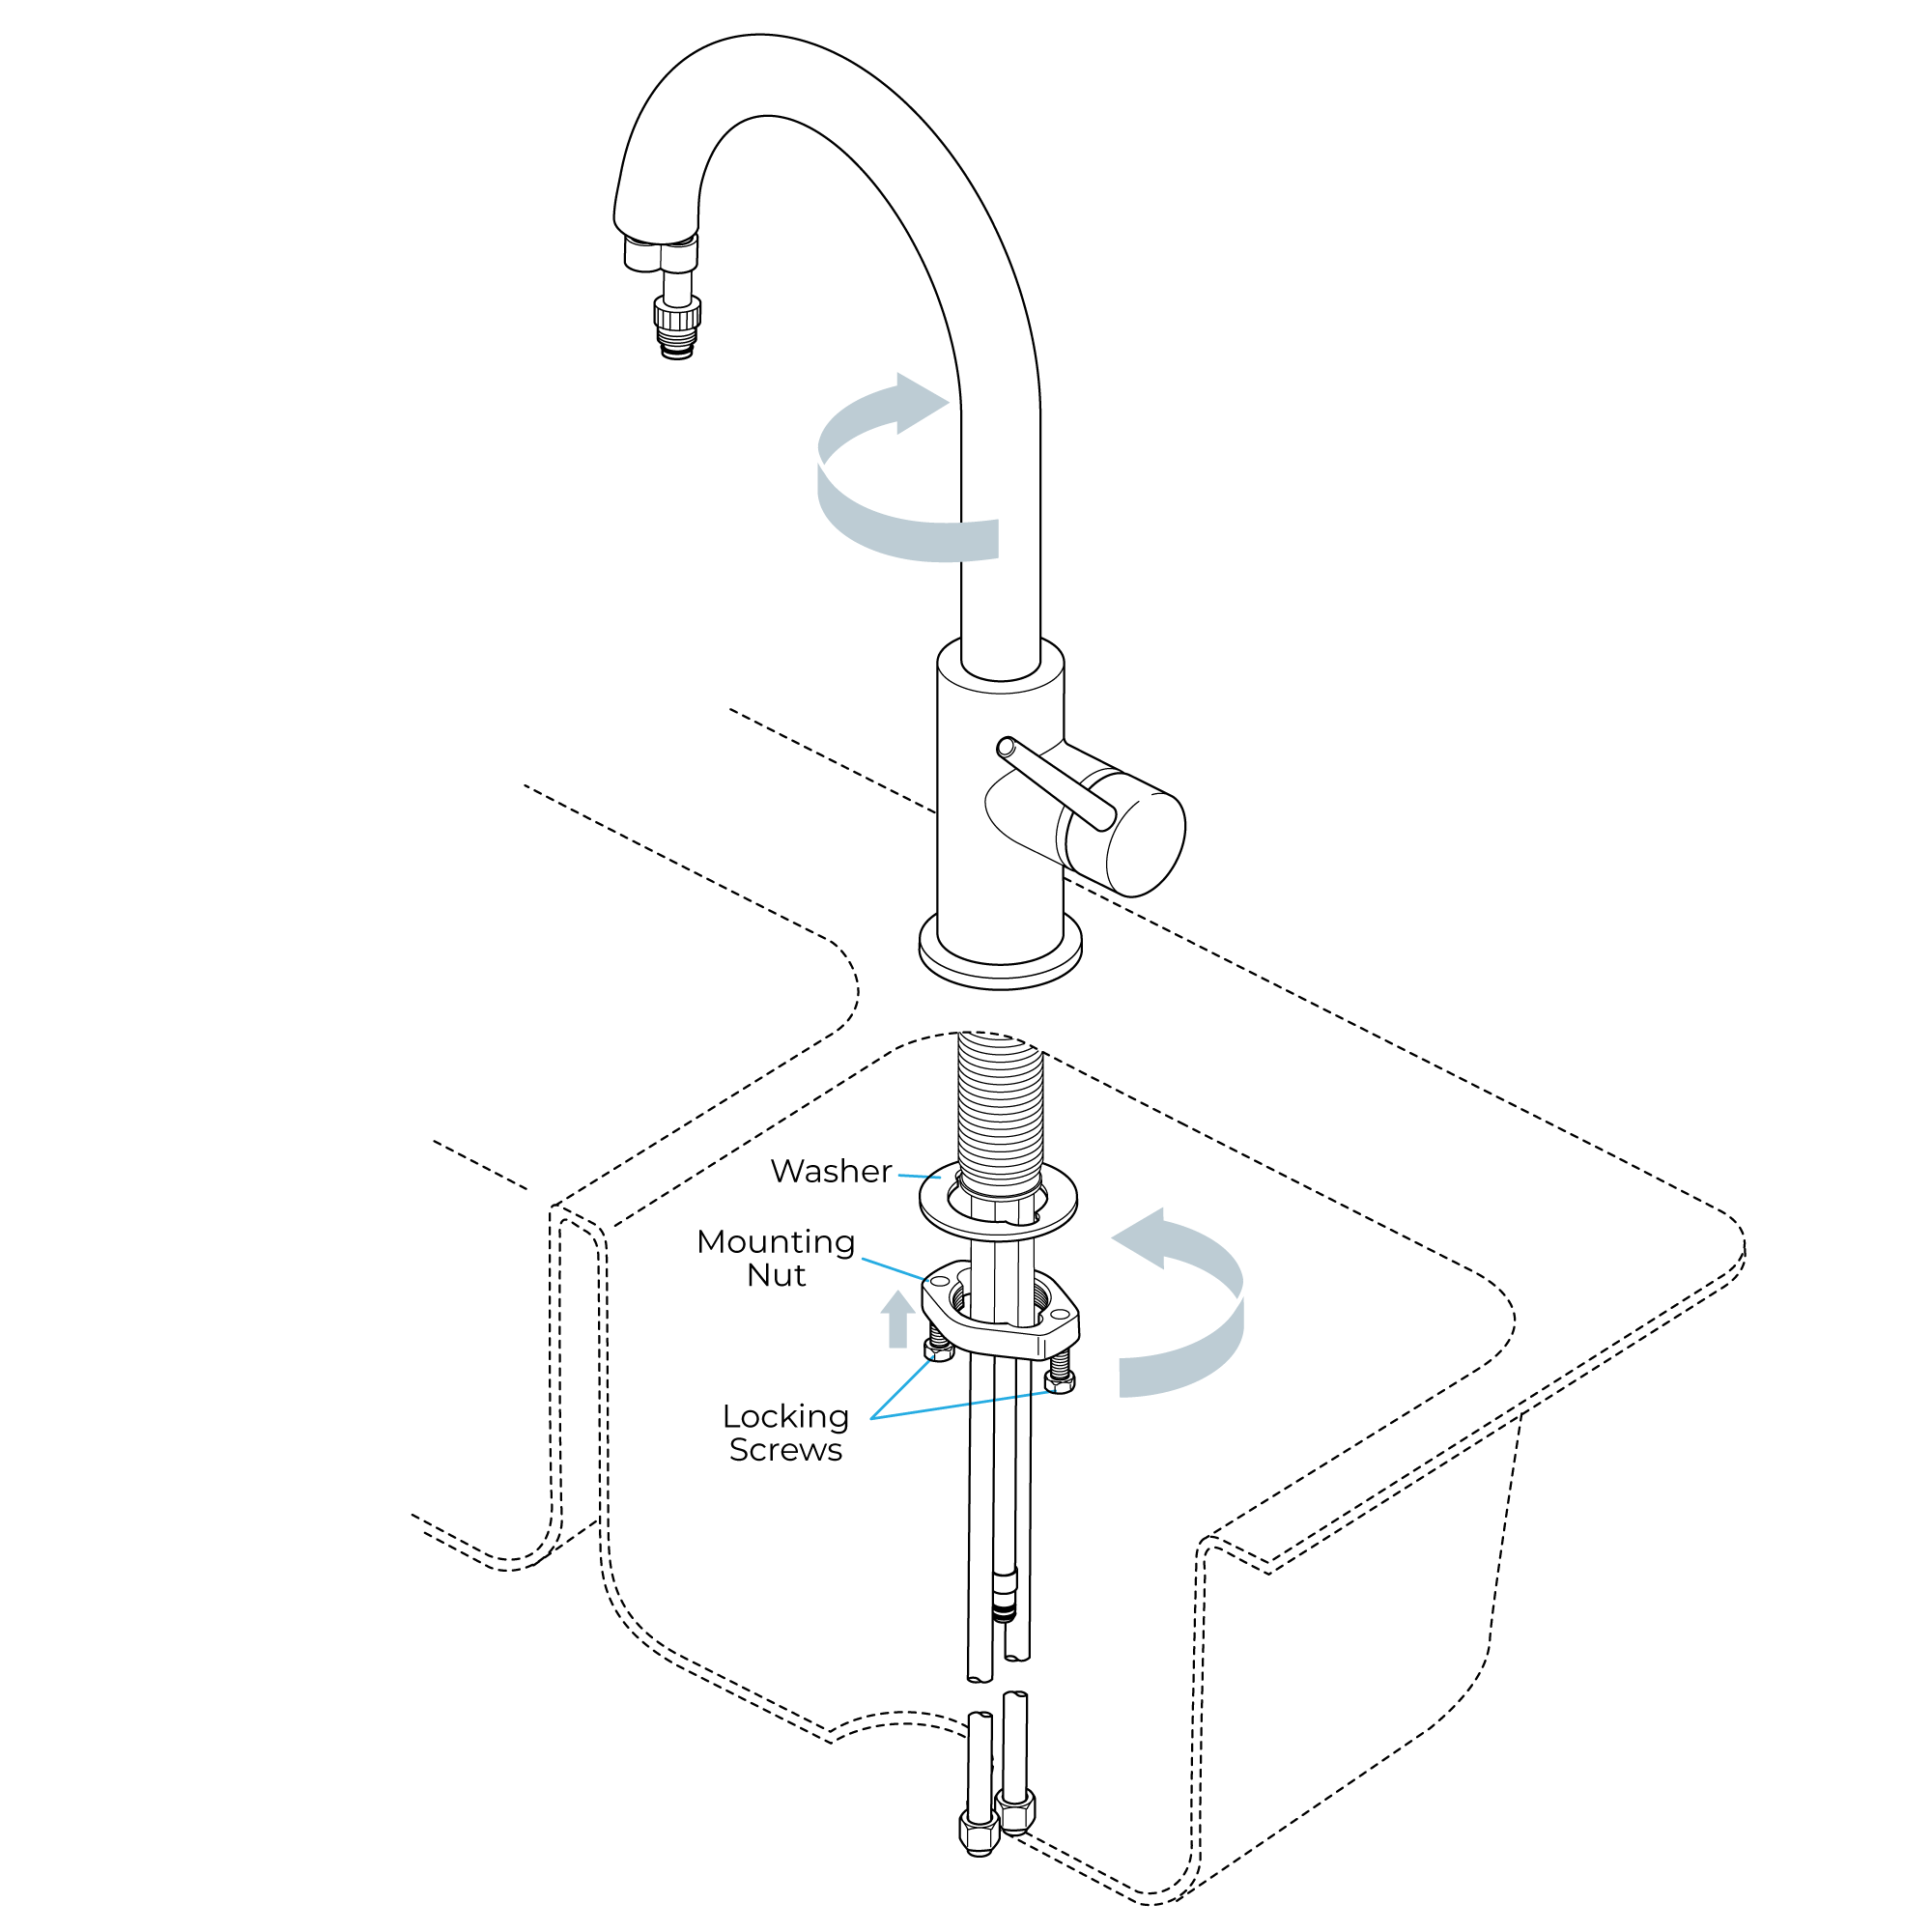
Secure faucet to sink with washer and mounting nut. Tighten securely by hand. Using a screwdriver, tighten locking screws.
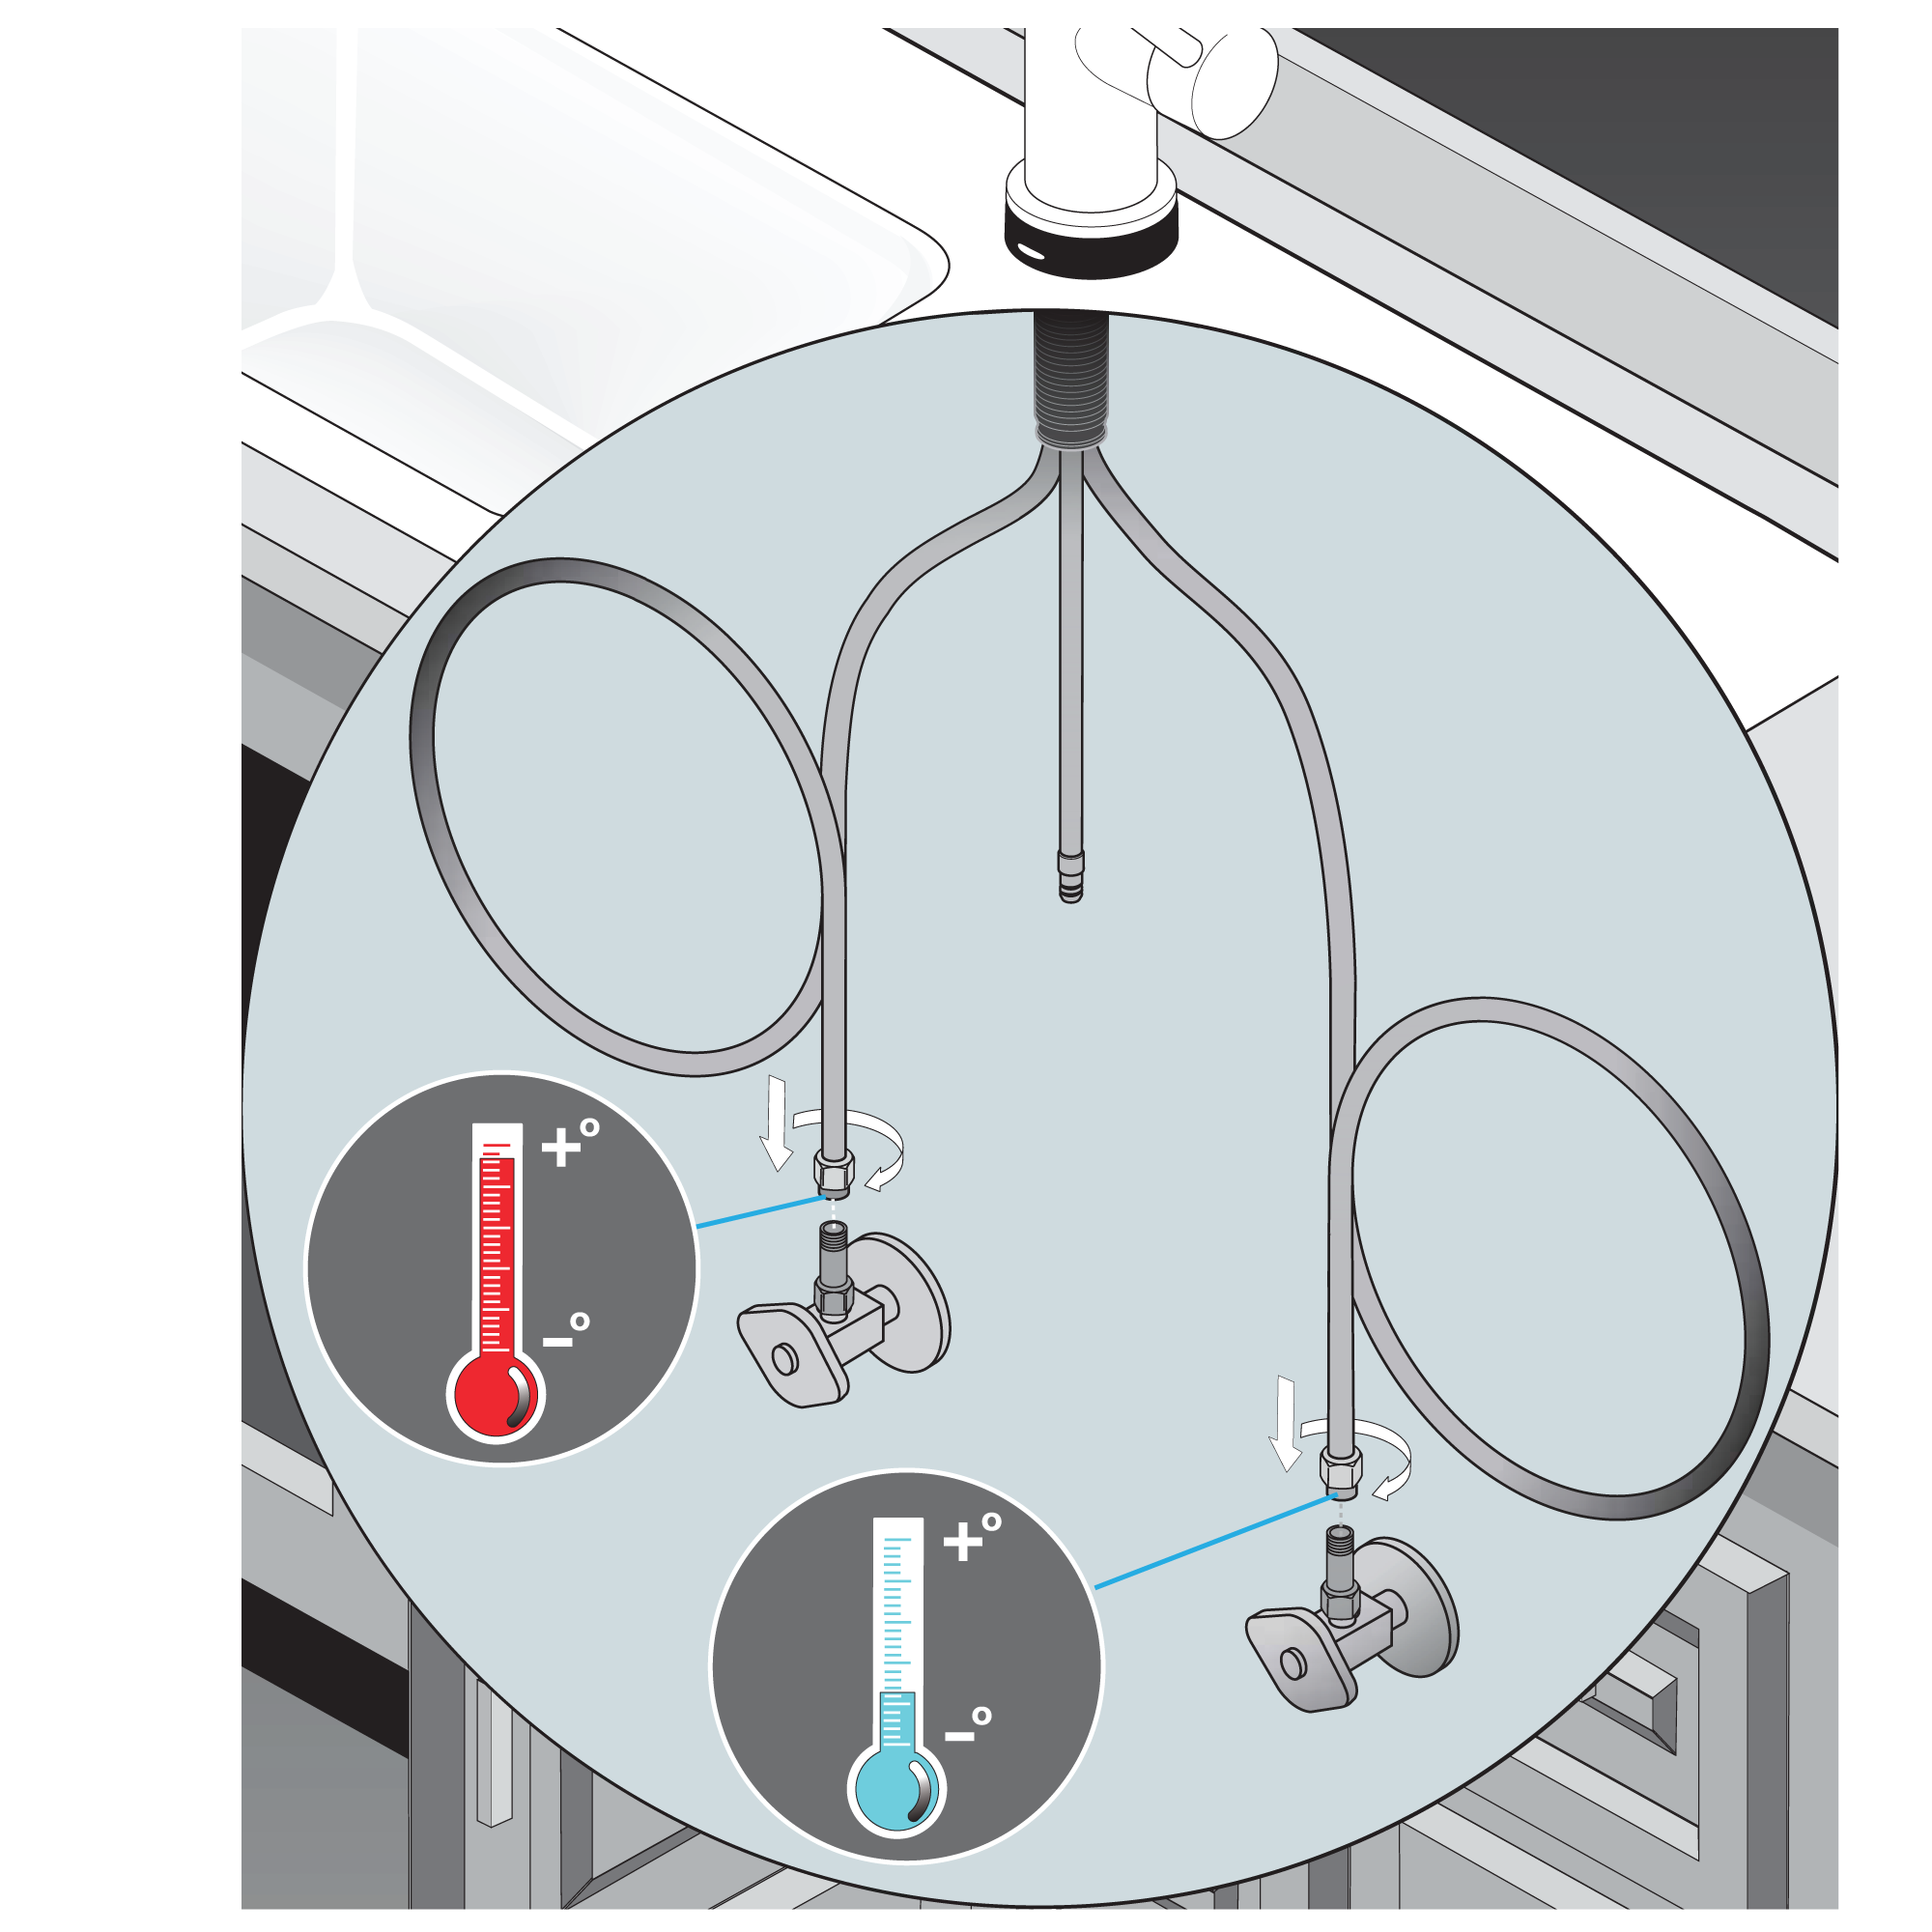
Loop the supply lines, if possible, to avoid having to cut them. Finger tighten both hot & cold sides. Tighten one additional turn with a wrench. Use a second wrench to ensure you do not over tighten the check valves. Repeat for the other side.
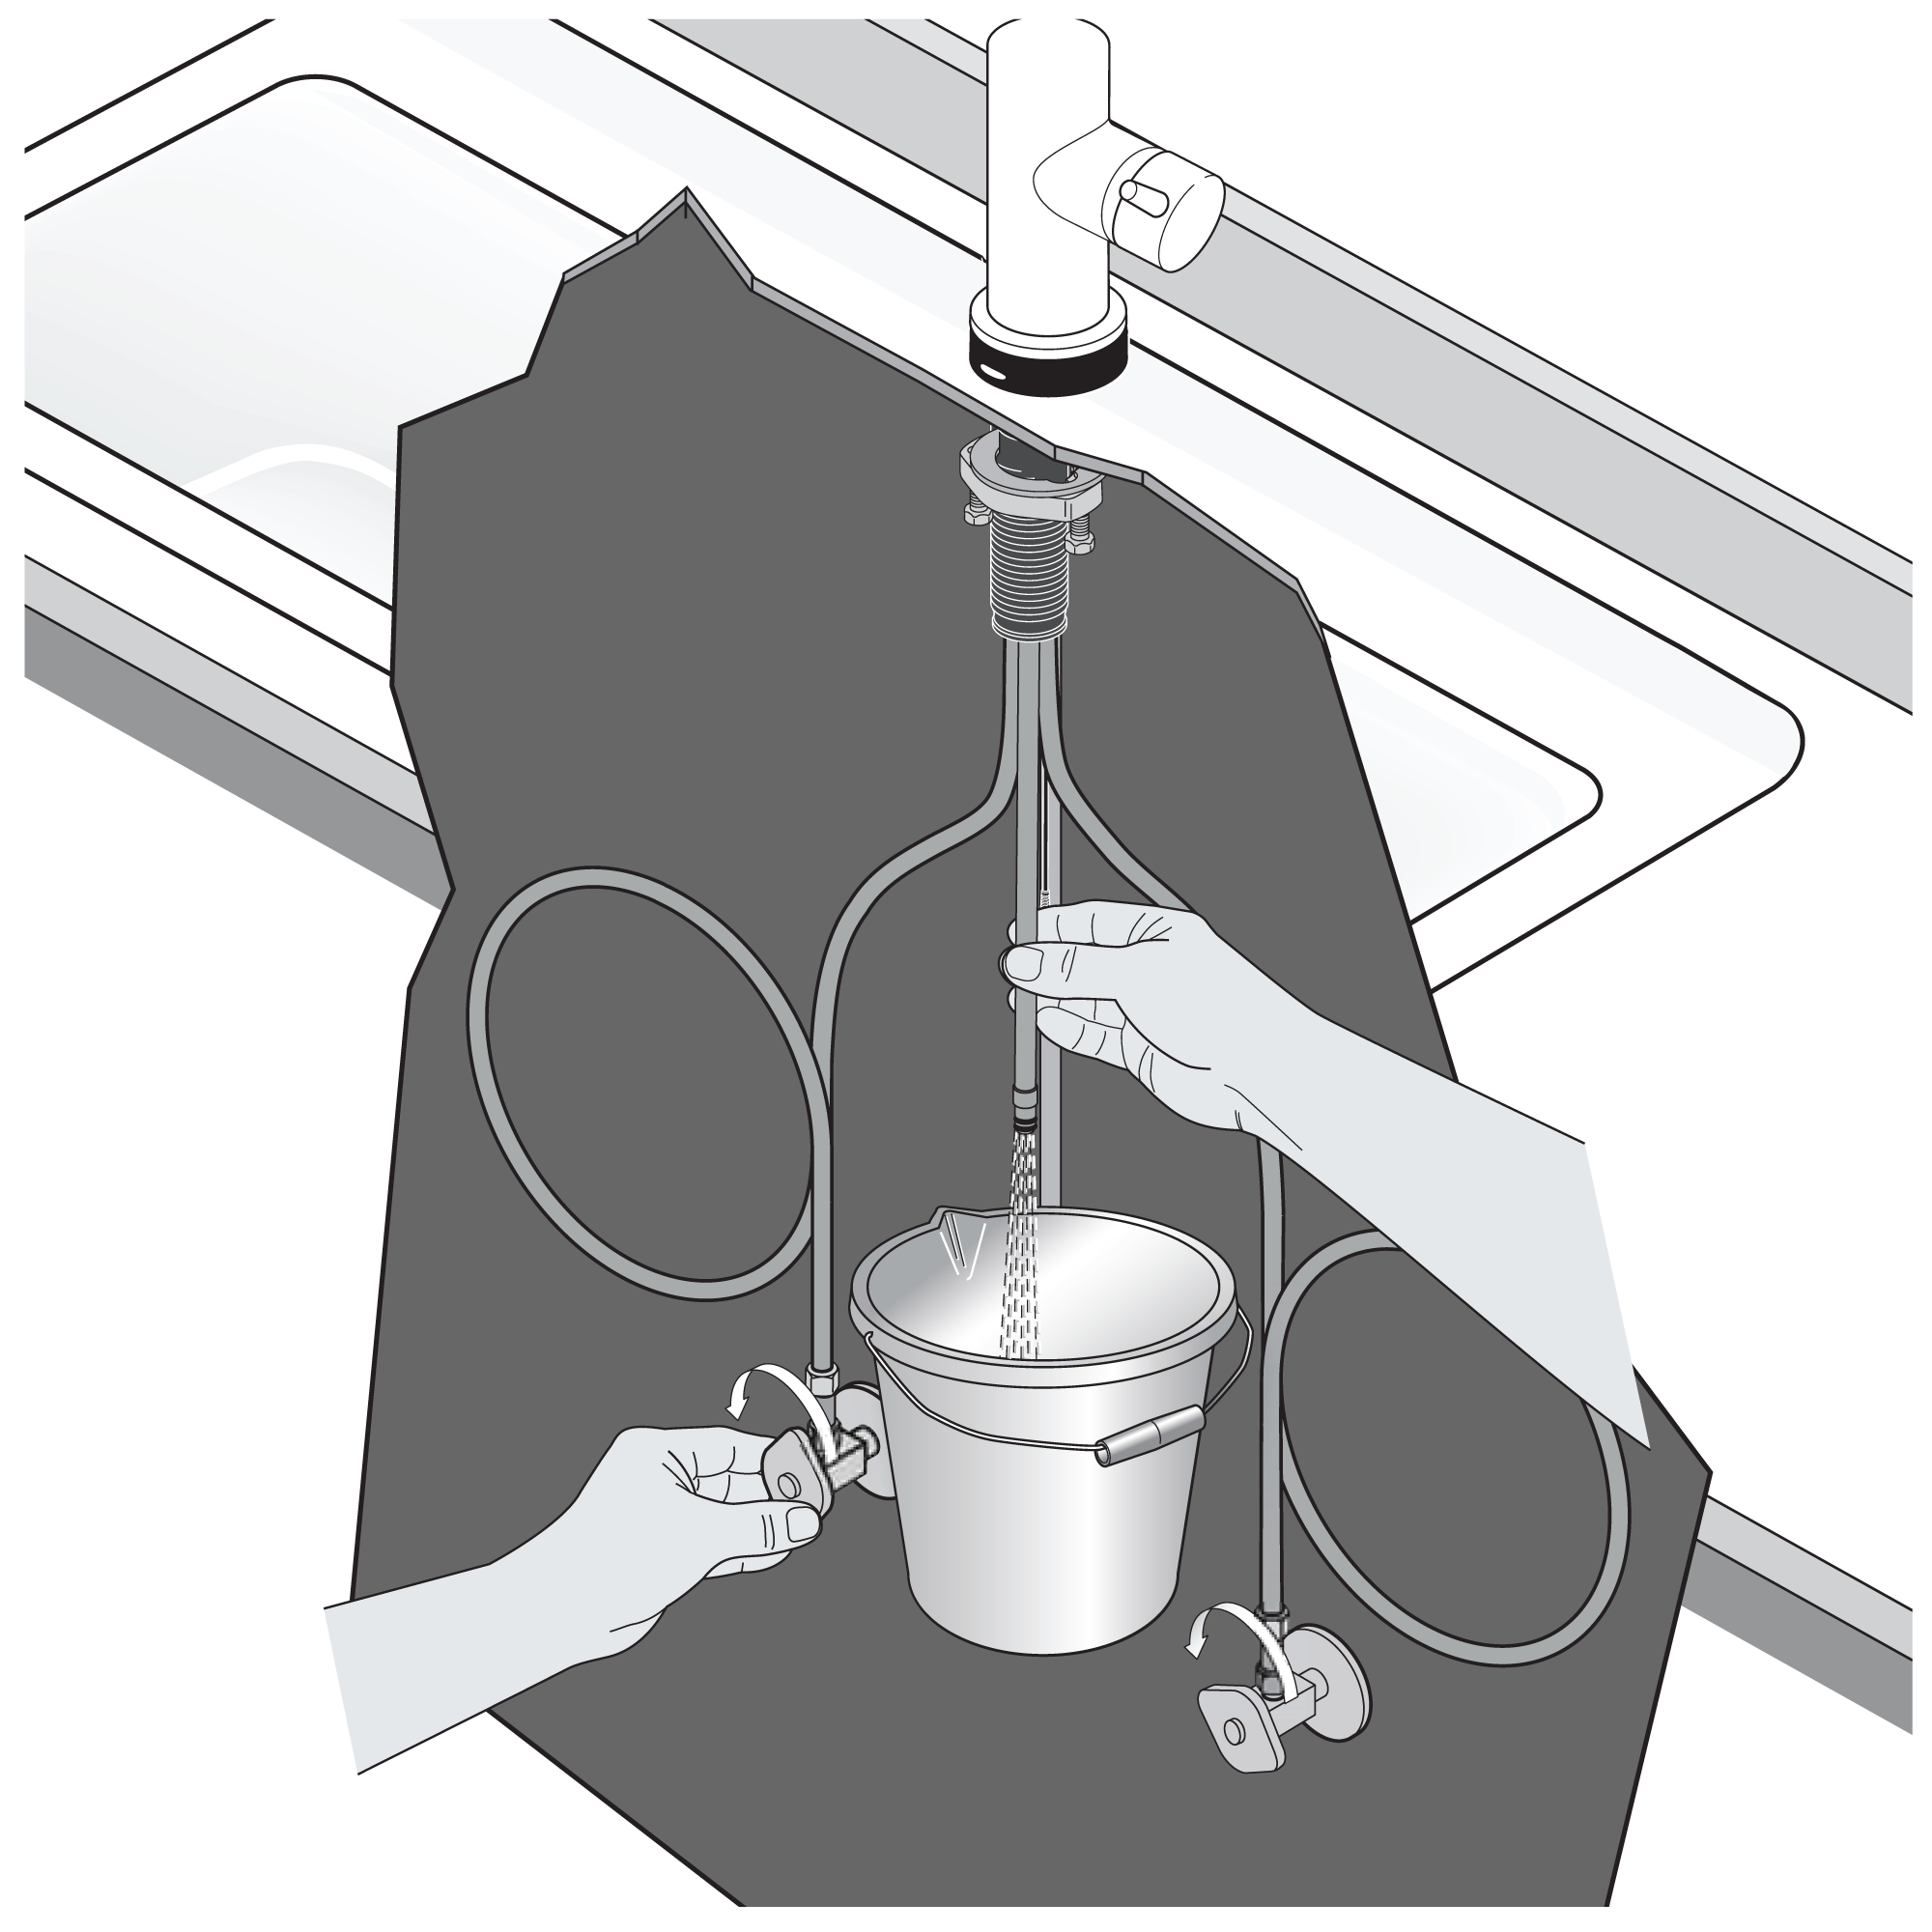
Make sure water supplies are closed. Move handle to full mix position. Place bucket under faucet outlet tube.
Slowly open both water supply stops to flush lines. This will prevent debris from being lodged in the hose and sprayer.
Close water supplies and faucet valve.
Remove bucket and dry tube with soft cloth.
Connect the battery cable to the battery box. Install 4 “AA†batteries into the battery box.
Important: DO NOT install batteries before making all electrical connections.
Note: It is critical for the batteries to be installed in the correct direction in the battery box.
Place the battery pack in a convenient location close to the floor.
Place flat on the floor for best performance and at least 2" from cabinet walls and other objects.
Note: If the battery pack does not reach the floor, place on a non-metallic object at least 2" from cabinet walls.
Turn on water supplies. Turn faucet valve on full and check connections are properly made.
Flexible Connecting Hose Care must be taken when connecting the flexible connection hose from the power supply box to the spout to ensure it does not bend sharply and kink or twist. See above for recommended ways to fit the flexible connecting hose.
Important: Failure to follow these guidelines may result in poor performance and damage to the flexible connection hose.
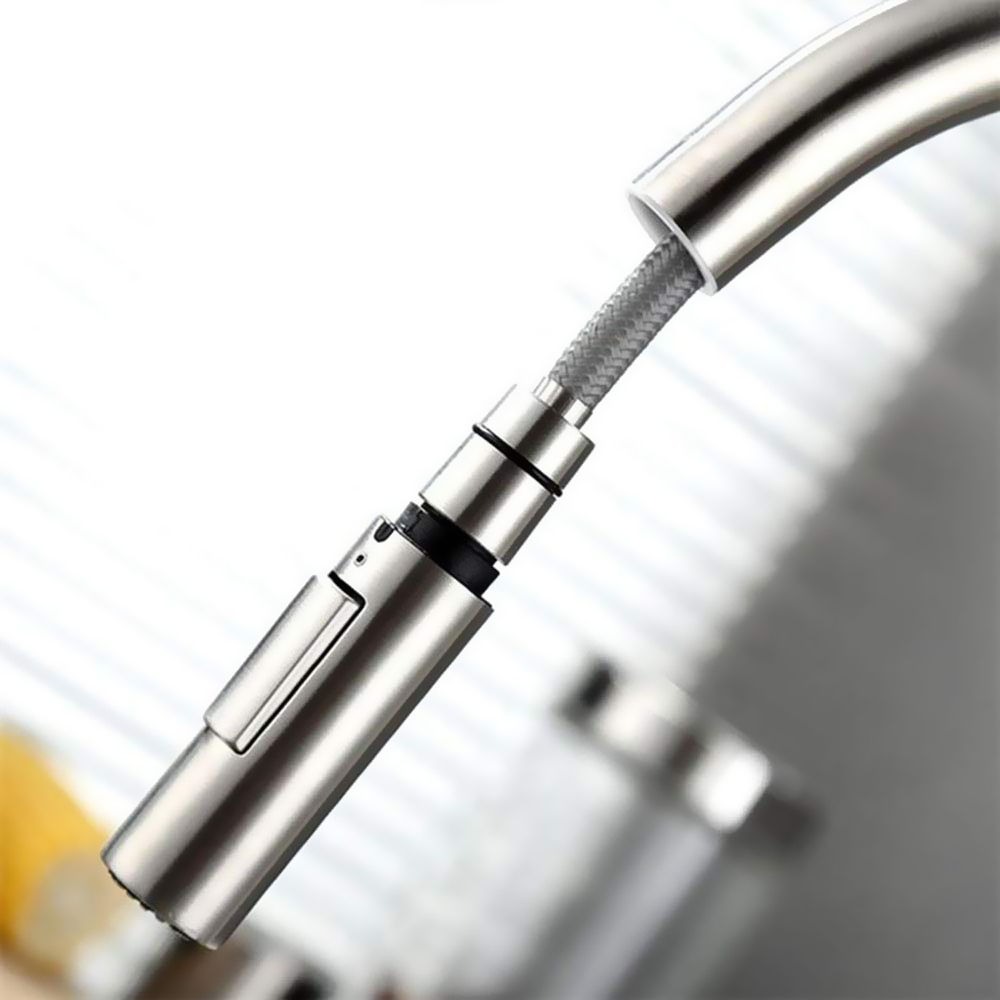
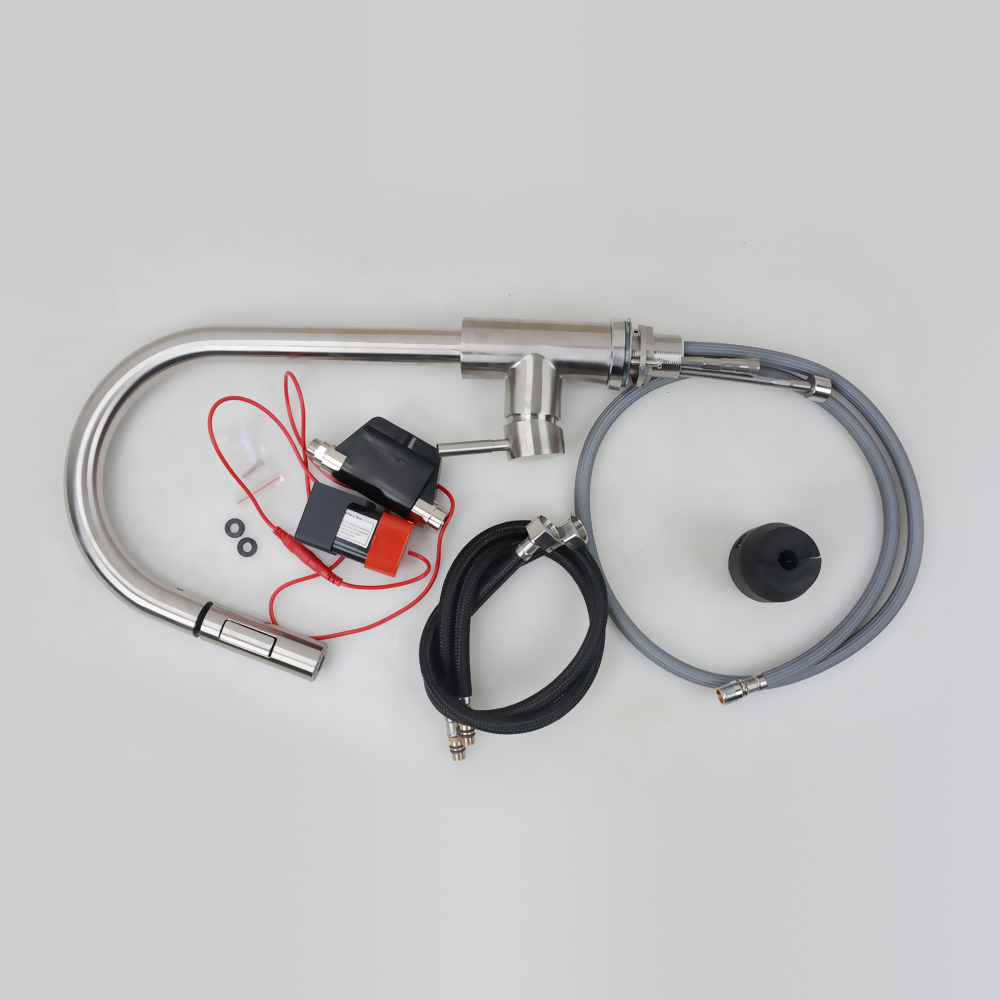
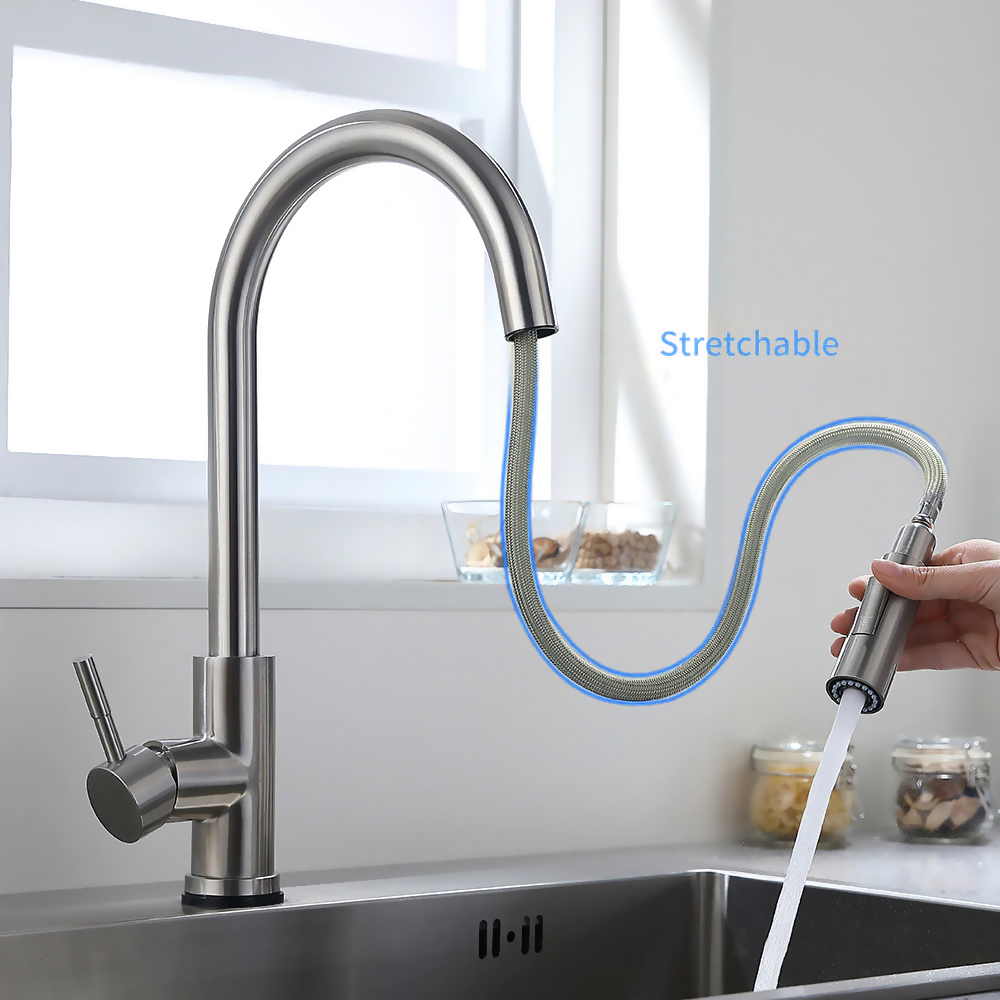
Product Images
1:
2:
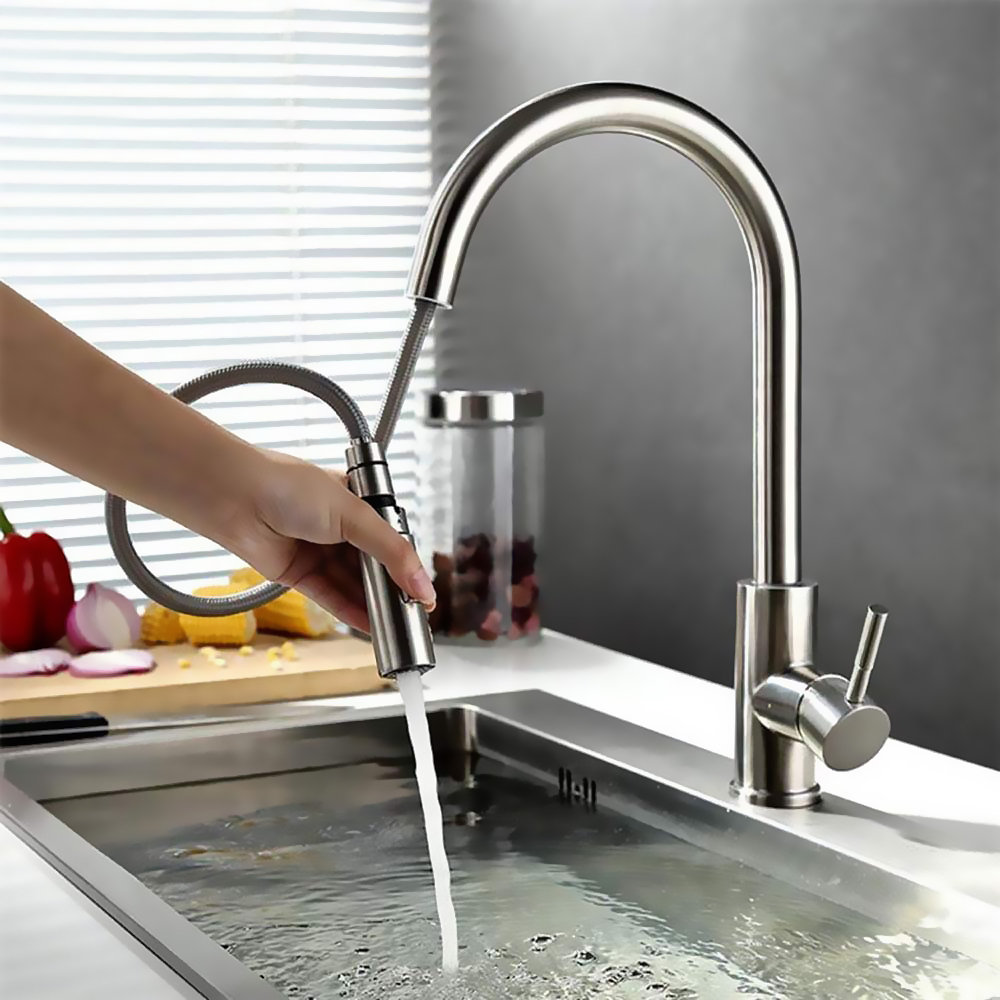
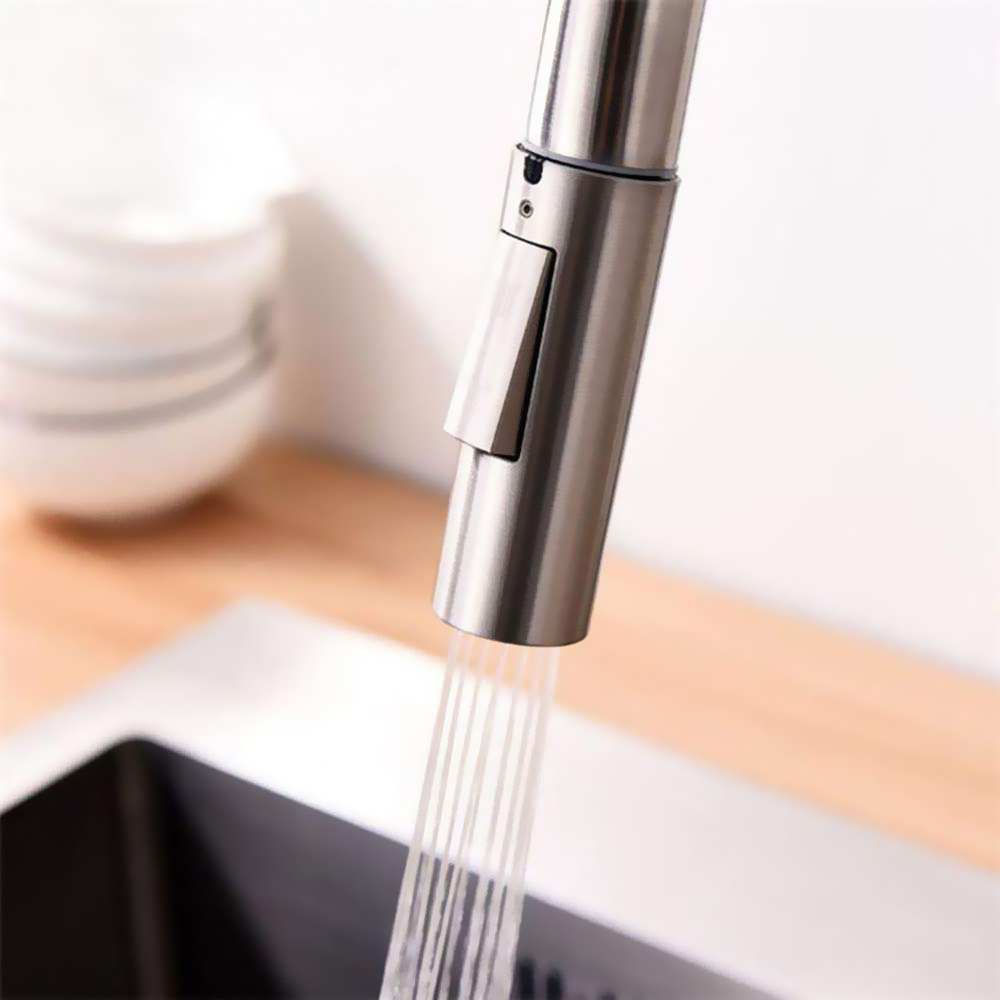
kitchen faucet
3:
4:
5:
6:
7:
8:
9:
10:
Operations
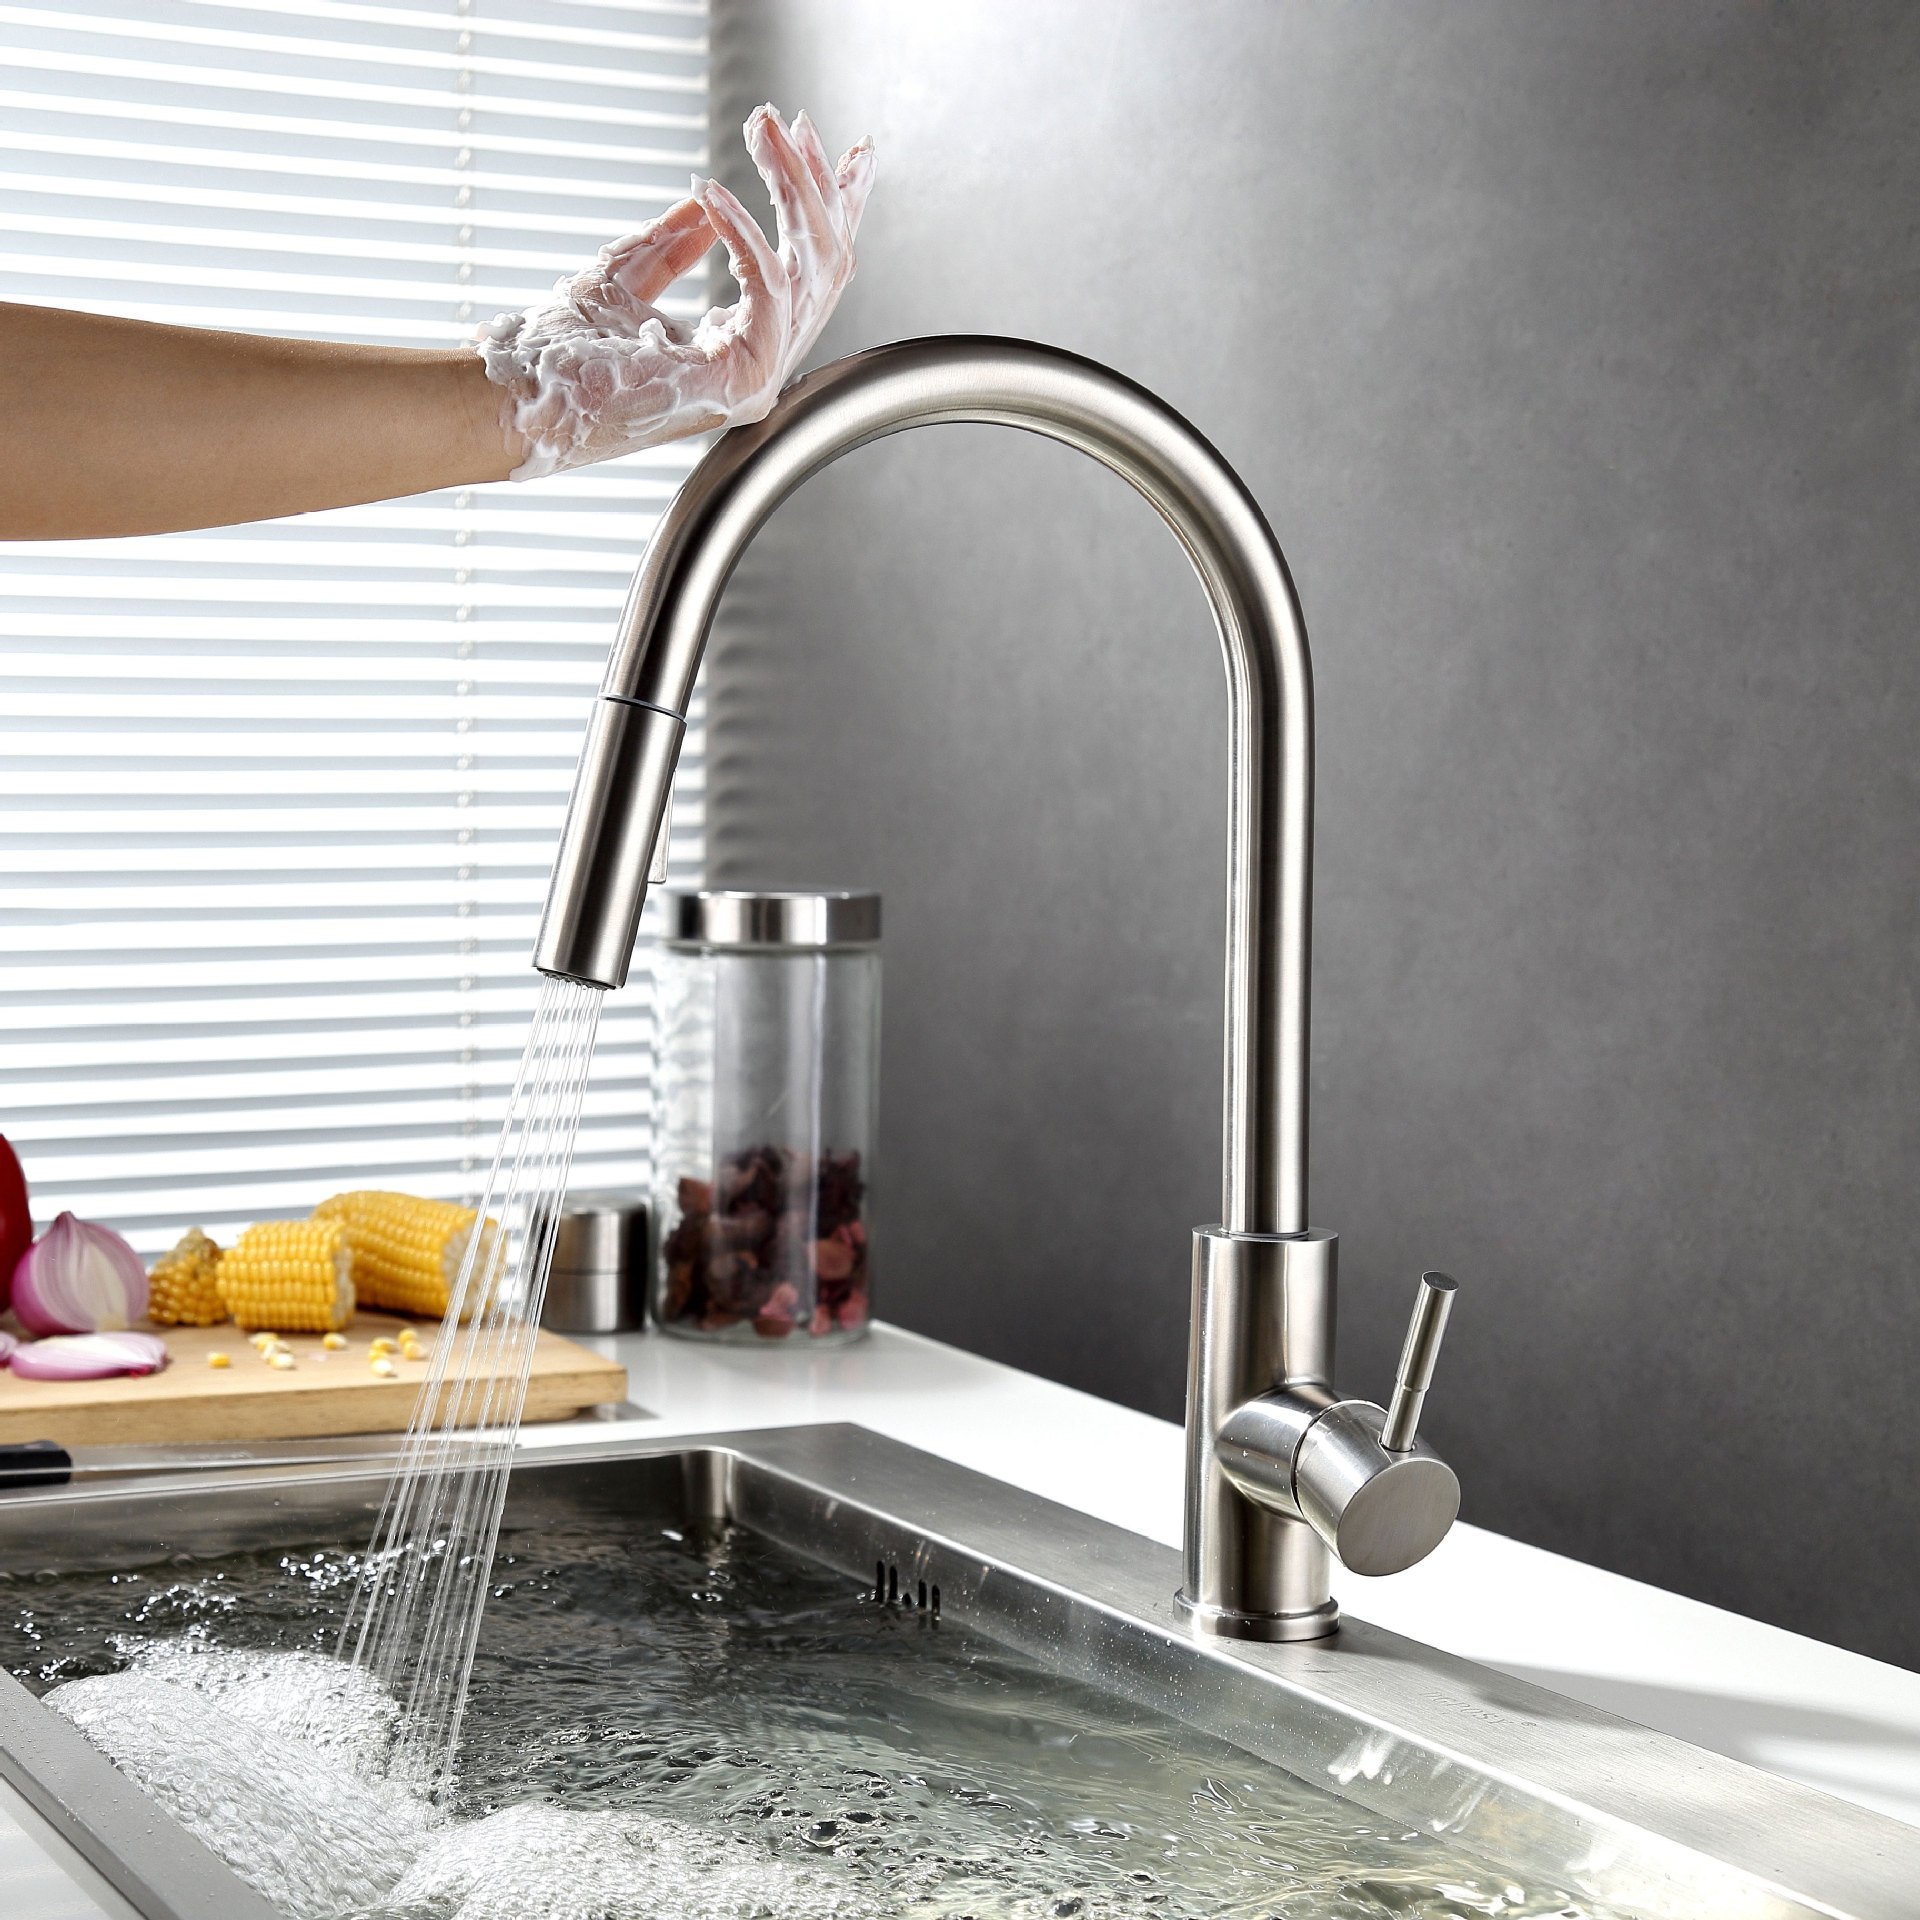
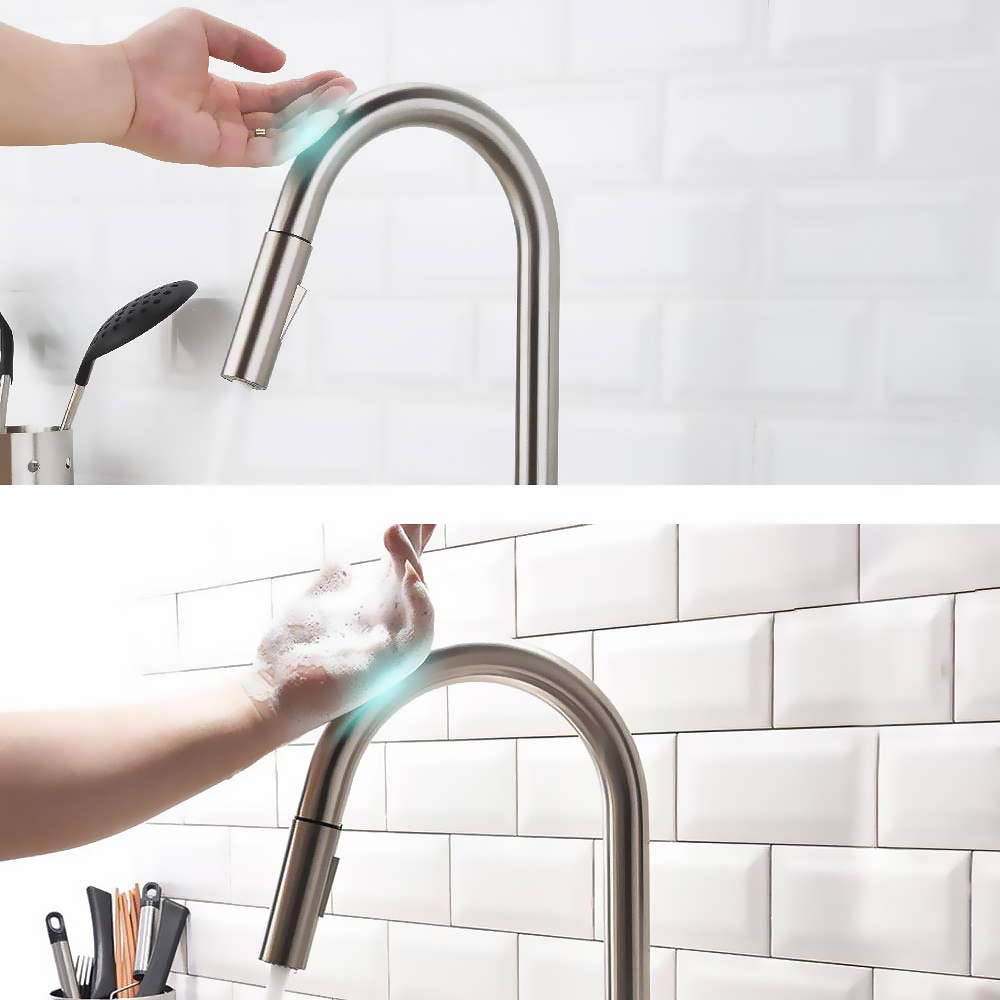
1. The operation is simple! With the handle in the “on†position tap anywhere on the spout, base, or handle.
2. The faucet is able to tell the difference between a touch and a grab. So it won’t turn on and off when you don’t want it to.
3. Use the handle to control temperature and volume for both manual and electronic operations.
4. Whether you grab the handle or taps it, water will flow. Once water is flowing, a tap will turn it off.
5. Auto Shut-off, the faucet will automatically shut off after running for 4 minutes.
6. Your new faucet will run for up to 2 years on 4 AA batteries.
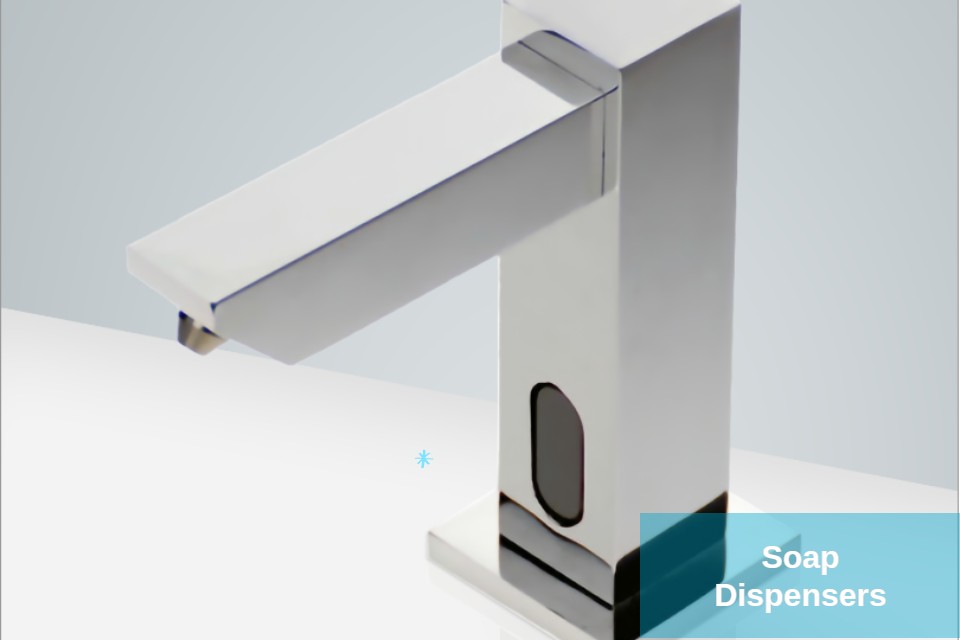
Healthcare facilities have seen a prevalence of touchless faucets and automatic soap dispensers. Numerous hospitals have been incorporating these fixtures to uphold hygiene protocols.
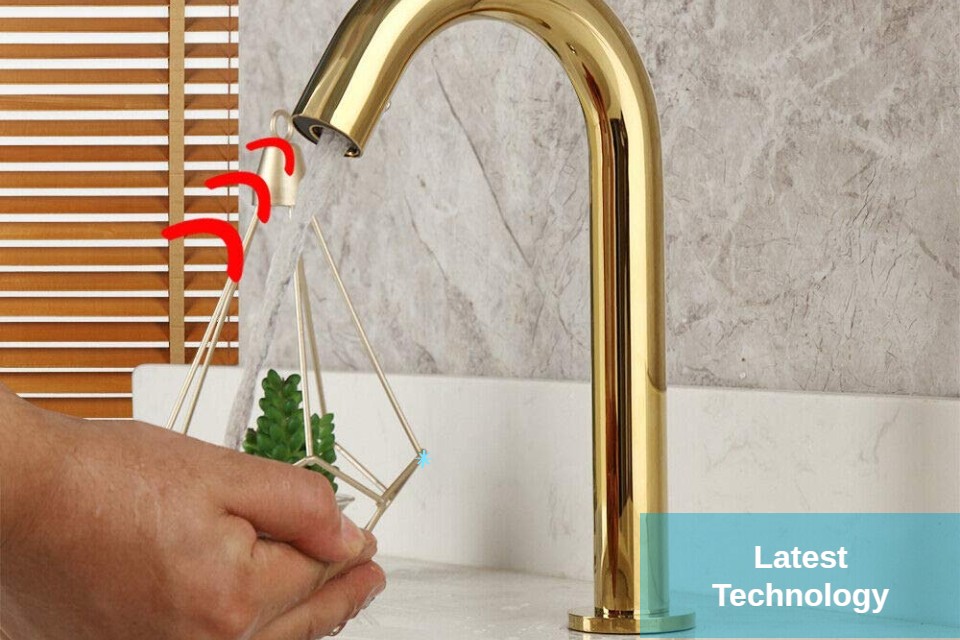
We provide comprehensive solutions for latest touchless operation as traditional handle faucets can harbor germs, whereas touch-free operation in restrooms helps prevent the spread of germs.
The hospitality industry, as well as public and high traffic restrooms are experiencing a surge in demand for touchless faucets and automatic soap dispensers, driven by the growing need for hygiene and sanitation solutions.