Fontana Peru Dark Oil Rubbed Bronze Rainfall LED Shower with Massage Jets
This shower system is very purposeful with temperature management, this shower trim kit with dual-function shower provides a lot of refined showering experience. Resists fingerprints and water spots. It looks new throughout an extended time use and less time to clean. You will have more time to enjoy your shower. Manufactured from lead-free sturdy category and top quality of stainless-steel. No harm to your body. No quality worry even after a long time use. This beautiful elegant design comes with solid construction for long durability that will upgrade your bathroom with a modern and cool look. A truly Spa-like thermostatic shower system with simultaneous flow out design offers you an ultimate shower spa experience than ever! Body jets massage helps you relax your muscles.
Fontana Peru Dark Oil Rubbed Bronze Rainfall LED Shower with Massage Jets Features:
Shower Brand Name: FontanaShowers
Shower Model Number: FS9605
Shower Surface Treatment: Oil Rubbed Bronze
Shower Type: Fixed Rotatable Type
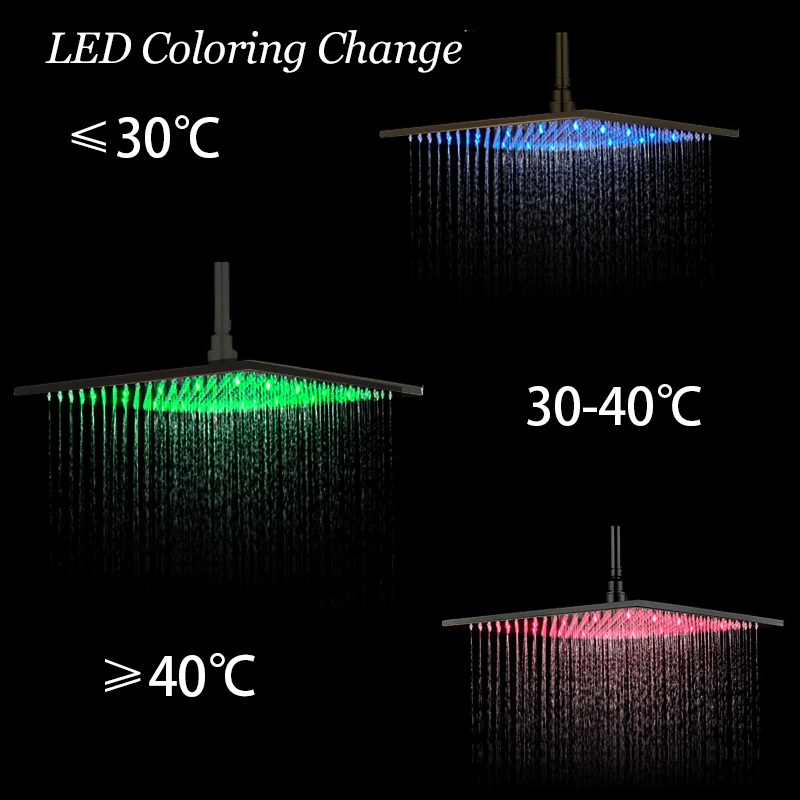
Shower Feature: LED Light
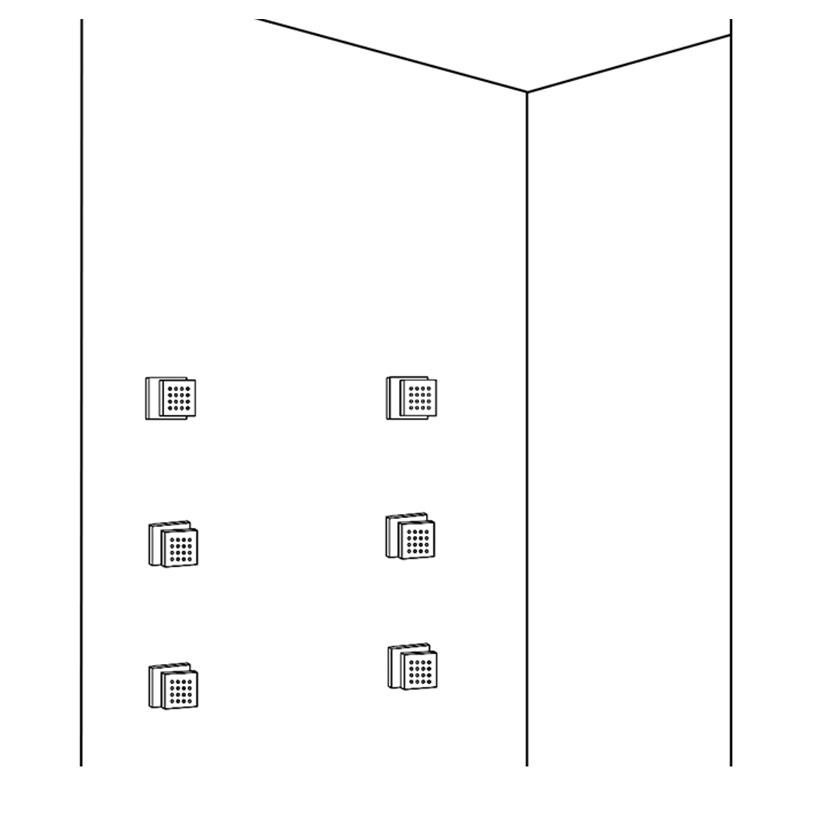
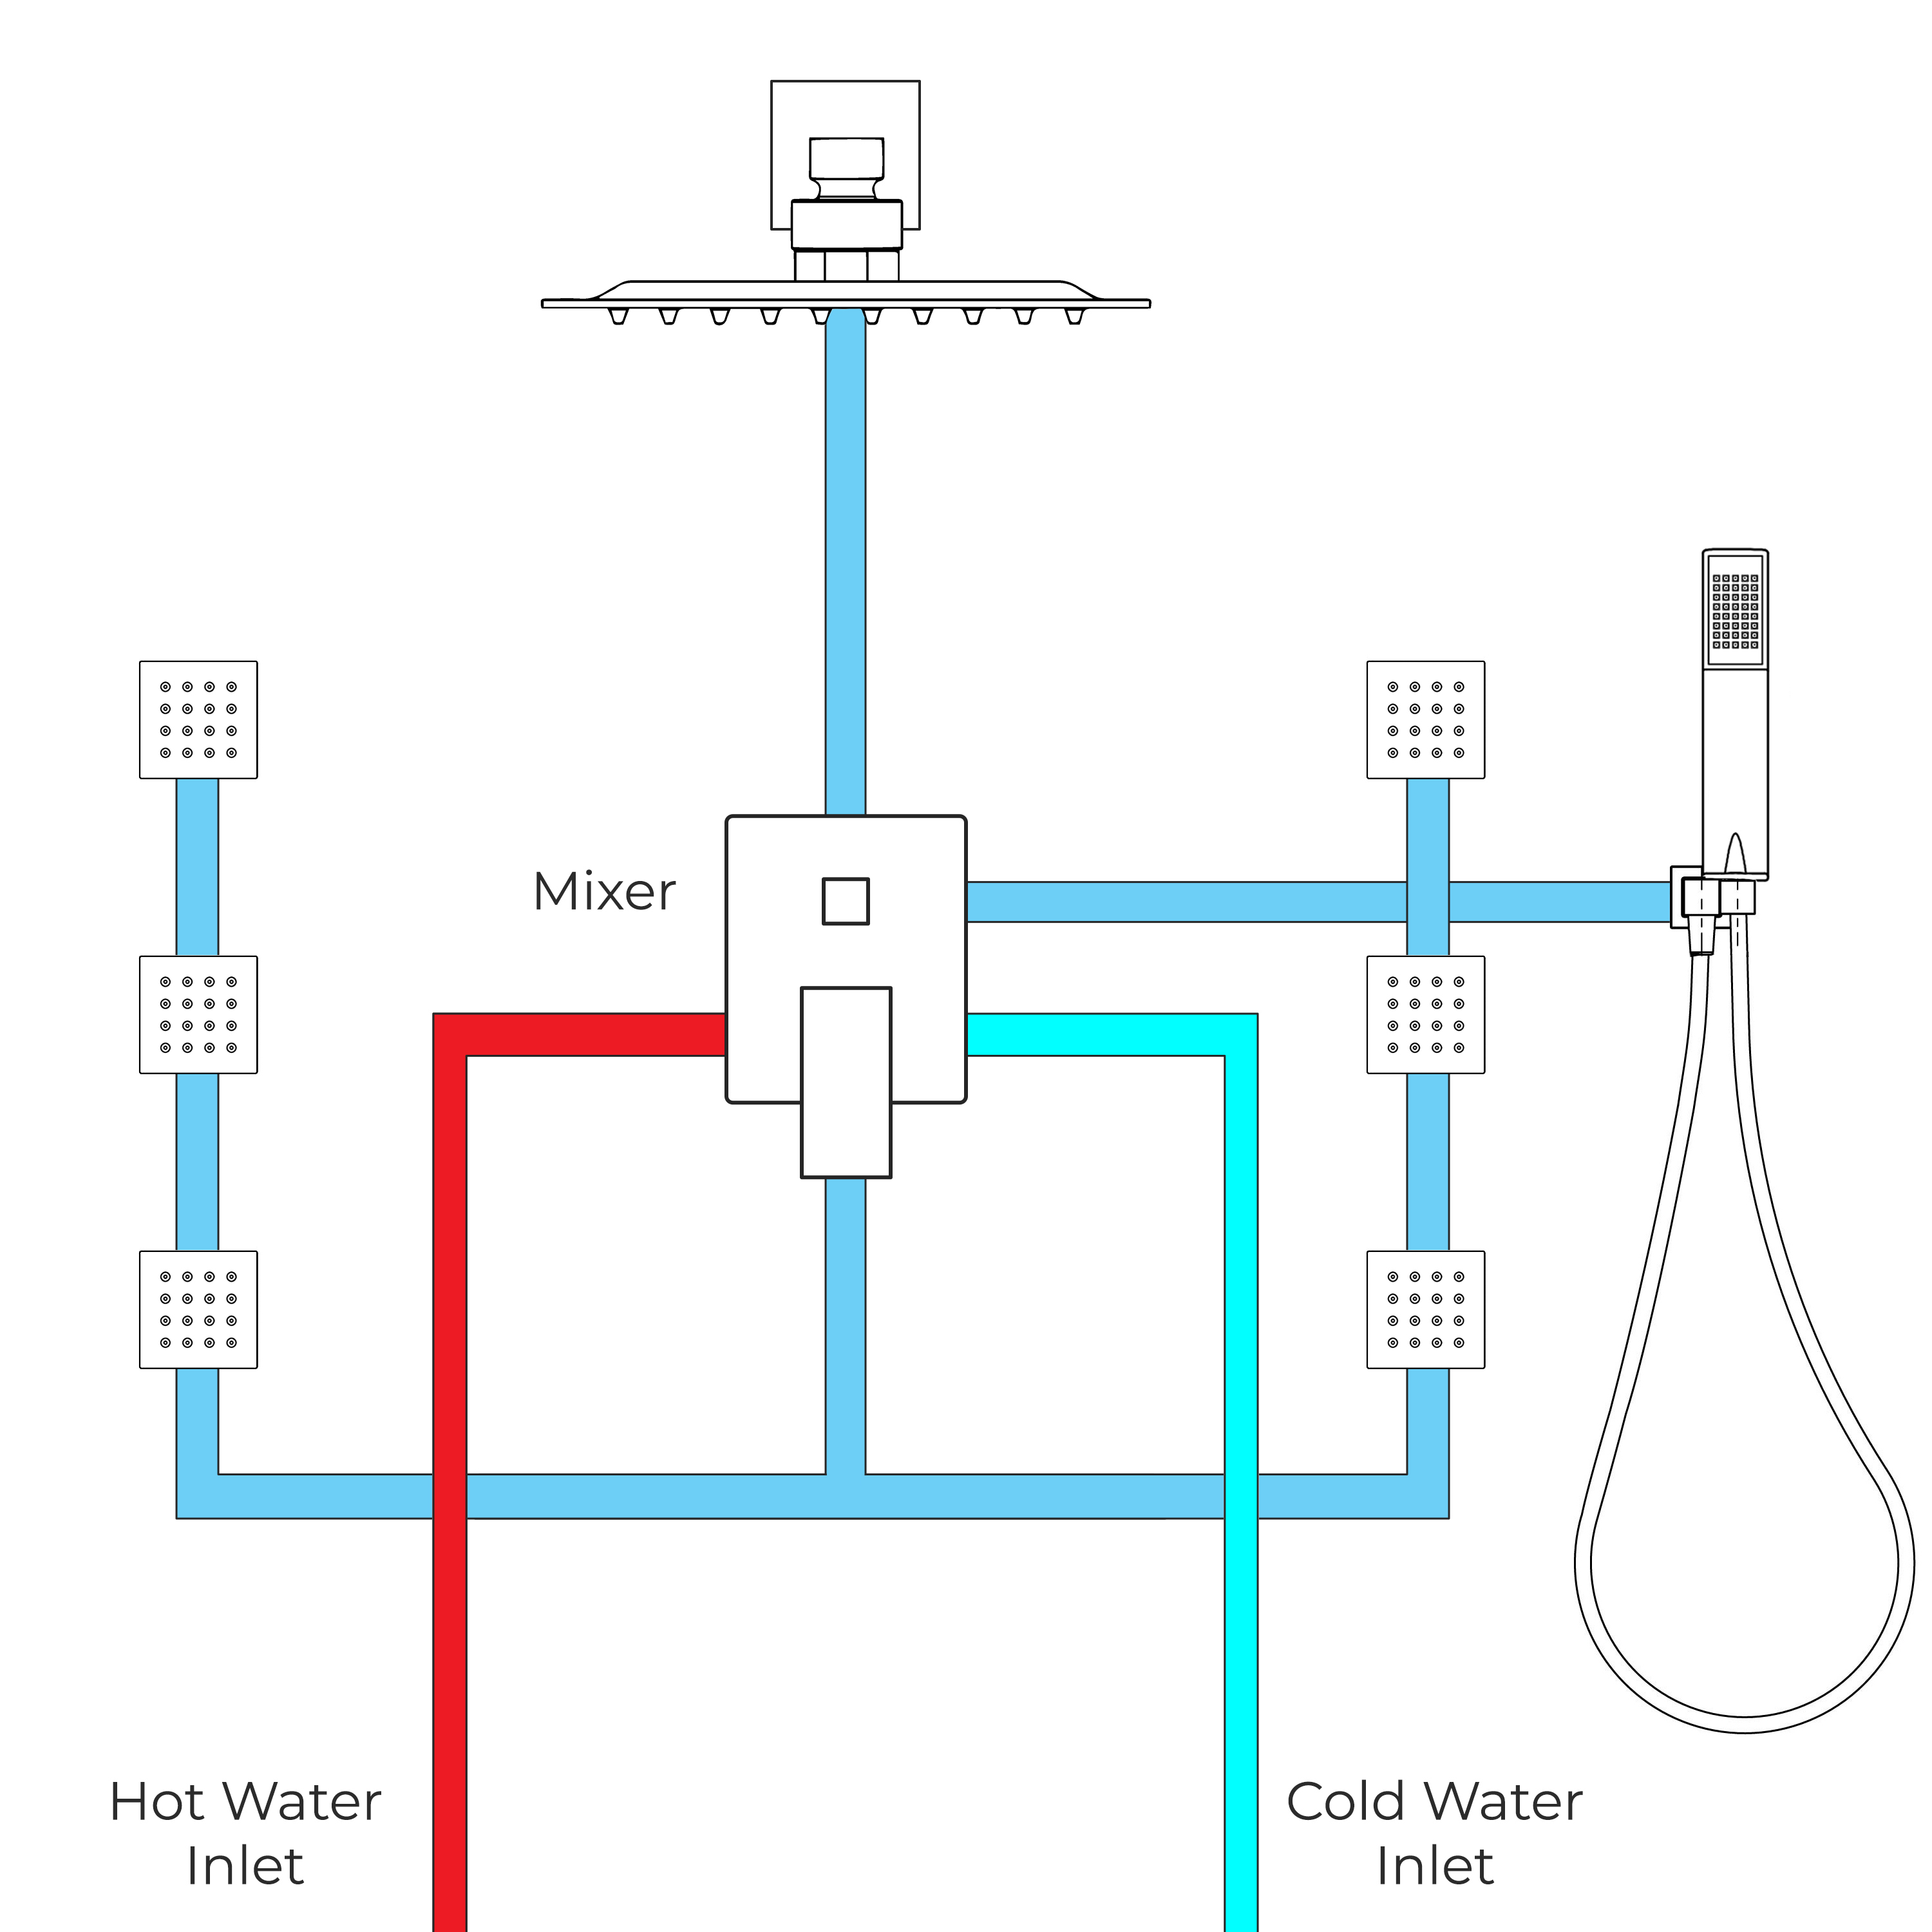
Shower Feature: Cold and Hot, with 6 Massage Jets
Shower Number of Handle: Single Handle
Shower Feature: Metered Faucets
Shower Surface Finish: Brass
Showerhead Size: 8 inches
Shower Style: Contemporary
Shower Valve Core Material: Ceramic
Shower Function: Shower Faucet
Shower Color: Oil Rubbed Bronze
Shower Material: Brass
Shower Water Control Type: Single Holder Dual Control
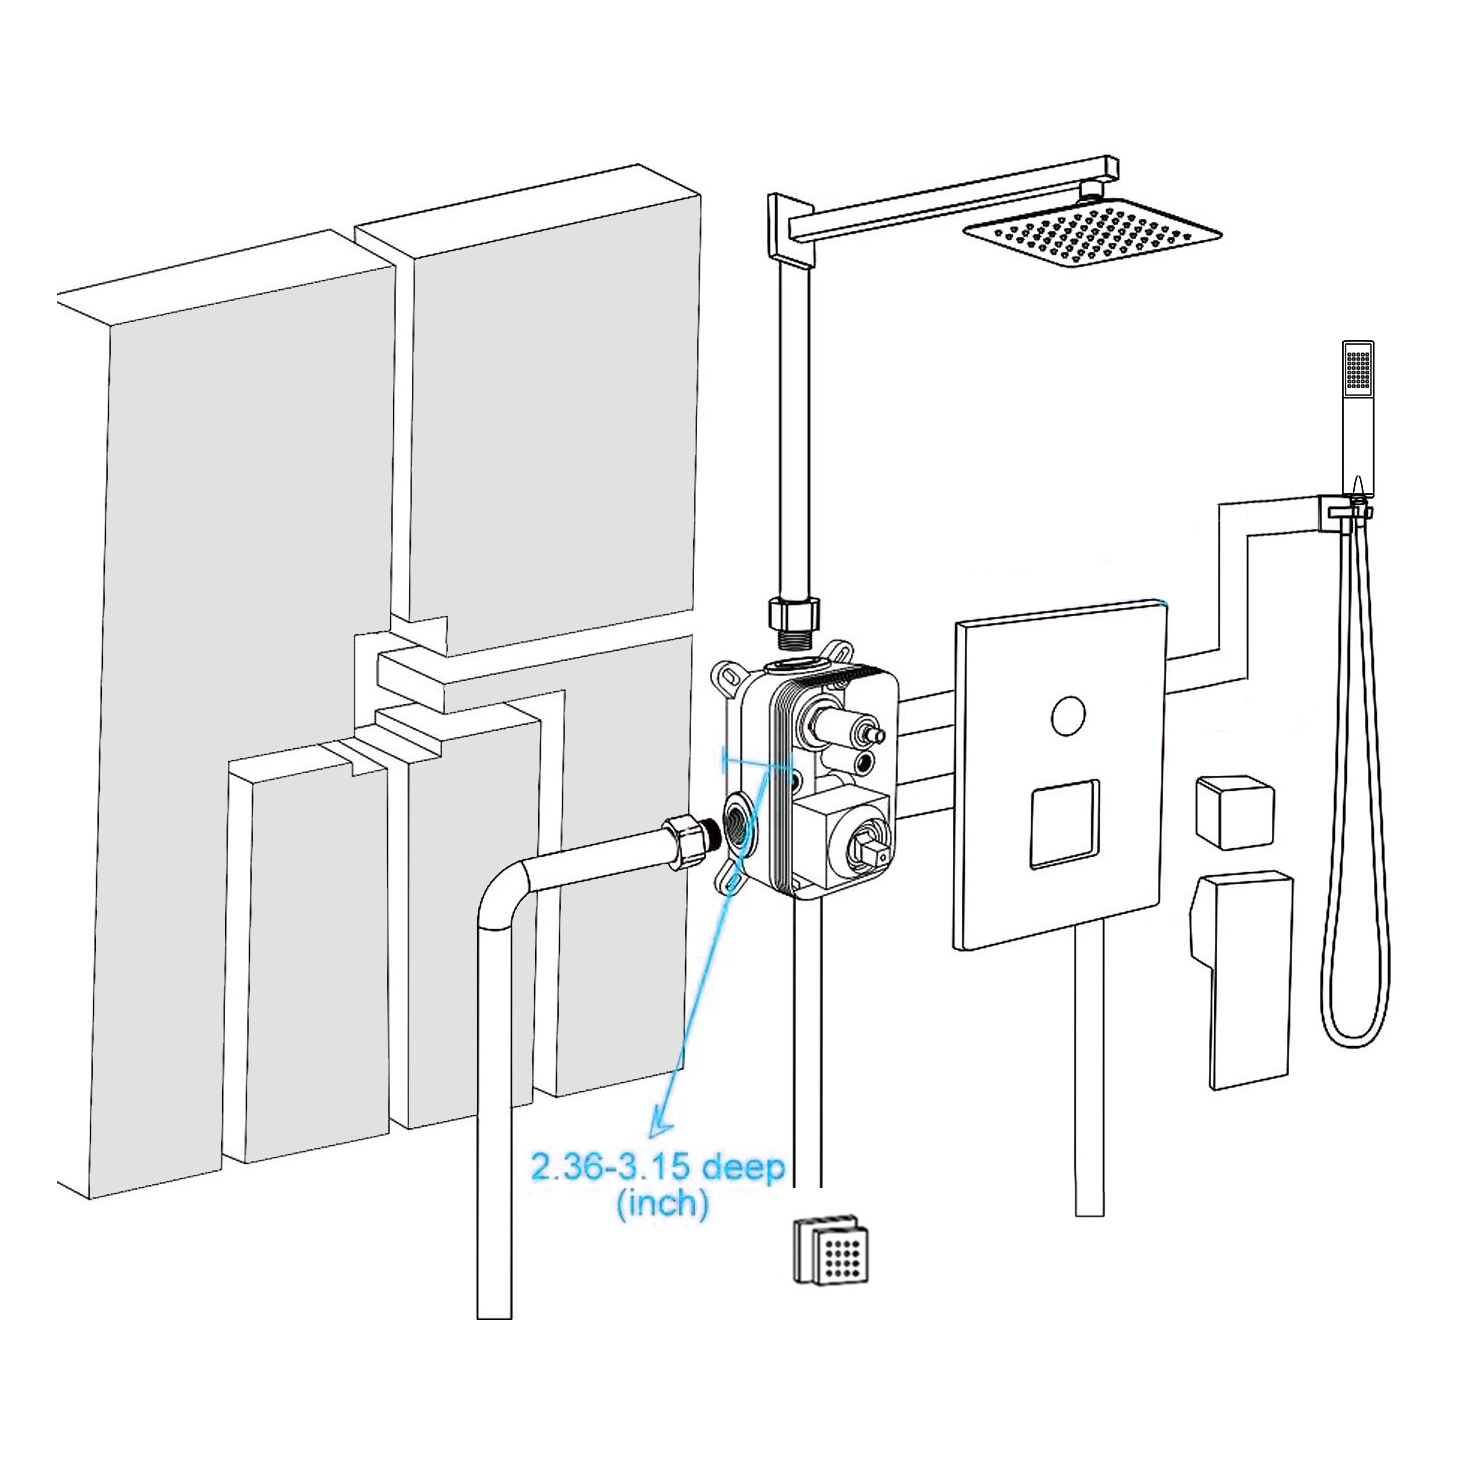
Before you begin, please read the installation instructions below. Observe all local building and safety codes.
Unpack and inspect the product for any shipping damages. If you find damages, do not install.
Please note all showers must be installed by a professional and certified plumber otherwise warranty might be voided.
Installation Instructions
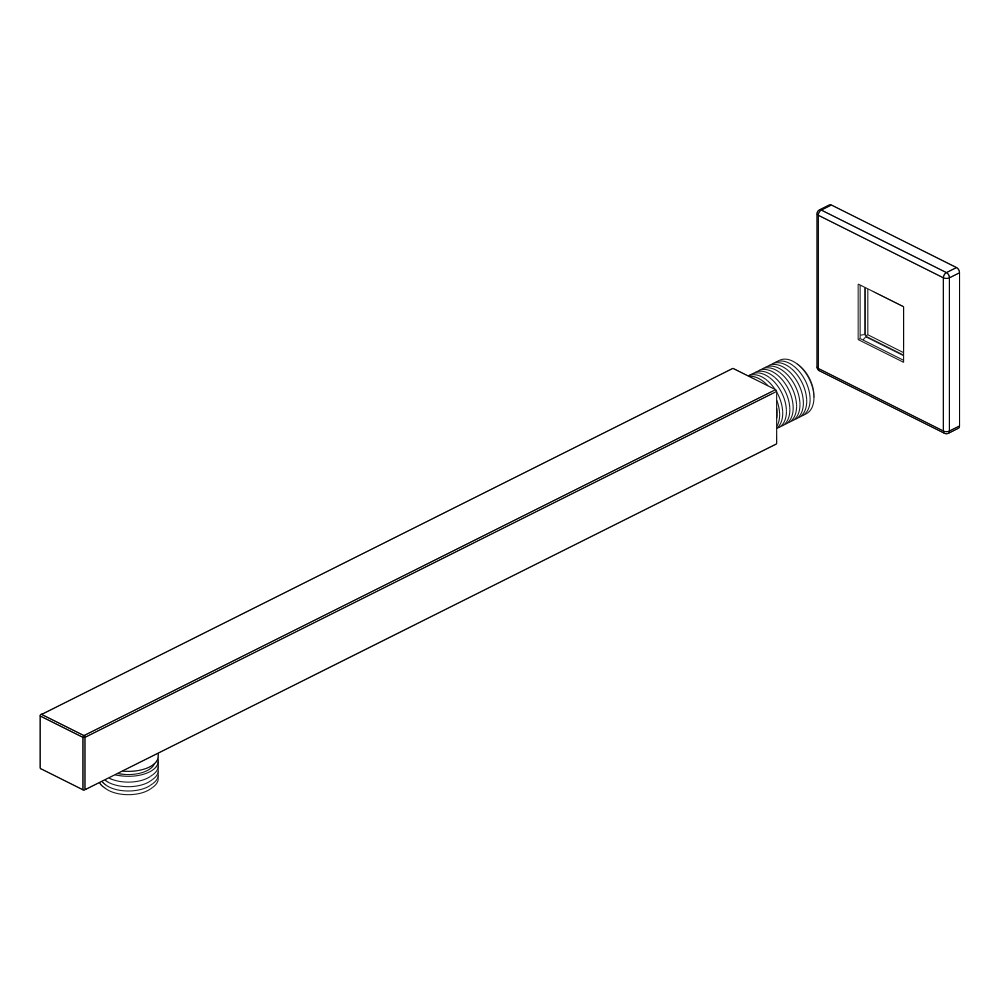
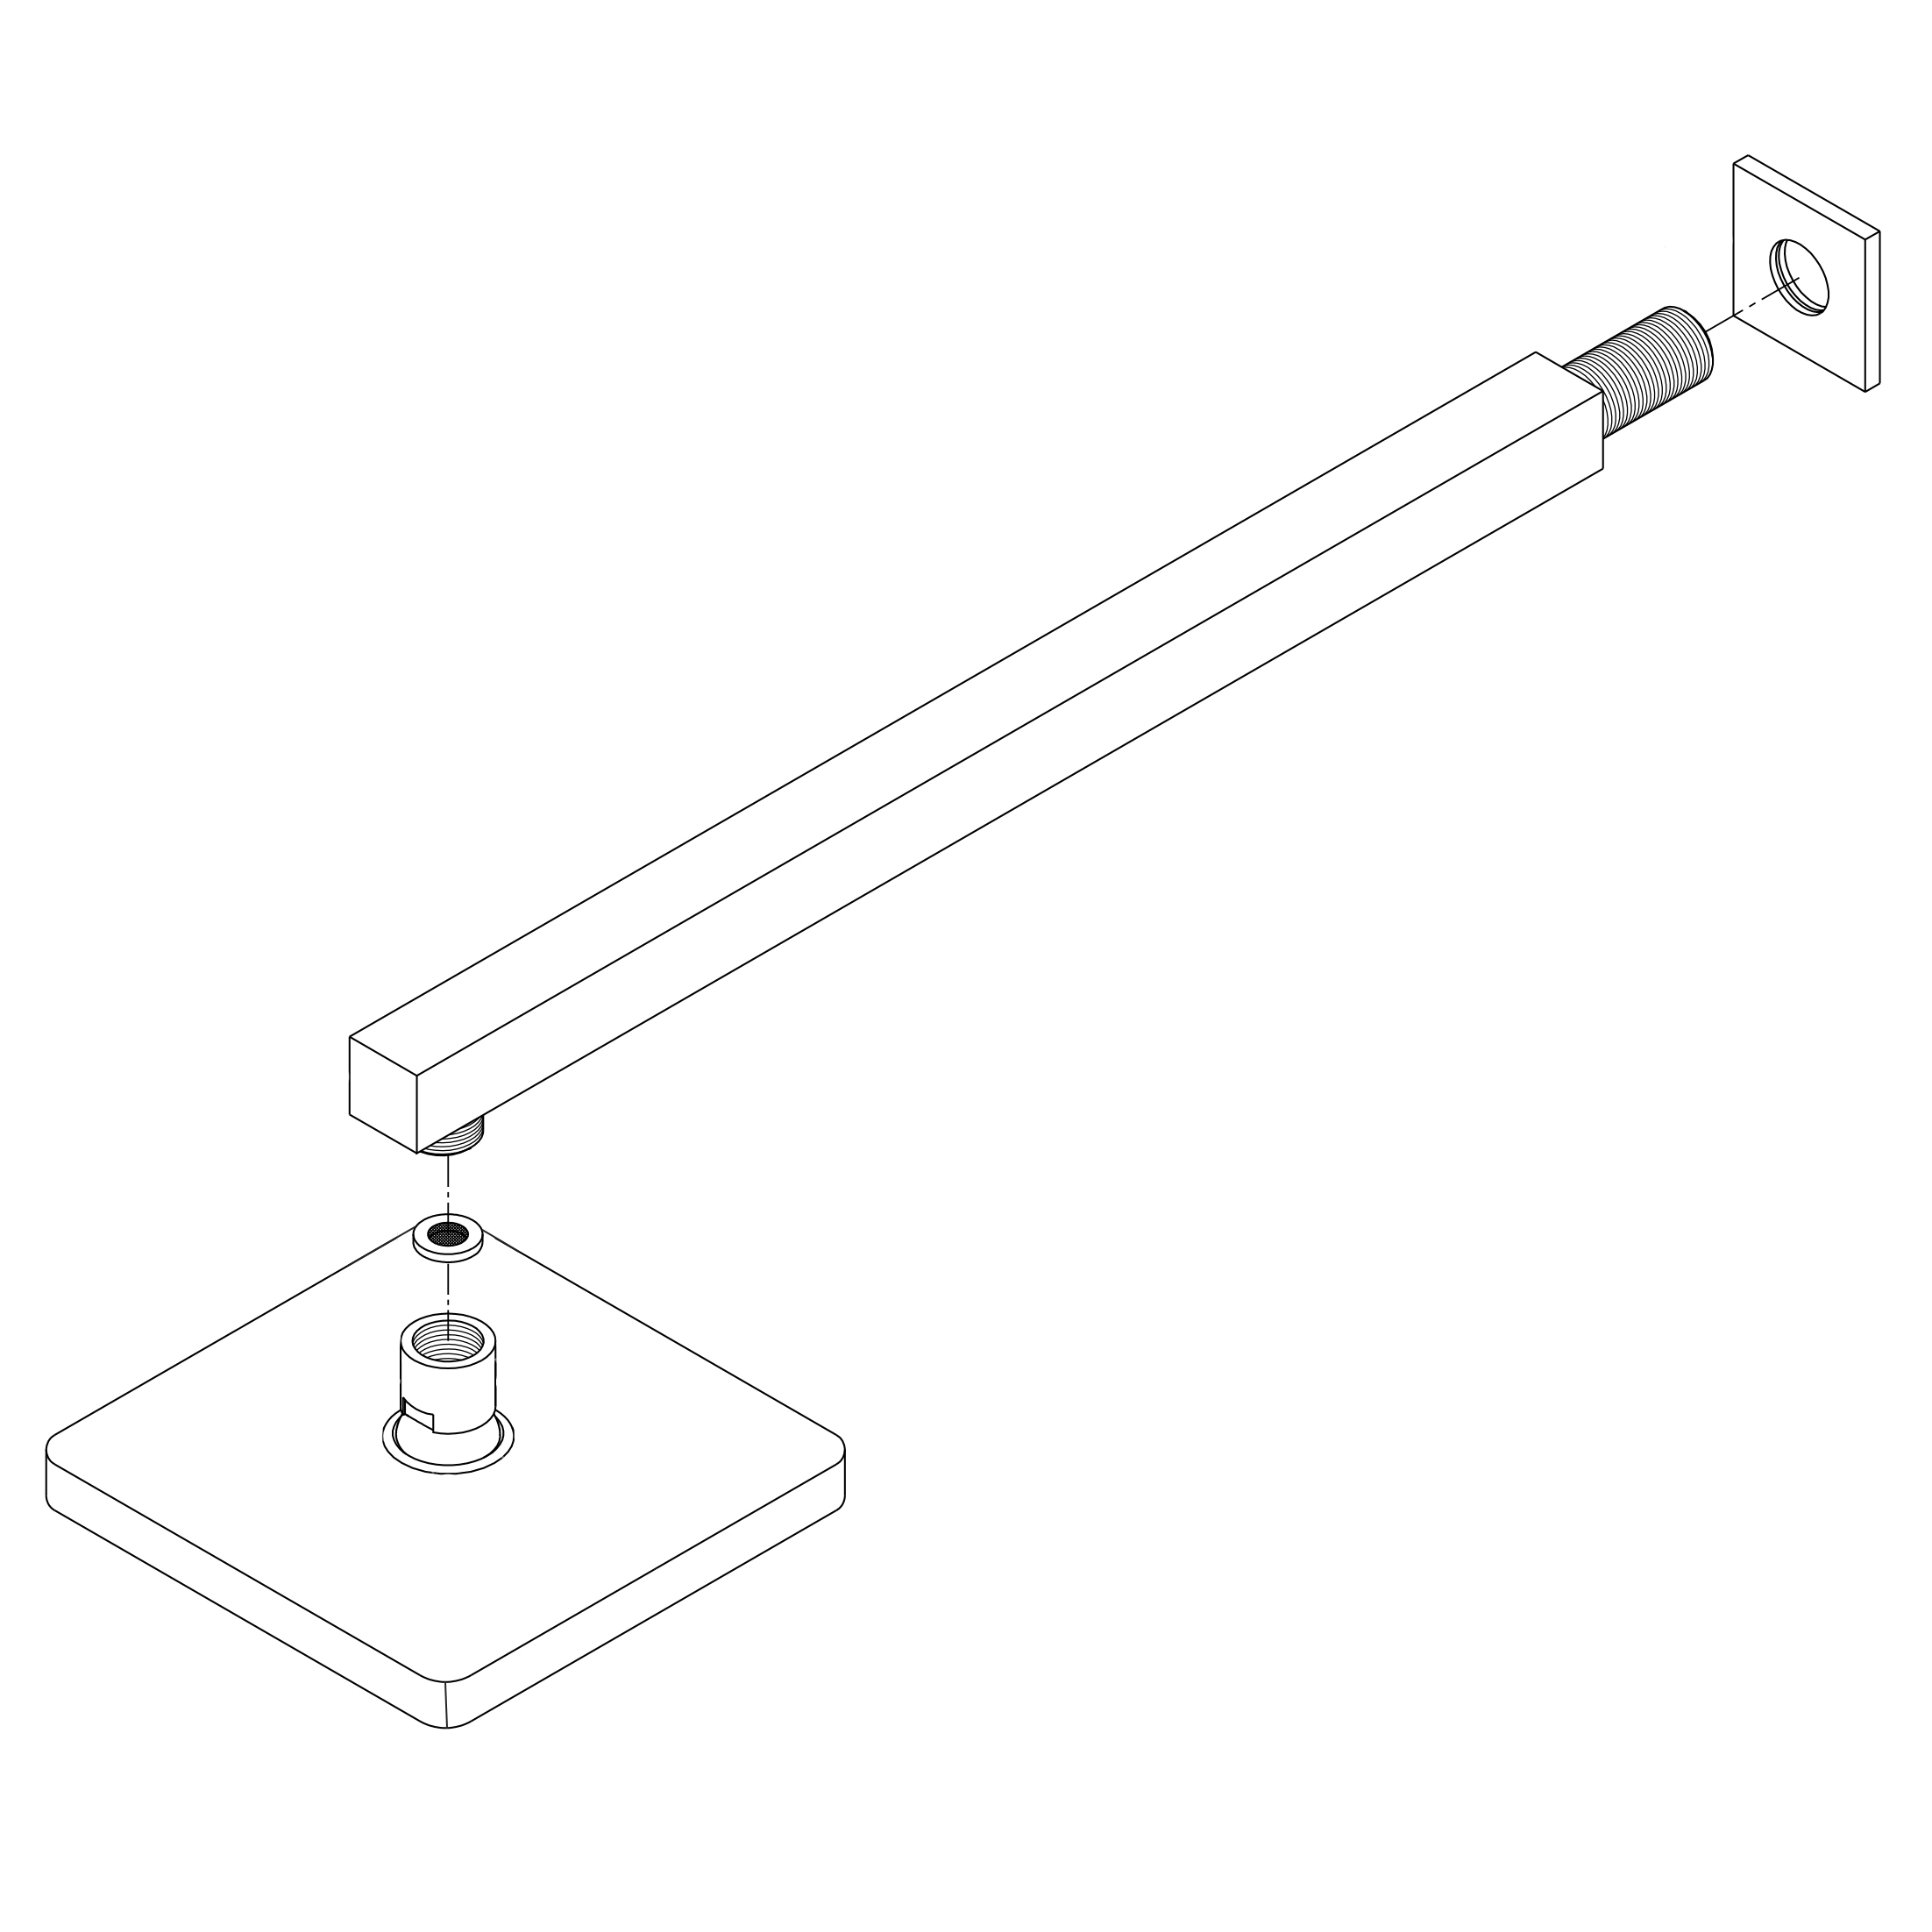
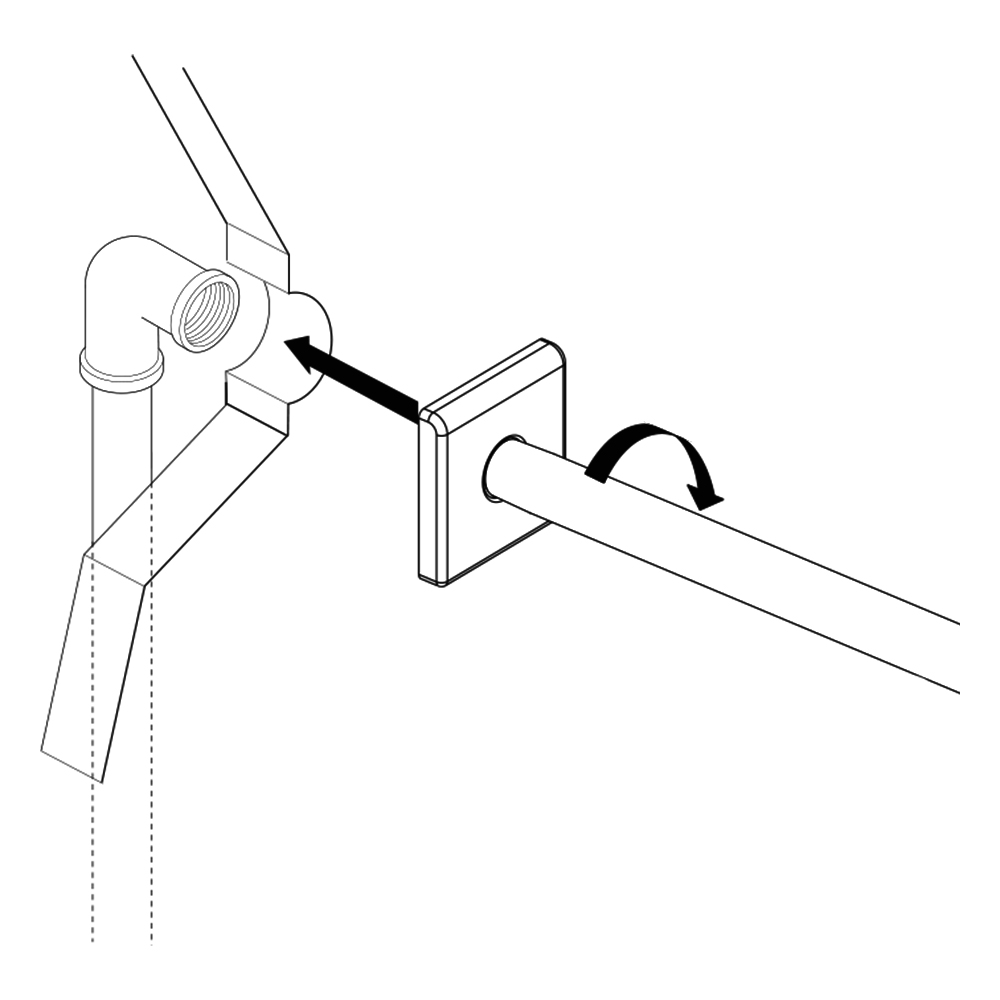
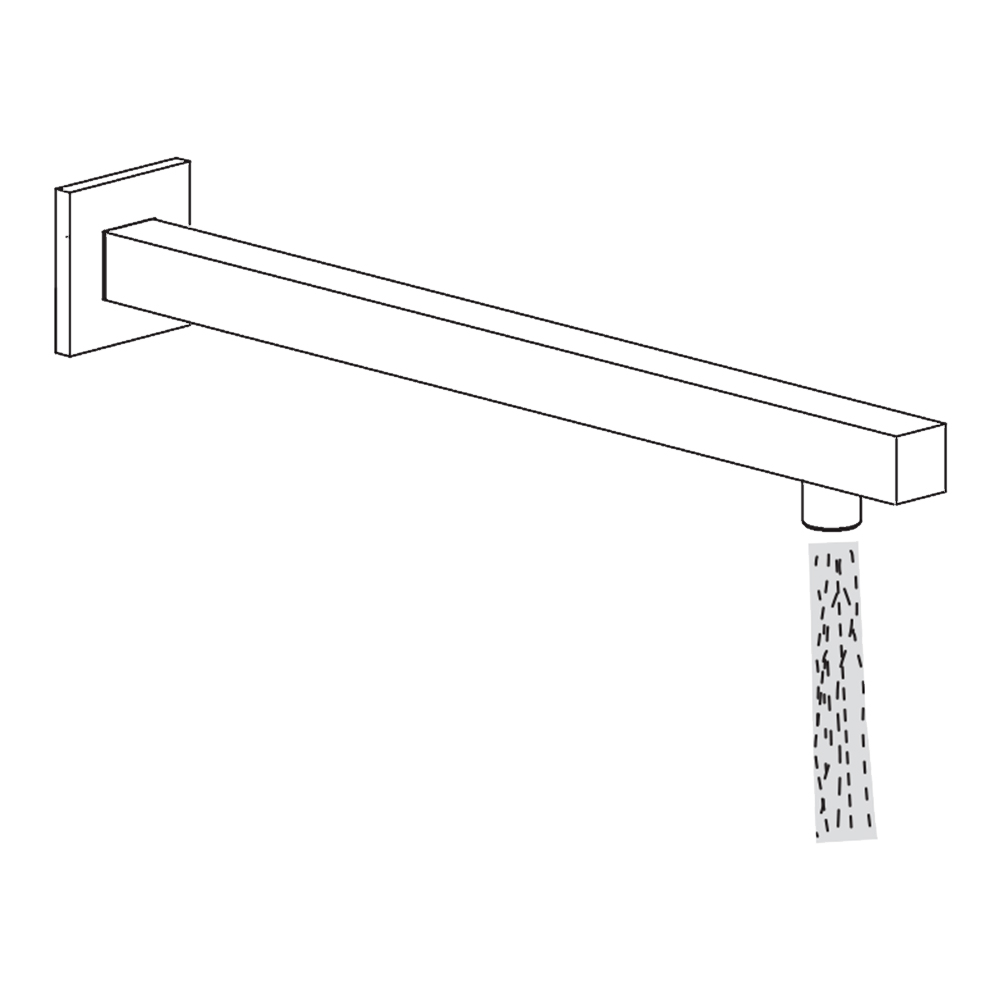
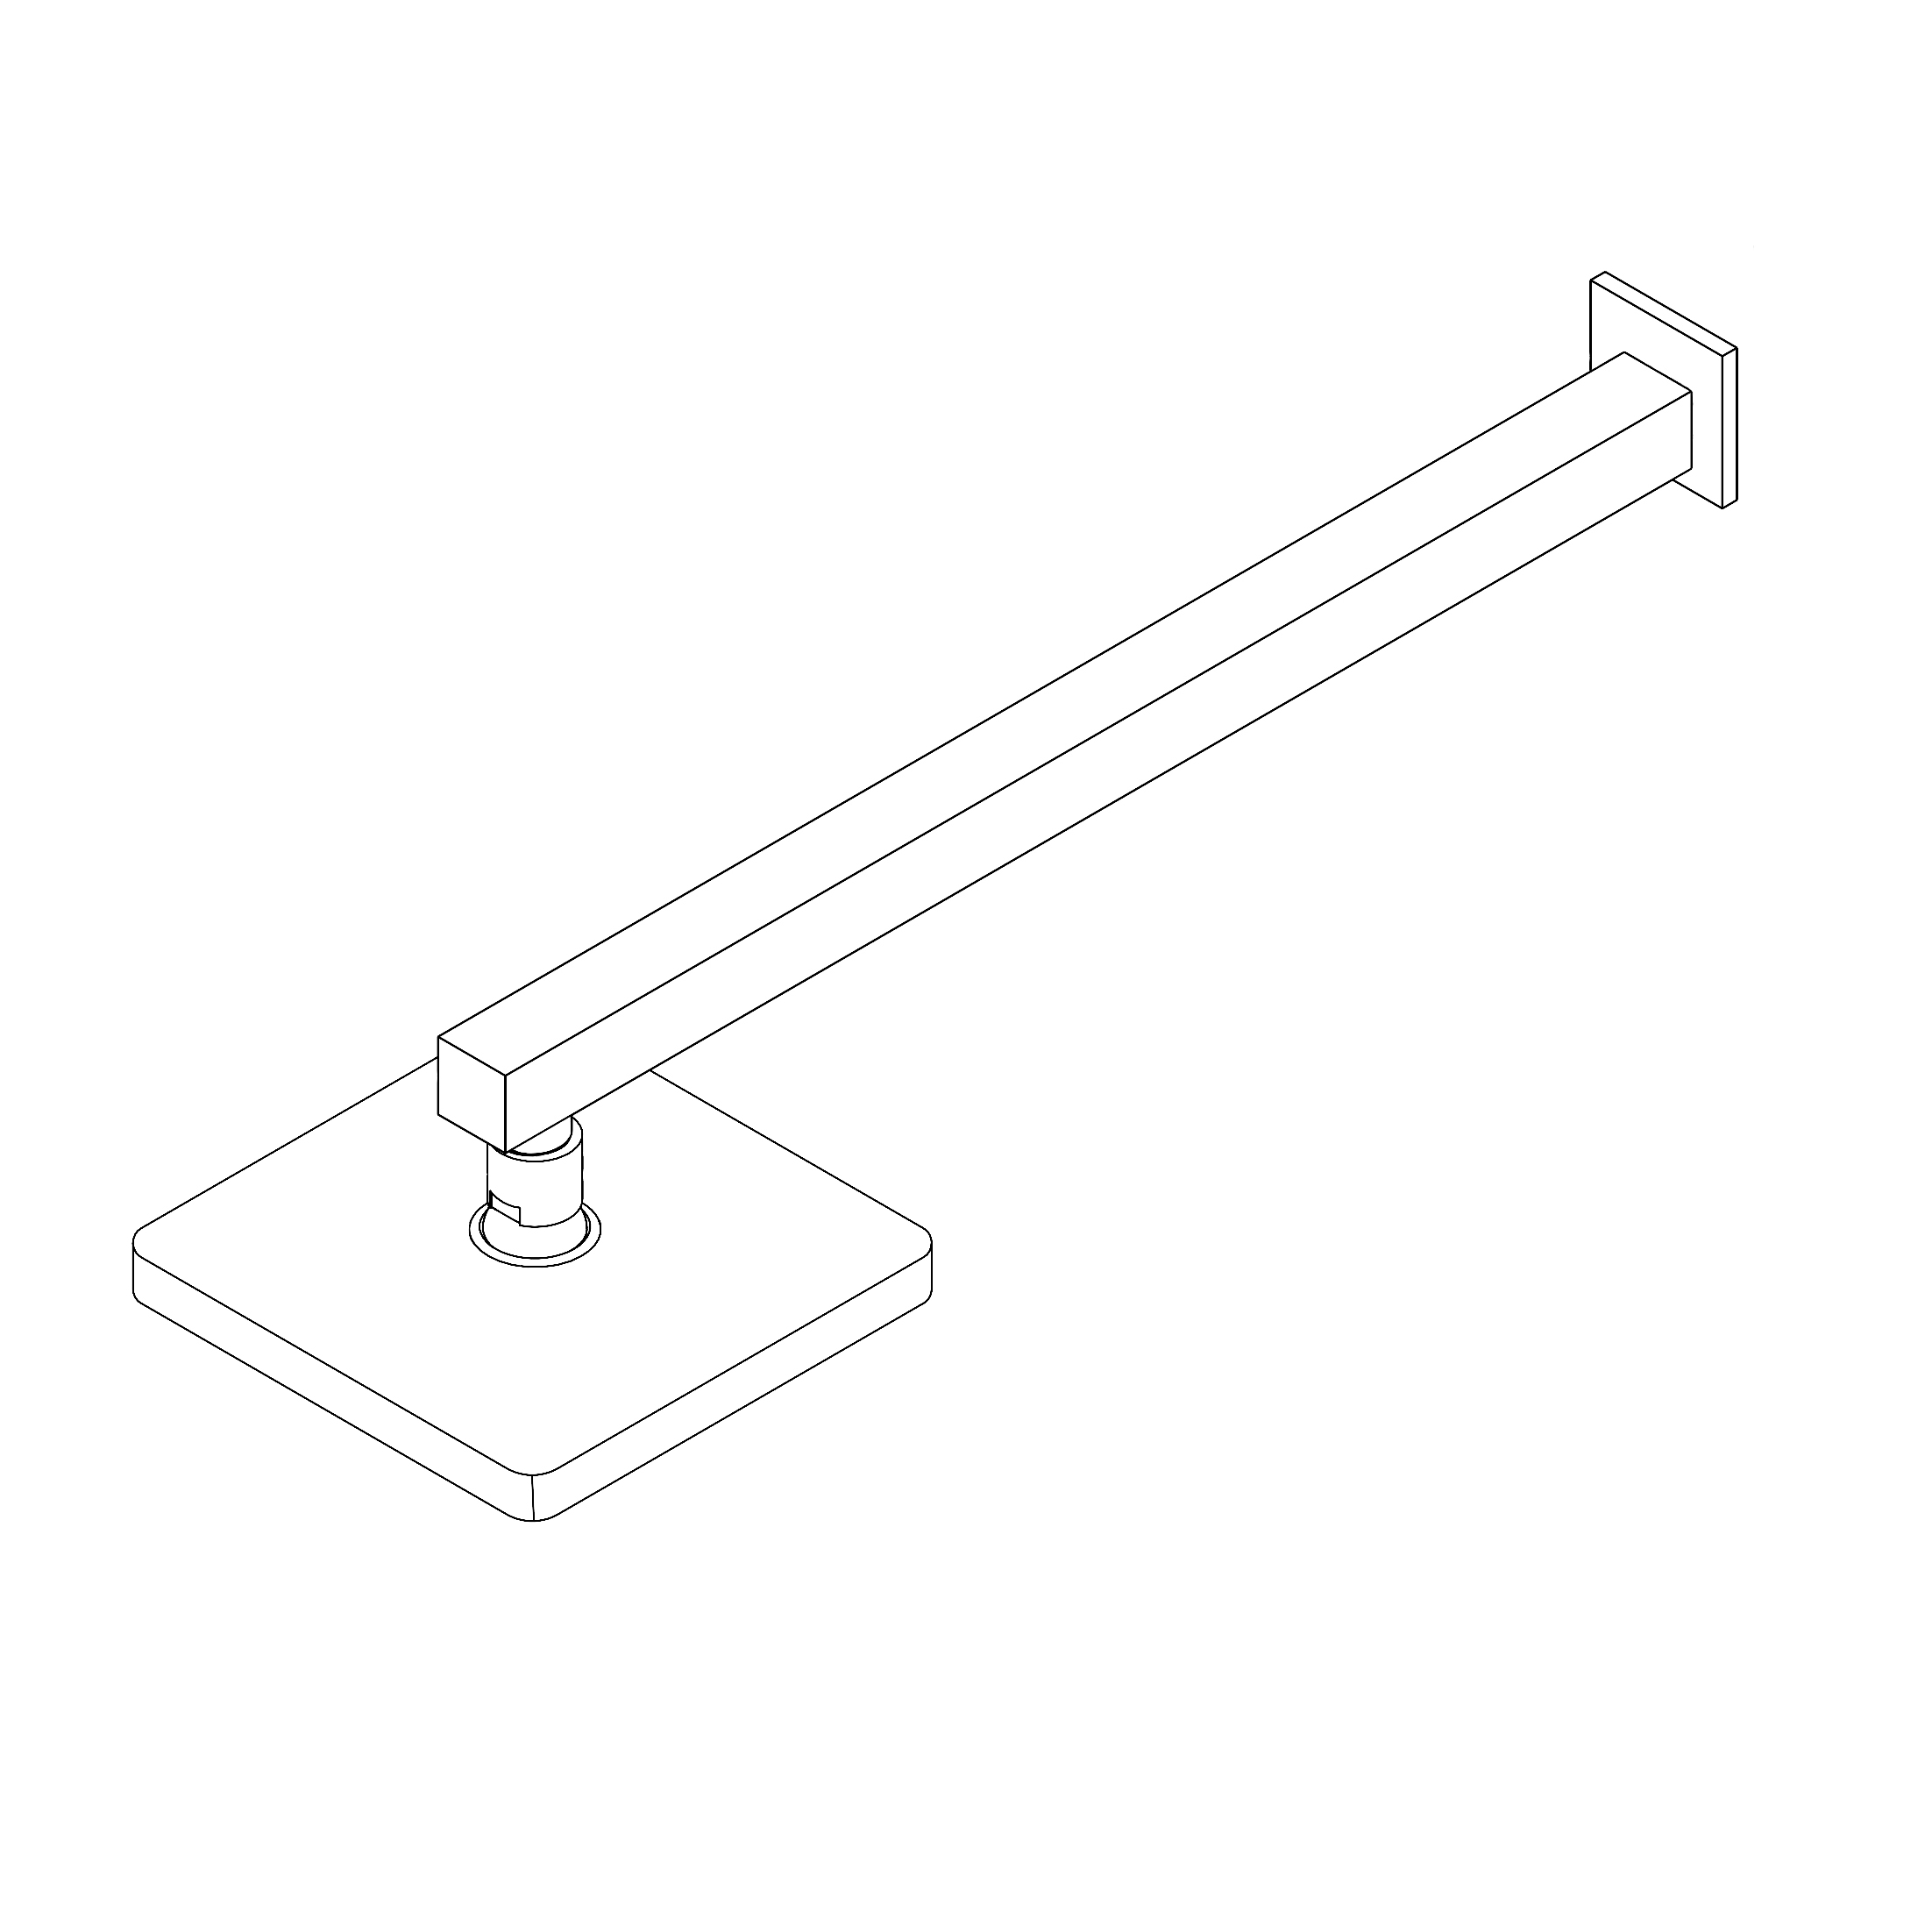
Shower Head Installation Instructions
Step 1:
shower
Step 2:
Step 3:
Step 4:
Step 5:
1. Apply plumber's tape to the threads on both ends of the shower arm and slide on the decorative escutcheon.
2. Insert the new arm into the fitting in the wall and twist to tighten. Finish tightening with your adjustable wrench. Wrap a dry cloth around the shower arm to protect the finish while tightening with an adjustable wrench.
3. Thread the new shower head onto the arm and hand-tighten. Hold the shower arm in place with groove joint pliers and finish tightening the shower head with your adjustable wrench. Wrap both in a dry cloth to protect the finish.
4. Before securing the decorative escutcheon, turn on the water supply to make sure that all connections are tight and there is no leaking. If no leaks are detected, continue with the installation. If leakage does occur, use your adjustable wrench to tighten the connections as necessary.
5. Apply a bead if silicone sealant to the back of the escutcheon and press firmly into place against the installation surface. Wipe away any excess sealant with your damp cloth.
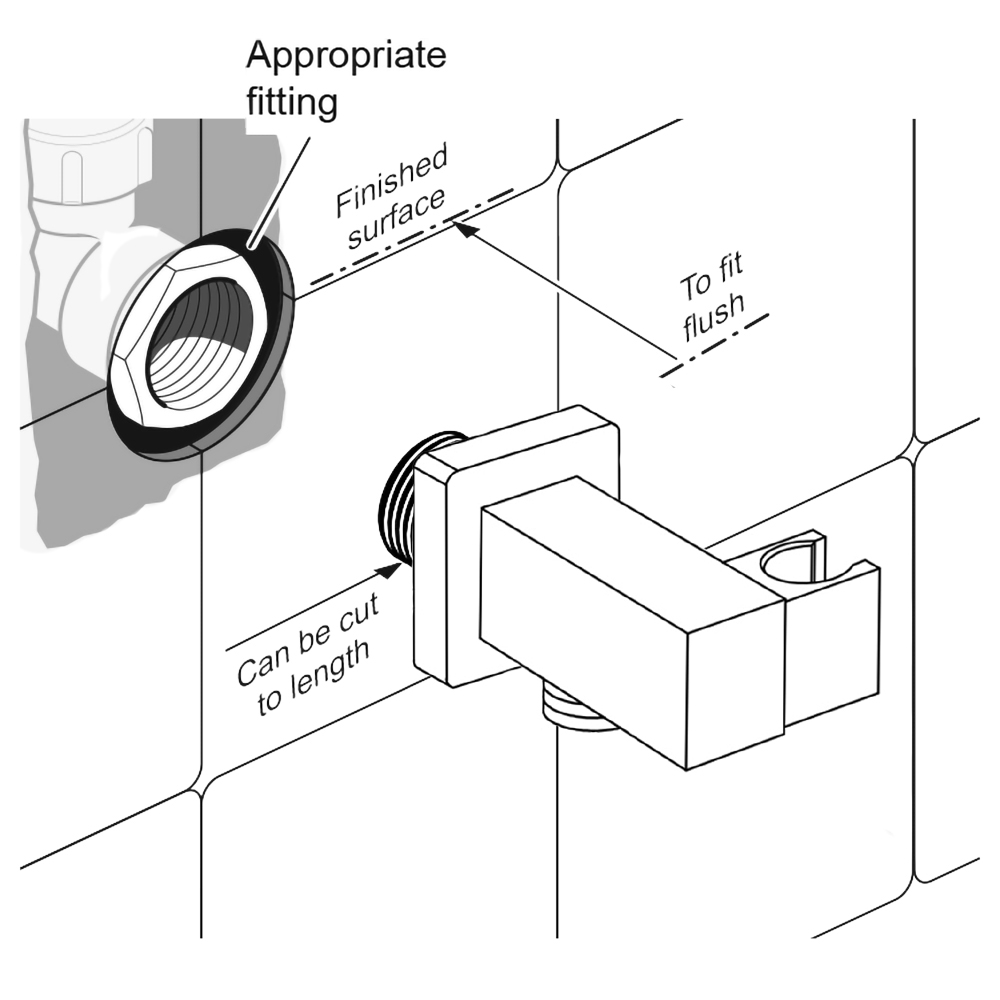
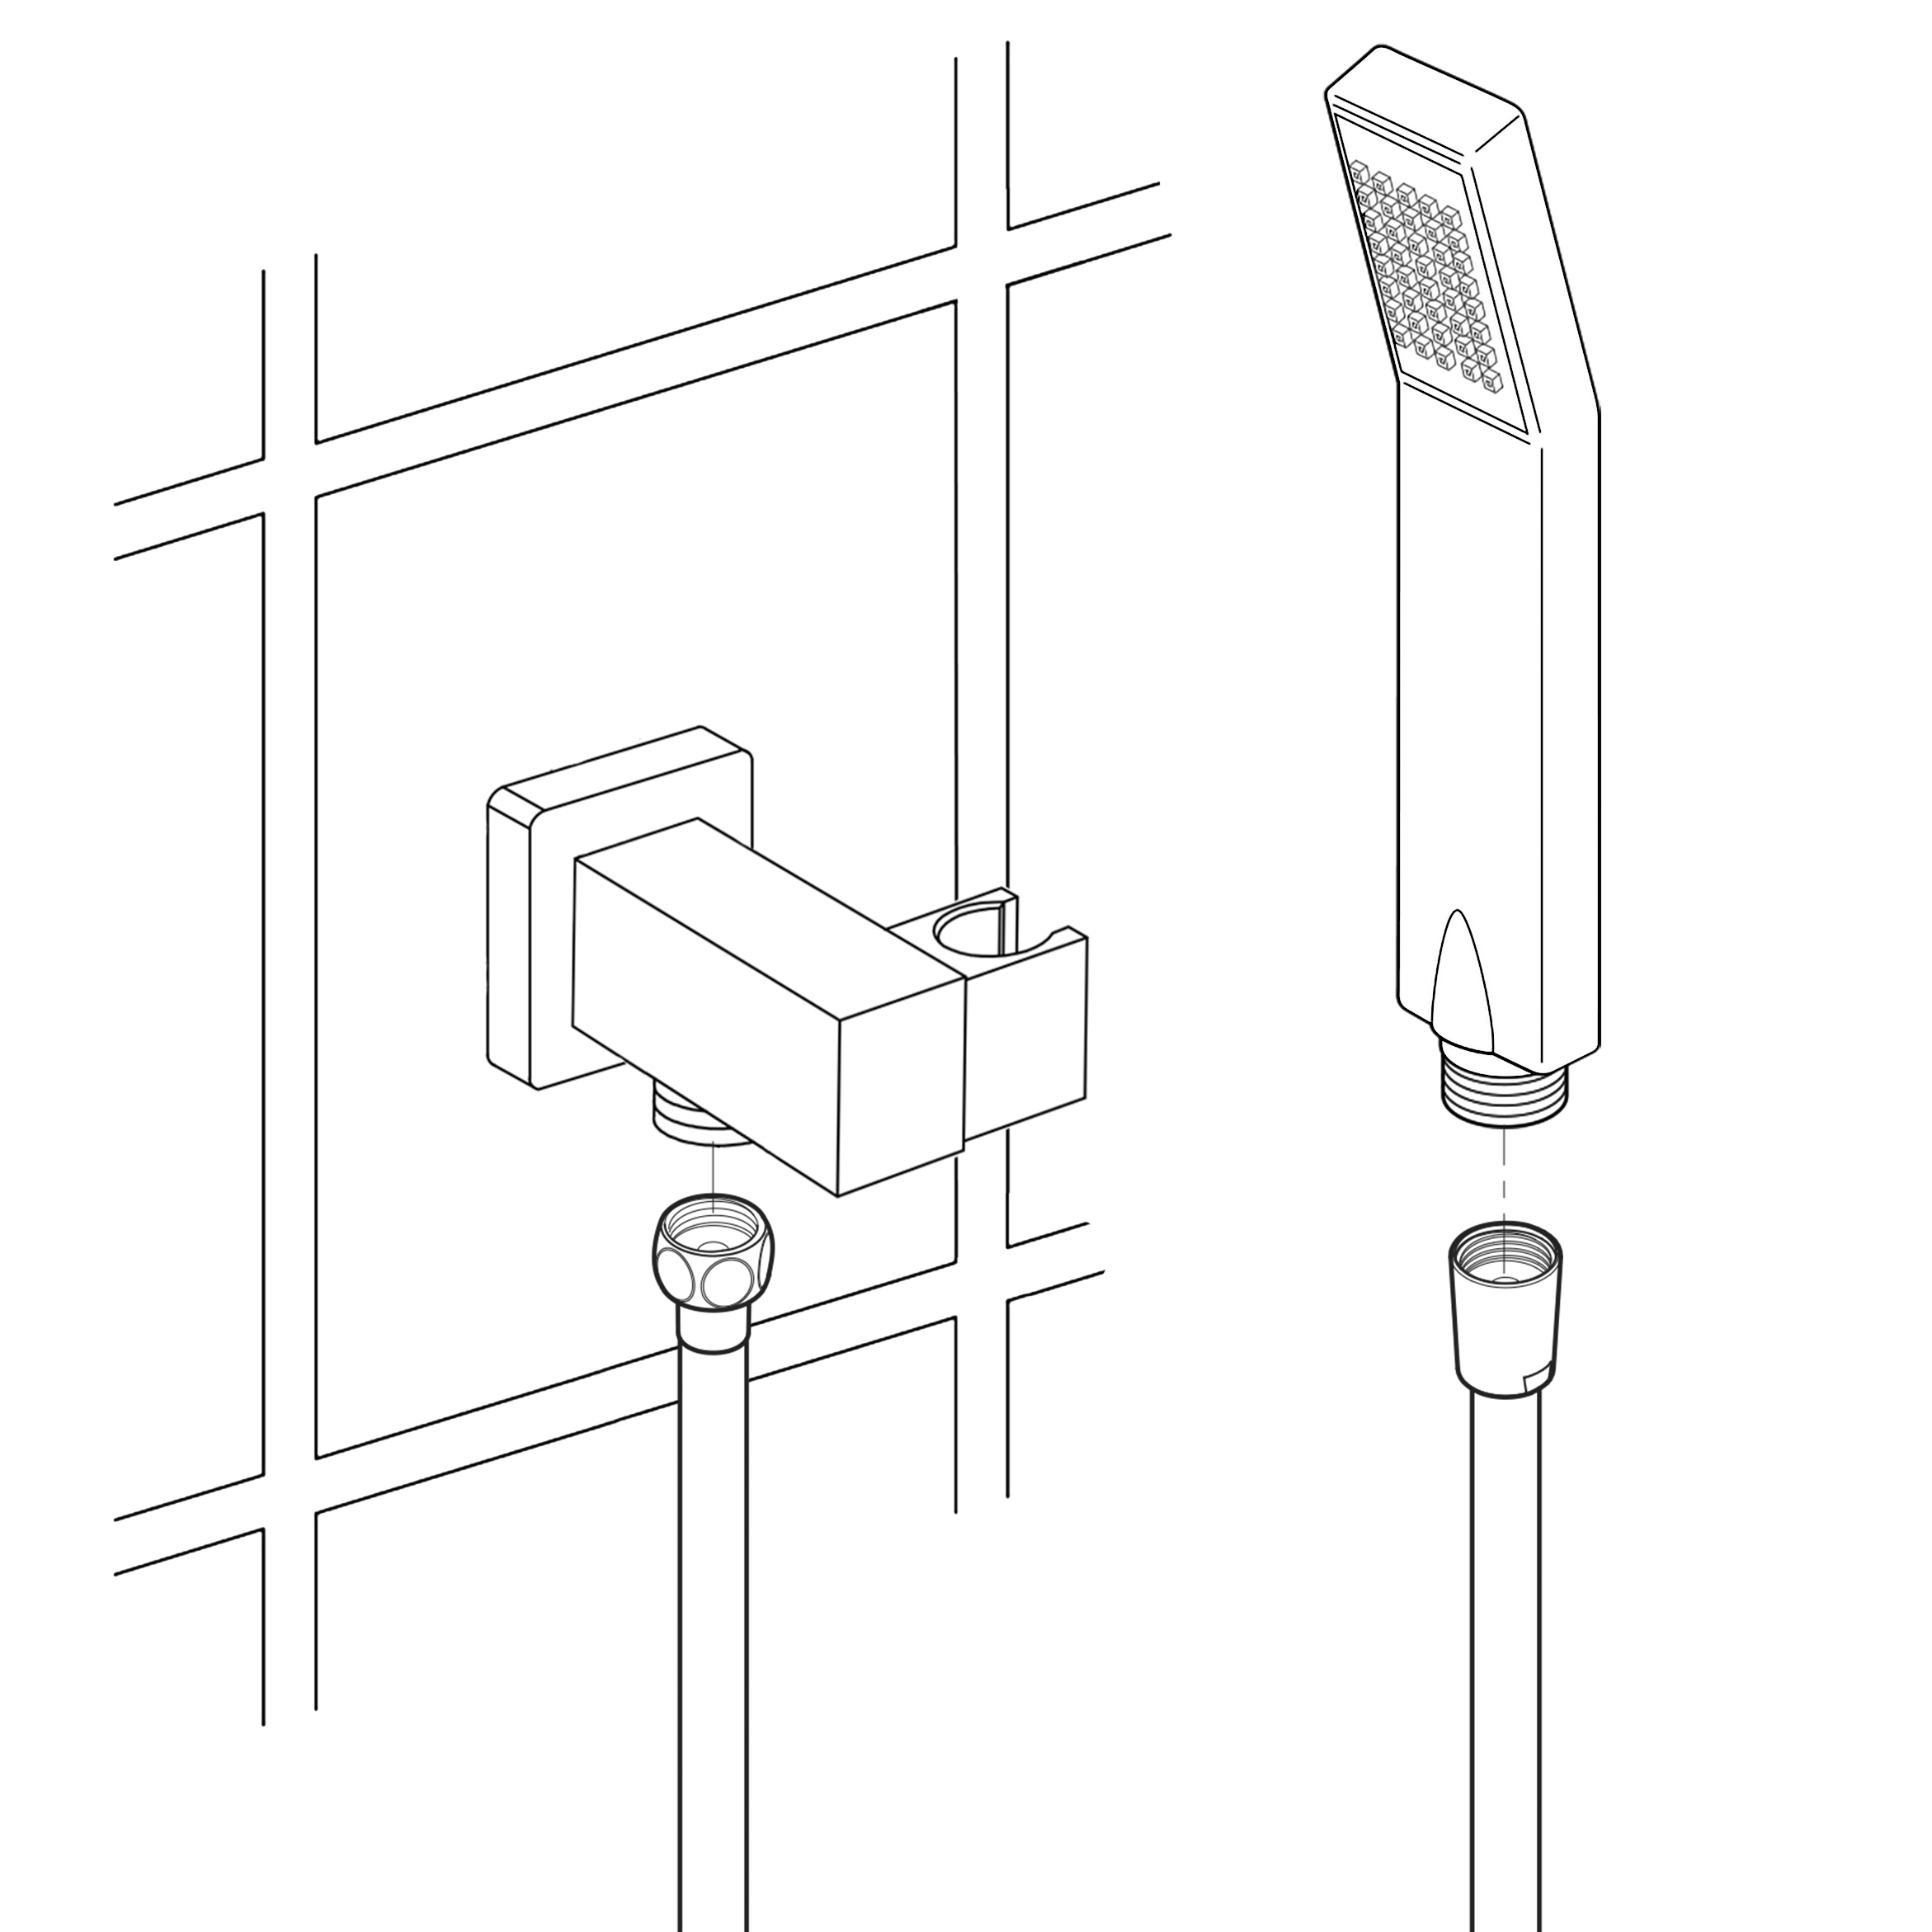
Hand Held Shower Installation Instructions
Step 1:
Step 2:
Hand
Held
Shower
Step 3:
Hand Shower Outlet Installation • Complete the outlet pipework ensuring it ends in an appropriate 15mm x 1/2" BSP female thread elbow.
Note: This fitting is not supplied as variations in installations require the selection of a suitable solder or compression fitting.
• Install the 'Wall Outlet', thread long male 1/2" BSP into the appropriate female fitting using PTFE tape to give a watertight joint.
Note: The thread can be cut to size if required. Make sure that all debris is removed from the connector and the section that has been cut is dressed correctly, before installation.
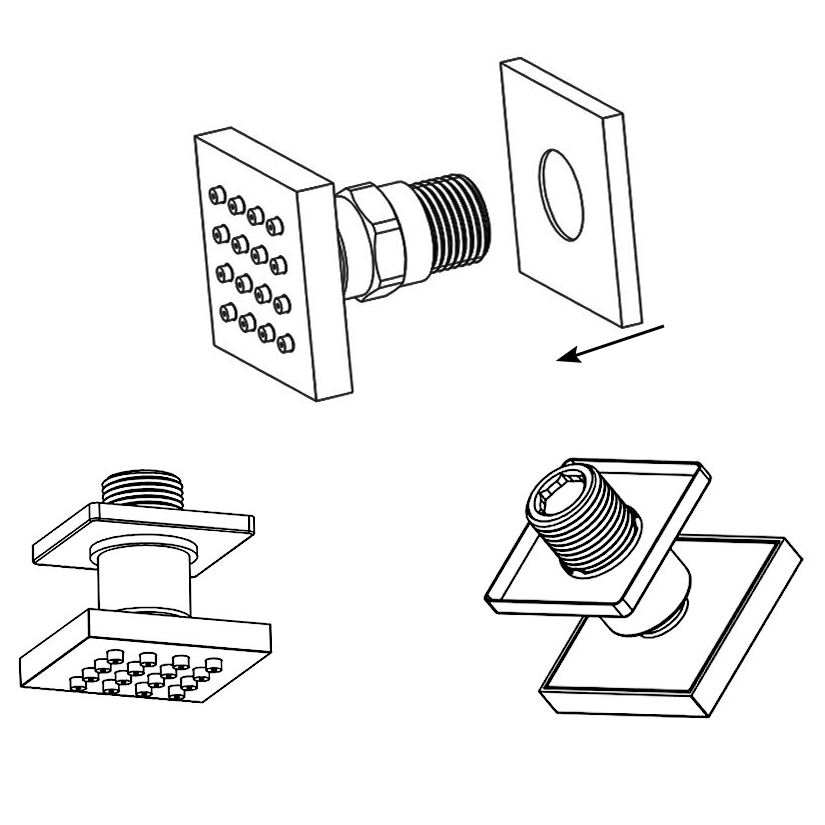
Shower Body Jets Installation Instructions
Step 1:
Body Sprays
Step 2:
Set the decorative cover on the body jet.
Roll the raw material belt in the thread screws.
Step 3:
Use a wrench to tighten 6 body jets on the water outlet holes.
Tighten it in a clockwise direction.