Bravat Brushed Gold Shower Set With Valve Mixer 3-Way Concealed Wall Mount
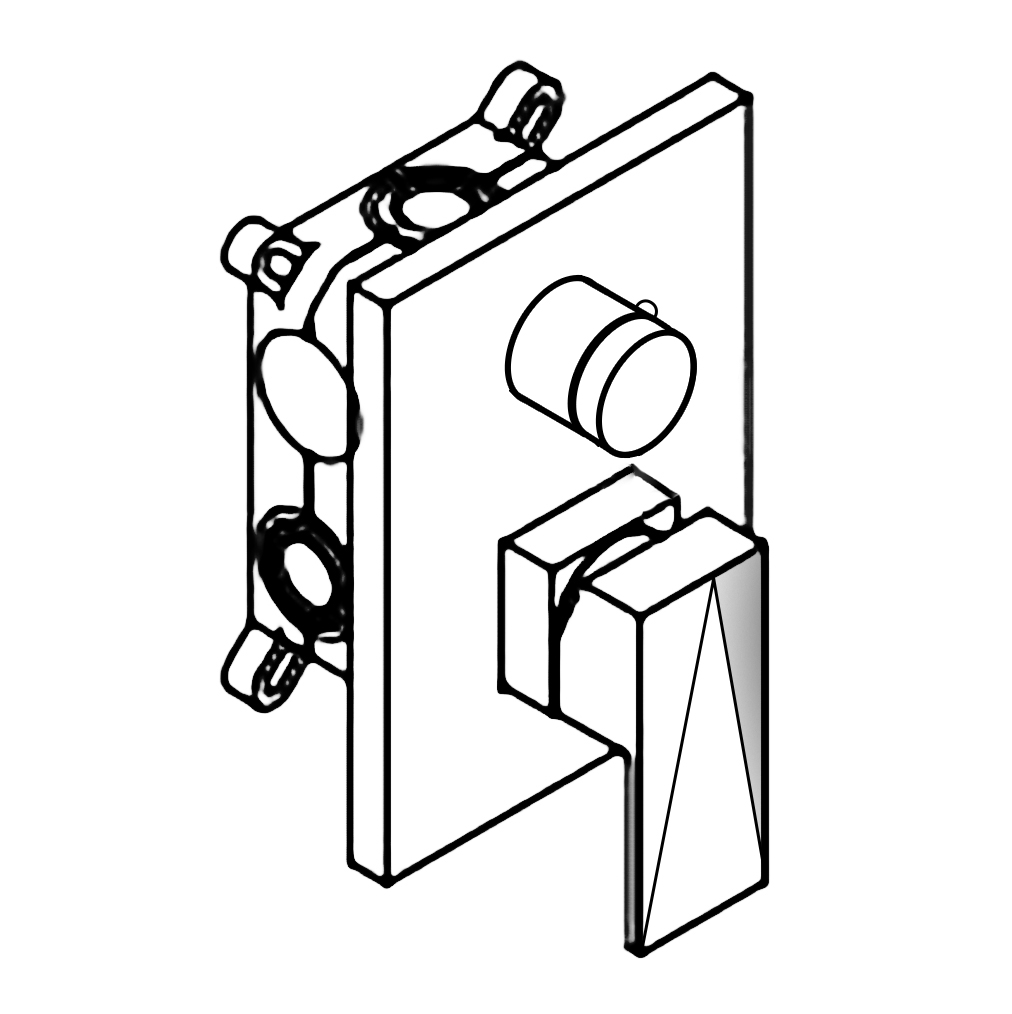
The Bravat Brushed Gold Shower Set With Valve Mixer 3-Way Concealed Wall Mount is one of the most trendiest finishes across decor styles in the bathroom. It has a contemporary style with a beautiful gold finish. When it comes to new bathroom upgrades, FontanaShowers is offering shape, finishes and styles that you've looking for. Bravat Brushed Gold Shower Valve Mixer 3-Way Concealed Wall Mounted Features:| Brand Name: FontanaShowersModel Number: FS1048Type: Shower Set & Thermostatic Shower MixerStyle: ContemporaryType: Fixed Support TypeSurface Finish: Brushed GoldInstallation Type: Wall MountNumber of Jets: FourControl Type: Single Holder Dual ControlSize: 7.91"-11.85" (201-300mm)Surface Treatment: PolishedValve Core Material: CeramicBath Shower Type: In-Wall Shower MixerValve Type: Ceramic ValveFaucet Handle Material: Zinc AlloyMixer Body Material: BrassValve Included: Yes Embedment Depth: 2.16" (55mm)Valve Panel Dimension: 6.29"x6.29" (160x160mm)Connector: G1/2"B (Standard) | 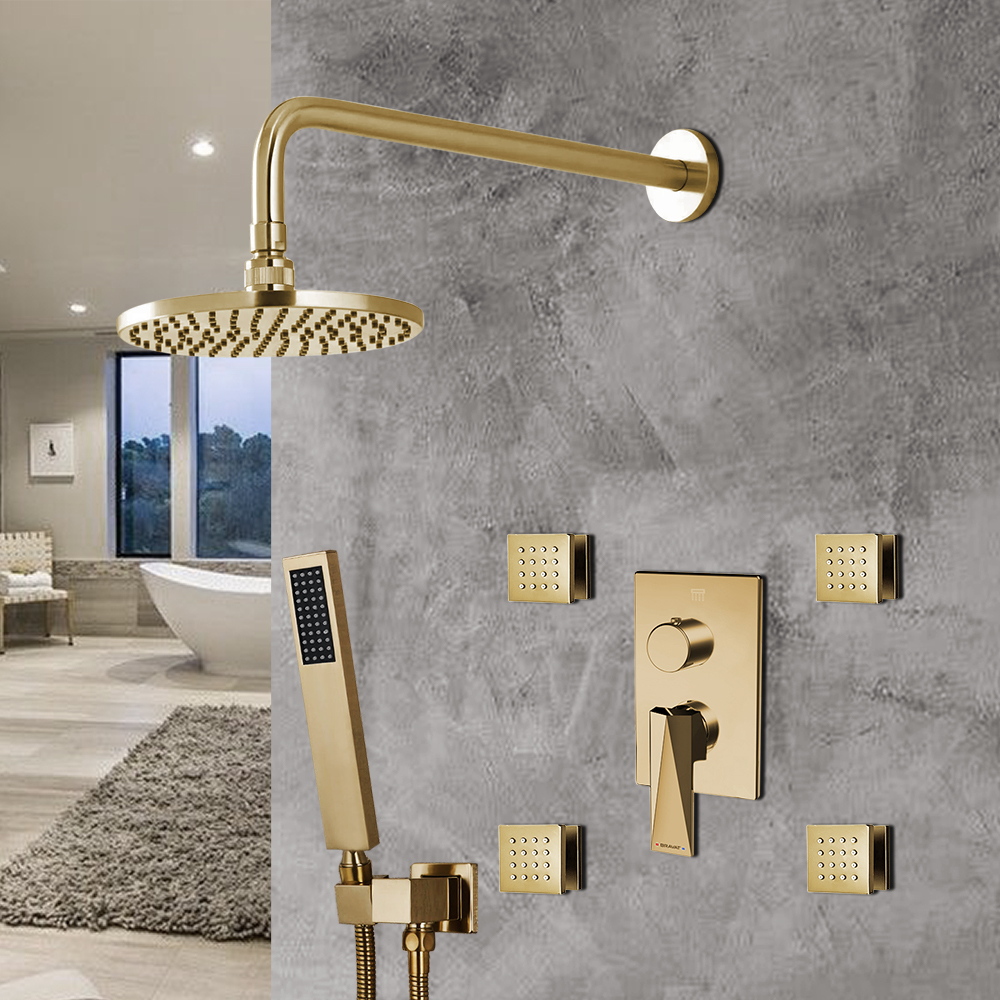 |
FontanaShowers® Product Warranty Information 
Before you begin, please read the installation instructions below. Observe all local building and safety codes.
- Unpack and inspect the product for any shipping damages. If you find damages, do not install.
- Please note all showers must be installed by a professional and certified plumber otherwise warranty might be voided
|
mixer
|
mixer
|
|
Shower Head Installation Instructions
|
mixer
|
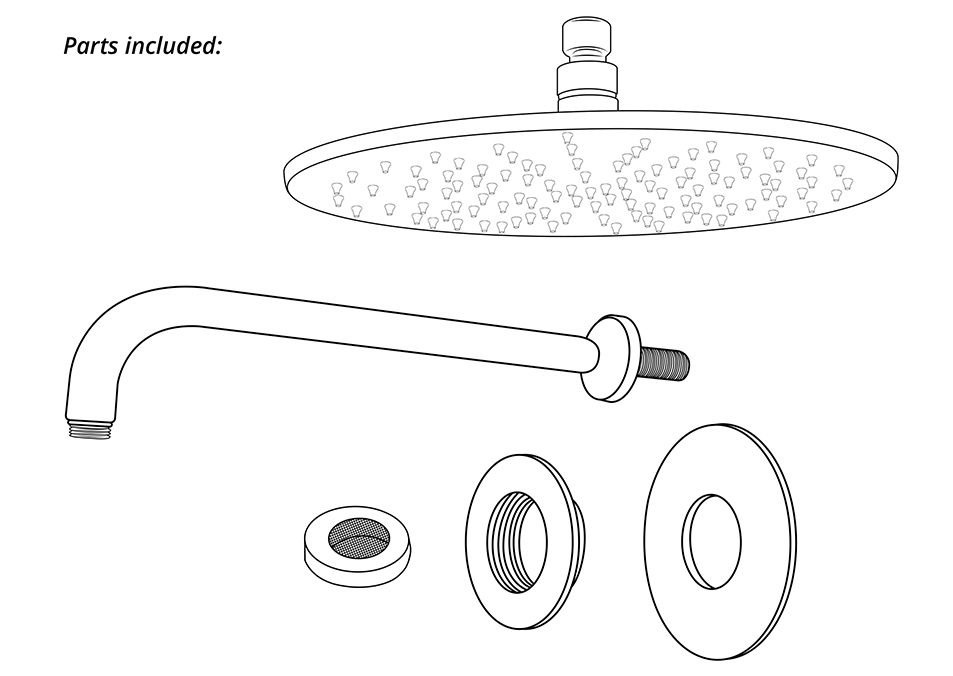
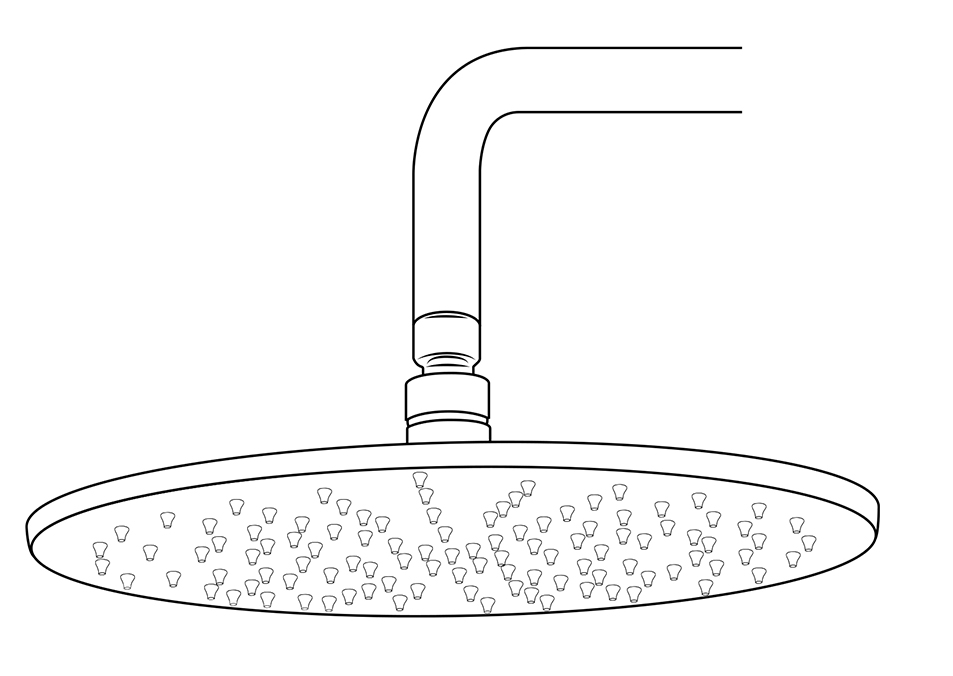
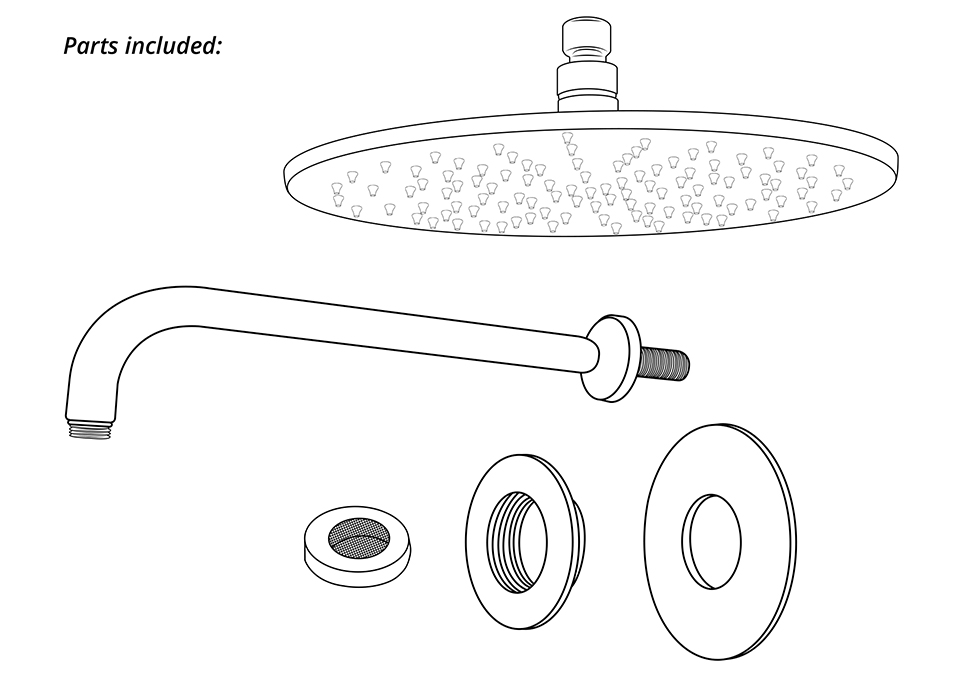
Shower Head Parts Included:
- Wall Mounting Arm
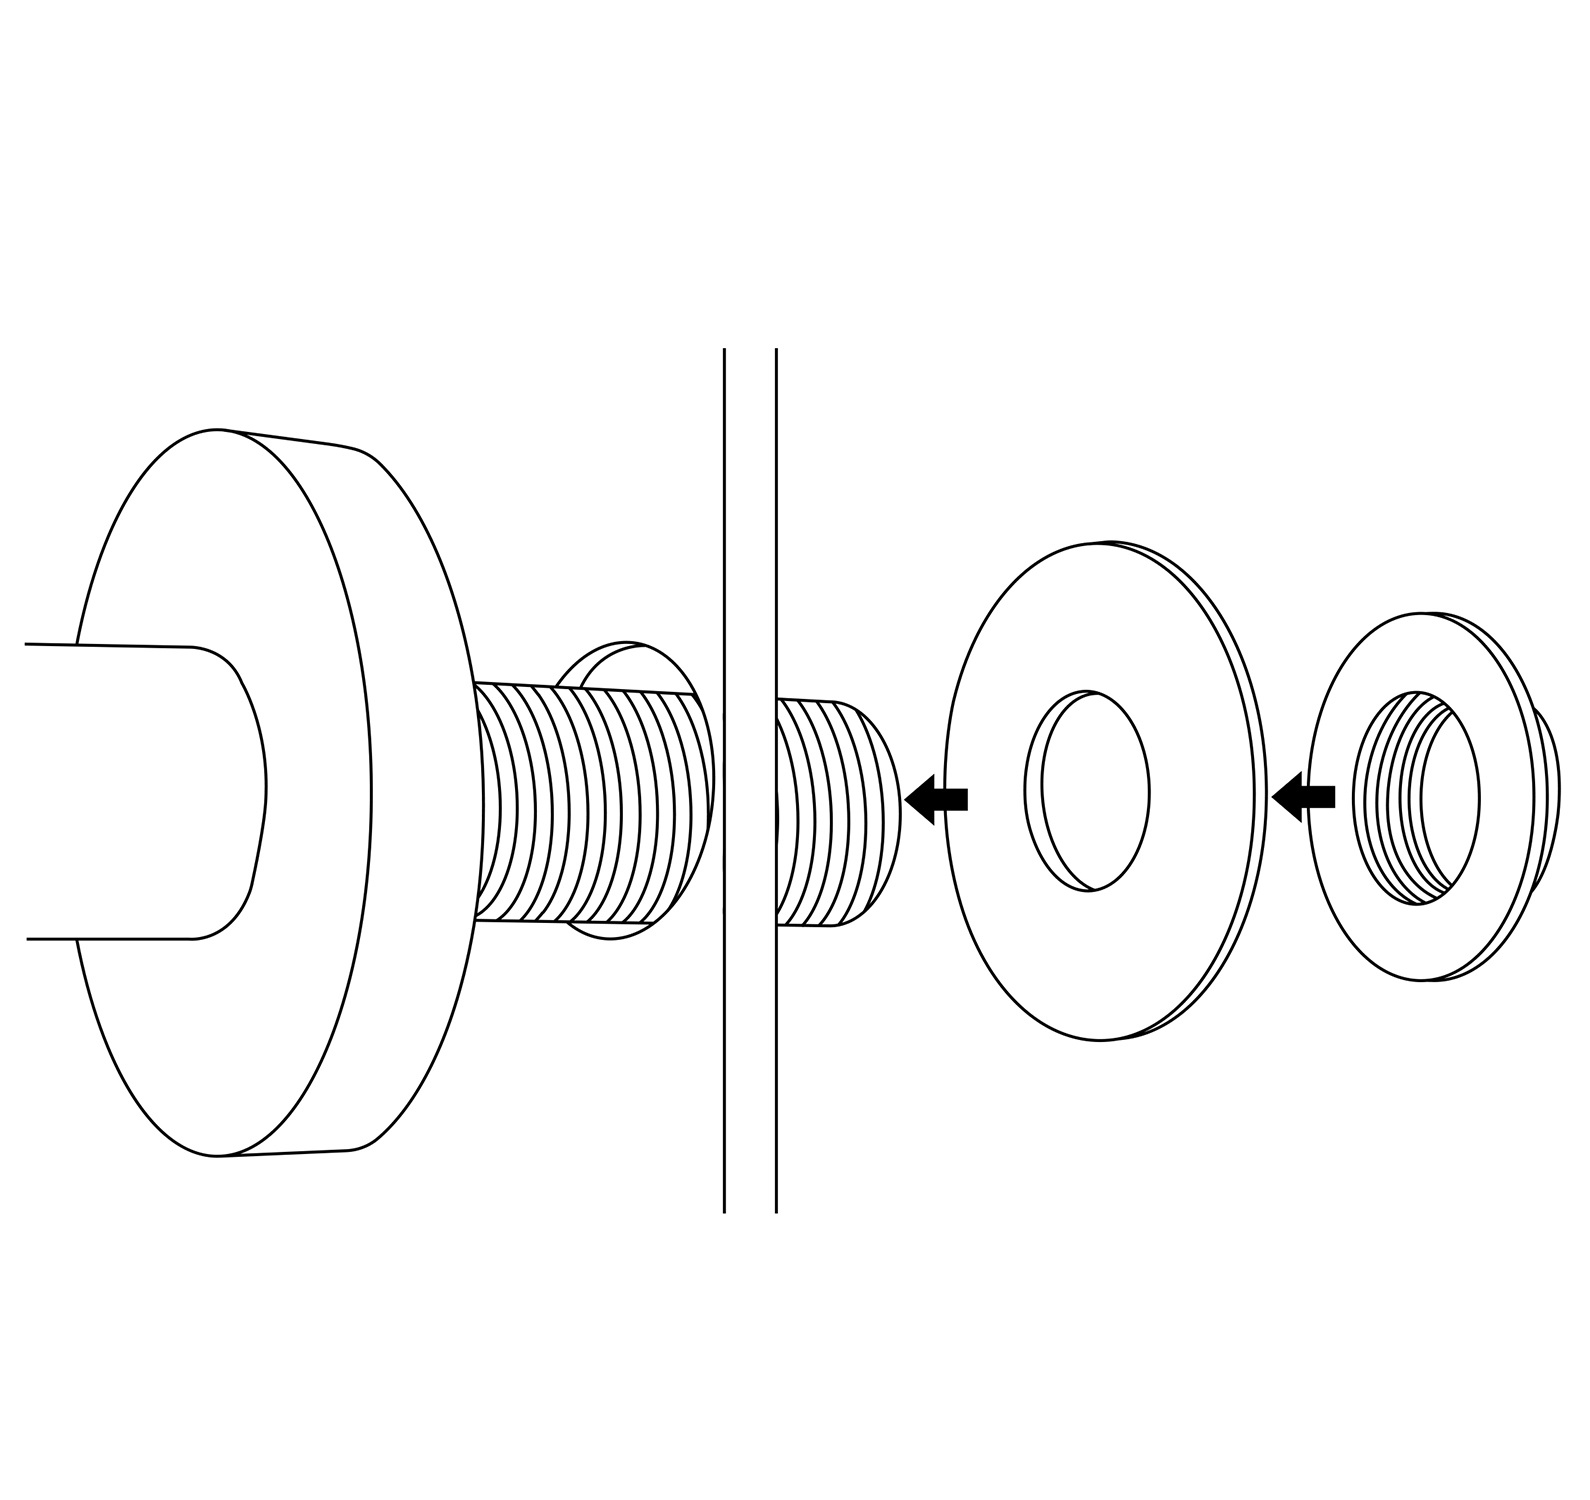
- Locking nut
- Wall trim
- Shower arm
- Showerhead
- Fixing screws and wall plugs (not shown)
|
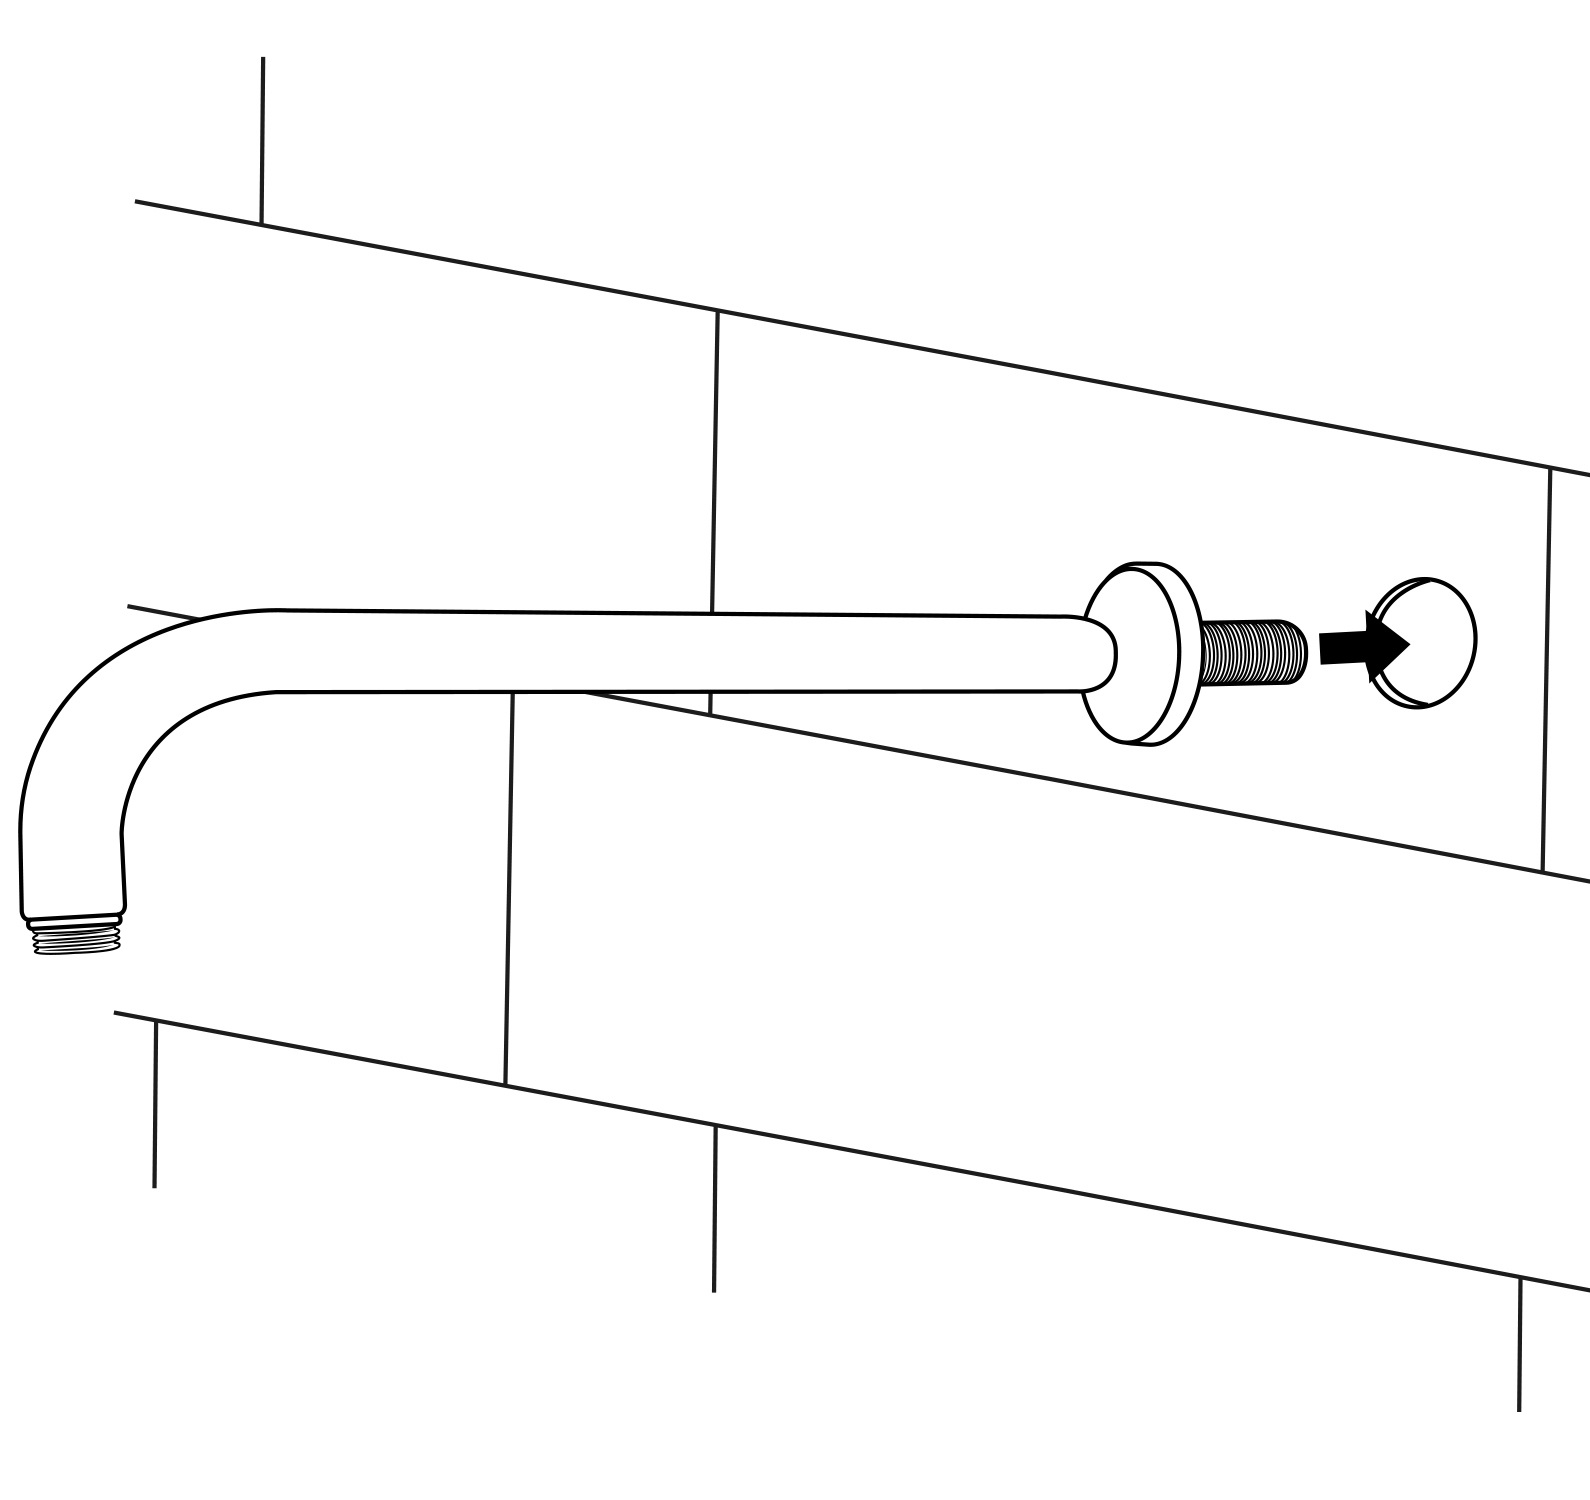
Step 1
|
|
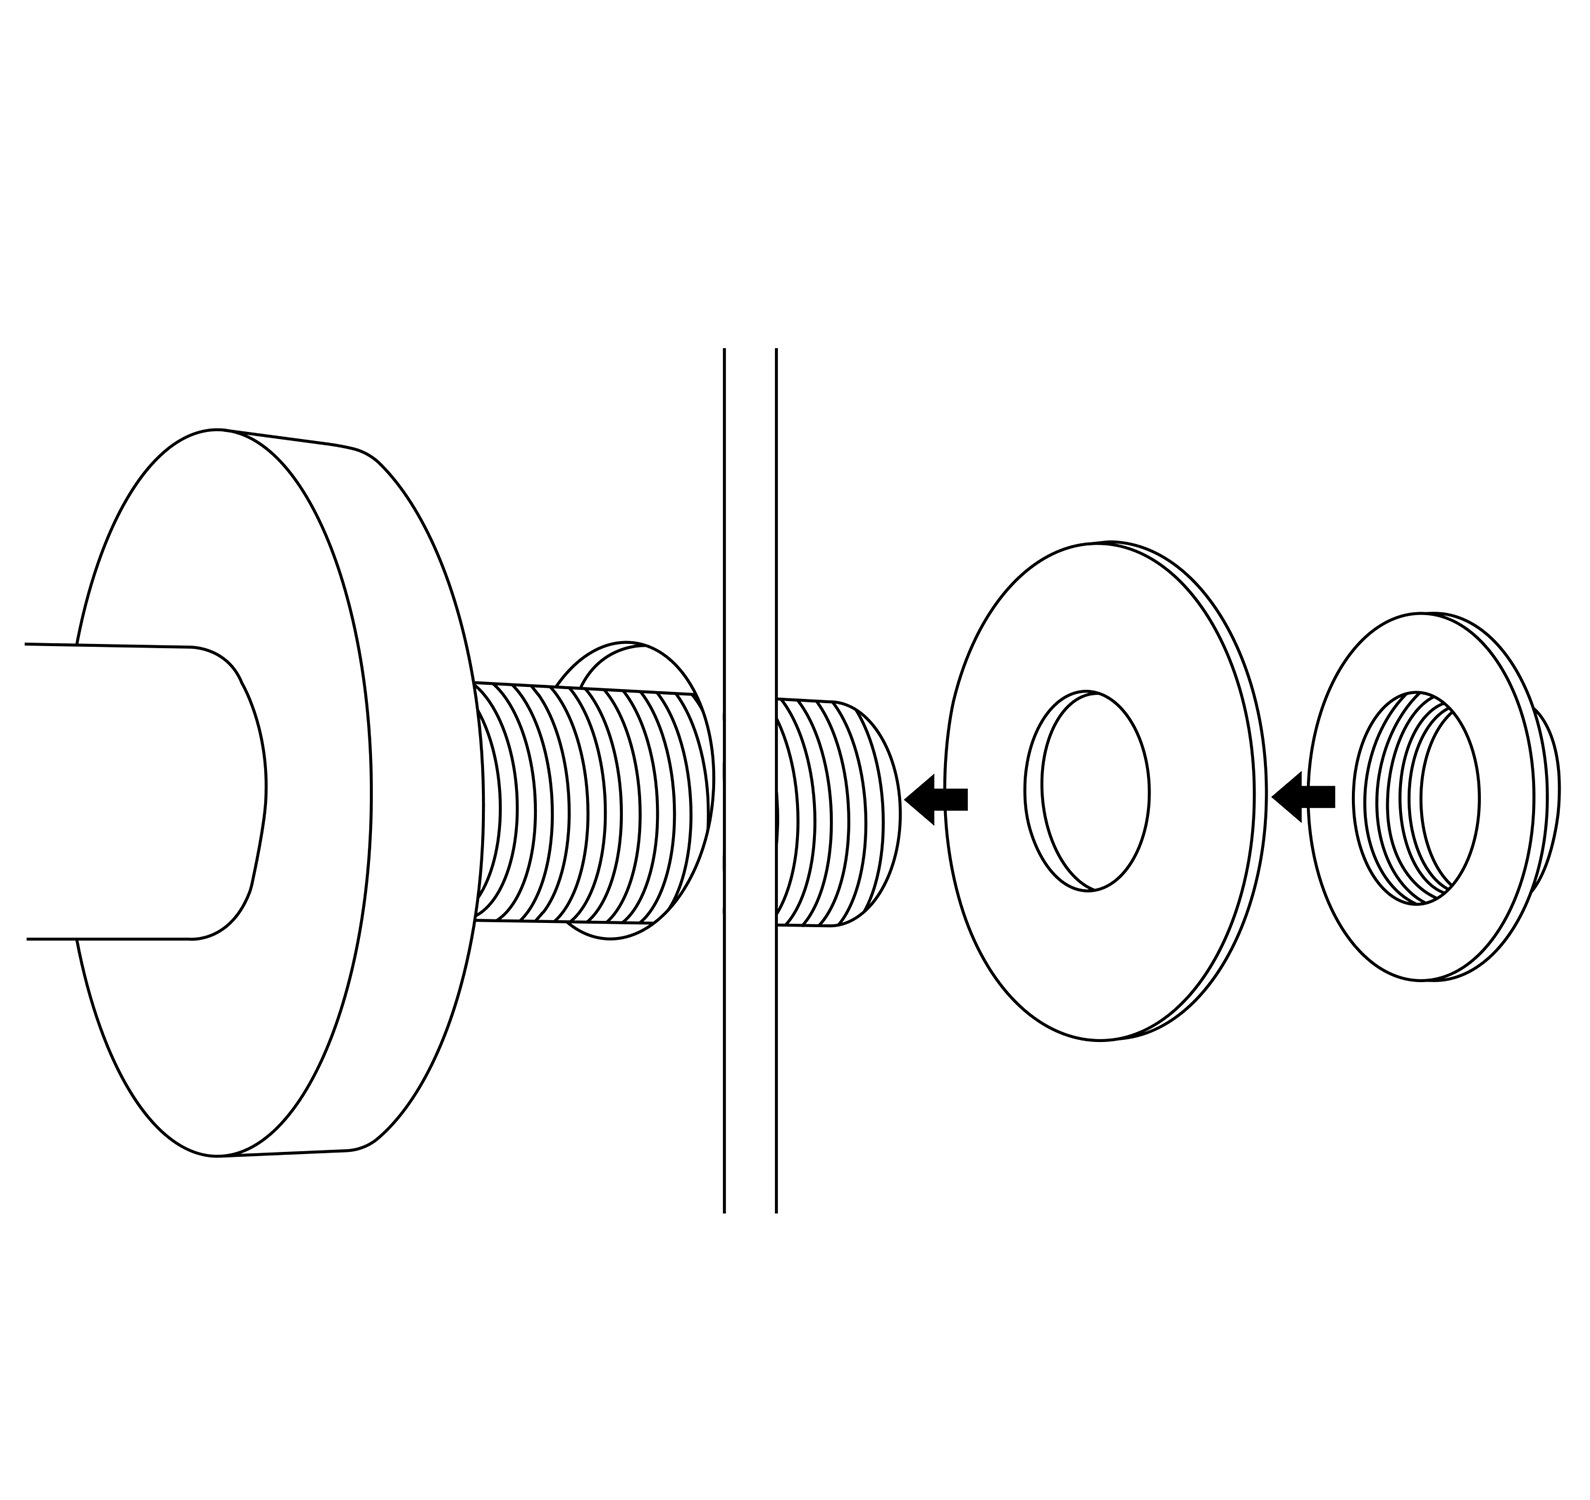
Step 2
|
Step 3
|
|
Step 4
|
Step 6
|
|
Step 7

|
|
|
|
|
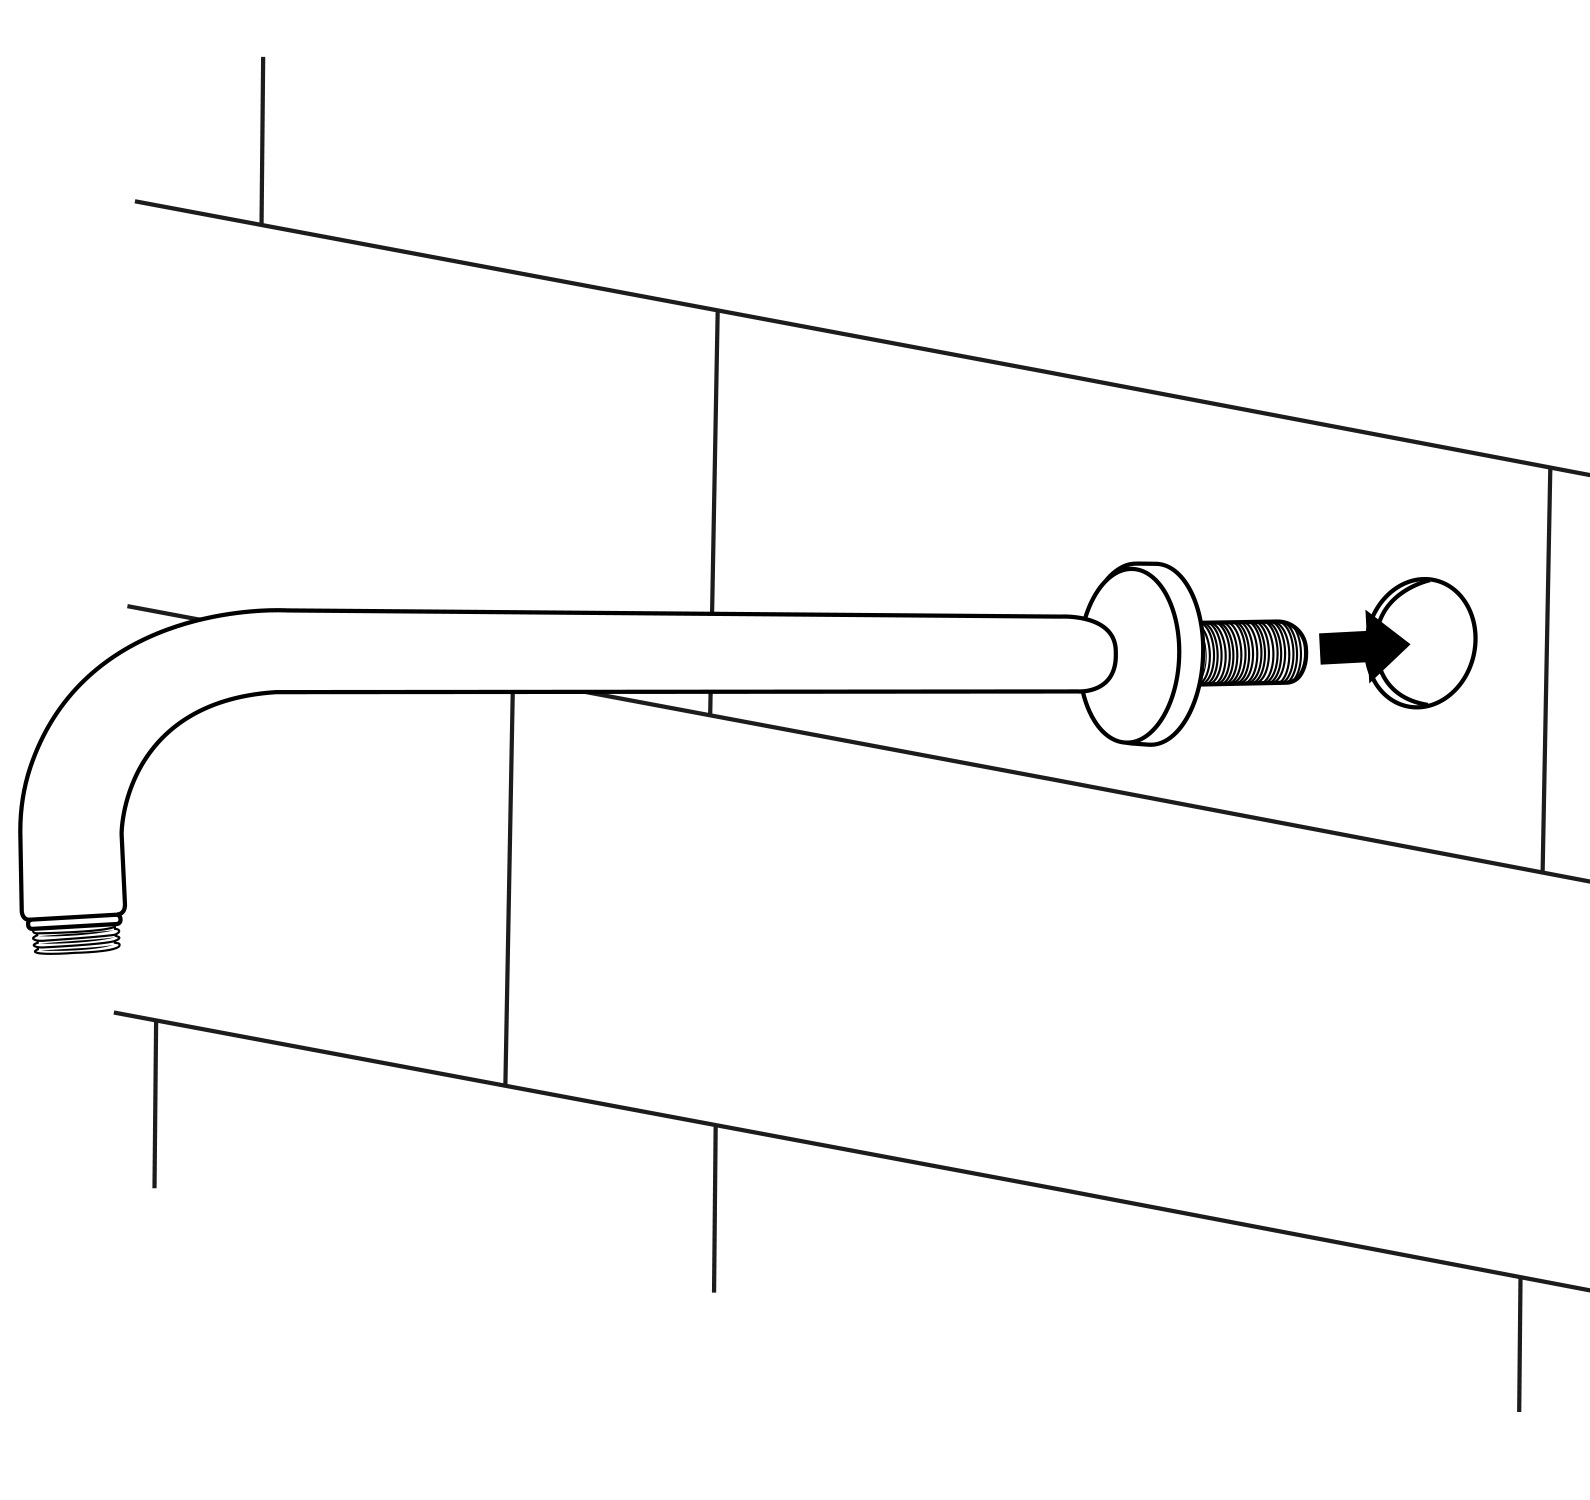
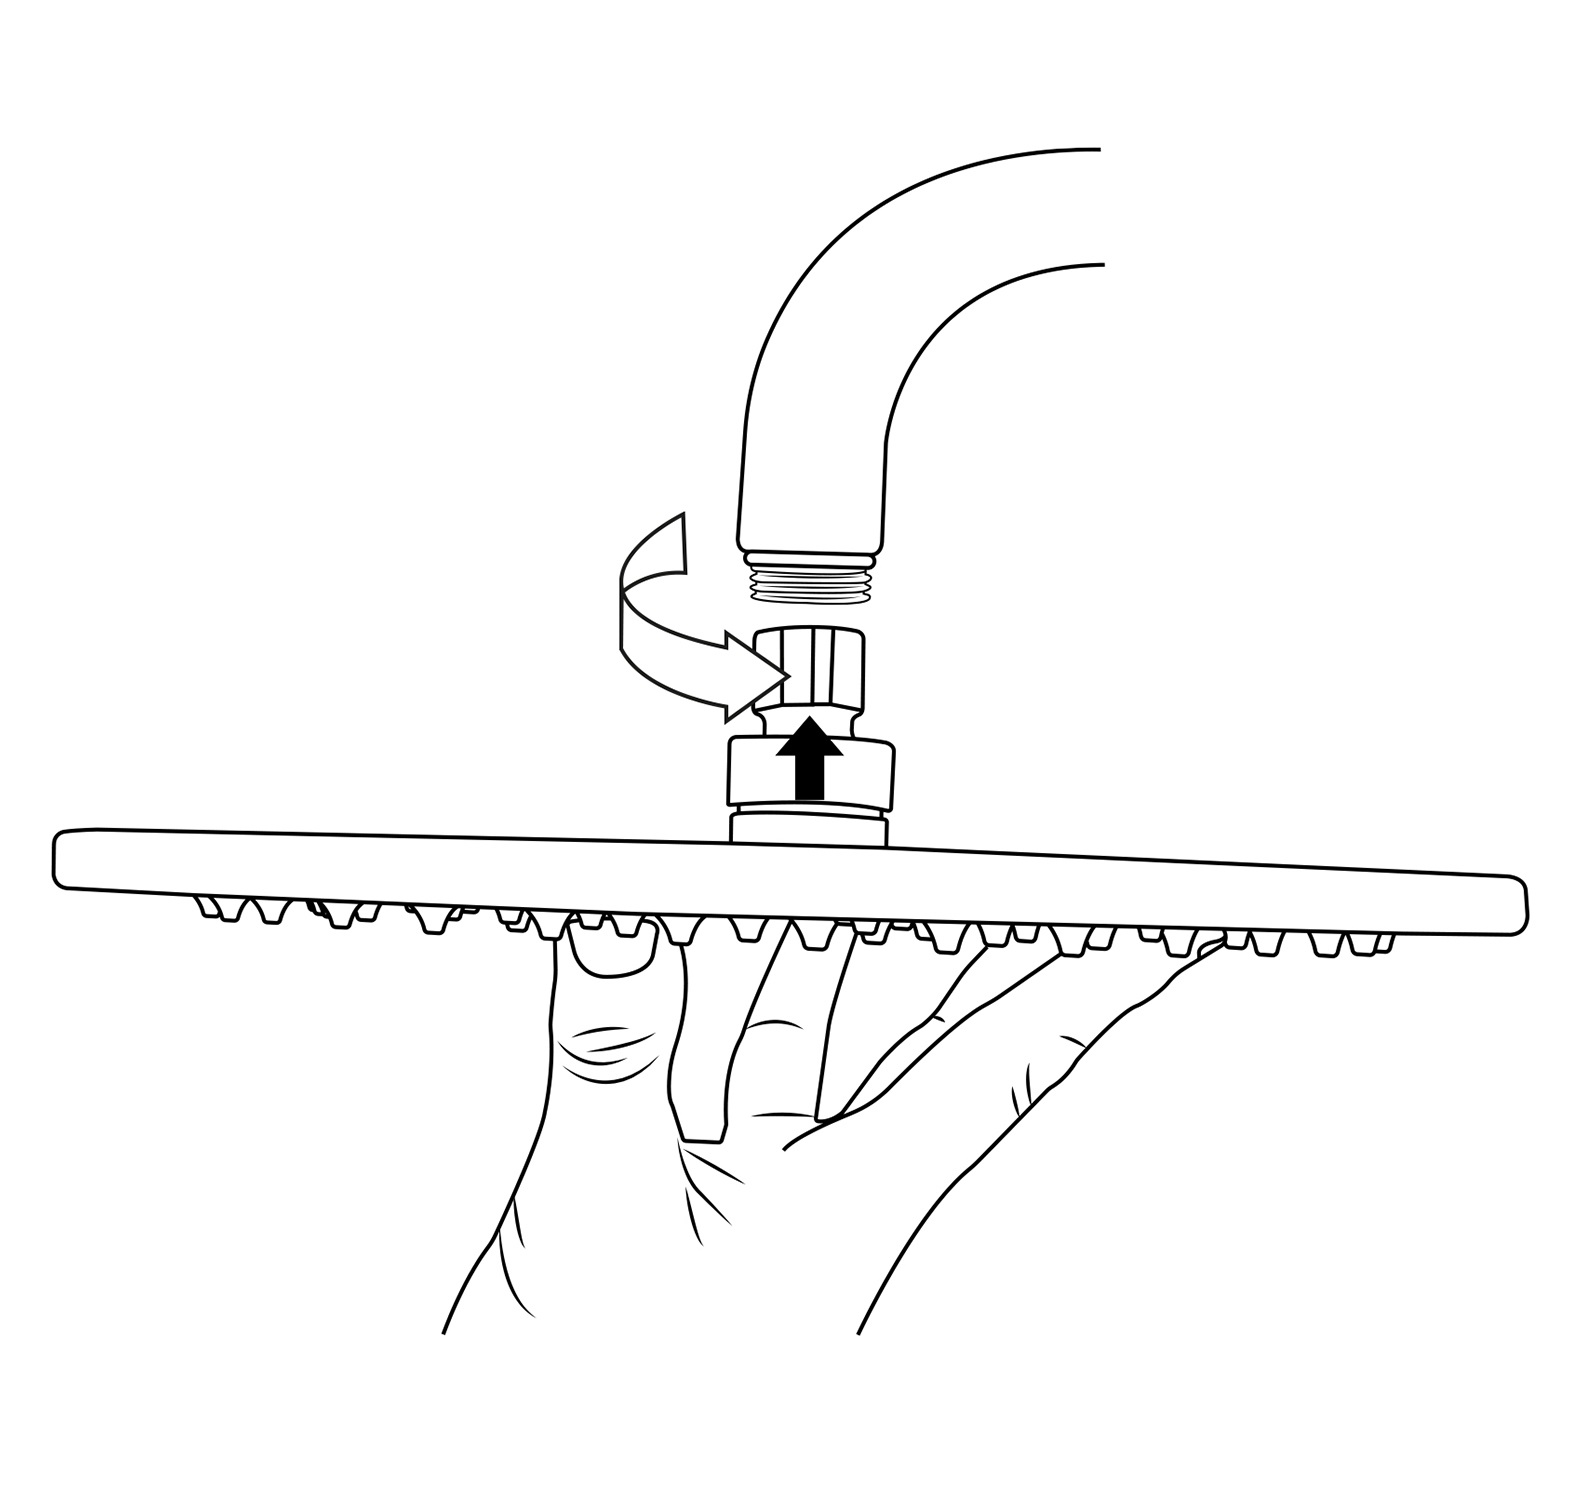
1. Remove the old shower head by using the channel lock pliers. Be sure to turn the pliers counter-clockwise to loosen the old shower head. (Tip: Right is tight, left is loose.)
2. Remove the shower arm by turning it by hand counter-clockwise. Make sure you remember to apply putty or tape to the new arm. (Tip: Using Teflon tape is less messy)
3. Apply Teflon tape to the threading of the shower arm by wrapping it around the threads, go all the way around 3 or 4 times depending on the quality of the Teflon tape.
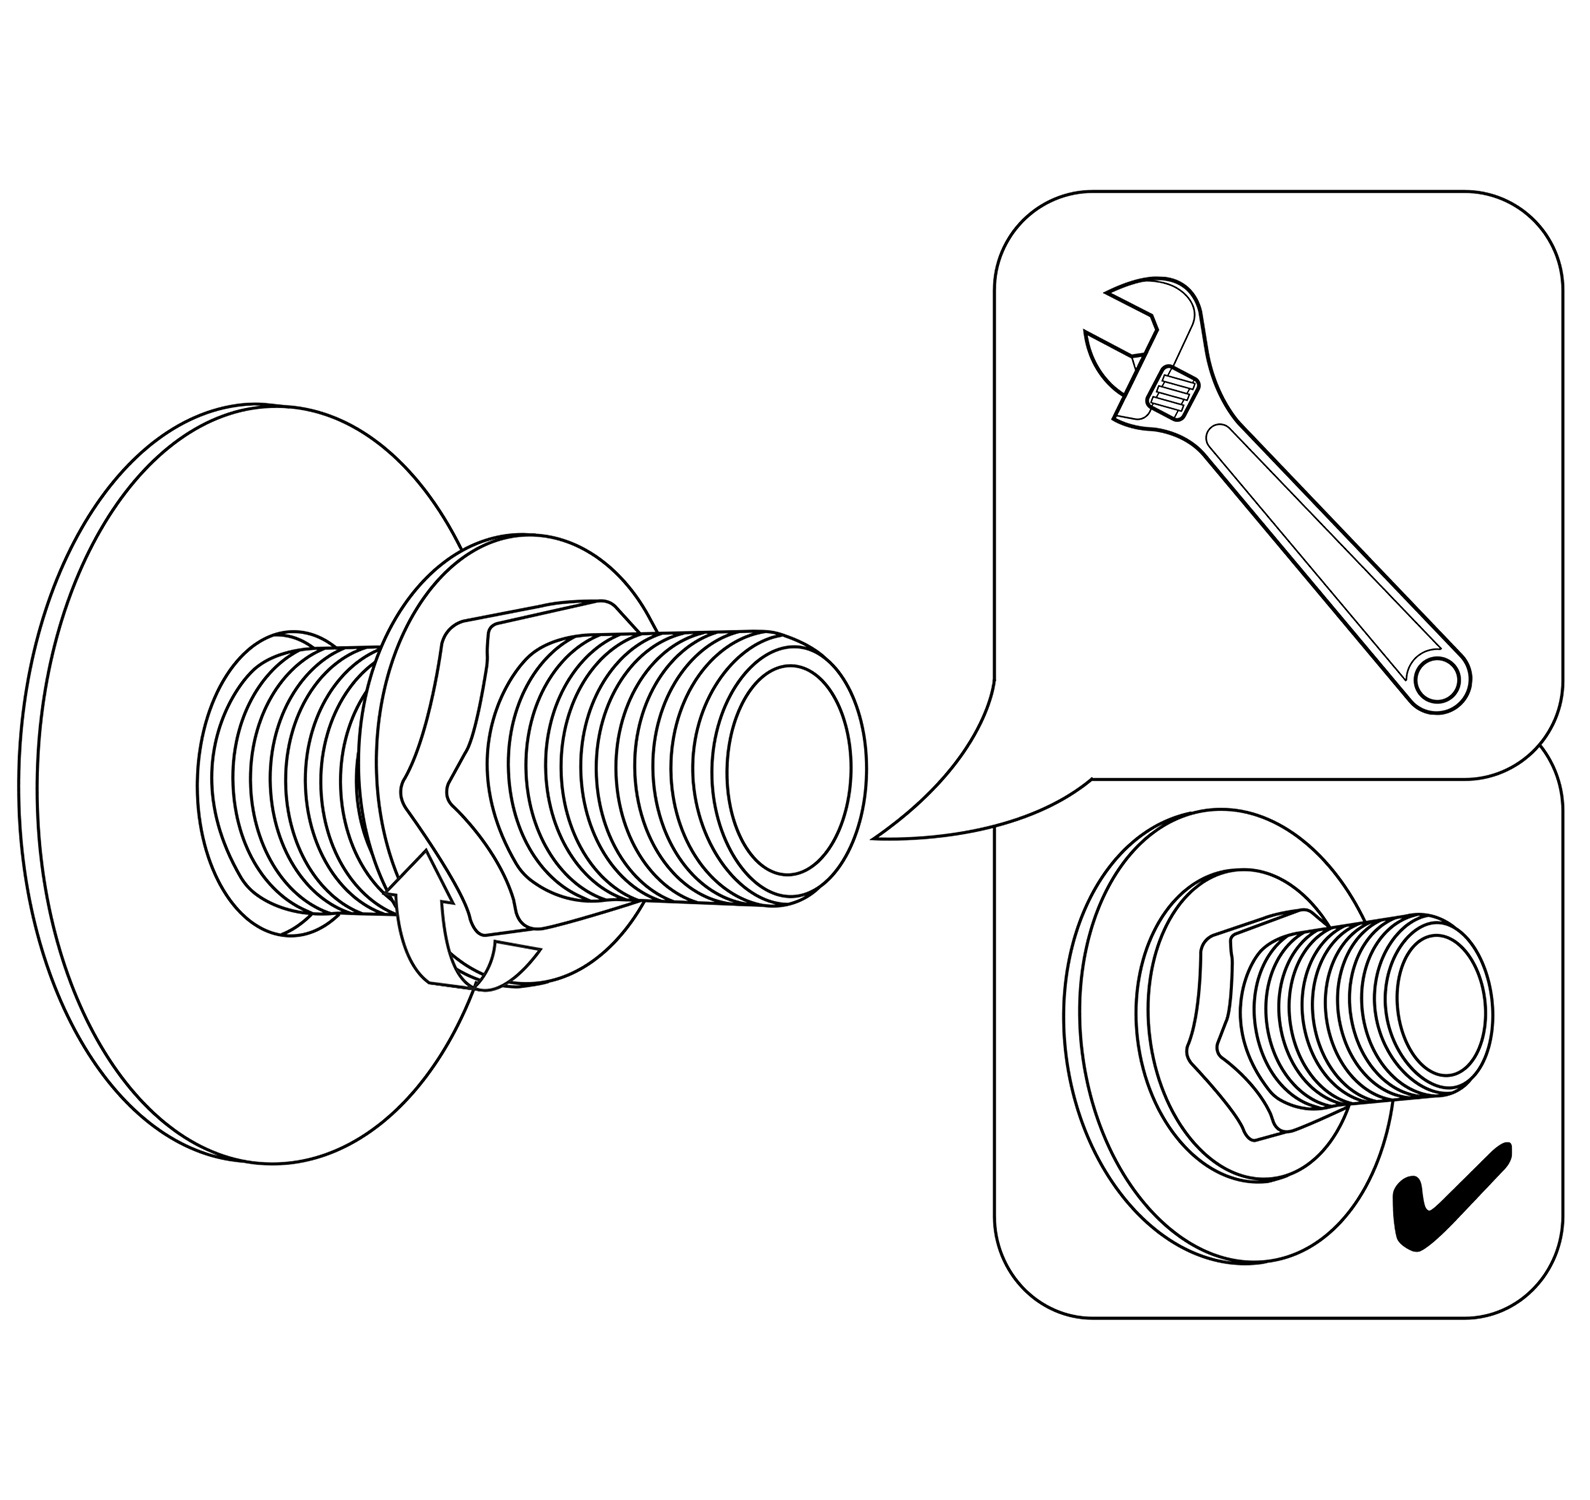
4. Install the new shower arm by going clockwise by hand until it is tight, then put painters tape around the arm and tighten the arm with the channel lock or monkey wrench.
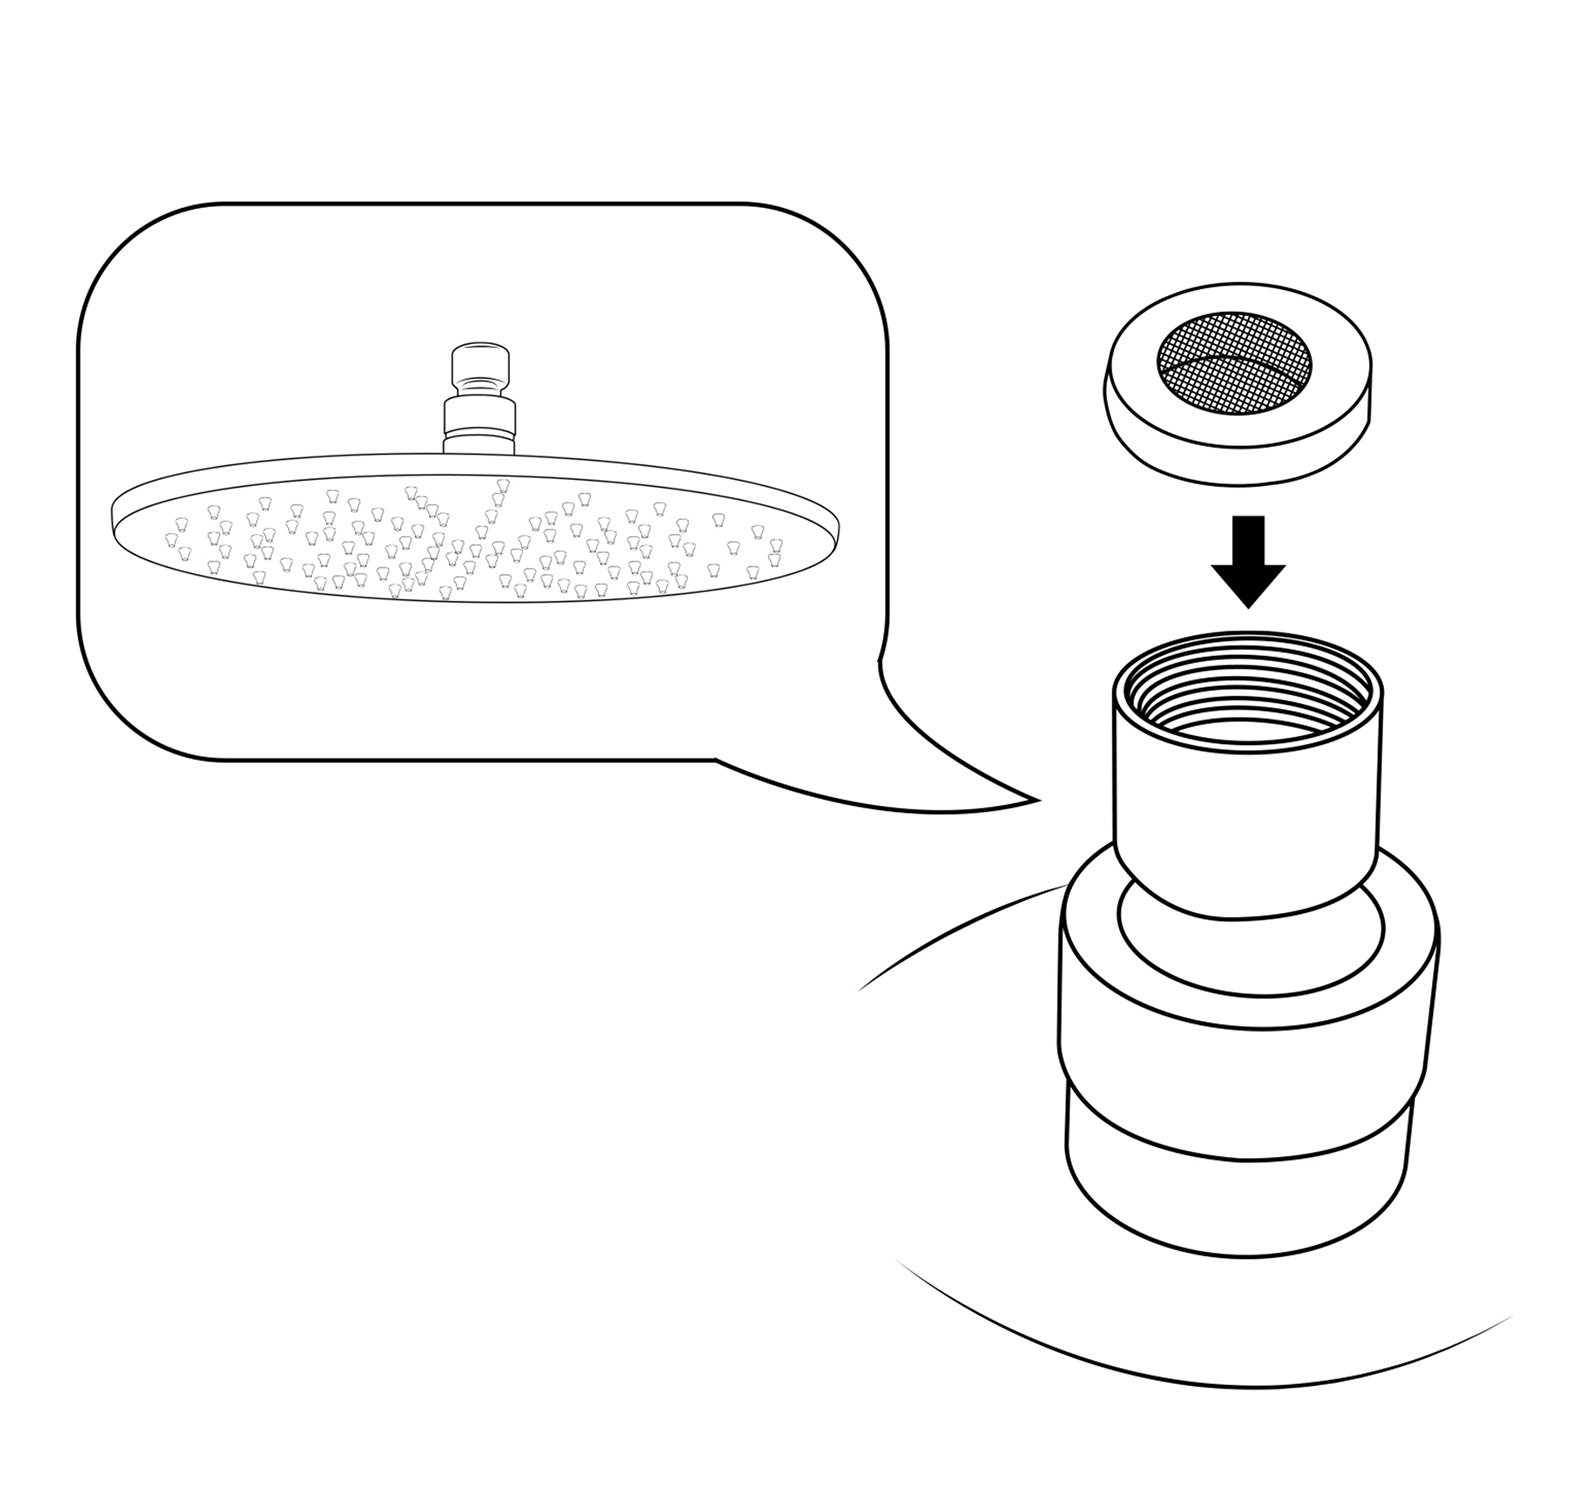
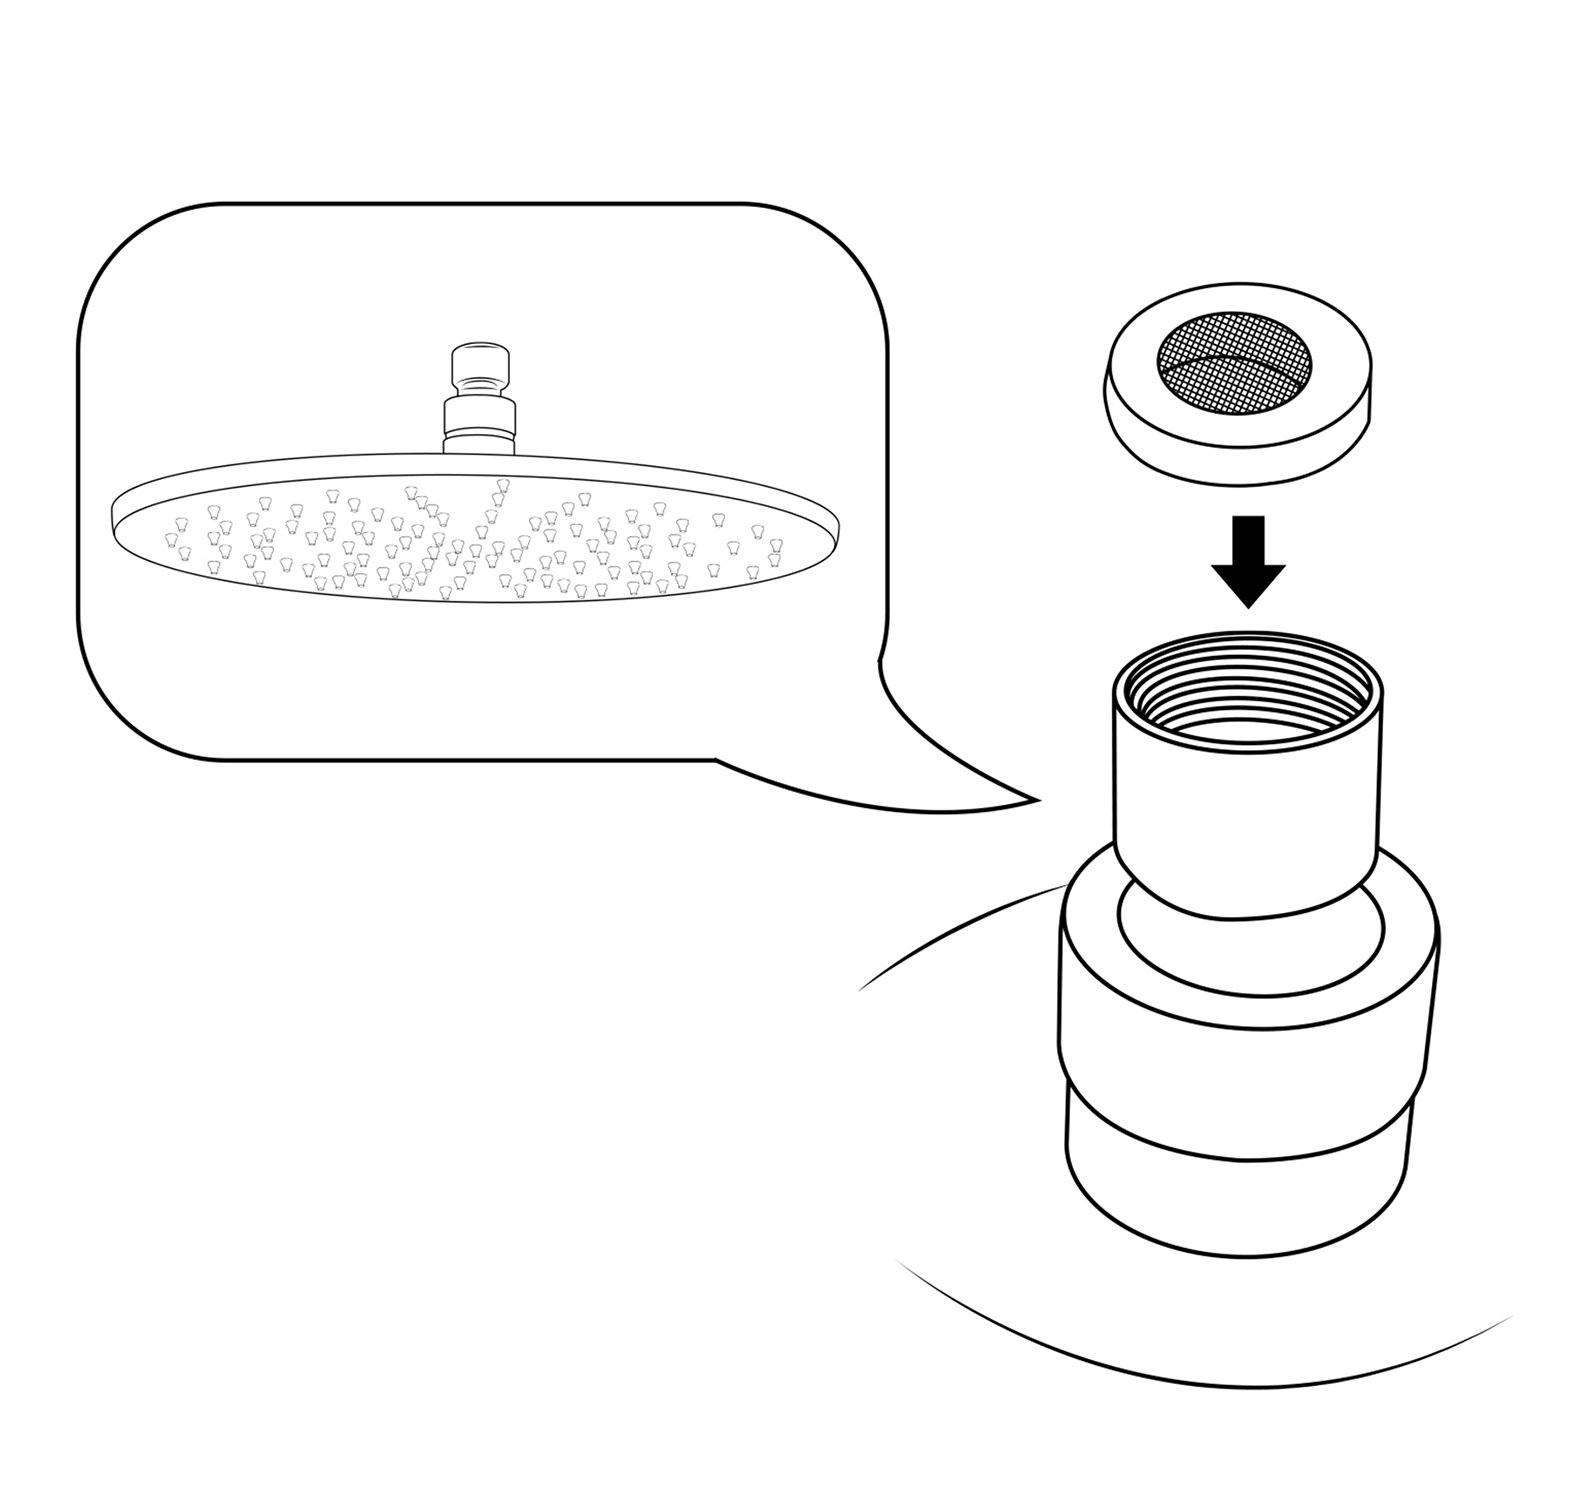
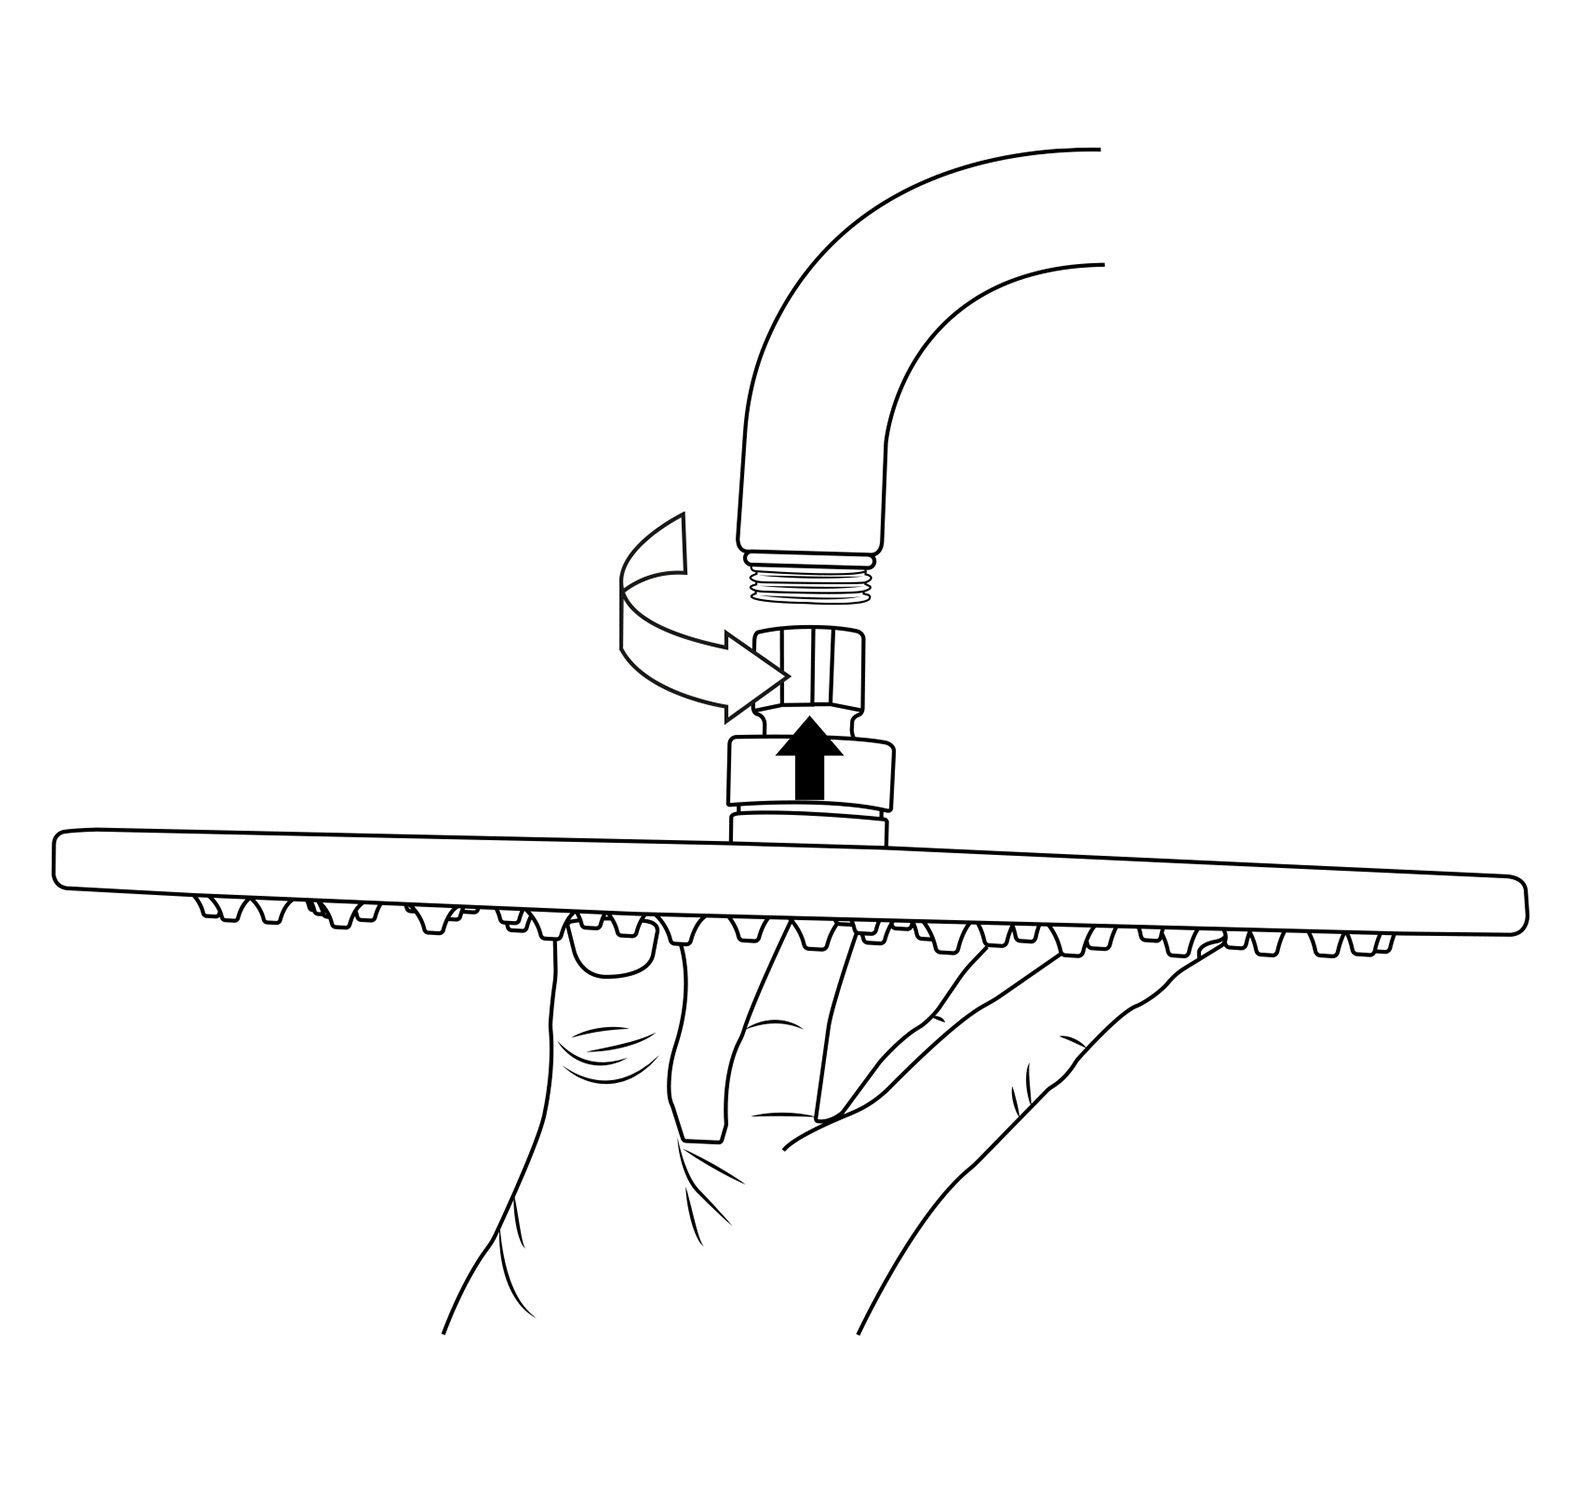
5. Place Teflon tape around the threads on the shower head and then place the shower head onto the shower arm by turning the shower head clockwise after the shower arm is already in the wall.
Hand-Held Shower Installation Instructions
Step 1
|
mixer
|
Step 2
|
Step 3
|
|
Step 4

|
Step 5

|
|
Step 6
|
|
|
|
|
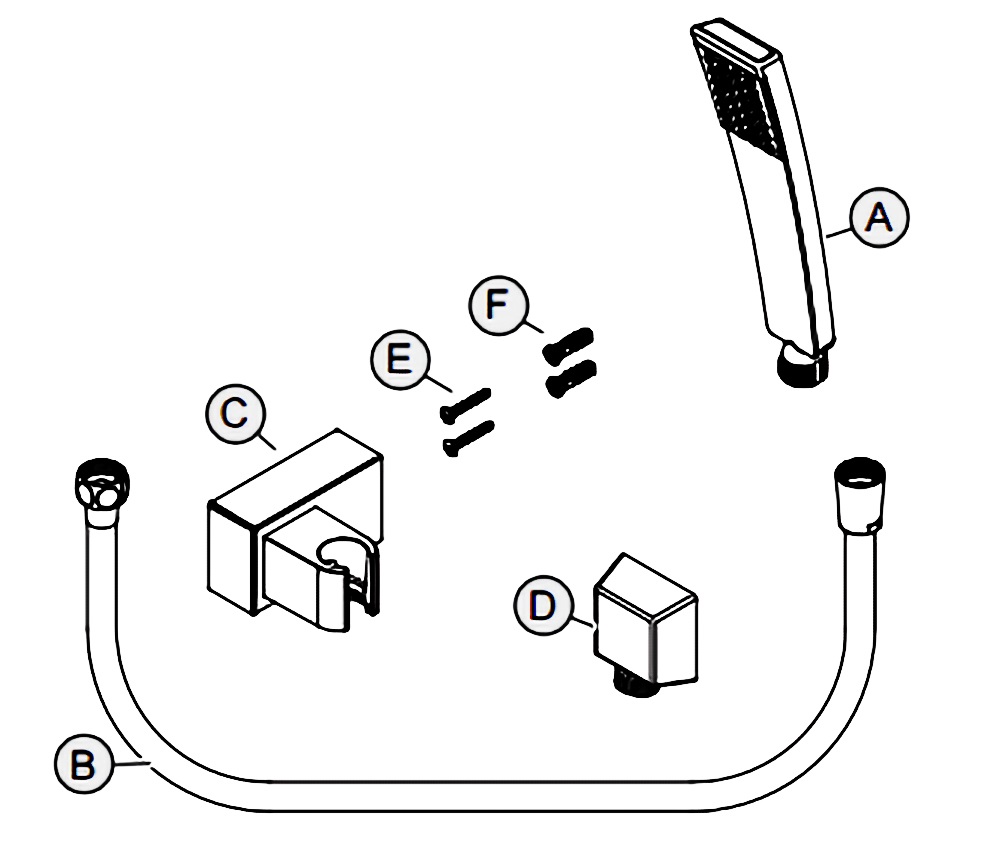
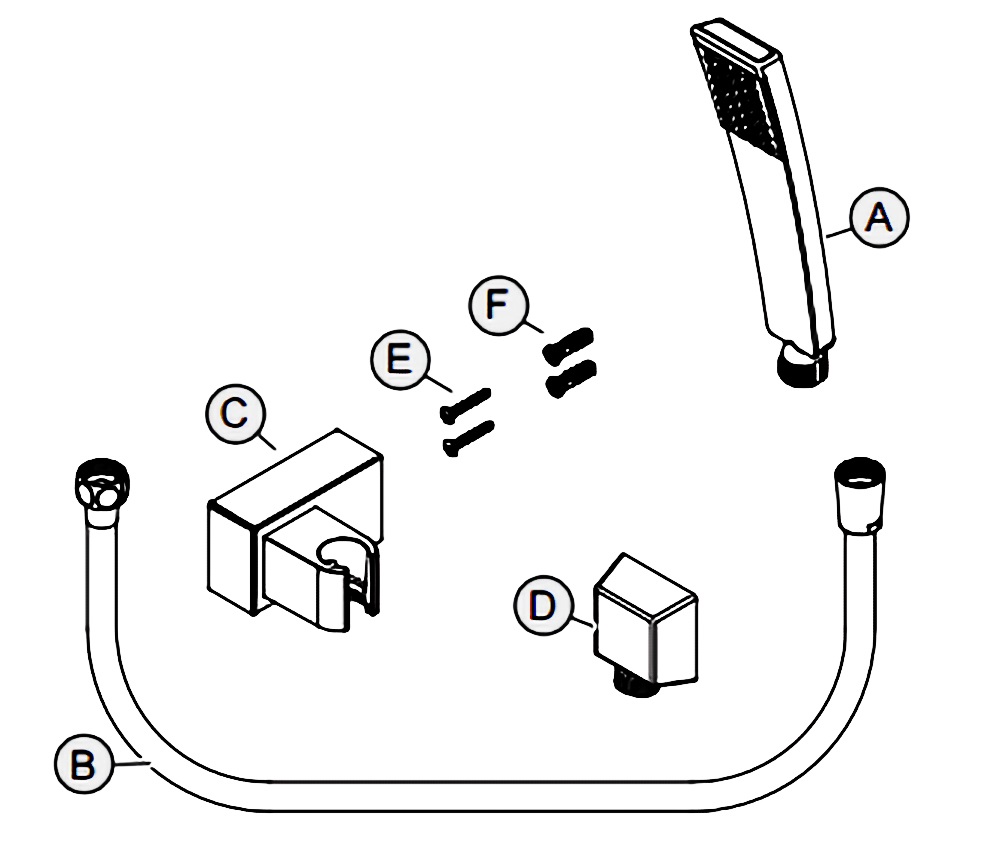
1. GATHER ALL PARTS
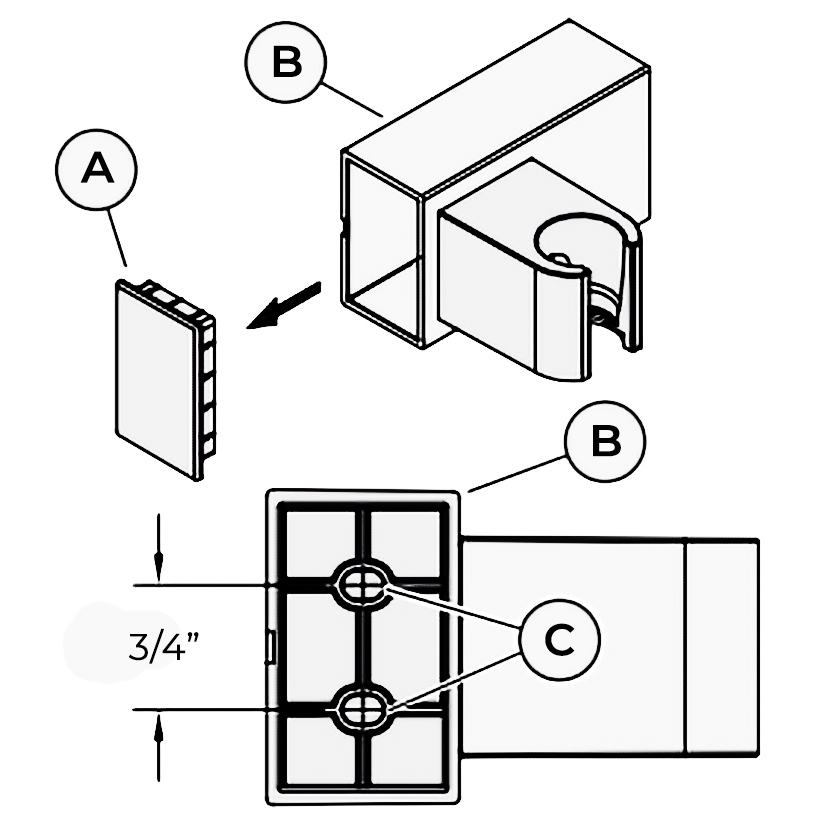
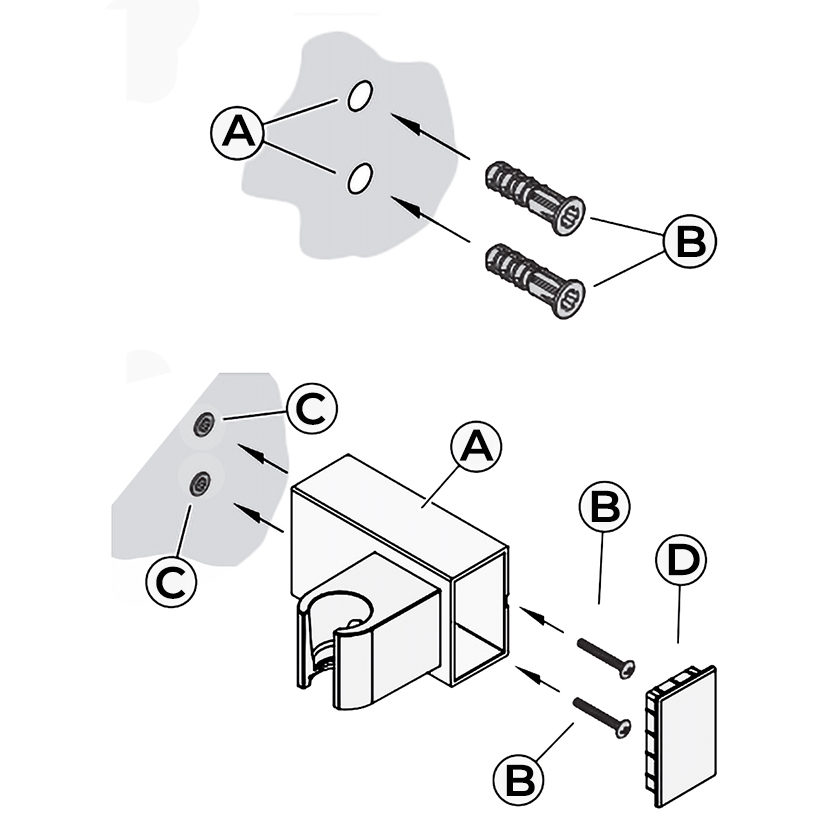
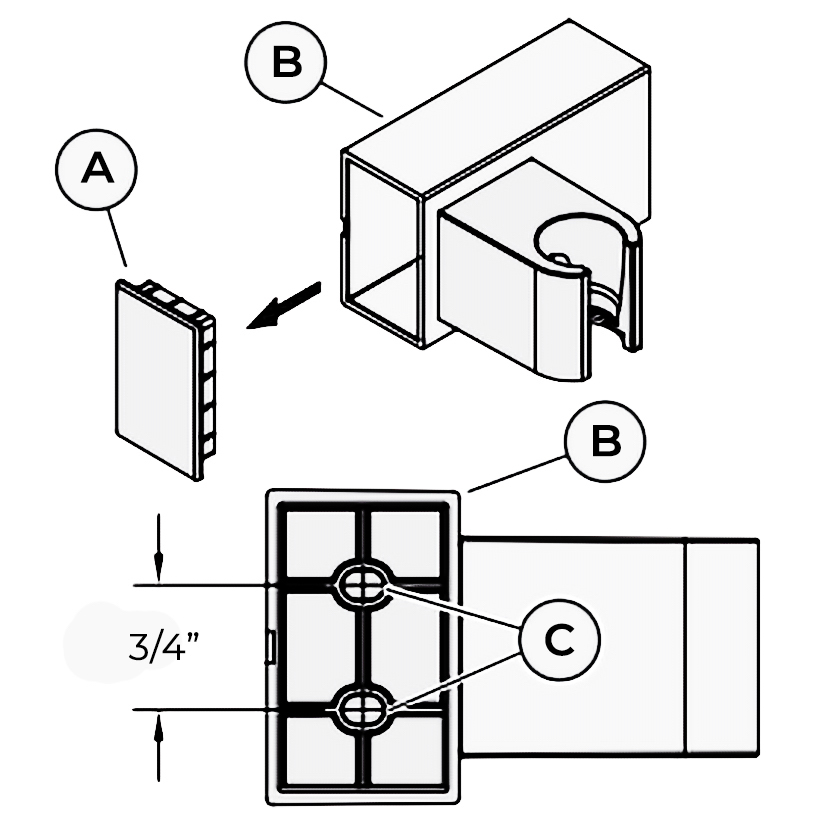
2. HOLE LOCATIONS FOR WALL MOUNT: Remove Front Cover (A) from Wall Mount (B). Use Wall Mount Screw Holes (C) to place the desired location. Using a punch or awl, tap the screw hole locations.Holes must be vertically aligned.
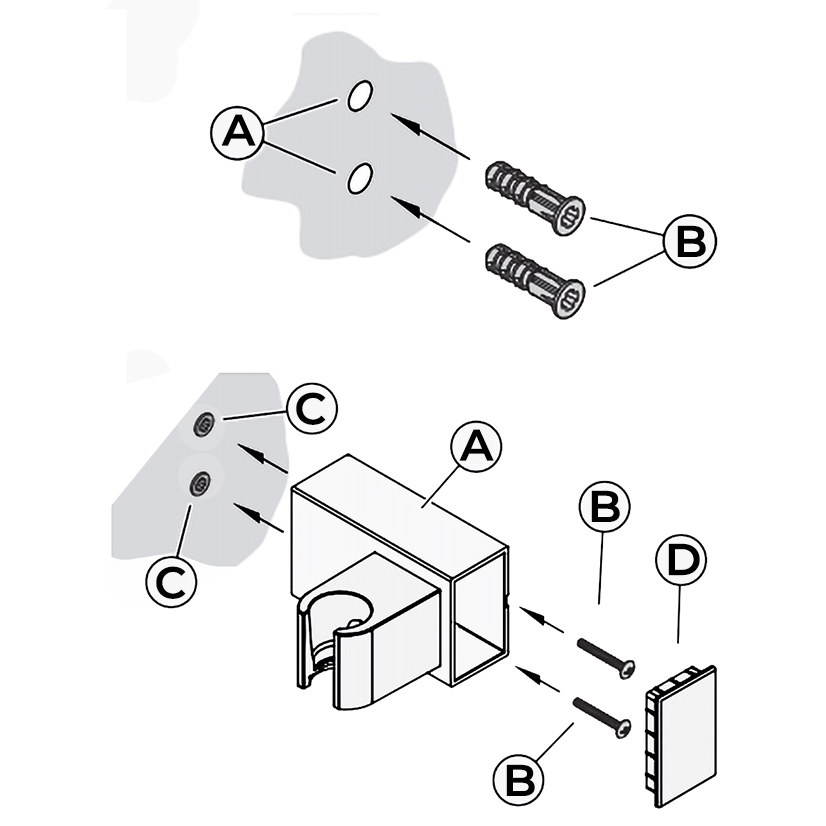
3. ANCHOR INSTALLATION: Drill two 1/4” dia. Holes (A). If installing into a studs drill two 1/8” dia. holes and do not use Anchors (B). Insert Anchors (B) into Holes (A) and tap flush with the wall.
4. WALL MOUNT INSTALLATION: Place Wall Mount (A) into wall and inset Mounting Screws (B) through Wall Mount Holes (C) and tighten until Wall Mount (A) is flush with the wall. Do Not Over Tighten! Insert Front Cover (D) into Wall Mount (A)
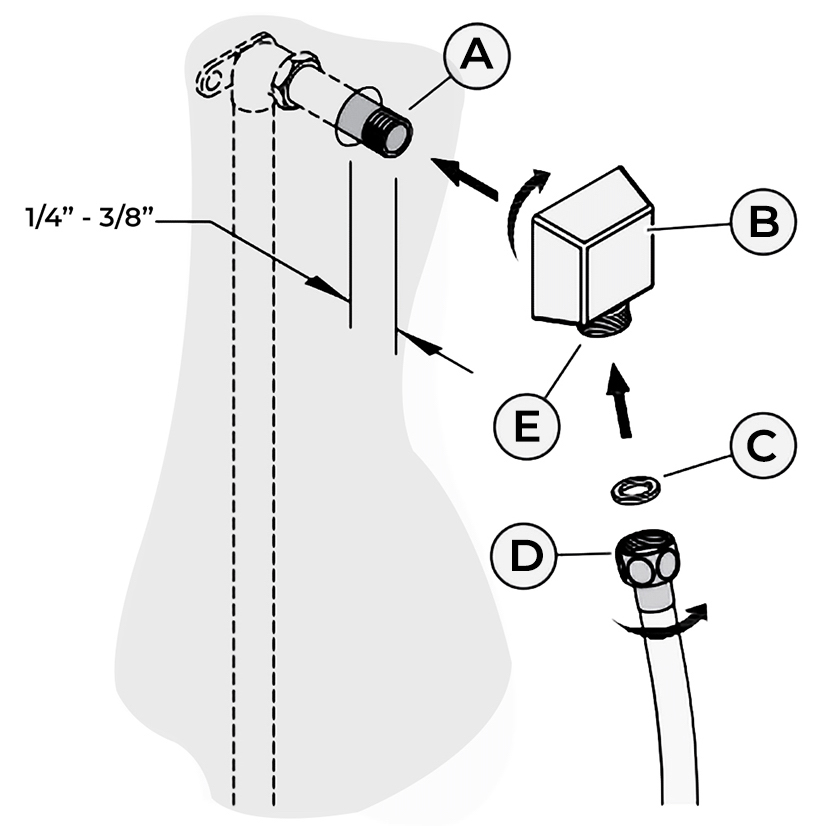
5. DROP ELBOW & HOSE INSTALLATION: Apply PTFE plumbers tape on both ends of Pipe Nipple (A) (not included). Screw Pipe Nipple (A) into the elbow inside the wall.The Pipe Nipple (A) is to project 1/4” – 3/4” from the finished wall. Screw Drop Elbow (B) onto Pipe Nipple (A) and tighten until Drop Elbow (B) is property positioned and flush to the finished wall. Place Rubber Seal (C) inside Hex Hose Fitting (D). Connect Hex Hose Fitting (D) into Drop Elbow Outlet (E) by turning Hex Hose Fitting (D).
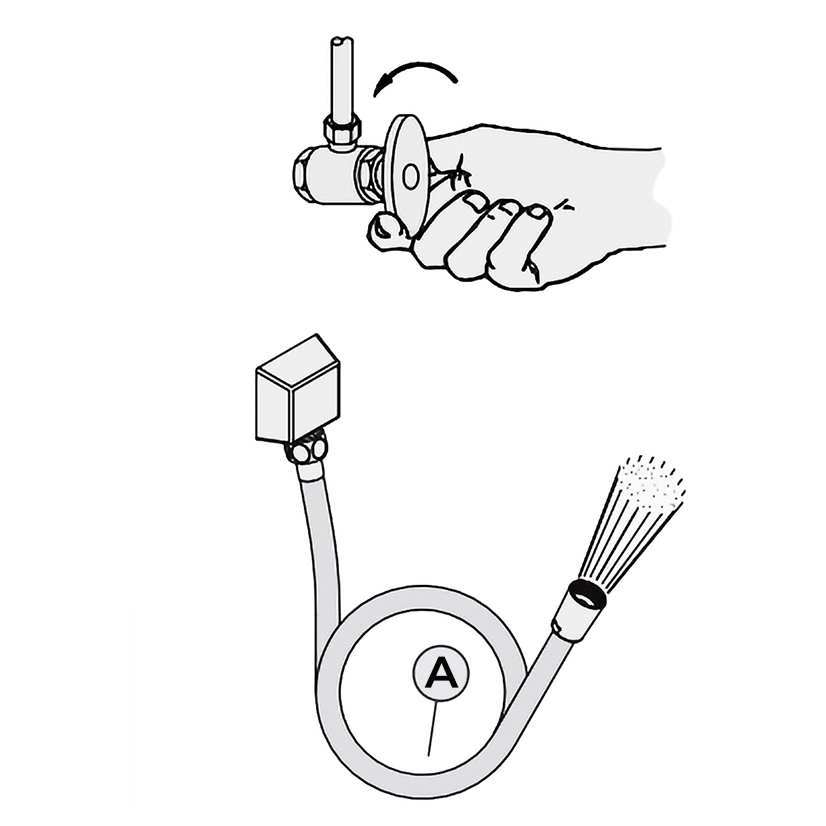
6. UNIT STARTUP: Turn on hot and cold water supplies, and check all connections for leaks.
7. FINAL FLUSHING: For final flushing, turn the valve on and allow water to run through the Hose (A) for several minutes.Allow water to run for several minutes until all foreign matter clears the line.
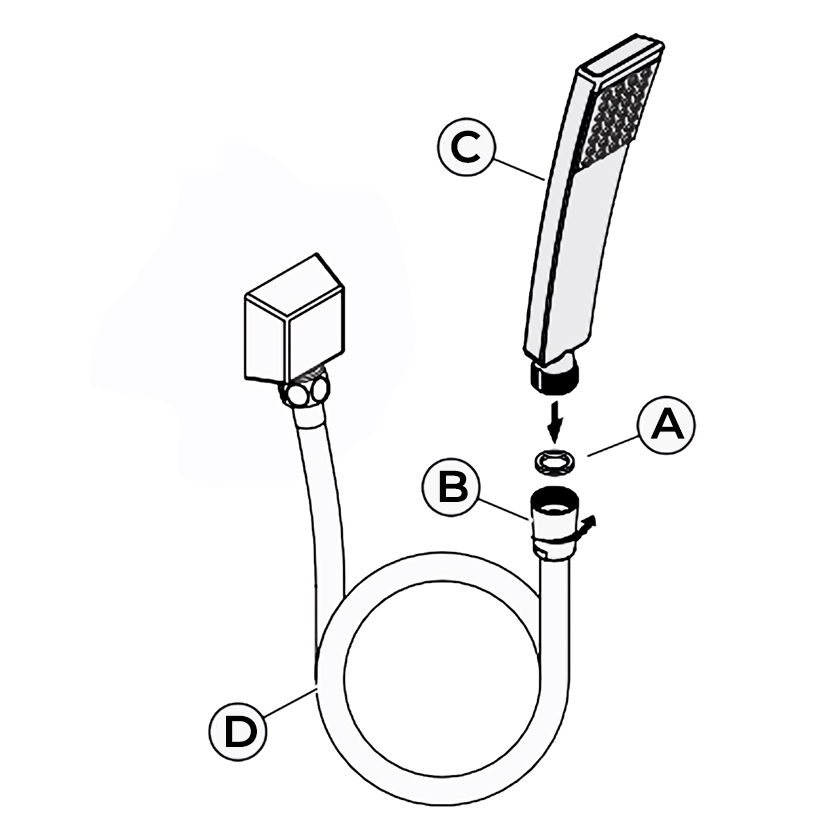
8. SHOWER ARM INSTALLATION: Place Rubber Seal (A) inside Tapered Hose Fitting (B). Conned Hand Shower (C) to Hose (D) by turning Tapered Hose Fitting (B ) clockwise.Warning: Make sure Hand Shower (C) is securely tightened to Hose (D).
Shower Body Jets Installation Instructions
Step 1
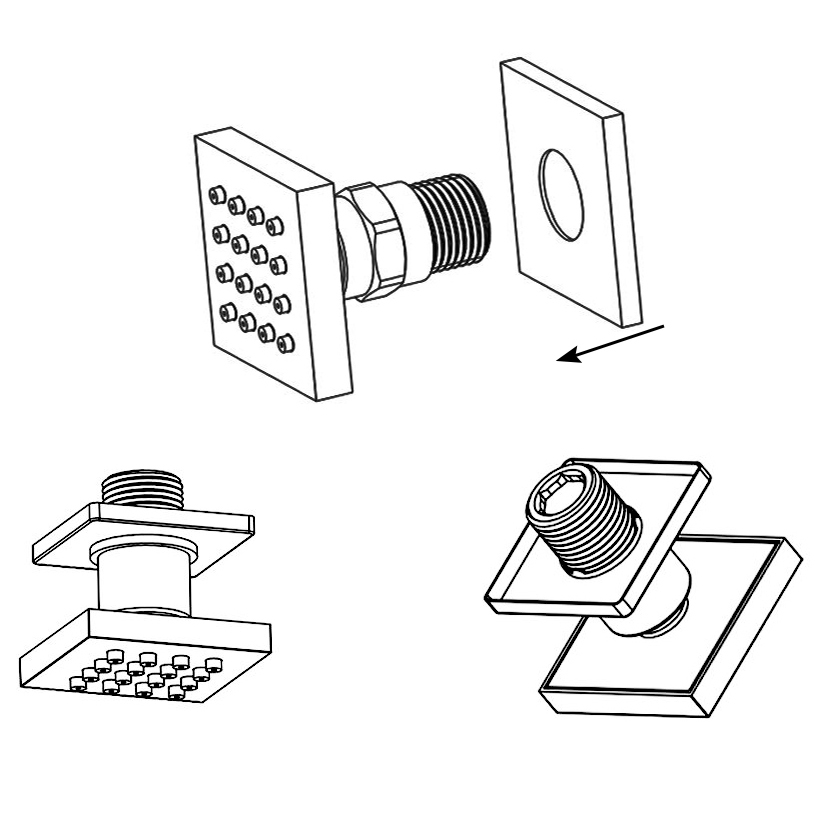
Set the decorative cover on the body jet.
|
mixer
|
Step 2
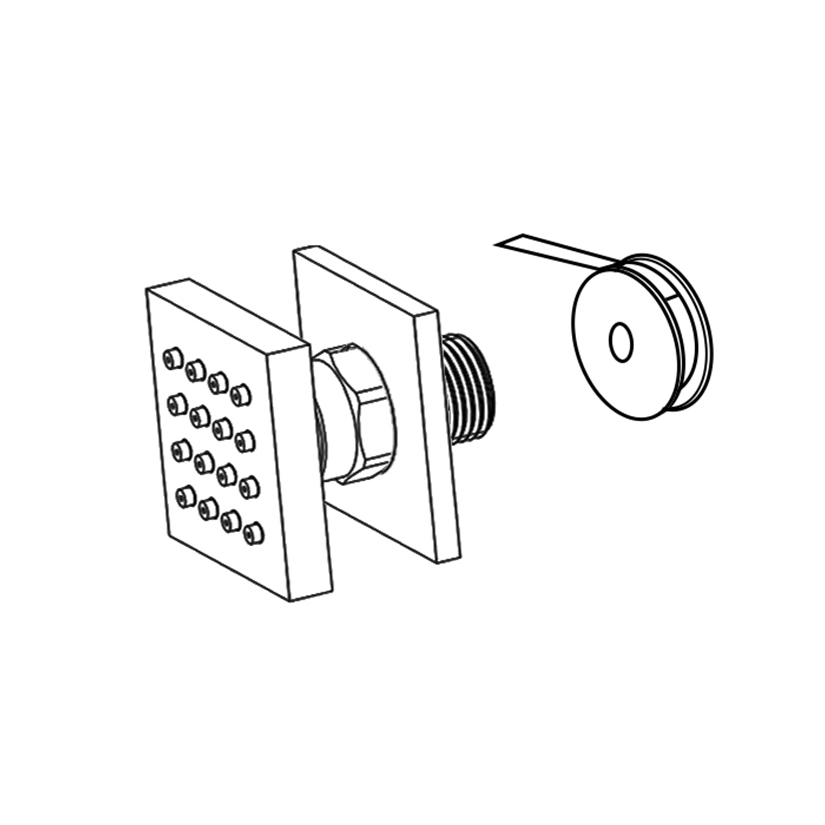
Roll the raw material belt in the thread screws.
|
mixer
|
Step 3
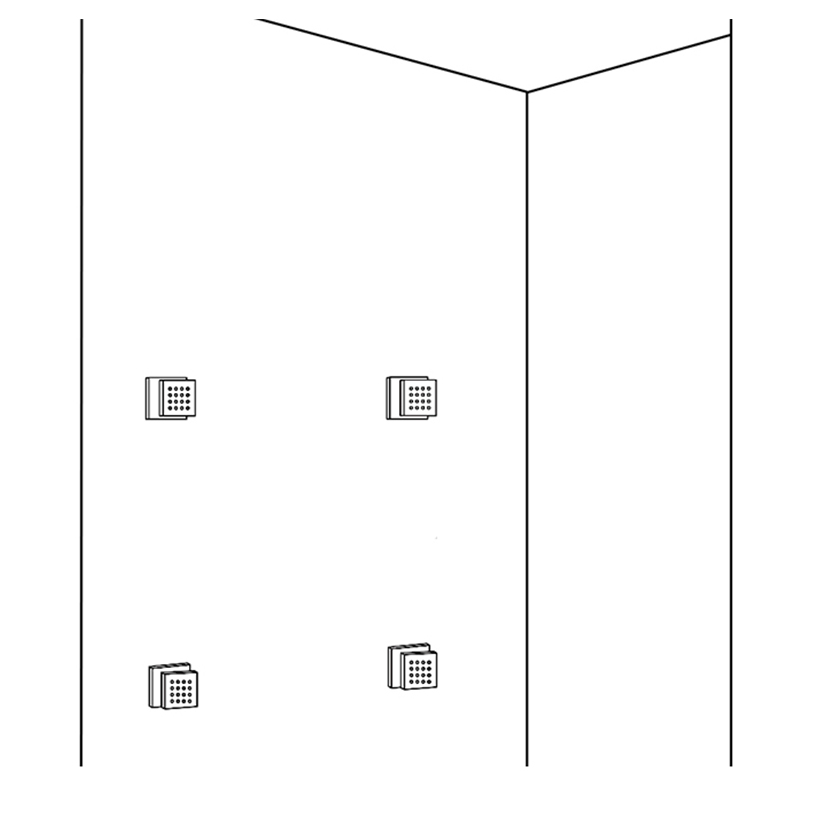
Use a wrench to tighten 6 body jets on the water outlet holes in a clockwise direction.
|
|
Thermostatic Mixer Installation Instructions
|
Step 1:
|
|
Step 2:
|
|
|
|
|
Thermostatic
Mixer
|
|
|
|
|
Thermostatic Mixer
|
|
|
|
|
|
|
Step 3:
|
|
Step 4:
|
|
|
|
|
|
|
|
|
|
|
Thermostatic Mixer
|
|
|
|
|
|
|
Step 5:
|
|
Step 6:
|
|
|
|

|
|
|
|