Guide for Architects, Interior Designers & Engineers
How to Choose the Right Bathroom Faucet Set for Your Vanity Layout
Selecting a bathroom faucet set for a vanity is no longer just a matter of “pick a finish and go.” For AEC professionals, the faucet assembly affects rough-in dimensions, ADA clearances, water budgets, and long-term maintenance in both residential and commercial projects. The goal is to specify a set that aligns with the vanity layout, plumbing design, and project performance requirements—without creating coordination issues downstream.
Whether you are drawing details around a boutique hospitality project using BathSelect, coordinating sensor sets from FontanaShowers, or curating content for a design blog, the principles are the same: start from the vanity, then work forward to faucet type, control strategy, performance, and compliance.
Vanity Geometry & Hole PatternsDeck vs. Wall-Mounted LayoutsWaterSense & Flow PerformanceADA Reach & AccessibilitySensors, Power & BIM Documentation
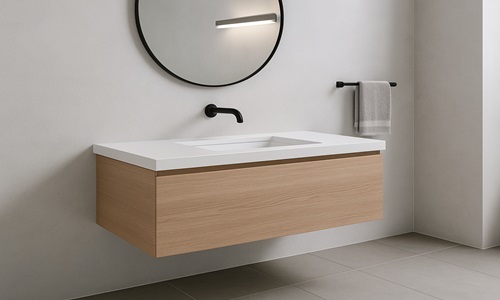
Vanity layout and basin geometry drive faucet selection, clearances, and user experience—especially in compact bathrooms.
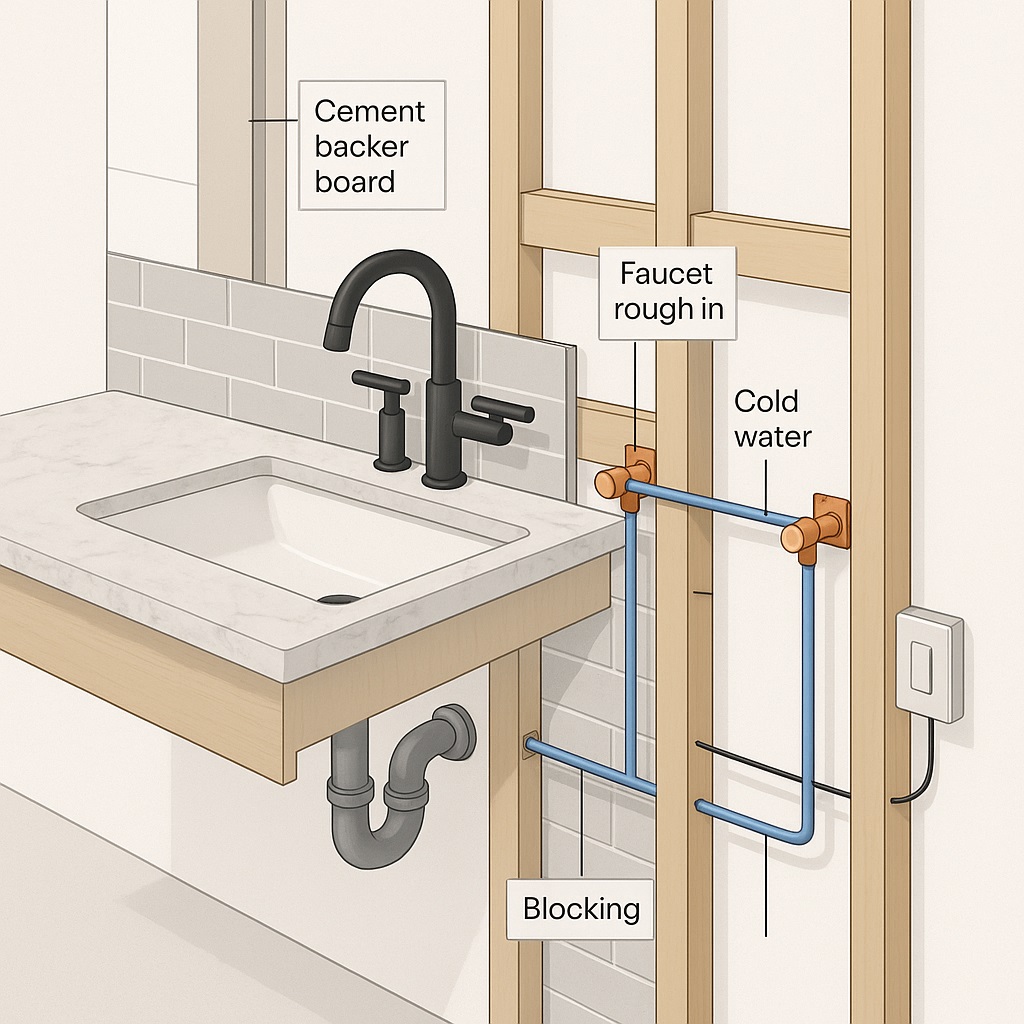
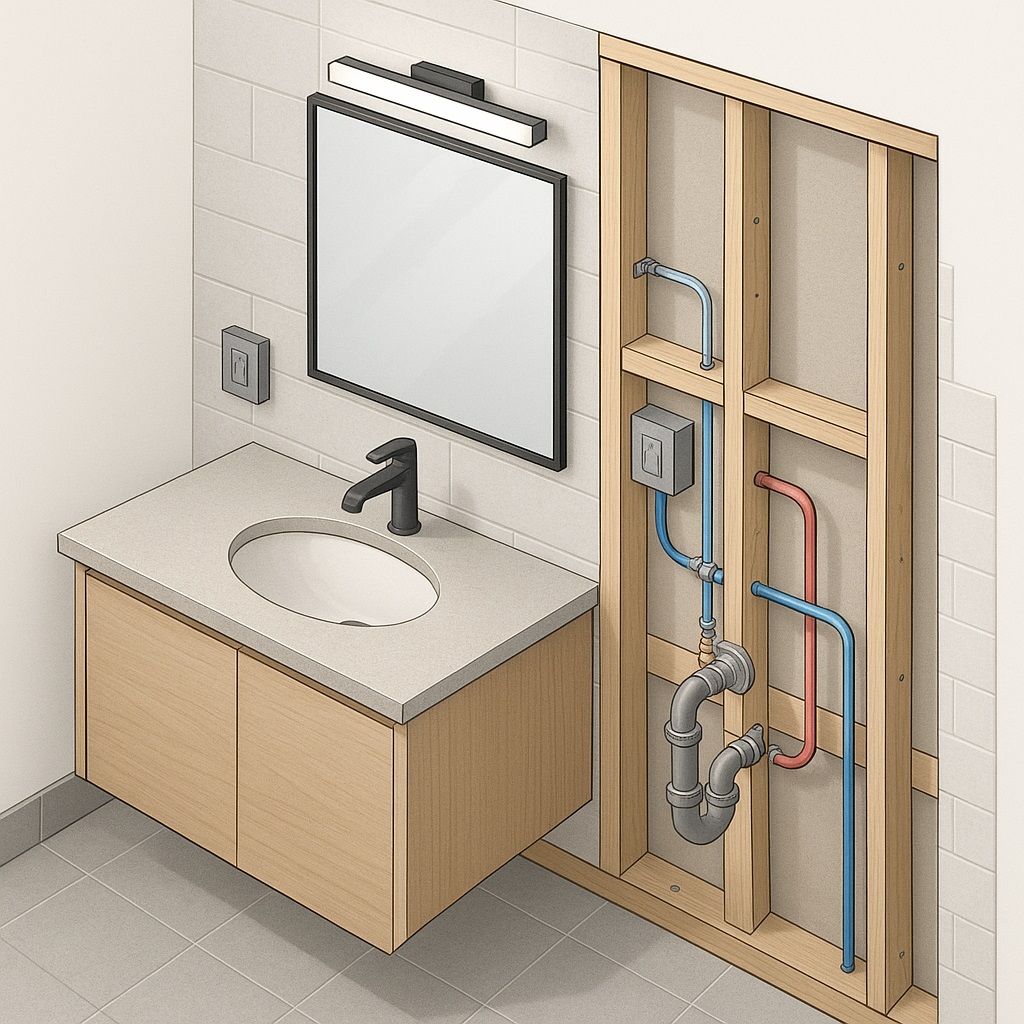
Deck- and wall-mounted faucets must be coordinated with structure, plumbing, and power in the wall or vanity zone to avoid clashes.
This guide walks through how AEC professionals can choose faucet sets that match vanity geometry, mounting style, water and energy targets, accessibility requirements, and documentation workflows—using real-world examples from FontanaShowers®, BathSelect, and hands-free faucet specialists.
1. Start With the Vanity Geometry and Hole Configuration
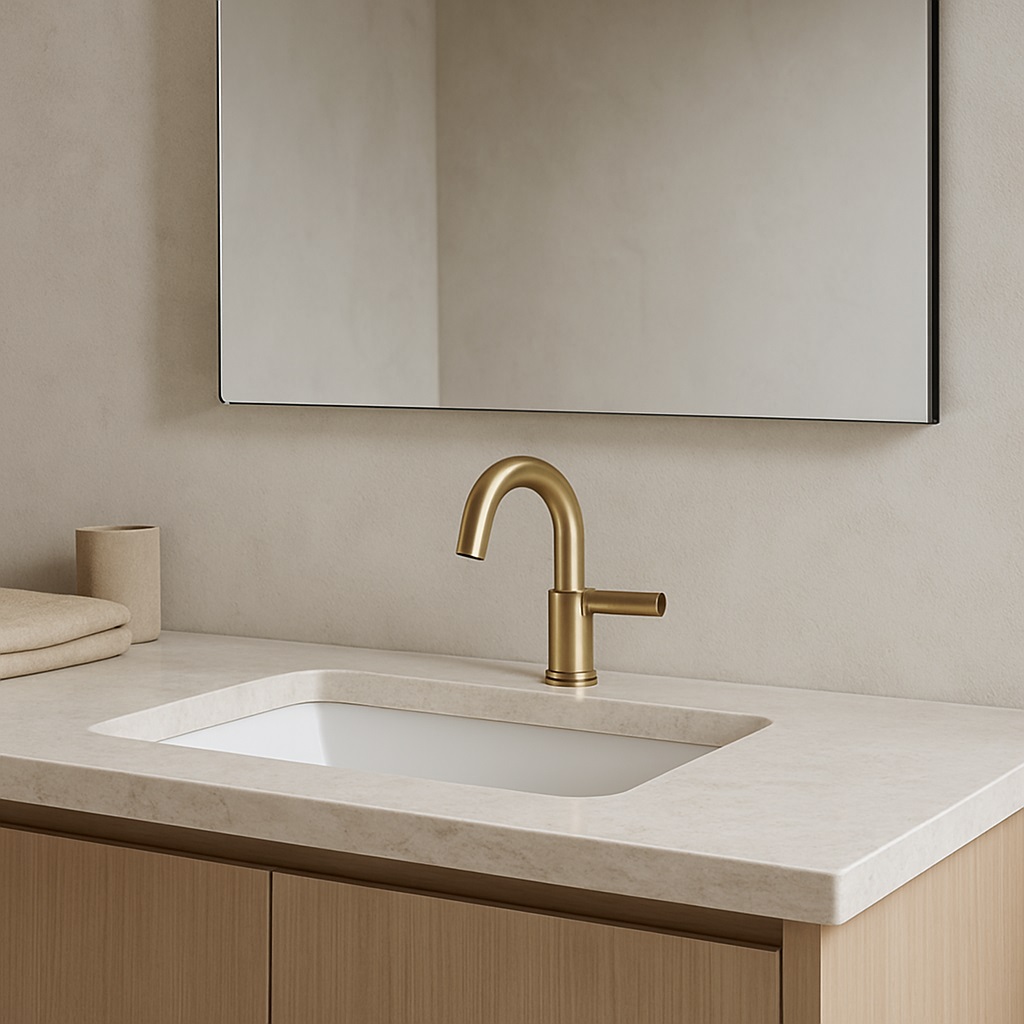
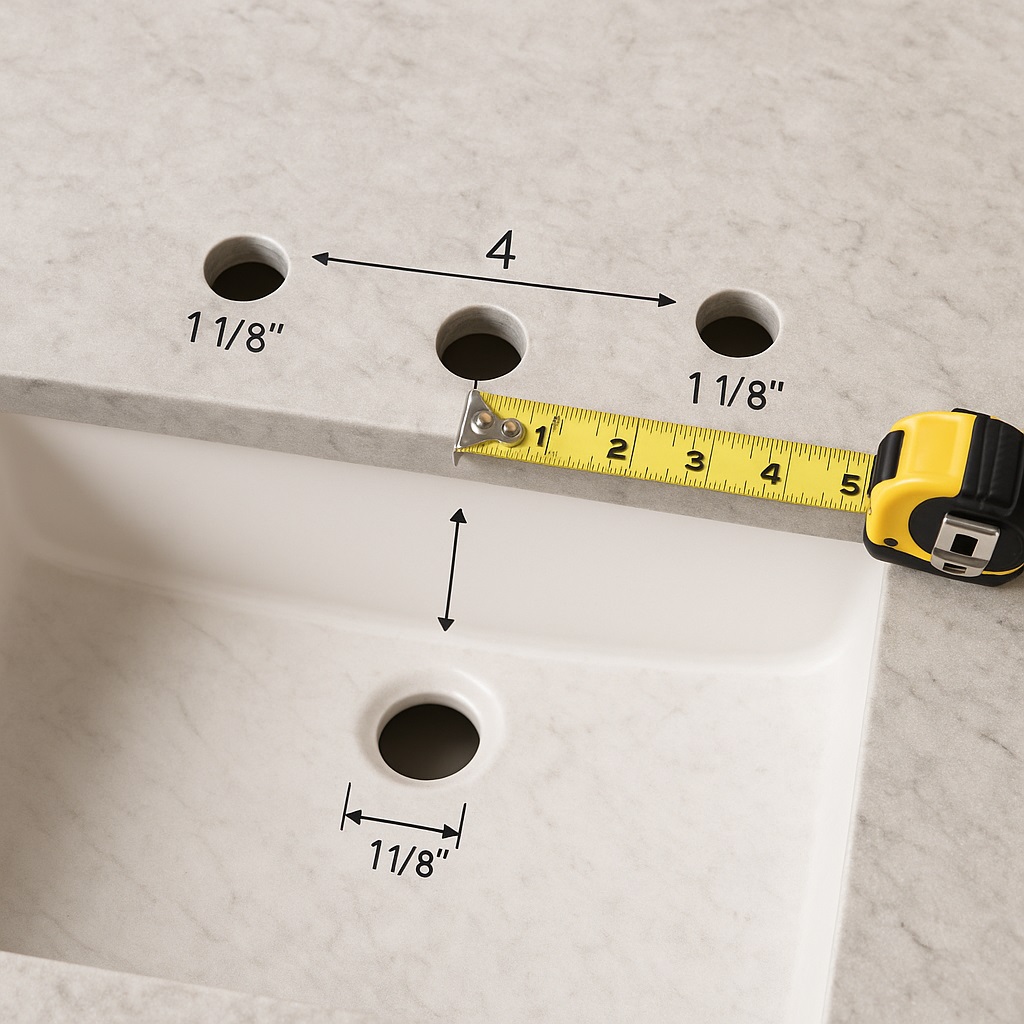
Before you look at finishes or styles, confirm basin type and count (undermount, vessel, integral, semi-recessed), the pre-drilled hole pattern (single-hole, 4" centerset, 8" widespread, or custom), and deck thickness and setback from the bowl. For example,
FontanaShowers bathroom faucet collections
cover single-hole mixers, widespread sets, and specialty waterfall spouts that align with common counter layouts and centerlines.
For hospitality and commercial programs, where you may be standardizing vanity modules across room types, coordinate early with suppliers such as
BathSelect Hospitality
to confirm which faucet sets align with your chosen quartz or solid-surface top, hole pattern, and mounting constraints. Show hole centerlines and label “faucet by spec section 22 42 00 – confirm trim with schedule” on your drawings.
For vessel and wall-mounted solutions, add elevation dimensions from finished floor to spout outlet and controls to avoid splash and clearance issues. Treat the lavatory, countertop, and faucet as one system so rough-ins and supports in the wall zone are documented accurately.
2. Select the Mounting Style That Matches the Layout
Deck-Mounted, Single-Hole or Centerset
Deck-mounted, single-hole or 4" centerset faucets are often the simplest choice for compact residential and standard developer units. They minimize wall coordination, are easy to replace during future renovations, and pair well with off-the-shelf lavatory tops with pre-punched holes.
Deck-Mounted, Widespread
Widespread faucet sets provide more design flexibility for higher-end residential or hospitality suites. They require precise drilling or factory-fabricated vanity tops, so measurements for spout and handle centerlines should be shown clearly on shop drawings and approved submittals.
Wall-Mounted Faucets
Wall-mounted faucets free up counter space and work especially well with vessel or concrete trough basins. They demand close coordination with wall framing, blocking, and in-wall carriers—rough-in locations must be dimensioned in elevations, and tile thickness must be included in your calculations.
Maintaining a Unified Visual Language
Many luxury manufacturers, including
FontanaShowers,
offer both deck- and wall-mounted variants with consistent finishes. This allows design teams to keep a unified visual language across different vanity types in the same project while varying the mounting style where needed.
Coordination With Basin Geometry
Whatever mounting style is selected, verify spout reach and height against basin geometry so users can comfortably wash hands without excessive splash. For vessel basins, this often means raising the spout outlet and moving the rough-in further from the wall than for shallow undermount bowls.
Documenting Mounting Decisions
In CDs, call out whether the faucet is deck-mounted or wall-mounted on both plans and elevations, and tie those notes to the plumbing fixture schedule. This reduces RFIs where contractors might otherwise substitute different mounting types without understanding the coordination impact.
4. ADA, Accessibility, and Dimensional Criteria
Mounting Heights, Reach Ranges & Clearances
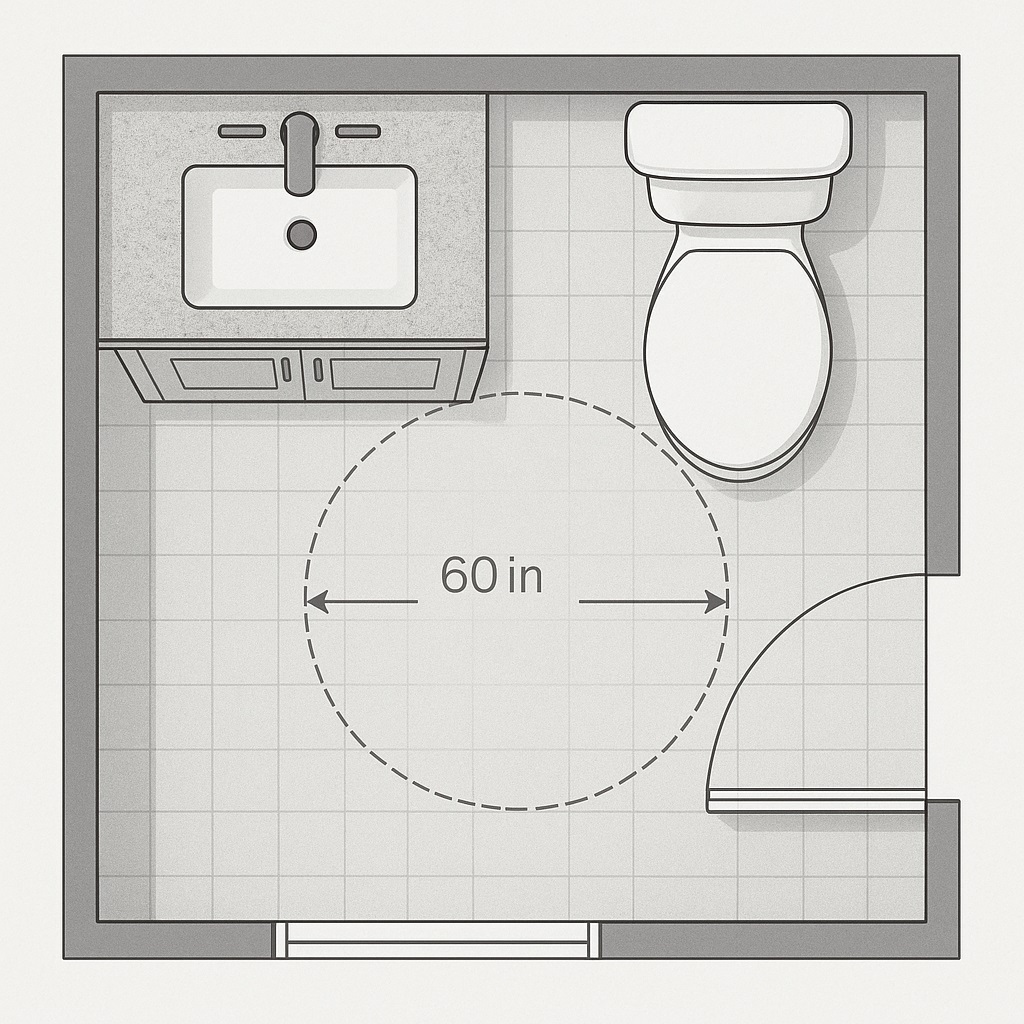
For spaces required to be accessible, design the lavatory, countertop, faucet, and controls as an integrated system that meets the 2010 ADA Standards. The front rim or counter surface at accessible lavatories is typically limited to 34" maximum above finished floor, with specific knee and toe clearance requirements.
The ADA limits the height of the front rim or counter surface at accessible lavatories to 34" max above finished floor, and defines knee and toe clearances beneath the lavatory. Reference detailed dimensional criteria in
Section 606 of the 2010 ADA Standards.
Ensure that clear floor space (typically 30" × 48") is coordinated with partitions, doors, and accessories, and that faucet operation falls within the required reach ranges for seated users.
Use resources like
ADA Standards for Accessible Design
to confirm that your lavatory assemblies meet both federal and local accessibility requirements.
Faucets at accessible lavatories must be operable with one hand, without tight grasping, pinching, or twisting of the wrist, and require no more than 5 lbf (22.2 N) to operate. Lever handles, push-type, or electronically controlled faucets are common solutions.
Touchless solutions can significantly simplify compliance. Hands-free faucet guidance from sites such as
Bath Touchless Faucets
can help align sensor-based designs with accessibility principles while improving hygiene.
Detail sensor windows or handle locations relative to the bowl centerline and front edge of the counter so users can easily reach and operate the faucet without stretching beyond the accessible reach envelope.
On schedules, flag which faucet sets are used at accessible lavatories and verify that trim and controls at those stations meet all ADA reach, force, and operability requirements.
3 & 5. Flow Performance, Water Efficiency, and Durability
WaterSense-Labeled Bathroom Faucets
Most modern projects include explicit targets for water use. The U.S. EPA’s
WaterSense-labeled bathroom sink faucets
are designed to use a maximum of 1.5 gpm at 60 psi—roughly 30% less than the federal standard of 2.2 gpm—without compromising performance. WaterSense-listed products simplify compliance where jurisdictions mandate low-flow lavatory fittings.
Coordinating With Codes & Energy Modeling
Always verify local code requirements for maximum lavatory flow rates and coordinate those with mechanical and energy modeling. When water heating and domestic hot water recirculation are modeled, faucet flow rates should match the specifications listed in the plumbing fixture schedule and manufacturer cut sheets.
Confirming Actual Flow Performance
Use manufacturer data and the EPA’s
WaterSense product specifications
to confirm actual flow performance at typical building pressure. This ensures water budgets and performance assumptions in design-phase calculations align with what is installed in the field.
Standards & Material Quality
From a technical standpoint, the faucet set is only as good as its underlying standard compliance and materials. Most North American jurisdictions reference the harmonized
ASME A112.18.1/CSA B125.1
standard for plumbing supply fittings, as described in
ASME’s plumbing supply fittings standard.
Lead-Free & Finish Durability
When evaluating faucet sets, confirm third-party certification to ASME A112.18.1/CSA B125.1, as well as any applicable lead-free requirements (e.g., NSF/ANSI 61 & 372). Review materials—solid brass bodies, ceramic cartridges, and robust PVD or electroplated finishes—for long-term resistance to corrosion and hard water build-up.
Matching Brand Portfolios to Project Needs
Brands such as
FontanaShowers
and hospitality-focused vendors like
BathSelect Hospitality
offer both residential and commercial-grade faucet lines. In higher-traffic applications, specify commercial-grade sets with vandal-resistant aerators and sensor modules to reduce lifecycle maintenance burdens.
6 & 7. Coordinating Faucets, Rough-Ins, Sensors, and BIM
Faucet Selection, Rough-In Heights & Layout
Begin with the vanity geometry—basin location, hole configuration, and deck thickness—then select faucet families that match those constraints. Dimension centerlines for supplies and waste relative to finished floor and finished wall on interior elevations and details, and lock in spout heights in DD so rough-ins are coordinated with the final faucet selection.
Touchless Controls, Sensors & Power
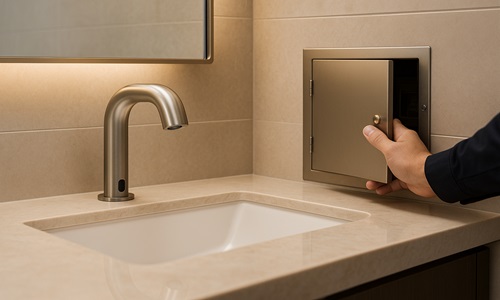
For touchless or thermostatic sets, coordination extends behind the finished face. Sensor location must align with basin geometry and user reach zones; under-counter mixing valves affect millwork and access panel design; and power strategy (hardwired vs. battery) drives electrical rough-ins. When using hands-free products similar to those featured on
Bath Touchless Faucets,
note the power source, access to the control box, and any required low-voltage cabling on your architectural and MEP drawings.
Accessible Stations & ADA Coordination
At accessible lavatories, verify that the combination of lavatory height, clear floor space, and faucet operation meets the 2010 ADA Standards. Ensure faucet controls fall within reach ranges and can be operated without tight grasping, pinching, or twisting of the wrist, with no more than 5 lbf (22.2 N) of operating force. Reference
ADA Standards for Accessible Design
and
Section 606 Lavatories and Sinks
for detailed guidance.
Sensor Faucet Detail & Under-Counter Components
Include a dedicated sensor faucet detail in the drawing set that shows deck thickness and cut-out, sensor window location, under-counter mixing valve and solenoid, and power pack or transformer placement. Route supply lines and controllers so they do not encroach into required knee and toe clearances, while still allowing straightforward access for future service.
BIM, Clash Detection & Coordination
Load manufacturer-provided Revit families for lavatories, vanities, faucets, and mirrors early in the project model. Embed connector heights and clearances so clash detection around dense wet-wall zones can confirm that carriers, waste arms, supply lines, and electrical for mirrors or accessories can coexist without conflict.
Fixture Schedules & Specification Sections
Plumbing fixture schedules should assign unique fixture tags (e.g., L-1, L-2) to each faucet + lavatory combination and list manufacturer, model, flow rate, mounting type, finish, and relevant standards such as ASME A112.18.1/CSA B125.1 and WaterSense. Specifications are typically placed in MasterFormat Division 22 40 00 – Plumbing Fixtures, referencing standards, ADA compliance, and finish coordination with interior schedules.
Manufacturer Support & Portfolios
Portfolios like
FontanaShowers residential bathroom fixtures
allow design teams to standardize across faucet sets, shower systems, and accessories. Use these resources, along with technical support from manufacturers, to confirm flow rates, standards compliance, and compatible trim packages during specification and submittal review.
Narrative Specs & Finish Alignment
In narrative and project specifications, outline performance expectations, reference applicable codes and standards, and call for coordinated finishes across suites so metalwork on faucets, drains, and accessories presents a unified appearance. This helps ensure that the faucet sets selected for each vanity layout support both performance and design intent.
By treating faucet selection as an integral part of the vanity layout, AEC teams can reduce RFIs, avoid rework around rough-ins and accessibility constraints, and deliver bathrooms that function as well as they look.
Starting from basin geometry and hole configuration, then layering on mounting style, flow performance, accessibility, and documentation requirements, creates a clear framework for choosing faucet sets across residential, hospitality, and commercial projects.
Leveraging manufacturer portfolios, WaterSense resources, ADA guidance, and robust BIM content helps ensure that built installations match the performance, compliance, and aesthetic goals established at concept design.
6. Hygiene, Touchless Operation, and Maintenance
Touchless faucets reduce cross-contamination and support modern hygiene standards in both residential and commercial environments. When combined with open, easy-to-clean vanity and floor layouts, they allow janitorial teams to work quickly while maintaining high cleanliness levels in high-turnover restrooms.
Best practice is to include a sensor faucet detail that illustrates deck cut-outs, sensor windows, mixing valves, solenoids, and power packs or transformers. Clear diagrams help ensure that trades install components where they can be accessed for maintenance without compromising ADA knee and toe clearance envelopes.
7. Documentation: Schedules, BIM, and Spec Sections
Plumbing Fixture Schedules
Assign a unique fixture tag (e.g., L-1, L-2) to each faucet + lavatory combination and include manufacturer, model, flow rate, mounting type, finish, and relevant standards such as ASME A112.18.1/CSA B125.1 and WaterSense listings. Clear schedules help estimators, contractors, and commissioning teams understand exactly what is required.
BIM/Revit Families
Use manufacturer or custom Revit families sized correctly to your vanity layout, embedding connector heights, clearances, and rough-in dimensions. This reduces clashes with casework, backing, and adjacent services, and allows coordinated updates when faucet models or finishes are revised.
Specification Sections
Place faucet requirements in MasterFormat 22 40 00 – Plumbing Fixtures (or local equivalent), referencing ASME/CSA standards, WaterSense compliance, ADA criteria, and finish alignment with interior schedules. Explicitly call out where commercial-grade or vandal-resistant fittings are required by the program.
Coordinating With Manufacturer Portfolios
Portfolios such as
FontanaShowers residential bathroom fixtures
enable teams to standardize faucet sets, shower systems, and accessories. Starting from a coherent manufacturer portfolio streamlines documentation and submittal review while supporting a unified design language.
Aligning With Water Budgets & Green Programs
Where projects pursue green building certifications or must meet municipal water-use policies, coordinate WaterSense-labeled faucets and documented flow rates with the project’s plumbing basis-of-design. This ensures that as-built water use aligns with the performance models submitted for approvals.
Reducing RFIs With Clear Drawings
Clearly dimension faucet centerlines, mounting heights, and sensor or handle locations on plans and elevations. Tie these to schedules and spec sections so bidders have a complete picture. The more precisely the faucet + vanity assembly is documented, the fewer RFIs and field changes you will face during construction.
Key Takeaways & Quick Reference for AEC Teams
Key Takeaways for Faucet & Vanity Coordination
Begin with the
vanity geometry and hole configuration,
then match the faucet family, not the other way around. Confirm basin type, hole pattern, and deck thickness before locking in faucet models.
Prioritize
WaterSense-compliant flow rates
and verify performance data against project water budgets and local code requirements for maximum lavatory flow. Use EPA WaterSense resources to confirm product performance.
Design faucet + vanity assemblies that satisfy
ADA reach and clearance
requirements at accessible lavatories, including rim height limits, clear floor space, and operable controls within required reach ranges.
Confirm faucets are certified to
ASME A112.18.1/CSA B125.1
and other applicable standards, and that materials (bodies, cartridges, finishes) are suited to the usage profile—especially in hospitality and public-restroom settings.
Coordinate
controls, sensors, mixing valves, and power
in the vanity zone so under-counter components do not conflict with casework, knee and toe clearances, or other services.
Document clearly in
plans, elevations, schedules, BIM content, and spec sections
so contractors can build exactly what was designed, with minimal substitutions and RFIs.
Consider touchless options, guided by resources such as
Bath Touchless Faucets,
where hygiene and accessibility are high priorities and where project budgets support electronic fittings.
Align flow rates, distribution losses, and usage profiles with the project’s
mechanical and energy modeling
so domestic hot water systems are right-sized for the chosen fixtures.
By treating the bathroom faucet set as an integrated part of the vanity layout—rather than a late-stage decorative choice—you protect accessibility and performance goals while delivering bathrooms that perform as well in operation as they do in renderings.
When you are ready to finalize CDs, select a coherent family of vanities and faucet sets and repeat them across unit types to simplify detailing and procurement. Confirm WaterSense and local code requirements for flow rates, verify ADA reach and clearance criteria at accessible lavatories, and carefully document sensor locations, mixing valves, and power sources where touchless technology is used. Lean on manufacturer data, BIM resources, and clear specification language so the installed faucet assemblies fully reflect both the performance and design intent established at the vanity layout stage.
Find Out First
Get FontanaShowers emails of inspiration, new product releases, and more!