How to install FontanaShowers Brushed Nickel Ceiling Mount Rainfall Shower Set With Thermostat Mixer Jet Spray And Handshower | FS1501
Easy step by step Installation Instructions for Thermostatic Rainfall Shower System
Before you begin, please read the installation instructions below. Observe all local building and safety codes.
Unpack and inspect the product for any shipping damages. If you find damages, do not install.
Please note all products must be installed by a professional and certified plumber otherwise warranty might be voided.
shower
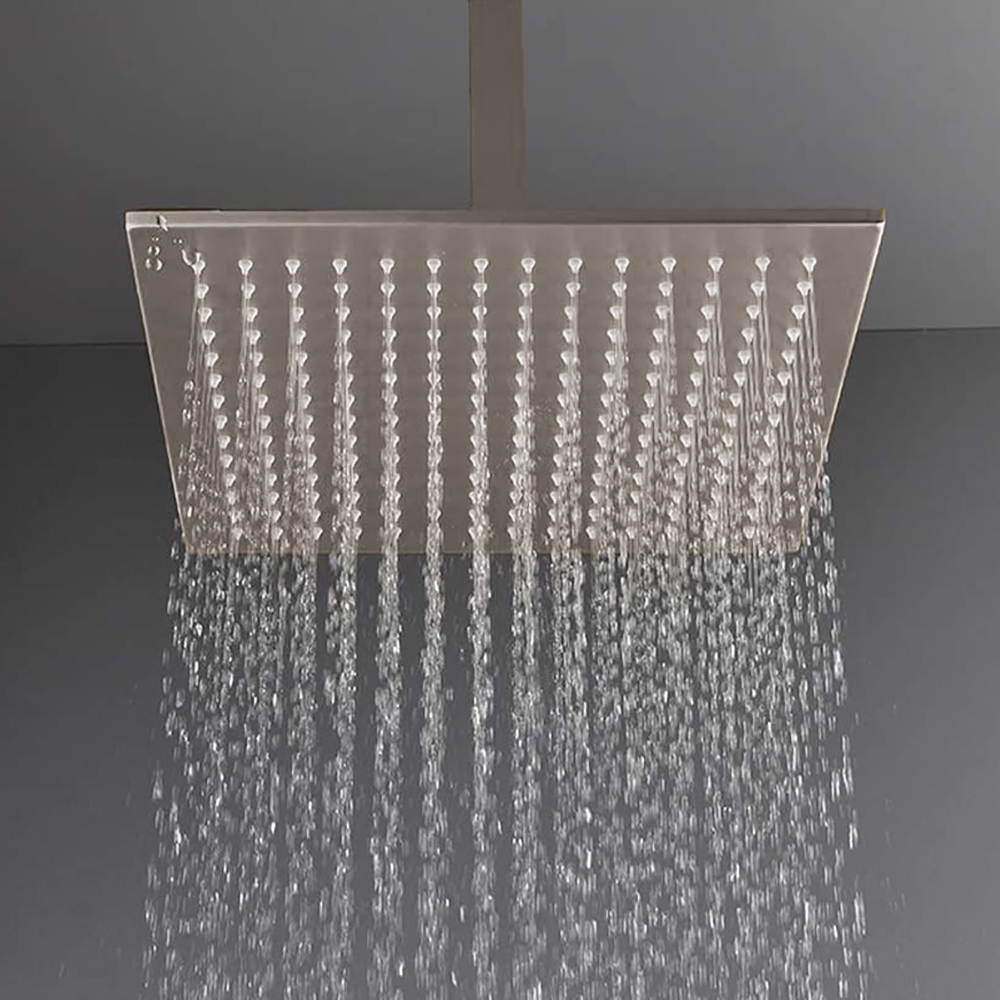
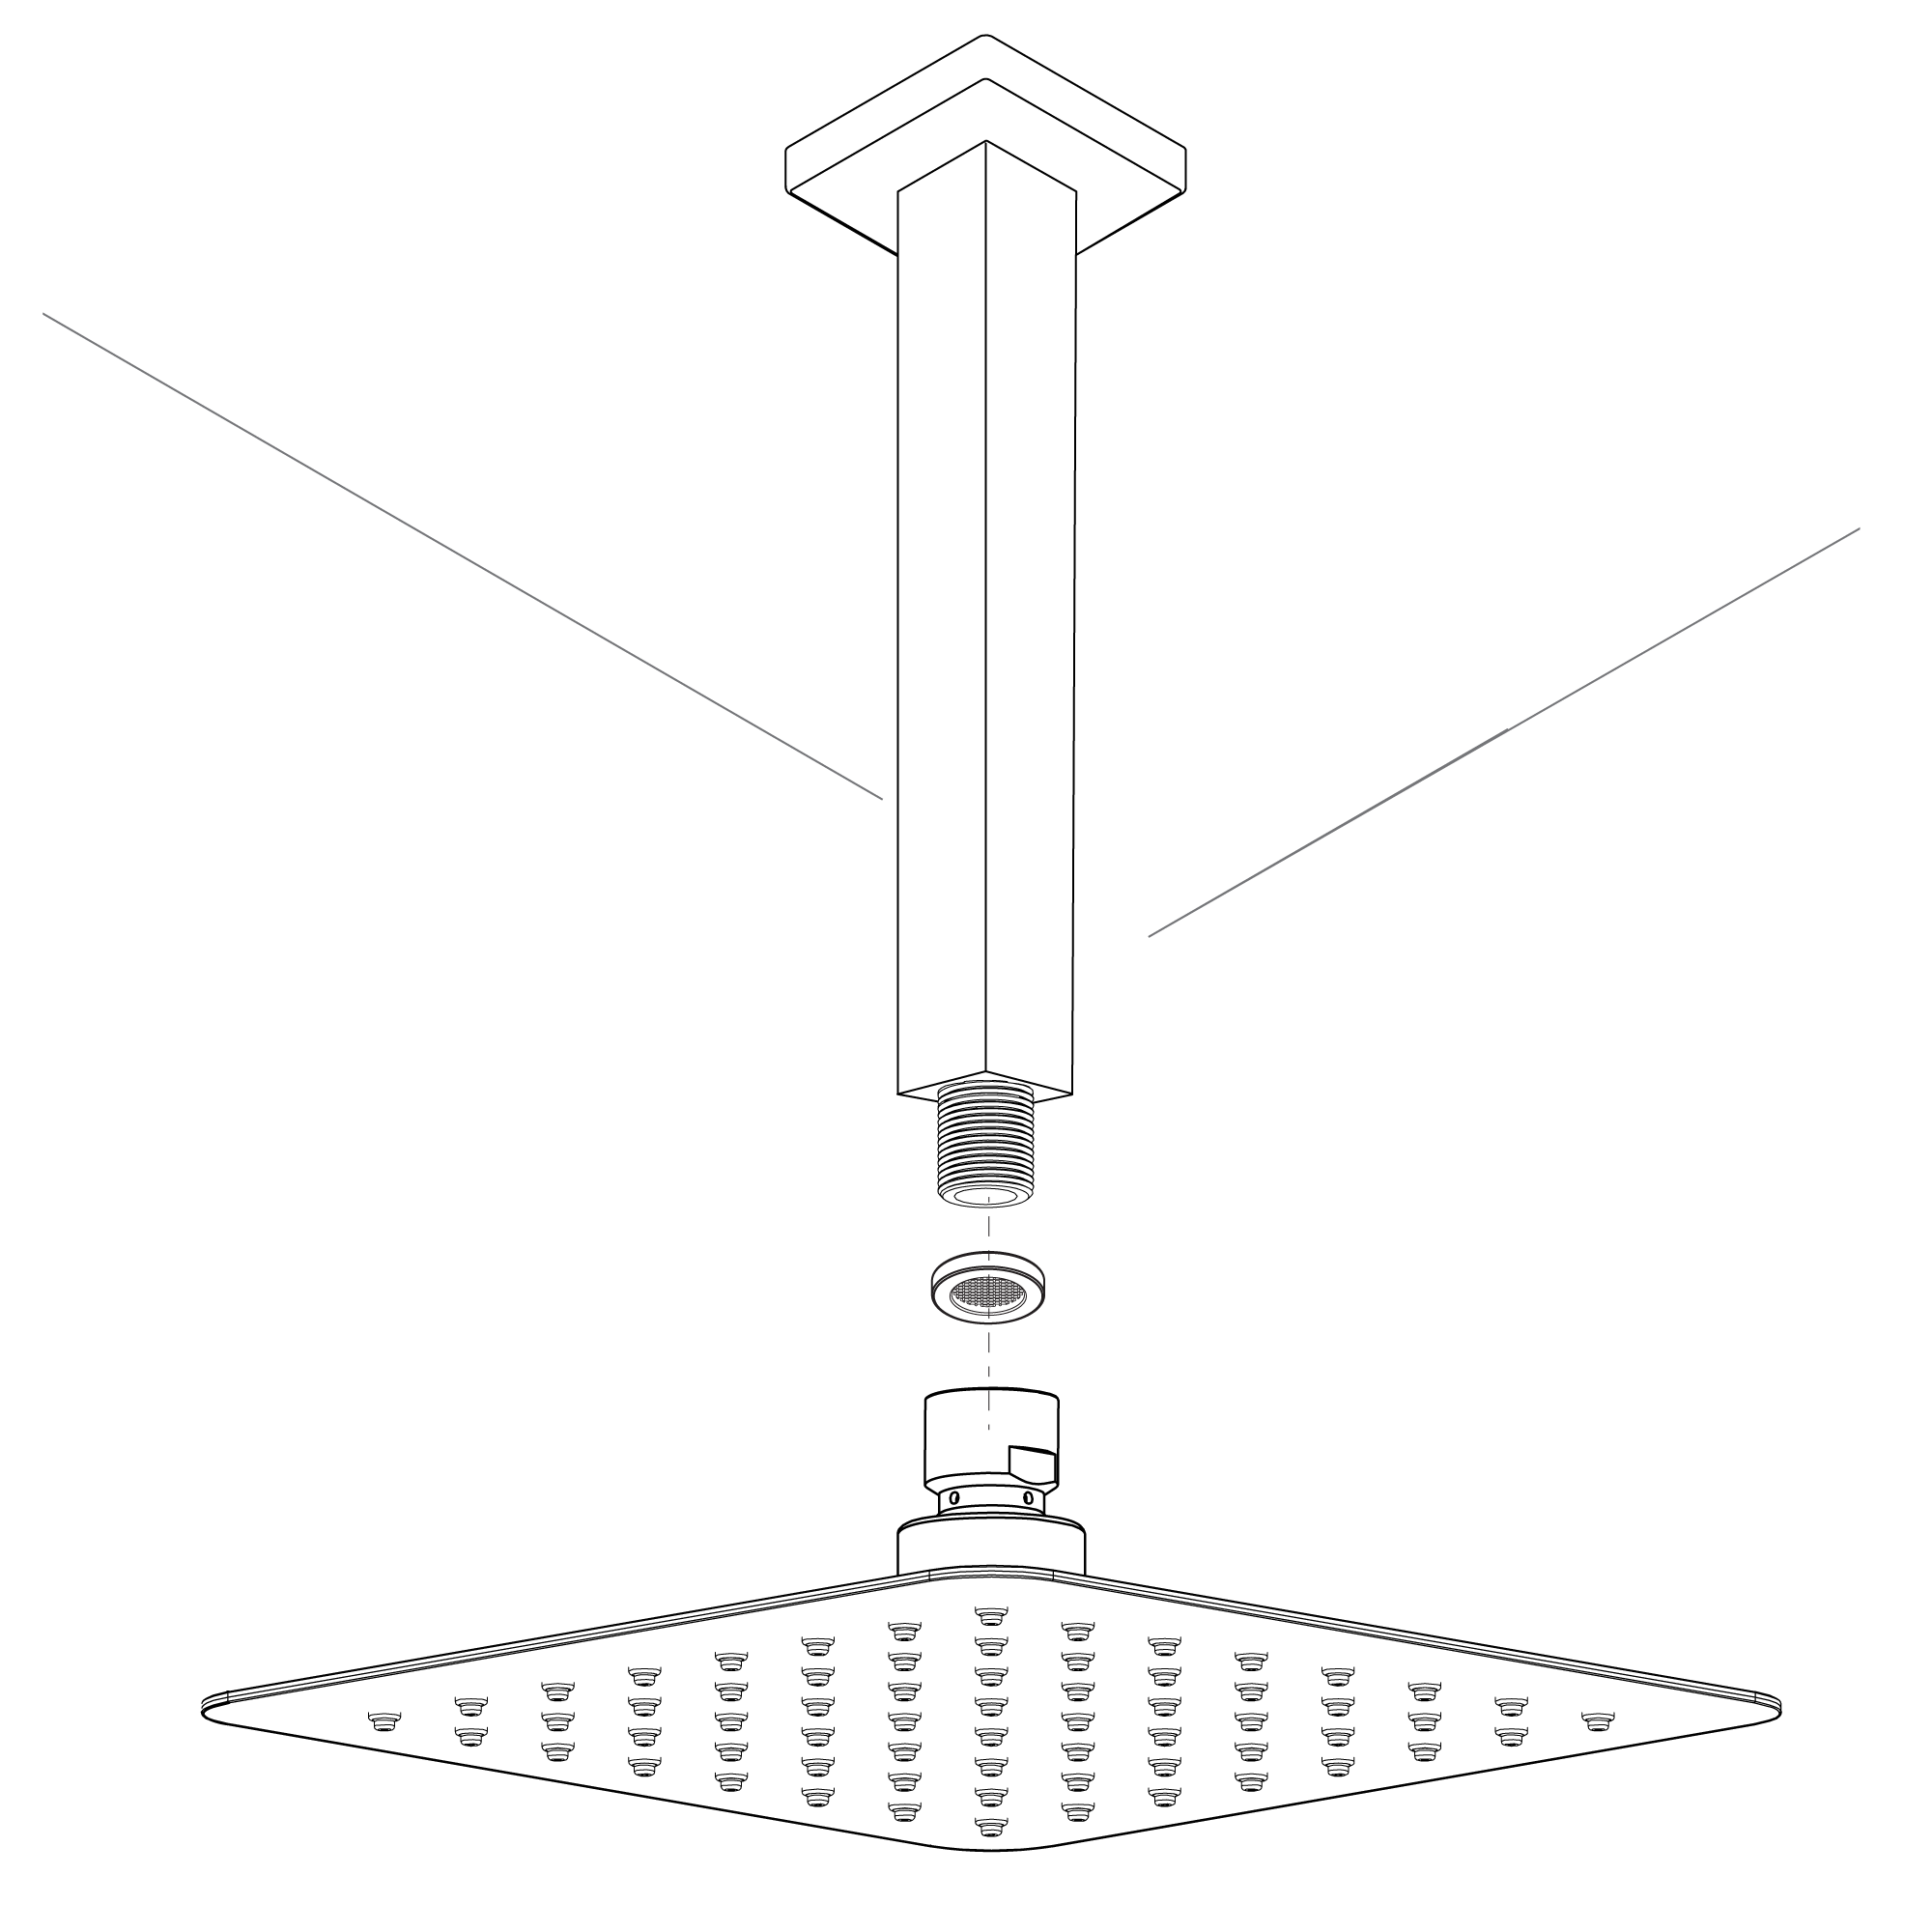
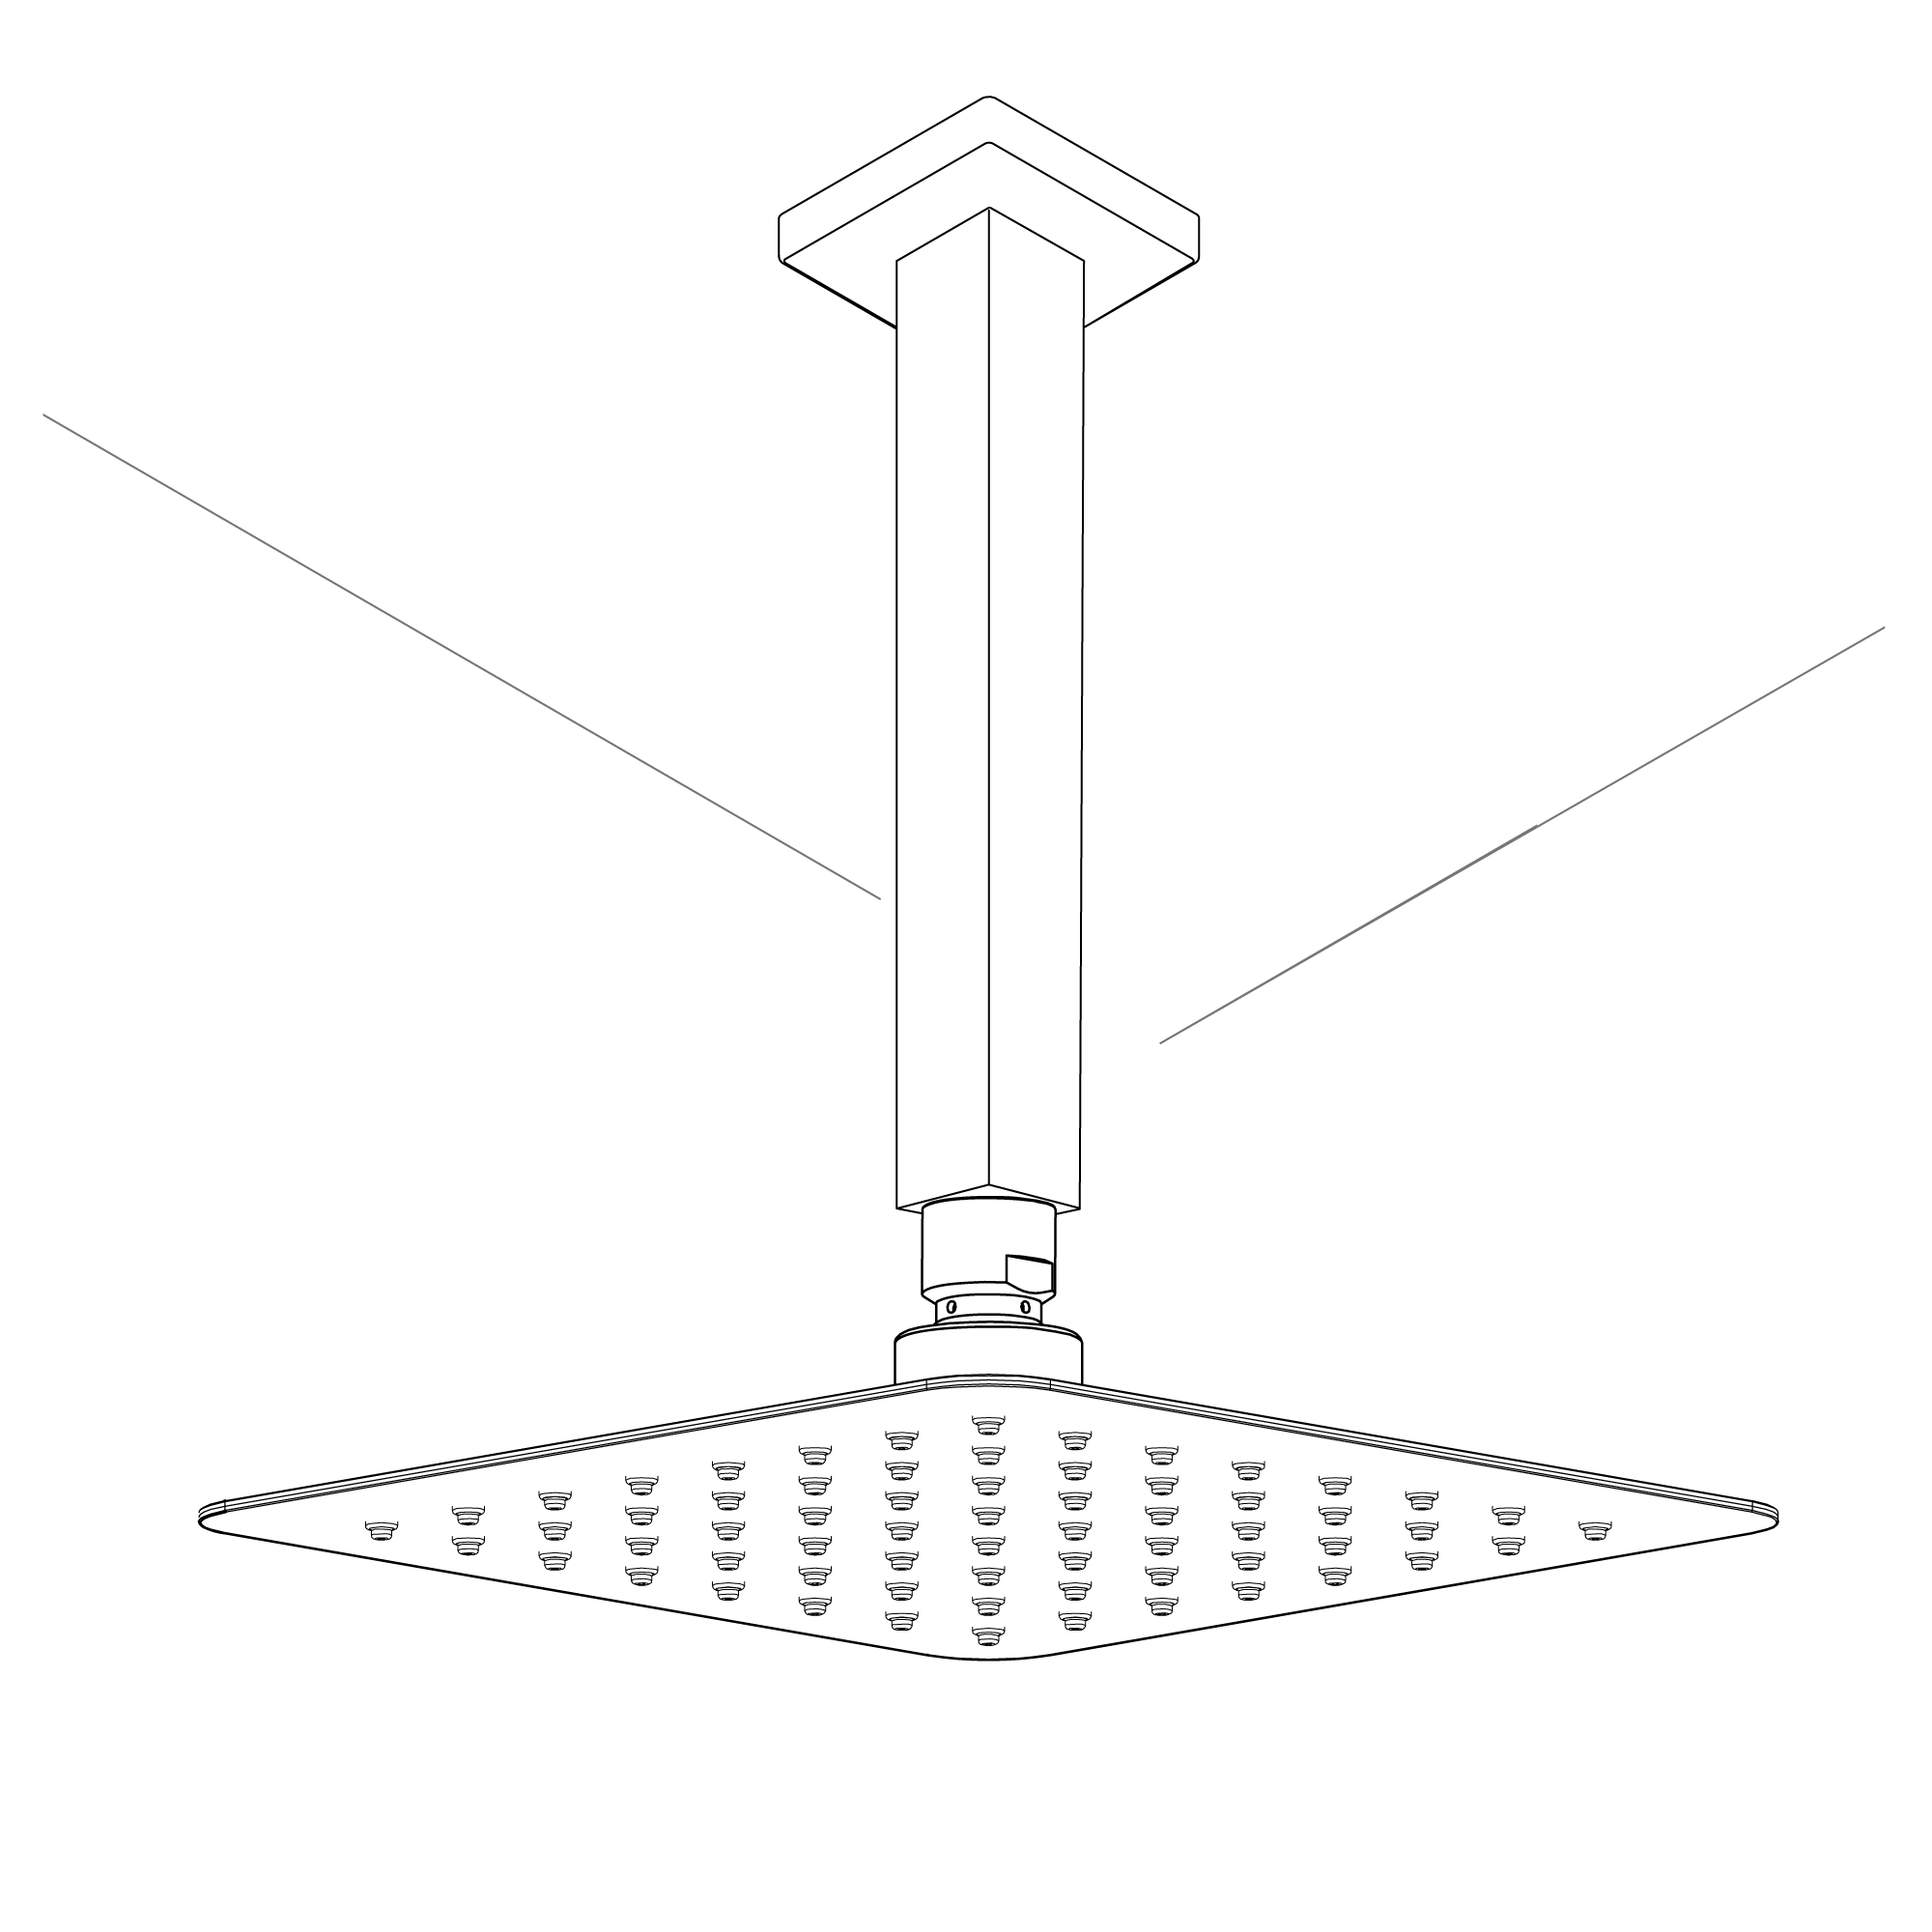
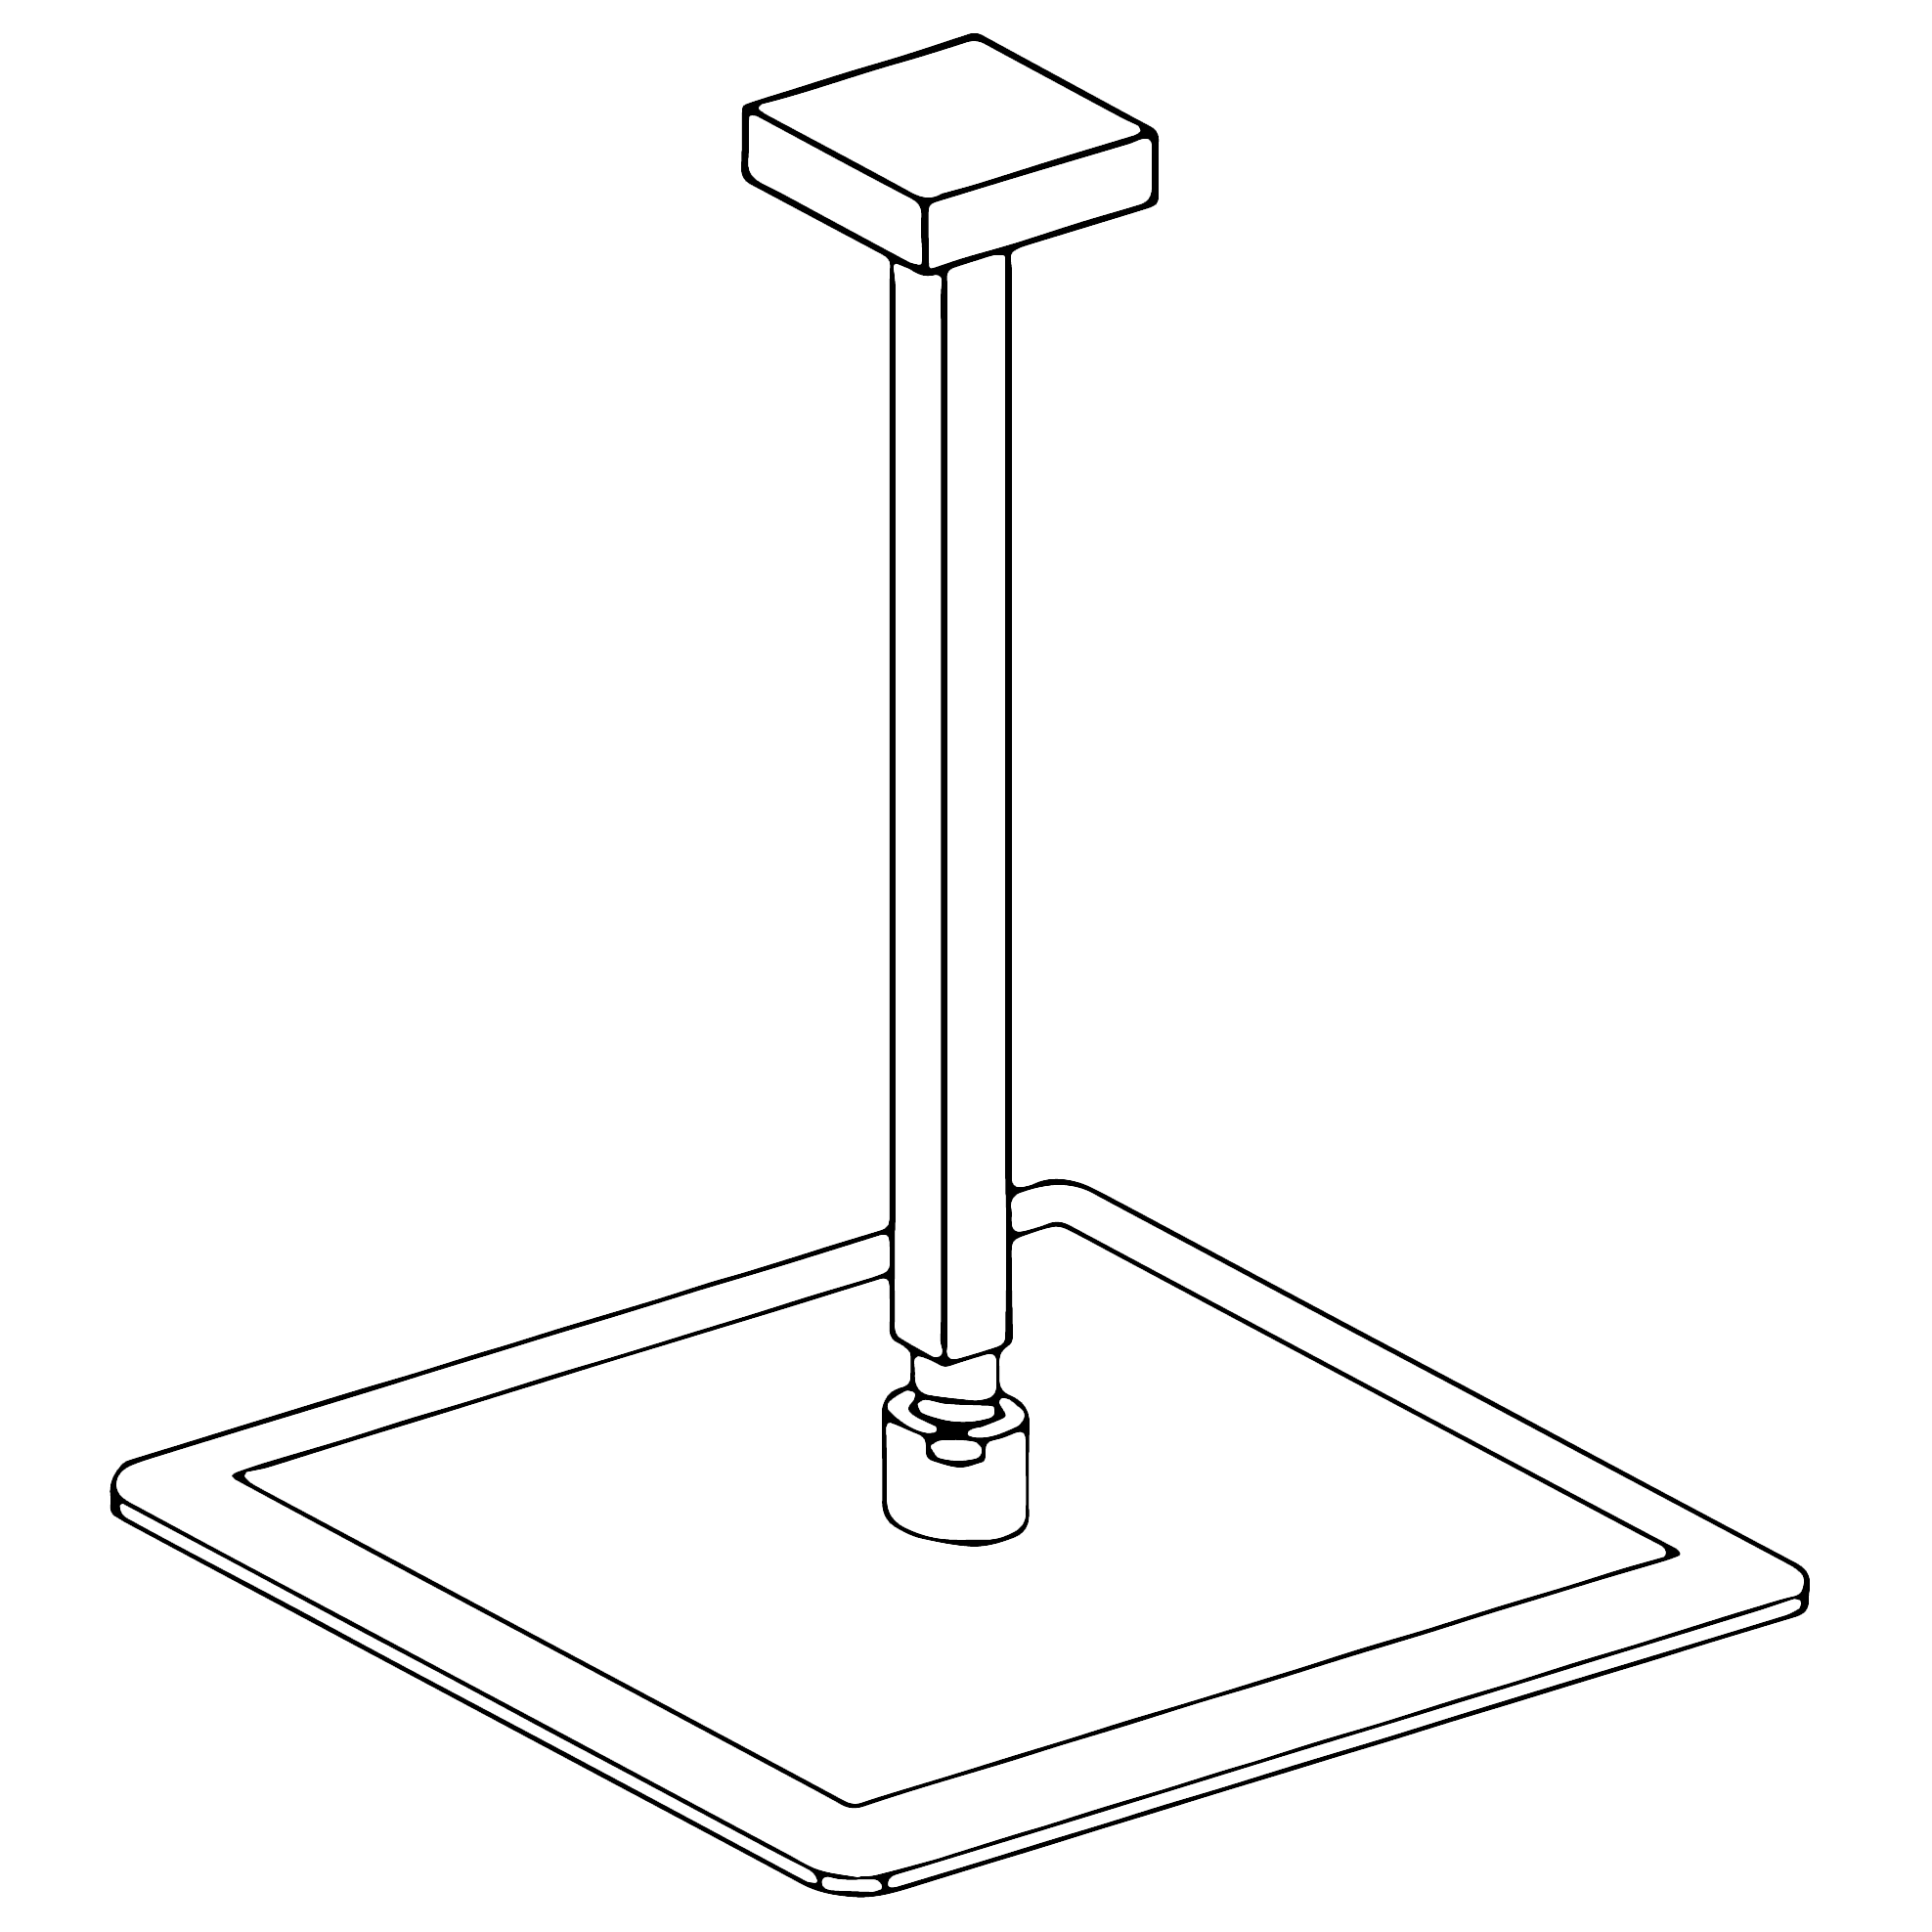
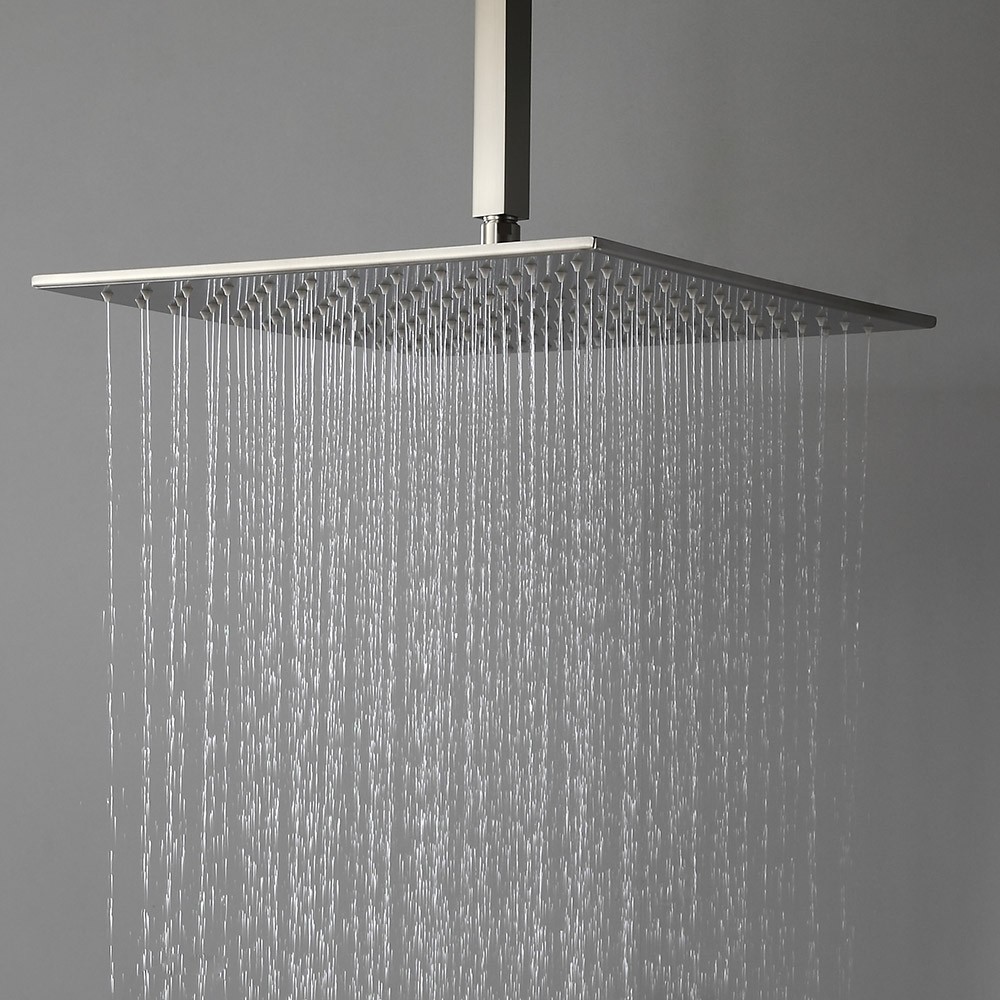
Ceiling Mount Shower Head Installation Instructions
Step 1:
Step 2:
Step 3:
Step 4:
Step 5:
Step 6:
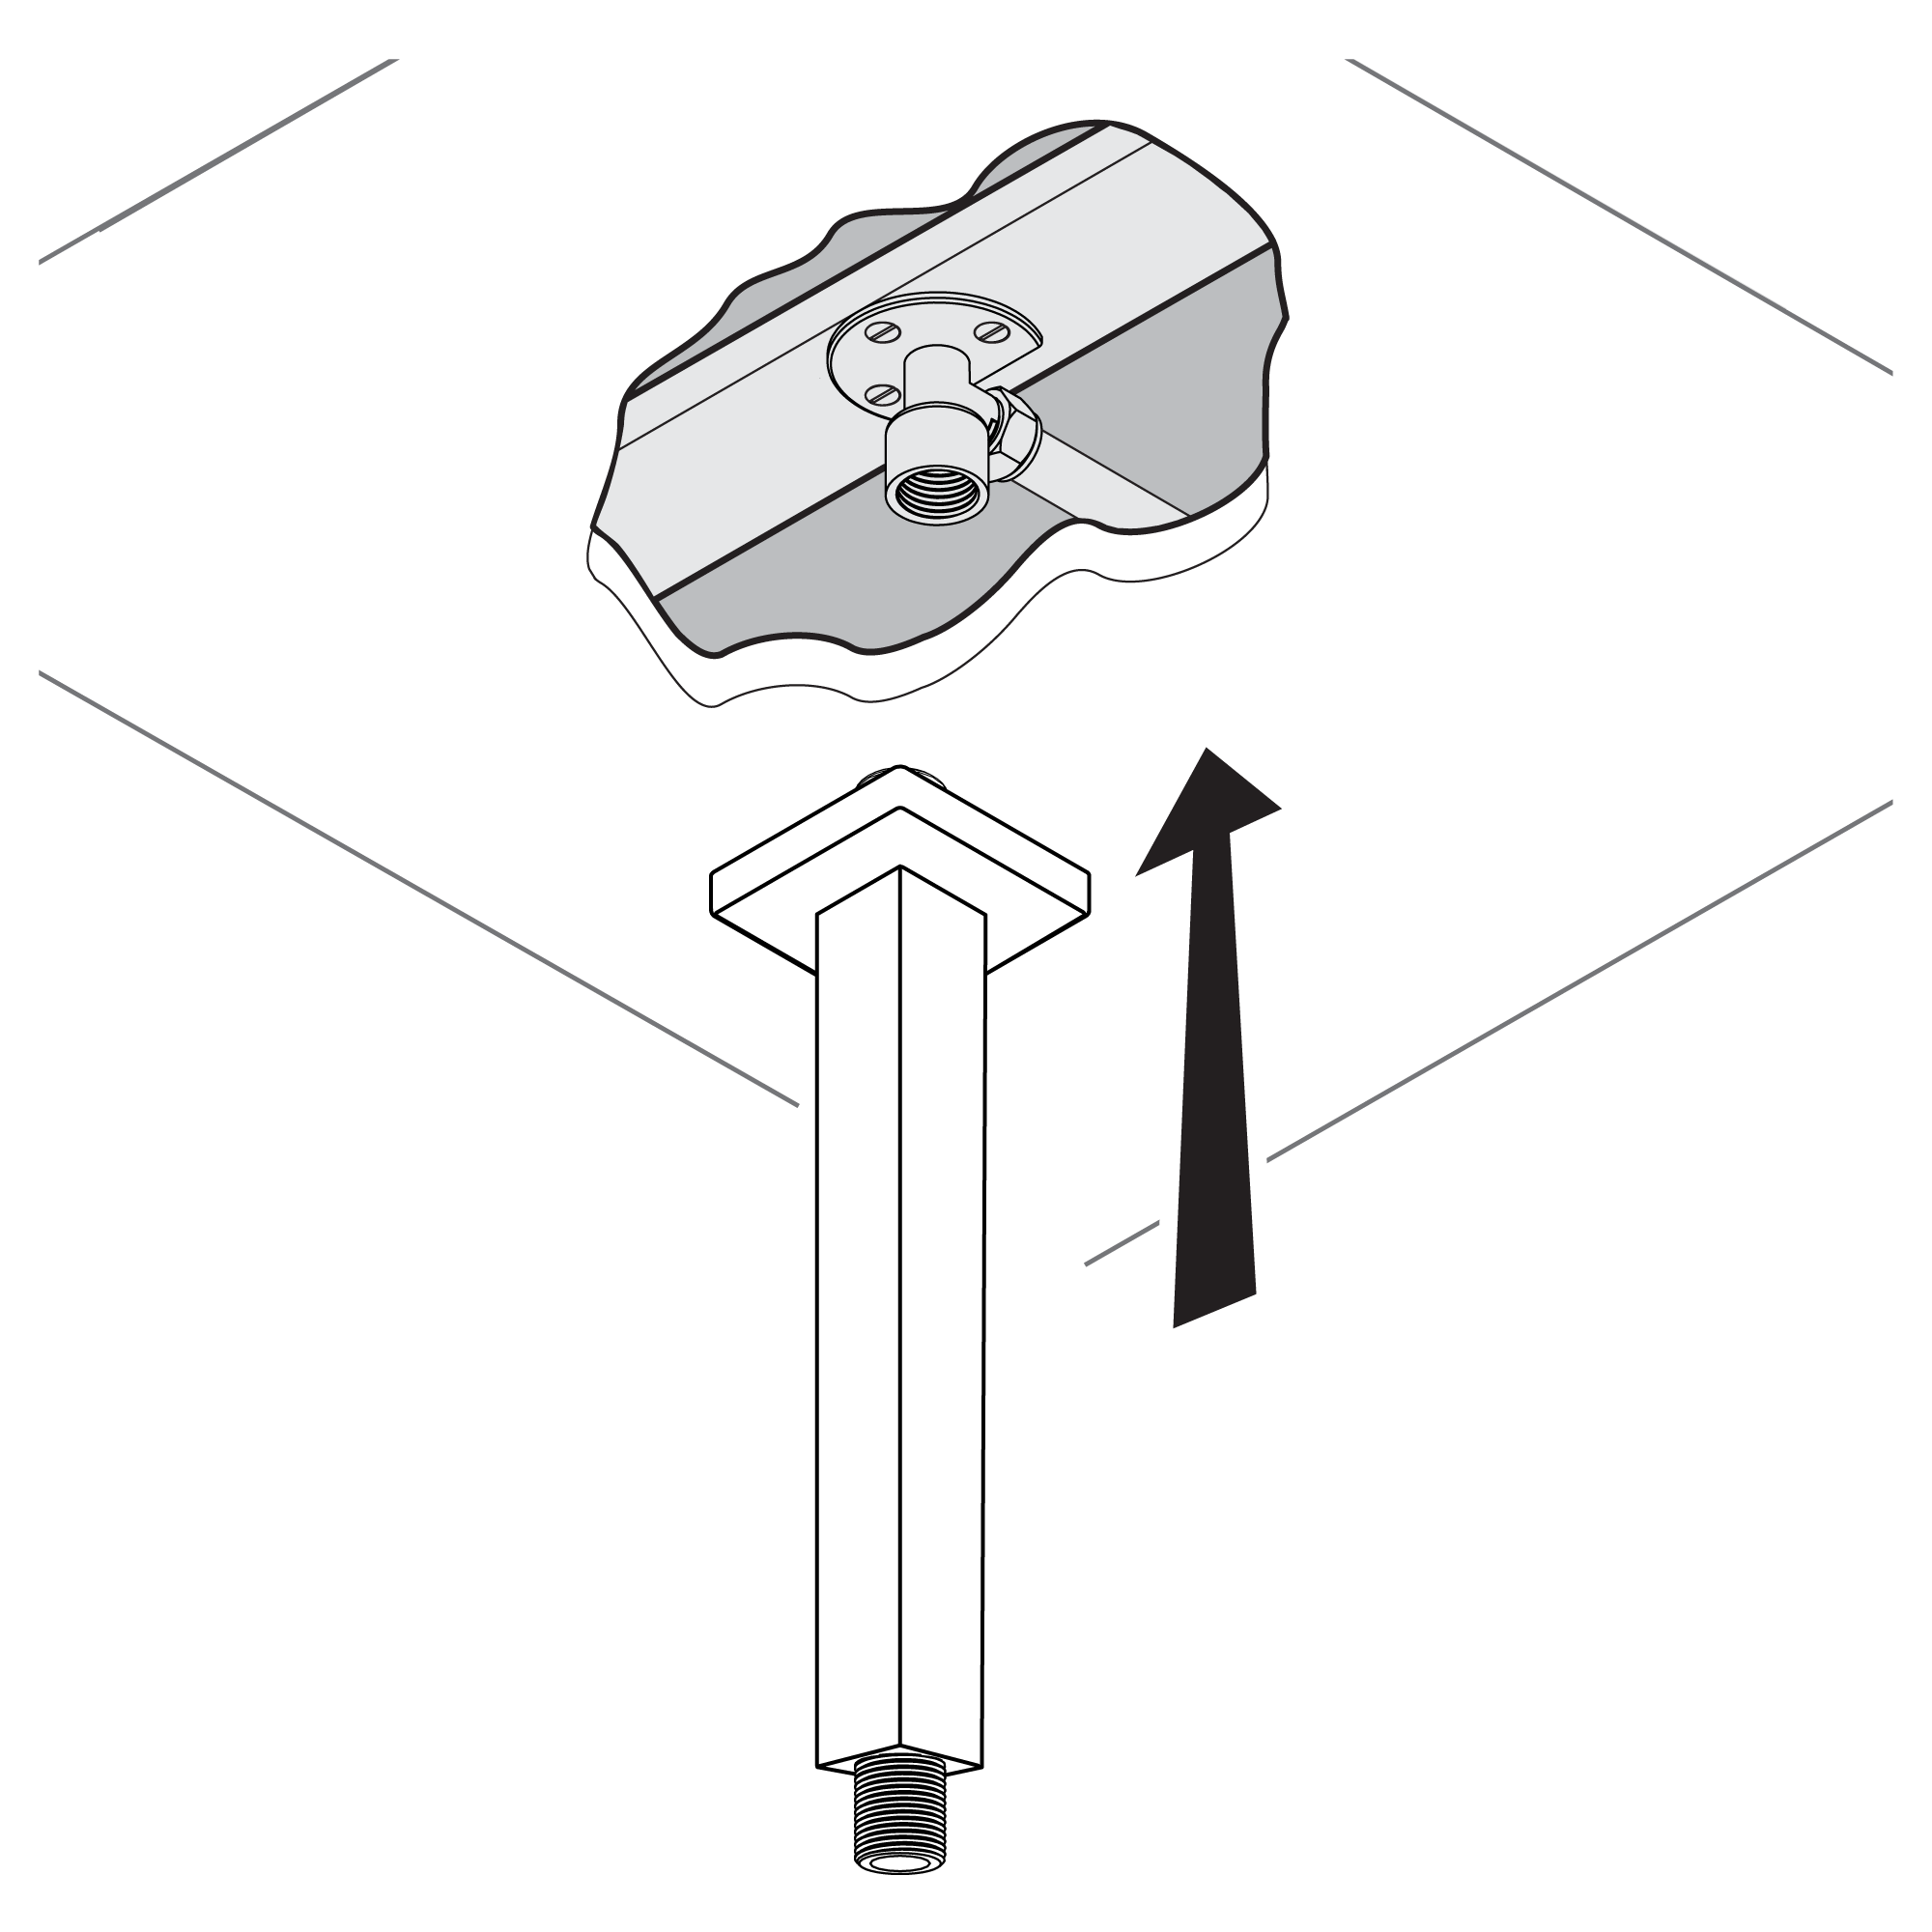
Step 1: Take Out the Old Shower Head You can easily remove it by hand, but depending on how long the rain showerhead has been installed, you might need to use an adjustable wrench. Hence, if you find it difficult to remove, rotate the showerhead with an adjustable wrench in a counterclockwise direction to unscrew it.
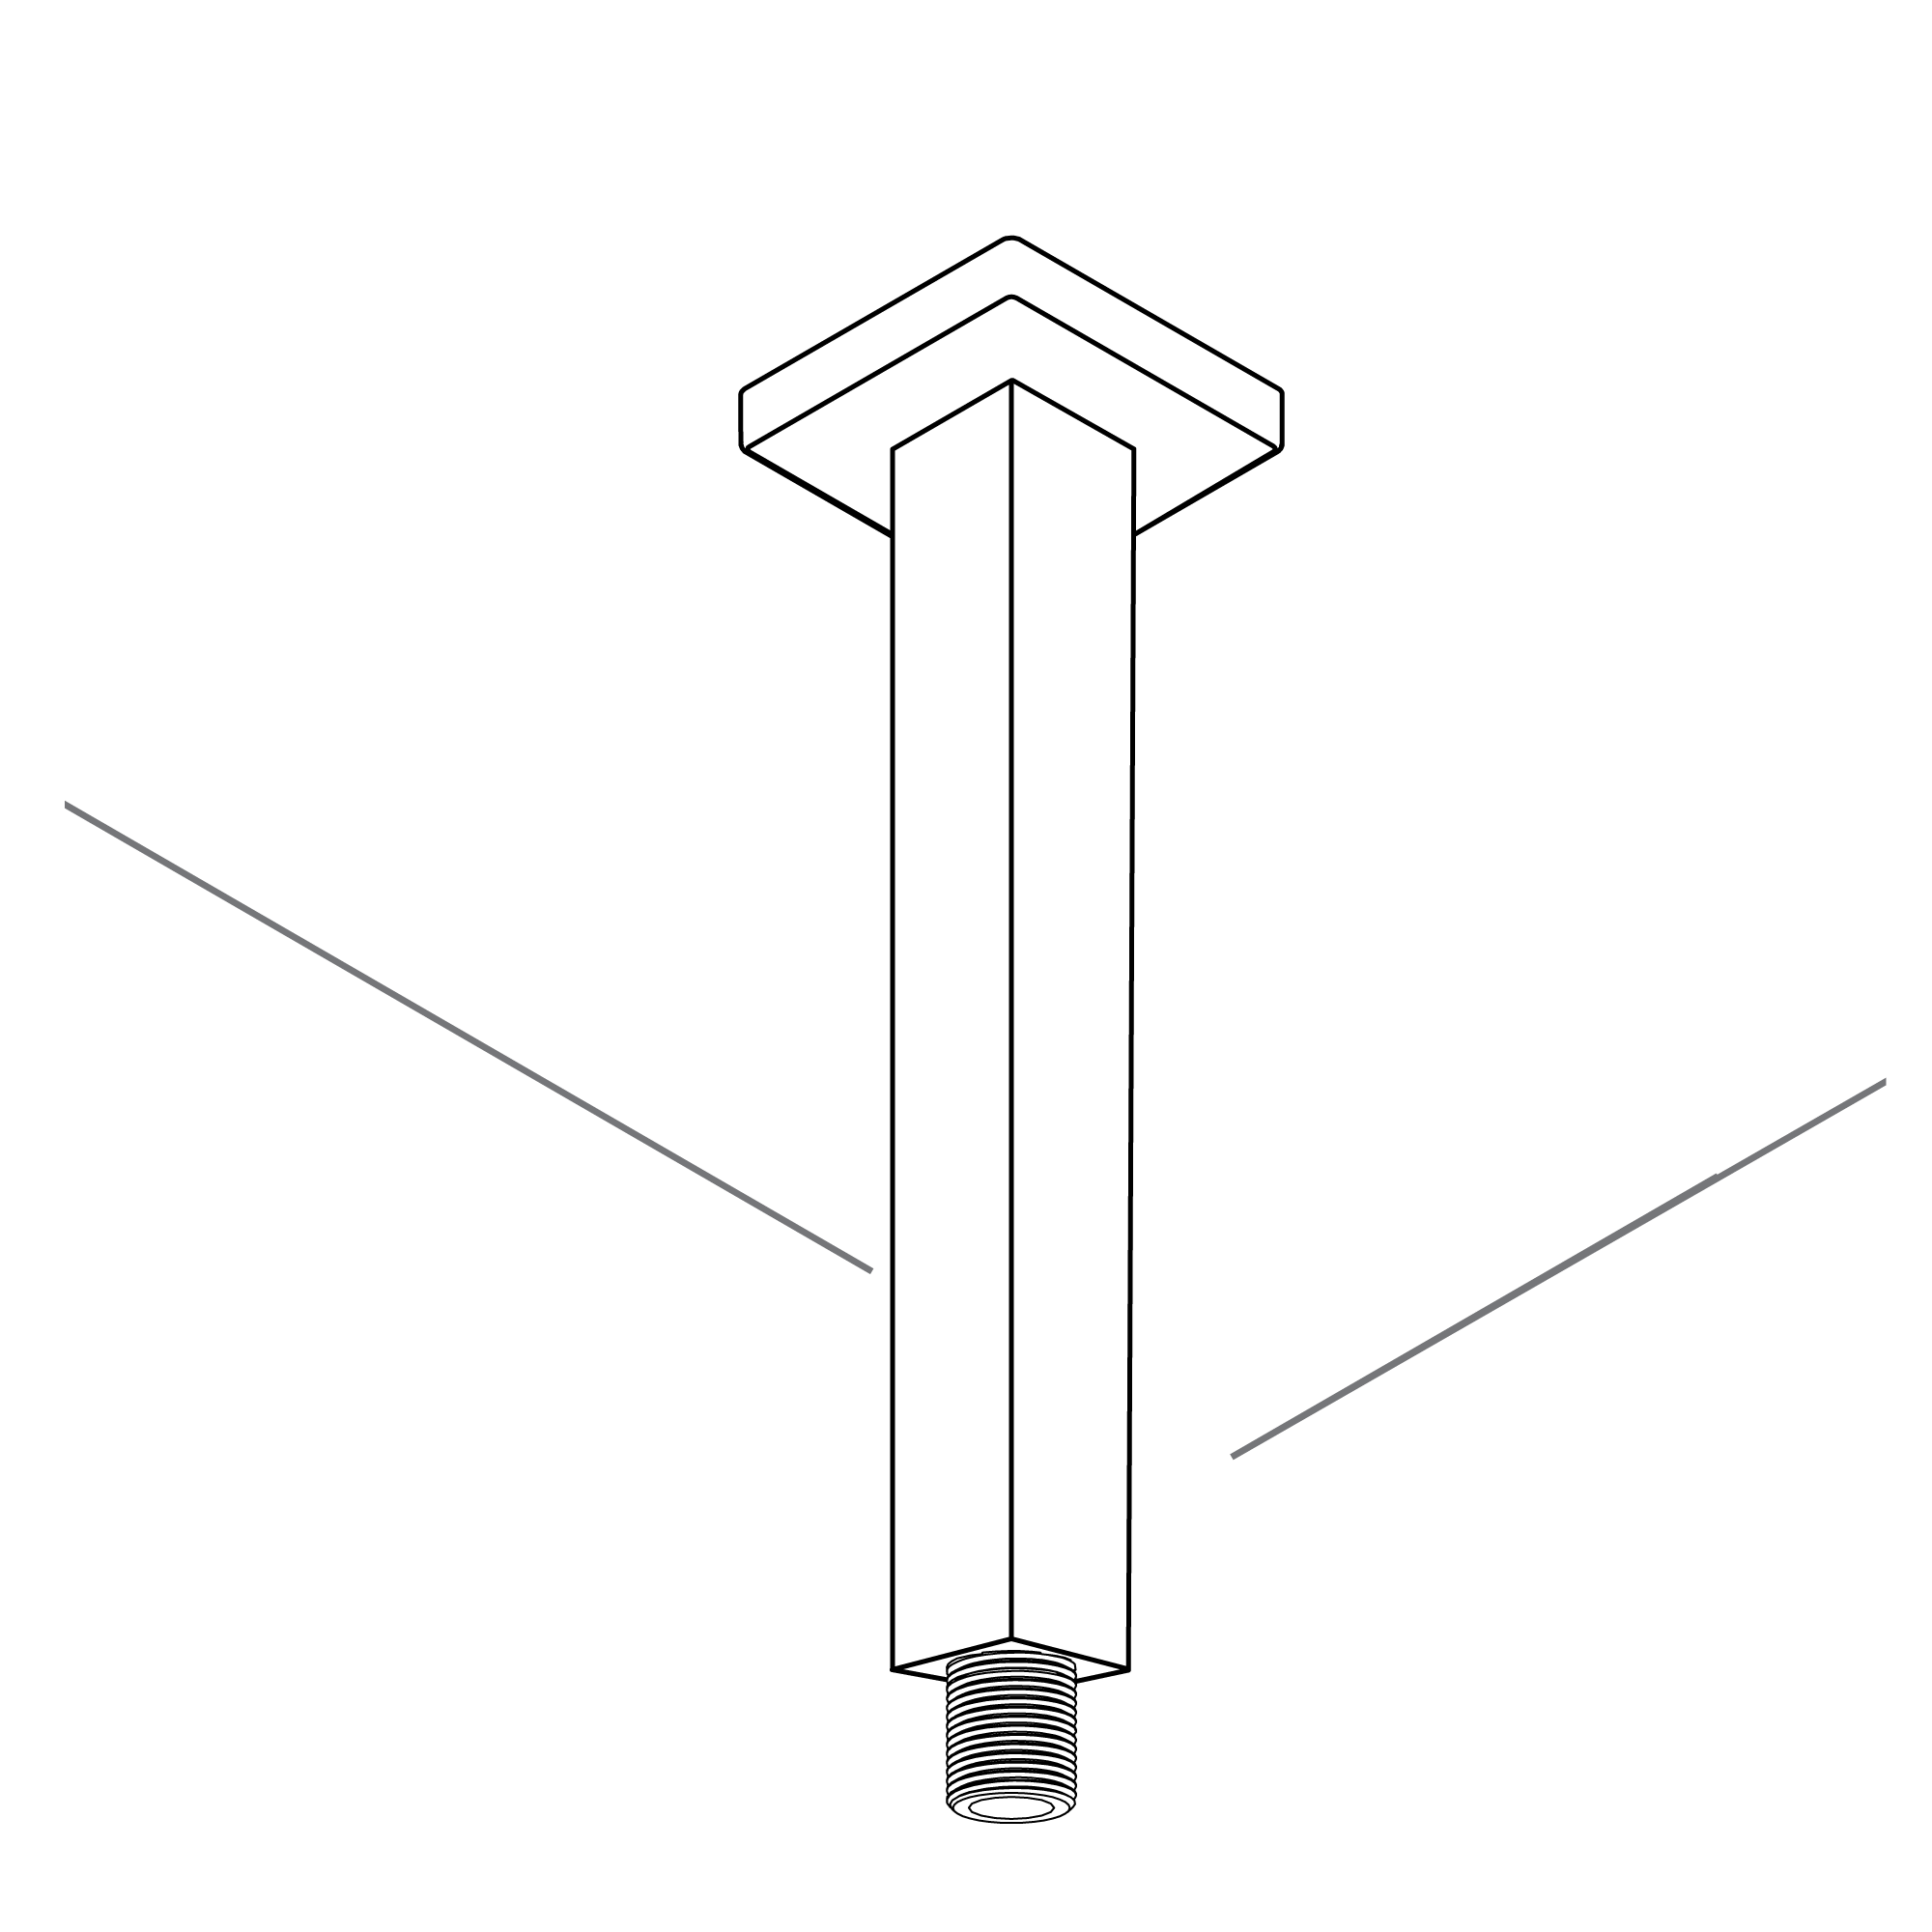
Step 2: Keep the Shower Arm Clean and In Good Shape After you have removed the head, check the shower arm threads for any debris and old Teflon tape. If you find any, remove it and clean them off thoroughly. It’s best to use a microfiber cloth when cleaning the thread because it removes Teflon tape perfectly and works great to pick up tiny grits. Once you’re done cleaning, check if it is corroded or leaking. For damaged threads, it will be best you replace it entirely so you can have a comfortable shower experience any time.
Step 3: Time to Add New Teflon Tape Since you have removed the old Teflon tape, you have to replace it with new ones. The reason is that this tape helps to protect the shower from leaking after installing the showerhead. Now apply the new Teflon tape about 3-5 turns on the thread and tear the end part. Use your hands to smooth it out to keep it leveled to the thread. Keep in mind that when applying the tape, you should go in a clockwise motion so that it doesn’t come off when you attach the head in the same direction.
Step 4: Connect the Showerhead As said earlier in the tools needed, we’re using the rubber sealing washer that comes with the showerhead. This tool helps to make the showerhead stay watertight and secured on to the thread. Ensure you place it properly before installing it. After that, reconnect the shower head and tighten it down with your hands. You can employ a chair or ladder to make things easier for you.
Step 5: Tighten the Showerhead On To the Thread You will need to get the adjustable wrench handy to tighten down the shower very well. But make sure you wrap the threads with a terry cloth, so it doesn’t damage the finish when tightening the showerhead. Once you have done that, now use the adjustable wrench to tighten down the showerhead. However, don’t over-tight or force it so that it’s easier to remove in the future.
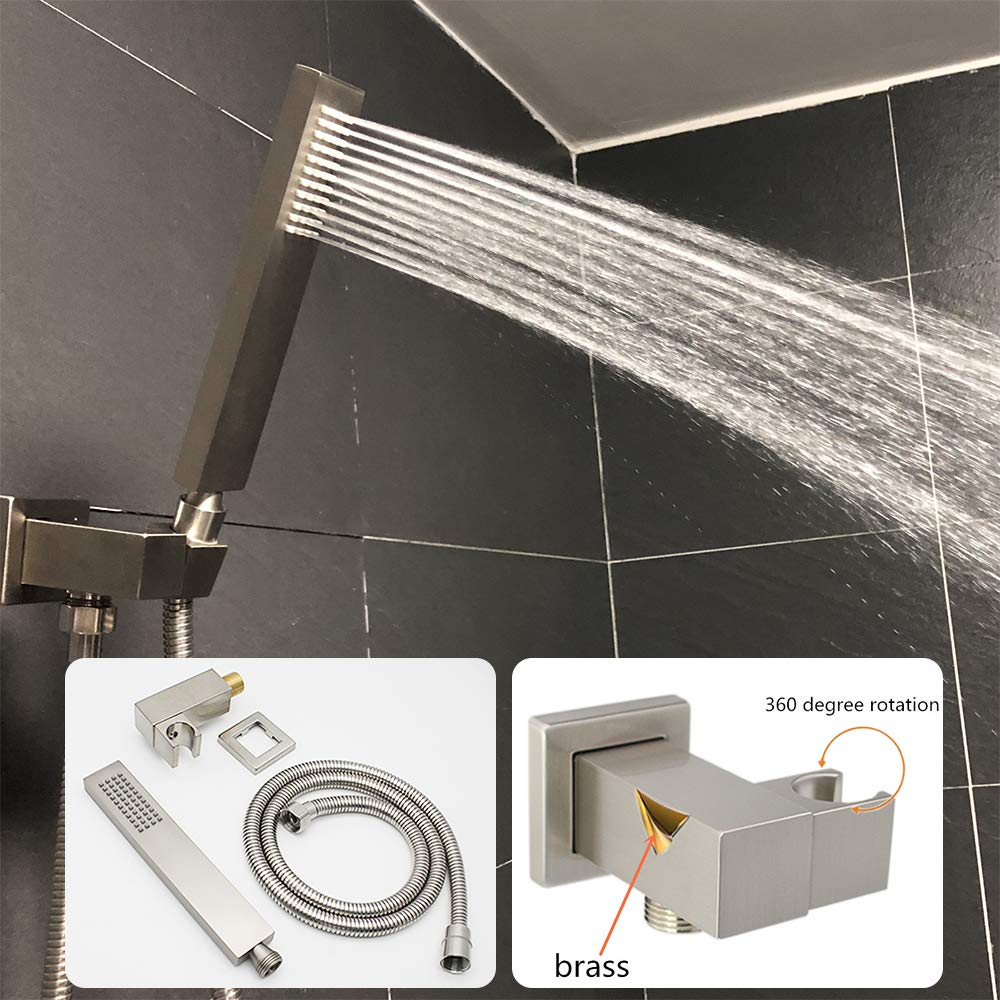
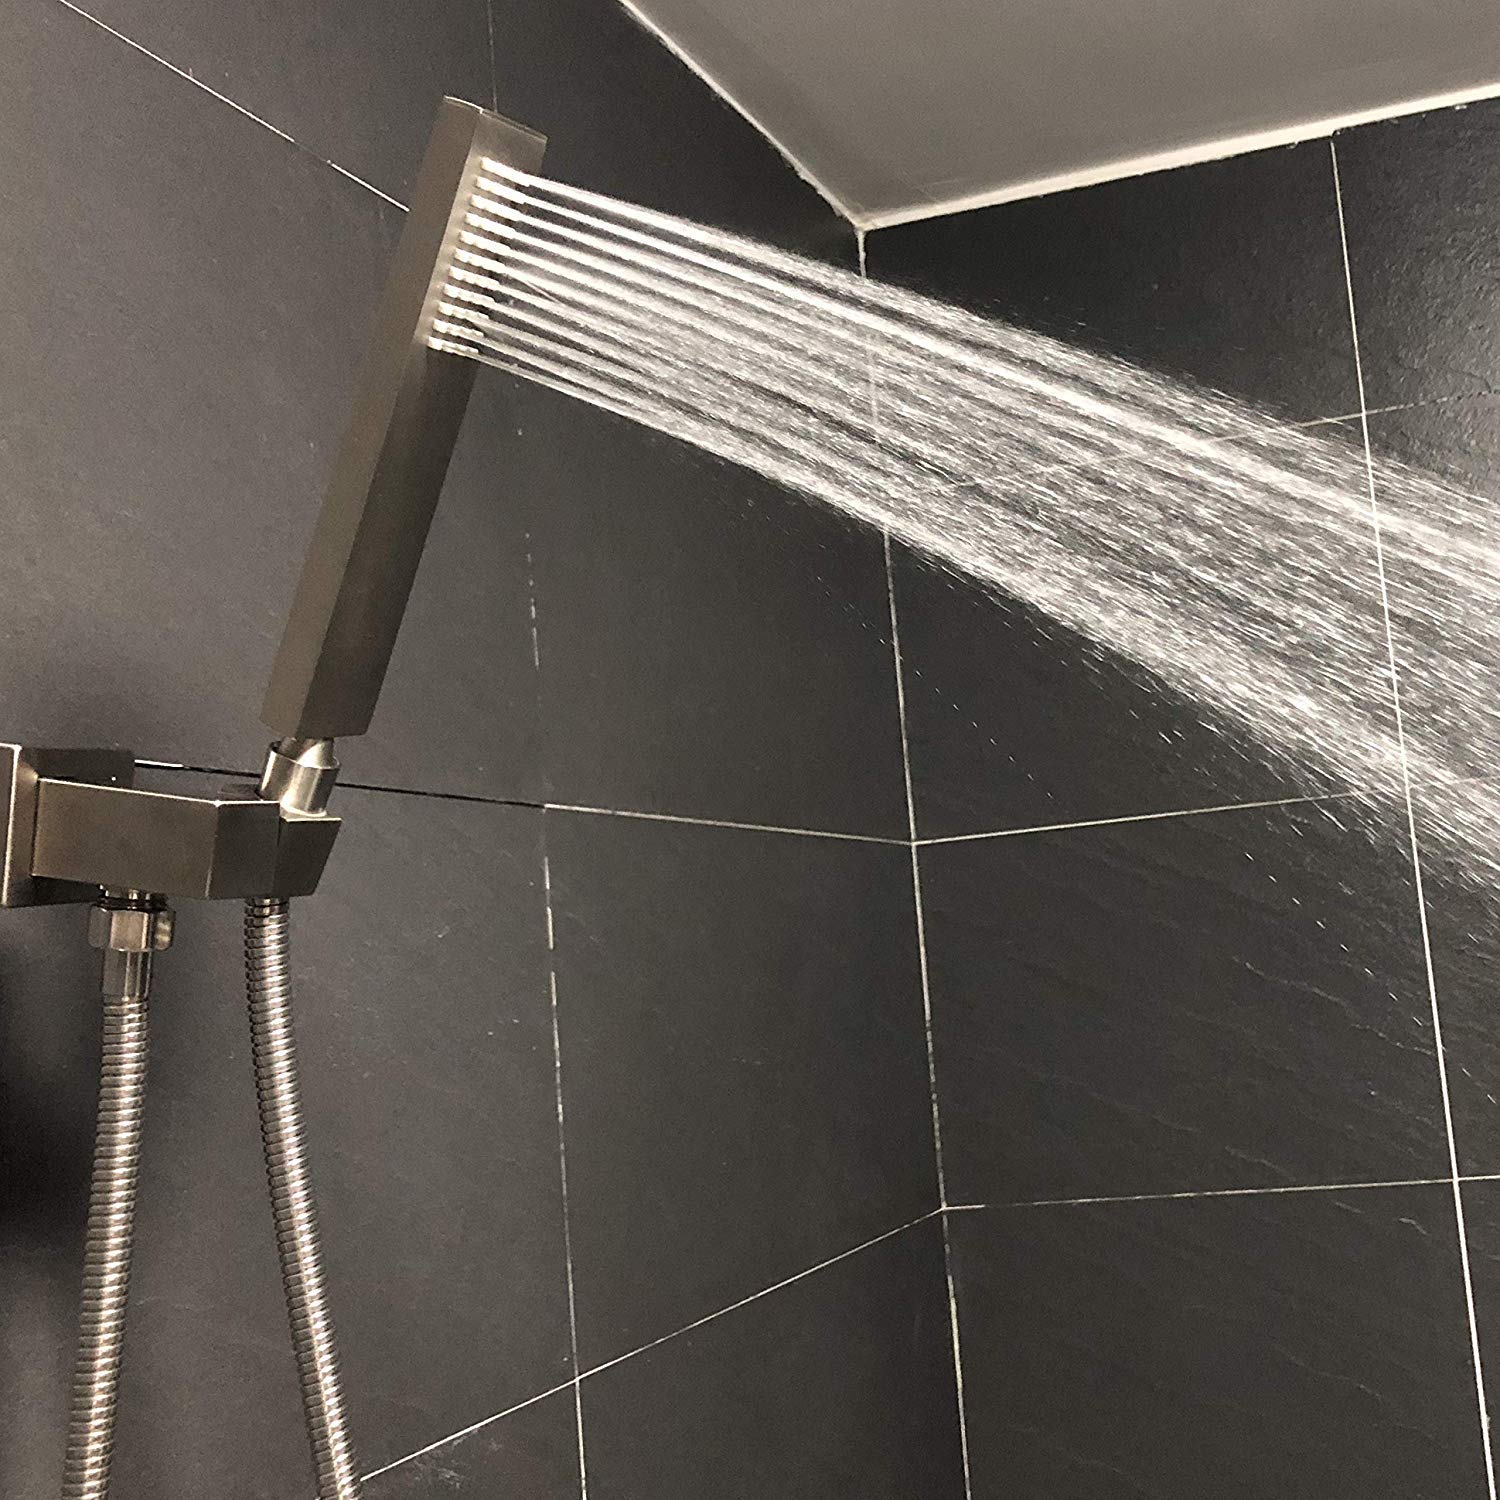
Hand Held Shower Installation Instructions
Step 1:
Step 2:
Hand
Held
Shower
Hand Held Shower
Handheld Shower
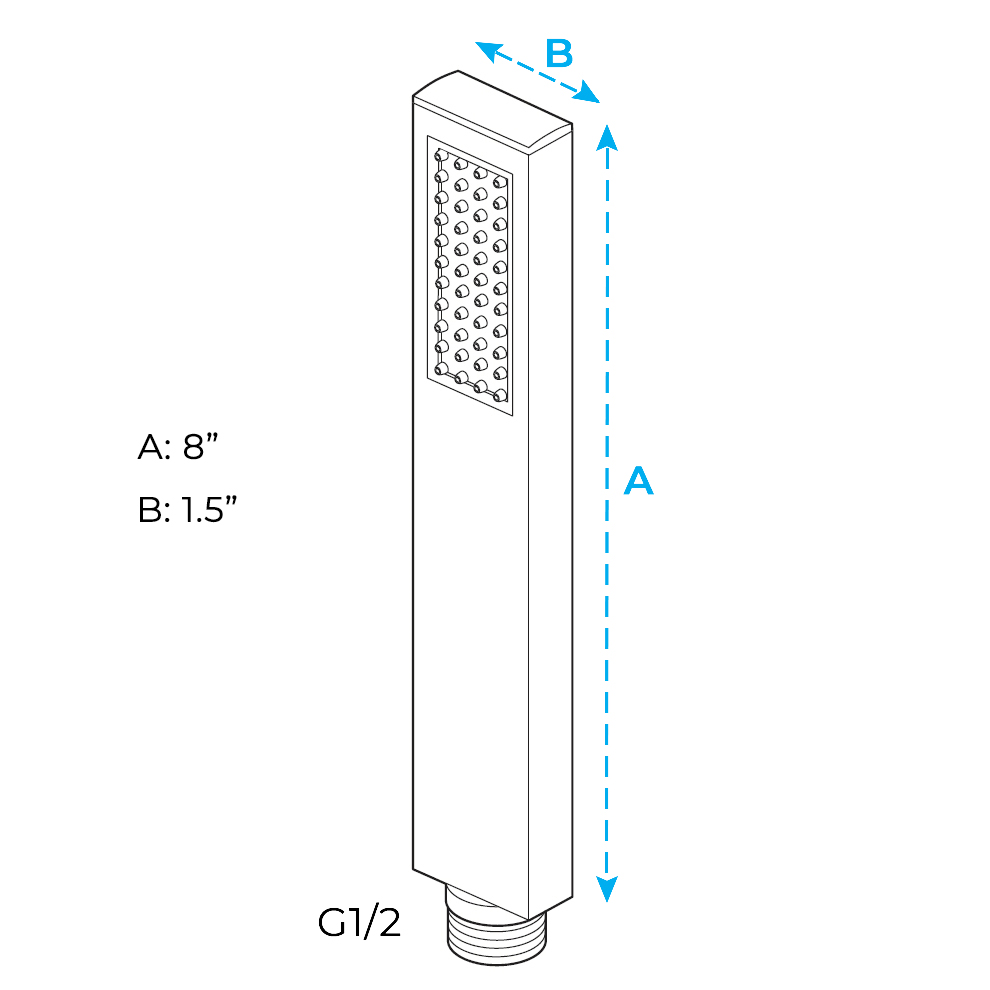
Step 3:
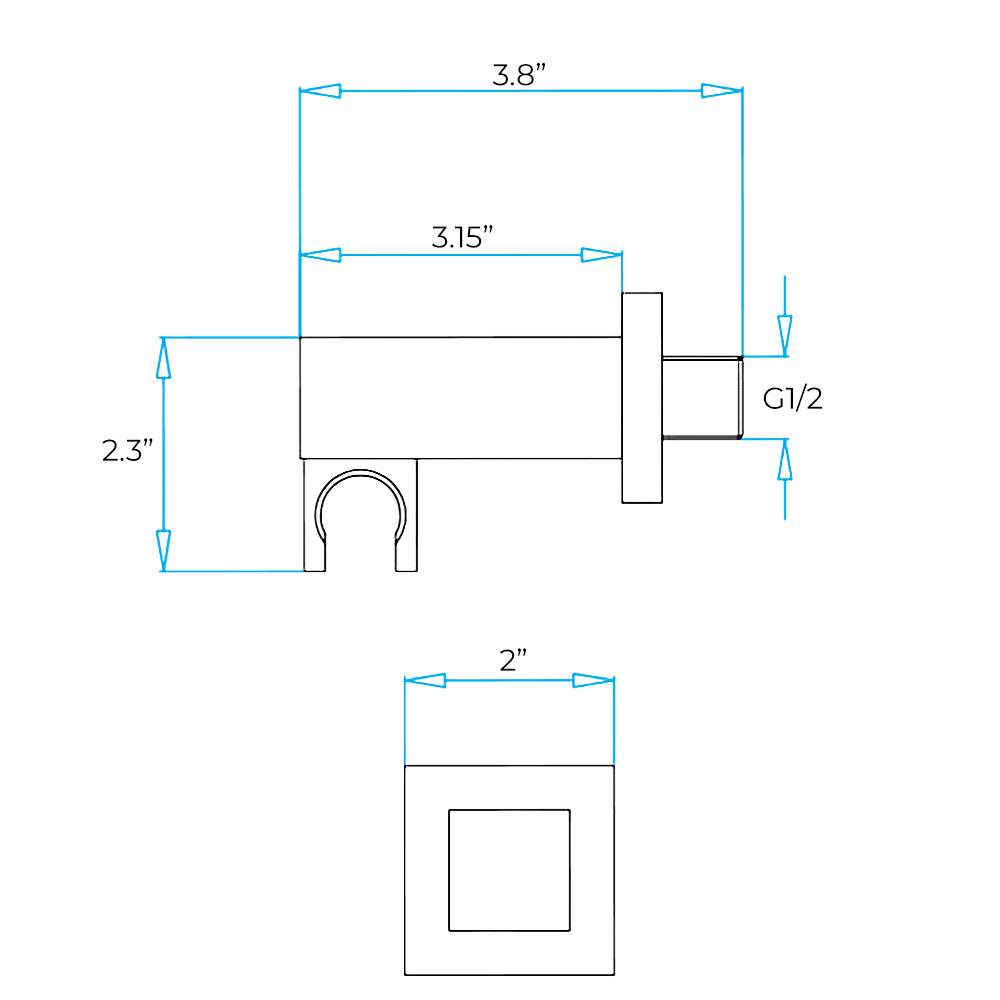
Size:
Handheld Shower
Holder Size
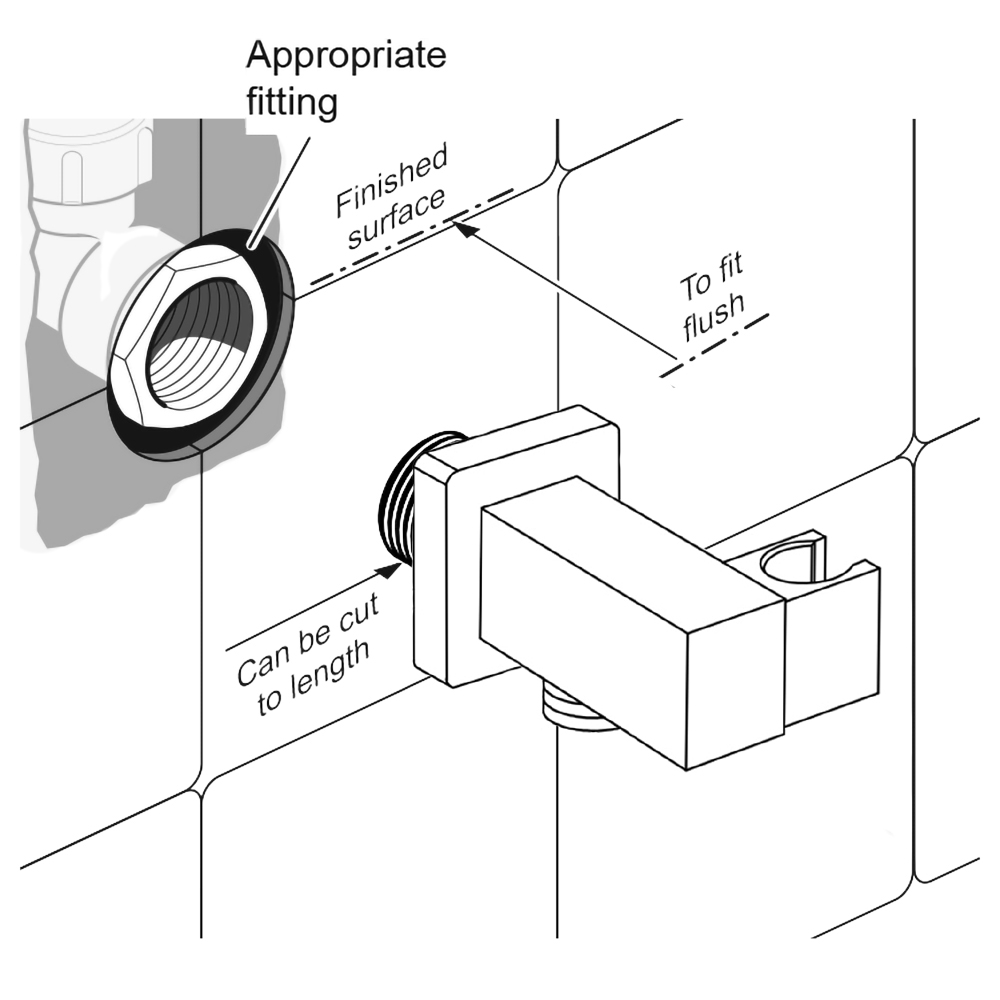
Hand Shower Outlet Installation
• Complete the outlet pipework ensuring it ends in an appropriate 15mm x 1/2" BSP female thread elbow.
Note:
This fitting is not supplied as variations in installations require the selection of a suitable solder or compression fitting.
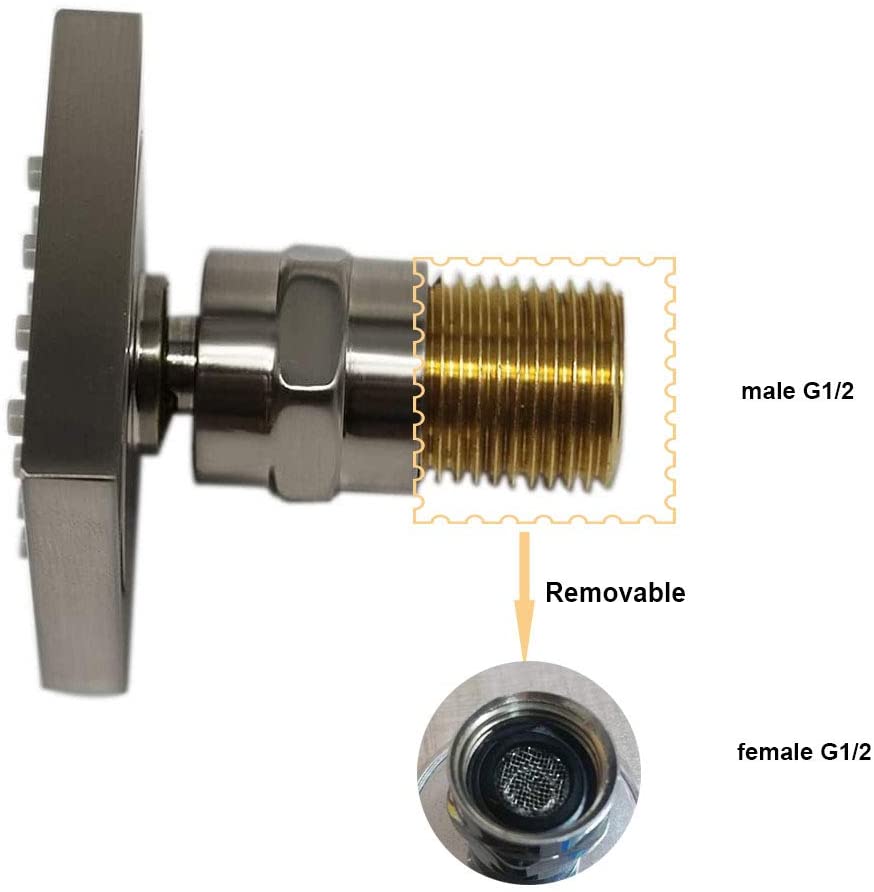
• Install the 'Wall Outlet', thread long male 1/2" BSP into the appropriate female fitting using PTFE tape to give a watertight joint.
Note:
The thread can be cut to size if required. Make sure that all debris is removed from the connector and the section that has been cut is dressed correctly, before installation.
The minimum required water pressure is 0.05 MPa (0.5 bar).
Flow rate 2.5 GPM (9.5 LPM).
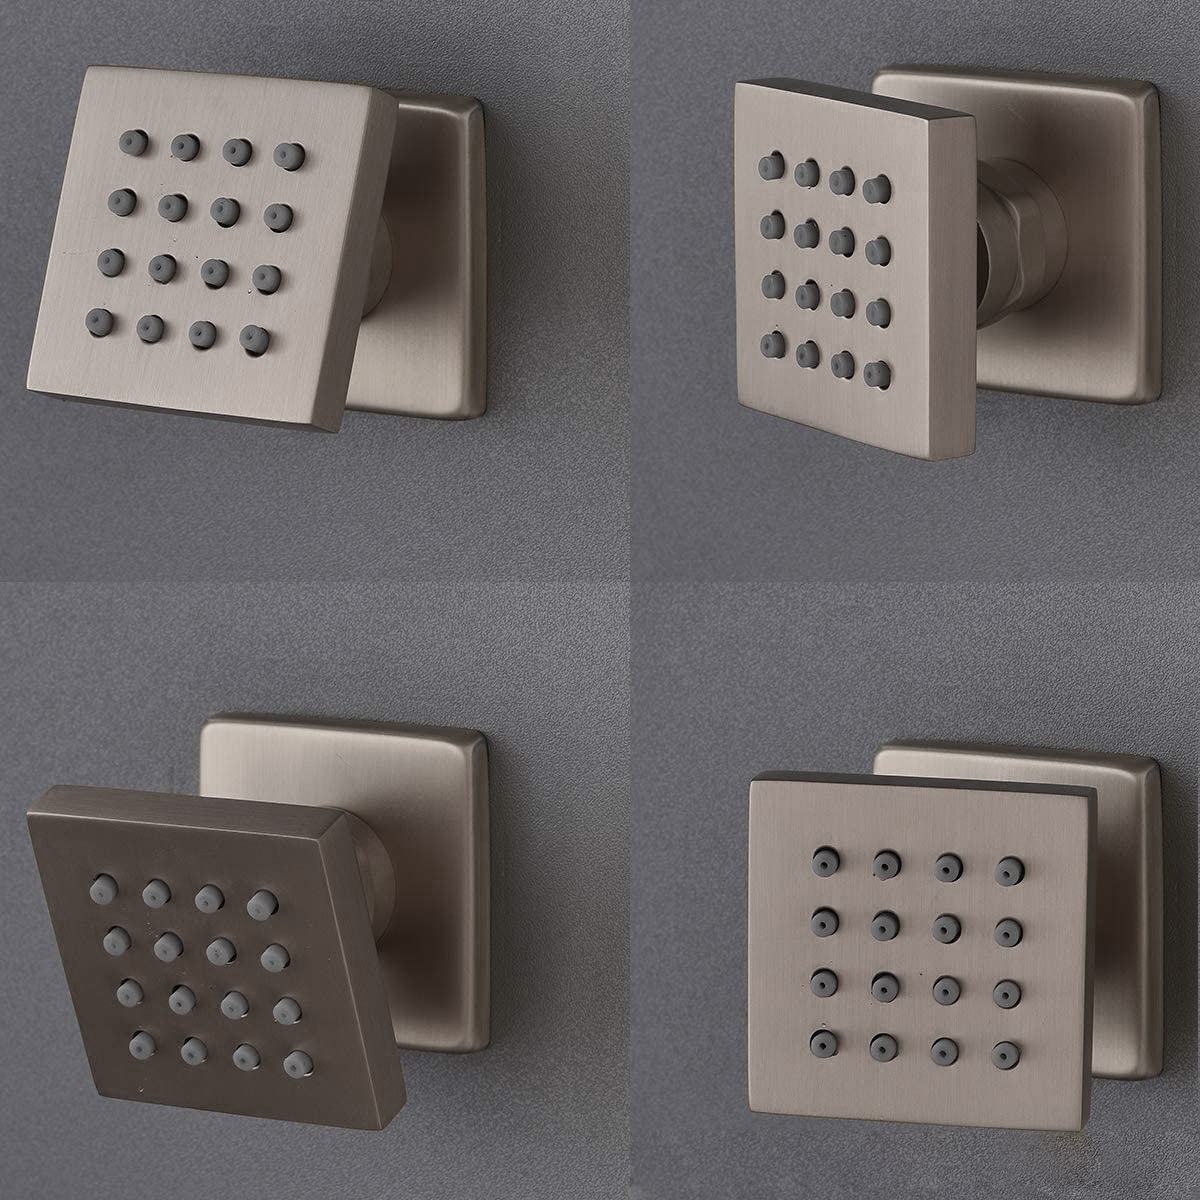
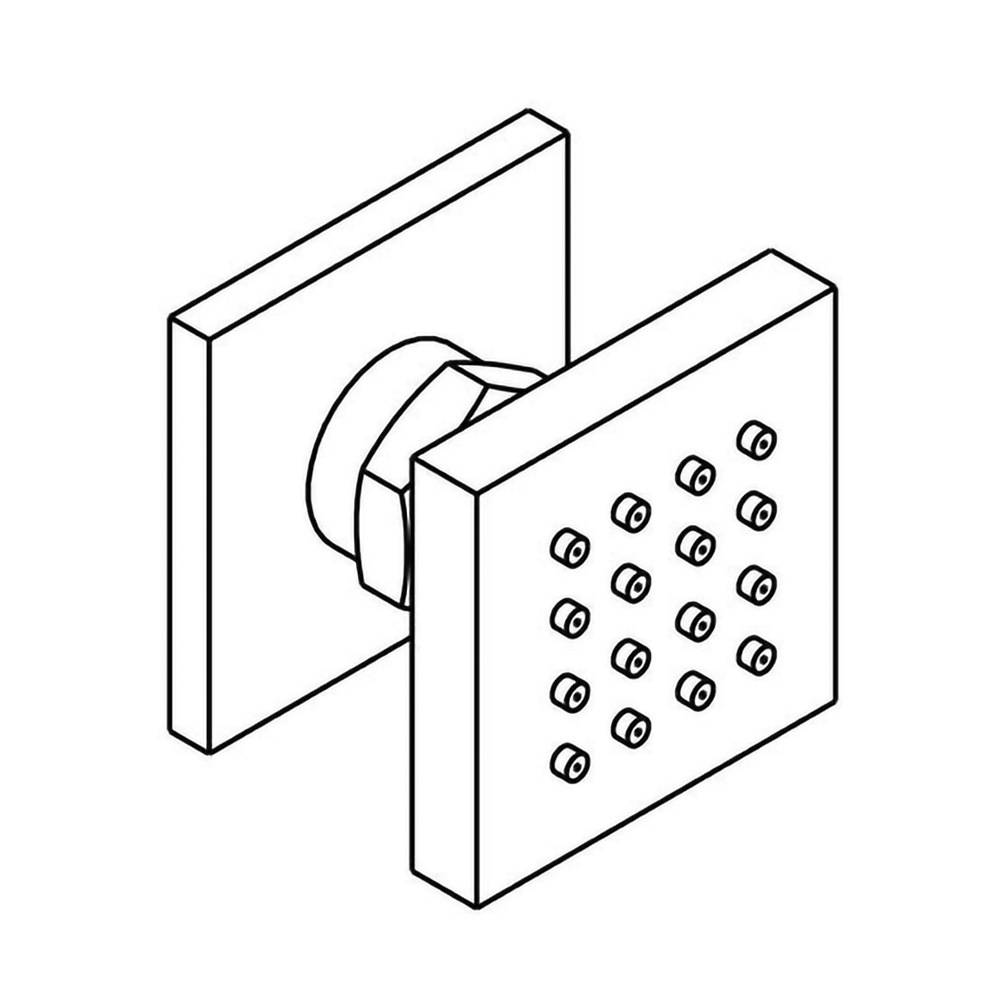
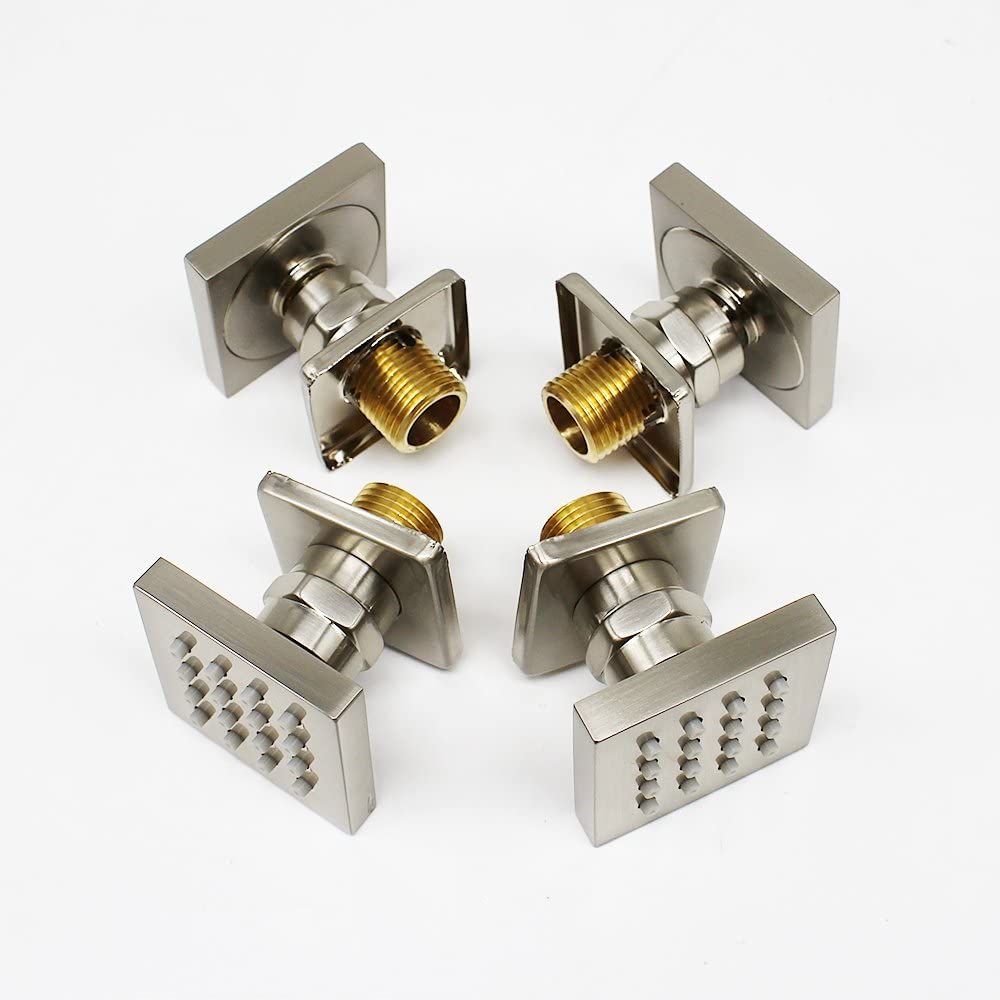
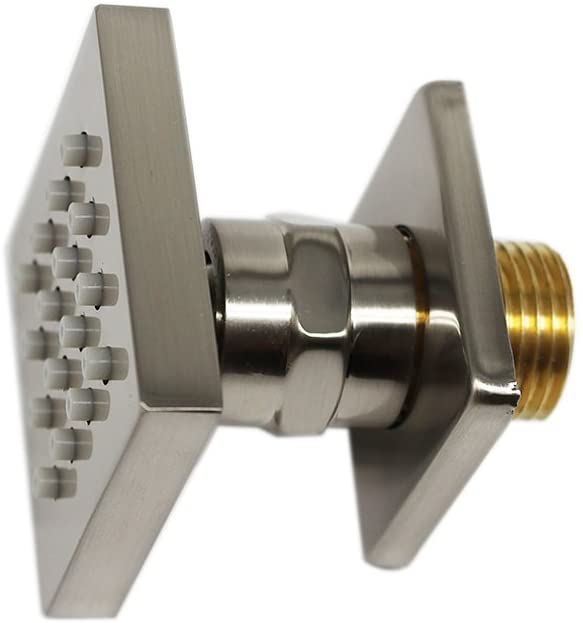
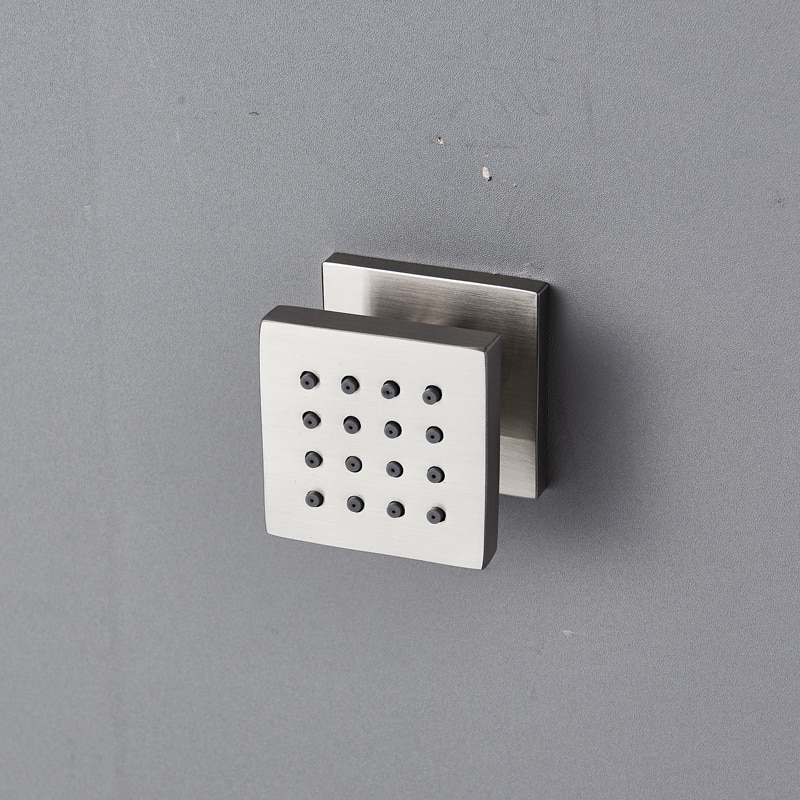
Shower Body Jets Installation Instructions
Step 1:
Step 2:
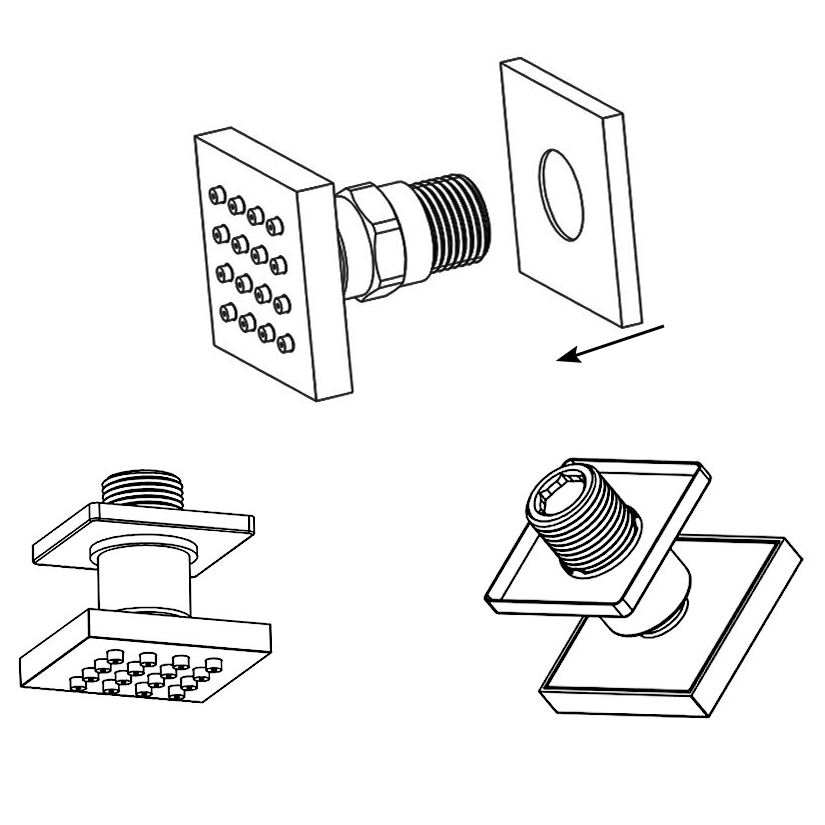
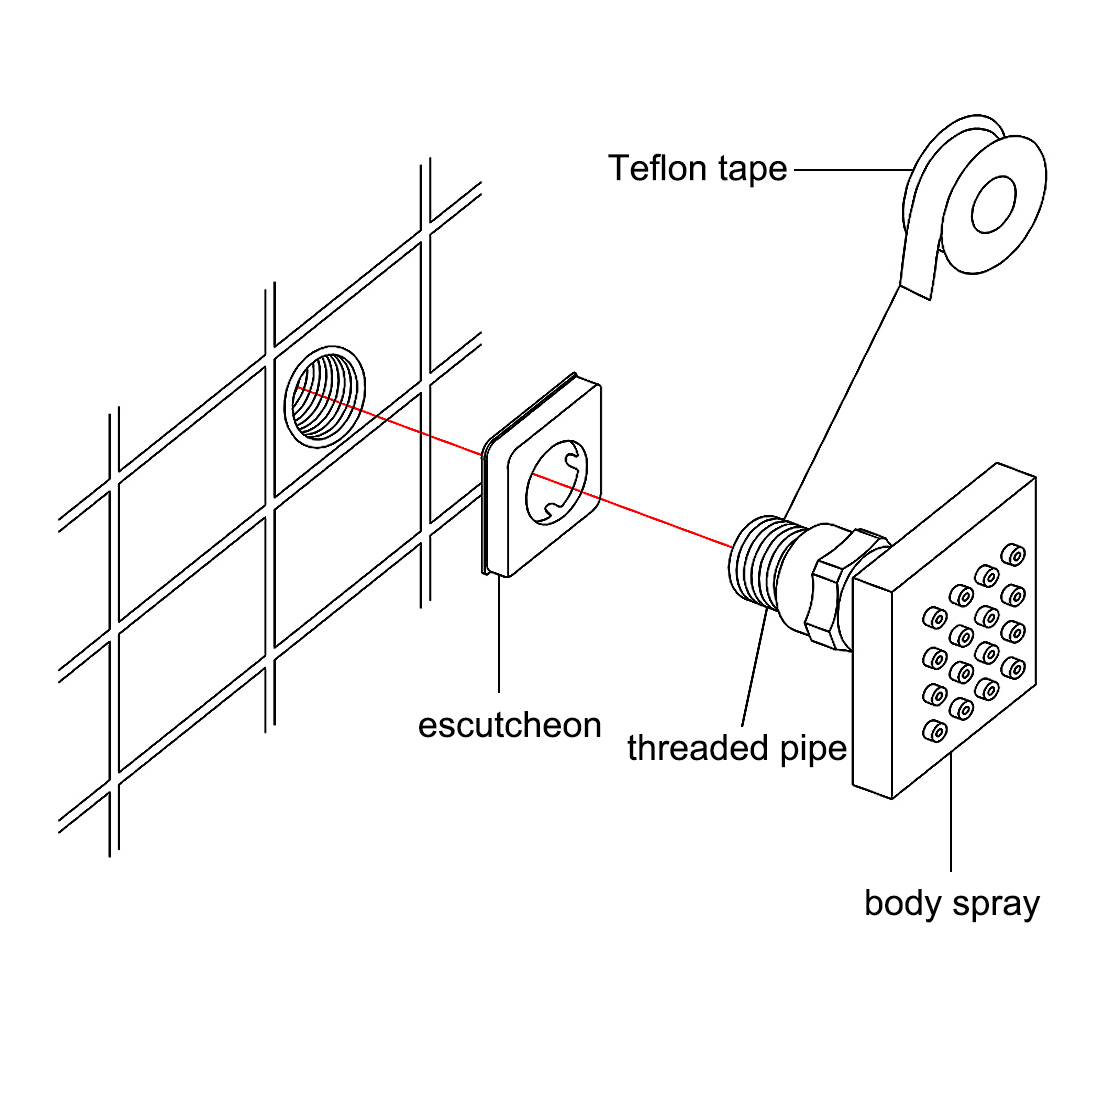
Body Sprays installation
Step 3:
Step 4:
Step 5: (Pressure Balancing Loop)
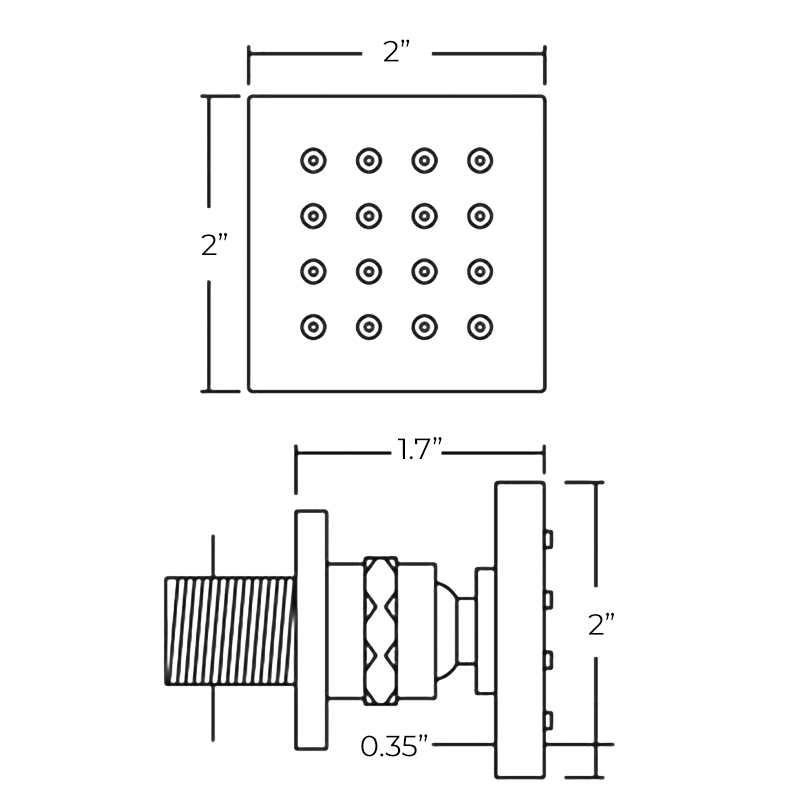
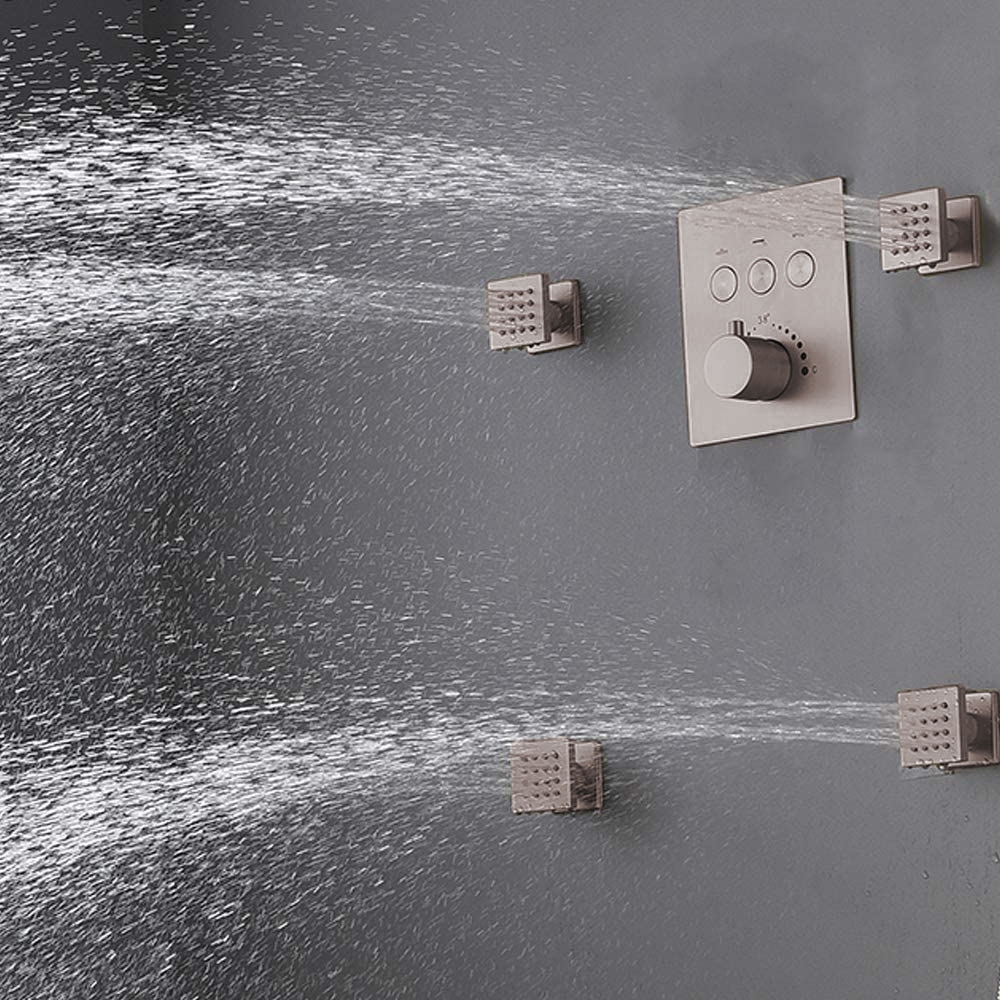
Rough-in Suggestion: This installation requires a 1/2" male threaded pipe fitting to extend 1/4" beyond the finished surface. The plumber should install a properly anchored 1/2" female pipe fitting (i.e. a drop-ear ell) recessed into the wall, into which a brass pipe nipple of proper length can be fitted once the finished wall is complete. Note: The hole size opening should be 1.5" max diameter. Bodyspray placement: Custom shower systems are sized to the user or users. Bodysprays are normally placed at the upper back, middle back, and upper thigh. Always position bodysprays according to the preferences of the user(s).
Pressure Balancing Loop: If installing bodysprays in a bank of 3 or fewer, a pressure balancing loop is not necessary. If installing bodysprays in a bank of 4 or greater, a pressure balancing loop must be used to keep the pressure even between the bodysprays.
Instructions
Body jets should be arranged in your system to provide the necessary spray outlets to suit the application. 1. Identify all components and check for completeness, particularly before arranging fitting. 2. Depending on the application the body jet can be panel mounted using a backnut (not supplied) or set into the wall on rigid pipe work. If panel mounting care should be taken to ensure connection can be made after securing with the backnut. 3. Connect body jet to pipe work using recommended ½” BSP connections (not provided) with thread sealing compound where necessary. Note: - Before finishing wall turn on water supplies to check both correct system function and for leaking from joints/connections. 4. Complete wall finish.
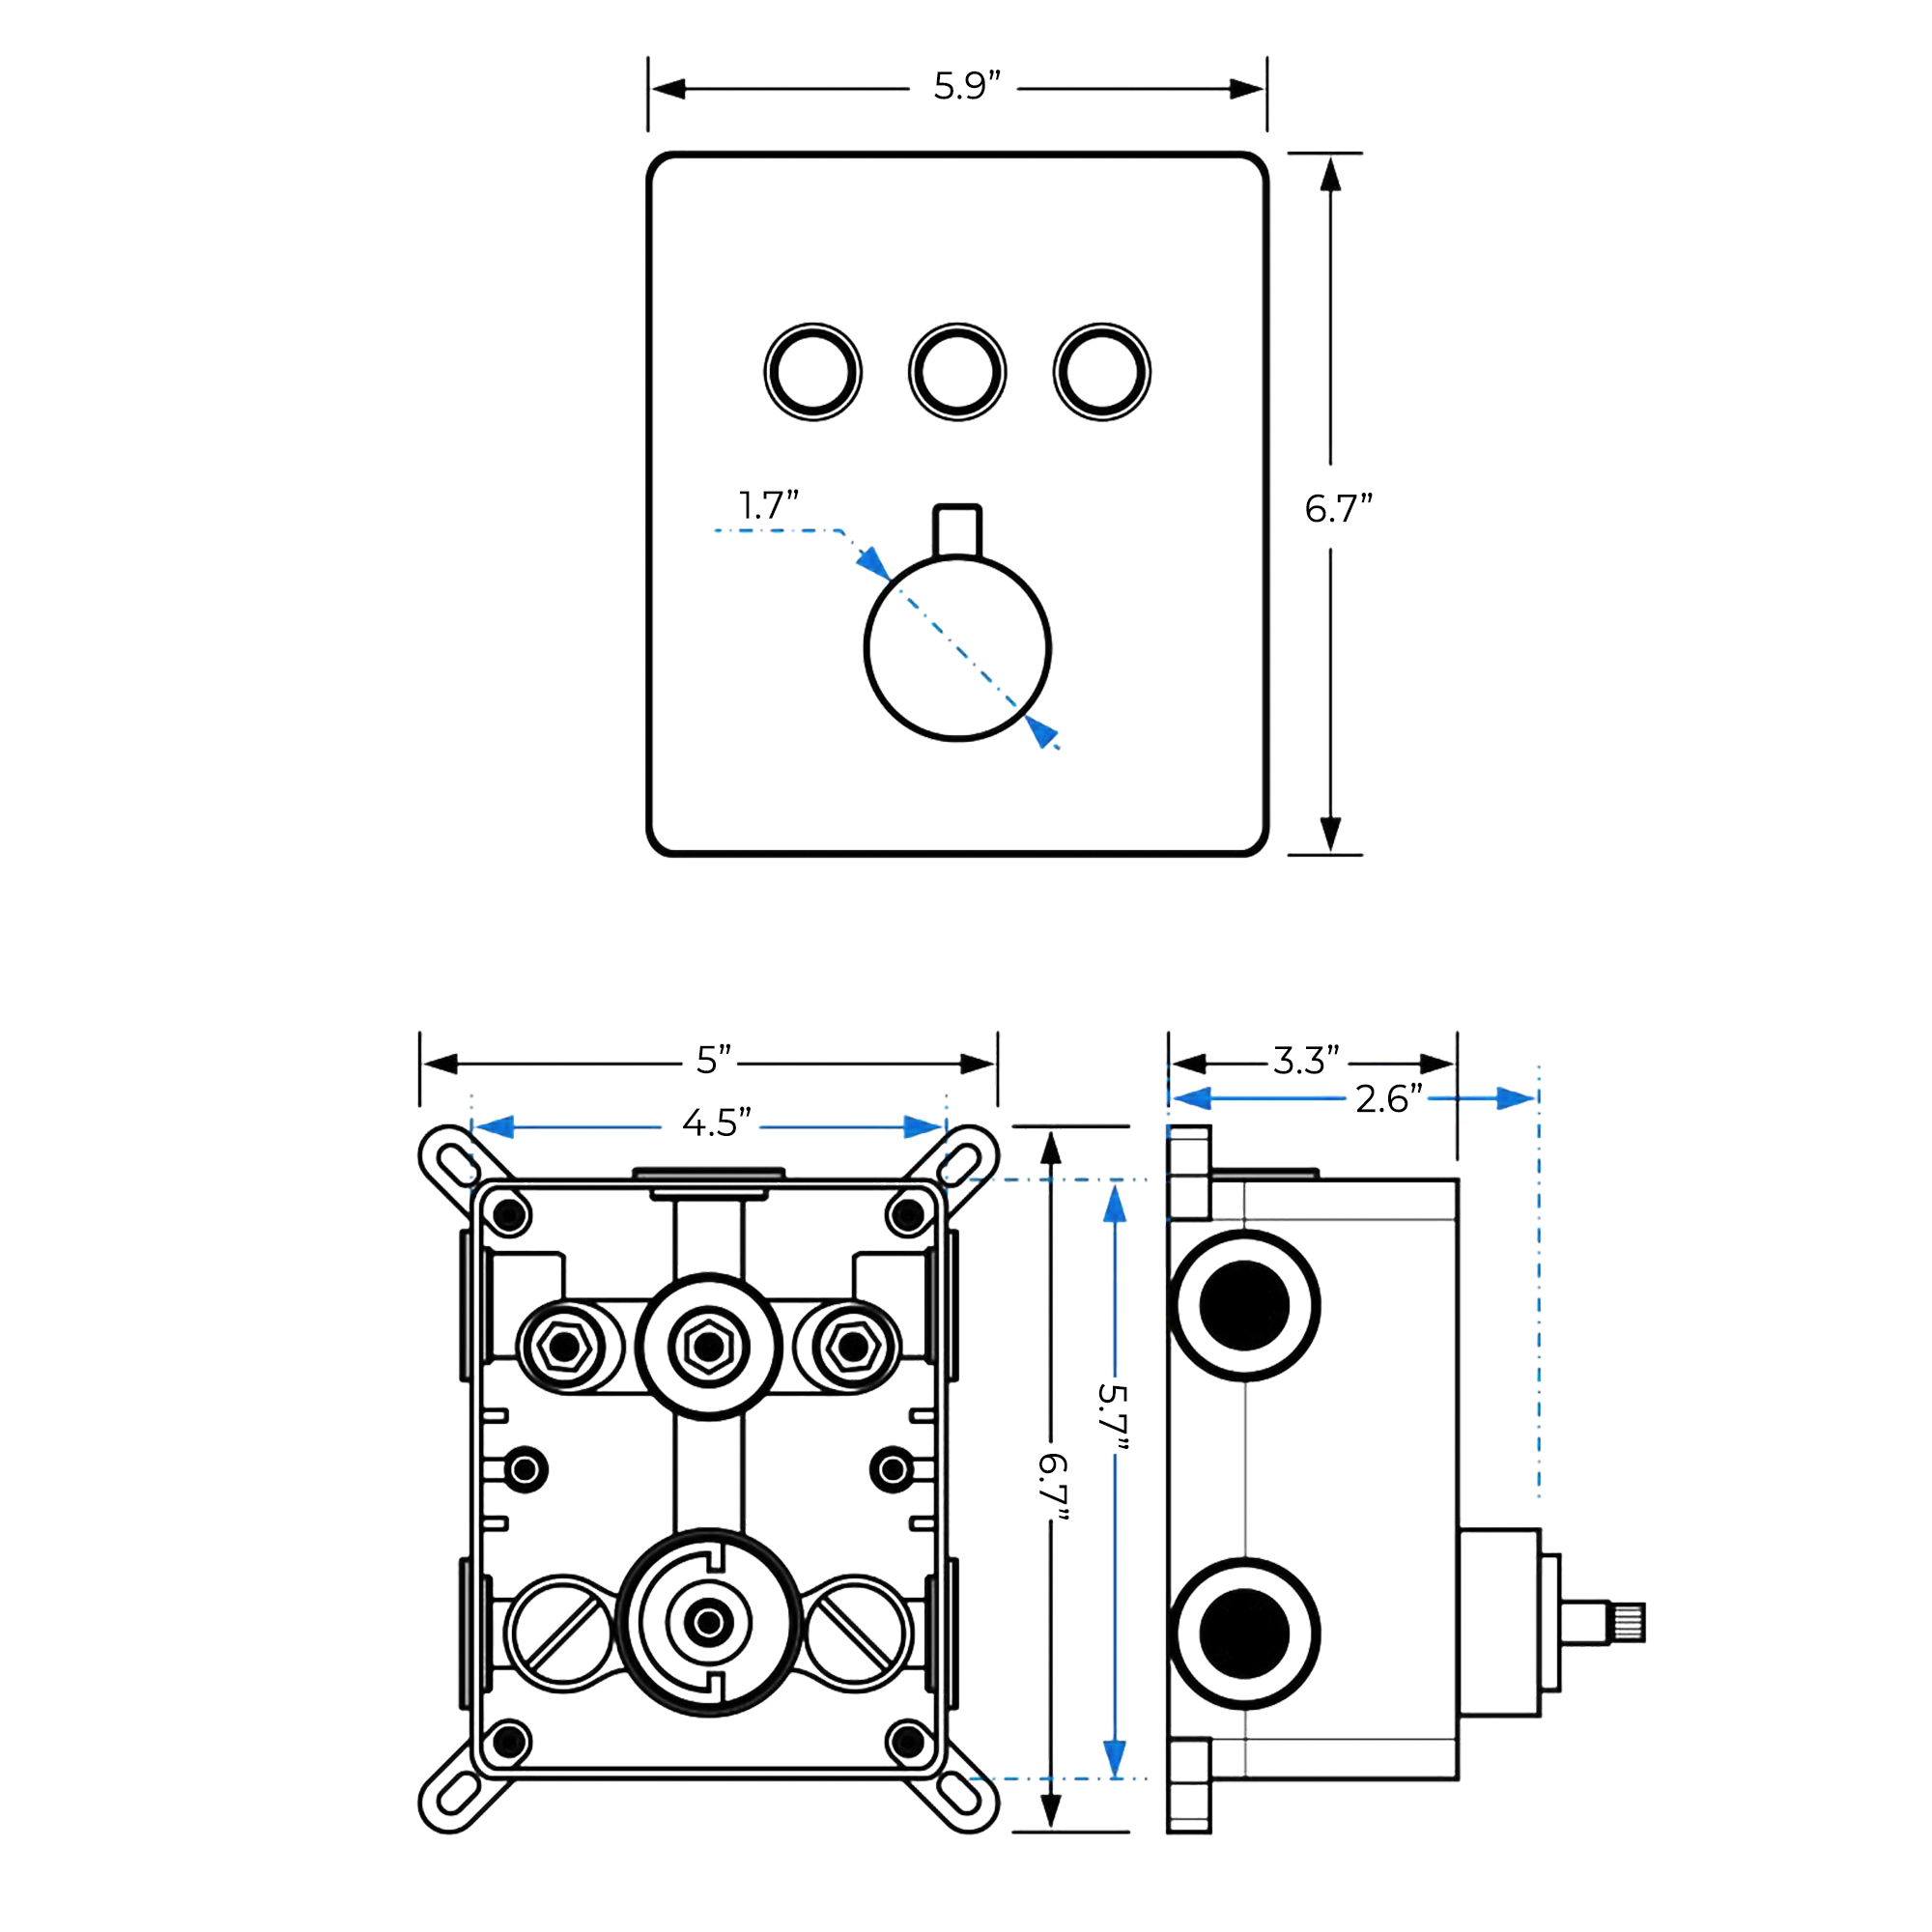
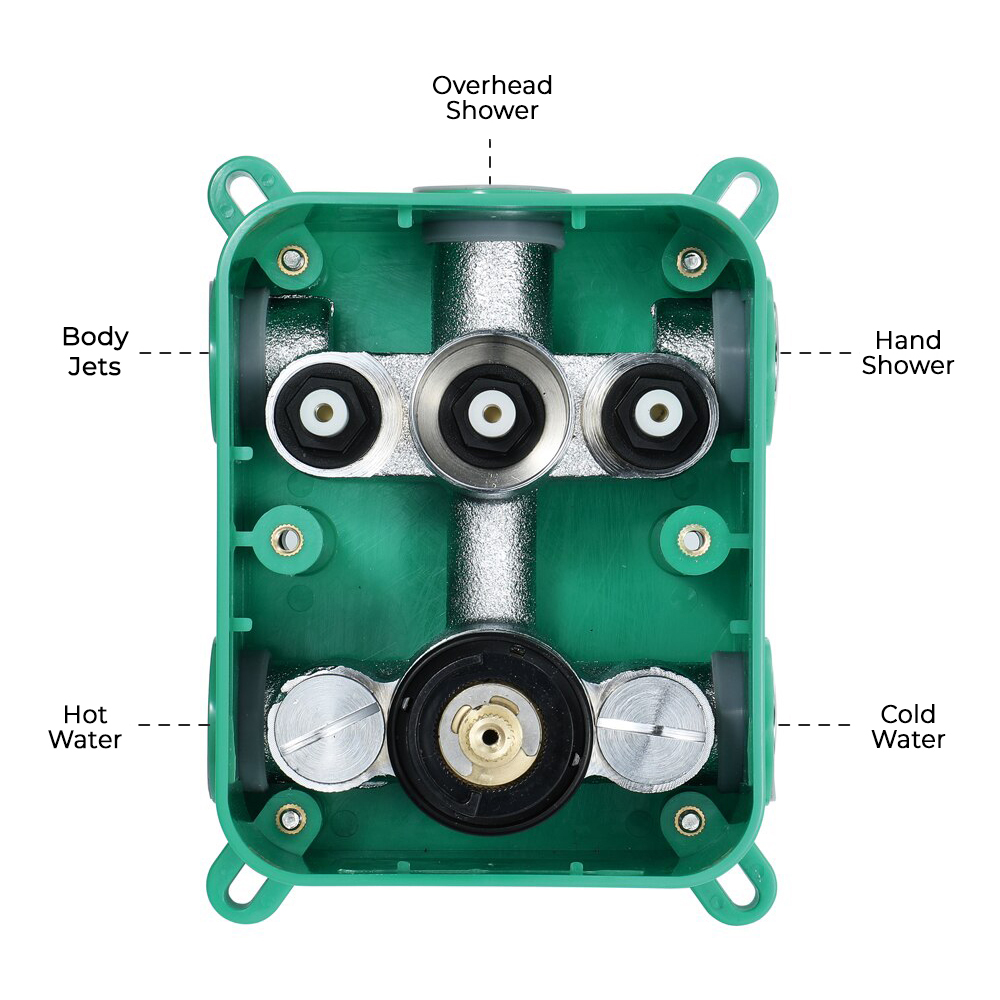
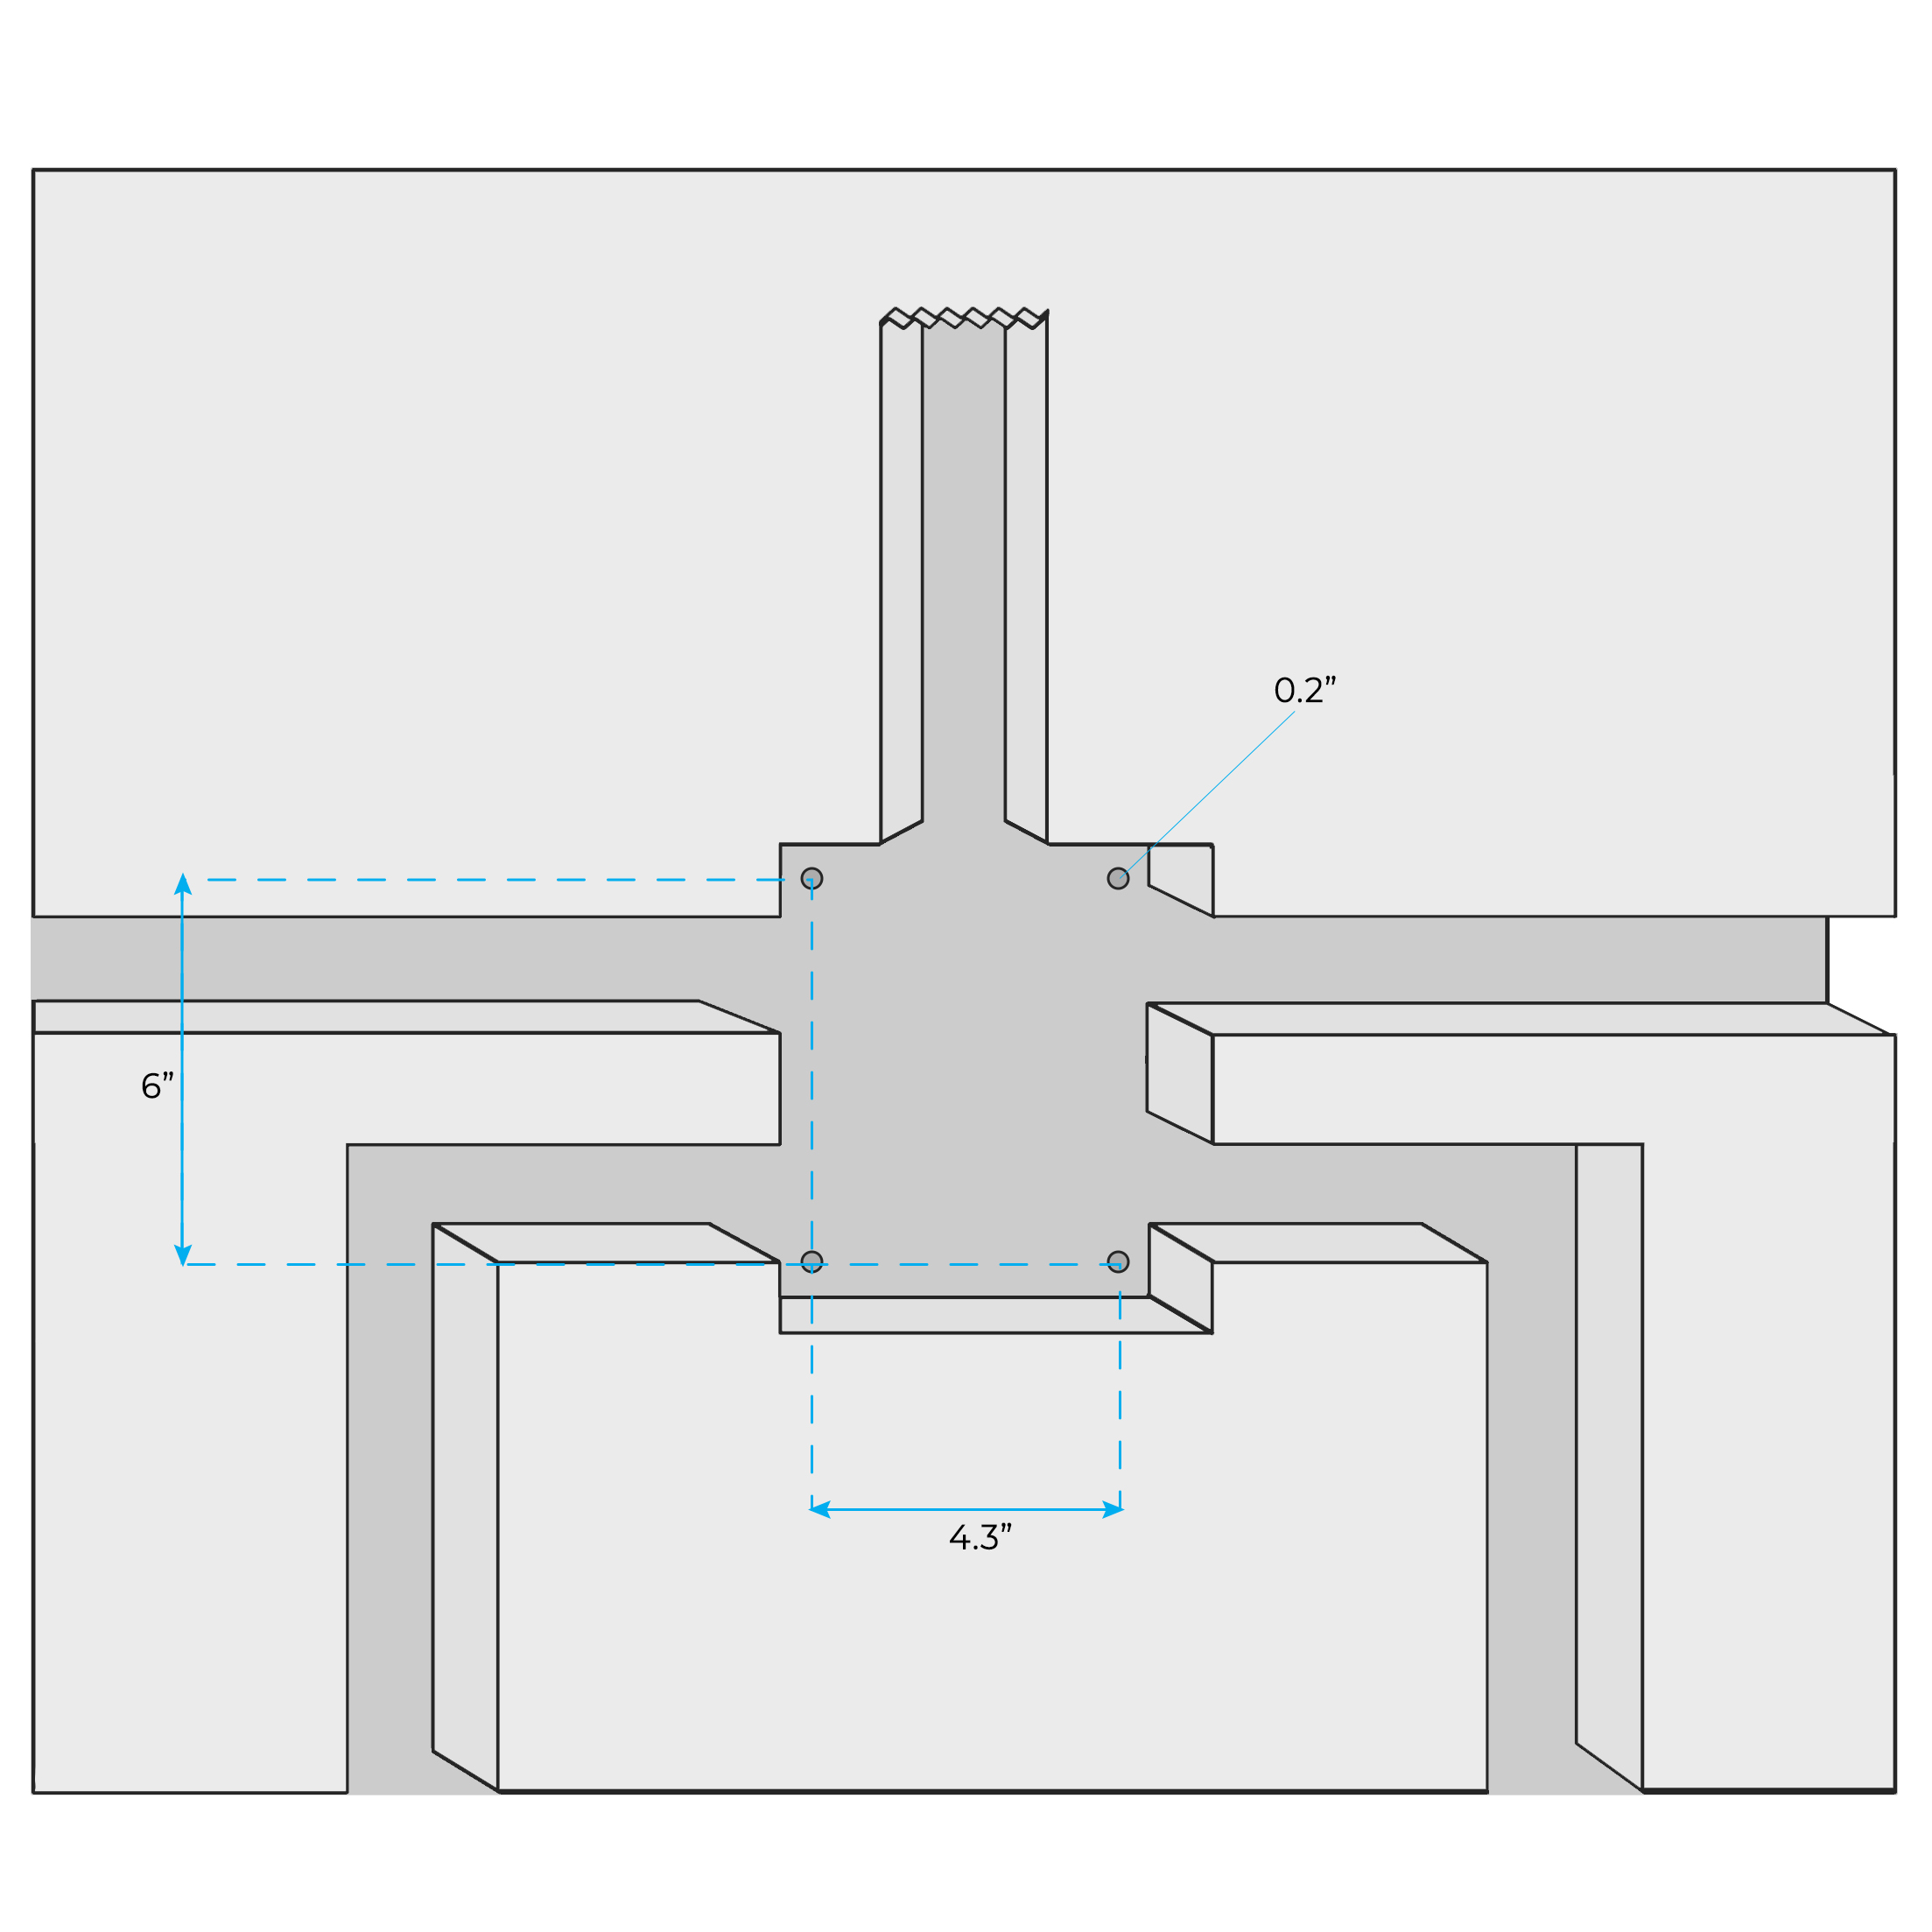
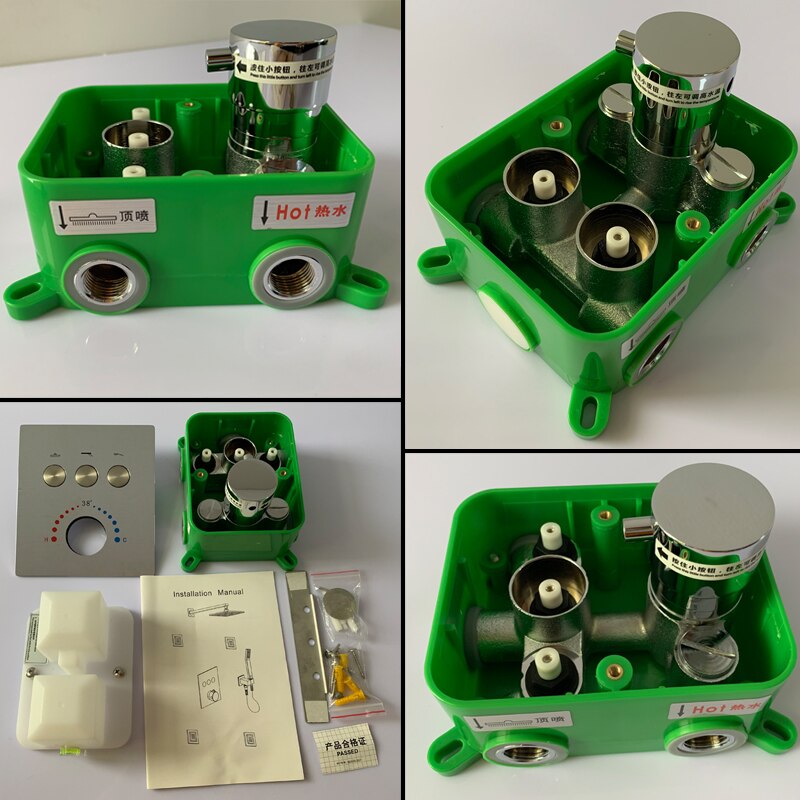
• According to the basic picture of the product, refer to the above picture, open the wall to dig the main body embedded port, the hot and cold water inlet, and the mixed water outlet.
• Drill5 6mm(0.2") holes with impact drill according to product size.
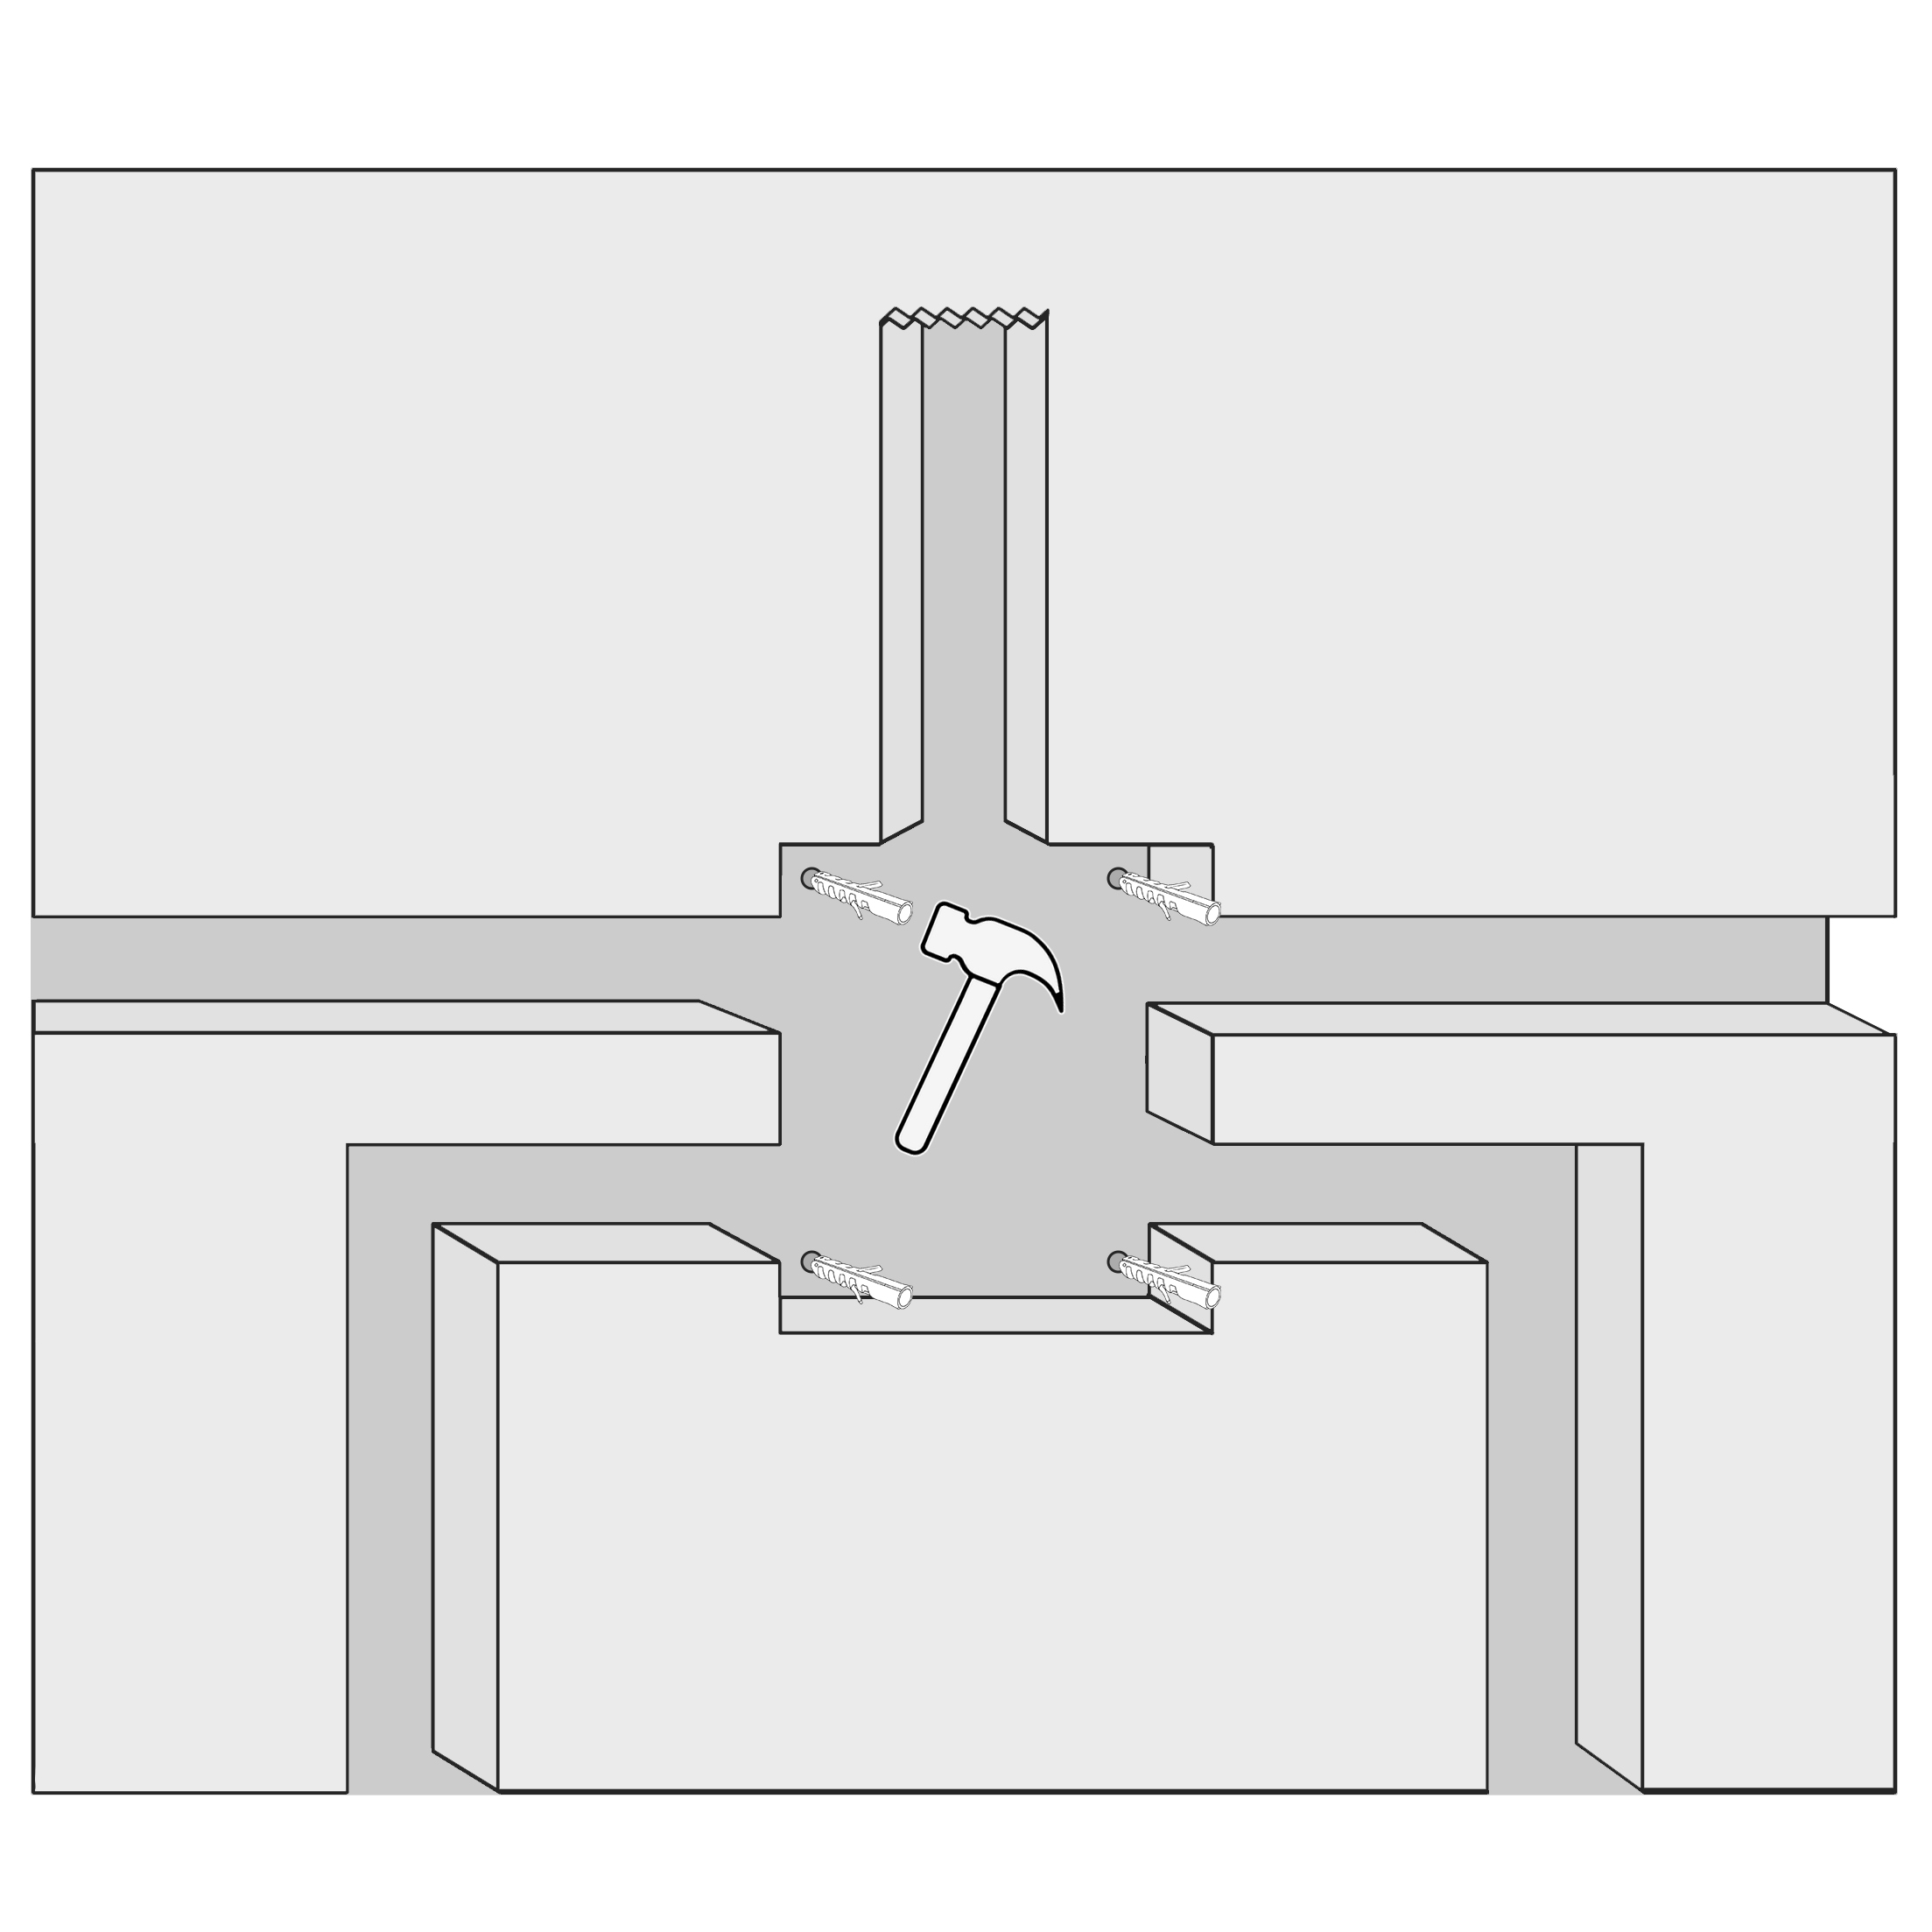
• Use a hammer to break four expanded capsules into the drilled holes.
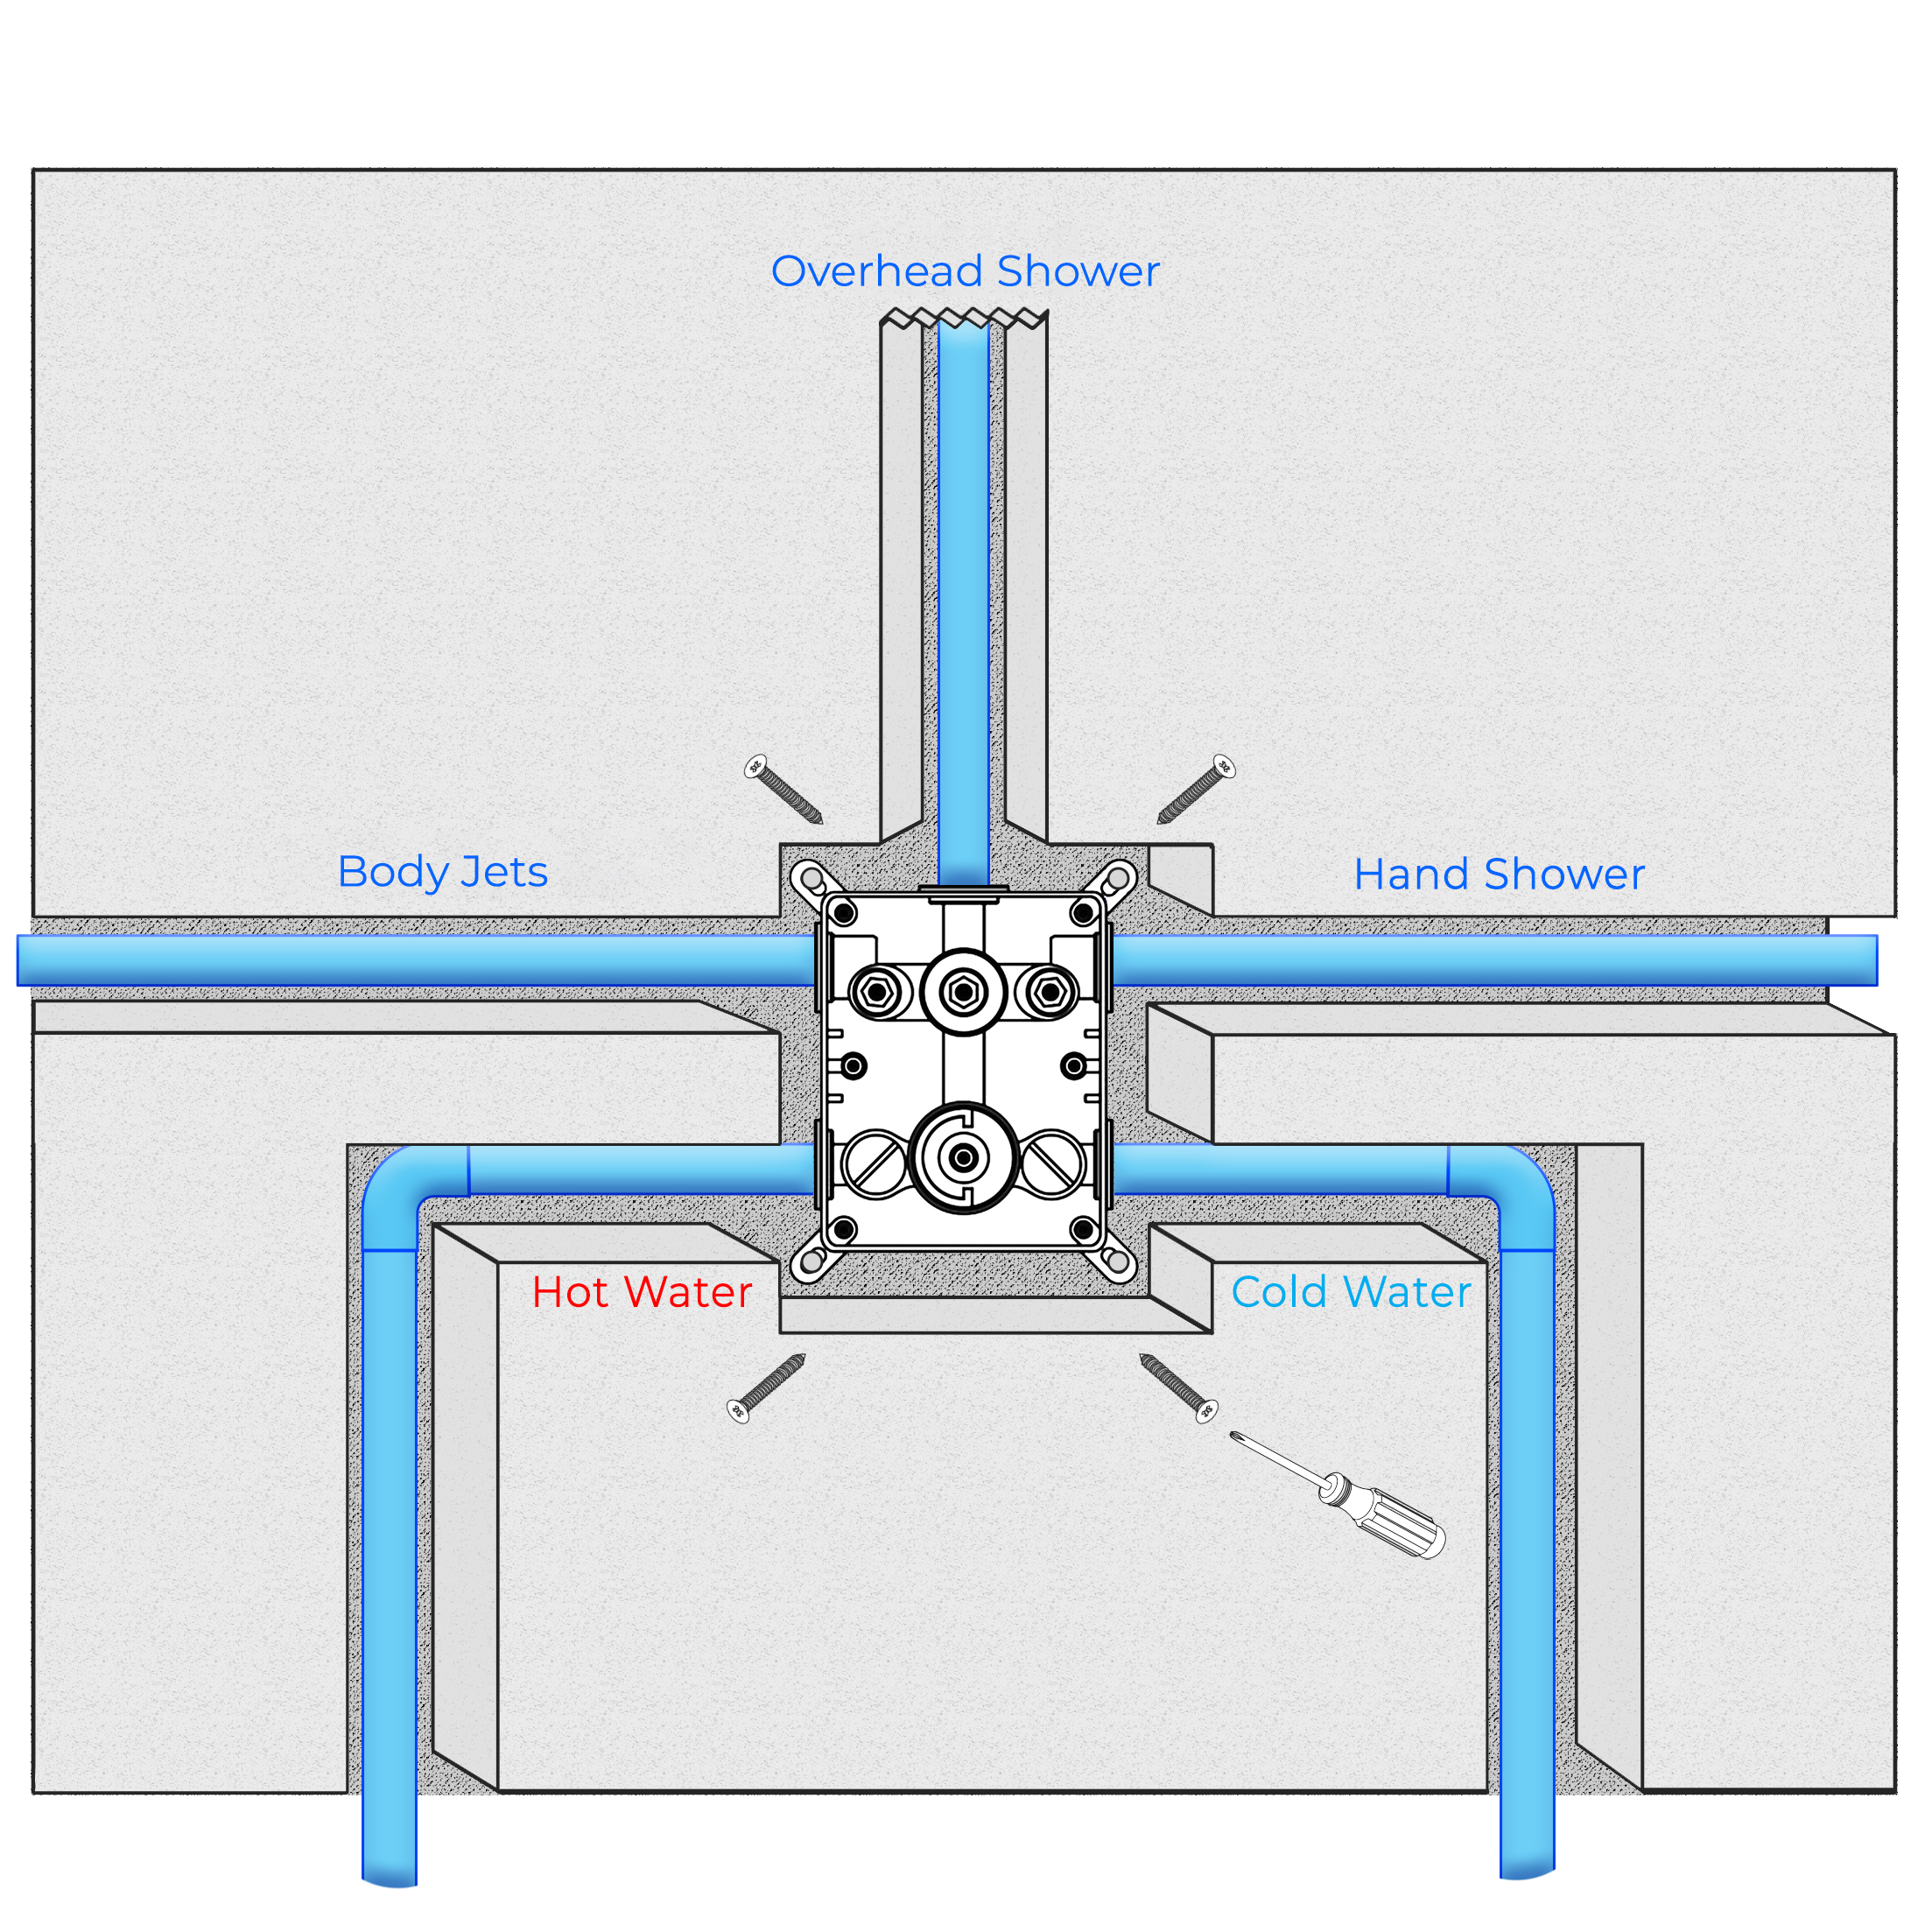
• Connect each takeover, then connect the water source to confirm that there is no leakage.
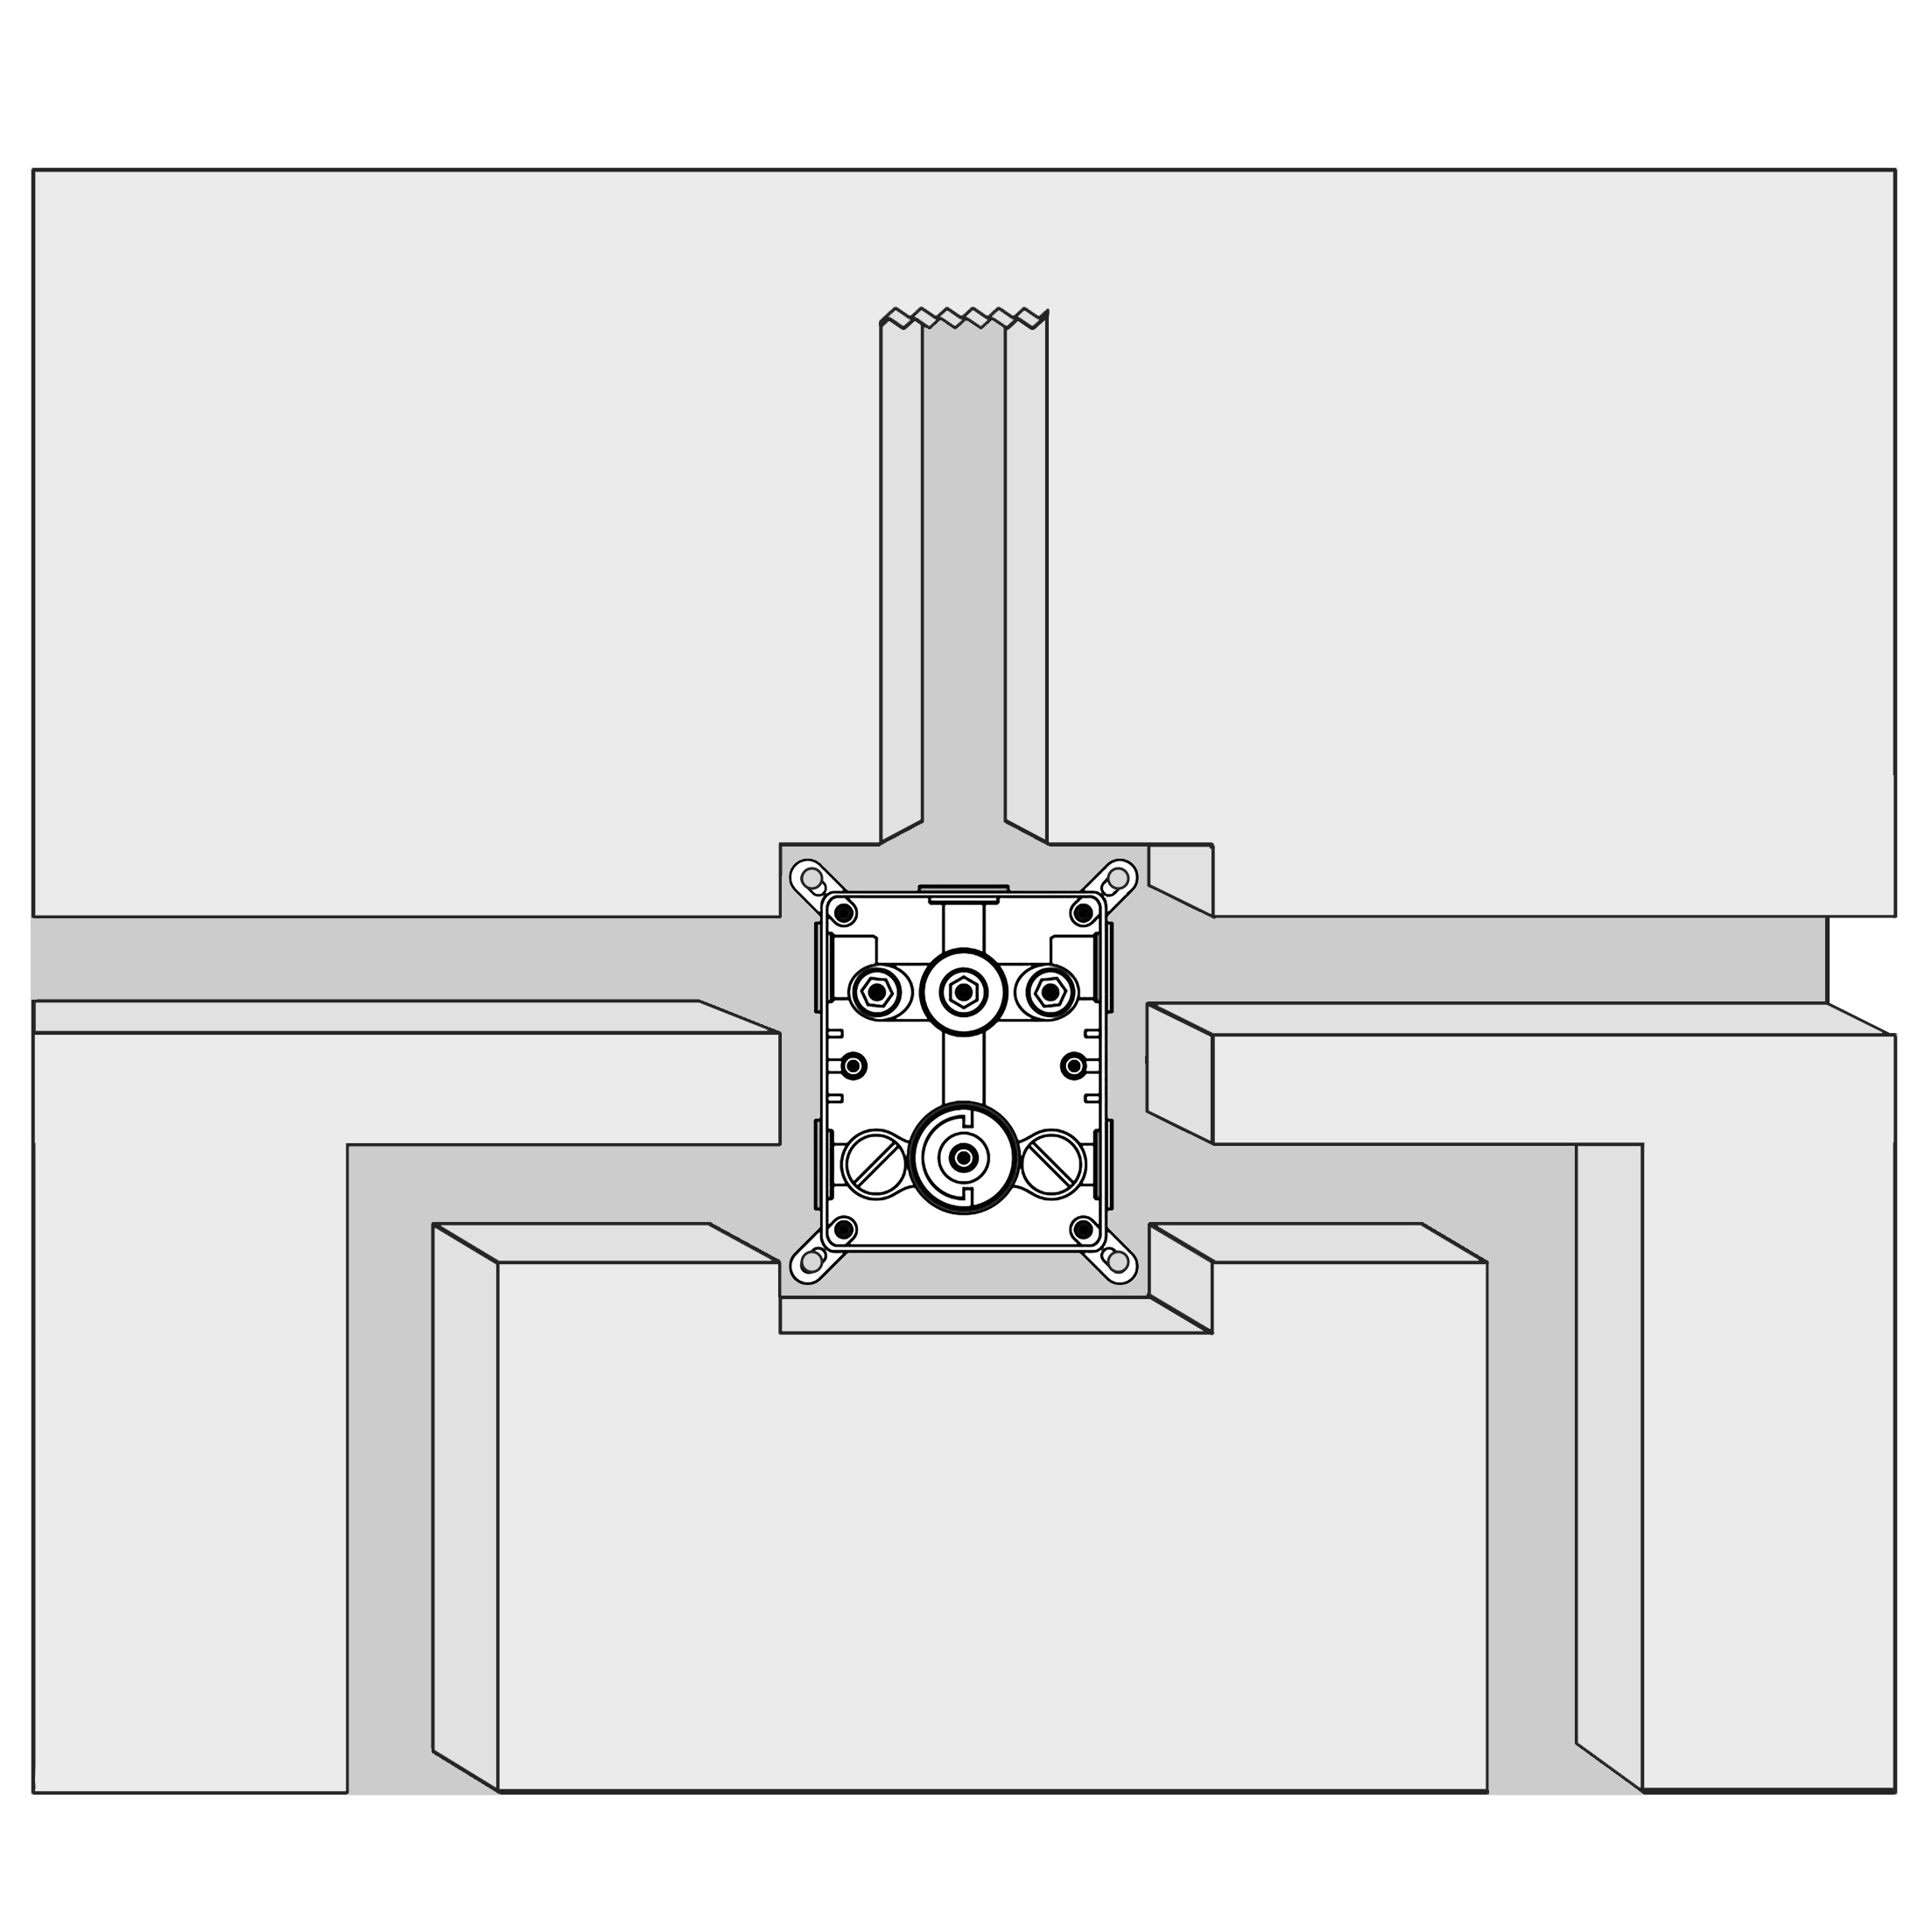
• Adjust the embedded body to the horizontal line, and fix the embedded body on the wall with a cross screwdriver to lock the 4 self- tapping screws. Seal the pipeline with cement filler.
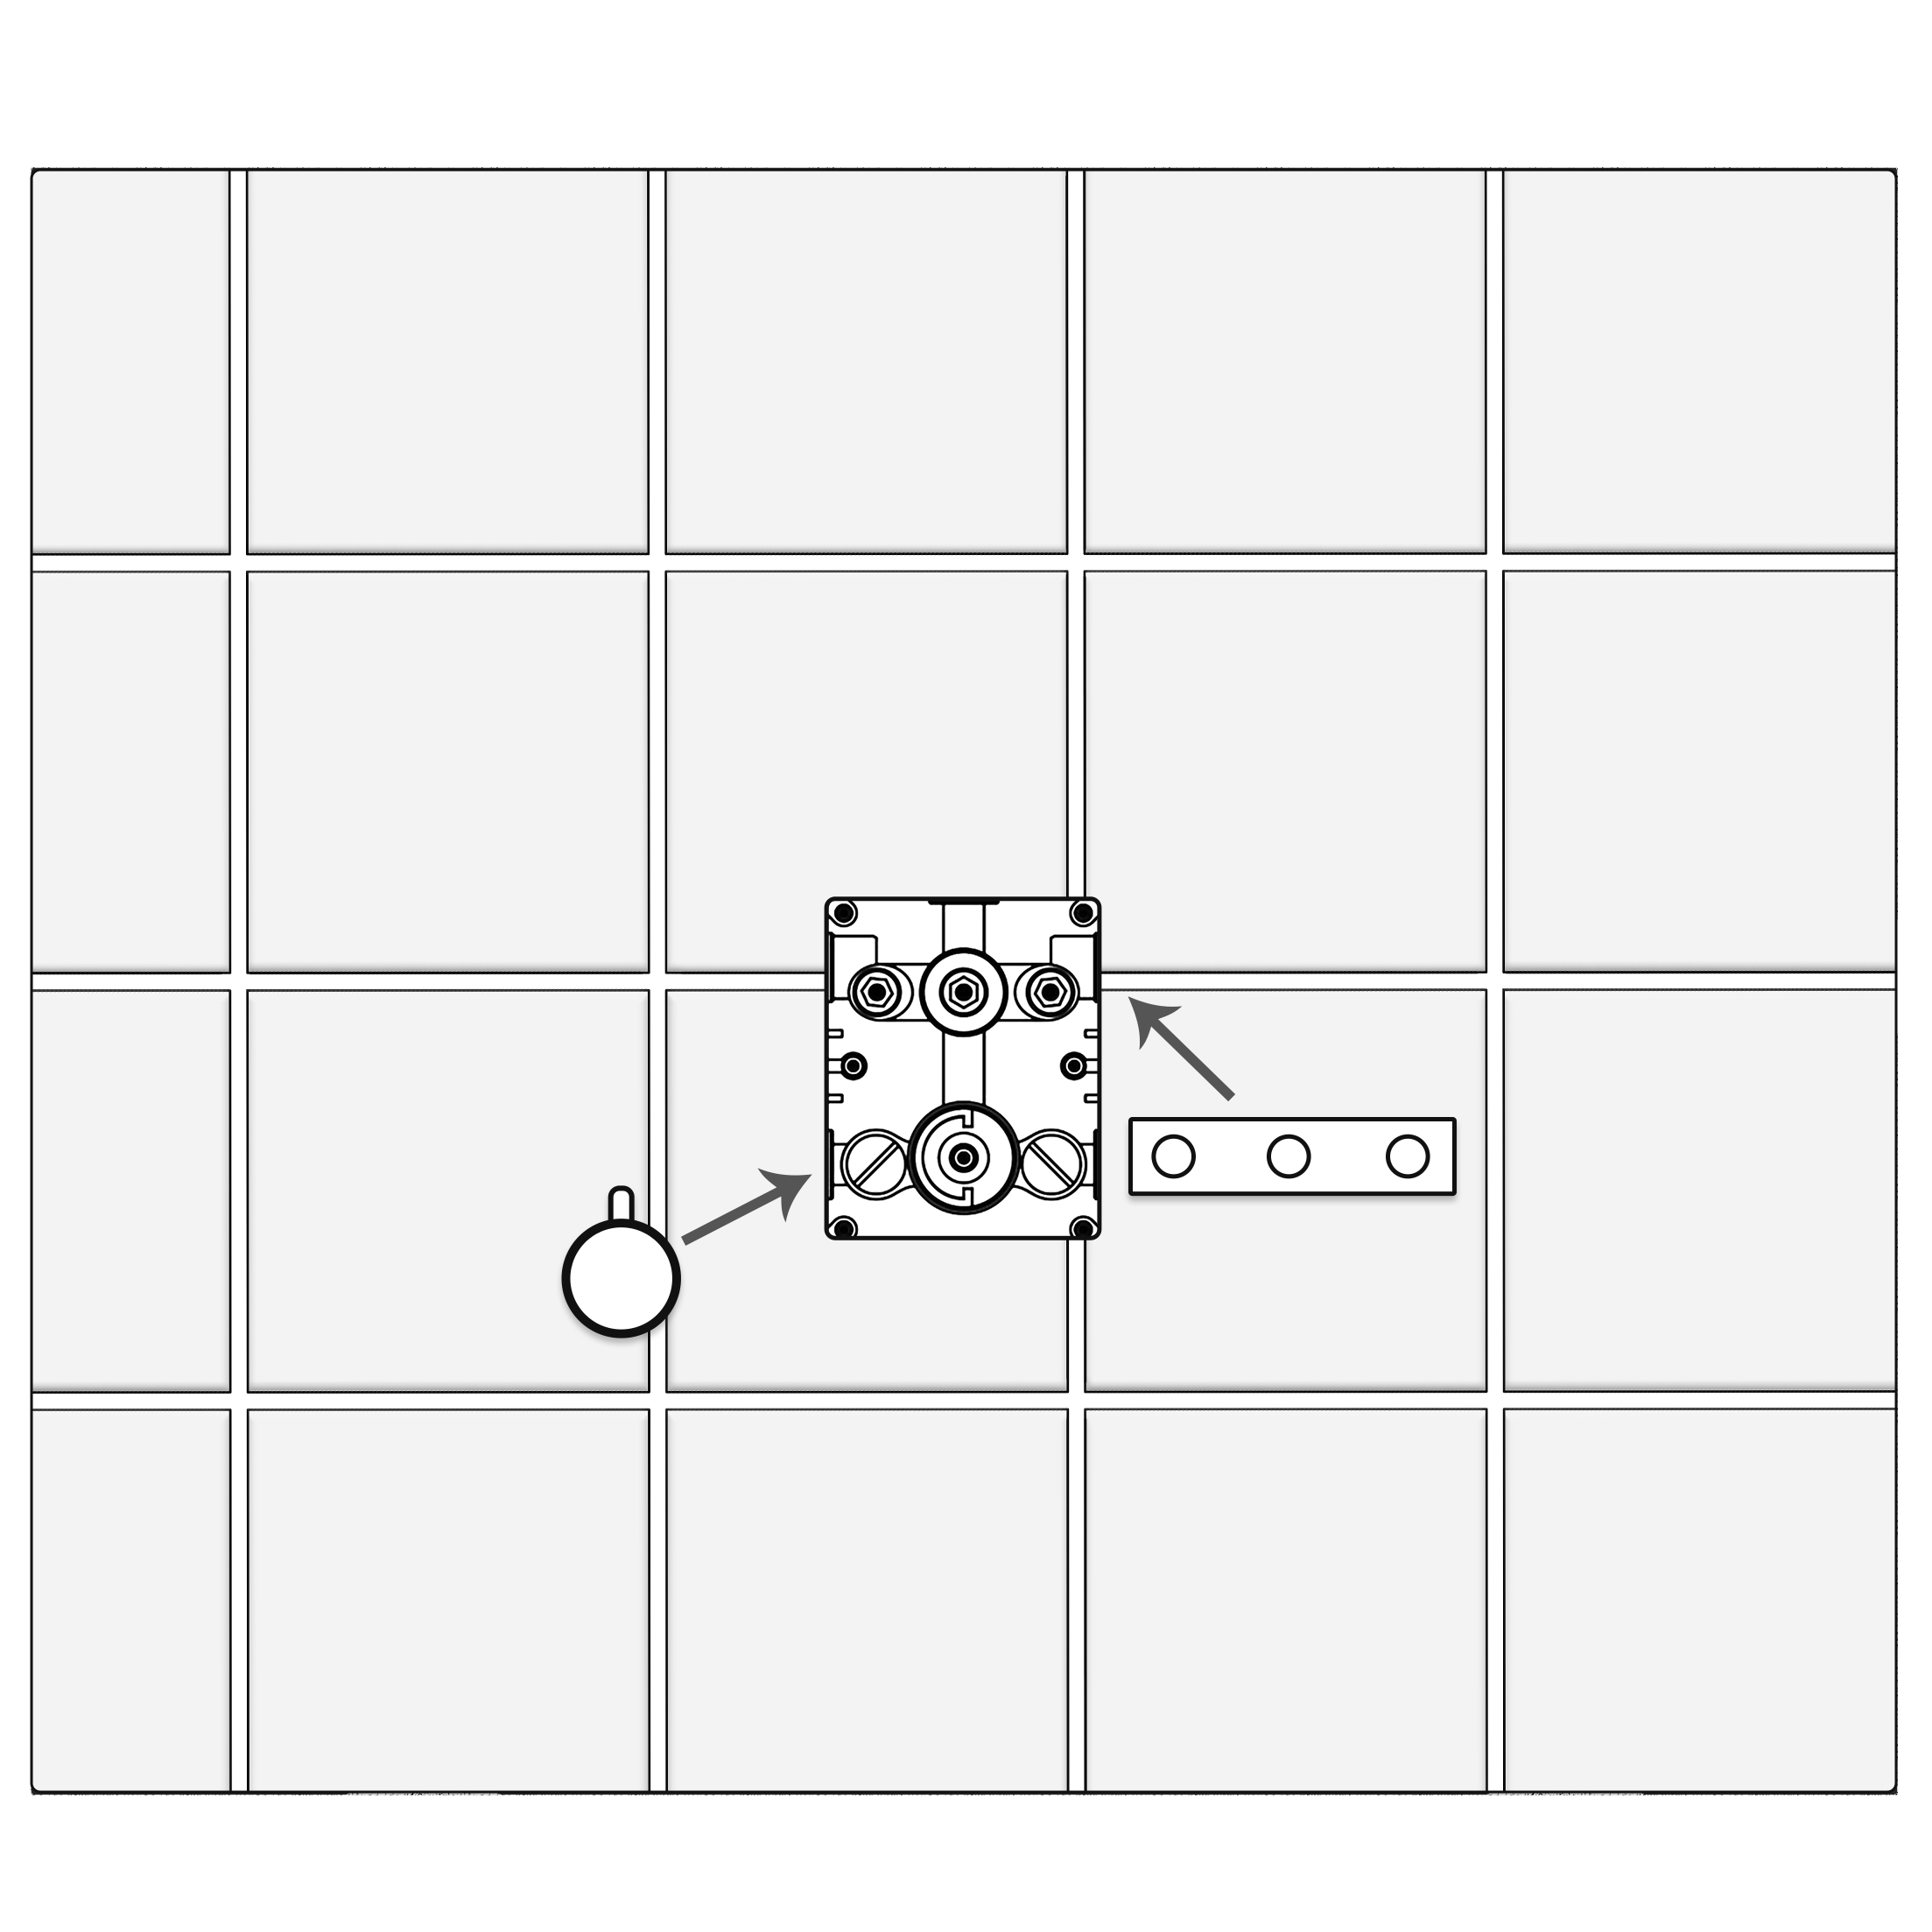
• Loosen the two M5 screws on the sheath counter-clockwise with a cross screwdriver and remove the sheath.
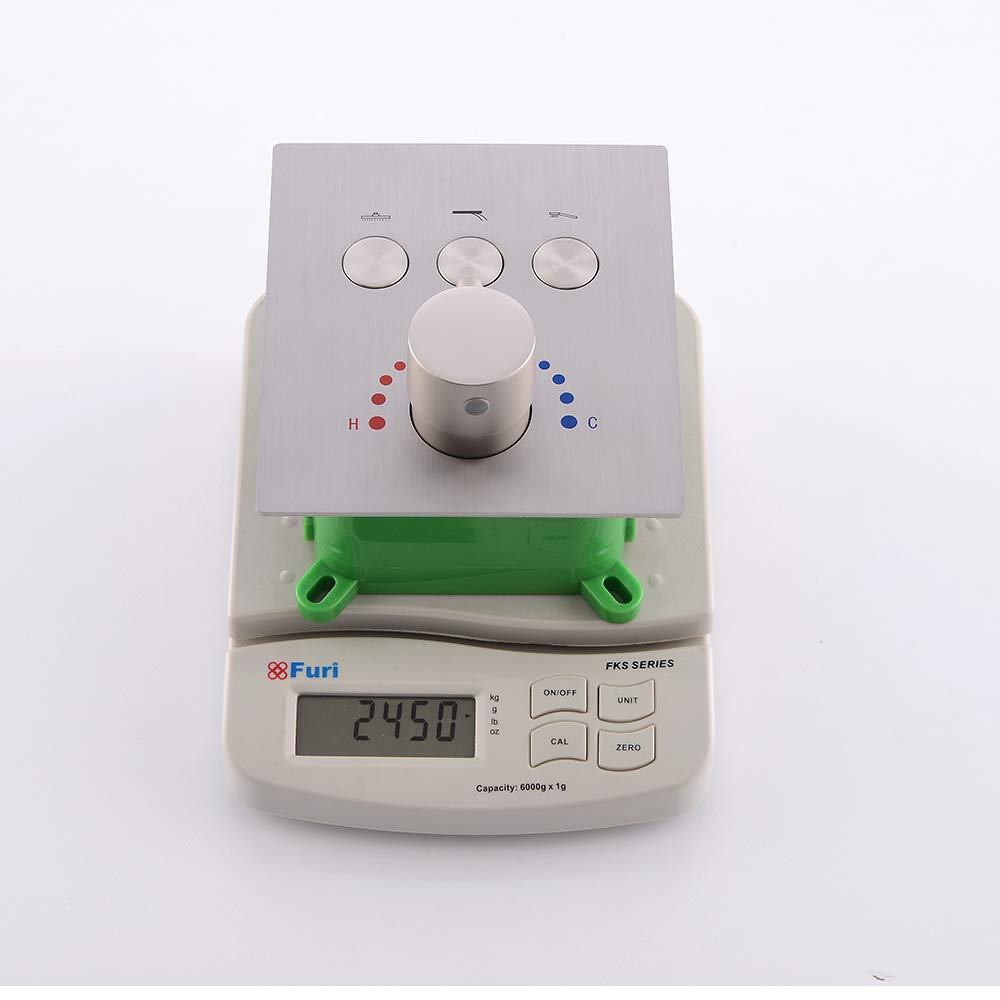
First, remove the color button of the constant temperature handwheel, loosen the main handwheel in the counterclockwise direction with the 2.5mm hex plate, and remove it. When taking out the constant temperature handwheel, do not turn the constant temperature handwheel to ensure that the constant temperature handwheel button is aligned with the 38-degree dial line on the panel.
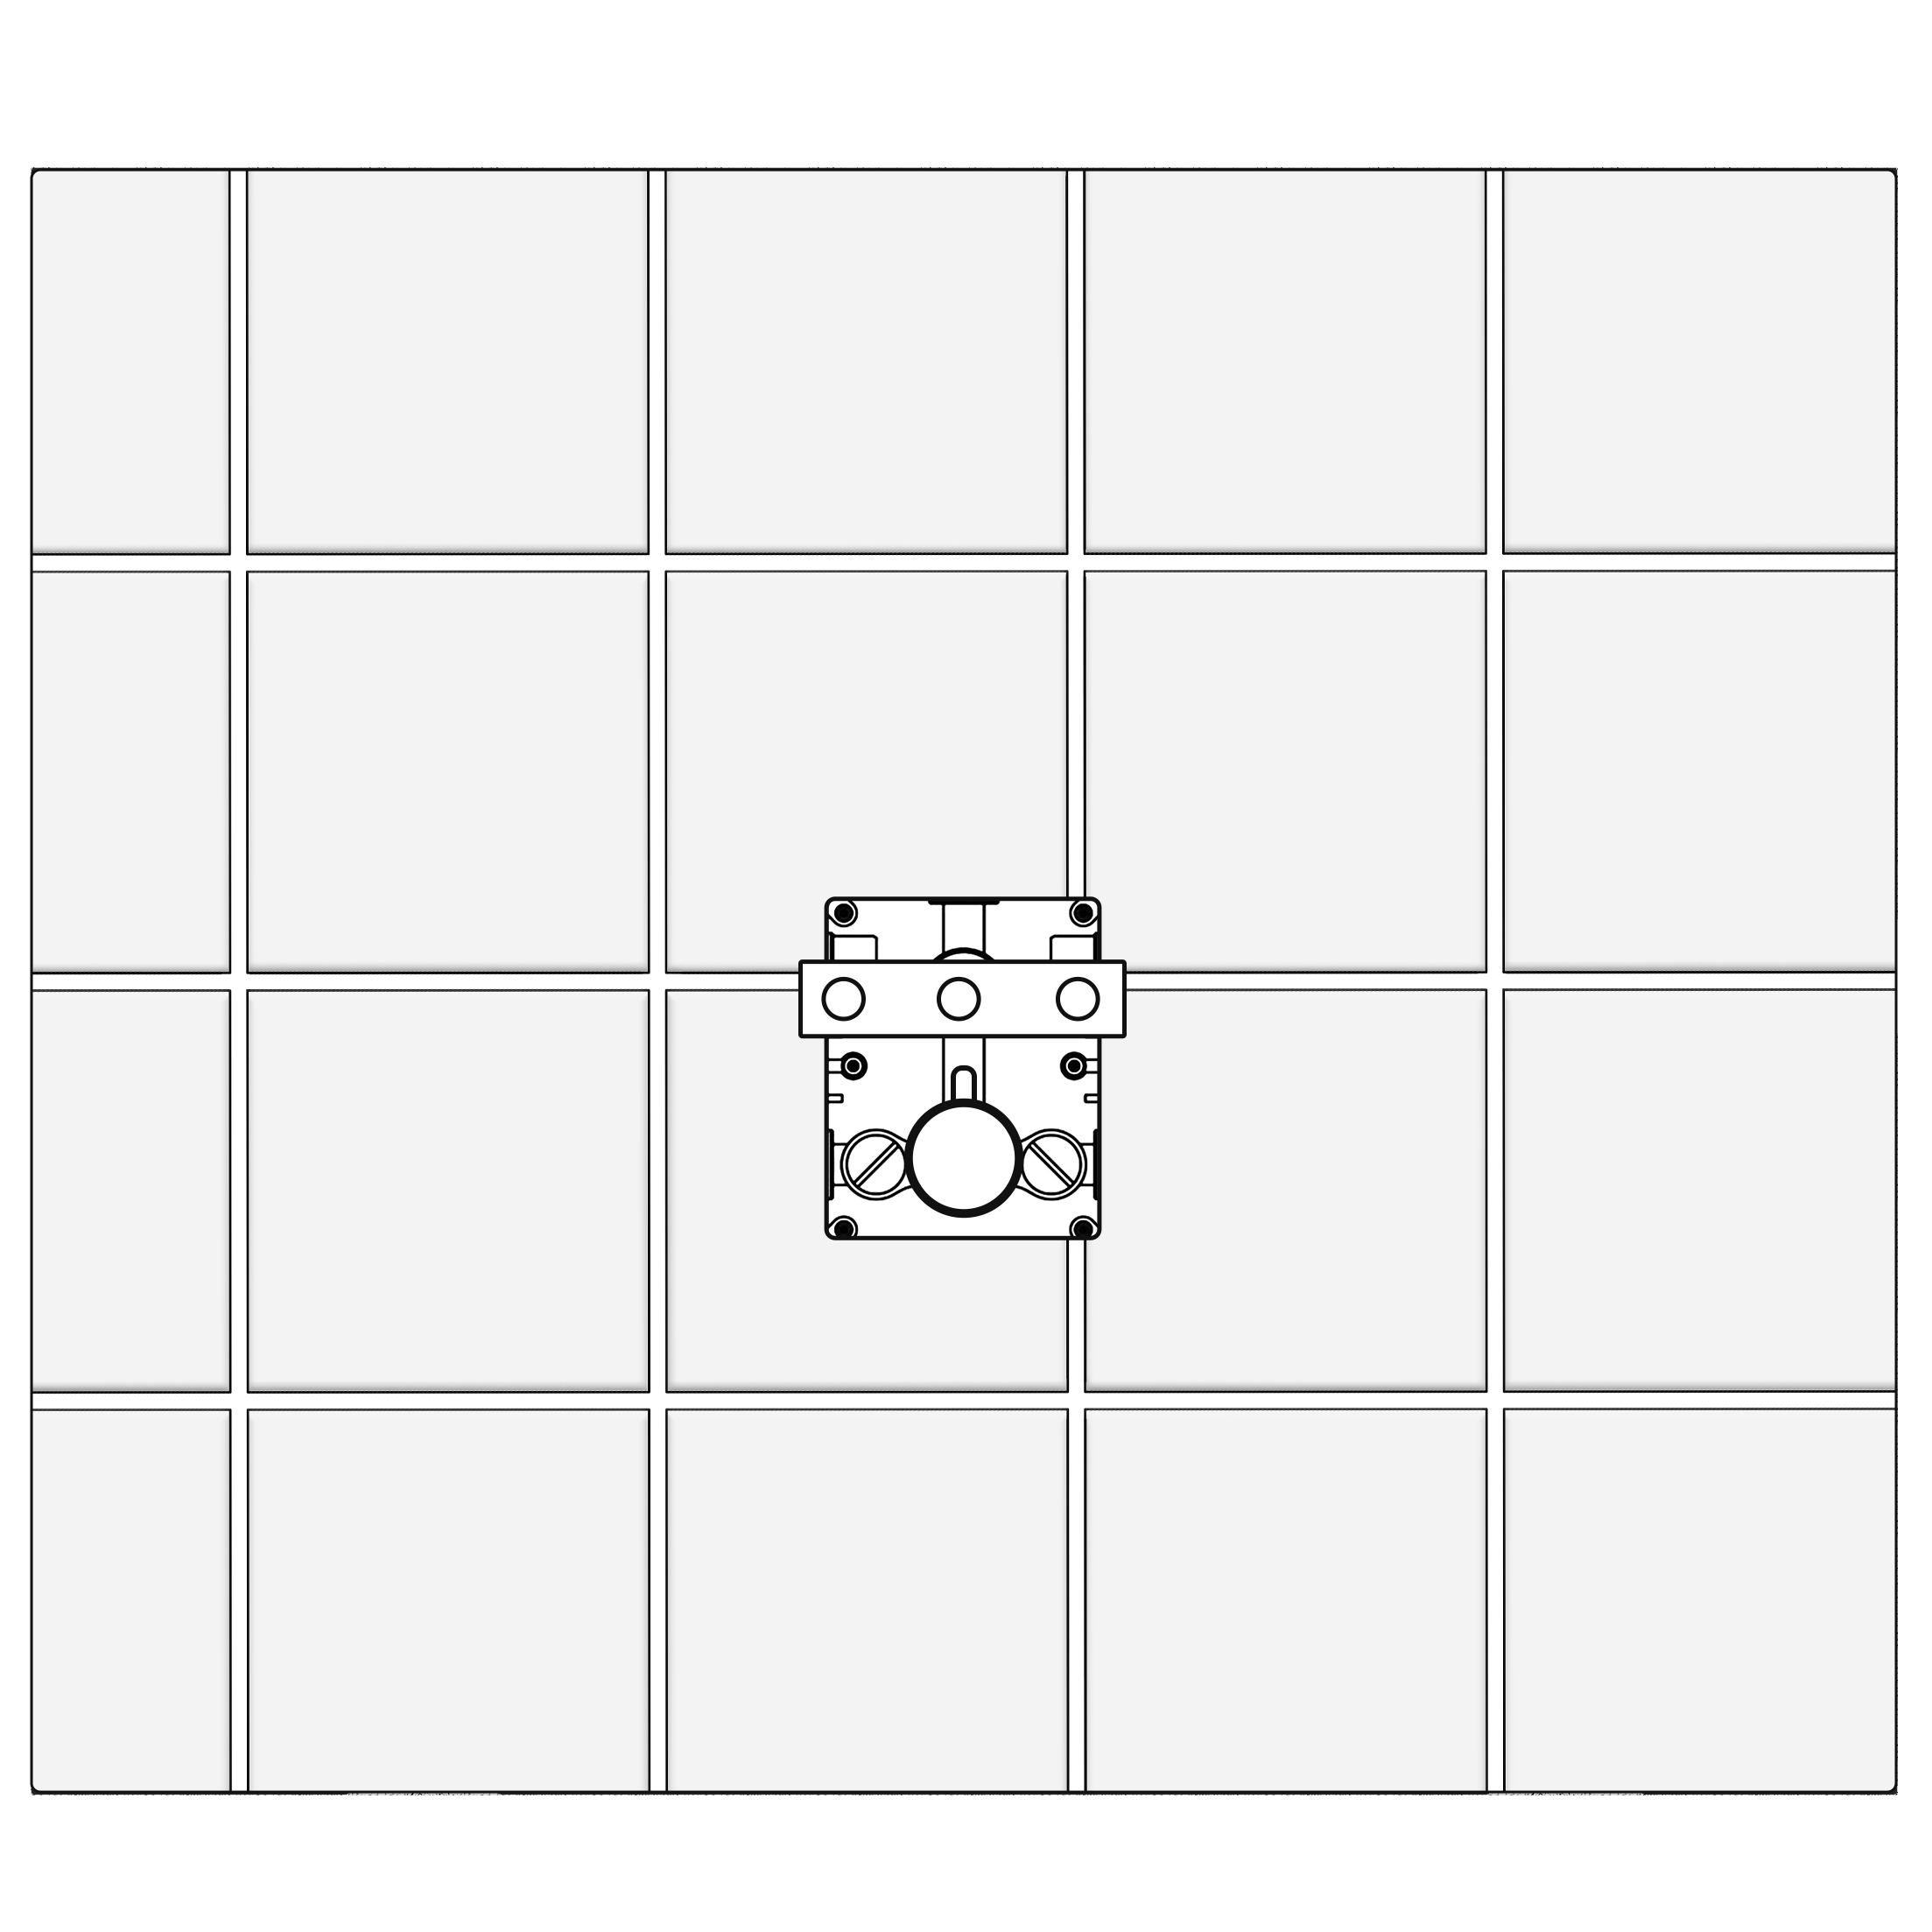
• Tighten the three long poles on the key-value core, flatten the wall on the set, and cut off the extra parts with a cutting machine or blade to extend the positioning plate plane of the long rod. Then go to the positioning board and press the icon.
Positioning board
Long pole
The excess part of the long bar.
Tight on the wall.
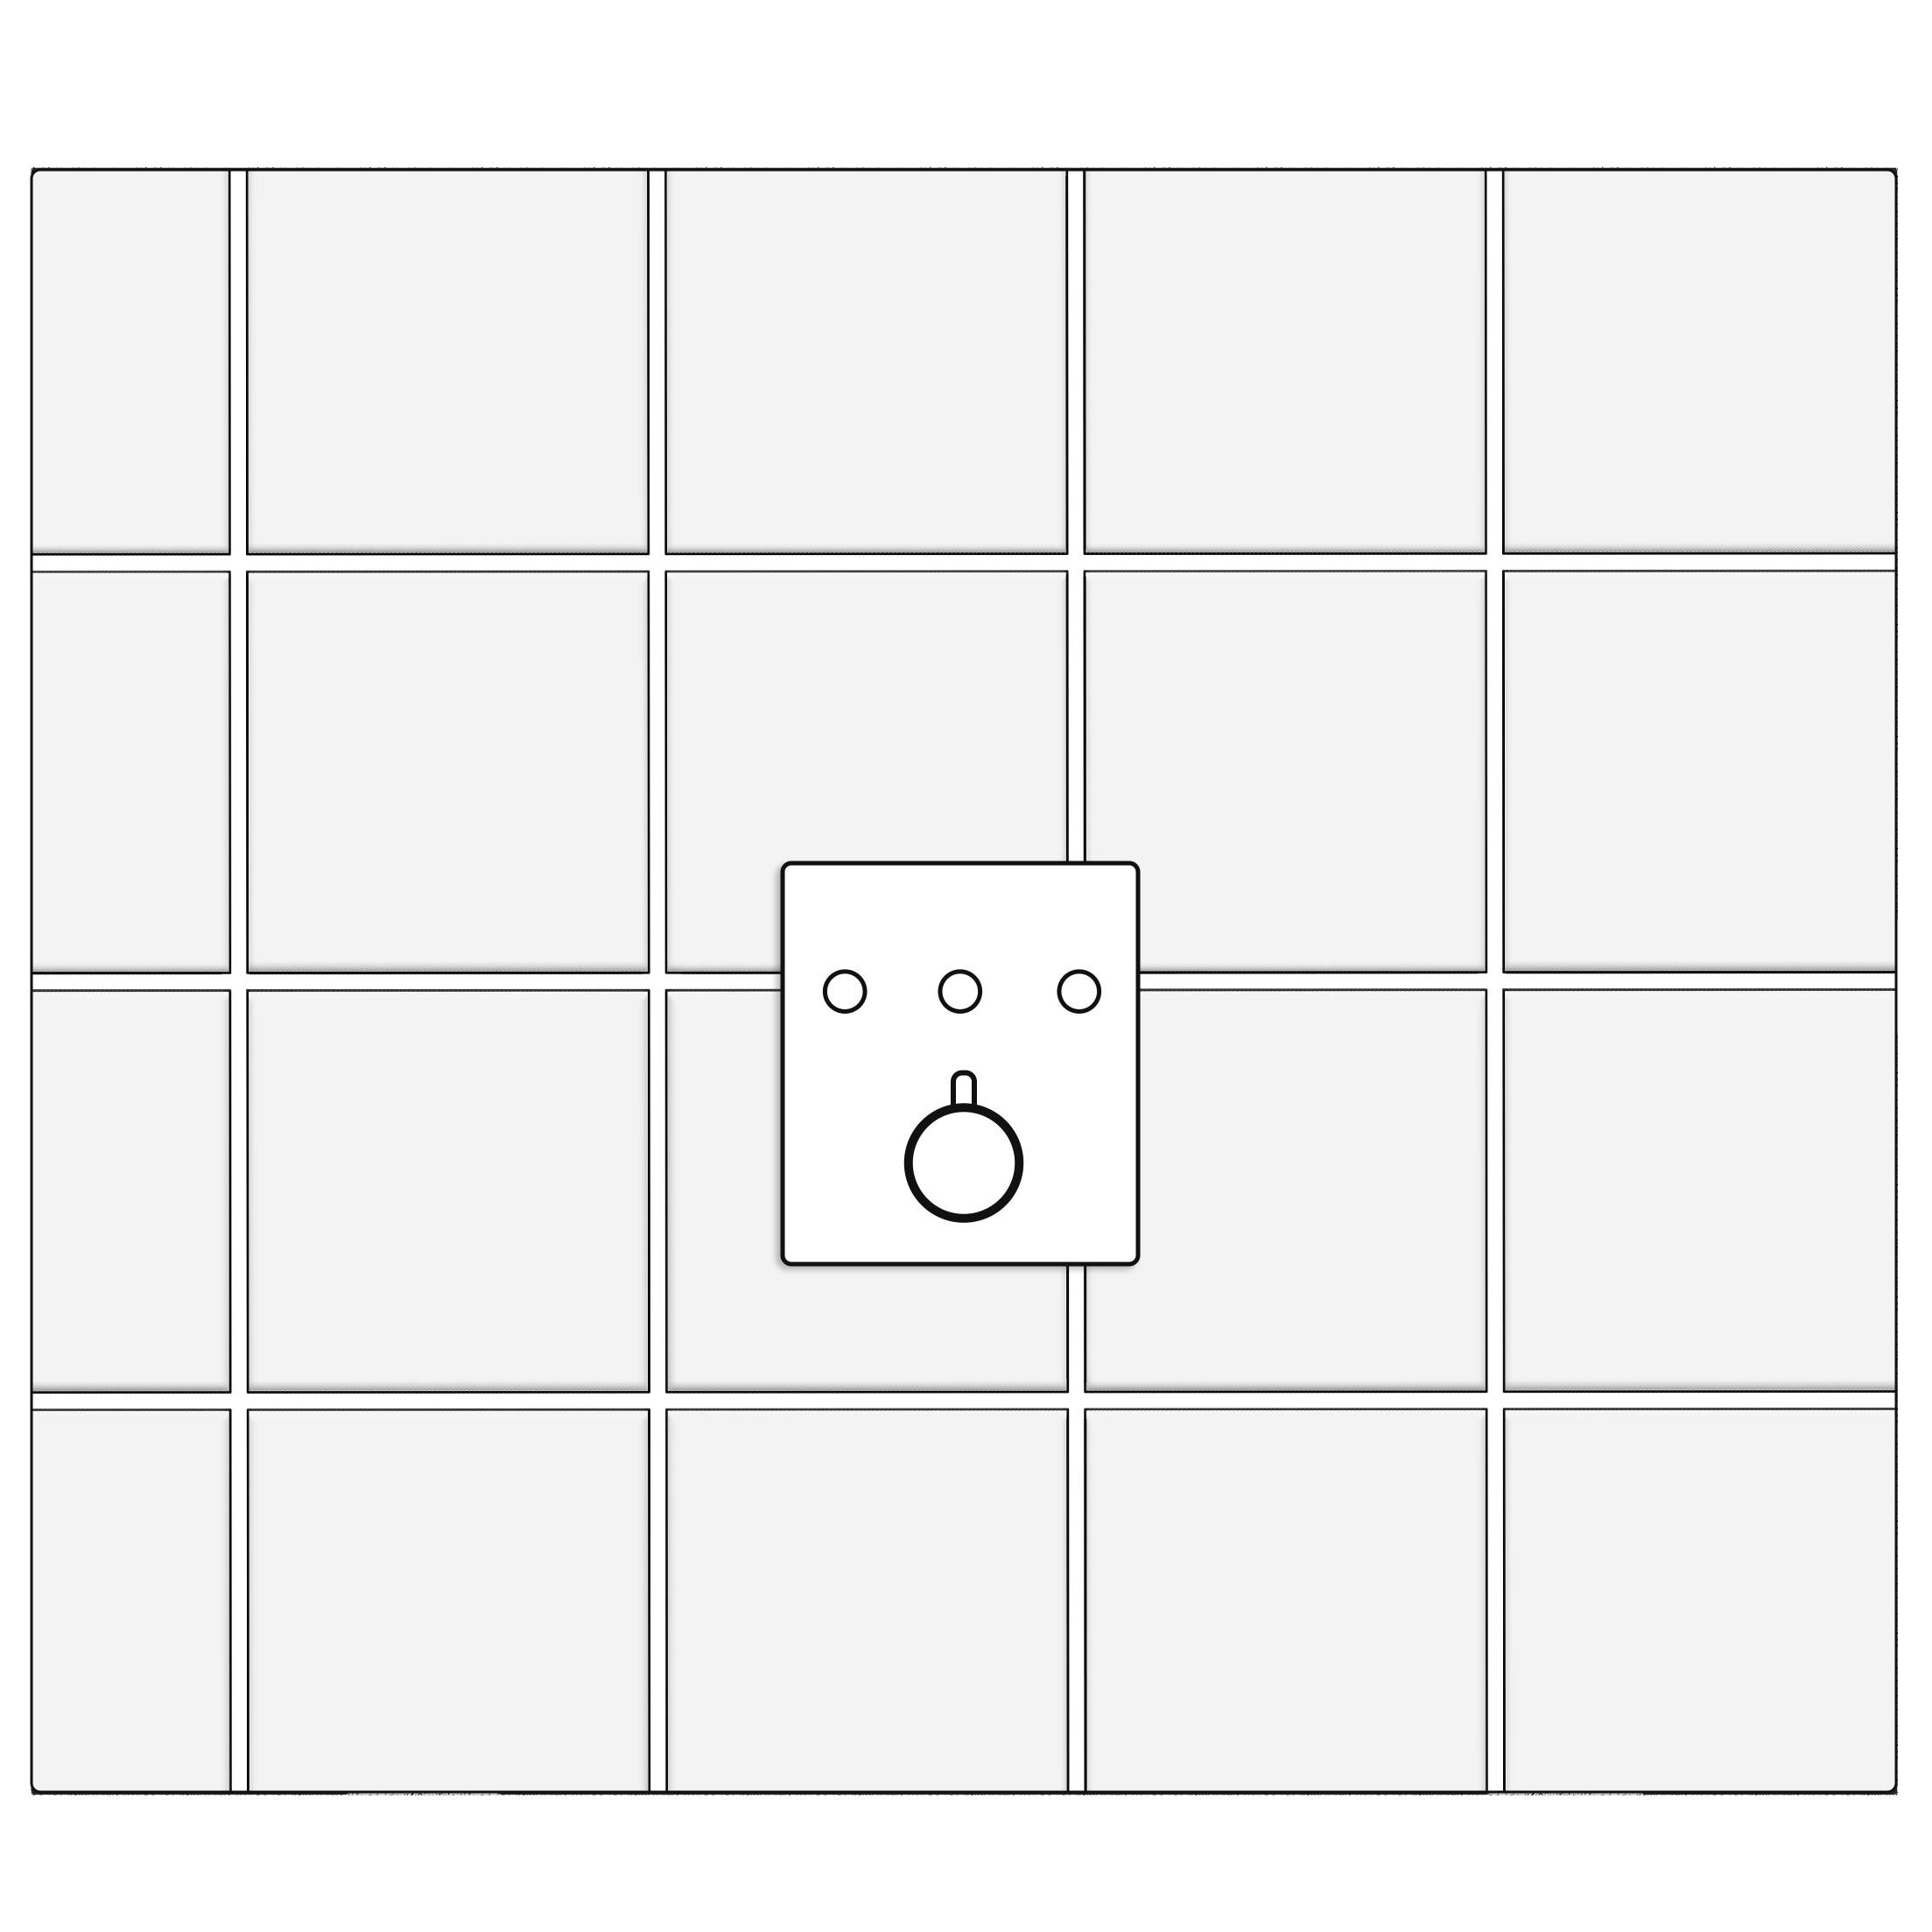
• Balance the panel on the main body. Put the accessories of the constant temperature handwheel in the opposite direction of the unloading on the main body,(pay attention to the constant temperature handwheel installation to ensure that the valve core does not turn, the button direction is aligned with the direction of the outlet pipe.)
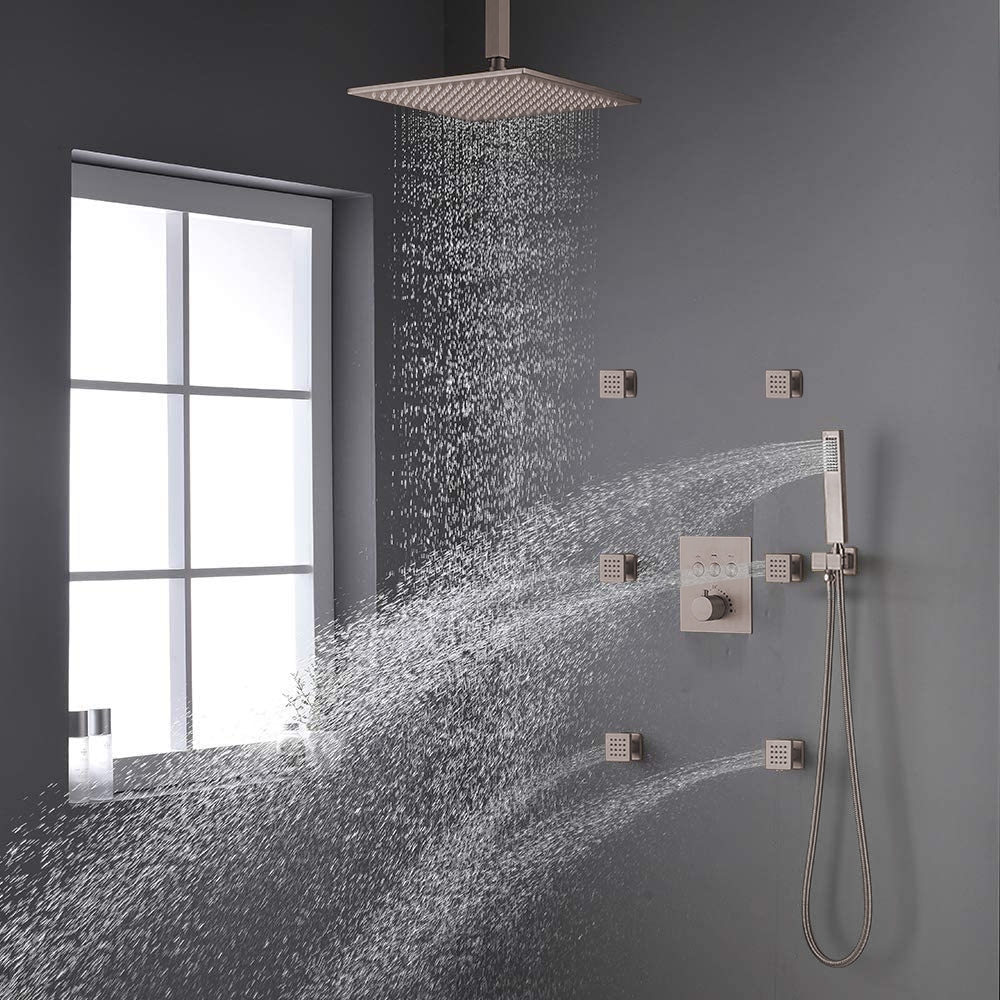
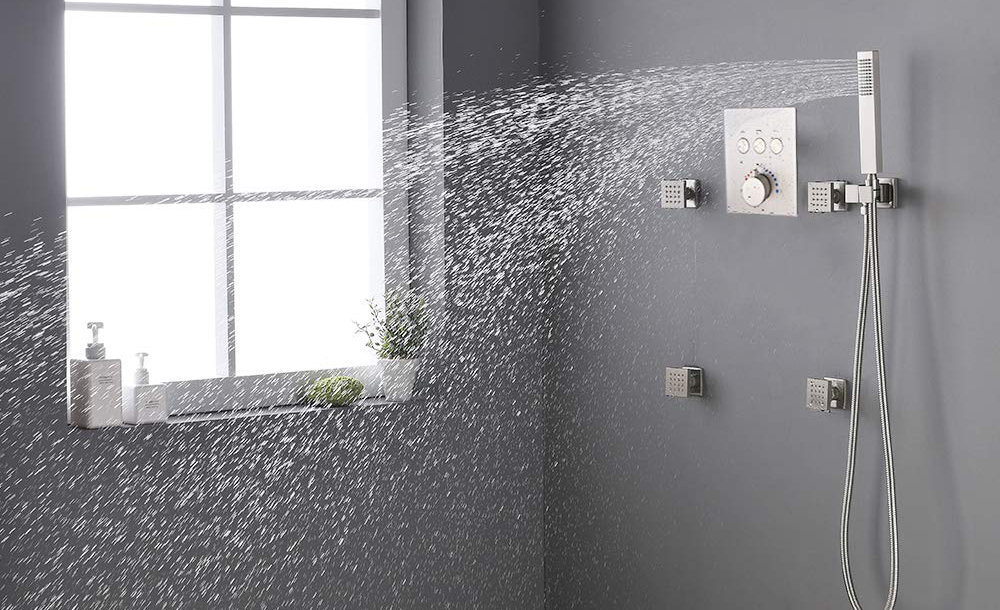
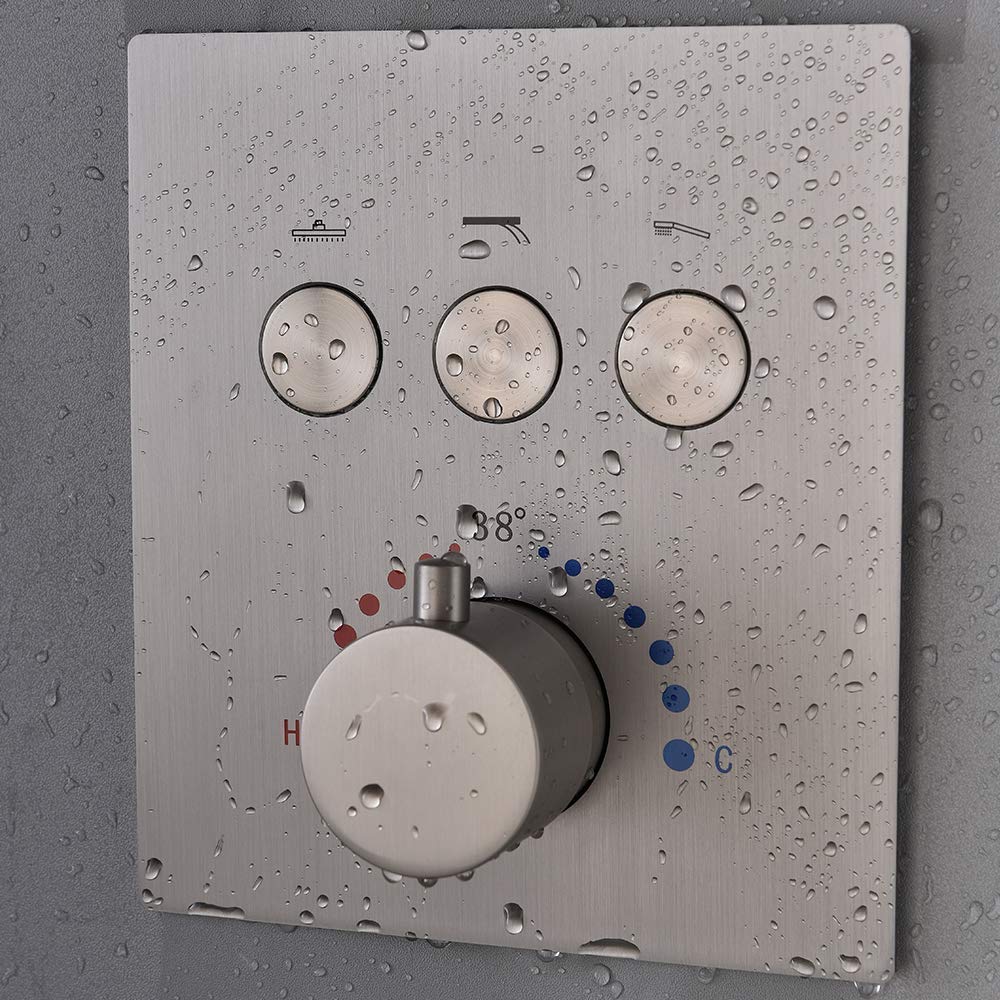
FontanaShowers Brushed Nickel Ceiling Mount Rainfall Shower Set With Thermostat Mixer Jet Spray And Handshower
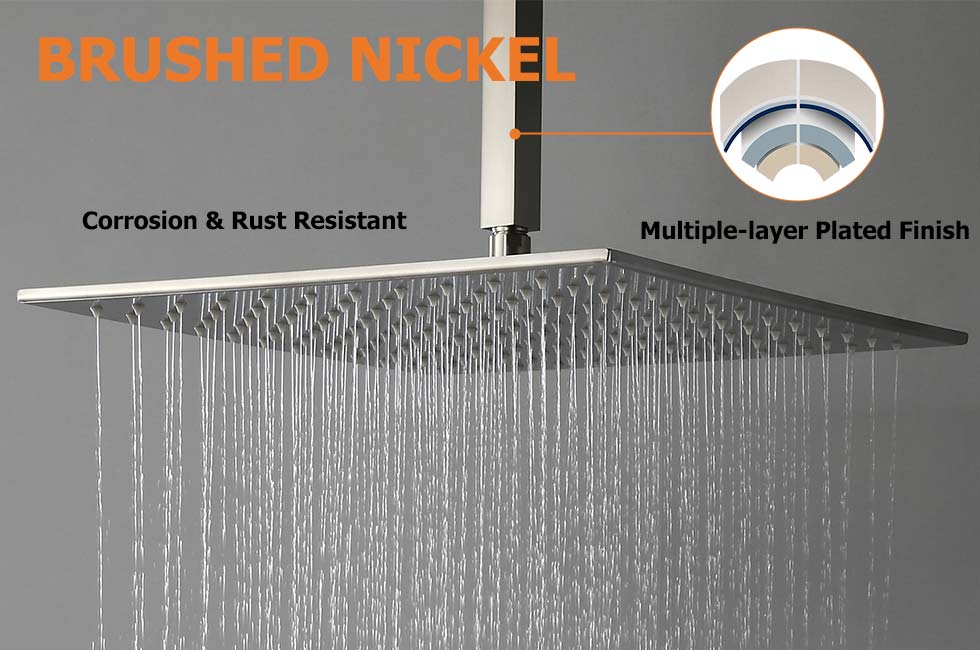
This Brushed Nickel Rainfall Shower Set is a ceiling mount shower with brushed nickel plated finish and comes with a handheld shower. When it comes to new bathroom upgrades, FontanaShowers is offering shape, finishes, and styles that you've been looking for. Give your bathroom an elegant glance with sink faucets and fixtures. This is one of the most trendiest finishes across decor styles in the bathroom. This has an elegant design and elevates the appeal of your decor made from the highest quality and for great tastes.
Features:
Brand Name: FontanaShowers
Model Number: FS1501
Type: Shower Set
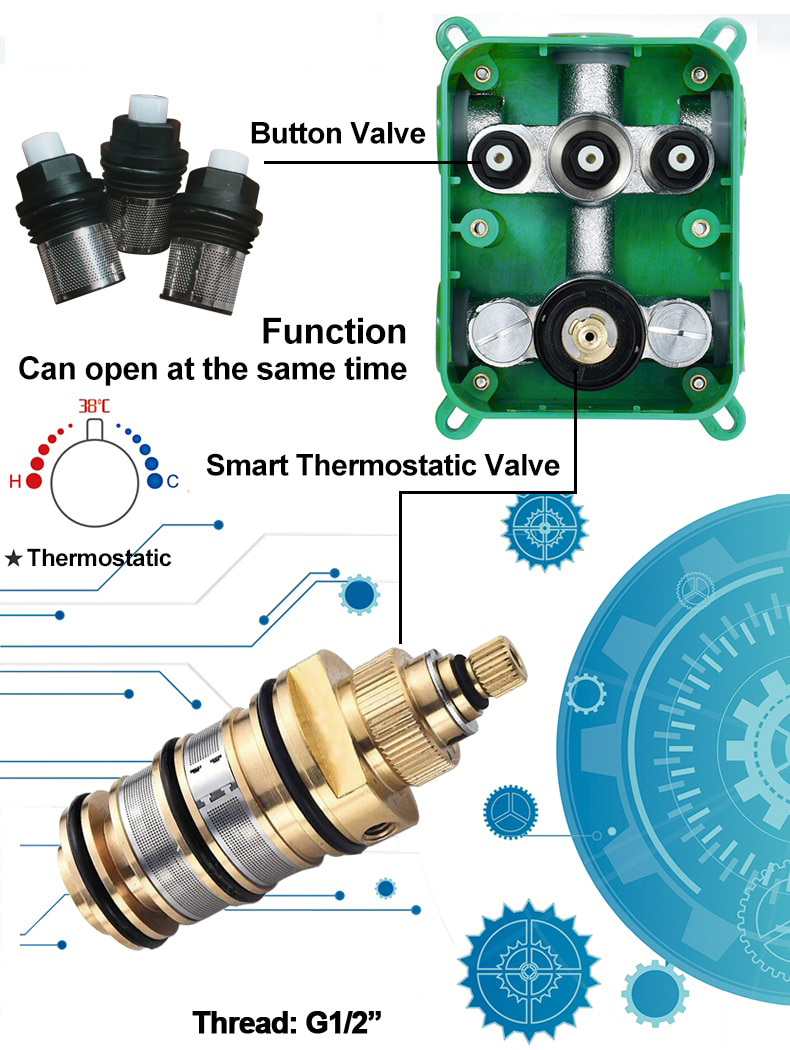
Valve Core Material: Ceramic
Surface Treatment: Polished
Surface Finish: Brushed Nickel
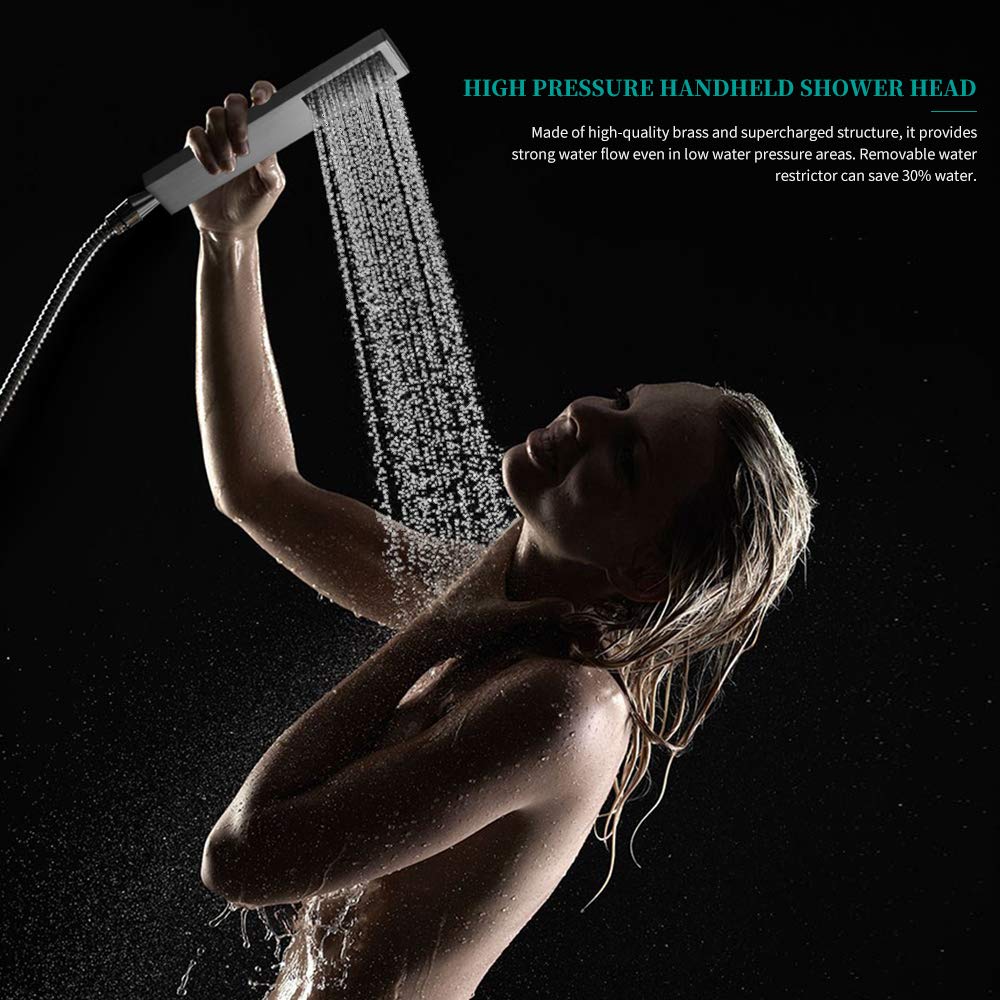
Shower Head Material: Brass
Installation Type: Ceiling Mount
Six Jet Spray
Handshower With hose
Shower Head Function: Rainfall with Thermostatic Mixer
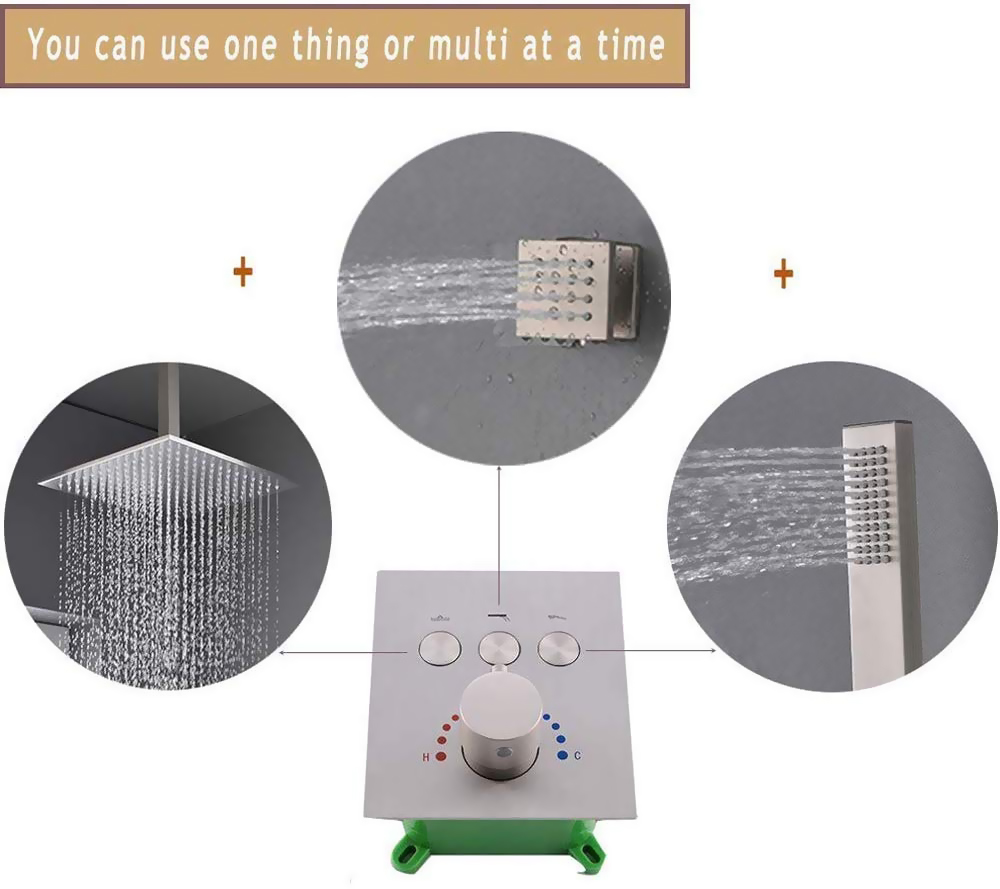
Simultaneous use of shower head, handshower and jet sprays