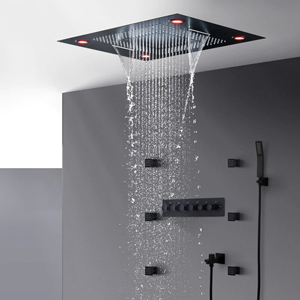
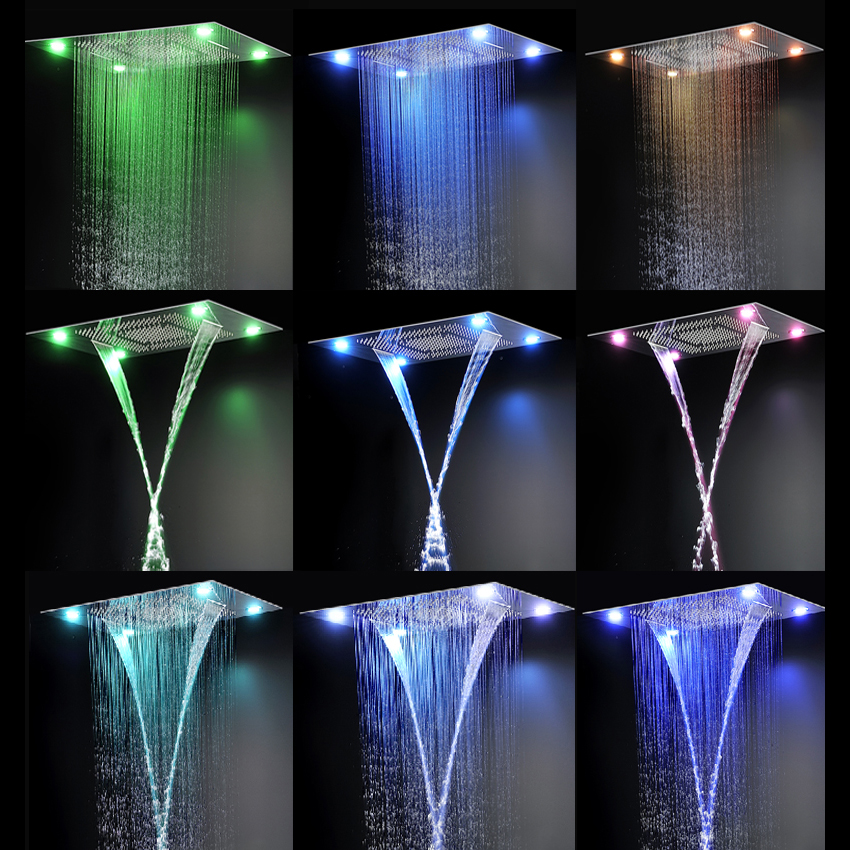
This Luigi multi-function shower set led remote control light brass shower system complement classic or contemporary spaces with their versatile design and effortless installation. This Luigi led remote control brass shower set exemplifies the Fontana Showers collection understated style, SPA body massage spray, relieving fatigue and stress just by turning on the water in a high-pressure bathroom head shower with 360° 6 adjustable body spray jets and a hand shower with Solid Brass Mixer valve features stylish yet easy to use handles that control the flow and temperature of the water and a diverter that allows you to switch between the fixed head, hand shower or the body jets.. This shower set has been made with premium-grade lightweight and the LED lights will automatically light up and set the mood. They will even change colors automatically based on the water temperature. All this with no batteries, everything is self-powered by a built-in dynamo that takes advantage of the water pressure to create the energy to light the bulbs.
Luigi LED Remote Control Brass Shower Set Features:
Brand Name: FontanaShowers
Model Number: FS9815
Type: LED Shower System
Material: Brass
Finish: Finish: Dark Oil Rubbed Bronze
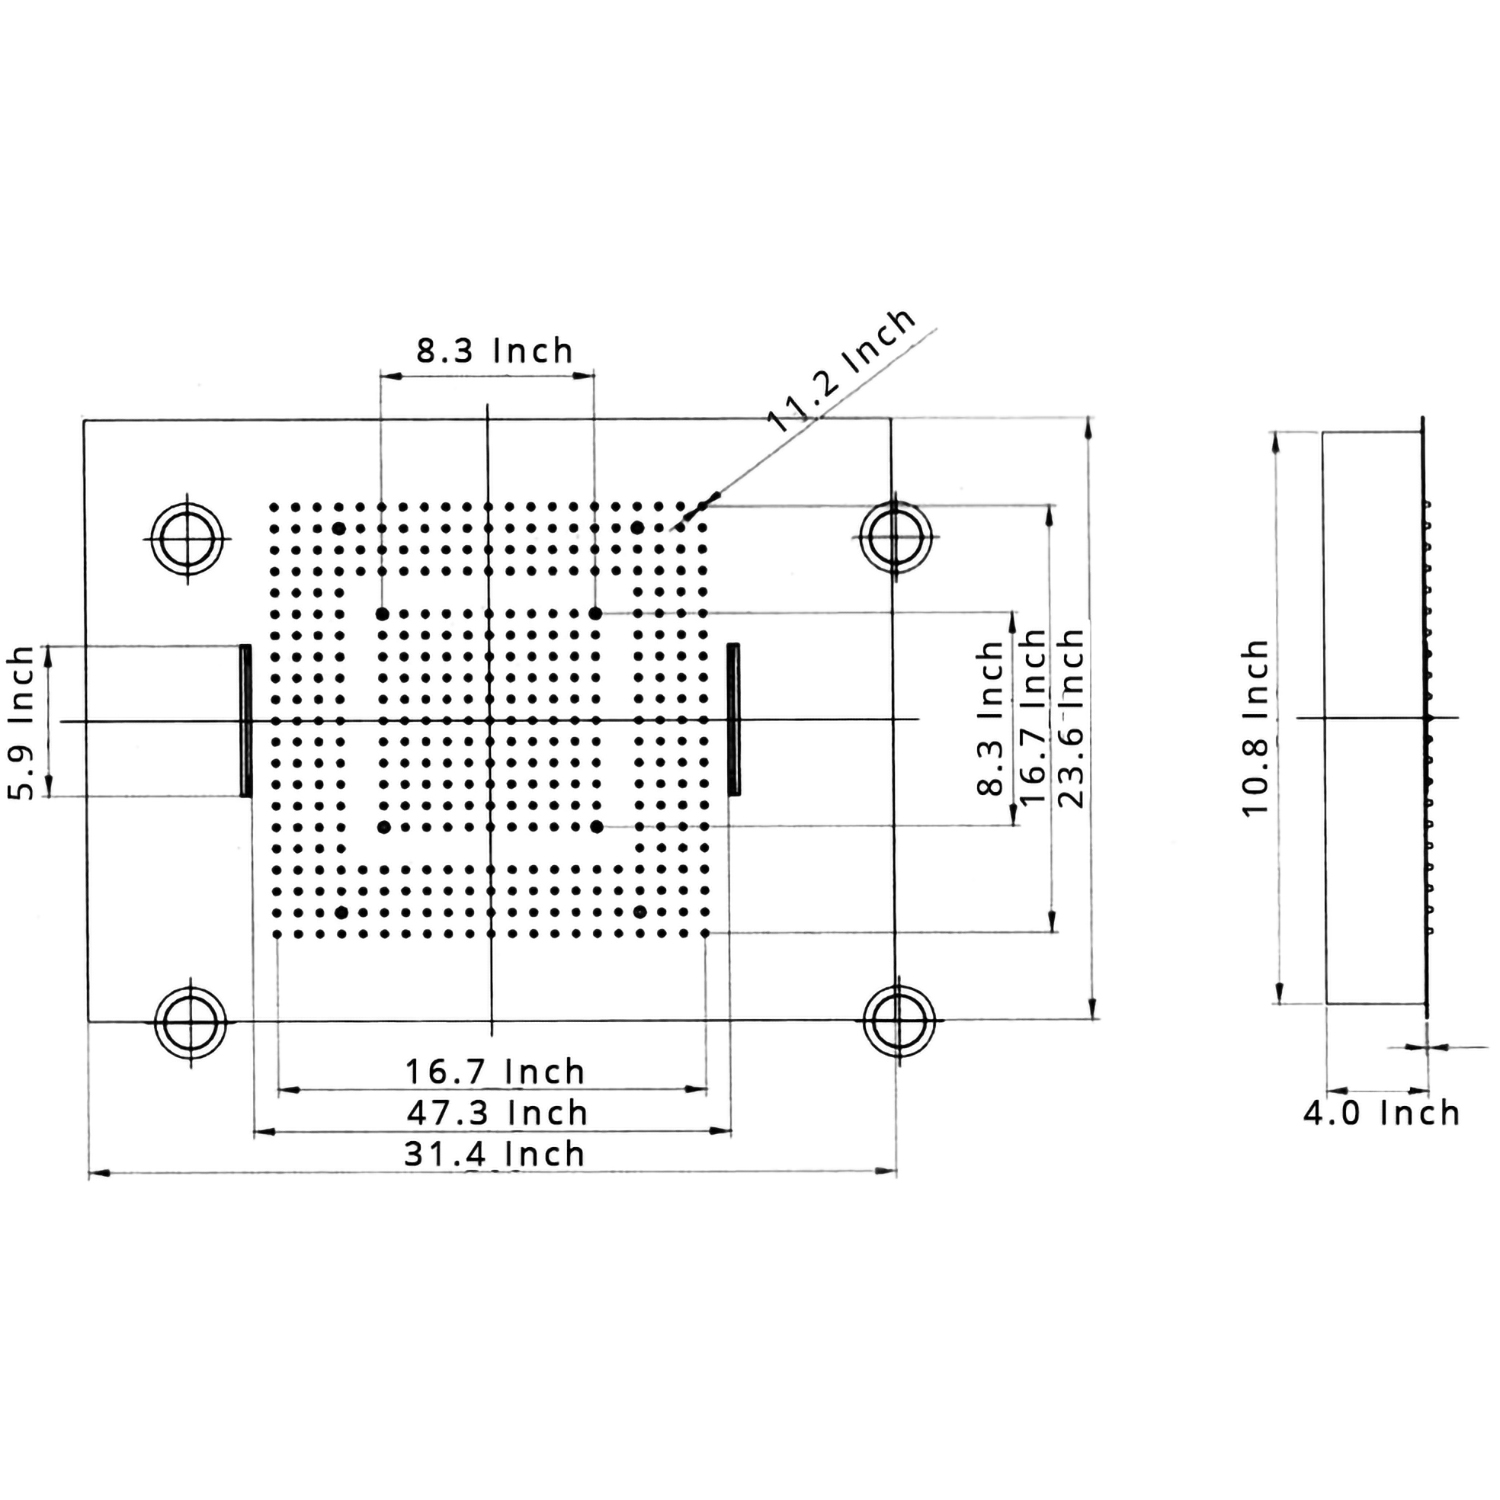
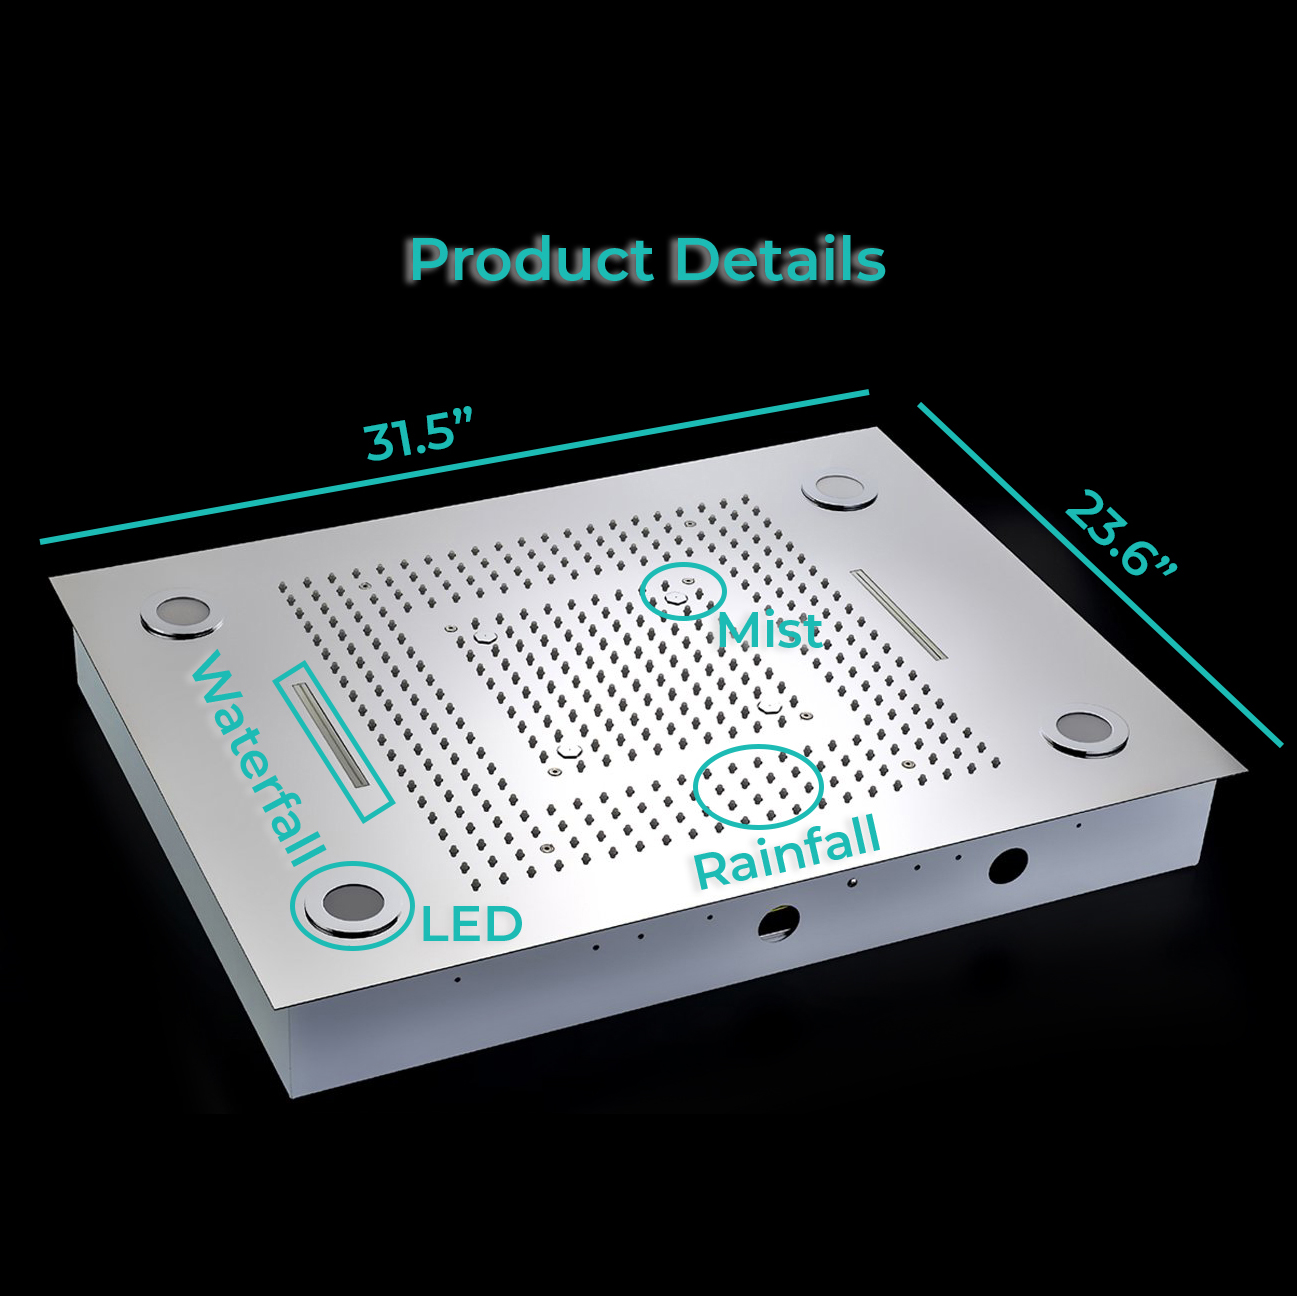
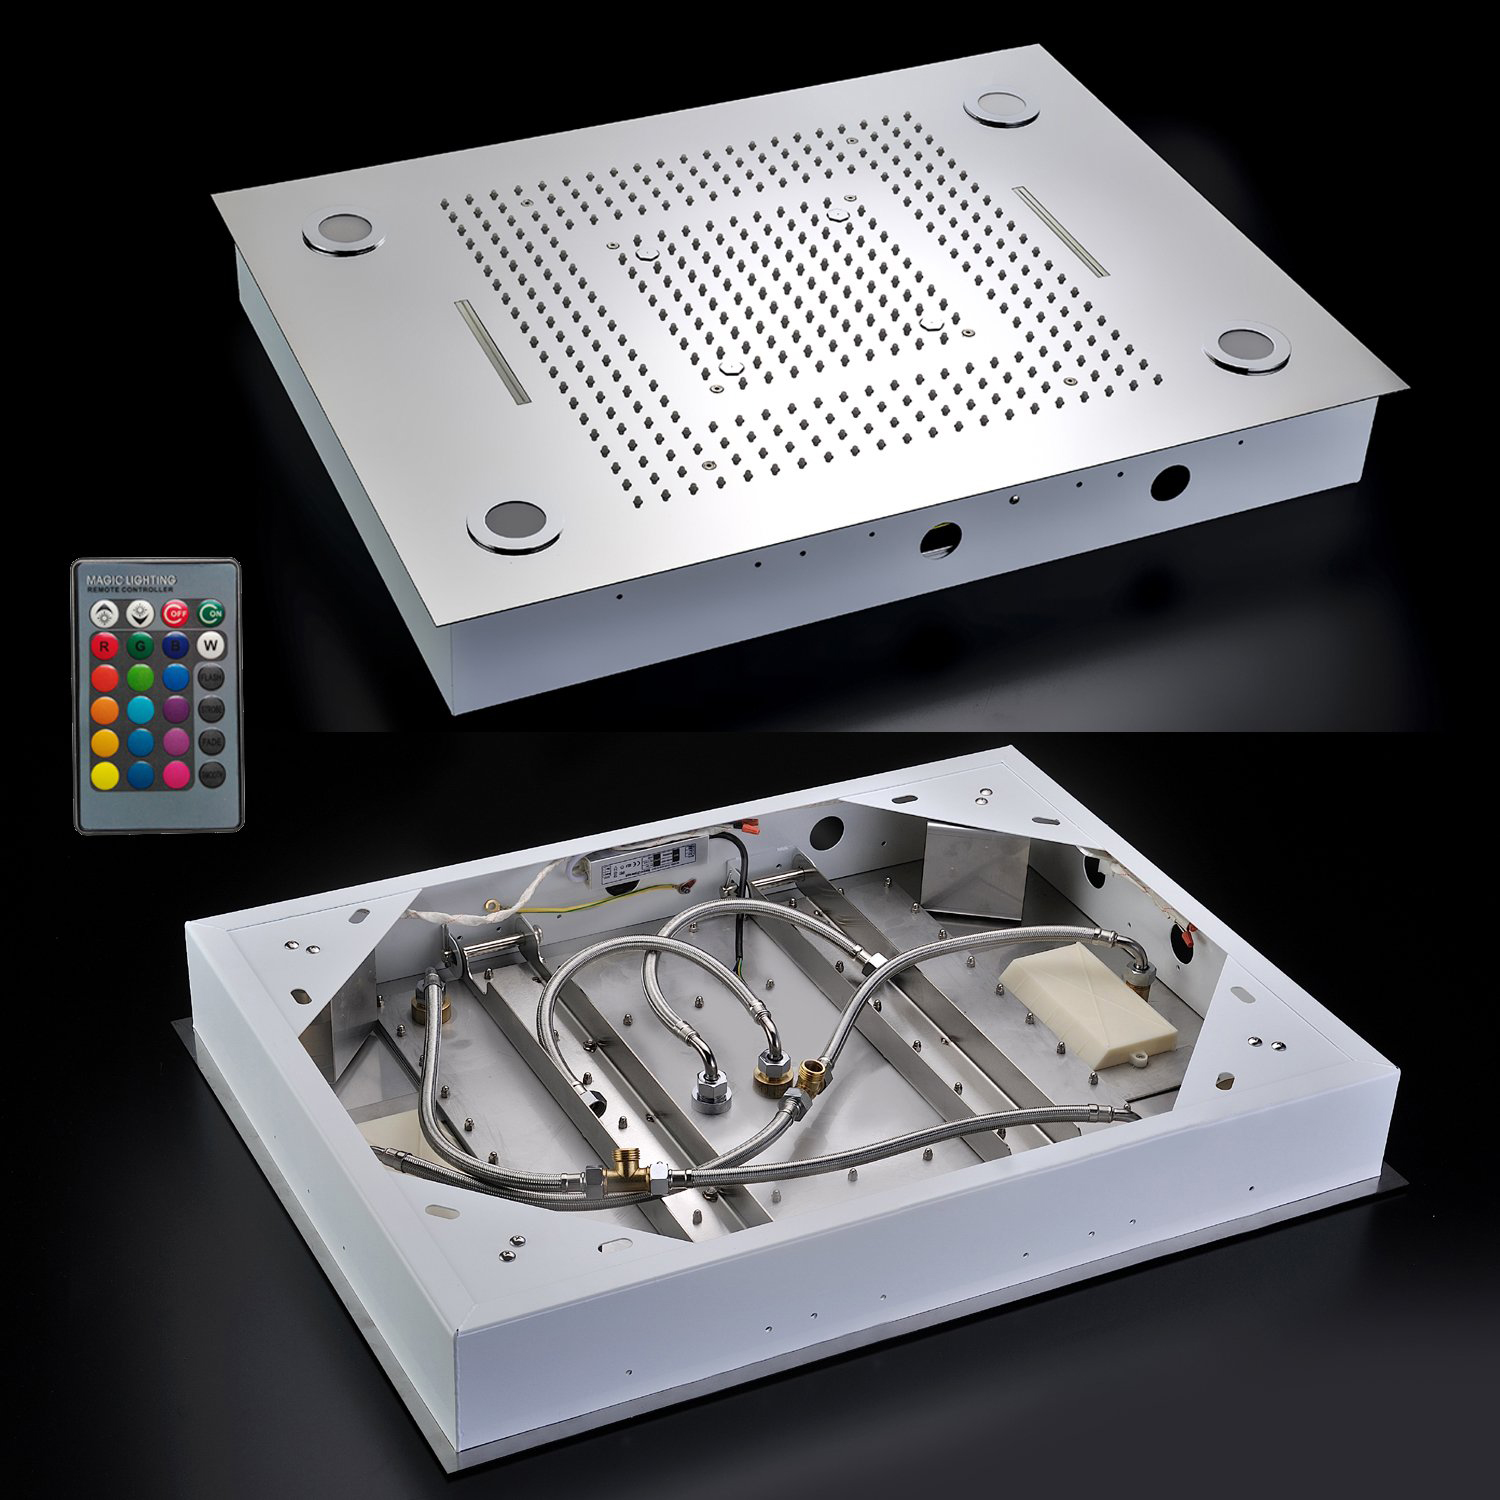
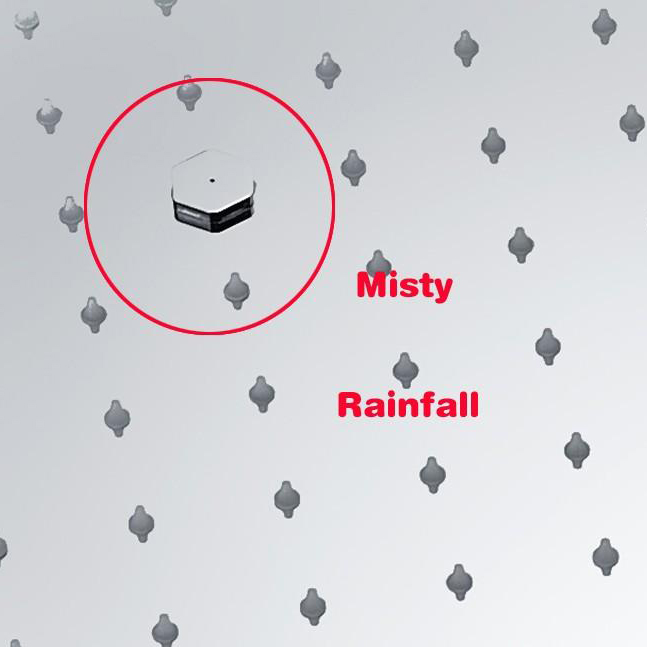
Shower Head Size: 20" x 40"
Flow Rate: 2.5 GPM
Installation:Recessed/ Ceiling Flushed Shower head
Before you begin, please read the installation instructions below. Observe all local building and safety codes.
Unpack and inspect the product for any shipping damages. If you find damages, do not install.
Please note all showers must be installed by a professional and certified plumber otherwise warranty might be voided.
showe
Shower Head Installation Instructions
Step 1:
Step 2:
shower
LED Shower Head Installation Instructions
Step 3:
Step 4:
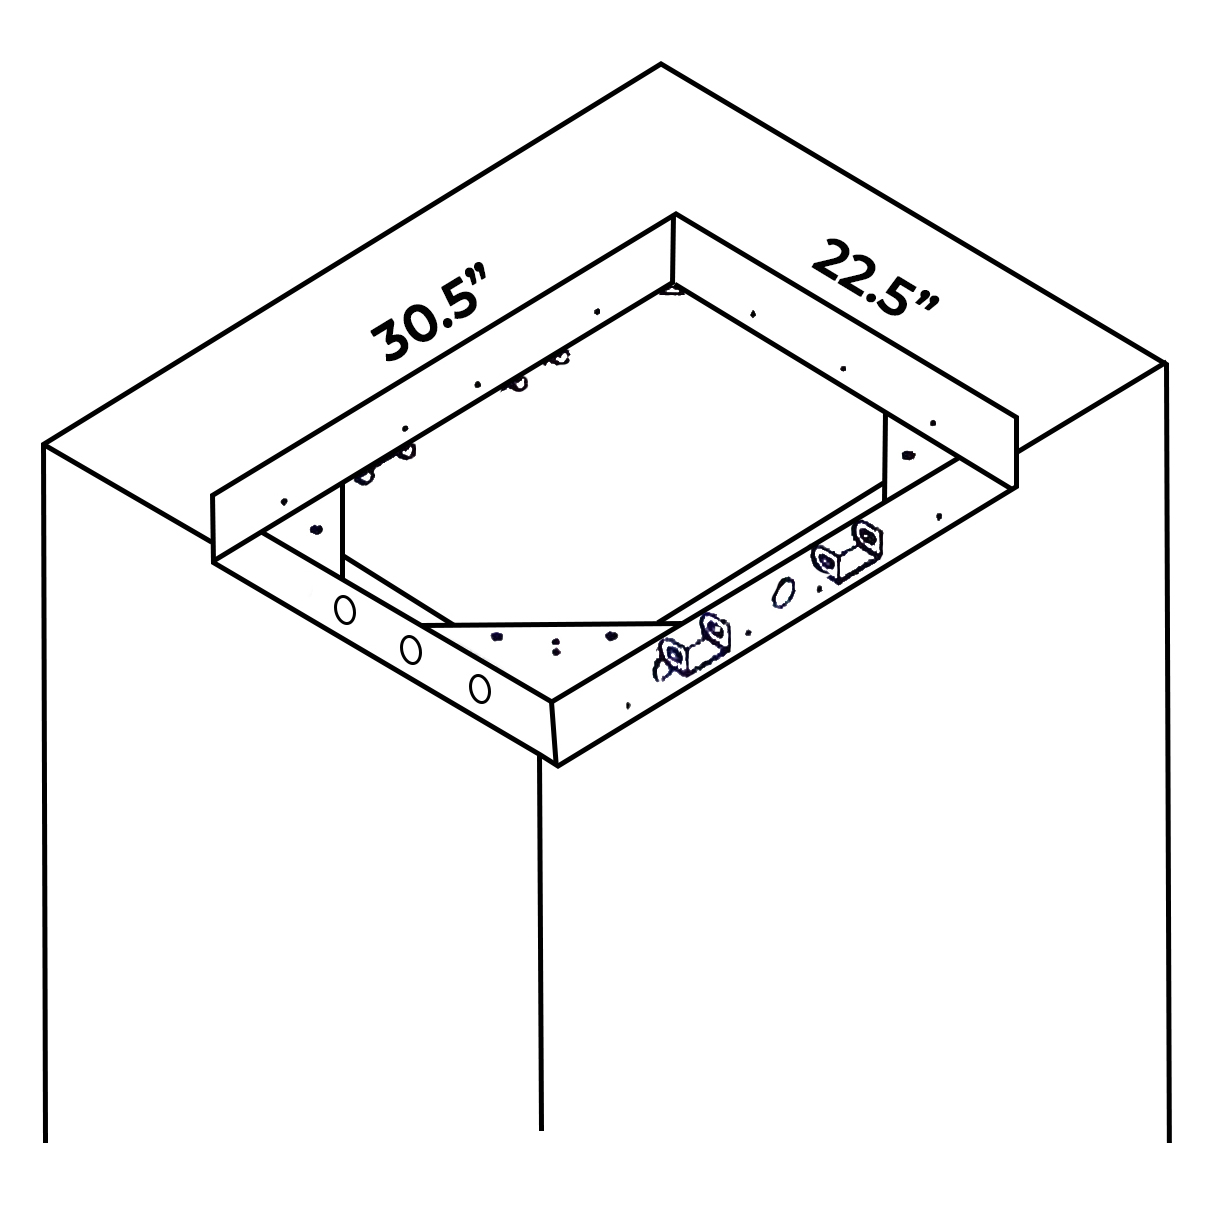
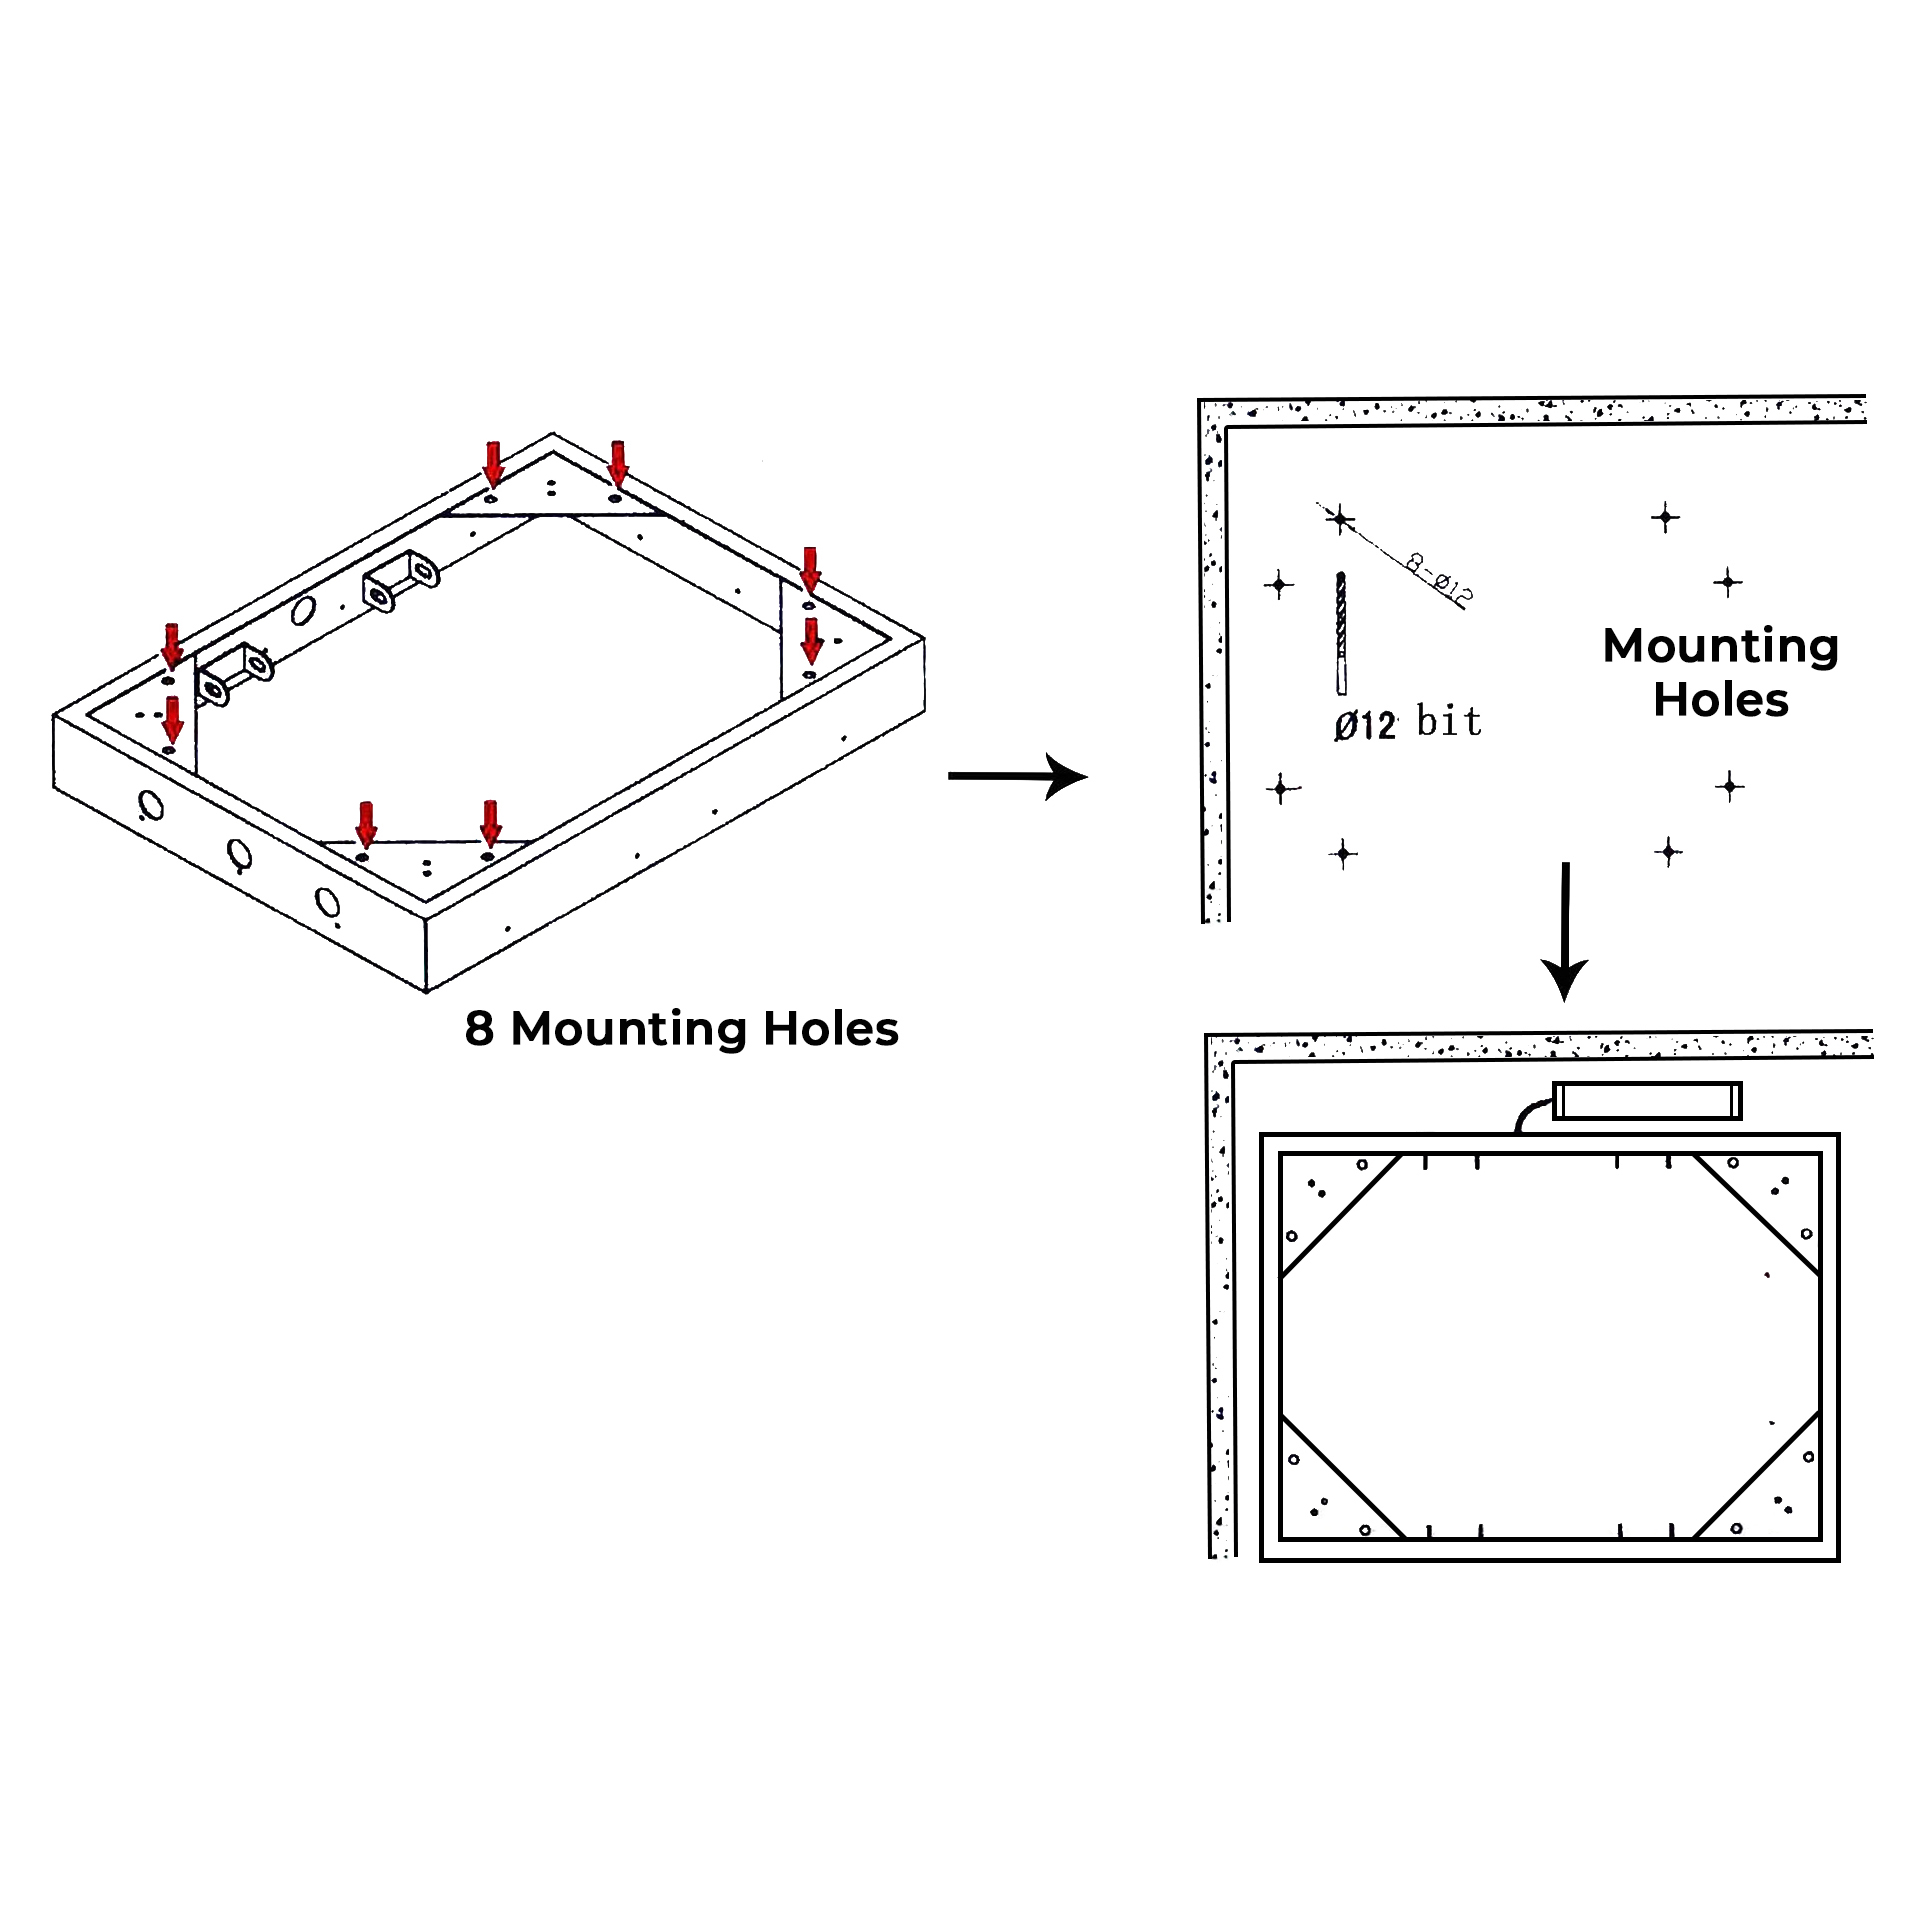
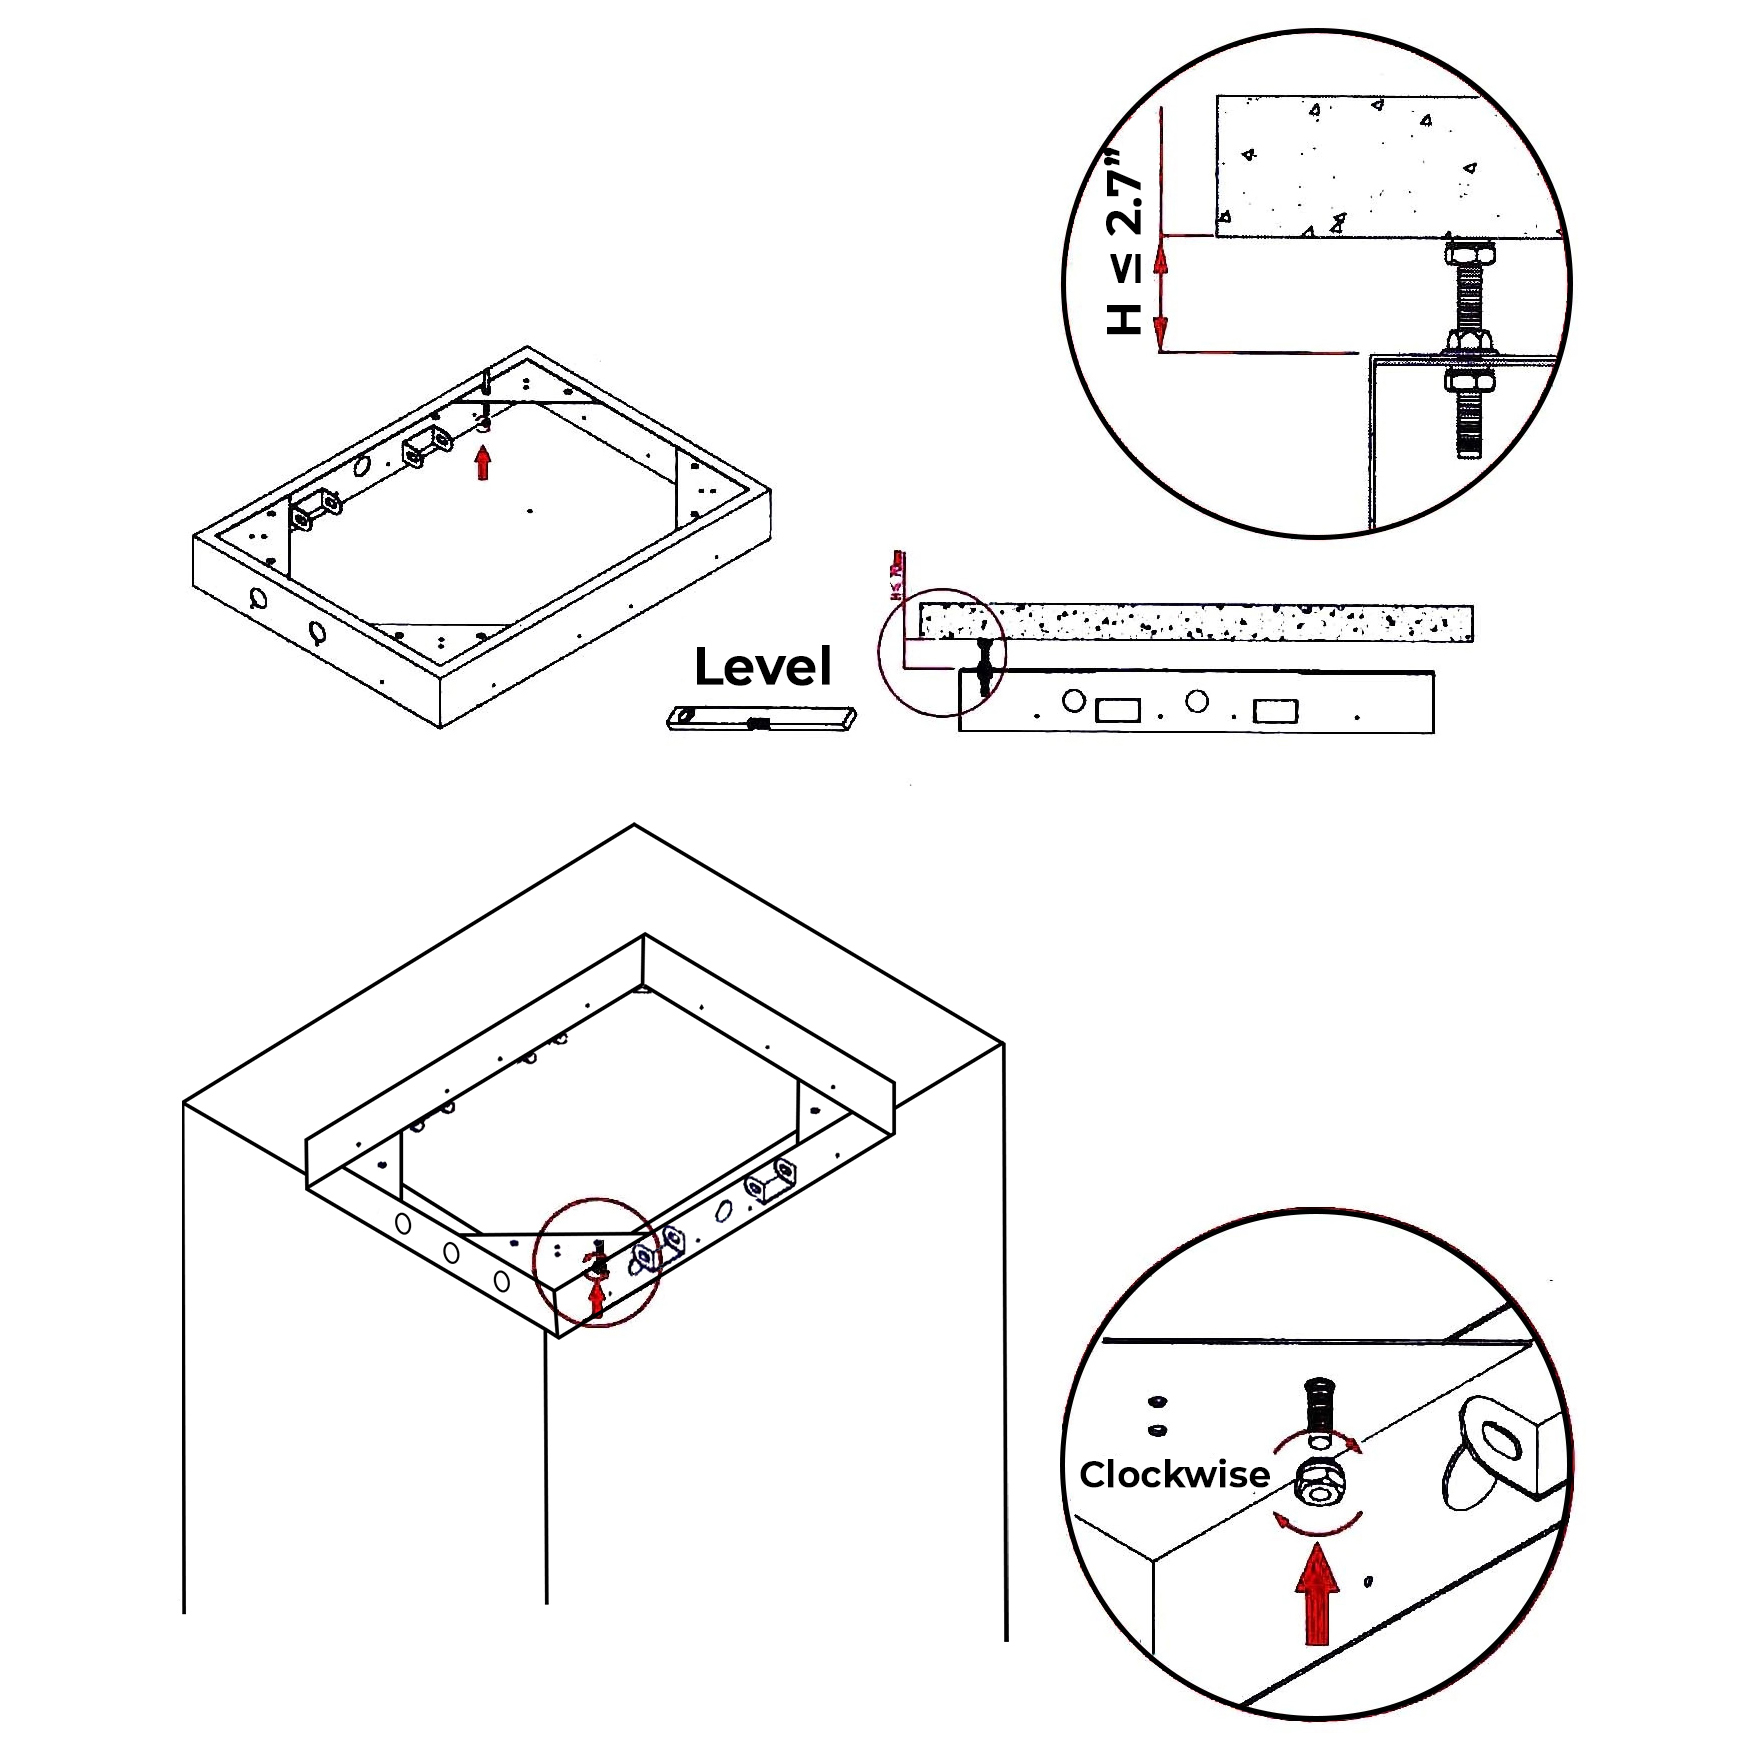
According to the dimensions and shape of the mounting bracket, determine the bracket location to be installed in the ceiling.
According to the 8 mounting holes on the mounting bracket, use an Electric drill to make the mounting holes.
Shower Head Installation Instructions
Step 5:
Step 6:
Using the two hexagonal nuts adjust the distance between the mounting bracket and the ceiling, and keep the mounting bracket on the level. Use an explosion screw to fix the mounting bracket on the ceiling, pay attention to the explosion screw, it can adjust the height and use level tool to adjust the mounting bracket to reach level.
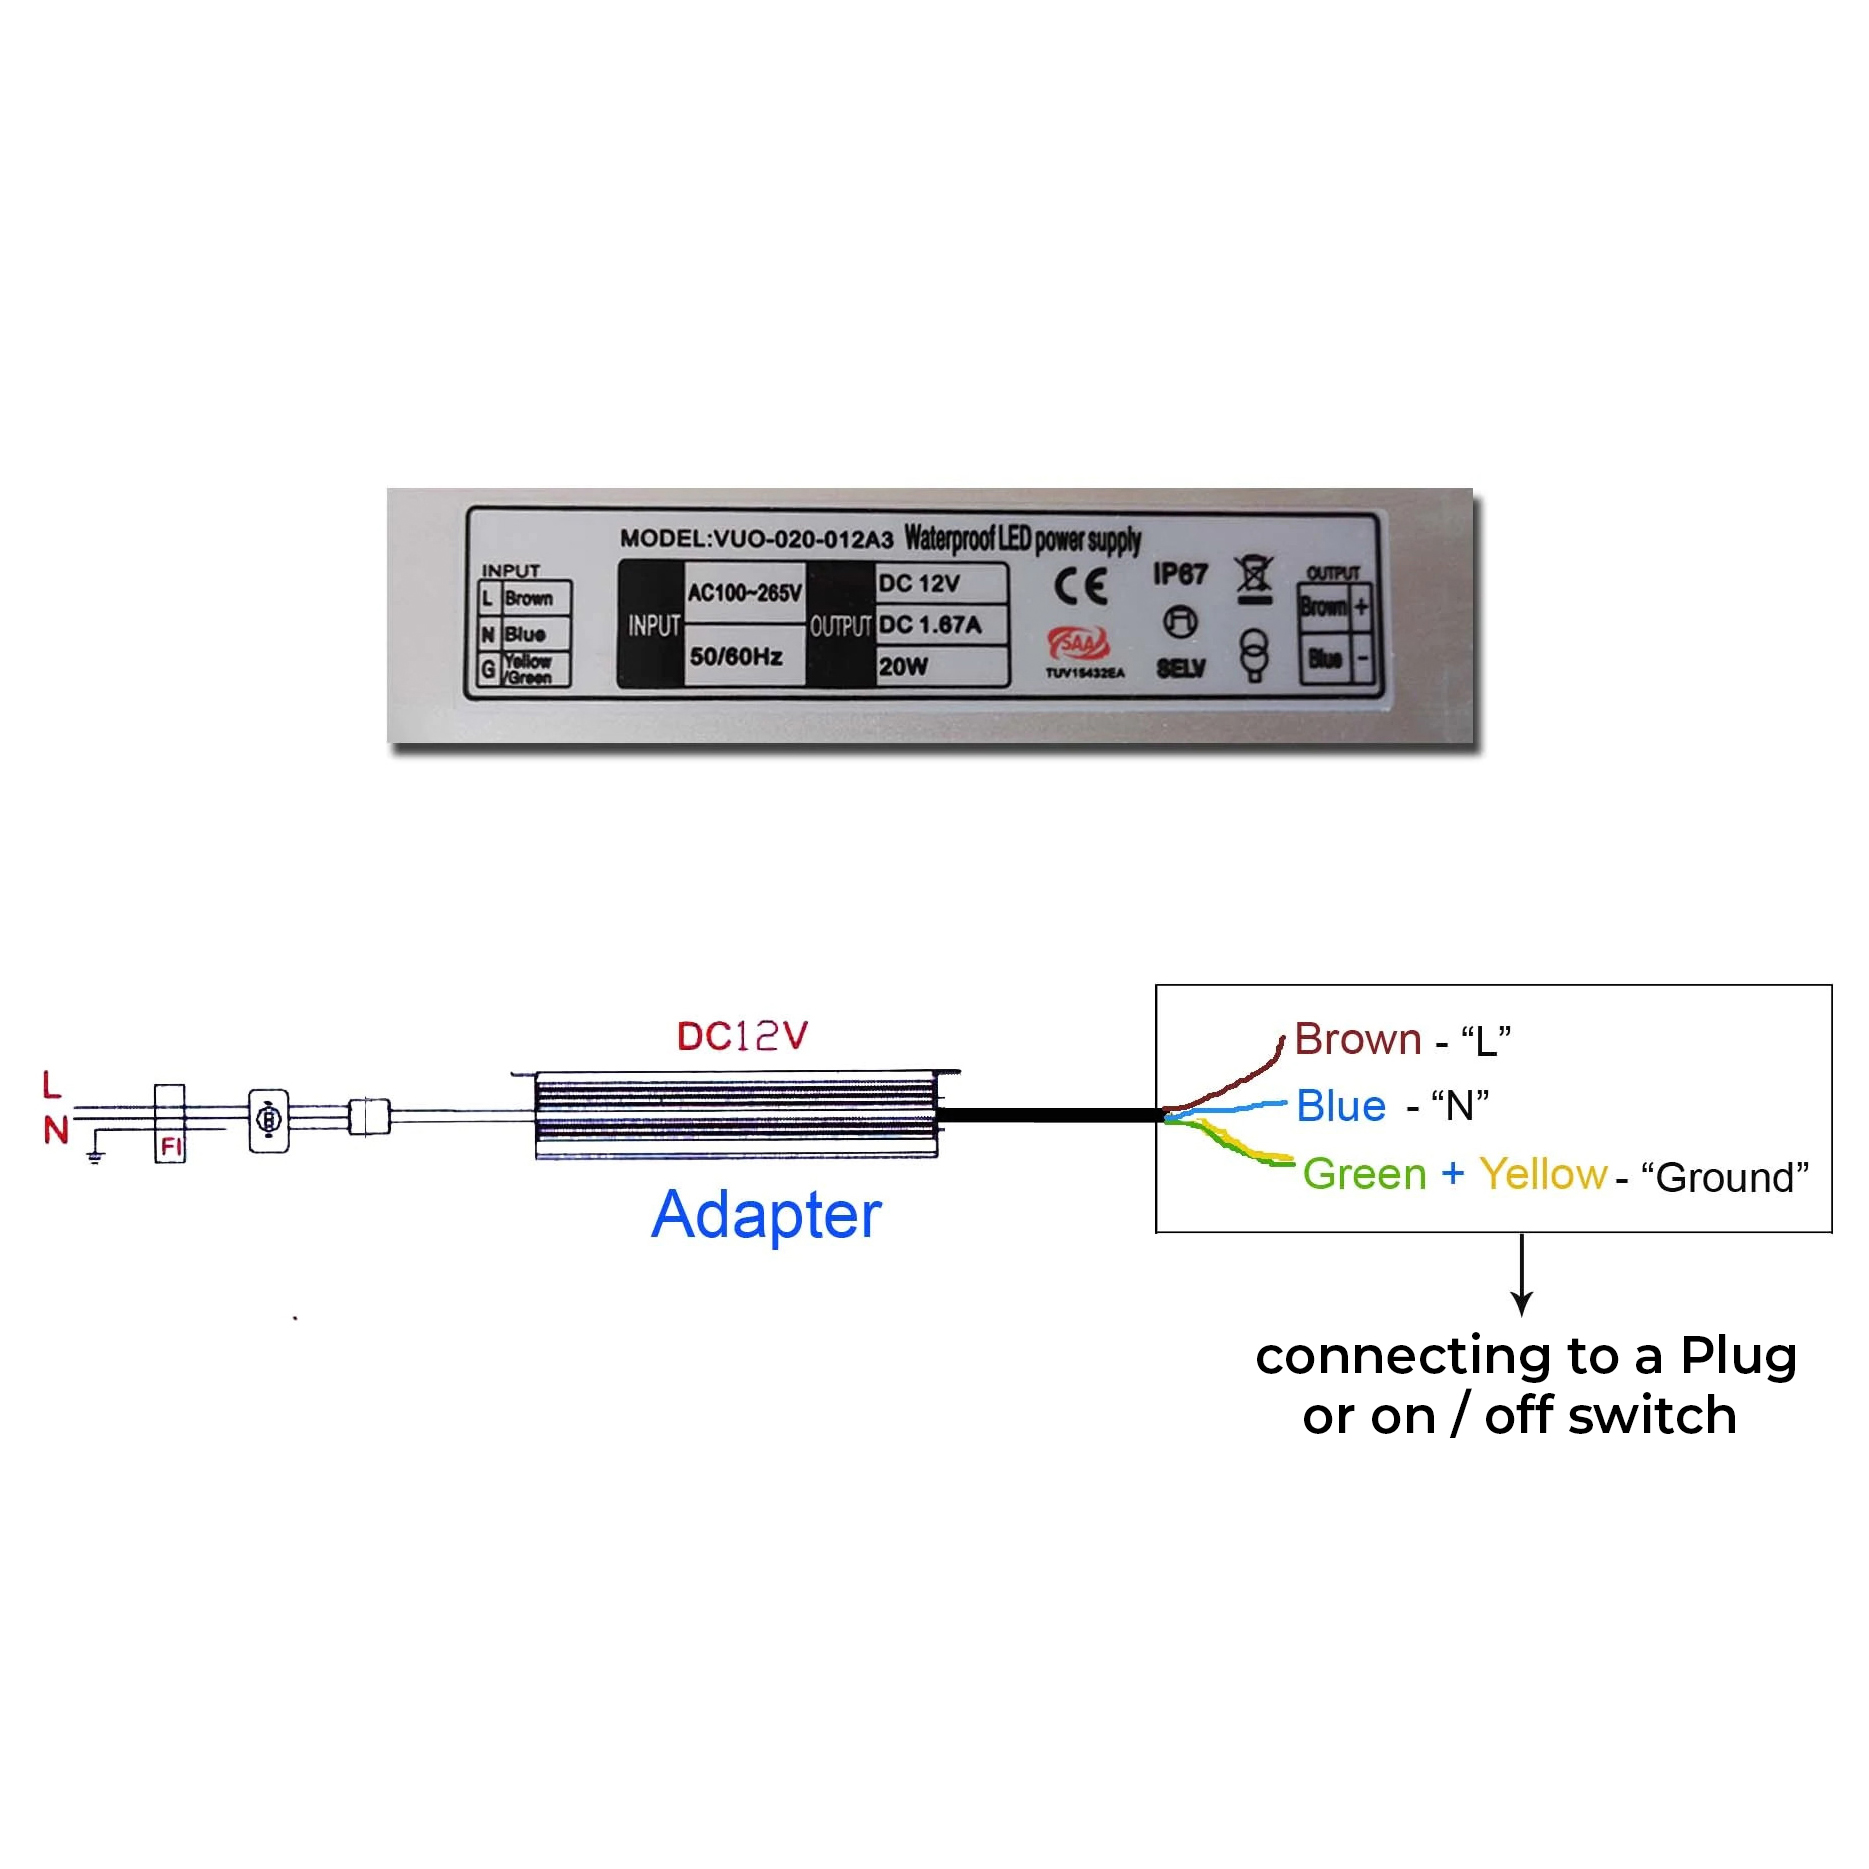
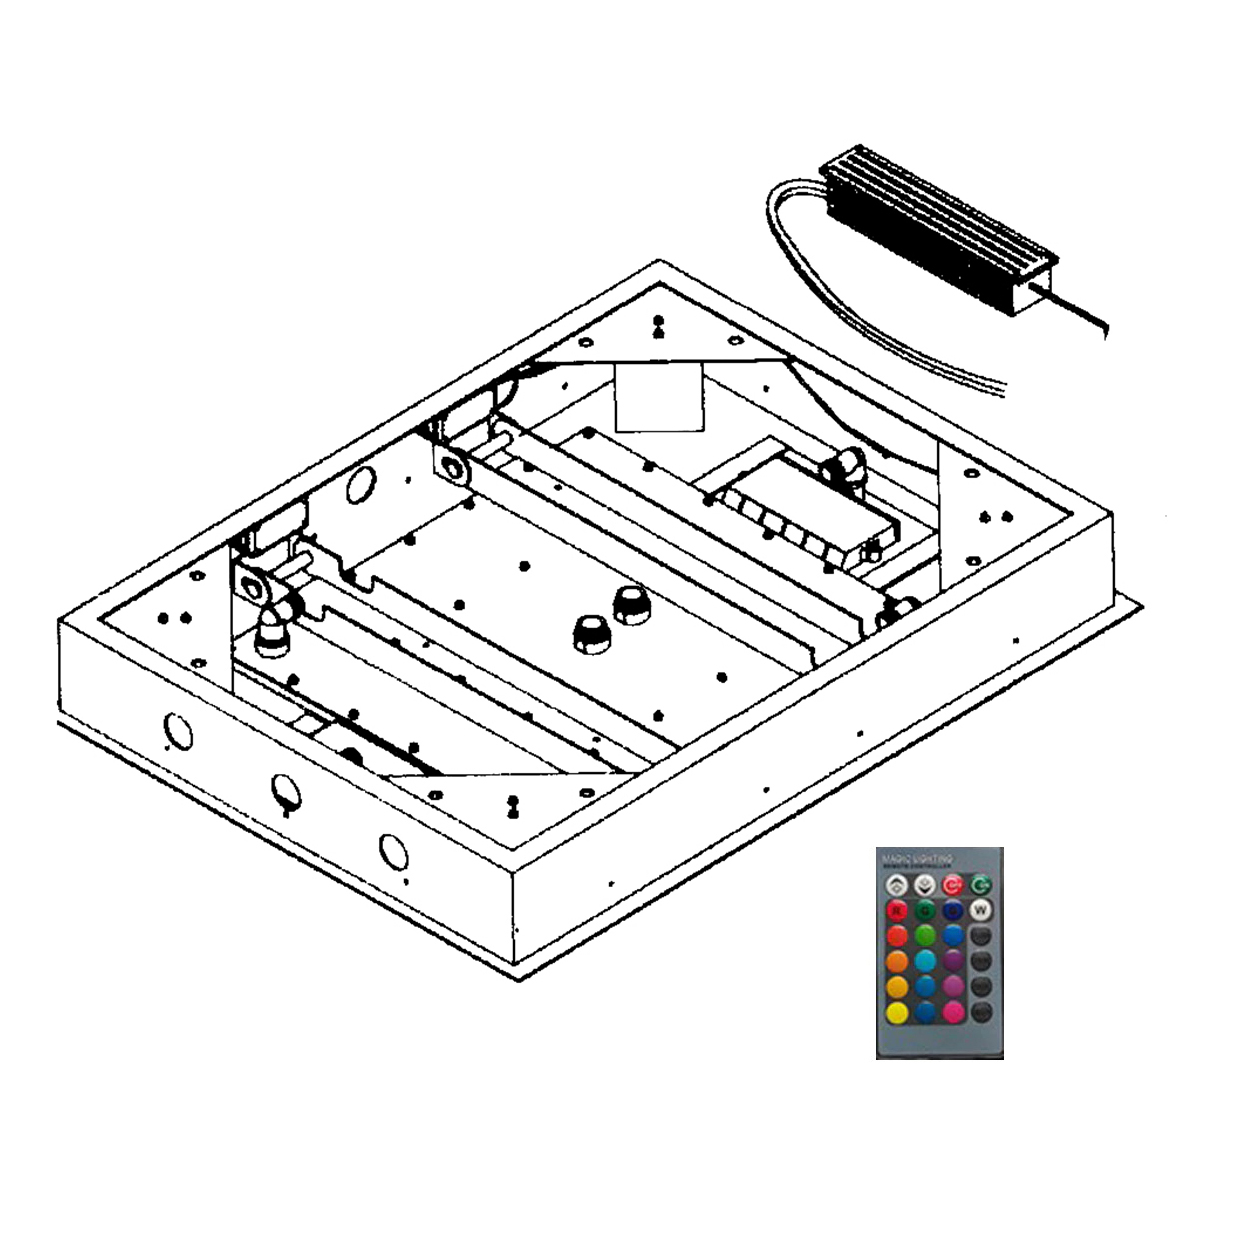
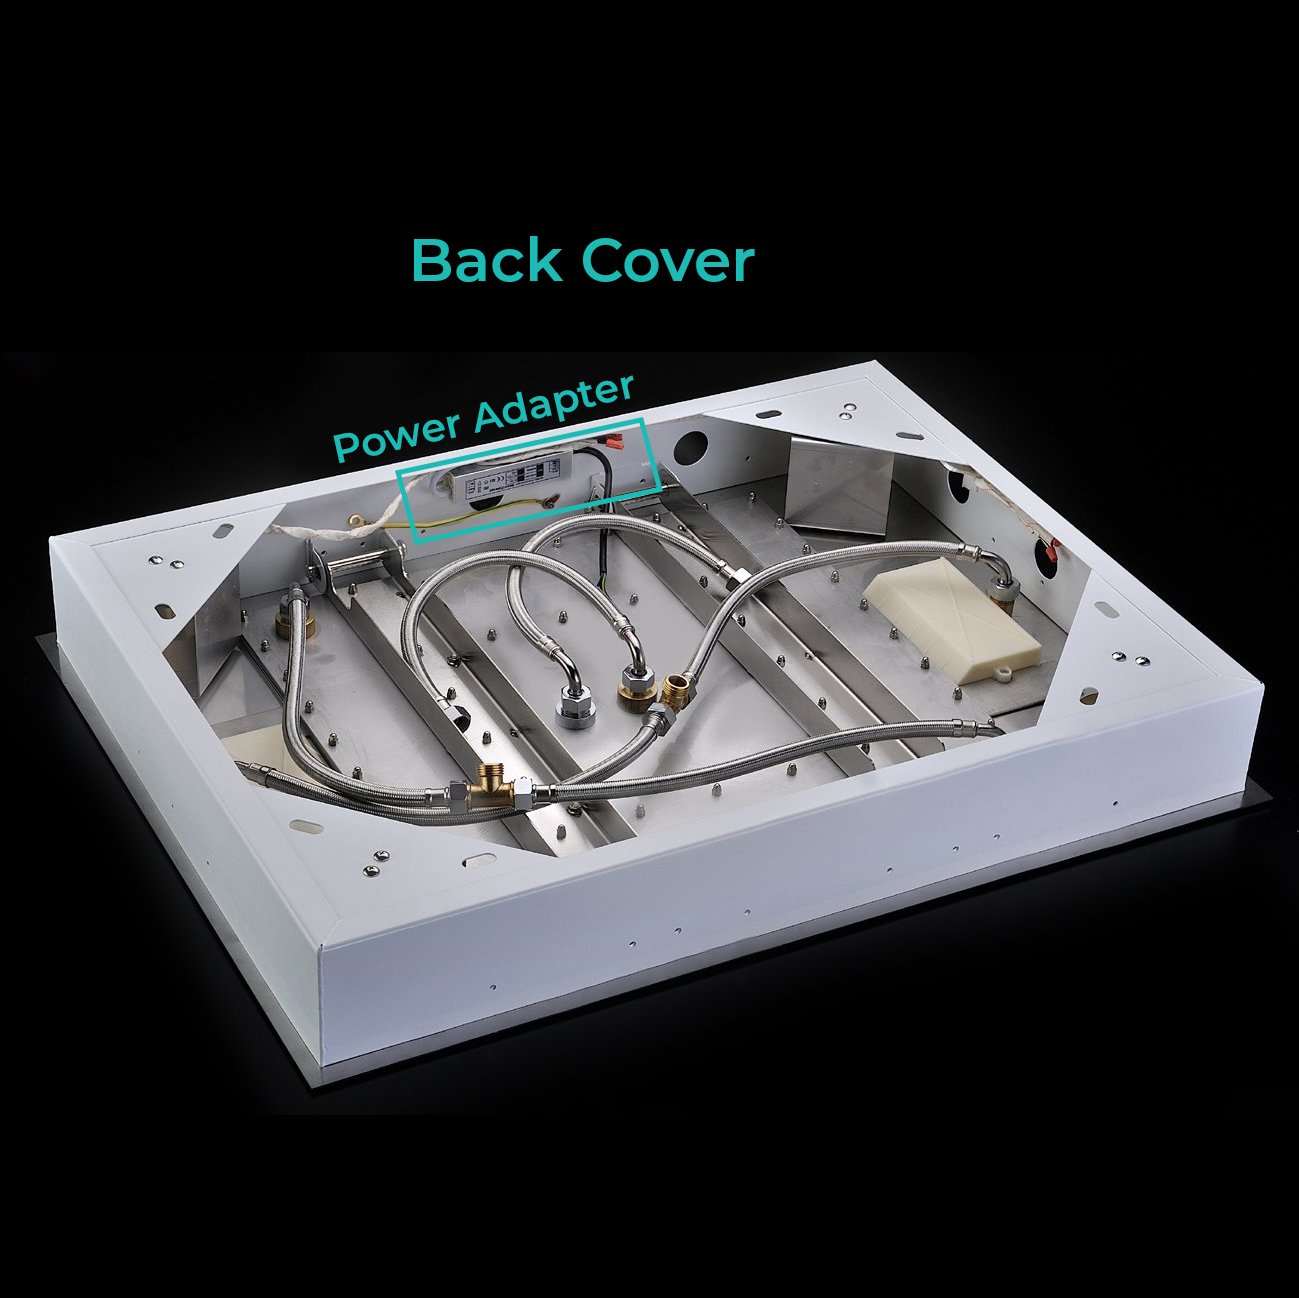
Connecting Circuits
Shower Head Installation Instructions
Step 7:
Step 8:
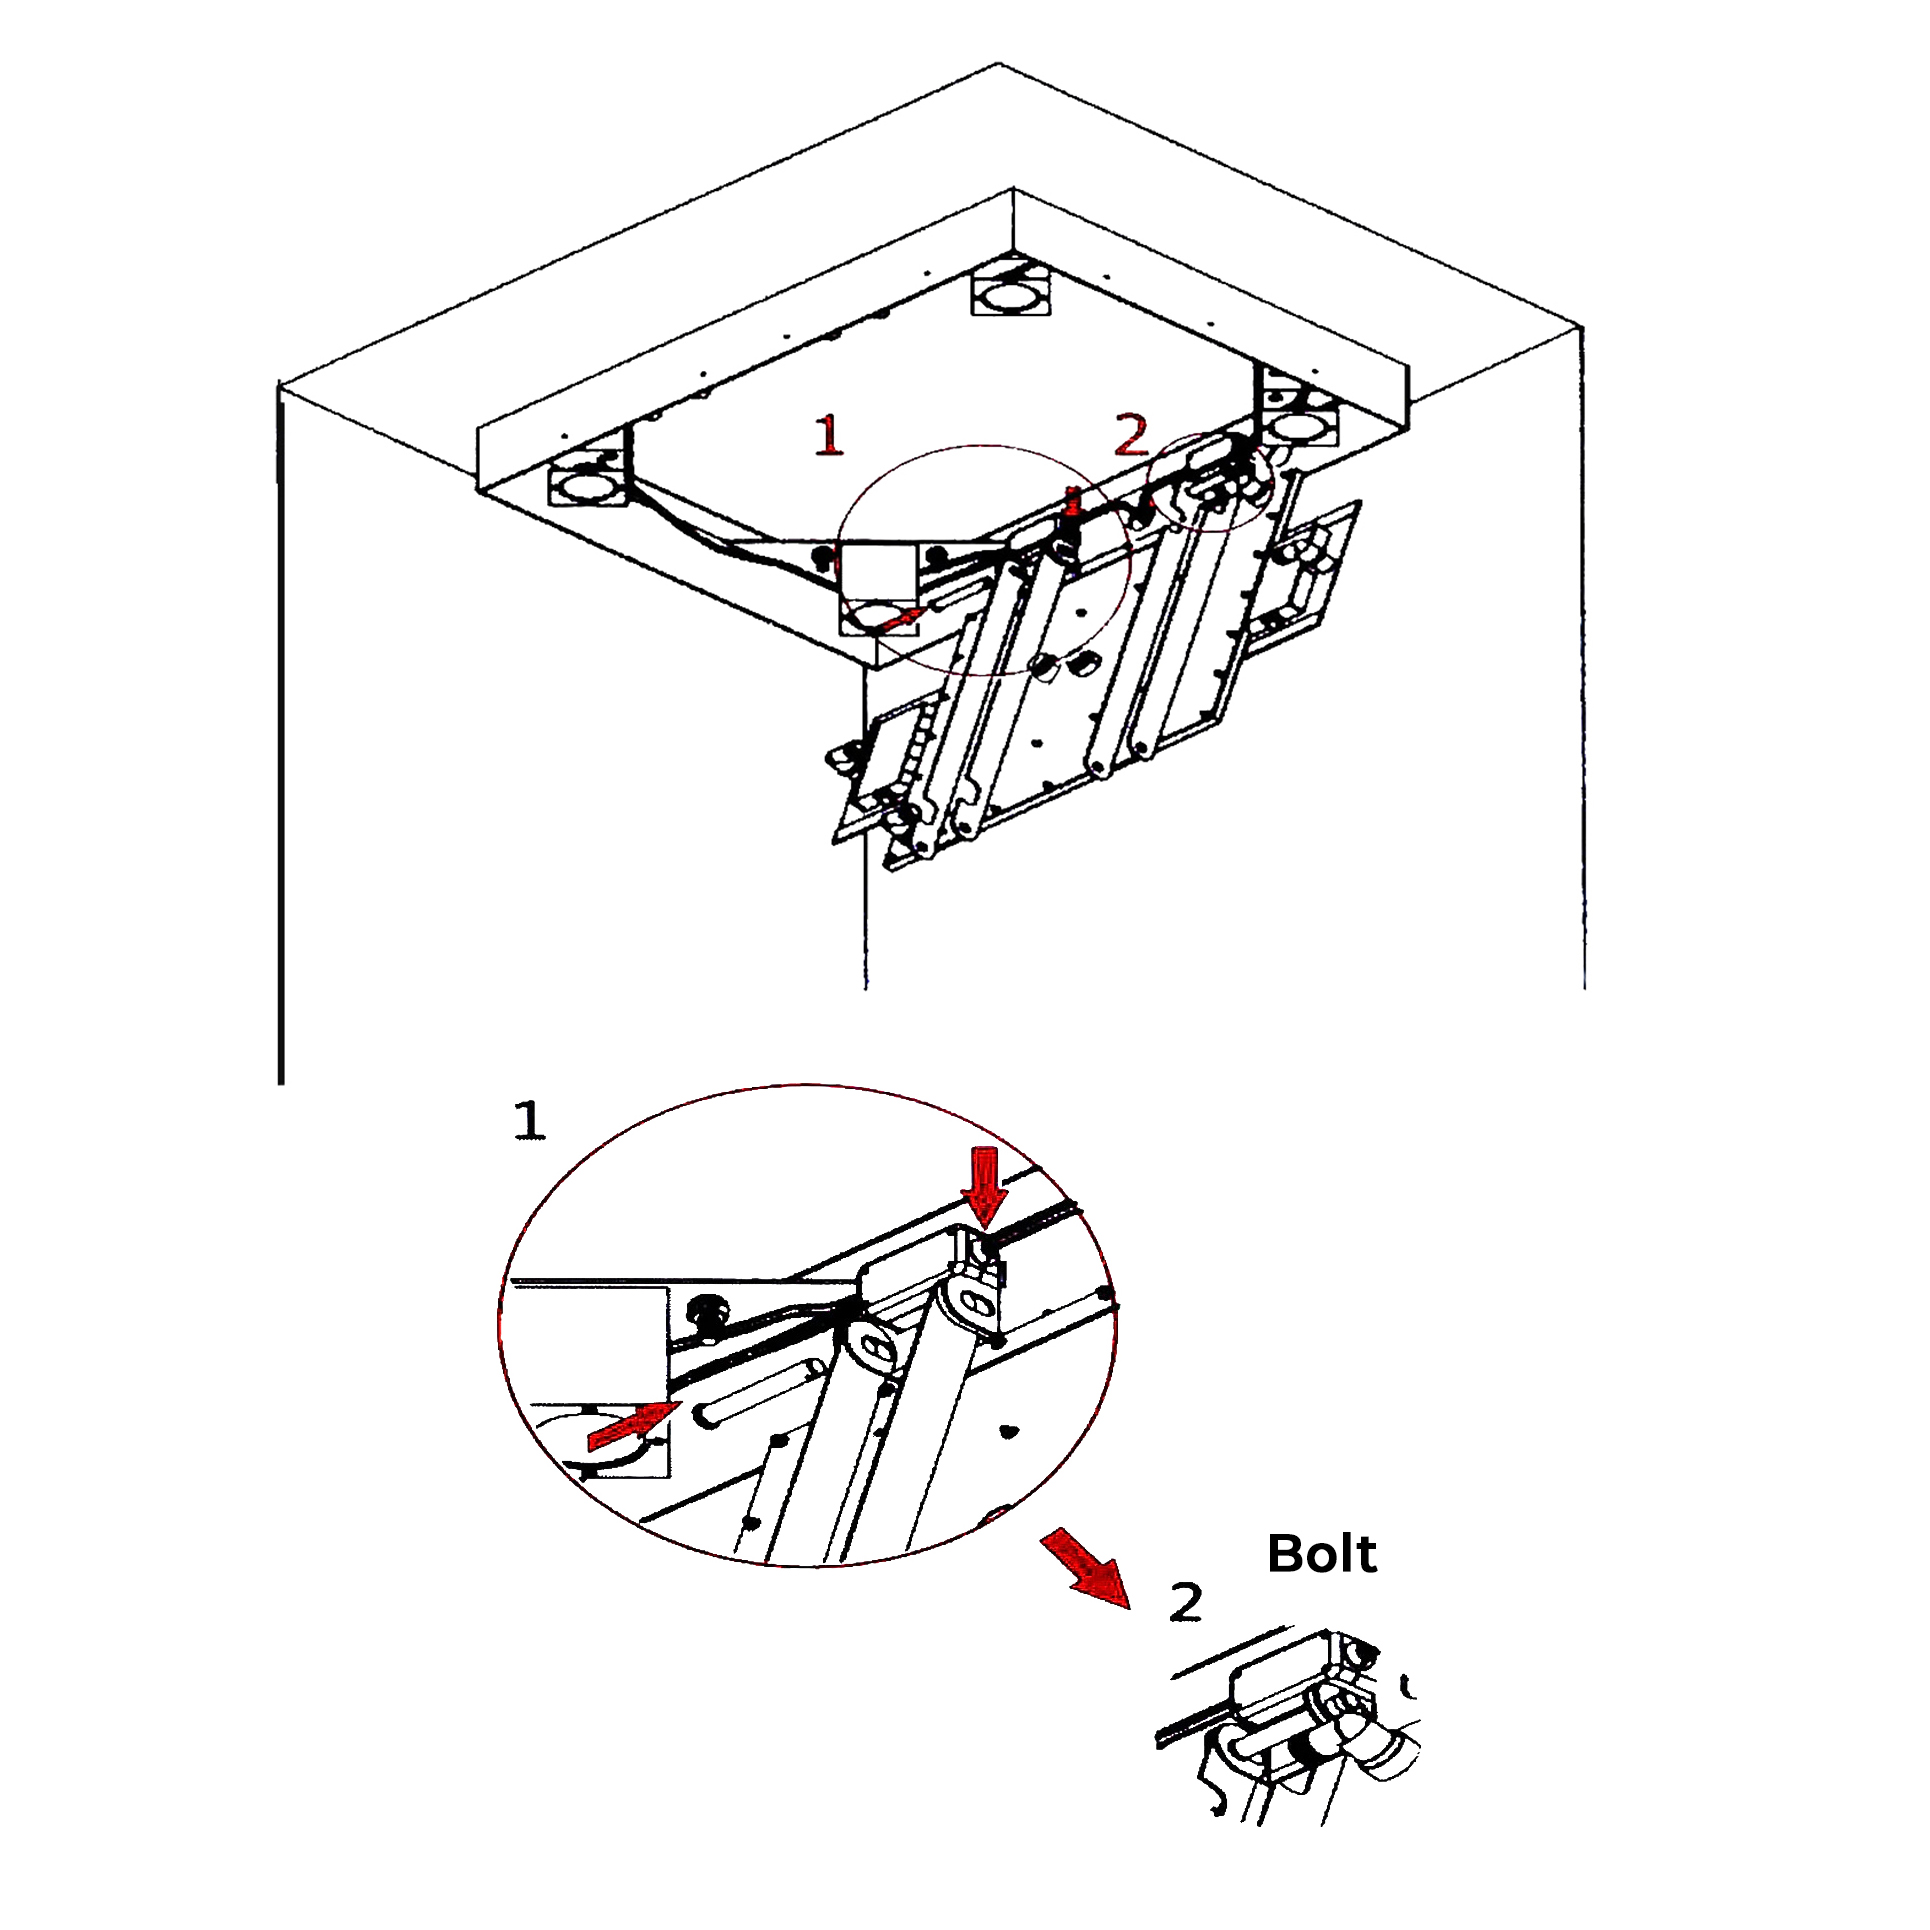
According to the chart shows: Raise the showerhead, Aim at the hole of the bolt, plug the bolt.
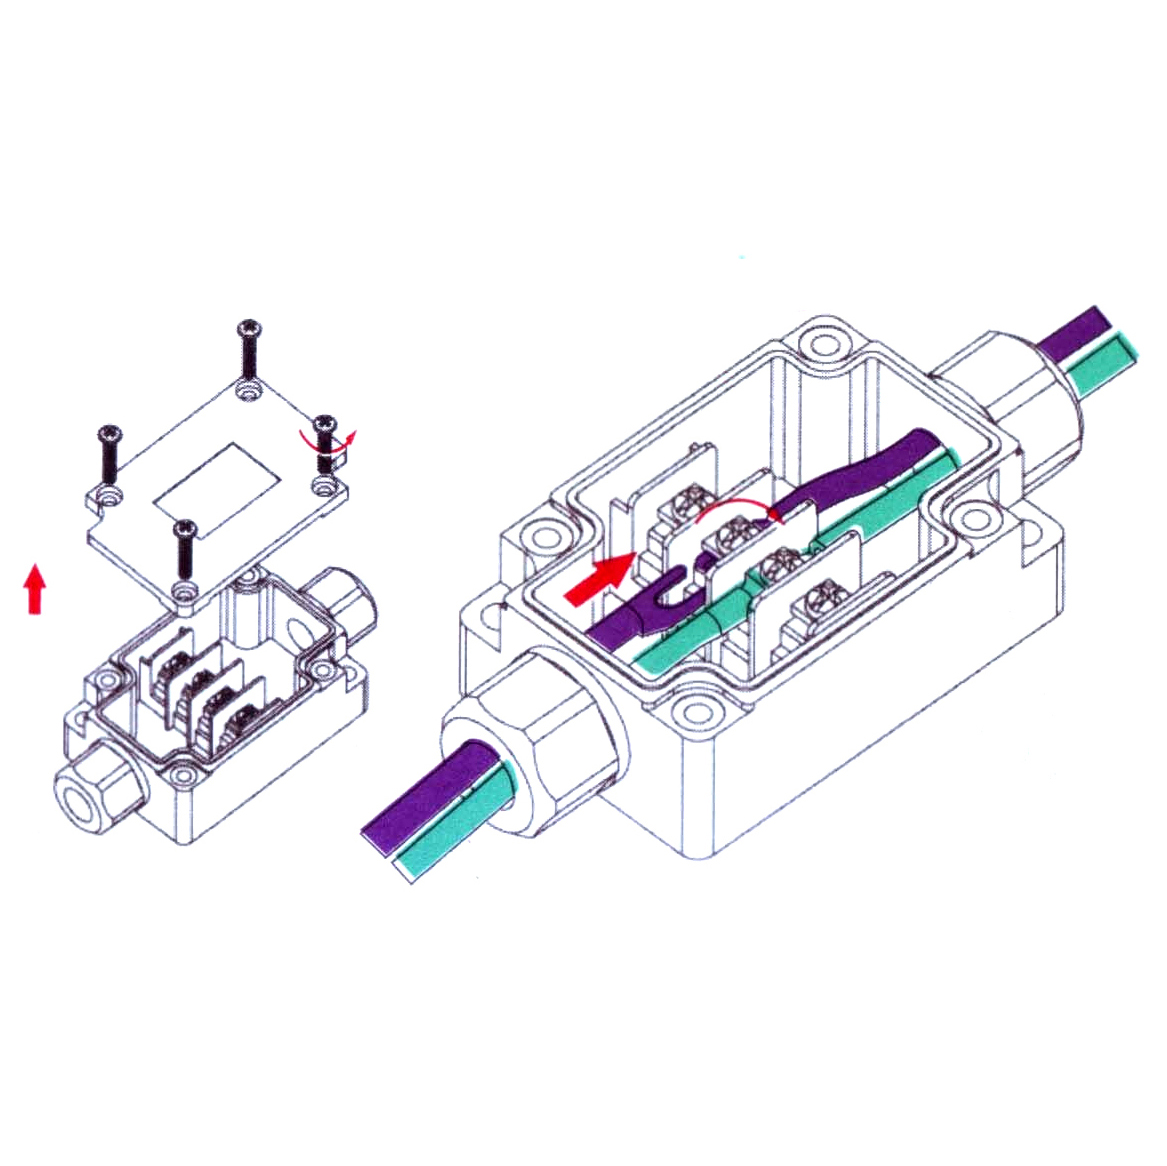
Use a Phillips screwdriver screw out the upper cover 4 screws, open the plastic waterproof boxes. Note: The same color line docking, brown line for line, the blue line is zero line. Use a Phillips screwdriver screw out the screws in plastic waterproof box wiring position, then put the fork terminal line connected, then fix it with a Phillips screwdriver.
Shower Head Installation Instructions
Step 9:
Step 10:
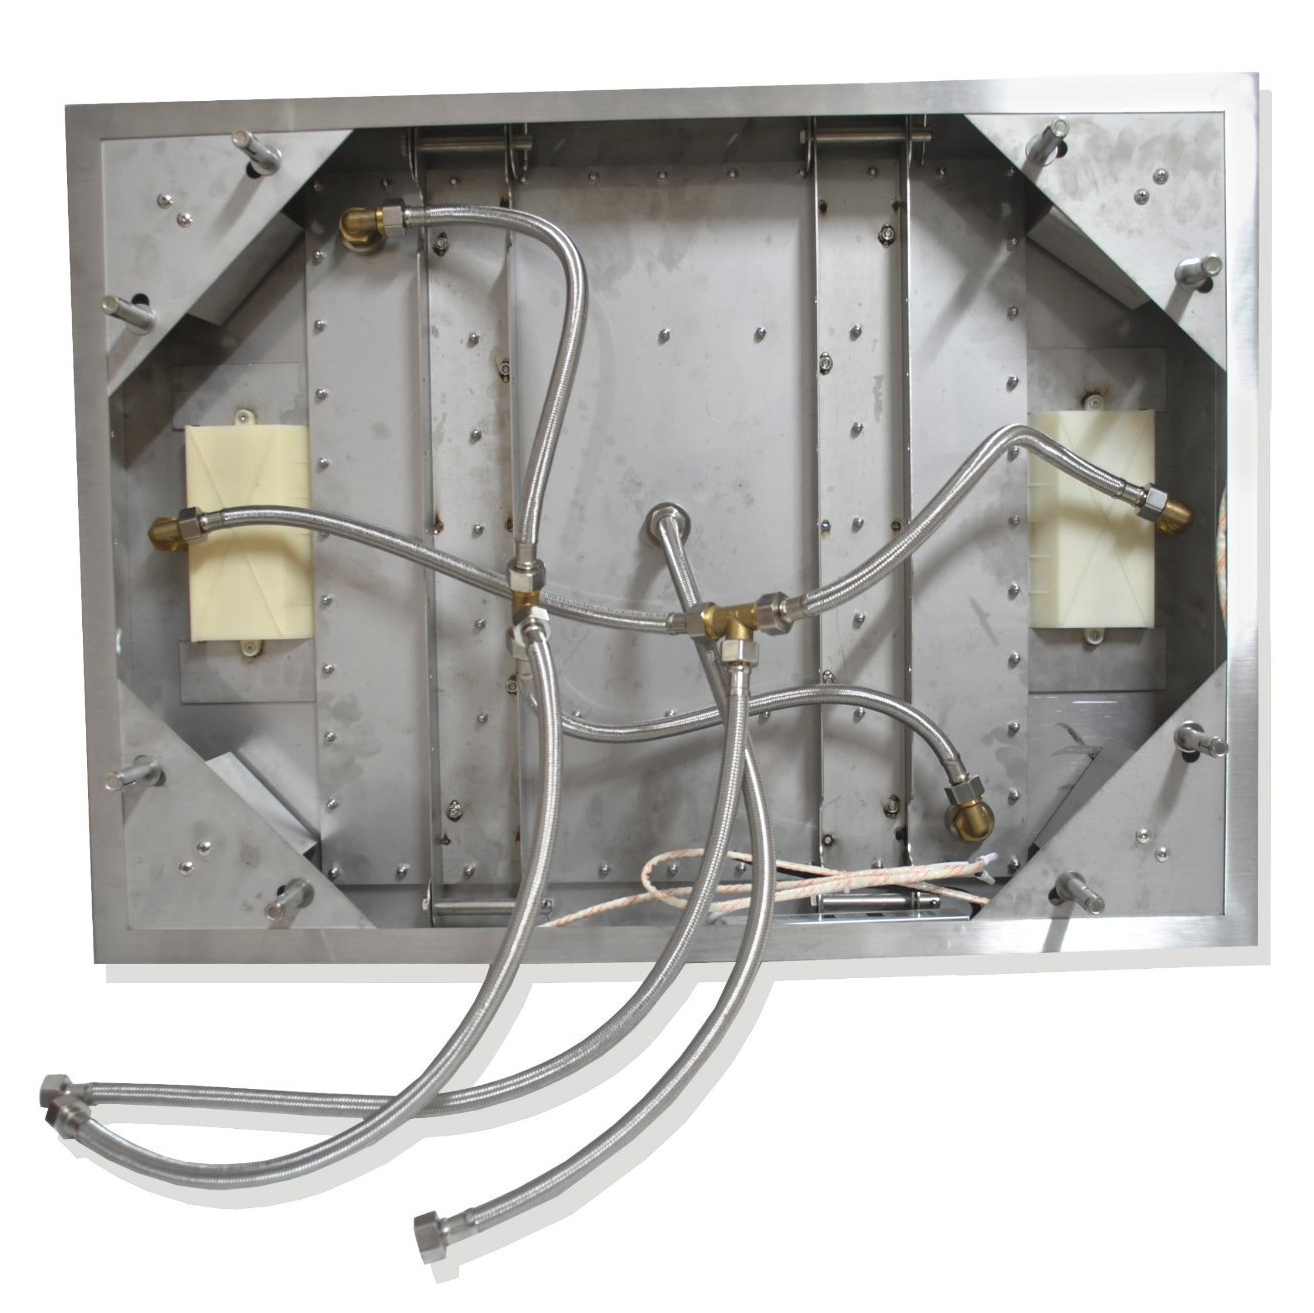
According to the circuit diagram as shown in step 5, then connect plastic waterproof case, please note that the same color of the wire when connecting circuit to docking.
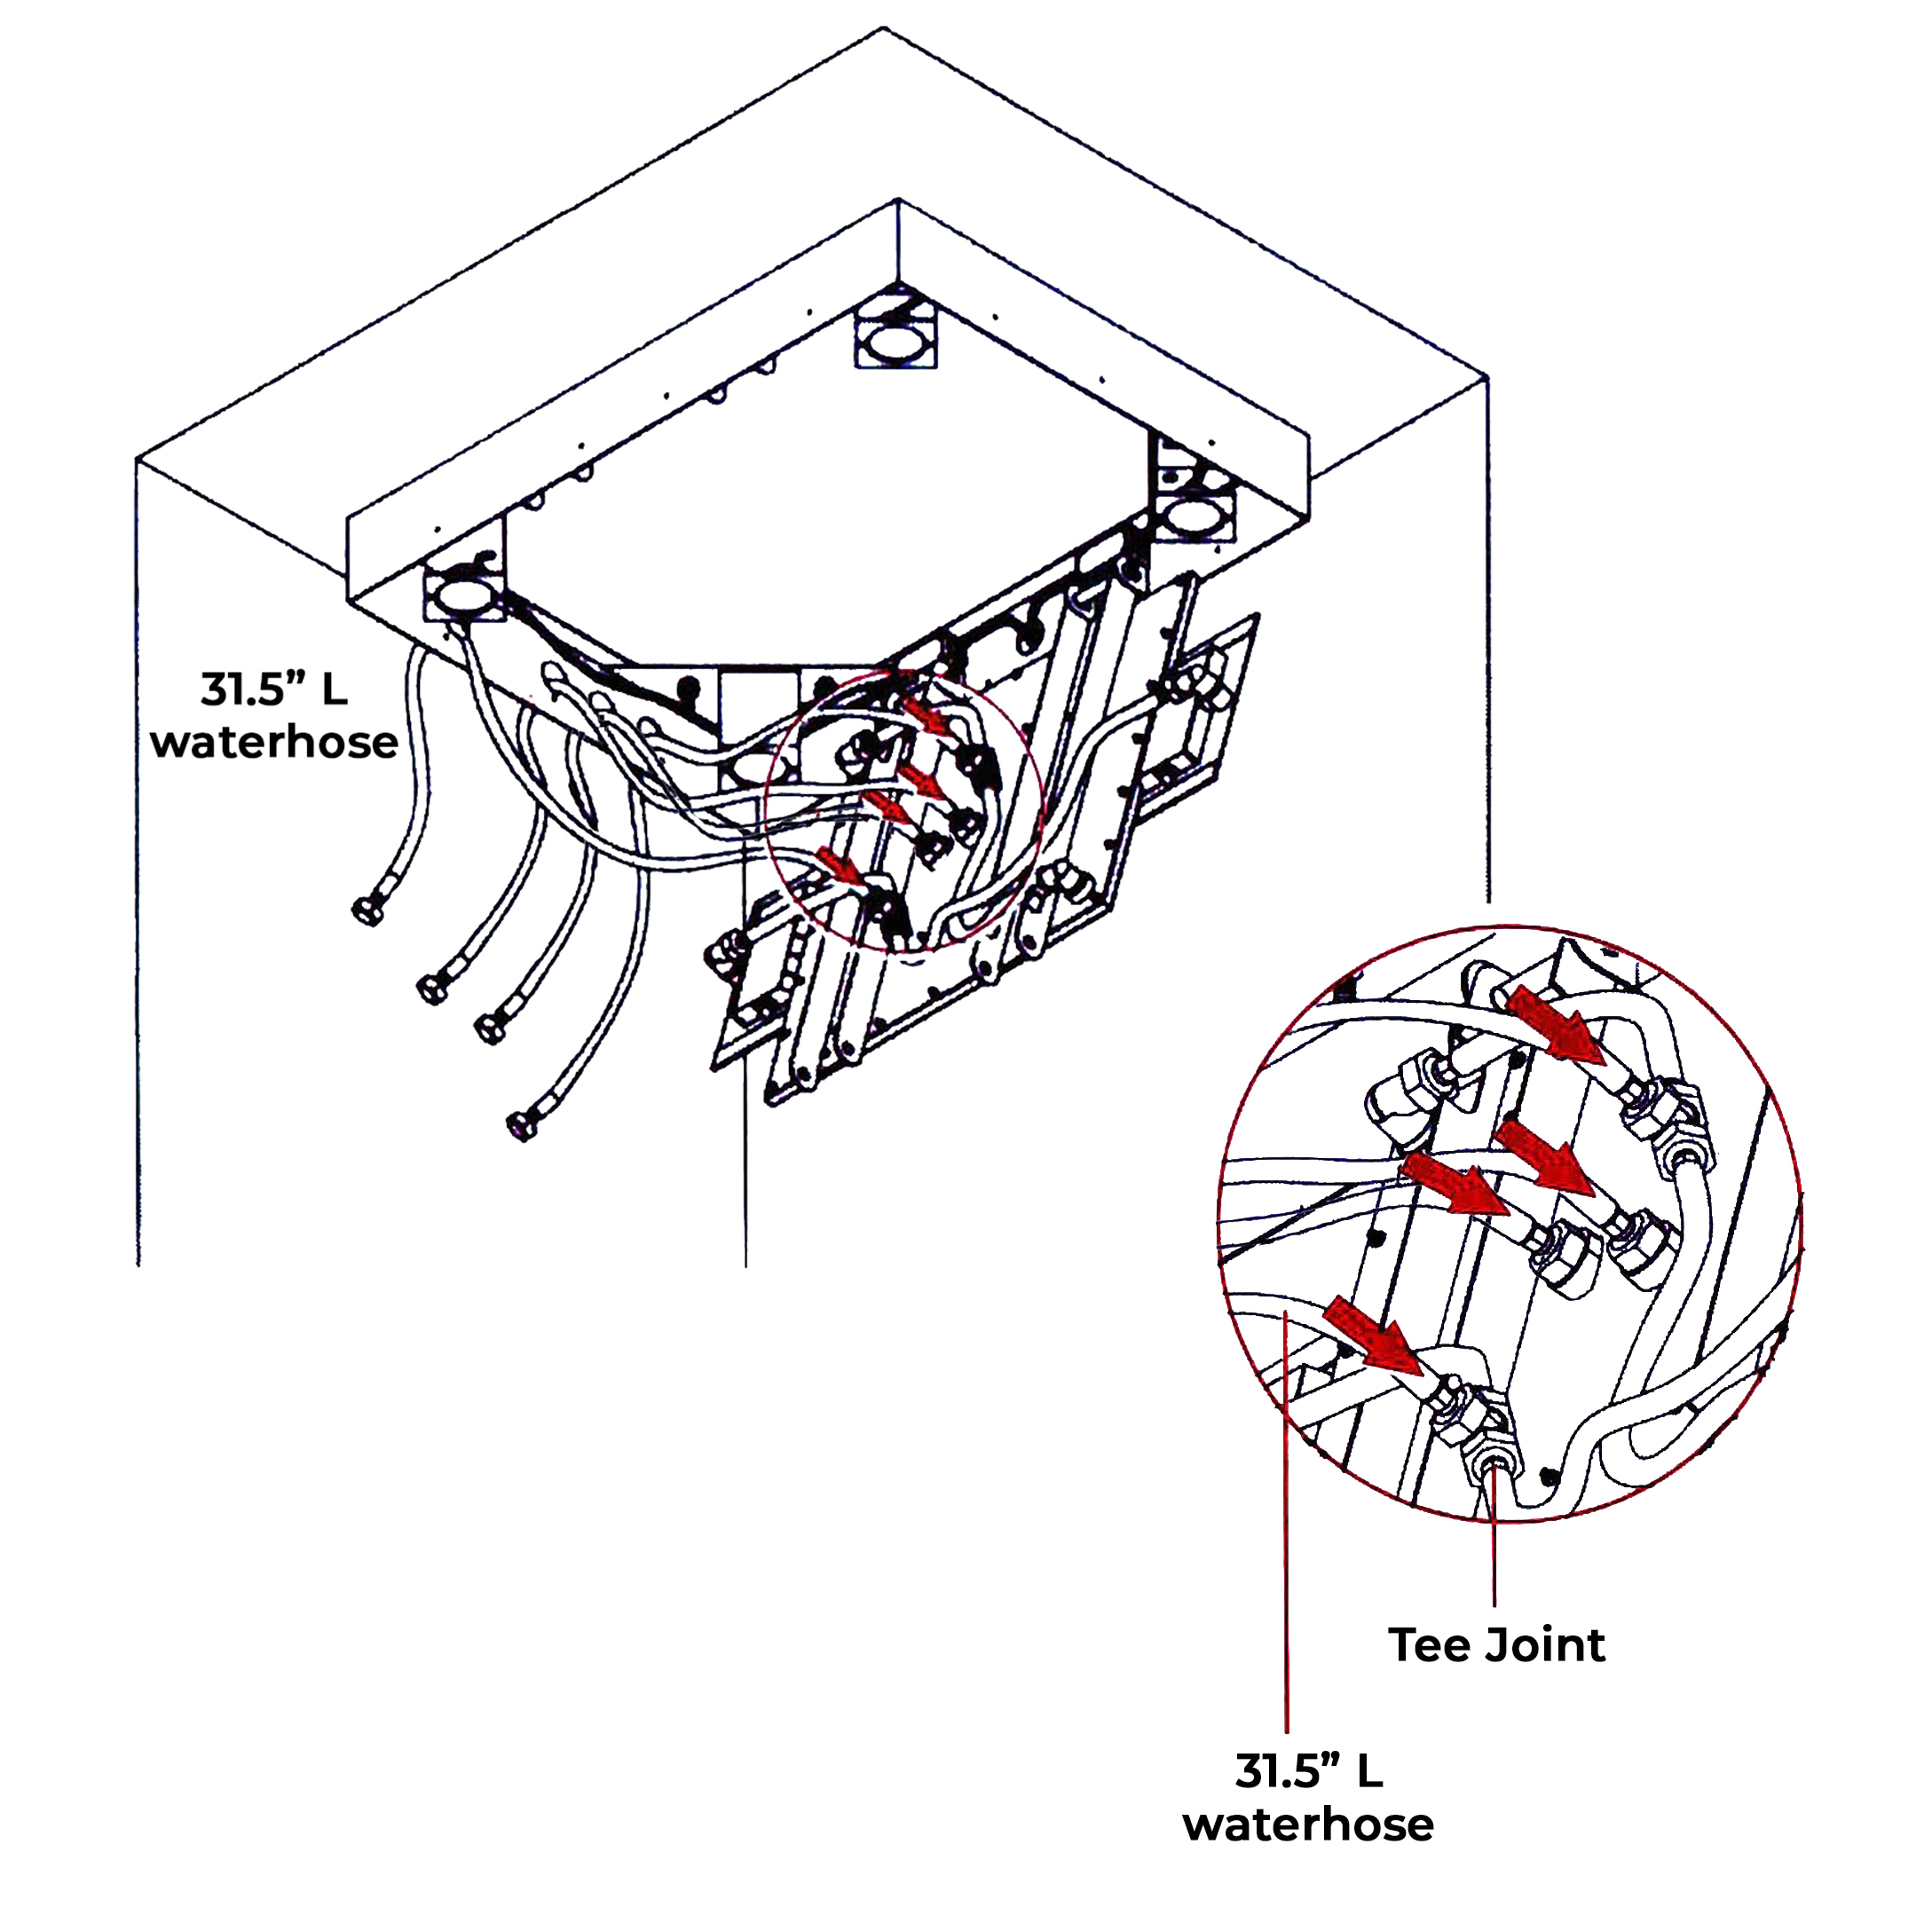
Connecting water hoses and Tee joints and then connect the water hoses to the water inlet pipe connector.
LED Shower Head Installation Instructions
Step 11:
Step 12:
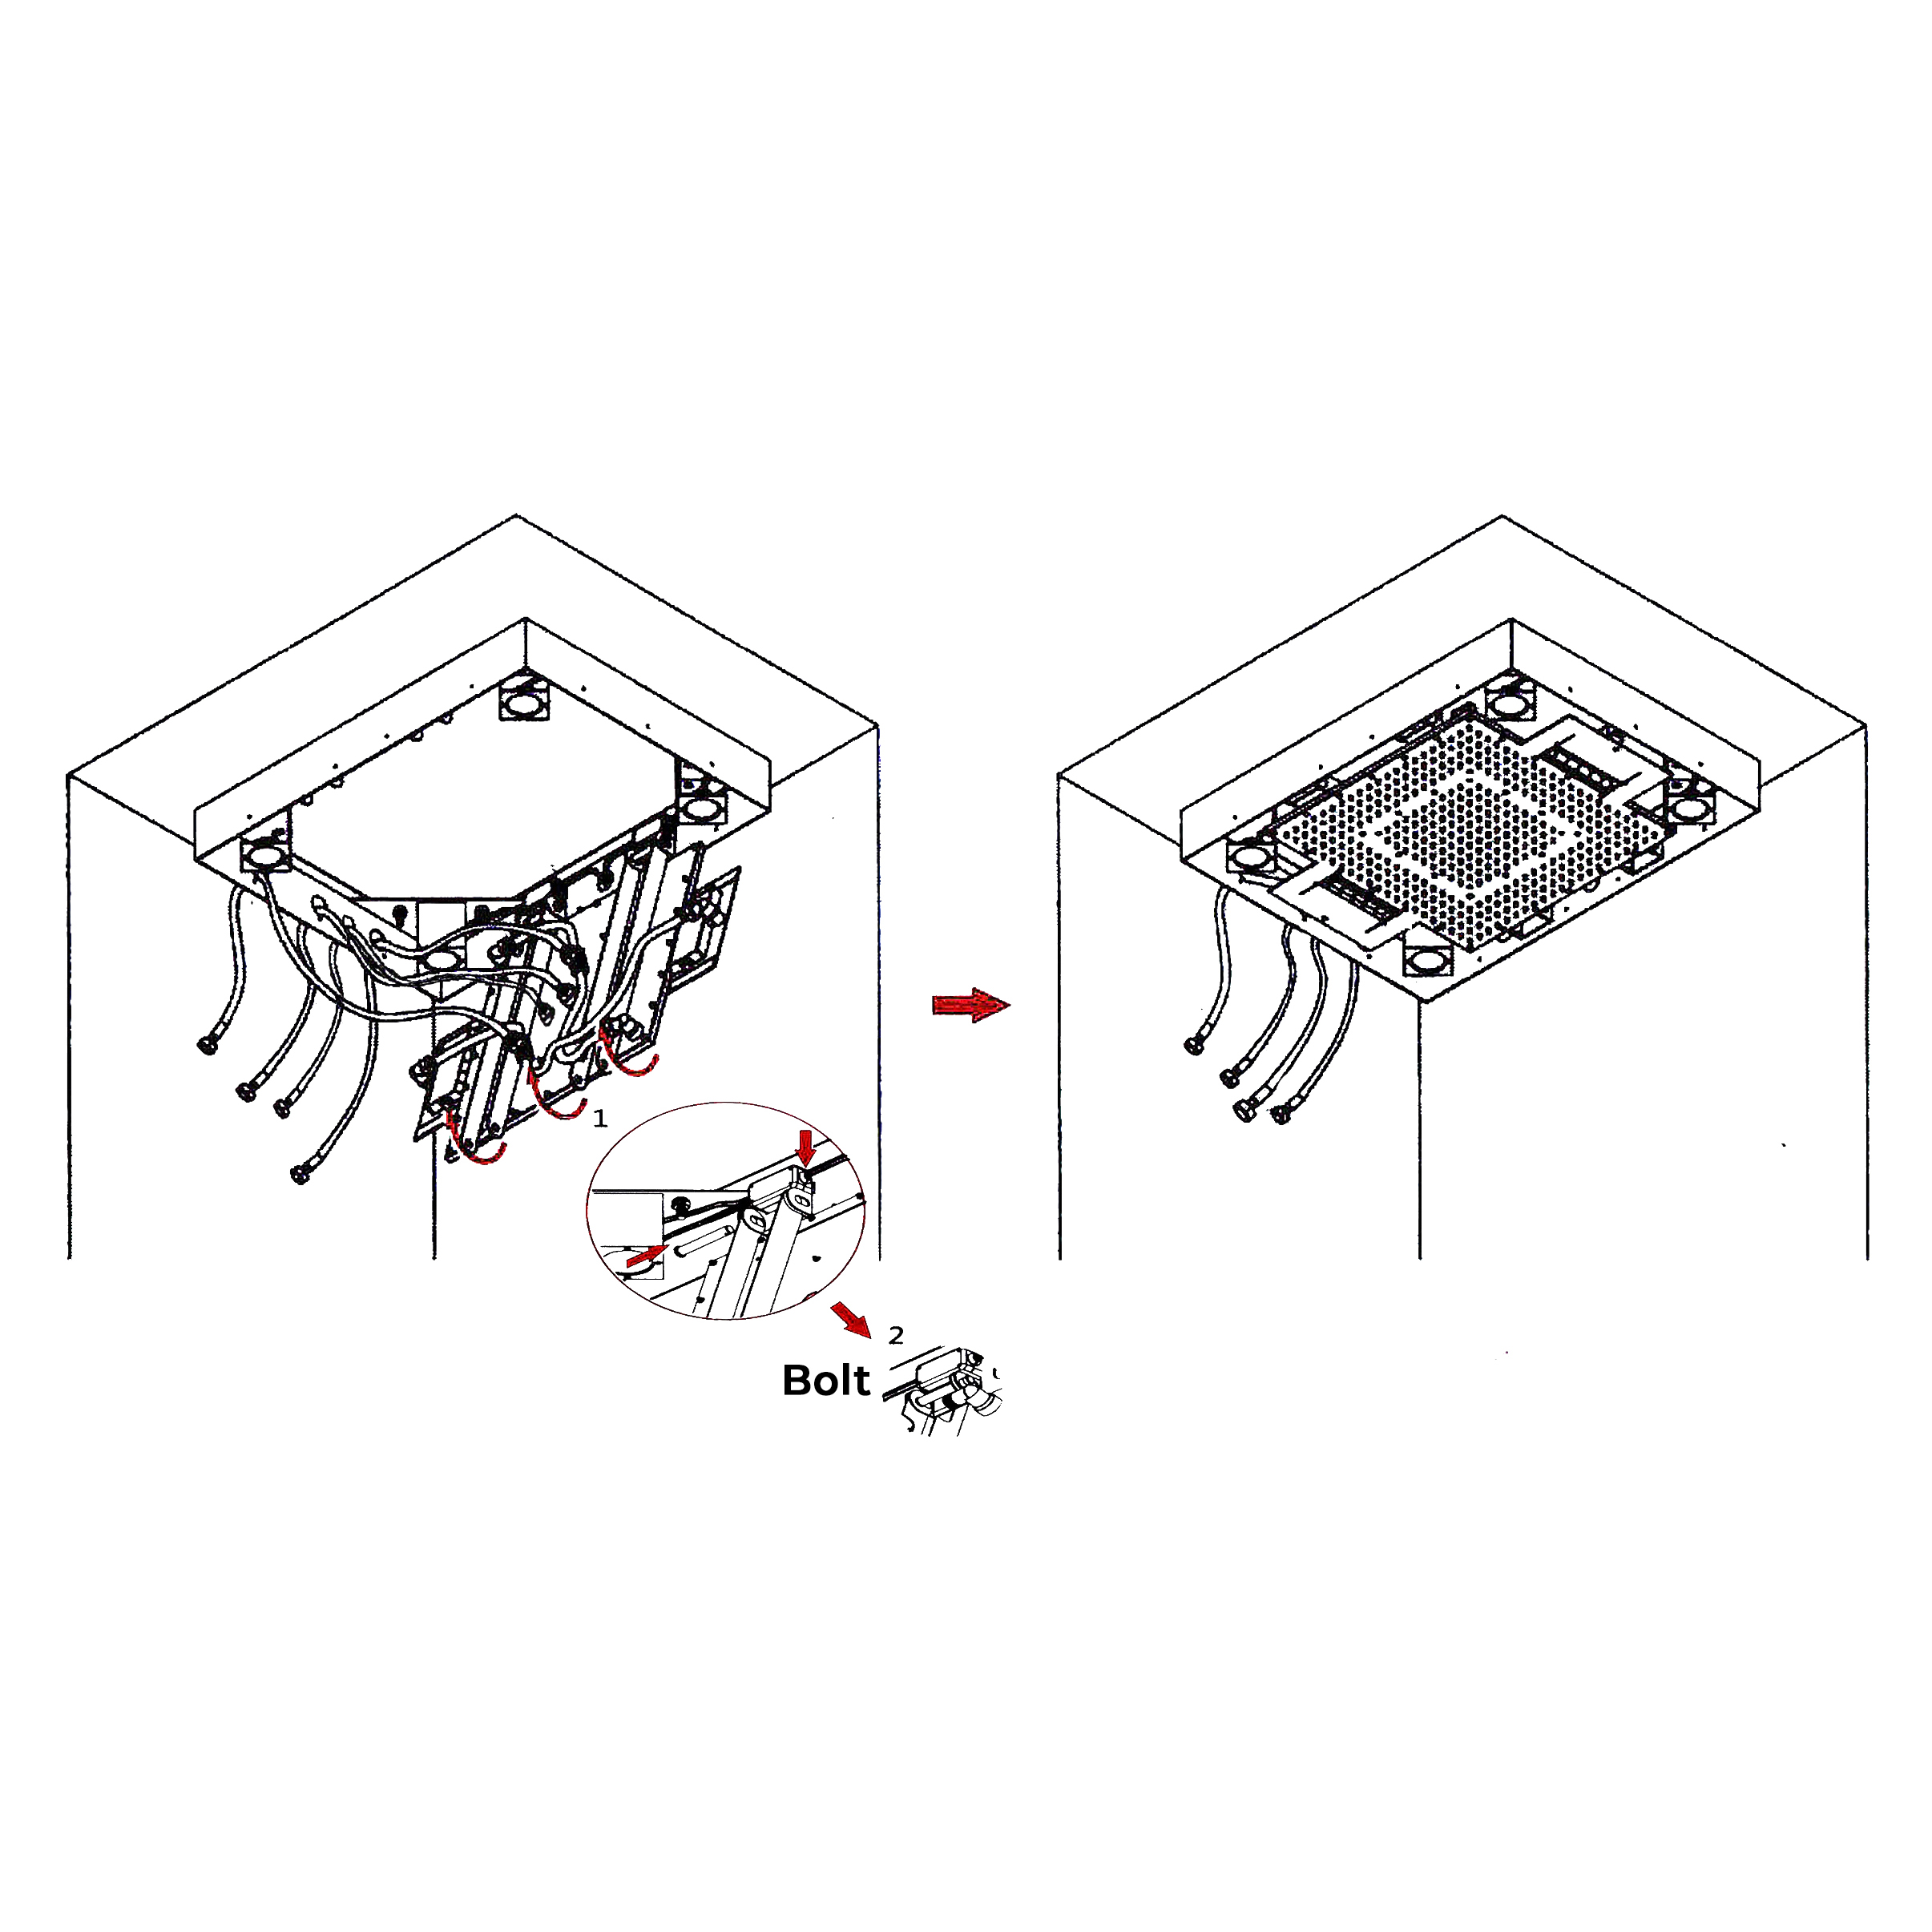
Connecting 4 pcs water hose to 2 Tee joints and G1/2 joints in the middle and then put another side of the shower hoses through the showerhead side holes.
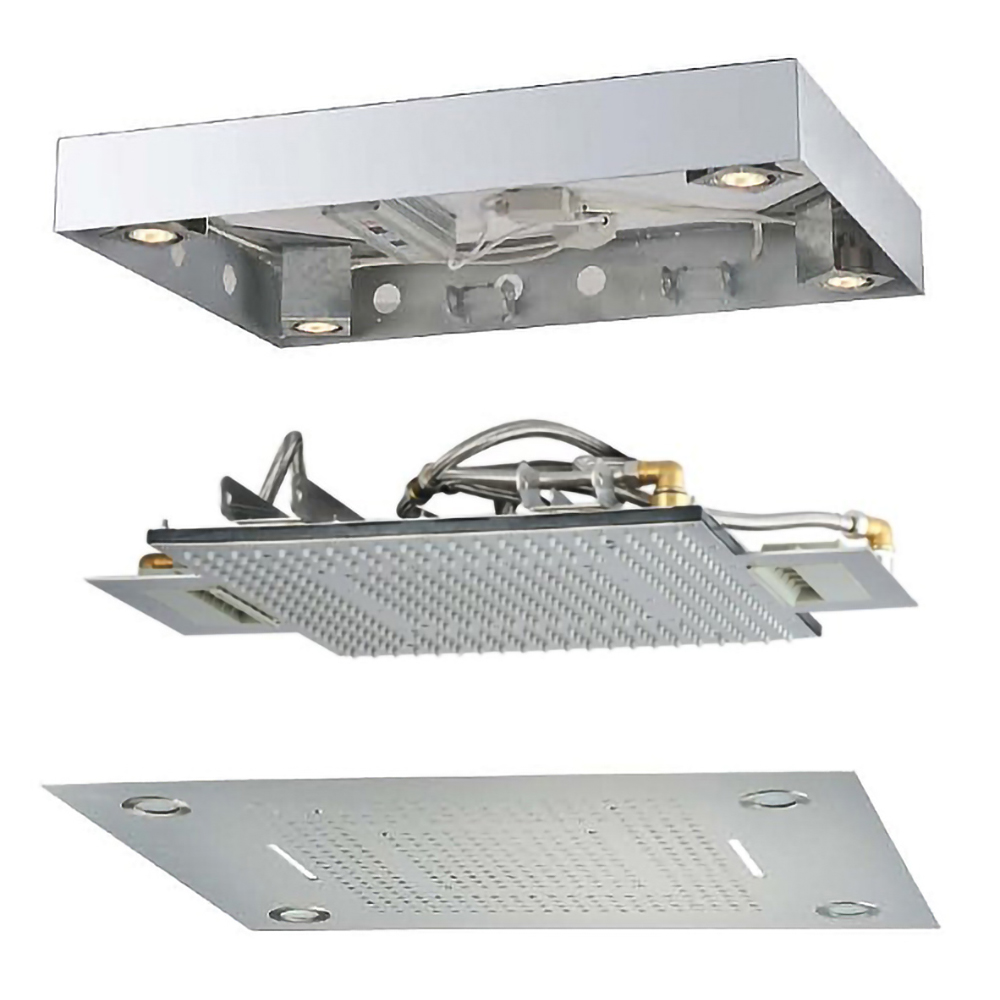
Installing the shower body by plugging the bolts. (As the above picture).
LED Shower Head Installation Instructions
Step 13:
Step 14:
Install the decorative panel and twist the corresponding 8 fixing screws with a SW4 hex wrench.
Install 4 LED lights and lamp cups clockwise.
LED Shower Head Installation Instructions
Step 15:
Step 16:
Note: 1. Before connecting water hoses and water pipes, cleaning the water pipes first. It will prevent impurities from clogging the showerhead. 2. When connecting water pipes and hoses, don't forget to put the G1/2 filter net in the water hoses, filtering impurities.
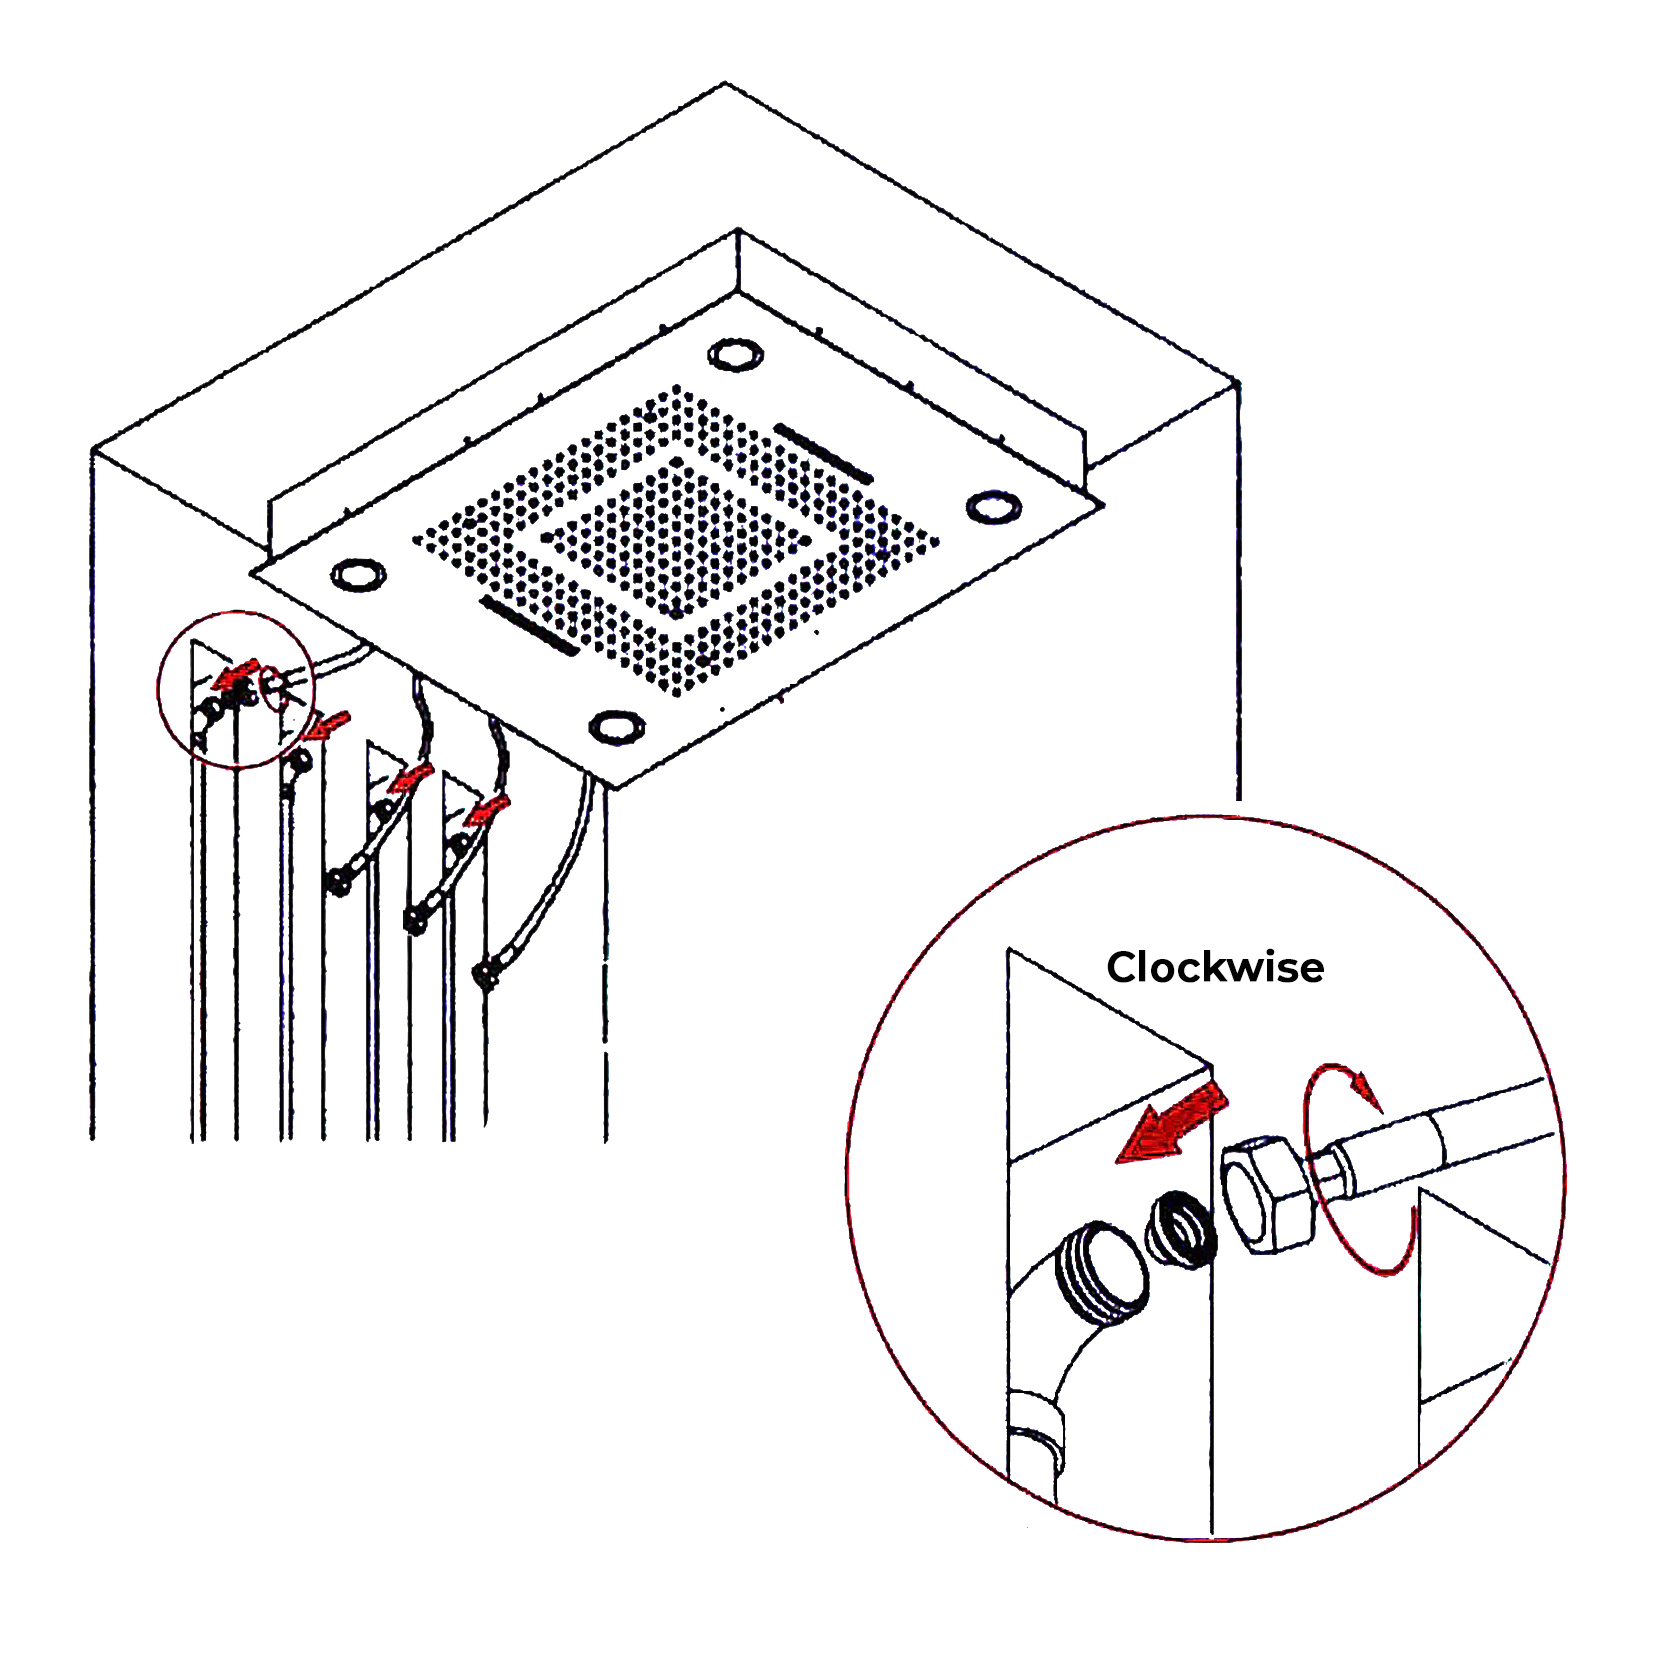
Connect 4 water inlet hoses to the wall-embedded water inlet pipes and then seal the wall.
LED Shower Head Installation Instructions
Step 17:
Step 18:
LED Shower Head Installation Instructions
Step 19:
Step 20:
LED Shower Head Installation Instructions
Step 21:
Step 22:
LED Shower Head Installation Instructions
Step 23:
Step 24:
LED Shower Head Installation Instructions
Step 24:
Step 25:
Shower Head Installation Instructions
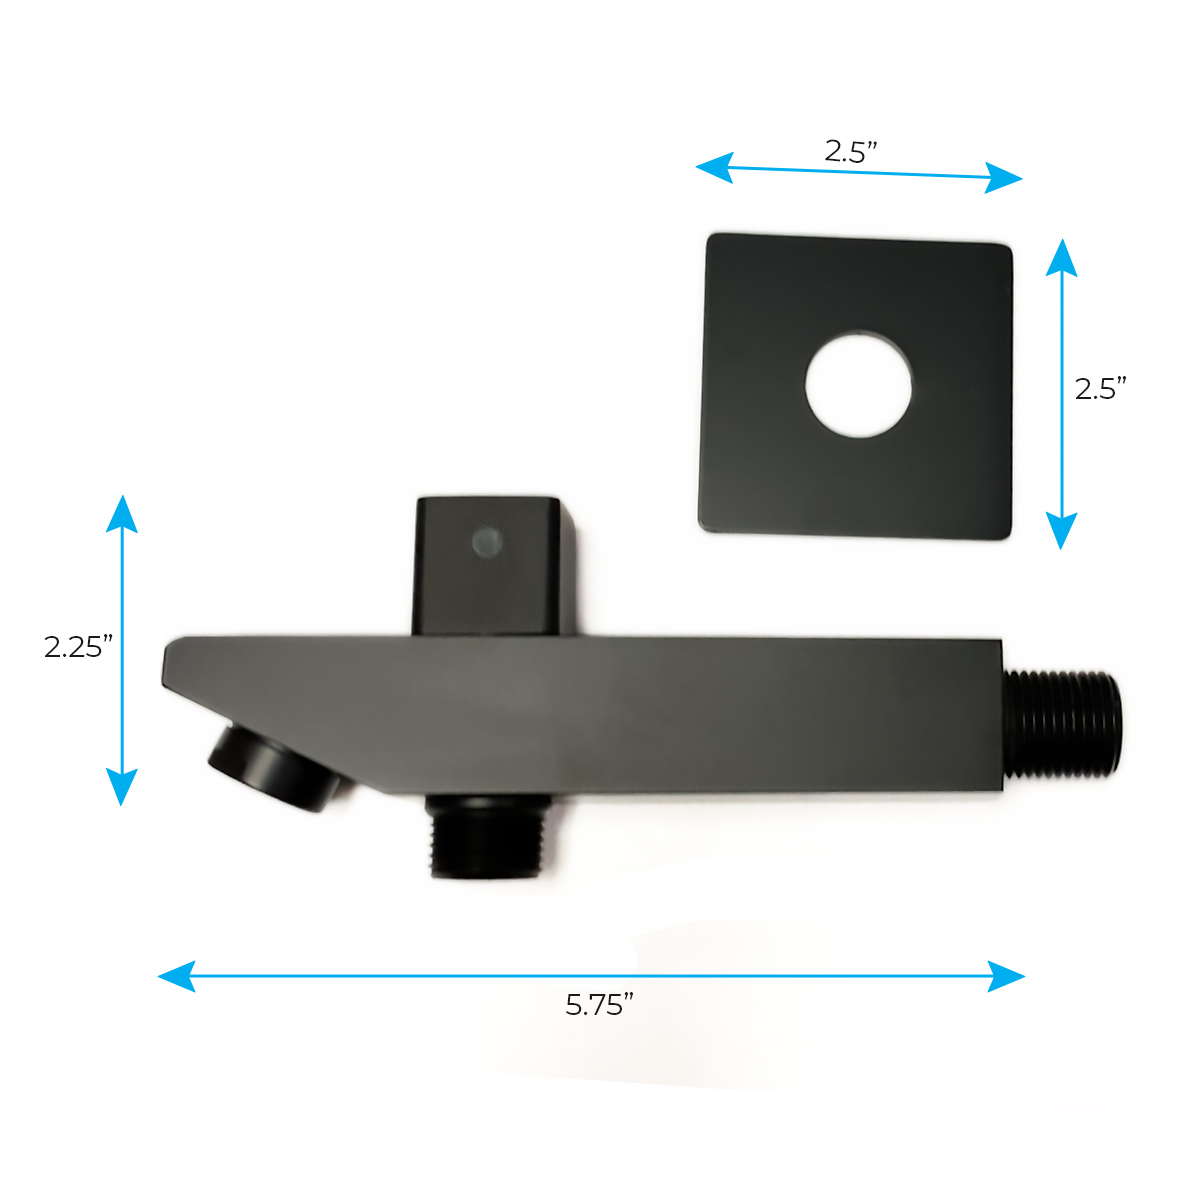
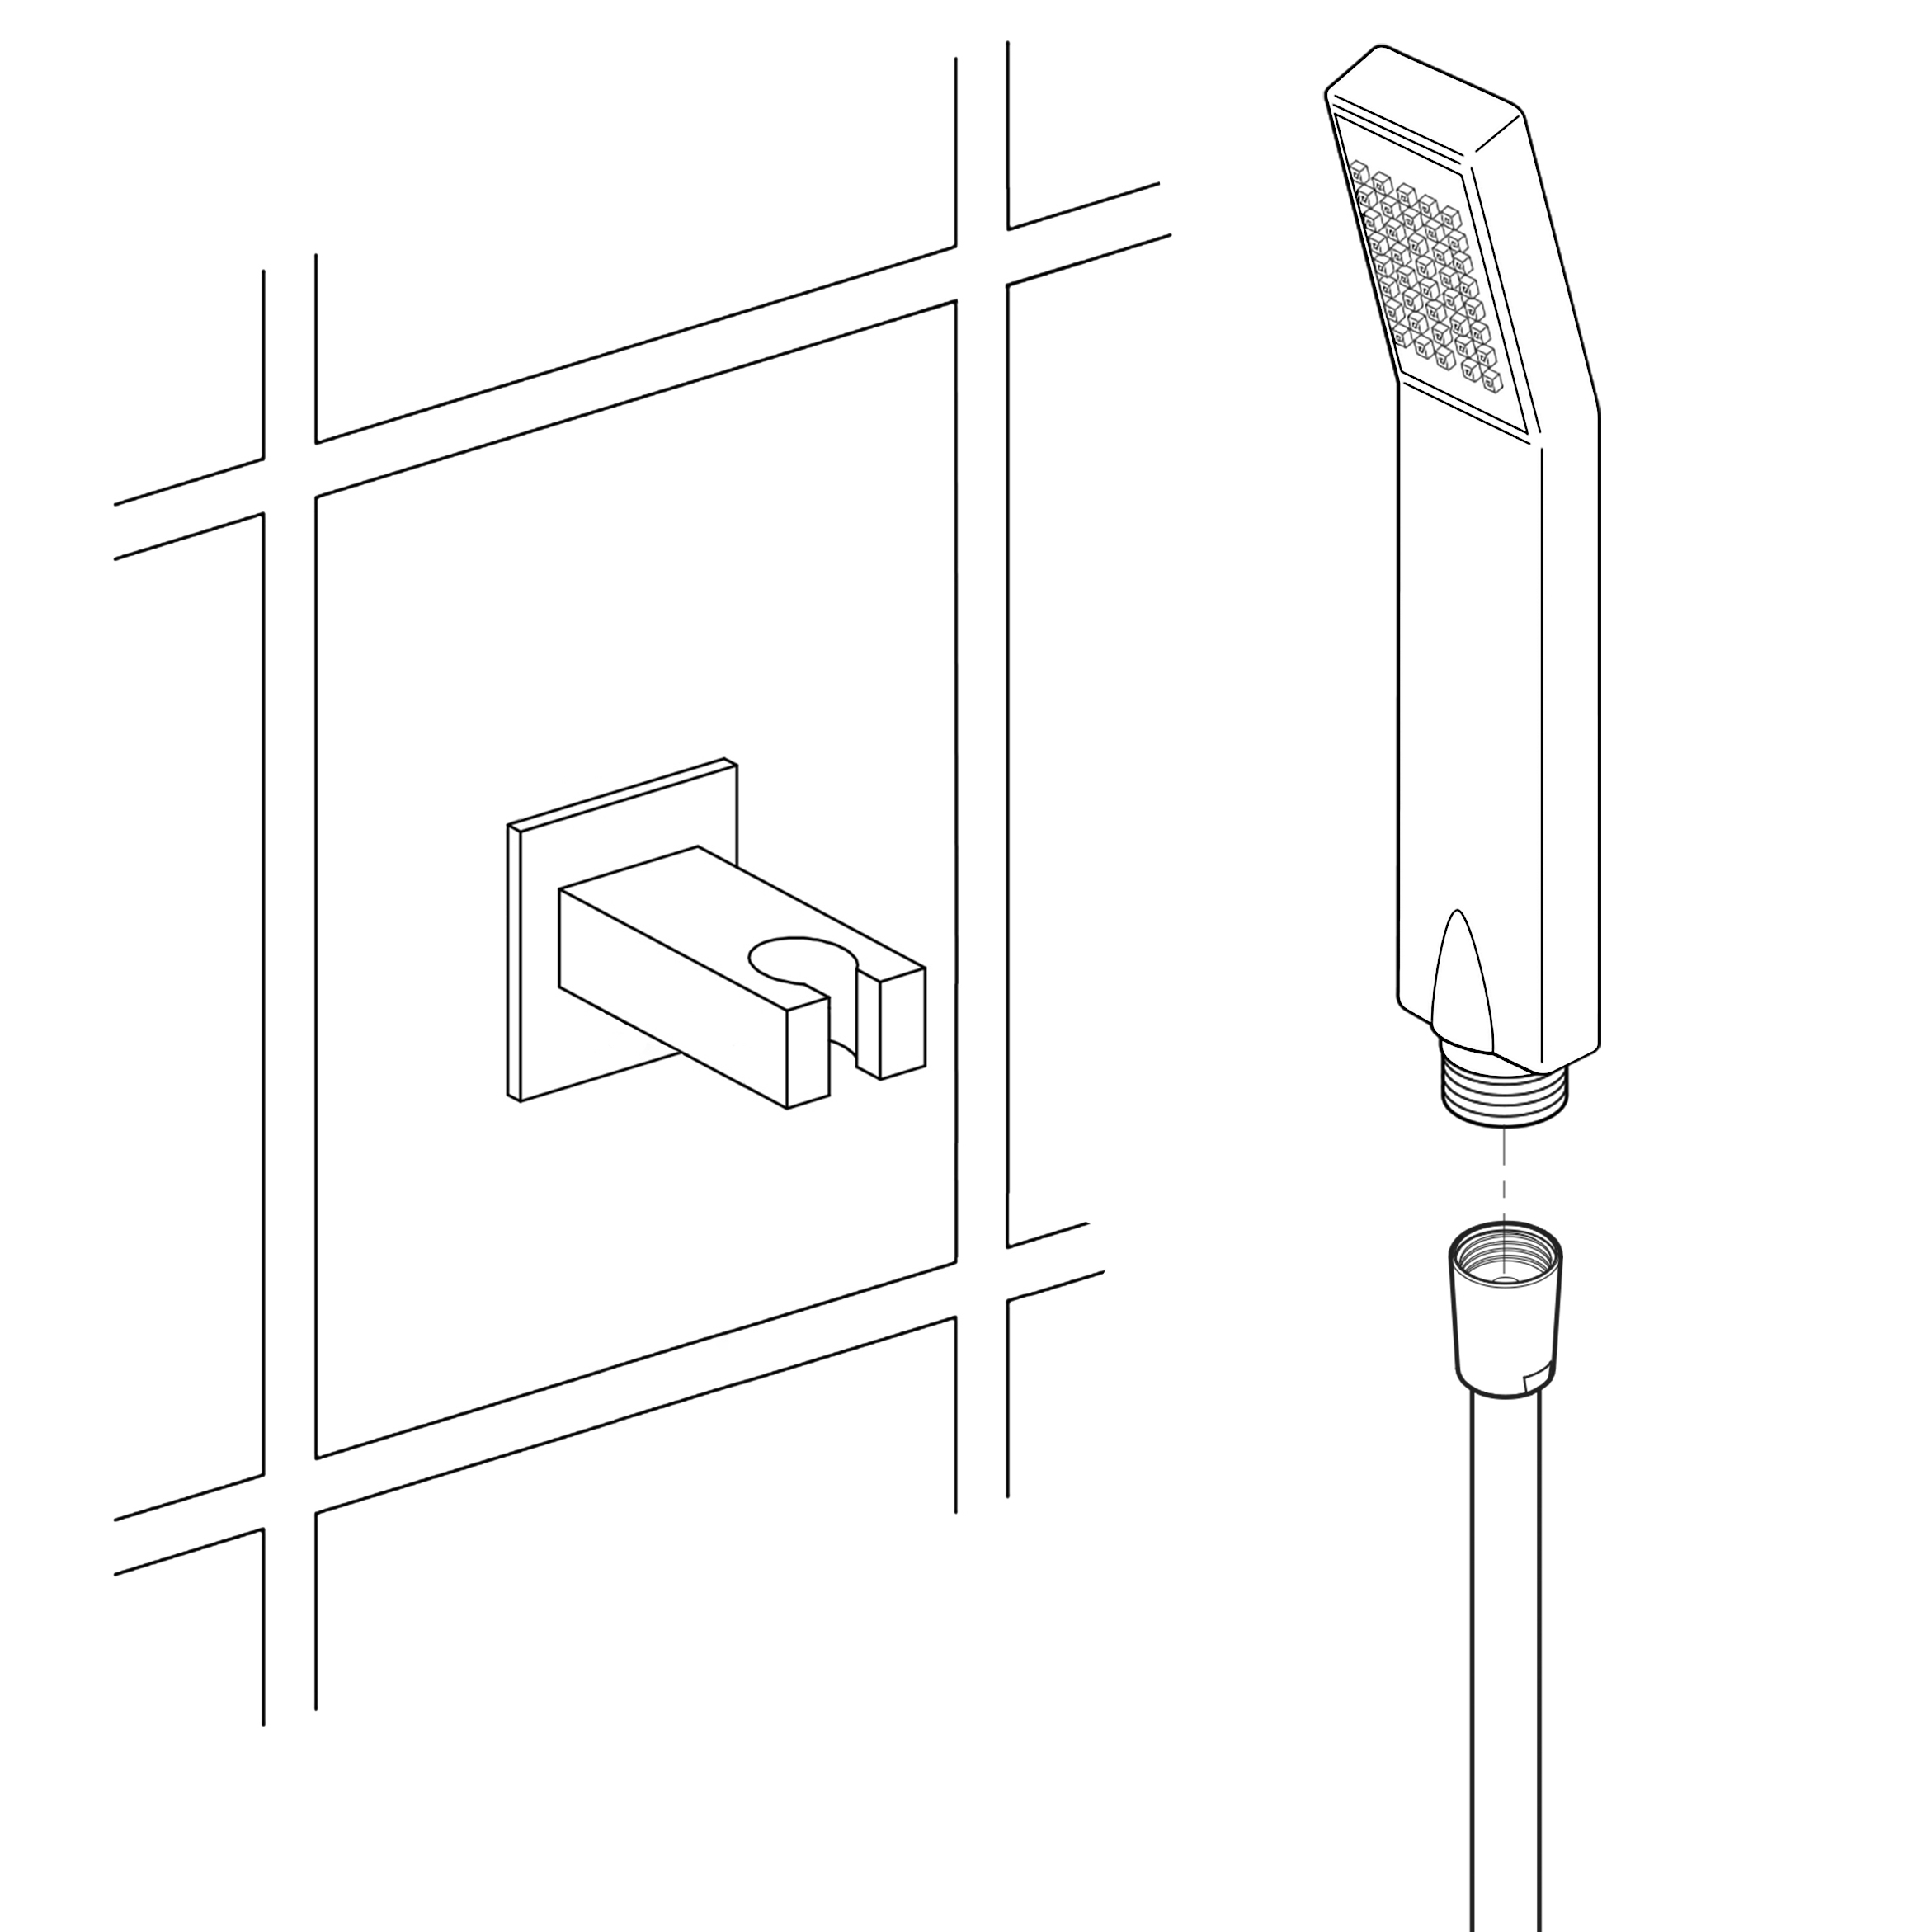
Shower Hand Held Shower Installation Instructions
Step 1:
Step 2:
HandHeld
Shower
Hand Held Shower
Handheld Shower
Step 3:
Step 4:
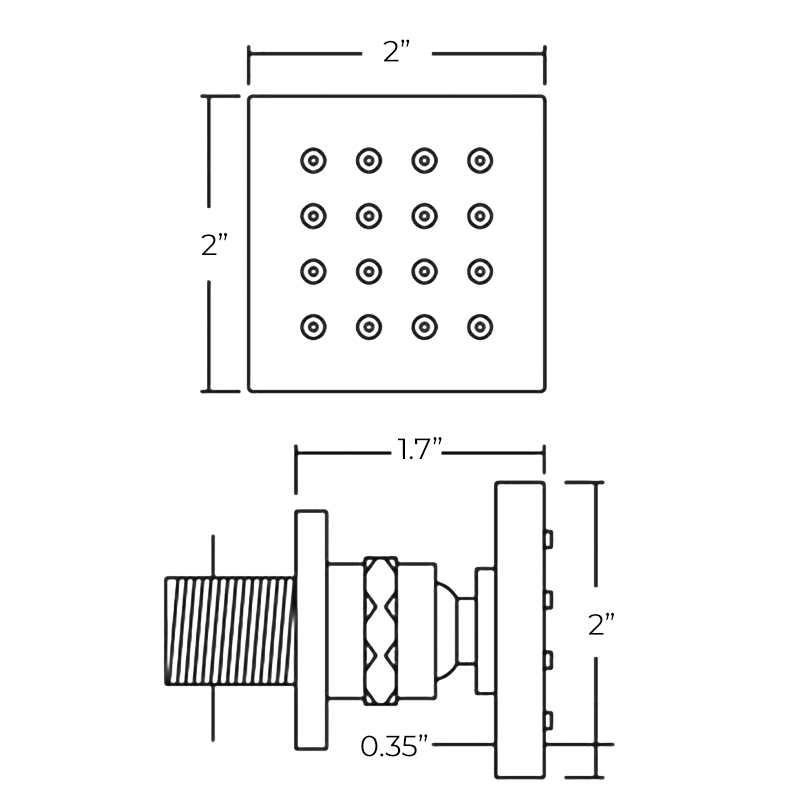
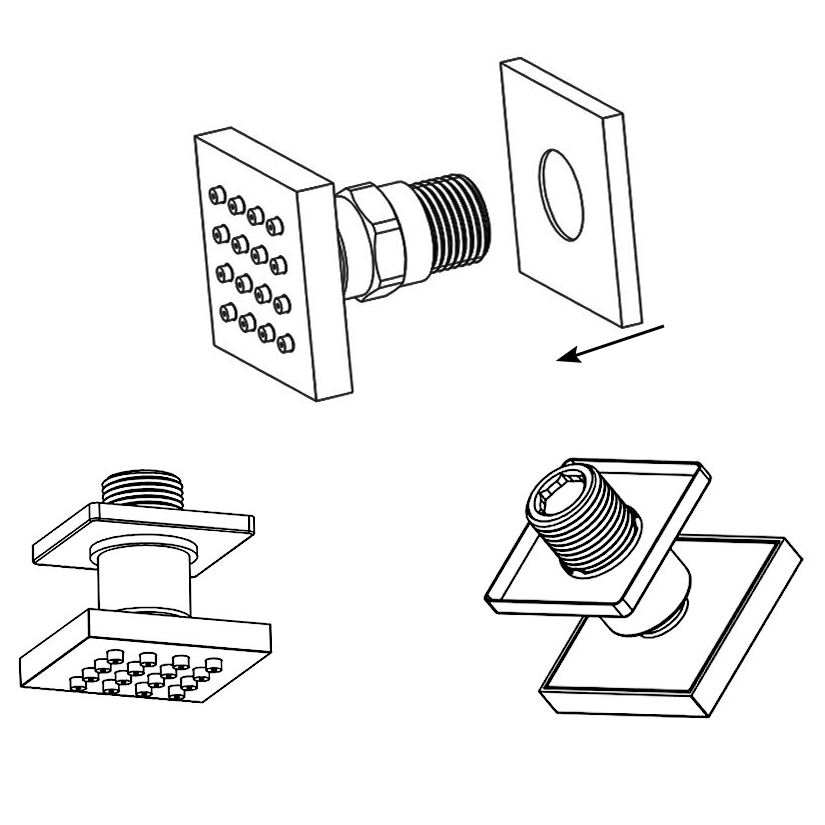
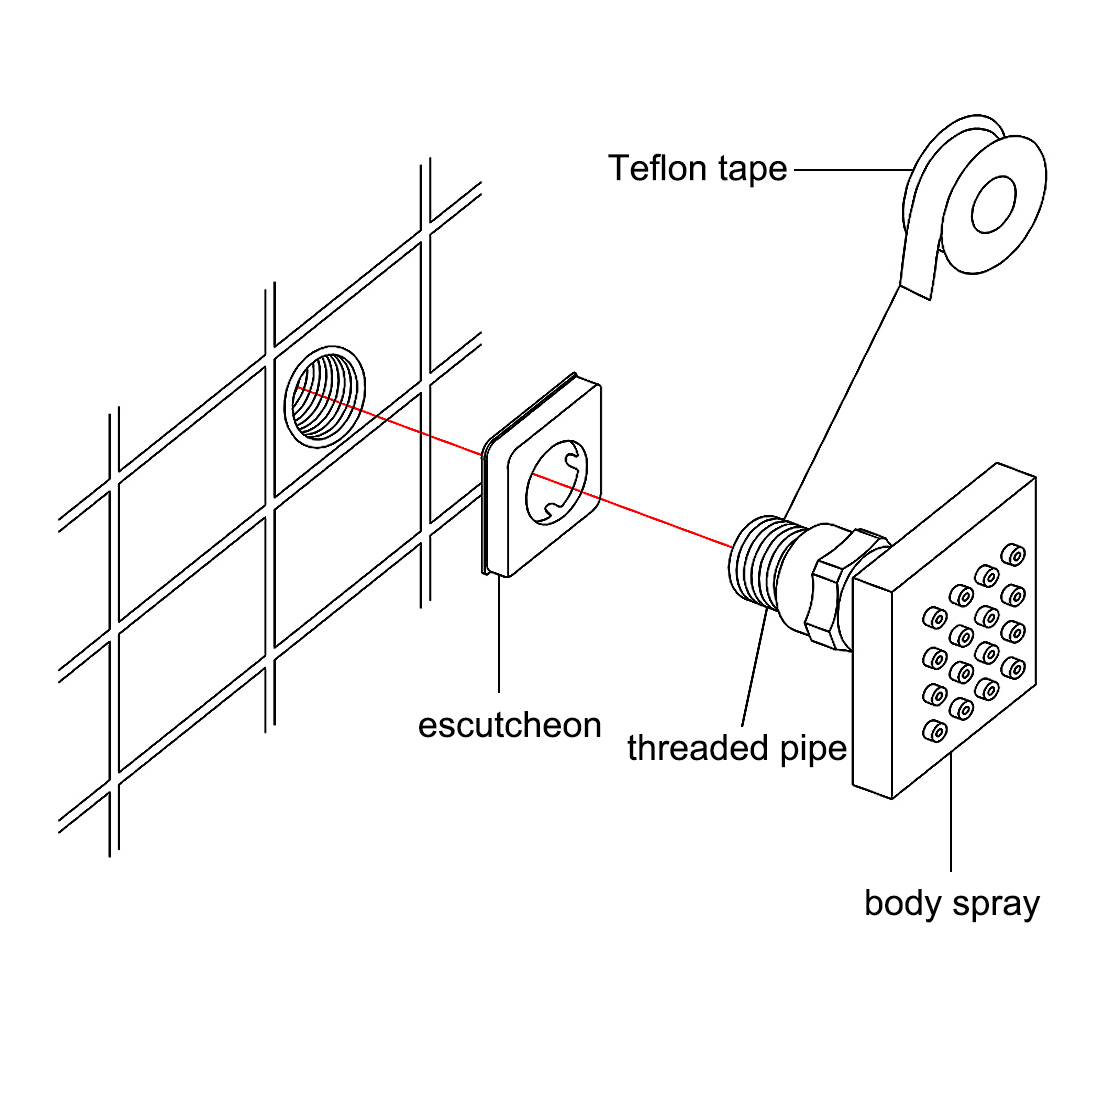
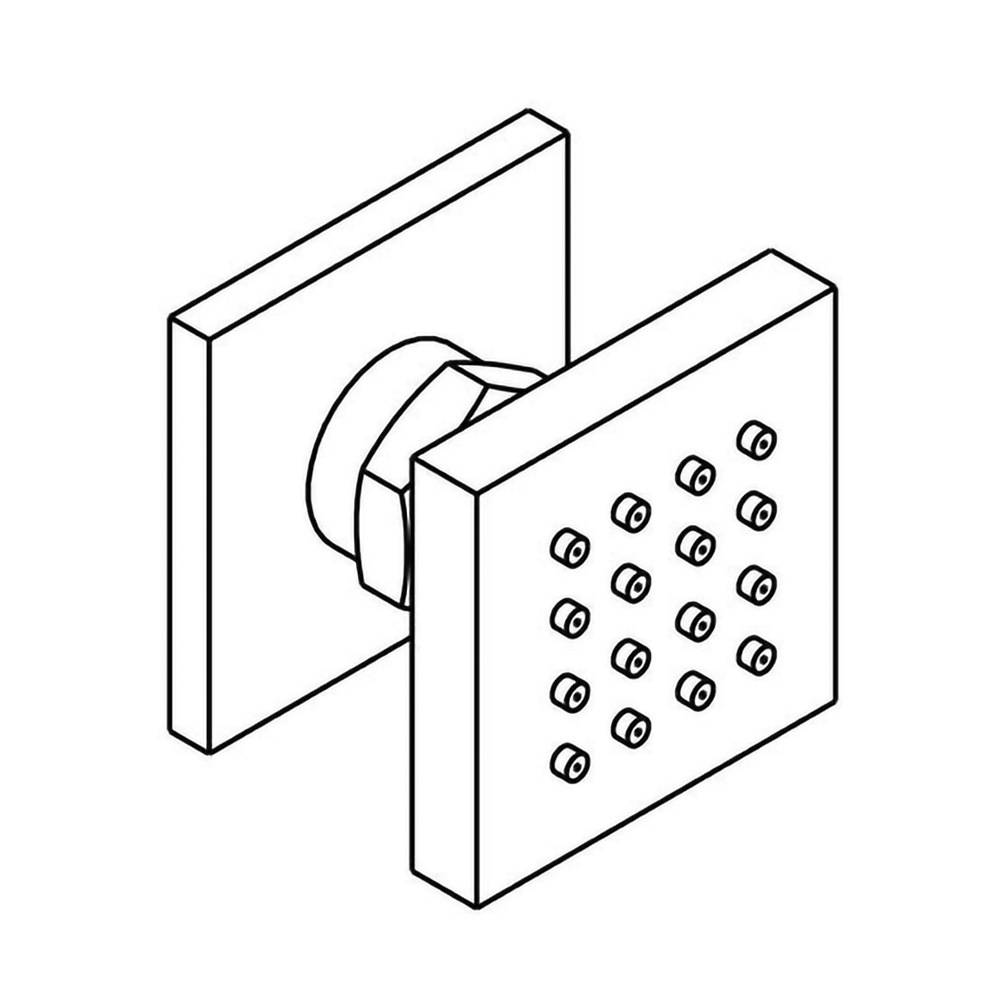
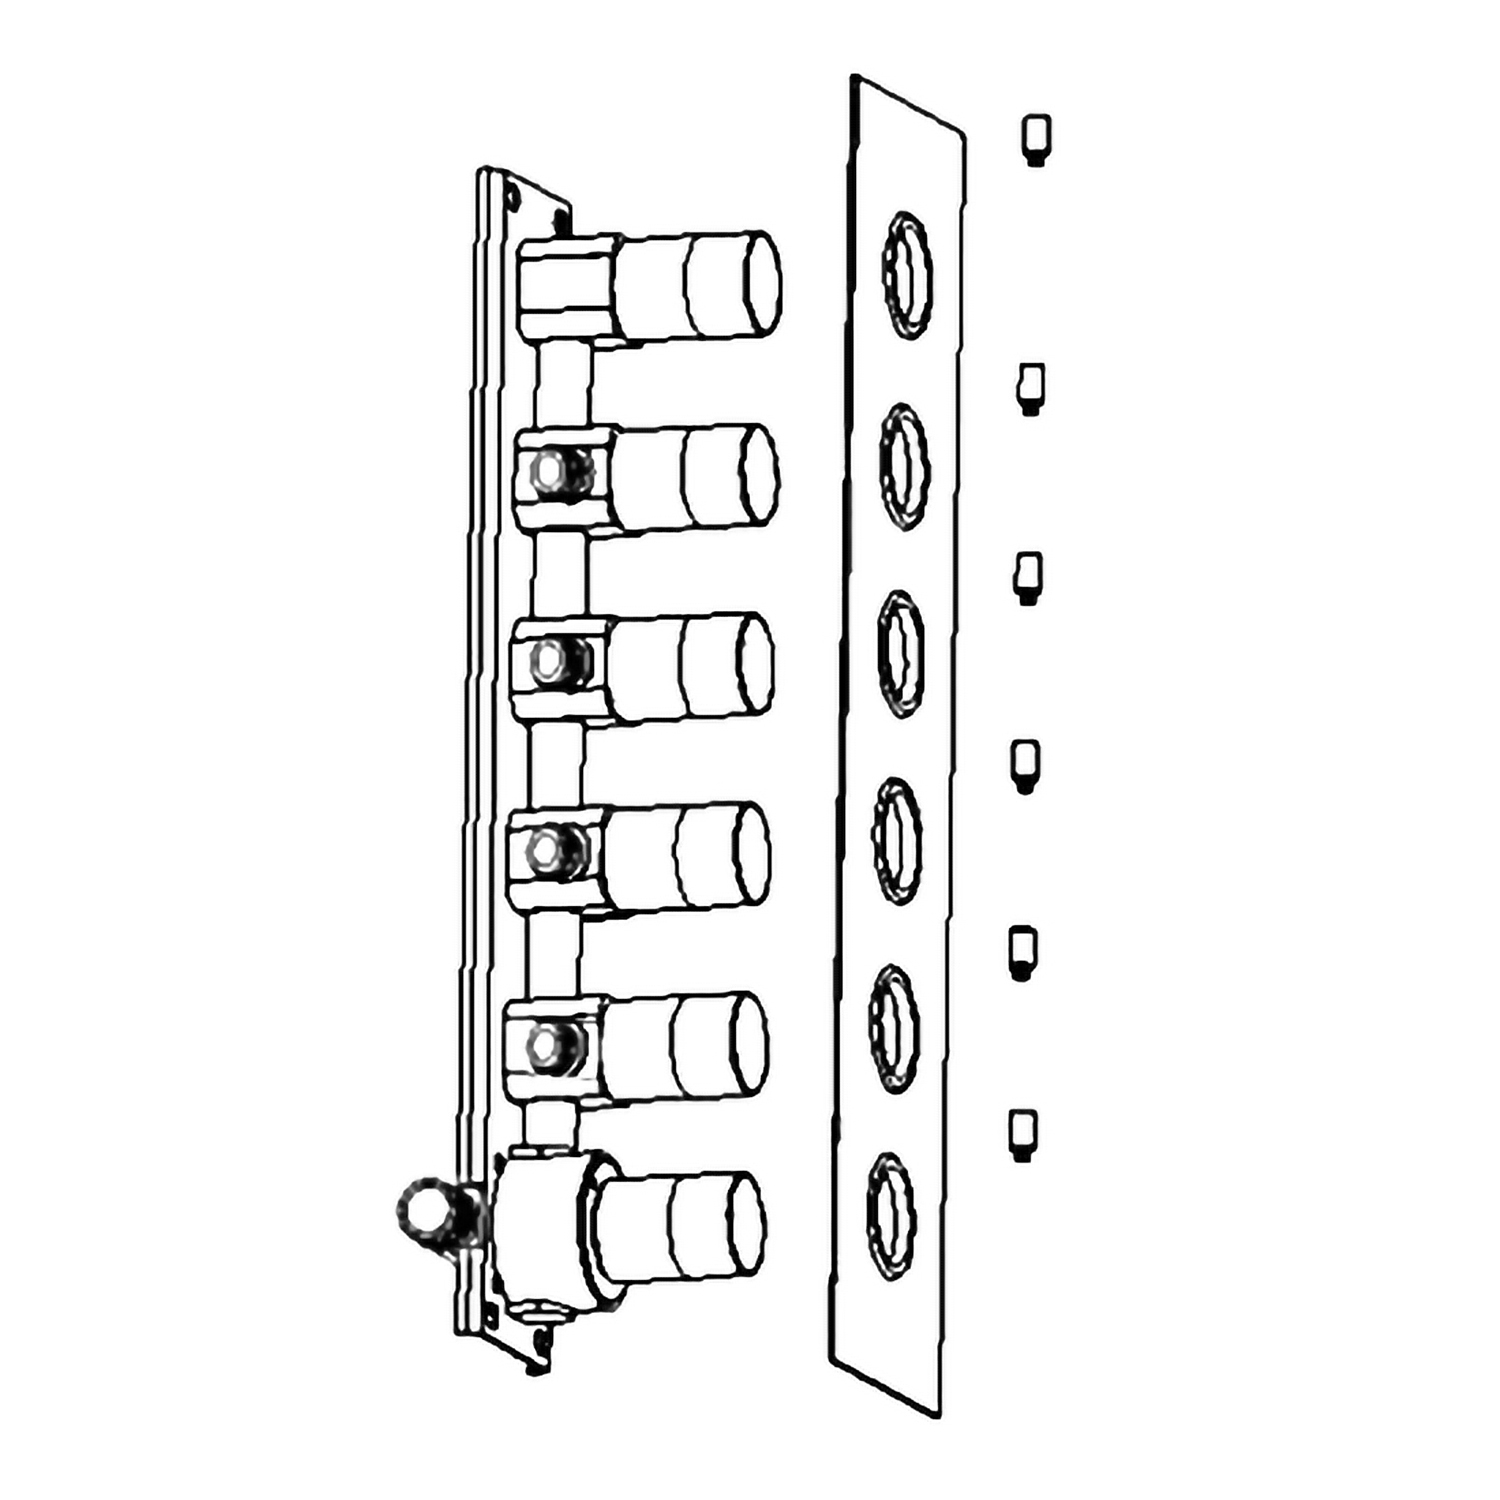
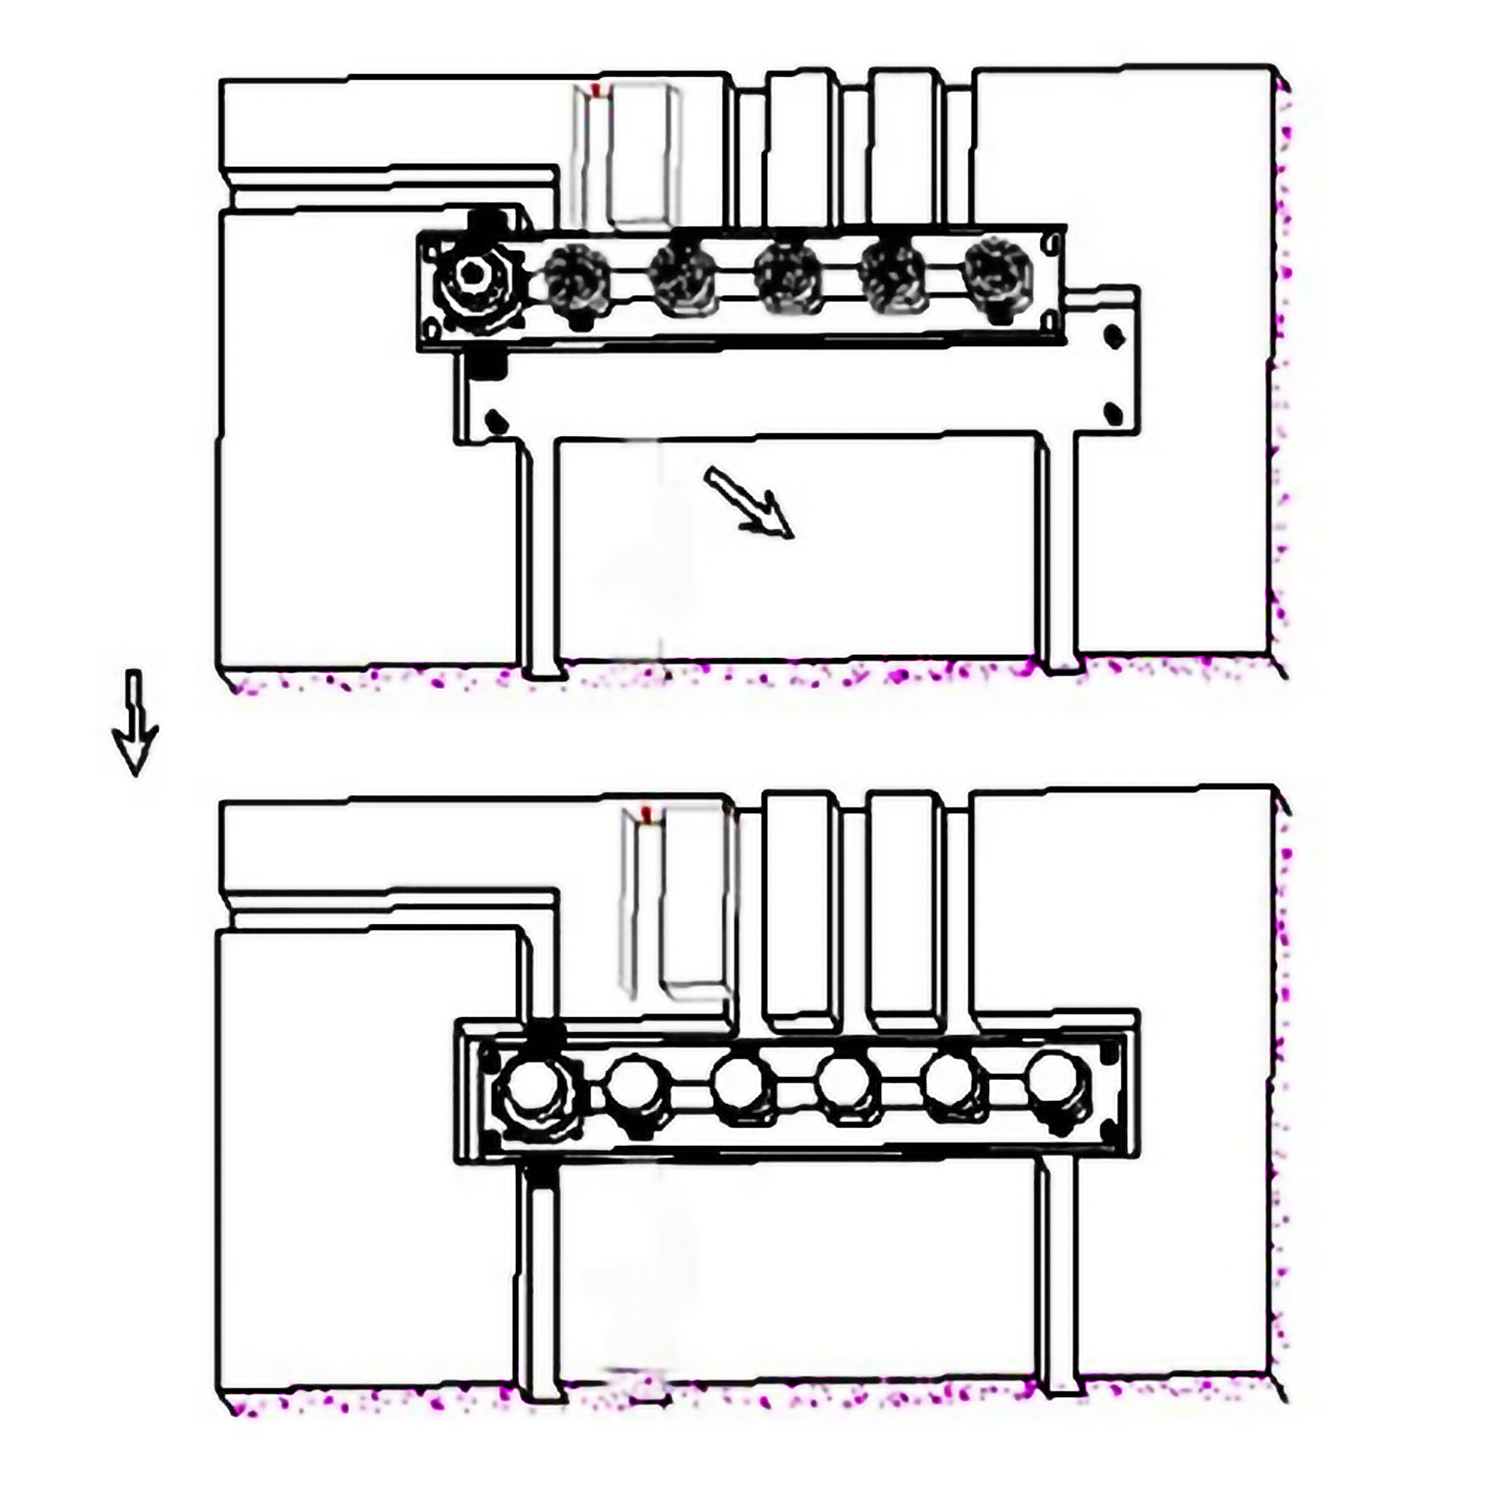
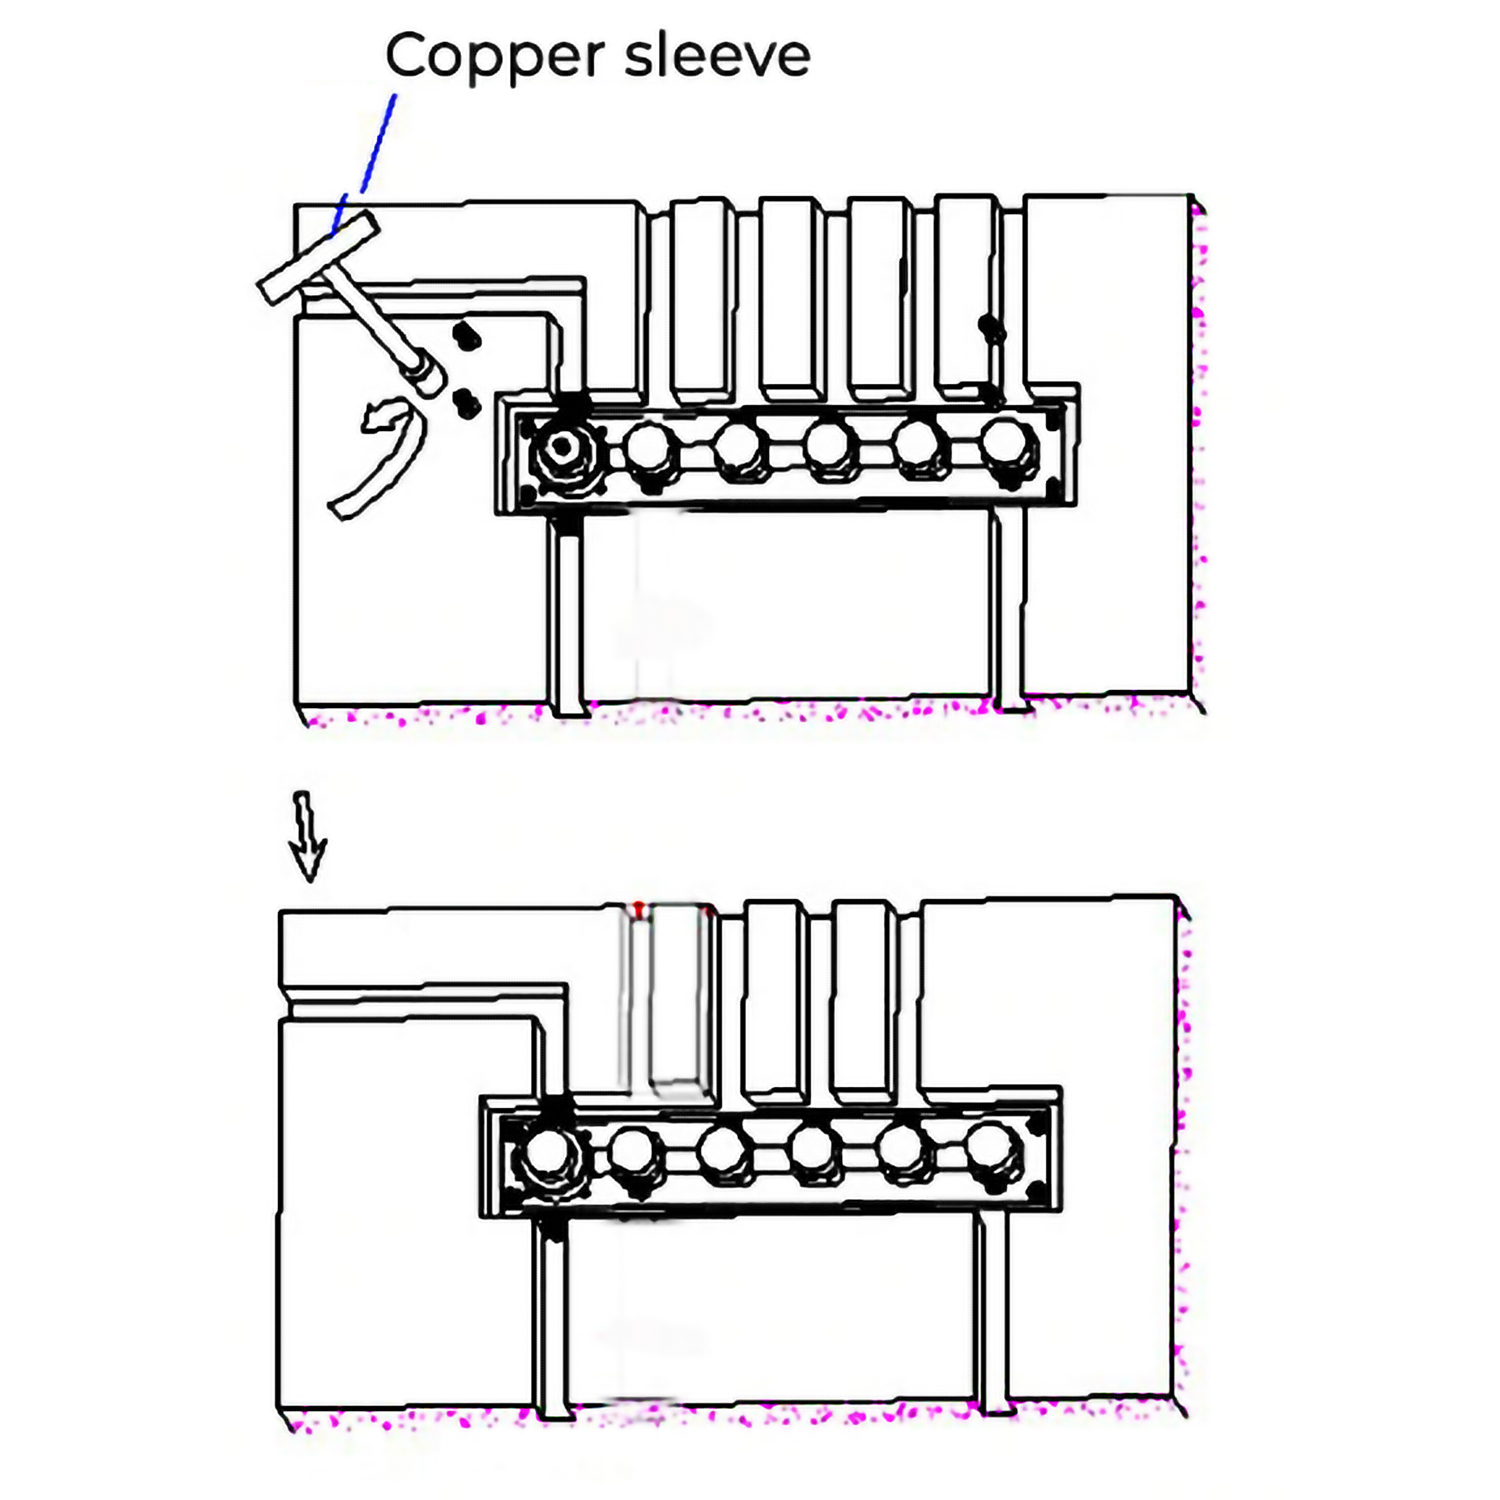
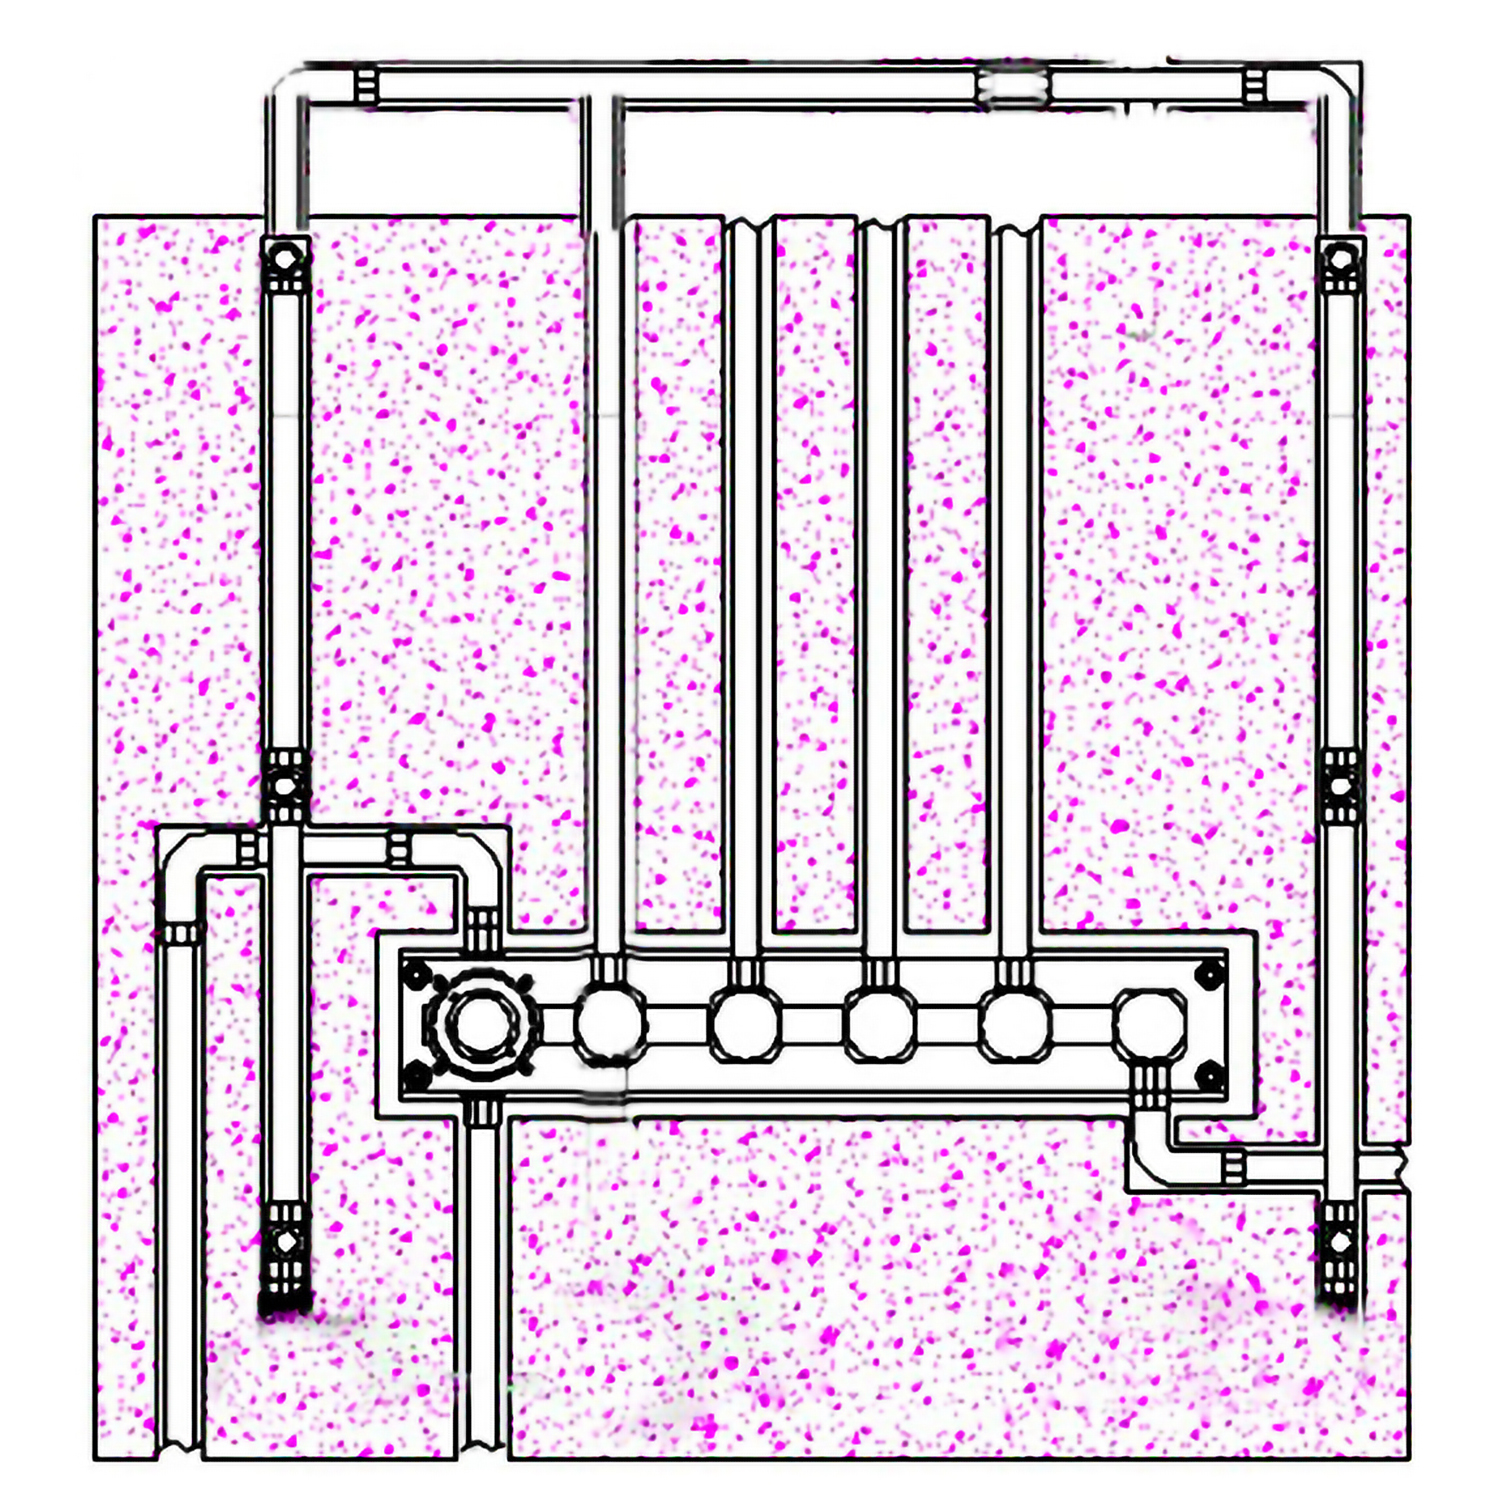
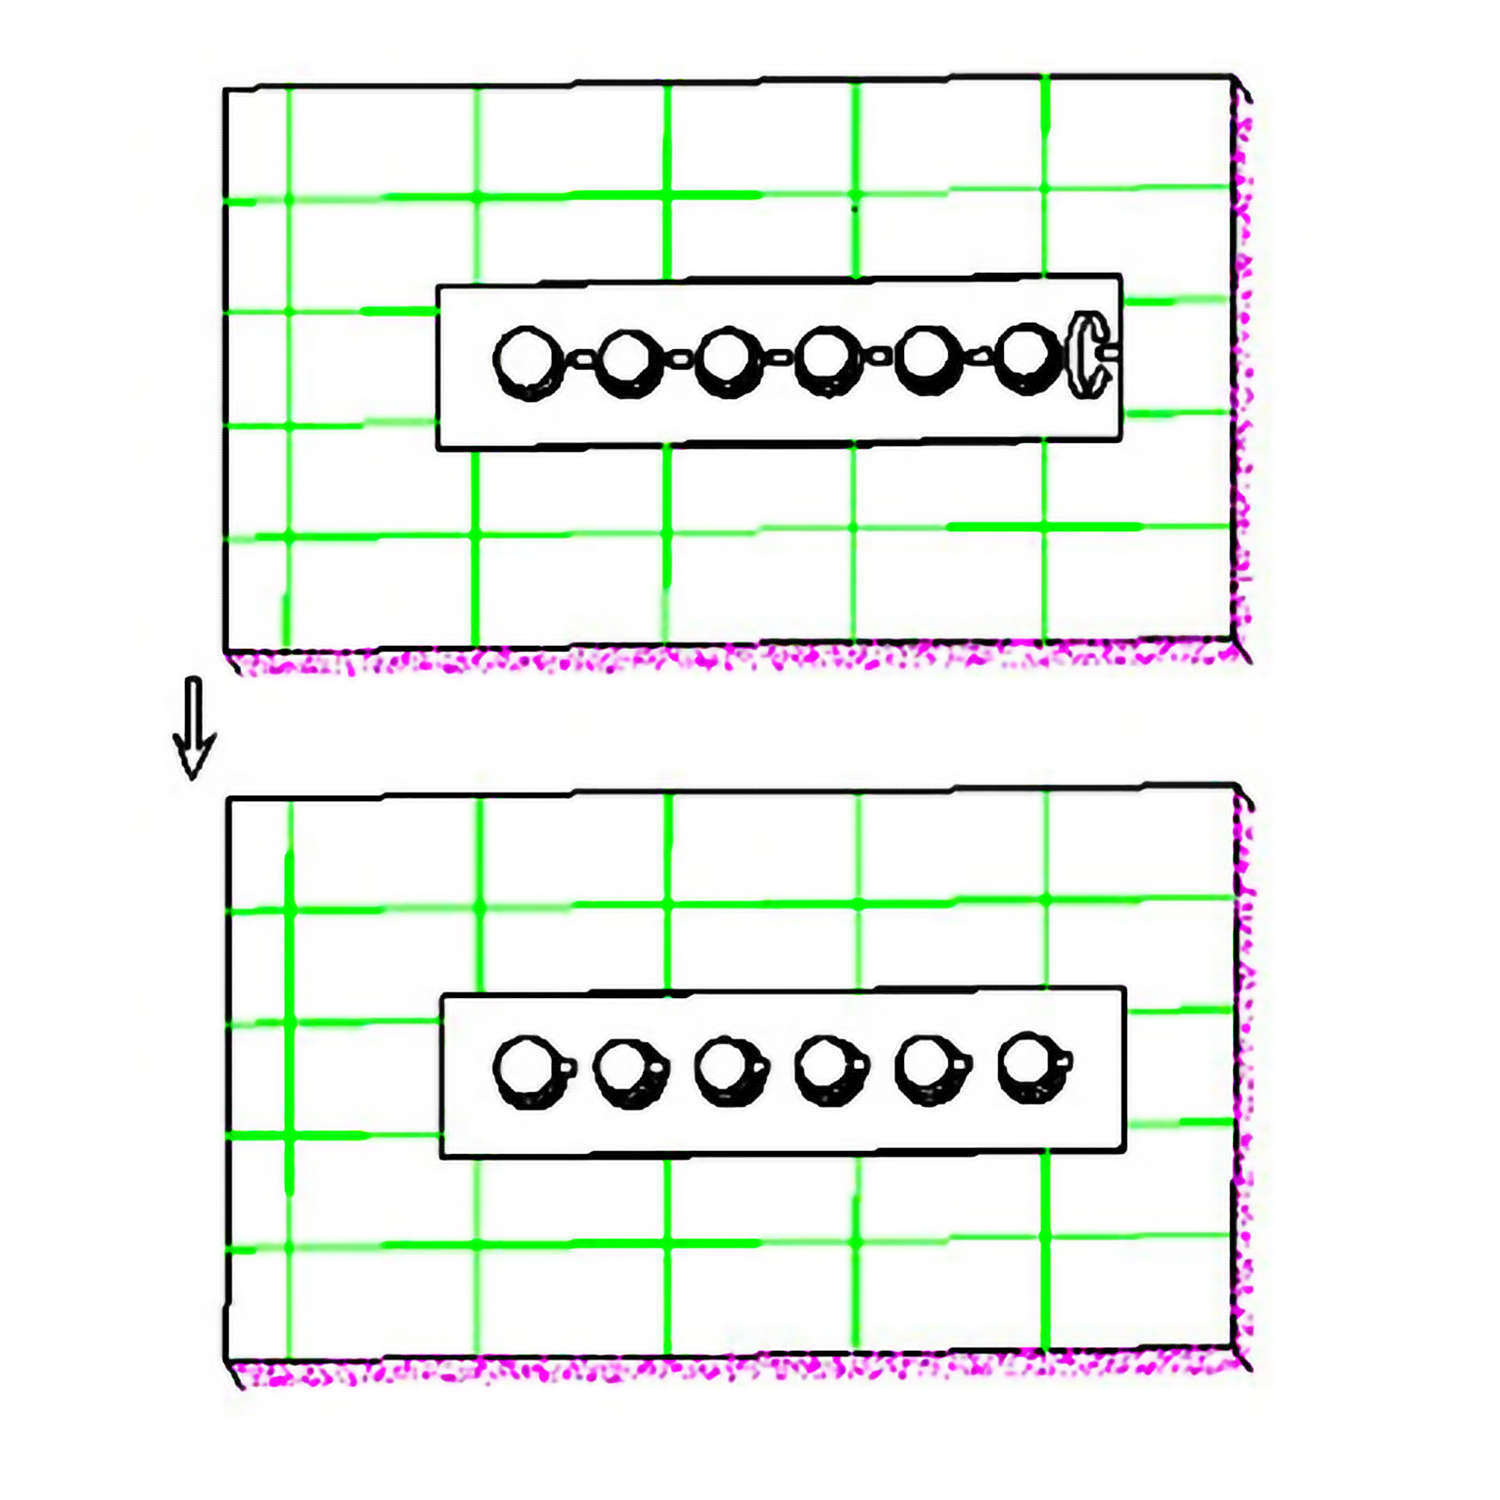
Shower Body Jets Installation Instructions
Step 1:
Body Sprays
Step 2:
installation
Step 3:
Step 4:
Step 5: (Pressure Balancing Loop)
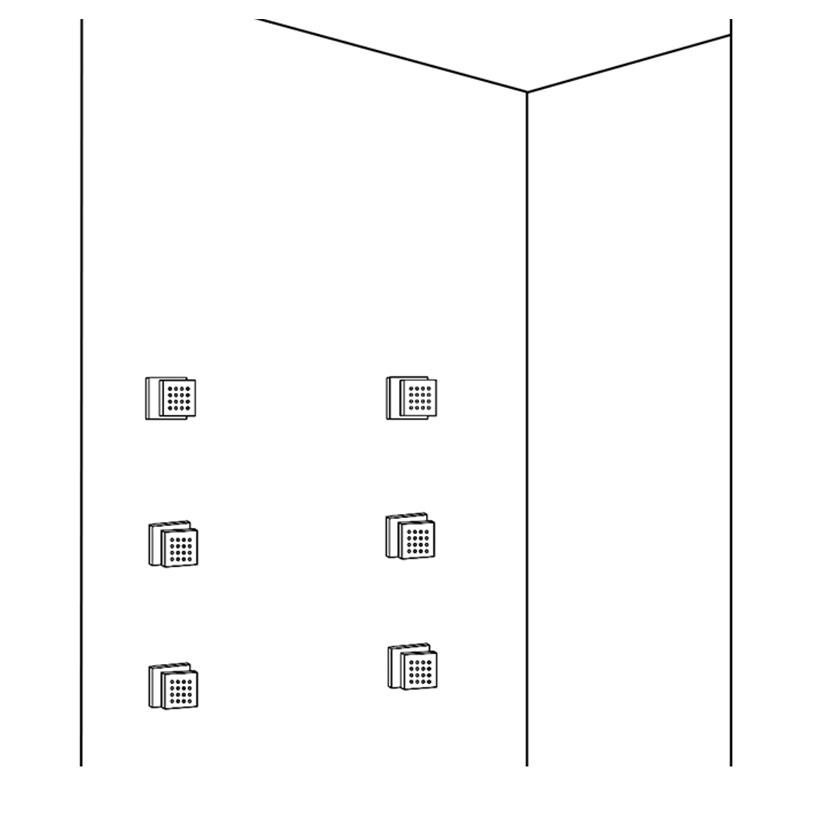
Rough-in Suggestion: This installation requires a 1/2" male threaded pipe fitting to extend 1/4" beyond the finished surface. The plumber should install a properly anchored 1/2" female pipe fitting (i.e. a drop-ear ell) recessed into the wall, into which a brass pipe nipple of proper length can be fitted once the finished wall is complete. Note: The hole size opening should be 1.5" max diameter. Bodyspray placement: Custom shower systems are sized to the user or users. Bodysprays are normally placed at the upper back, middle back, and upper thigh. Always position bodysprays according to the preferences of the user(s).
Pressure Balancing Loop: If installing bodysprays in a bank of 3 or fewer, a pressure balancing loop is not necessary. If installing bodysprays in a bank of 4 or greater, a pressure balancing loop must be used to keep the pressure even between the bodysprays.