Fontana Peru Single Handle Wall Mount Bathroom Sink Faucet Mixer
This elegantly designed faucet is made of real high-quality solid brass materials. No false component. High hardness, no impurities, no cracking. Very good surface treatment. Smooth and round, true plating, no fading. It has reinforced thermostatic on the hot/cold lines that are pressure and freeze resistant. This has solid construction for long durability that will upgrade your bathroom with a modern and cool look, this faucet is just what you've been looking for to upgrade your bathroom.
Fontana Peru Single Handle Wall Mount Bathroom Sink Faucet Features:
|
Brand Name: FontanaShowers
Model Number: FS9603
Type: Sink Faucets
Style: Single Holder Single Hole
Installation Type: Wall Mount
Number of Holes: 2
Type: Ceramic Plate Spool
Number of Handle: Single Handle
Mixer Material: Solid Brass
Style: Contemporary
Hot and Cold Water: Yes
Surface Treatment: Electroplated
Valve Core Material: Ceramic
Color: Rose Gold
|
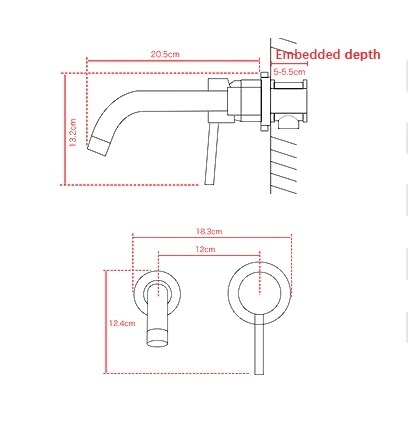
|
FontanaShowers® Product Warranty Information 
|
|
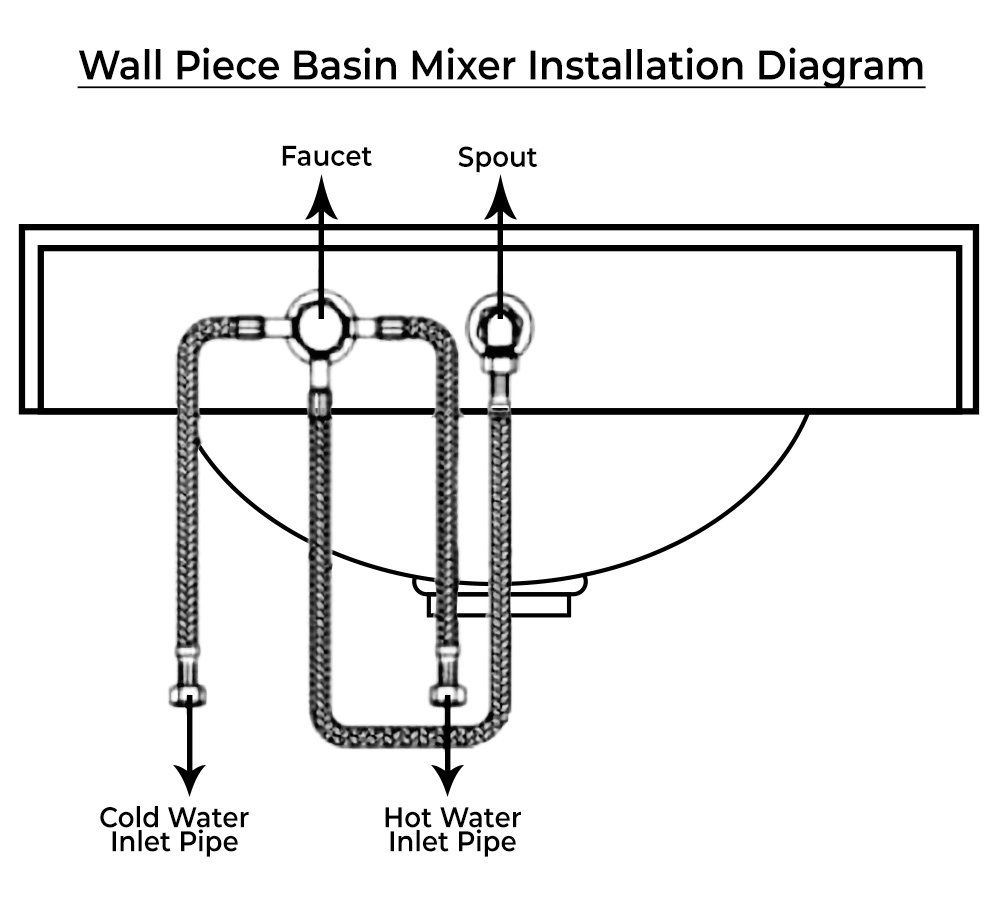 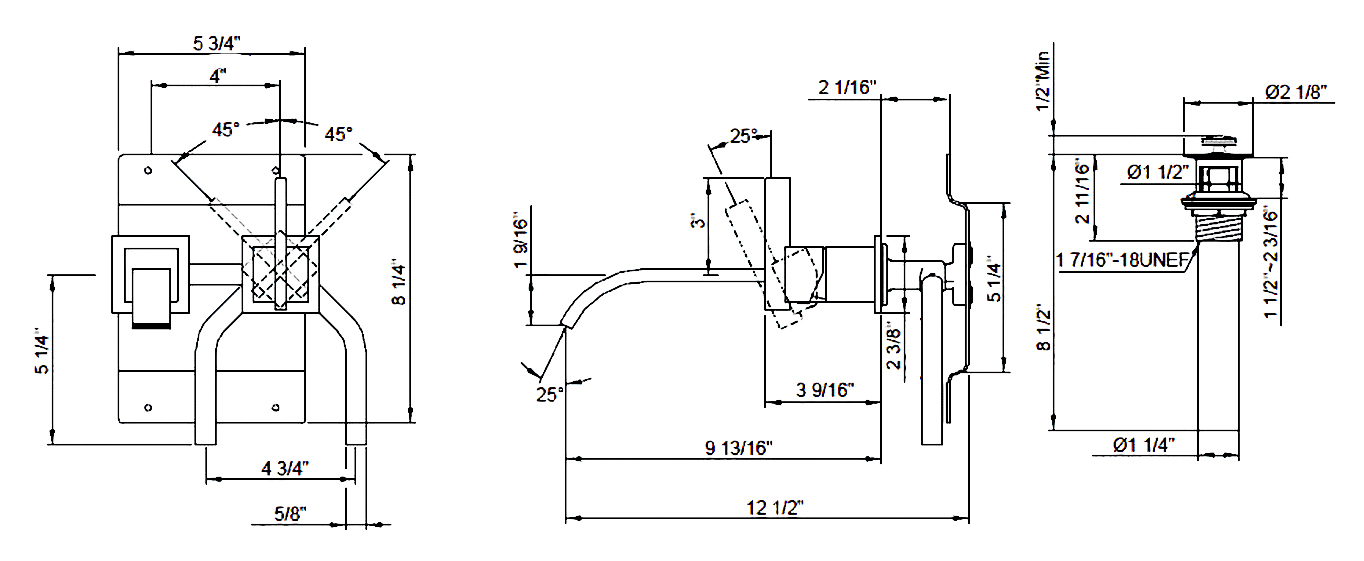 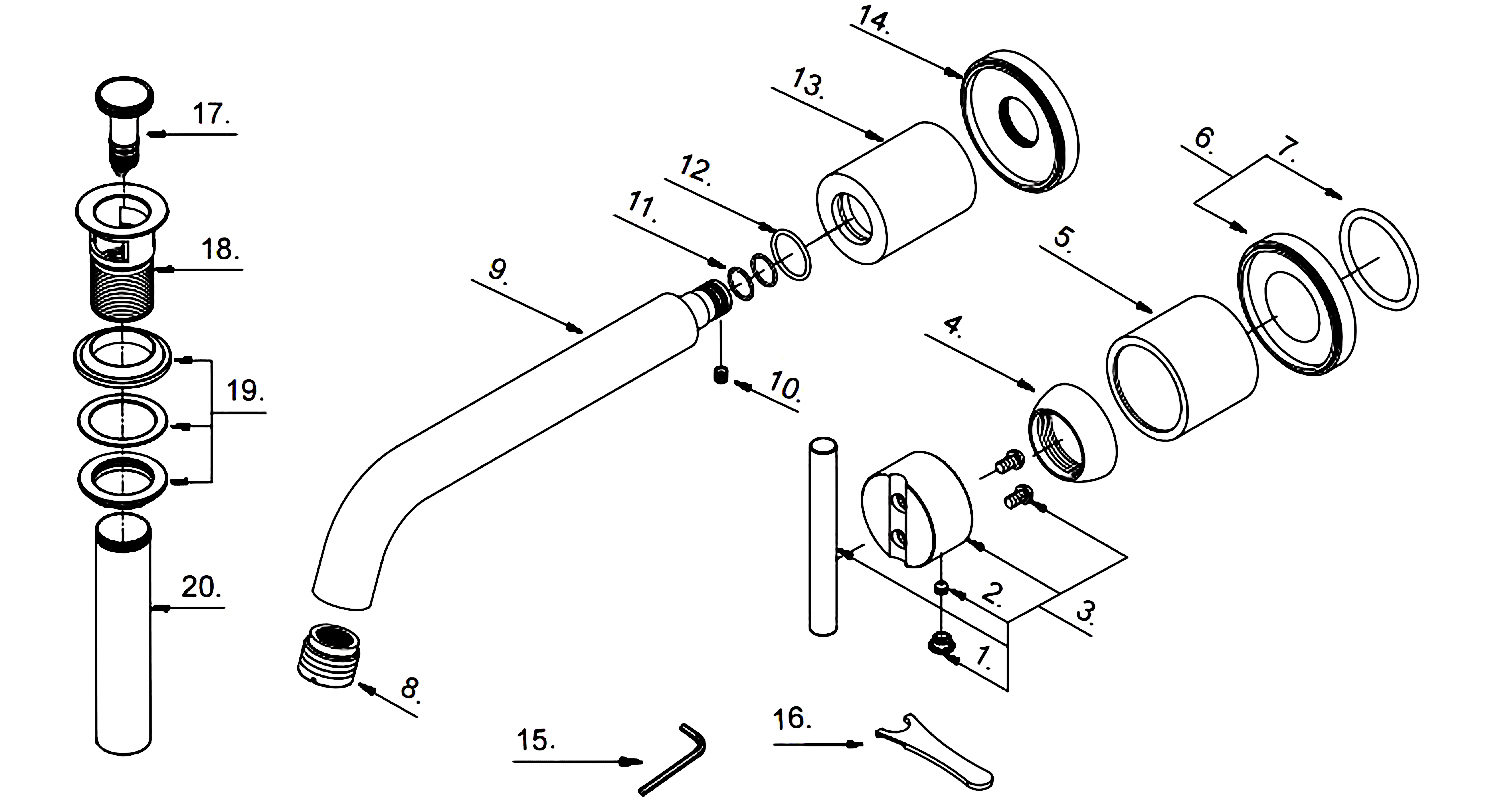 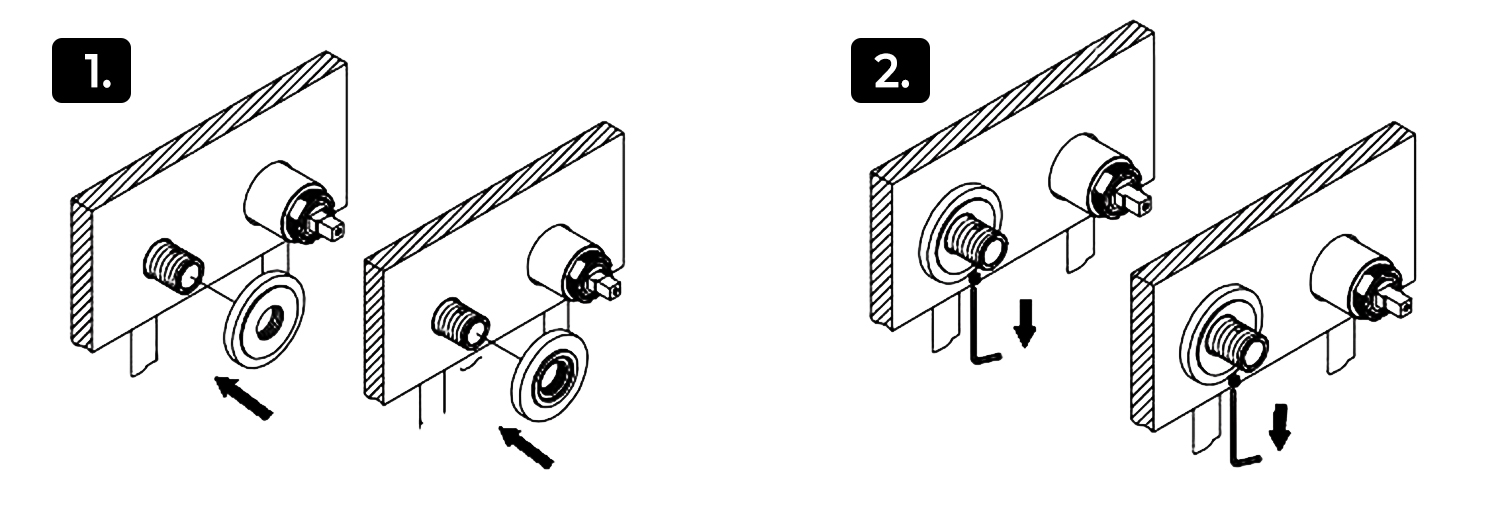
- Install spout trim ring onto spout shank.
- Loosen set screw from the valve.
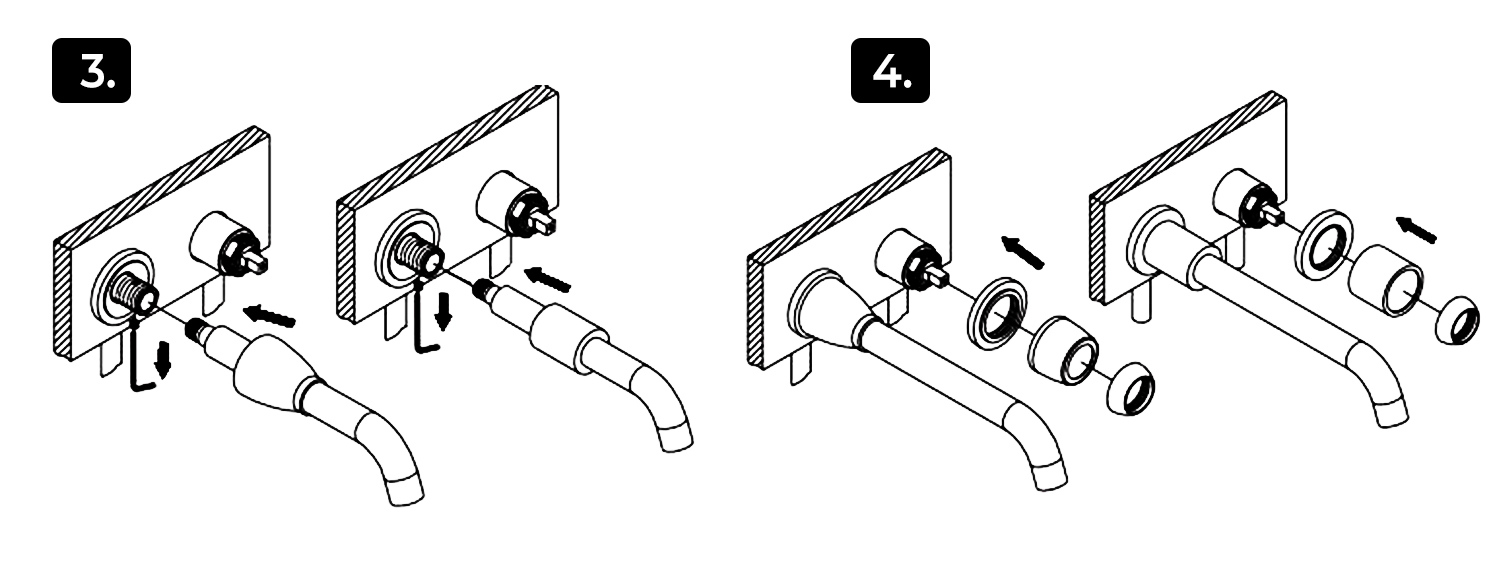
- hutch sport to spout shook
- a)Slide bock spout body from spout end.
- b)Slide spout onto spout mounting shank. Tighten set screw with the hex wrench.
- C)Slide spout body to spout trim ring.
- Install the handle trim ring, sleeve, and cap onto handle valve.
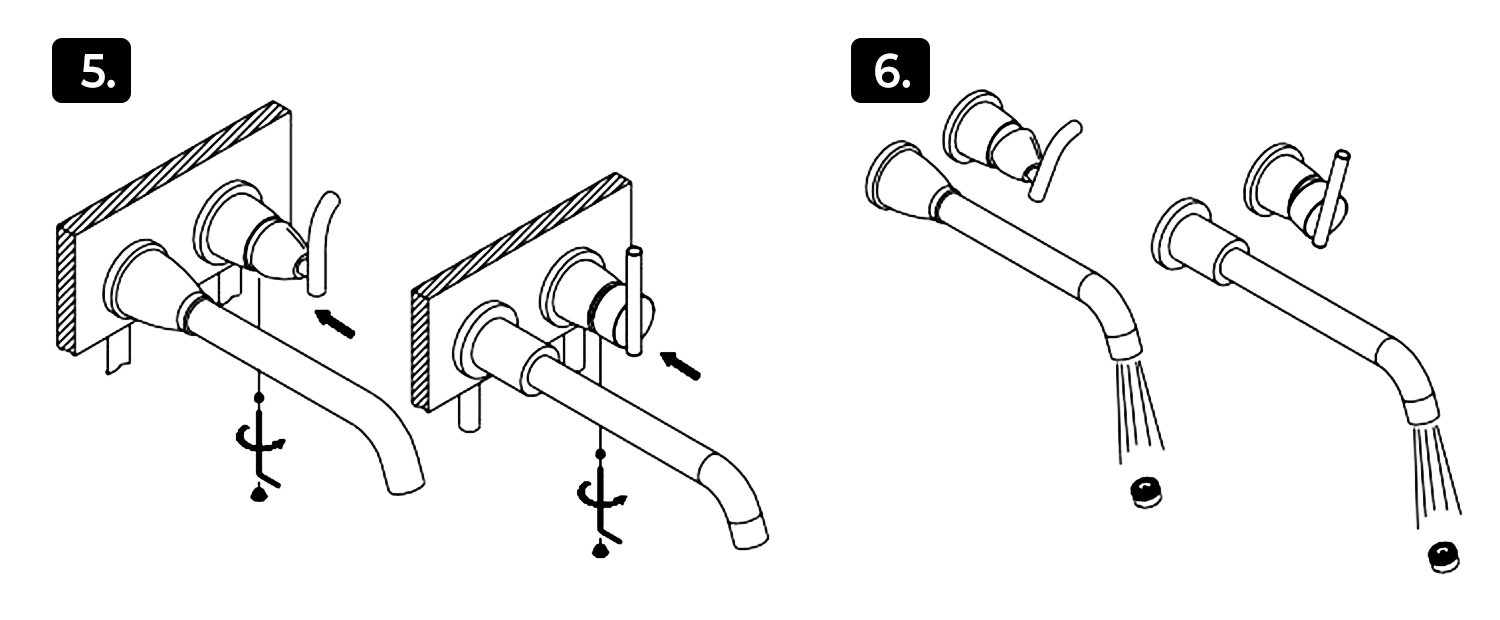
- Install handle with cartridge by tightening set screw. Put the insert.
- After installing the faucet, remove the aerator and turn on the water to remove any left-over debris. Re-assemble aerator.
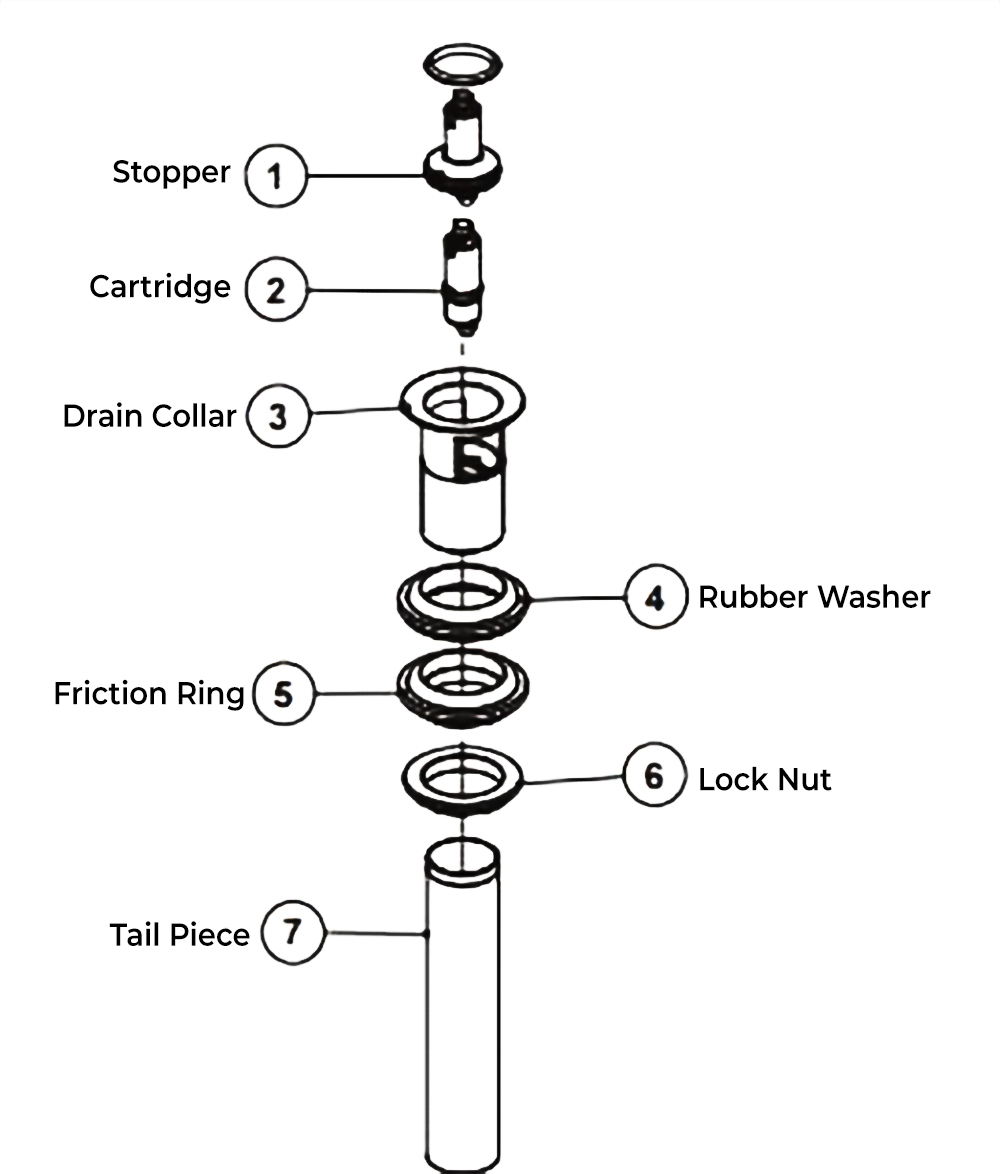 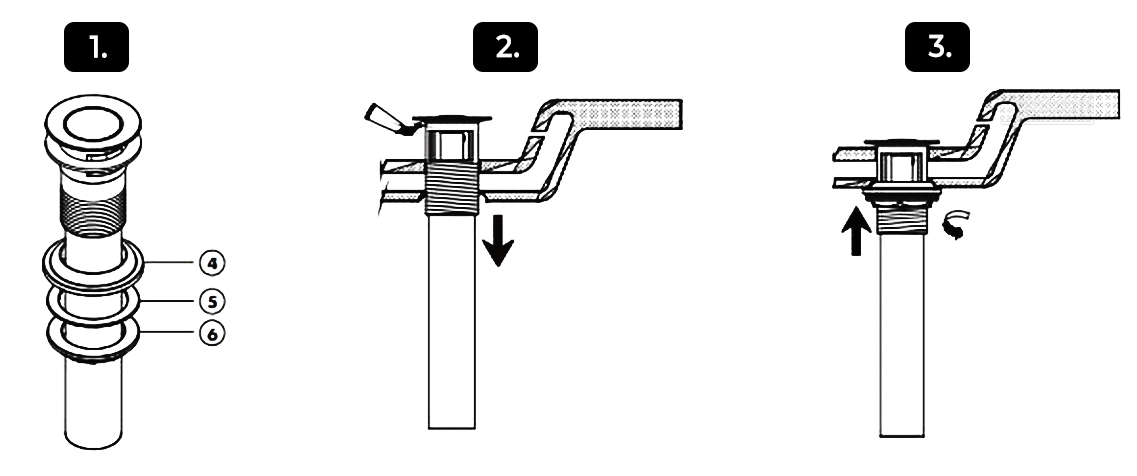
- Remove rubber washer (4), friction ring (5) and locknut (6) from the drain assembly.
- Place a ring of silicone sealant beneath the lip of drain collar (3) and place it in the opening of the sink. Press down firmly to secure the drain collar (3).
- Screw rubber washer (4), friction ring (5) and locknut (6) onto drain collar
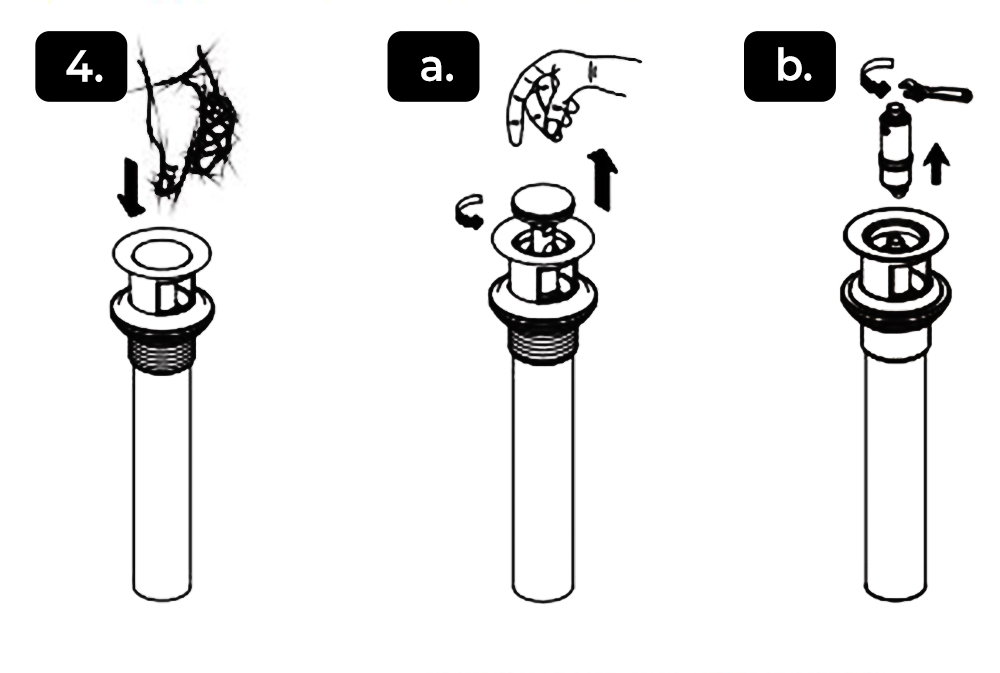 For drain cartridge replacement or cleaning For drain cartridge replacement or cleaning
- Remove cartridge (2) from drain: a)Push stopper to raised position. Unscrew the stopper cap from the cartridge. b)Using a wrench or pliers, unscrew the cartridge from drain collar and remove from drain.
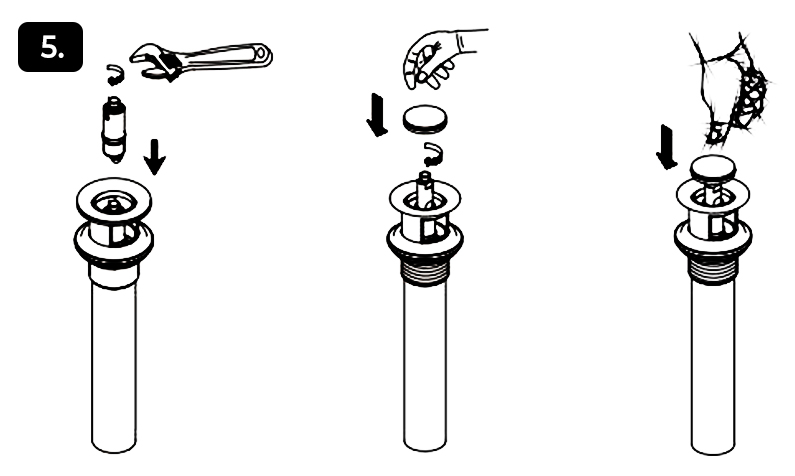 5. Reinstall cartridge (2) into drain collar: a) Thread on stopper cap. 5. Reinstall cartridge (2) into drain collar: a) Thread on stopper cap.
|
|
The installation and illustrations provided are for informational purposes only.
For detailed and accurate installation instructions, please refer to the
product specifications or the corresponding BIM file.
Experience unparalleled luxury and rejuvenation with our designer shower.
Advanced technology with customizable water pressure and temperature.
Revitalize with our opulent showers for ultimate indulgence.
|
|
|











