How to Install Fontana Lima Luxury Stainless Steel Shower Set | FS-40LBSF
Installation Instructions For Fontana Lima Luxury Stainless Steel Shower Set
Before you begin, please read the installation instructions below. Observe all local building and safety codes.
Unpack and inspect the product for any shipping damages. If you find damages, do not install.
Please note all products must be installed by a professional and certified plumber otherwise warranty might be voided.
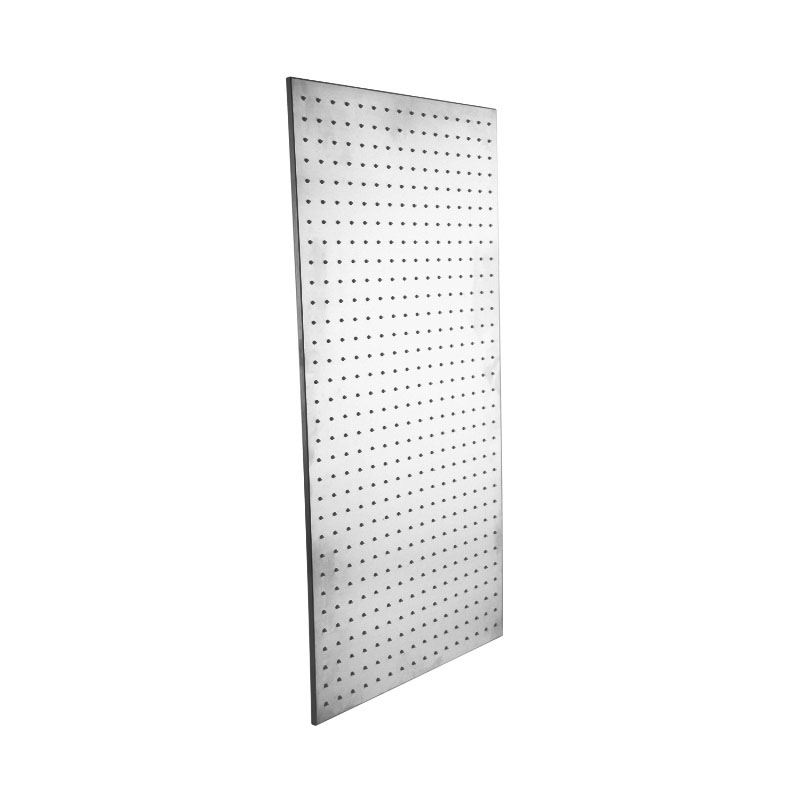
shower
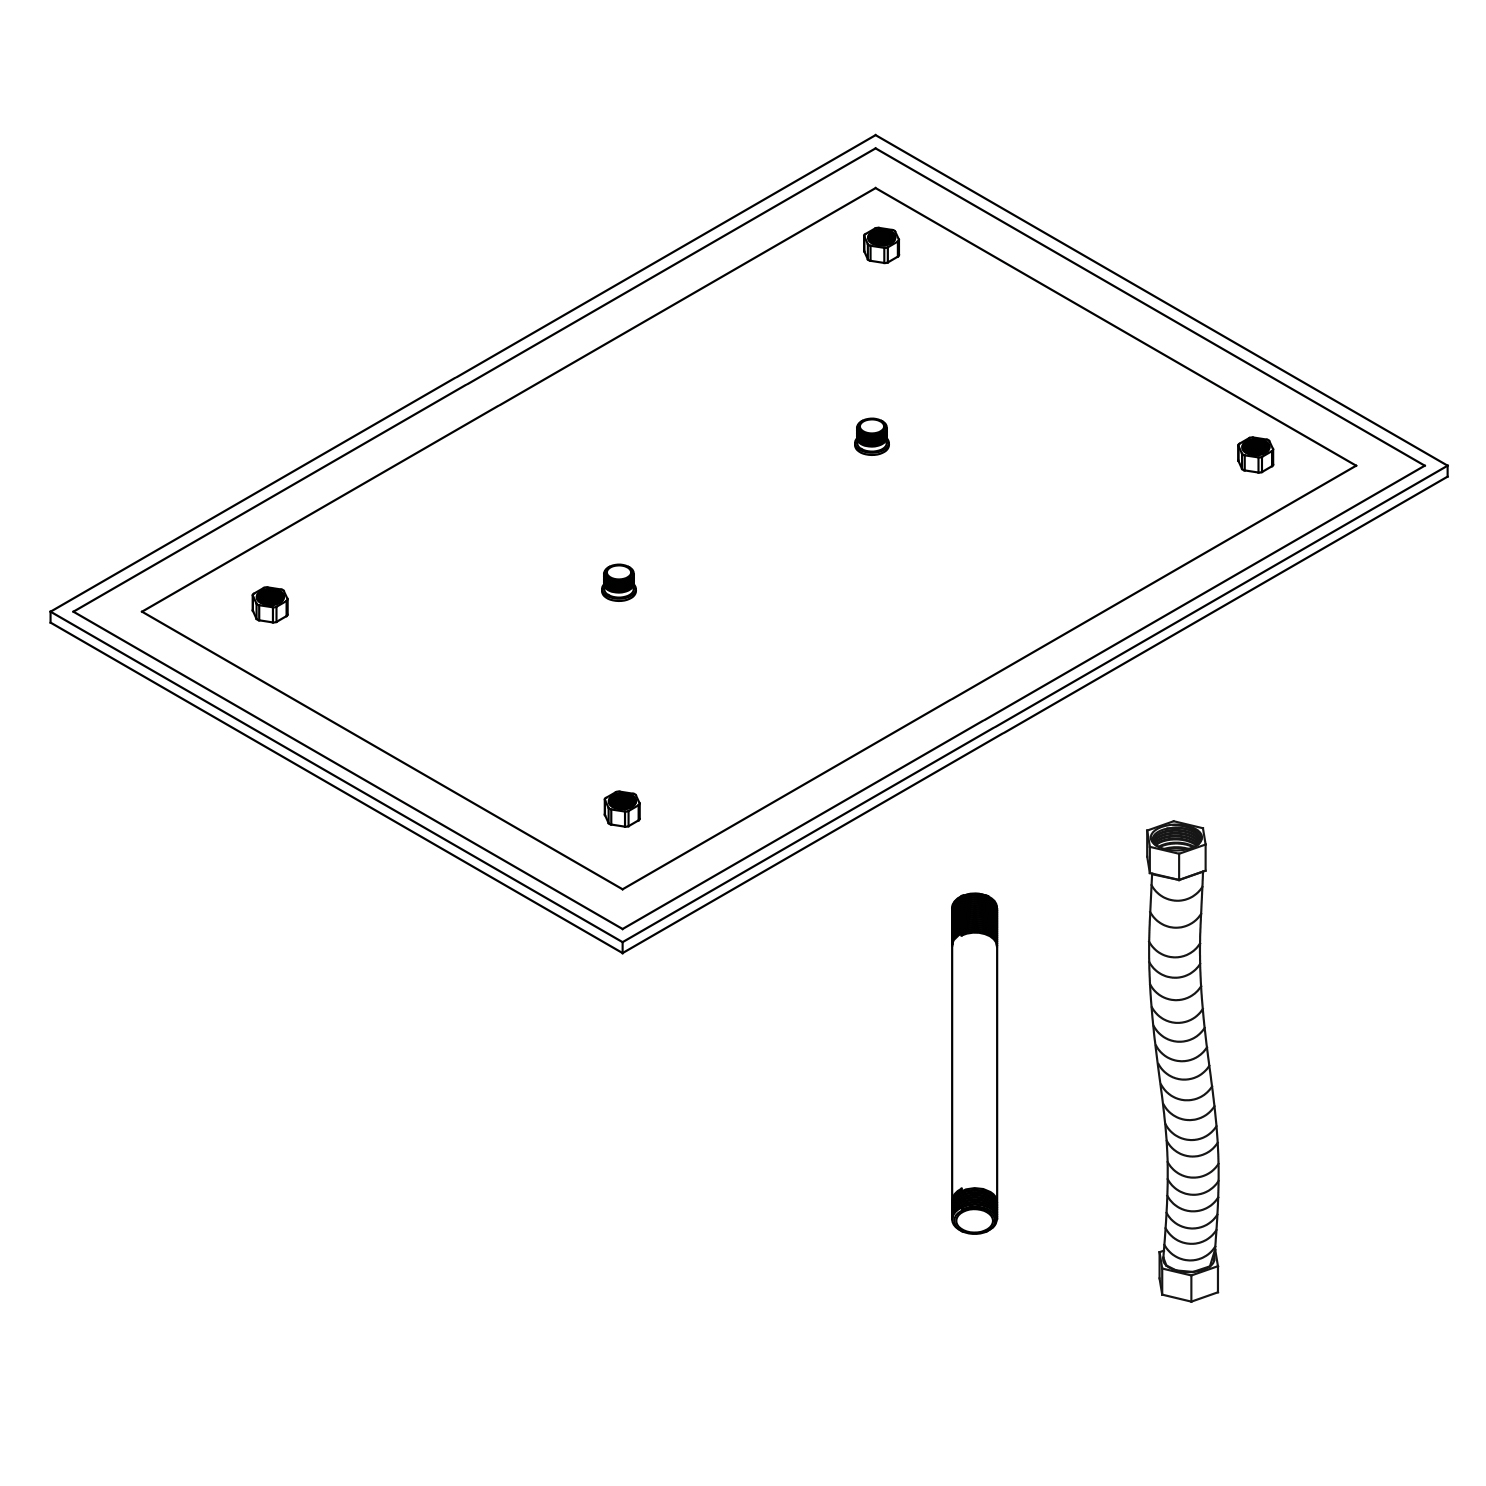
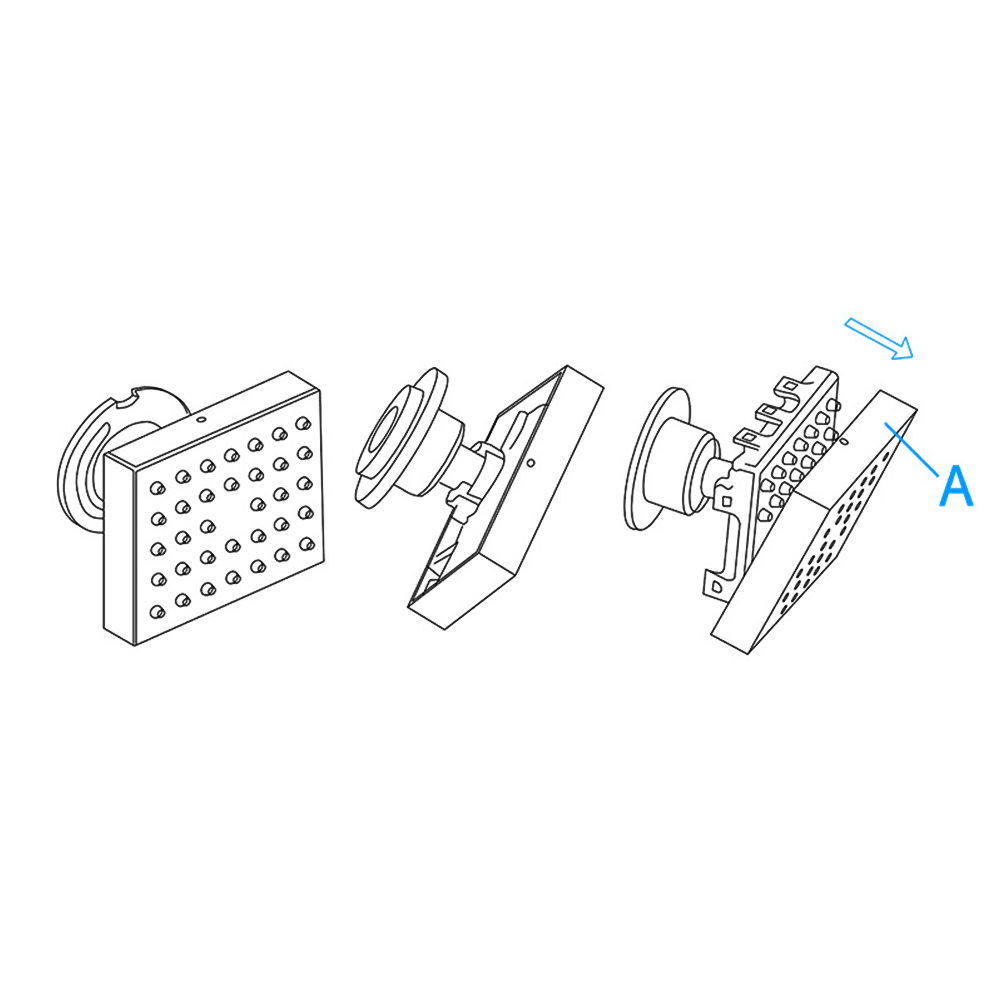
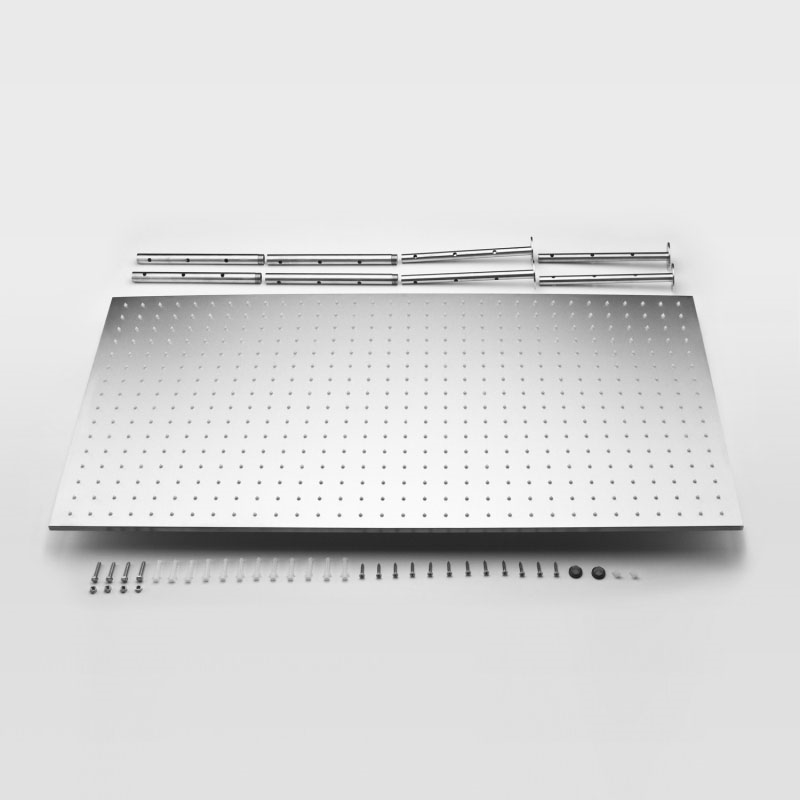
Shower Head Installation Instructions
shower
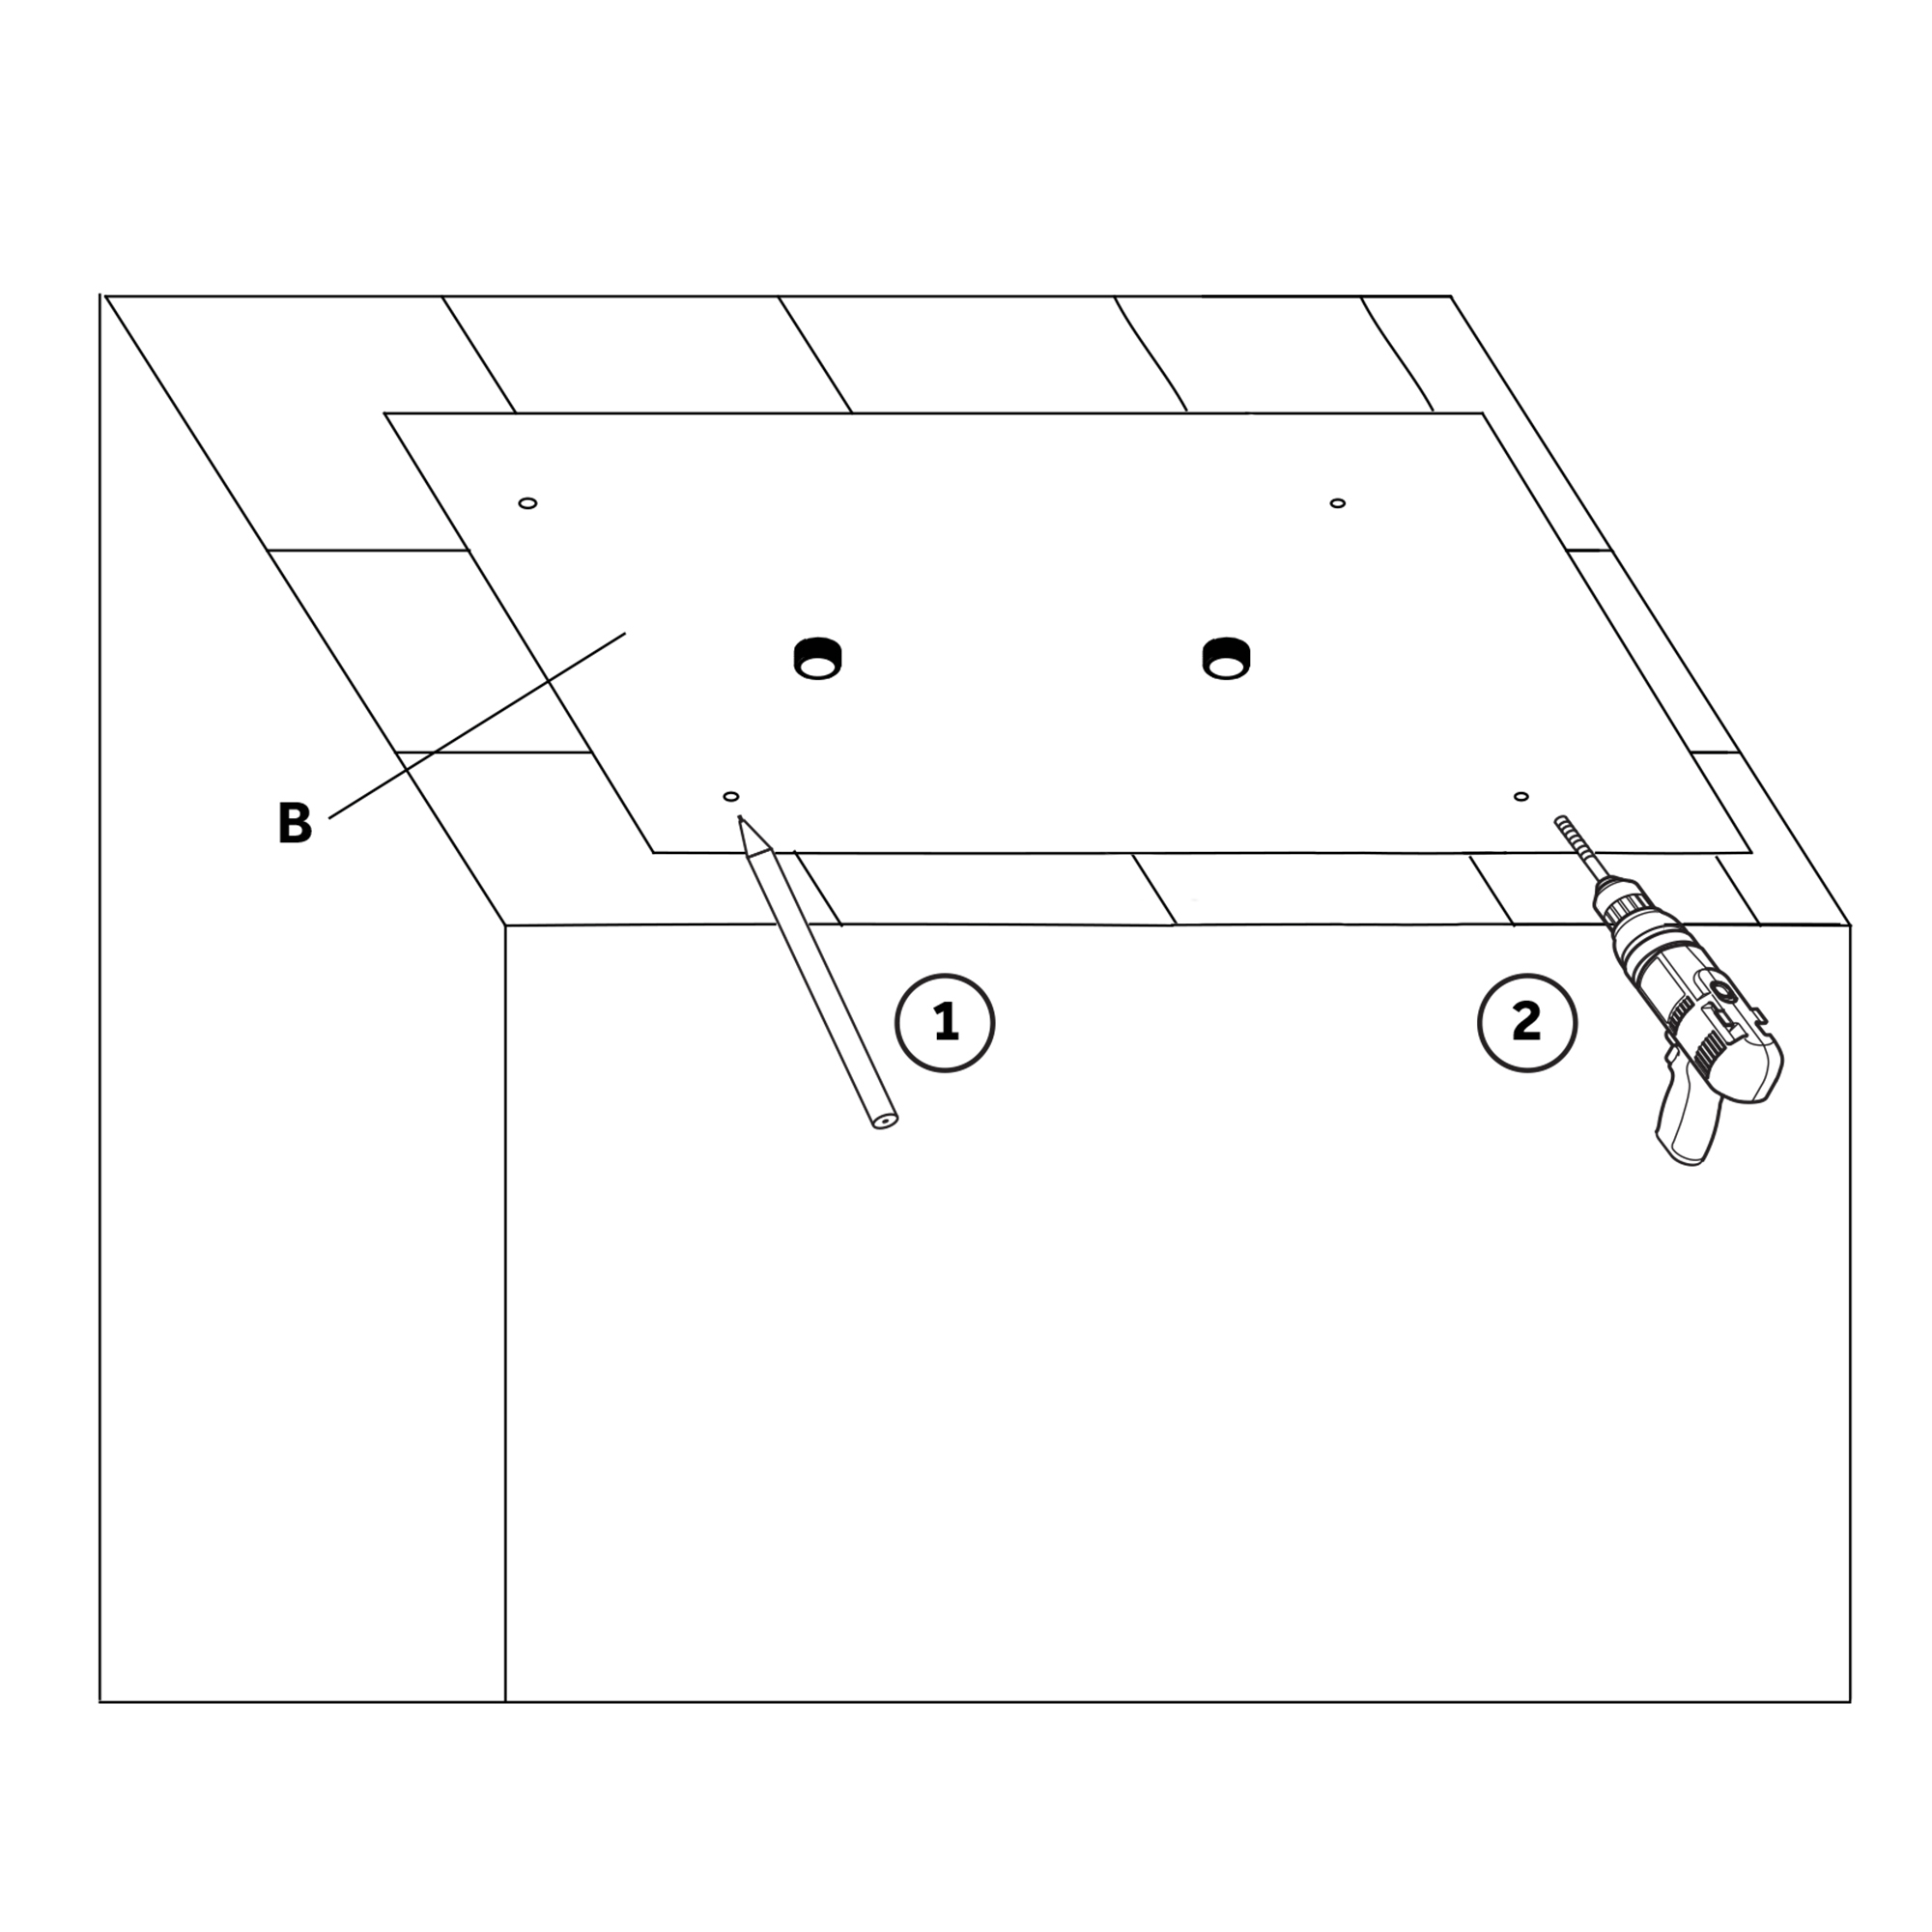
Step 1:
Step 2:
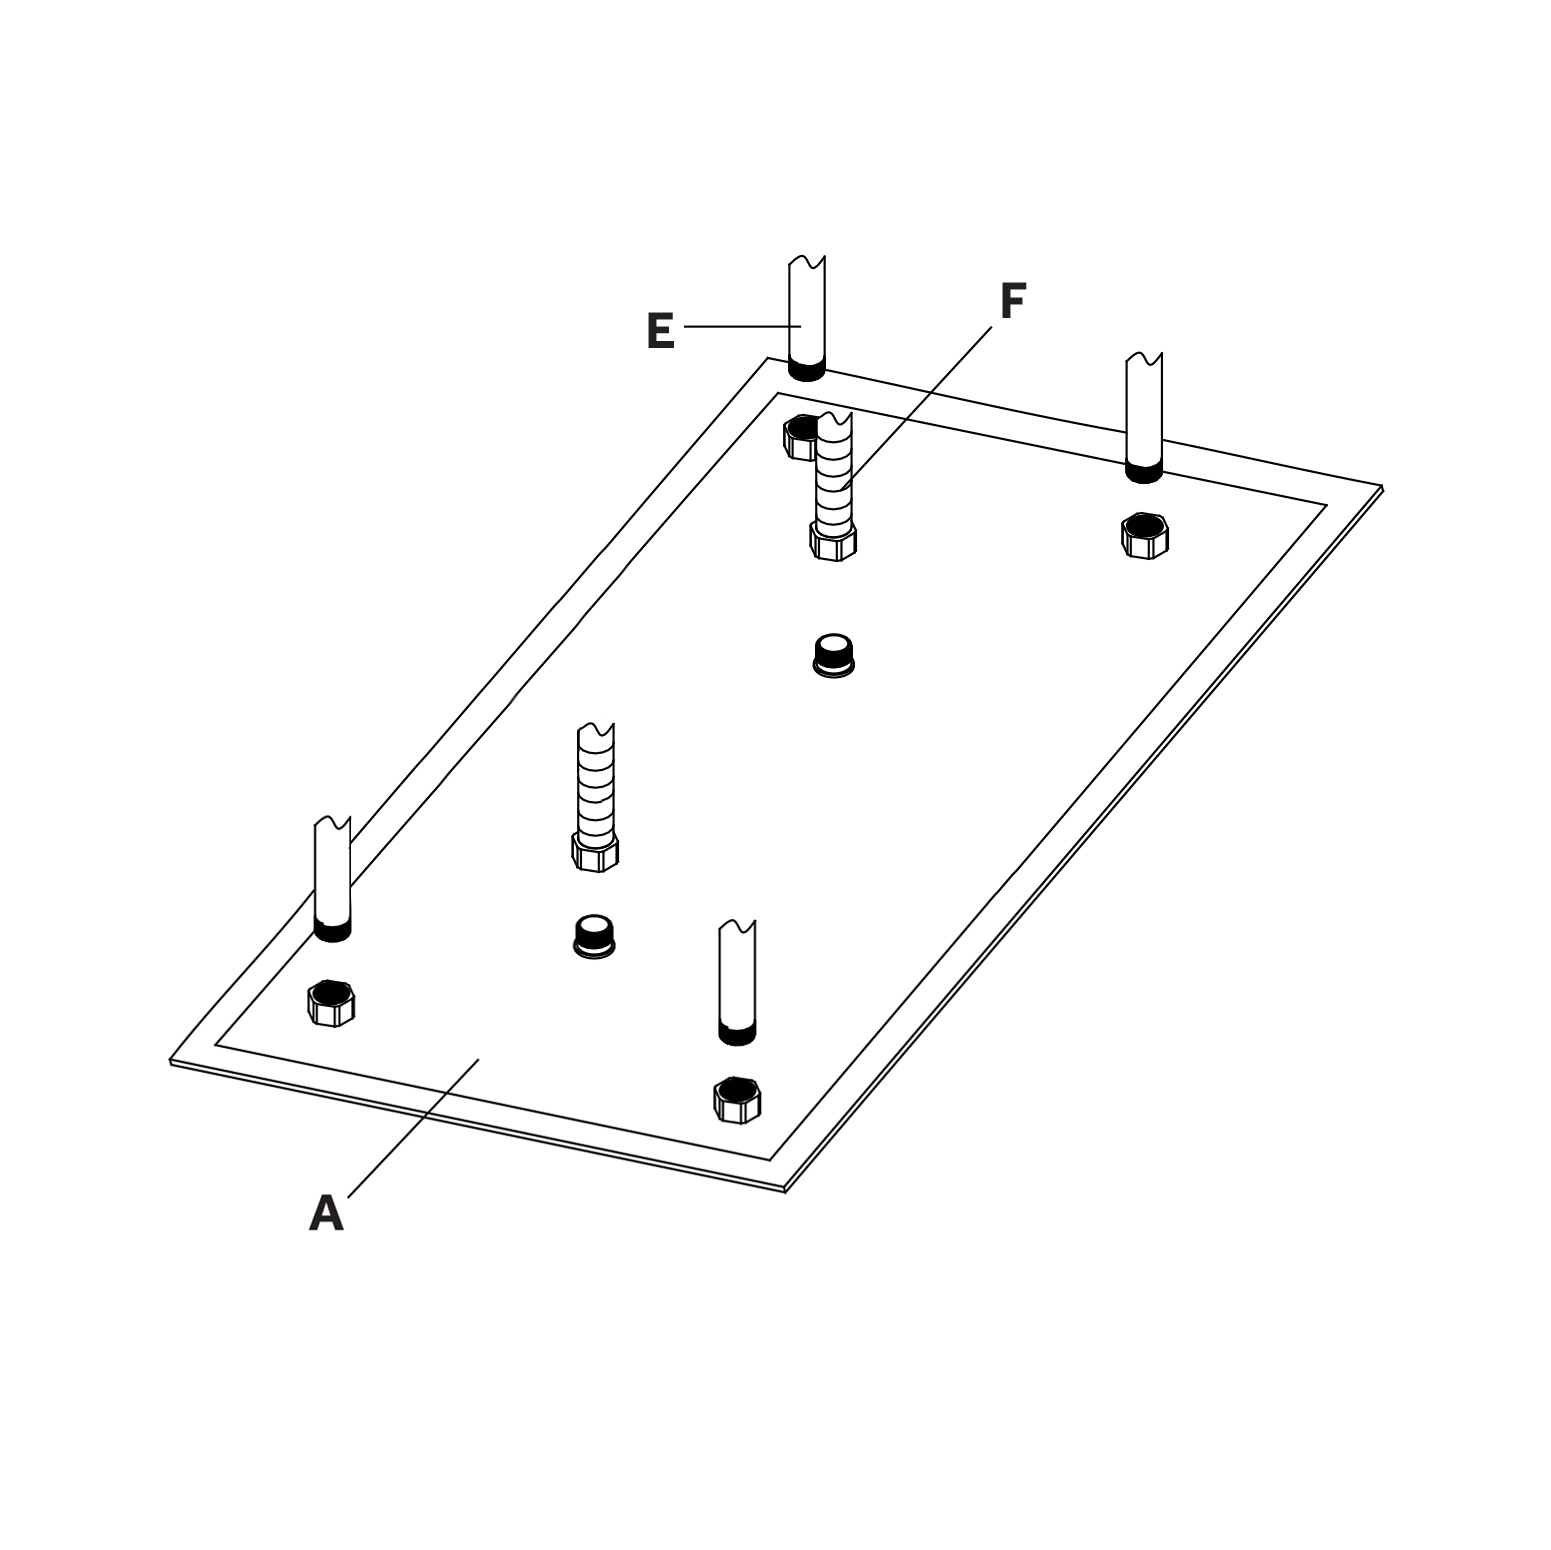
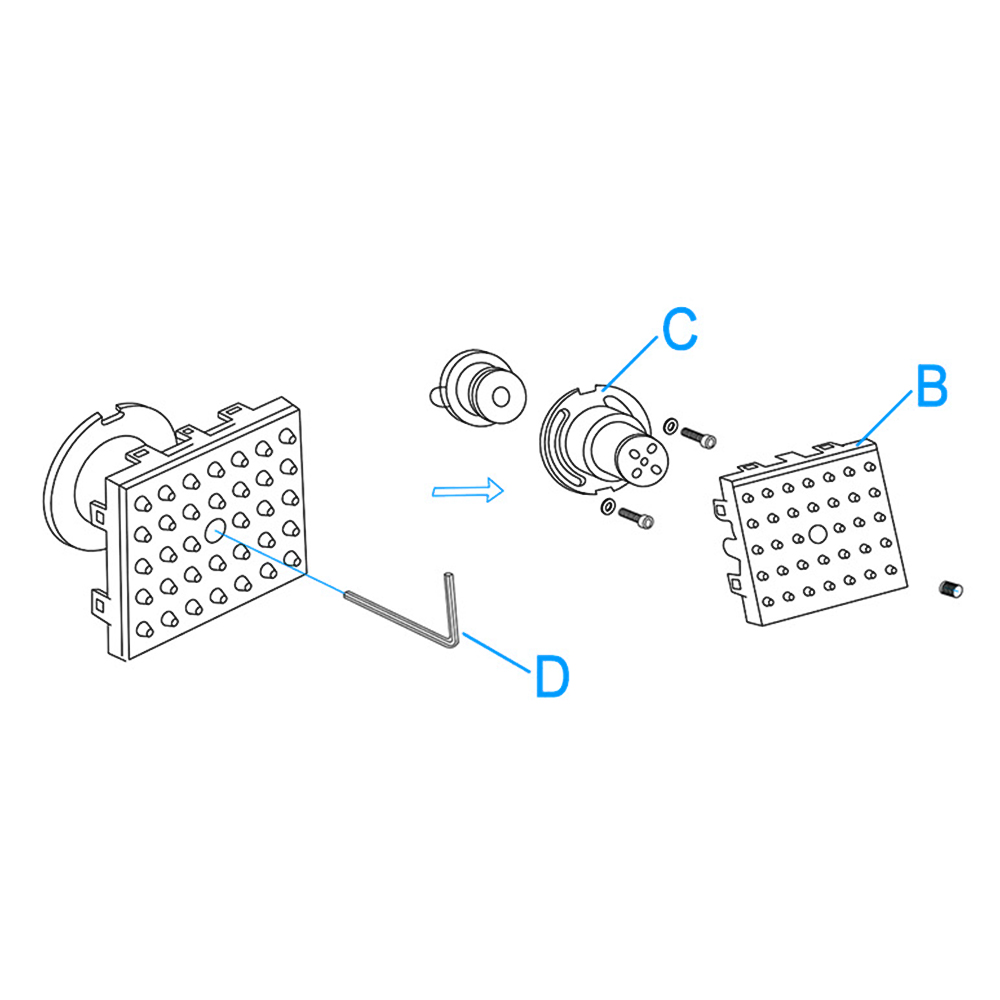
According to the template (B) mark the location of the mounting holes (1). Use a drill with a 6mm bit to drill mounting holes into studs or blocking.
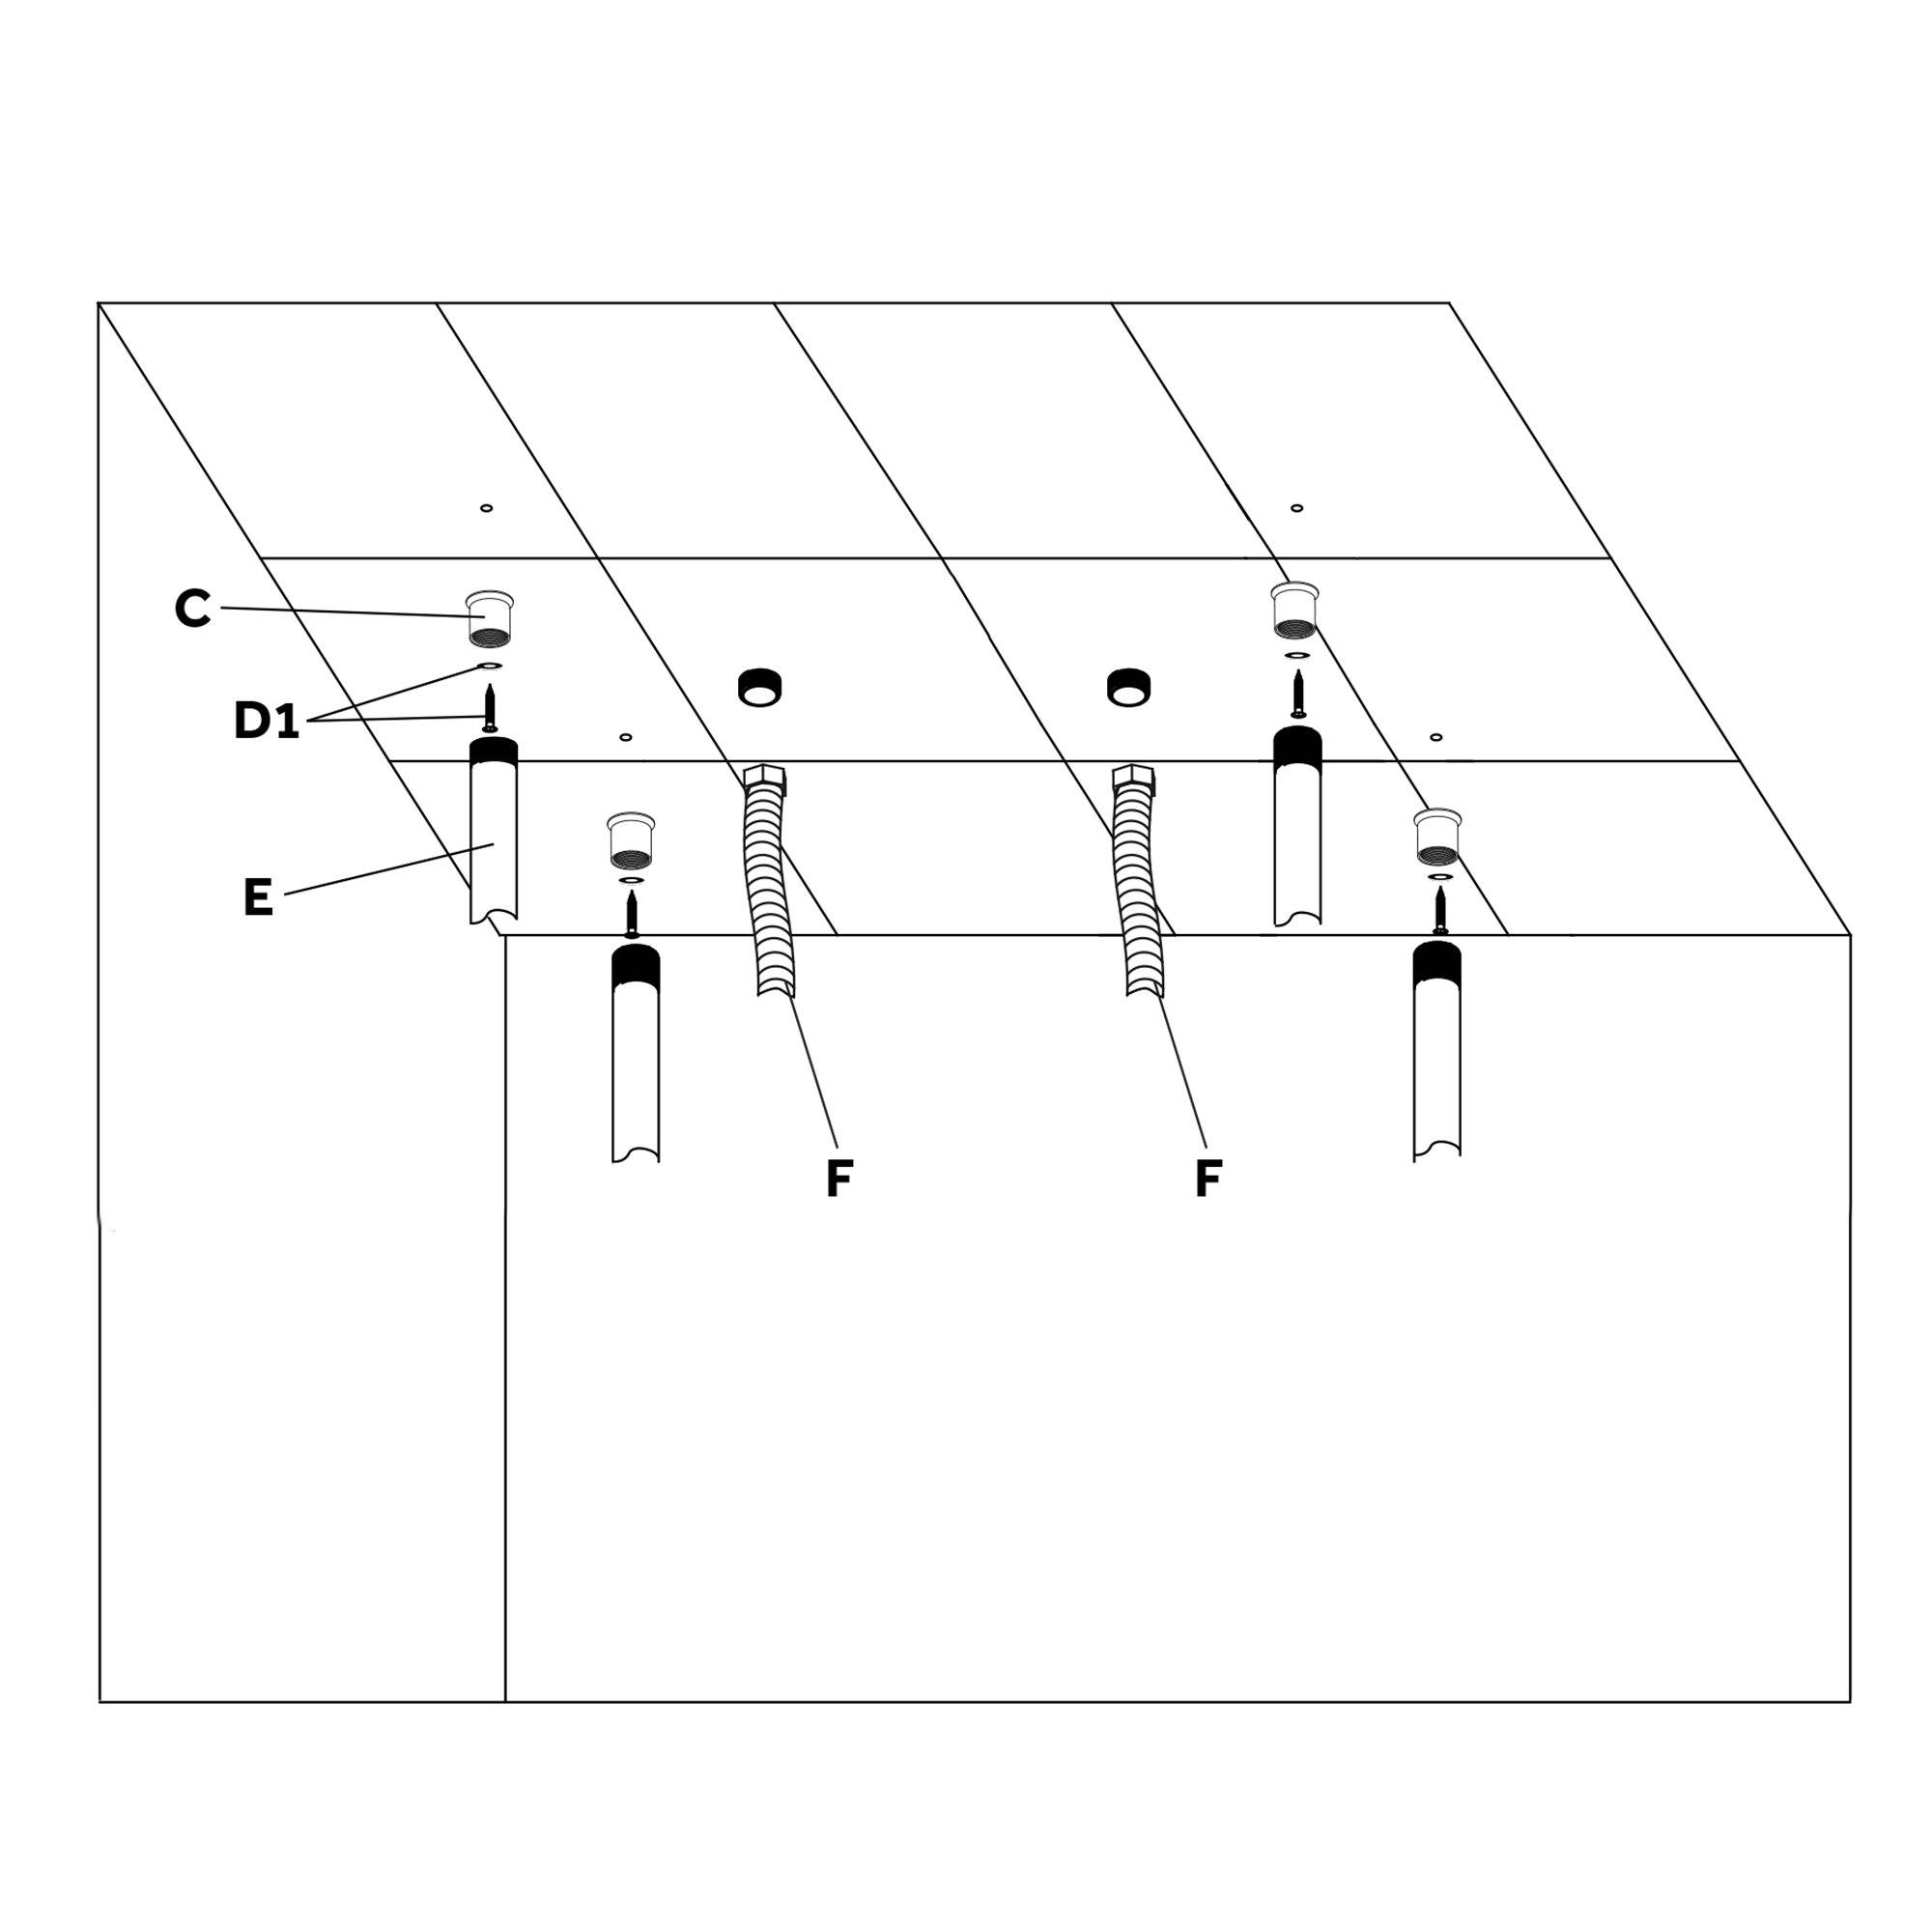
Install the mounting brackets (C) with the tapping screws (D1). Thread the shower bars (E) onto the mounting brackets, and the inlet hose (F) onto the water inlet.
Step 3:
Step 4:
Attach the shower head (A) to the shower bars (E). Connect the inlet hose (F) to the showerhead.
Step 5:
Hand Shower Installation
Step 1:
Step 2:
Hand Held Shower
Hand Held Shower
Handheld Shower
Step 3:
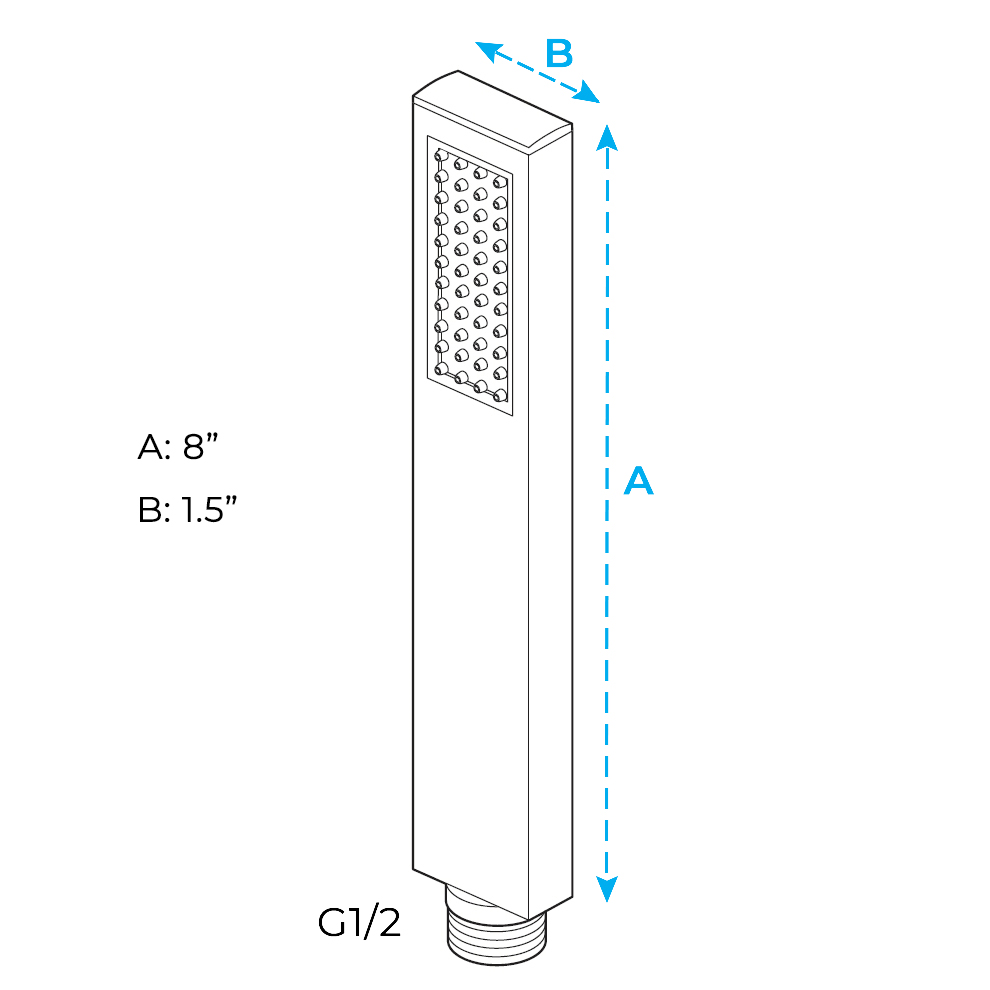
Size:
Handheld Shower
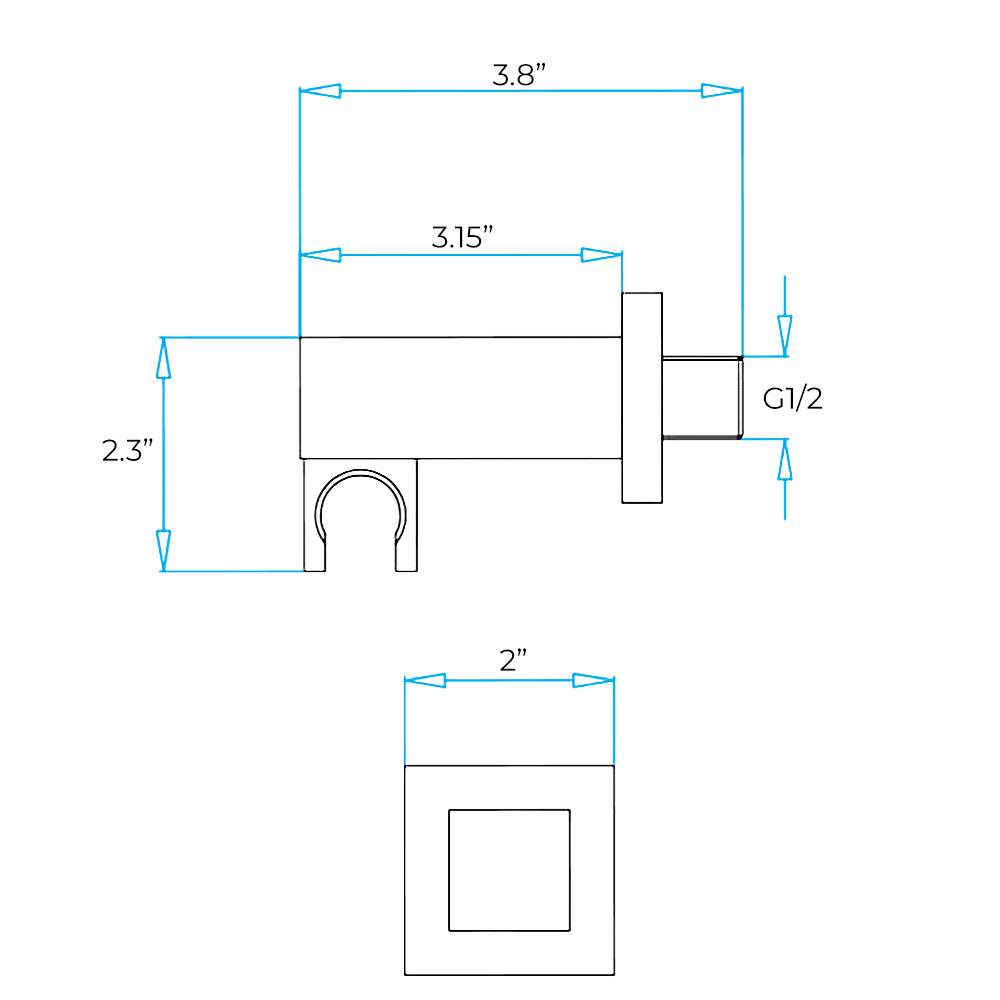
Holder Size
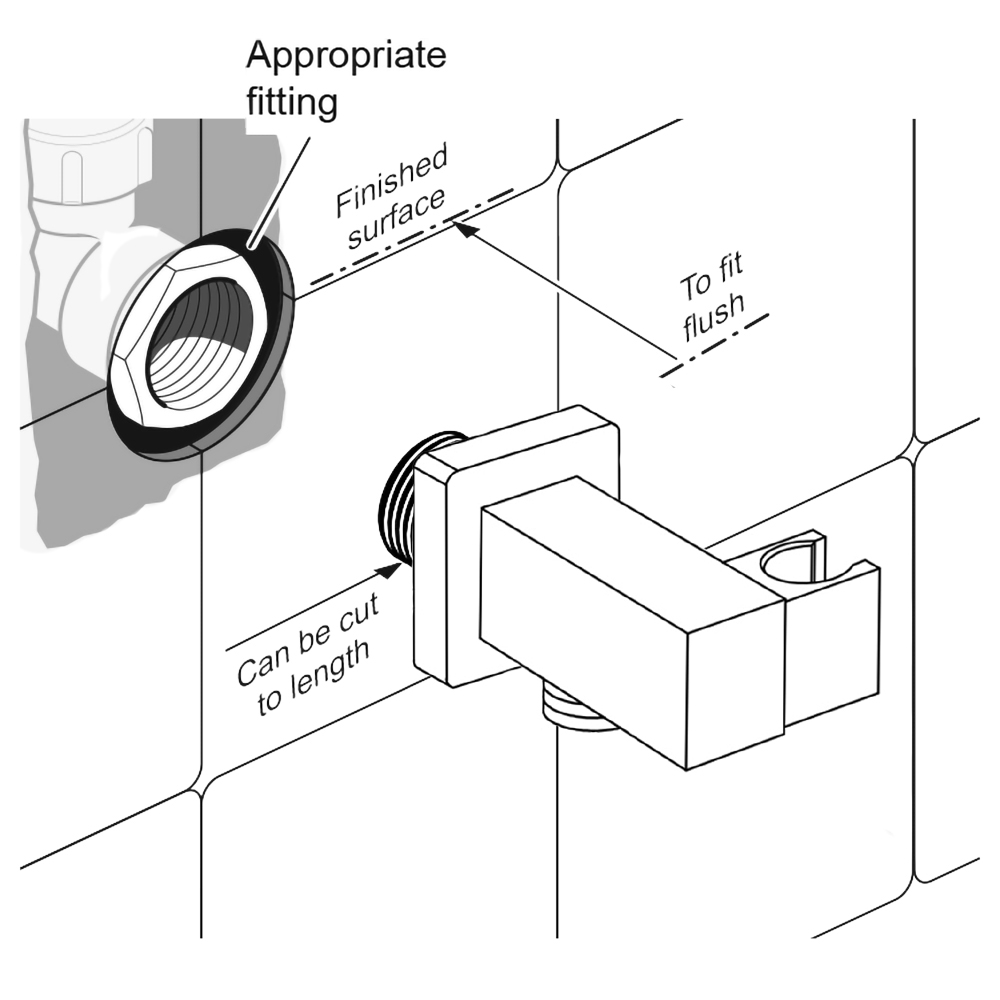
Hand Shower Outlet Installation • Complete the outlet pipework ensuring it ends in an appropriate 15mm x 1/2" BSP female thread elbow.
Note: This fitting is not supplied as variations in installations require the selection of a suitable solder or compression fitting.
• Install the 'Wall Outlet', thread long male 1/2" BSP into the appropriate female fitting using PTFE tape to give a watertight joint.
Note:The thread can be cut to size if required. Make sure that all debris is removed from the connector and the section that has been cut is dressed correctly, before installation.
The minimum required water pressure is 0.05 MPa (0.5 bar). Flow rate 2.5 GPM (9.5 LPM).
Shower Body Jets Installation Instructions
Step 1:
Step 2:
Body sprays
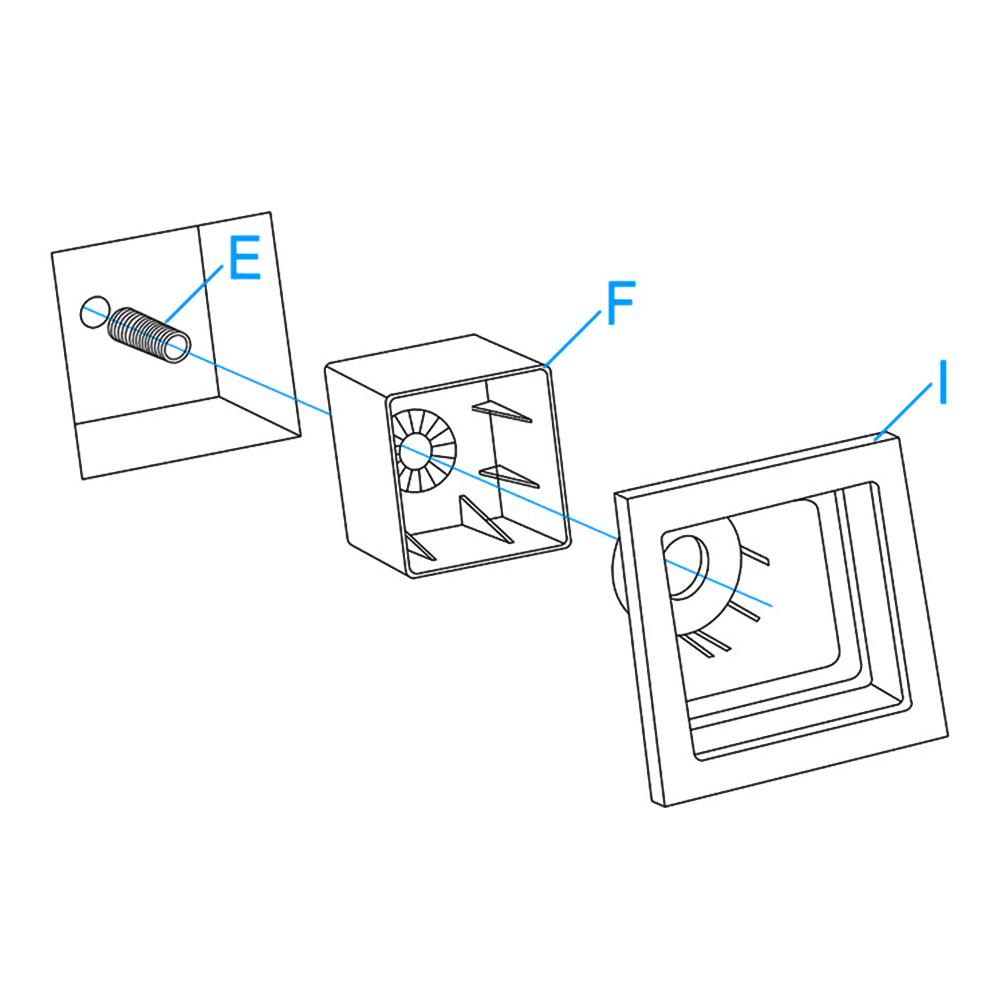
Remove the decorative plate (A) out of the body.
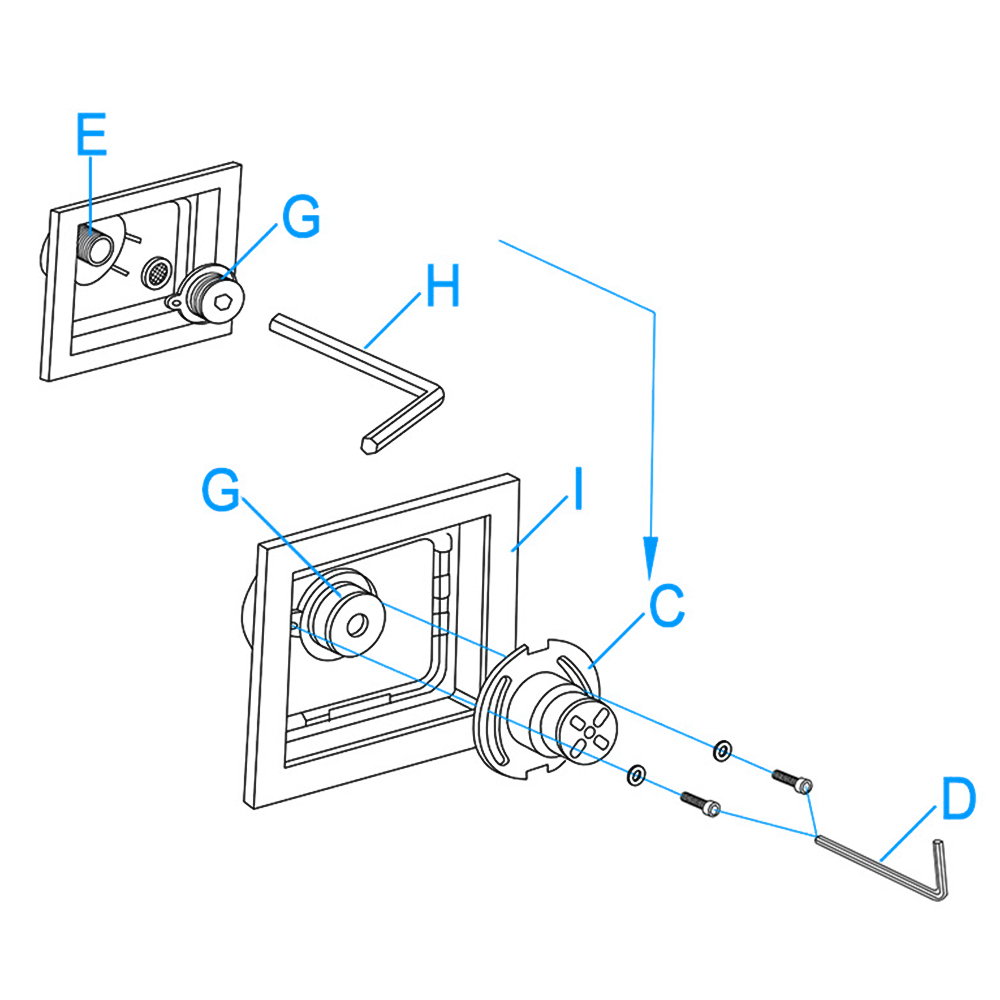
Remove the screws from the outlet face (B) and connector body (C) with the Allen key (D).
Body Spray Installation Instructions
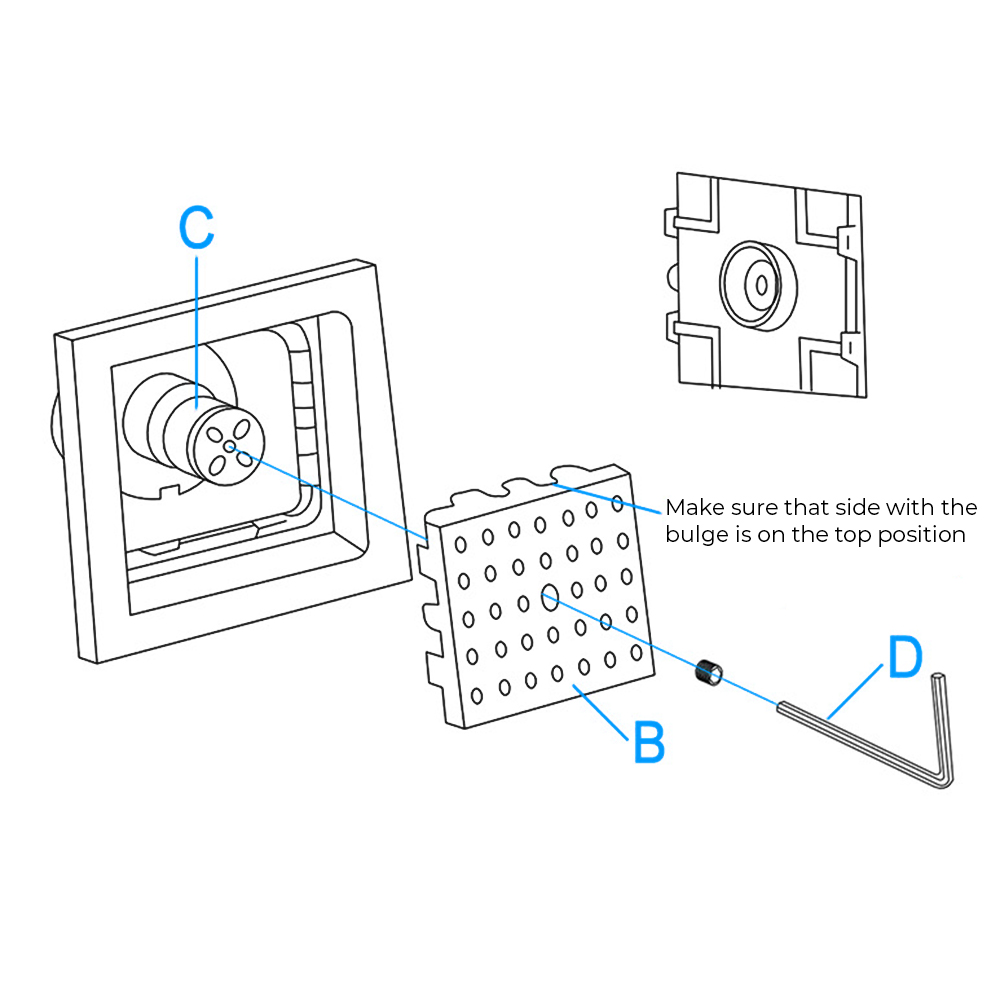
Step 3:
Step 4:
Screw the threaded pipe (E) to the water supply fittings. Push the plastic box (F) into the wall through the threaded pipe (E). Then, install the decorative plate (I) into the plastic box (F). Make sure the position is correct according to the diagram.
Screw the connector (G) into the threaded pipe (E) with the Allen key (H). Install the connector body (C) to the connector (G). When finish installation, please check to make sure the connection is completed. Then, fix the screws into the body (C) with Allen key (D) and make sure the body (C), connector (G) and decorative plate (I) are tightened. Make sure the one side with the bulge is in the top position.
Body Spray Installation Instructions
Step 5:
Step 6:
Install the outlet face (B) to the body (C). Make sure the connection of body (C) and outlet face (B) are completed. Tighten the screw through the outlet face (B) into the body (C) with the Allen key (D).
Install the decorative plate (A) into the outlet face (B) tightly. Make sure the hole and the raised dot are in the correct position when you push the decorative plate (A) into the outlet face (B).
Body Spray Installation Instructions
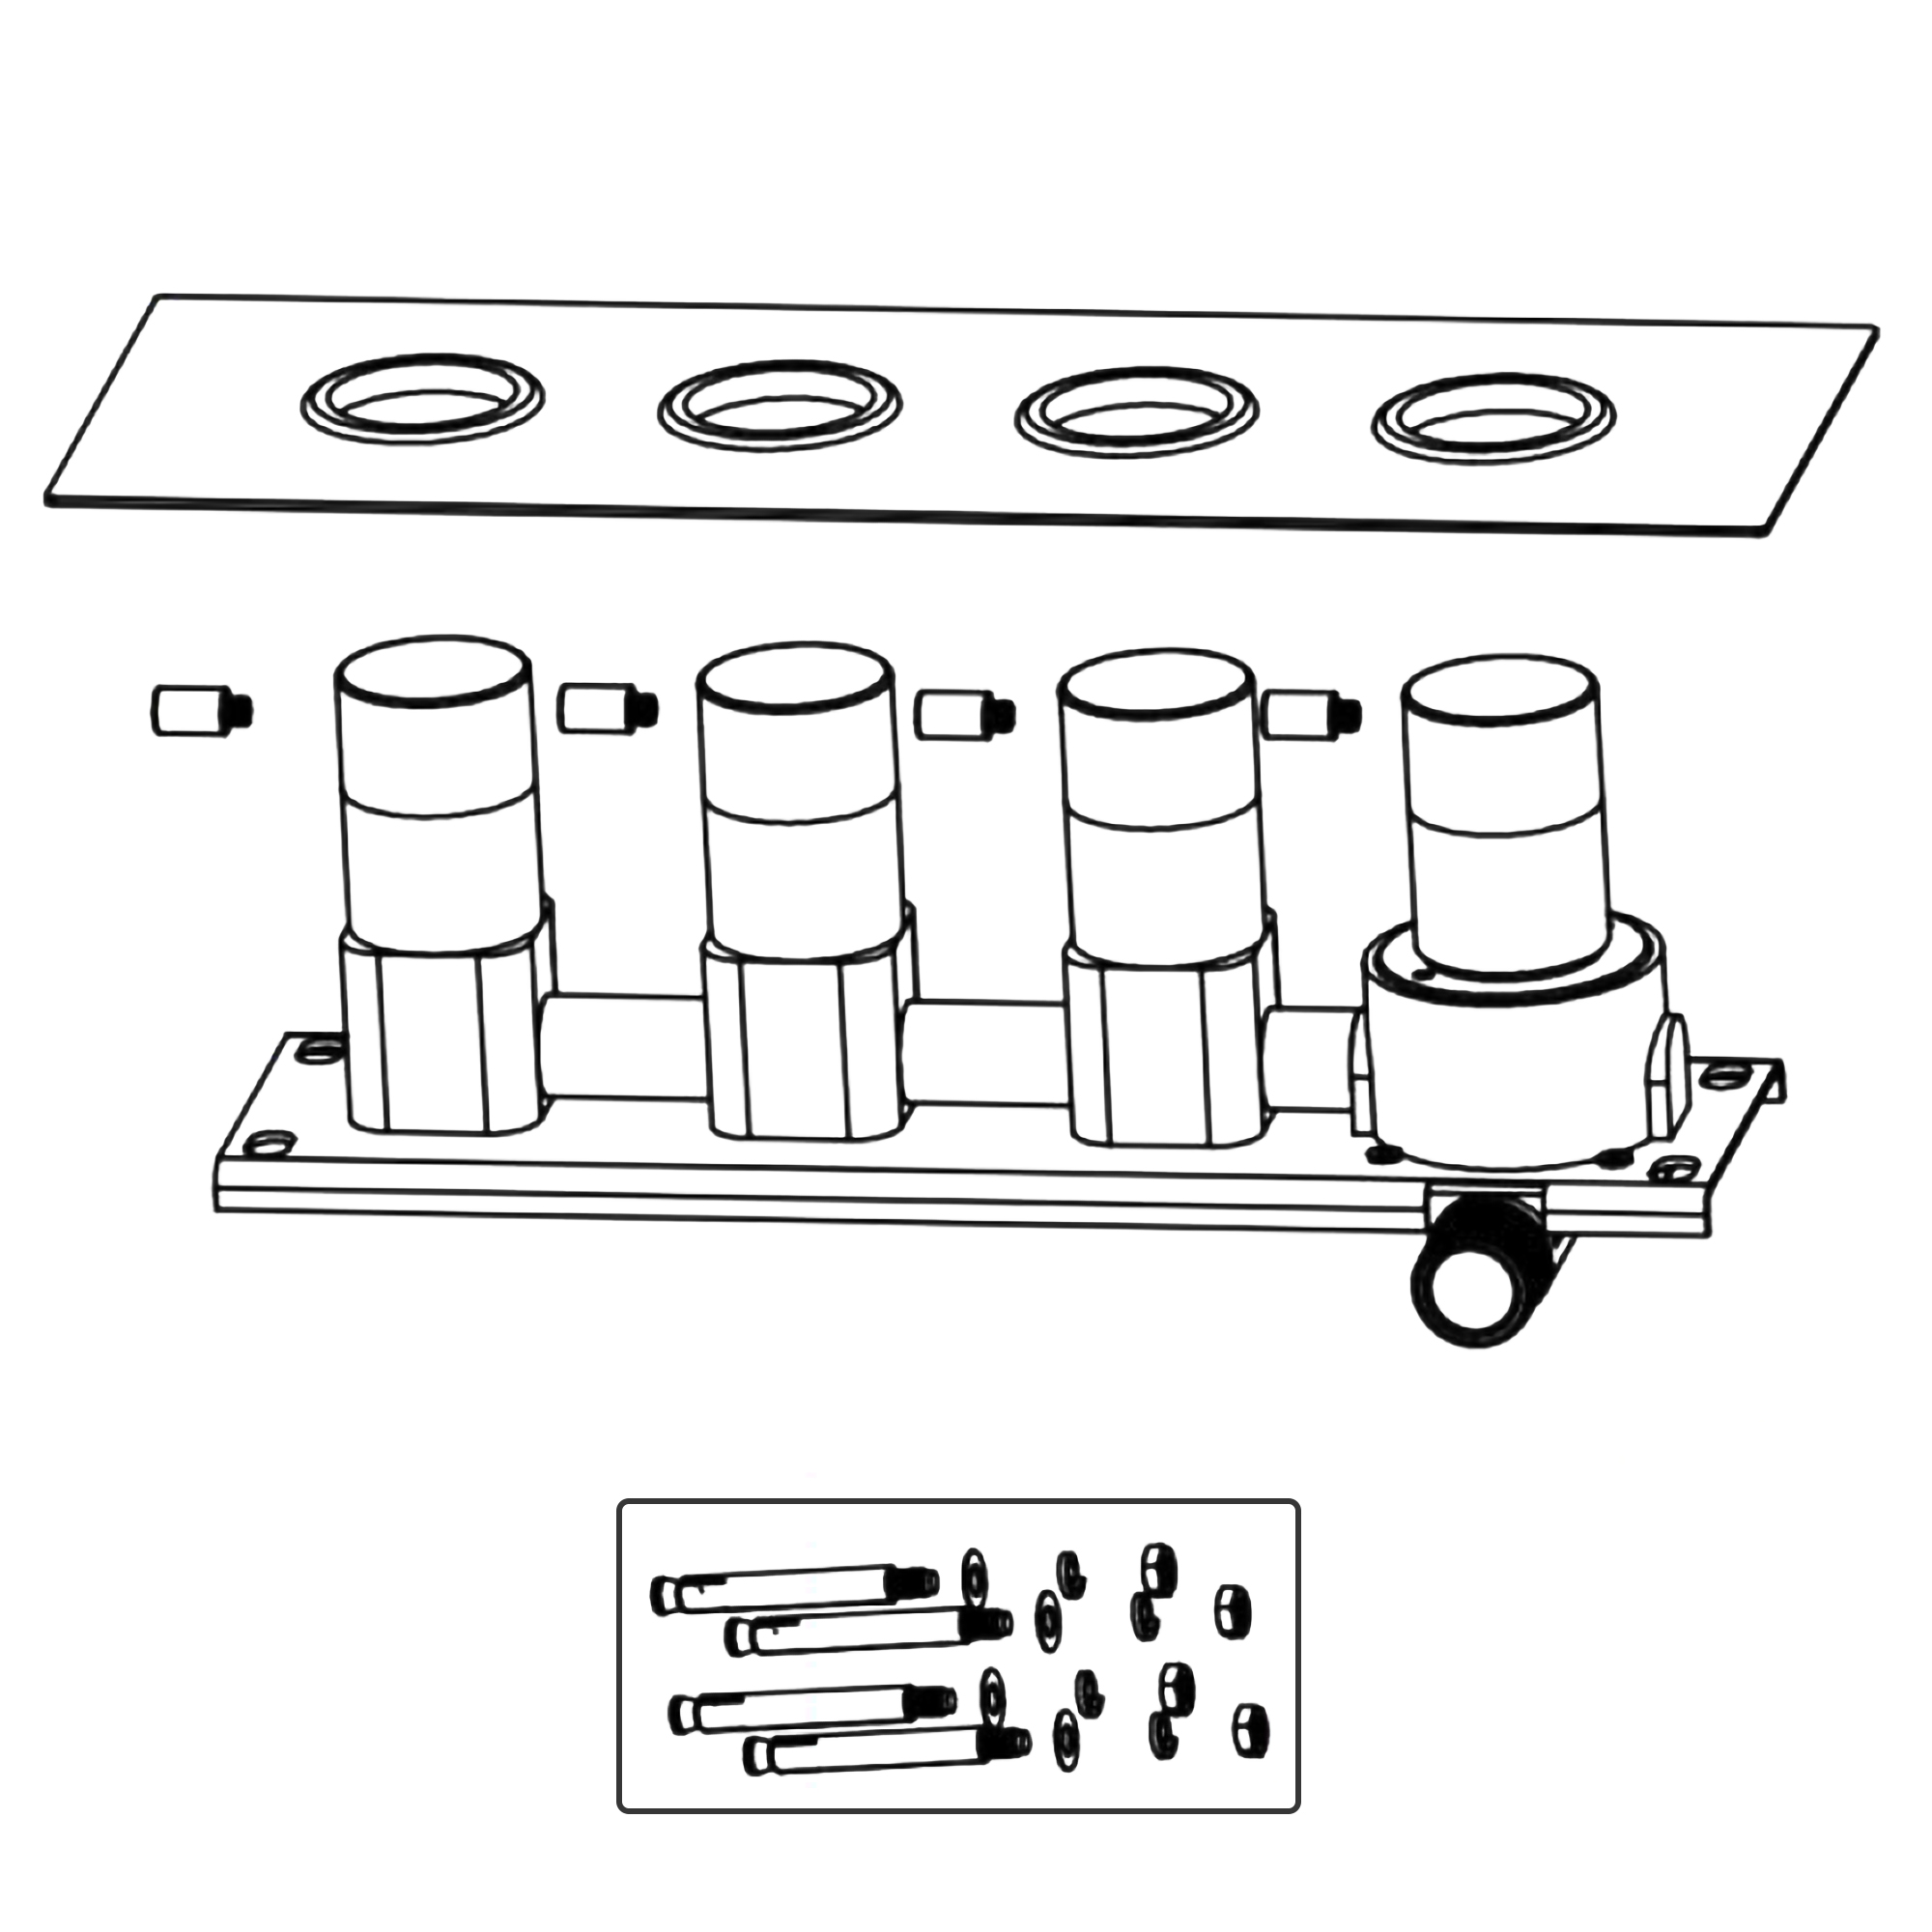
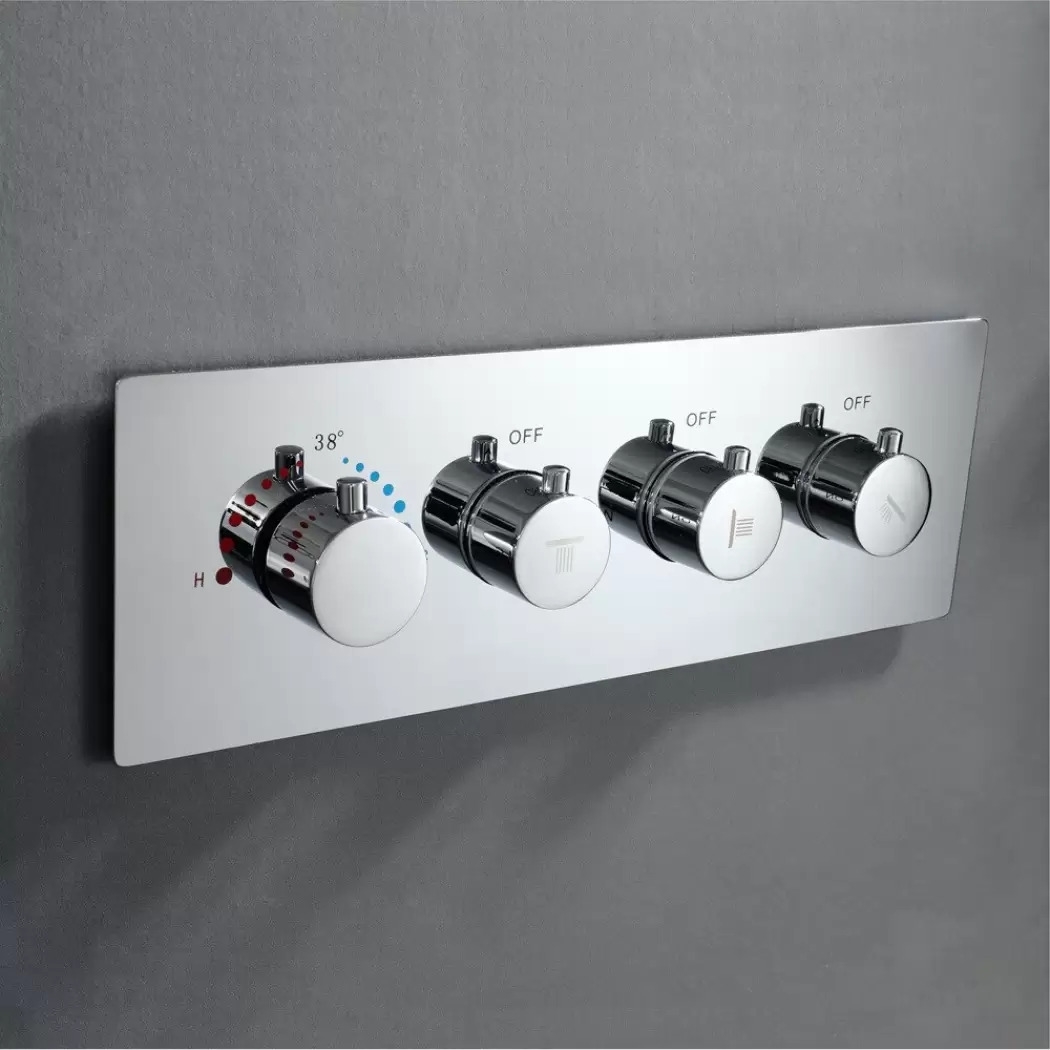
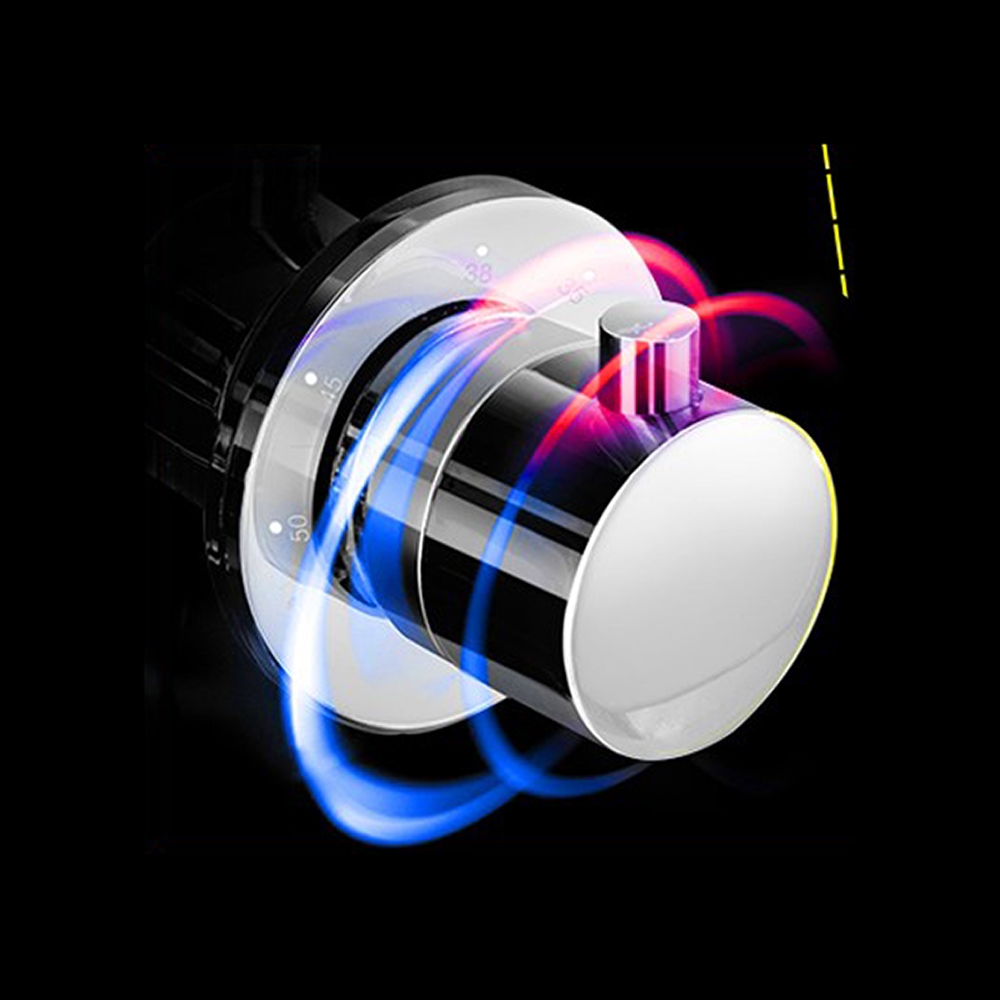
Thermostatic Mixer Installation Instructions
Step 1:
Step 2:
Shower
Mixer
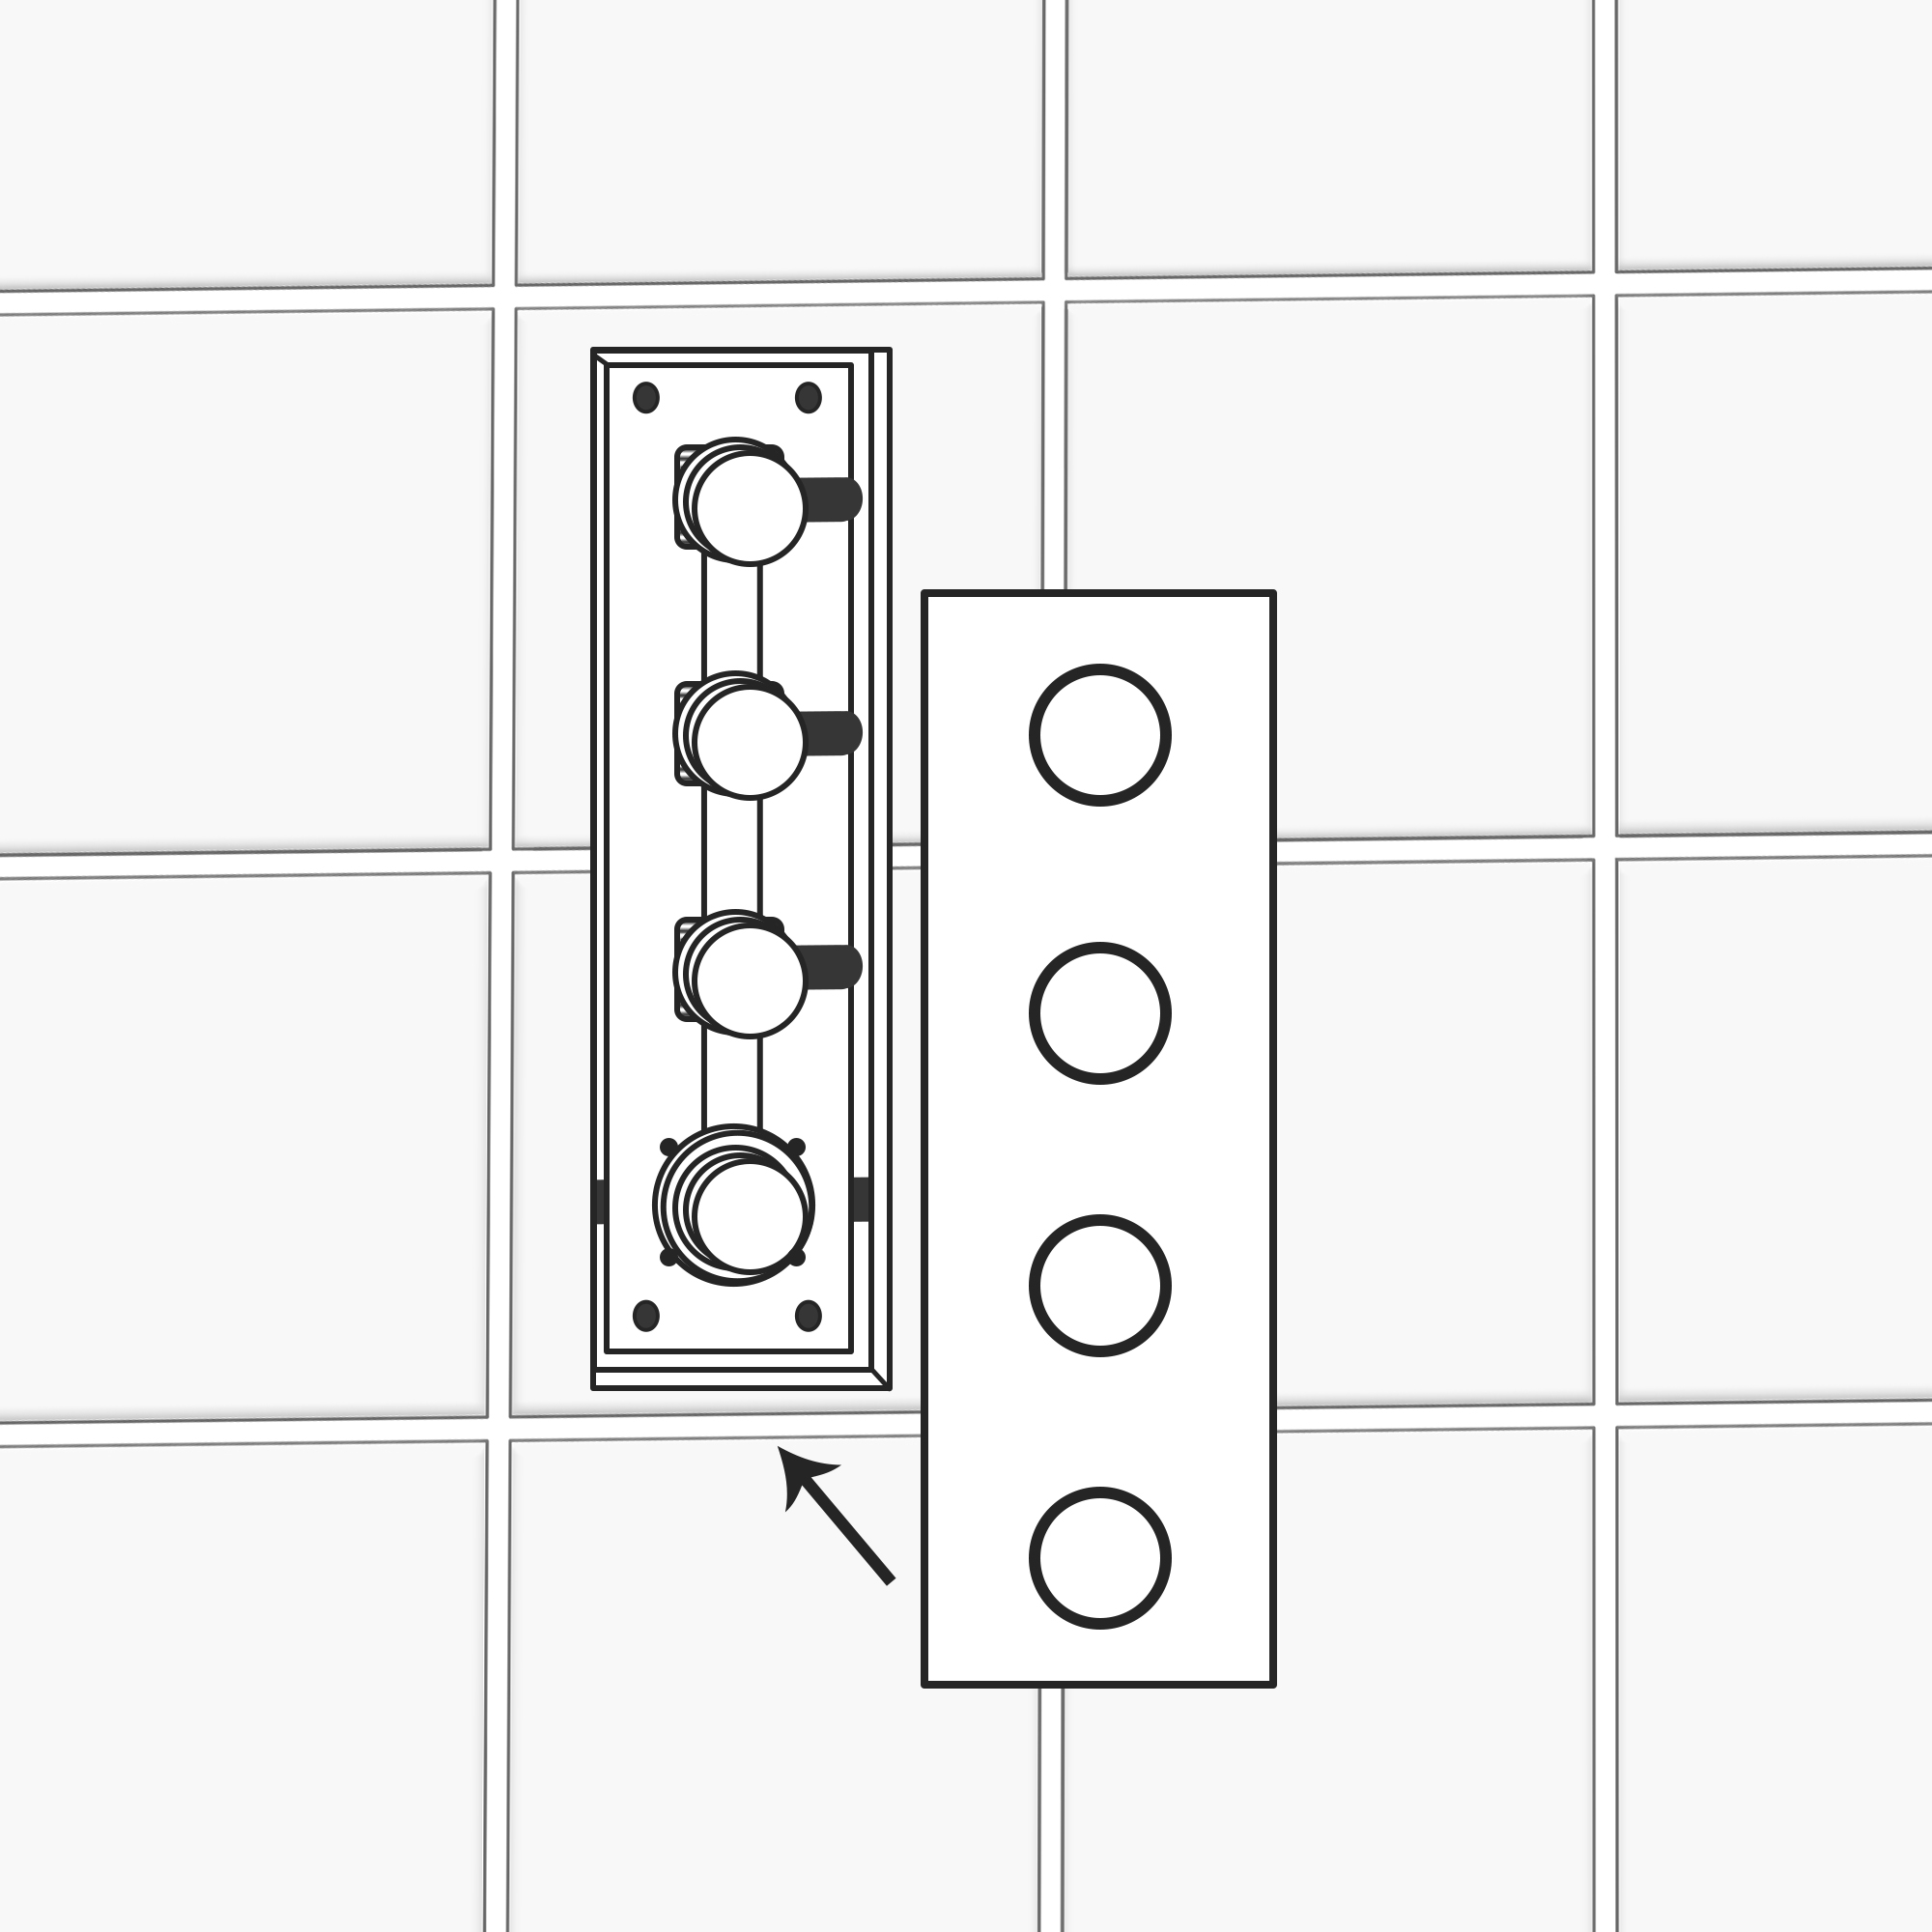
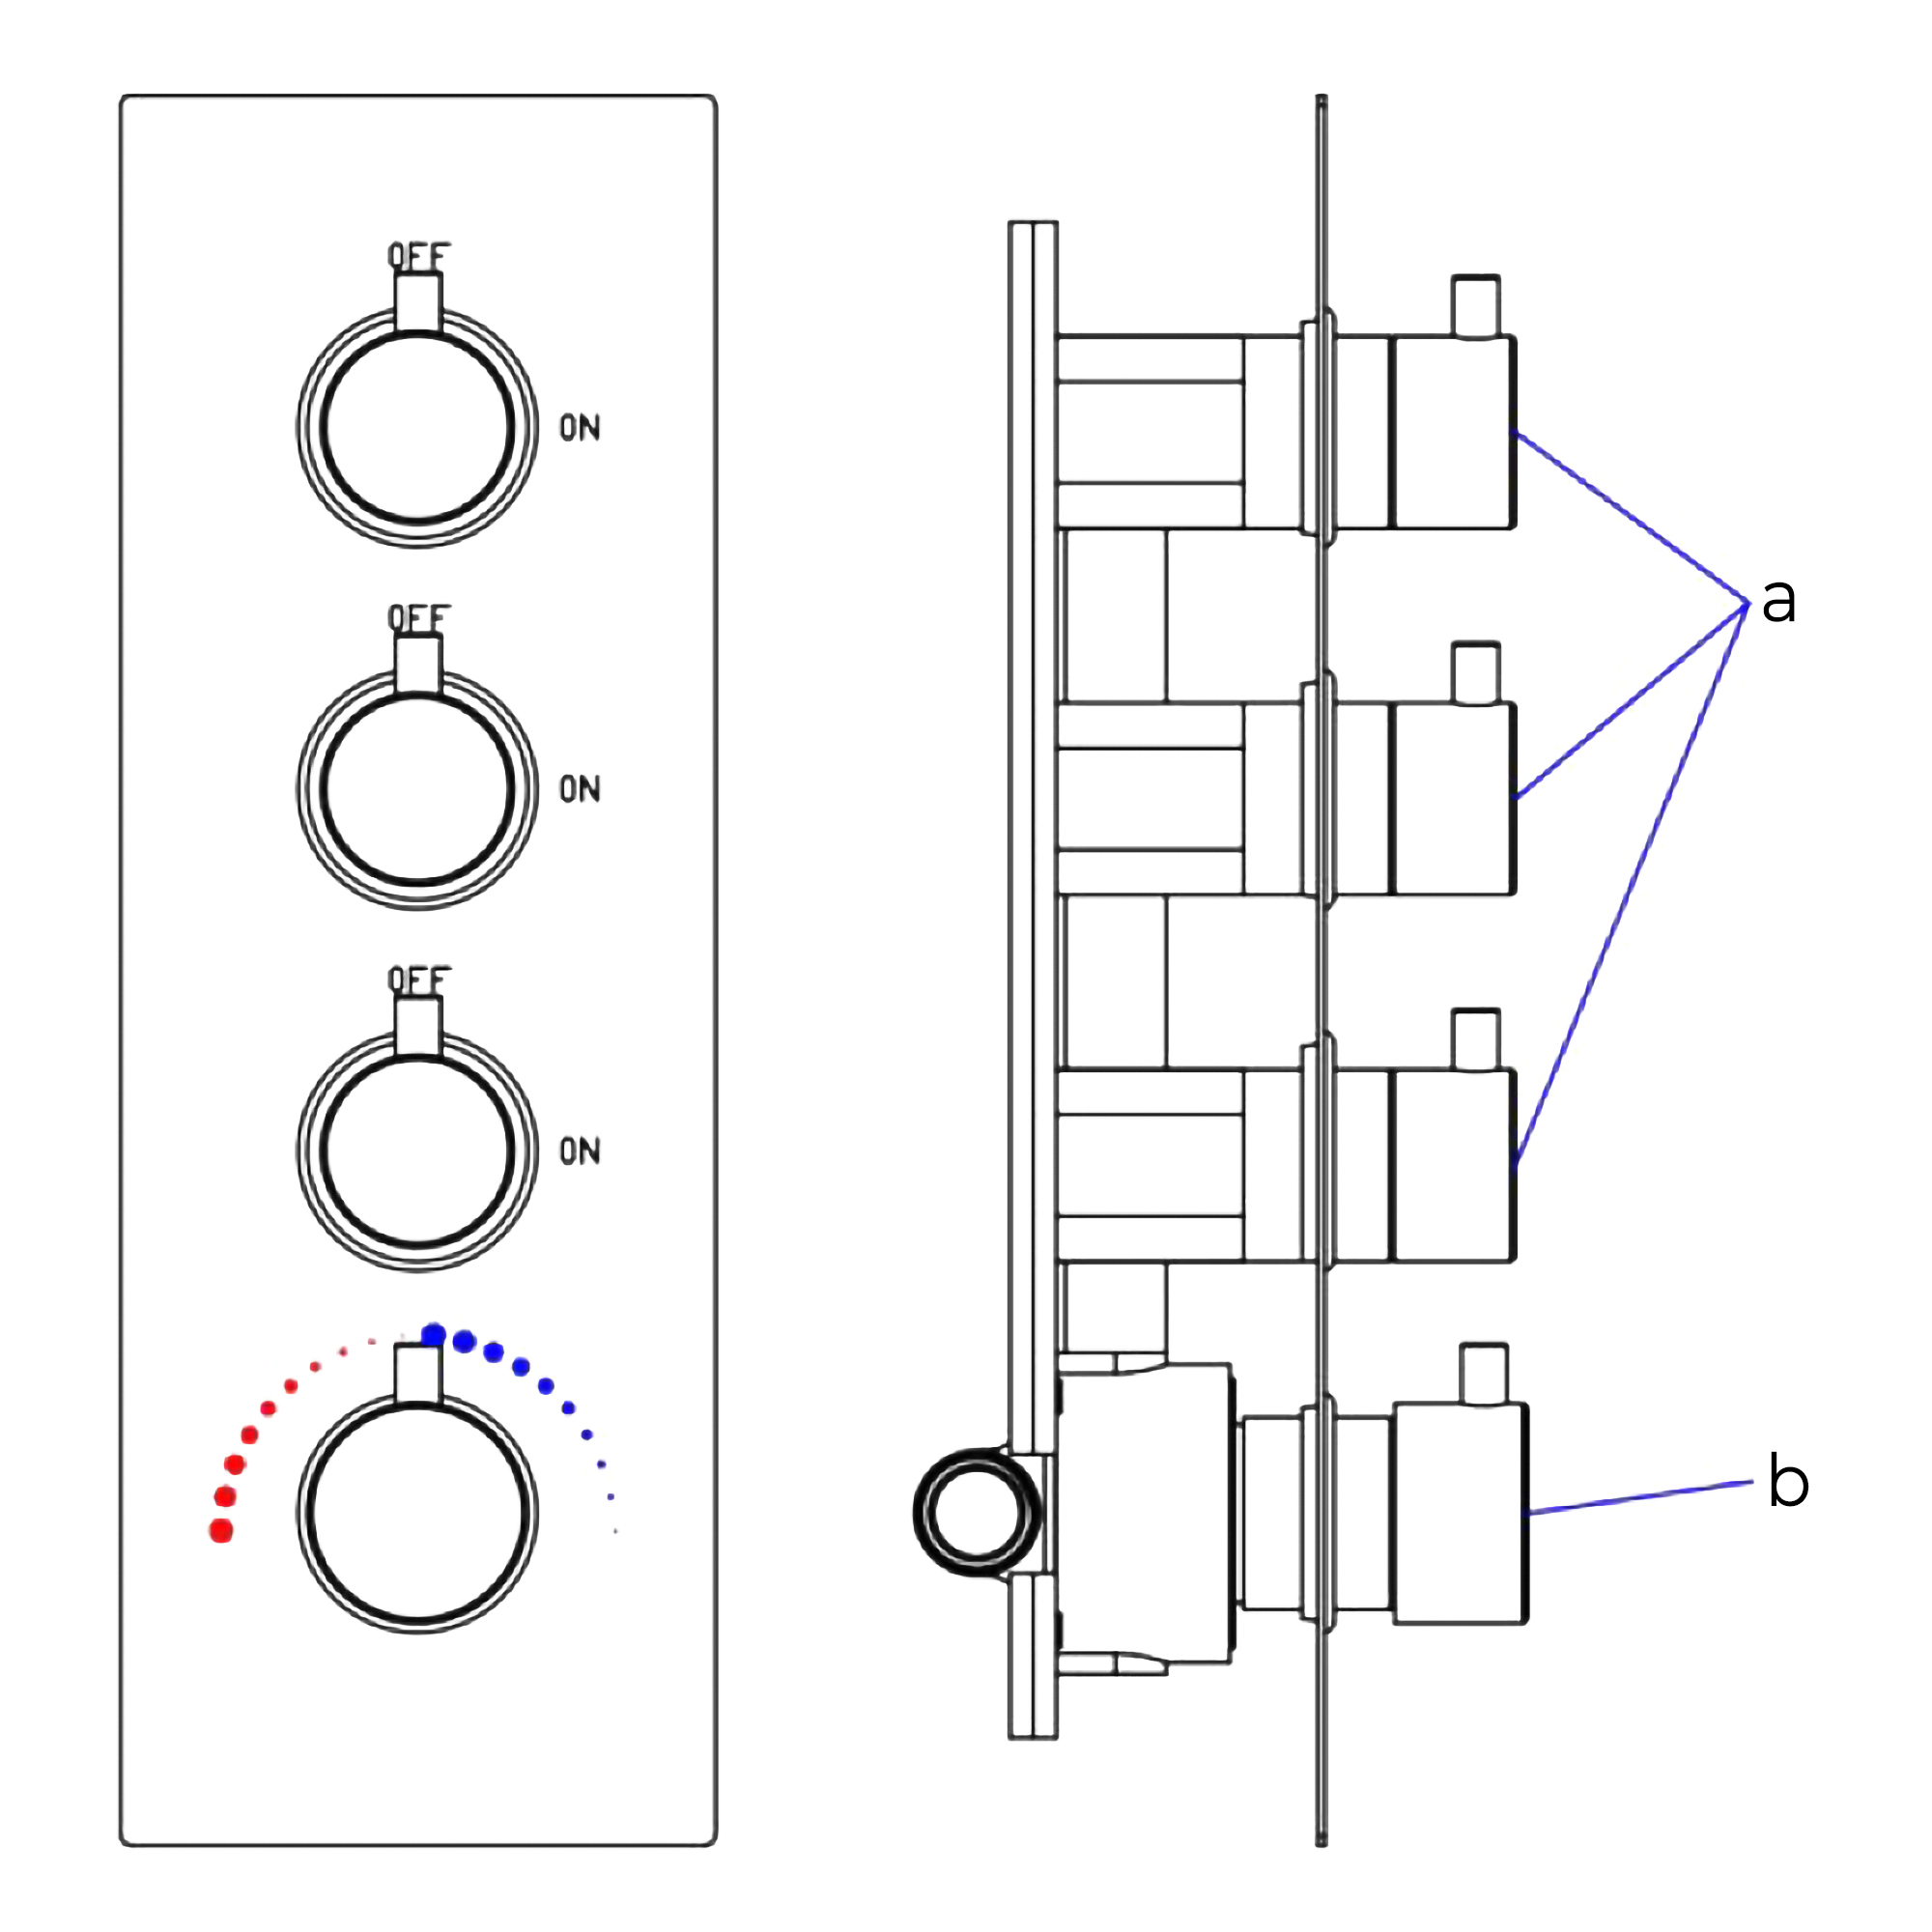
Shower Valve Mixer Installation Instructions
Step 3:
Step 4:
Please screw the handles out according to the above direction.
Take board and four handles out of the faucet body
Shower Valve Mixer Installation Instructions
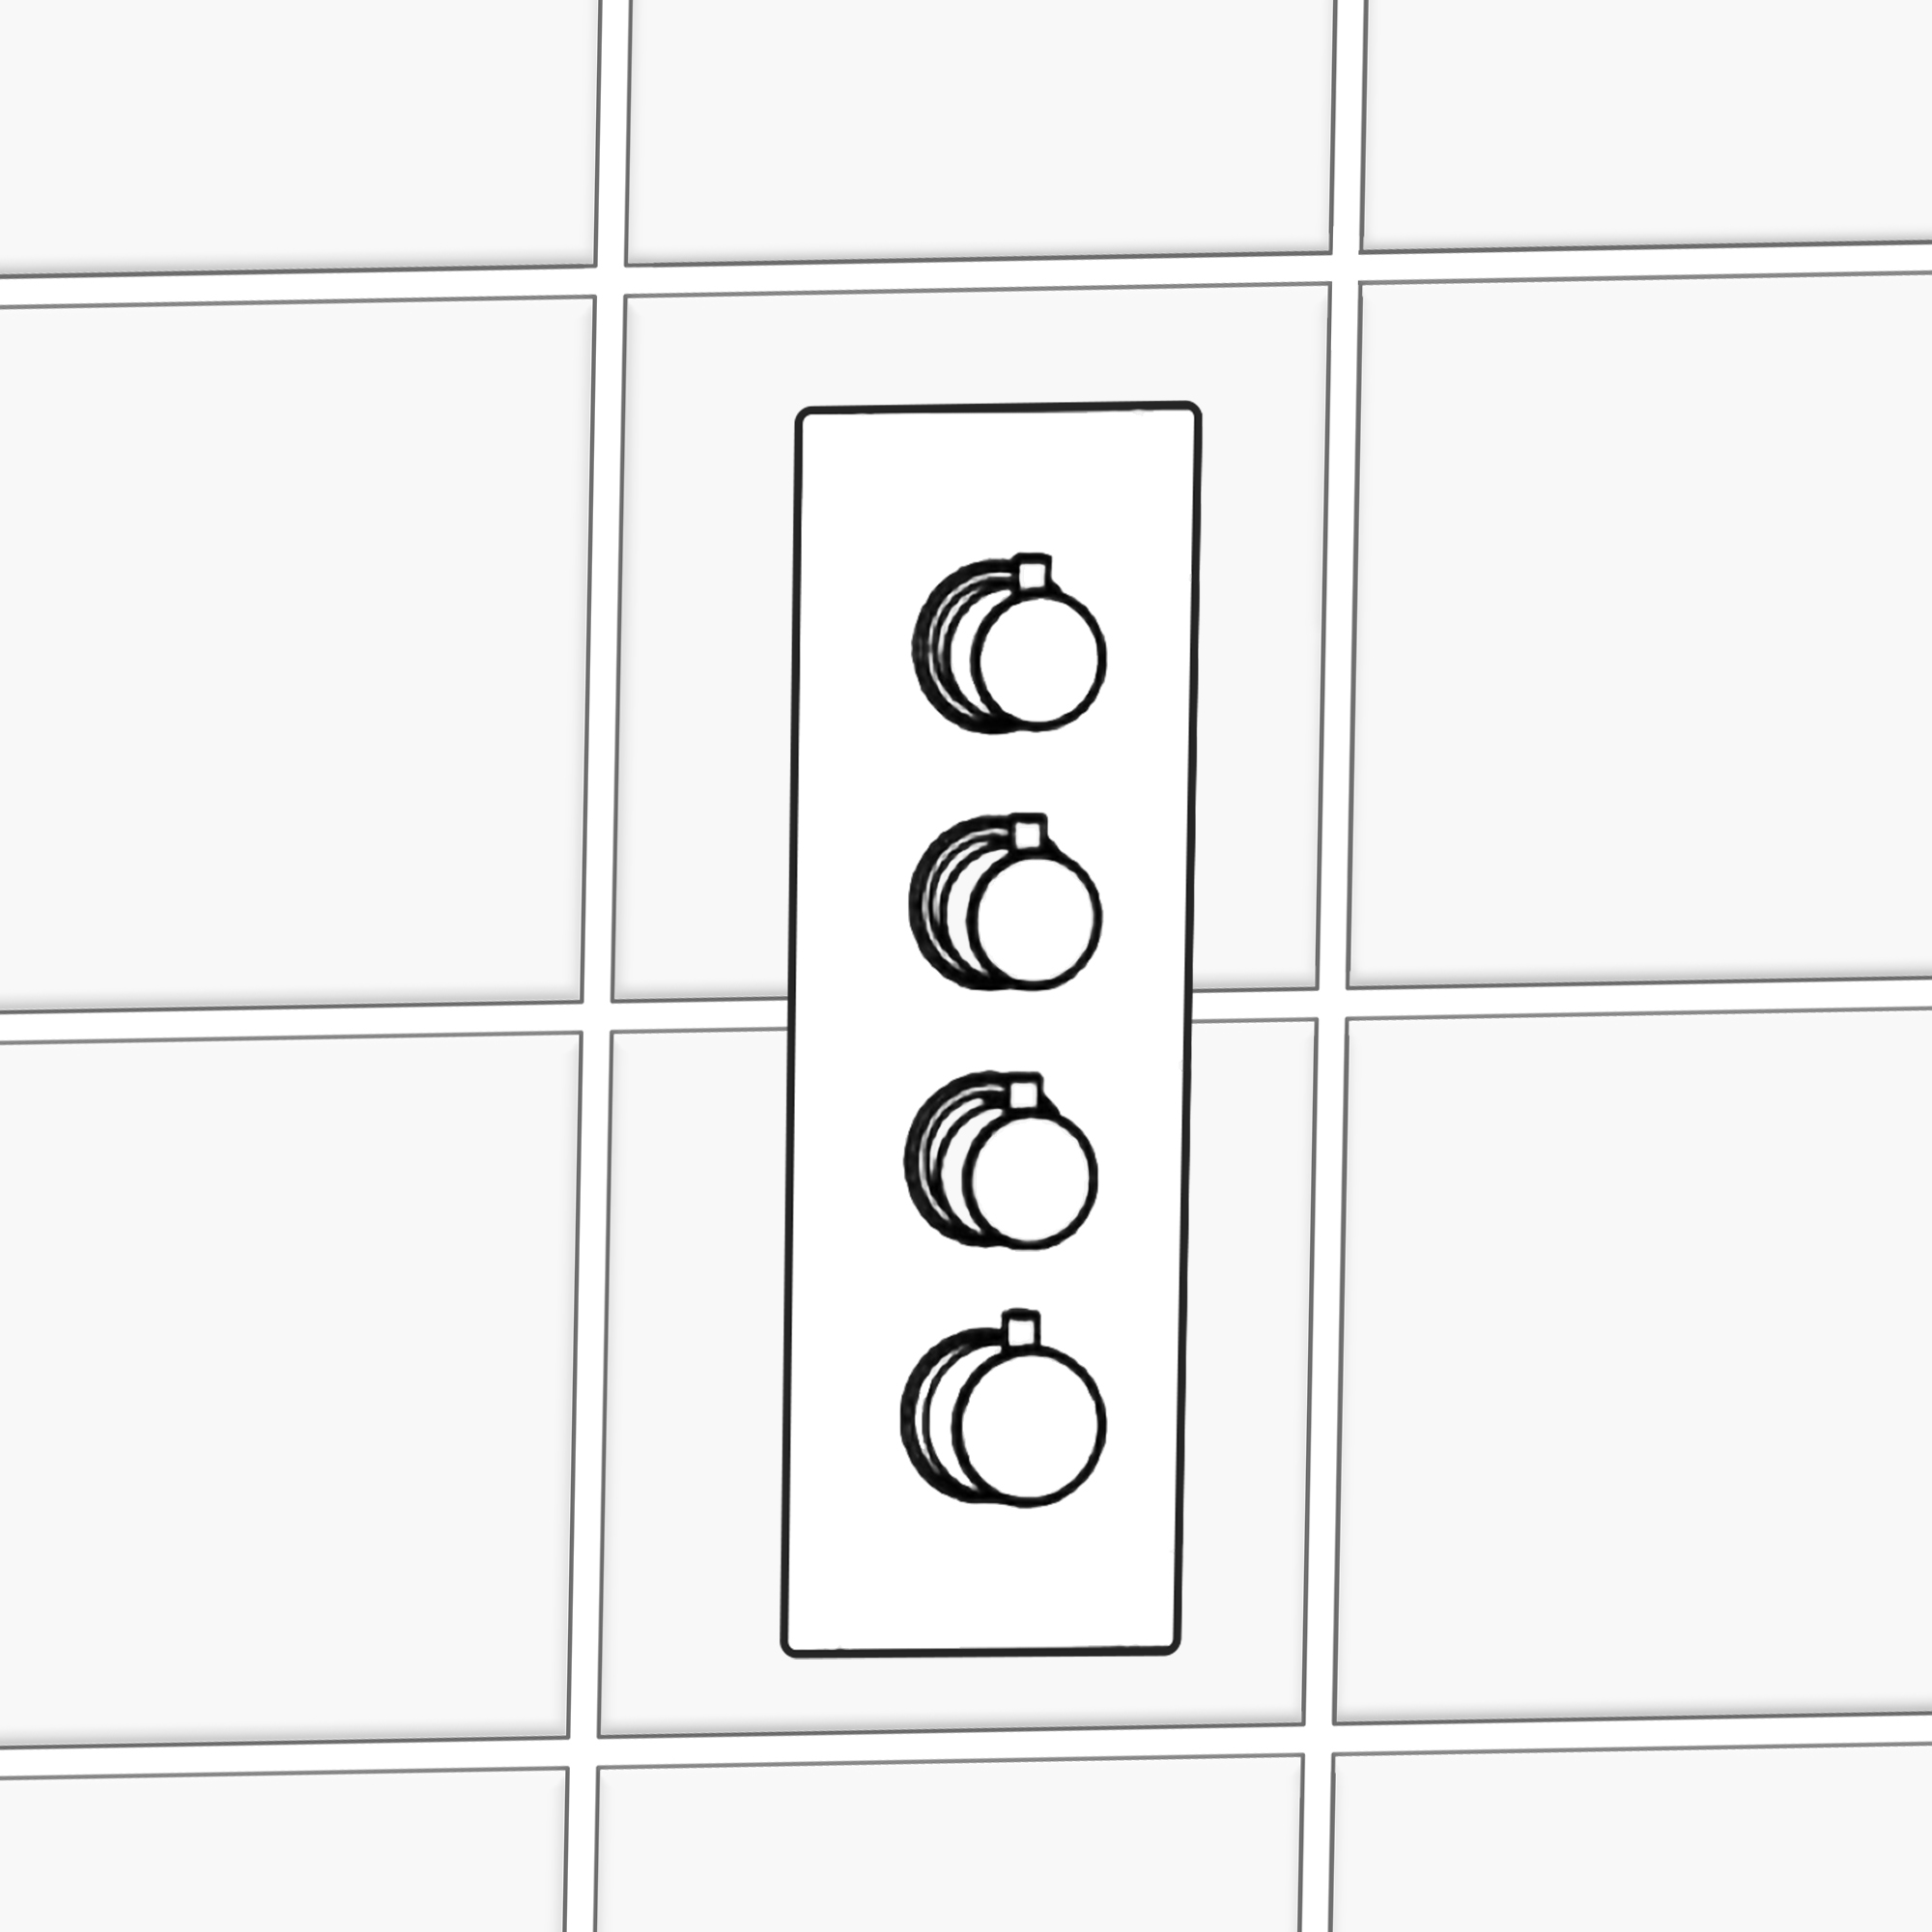
Step 5:
Step 6:
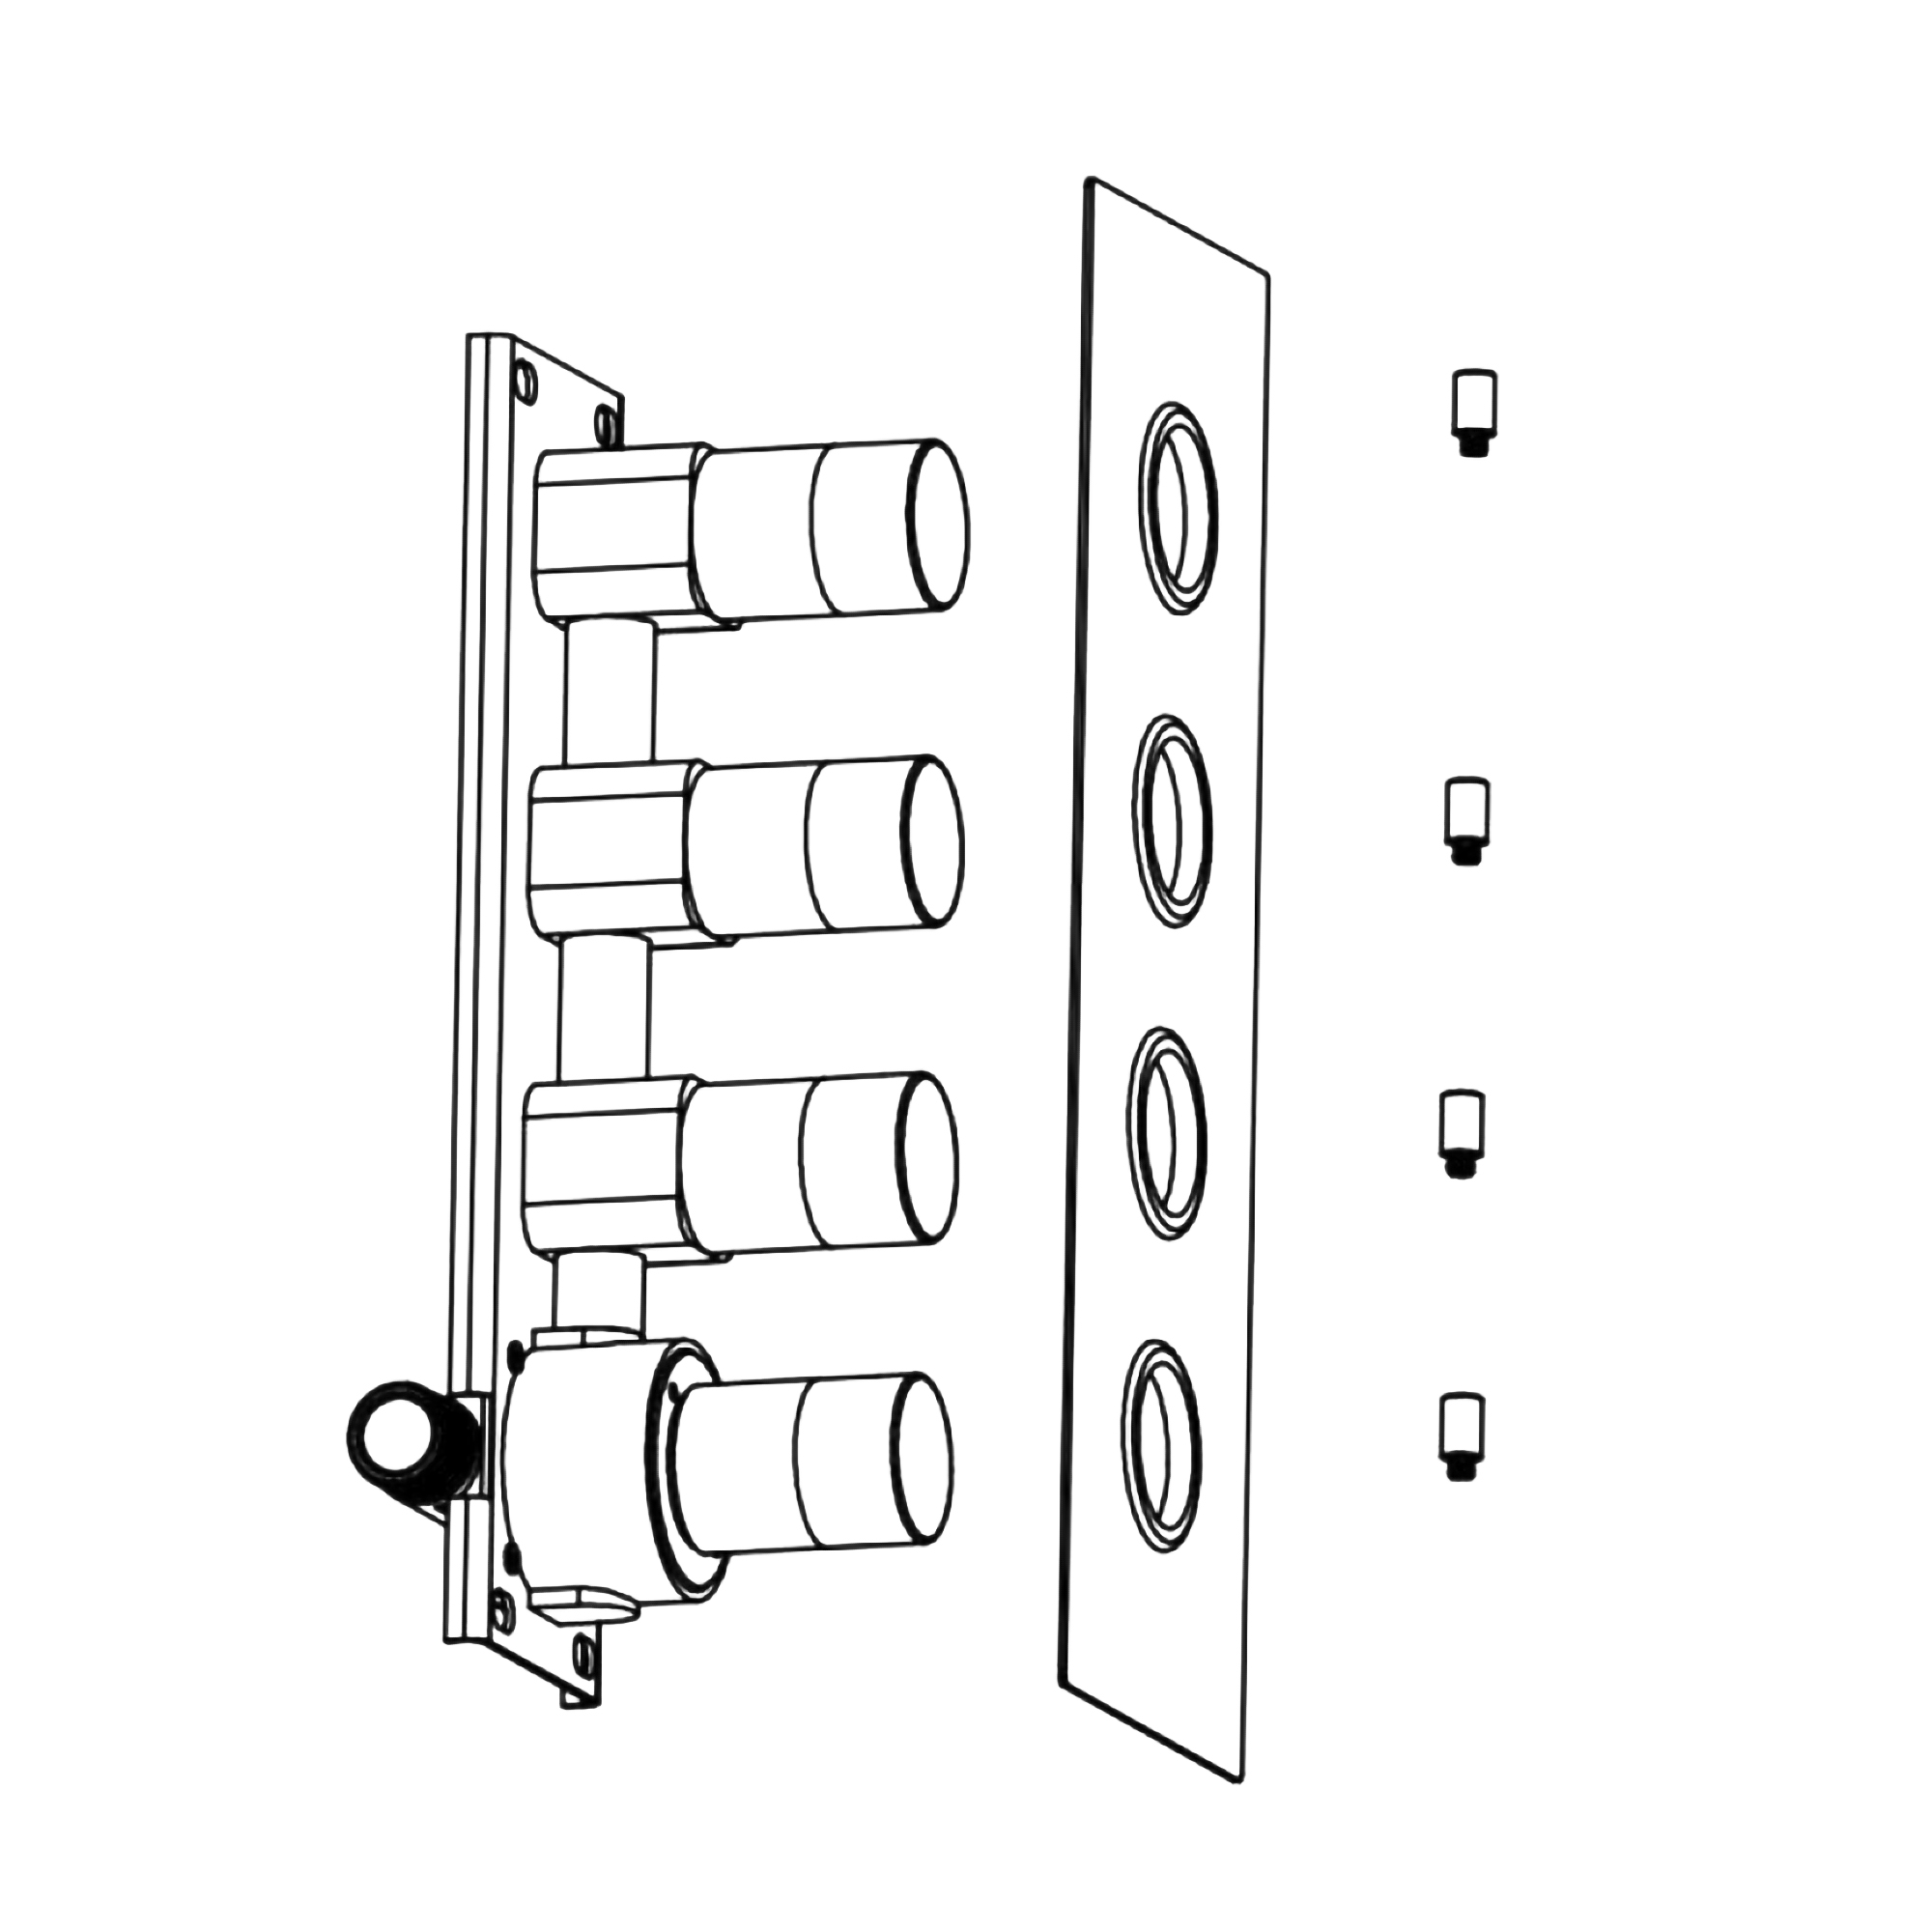
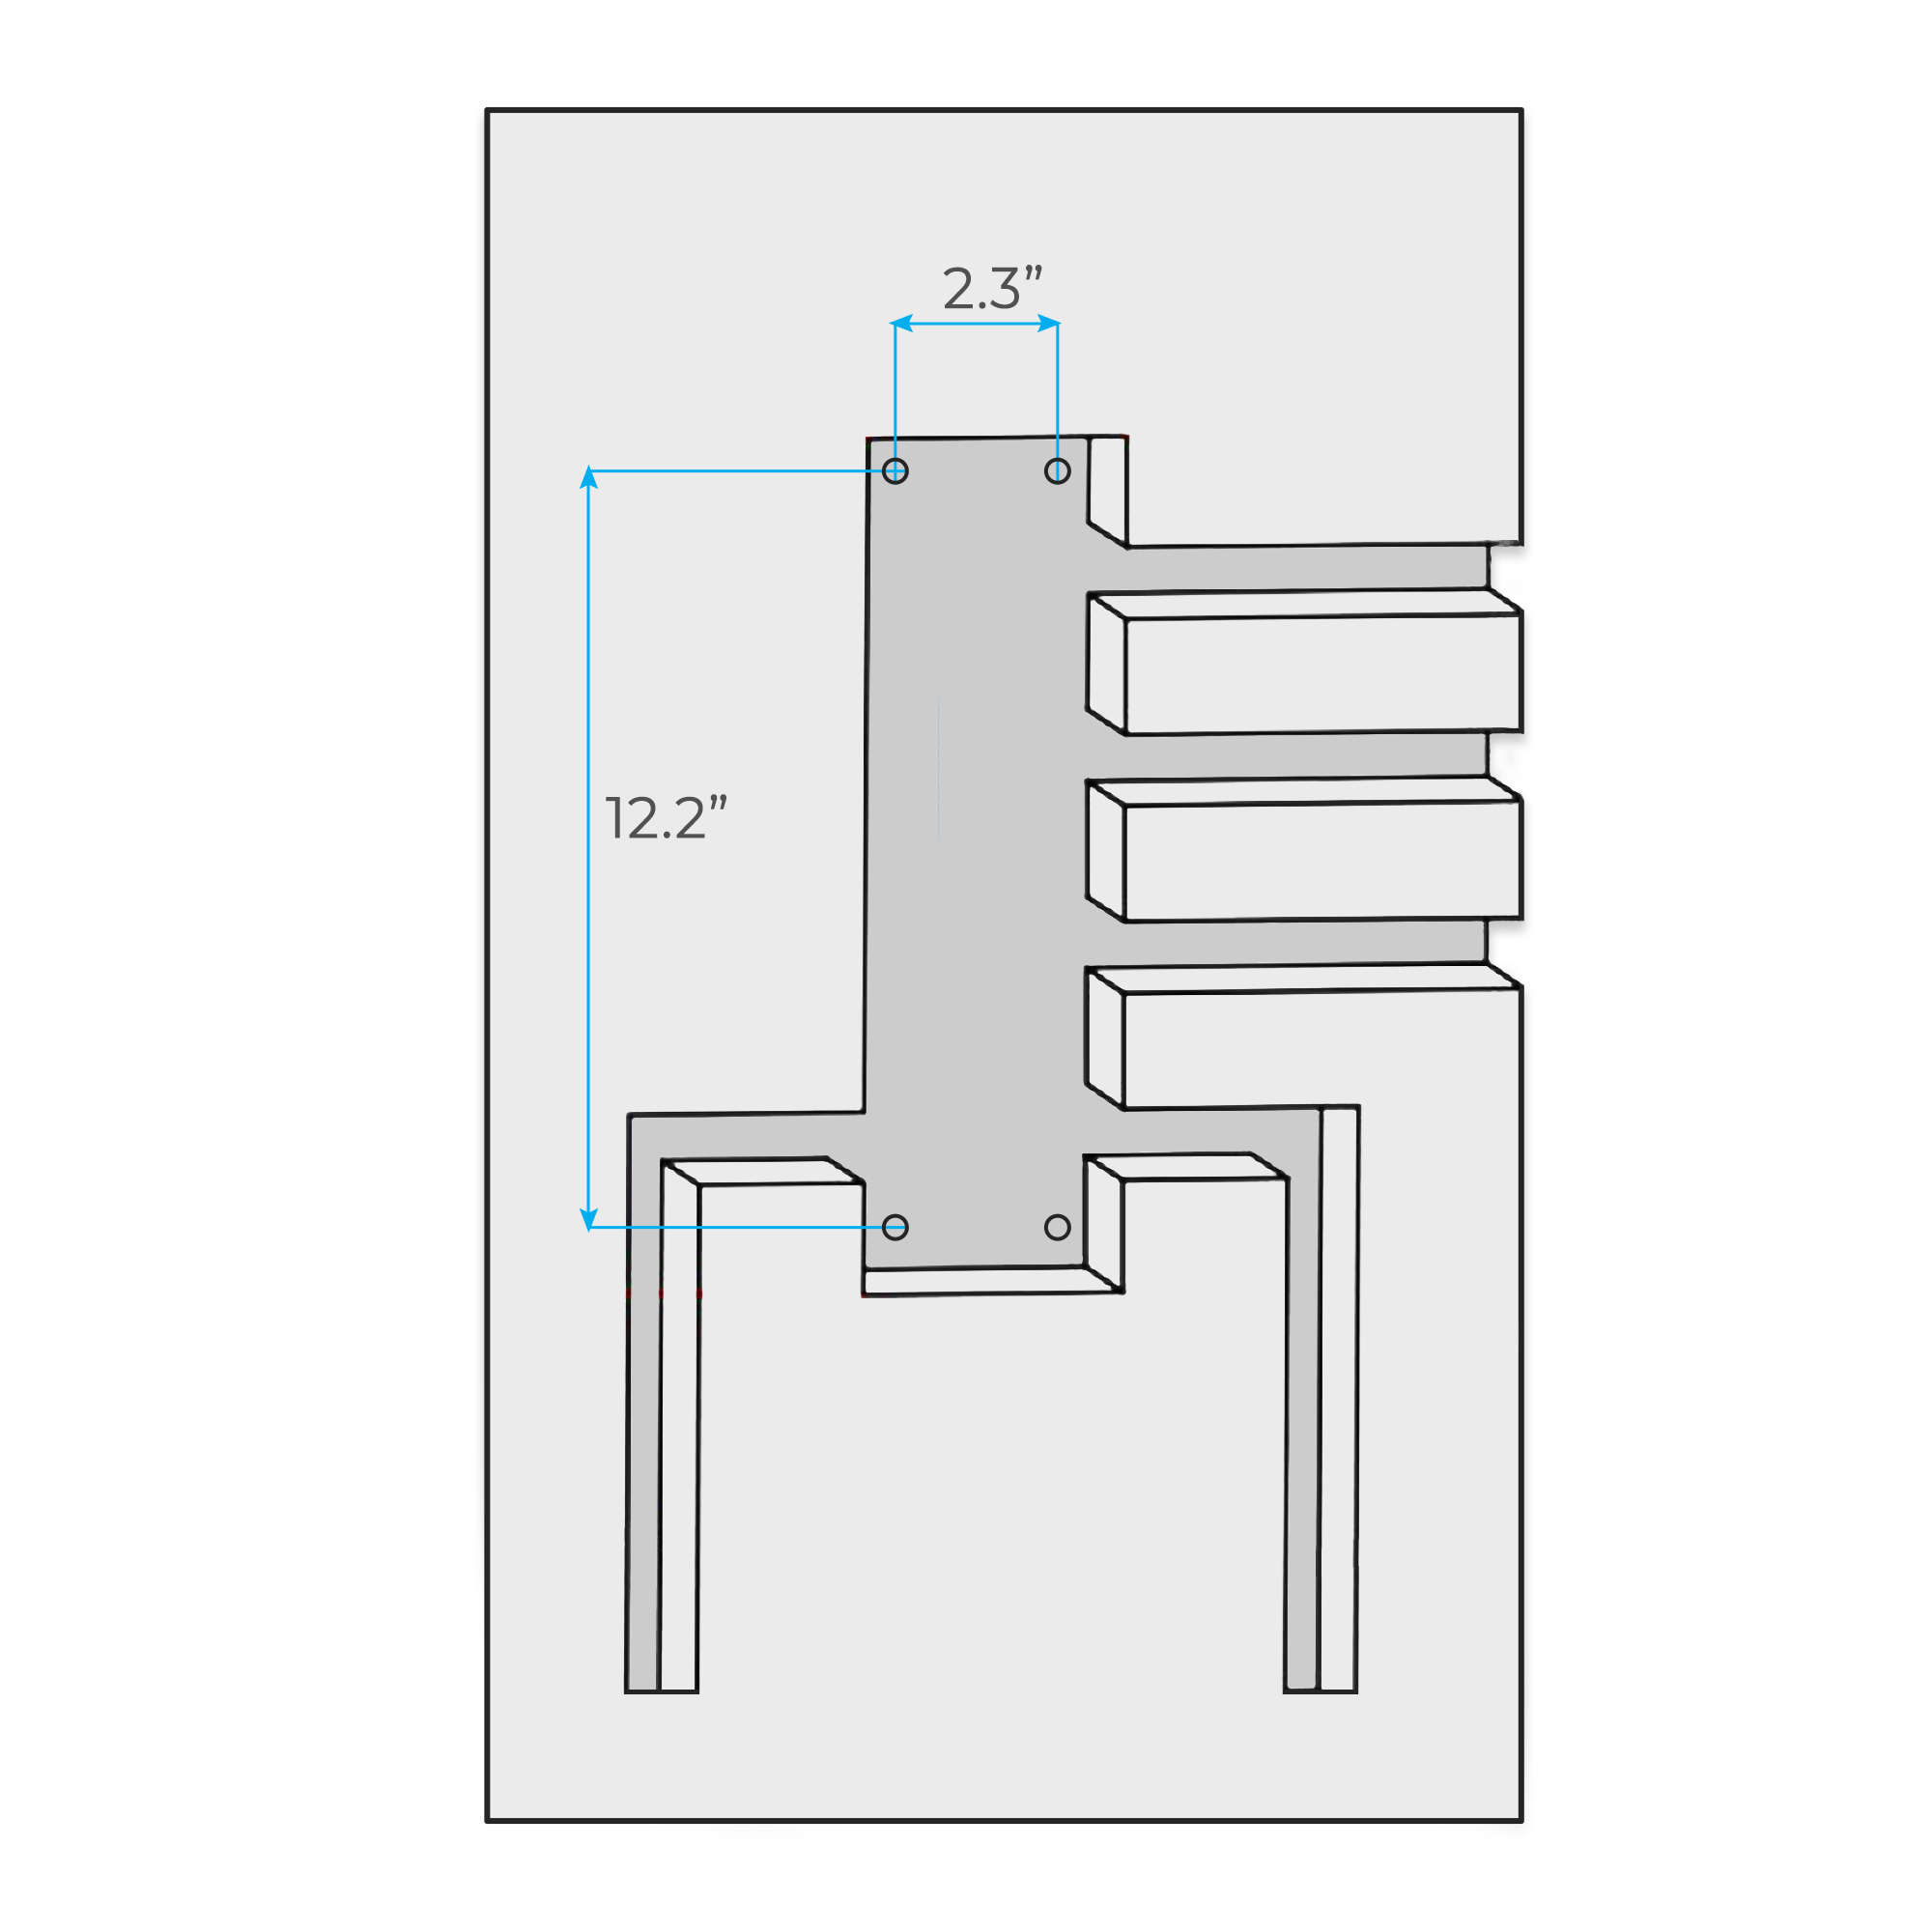
According to the actual size, get all pipe embedded mounts well ready.
According to the product basic size, dig four holes on the ideal place of the wall.
Shower Valve Mixer Installation Instructions
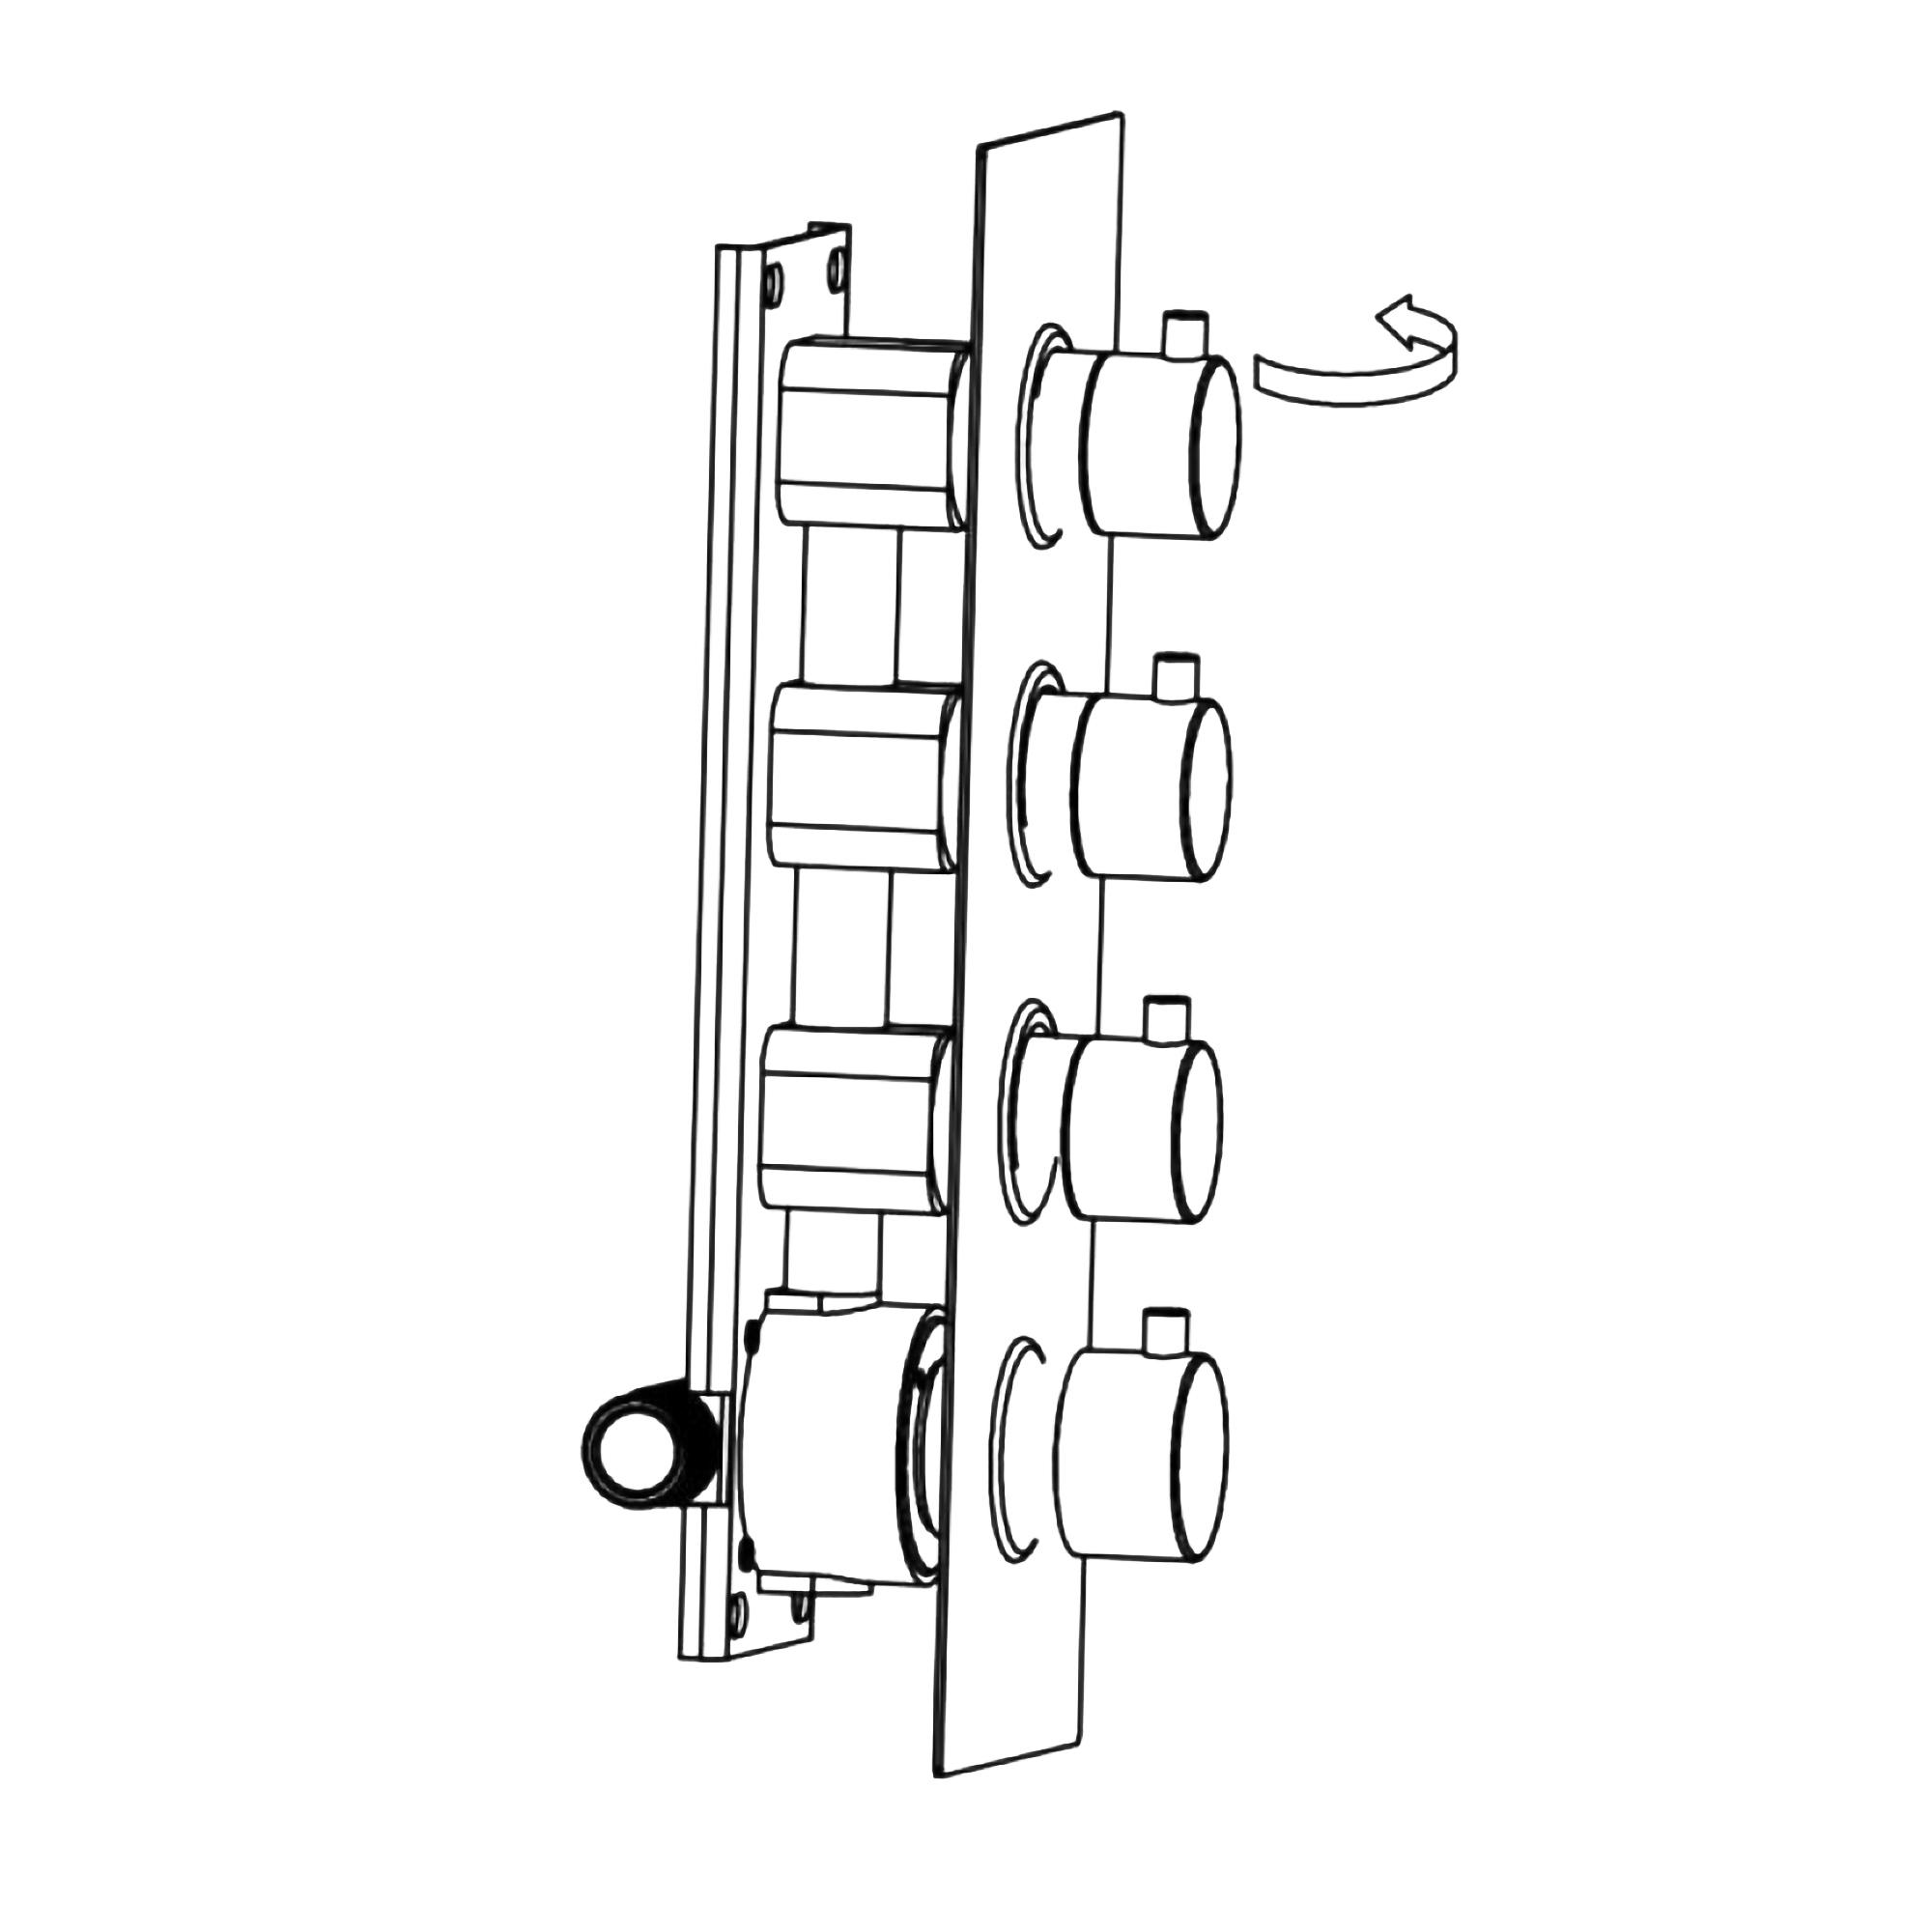
Step 7:
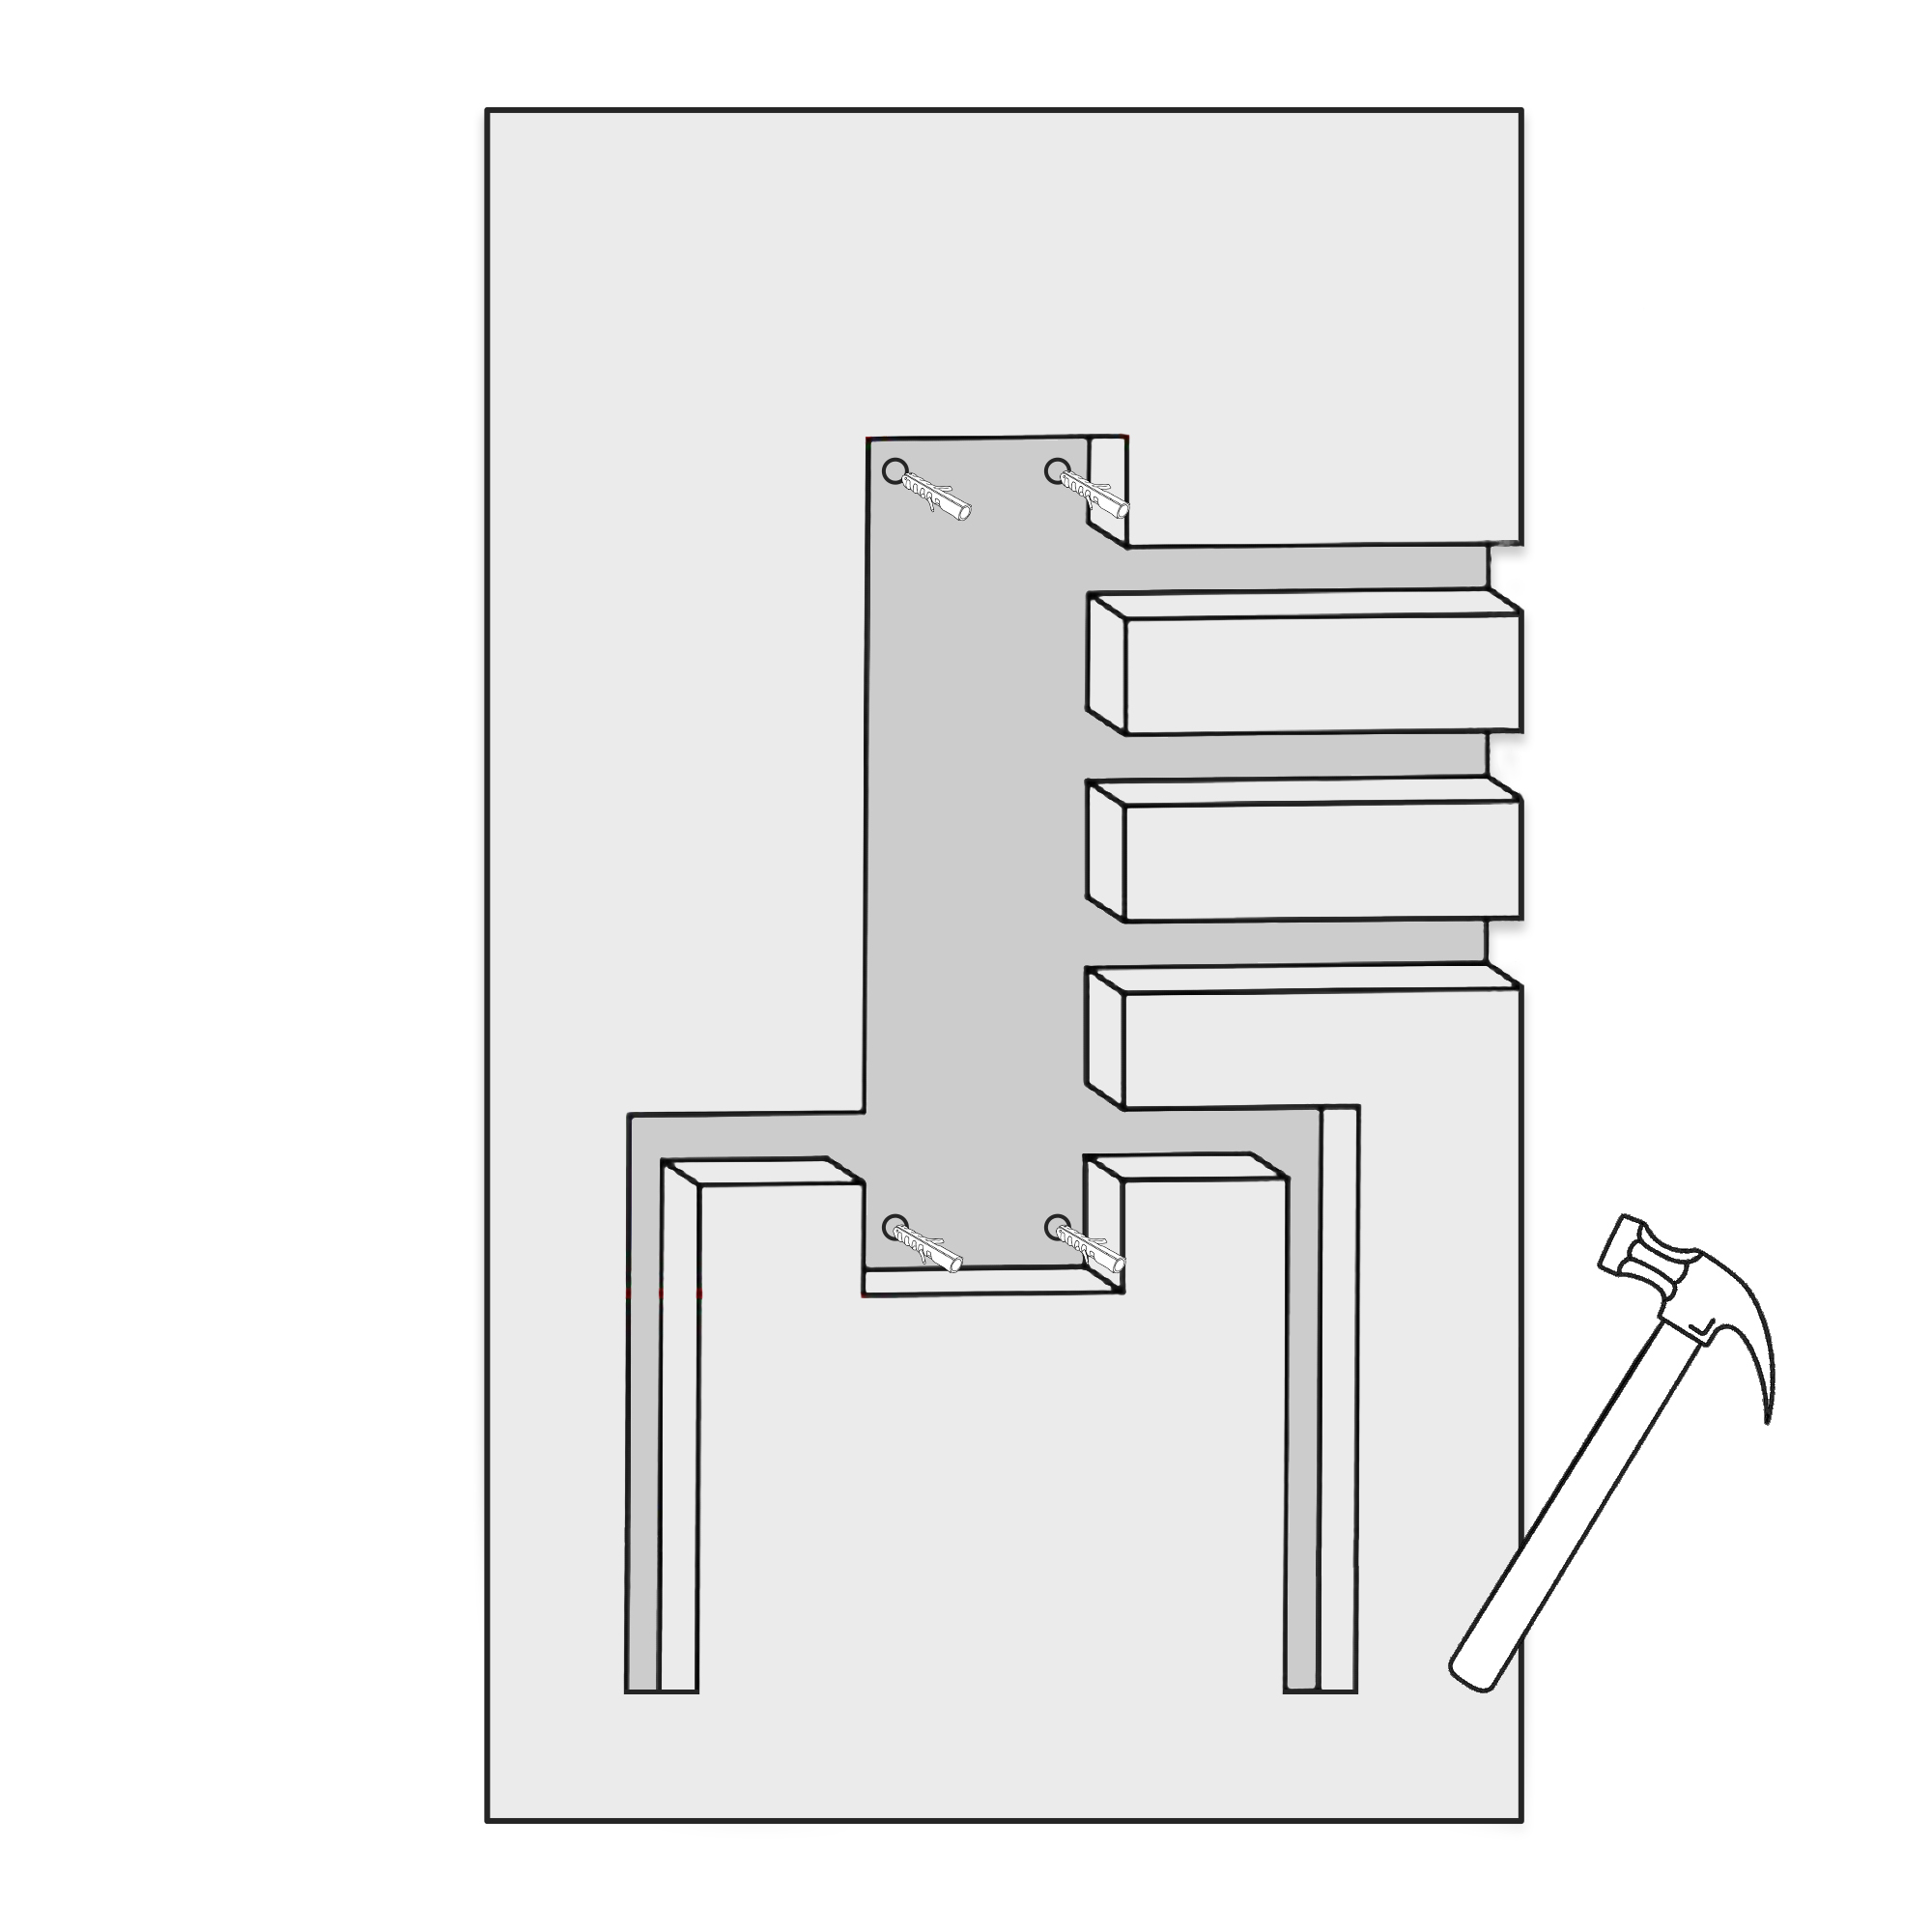
Step 8:
Place 4 tapping screws into the holes using a hammer.
Fix the faucet body by hand. And then take it into the four tapping screws.
Shower Valve Mixer Installation Instructions
Step 9:
Step 10:
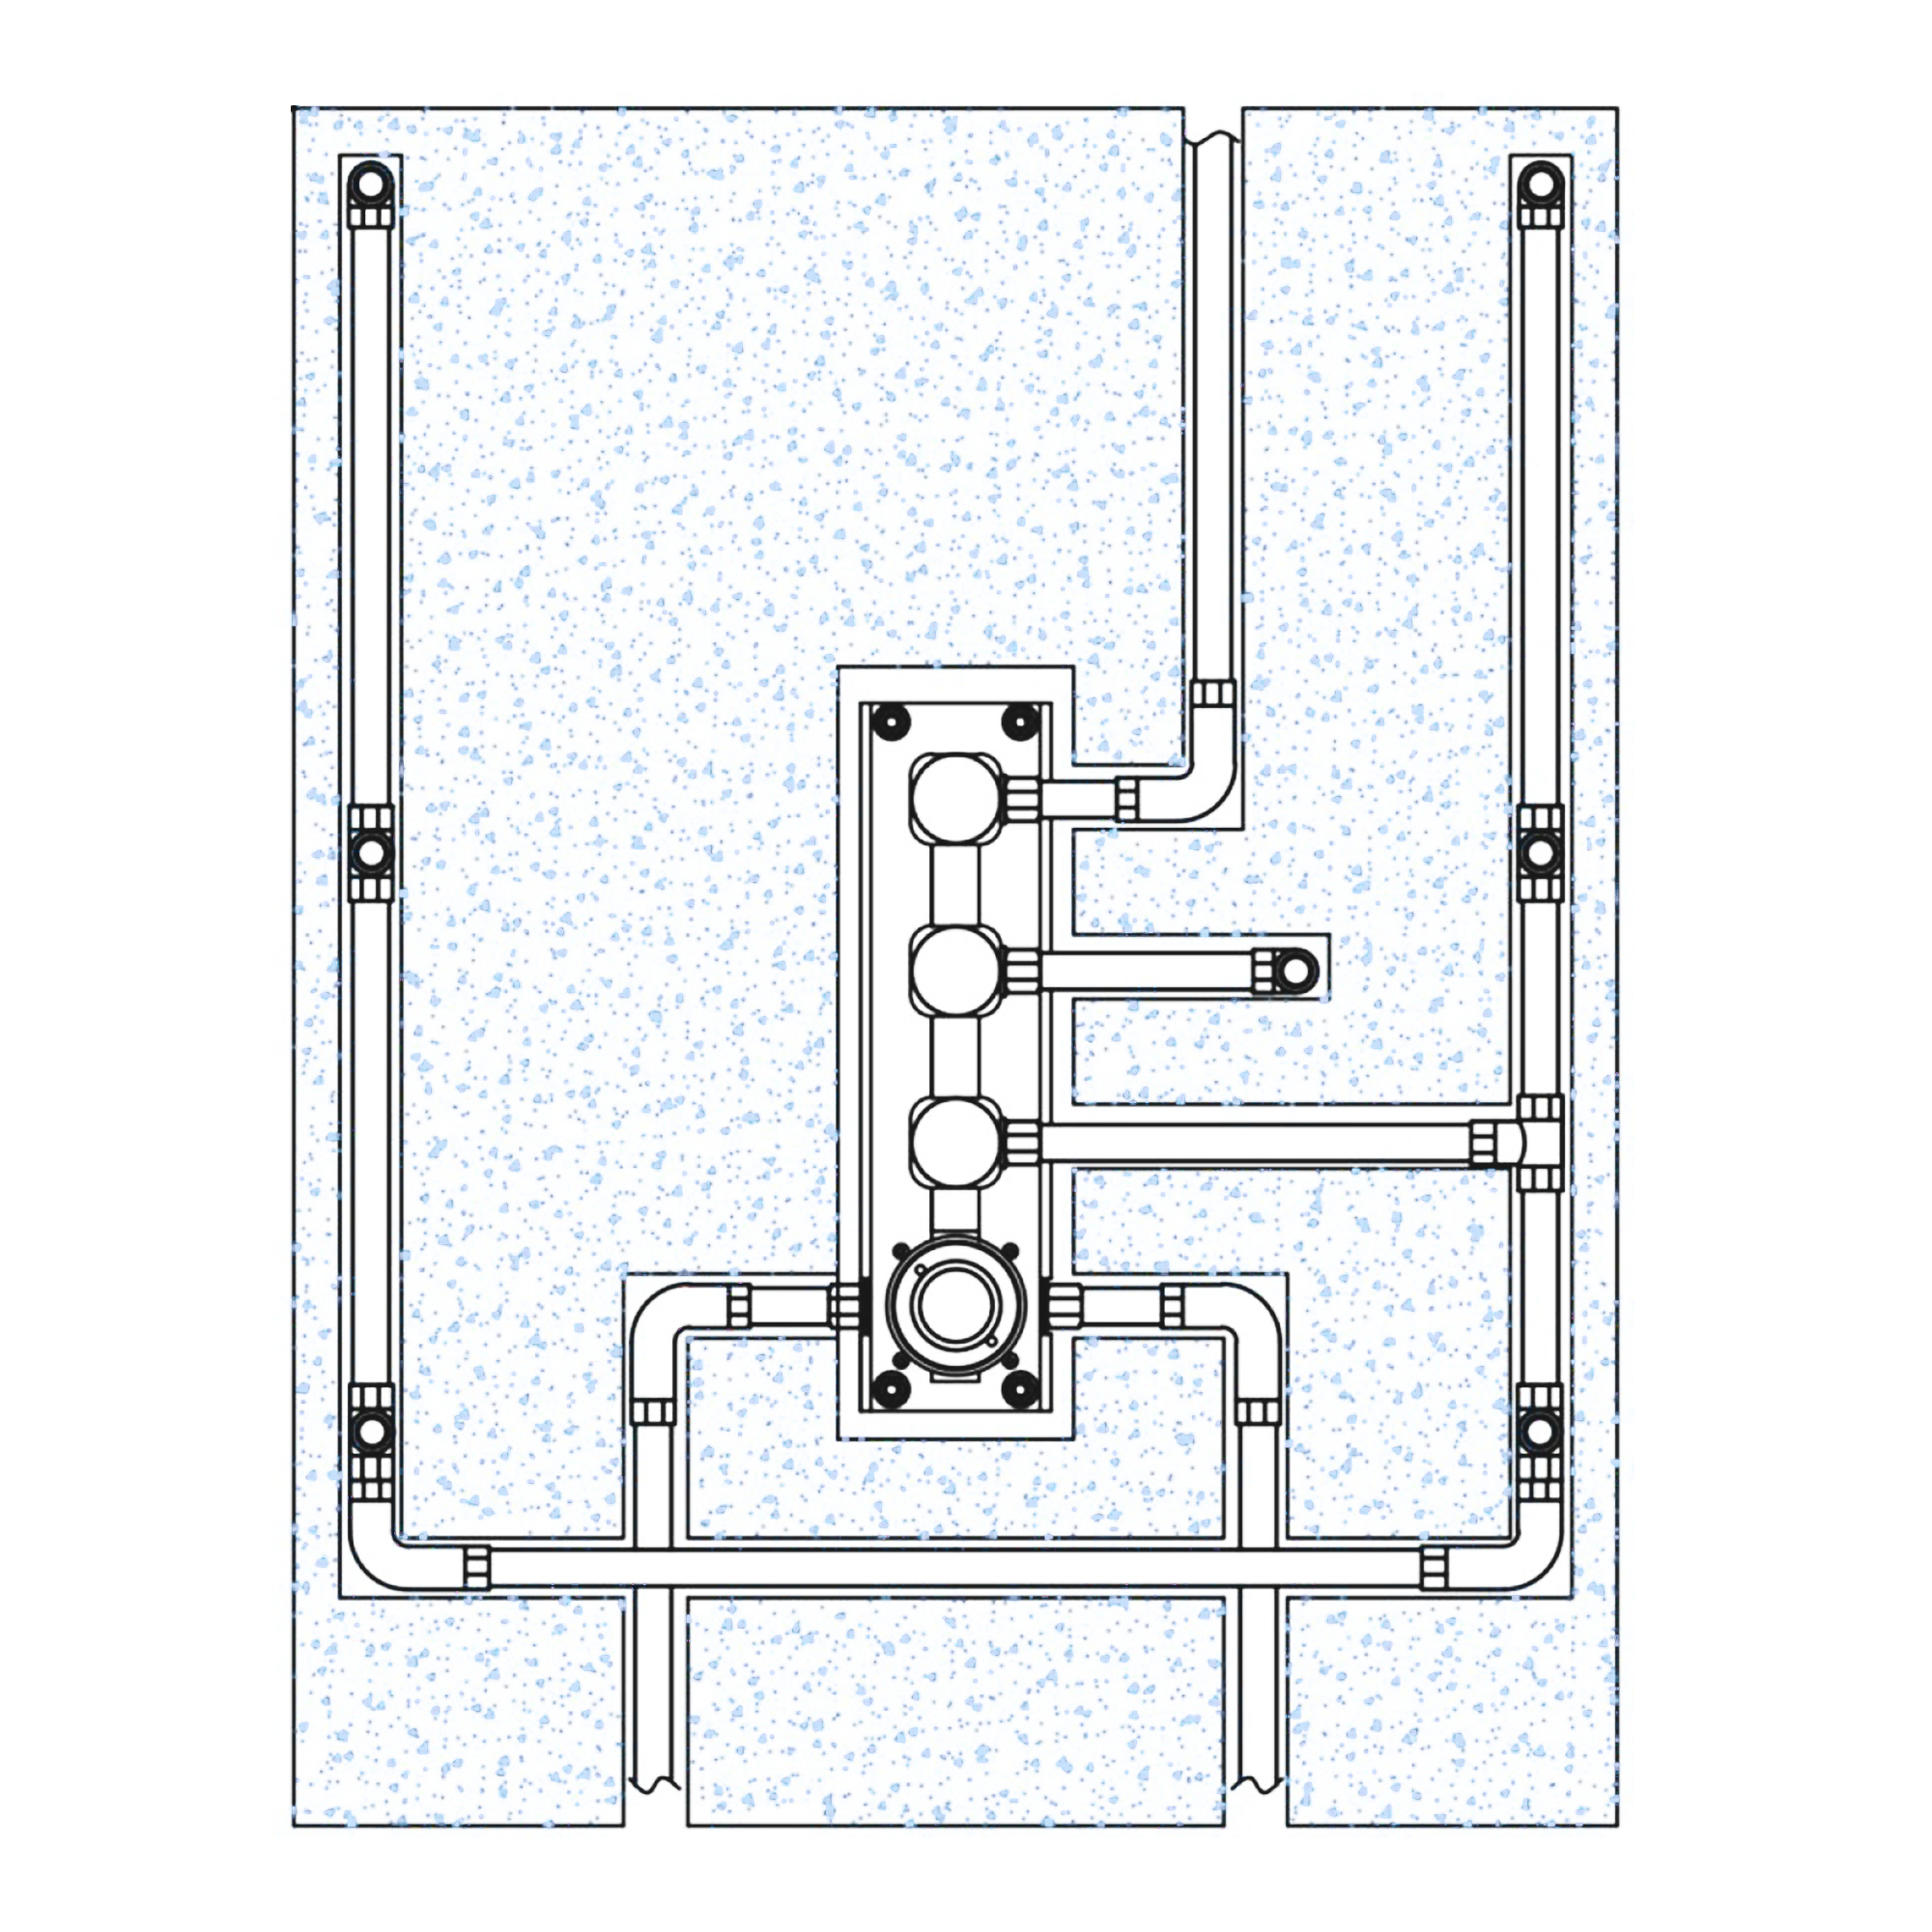
Connect hot & cold supply water pipes (not provided) and other water pipes. After that, open the water to test if all pipes have leakage or not. At last, seal the wall.
Take the board onto the faucet body.
Shower Valve Mixer Installation Instructions
Step 11:
Step 12:
Screws the handles into the handwheels.
a. Each water function handwheel b. Tempering handwheel
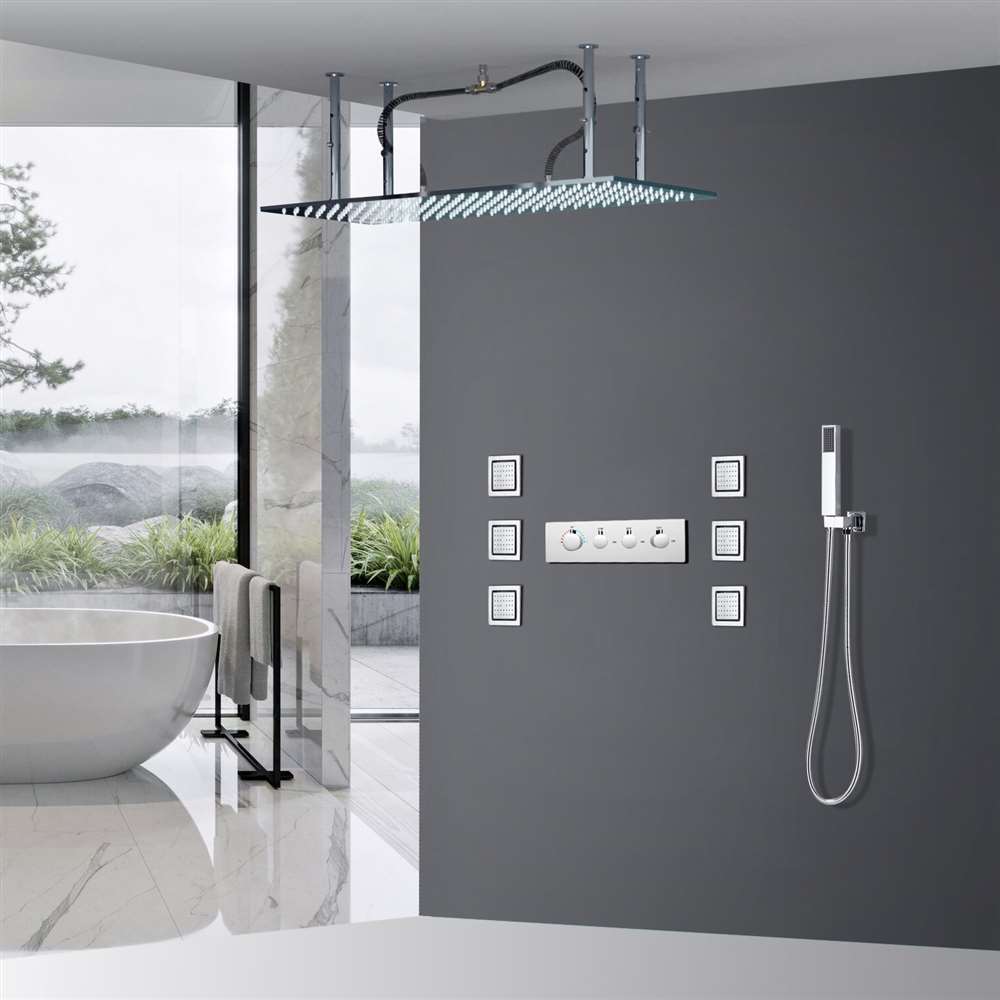
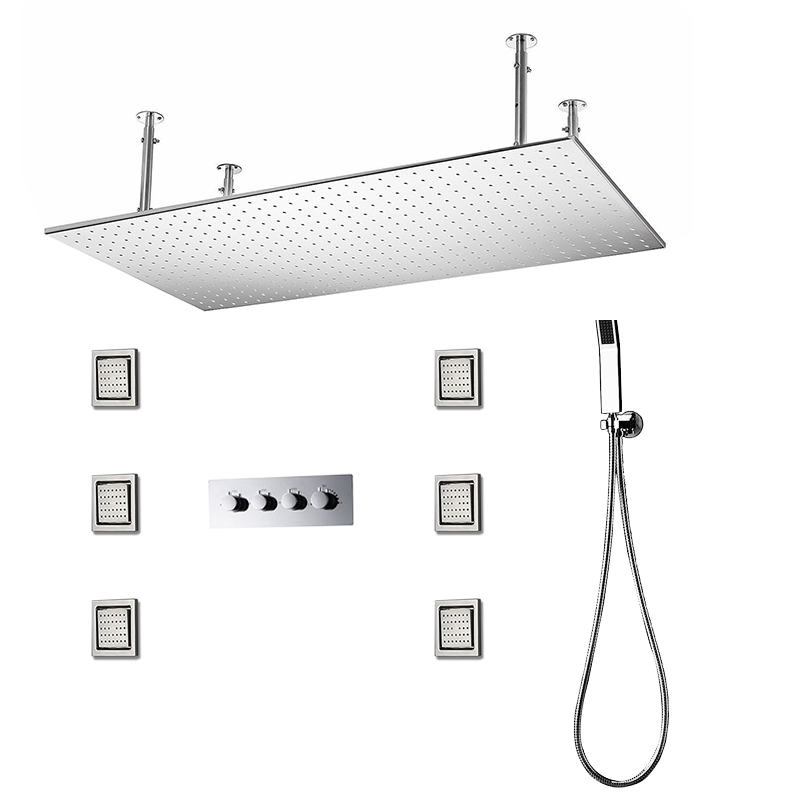
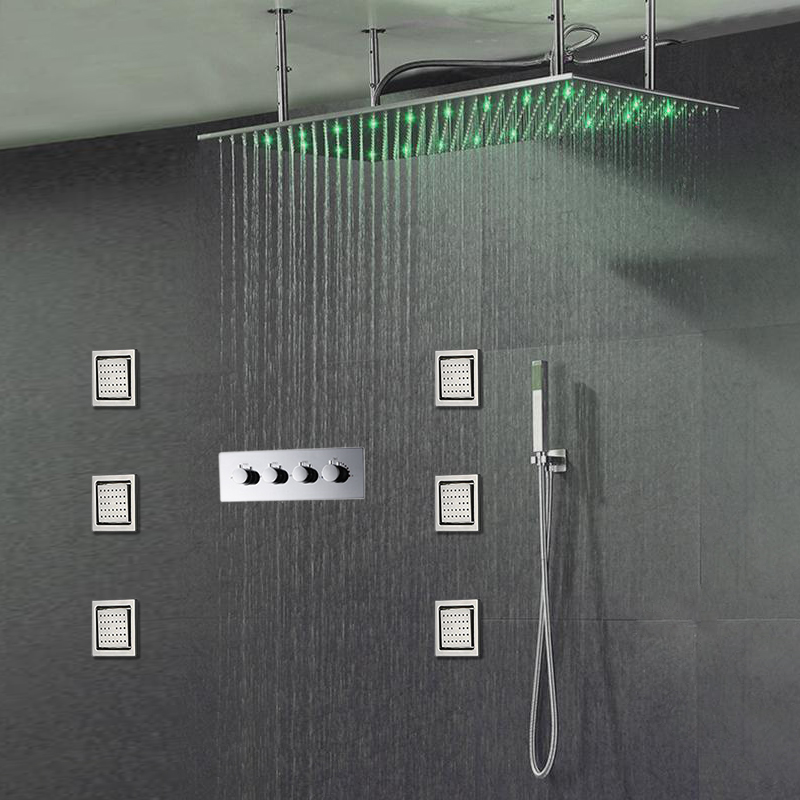
Fontana Lima Luxury Stainless Steel Shower Set
For those who want to fully enjoy the benefits of a large rain shower and get a soothing jet massage at the same time, our Lima Luxury Shower Set is the perfect choice. One of the largest rainfall showerheads available at more than three feet in length! The six body jets will always provide a soothing massage where you need it most. The showerhead is manufactured with long-lasting stainless steel and solid brass. The chrome finish is sleek and provides a touch of class to any bathroom.
Fontana Lima Luxury Stainless Steel Shower Set Features:
Brand Name: FontanaShowers
Model Number: FS-40LBSF
Type: Shower Set
Cold/Hot Water Type: Yes
Style: Contemporary
Size: 15.7" (>40 cm)
Surface Treatment: Polished
Valve Core Material: Ceramic
Surface Finish: Chrome
Installation Type: Wall & Ceiling Mounted
Head shower Material: 304 stainless steel in brushed