Fontana Commercial Automatic Brushed Gold Liquid Foam Soap Dispenser
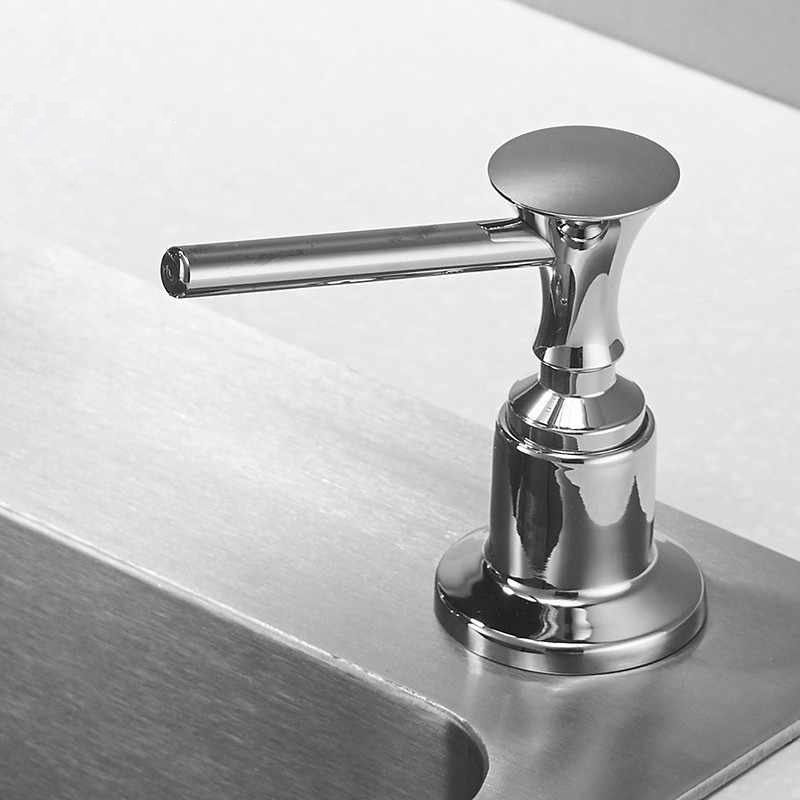
Its shape is like a faucet, which is beautiful and elegant, it can match and use together with all kinds of faucets perfectly. It adopts the infrared ray emission and reception technology, which is completely touch-free so that it is convenient and safe. The spout is made of brass plated with Brushed Gold and its plating is enhanced so that the product can maintain a long term fresh color and become more durable. Time-adjustable and amount-adjustable, the users can adjust the dispensing time and foam amount, and it can be used in various places. Easy to remote control and installation. Use remote controller to adjust time, sensor distance, dosage of the foam. Liquid outlet: non-leaking design, cuts off the soap flow completely. Anti-dripping & no trailing. Large capacity: capacity which can be customized will spare your precious time and frequency of refilling it.
Fontana Commercial Automatic Brushed Gold Liquid Foam Soap Dispenser Features:
|
Brand Name: FontanaShowers
Model Number: FS1027
Type: Liquid Soap Dispenser
Installation mode: Deck Mount
Main Material: Metal
Liquid Soap Dispenser Type: Automatic Soap Dispenser
Surface Treatment: Brushed Gold Plated
Working Mode: IR sensor
Metal Liquid Soap Dispenser: Brushed Gold
Pump Material: Brass
Volume: 1000ML
Quality Guarantee: 3 year
Power: AC 110-240V; DC 1.5V x 4 A battery
Usage: Ideal for commercial use applications in public restrooms, restaurants, office building, public facilities, hospitals. Fits all US Standard plumbing.
|

|
FontanaShowers® Product Warranty Information 
- Before you begin, please read the installation instructions below. Observe all local building and safety codes.
- Unpack and inspect the product for any shipping damages. If you find damages, do not install.
- Please note all showers must be installed by a professional and certified plumber otherwise warranty might be voided
|
|
|
|
|
Soap Dispenser Installation Instructions
|
|
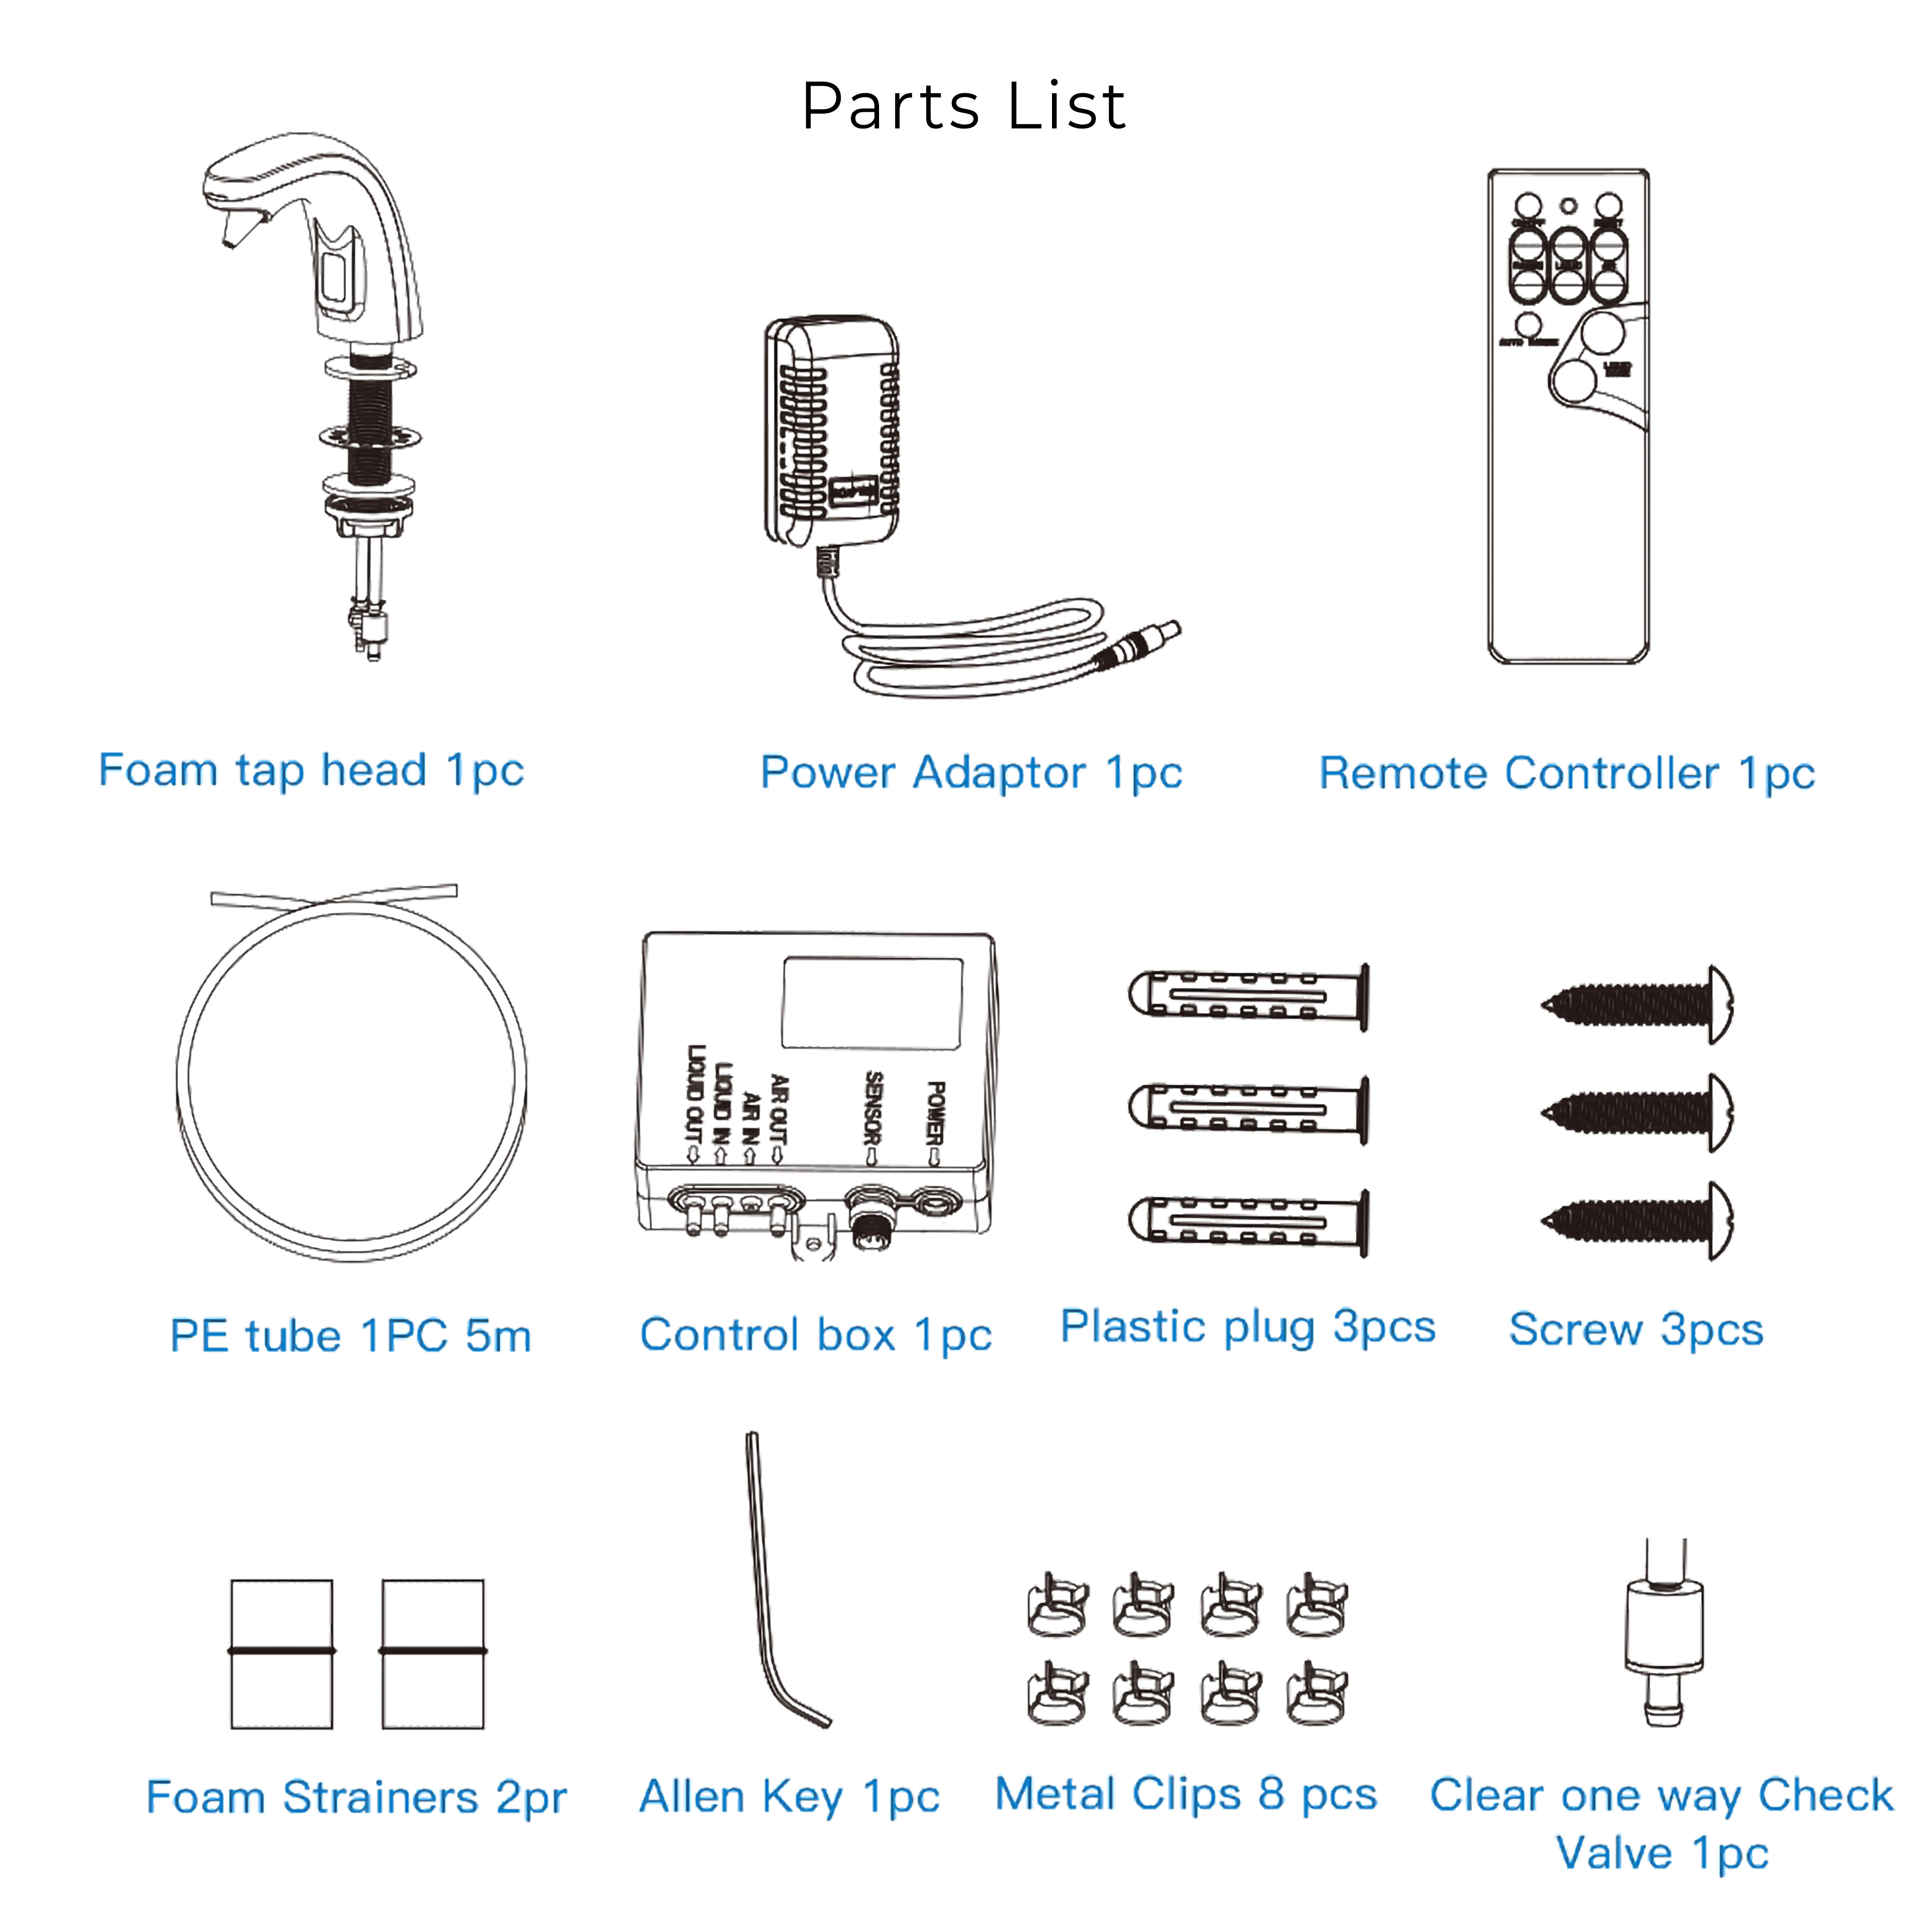
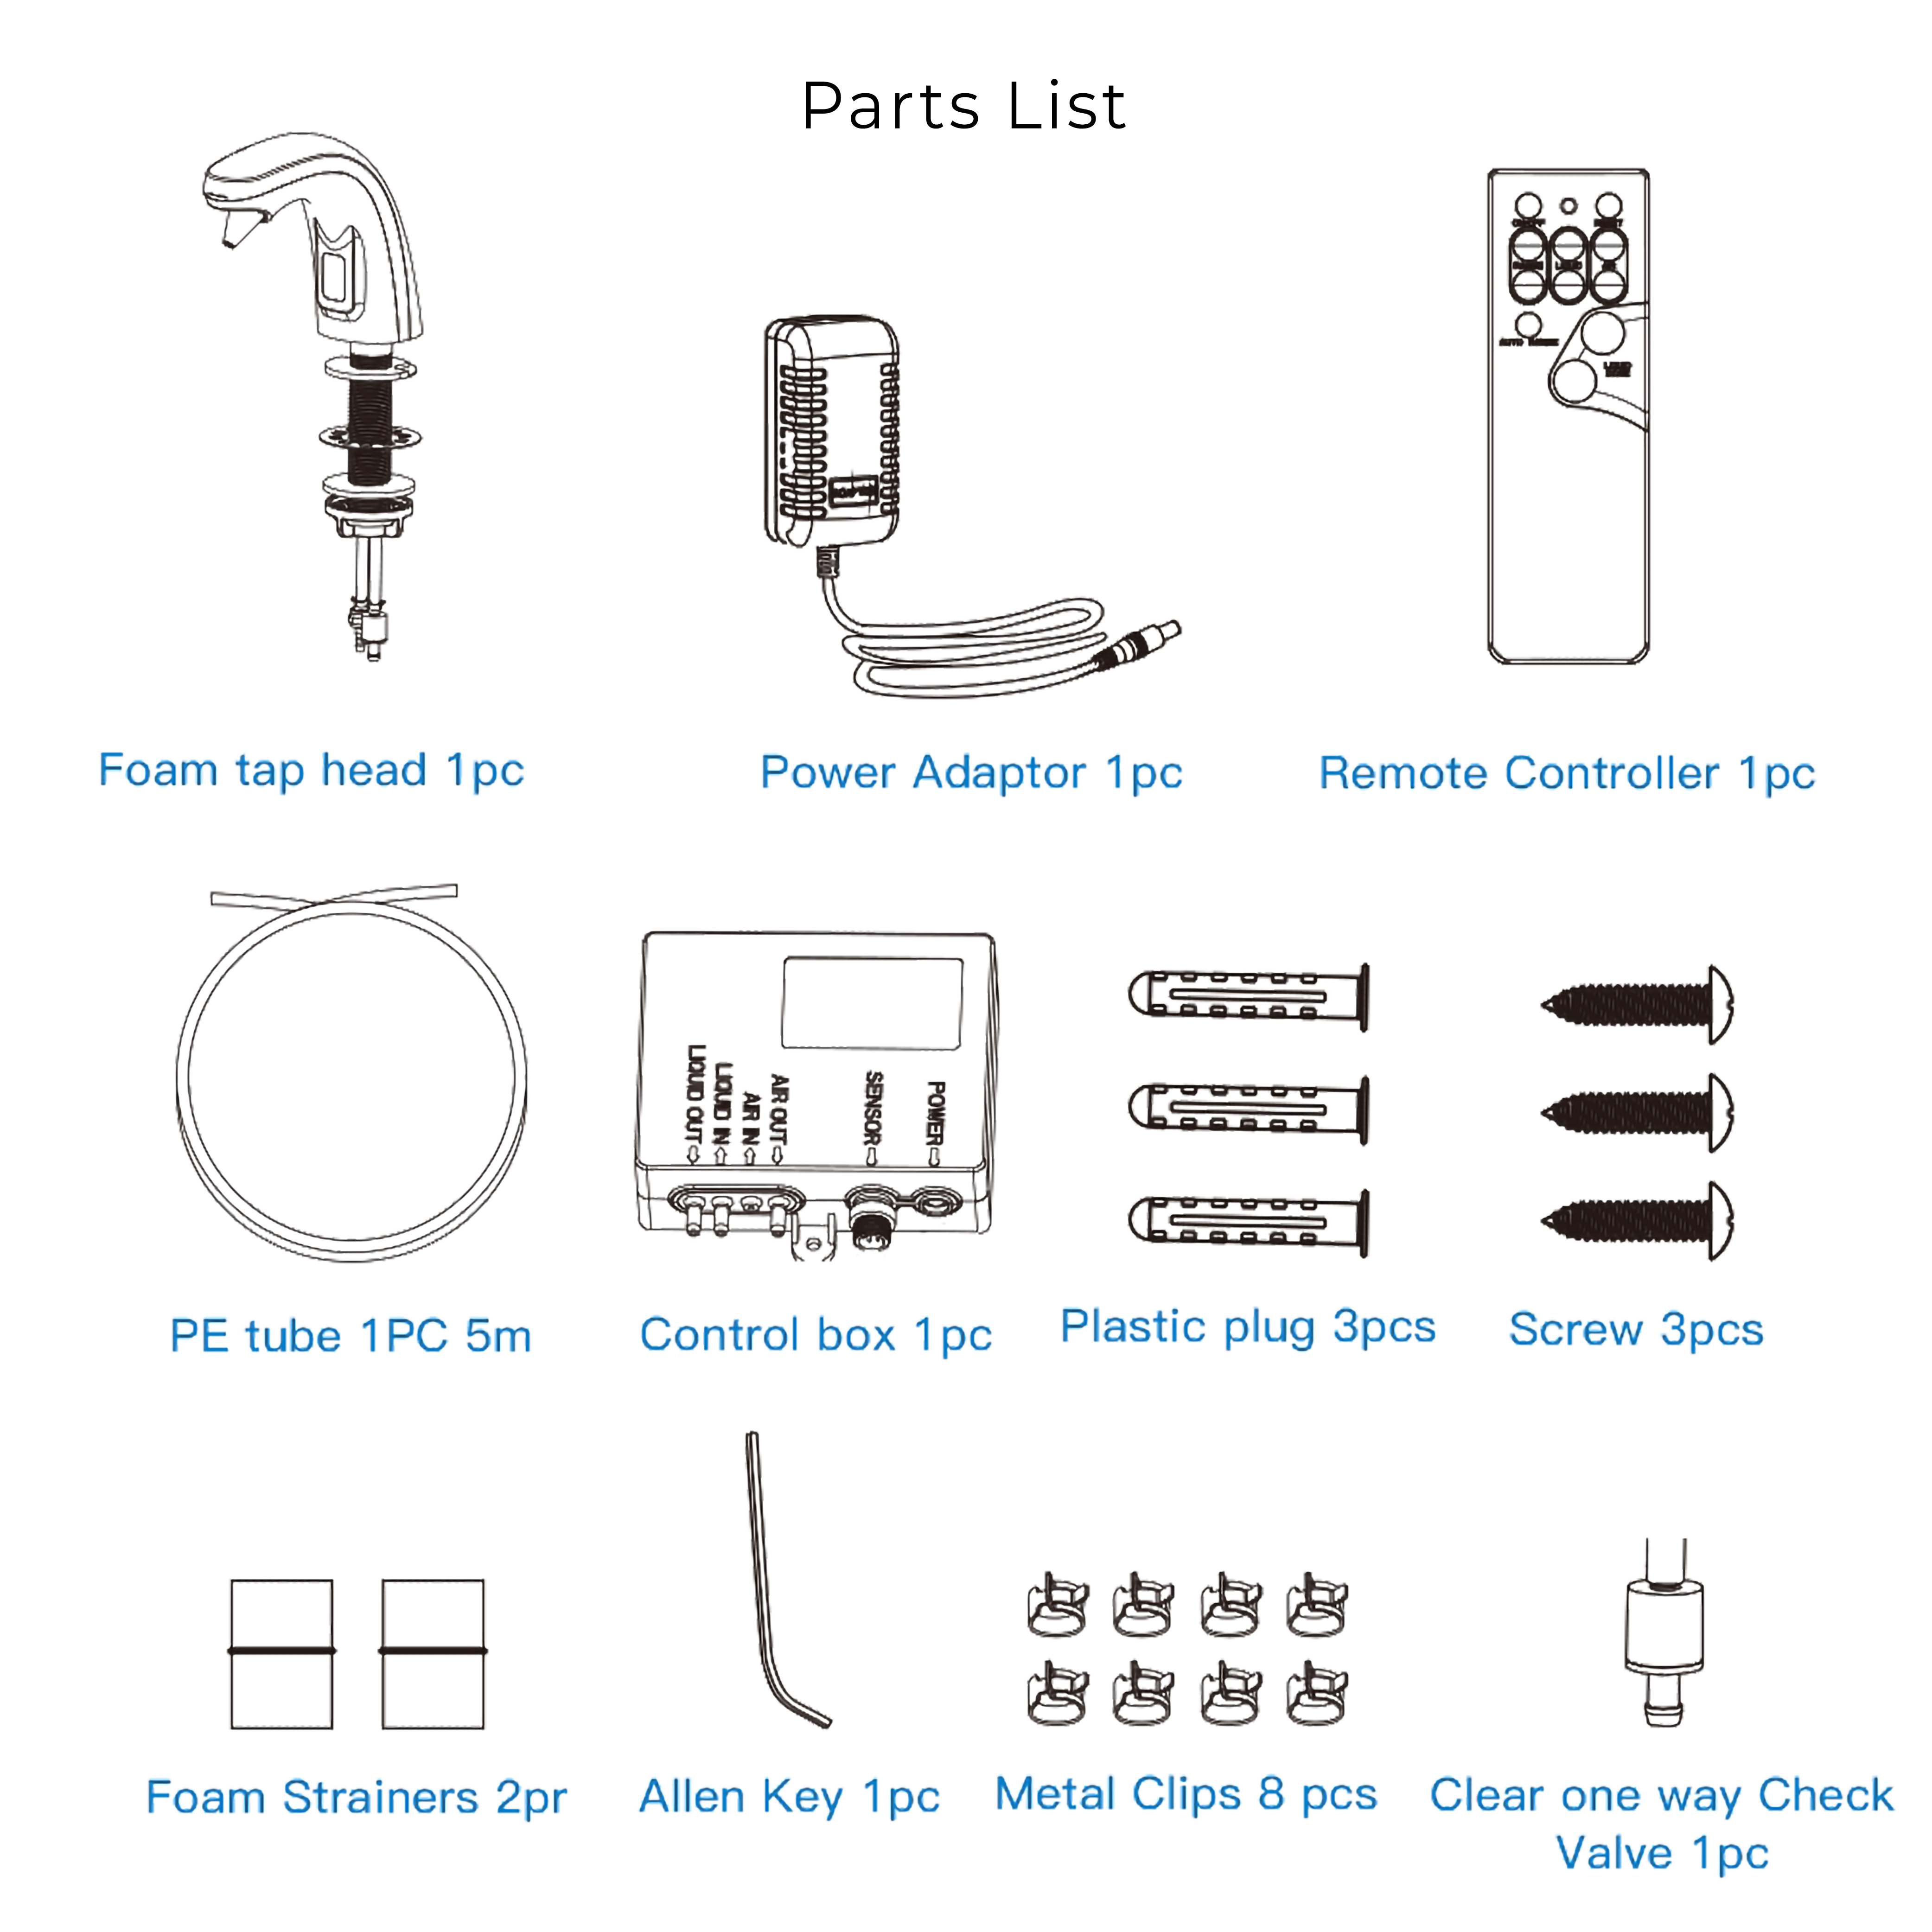
Parts List
|
|
Step 1:
|
|
sensor
soap
|
- Foam tap head 1 pc
- Power Adaptor 1 pc
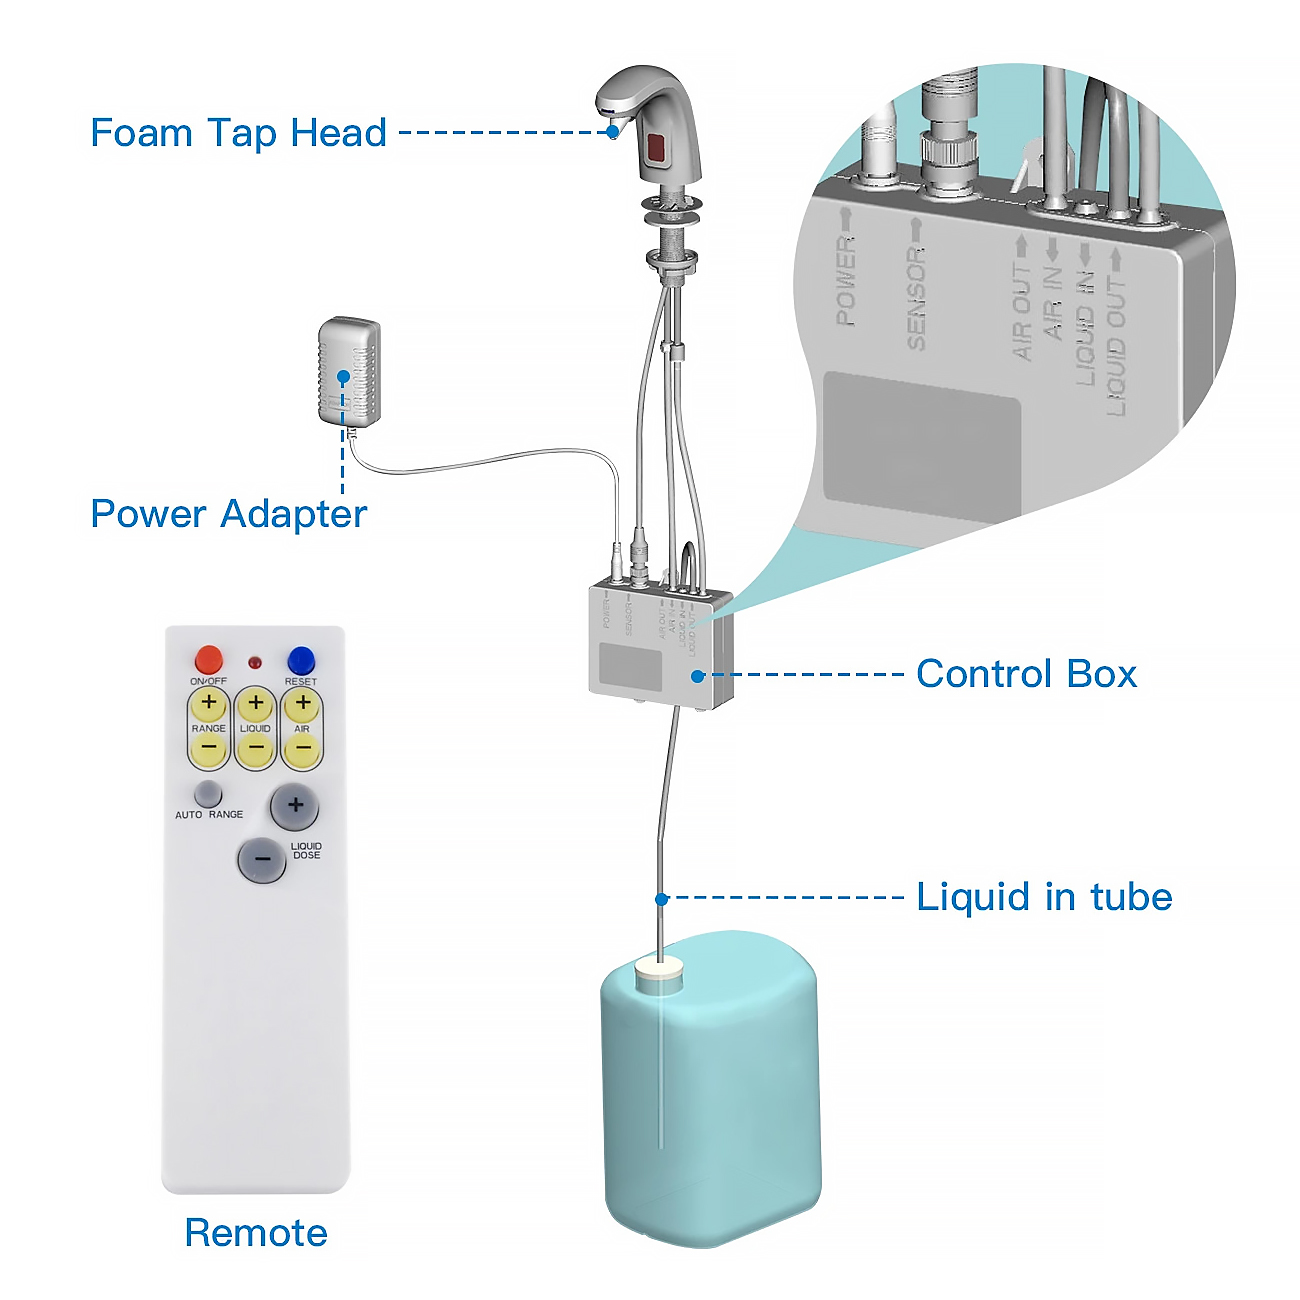
- Remote Controller 1 pc
- PE tube 1PC 5m
- Control box 1 pc
- Plastic plug 3 pcs
- Screw 3 pcs
- Foam Strainers 2pr
- Allen Key 1pc
- Metal Clips 8 pcs
- Clear one way Check Valve 1pc
|
soap
|
|
|
|
Soap Dispenser Installation Instructions
|
|
|
|
|
Soap Dispenser Dimensions
|
|
Soap Dispenser Exposed View
|
|
|
|
soap
|
|
|
|
Soap Dispenser Installation Instructions
|
|
|
|
|
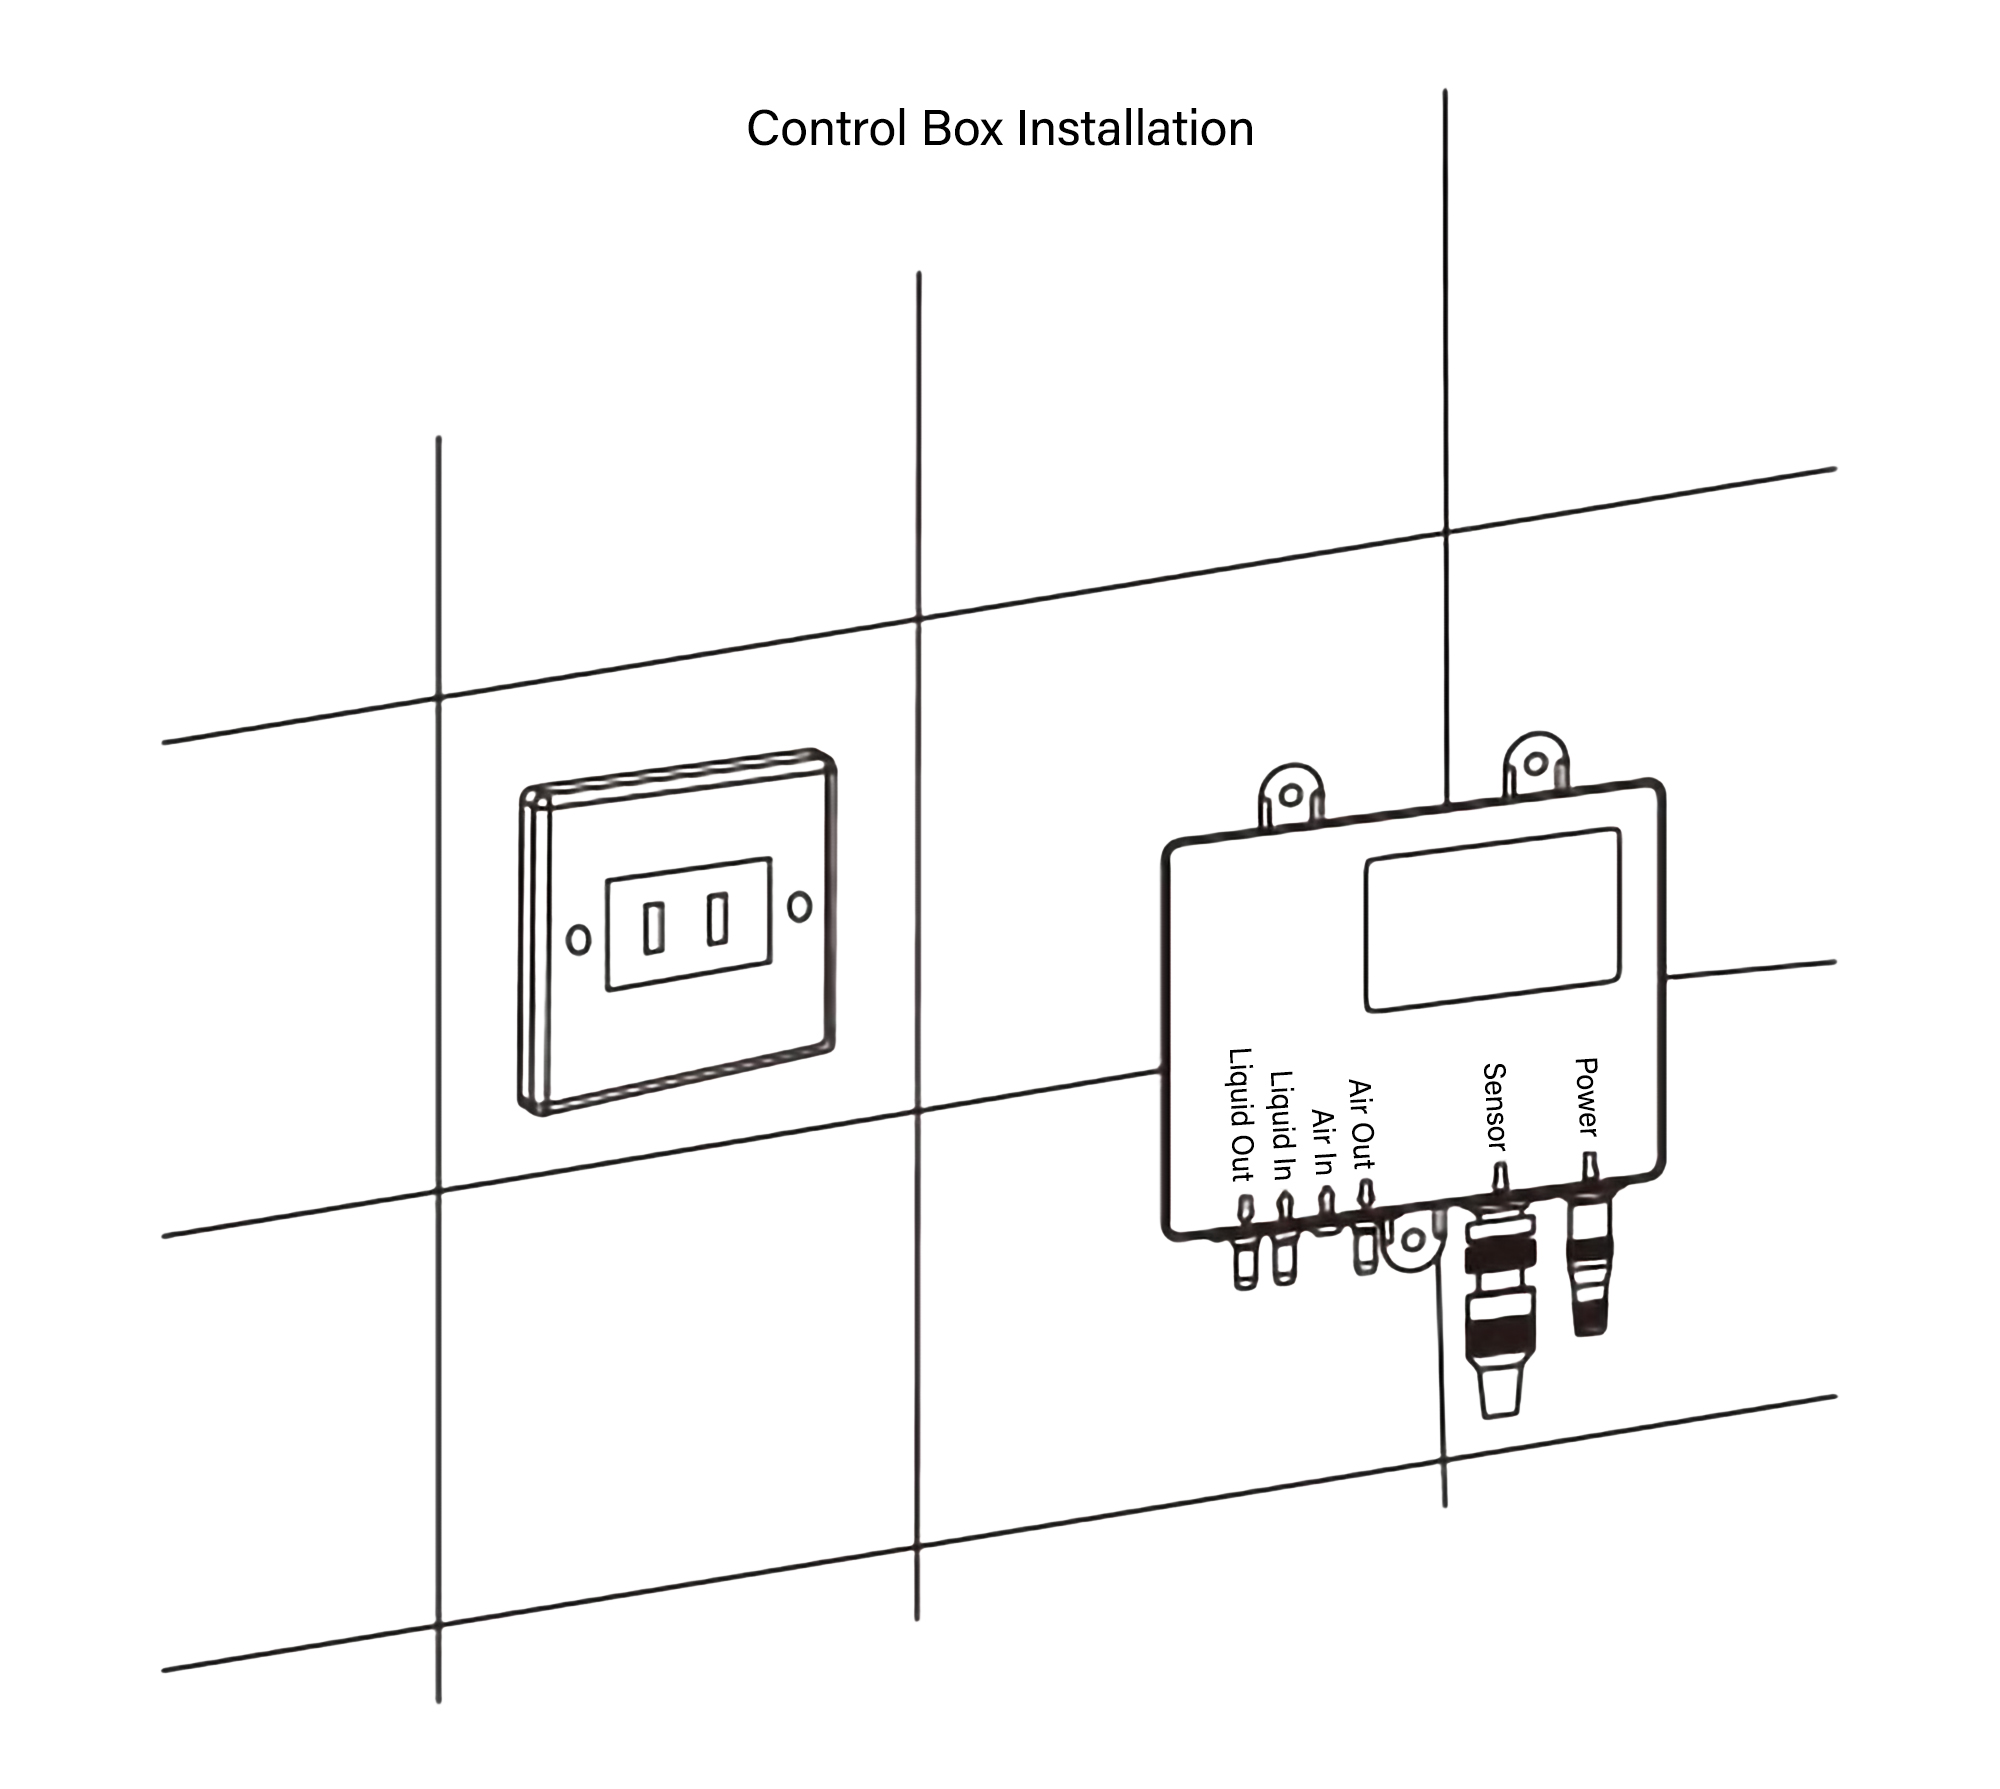
Control Box Installation Instructions
|
|
Step 2:
|
|
|
Tools needed (Not included)
- Drill 1/8" drill bit
- 1/4" masonry bit (if attaching to a concrete wall)
- 1" hole saw for drilling through a countertop
- Adjustable wrench or basin wrench Screwdriver
- Hammer
- Pair of pliers
- Tape measure
Please install the control box in a manner to ensure that the tubes don't kinked or bent. Find an appropriate spot to install the control box on the wall.
|
|
|
|
|
Soap Dispenser Installation Instructions
|
|
|
|
|
Soap Dispenser Installation Instructions
|
|
Step 3:
|
|
|
|
|
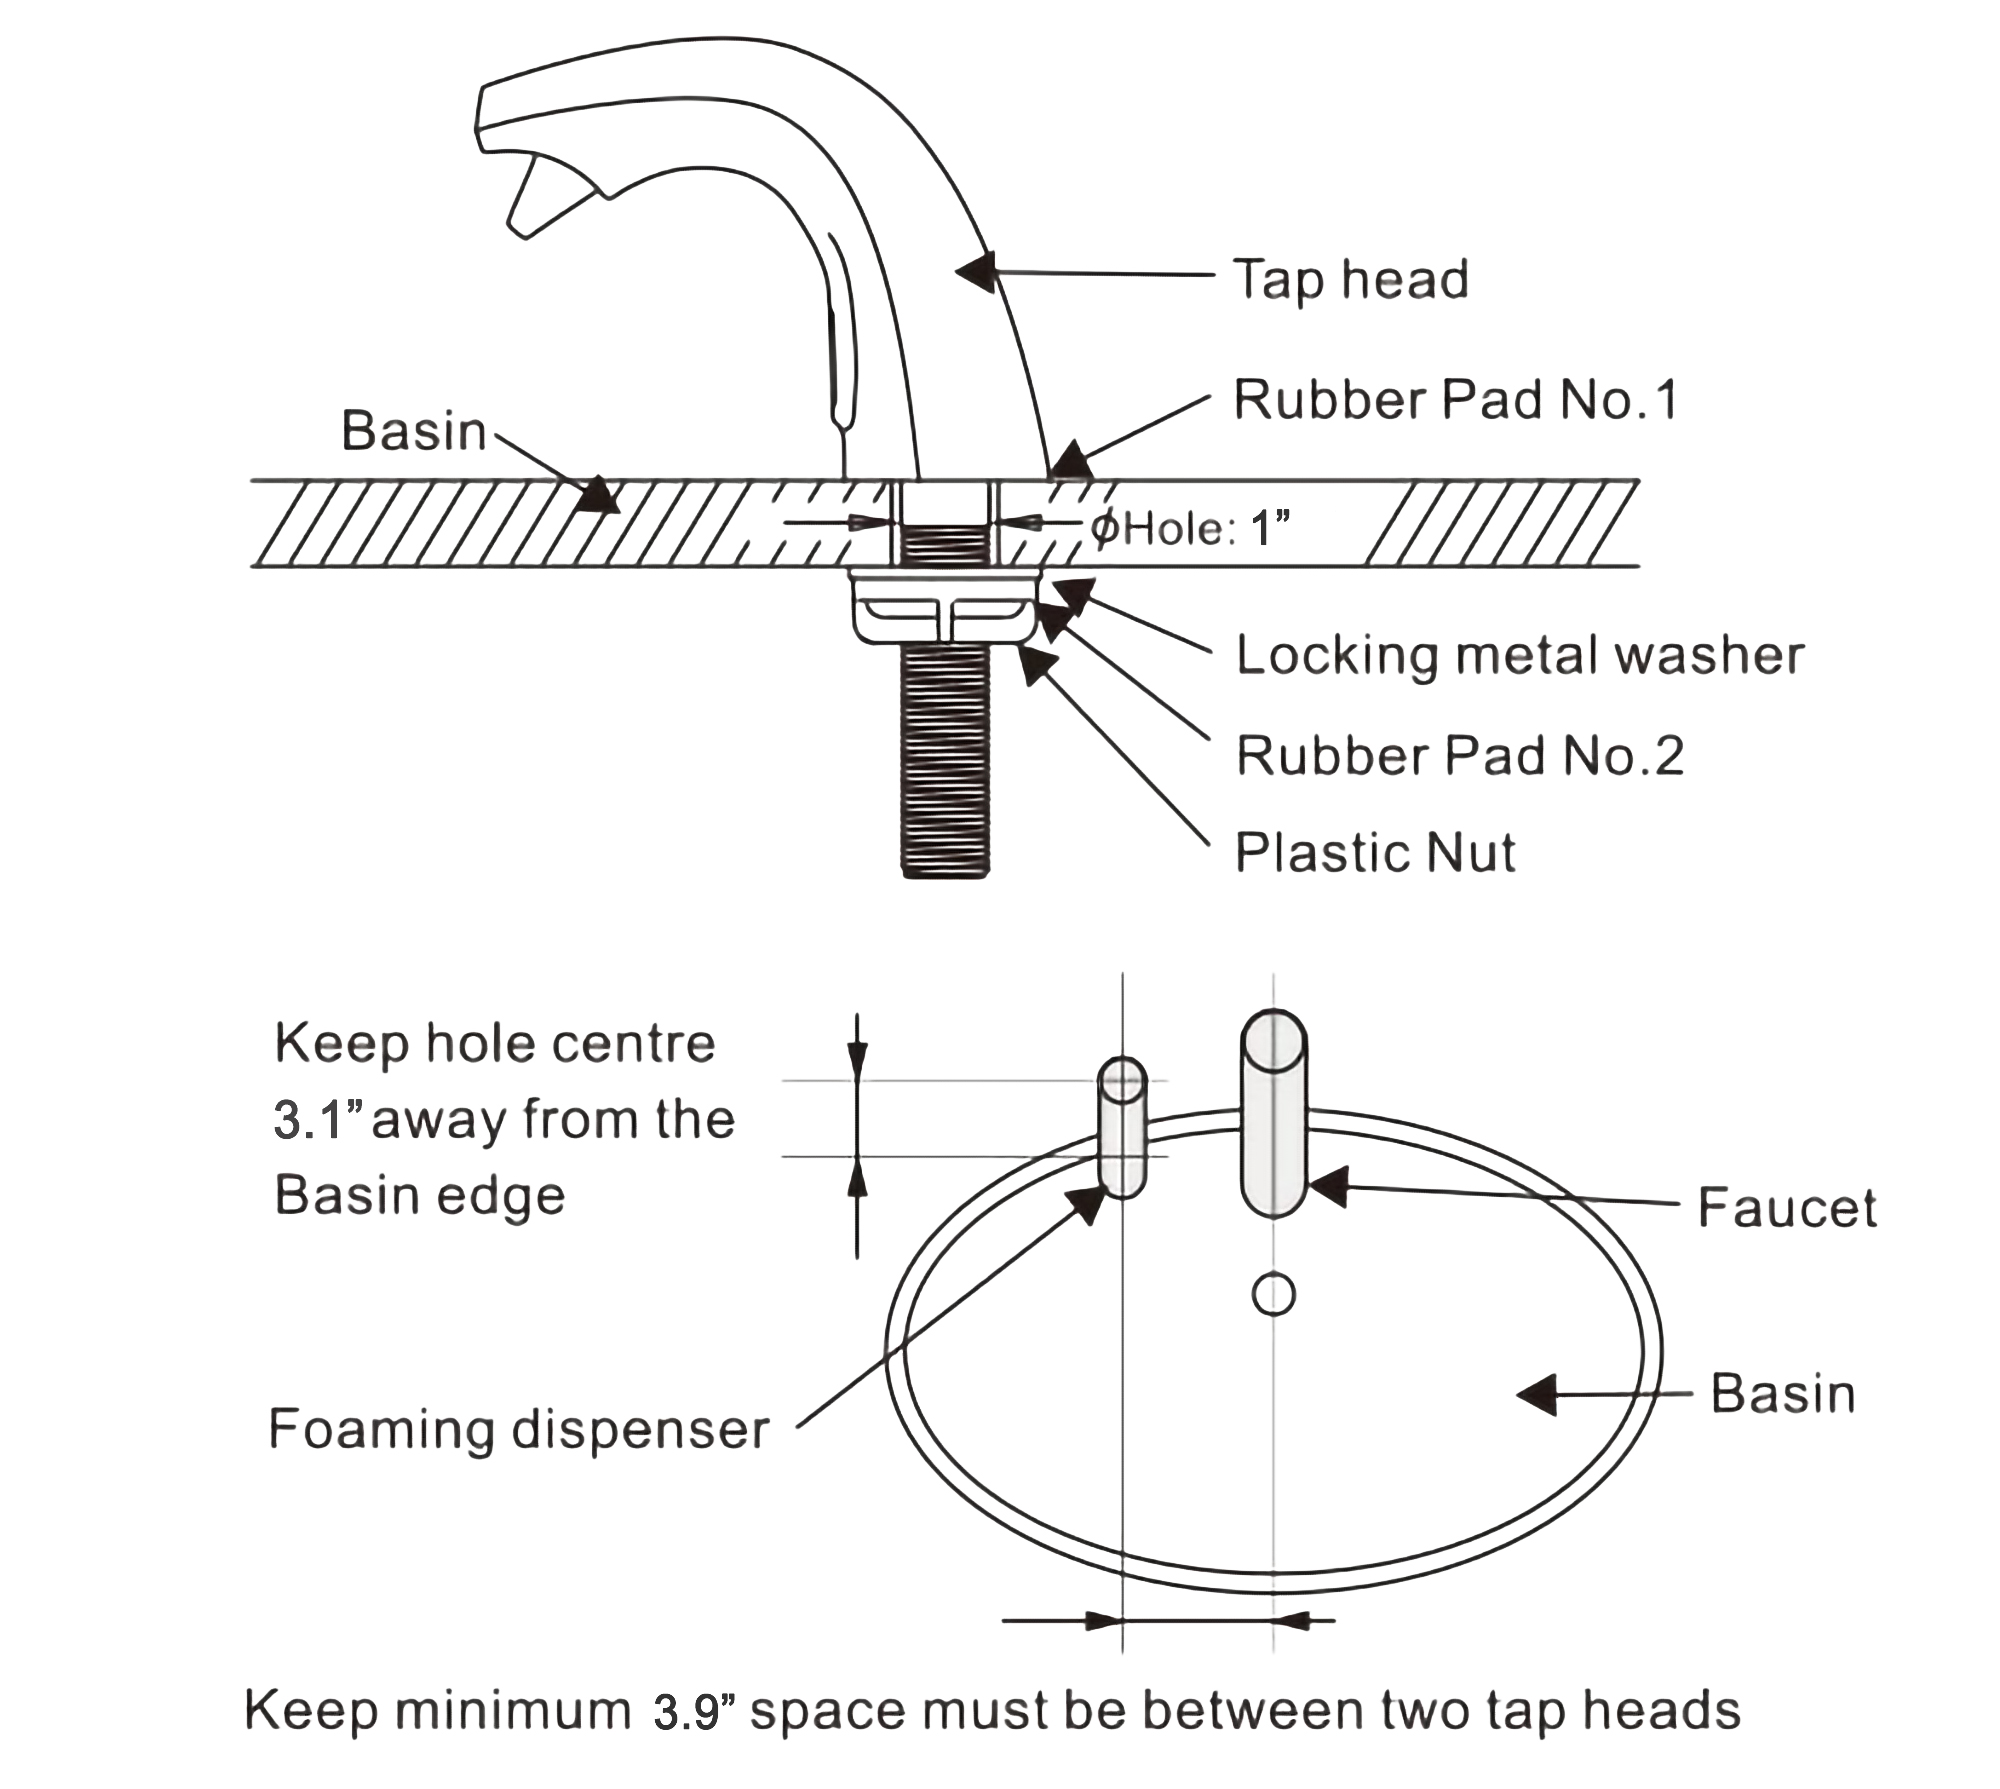
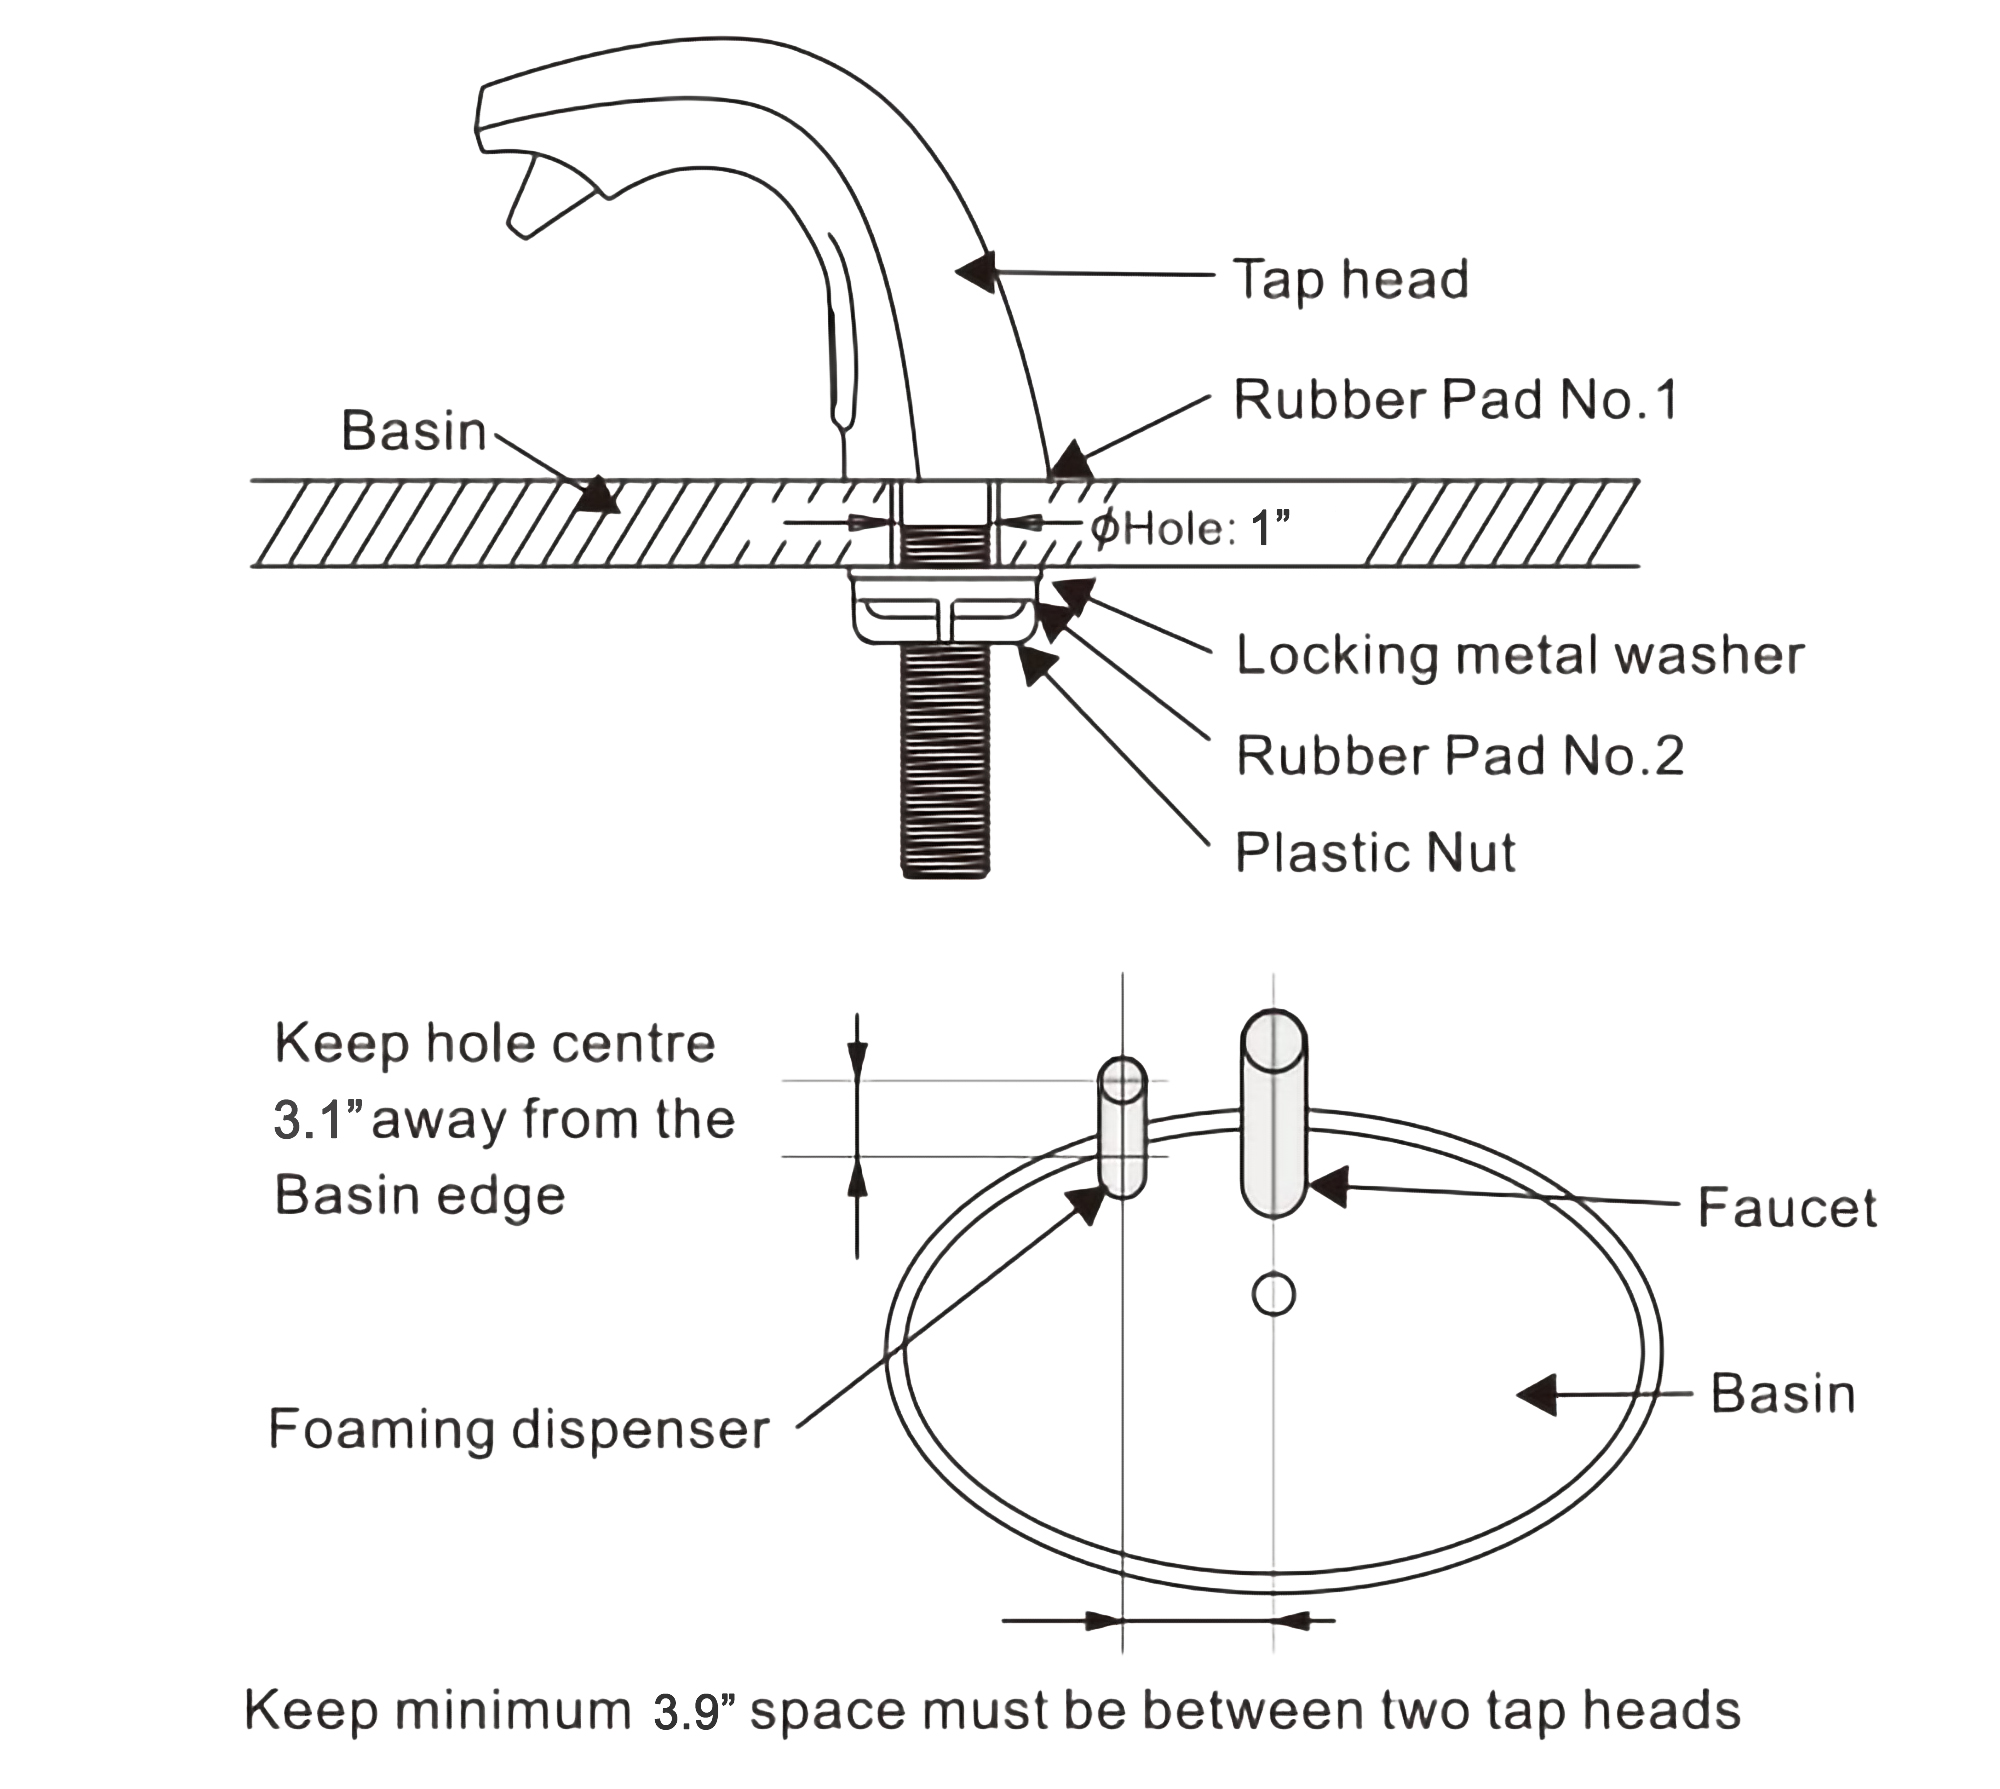
Drill 1" (25mm) hole from the surface of the basin,
next to the water tap, insert the soap dispenser shank with one rubber pad No.1 into the Hole from the top of the counter.
Secure the foam soap dispenser from underneath using Stainless steel locking washer, rubber pad No.2, metal washer and plastic nut.
Note:
1. Keep the foam tap next to the water tap more than 4”.
2. The foam tap shall be installed close to the edge of sink less than 3.1”.
|
|
|
|
|
Soap Dispenser Installation Instructions
|
|
|
|
|
|
|
|
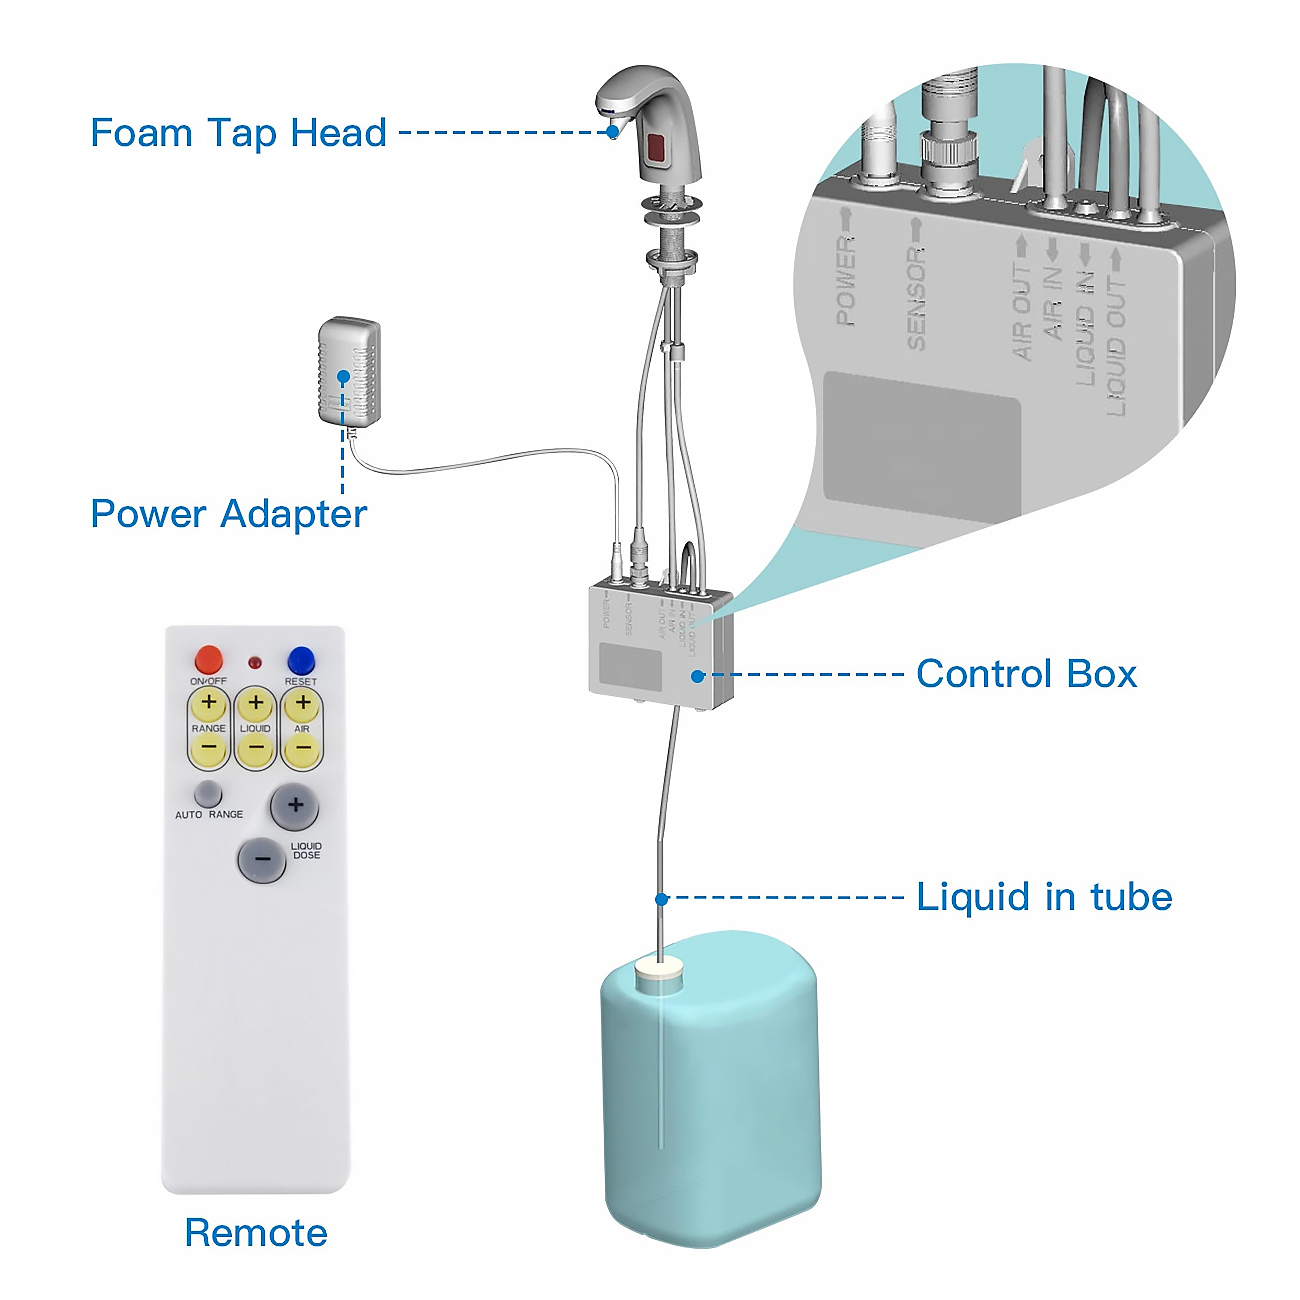
How To Connect With The Control Box
Step 4:
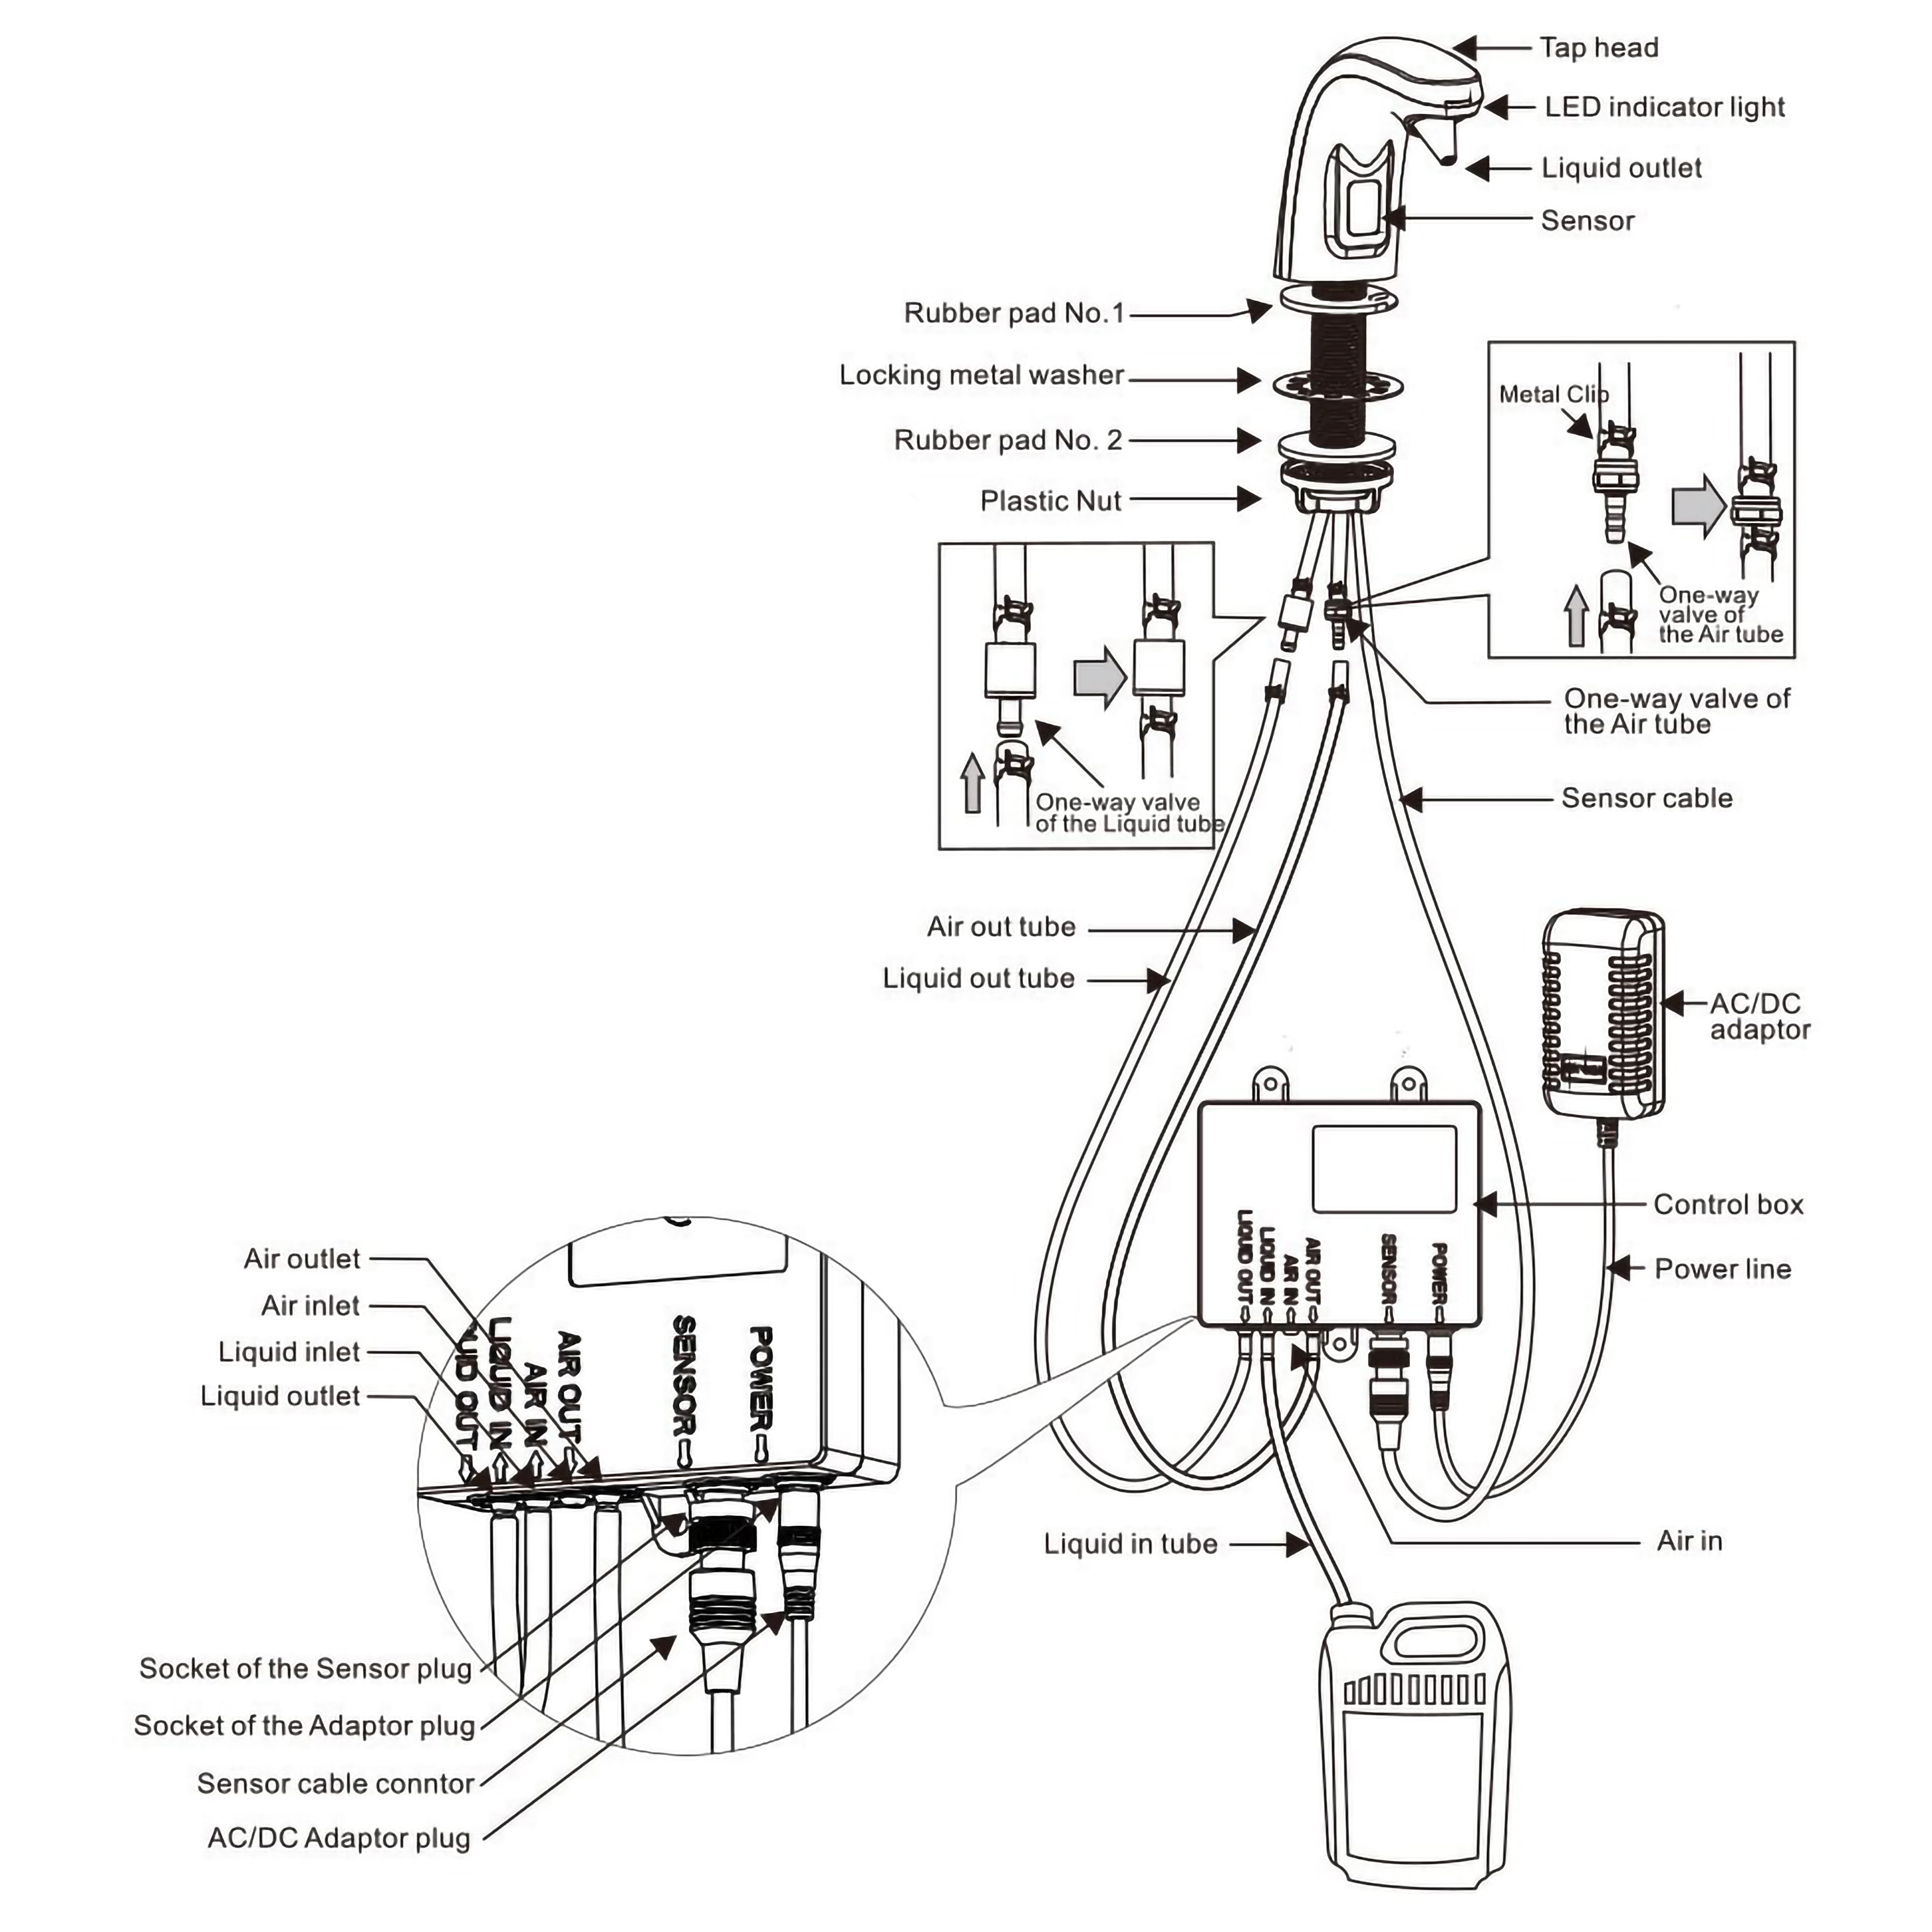
Please refer to the figure:
1. Take the prepared long PE tube, cut into 3 pieces according to your demand. One tube is for liquid out, another tube is for air out, the last tube is for liquid in.
2. Using the first tube; connect one end to the liquid tube from the dispenser. Connect the other end to the liquid out on the control box.
3. Connect the second tube; insert one end to the air tube from the dispenser. Connect the other end to the air out on the control box.
4. Using the third tube; connect one end to the liquid in on the control box. Insert the other end in the foam soap tank. (Cut the tube if necessary). Secure all connections using metal clips provided in the package.
5. Connect sensor cable from the dispenser to the sensor on the control box.
6. To power up the control box, connect AC/DC adaptor.
ATTENTION: Please ensure the air inlet is clear.
|
soap dispenser
|
|
|
How To Use Instructions:
|
|
Step 5:
|
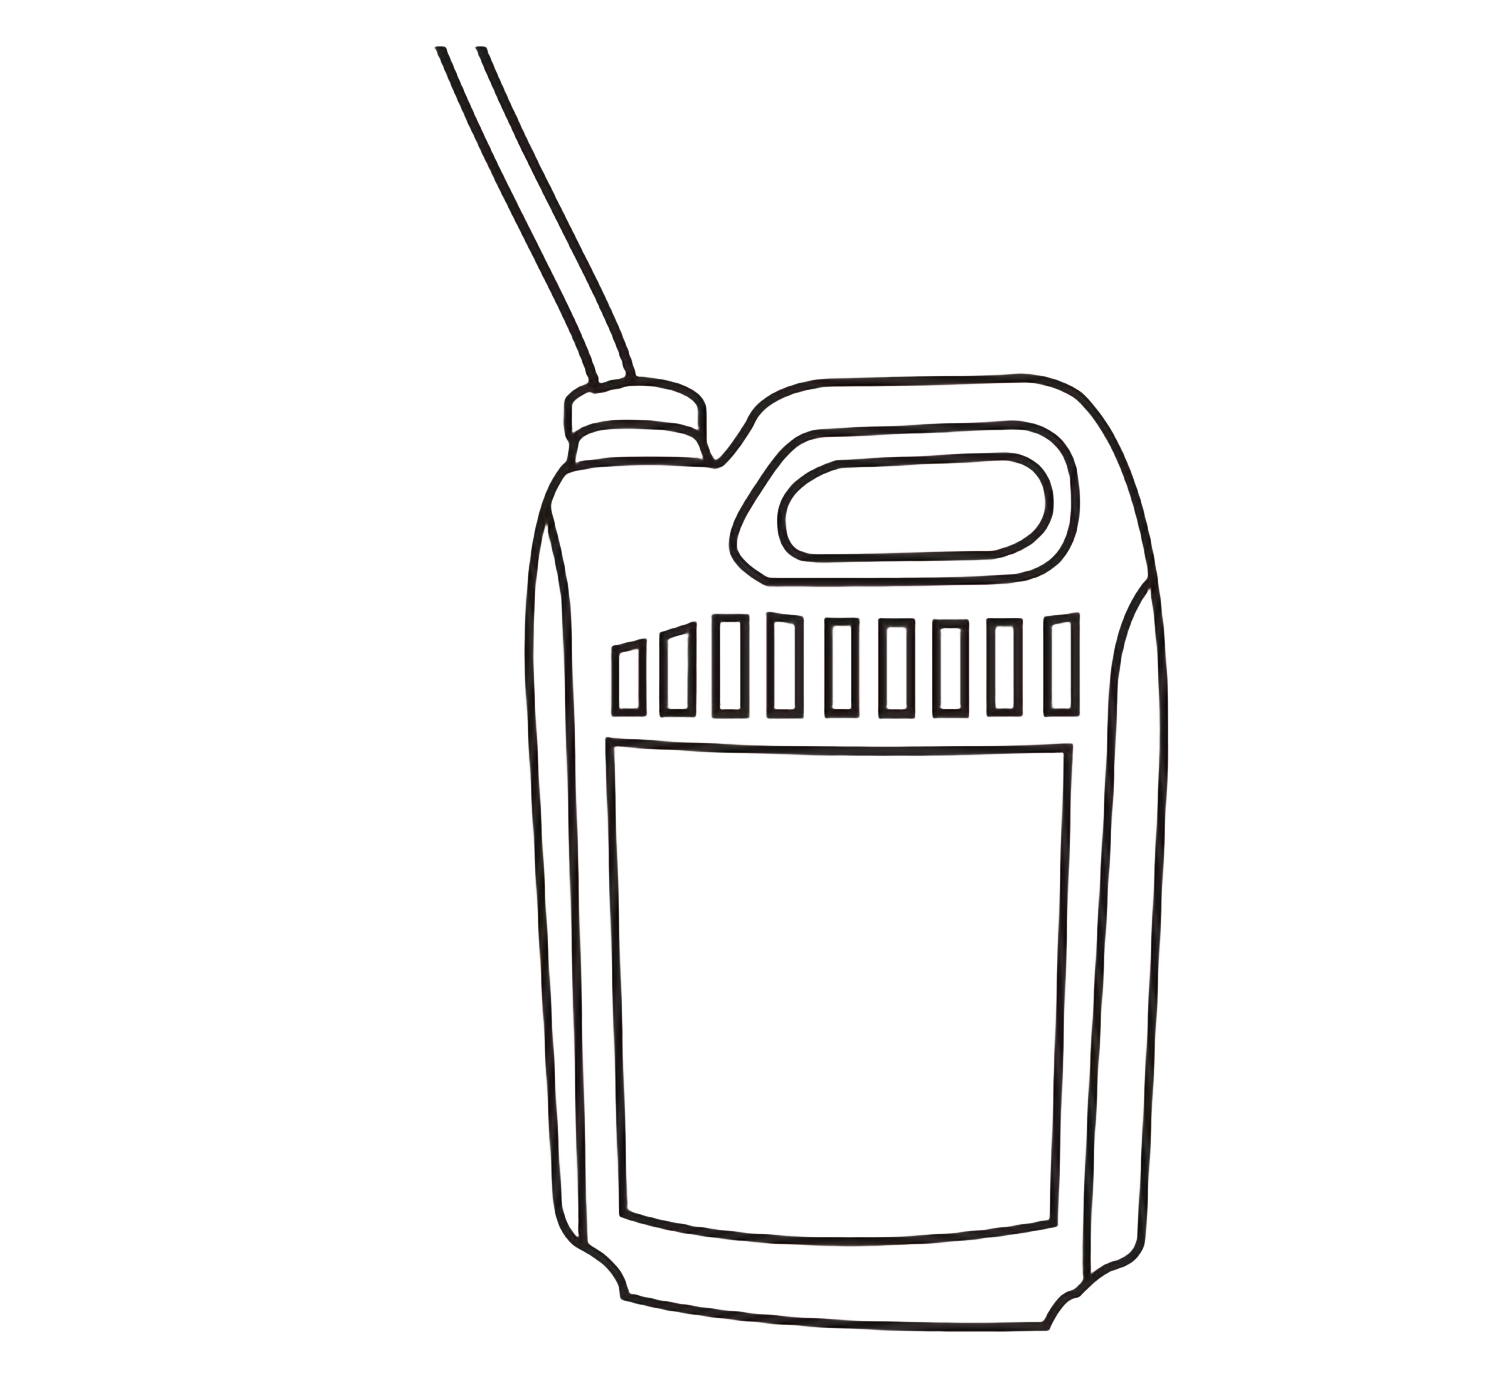
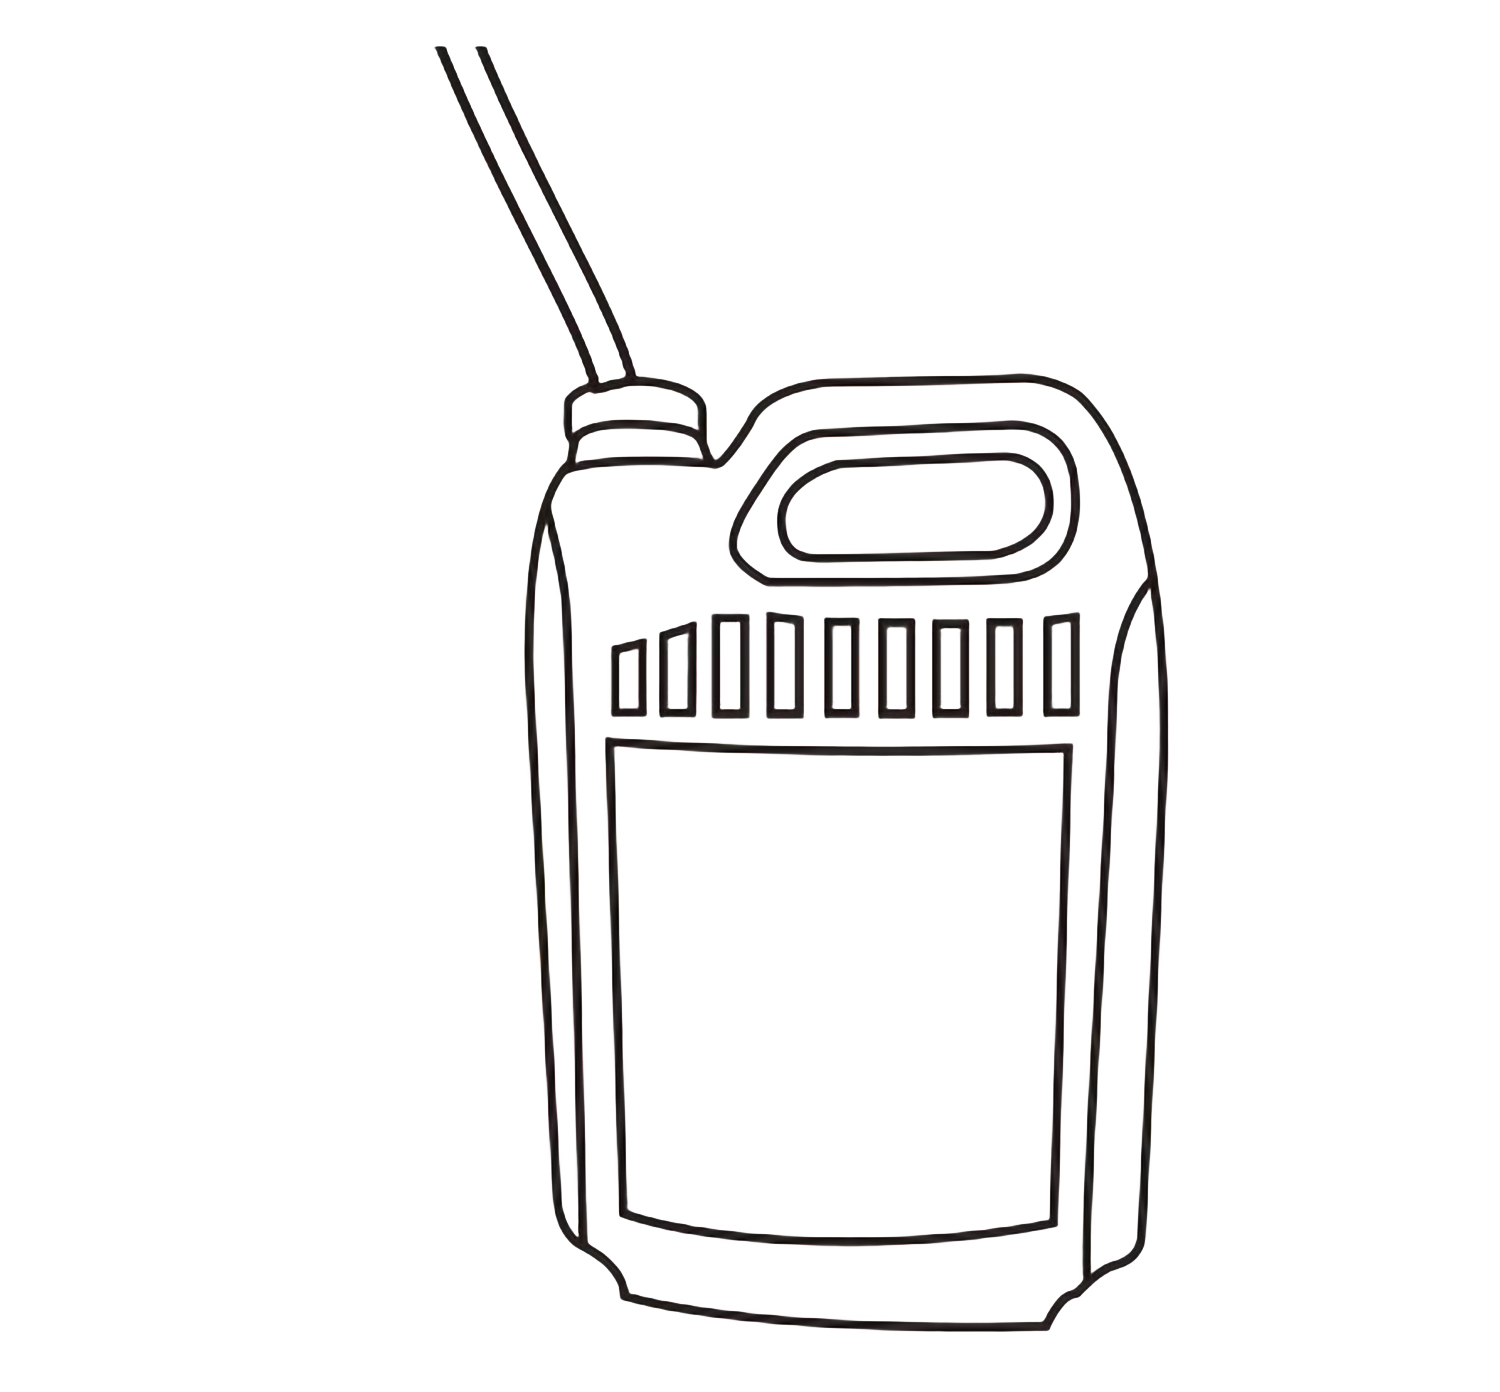
Fill the foam soap into the tank.
(Use only CMSI specially formulated premium foam soap)
|
|
|
|
Soap Dispenser Installation Instructions
|
|
|
|
|
|
Step 6:
|
|
Plugged the adapter plug into the socket.
|
|

|
|
Soap Dispenser Installation Instructions
|
|
|
|
|
|
Step 7:
|
|
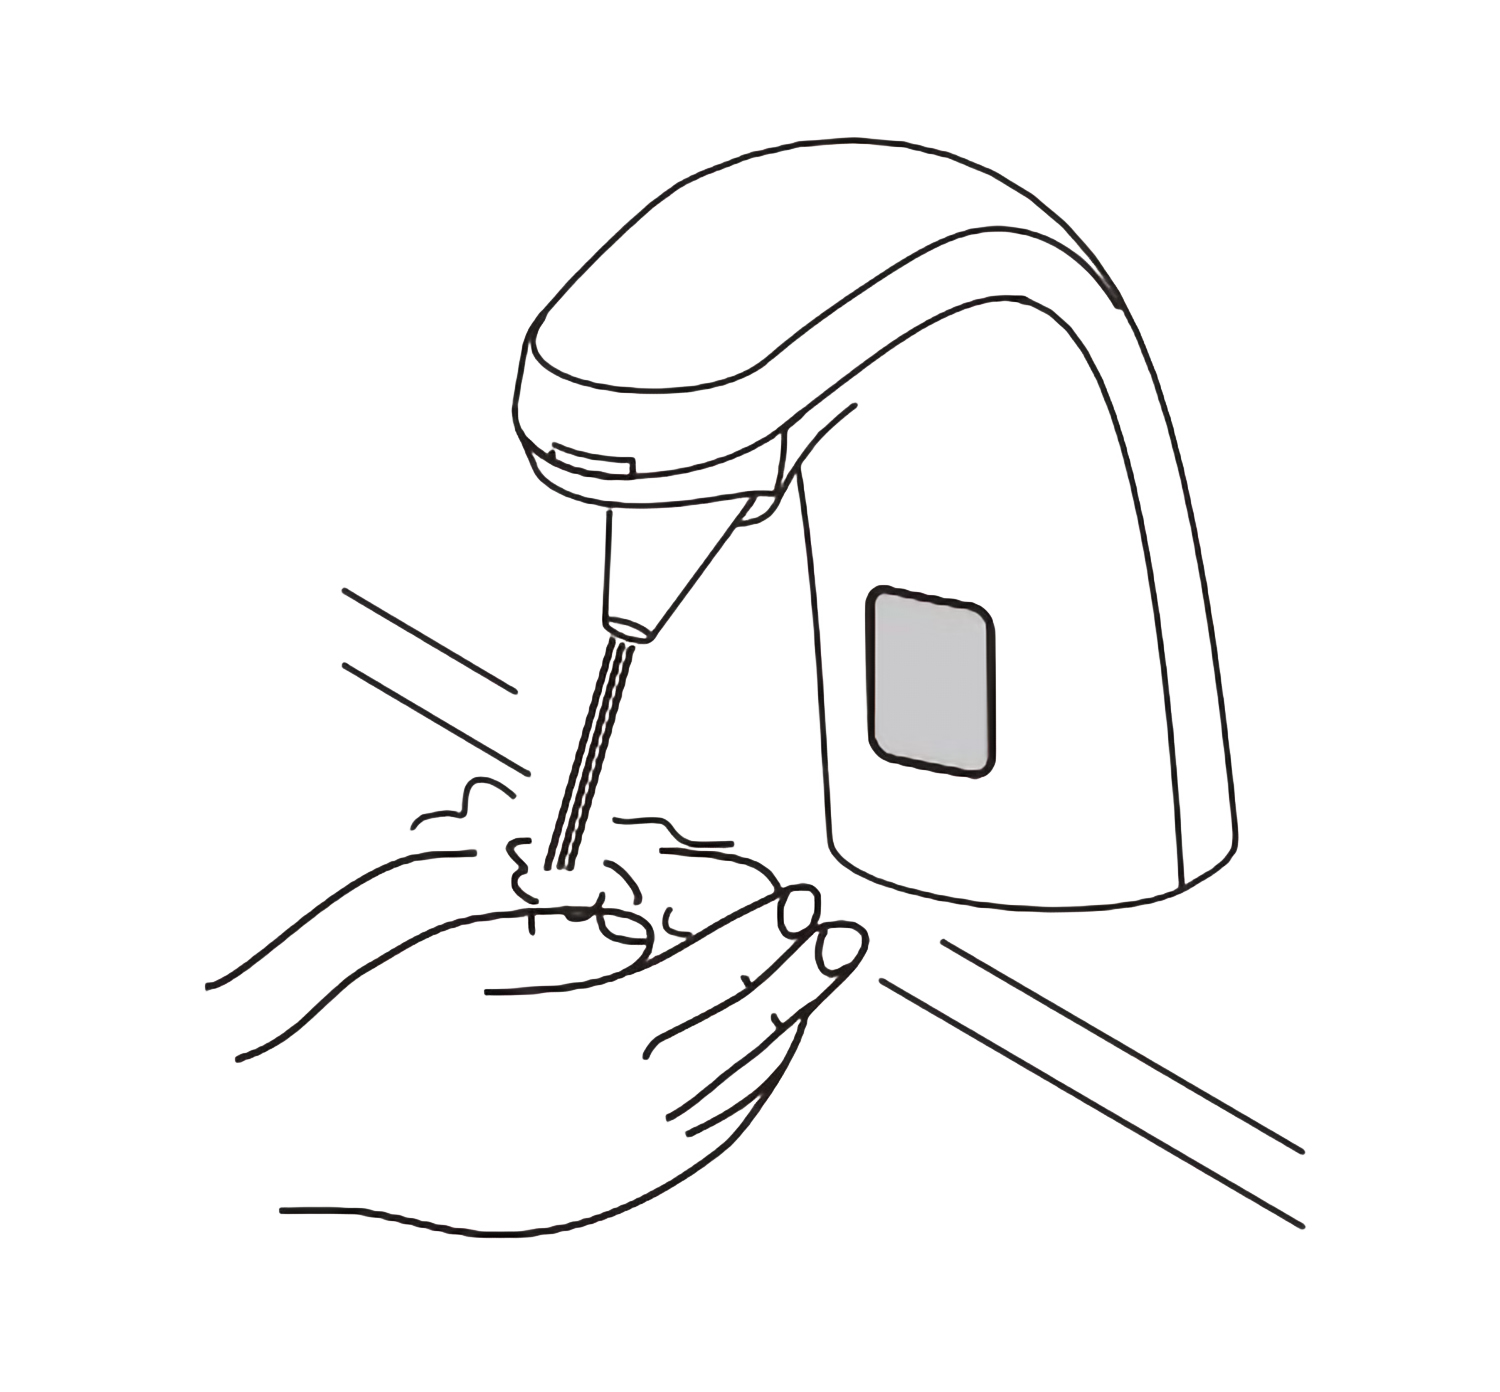
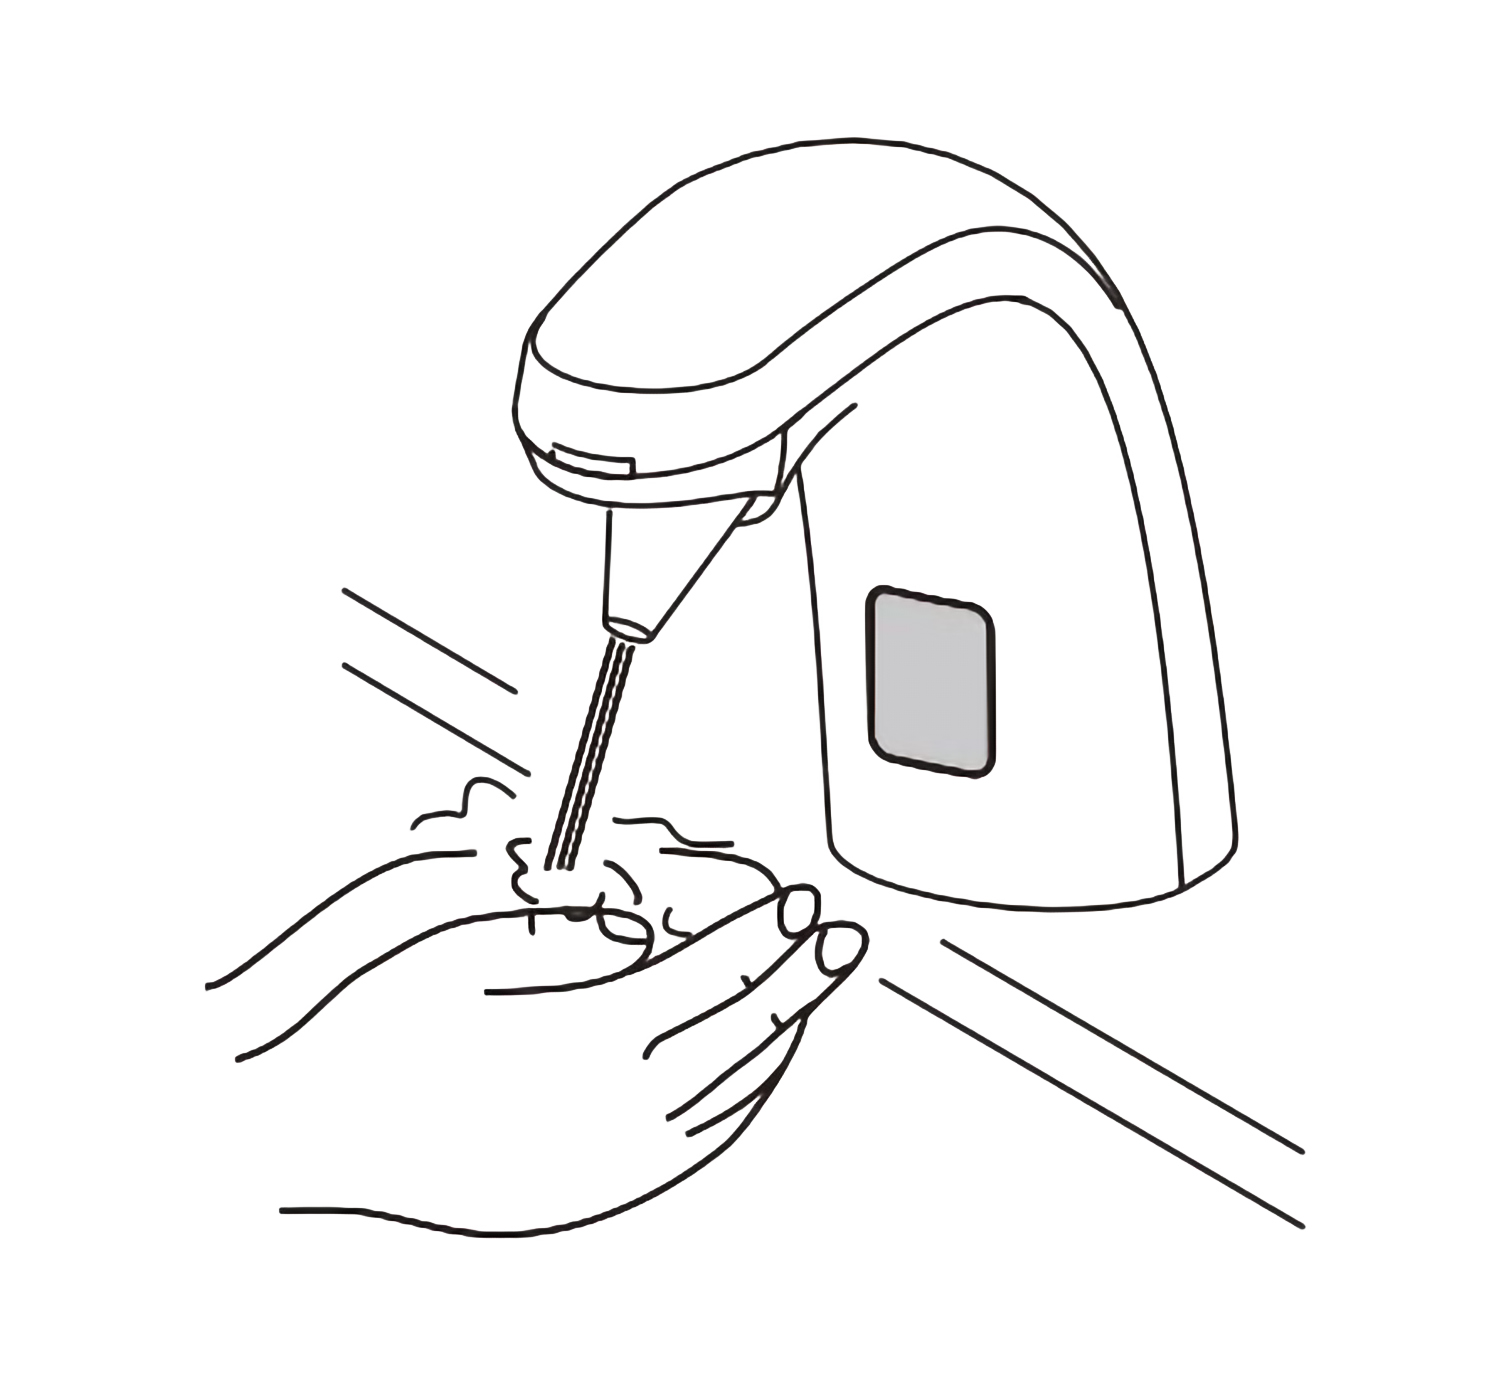
Place your hands under the sensor area until foam comes out.
|
|
|
|
Soap Dispenser Installation Instructions
|
|
|
|
|
|
Step 8:
|
|
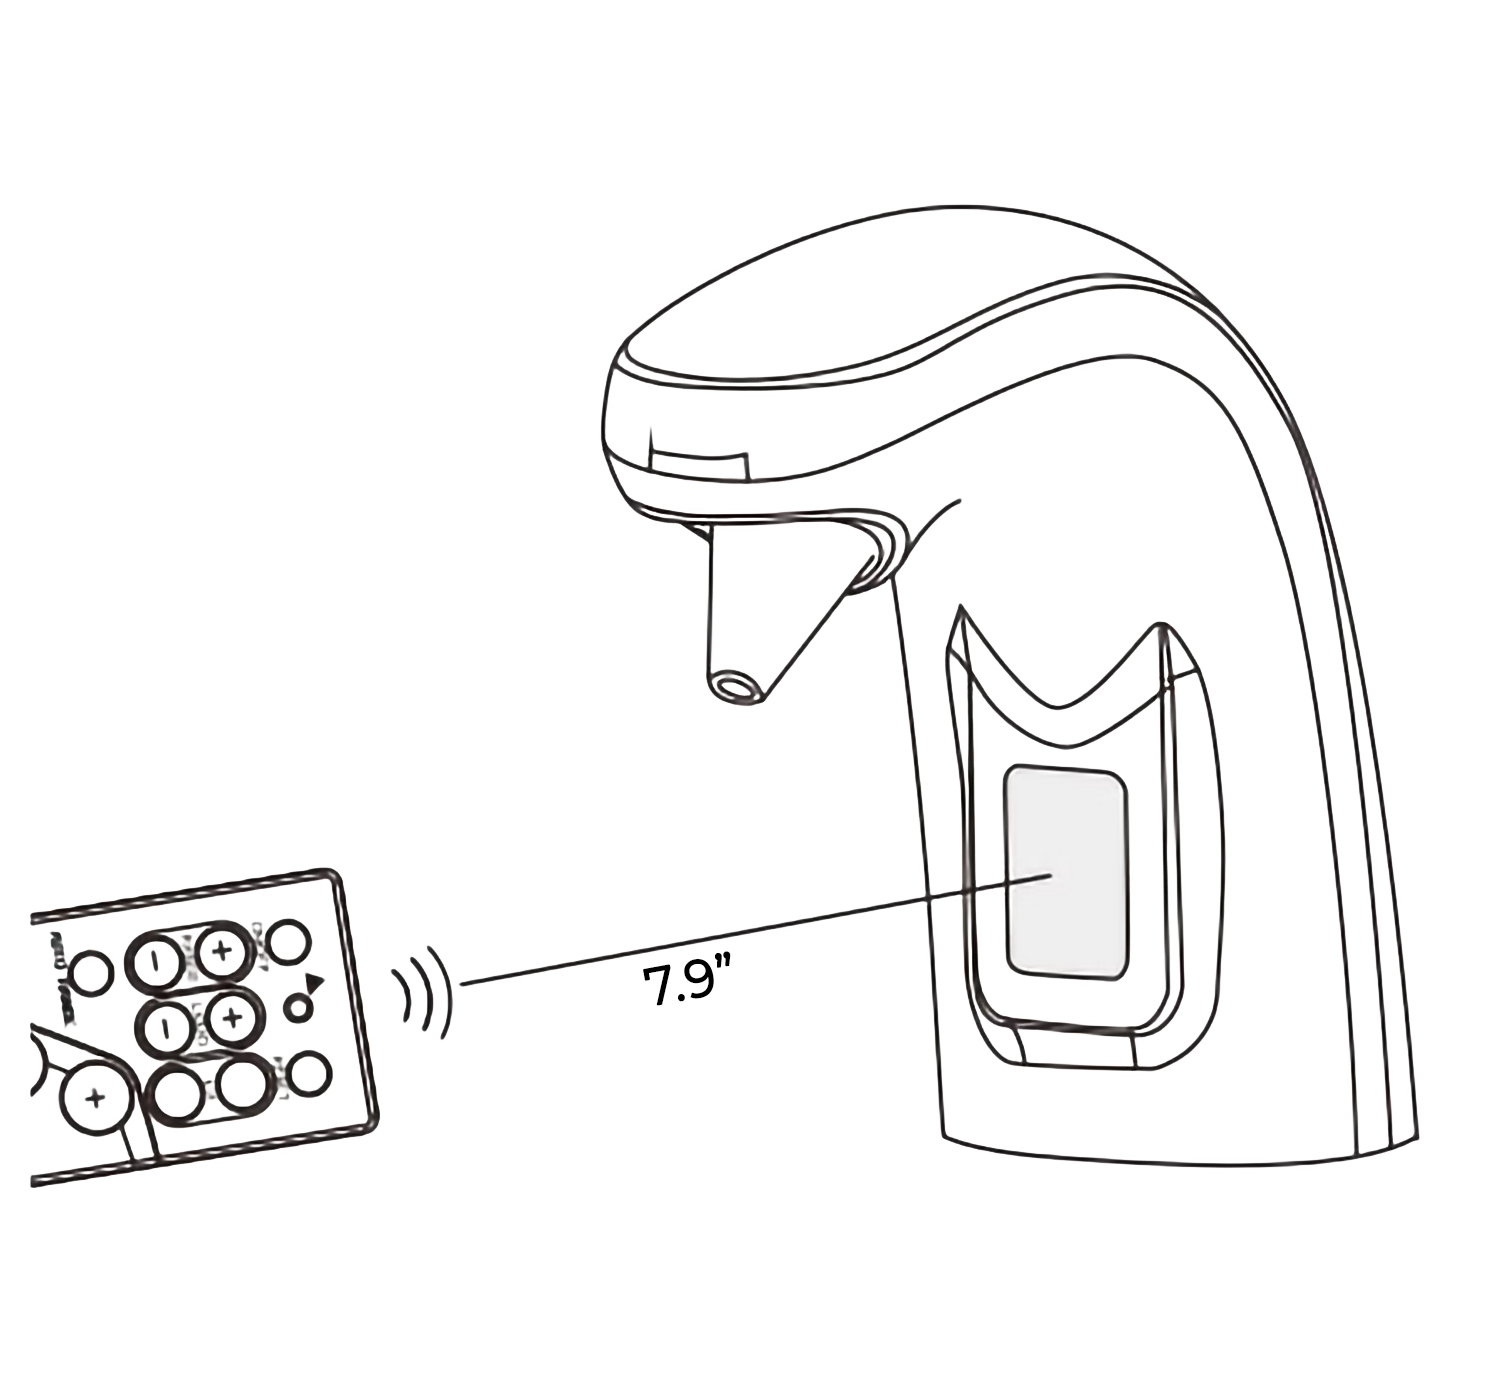
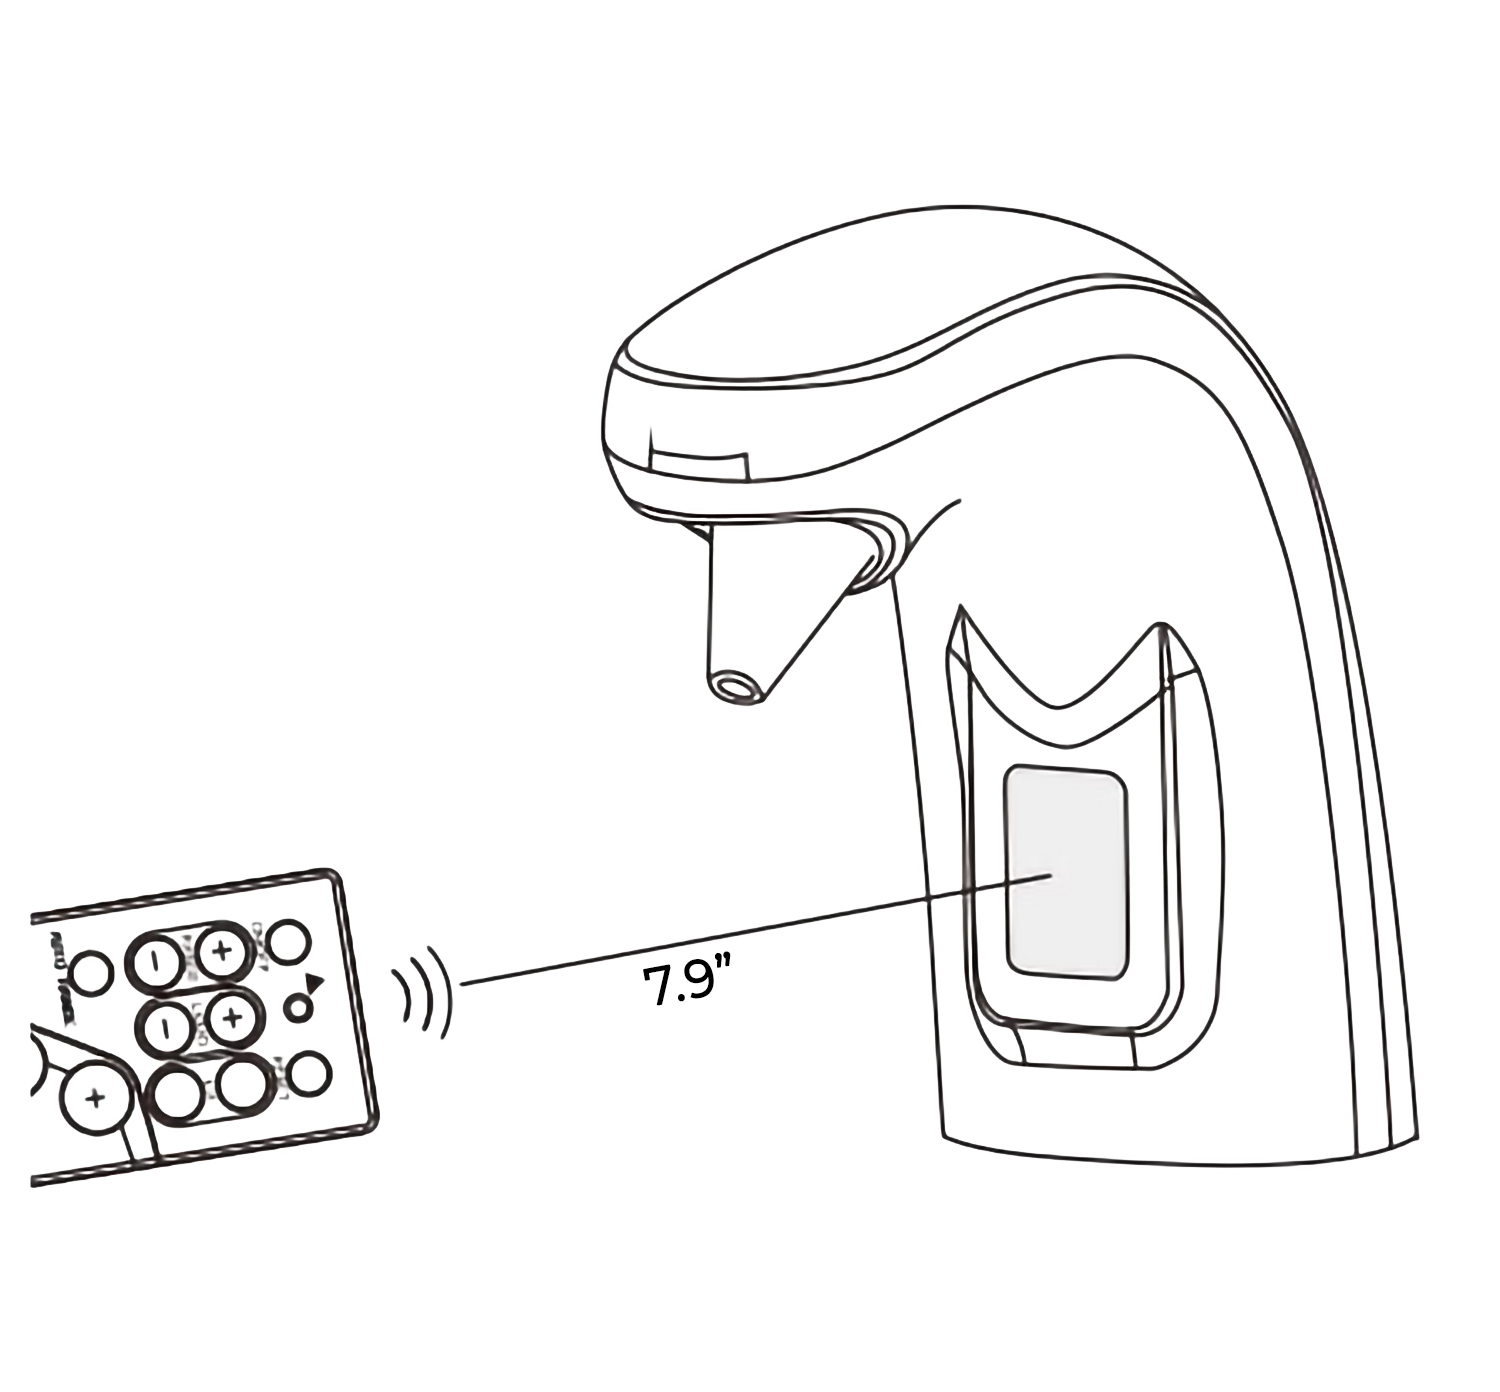
The foam dosage can be adjusted through the remote control.
|
|
|
|
Soap Dispenser Installation Instructions
|
|
|
|