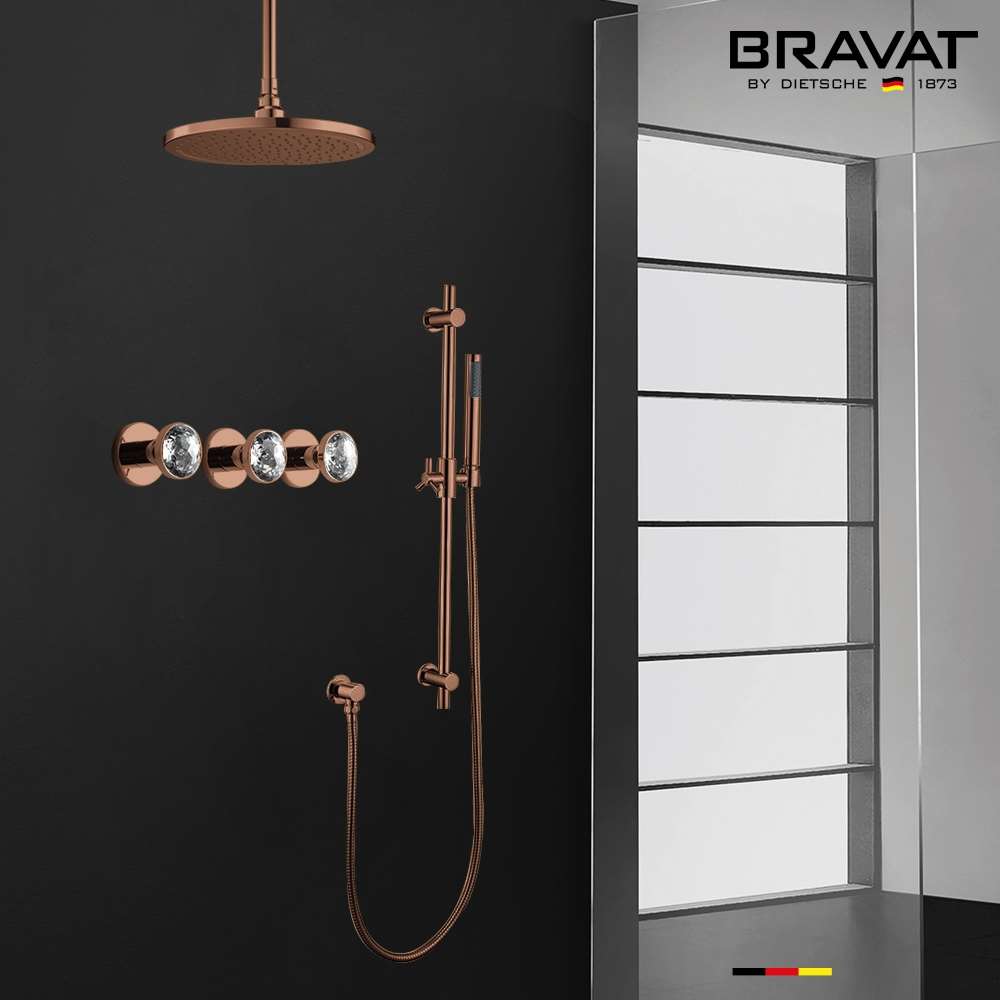
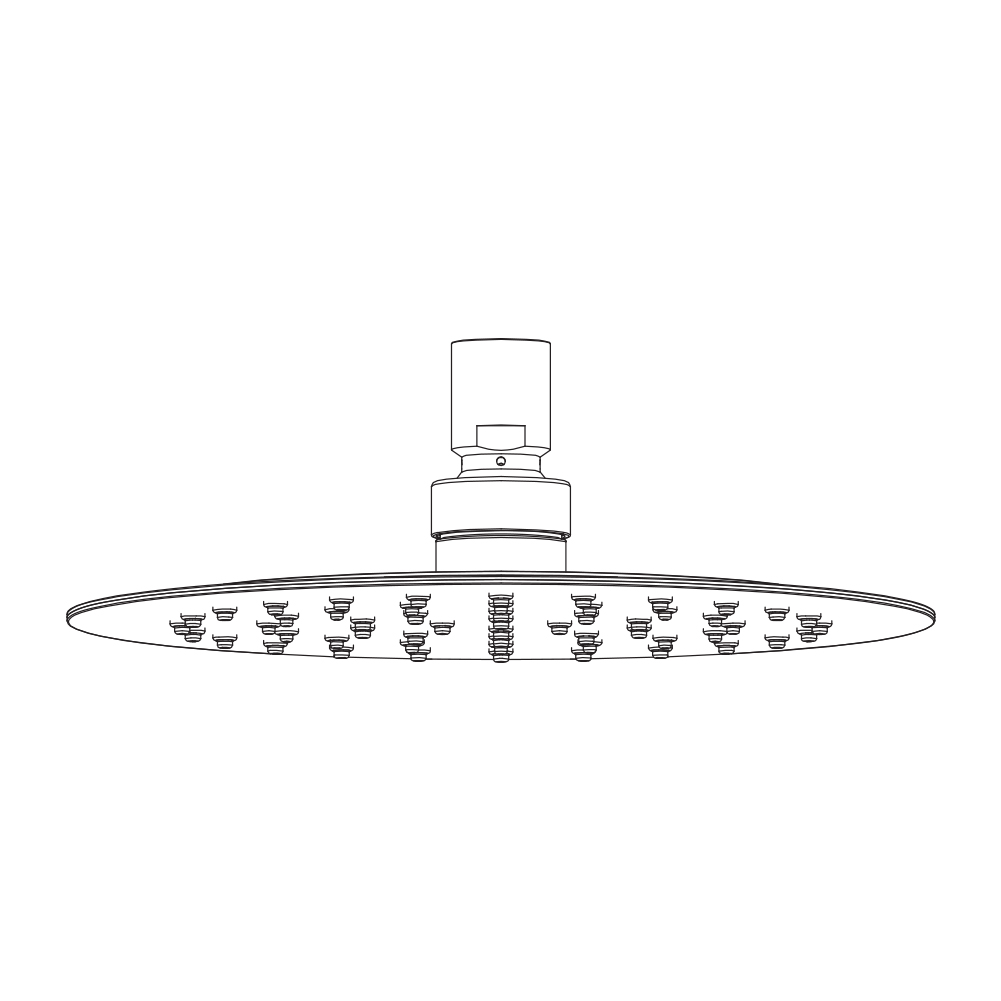
Bravat Light Oil Rubbed Bronze Ceiling Mount Shower Set with Rainfall Shower Head
Enjoy the ultimate showering experience with the Bravat Thermostatic mixer oil rubbed bronze ceiling mount shower set. Durable, dependable and with the luxury of a solid brass rough-in valve. This is one of the trendiest finishes across decor styles in the bathroom. The showerhead has an elegant rainfall flowing ideal for hand bathing. This has an elegant design and elevates the appeal of your decor made from the highest quality and for great tastes. It comes super seal technology inside, capable of delivering superior performance with solid construction for long durability that will upgrade your bathroom with a modern and cool look for a long period of time.
Bravat Light Oil Rubbed Bronze Ceiling Mount Shower Set with Rainfall Shower Head Features:
Brand Name: Bravat
Model Number: FS6105
Type: Shower Set
Finish: Light Oil Rubbed Bronze
Design: Lightweight
Resistance: Corrosion/Durable
Size: 7.87" X9.84" (200X250mm)
Water Flow Rate: 5(L/Min) /1.3 GPM
Pressure: Balanced Brass Valve
Balance Control: German-made Brass Valve Water pressure
Before you begin, please read the installation instructions below. Observe all local building and safety codes.
Unpack and inspect the product for any shipping damages. If you find damages, do not install.
Please note all showers must be installed by a professional and certified plumber otherwise warranty might be voided.
. .
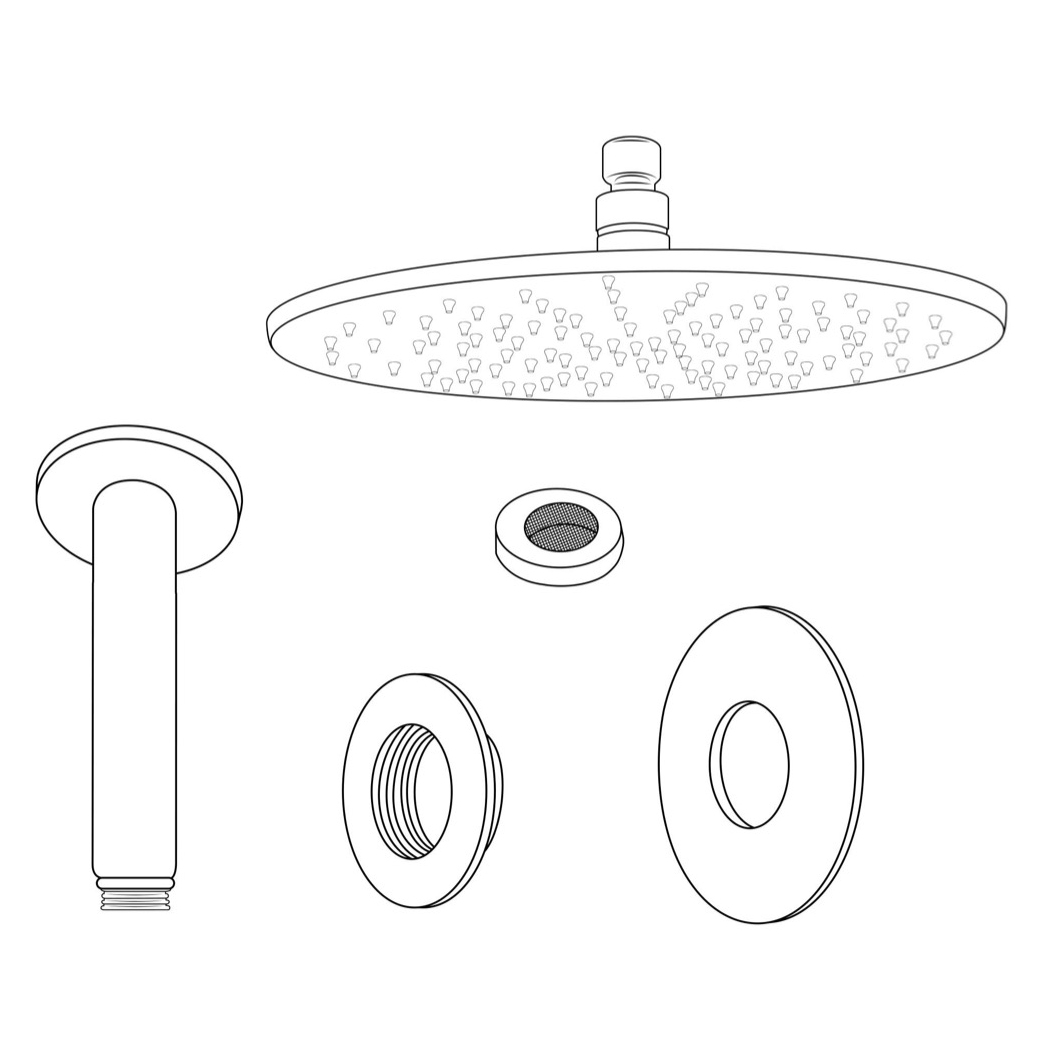
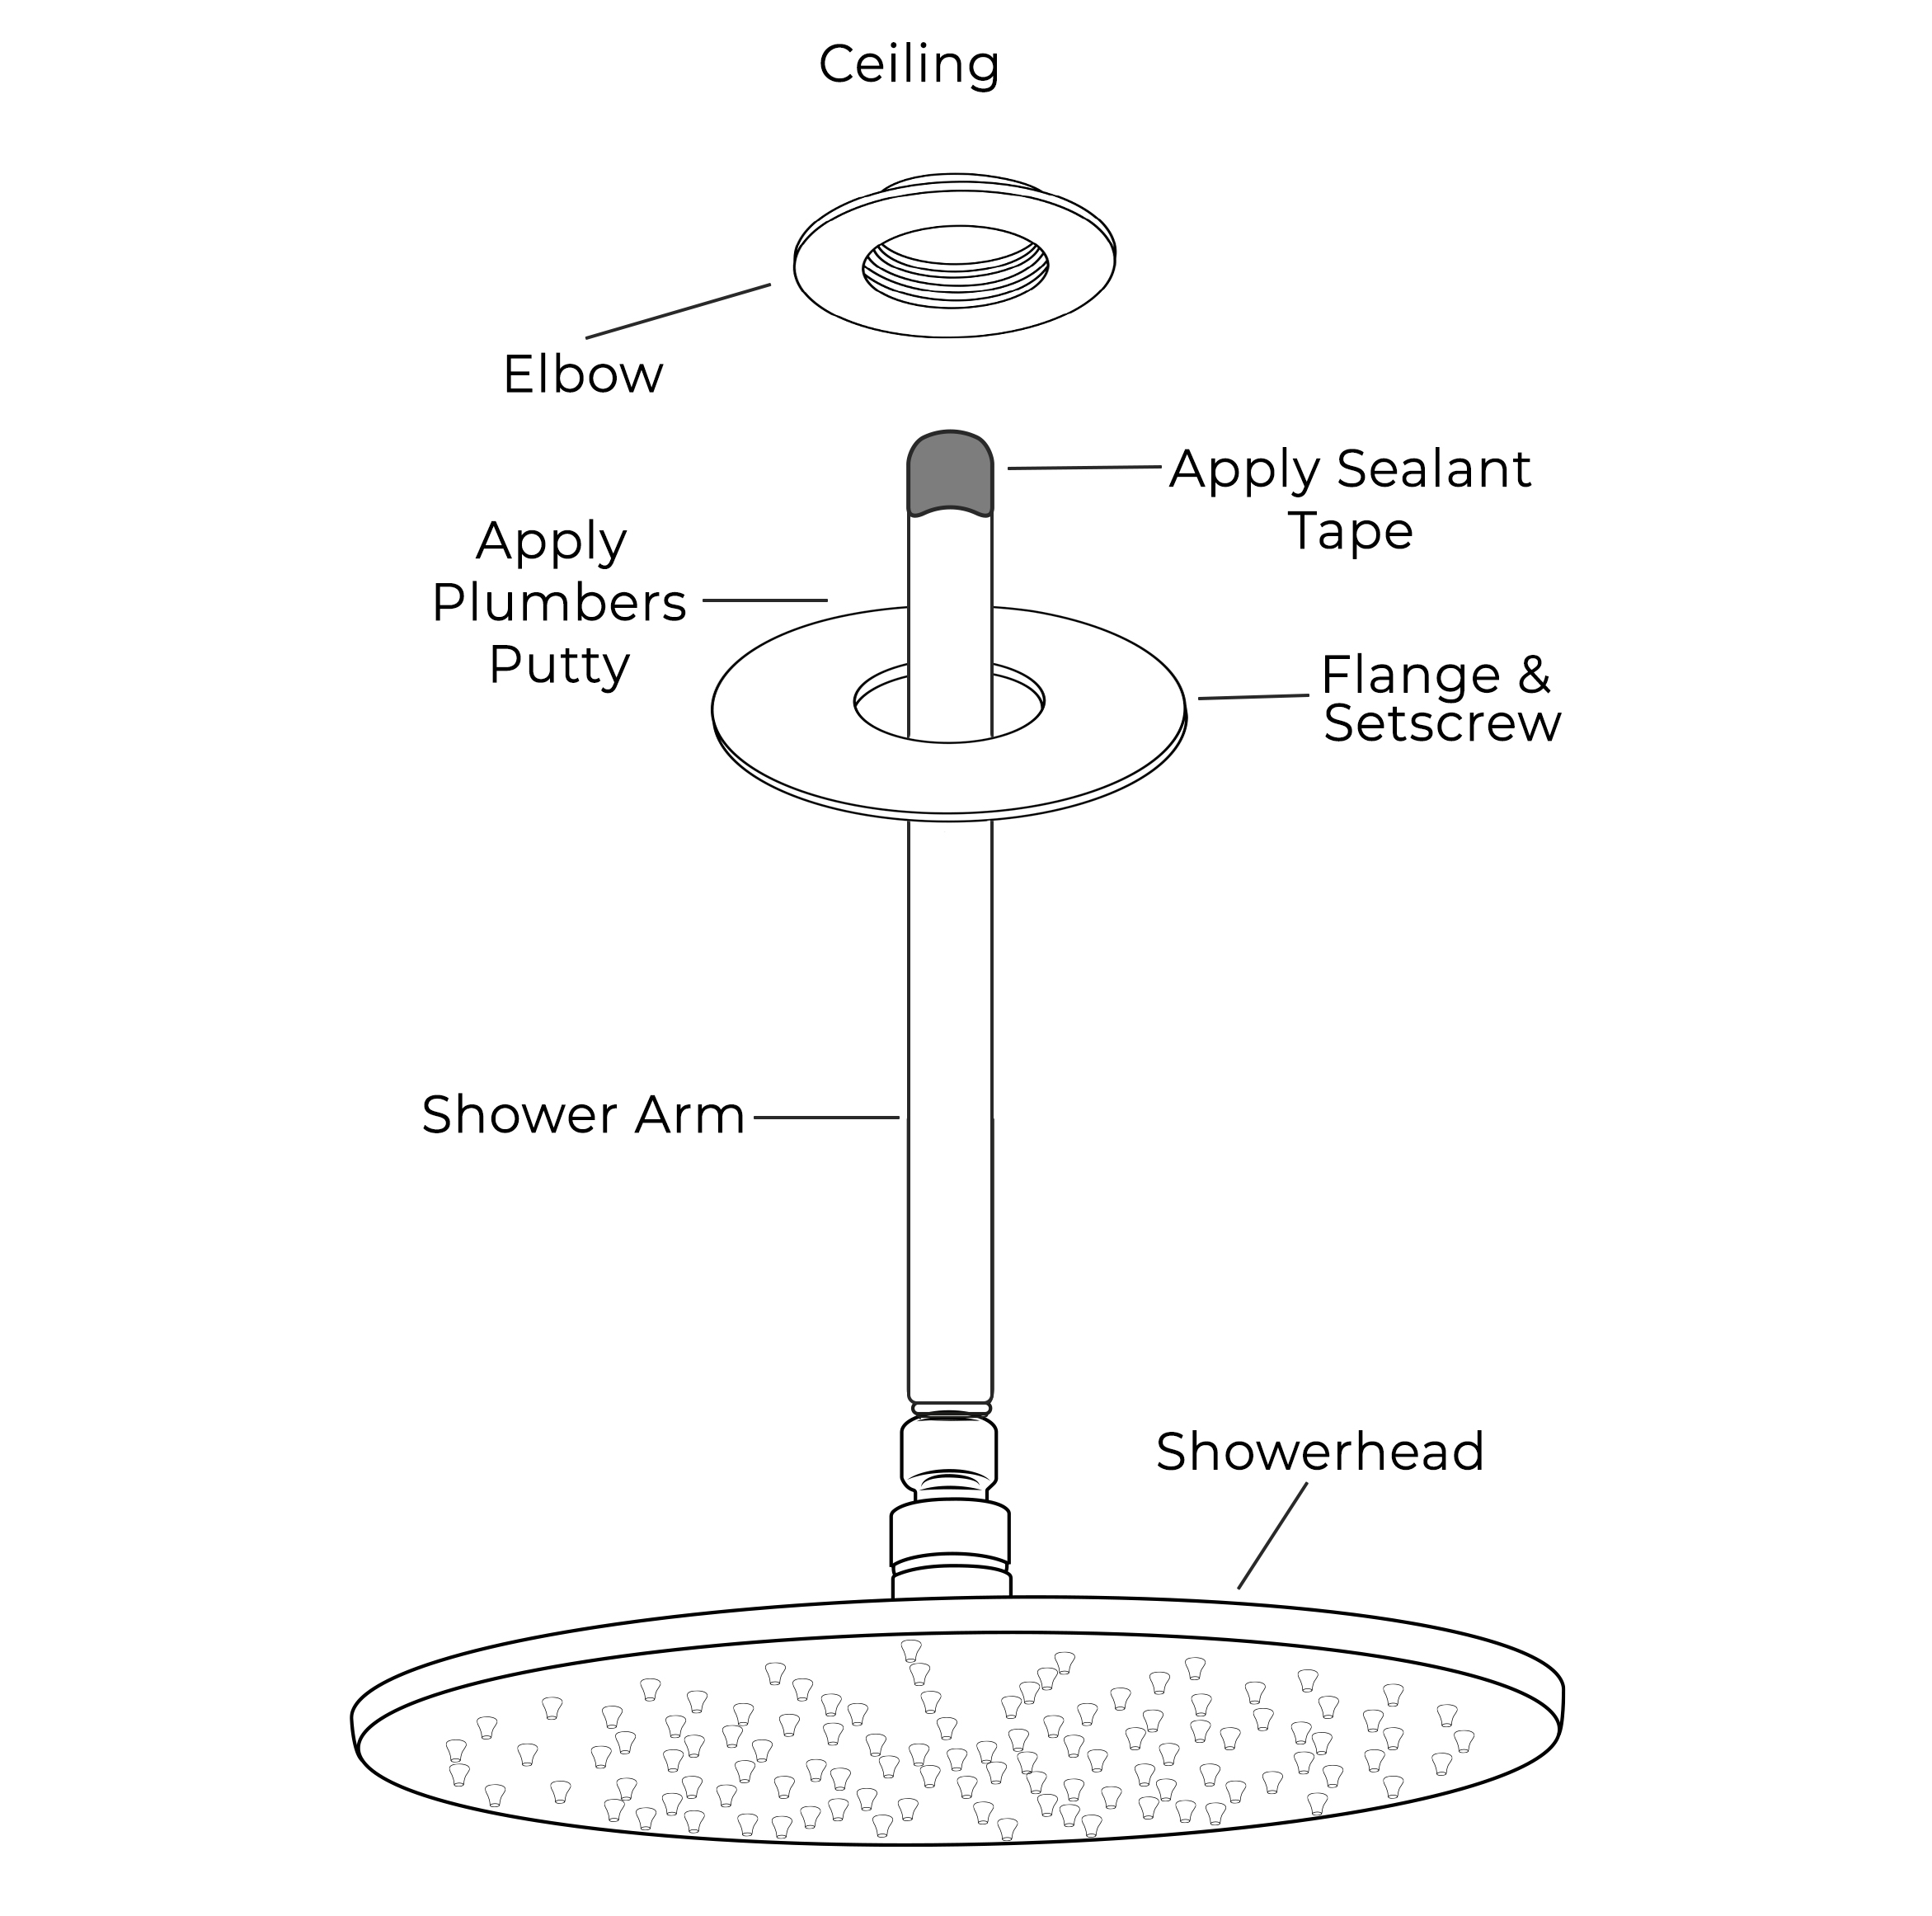
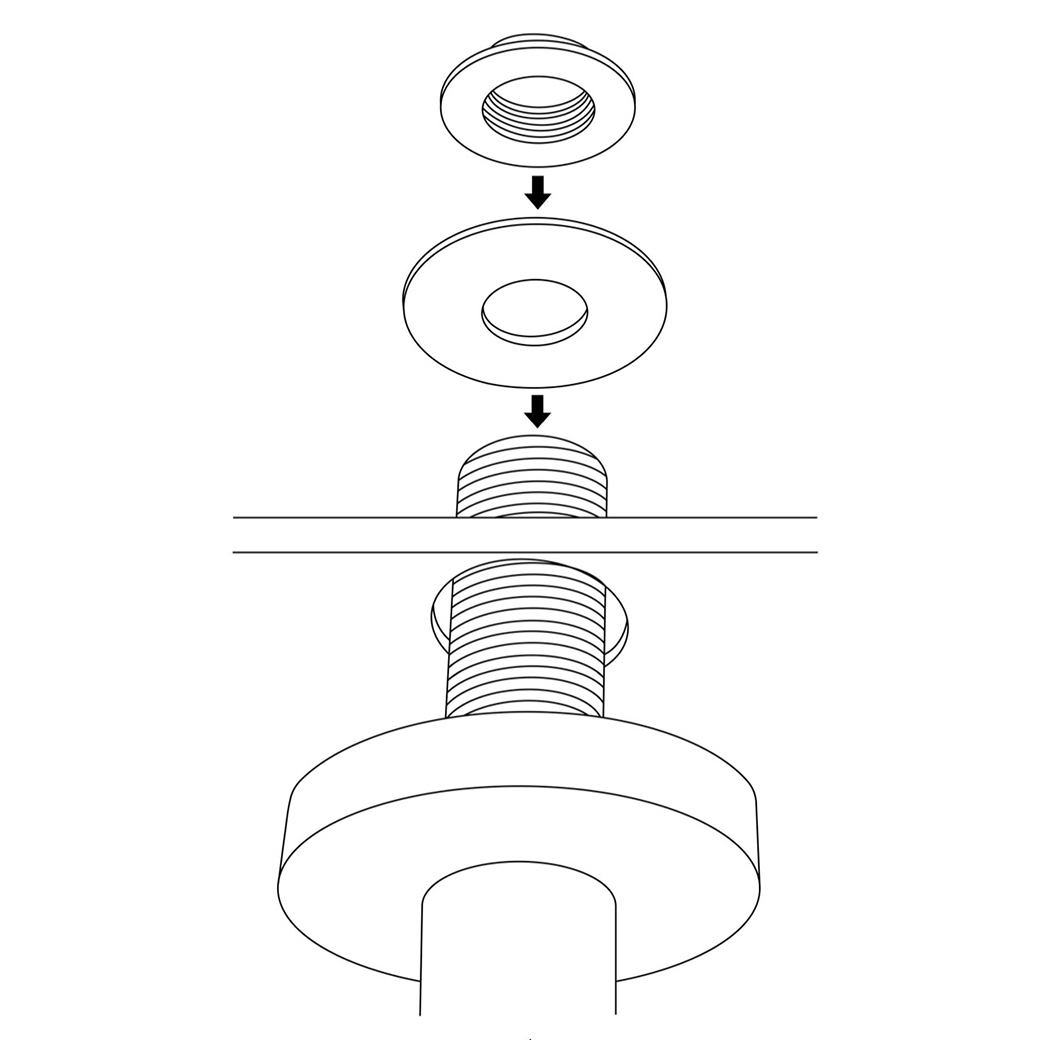
Shower Head Installation Instructions
Step 1:
Step 2:
shower
Step 3:
Step 4:
Step 5:
Step 6:
1. Attach the escutcheon to the shower arm. 2. Apply Teflon tape to the threaded tailpipe of the shower arm. 3. Screw the shower arm tightly into the female fitting in the ceiling. 4. Press the escutcheon against the finished ceiling.
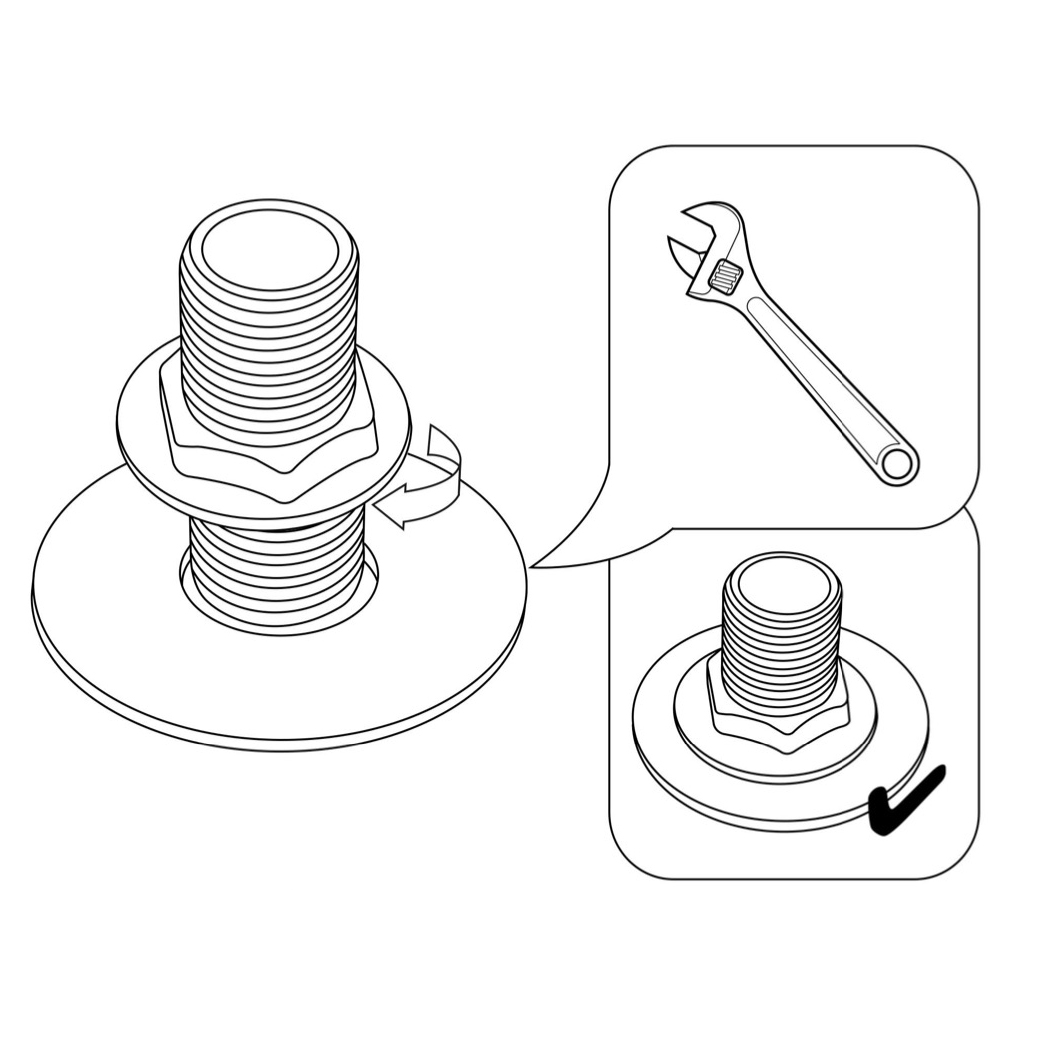
Step 1: Take Out the Old Shower Head You can easily remove it by hand, but depending on how long the rain showerhead has been installed, you might need to use an adjustable wrench. Hence, if you find it difficult to remove, rotate the showerhead with an adjustable wrench in a counterclockwise direction to unscrew it.
Step 2: Keep the Shower Arm Clean and In Good Shape After you have removed the head, check the shower arm threads for any debris and old Teflon tape. If you find any, remove it and clean them off thoroughly. It’s best to use a microfiber cloth when cleaning the thread because it removes Teflon tape perfectly and works great to pick up tiny grits. Once you’re done cleaning, check if it is corroded or leaking. For damaged threads, it will be best you replace it entirely so you can have a comfortable shower experience any time.
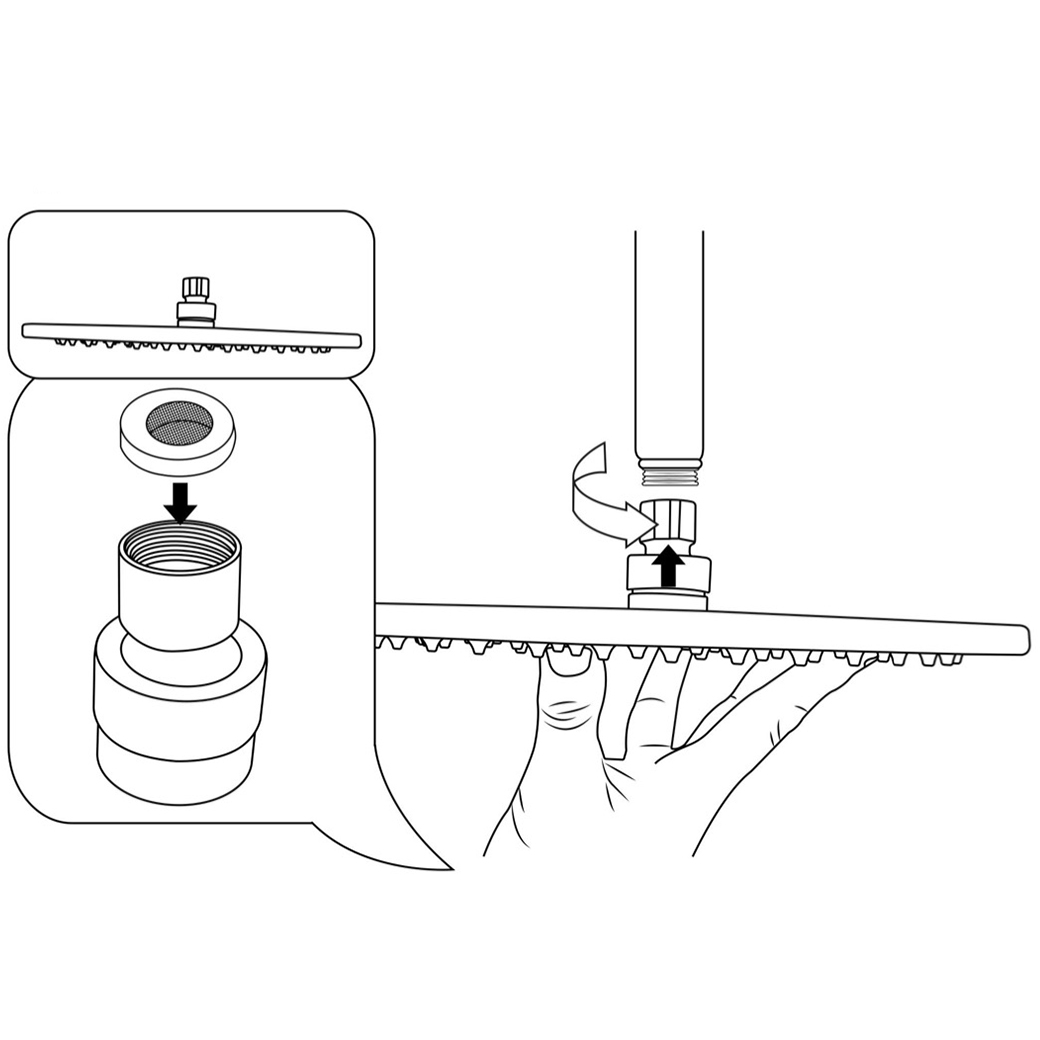
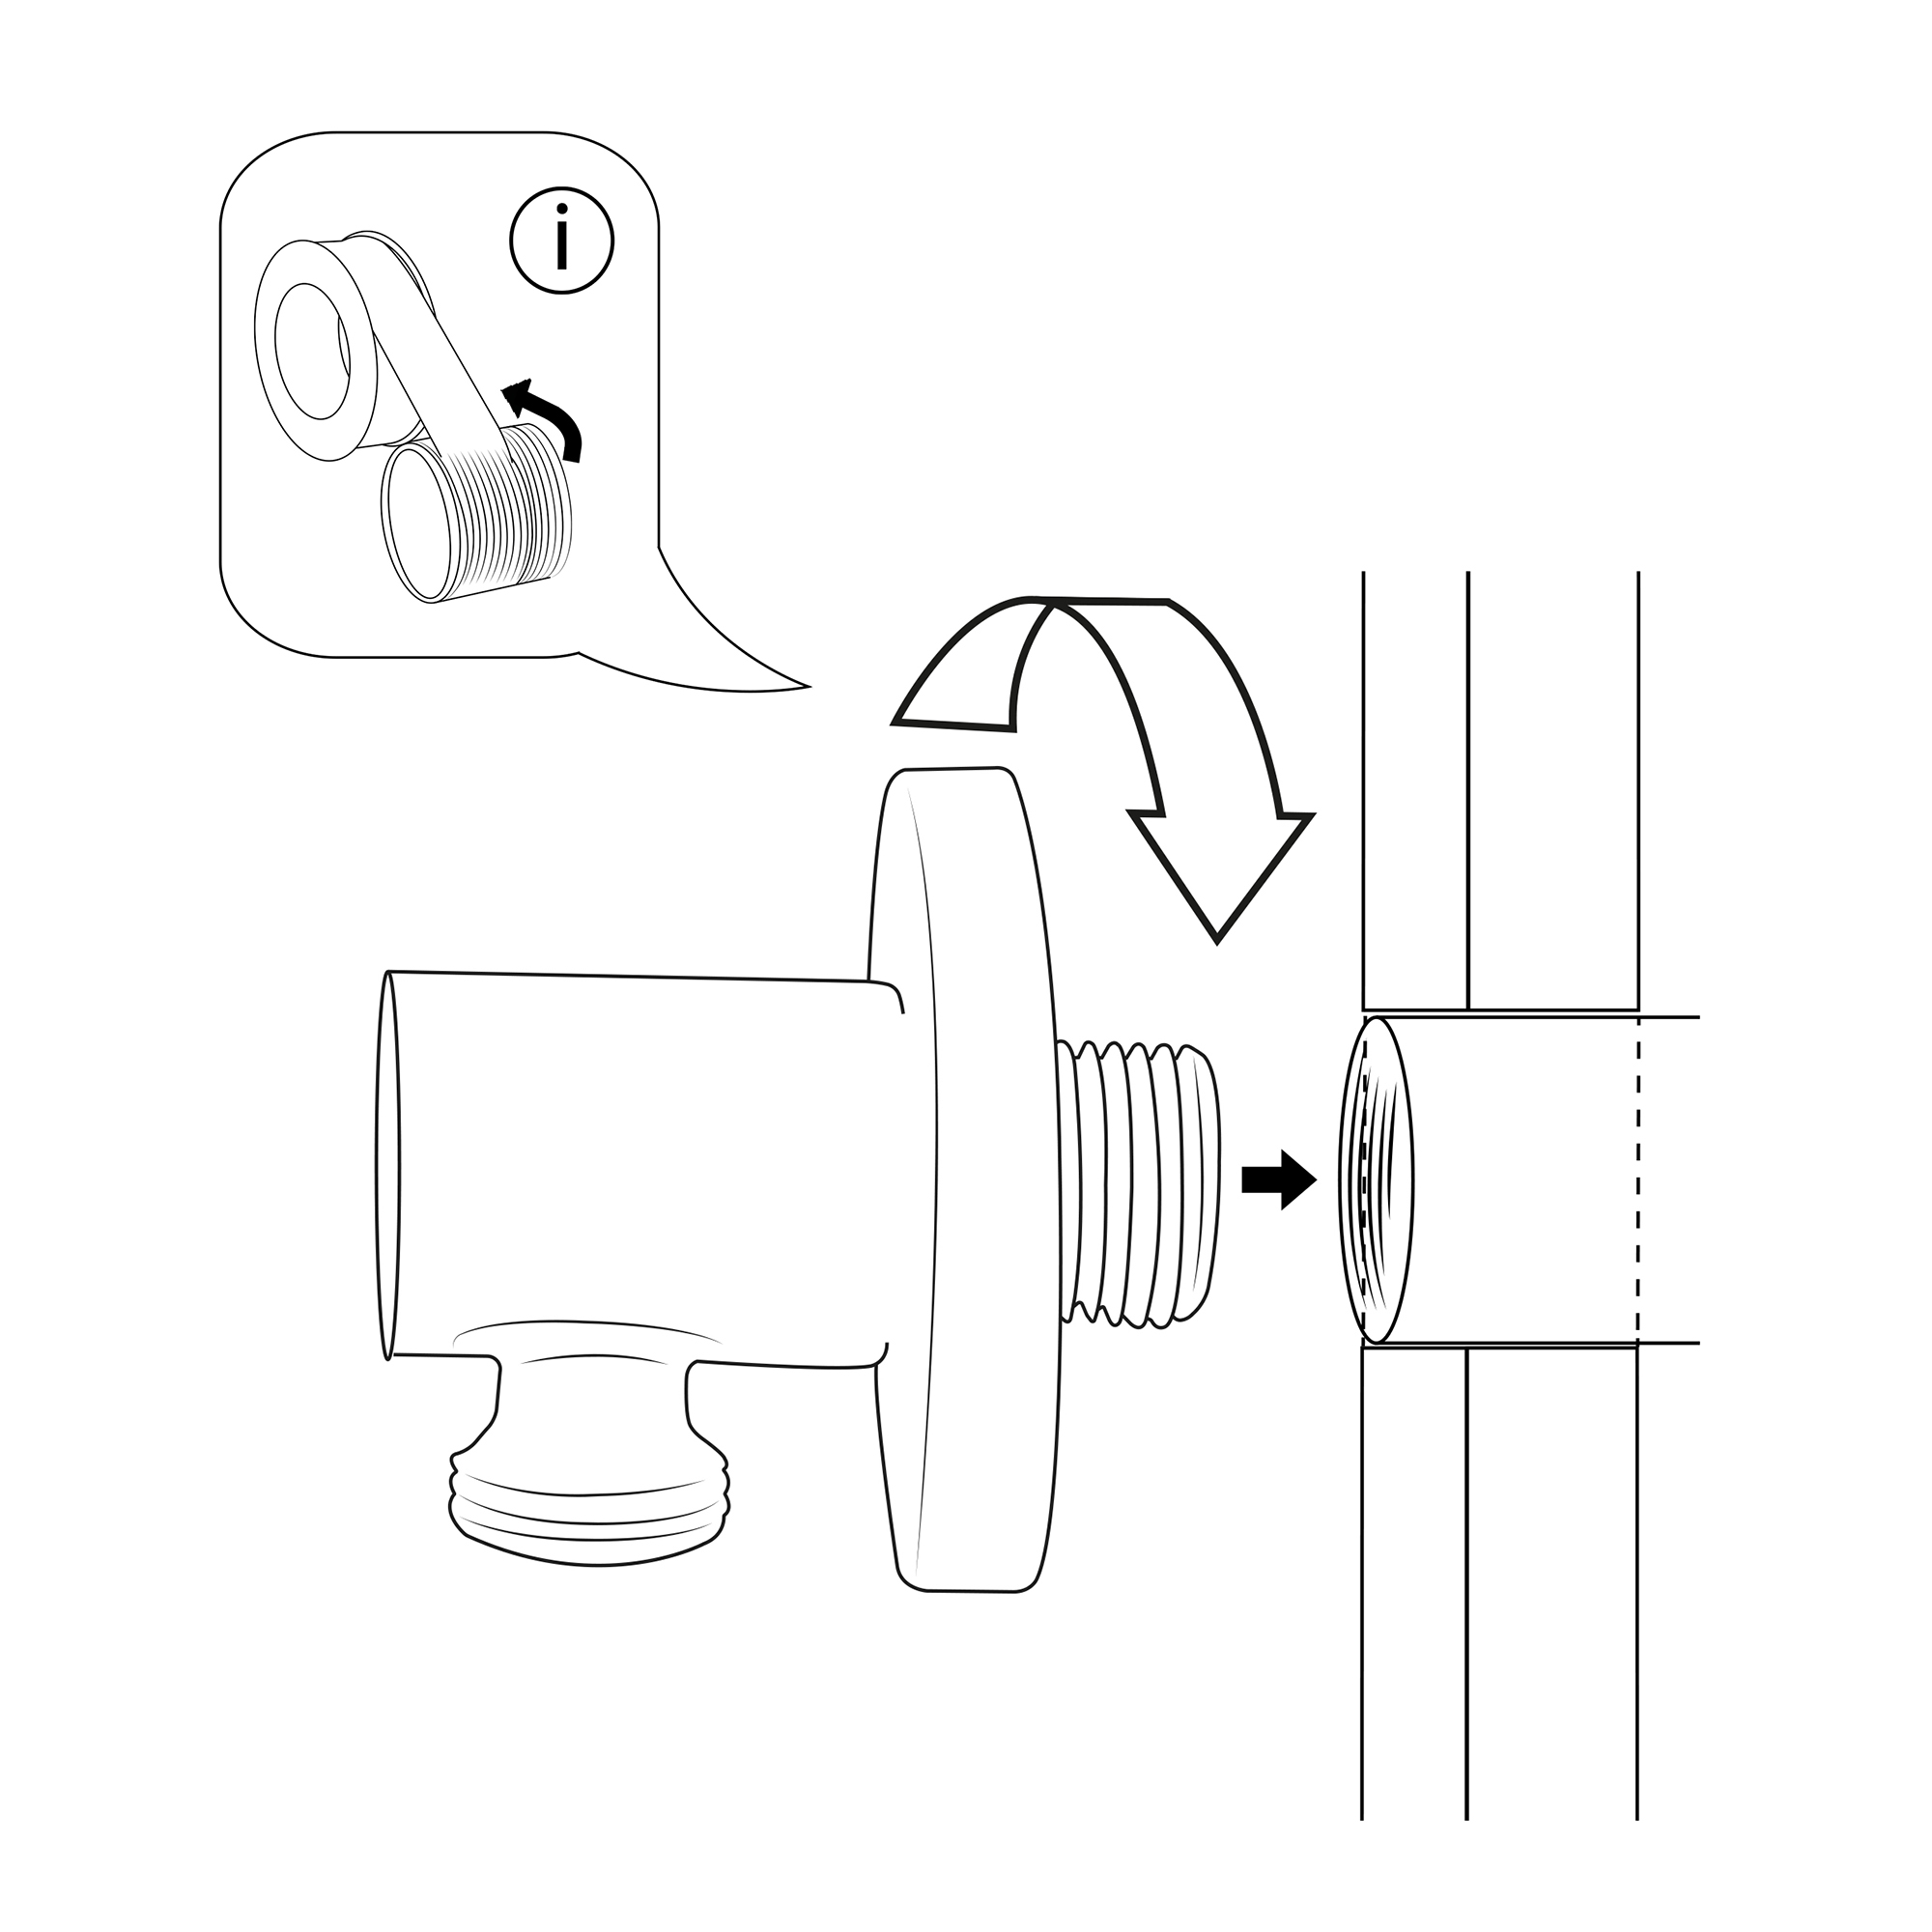
Step 3: Time to Add New Teflon Tape Since you have removed the old Teflon tape, you have to replace it with new ones. The reason is that this tape helps to protect the shower from leaking after installing the showerhead. Now apply the new Teflon tape about 3-5 turns on the thread and tear the end part. Use your hands to smooth it out to keep it leveled to the thread. Keep in mind that when applying the tape, you should go in a clockwise motion so that it doesn’t come off when you attach the head in the same direction.
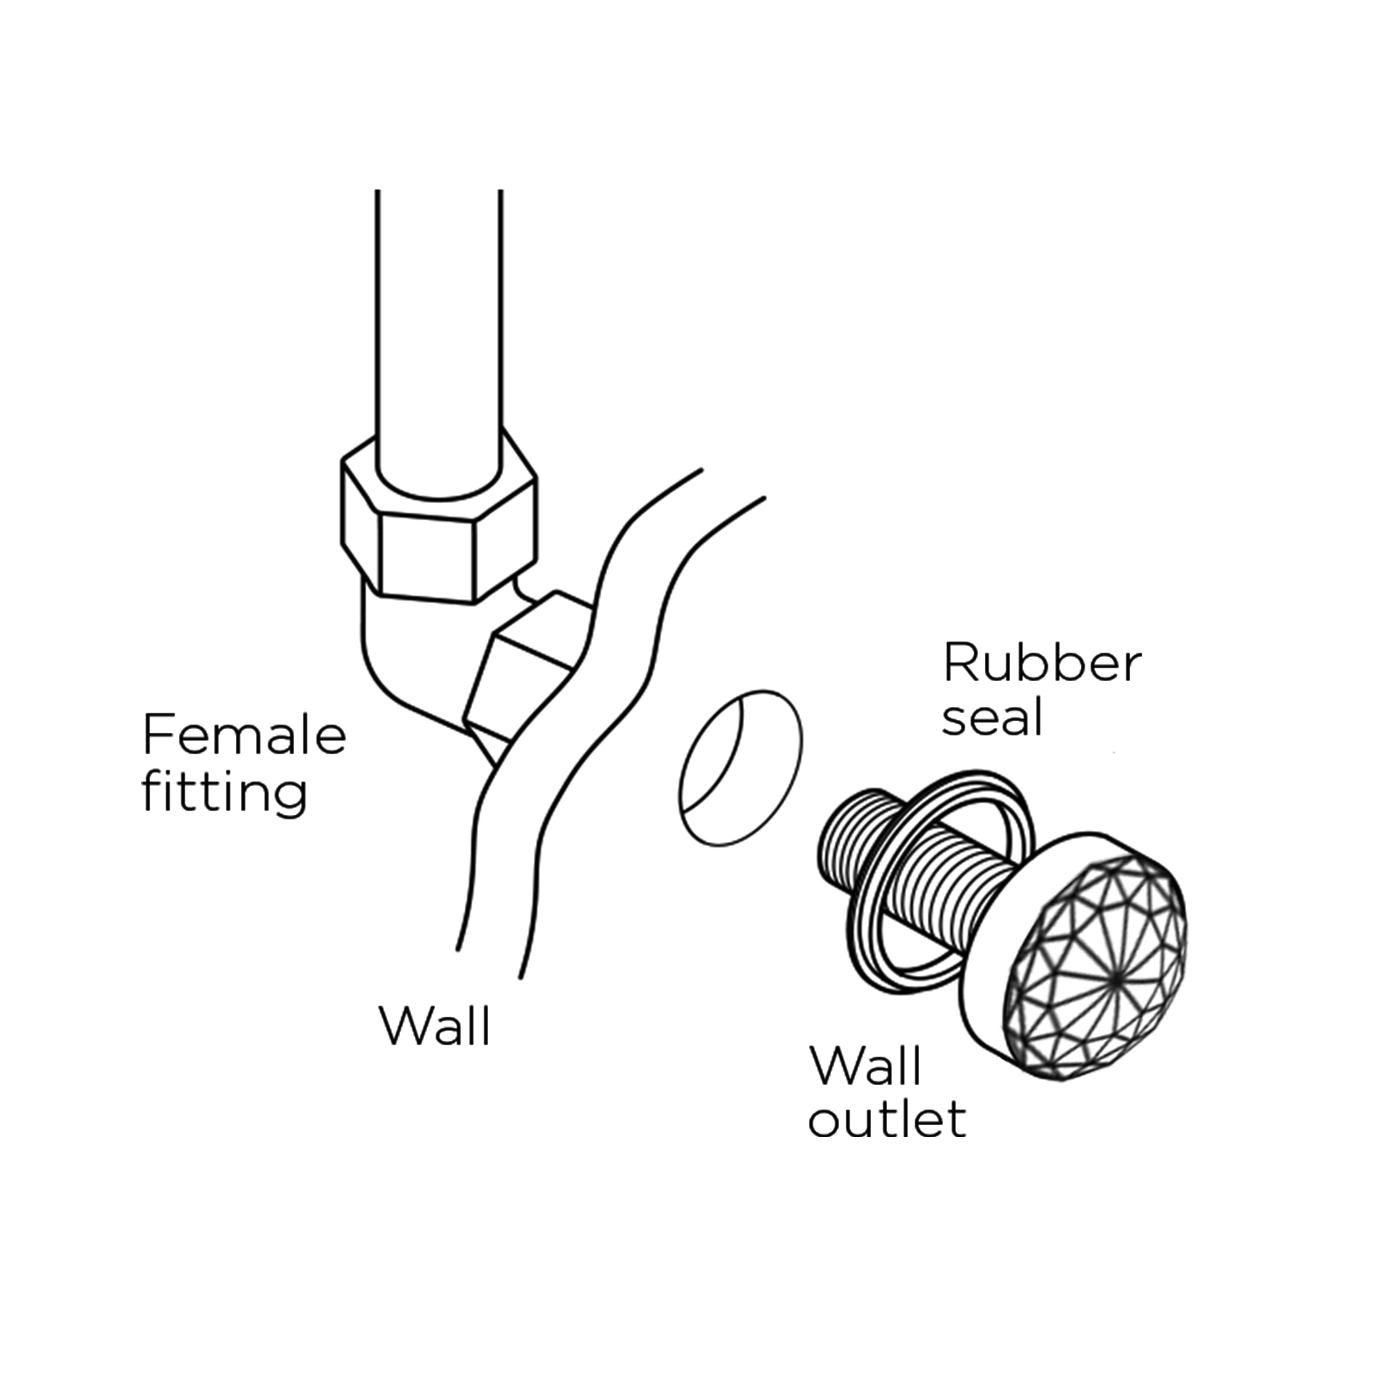
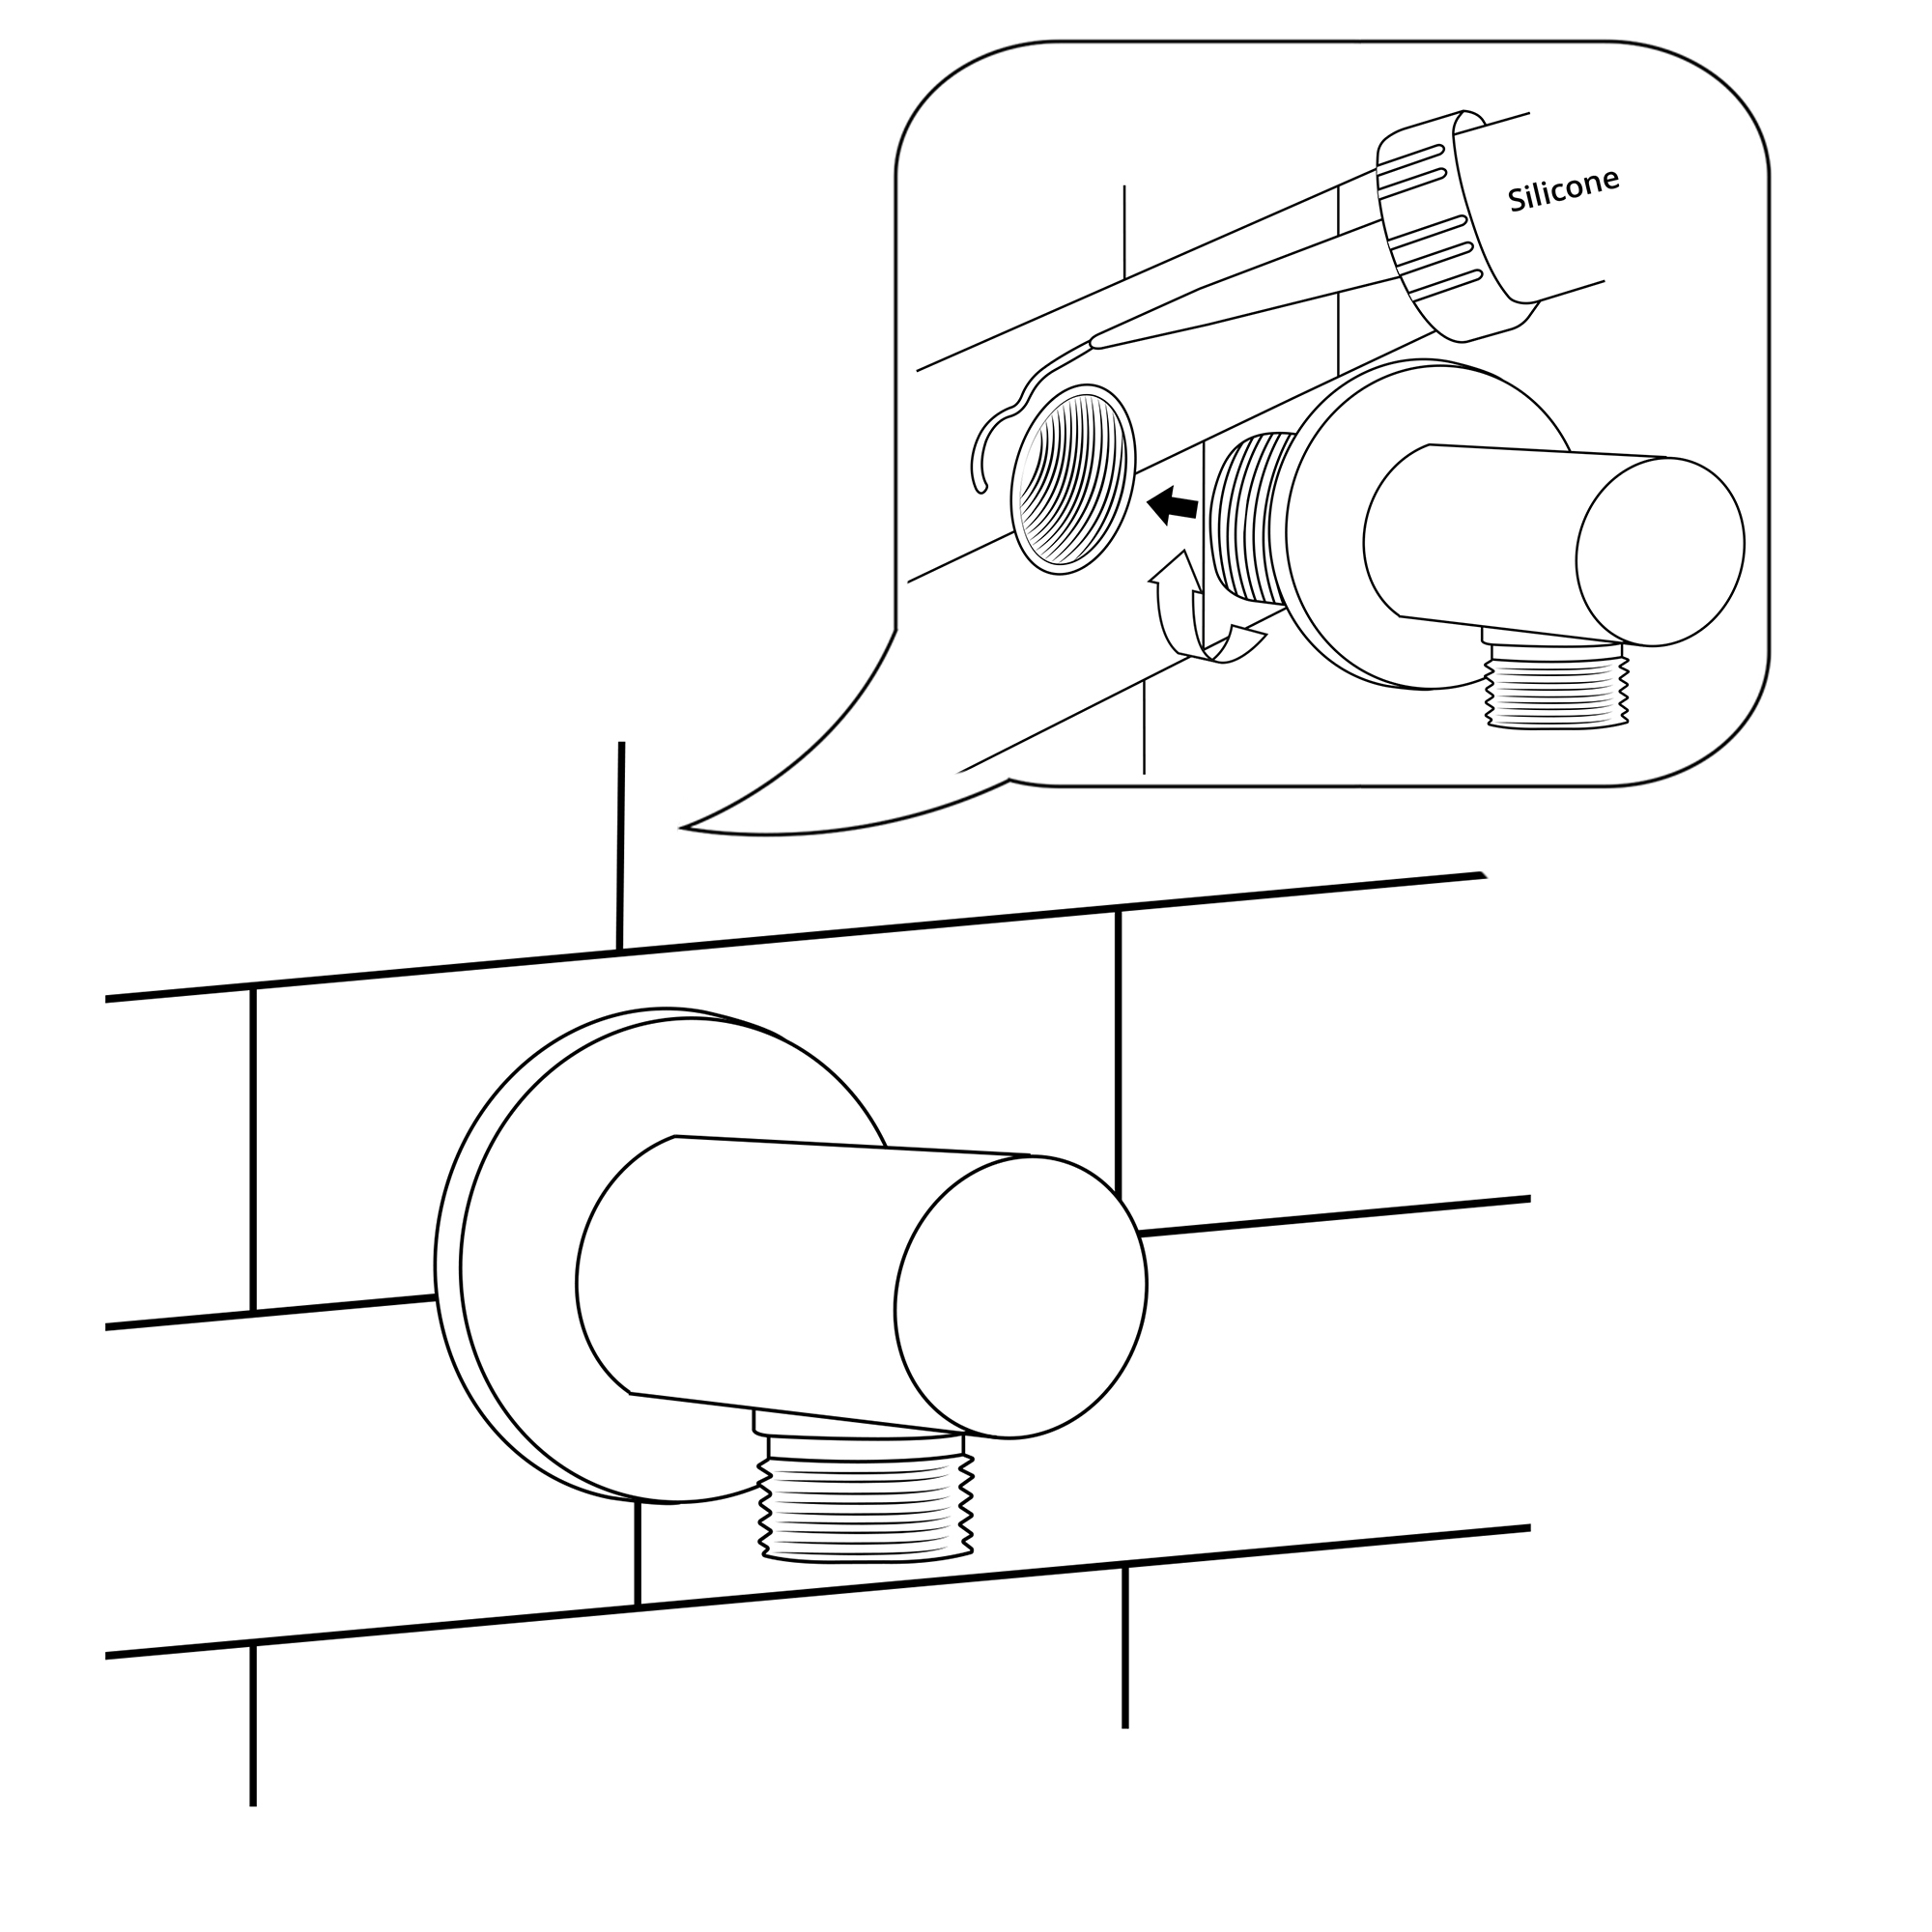
Step 4: Connect the Showerhead As said earlier in the tools needed, we’re using the rubber sealing washer that comes with the showerhead. This tool helps to make the showerhead stay watertight and secured on to the thread. Ensure you place it properly before installing it. After that, reconnect the shower head and tighten it down with your hands. You can employ a chair or ladder to make things easier for you.
Step 5: Tighten the Showerhead On To the Thread You will need to get the adjustable wrench handy to tighten down the shower very well. But make sure you wrap the threads with a terry cloth, so it doesn’t damage the finish when tightening the showerhead. Once you have done that, now use the adjustable wrench to tighten down the showerhead. However, don’t over-tight or force it so that it’s easier to remove in the future.
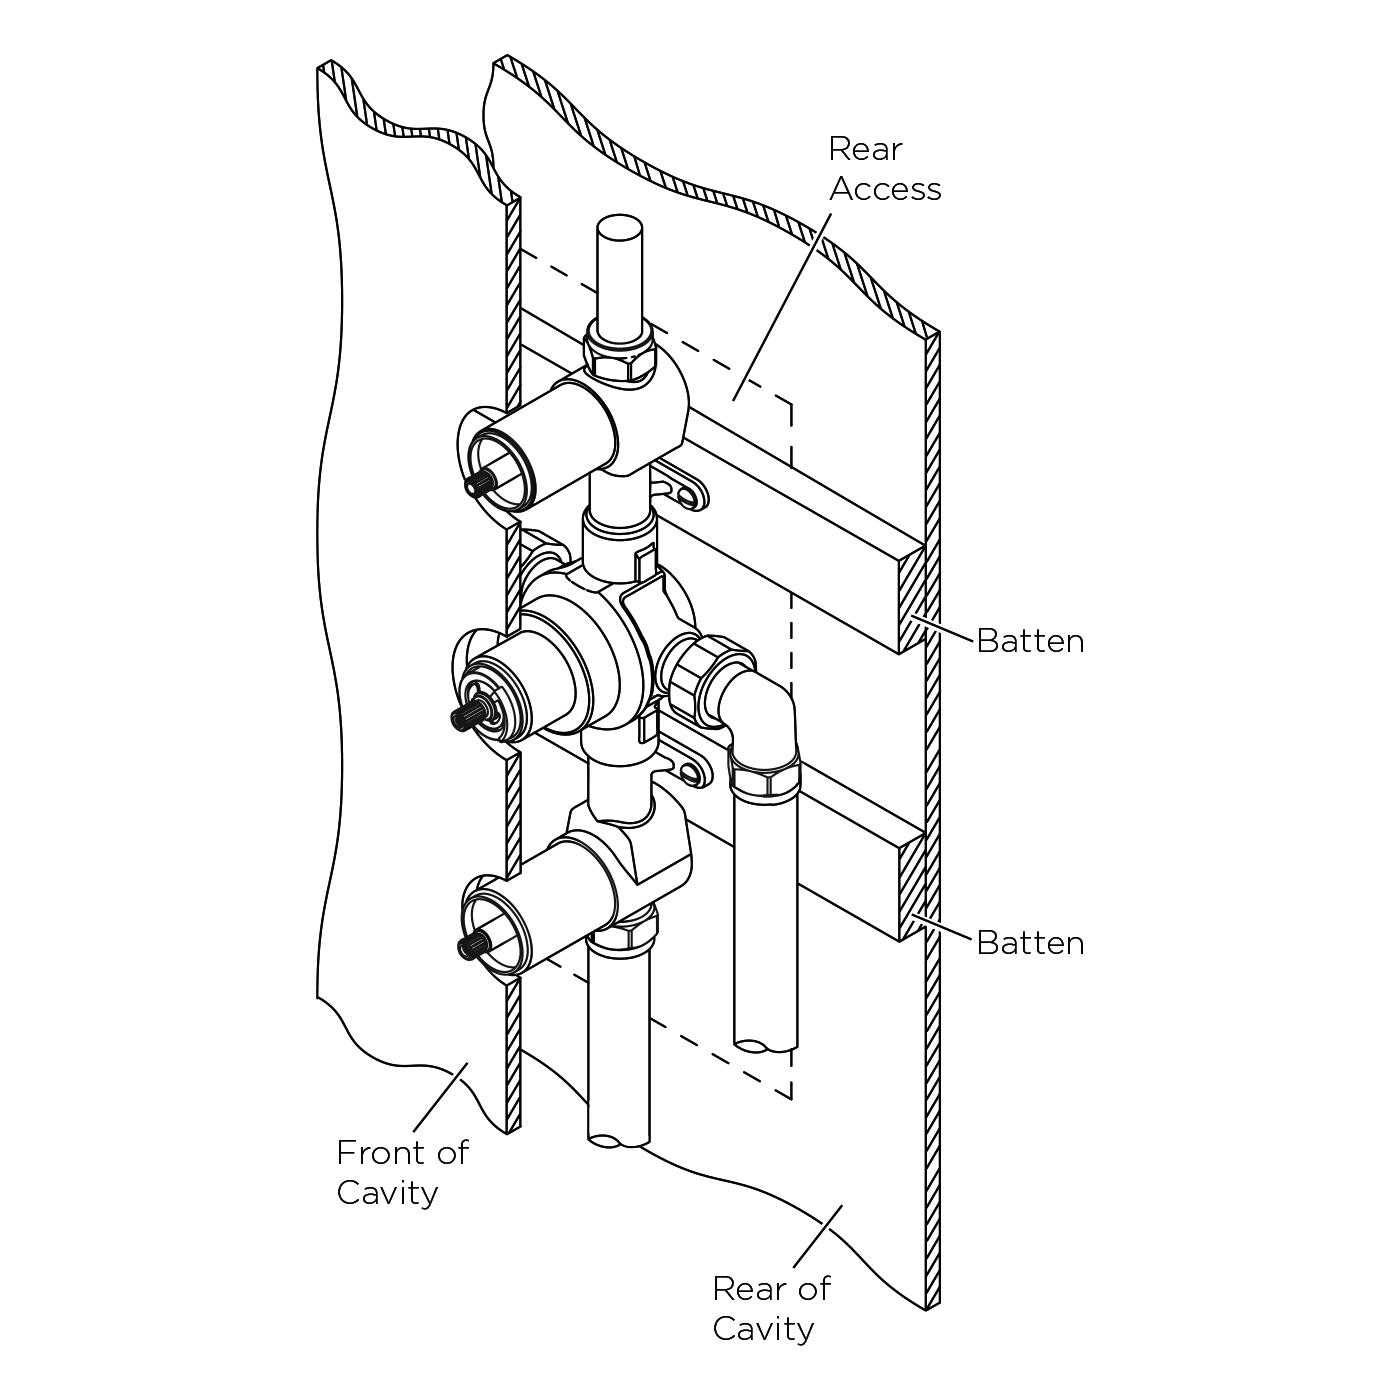
Once the shower valve has been installed the wall surface should be finished and tiled up-to-the valve. Rear access is required to allow for future servicing and maintenance of the valve filters. The thermostatic cartridge is accessible from the front. Before Installation
Flush through the pipework to ensure the removal of any debris. Turn off the mains water supply and close any isolating valves.
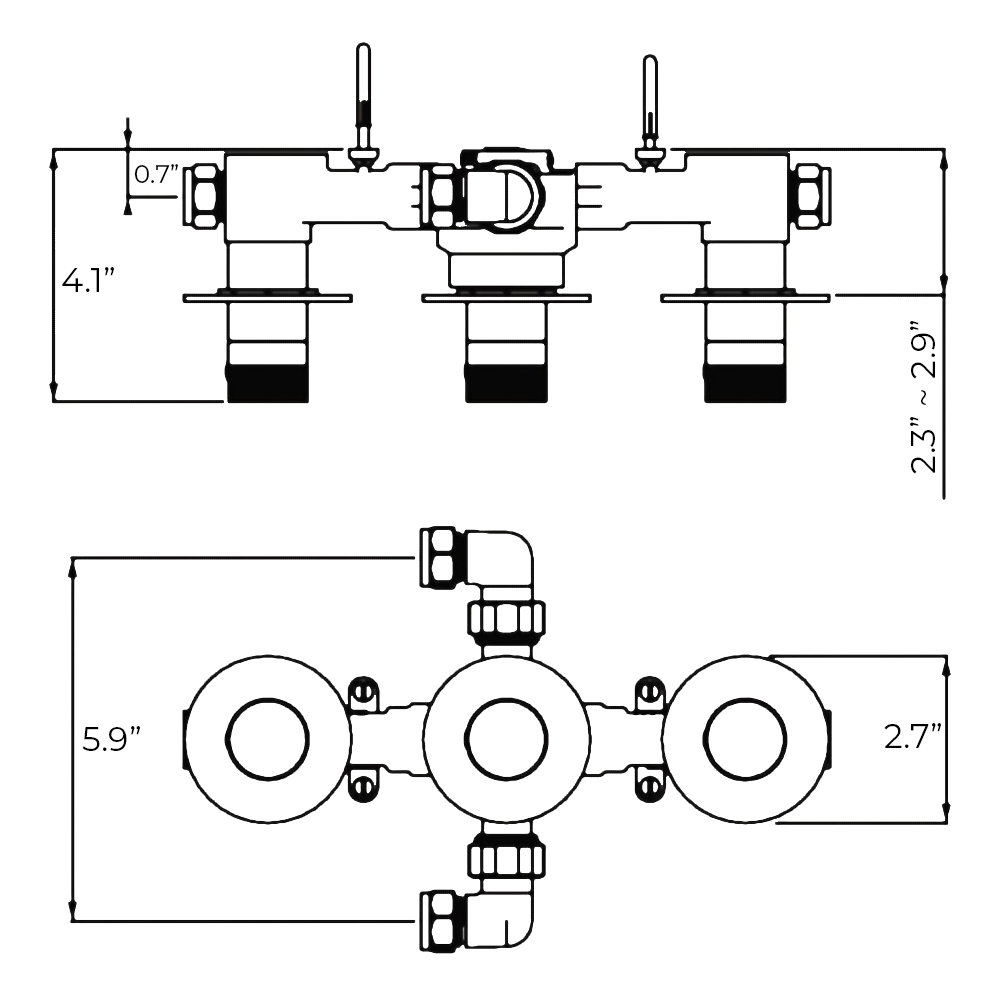
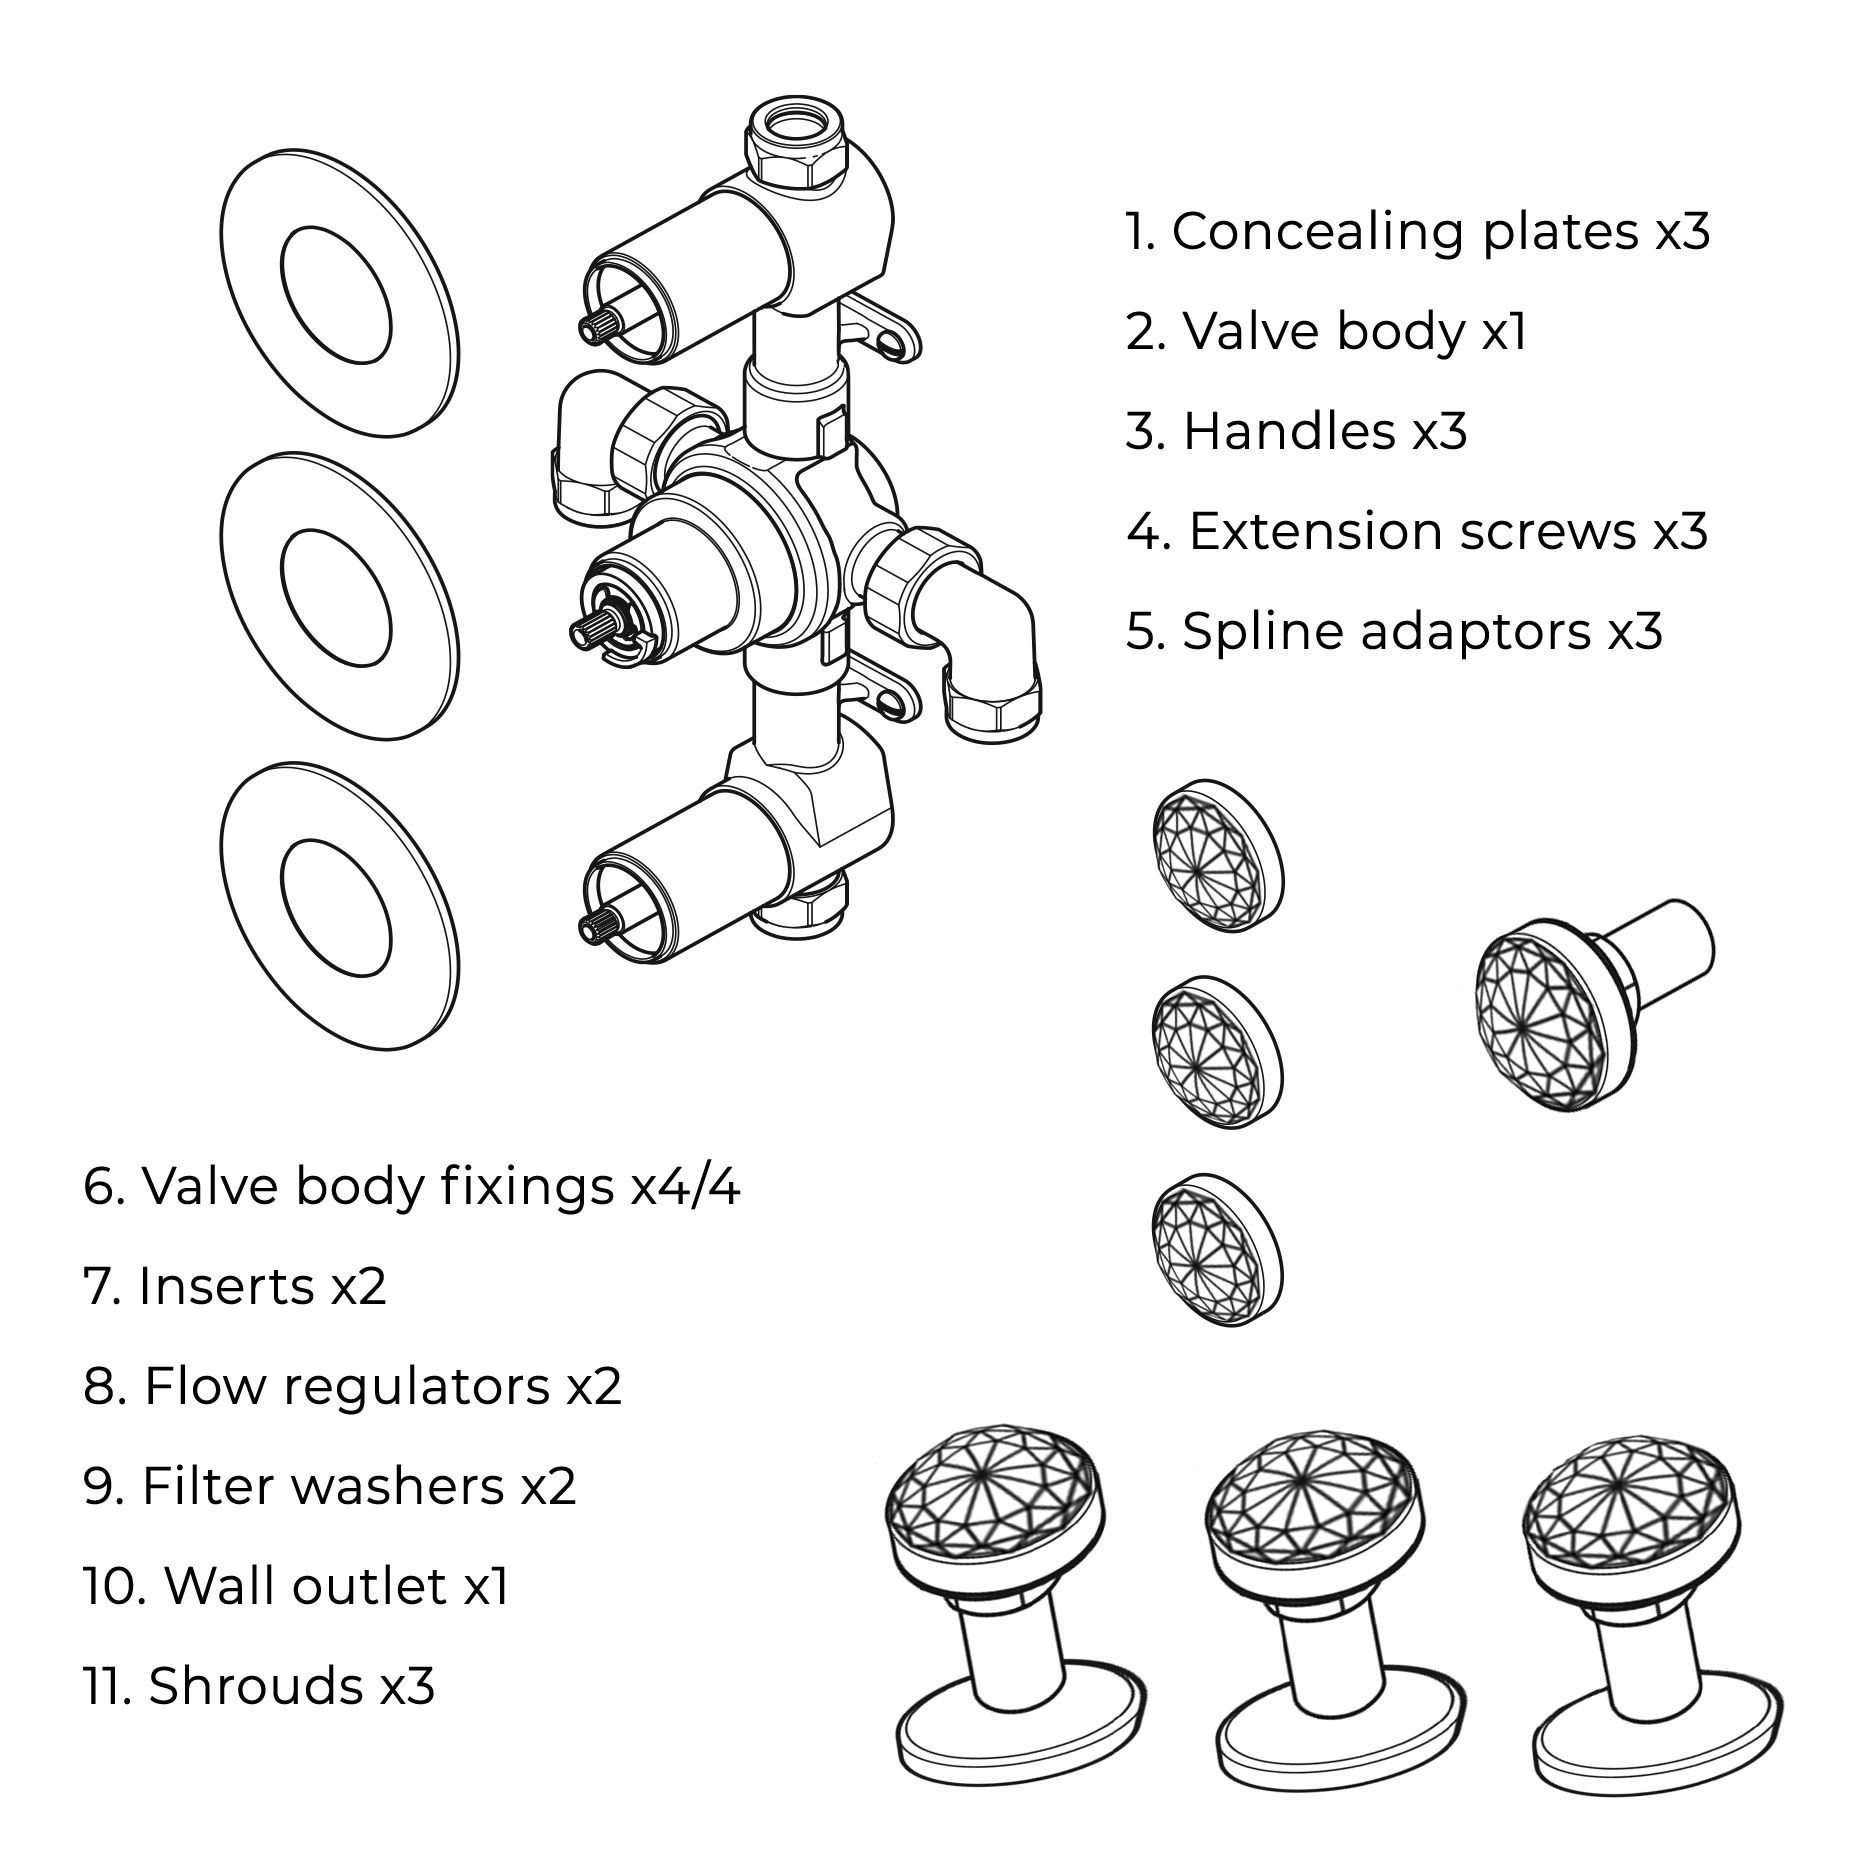
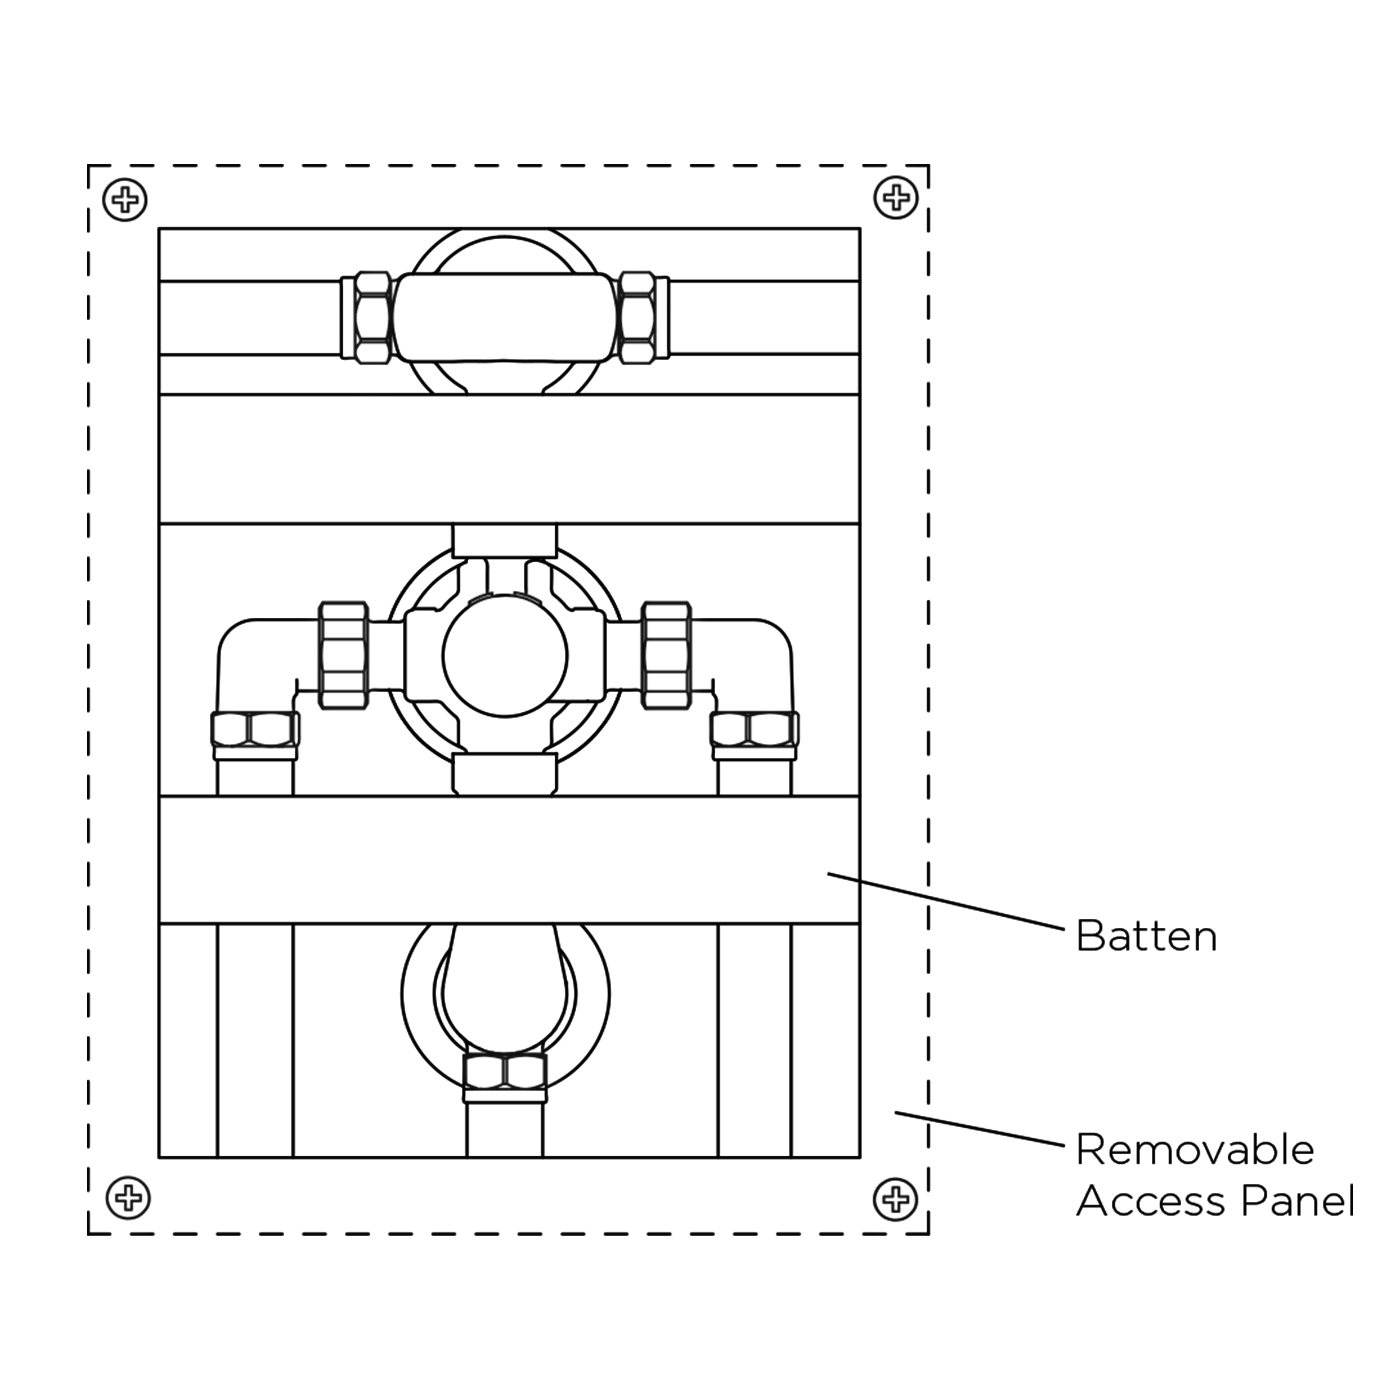
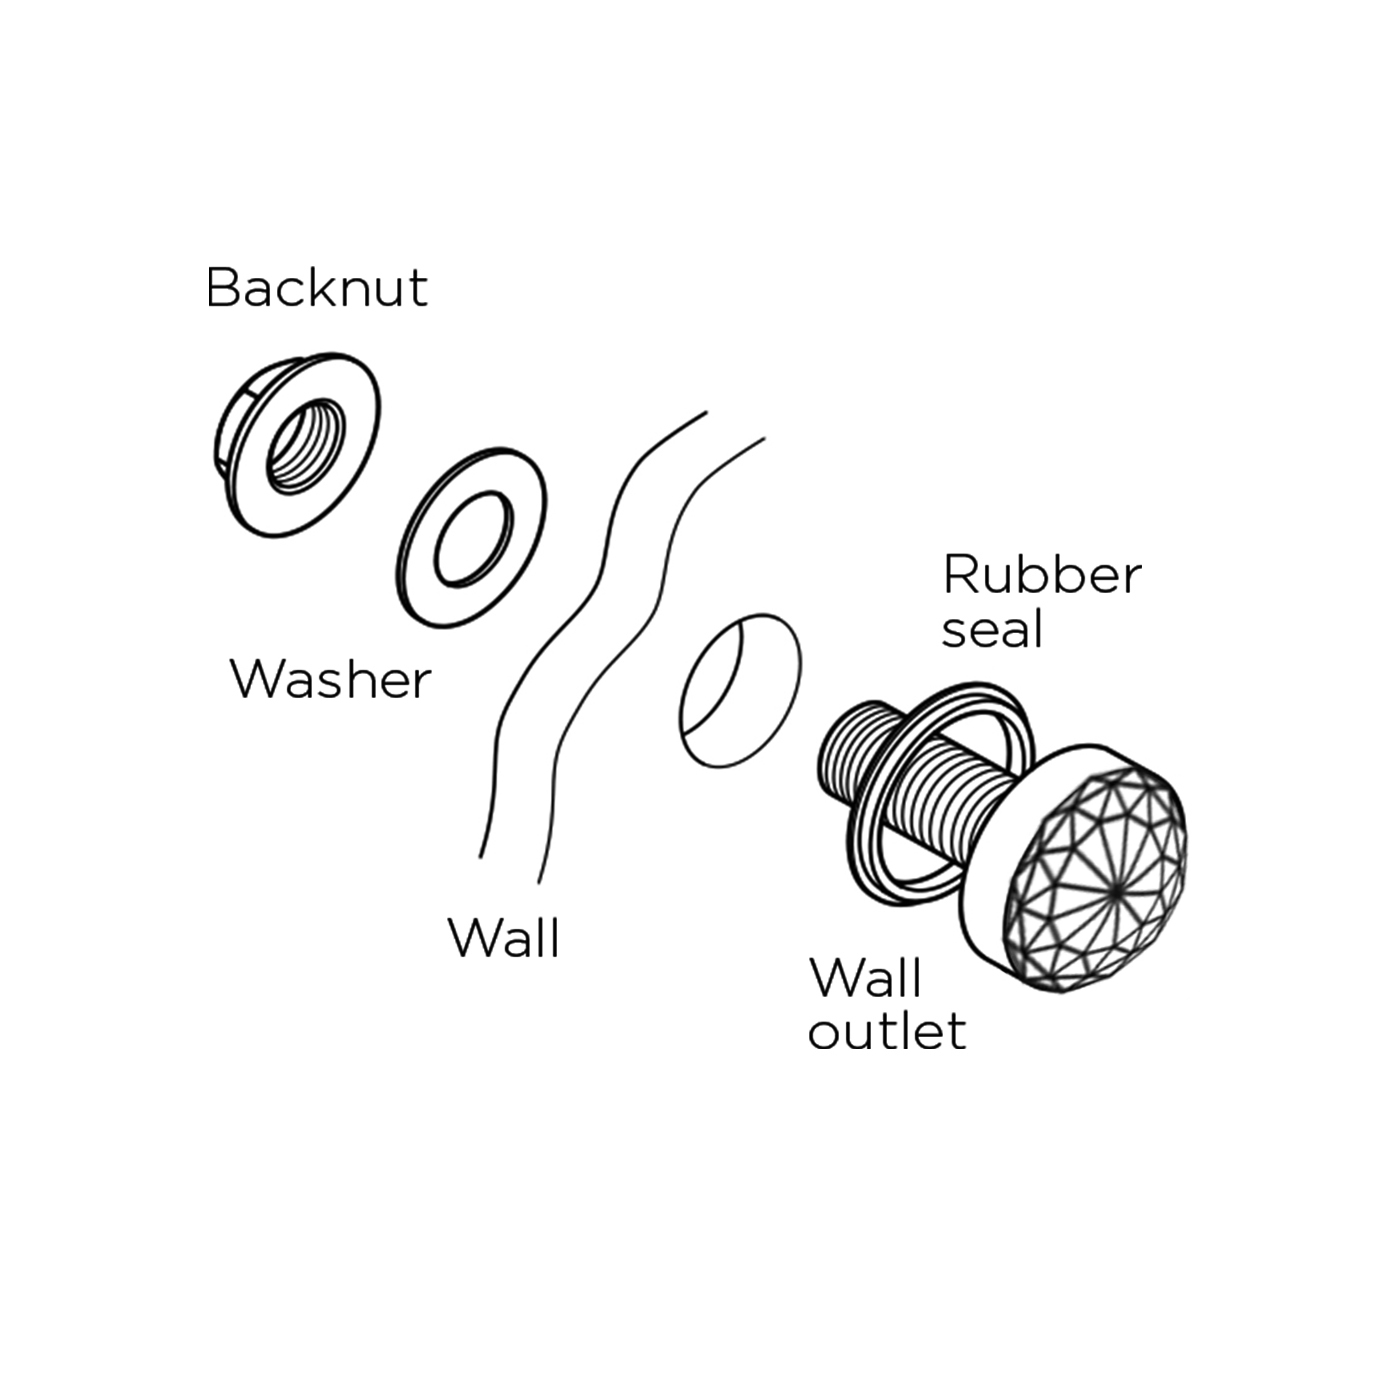
1. Install shower valve Install suitable battens (if required) onto the rear cavity wall. Place the shower valve in the required position and mark the fixing holes. Drill suitable holes and insert the wall plugs (if necessary). Securely attach the shower valve to the wall/battens using the screws supplied. 2. Connect water supply pipes Insert 15mm hot and cold water supply pipes into the inlet connections and tighten nuts, ensuring the olives are fitted. 3. Plumb in outlets Insert 15mm pipework into the top and bottom outlets and plumb into the users chosen products. Ensure the olives are fitted when tightening the nuts. 4. Finish wall surface Plasterboard and tile the cavity wall ensuring there is a gap between the tiles and the shower valve. 5. Fit concealing plate and handles Run a bead of waterproof silicon sealant around the inner edge of the concealing plate. Slide the concealing plate onto the shower valve and apply firm pressure to ensure to silicon sealant spreads. 6. Fit handles Push the spline adaptors onto the valve spindles. Push the handles onto the spline adaptors and secure by tightening the grub screw and push-fit the cap into position. 7. Create rear access Rear access to the shower valve is required to enable the shower to be maintained and serviced. Cut out the rear plasterboard in the back of the wall cavity to create access. A piece of plasterboard or a panel may be used to cover the access hole but must be removable.
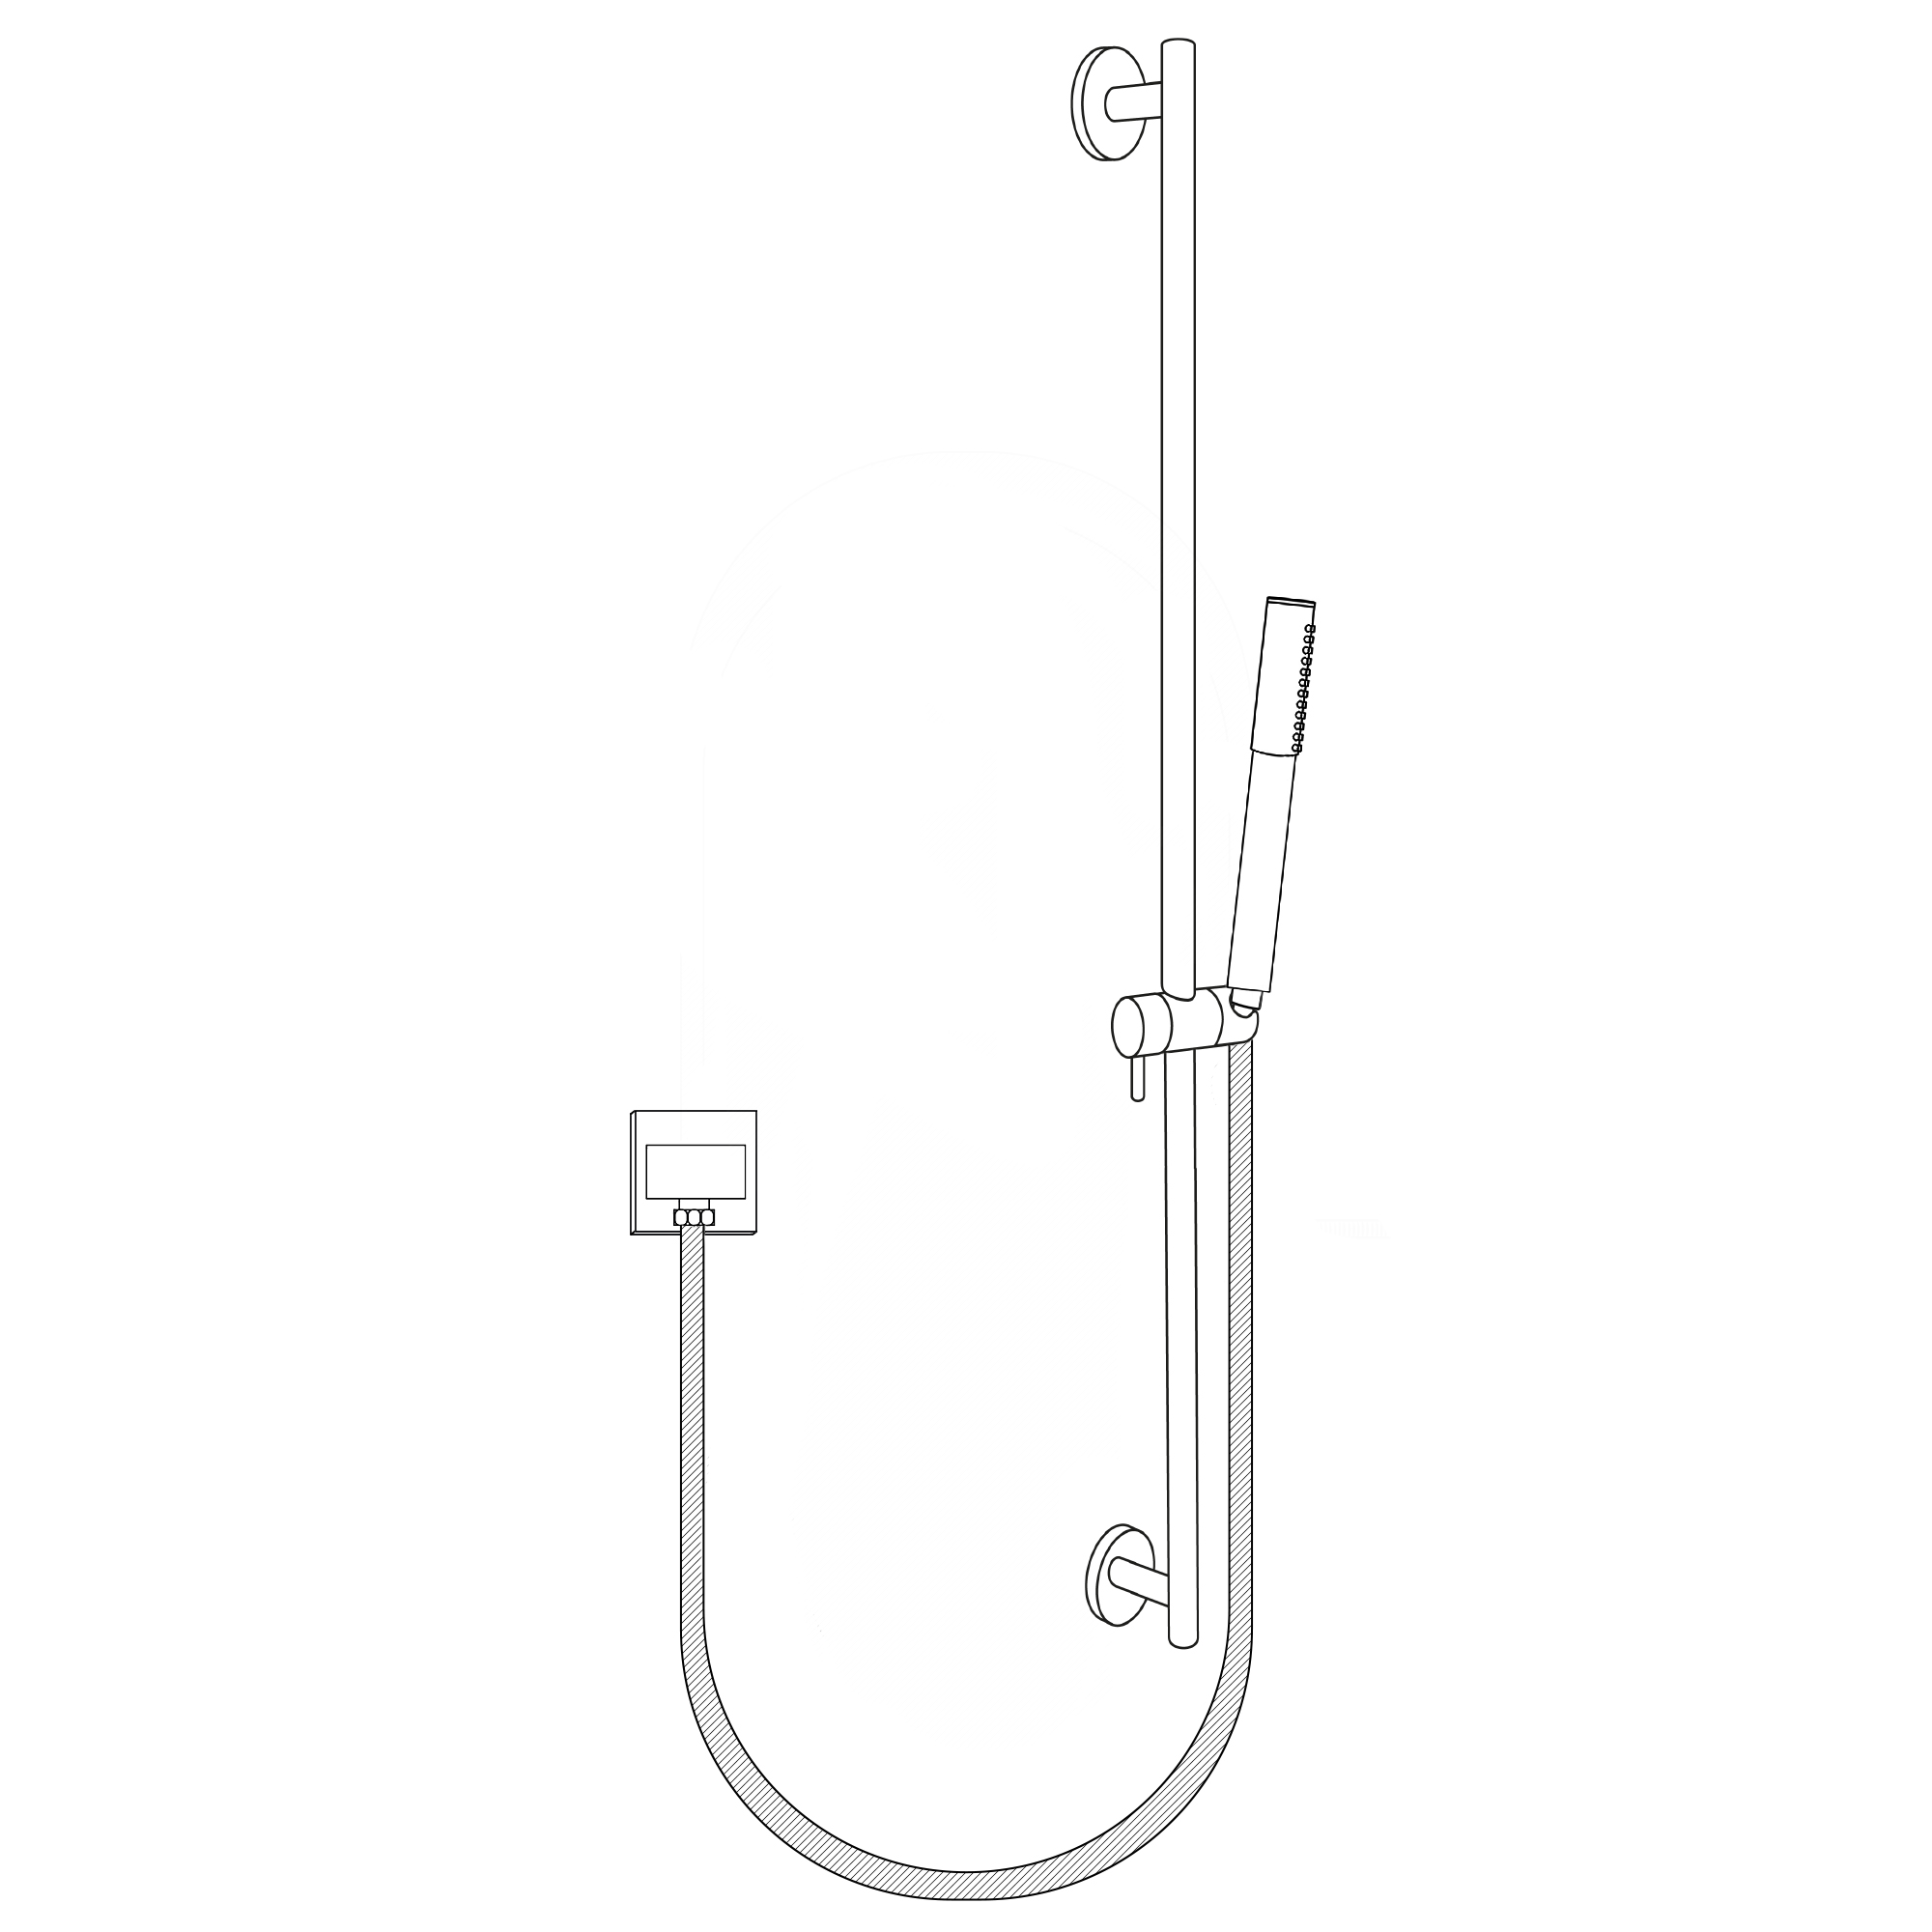
Hand-Held Shower Installation Instructions
Step 1:
. hand shower
installation .
Step 2:
Step 3:
Step 4:
Step 5:
Step 6:
Step 7:
Step 8:
Step 9:
Step 10:
Step 11:
Step 12:
Step 13:
Step 14:
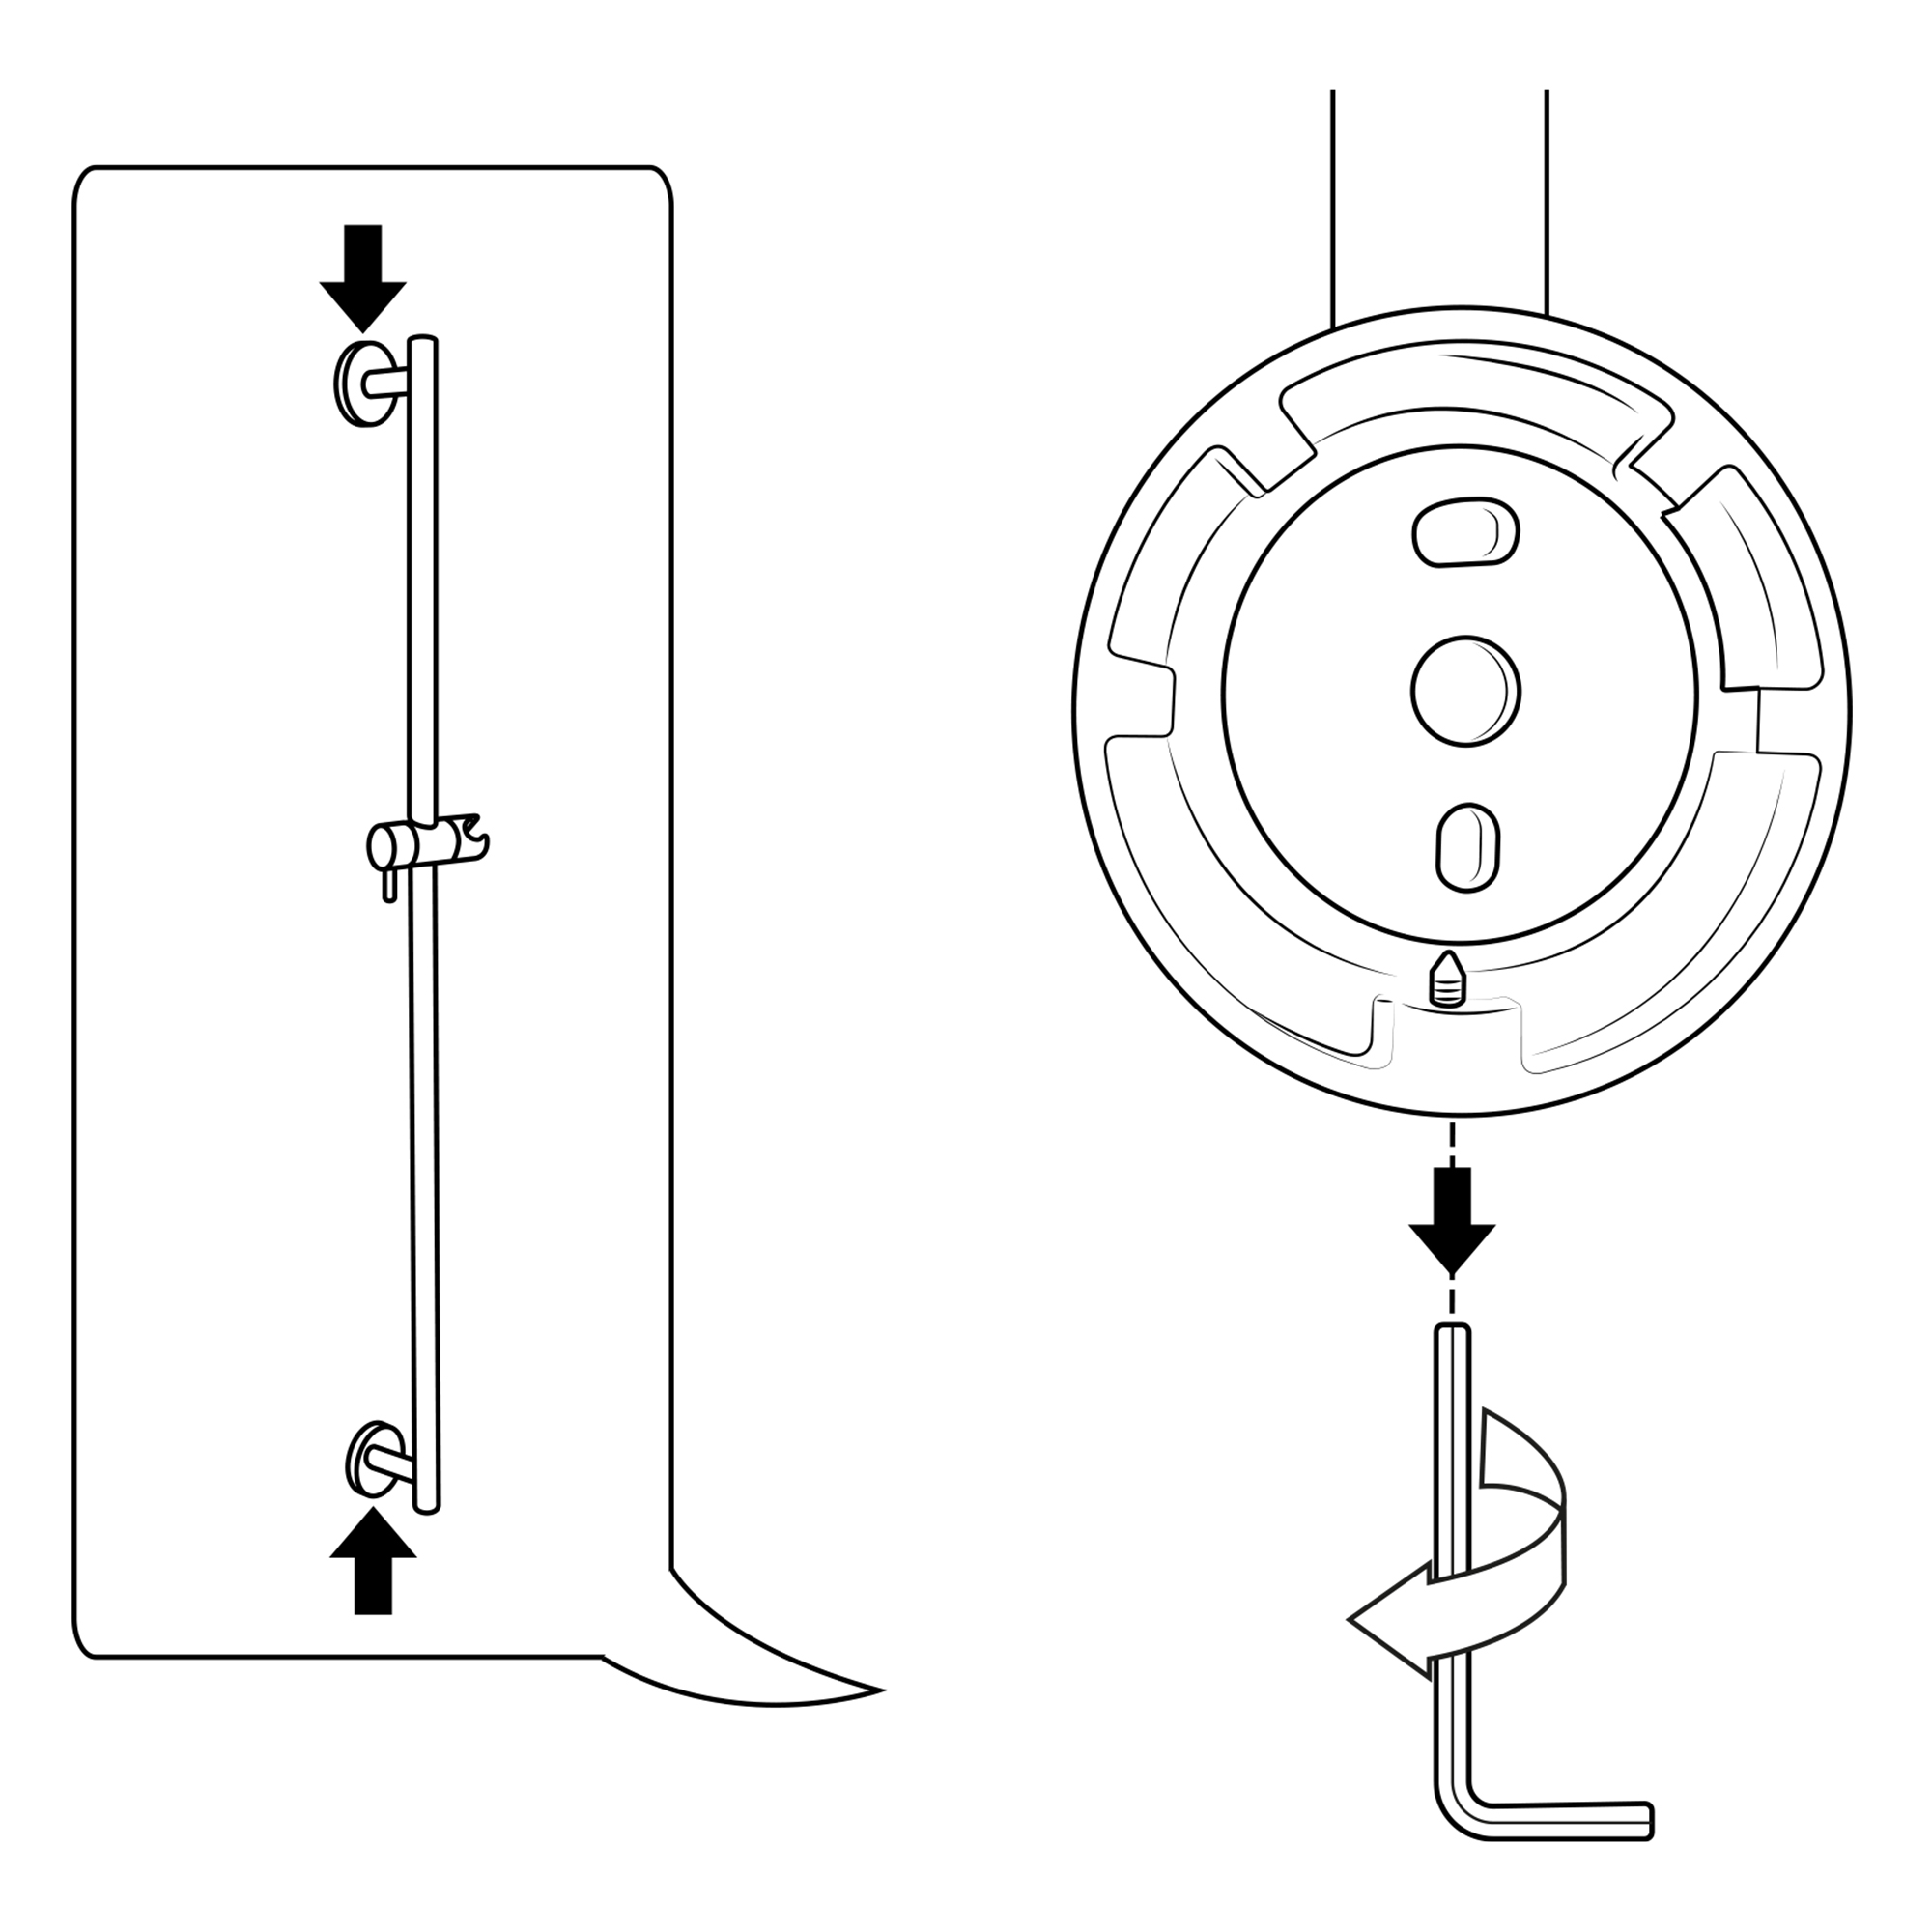
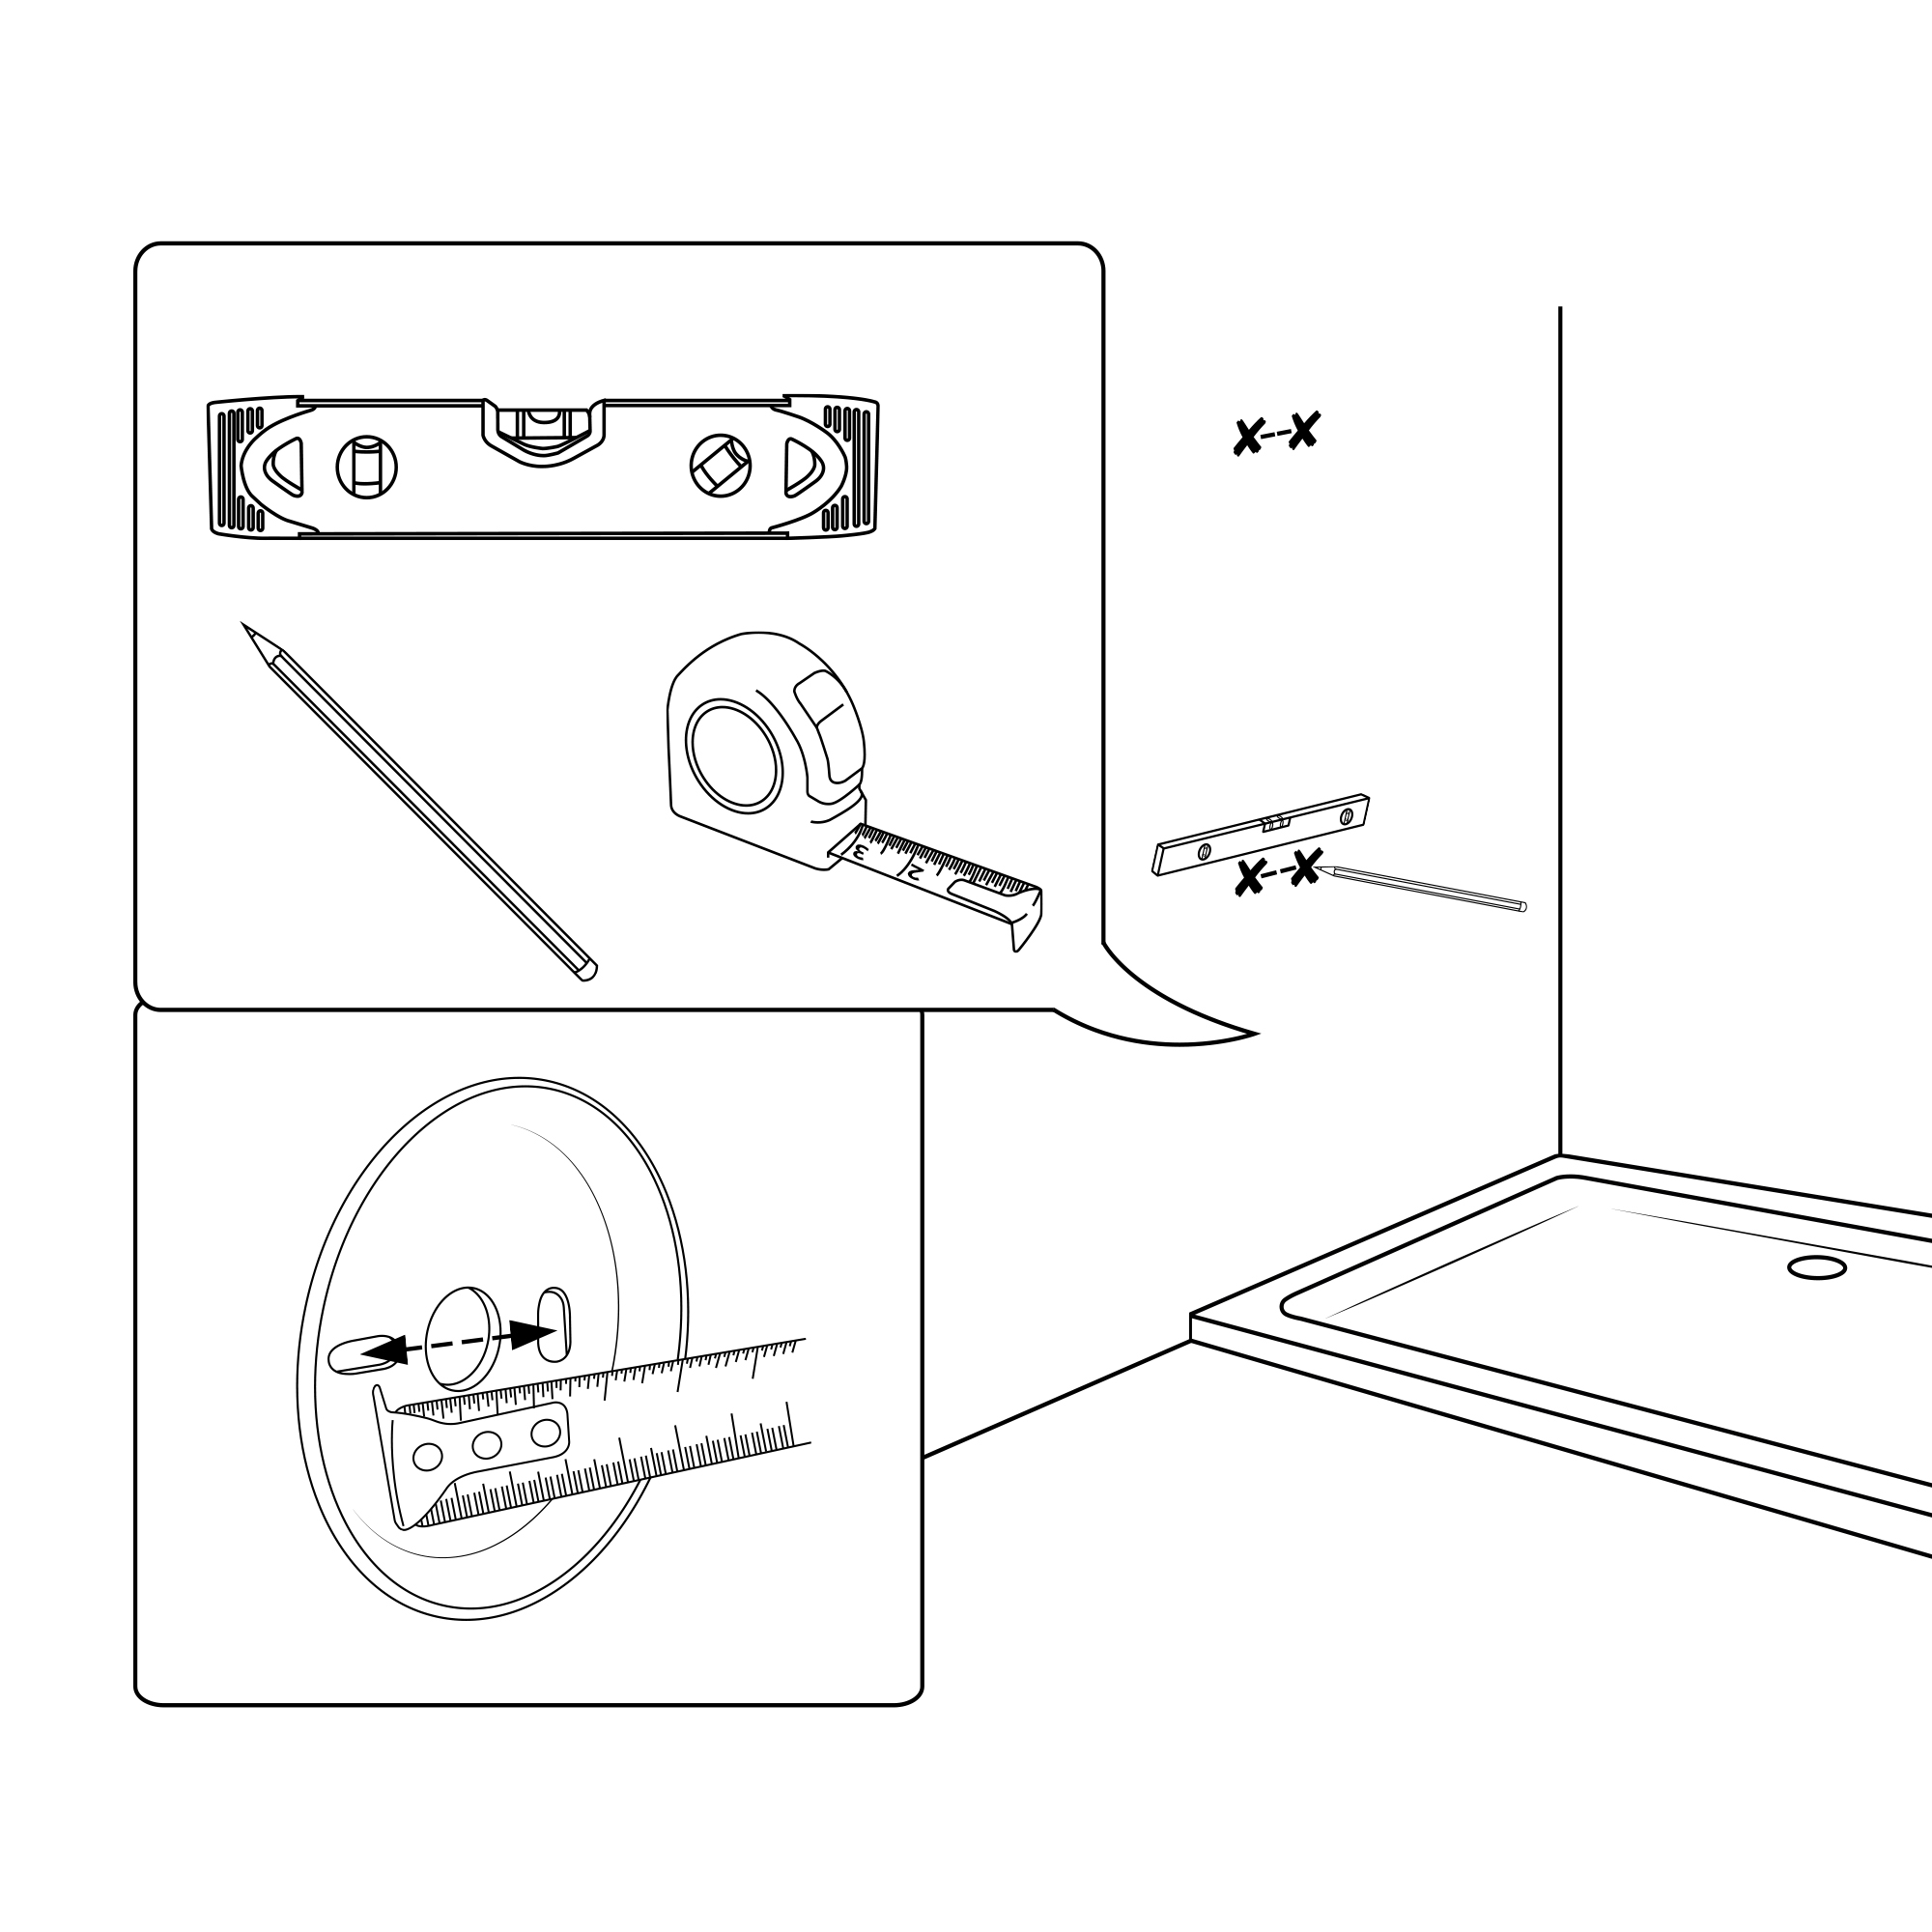
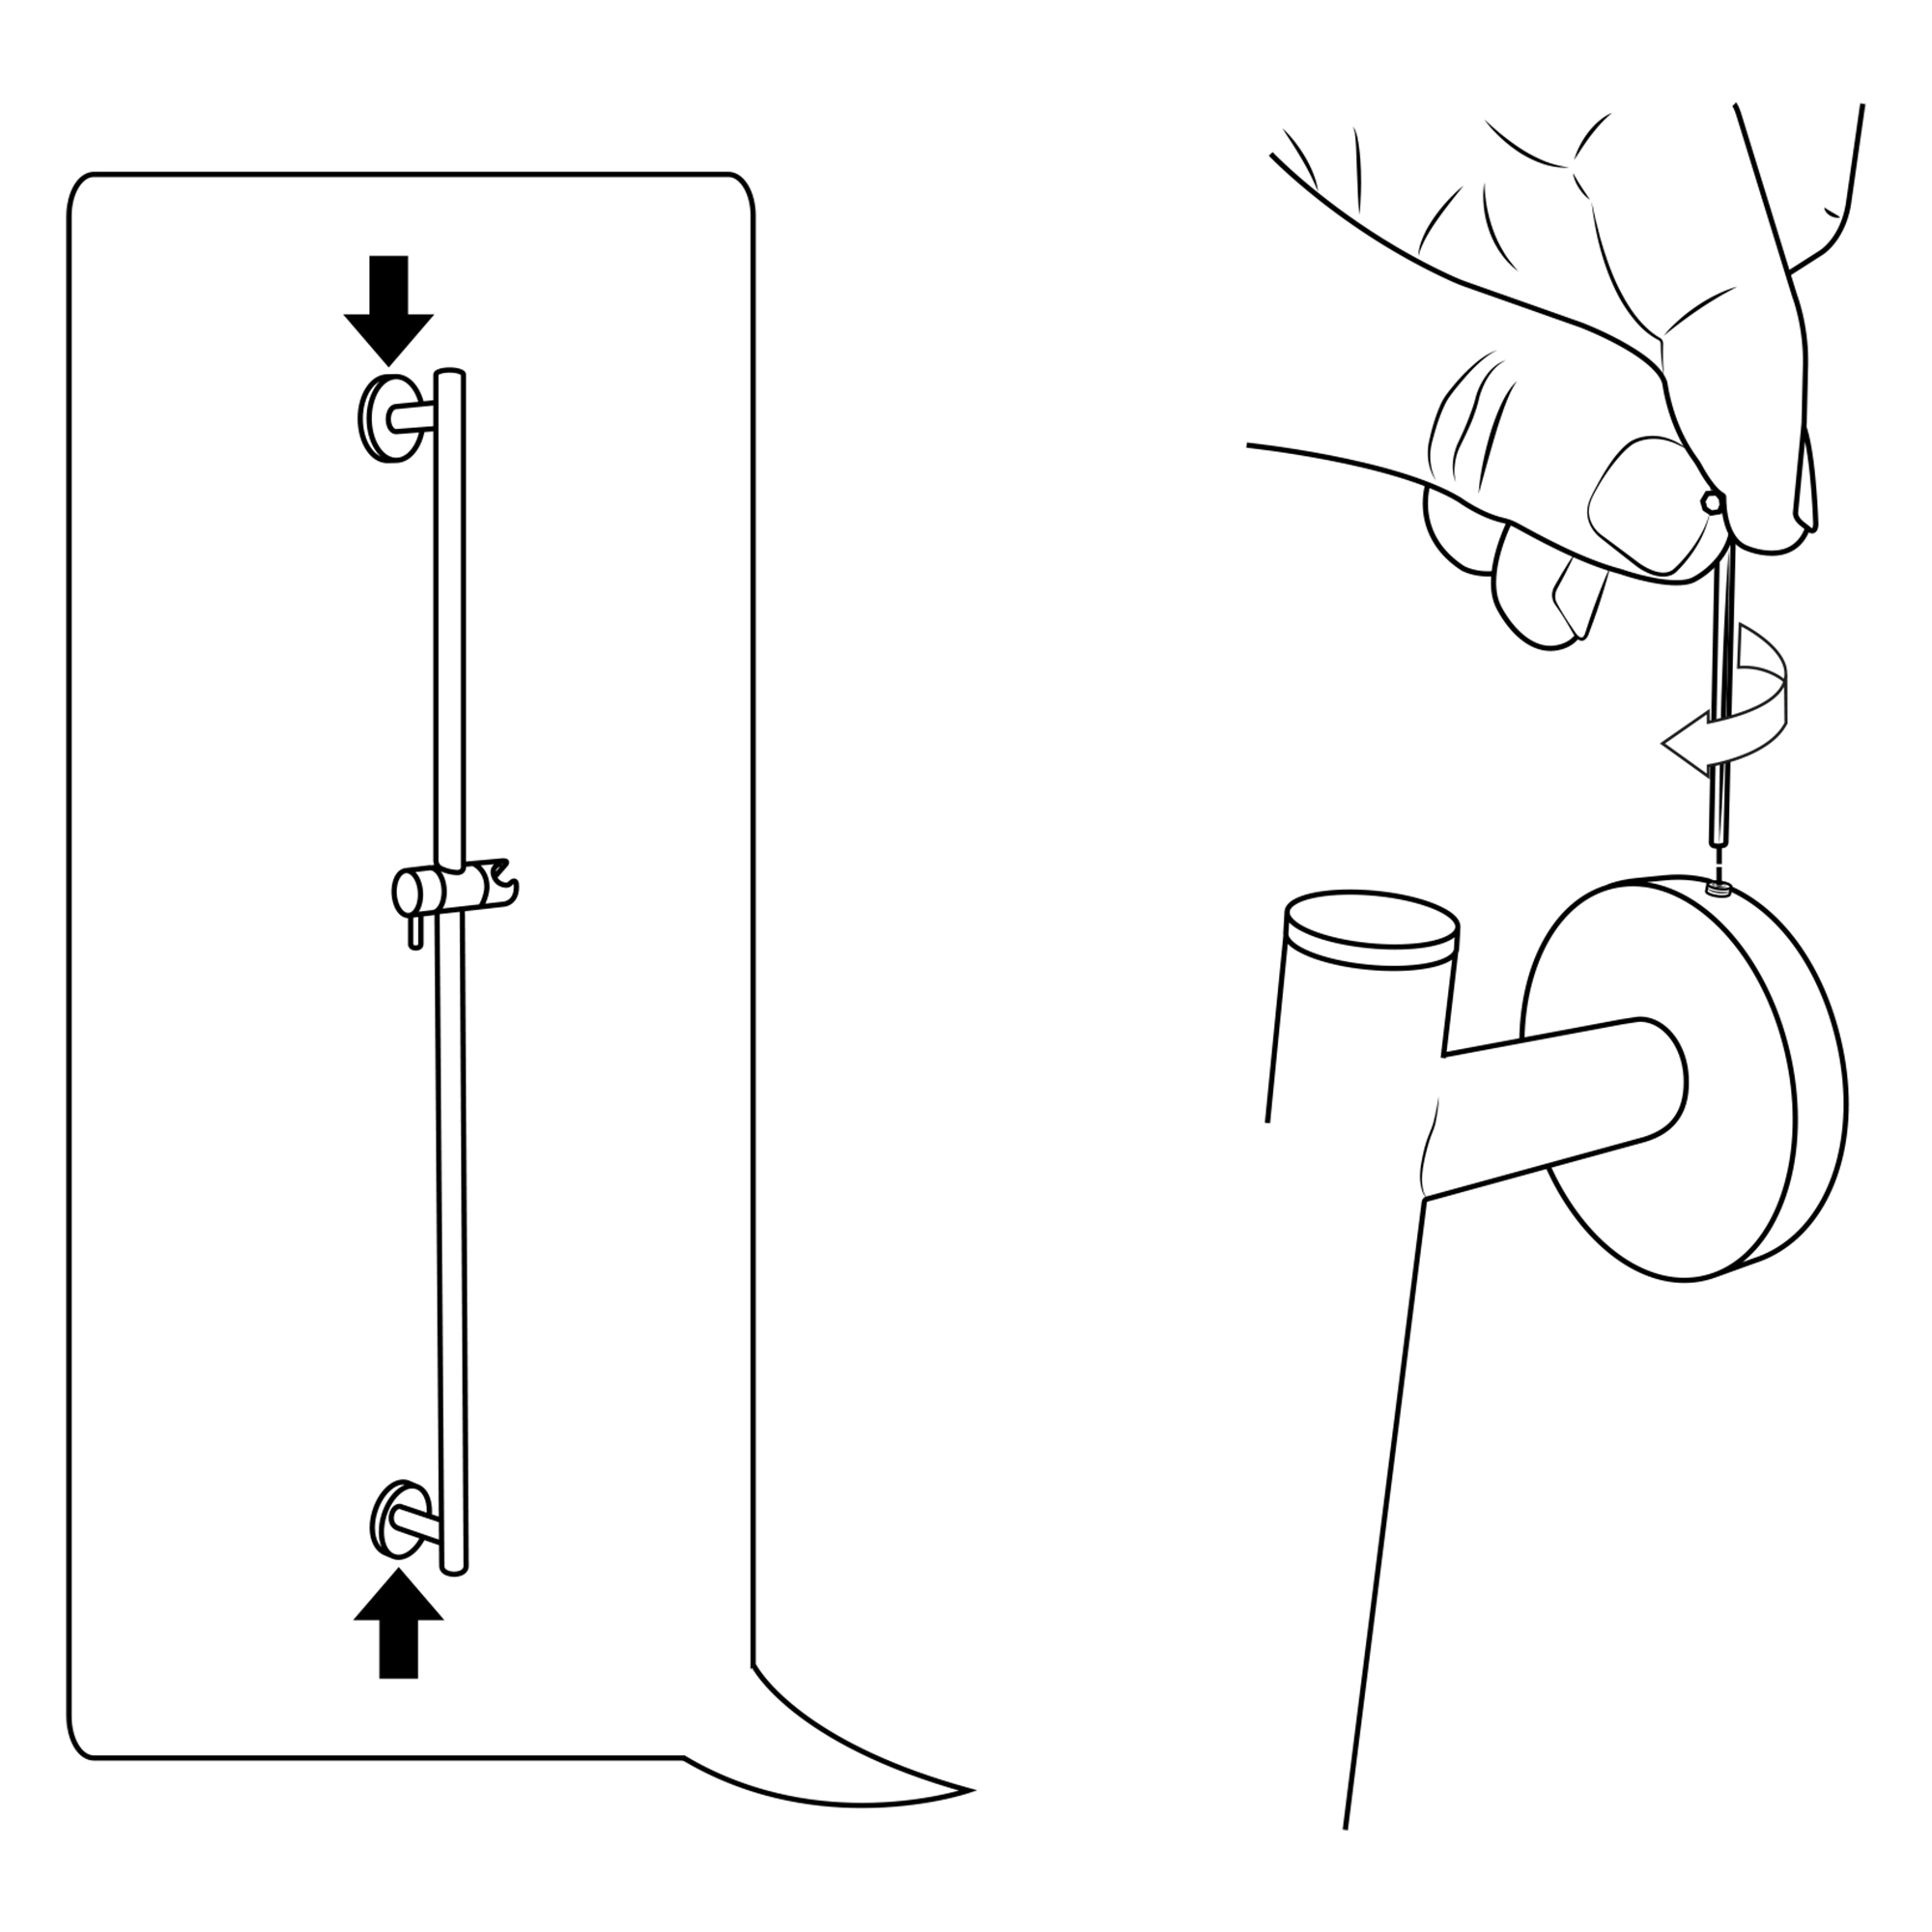
1. Open the closed cover of the shower holder and take out the screws.
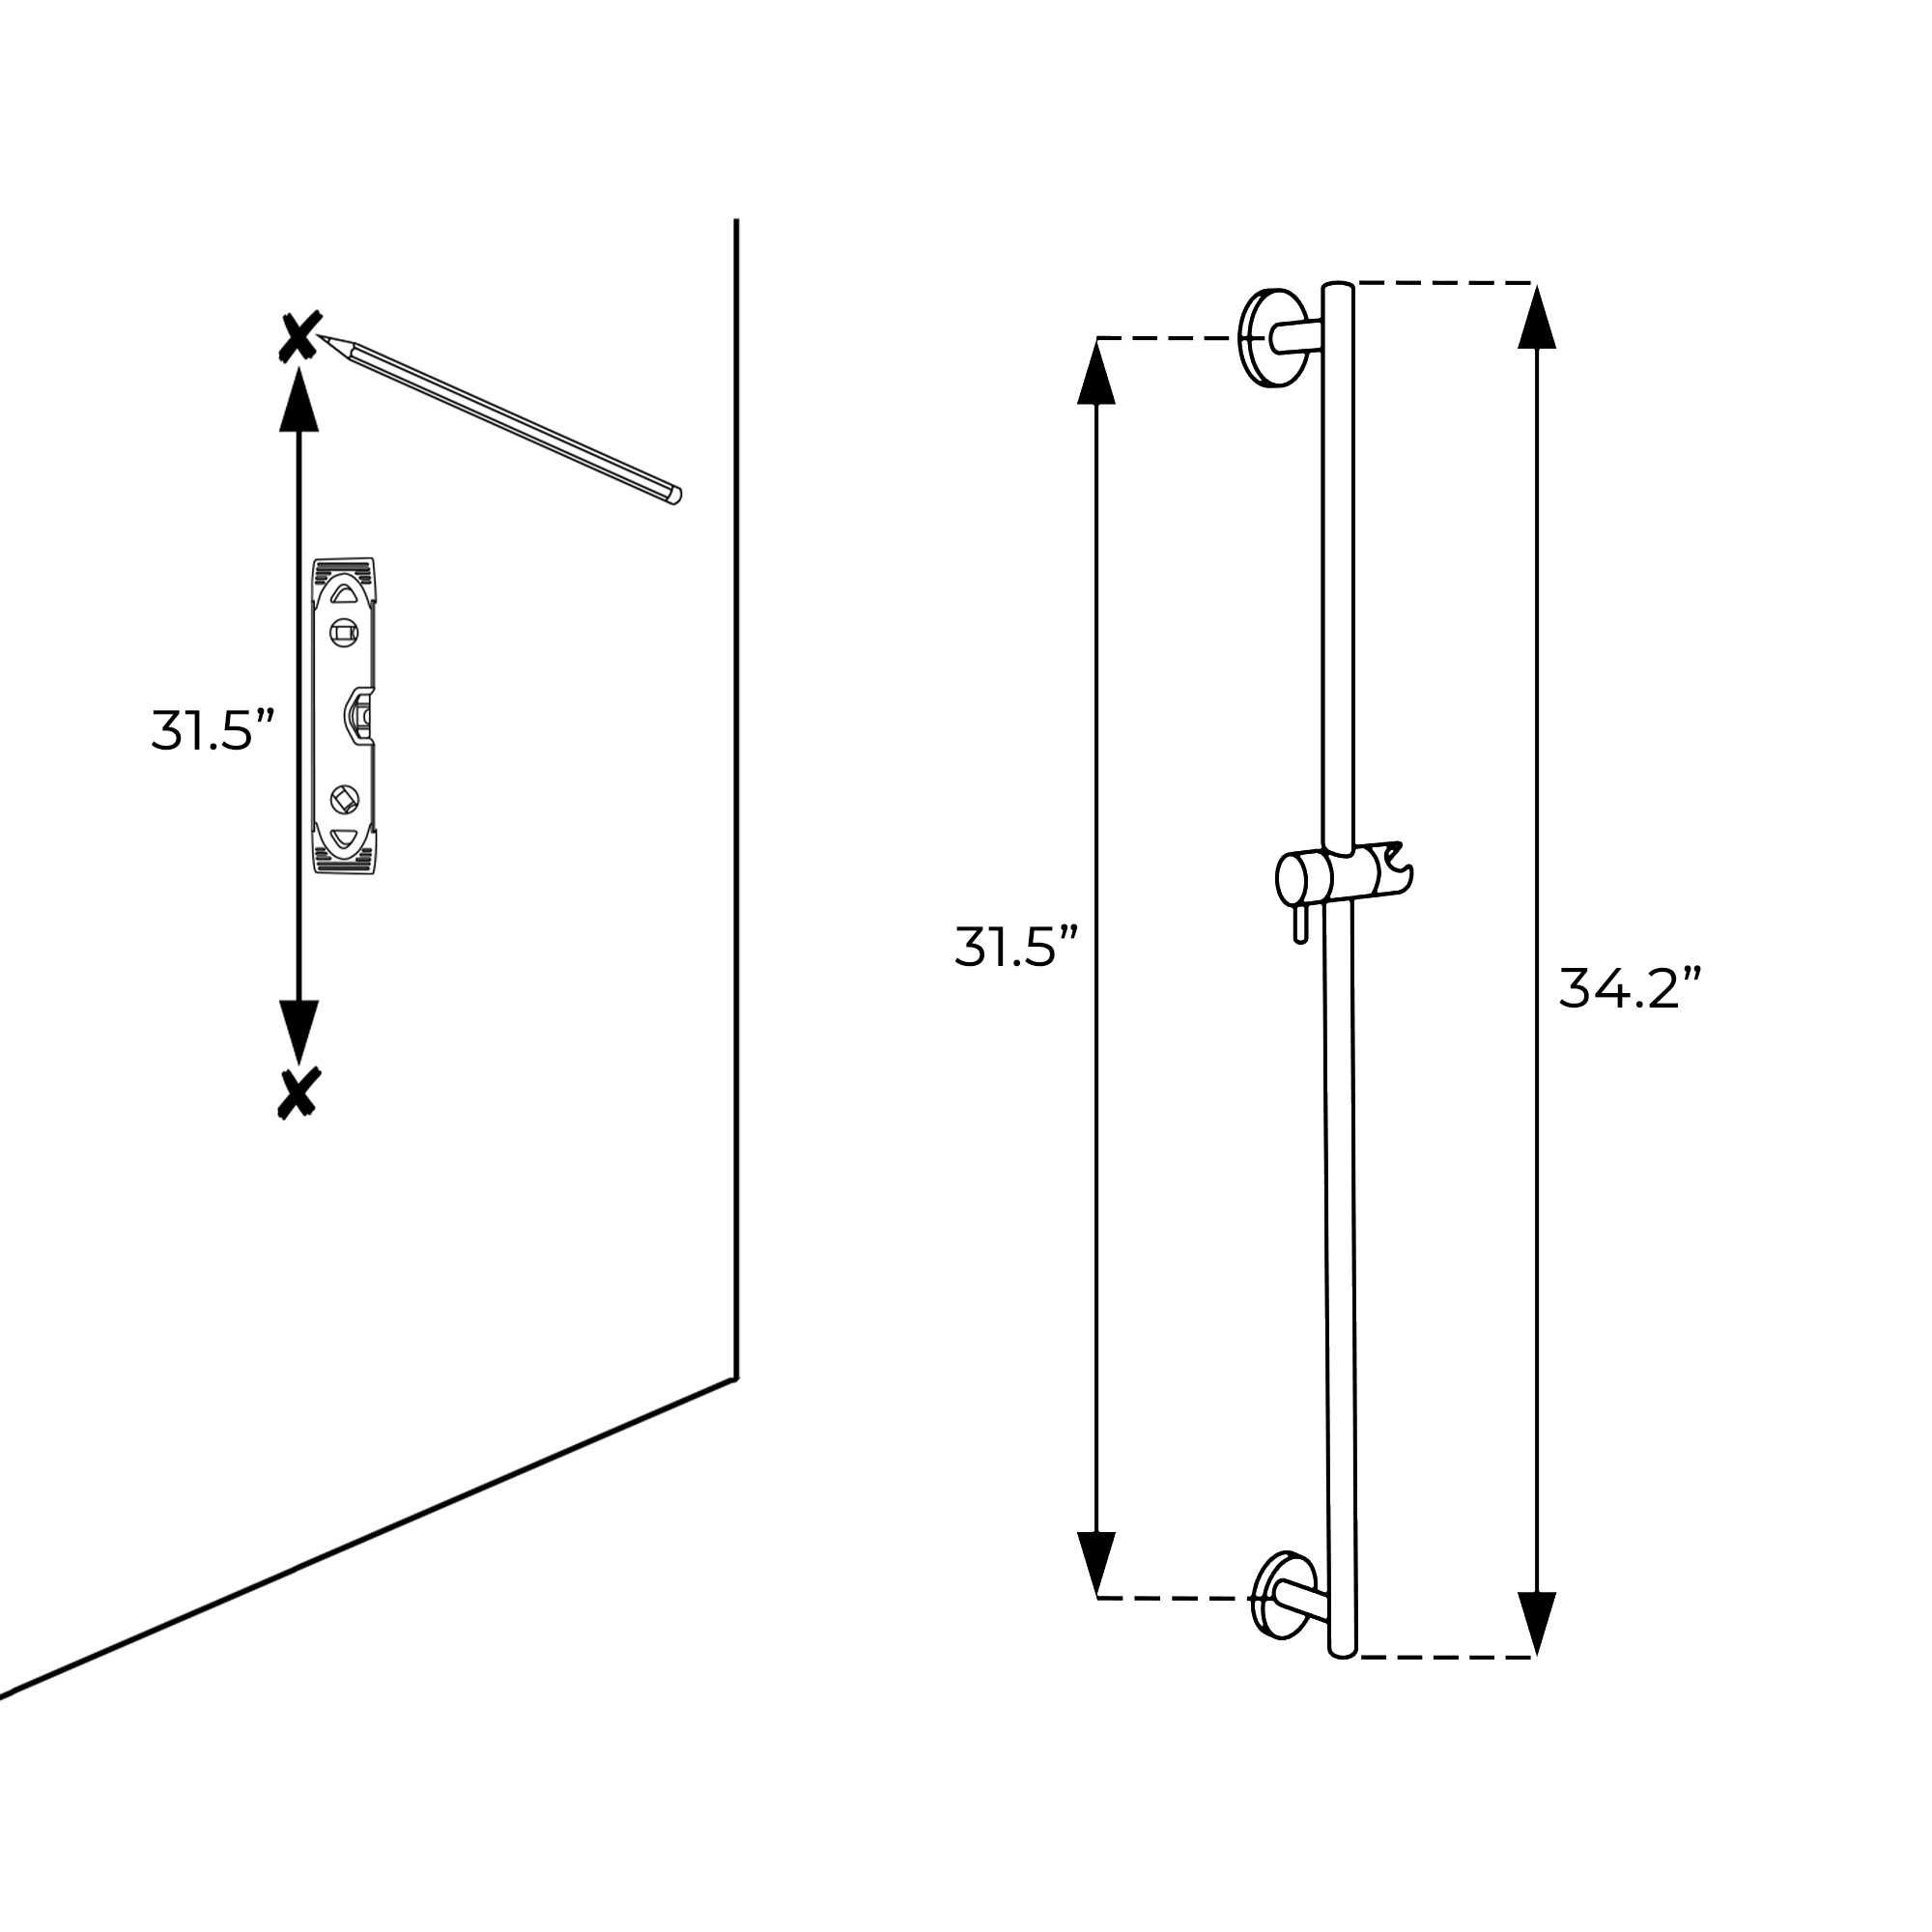
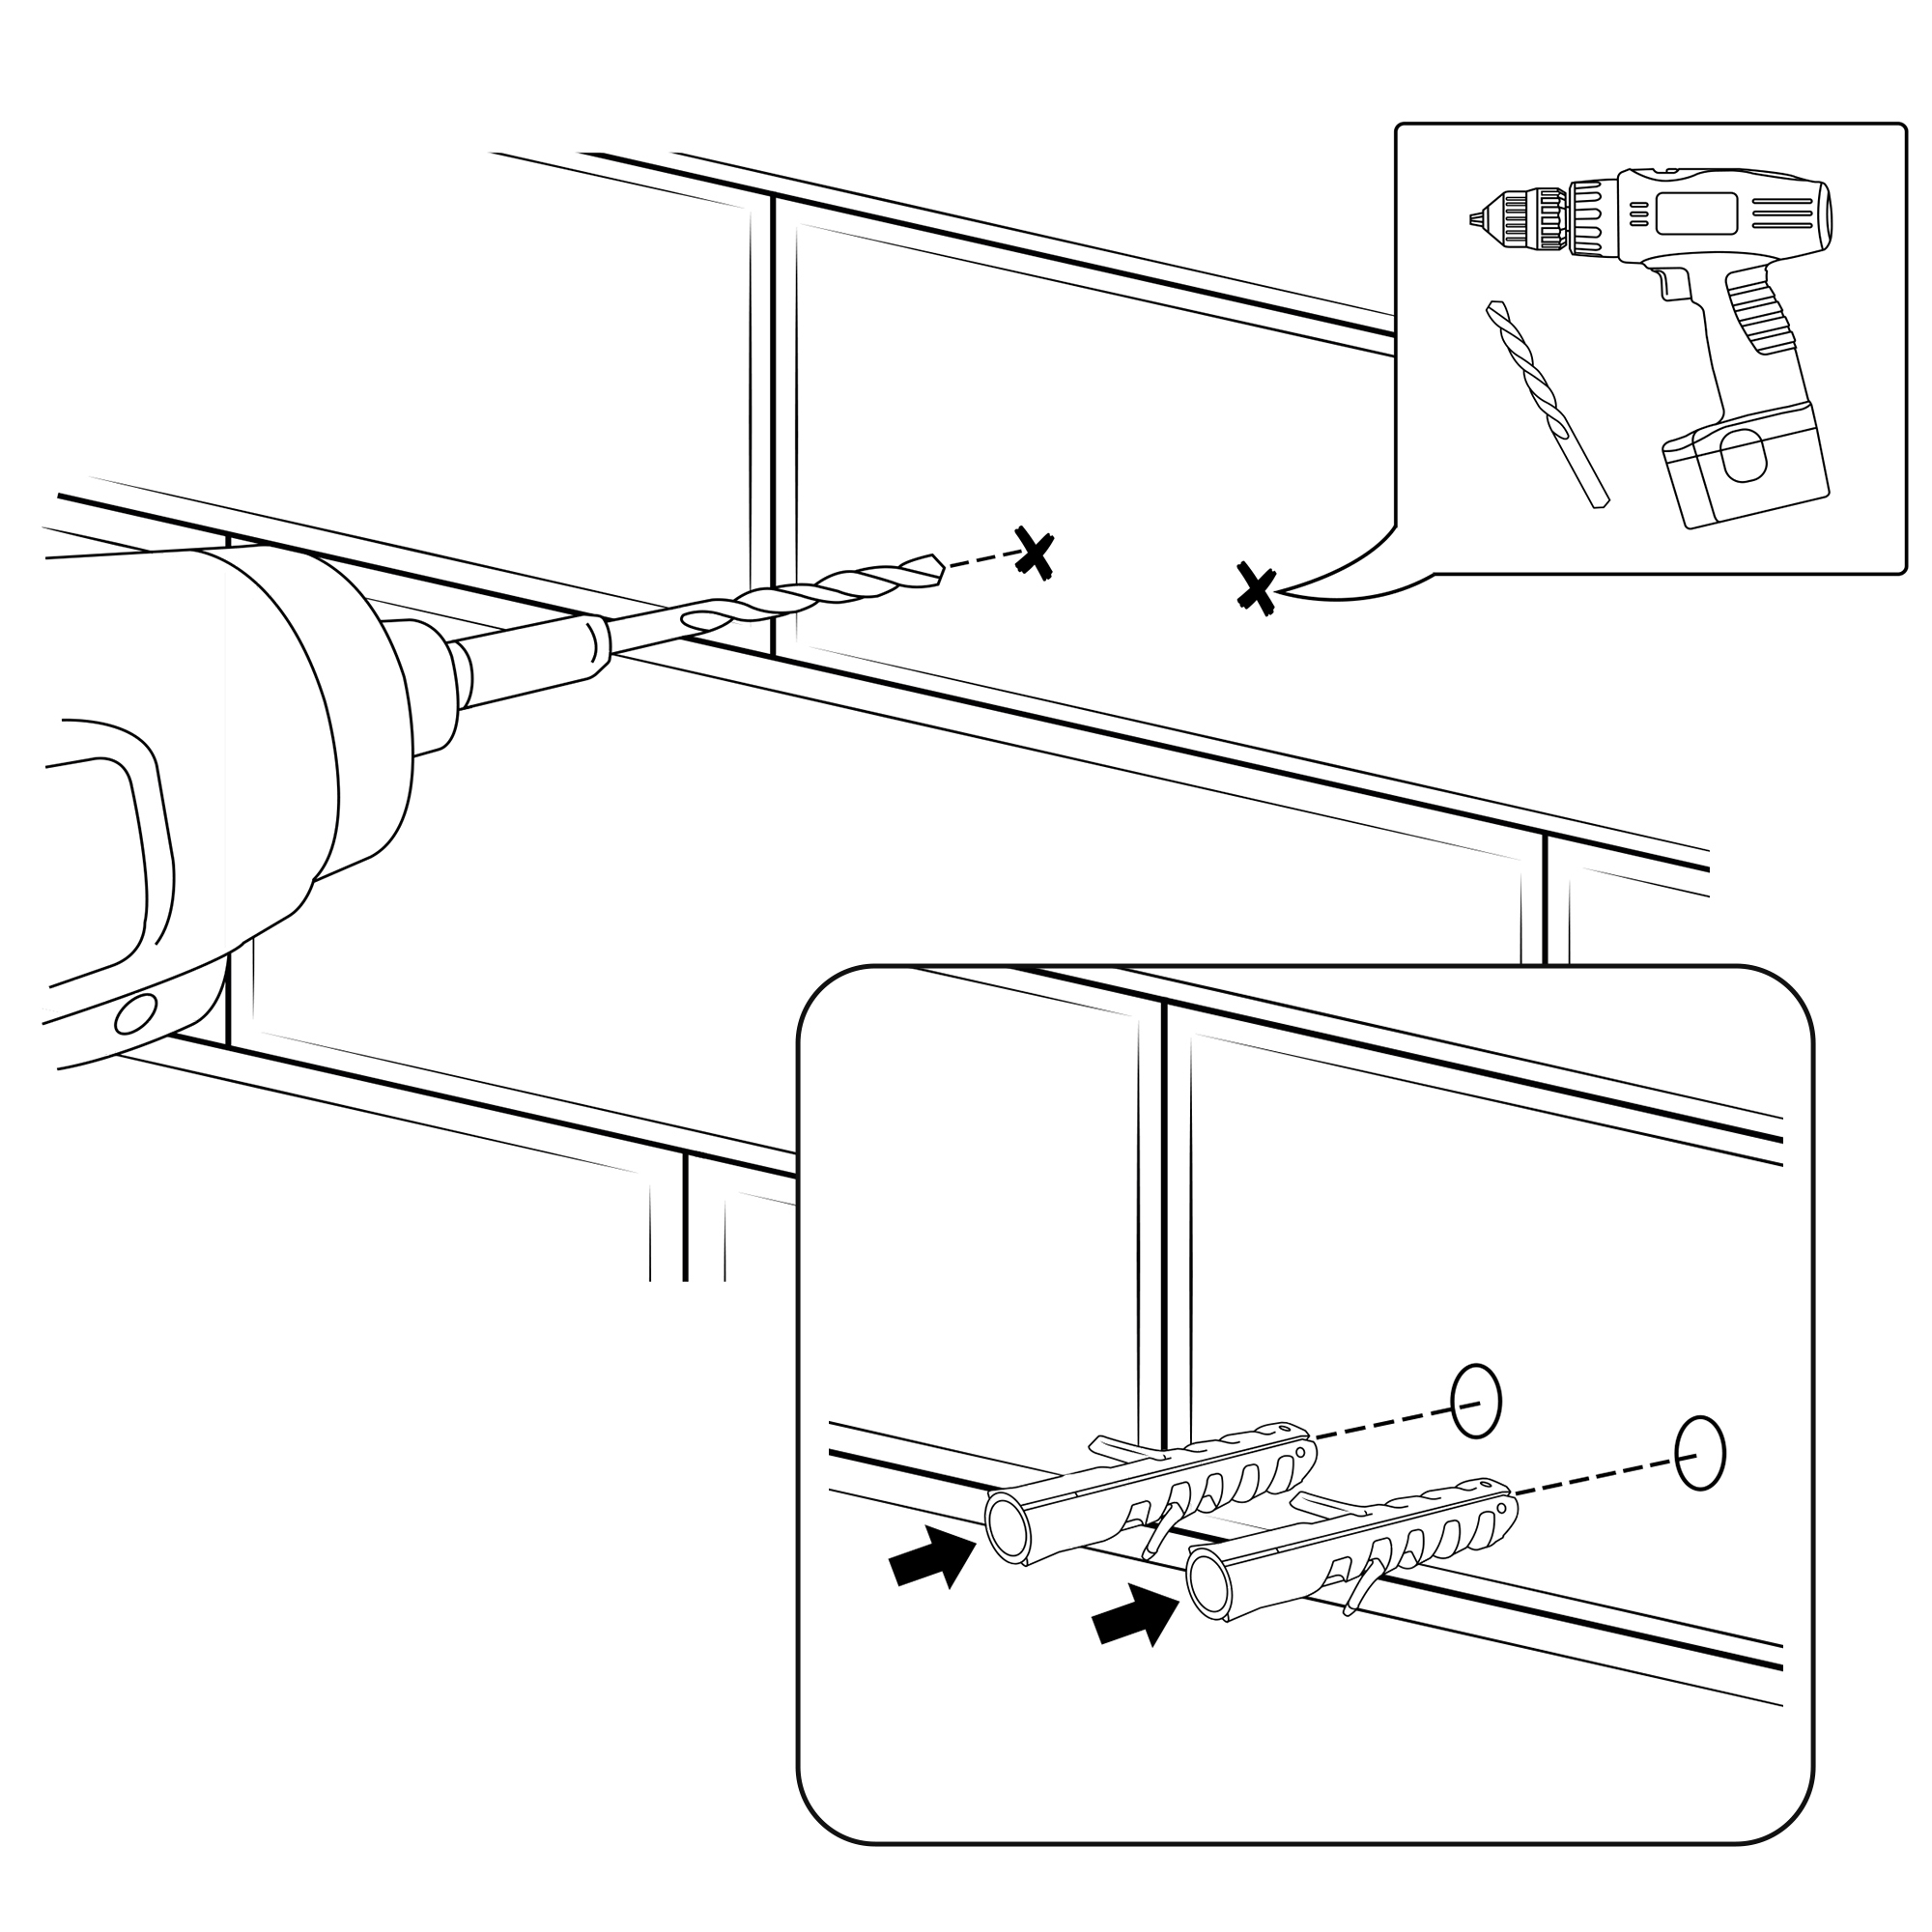
2. Drill two holes size 0.2" (6mm) on the wall according to the hole position of the shower holder.
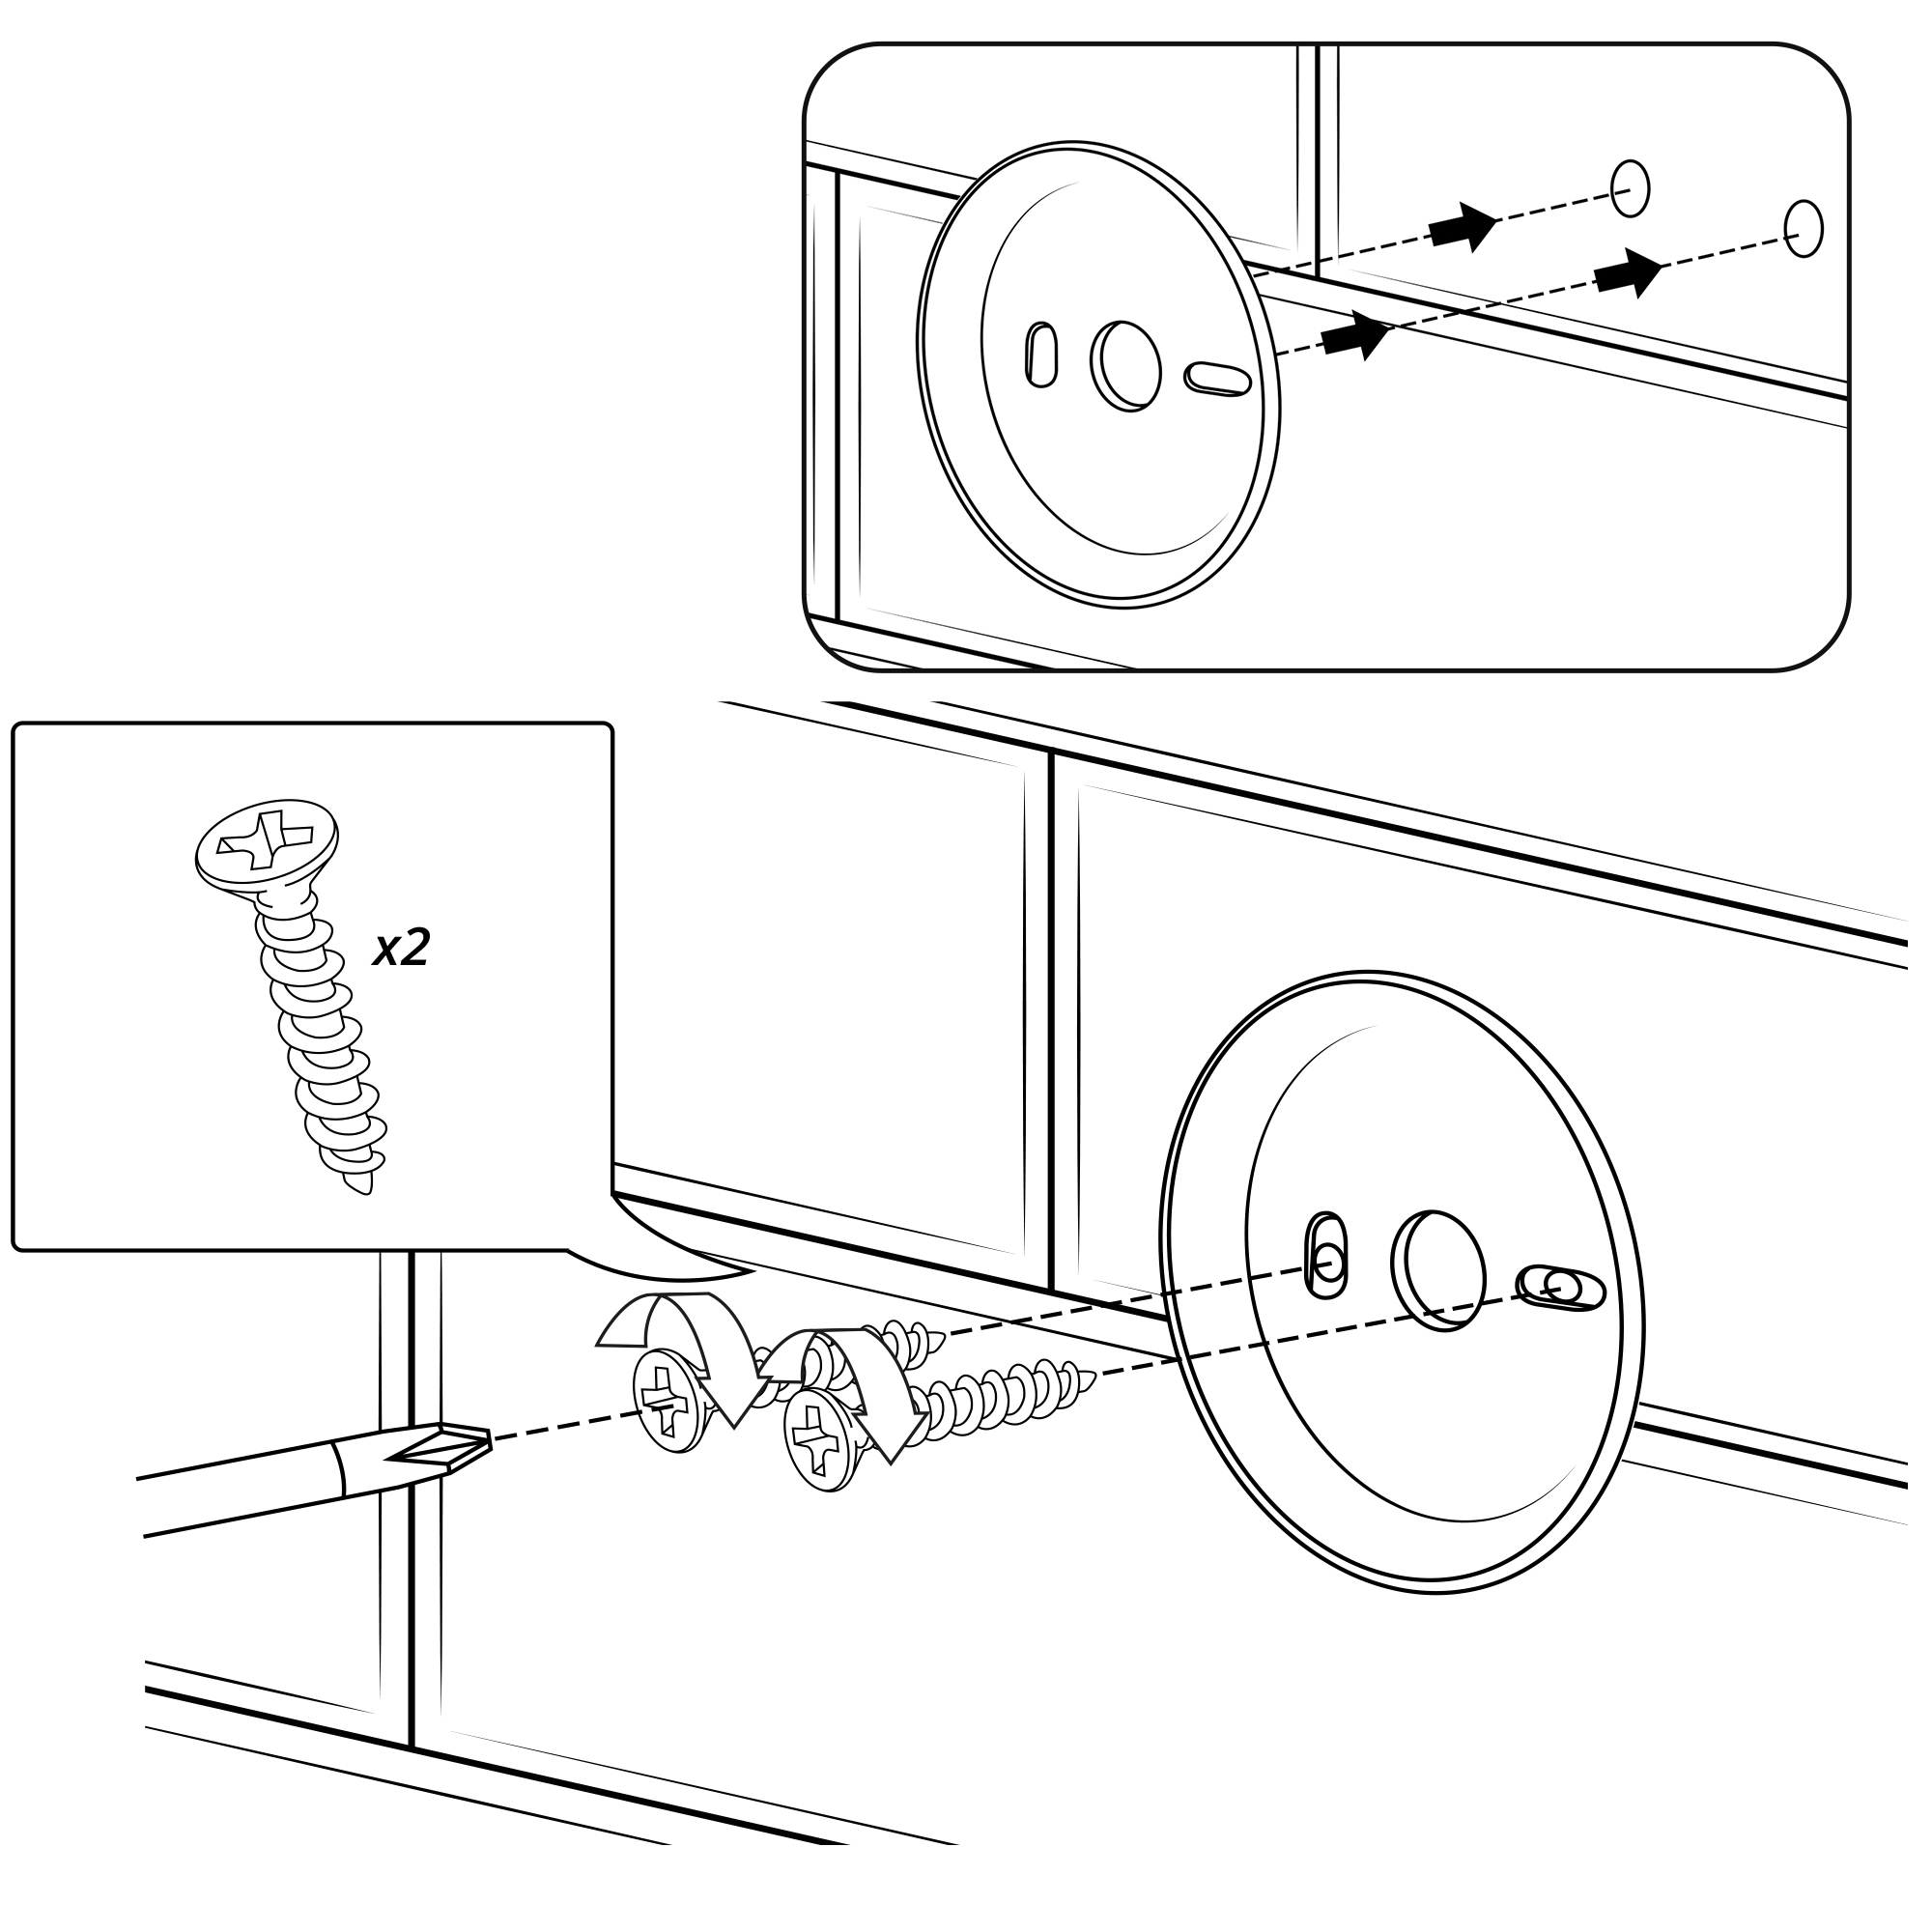
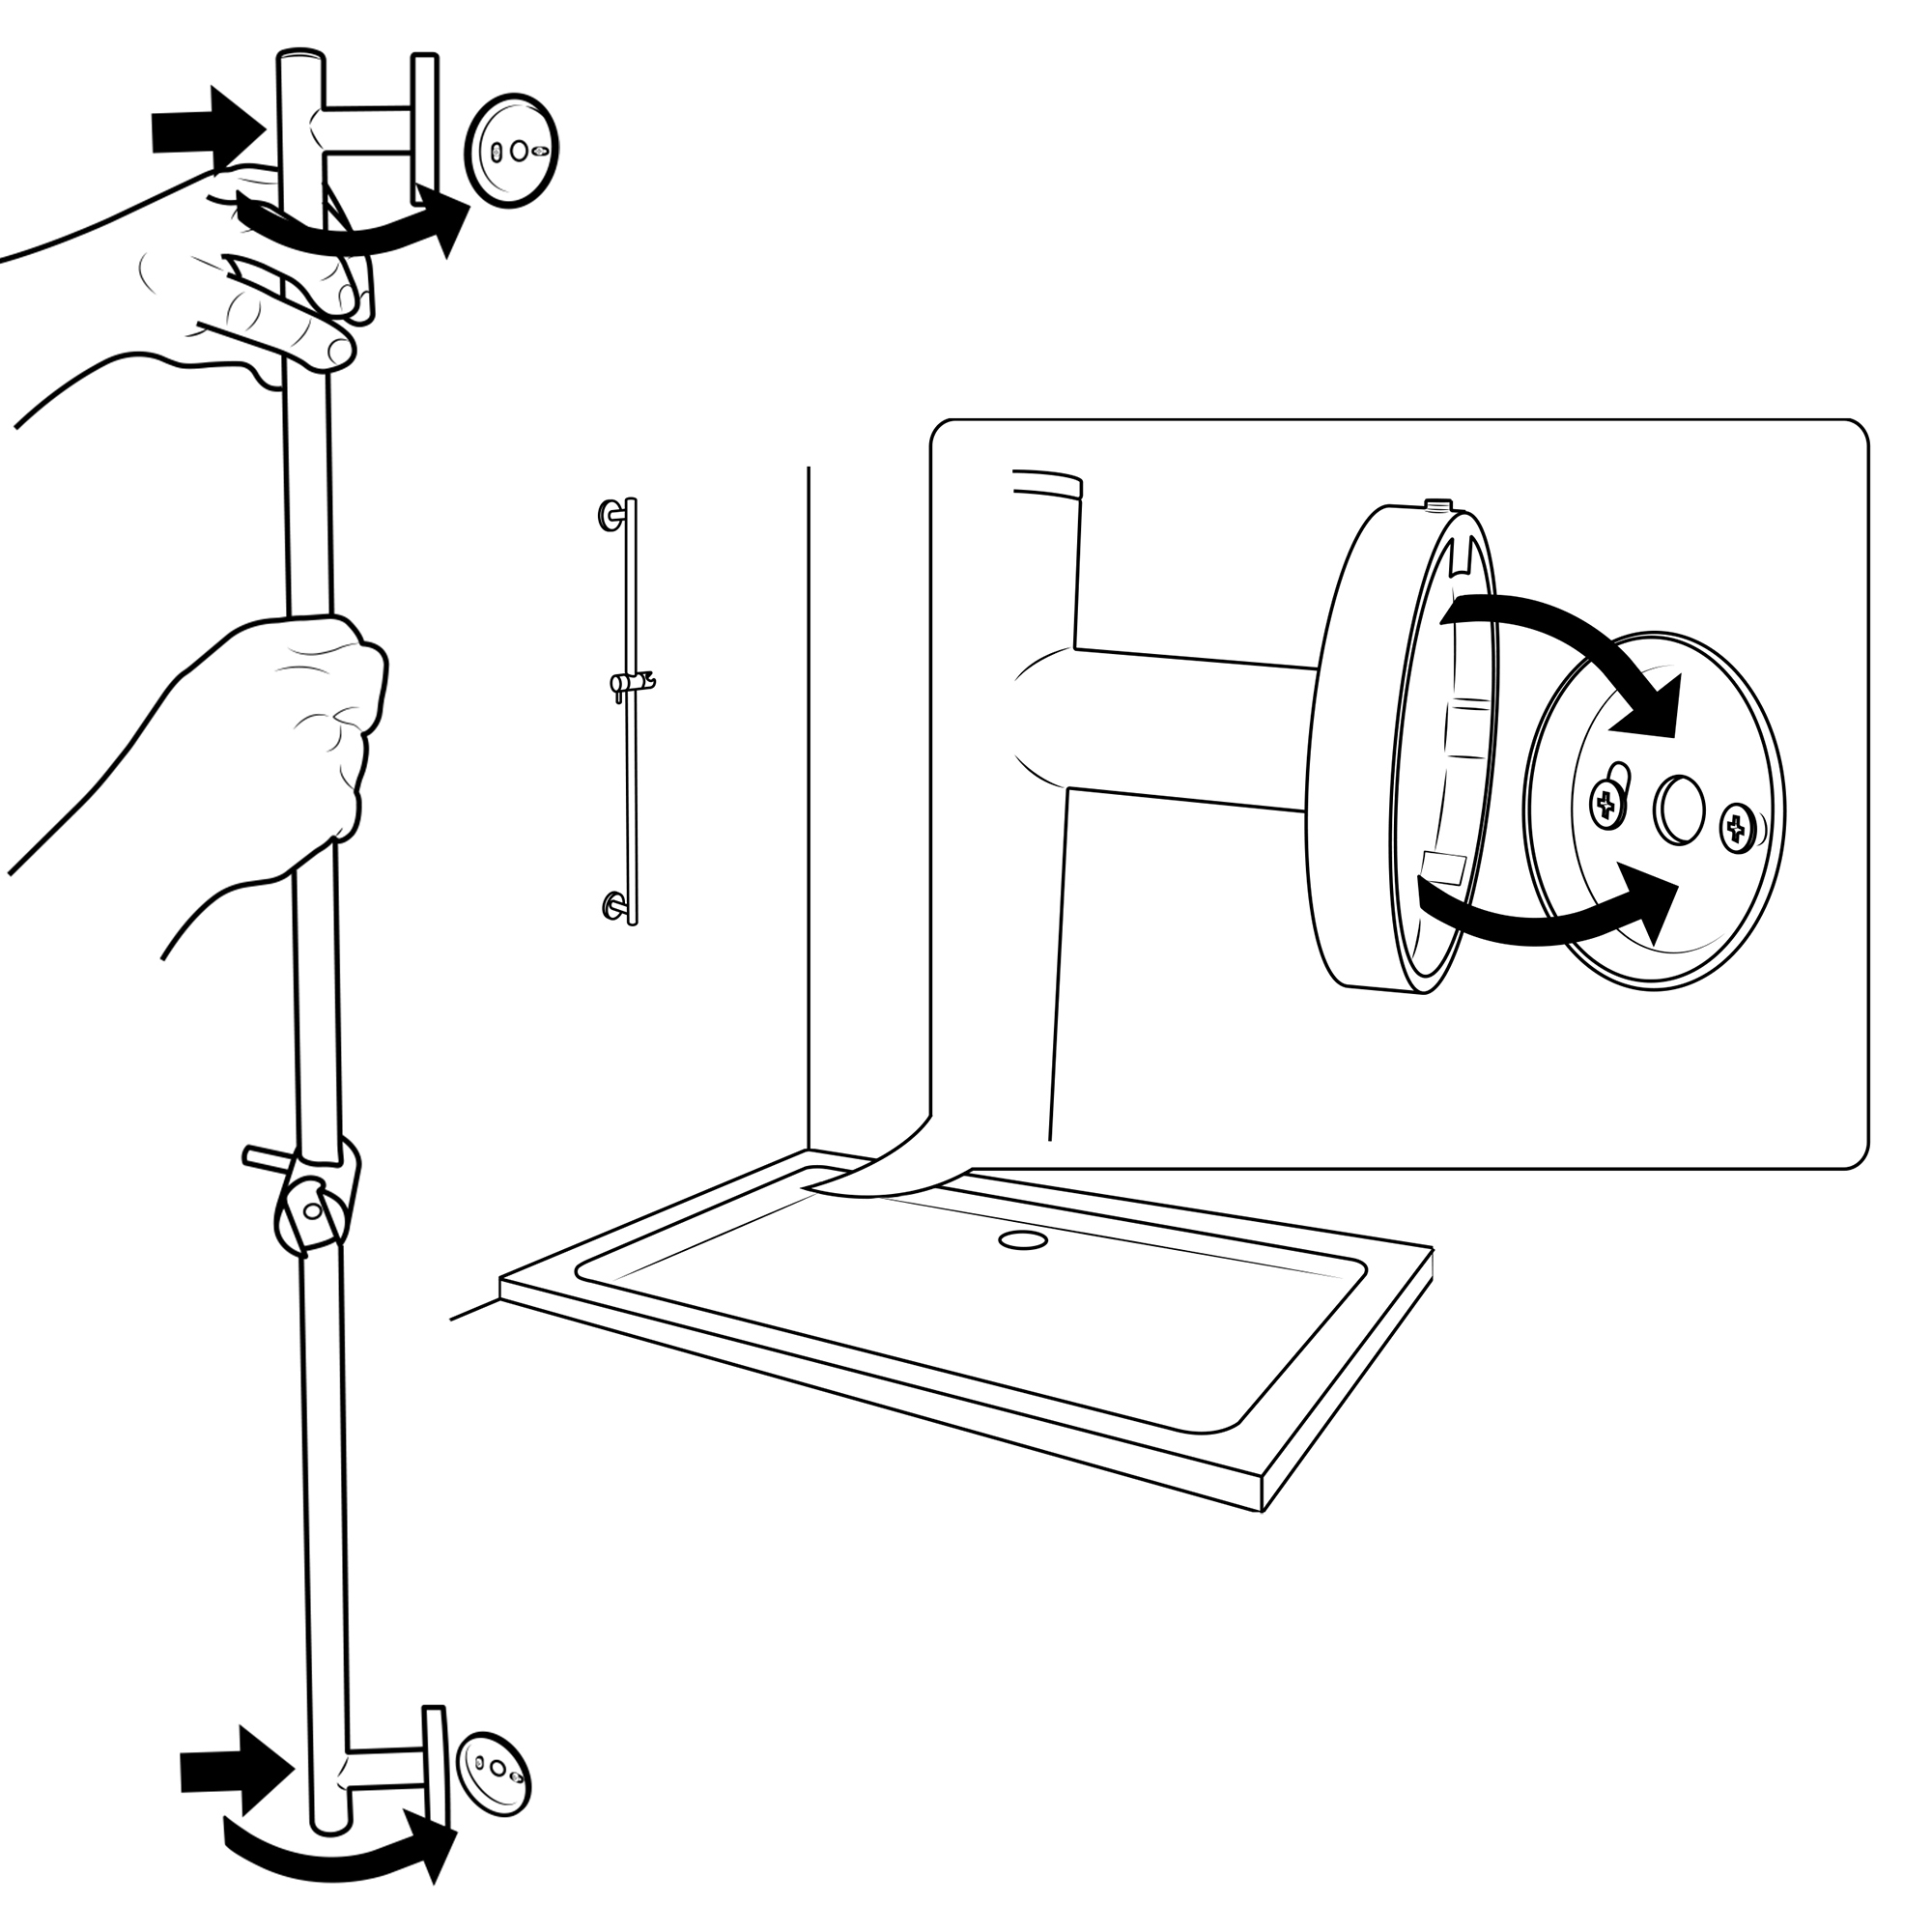
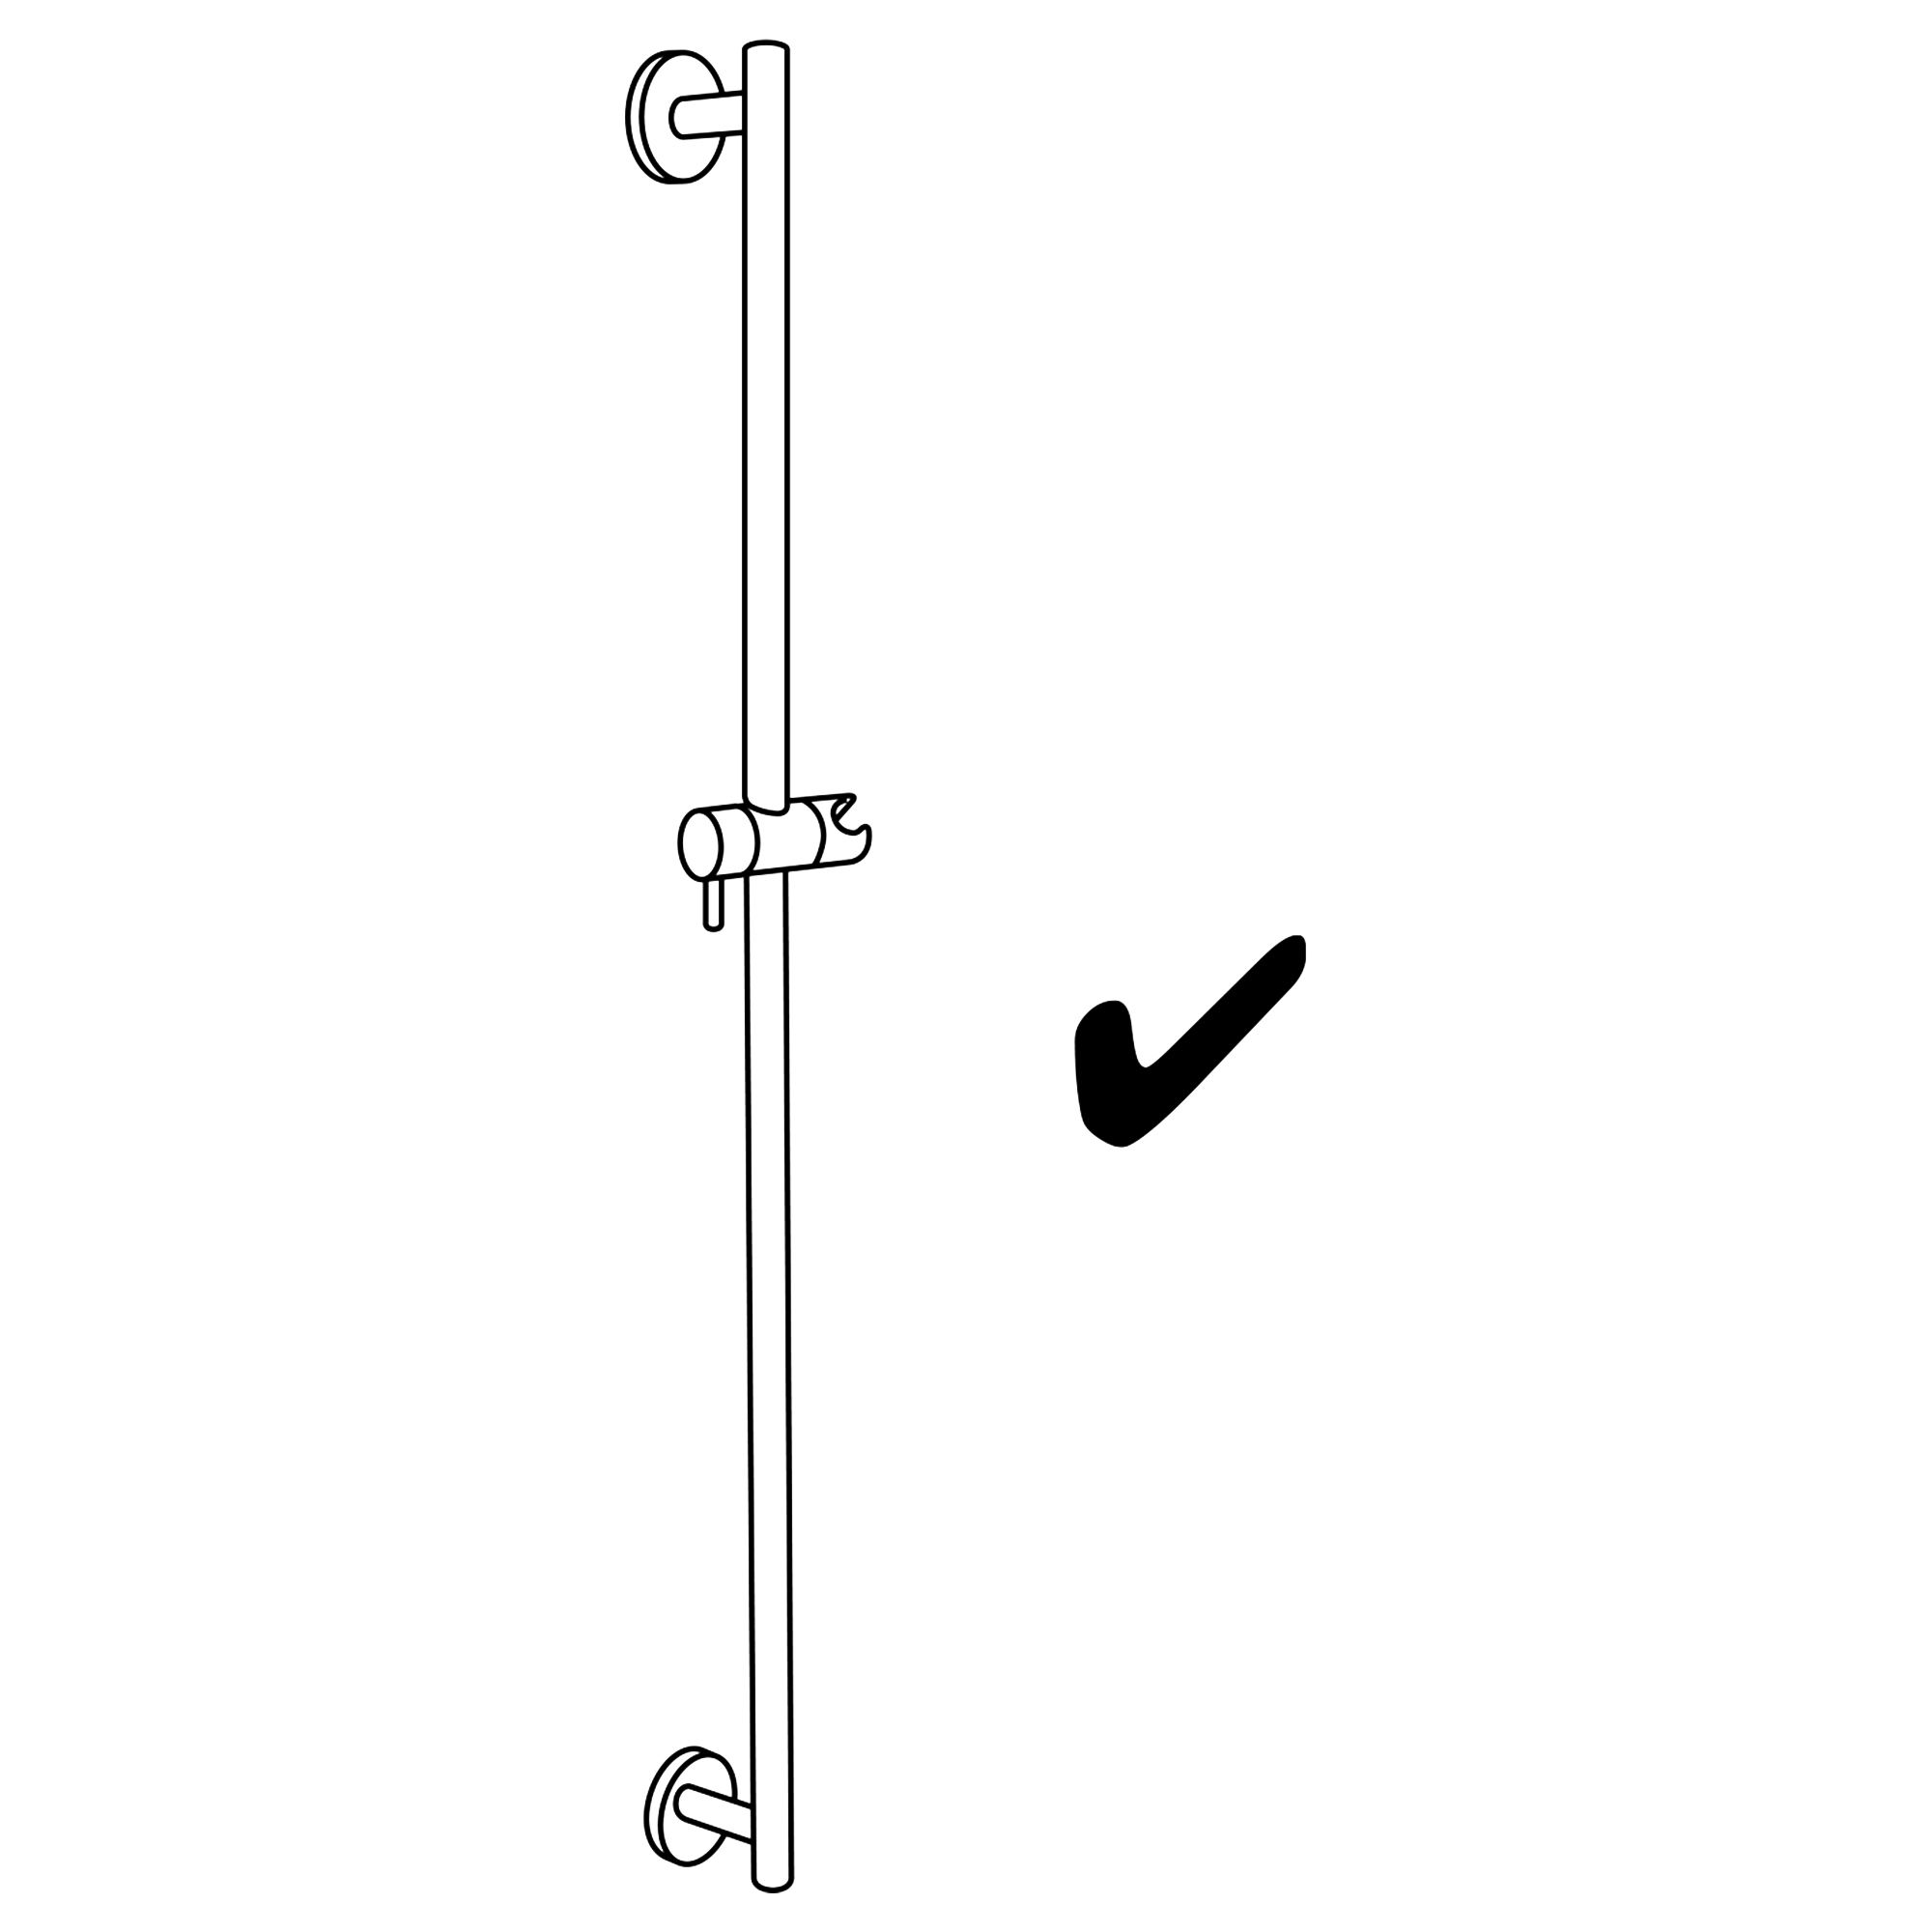
3. Use a hammer to break 2 plastic wall plug into two holes. Tighten the screws with the plastic wall plug and locking with the shower holder. Then install the closed cover.
4. Connect the shower hose with the water outlet connection part and hand shower. Plug the hand shower in the shower holder.
Mixer Installation Instruction
How to install the Shower Set with Showerhead, Hand Held Shower and Shower Mixer