Fontana Gold Trialo Color Changing LED Shower Head with Adjustable Body Jets
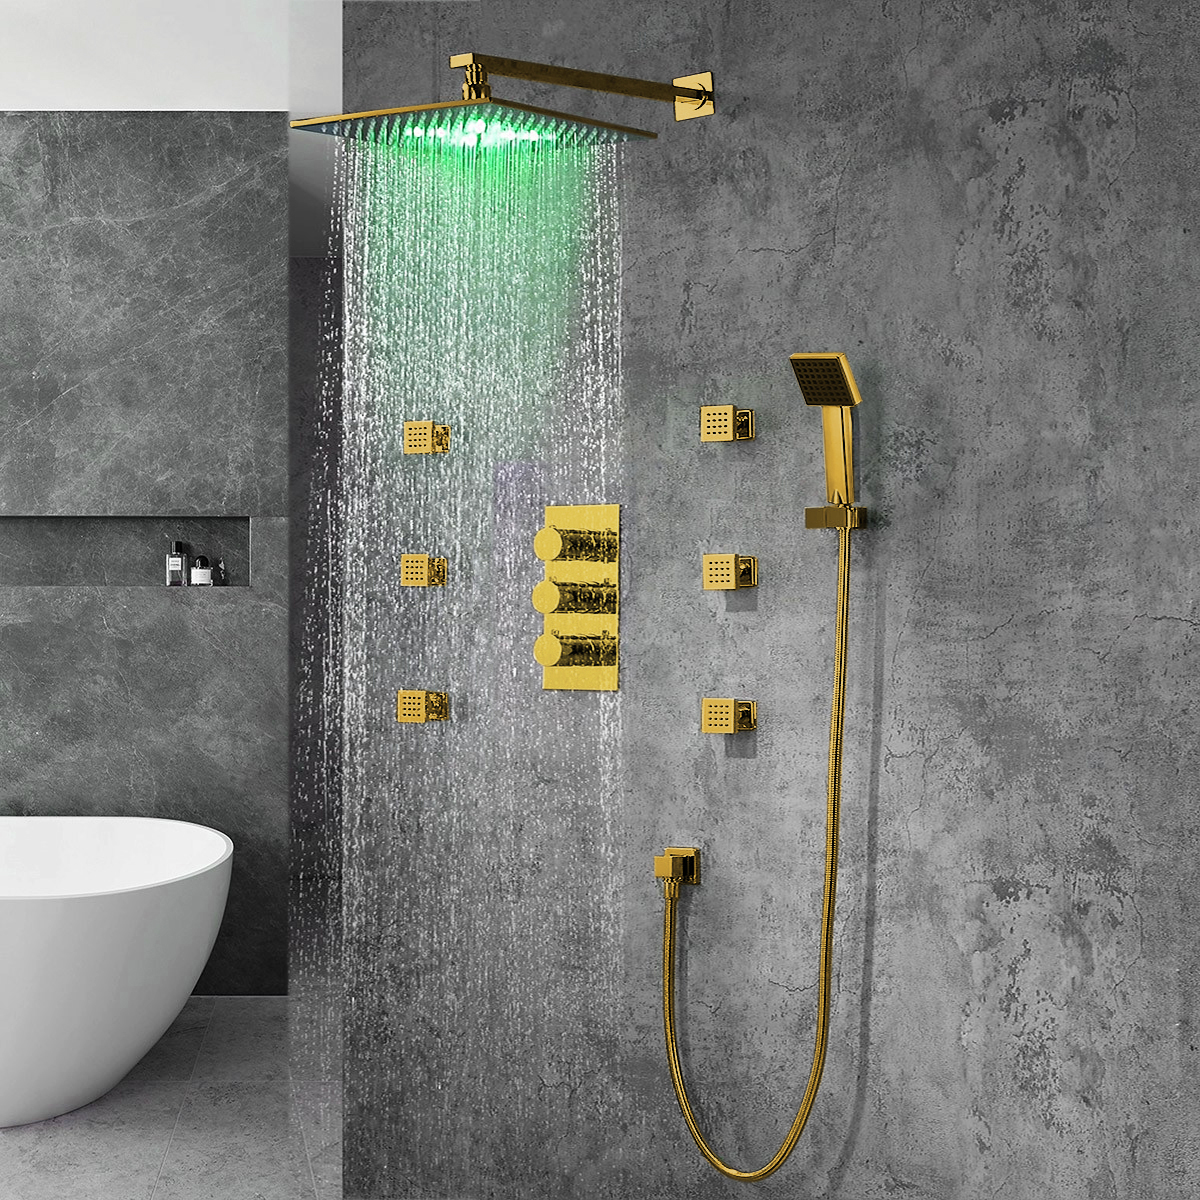
The Trialo Rainfall Shower Set from FontanaShowers is one of the most customizable models available. You can adjust almost any feature to best suits your needs. The shower head is available in round or square design and varies in size from 8” to 24”. The standard mixer comes with the set but can be upgraded to a thermostatic mixer. Six adjustable body massage jets and a handheld shower for your convenience. It comes complete with accessories and installation instructions.
Fontana Gold Trialo Color Changing LED Shower Head with Adjustable Body Jets Features:
|
Brand Name: FontanaShowers
Model Number: LED-SHOWER-HEAD-0522GG
Type: Shower Set
Material: Solid Brass
Finish: Gold
Style: Contemporary Rain Showerhead
Showerhead Thickness: 0.33"
Showerhead Width: Available in 8", 10", 12", or 16"
Showerhead Length: Available in 8", 10", 12", or 16"
LED Power Source: Water Flow
LED Colors: Blue, Green, Red
Showerhead Style: Contemporary Rain Shower
Mount Method: Wall or Ceiling Mount
Connection: 1/2" US standard (included)
Shower Arm: Included
Body Jets: Solid Brass
|
|
FontanaShowers® Product Warranty Information 
- Before you begin, please read the installation instructions below. Observe all local building and safety codes.
- Unpack and inspect the product for any shipping damages. If you find damages, do not install.
- Please note all showers must be installed by a professional and certified plumber otherwise warranty might be voided.
|
-------
|
-----
|
|
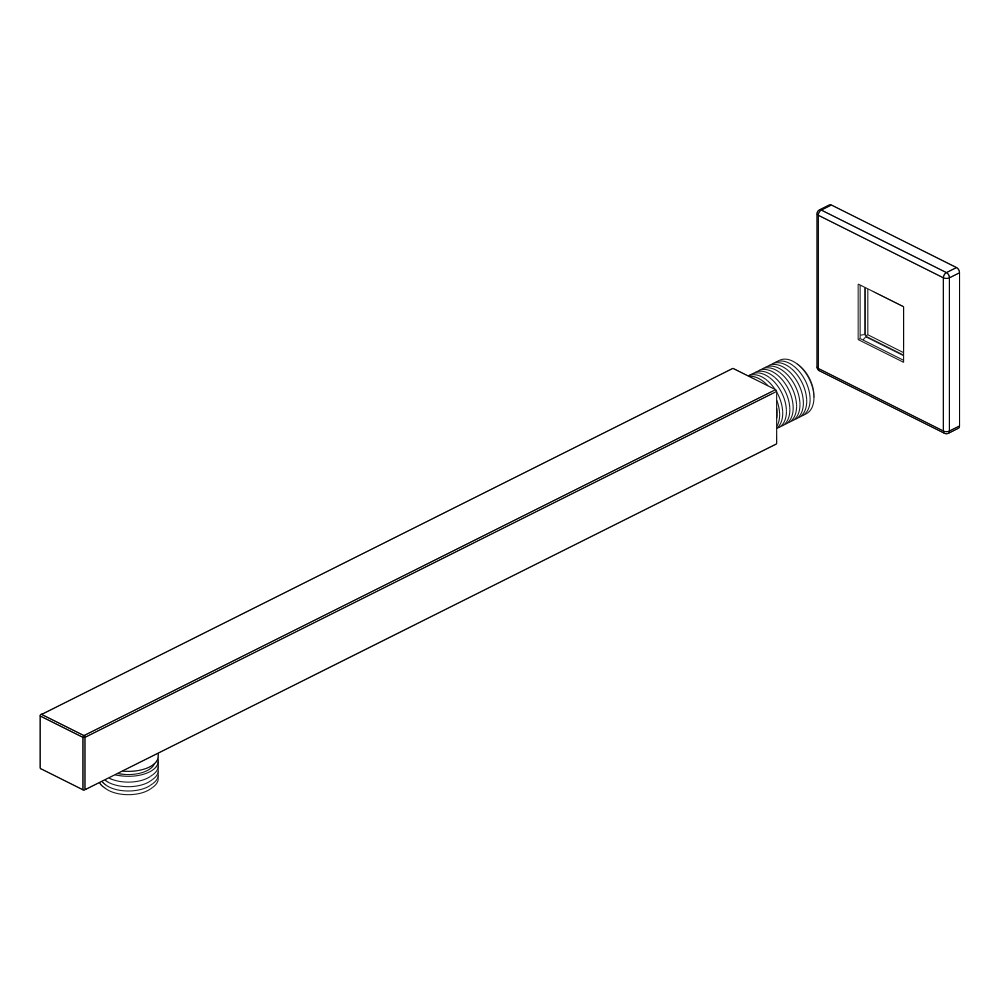
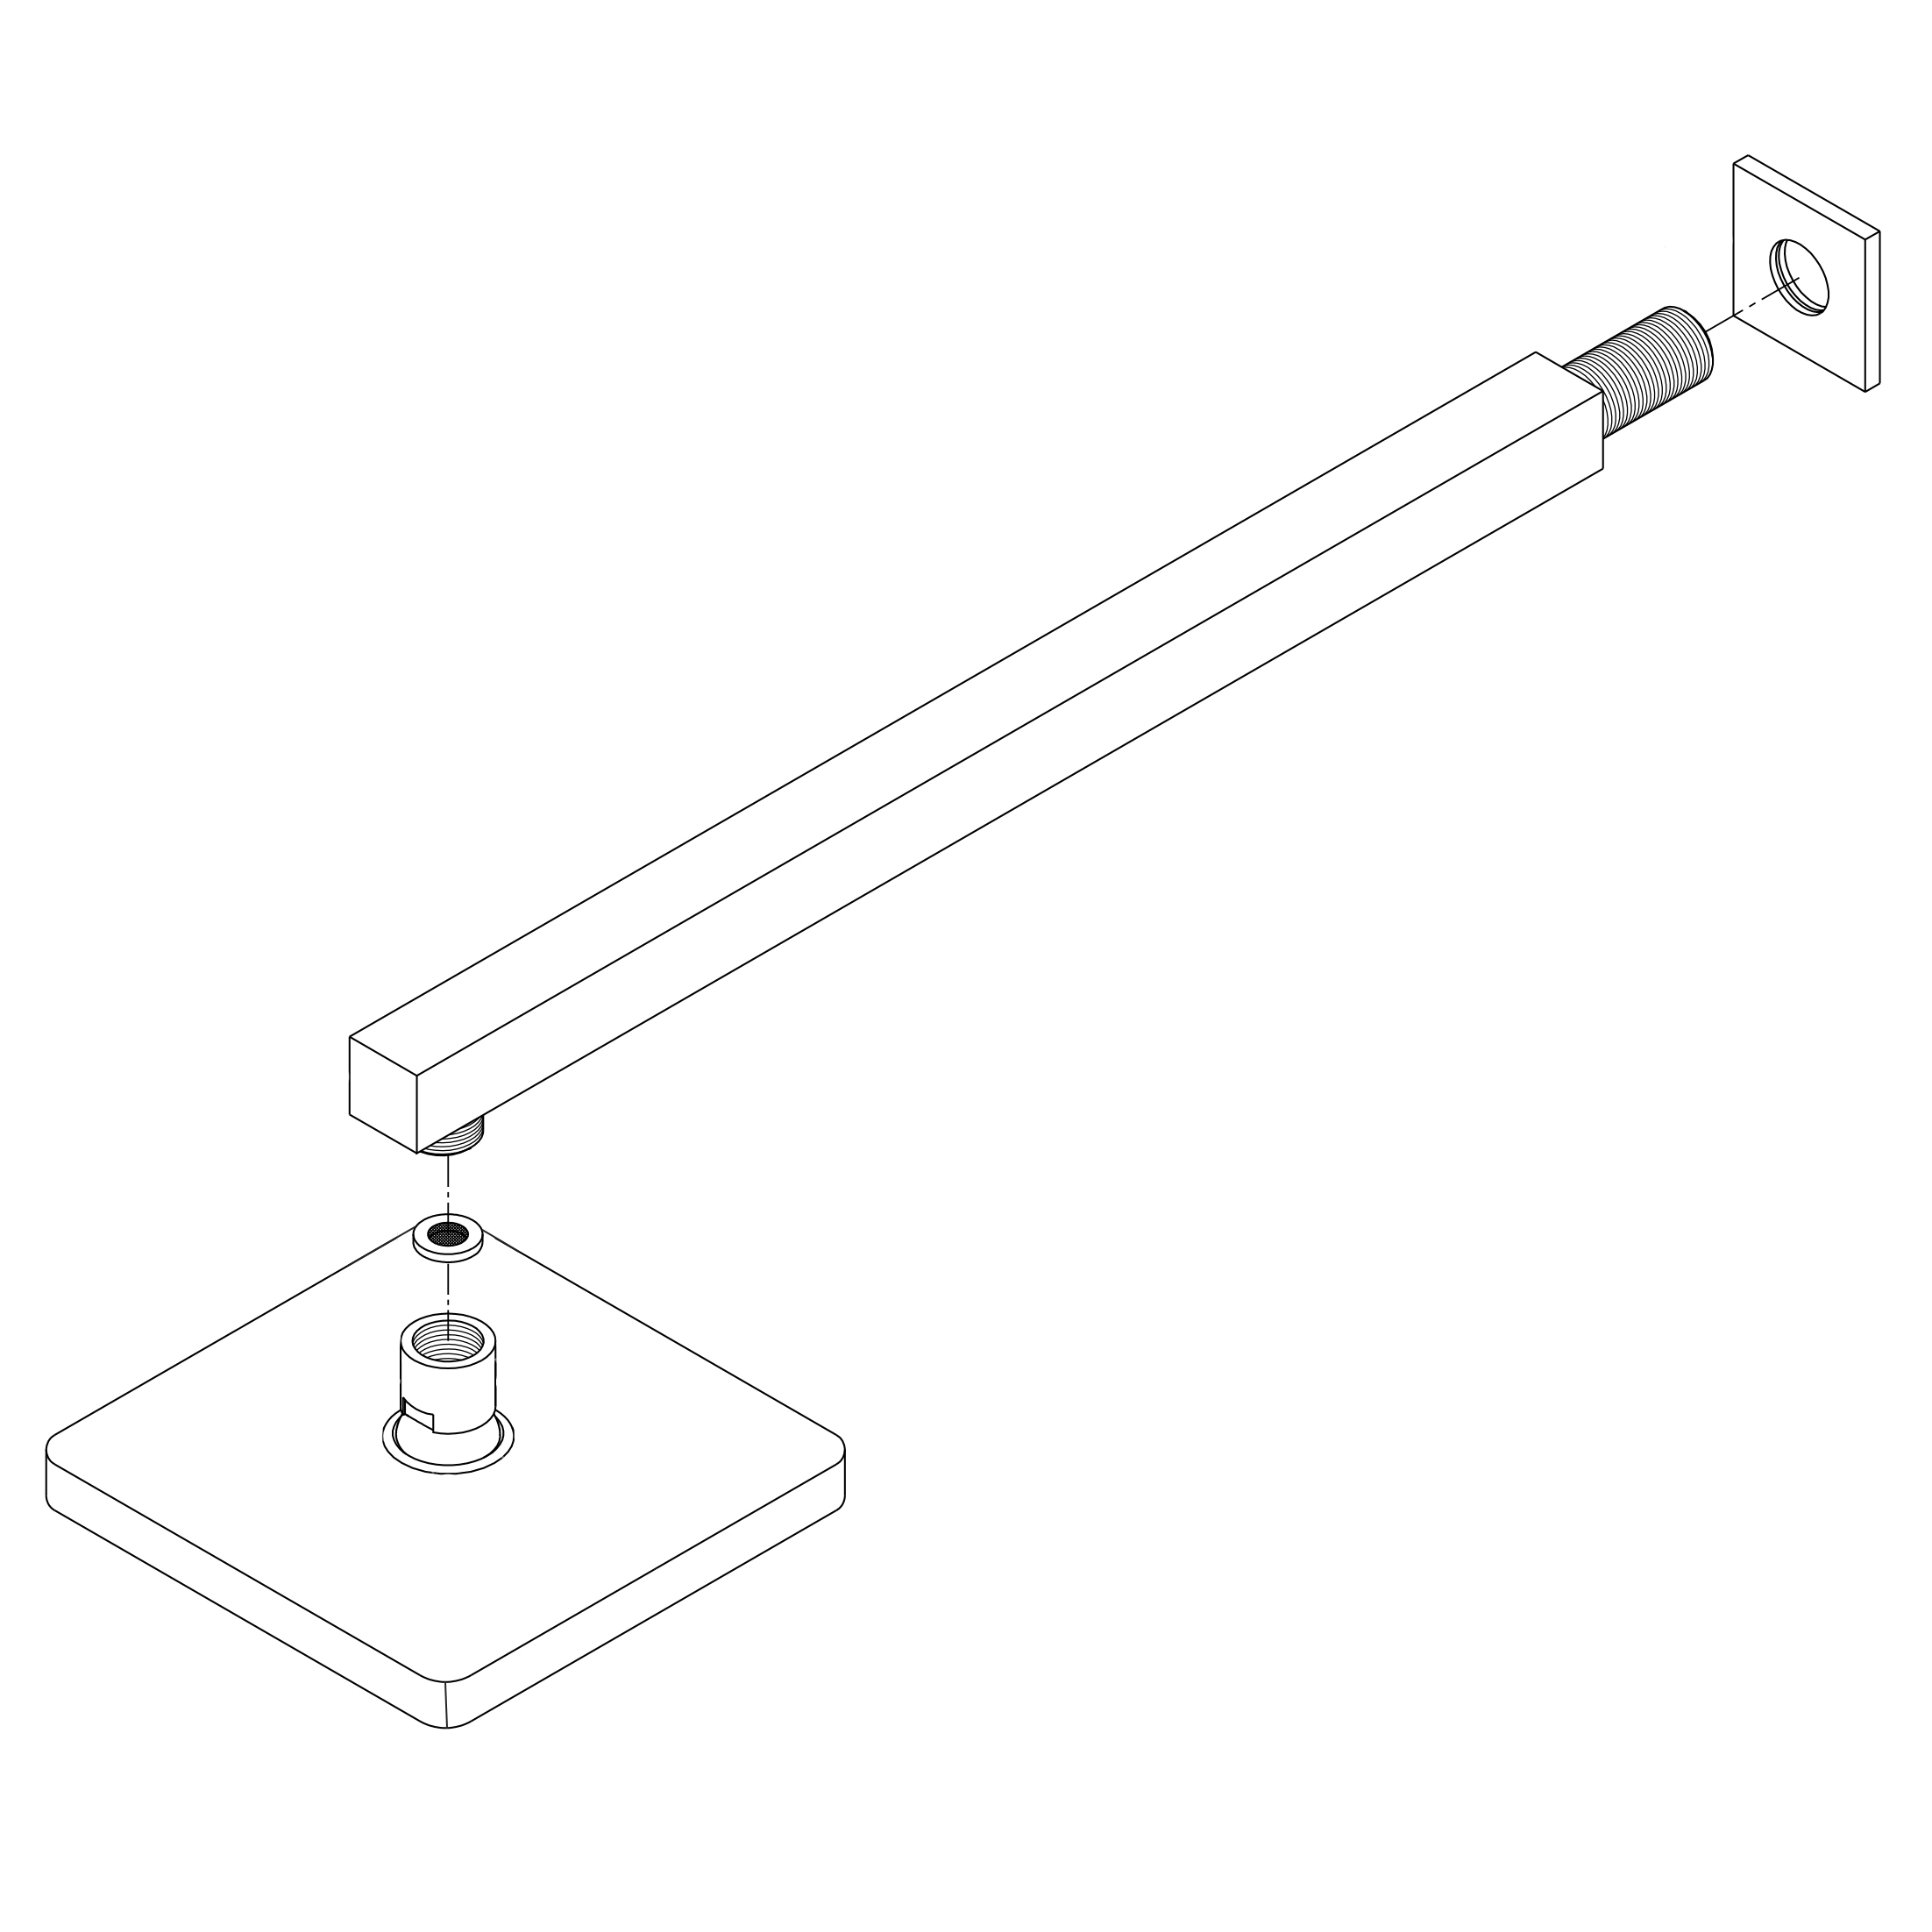
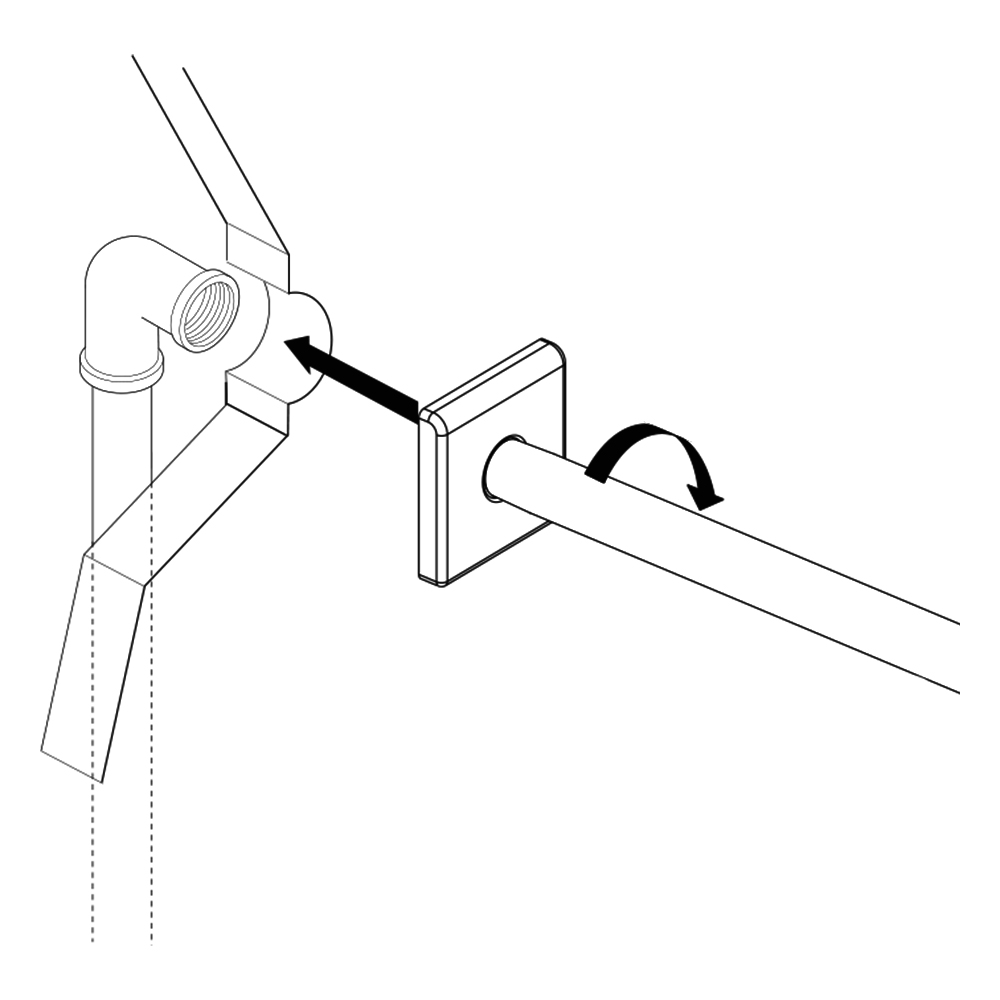
SHOWER HEAD INSTALLATION INSTRUCTIONS
|
|
|
|
|
|
|
|
Step 1:
|
shower
|
Step 2:
|
|
|
|
|
|
|

|
|
|
|
|
|
|
|
|
|
|
|
|
|
|
Step 3:
|
|
Step 4:
|
|
|
|
|
|
|
|
|
|
|
|
|
|
|
|
|
|
|
|
|
|
Step 5:
|
|
|
|
|
|
|
|
|
|
|
|
|
|
|
|
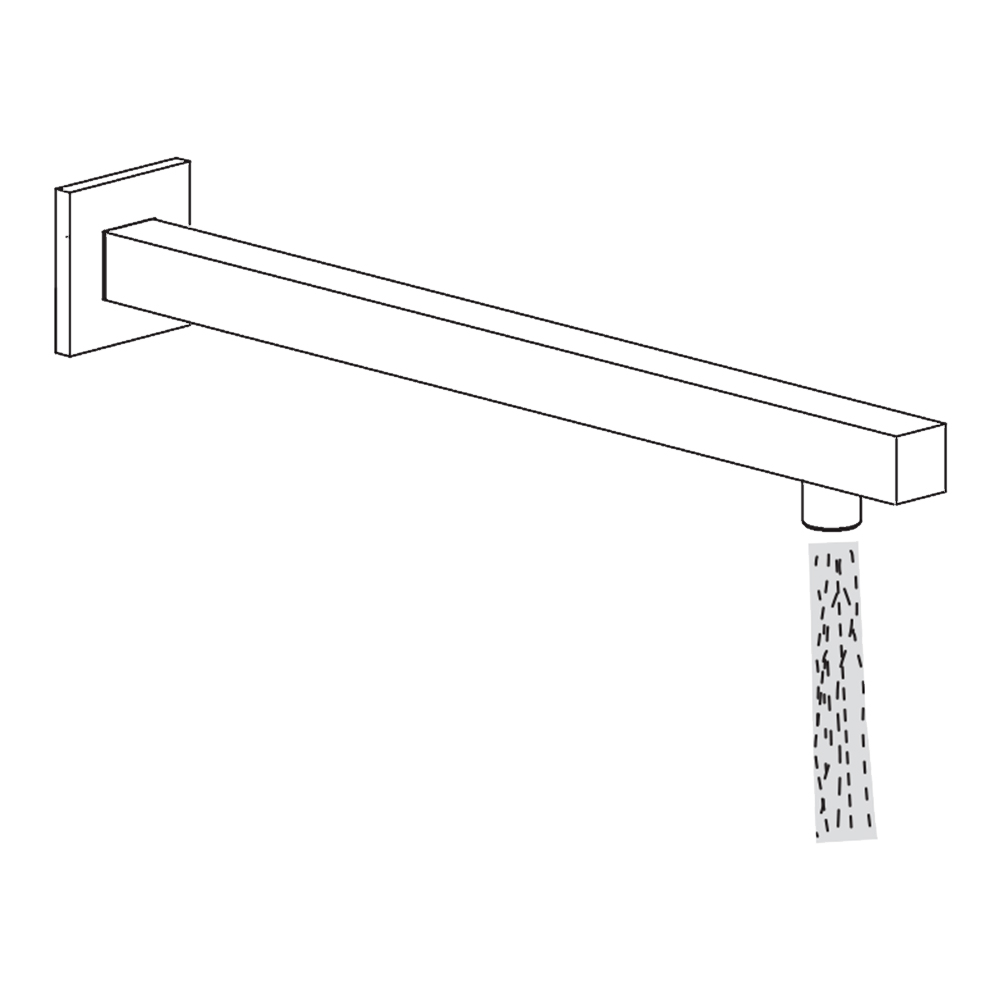
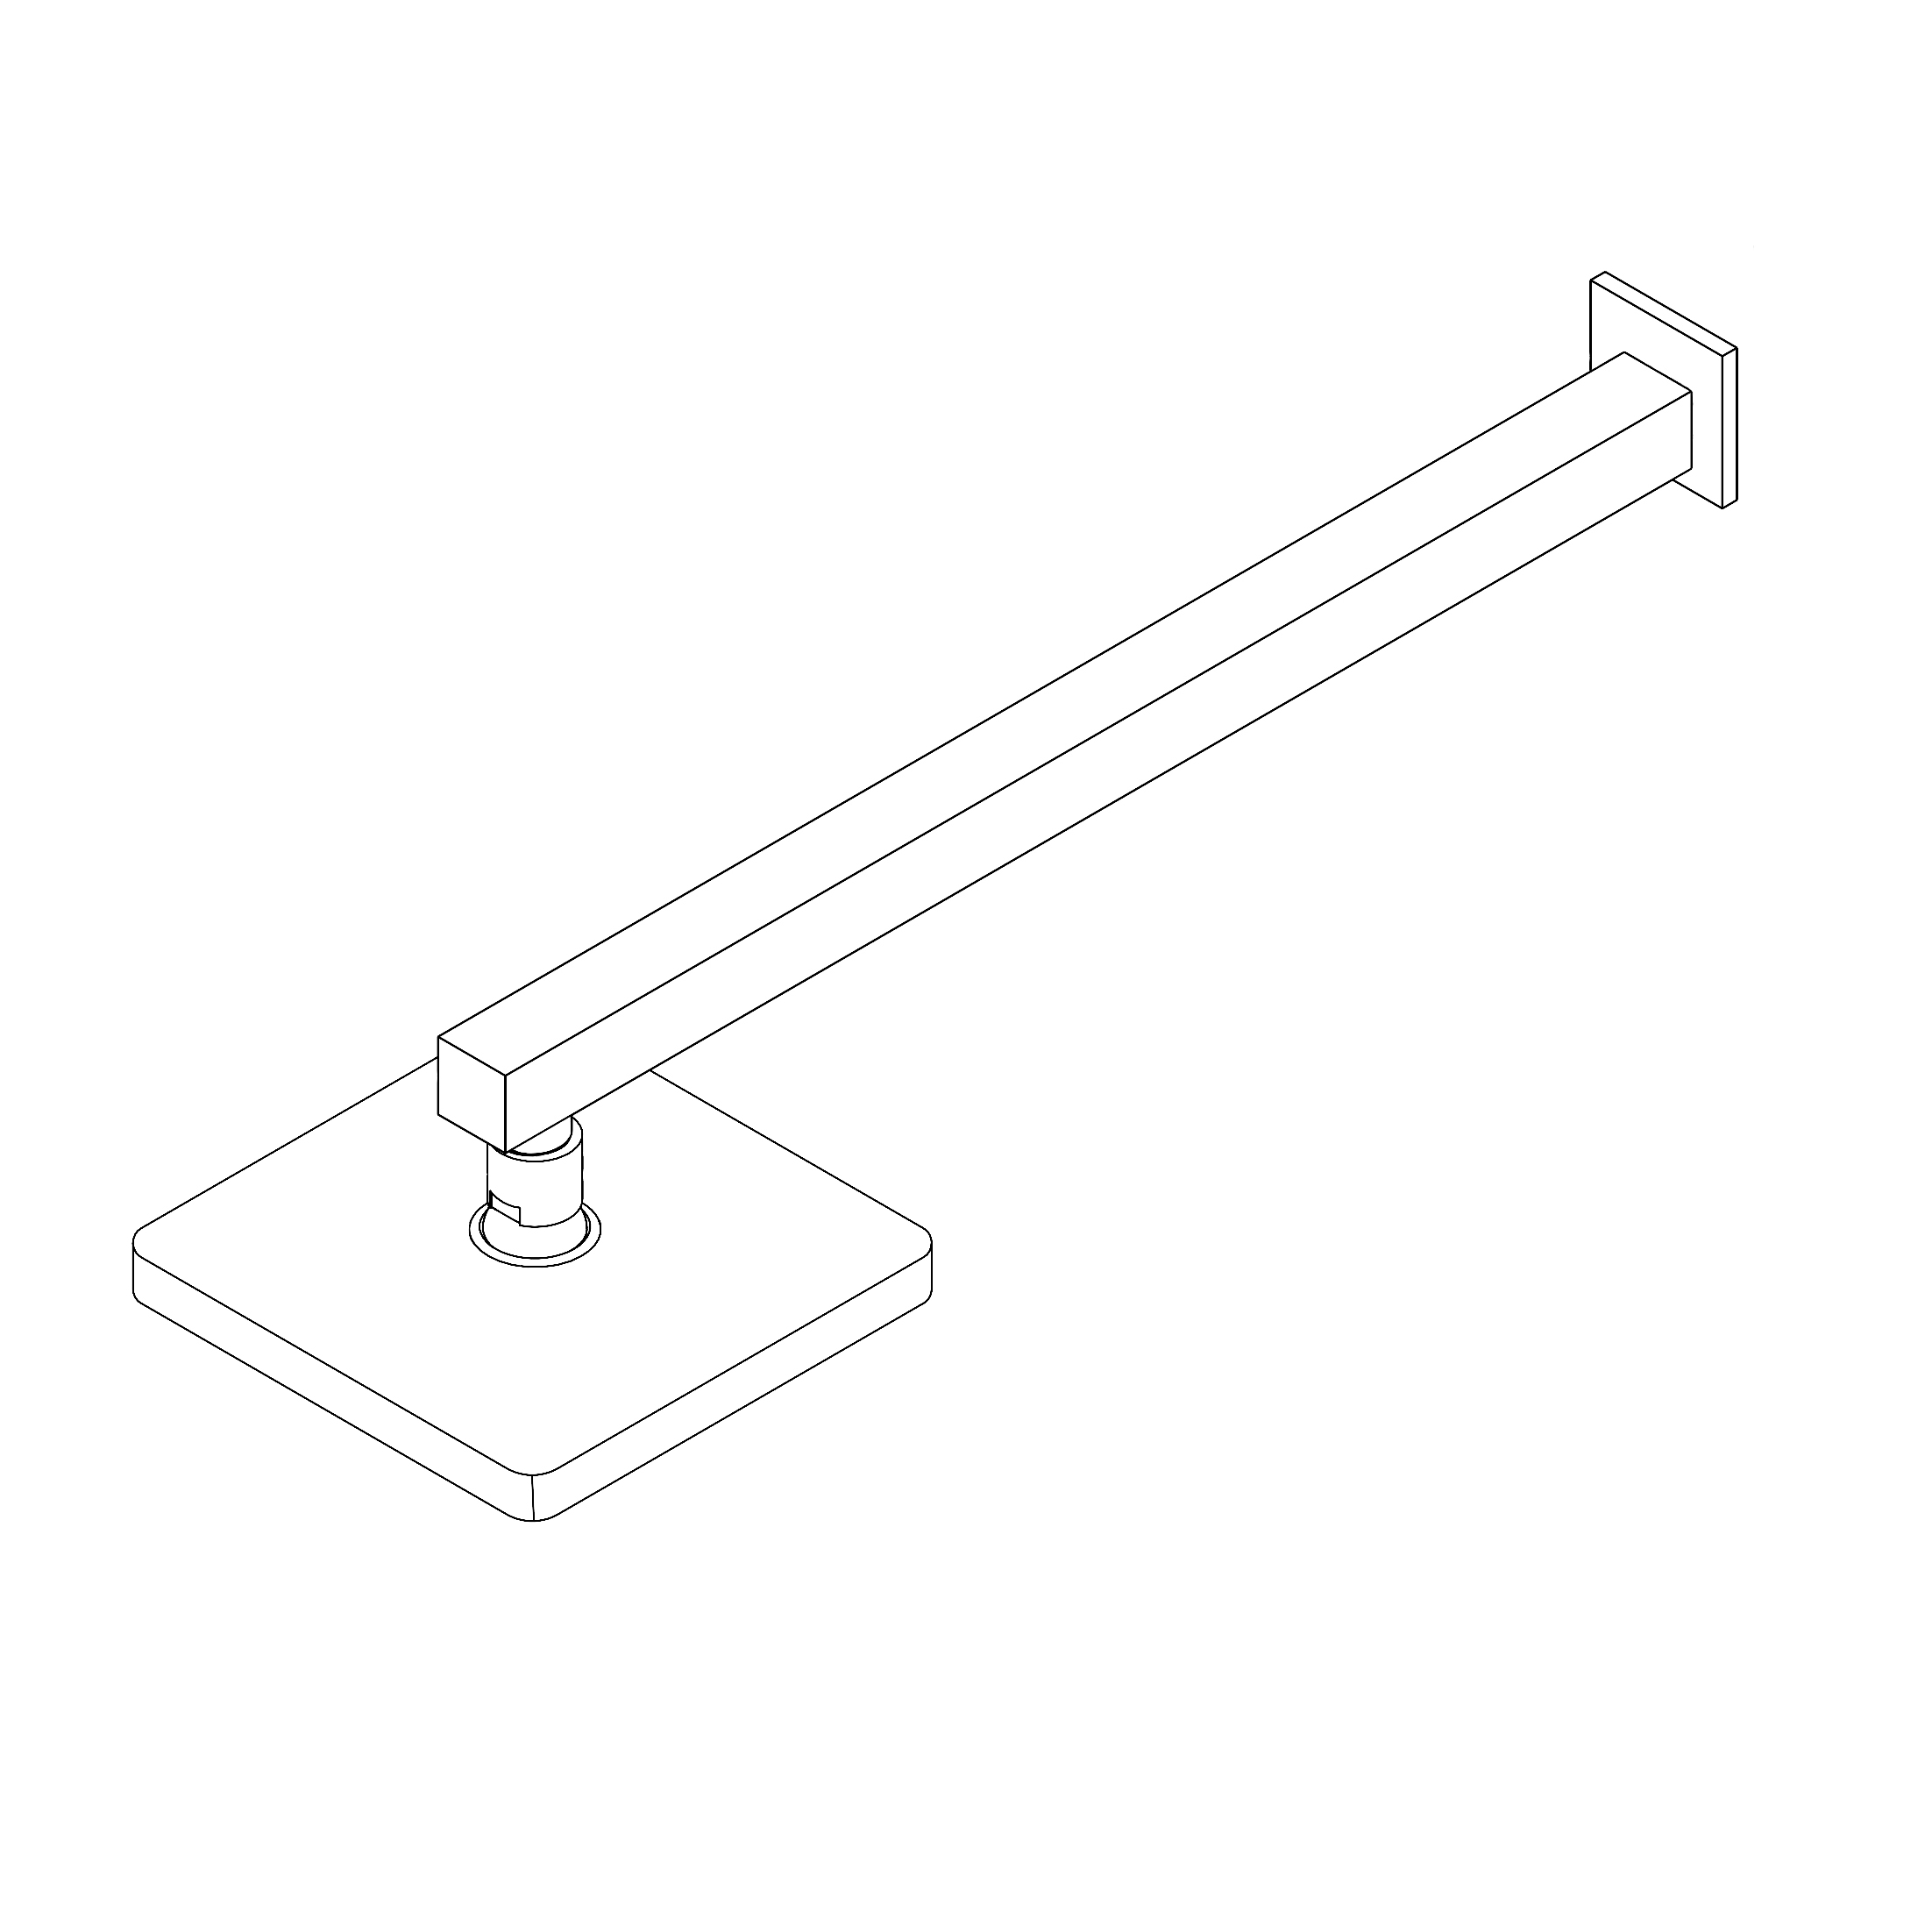
- Use your hands counter clockwise to unscrew the old showerhead and removed it.
- Take out the showerhead, make sure the shower filter is placed in the connector.
- Ensure the showerhead full horizontal alignment wall mounted shower arm thread.
- Use your hands clockwise to tighten showerhead.
|
|

|
|
HAND-HELD SHOWER INSTALLATION INSTRUCTIONS
|
STEP 1:
|
HAND
HELD
SHOWER
|
STEP 2:
|
|
|
|
|

|
HAND
HELD
SHOWER
|
|
|
|
|
|
|
|
STEP 3:
|
|
|
|
|
|
|
|
|
|
|
|
|
|
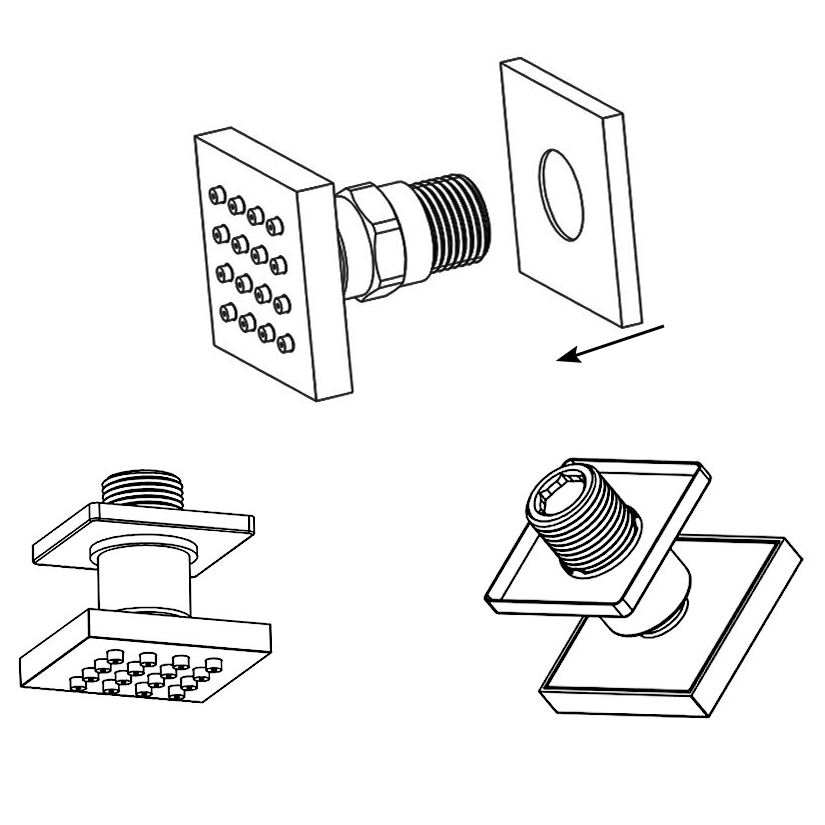
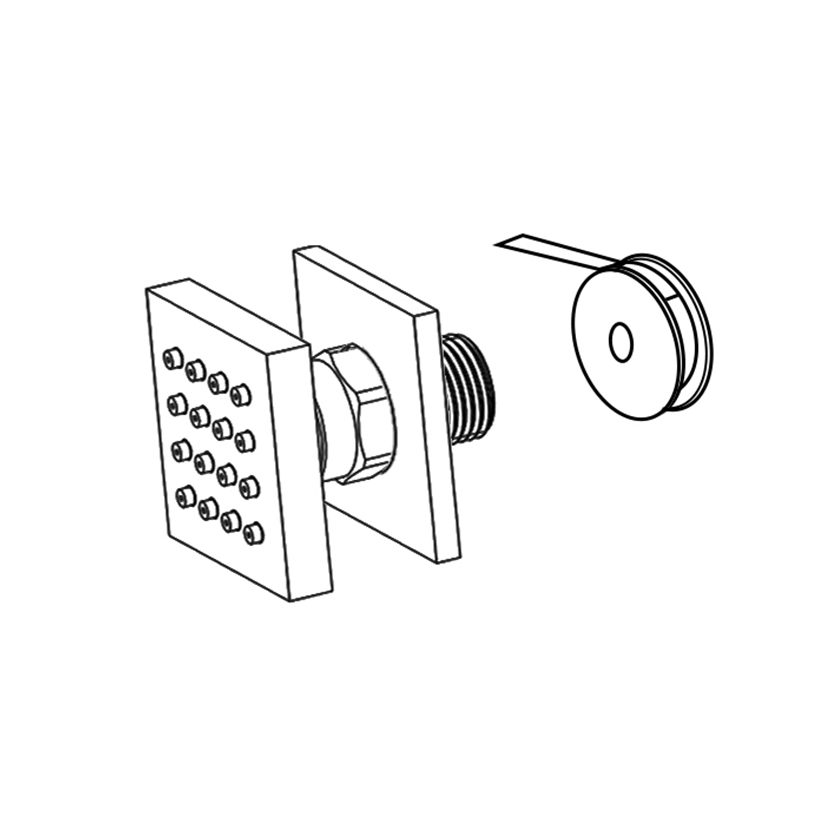
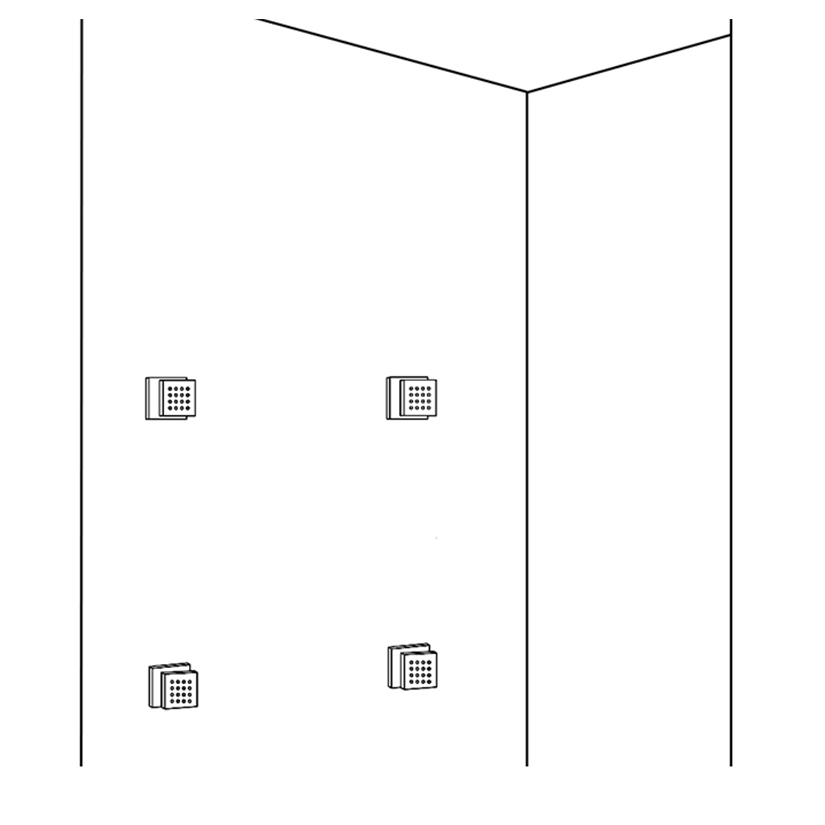
SHOWER BODY JETS INSTALLATION INSTRUCTIONS
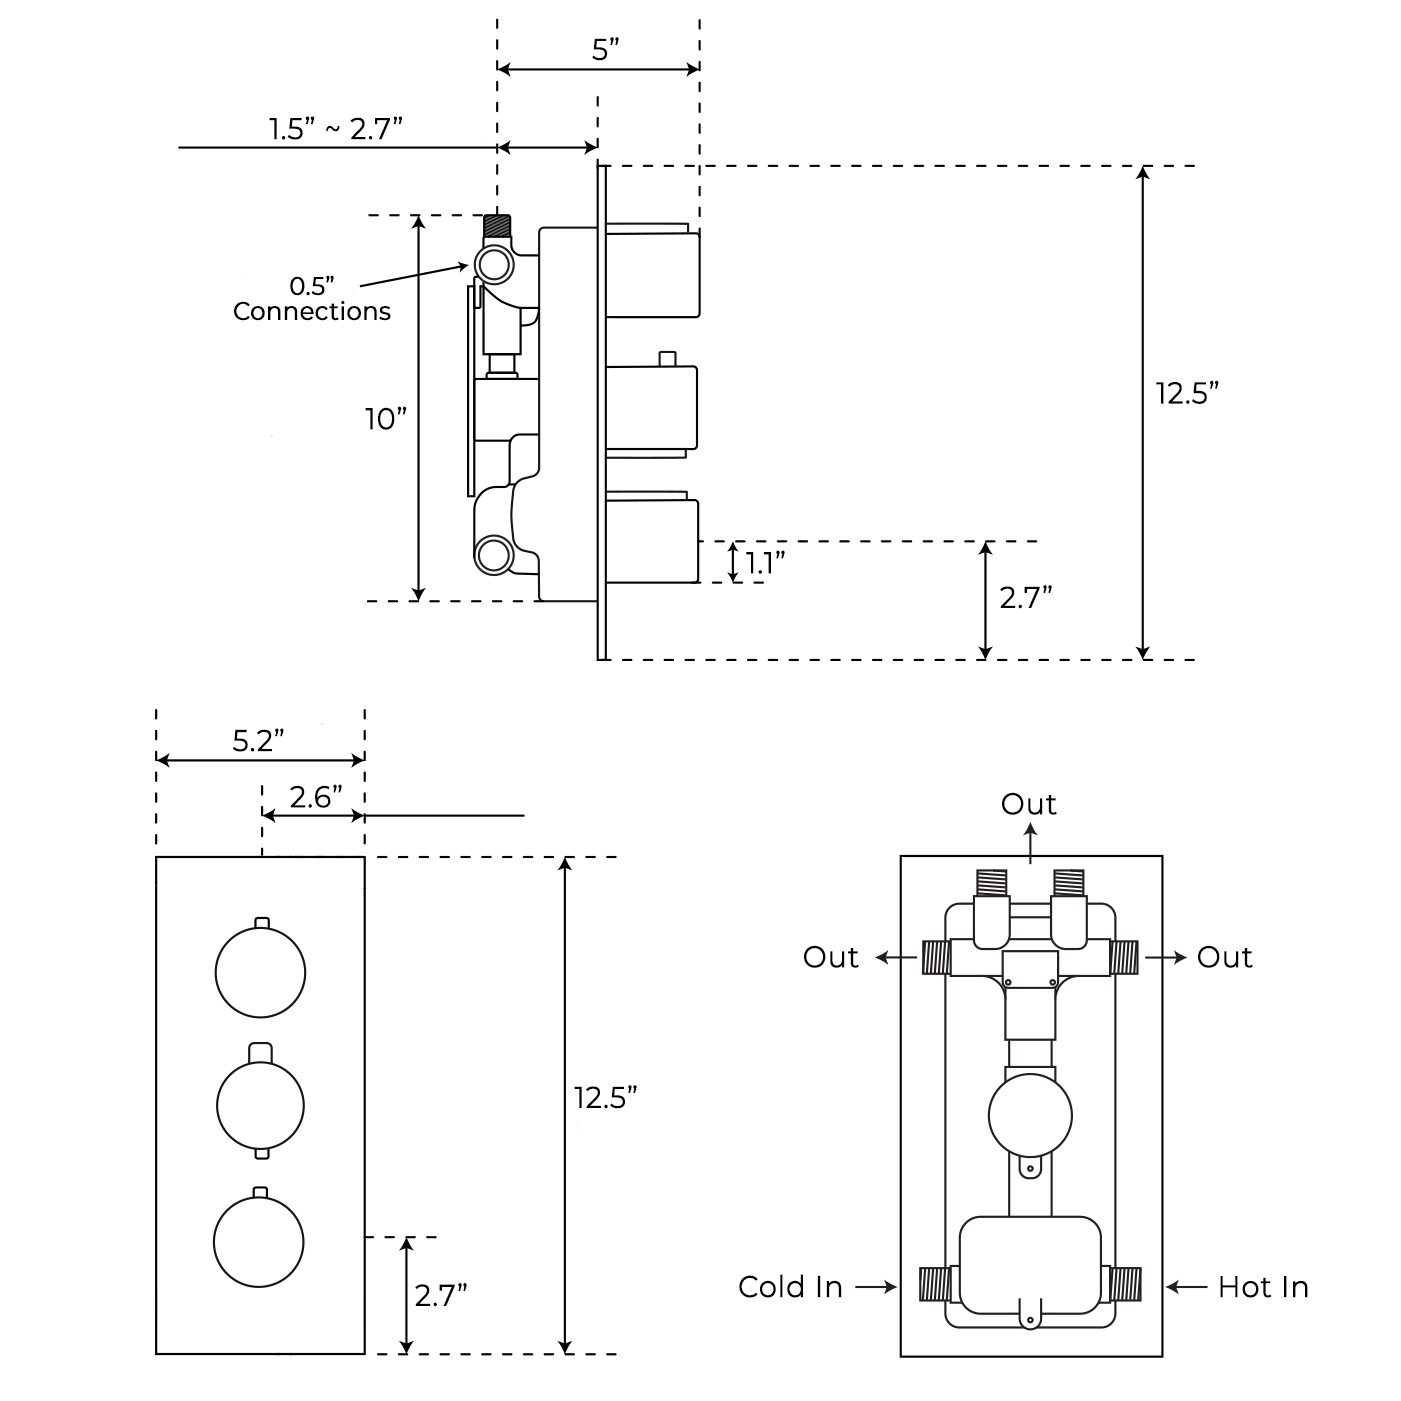
THERMOSTATIC MIXER INSTALLATION INSTRUCTIONS
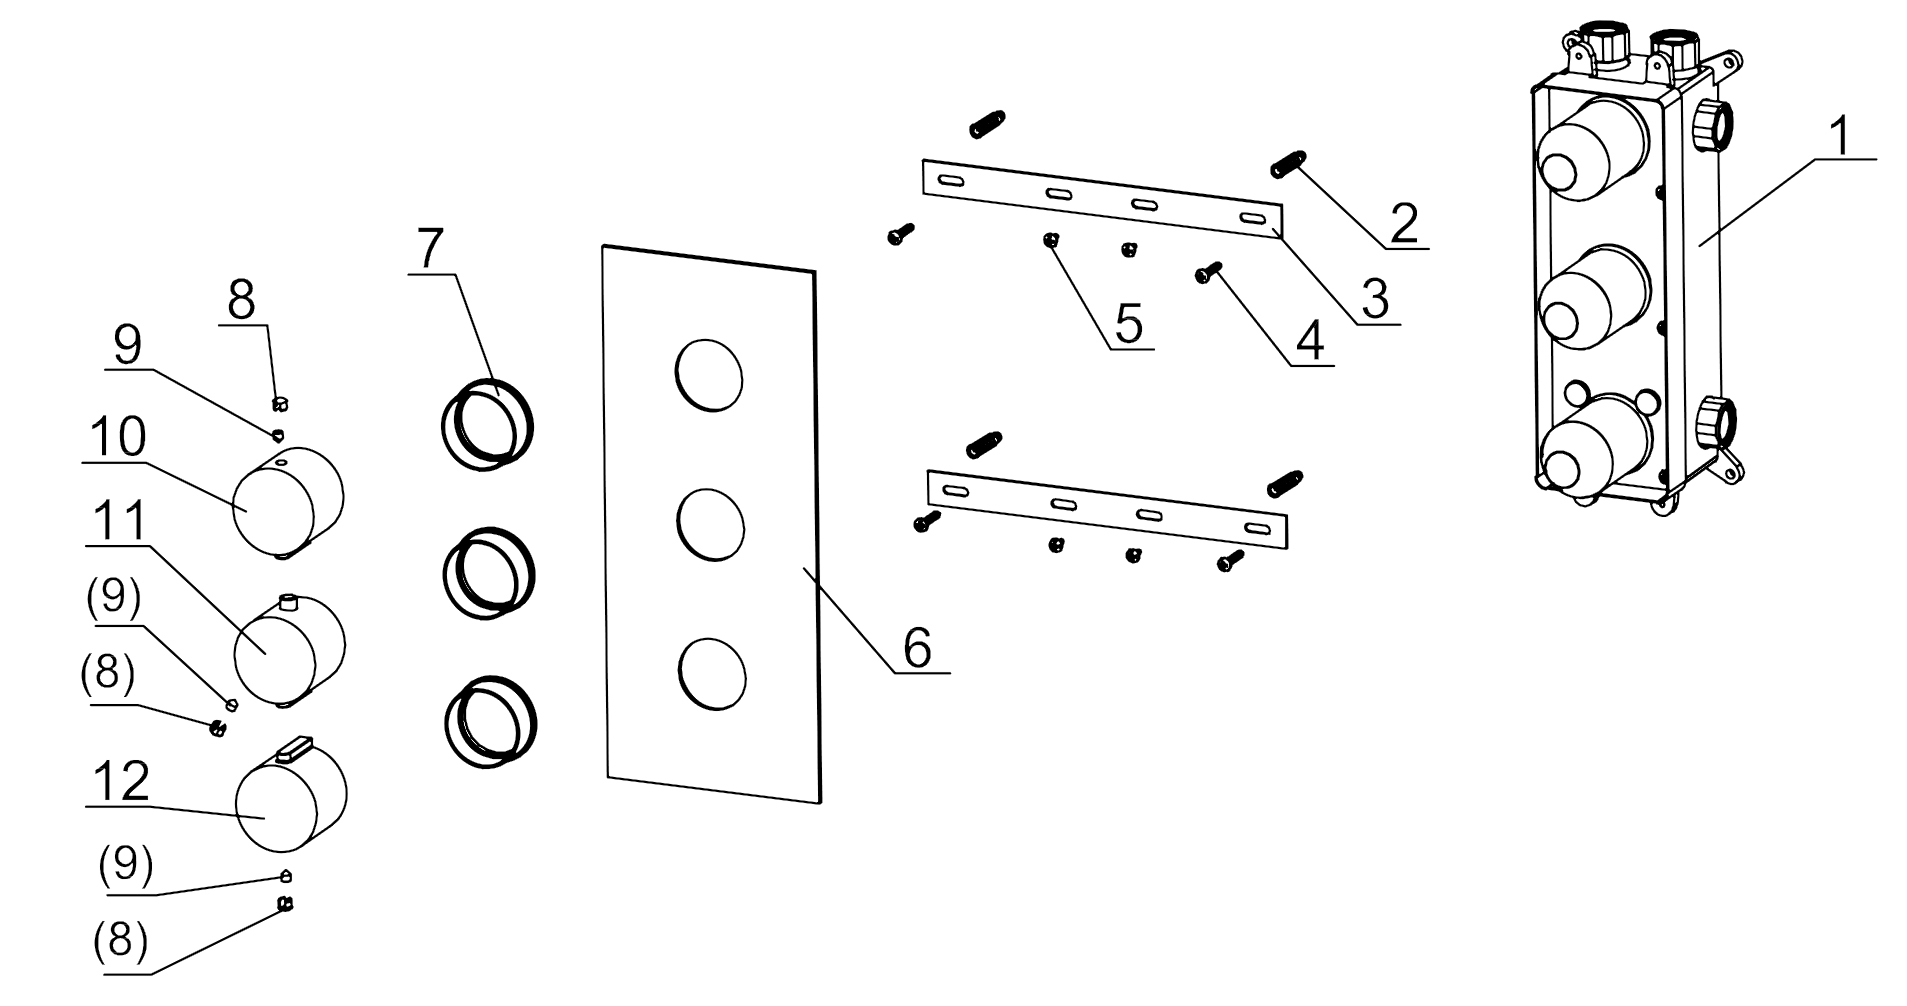
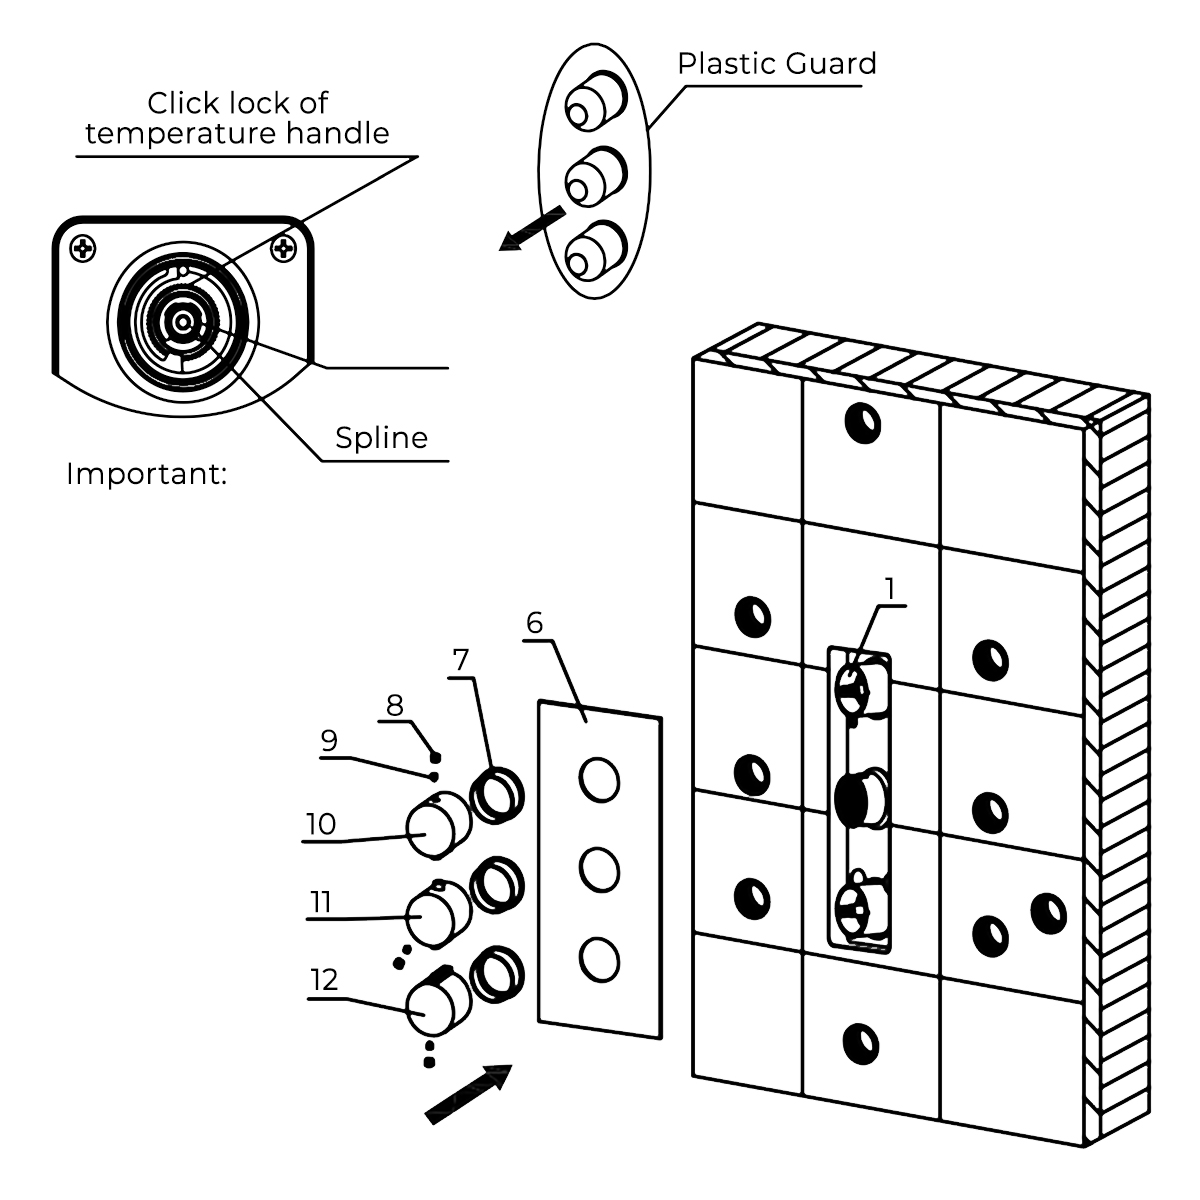
Parts:
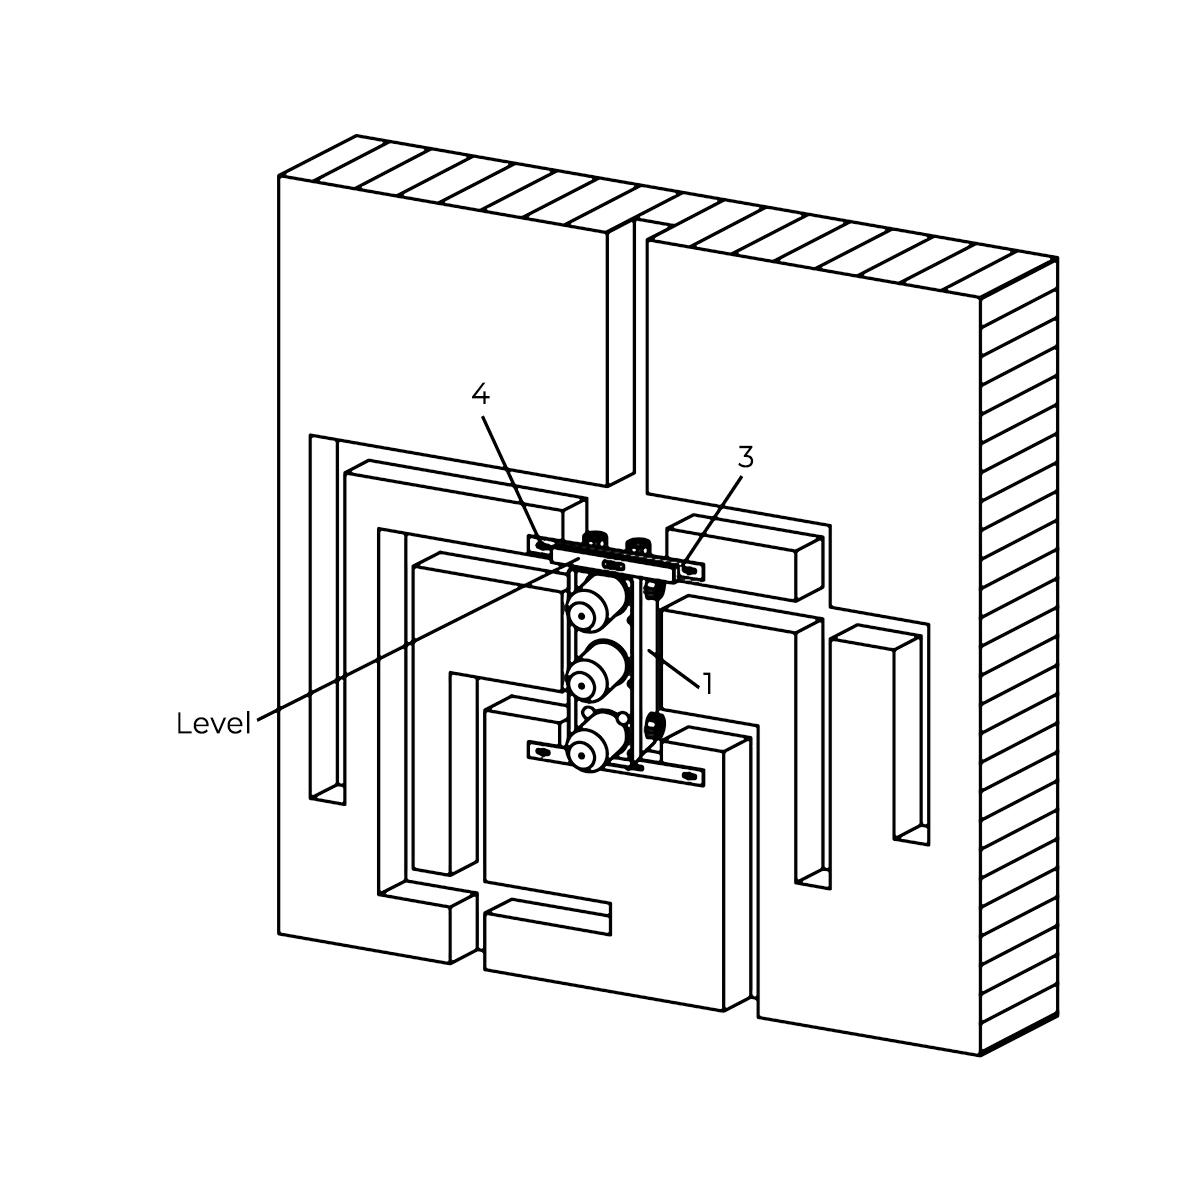
1. Rough-In Body x1
2. Anchor x4
3. Positioning Bar x2
4. Tapping Screw 1 x4
5. Tapping Screw 2 x4
6. Plate x1
7. Cover x3
8. Button x3
9. Screw 1 x3
10.Diverter Handle x1
11. Temperature Handle x1
12. Volume Handle x1
|
Shower
Mixer
|
|
|
|
|
|
|
Step 1:
|
|
Step 2:
|
|
|
Shower
Mixer
|
|
|
|
|
|
|
|
|
|
|
|
Step 3:
|
|
Step 4:
|
|
|
|

|
|
|
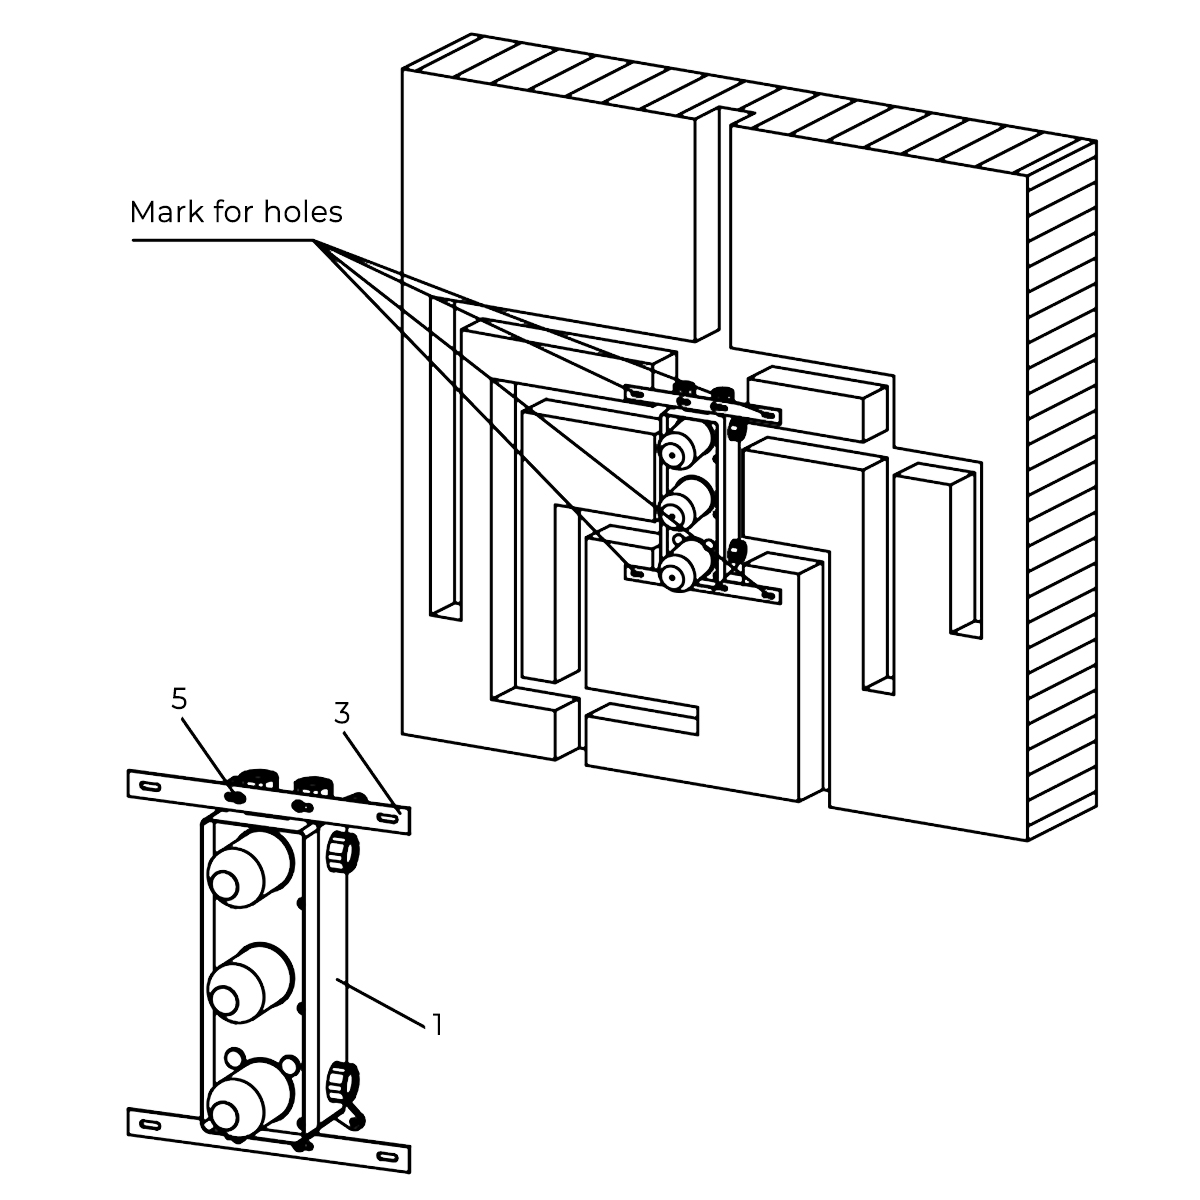
Attach the positioning bar to the rough-in body (4,5) with tapping screws. Mark the location of the mounting holes.
|
|
Remove the rough-in body and drill pilot holes at the locations marked in the previous step. Insert anchors.
|
|
|
|
|
|
|
Step 5:
|
|
Step 6:
|
|
|
|
|
|
Attach the rough-in body to the wall.
|
|
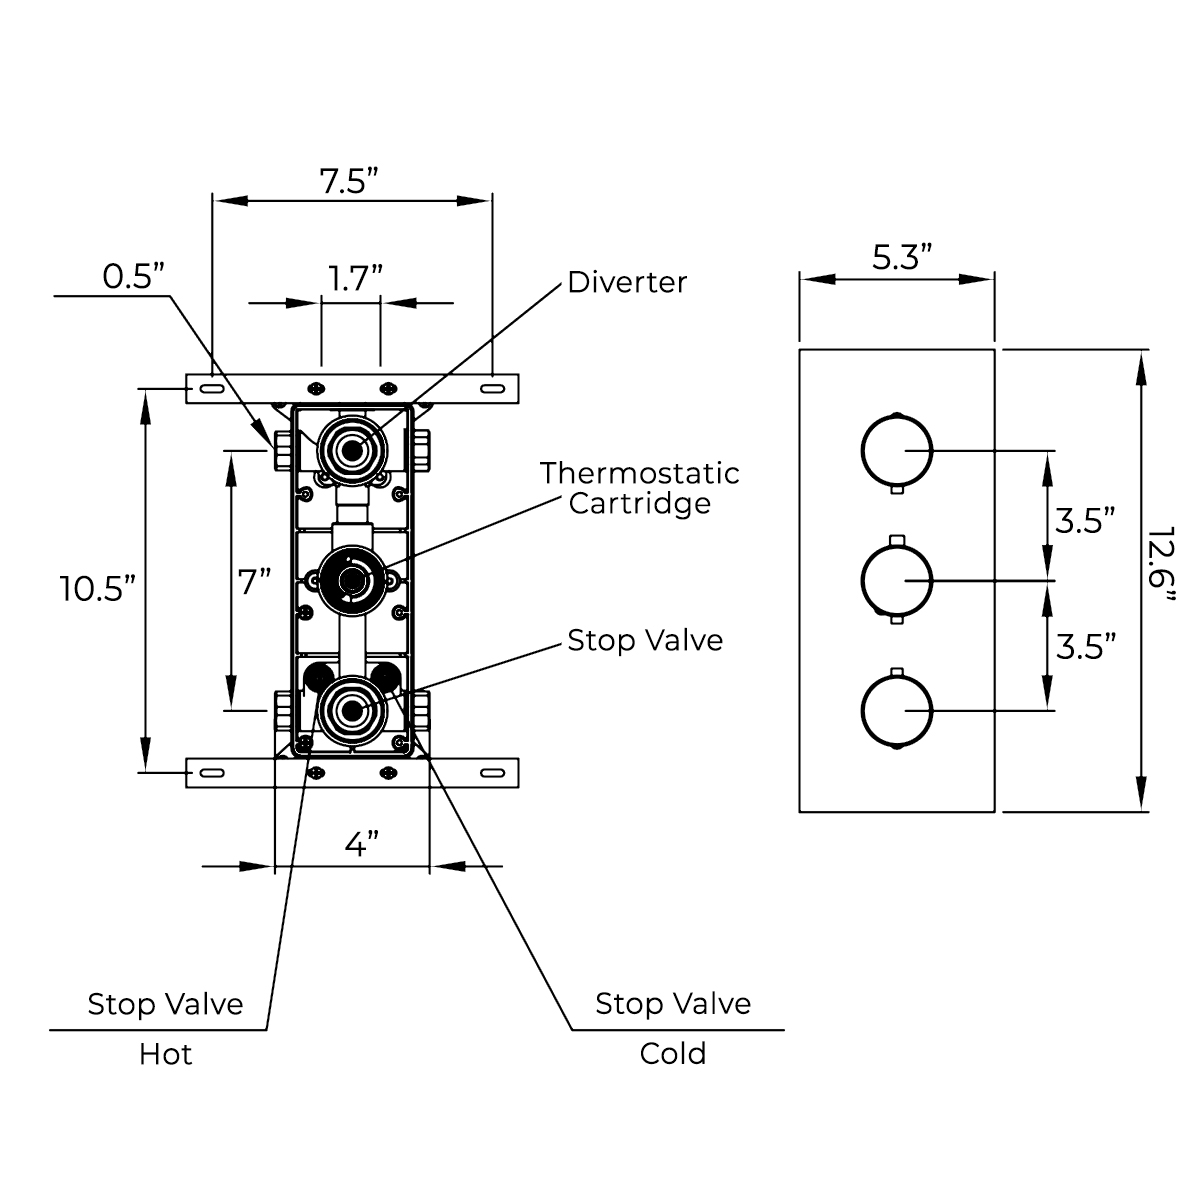
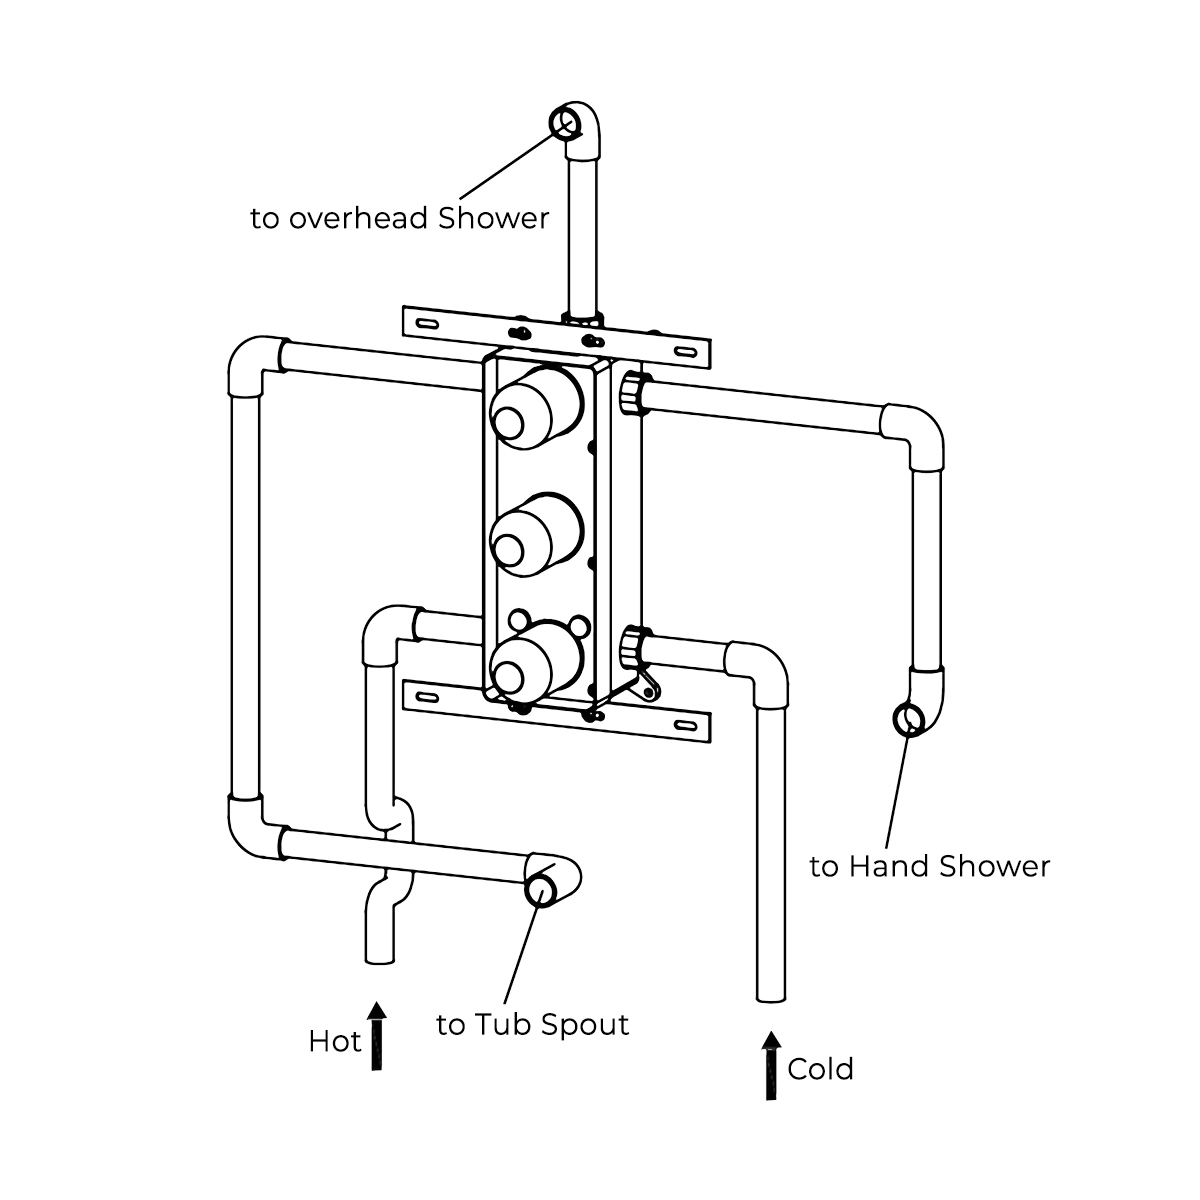
Connect the rough-in body to the water supply pipes according to the diagram.
|
|
|
|
|
|
|
Step 7:
|
|
Step 8:
|
|
|
|
|
|
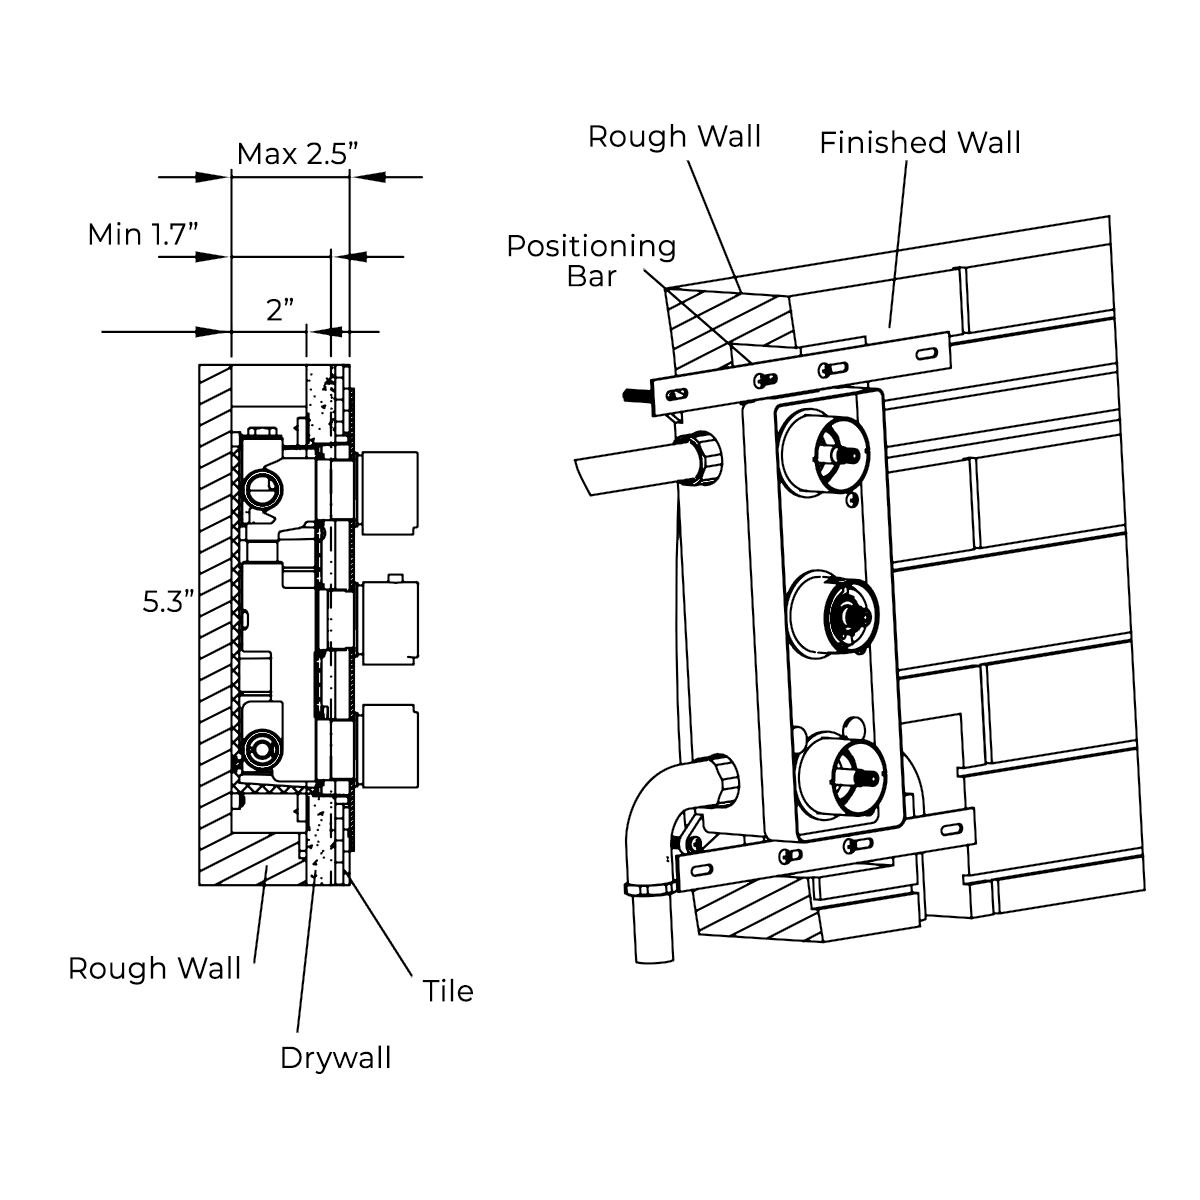
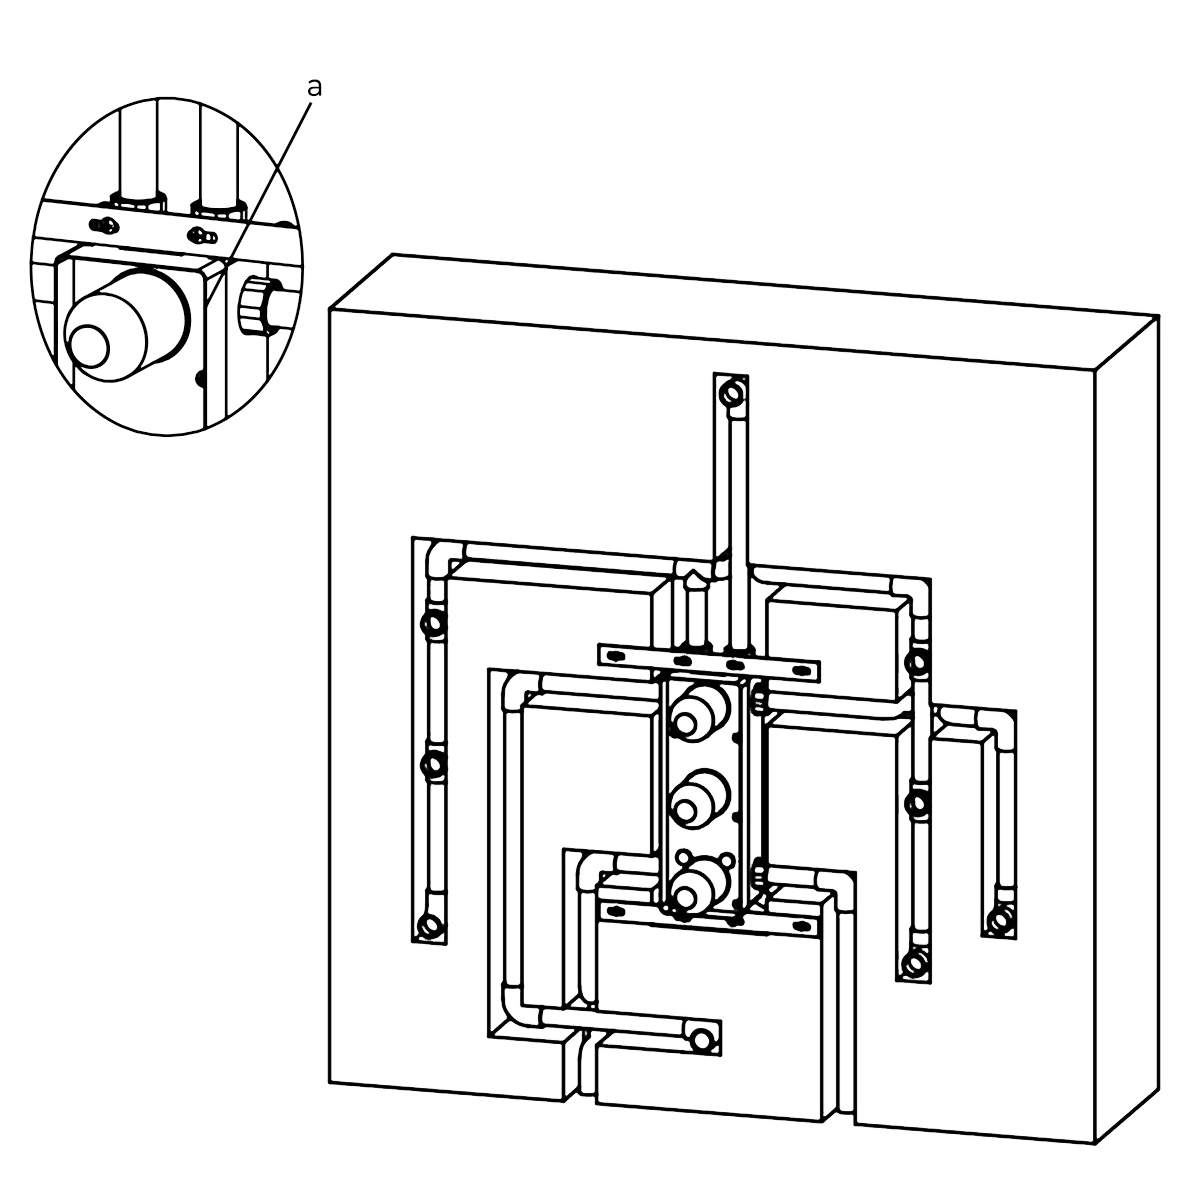
Finish the wall surrounding the shower with a thickness of 1/2"-1-1/2".
a) Finished wall surface should not exceed the upper edge of the installation box.
|
|
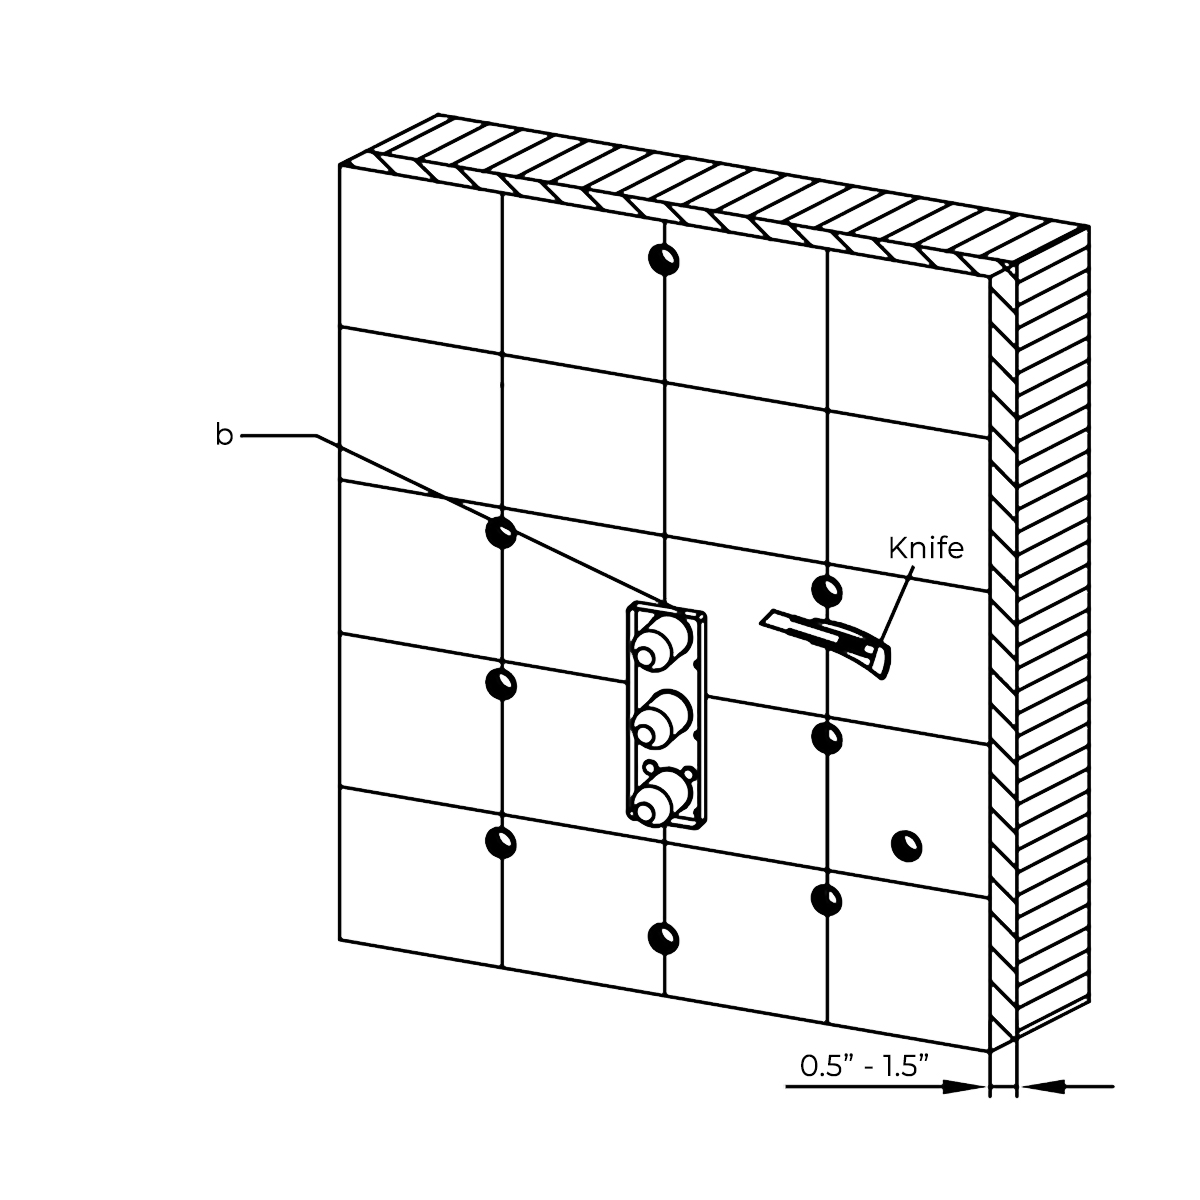
If the tile exceeds the edges of the installation box, trim the tile as necessary to install the trim plate.
b) Trim the tile around the installation box as necessary.
|
|
|
|
|
|
|
Step 9:
|
|
|
|
|
|
|
|
|
Remove the plastic guard and place the trim plate over the installation box. Install the screws covers, handles and buttons.
|
|
|
|
Shower Valve Mixer Installation
|
How to install the Shower Set with Wall Mount Showerhead, Hand Held Shower and Shower Mixer
|
|
|