Fontana Lima LED Ultra Shower Set in Oil Rubbed Bronze Finish
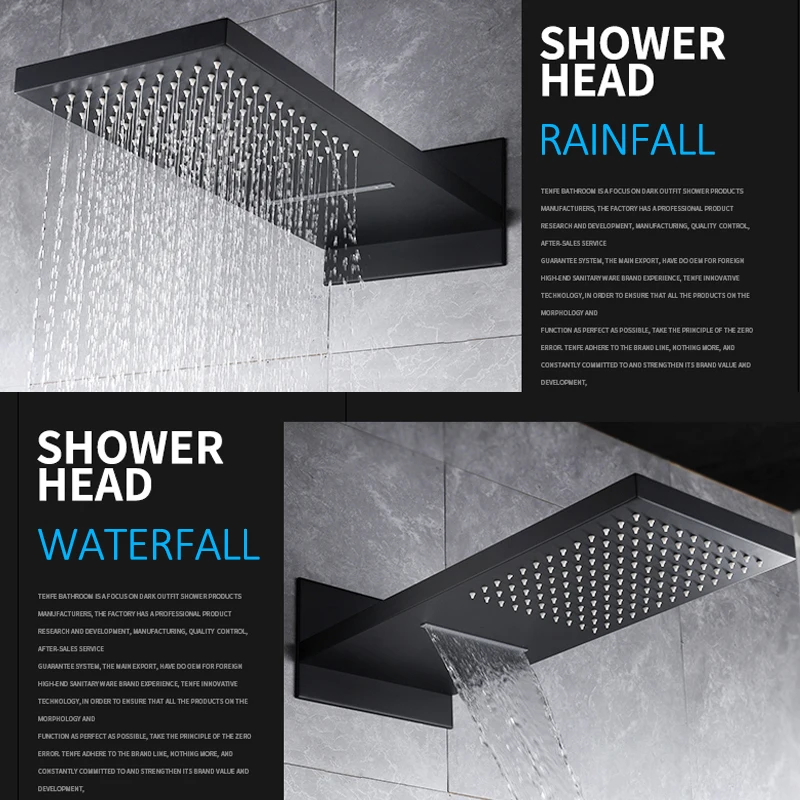
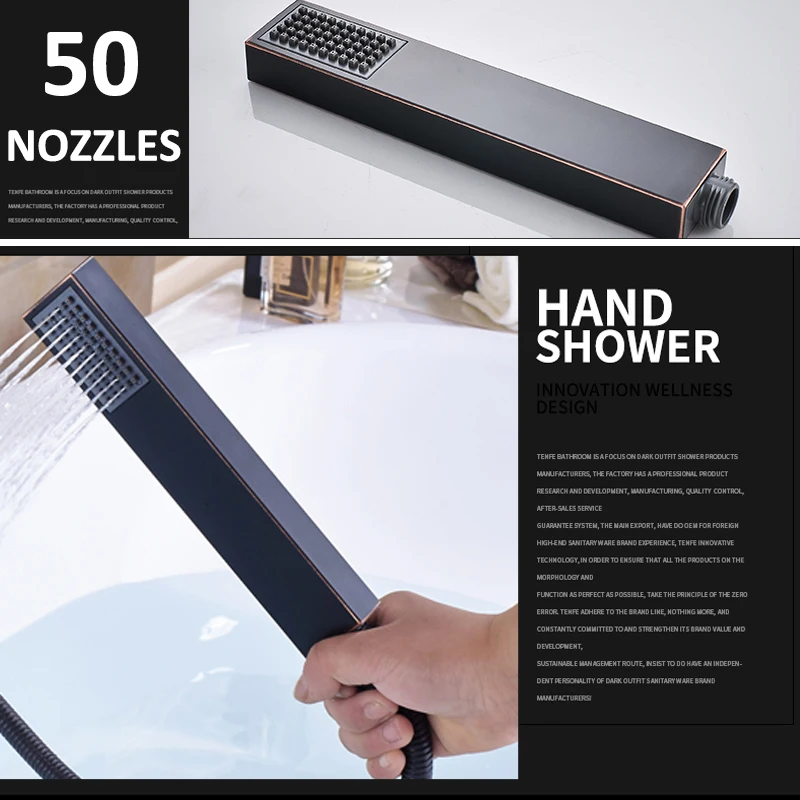
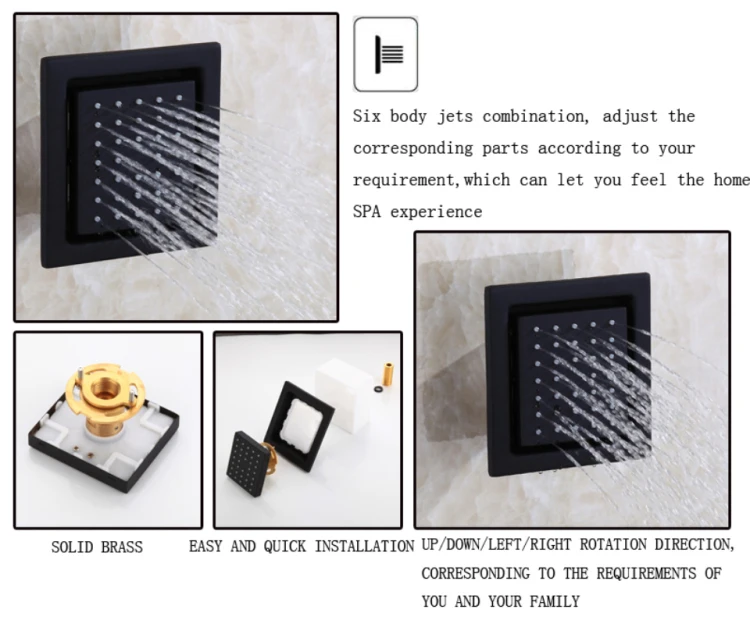
What makes this shower system "ultra" is the combination of LED lighting, warm oil rubbed bronze finish, rainfall shower and cascading massage option. The beautiful oil rubbed bronze finish combines an old world Venetian look with a contemporary design. The body massage waterfall will massage your neck and shoulders while you luxuriate under the rainfall showerhead. Six adjustable body jets and a handheld shower provide the ultimate bathing experience. Built-in hydro-powered device powers the LED lights, which provide visual shower temperature cues to reduce water waste. The lights will dim and brighten when you lower and raise the pressure so you can set the perfect mood, water, and lighting. When water temperature is ≤89 °F (≤32 °C), Blue color will show automatically. When water temperature is between 97 to 107 °F (36-42 °C), Green color will show automatically. When water temperature is between 109 to 122 °F (43-50 °C), Red color will show automatically. When water temperature is above 122 °F (>50 °C), Red color will flash immediately.
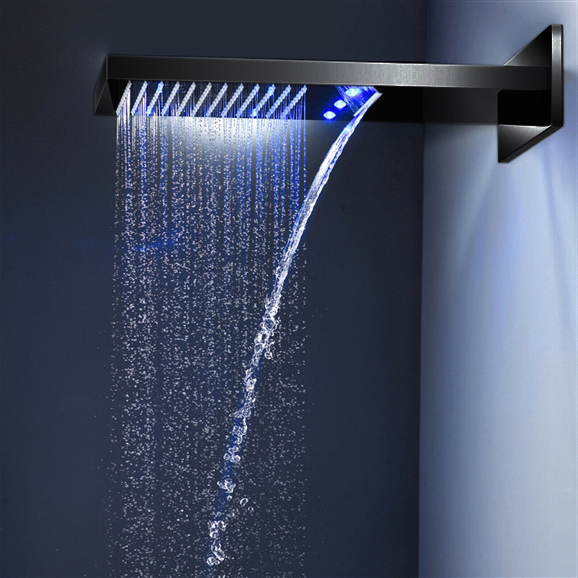
Fontana Lima LED Ultra Shower Set in Oil Rubbed Bronze Finish Features:
Brand Name: FontanaShowers
Model Number: FS-7629-ORB
Type: Shower Set
Flow Rate: 18 (L/Min)- 4.8 GPM
Finish: Oil Rubbed Bronze
Shower Hose: 64 inches
Installation: Wall Mount
Pressure Balance: Brass Valve
Connection: US Standard Plumbing
Minimum Pressure Required: 29 PSI
Maximum Pressure Required: 72.7 PSI
Pre-set Maximum Temperature: 104ºf
Recommended Pressure: 2-75 PSI
|
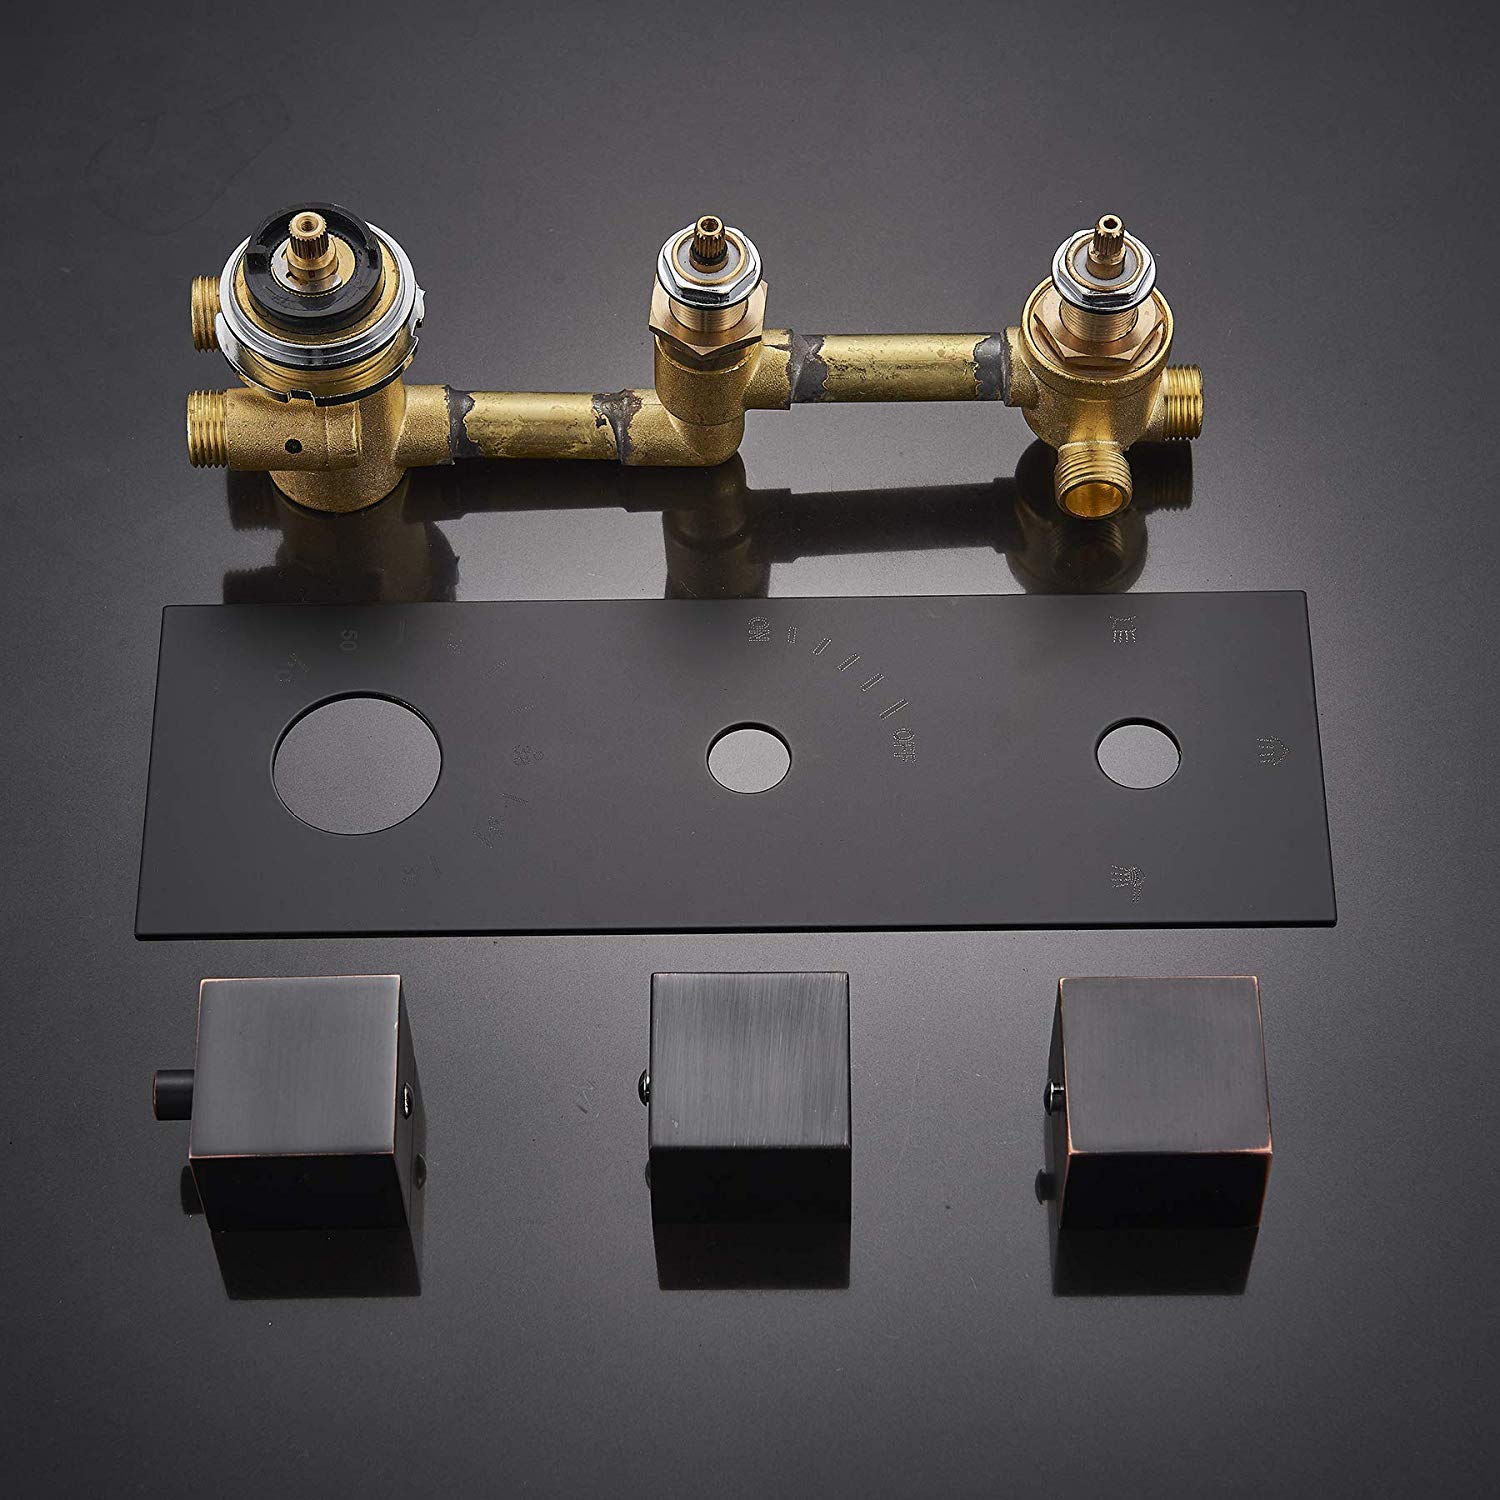
|
FontanaShowers®Product Warranty Information
- efore you begin, please read the installation instructions below. Observe all local building and safety codes.
- Unpack and inspect the product for any shipping damages. If you find damages, do not install.
- Please note all showers must be installed by a professional and certified plumber otherwise warranty might be voided.
|
shower
|
|
Shower Head Installation Instructions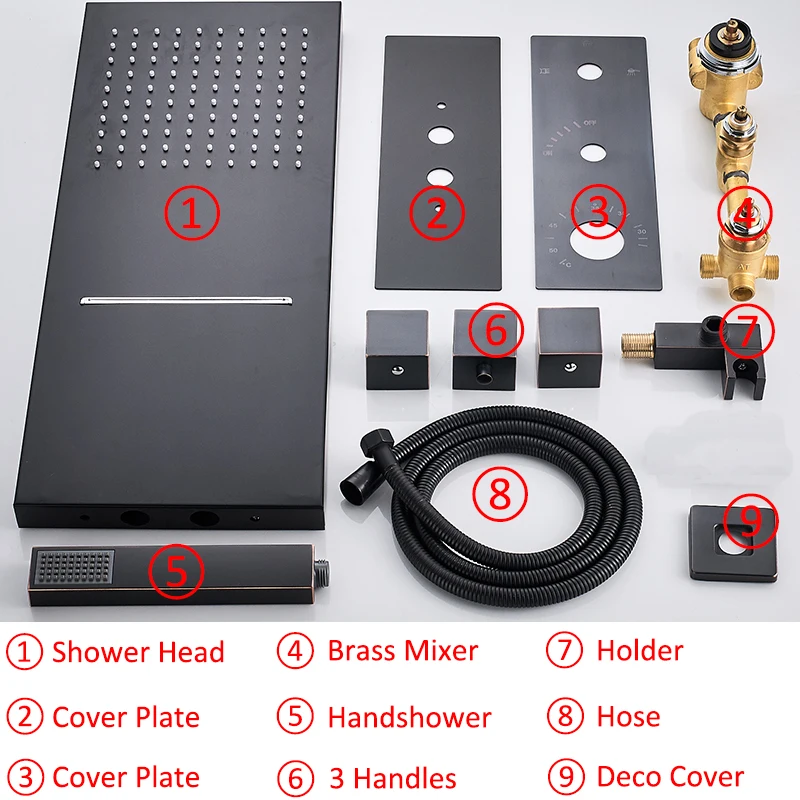
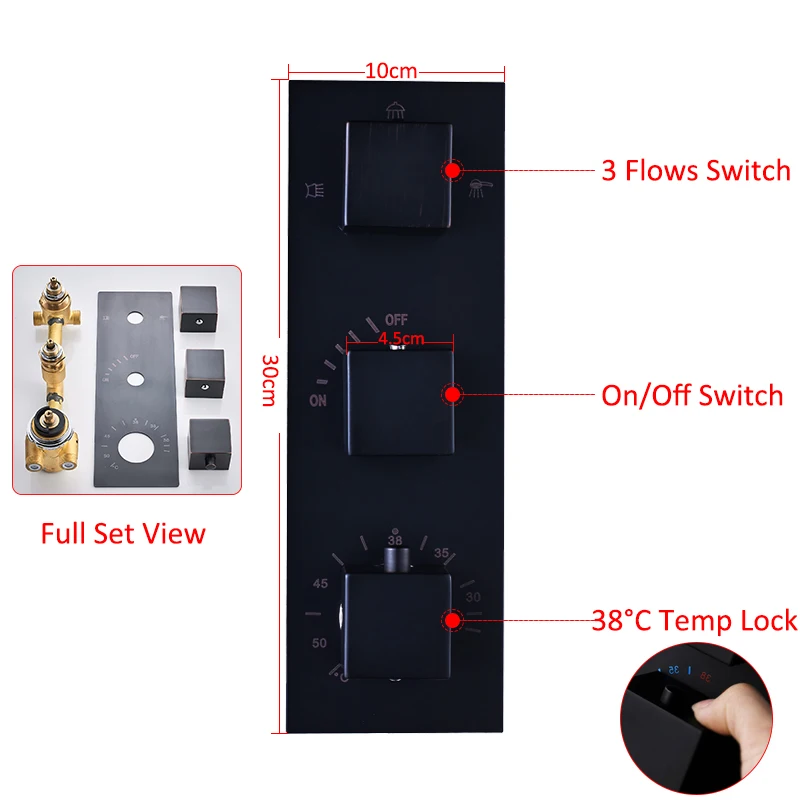
|
Step 1:
|
|
|
Step 2:
|
|
|
shower
|
|
|

|
Open the top cover and drill according to the marked position.
1. Mark by the position of the four holes.
2. Take care to avoid wires and pipes to prevent damage.
3. Be sure to confirm that the four holes are on the same horizontal line.
|
|
|
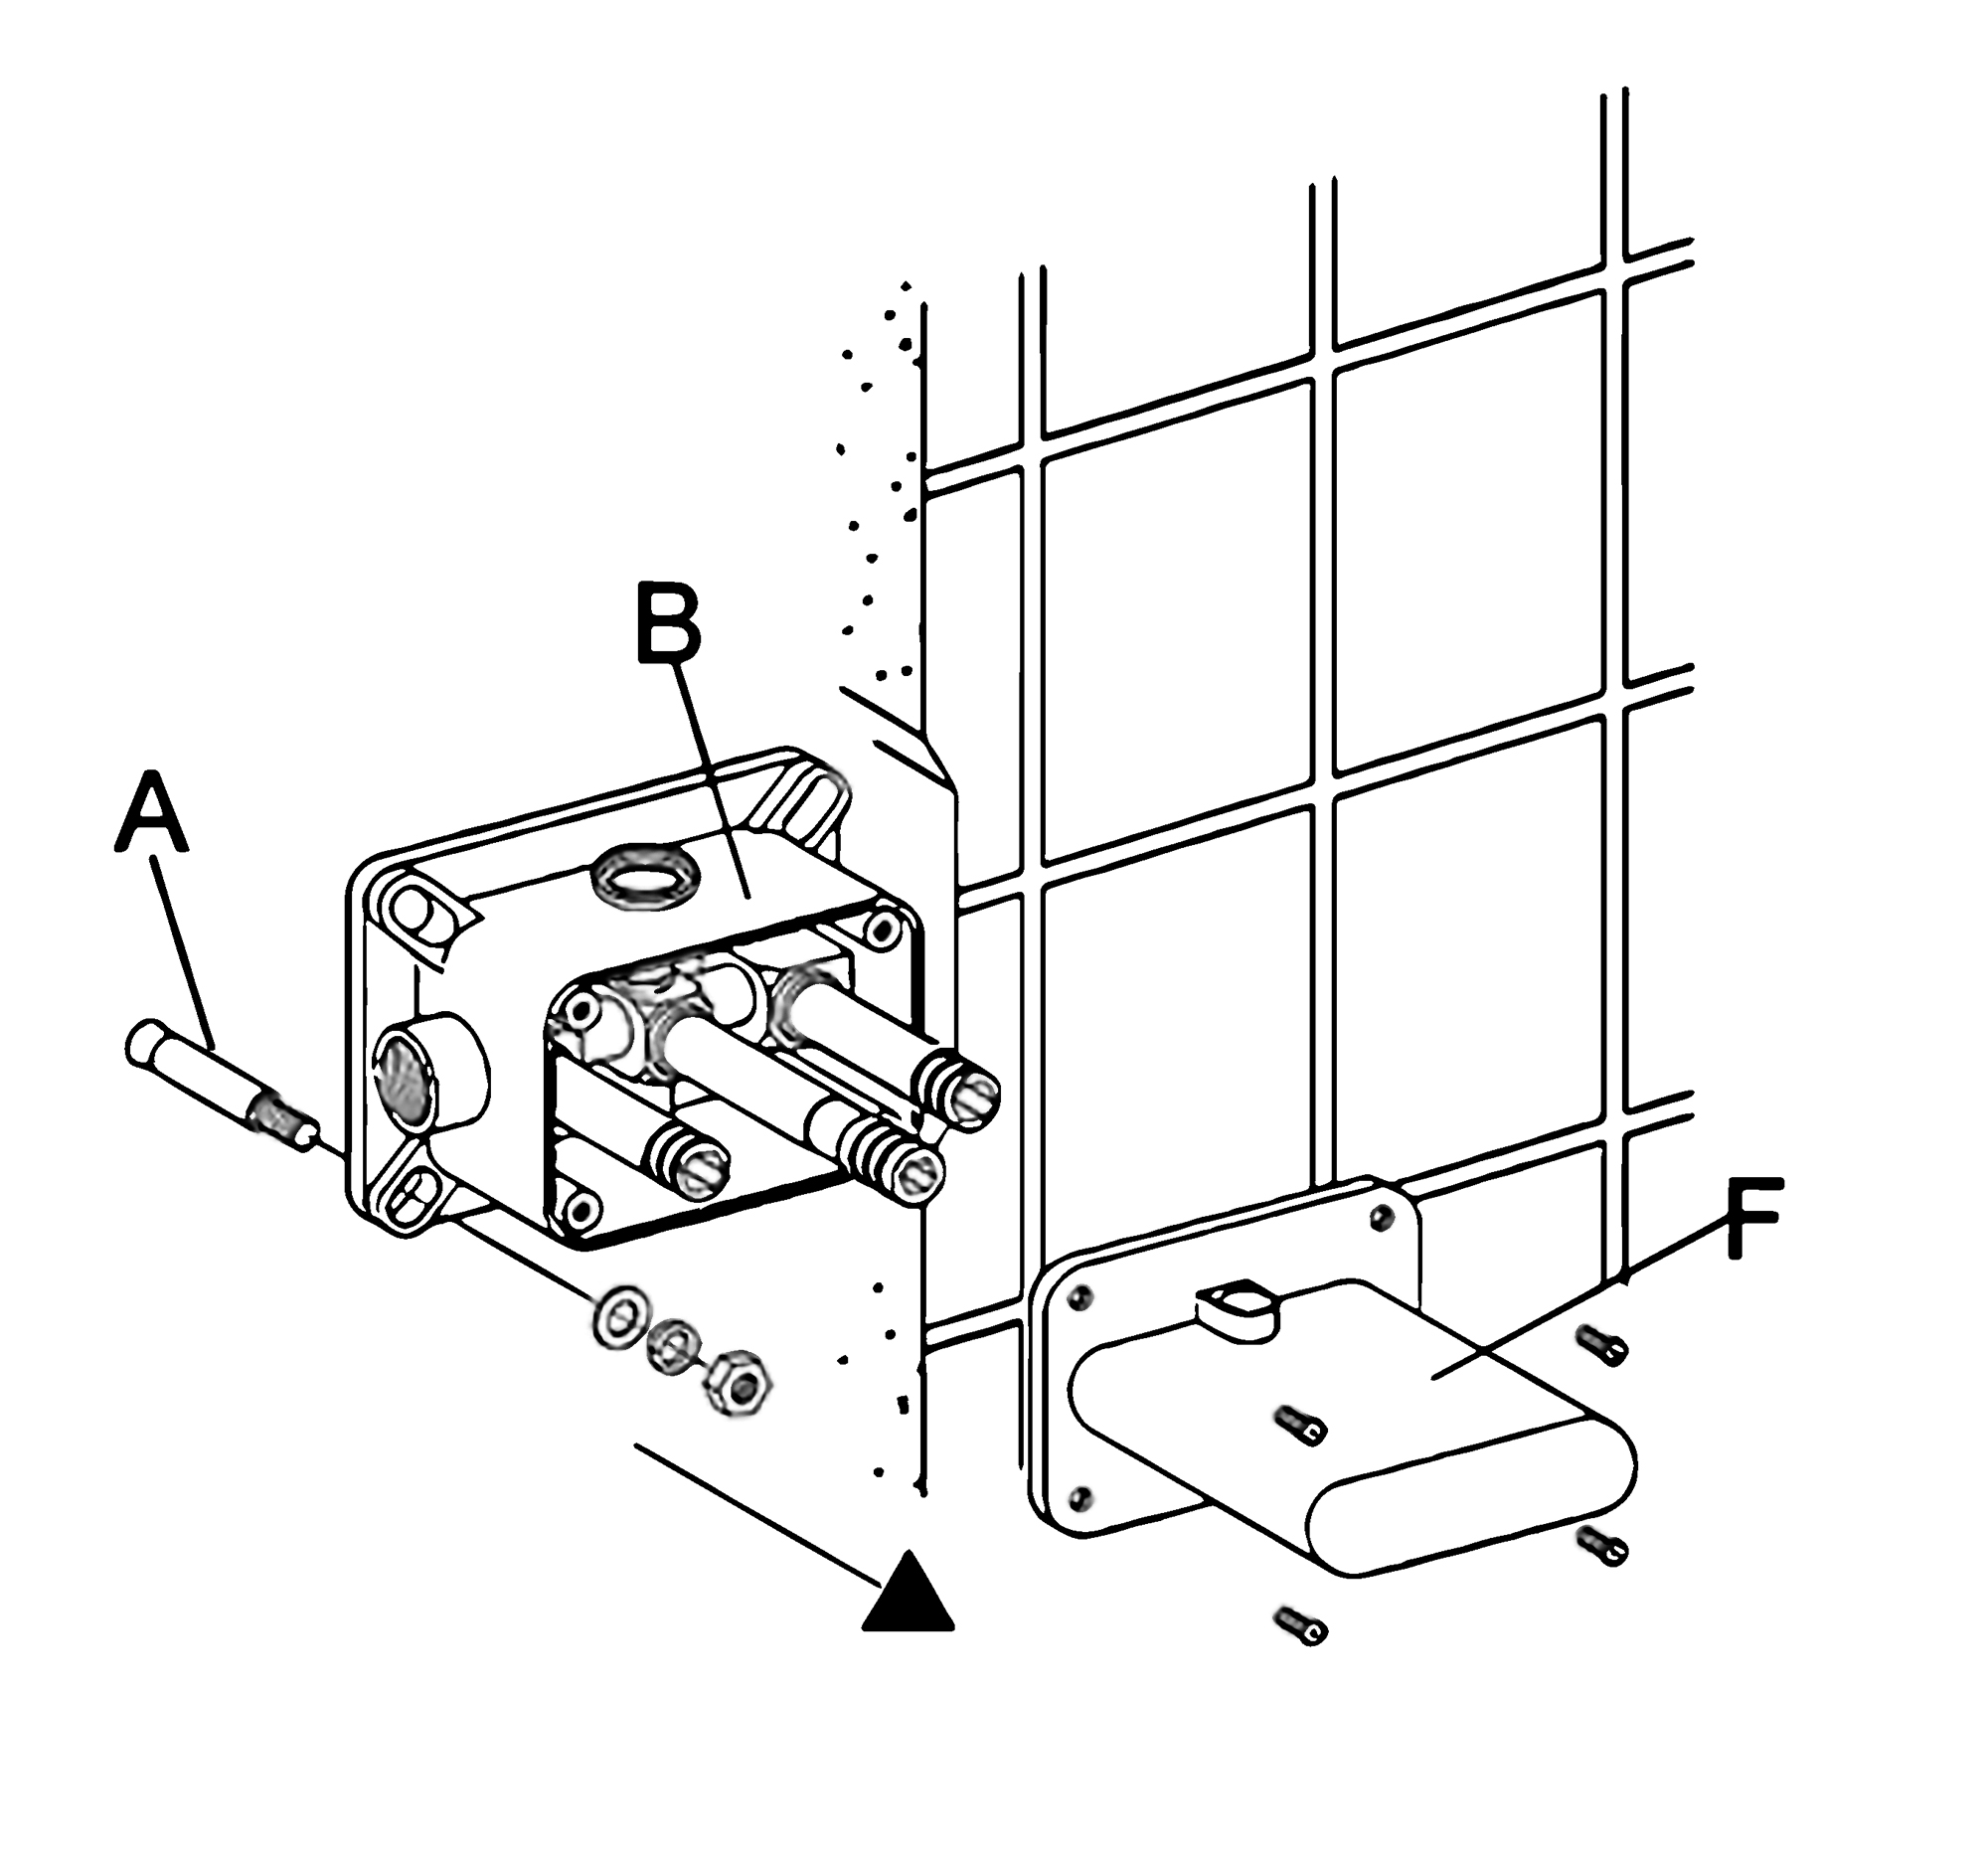
Remove the protective cover (F). Mark the positions and drill holes to suit the anchors (A). Install the anchors (A) and fix the rough-in valve (B) into the wall with screws. Use a level to ensure that the rough-in valve (B) is straight and level. (Important: Flush the water supply to remove any dirt and debris before installing the valve body).
|
|
Shower Head Installation Instructions
|
|
|
|
|
|
Step 3:
|
|
|
Step 4:
|
|
|
|
|
|
|
|
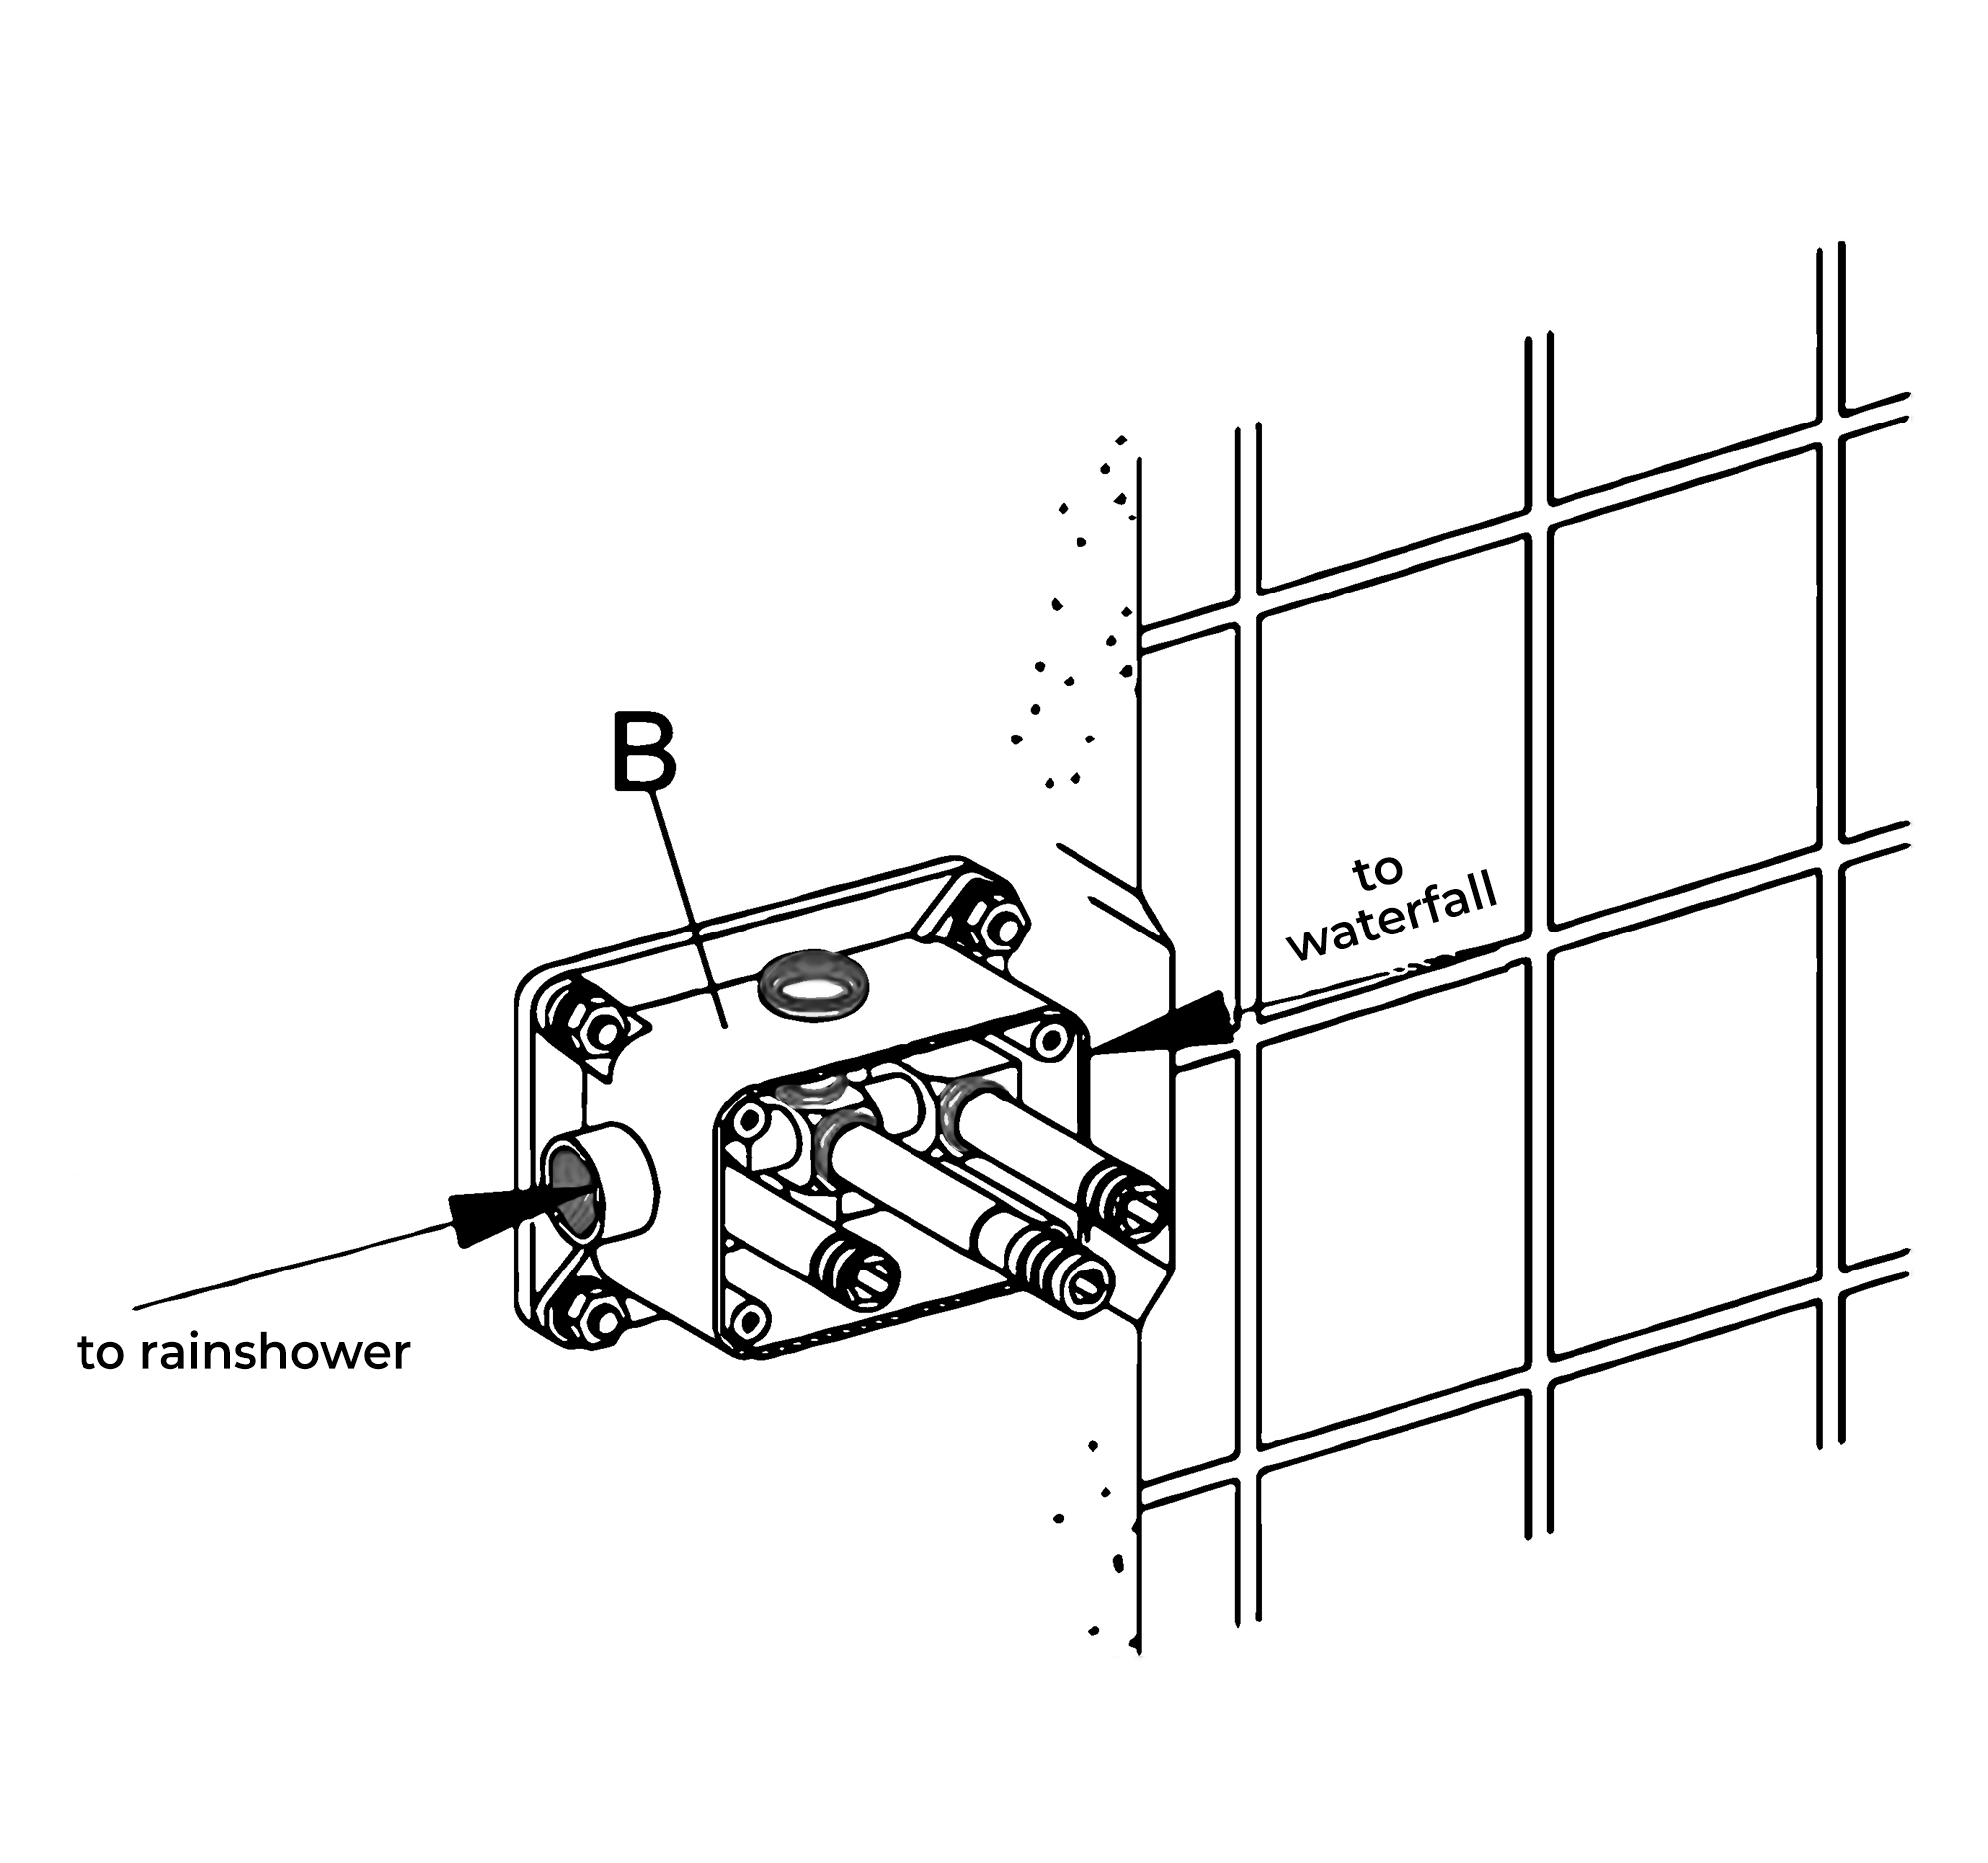
Wrap Teflon tape around the pipe threads and connect water supply lines and in-wall pipes (not included) as desired to the rough-in valve (B). Turn on the water supply and open the cartridge to check for leakage. Then put on the protective cover and finish the wall surrounding the valve. (Note: Test the water pressure after the pipe connections have been made and before the finished wall material is installed).
|
|
|
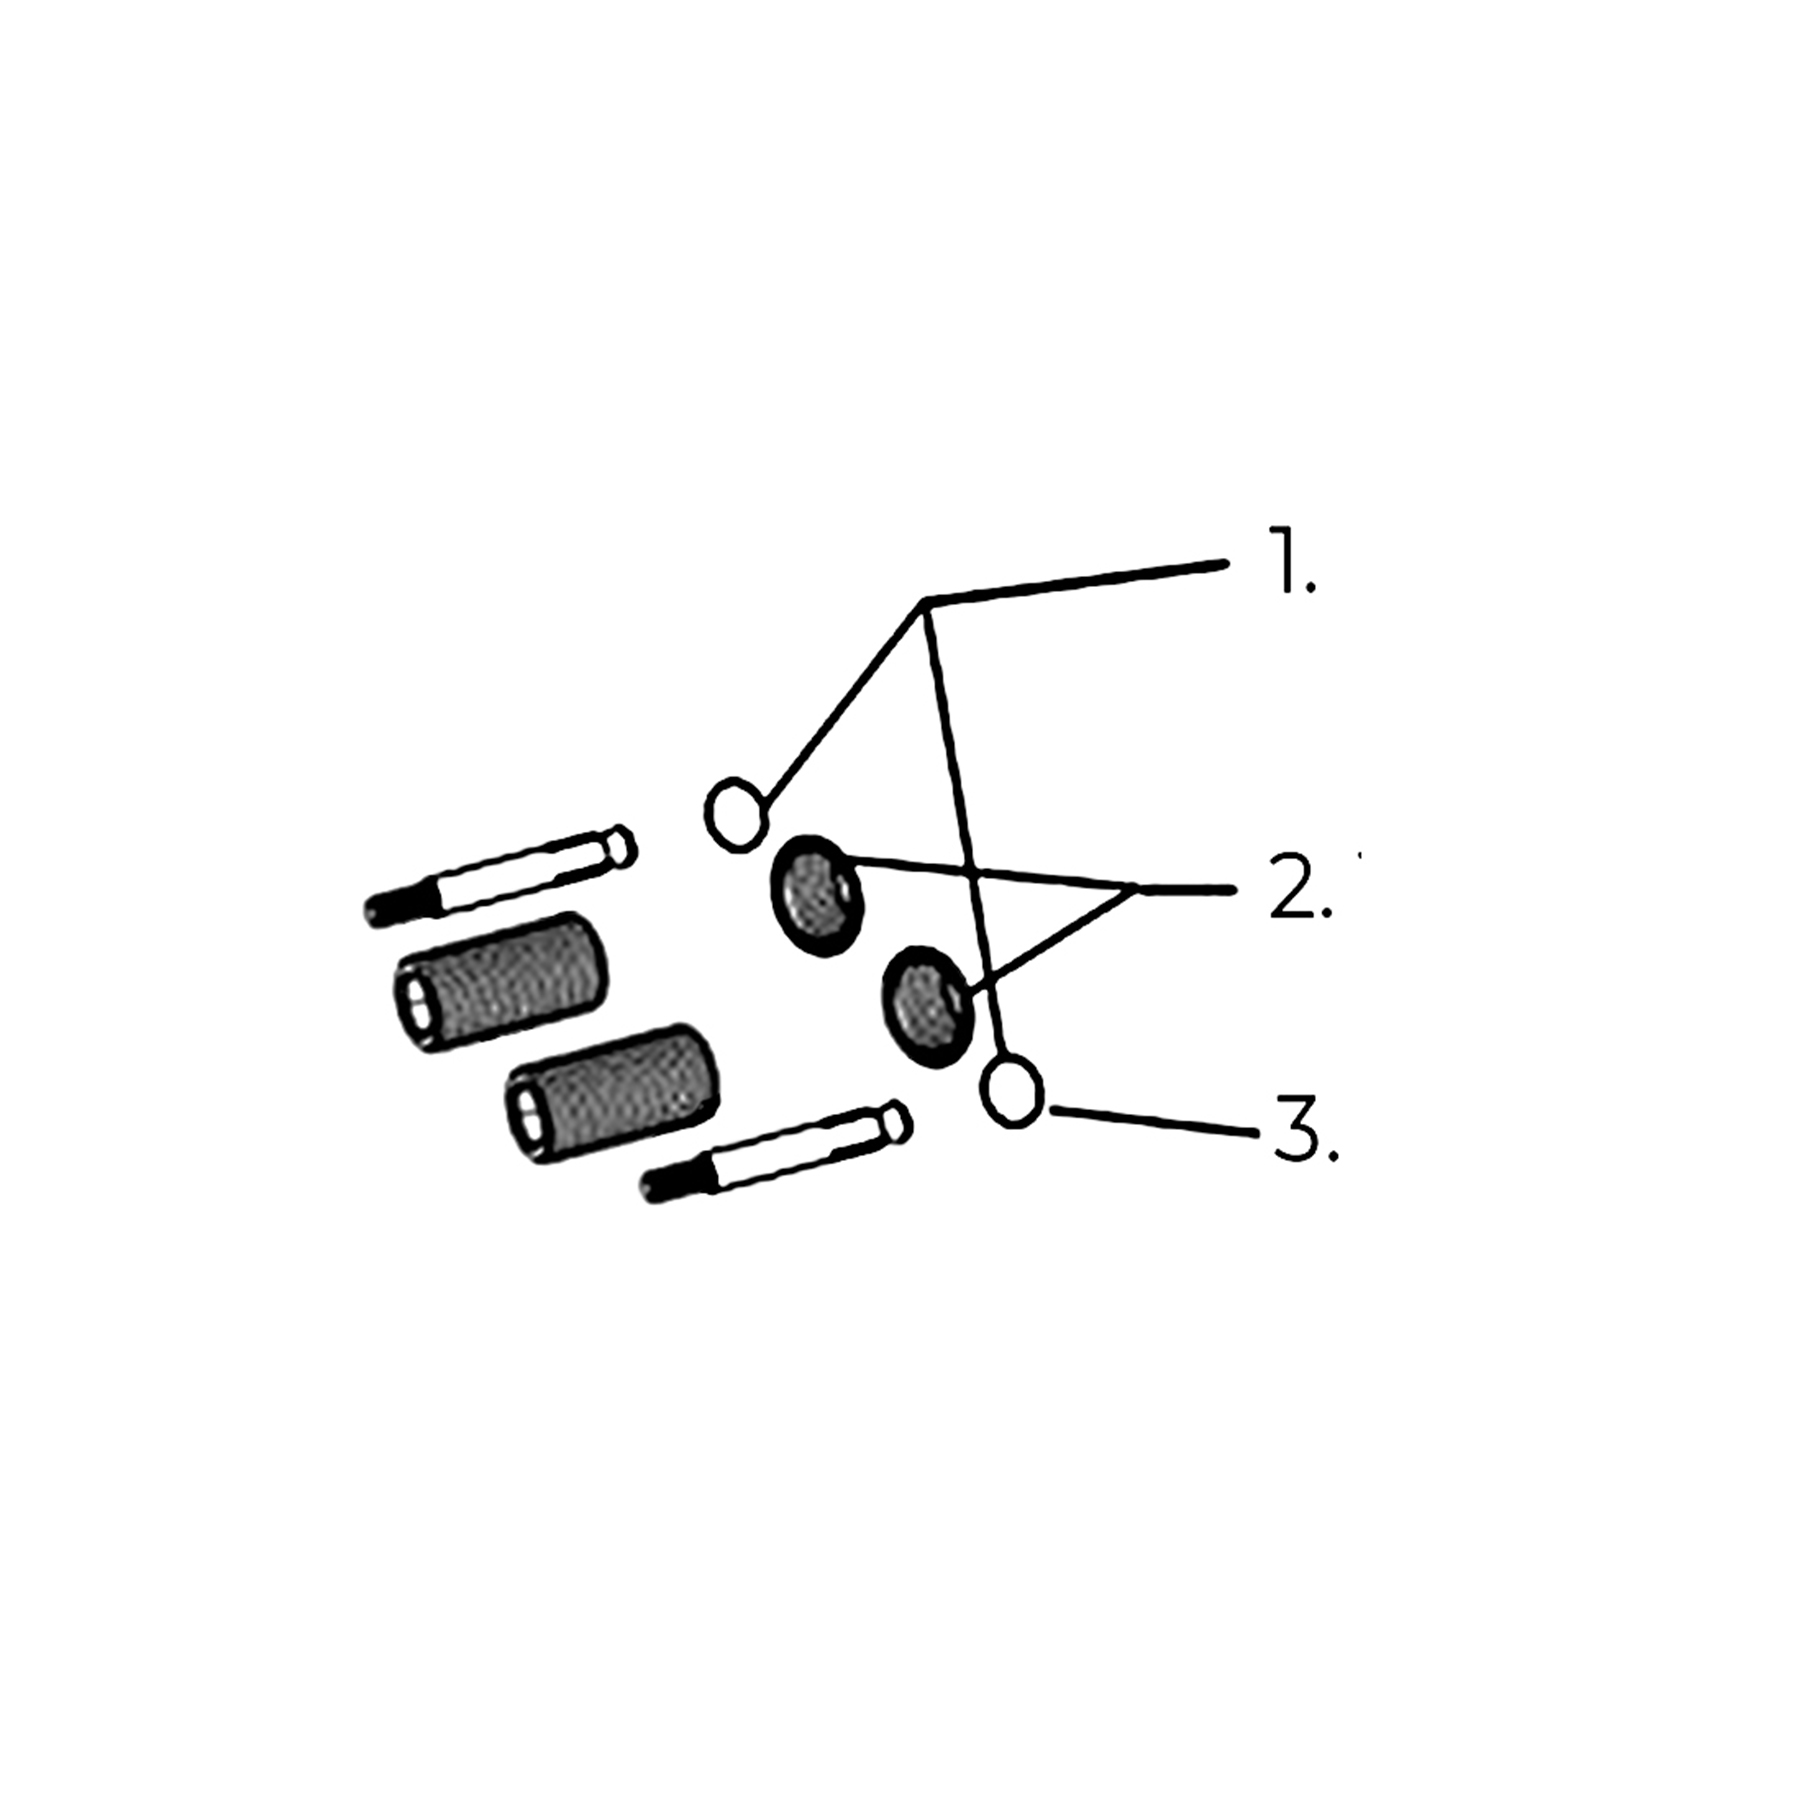
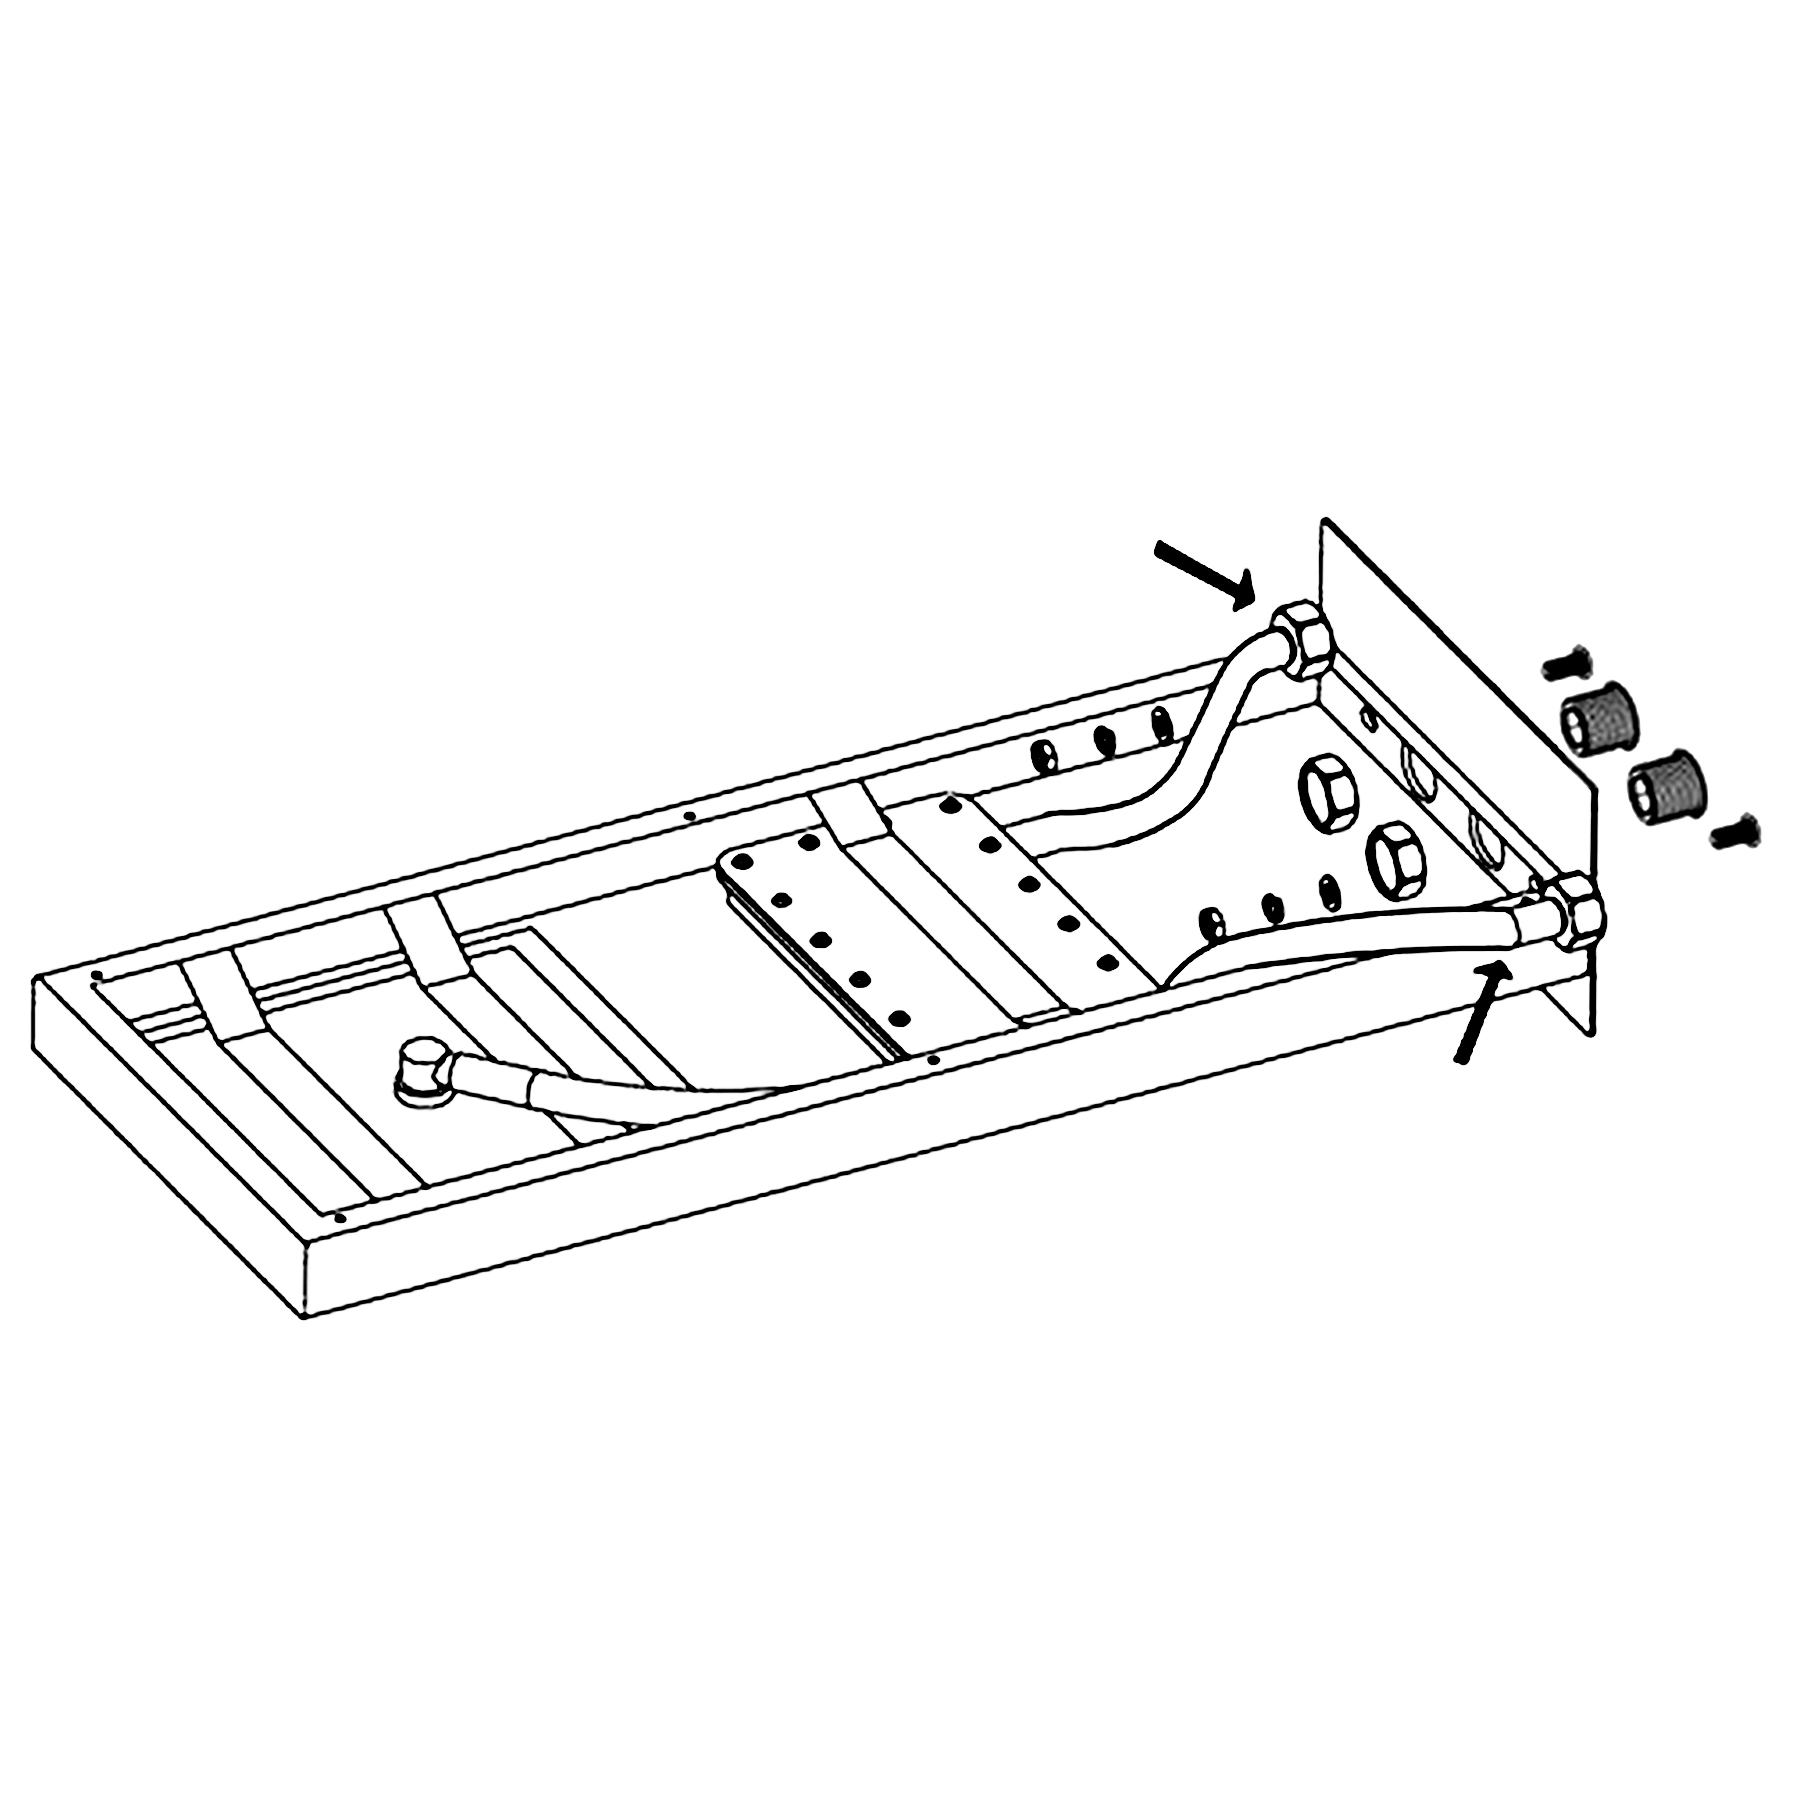
Two inlet fittings are connected to the pipe joint of the wall; then the nut, expansion screw, and inlet pipe are connected.
|
|
|
Shower Head Installation Instructions
|
|
|
|
|
|
Step 5:
|
|
|
Step 6:
|
|
|
|
|

|
|
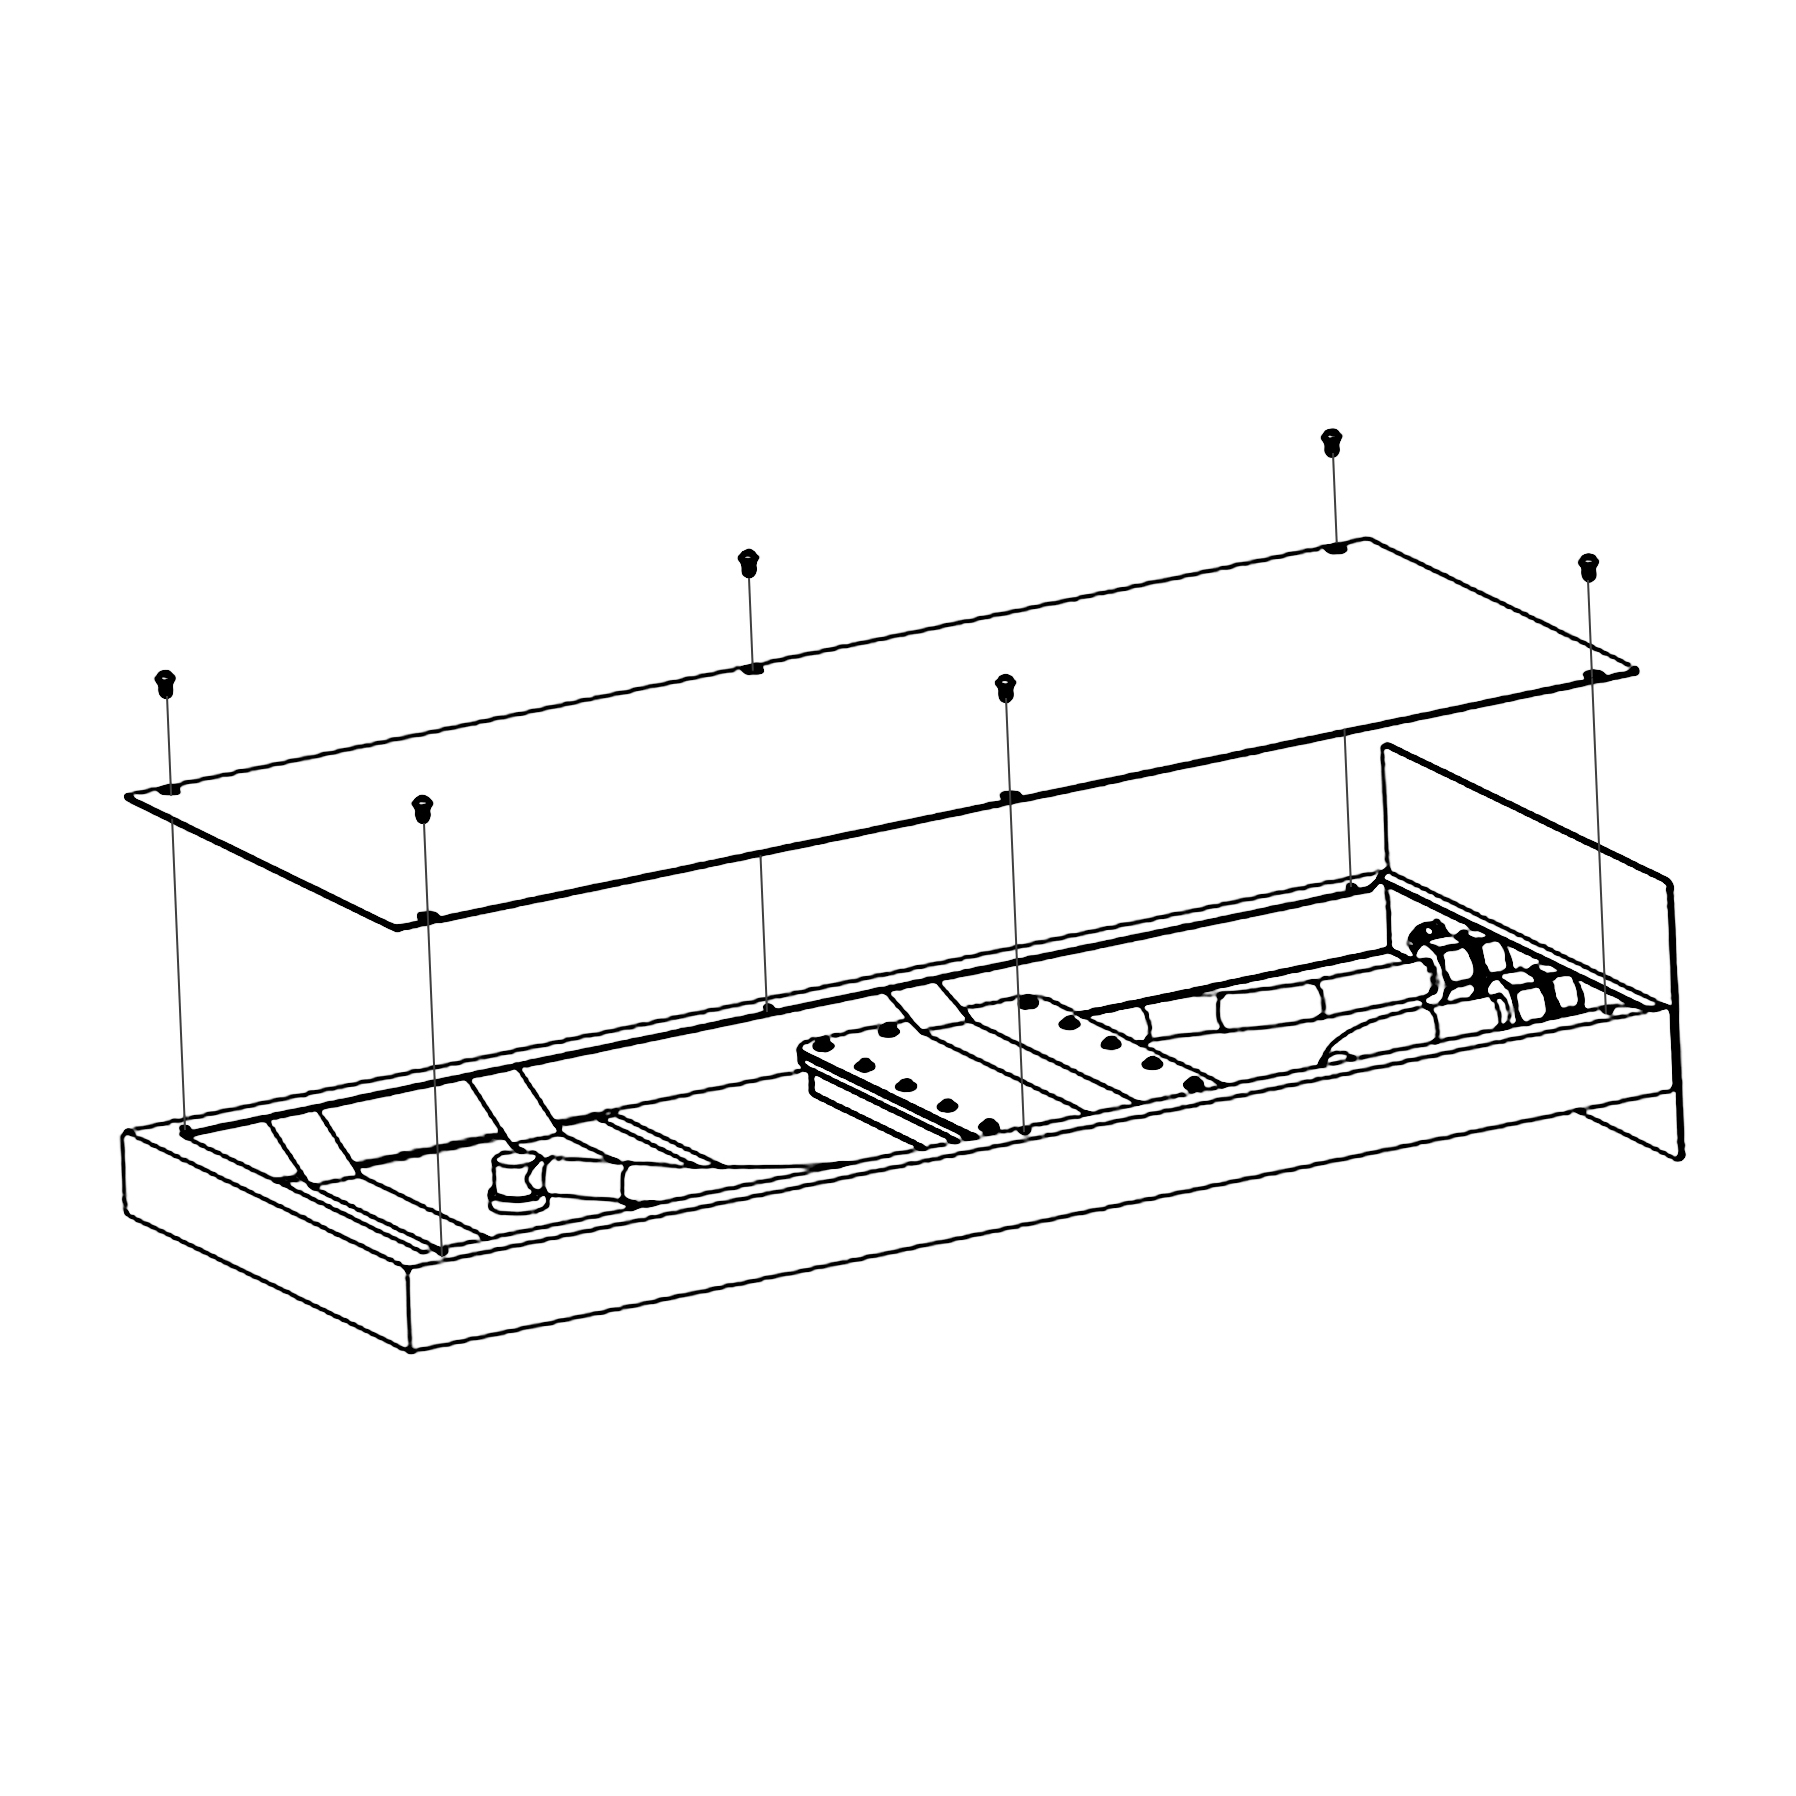
Reinstall the top cover.
|
|
|
Fix the escutcheon (D) to the showerhead (E) with screws (C).
|
|
|
Shower Head Installation Instructions
|
|
|
|
|
|
|
|
|
|
|
Step 7:
|
|
|
|
|

|
|
|
|
|
|
Remove the protective cover when the finished wall is completed. Then, install the showerhead (E) and press it against the finished wall.
|
|
|
|
|
|
Shower Head Installation Instructions
|
|
|
|
|
|
Shower Head Installation Instructions
|
|
|
|
|
Hand Held Shower Installation Instructions
|
Step 1:
|
|
Step 2:
|
|
|

|
Hand
Held
Shower
|
|
Hand
Held
Shower
|
|
|
Handheld Shower
|
|
|
|
|
|
Step 3:
|
|
|
|
|
|
|
|
|
|
|
Handheld Shower
|
|
|
|
|
Shower Body Jets Installation Instructions
|
Step 1:
|
|
|
Step 2:
|
|
|
Body sprays
|
|
|
|
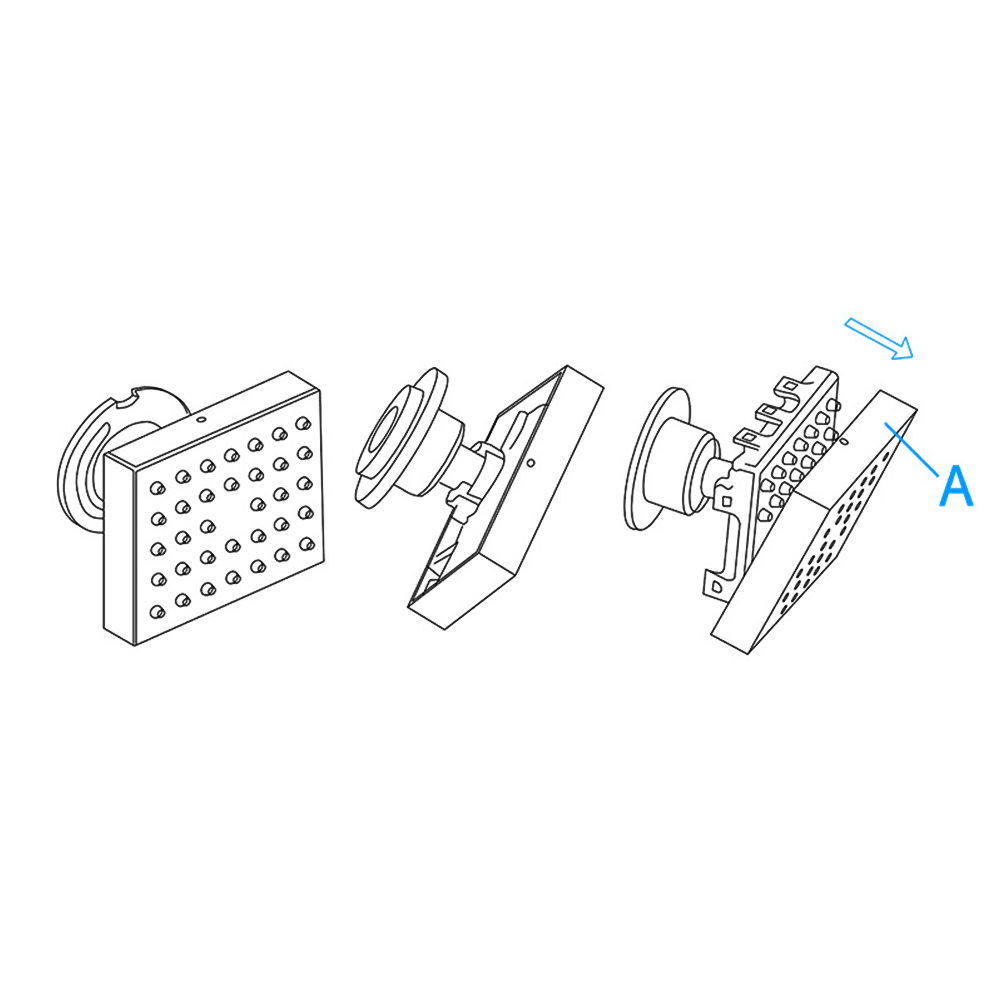
Remove the decorative plate (A) out of the body.
|
|
|
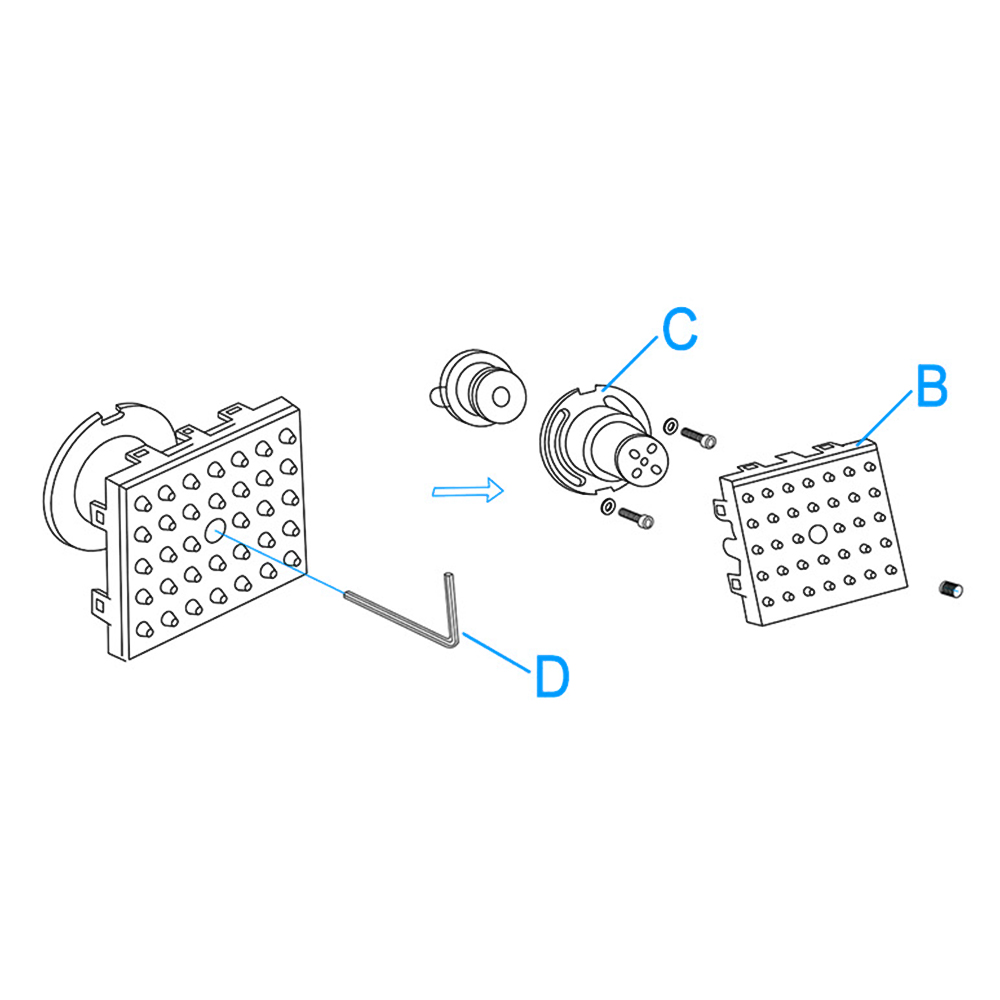
Remove the screws from the outlet face (B) and connector body (C) with the Allen key (D).
|
|
Body Spray Installation Instructions
|
|
|
|
|
|
Step 3:
|
|
|
Step 4:
|
|
|
|
|
|
|
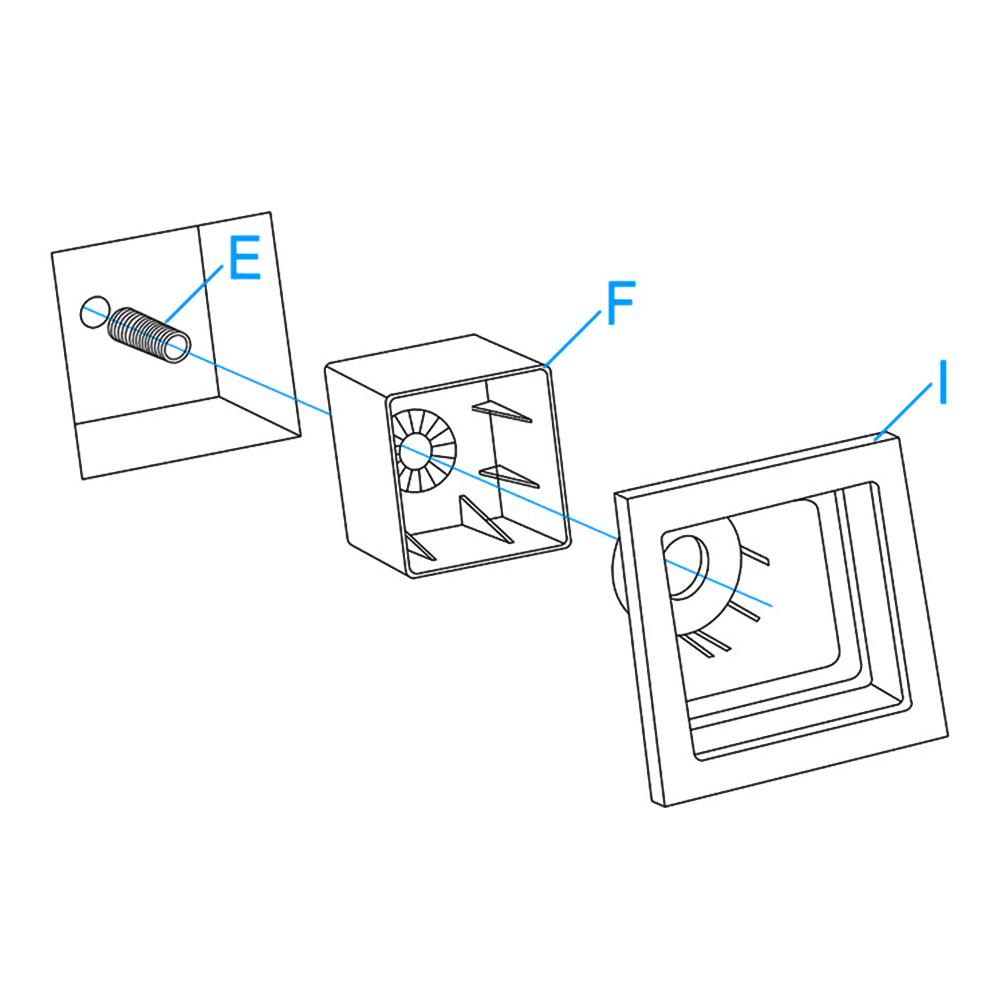
Screw the threaded pipe (E) to the water supply fittings. Push the plastic box (F) into the wall through the threaded pipe (E). Then, install the decorative plate (I) into the plastic box (F). Make sure the position is correct according to the diagram.
|
|
|
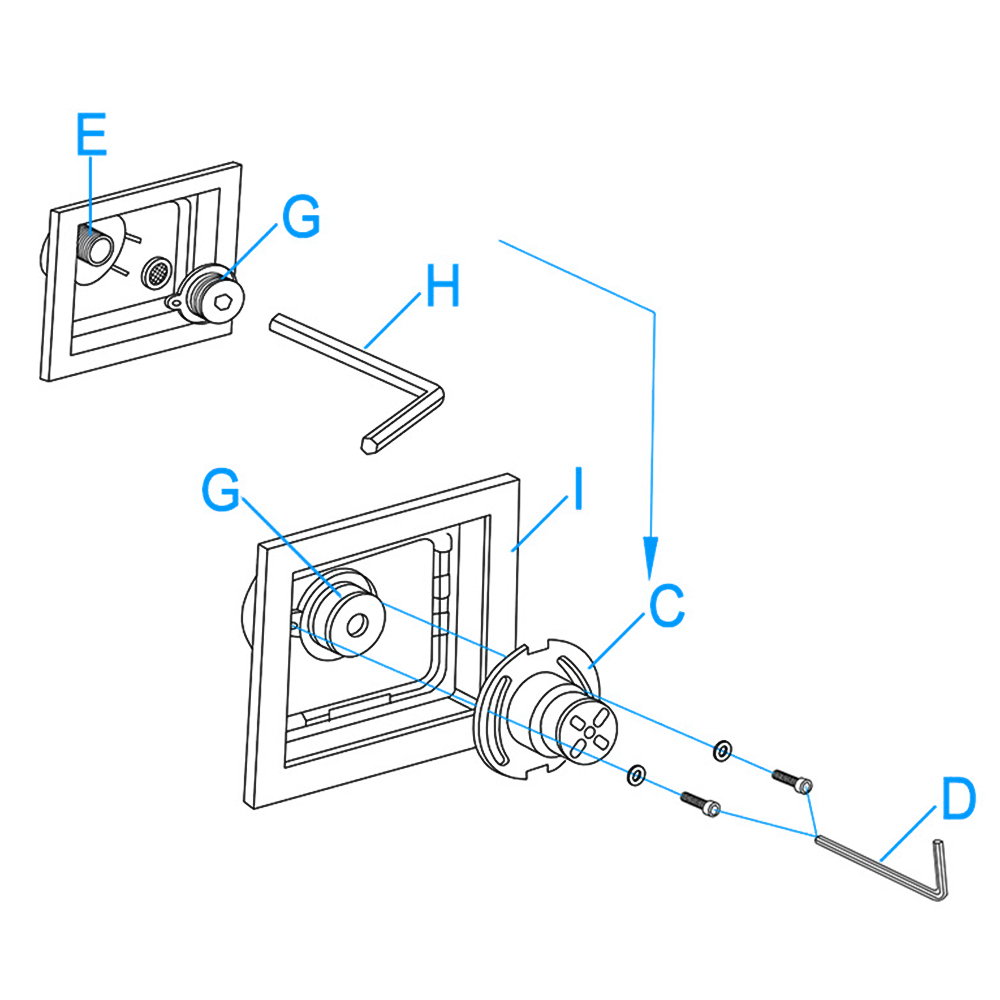
Screw the connector (G) into the threaded pipe (E) with the Allen key (H). Install the connector body (C) to the connector (G). When finish installation, please check to make sure the connection is completed. Then, fix the screws into the body (C) with Allen key (D) and make sure the body (C), connector (G) and decorative plate (I) are tightened. Make sure the one side with the bulge is in the top position.
|
|
|
Body Spray Installation Instructions
|
|
|
|
|
|
Step 5:
|
|
|
Step 6:
|
|
|
|
|

|
|
|
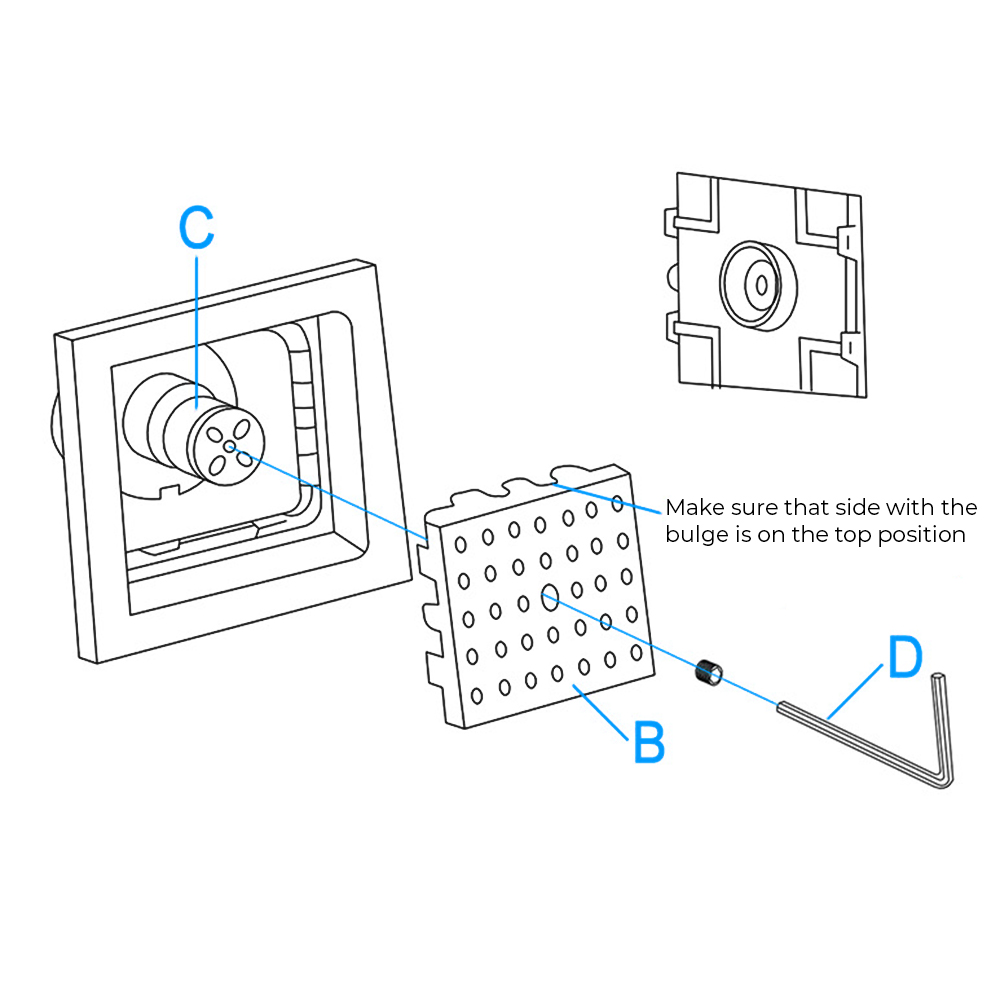
Install the outlet face (B) to the body (C). Make sure the connection of body (C) and outlet face (B) are completed. Tighten the screw through the outlet face (B) into the body (C) with the Allen key (D).
|
|
|
Install the decorative plate (A) into the outlet face (B) tightly. Make sure the hole and the raised dot are in the correct position when you push the decorative plate (A) into the outlet face (B).
|
|
|
Body Spray Installation Instructions
|
|
|
|
|
|
|
|
|
|
|
Body Spray Installation Instructions
|
|
|
|
|
|
|
|
|
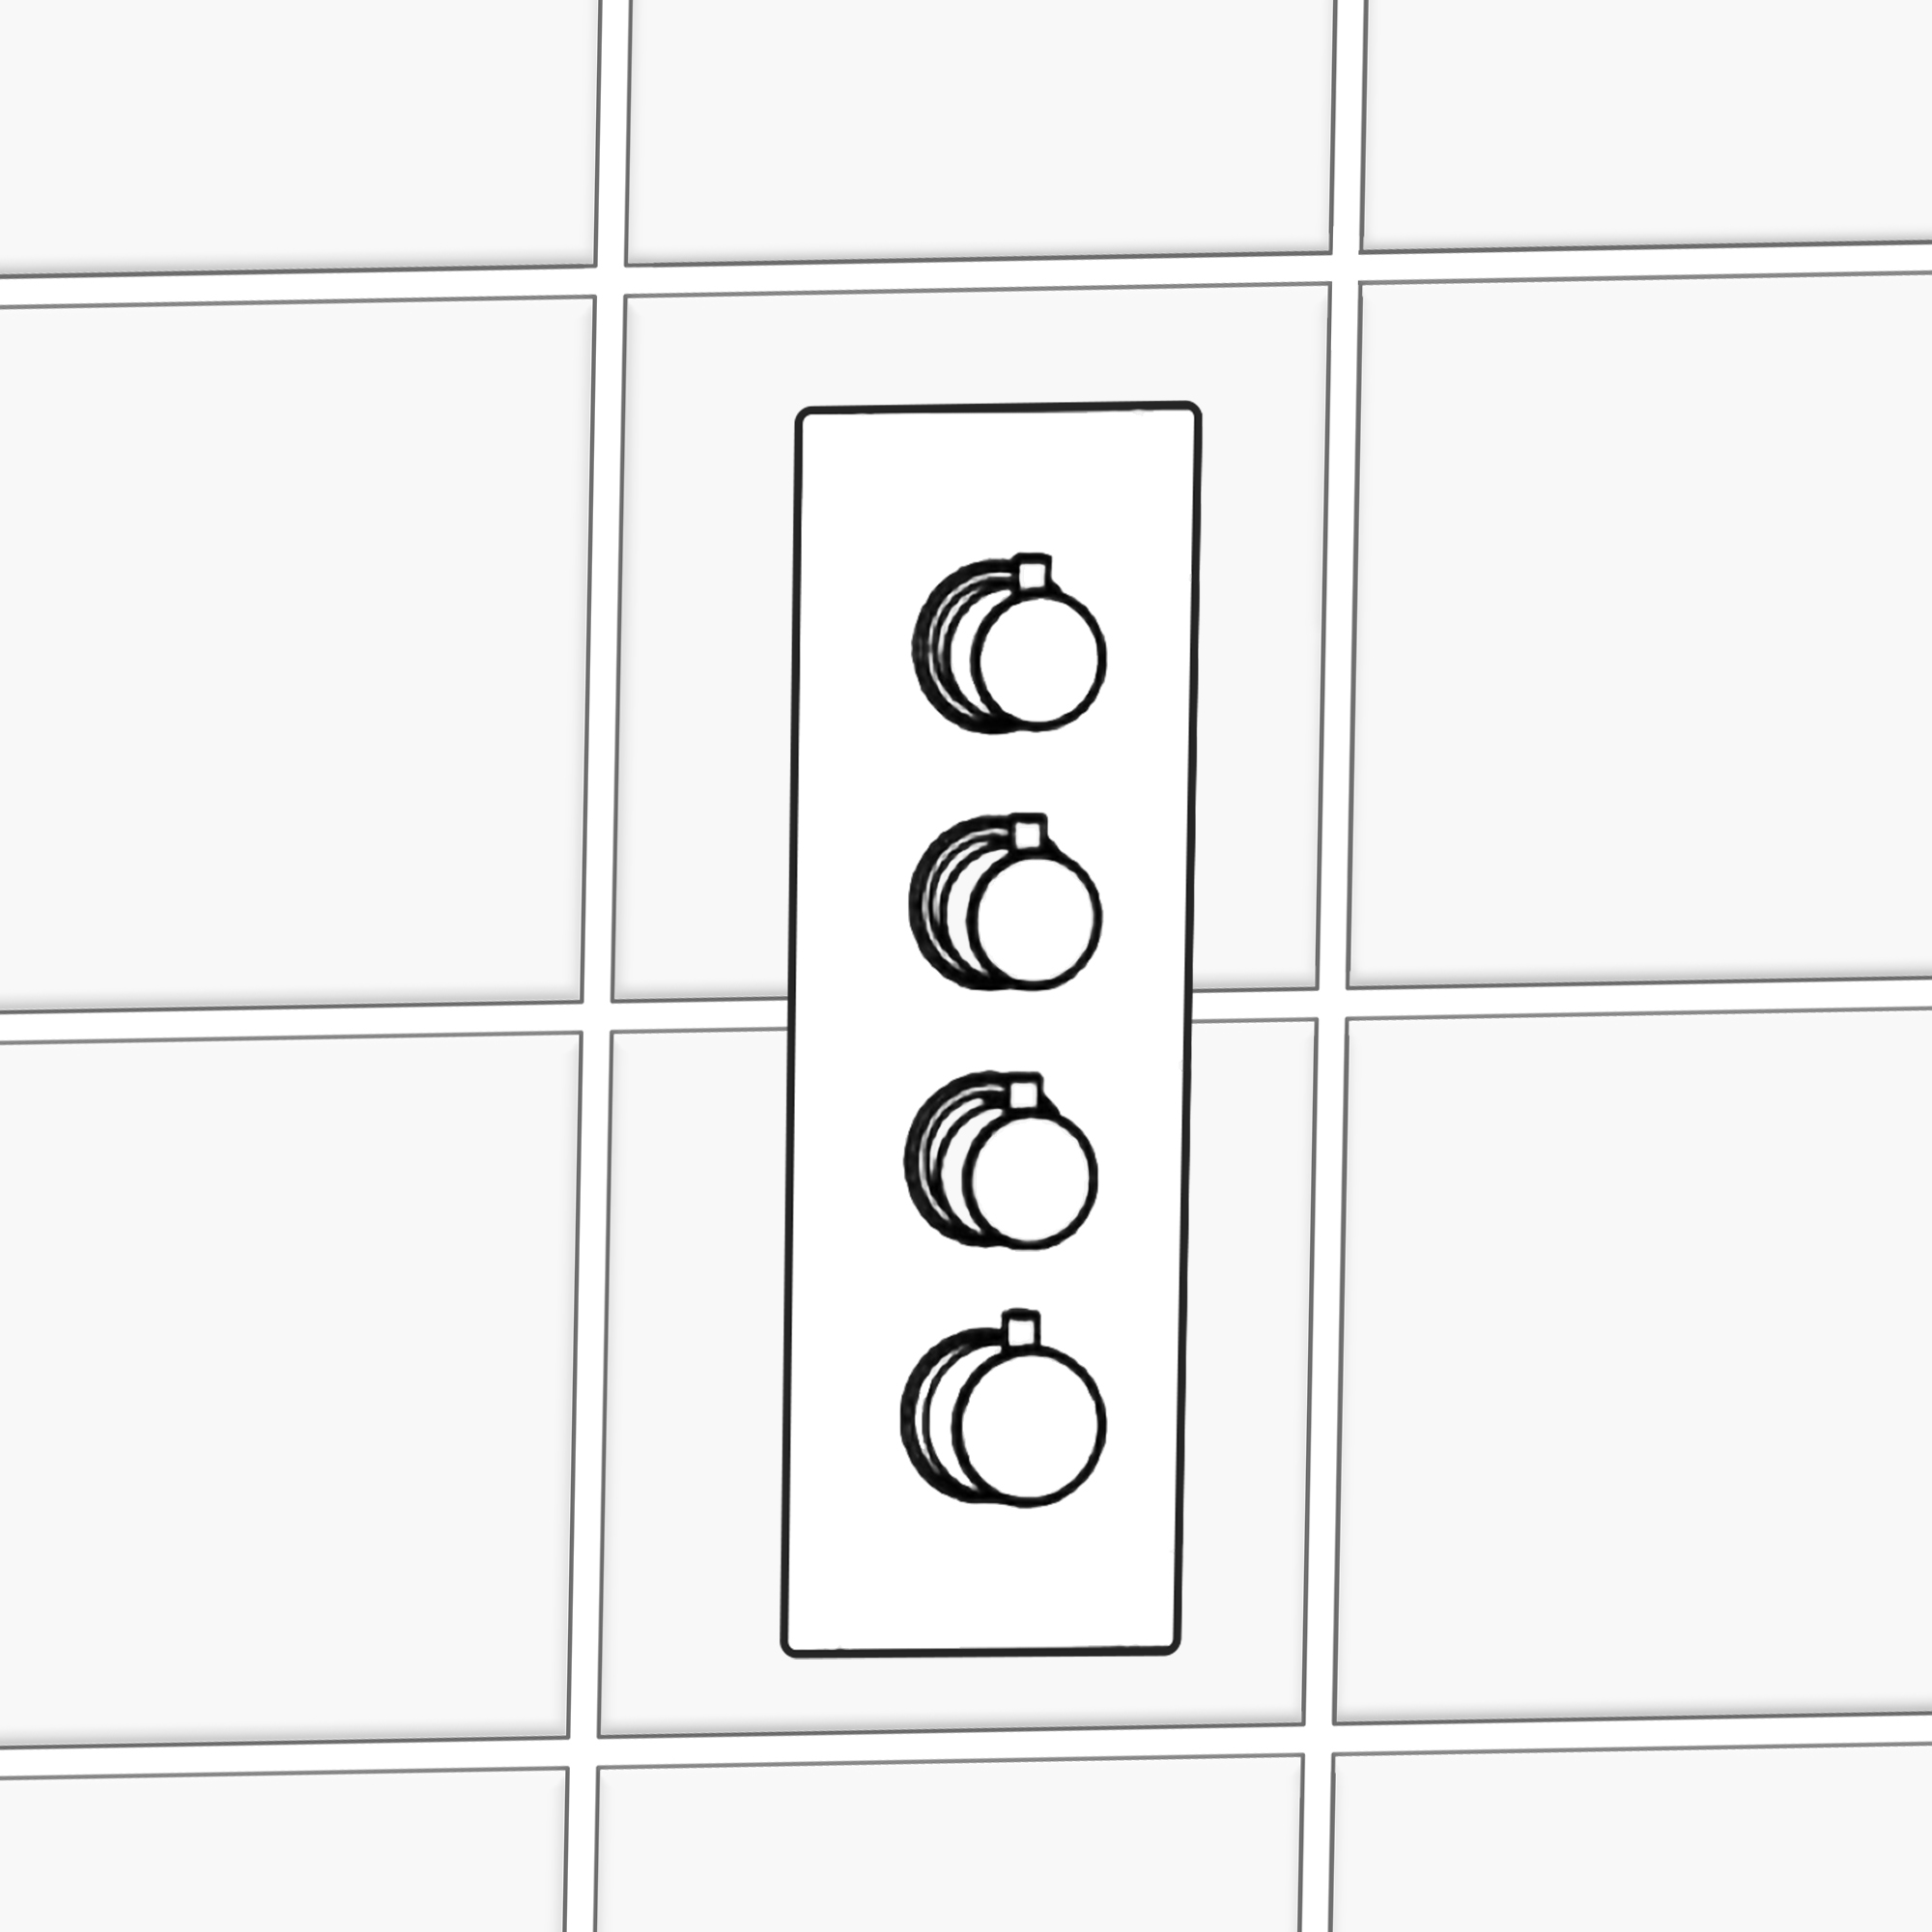
Shower Thermostatic Mixer Installation Instructions
|
Step 1:
|
|
Step 2:
|
|
|
Shower
Mixer
|
|
|
|
|
|
|
|
Shower Valve Mixer Installation Instructions
|
|
|
|
|
Step 3:
|
|
Step 4:
|
|
|
|
|
|
|
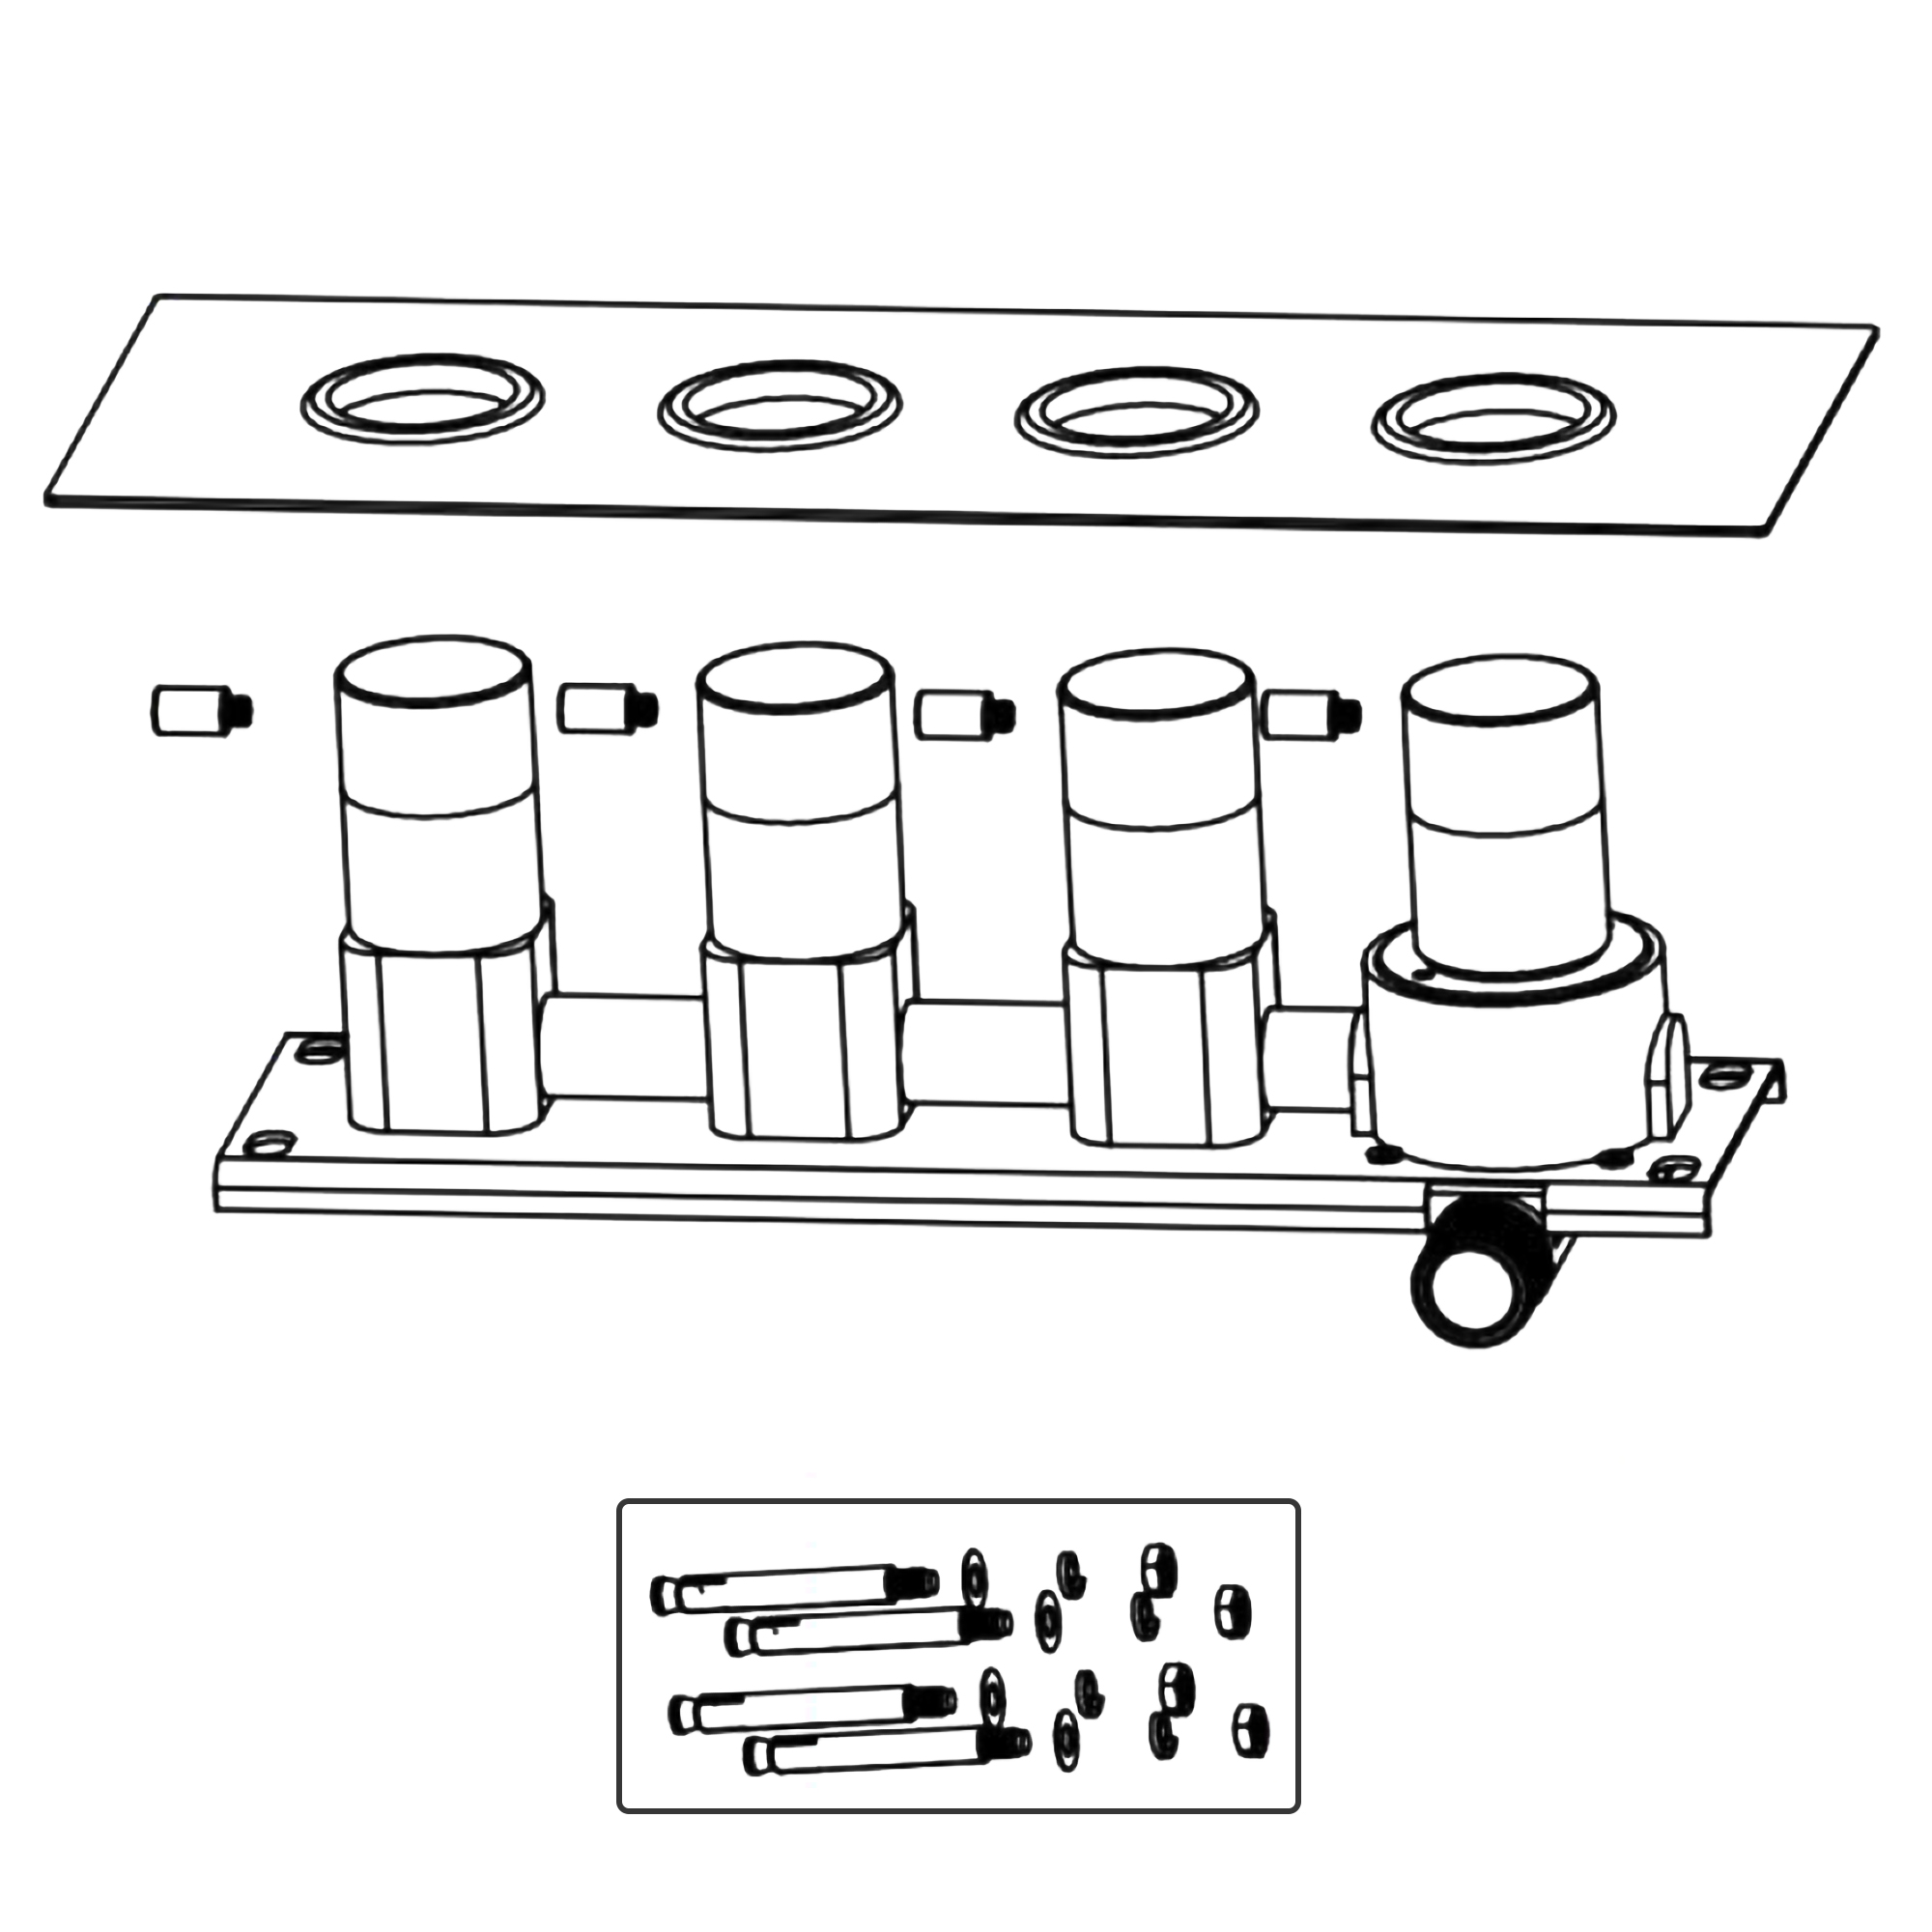
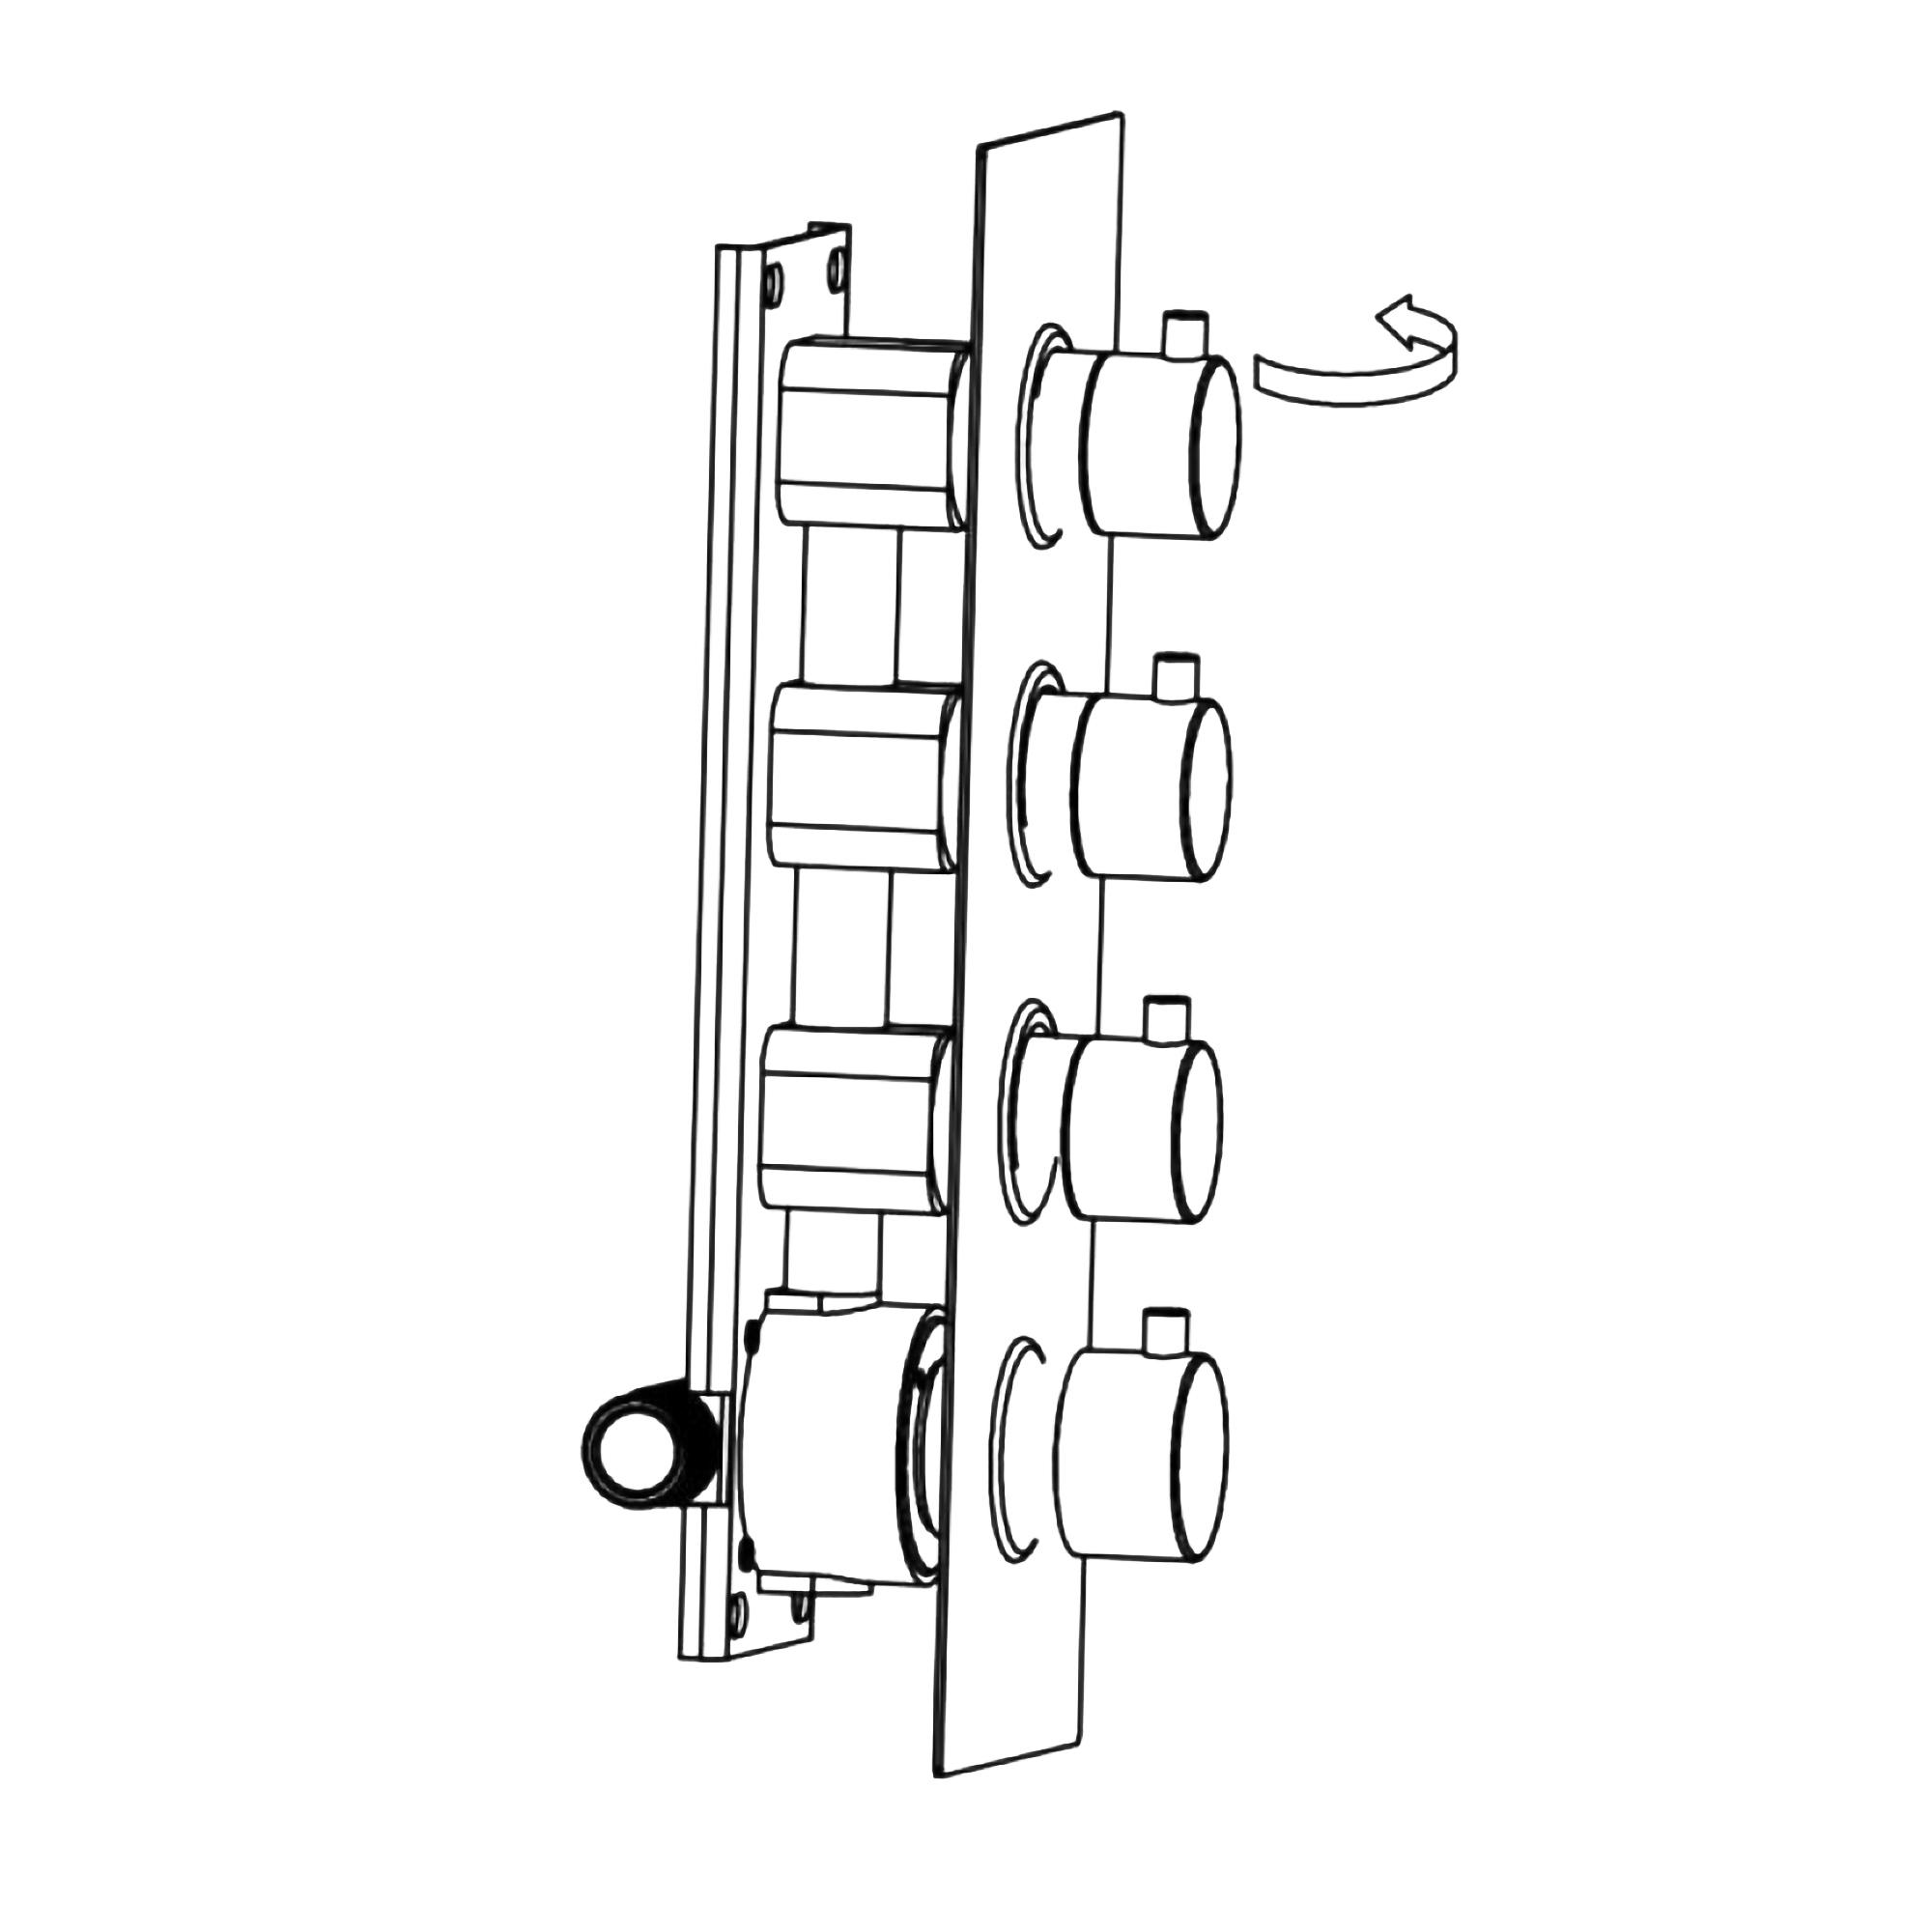
Please screw the handles out according to the above direction.
|
|
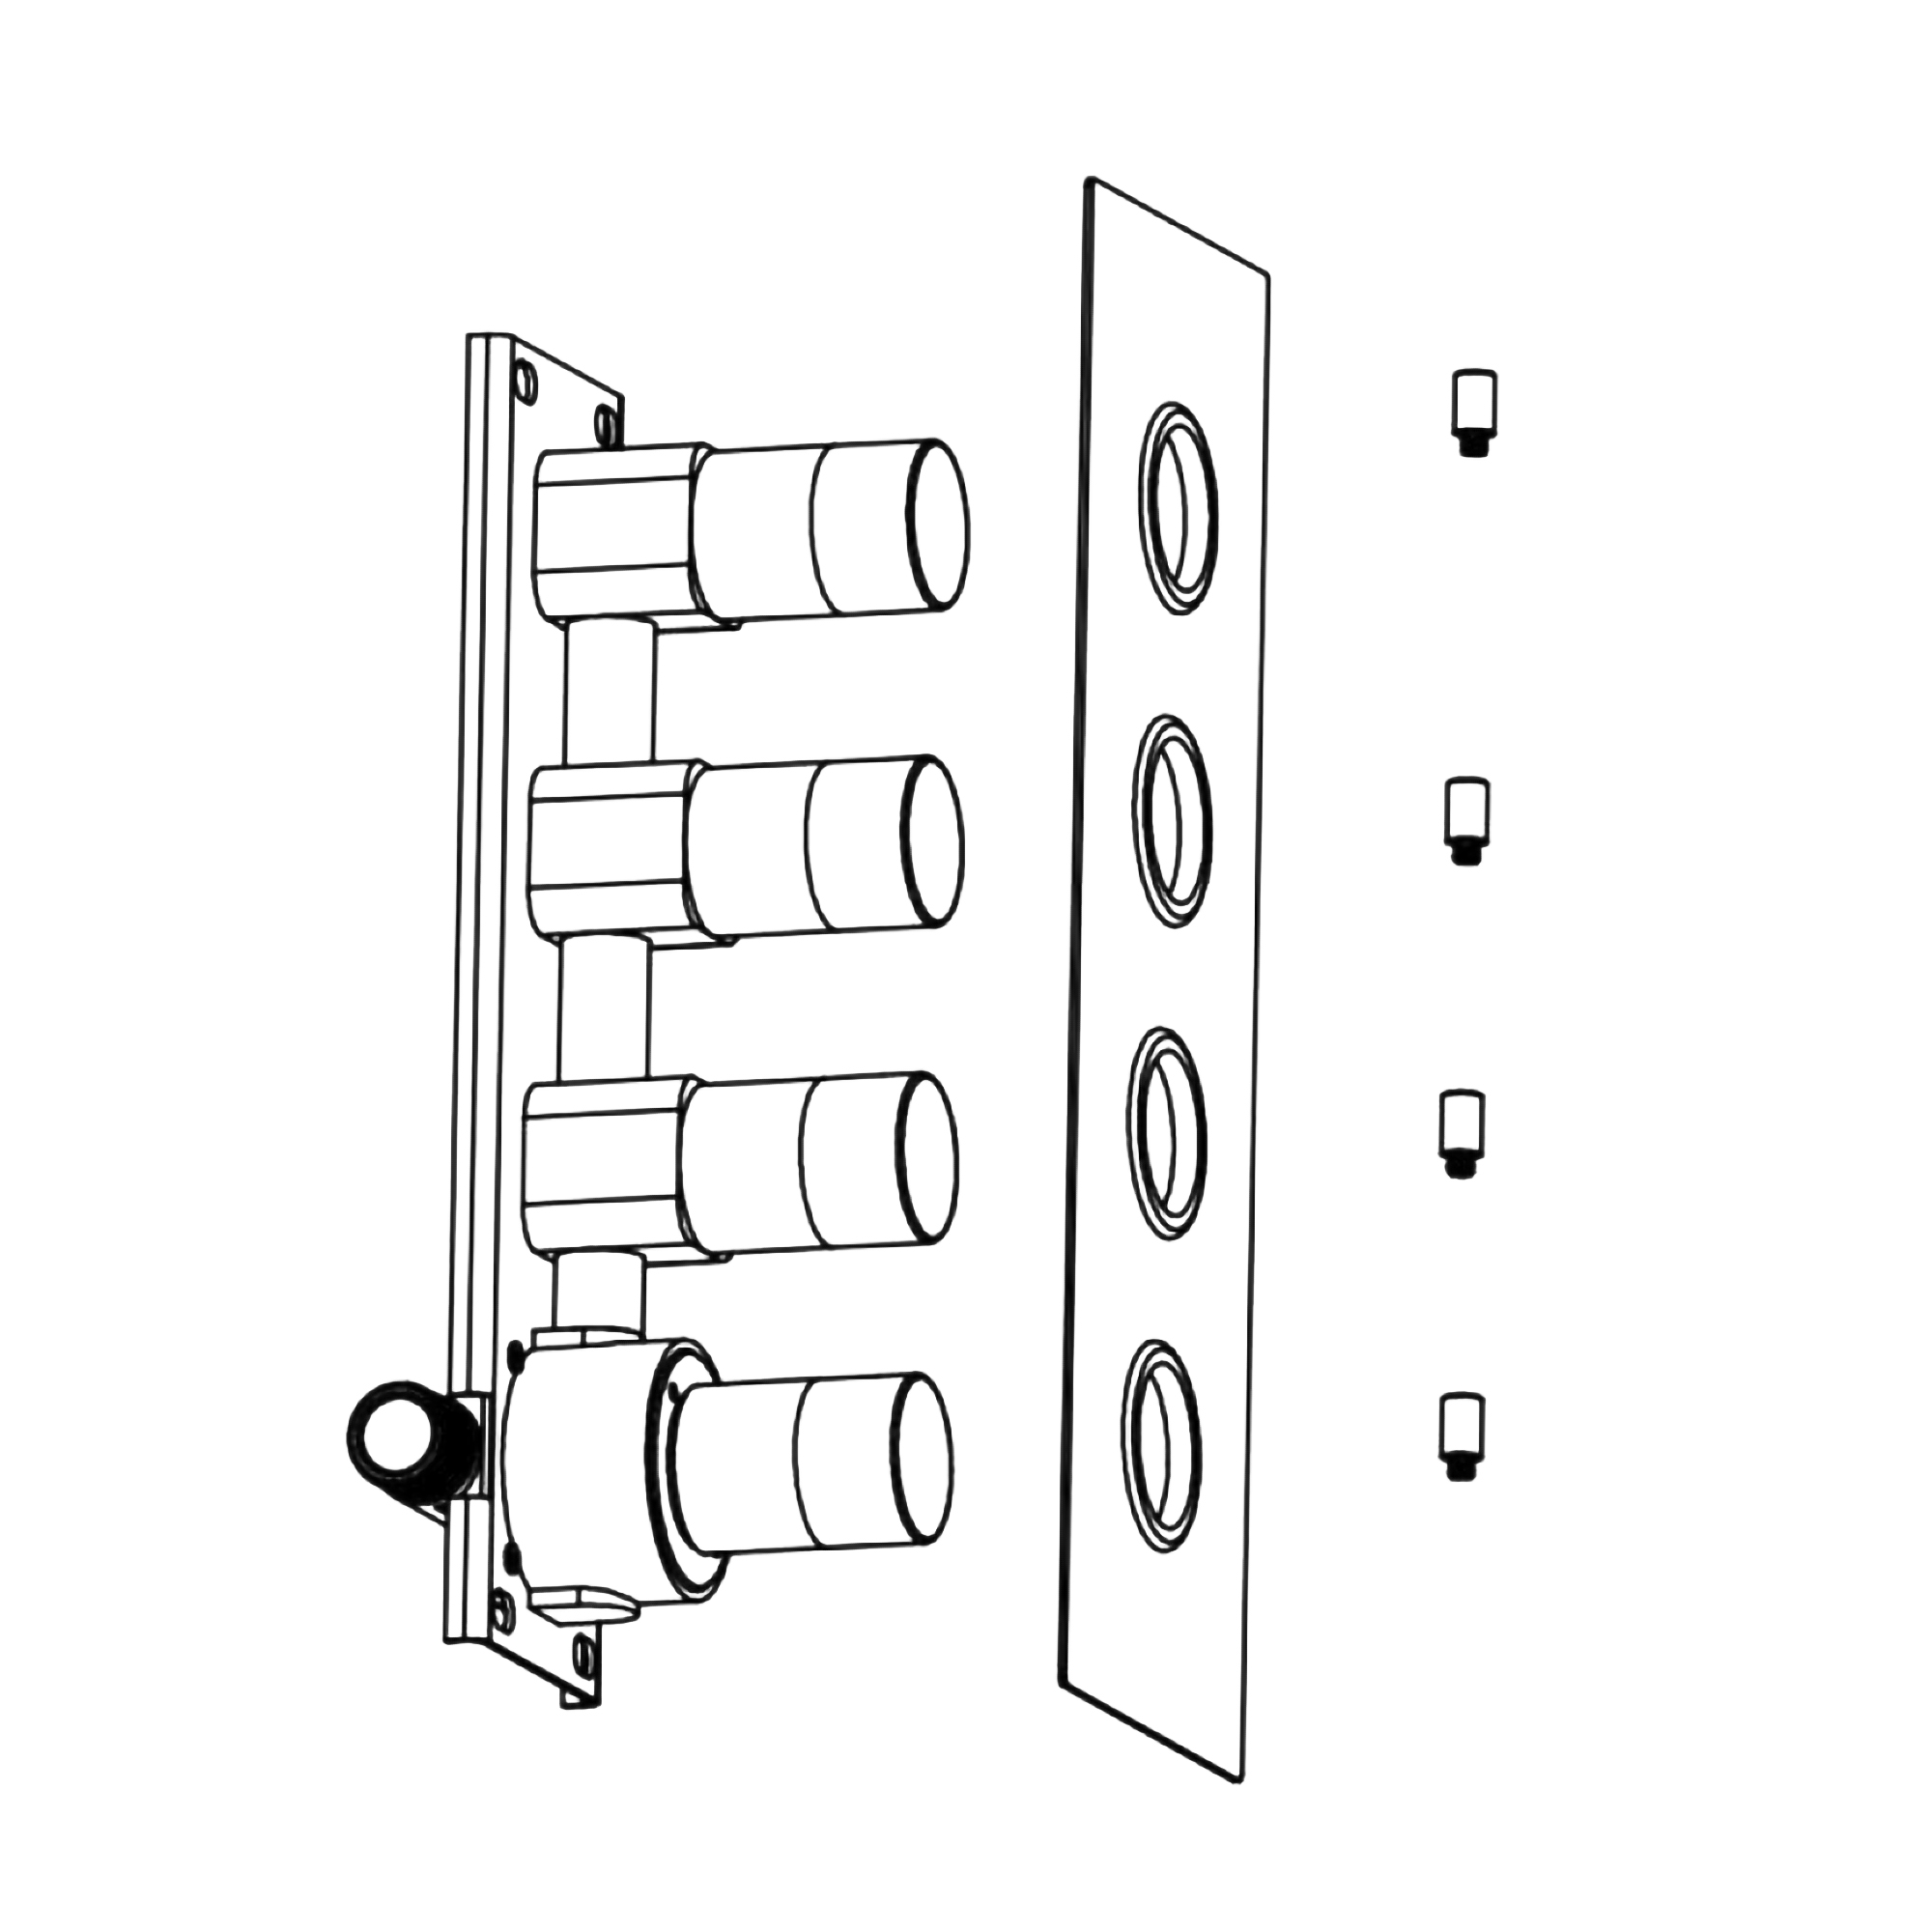
Take board and four handles out of the faucet body.
|
|
|
Shower Valve Mixer Installation Instructions
|
|
|
|
|
Step 5:
|
|
Step 6:
|
|
|
|
|
|
|
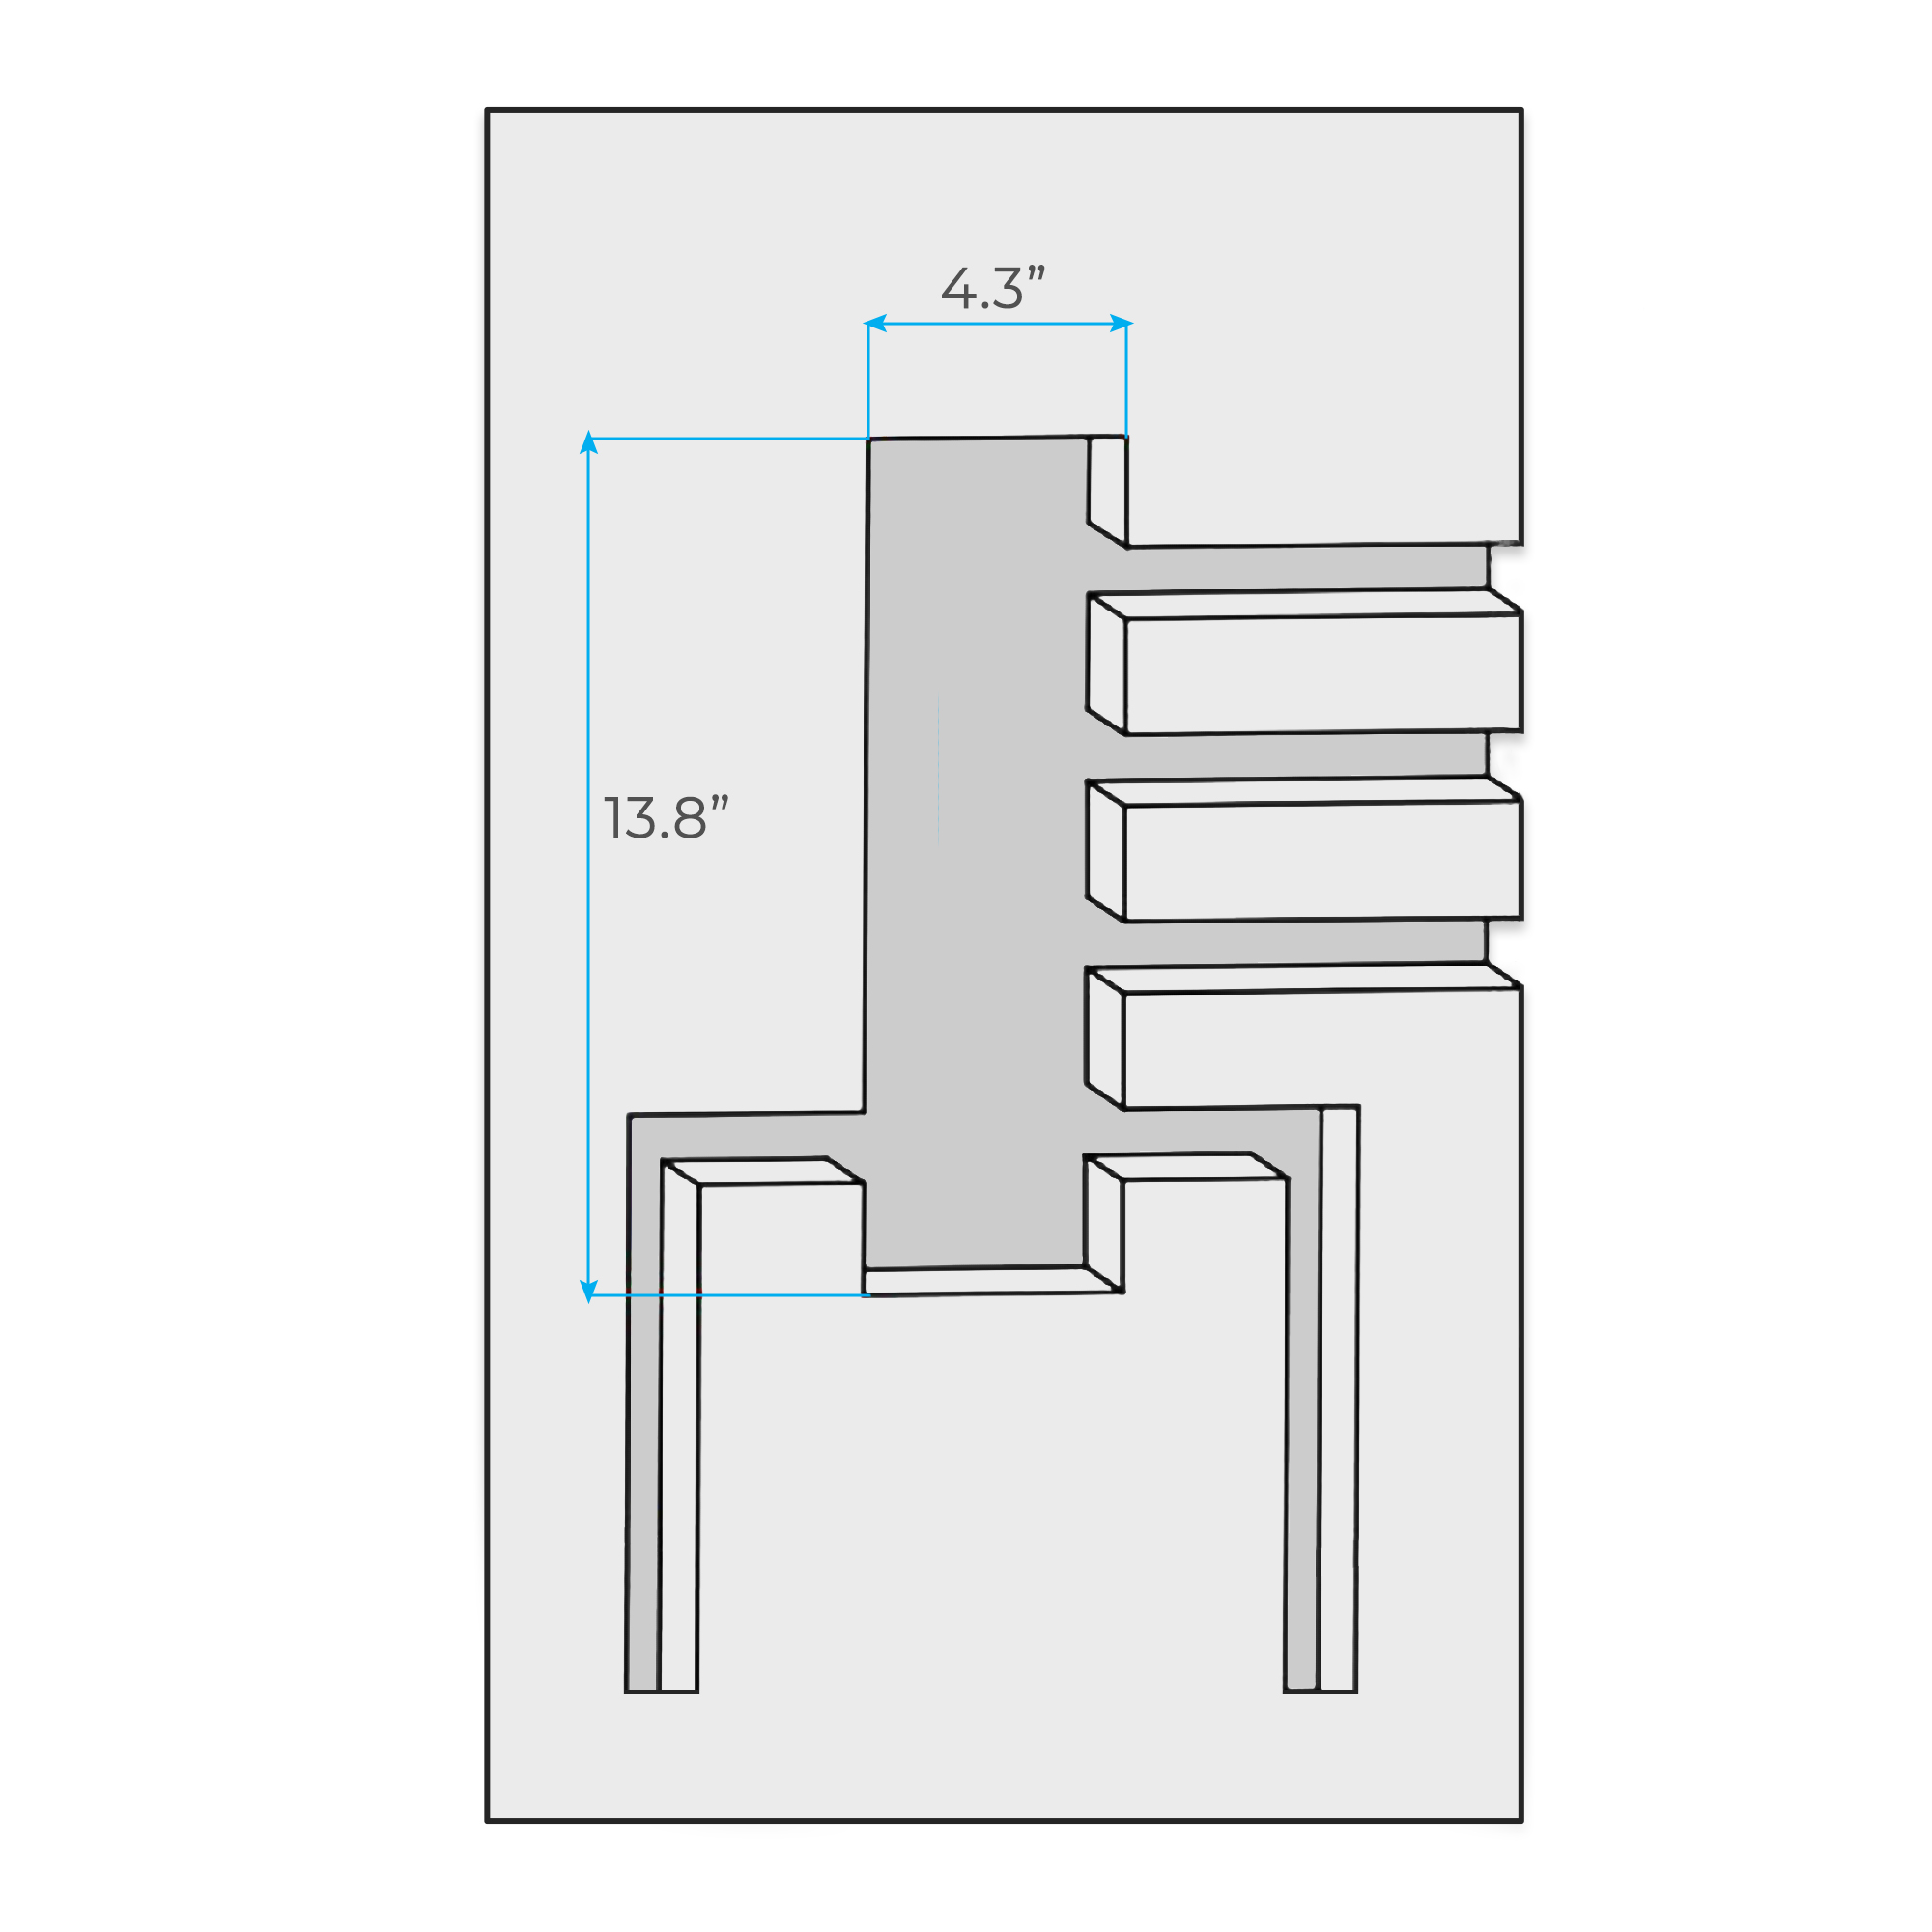
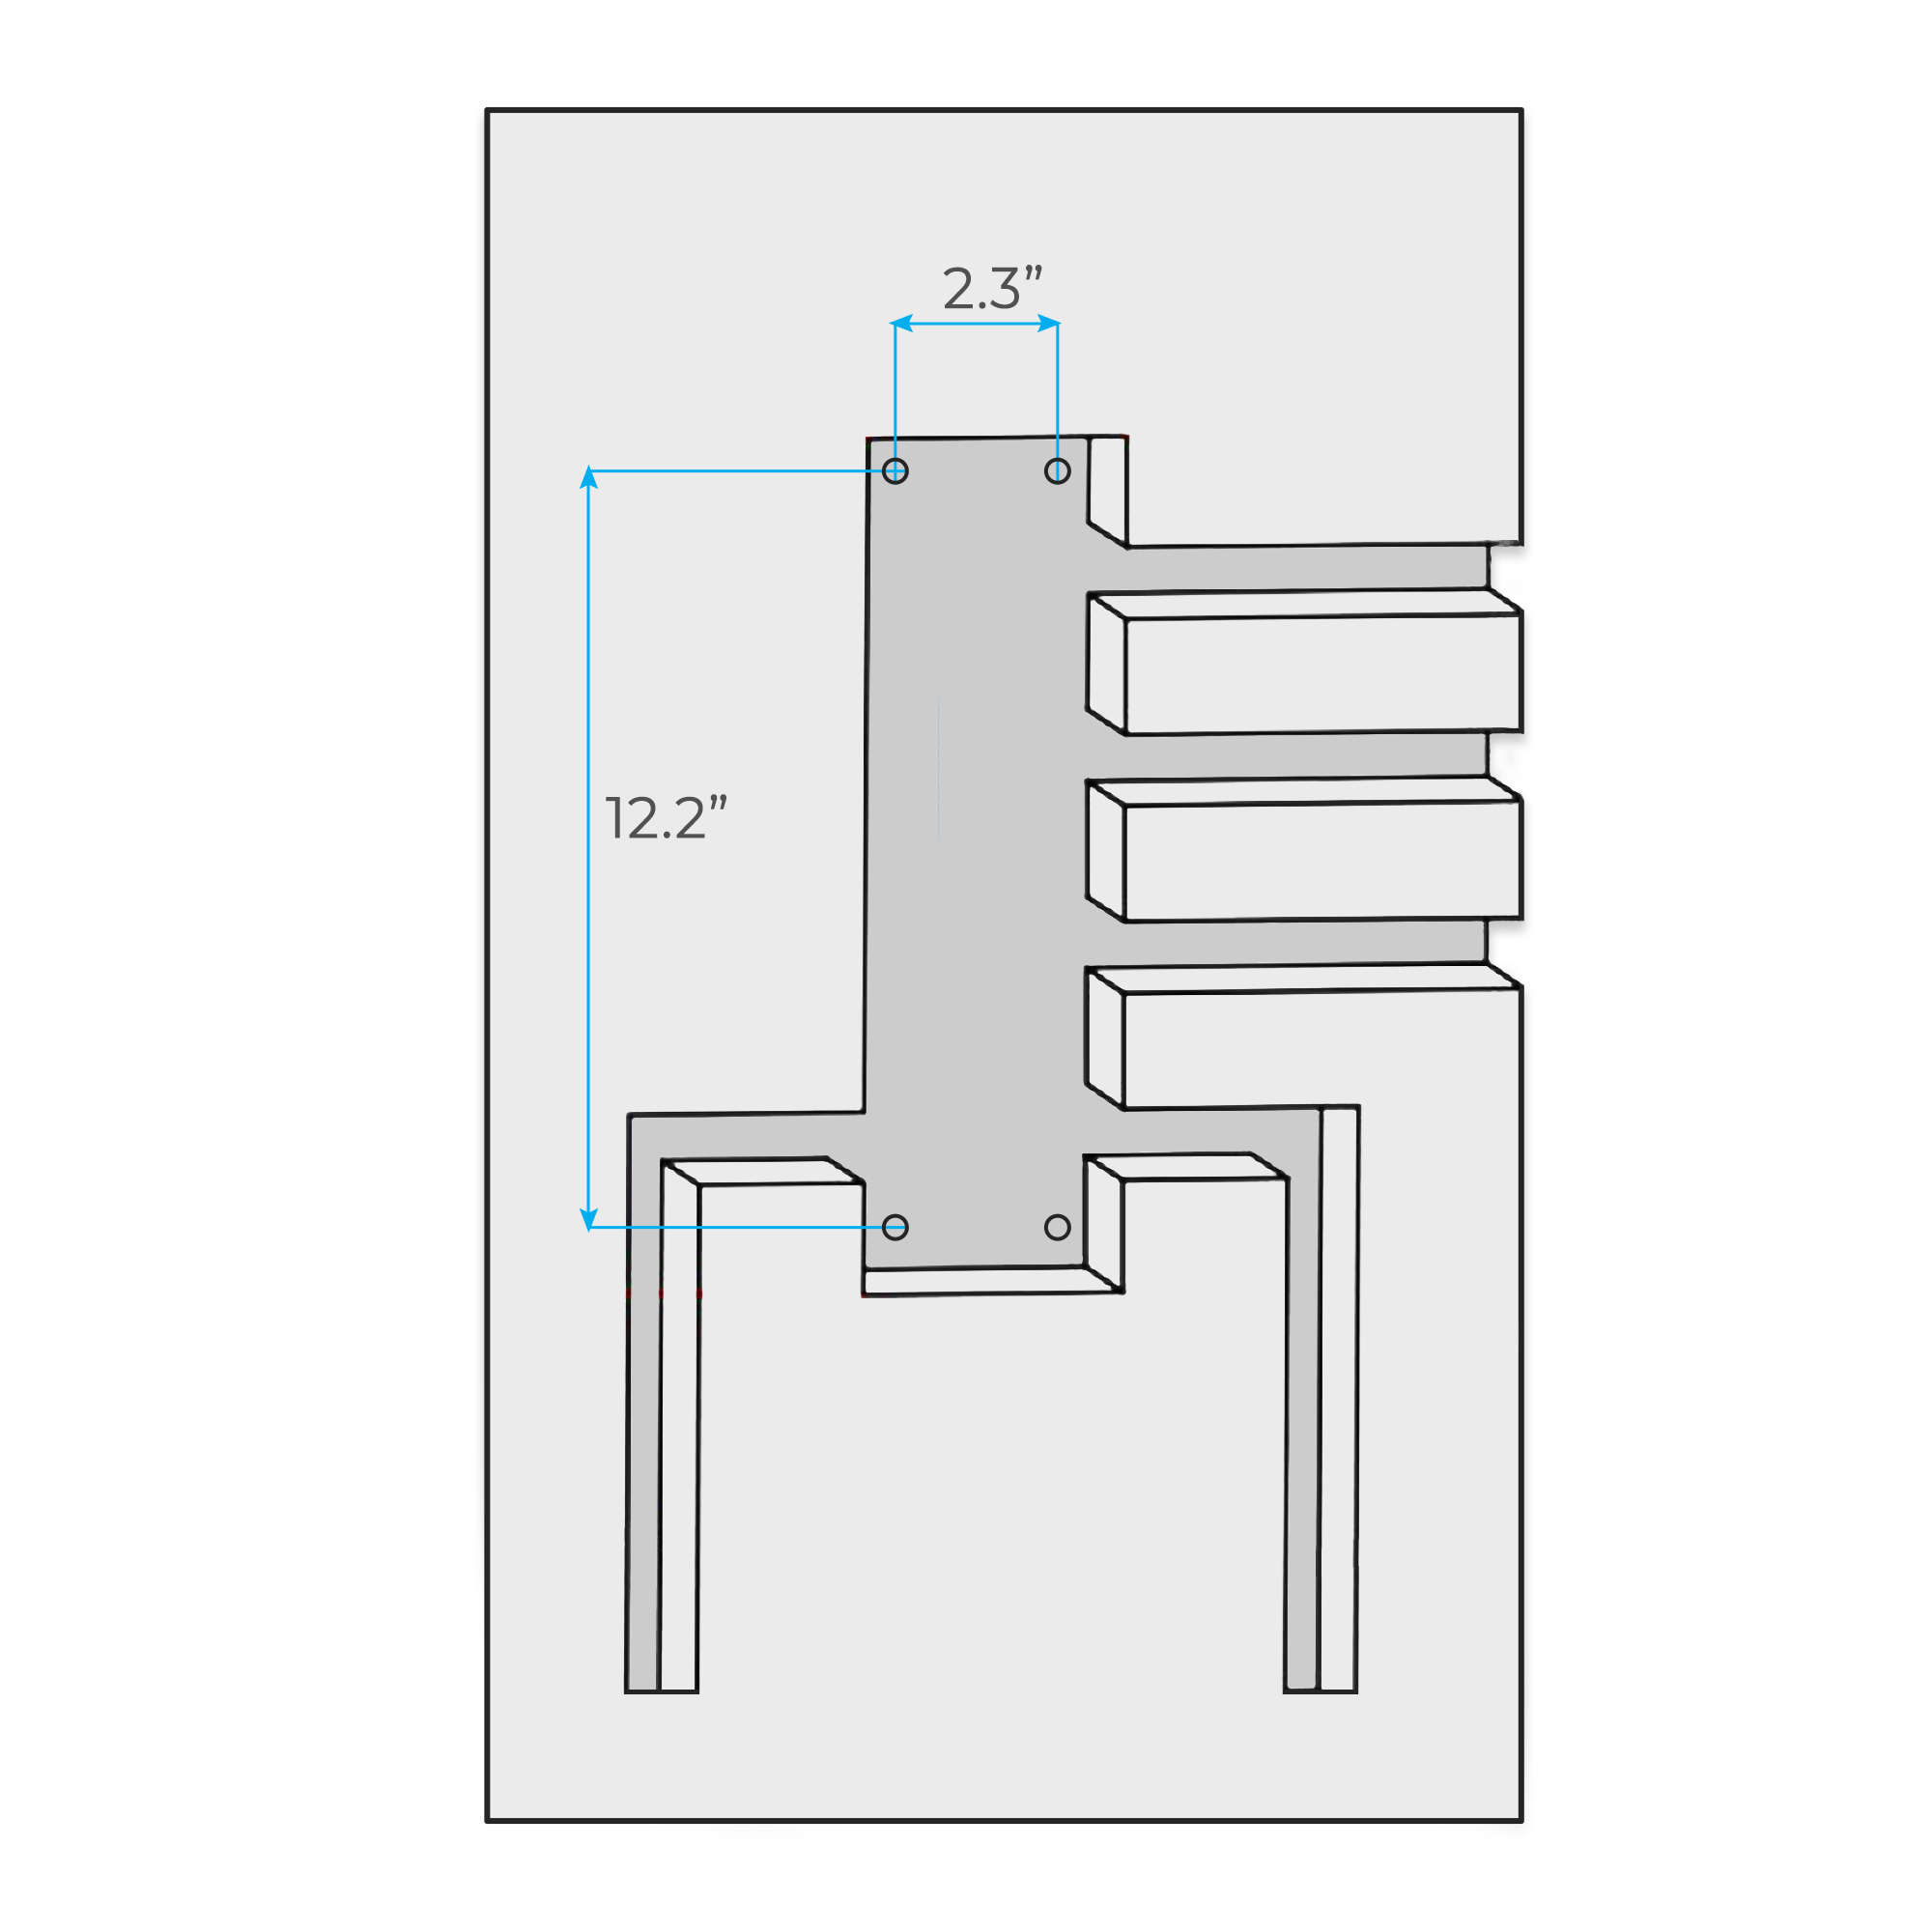
According to the actual size, get all pipe embedded mounts well ready.
|
|
According to the product basic size, dig four holes on the ideal place of the wall.
|
|
|
Shower Valve Mixer Installation Instructions
|
|
|
|
|
Step 7:
|
|
Step 8:
|
|
|
|

|
|
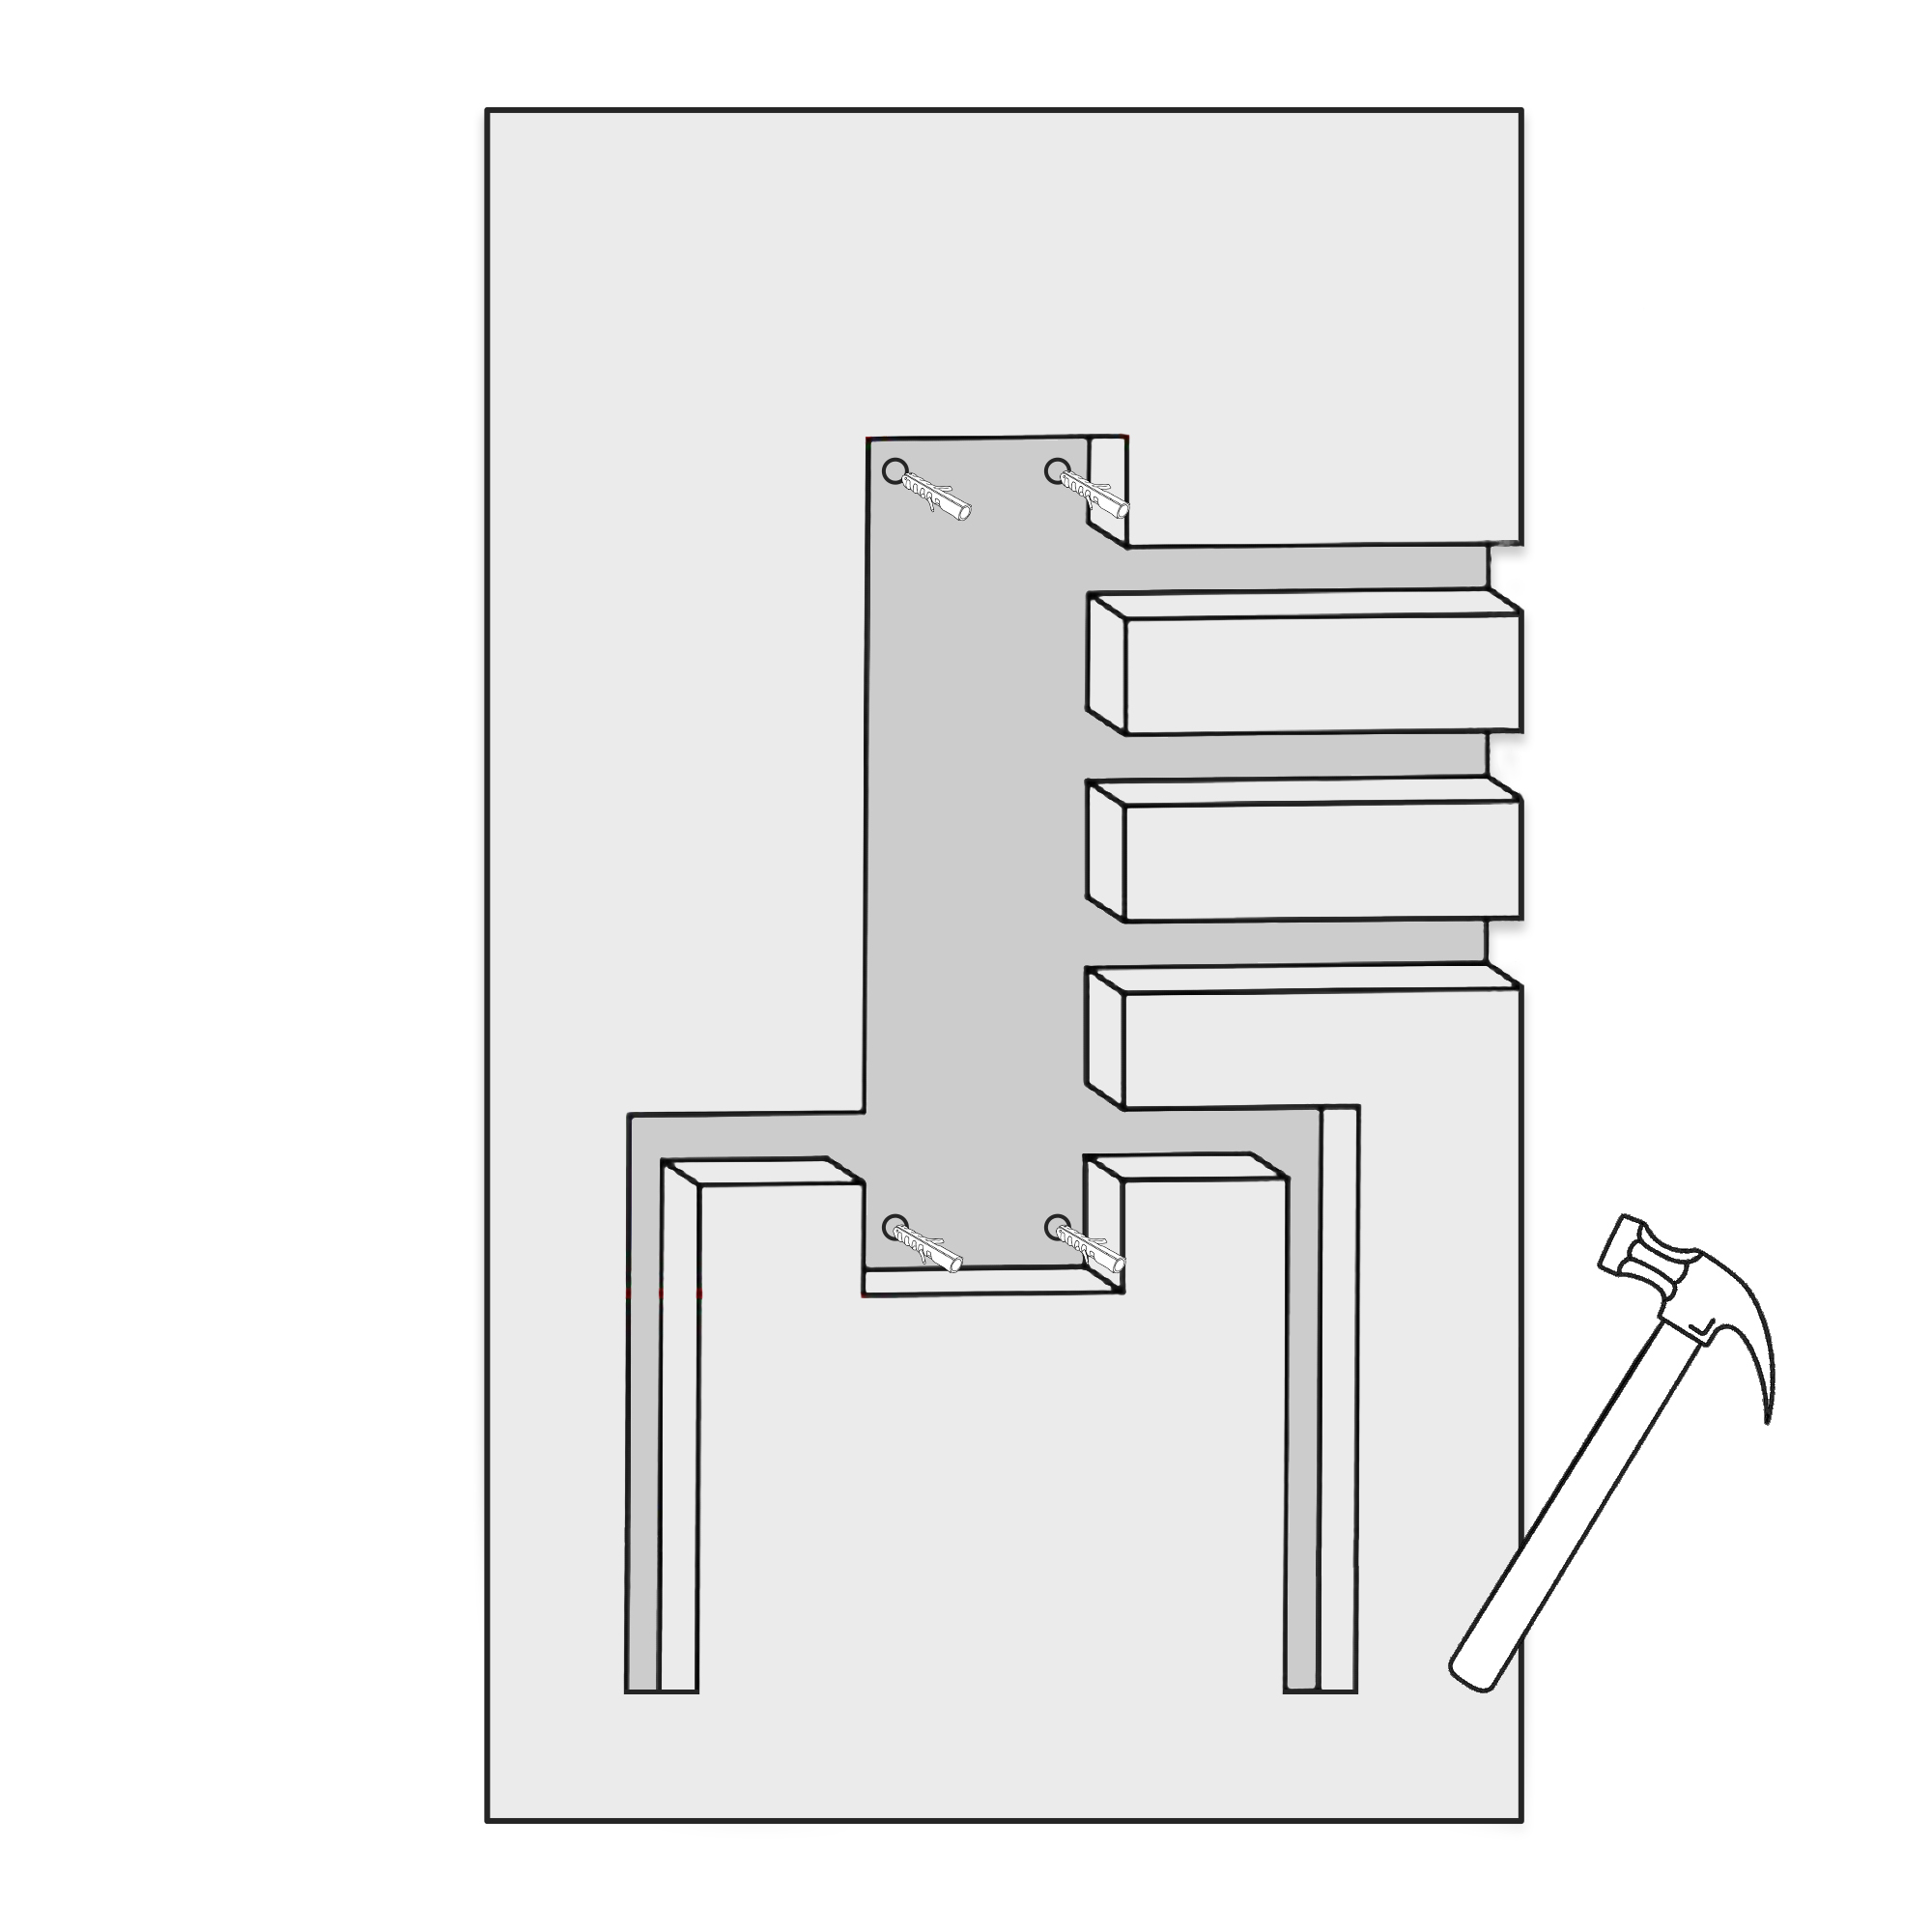
Place 4 tapping screws into the holes using a hammer.
|
|
Fix the faucet body by hand. And then take it into the four tapping screws.
|
|
|
Shower Valve Mixer Installation Instructions
|
|
|
|
|
Step 9:
|
|
Step 10:
|
|
|
|
|
|
|
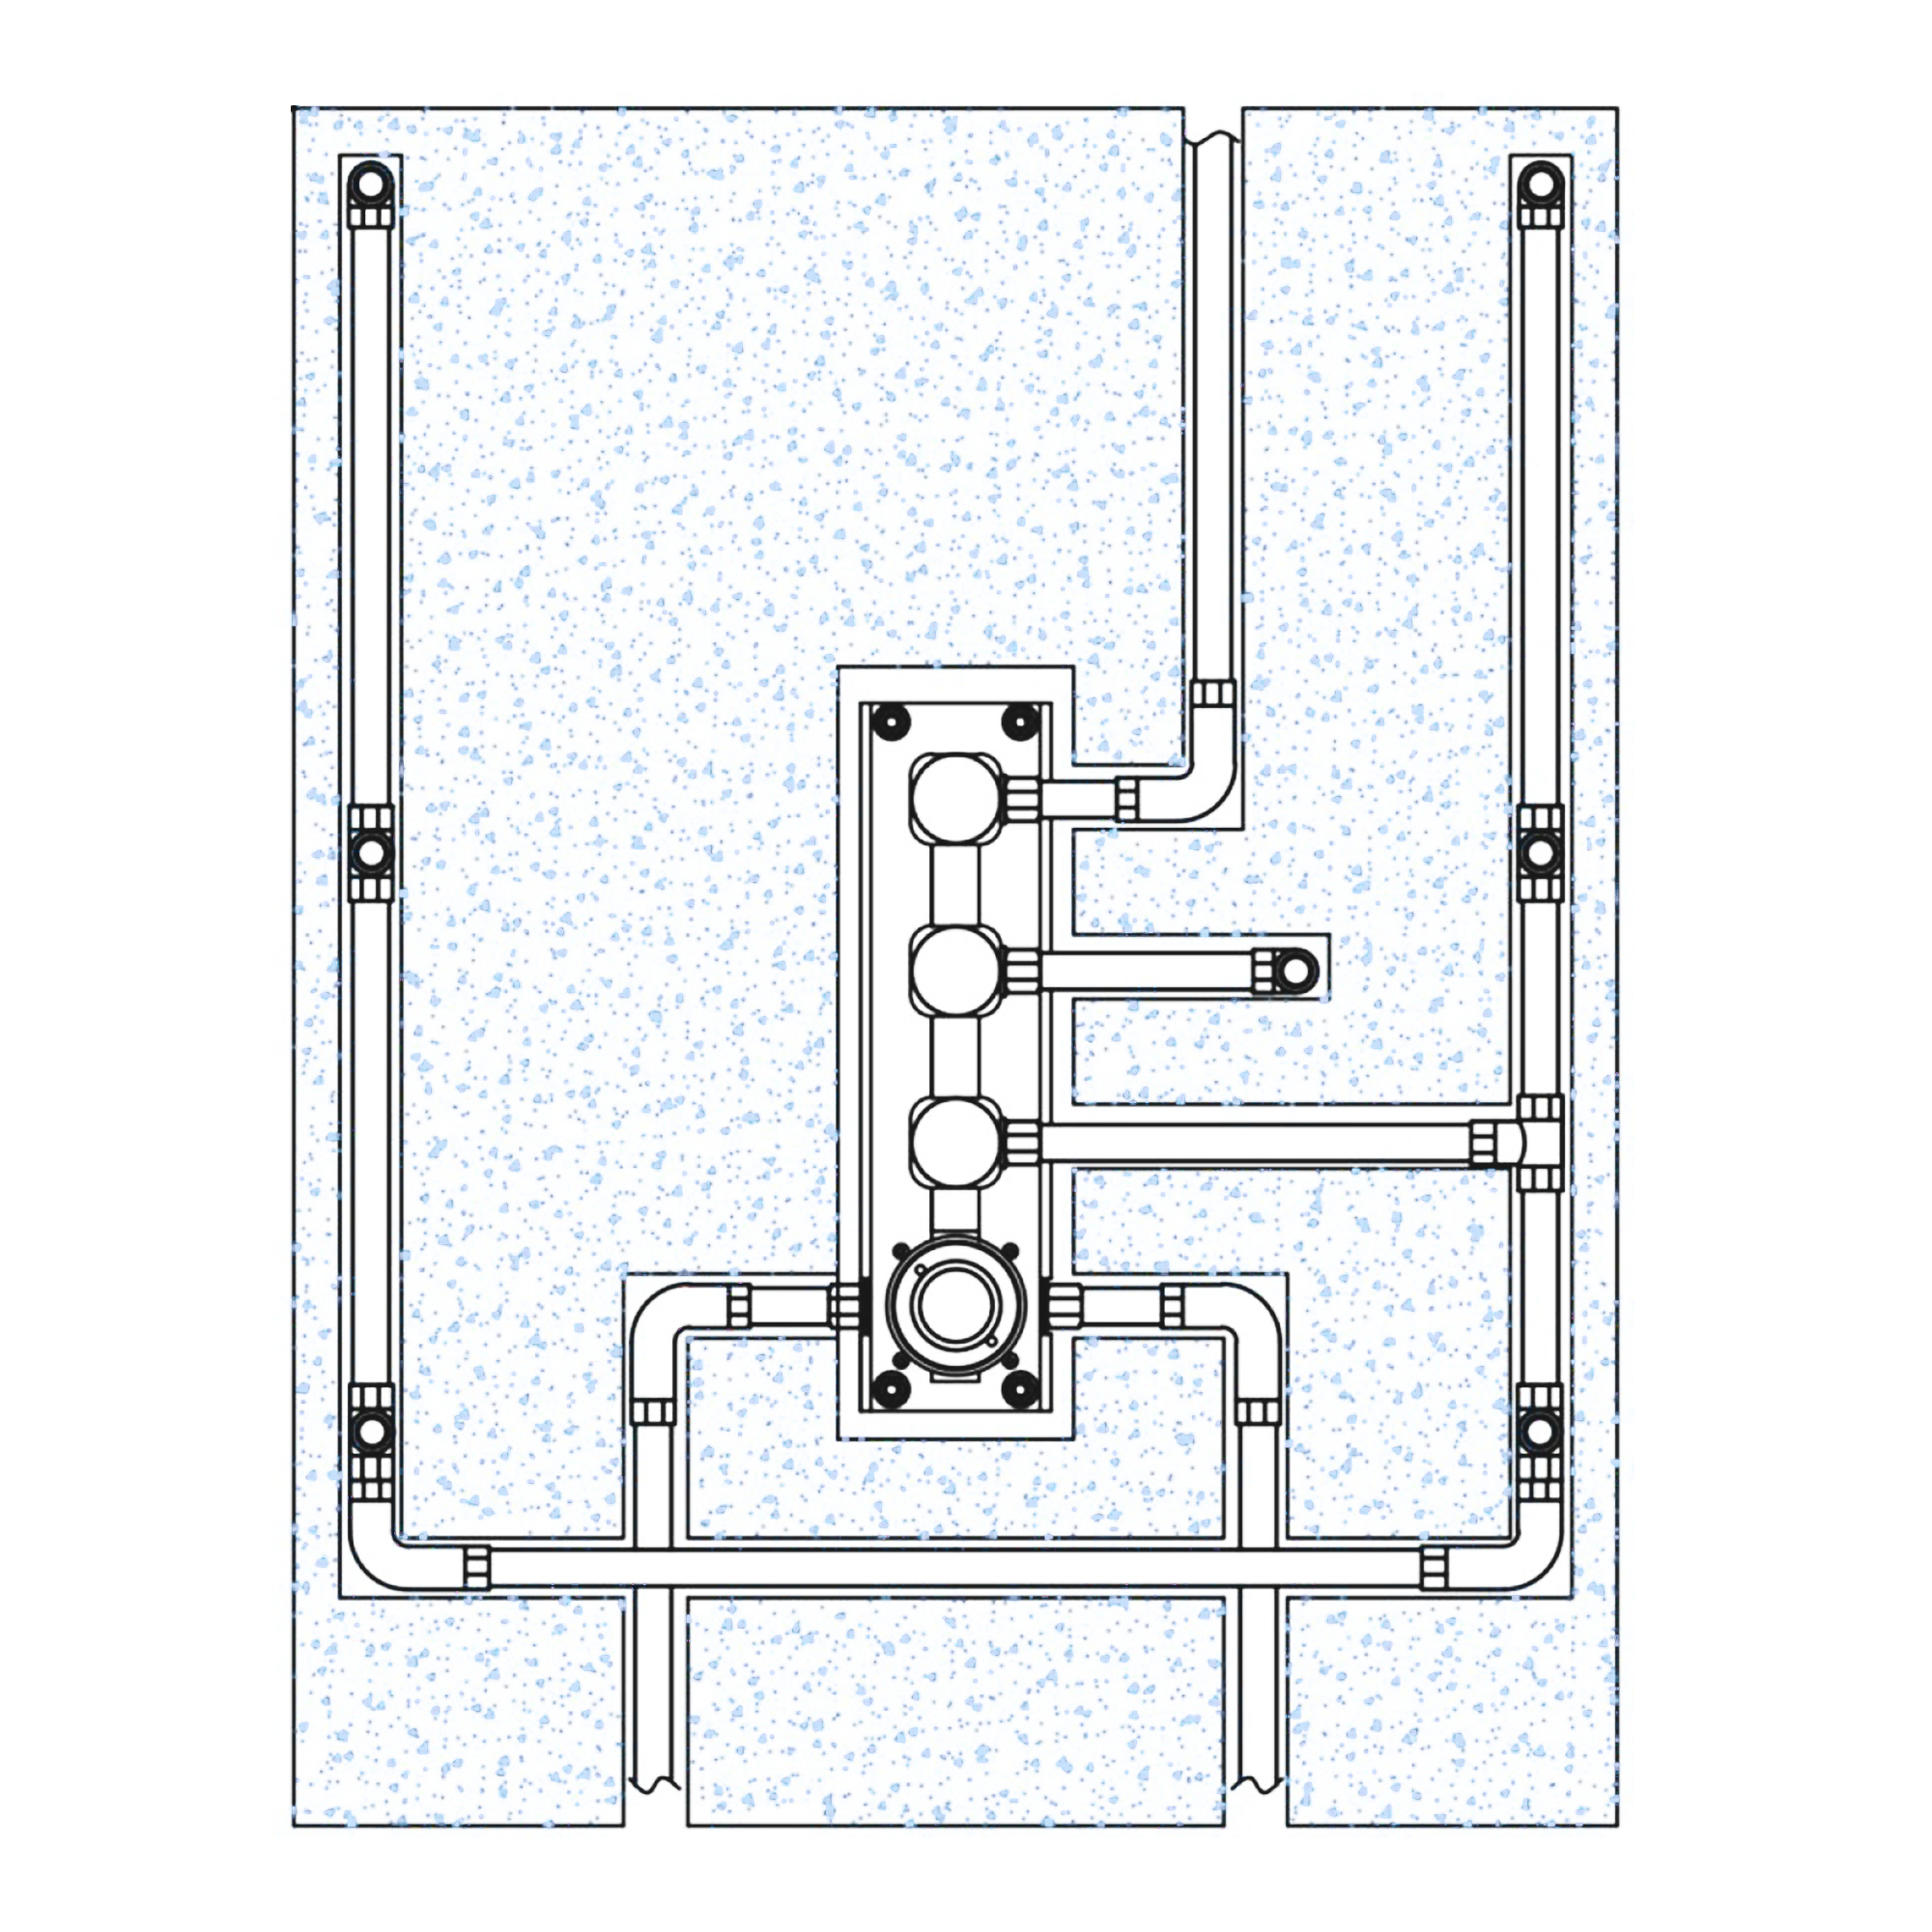
Connect hot & cold supply water pipes (not provided) and other water pipes. After that, open the water to test if all pipes have leakage or not. At last, seal the wall.
|
|
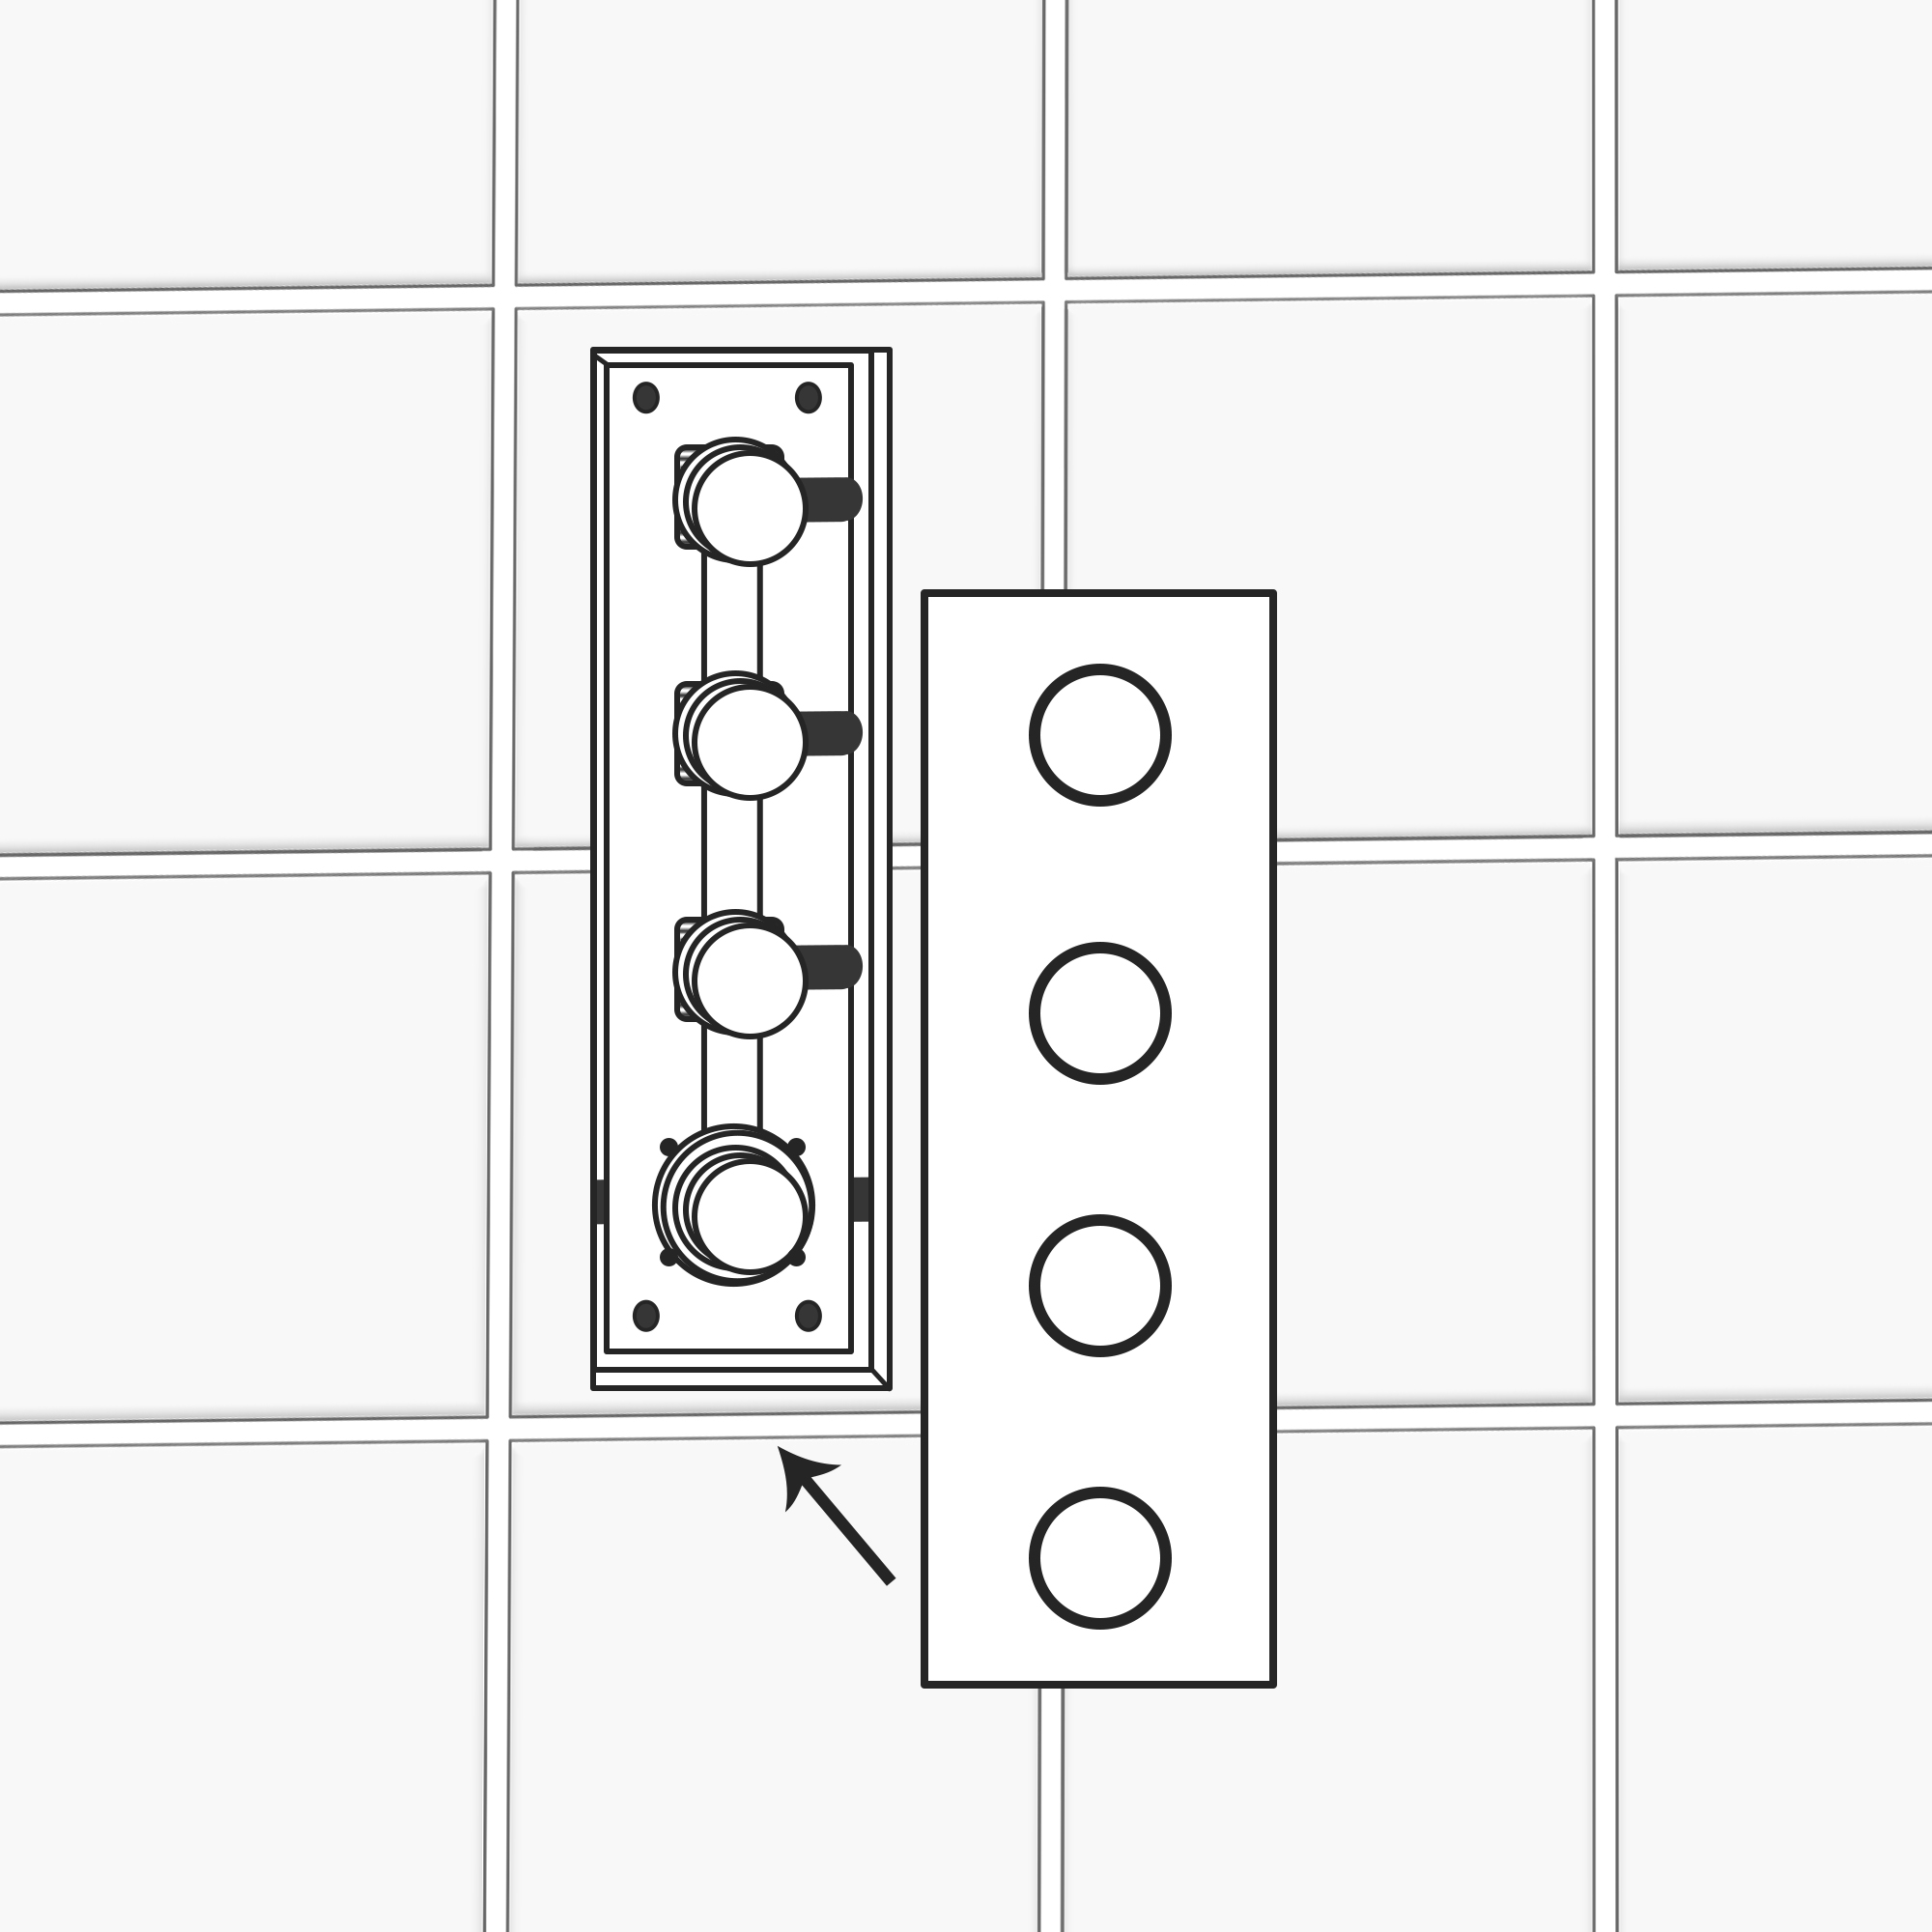
Take the board onto the faucet body.
|
|
Shower Valve Mixer Installation Instructions
|
|
|
|
|
Step 11:
|
|
Step 12:
|
|

|
|
|
|
Screws the handles into the handwheels.
|
|
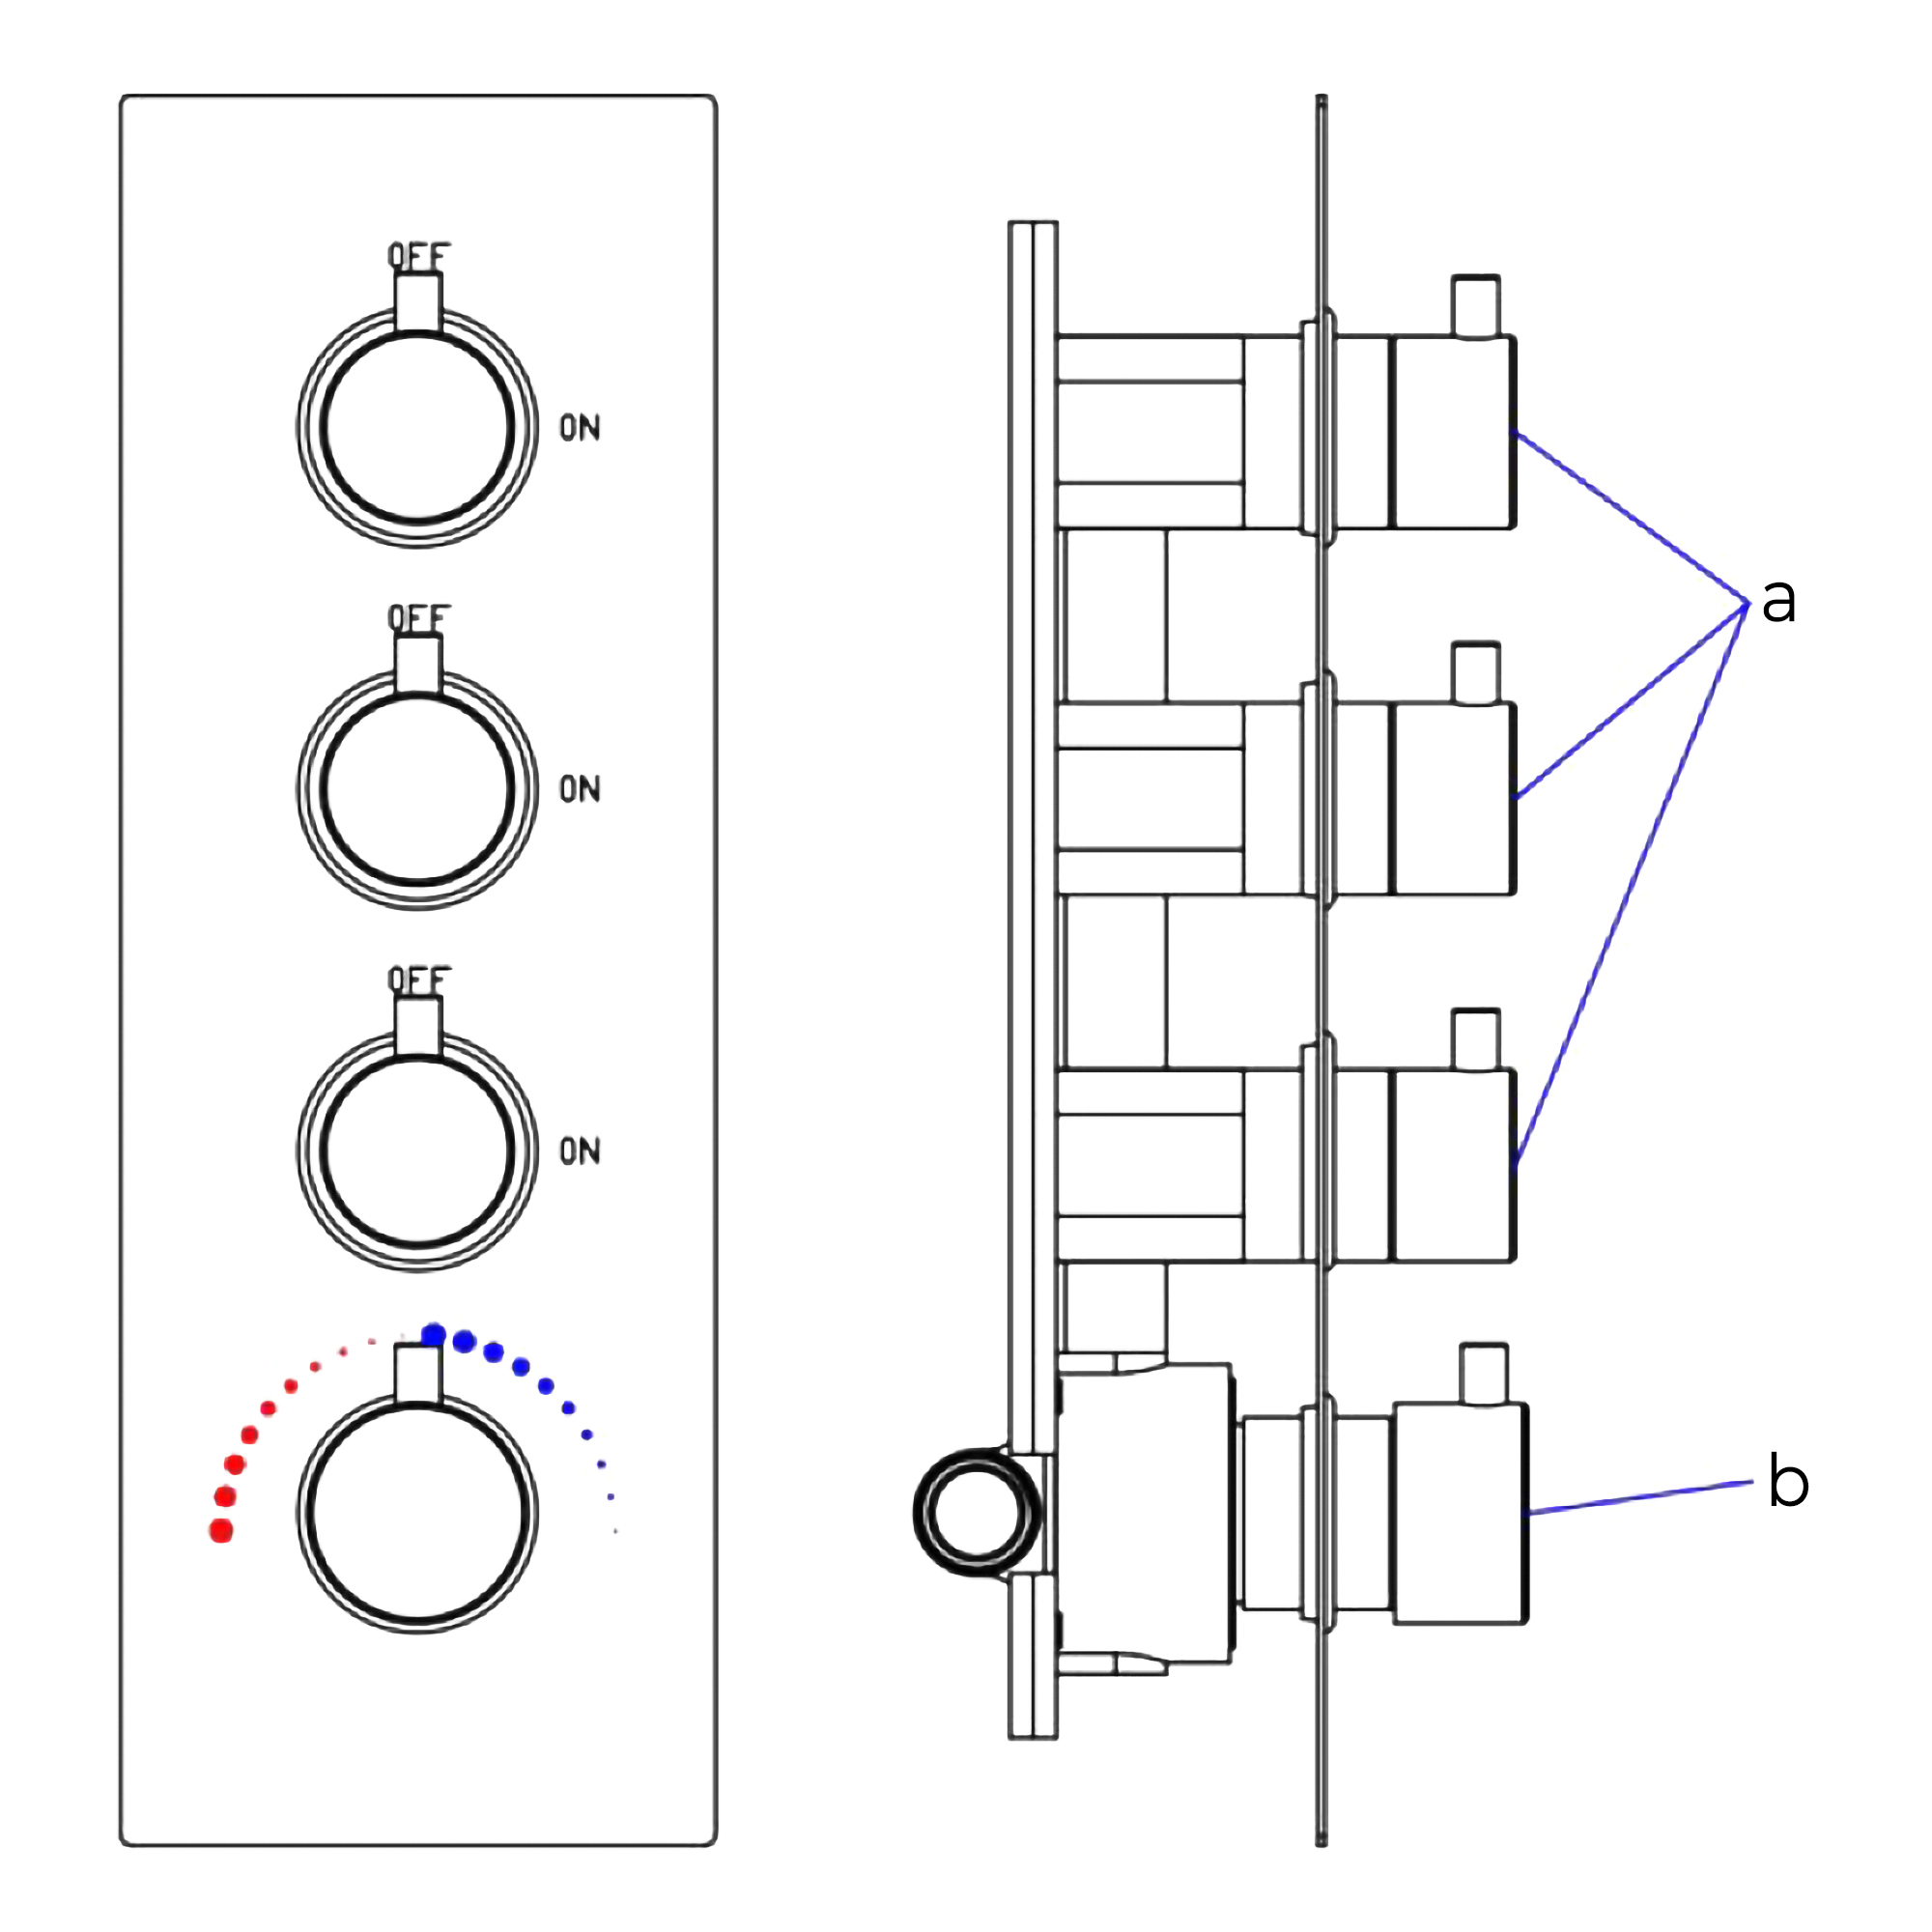
a. Each water function handwheel
b. Tempering handwheel
|
|
|
|
How to install the Shower Set with Wall Mount Showerhead, Body Jets, Hand Held Shower and Shower Mixer
|
|
|












