Lucania Wall Mount LED Waterfall Bathroom Sink Faucet
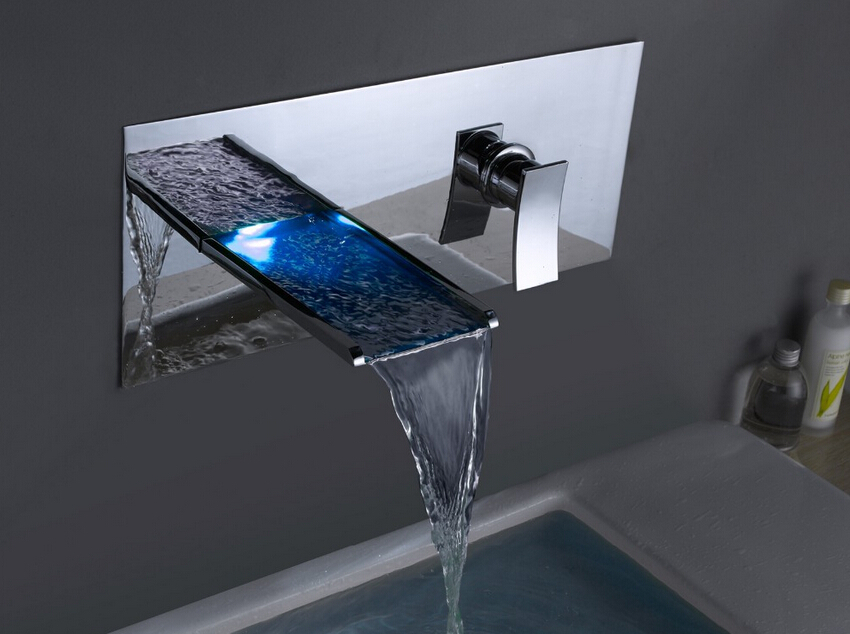
Our Lucania LED bathroom faucet was designed to instantly catch your eye. The finish is classic chrome, the LED lights combined with the waterfall effect of the spout bring the water flow to life. It is single hole wall mount, with one handle for ease of use. It is built with the best materials with brass body and ceramic valve core, for best performance and long lasting life time. It comes complete with accessories and installation instructions.
Lucania Wall Mount LED Waterfall Bathroom Sink Faucet Features:
|
Brand Name: FontanaShowers
Model Number: BS681NPC
Faucet Type: Sink Faucet
Faucet Mount: Single Hole
Valve Core Material: Ceramic
Faucet Style: Contemporary
Feature: LED Light
Hot & Cold Water: Yes
Number of Handles: Single Handle
Installation Type: Wall Mount
Surface Treatment: Chrome
Material: Brass
|
|
FontanaShowers® Product Warranty Information 
|
|
Installation Instructions
Before installing, read entire Wall Mount Faucet Installation Instructions. Observe all local building and safety codes.
For the following Installation Instructions for your new Wall-Mount Faucet it is assumed that any old fixtures have been removed and the water supply lines have been relocated to the proper installation location.
TOOLS AND MATERIALS:
- Allen Wrench (provided)
- Drill
- Level
- Wood Screws
- Silicone Sealant
INSTALLATION
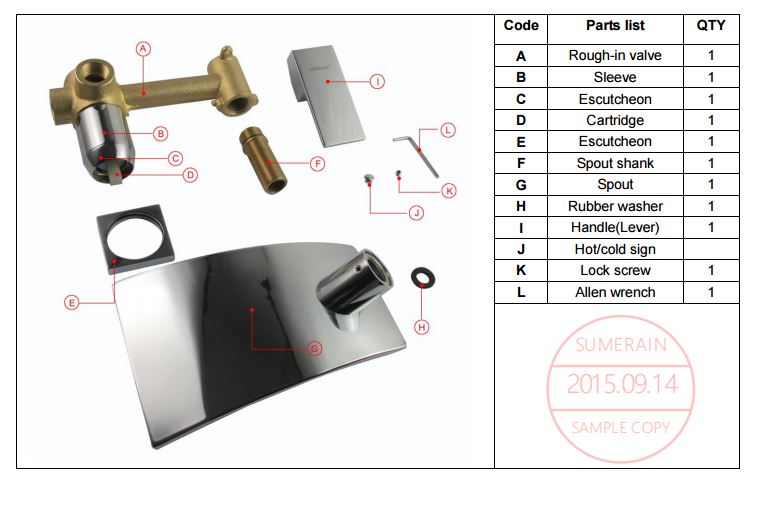
1. Install the rough-in valve body behind the finished wall. Attach the valve body to wood blocking between two wall studs with wood screws. Be sure that the rough-in valve is completely level, and connect to the main water supply.
2. When the wall around the rough-in valve is finished, install your faucet trim.
3. If your faucet spout is not assembled, assemble by connecting the threaded outlet to the faucet body. If your spout is already assembled move on to the next step.
4. If your faucet features a decorative face plate, secure the face plate to the wall with silicone sealant before installing your handle and spout trim pieces. Make sure that the face plate is properly aligned over the rough-in valve and perfectly straight. If your faucet does not feature a face plate move on to the next step.
5. If the decorative spout escutcheon is not attached, place the escutcheon on the body of the spout and install the spout over the spout shank. Screw the spout into place and press the escutcheon firmly against the finished wall.
6. Tighten any set screws in the spout with the Allen wrench.
7. Install the handle(s) and any necessary hardware and tighten the set screws with your Allen wrench. If rubber O-rings or sealing gaskets are included, place between the handle body and wall to create a water tight seal.
8. When your faucet installation is complete, turn on the water supply. Check to make sure that all connections are tight (no water should be leaking) and that the hot and cold supplies are working correctly. Turn the water on and allow the water to flow through the spout for approximately 60 seconds. Allow sealant to cure for 24 hours before use. Allen Wrench (provided) Drill Level Wood Screws Silicone Sealant
|