Sacramento Brushed Nickel Wall Mount Double Handle Bathtub Faucet
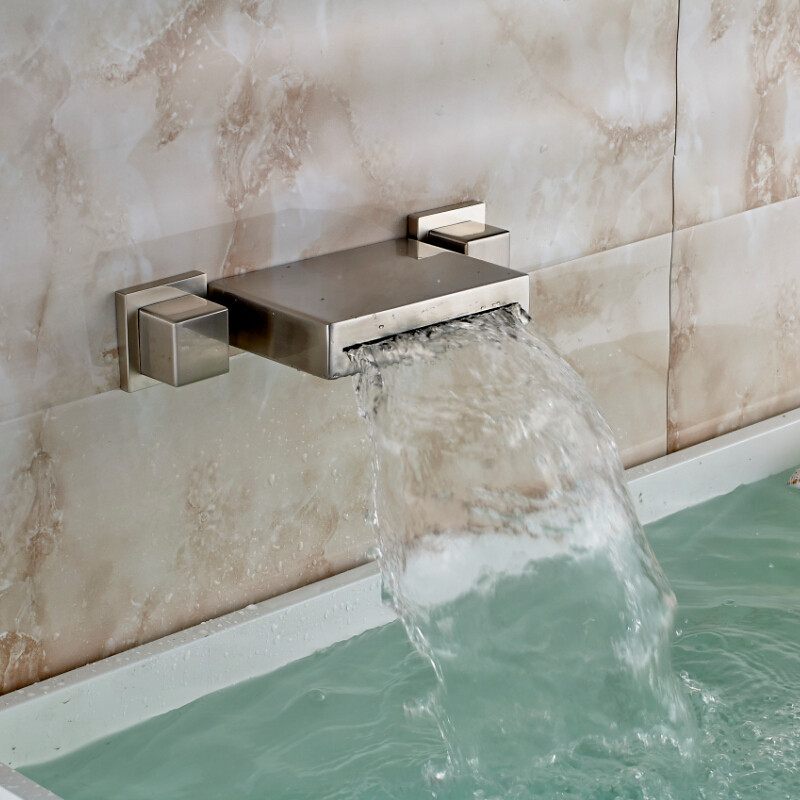
This model is a perfect fit for large bathrooms. Our Sacramento bathtub faucet will make an ideal choice because of its wide spout, almost 6 inches and the elegant brushed nickel Finish. It comes with hot and cold water mixer for your convenience. It is wall mount three holes and two handles, with brushed nickel finish. The body, spout and handles are made of brass, while the valve core material is ceramic for best performance and long lasting life time. It comes with complete accessories and installation instructions.
Sacramento Brushed Nickel Wall Mount Double Handle Bathtub Faucet Features:
|
Brand Name: FontanaShowers
Model Number: FS701BNW
Faucet Type: Bathtub Faucet
Valve Core Material: Ceramic
Faucet Style: Classic Contemporary
Hot & Cold Water: Yes
Number of Handles: Dual Handle
Installation Type: Wall Mount
Surface Treatment: Brushed Nickel
Installation Holes: Three Holes
Waterfall spout width: 5.9-inch (15 cm)
Faucet Body Material: Brass
Faucet Spout Material: Brass
|
|
FontanaShowers® Product Warranty Information 
- Before you begin, please read the installation instructions below. Observe all local building and safety codes.
- Unpack and inspect the product for any shipping damages. If you find damages, do not install.
- Please note all showers must be installed by a professional and certified plumber otherwise warranty might be voided
|
faucet
|
|
Bathtub Faucet Installation Steps
Step 1

|
faucet
|
Step 2
|
Step 3
|
|
Step 4
|
Step 5
|
|
Step 6
|
Step 7
|
|
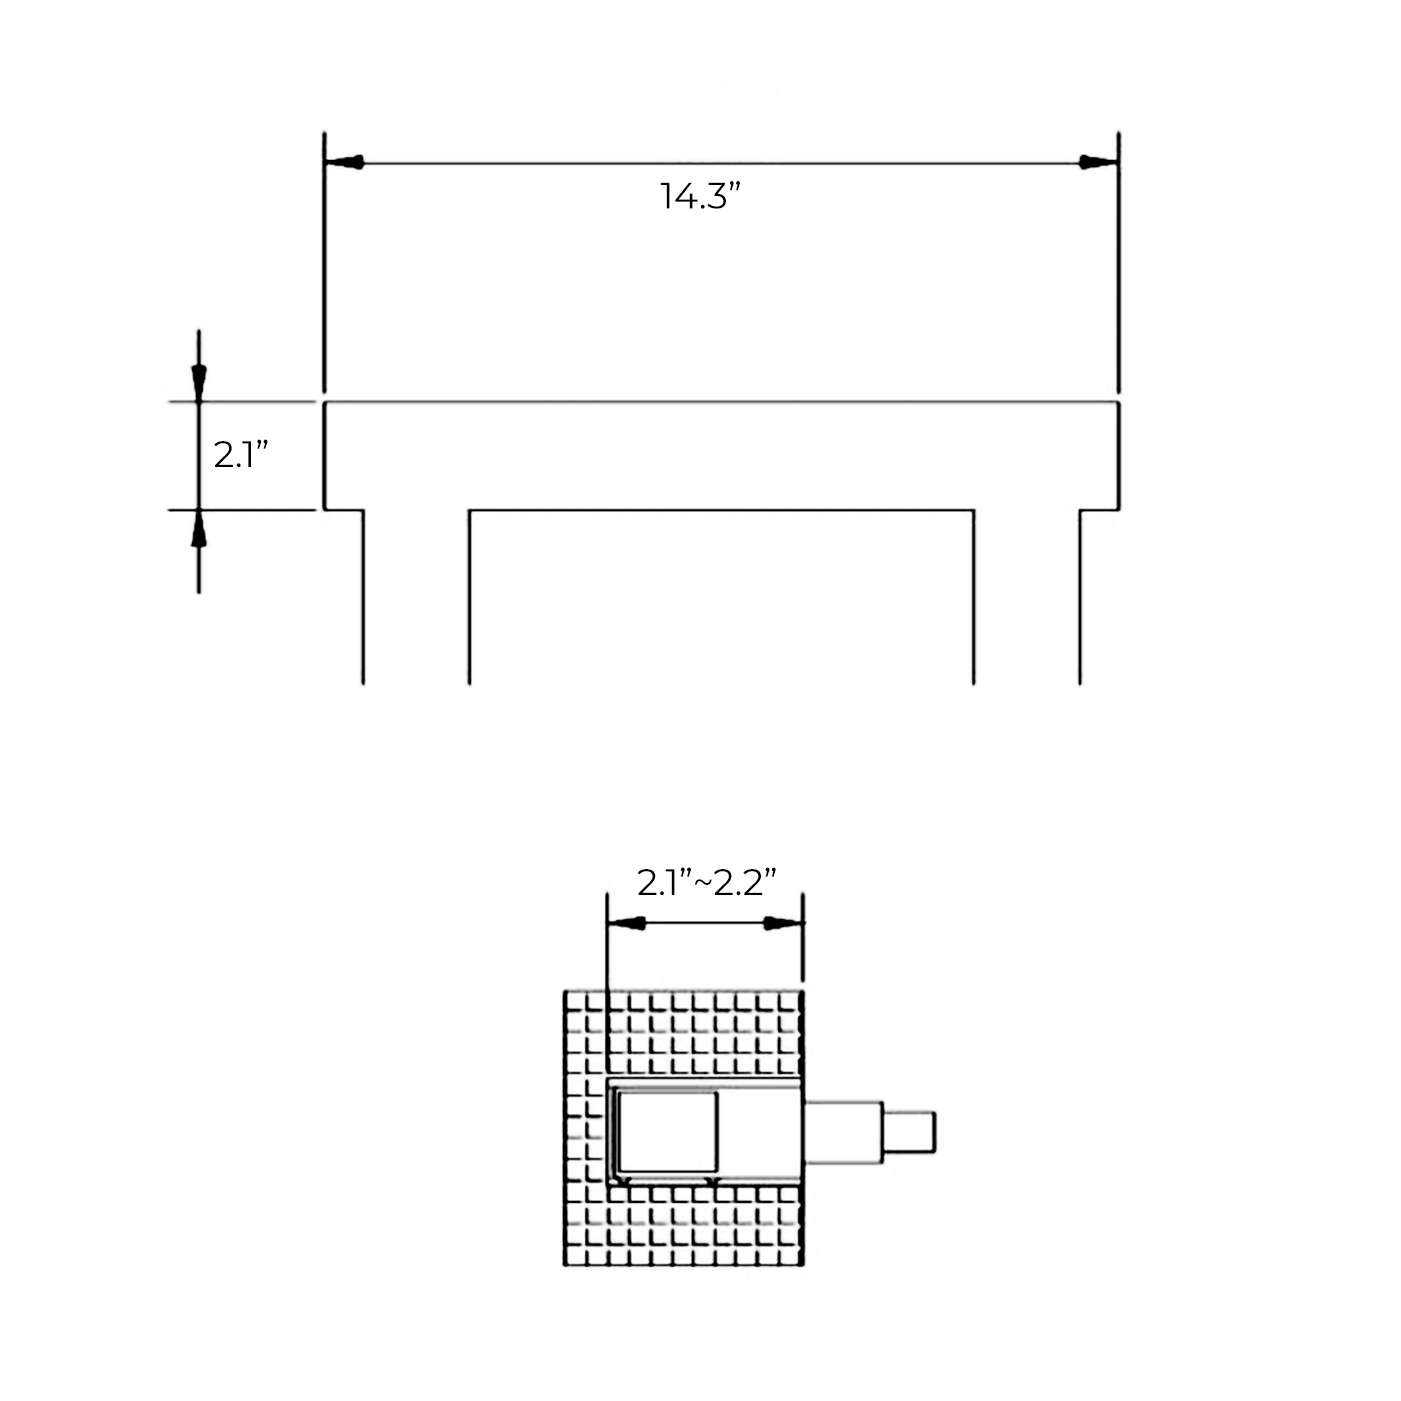
Step 2: The valve body excavates hole size. (L 14.37"xH 2.16"xD 2.16-2.24")
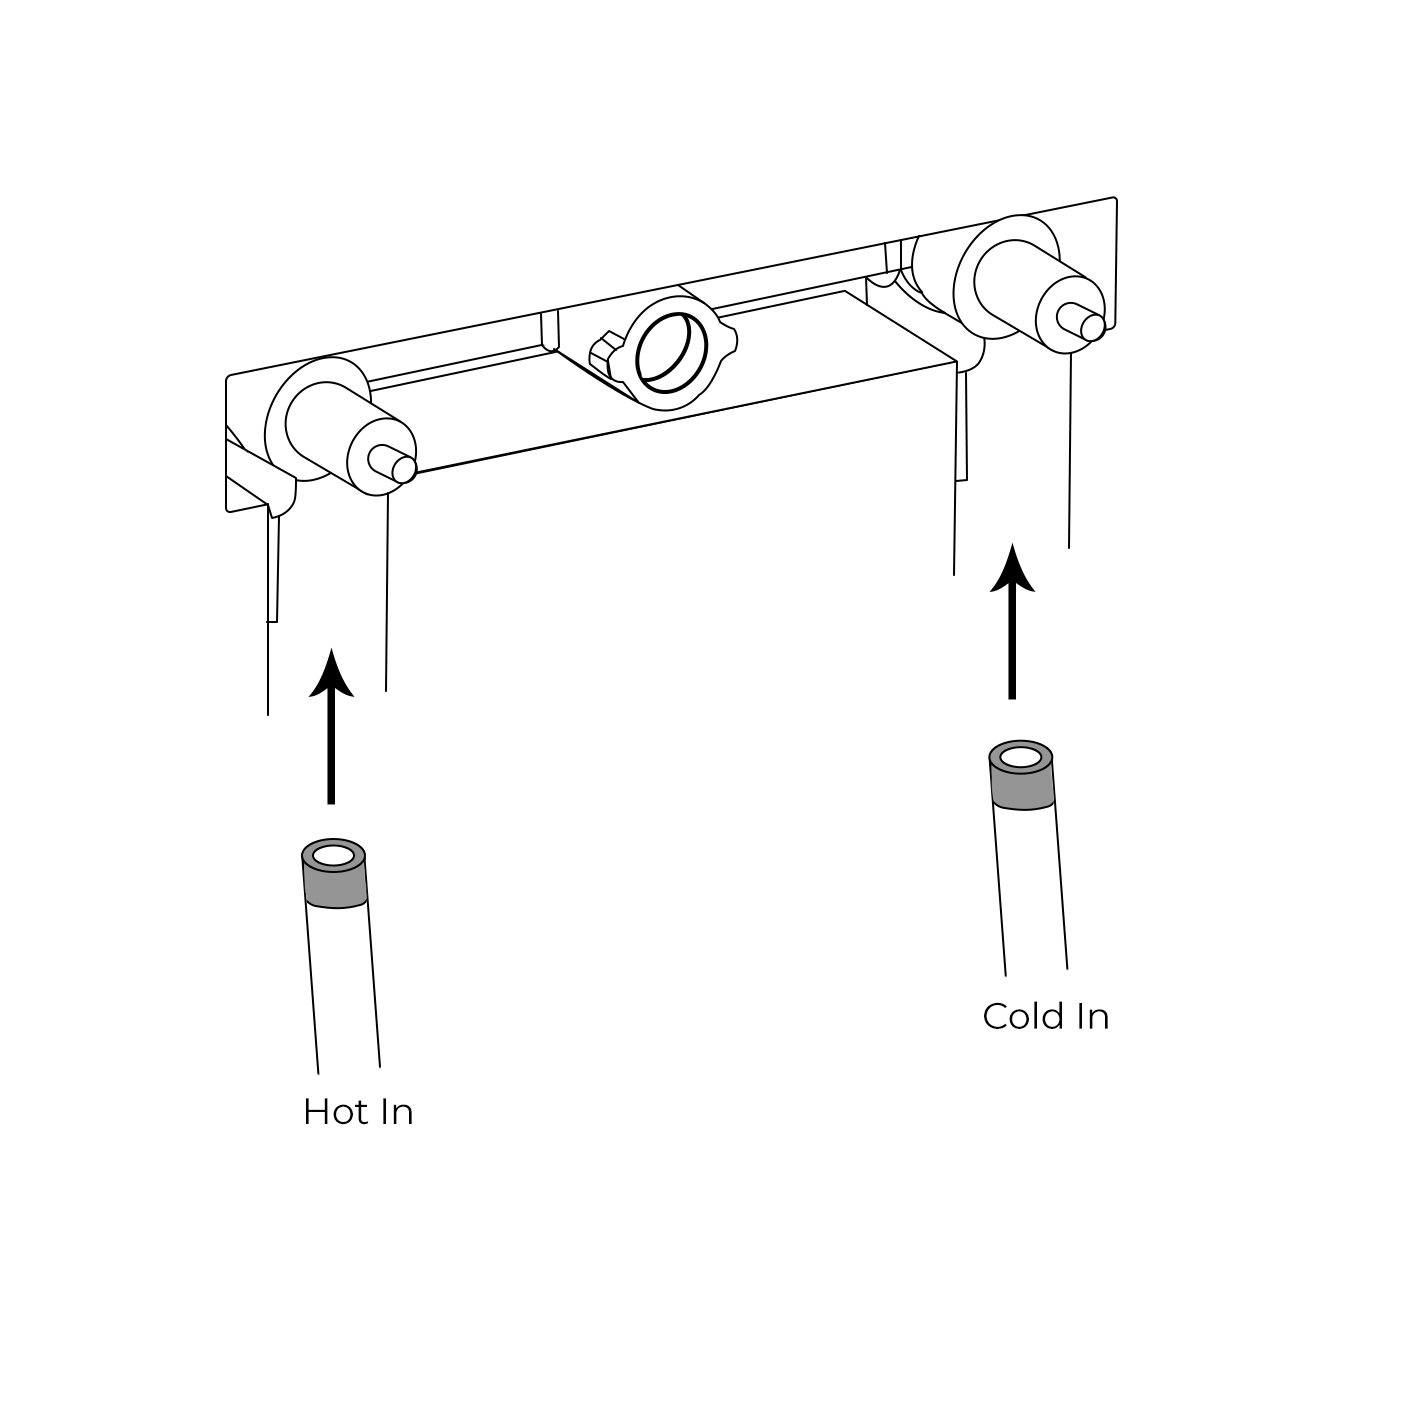
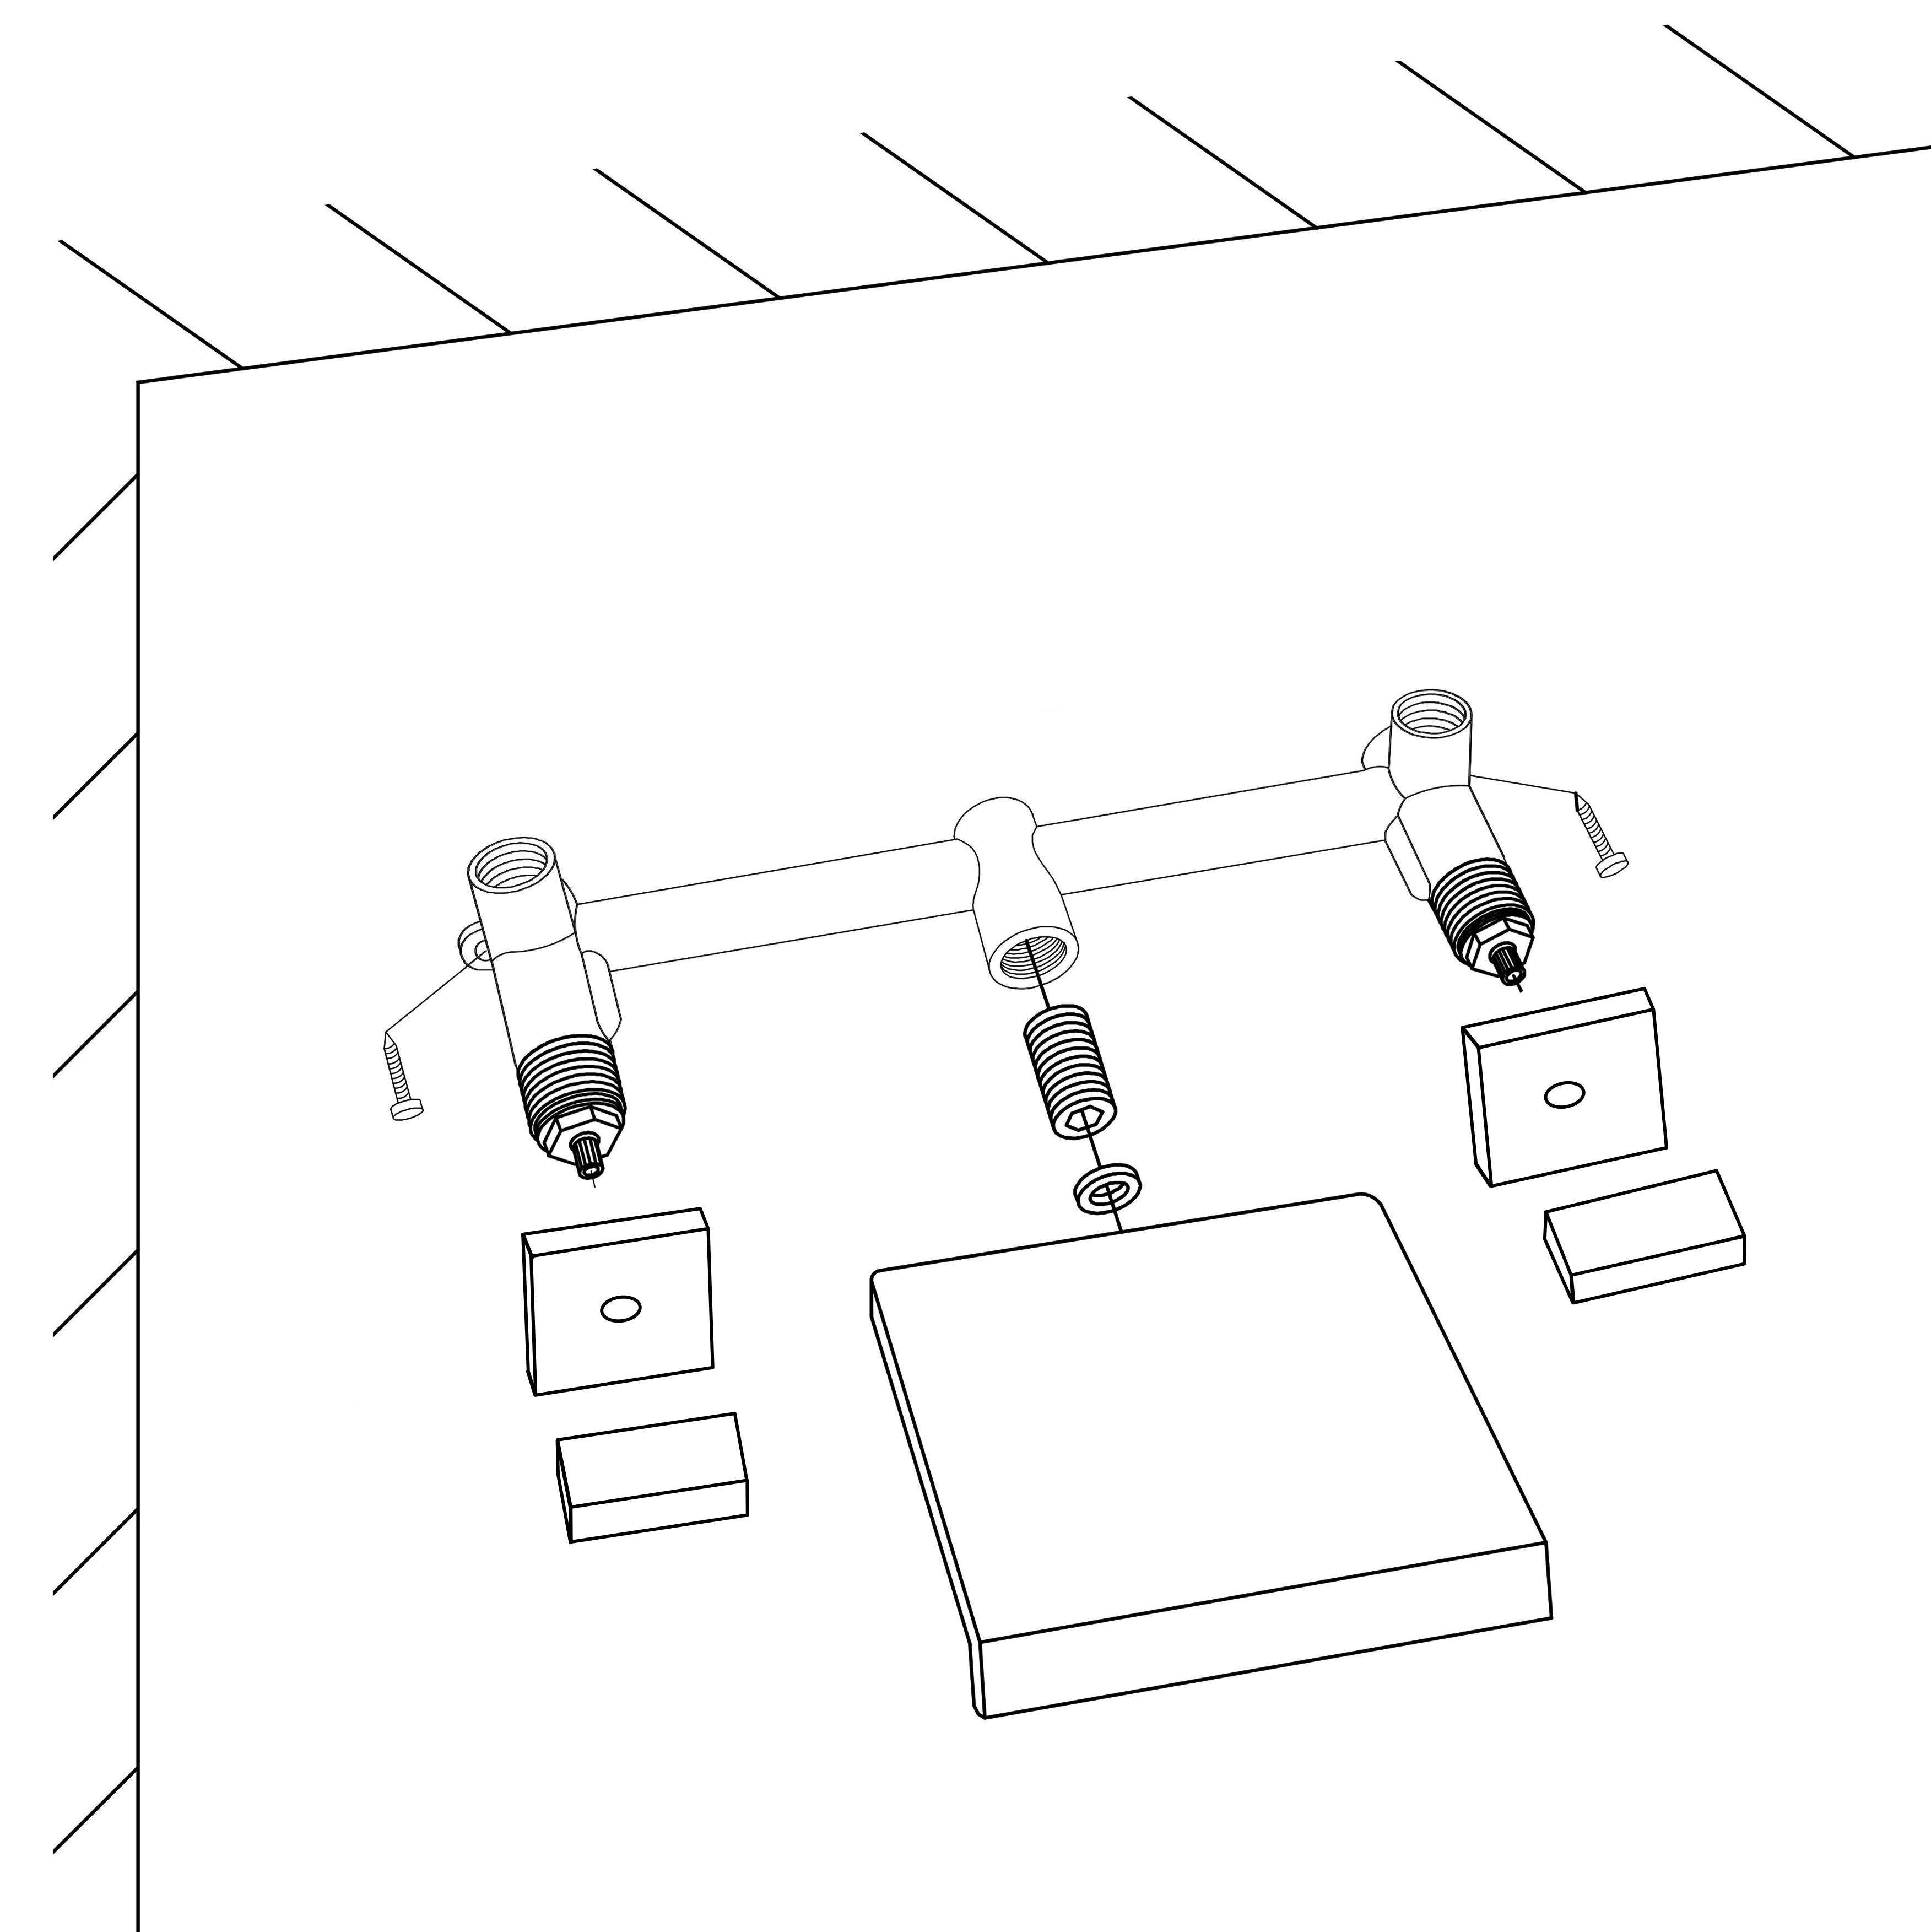
Step 3: Turn off the main switch, adjust the cold and hot water inlet interface and the upper and lower water outlet interface, and use screws to fix the valve body in the wall. The installation in the wall is completed and the switch is opened for the sealing test.
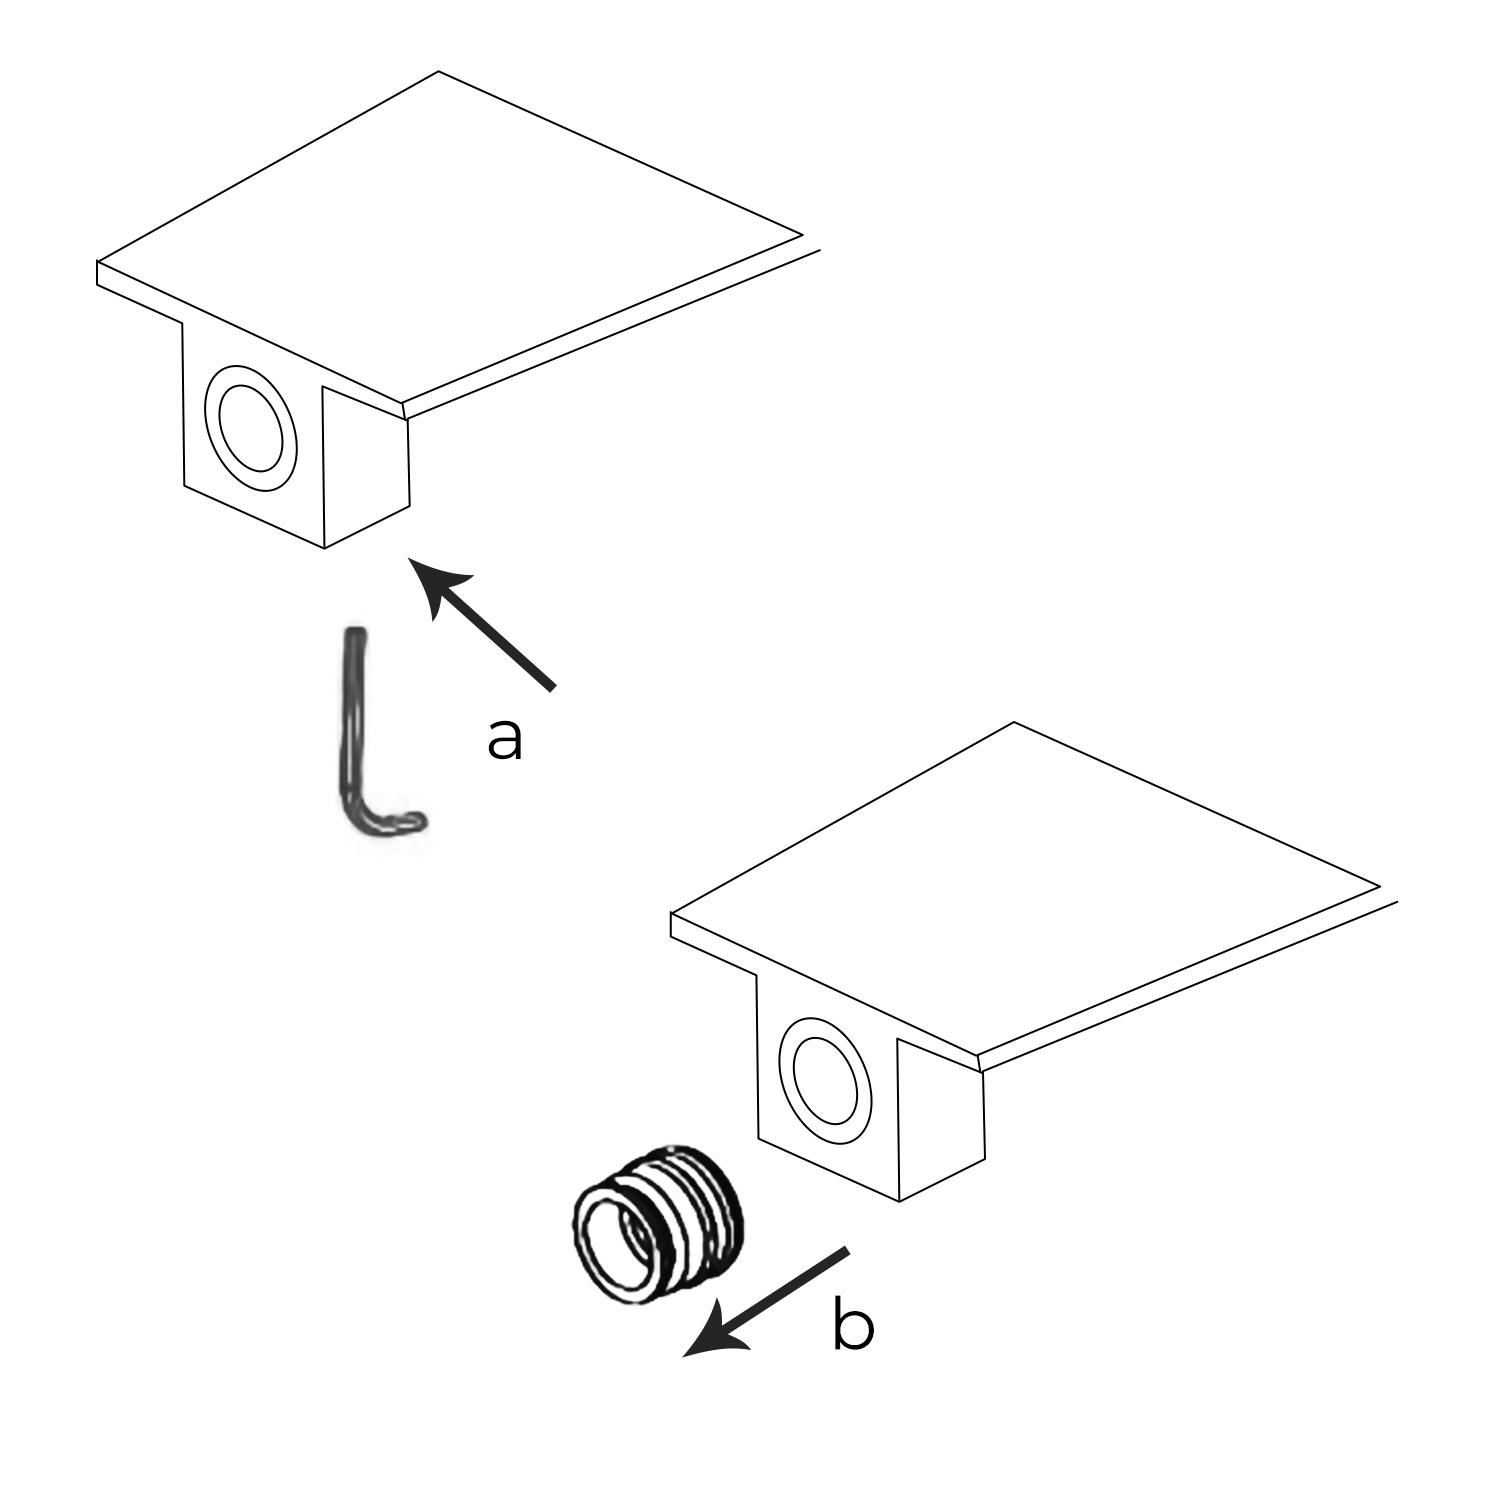
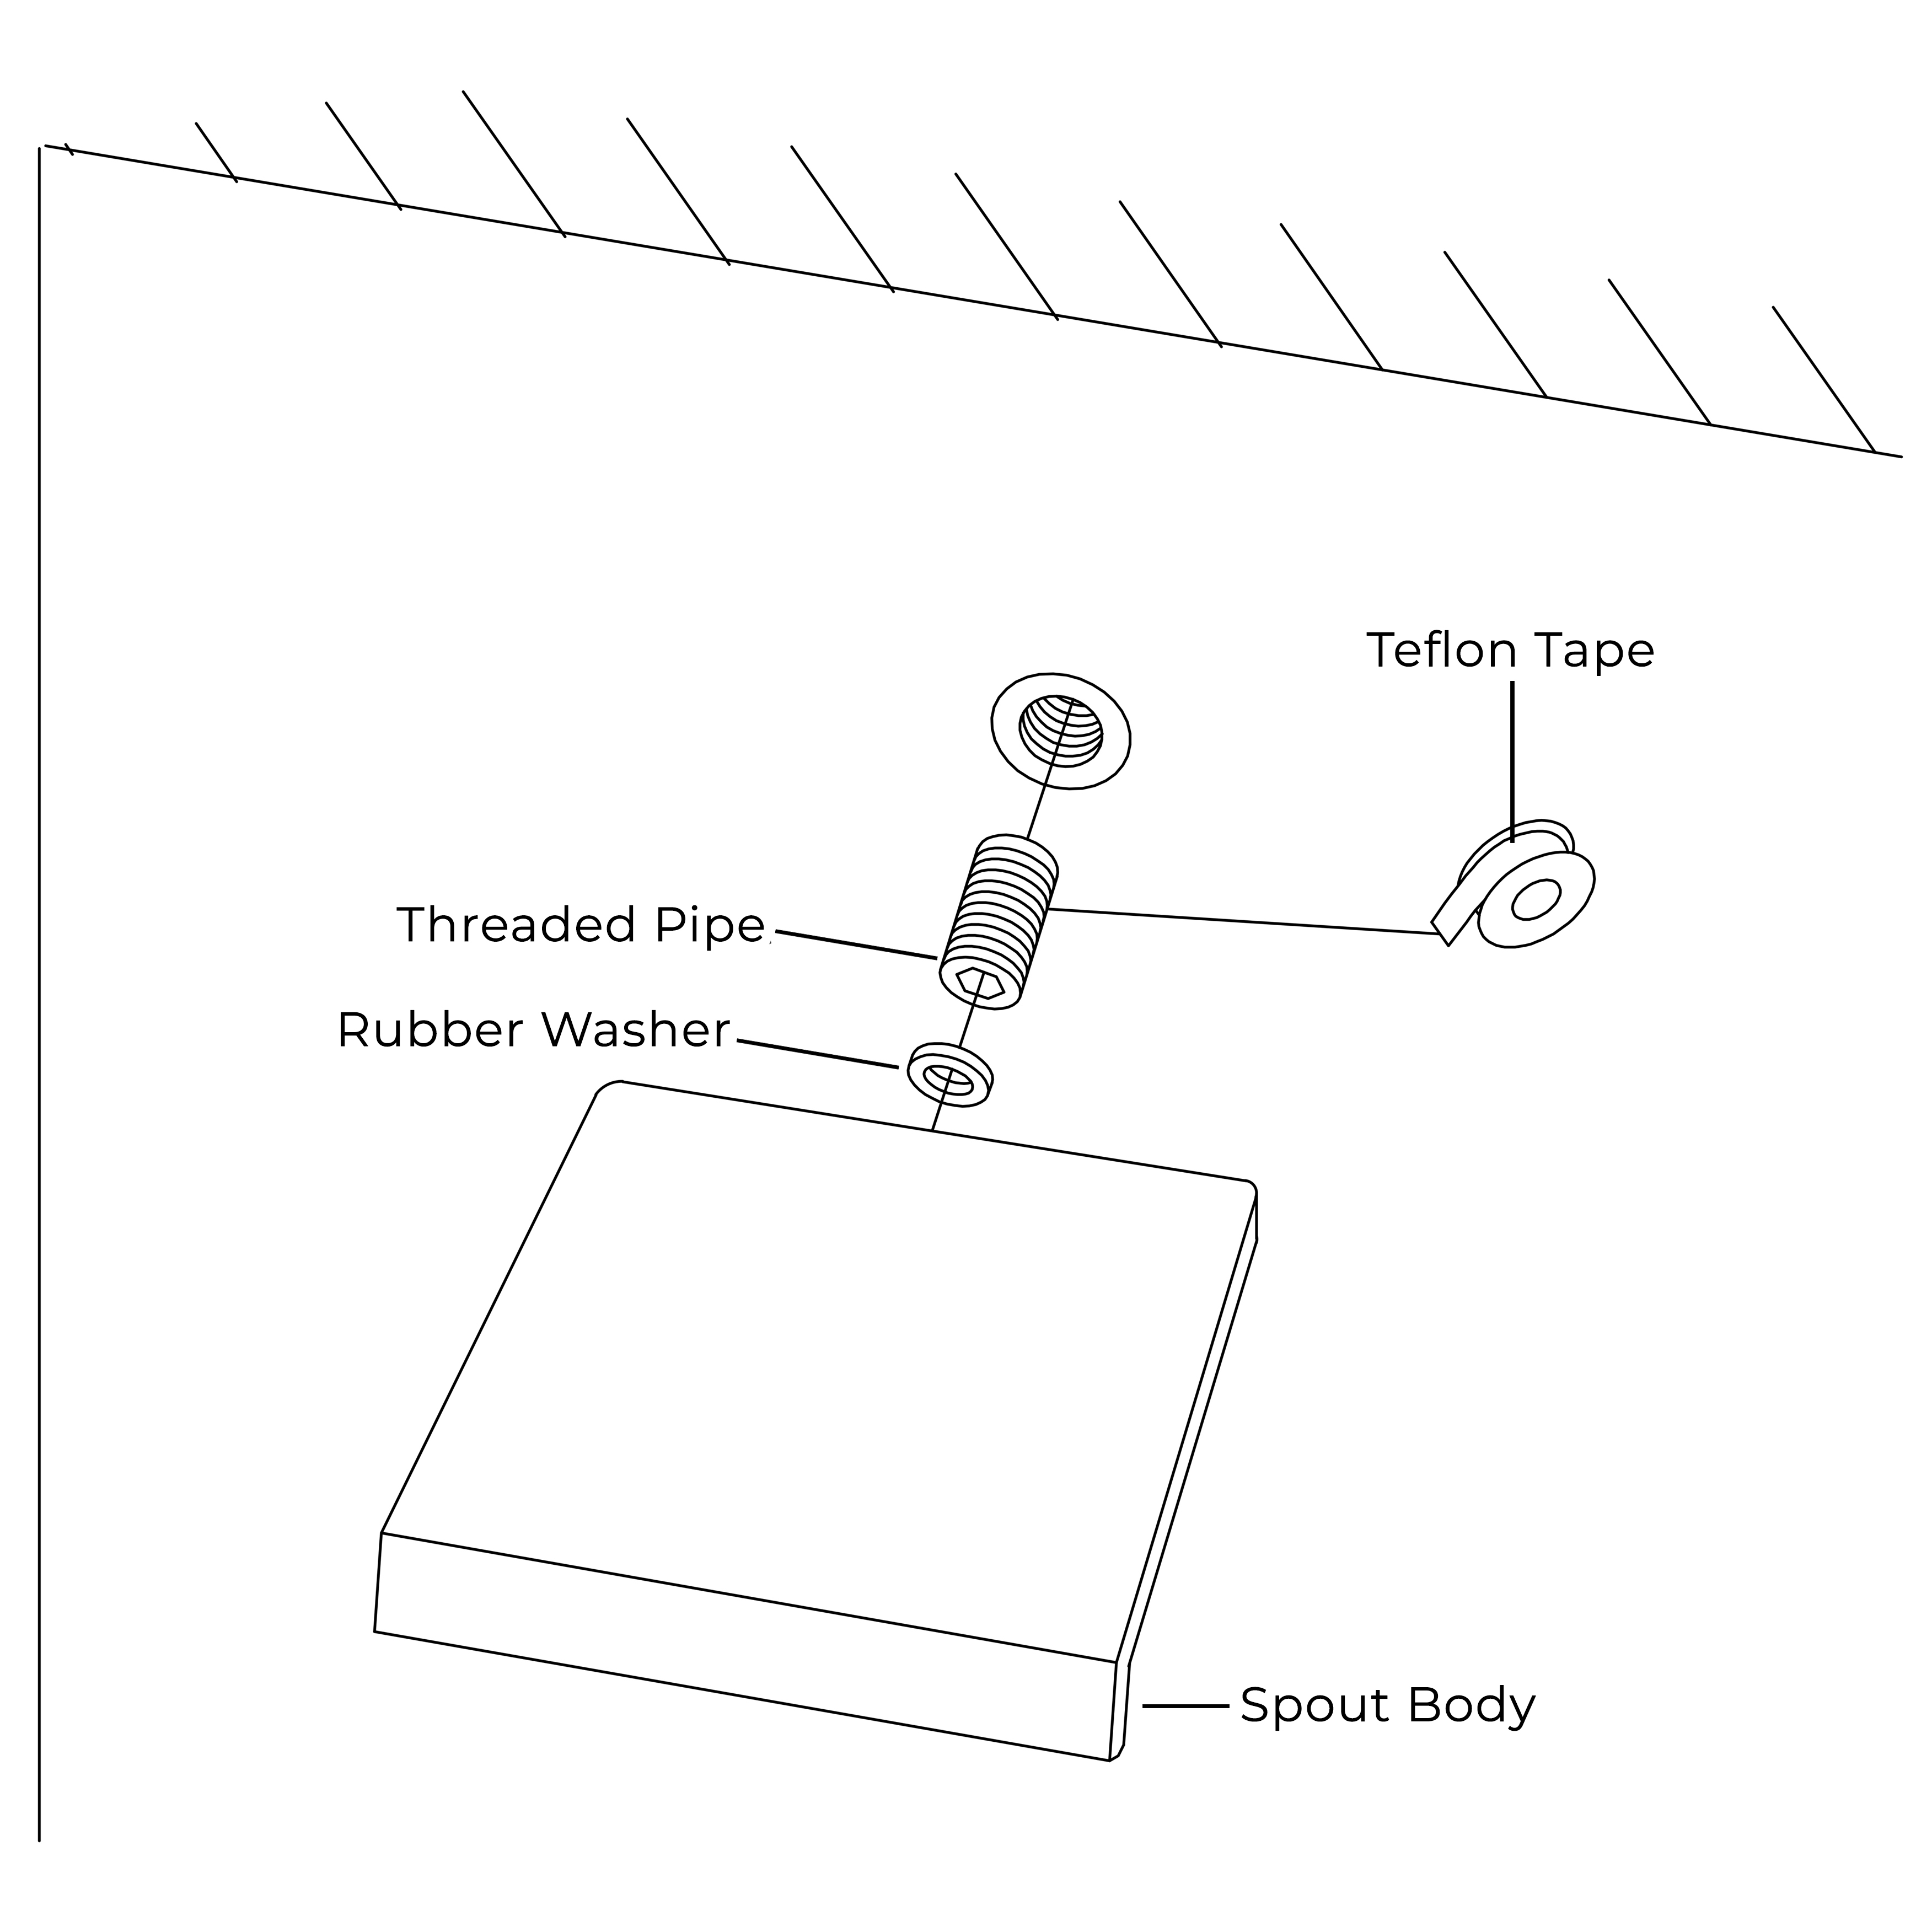
Step 4: Install the spout part: Use the connecting pipe to connect the left outlet of the valve body to the interface of the spout.
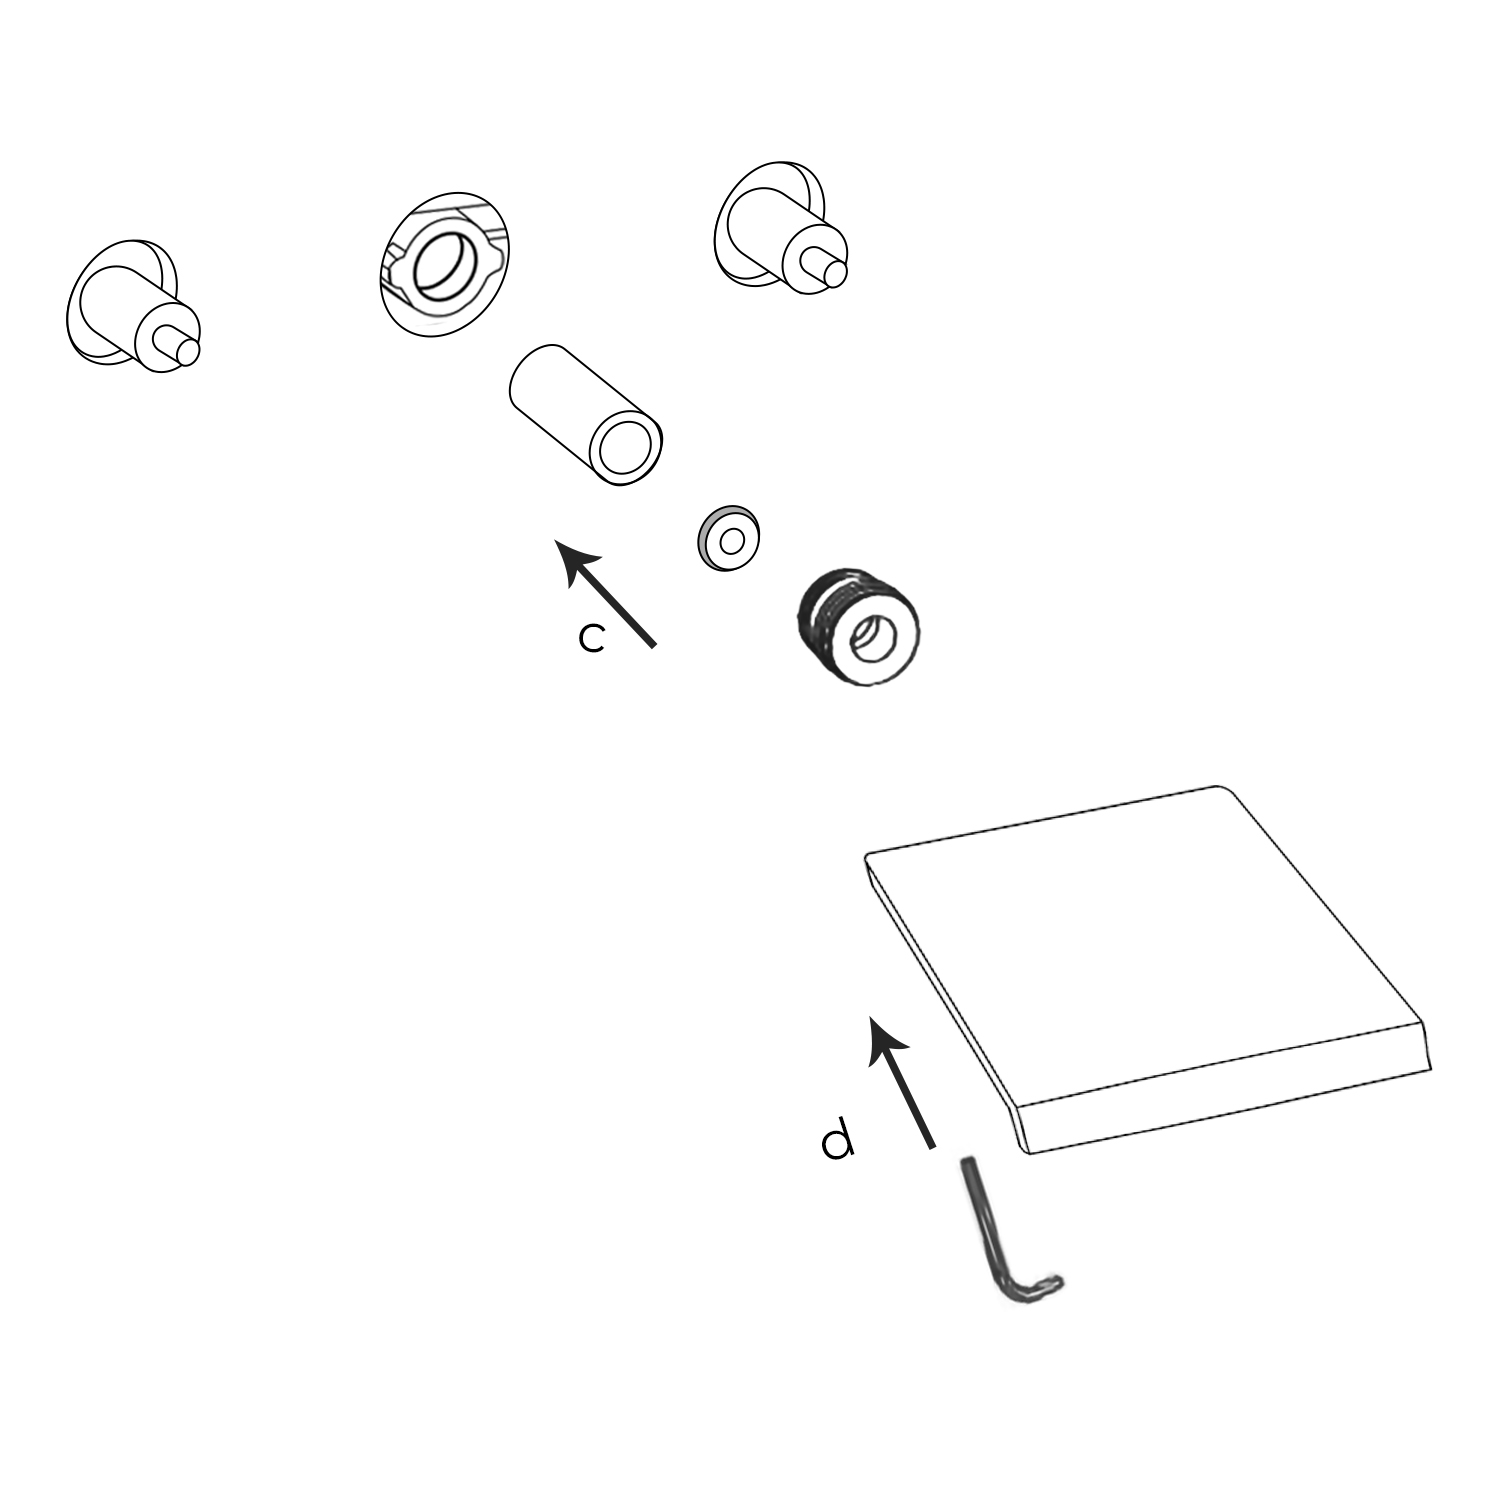
Step 6: Installation Panel: The valve body is fixed, and the panel is covered on the valve body.
Step 7: Install handle: Put two handles on top and lock with a hexagonal wrench.
|