How to install Commercial Automatic Temperature Control All-In-One Thermostatic Chrome Finish Sensor Faucet | FS-5137
Easy step by steps Installation Instructions for Sensor Faucet
Visit Product Page
Before you begin, please read the installation instructions below. Observe all local building and safety codes.
Unpack and inspect the products for any shipping damages. If you find damages, do not install.
Please note all products must be installed by a professional and certified plumber otherwise warranty might be voided.
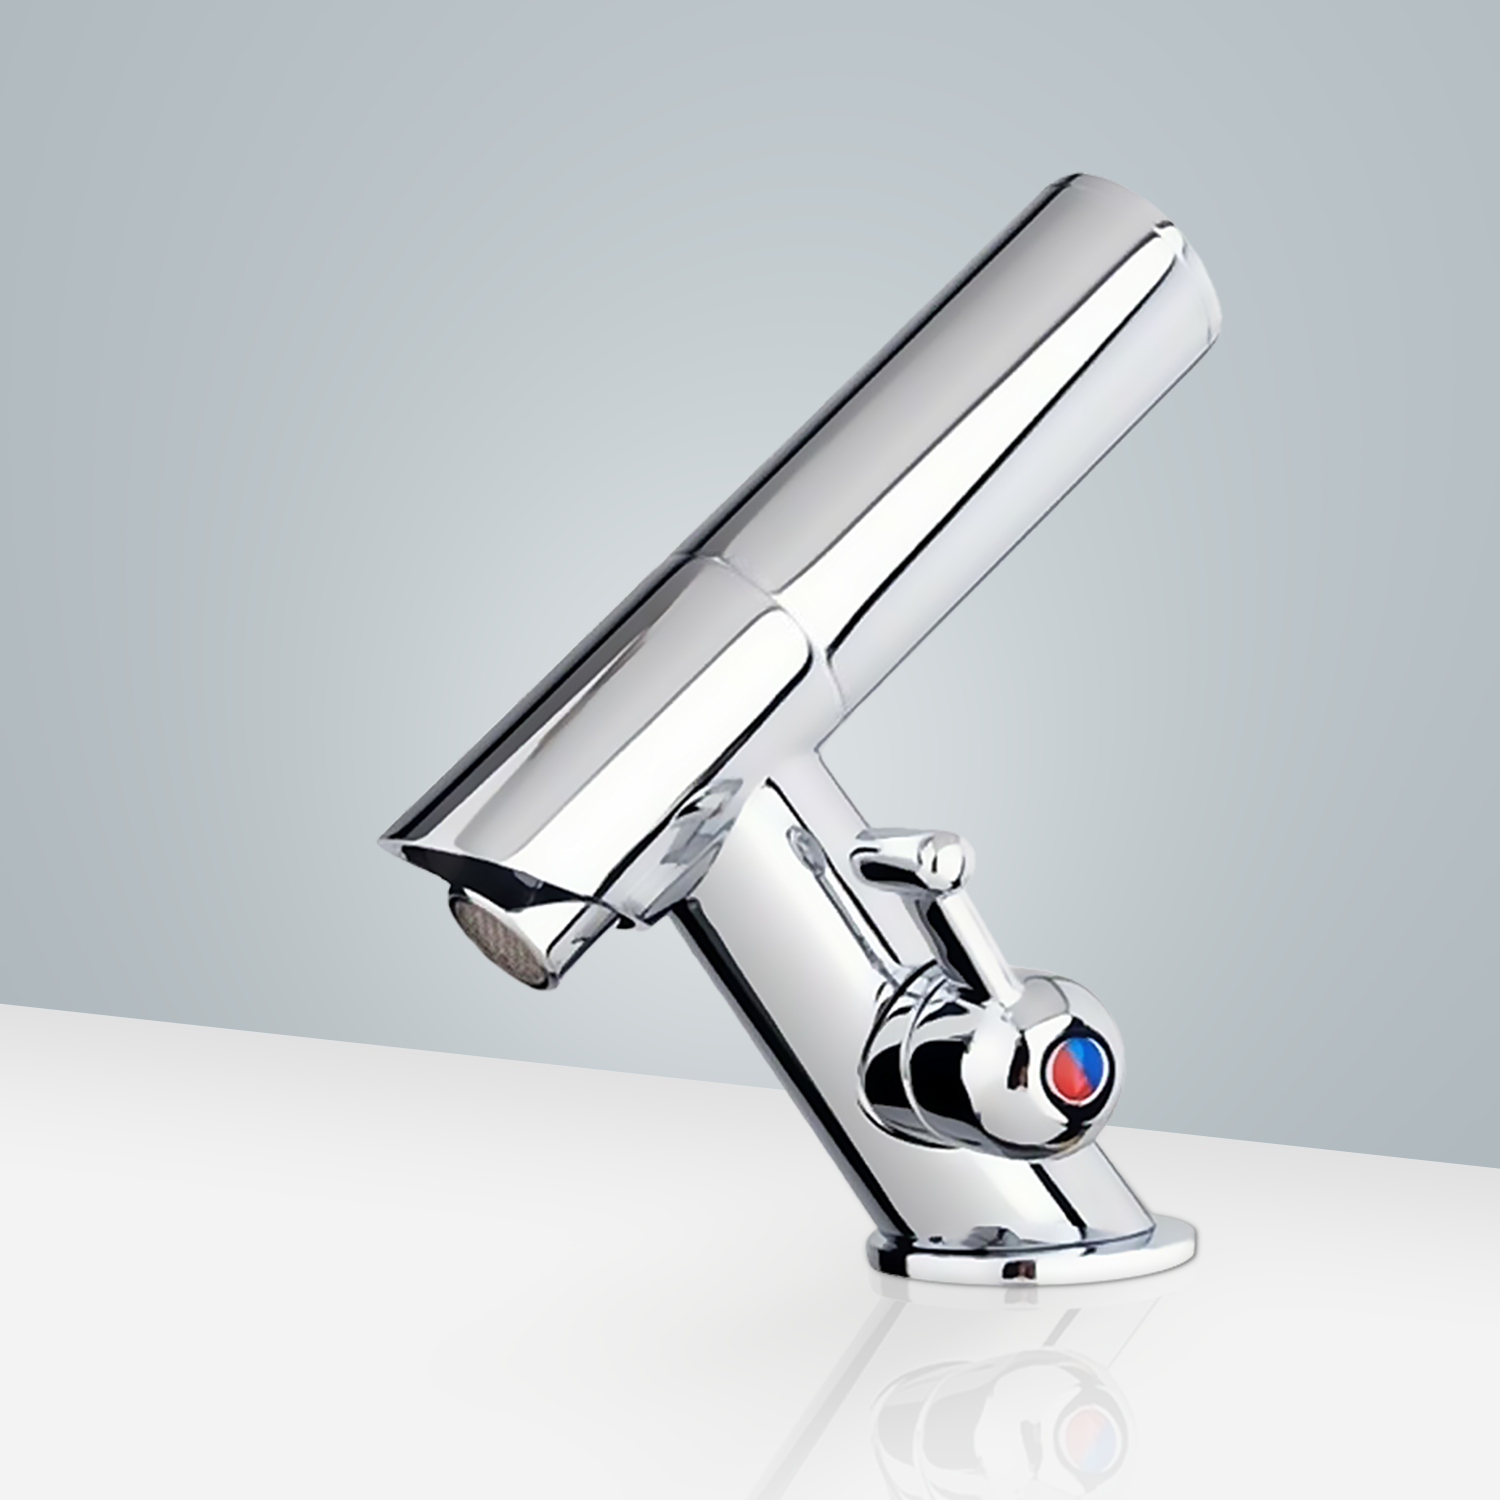
sensor
Sensor Faucet Installations Instructions
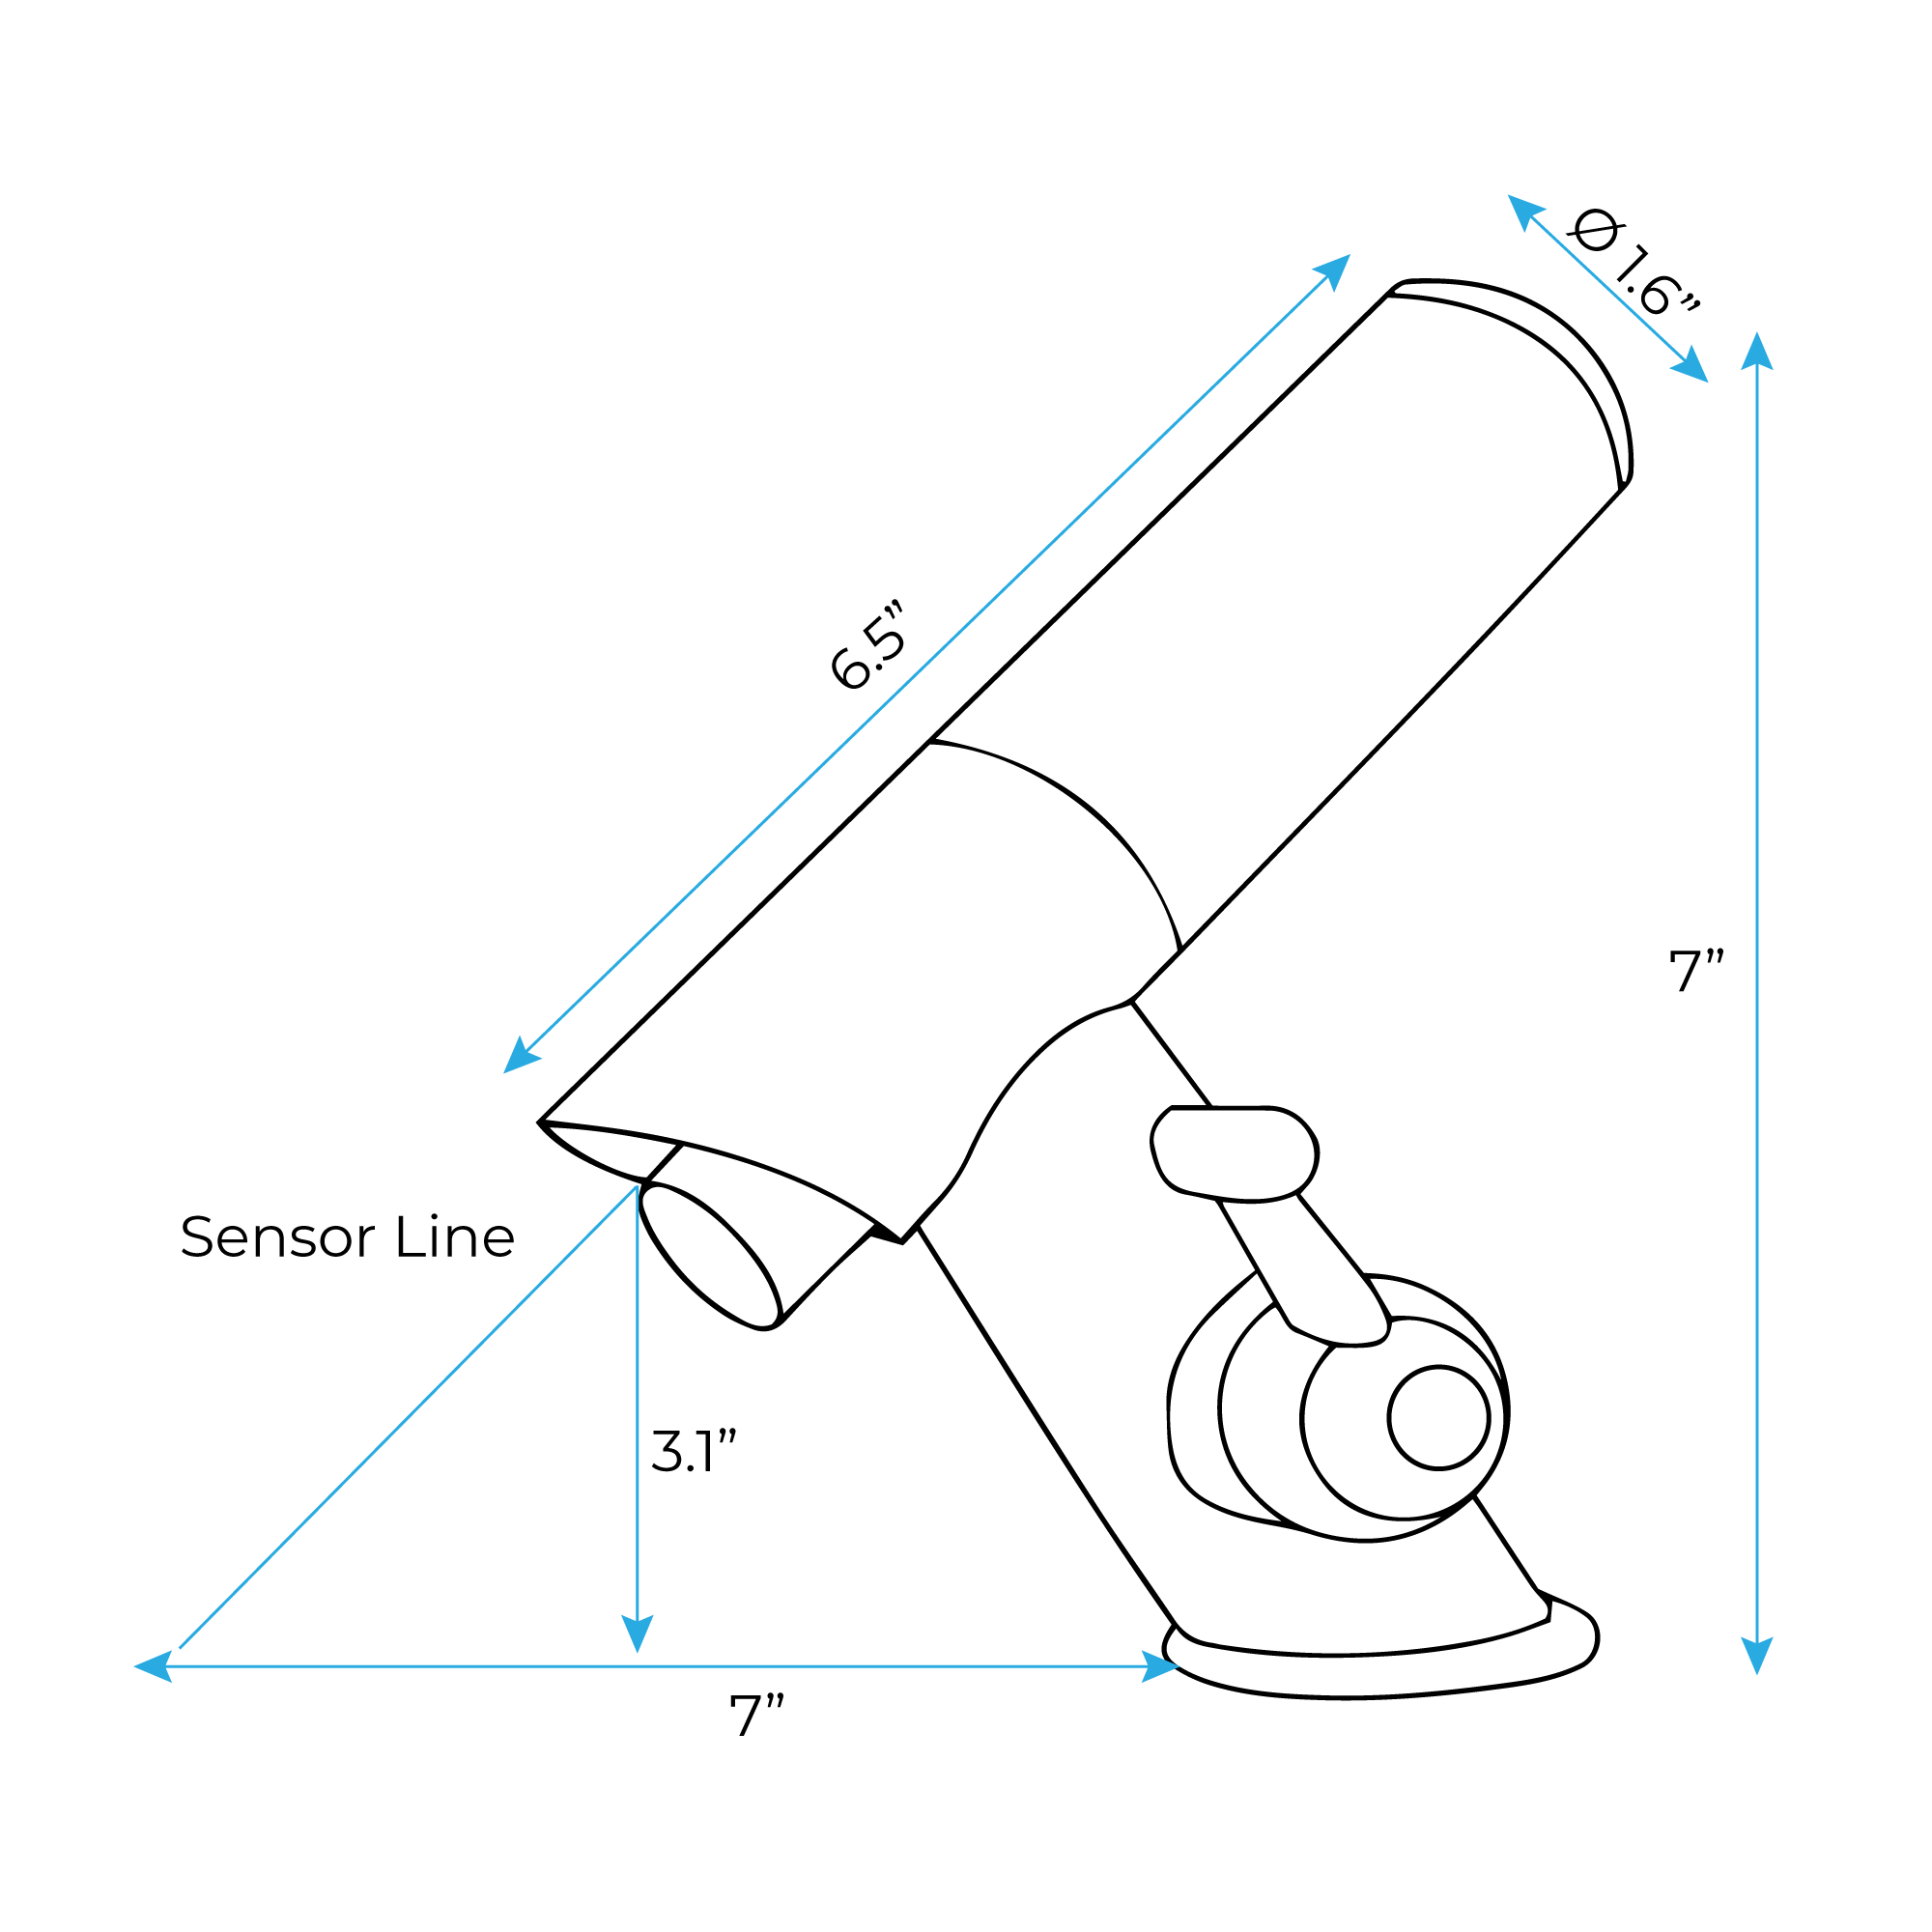
Size:
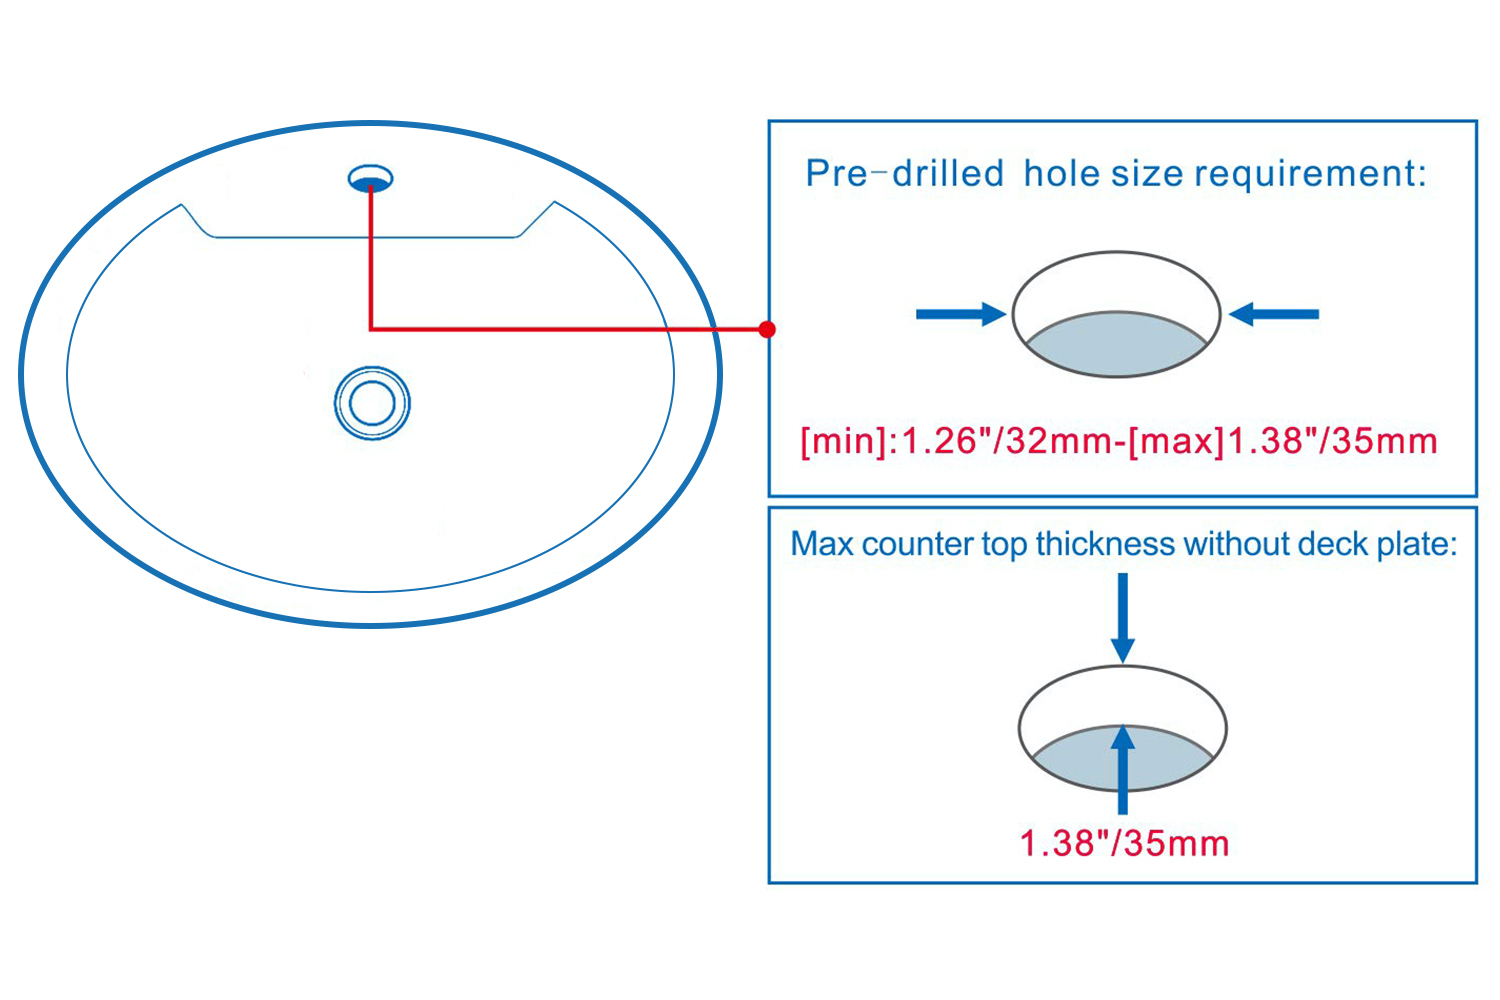
Hole Size Chart:
Auto Sensor Faucet Specifications:
Power and voltage
DC6V AC220V - 50 / 60Hz
Body Material:
Brass with chrome
Work pressure:
0.5 ~ 7 Bar
Water supply pipe size:
DN15 (G1/2")
Ambiance Temp
Range: 0.1 ~ 60 Degrees Celsius
Distance detection:
Adjustable 5 ~ 25cm (default 25cm)
Setting range:
Digital
Response time:
0.3 seconds (default)
Time delay:
0.5 seconds (default)
The weakness of the battery:
Red LED on
Size 1: Deck Mount Installation
Step 2:
sensor
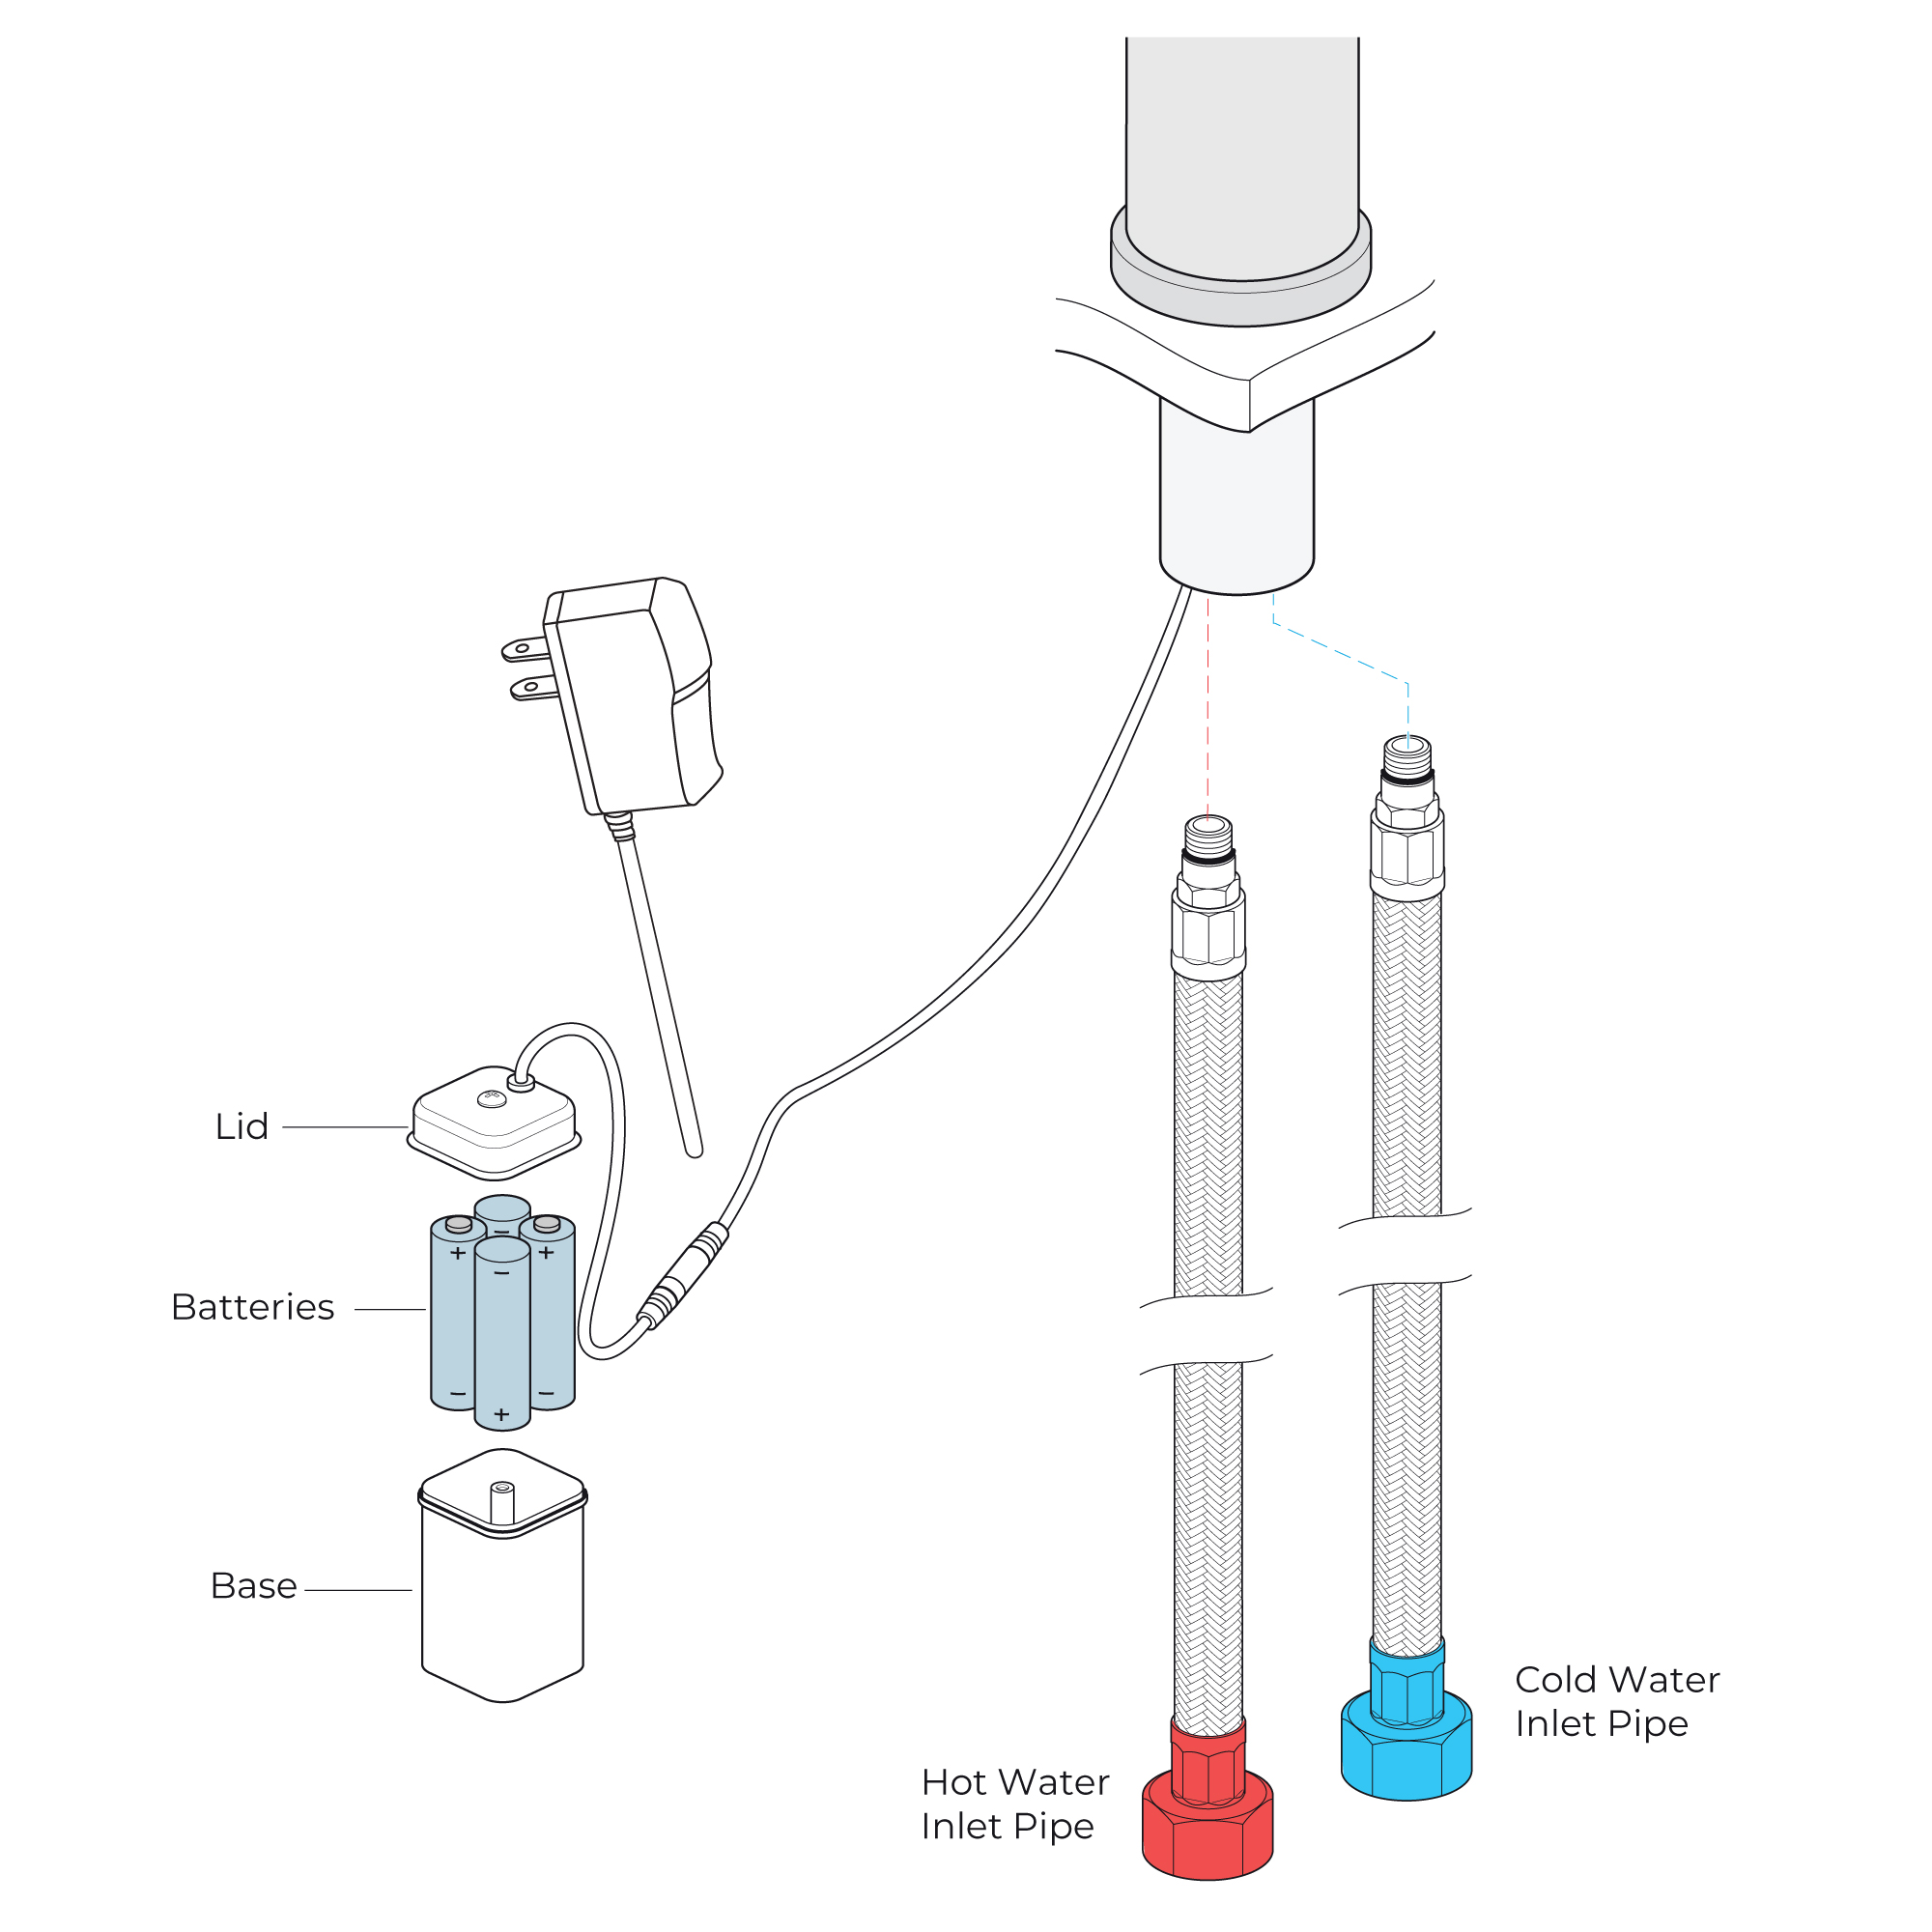
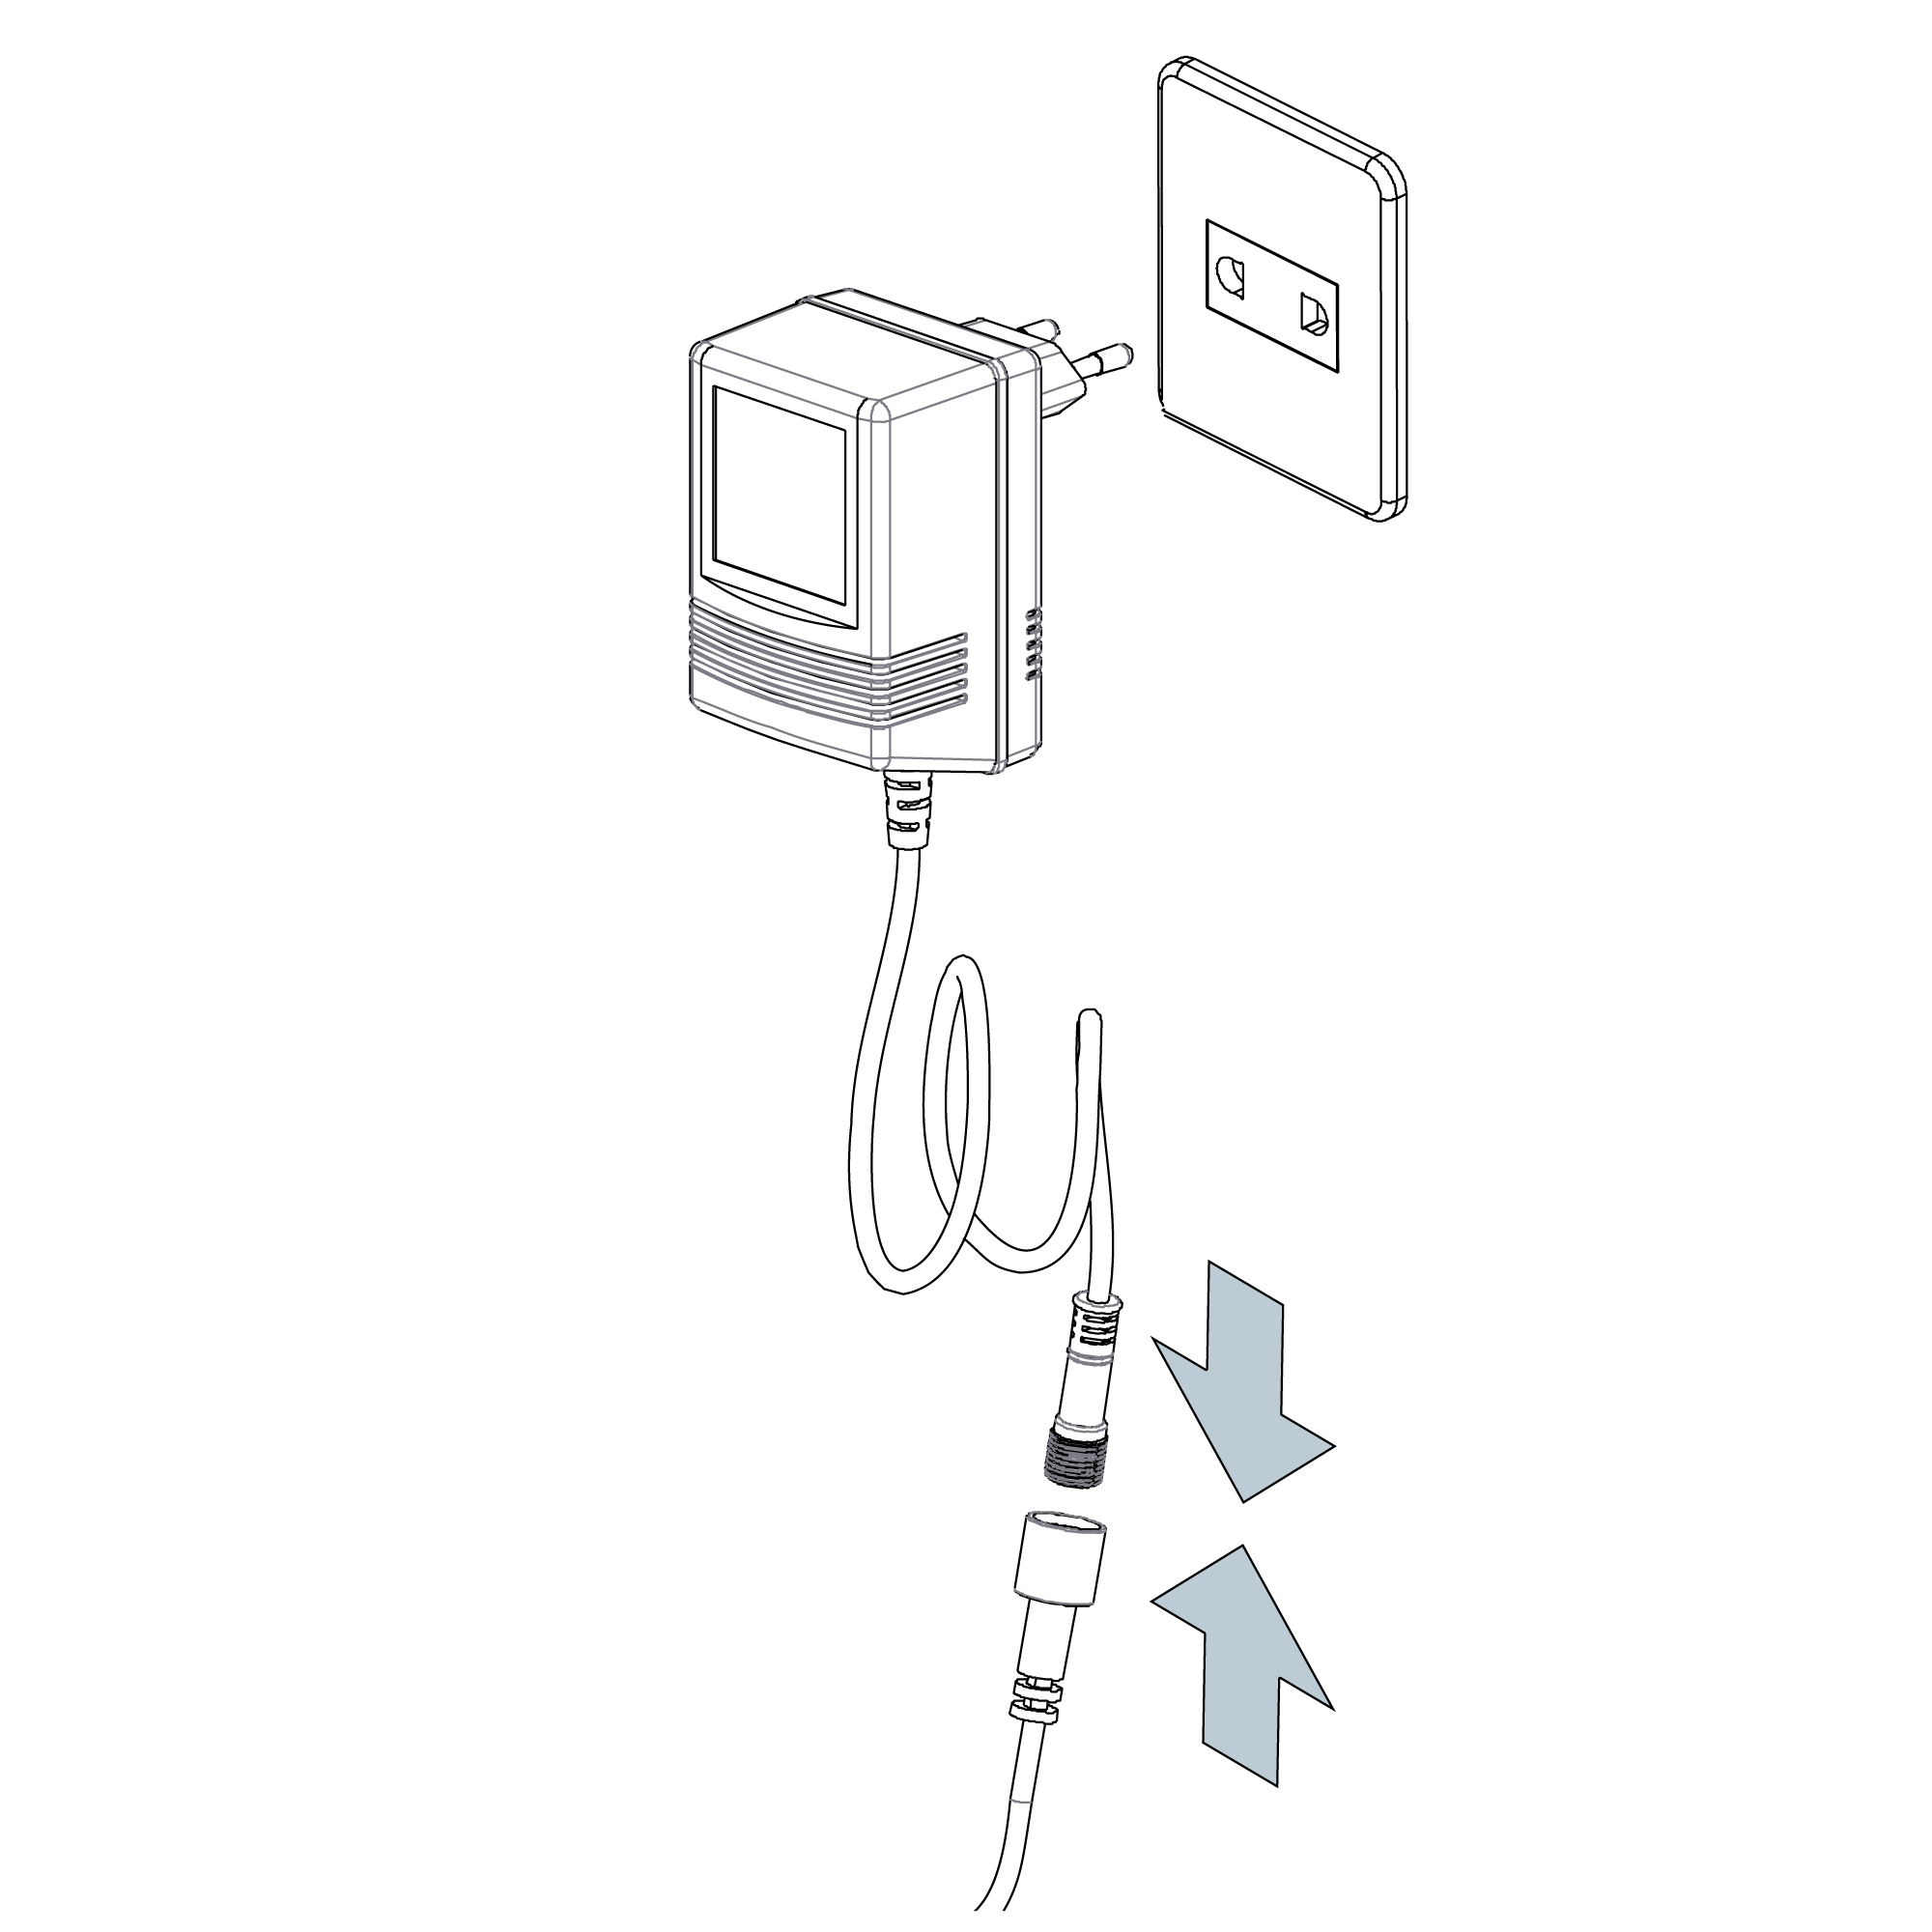
Step 3: Connect to Power Supply
Step 4:
Step 5:
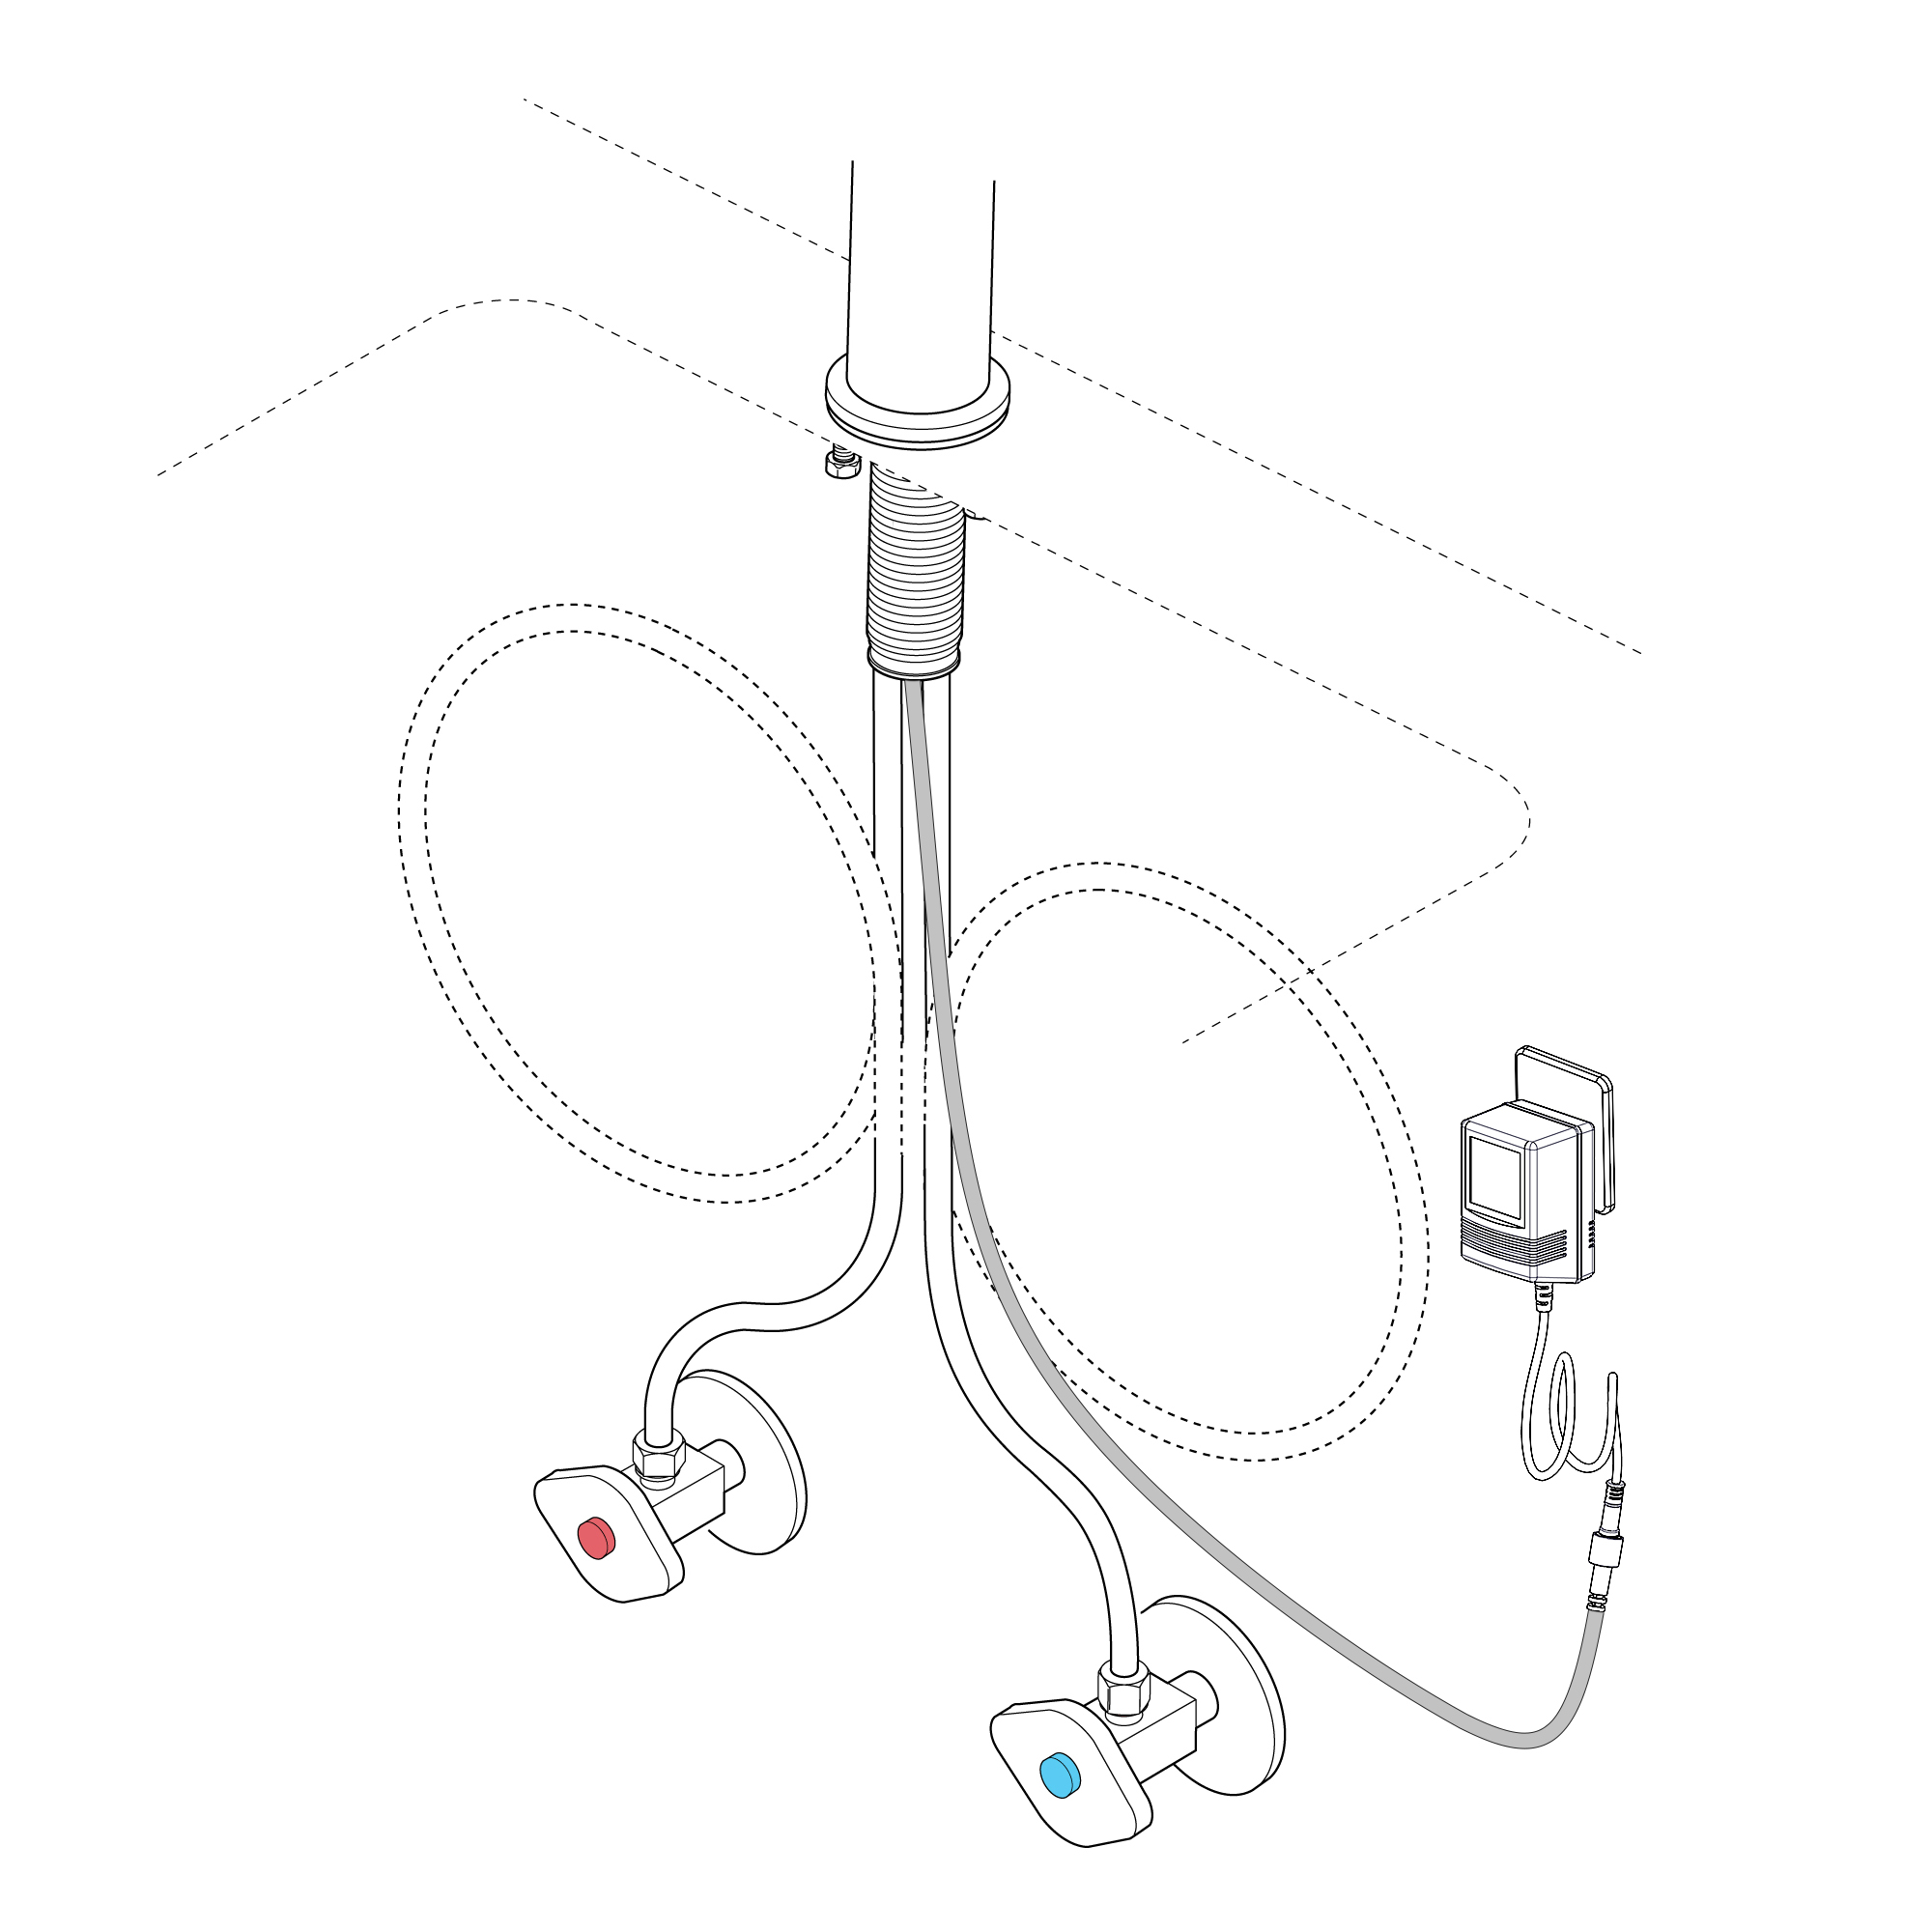
Step 6: (Correct way for Hose)
Before installing your new mixer, flush through the pipework to ensure removal of debris, turn off the water supply.
Ensure the ‘O’ ring is in place at the bottom of the mixer body.
Push the control cable down through the hole and position the mixer on the basin. From the underside of the basin fit the rubber washer, metal washer onto the threaded tube followed by the nut. Tighten the nut to clamp the mixer to the basin. Tighten the 2 side screws up onto the washer.
CAUTION: Do not over tighten the nut/bolts as this may damage the basin.
Screw the two flexible pipes to the mixer body, but do not over tighten, hand tighten only.
Connect the water supply to the inlet pipes. The hot water should be connected to the front pipe.
Plug together the connectors coming from the mixer to the transformer. Line up the flats on both the plug and socket and firmly push together.
Flexible Connecting Hose Care must be taken when connecting the flexible connection hose from the power supply box to the spout to ensure it does not bend sharply and kink or twist. See above for recommended ways to fit the flexible connecting hose.
Important:Failure to follow these guidelines may result in poor performance and damage to the flexible connection hose.
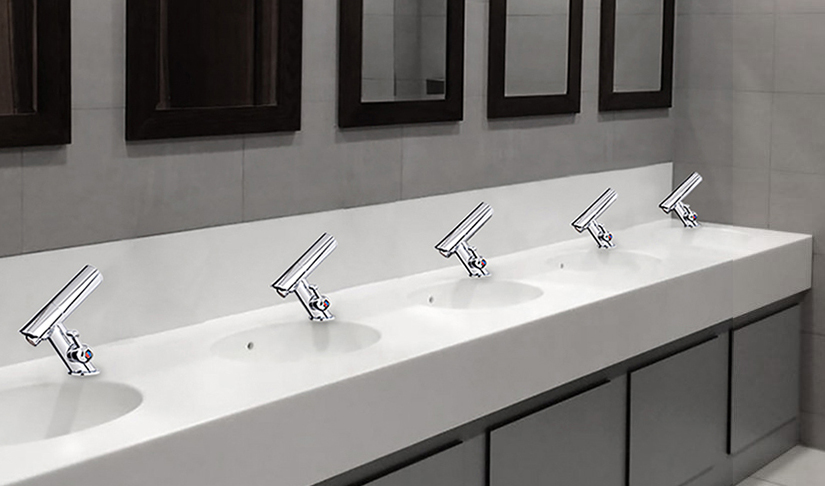
Automatic faucet functions:
1) Water saving: water flows when your hands approach and stop immediately
2) Hygienic: auto-open and close to the hands free from any touch, which can Avoid mutual bacteria infections
3) smart: with its microcomputer to control its action, the tap can AUTO adjusts its best detection zone based on bath color and shape
4) Low power consumption: For DC scrubbers, 4AAA alkaline batteries can be used to 2 years at 200 cycles per day
5) Samples: low cost and freight available
Automatic faucet advantage:
Works with infrared sensor, works without contact;
Advanced energy-saving design for long battery life;