Home > How to Install Fontana 2-Way Wall-Mounted Shower Mixer

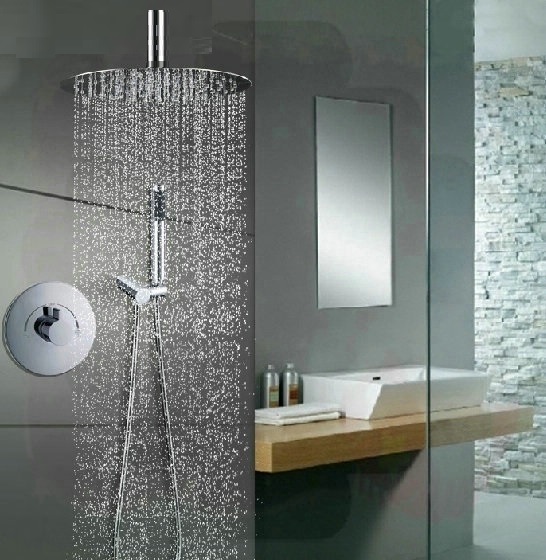
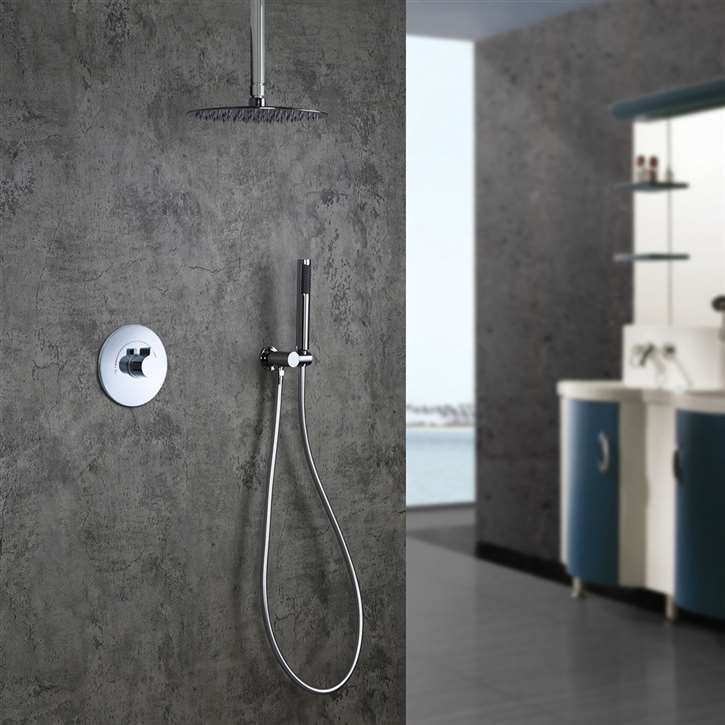
Fontana Lima 2-Way Shower Set - Round Chromed Brass Shower Head

A fully functional yet very affordable shower set is what this Fontana Lime 2-way Shower Set is all about. Complete with a shower head, a handheld shower, and a dual control, there certainly is nothing else that you could look for. The shower head comes in a variety of sizes (12", 16", 20" and 24") It also comes in chrome finish to cater to the different style and preferences. When it comes to quality, you get the assurance that every part and component of this shower set is made from high grade materials and that they are manufactured under the highest standard of quality and excellence.

Fontana Lima 2-Way Shower Set - Round Chromed Brass Shower Head Features:

  • Brand Name: FontanaShowers
  • Model Number: FS6113SS
  • Type: Complete Shower Set
  • Number of Handle: Single Handle
  • Valve Core Material: Ceramic
  • Surface Treatment: Polished
  • Style: Contemporary
  • Size: See Options
  • Cold/Hot Water Control Type: Single Holder Dual Control
  • Type: Fixed Rotatable Type
  • Surface Finish: Chrome
  • Installation Type: Wall Mount
  • Number of Holes: Three Holes
  • Fontana Lima 2-Way Shower Set - Round Chromed Brass Shower Head
    round-brass-shower-set-with-arm brass-shower-shower-set-with-arm-round head-mixer-shower-set-with-arm-round

    FontanaShowers® Product Warranty Information FontanaShowers Product Warranty


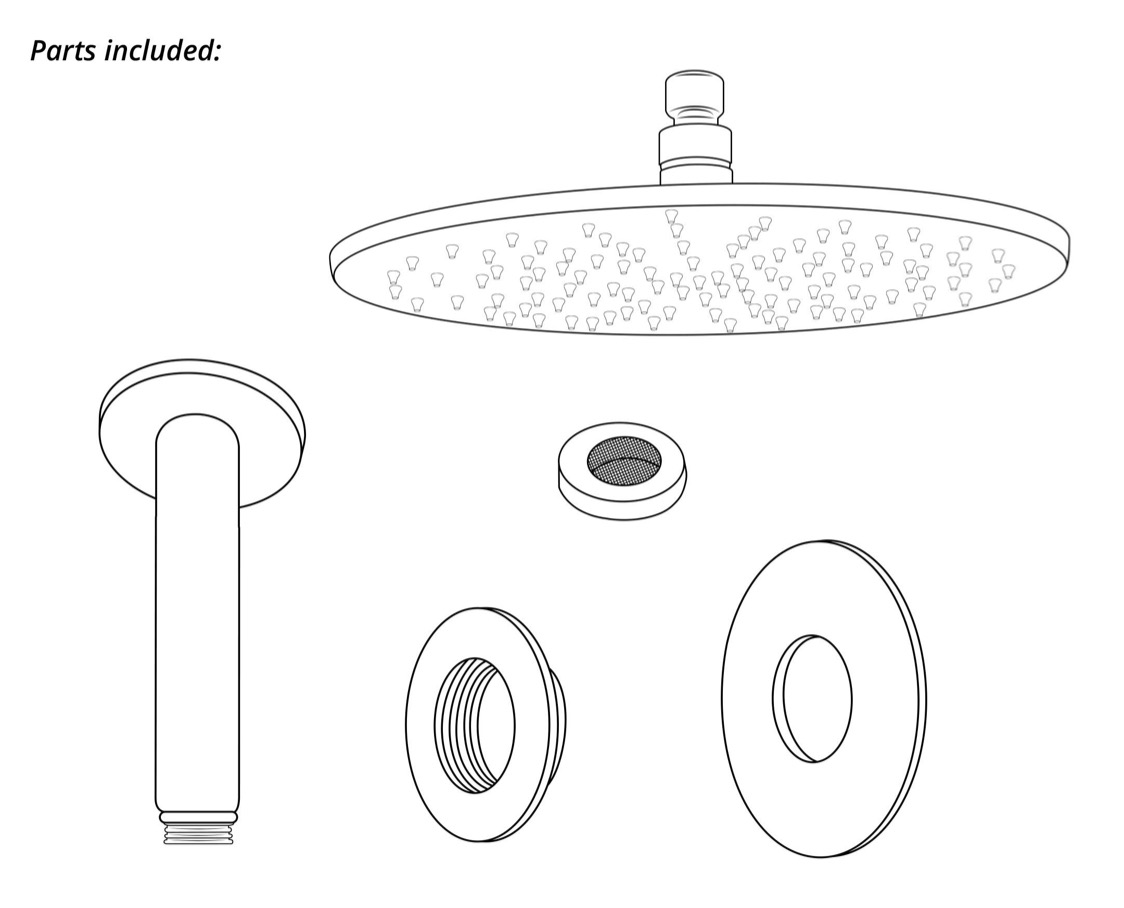
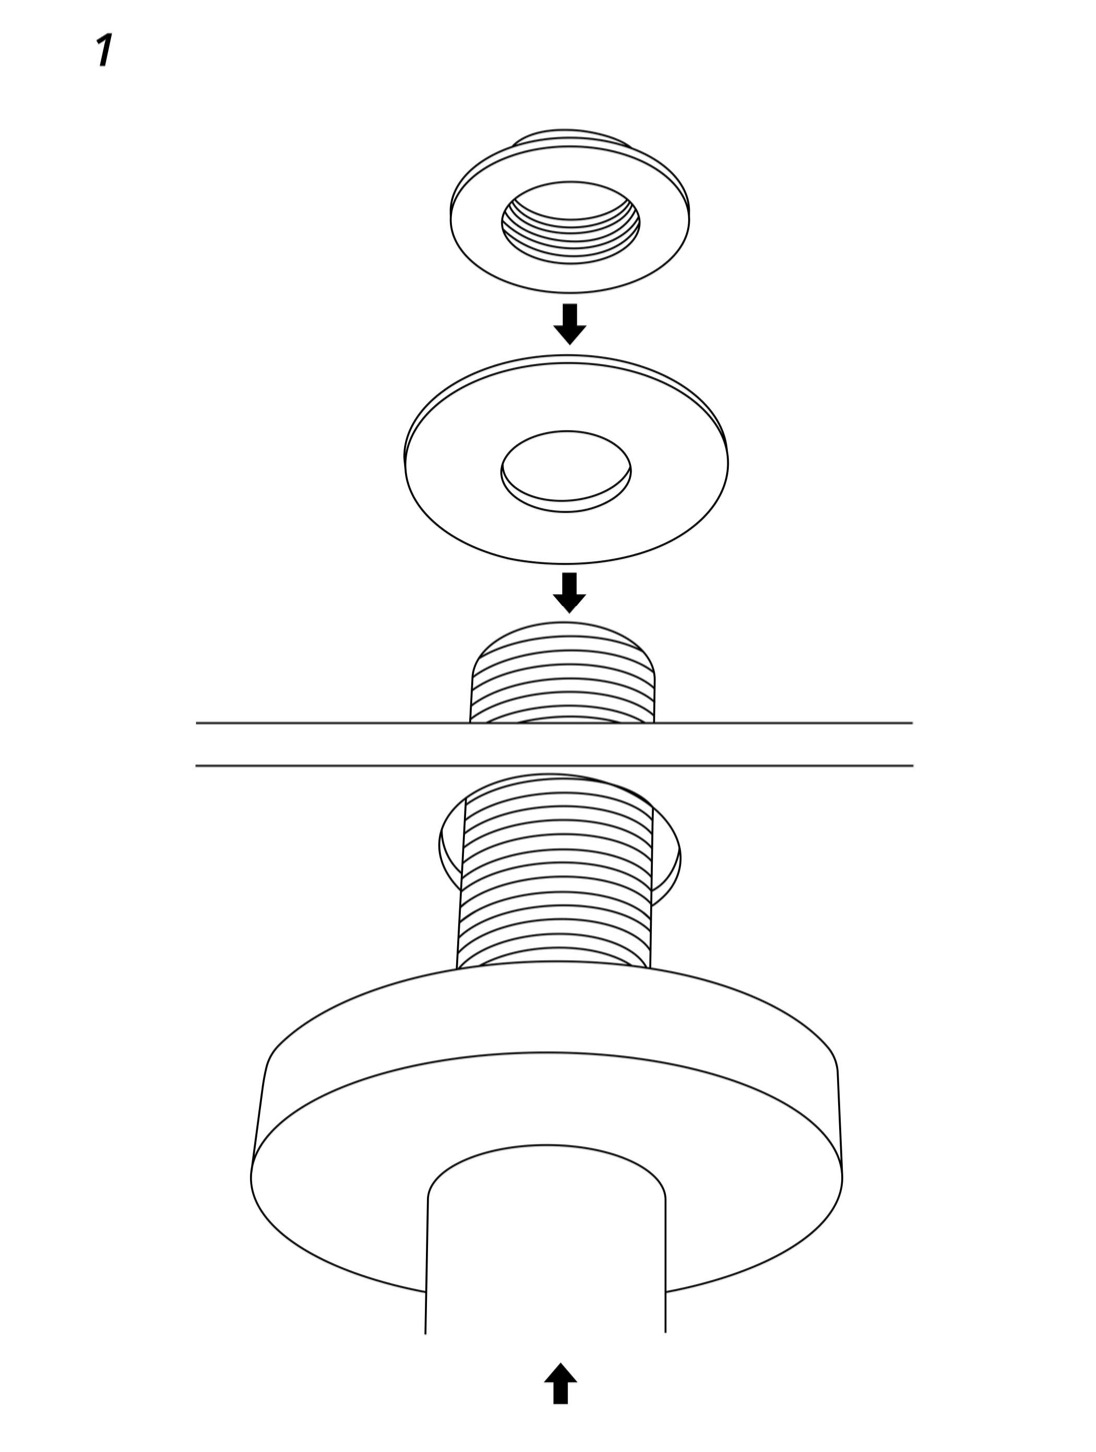
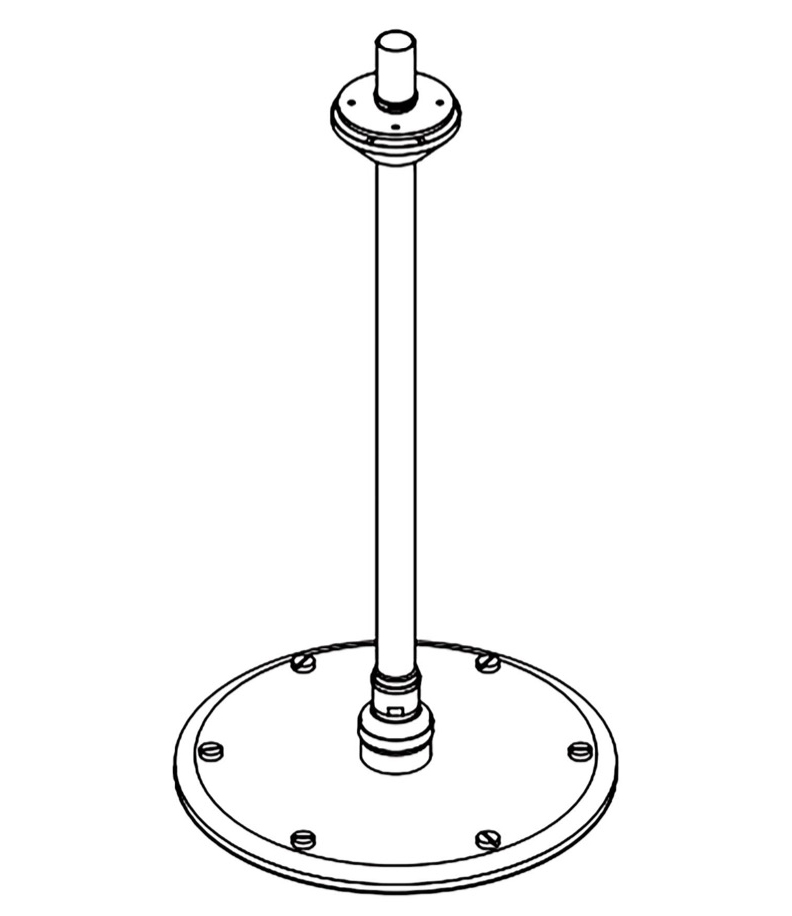
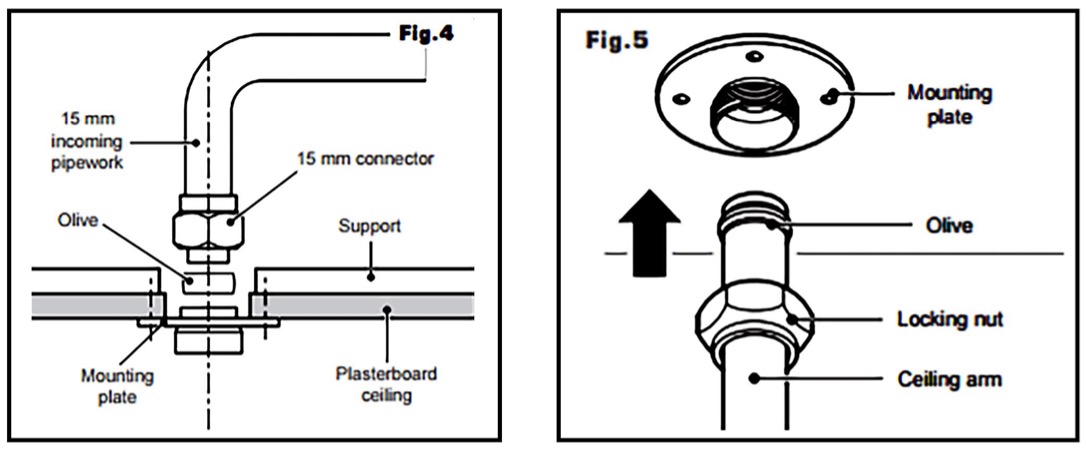
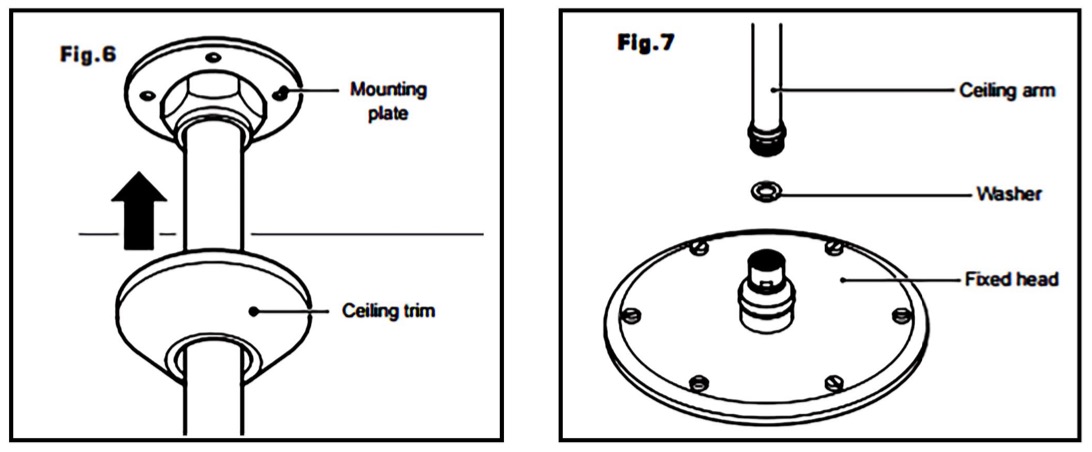
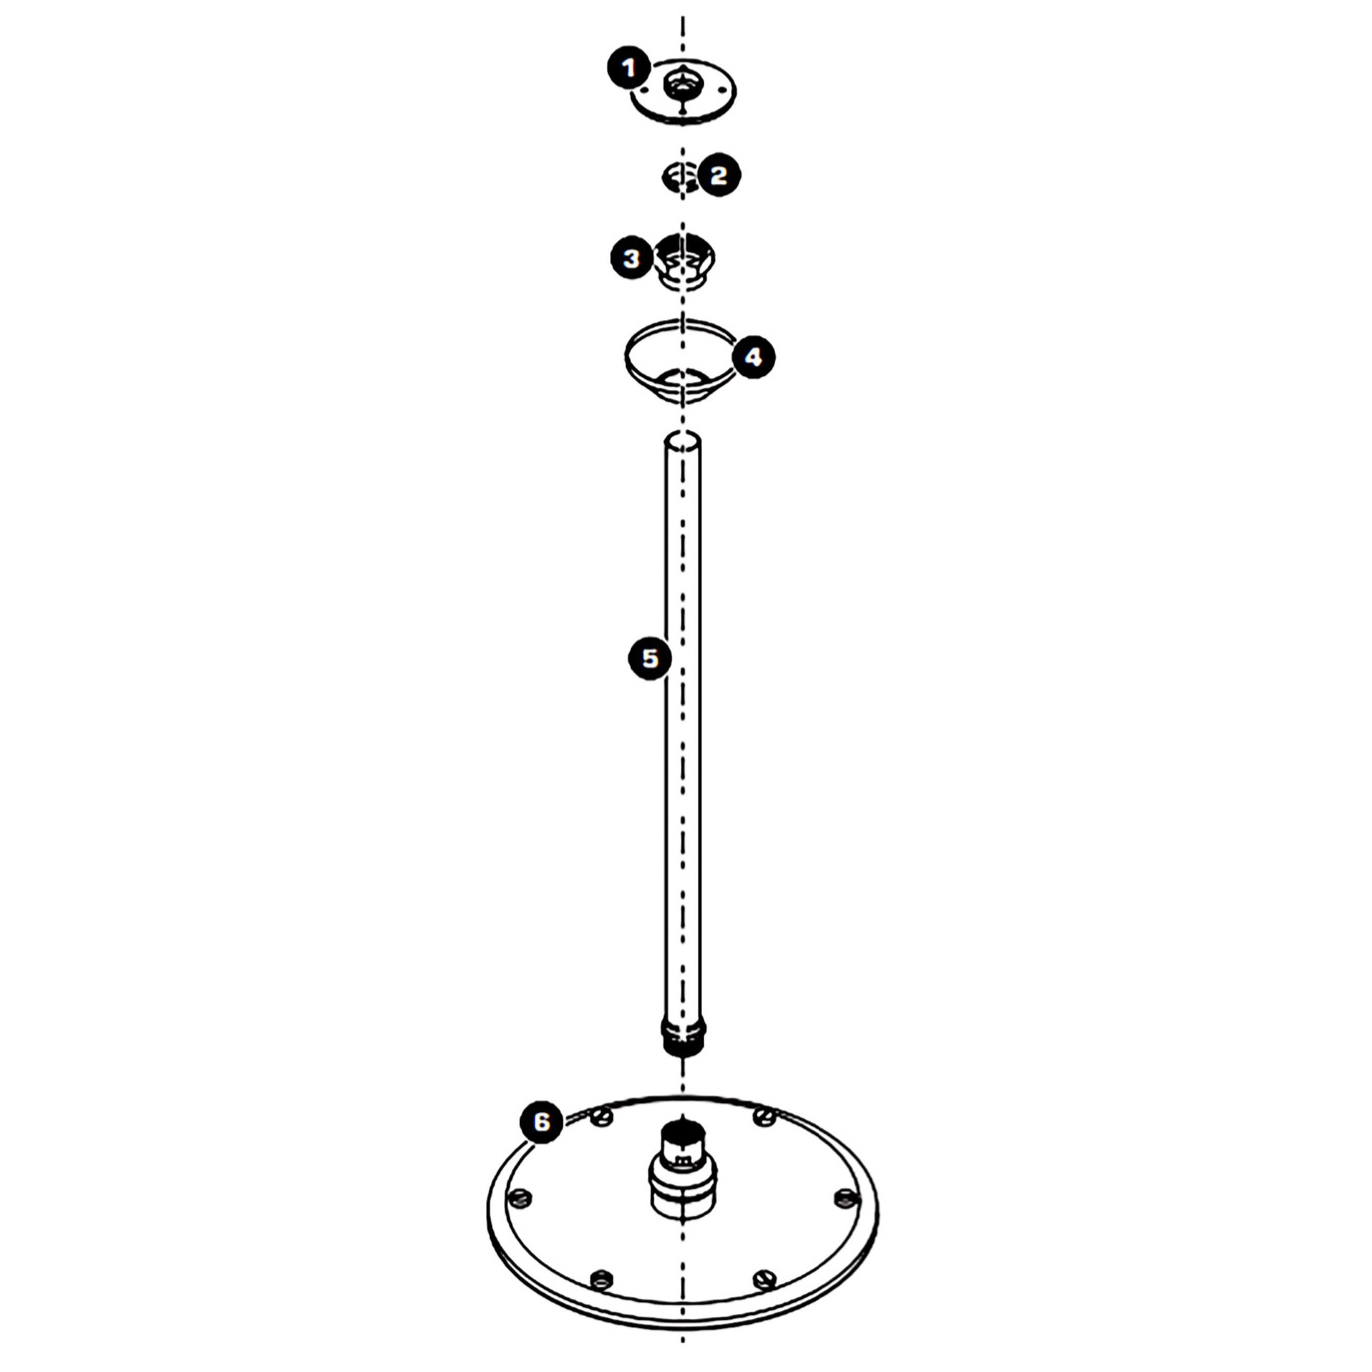
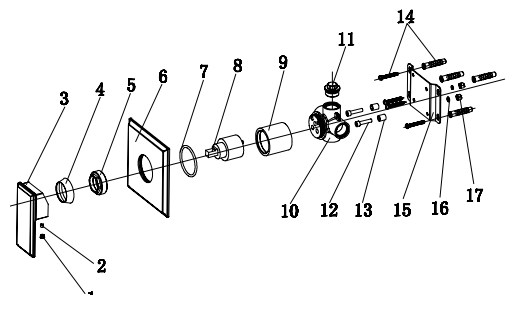
    1. Ceiling arm mounting plate
    2. Olive
    3. Locking nut
    4. Ceiling trim
    5. Ceiling arm
    6. Emily fixed showerhead
    7. Fixing screws and wall plugs (not shown)


    Fontana 16″ Oil Rubbed Bronze Round LED Rainfall Showerhead


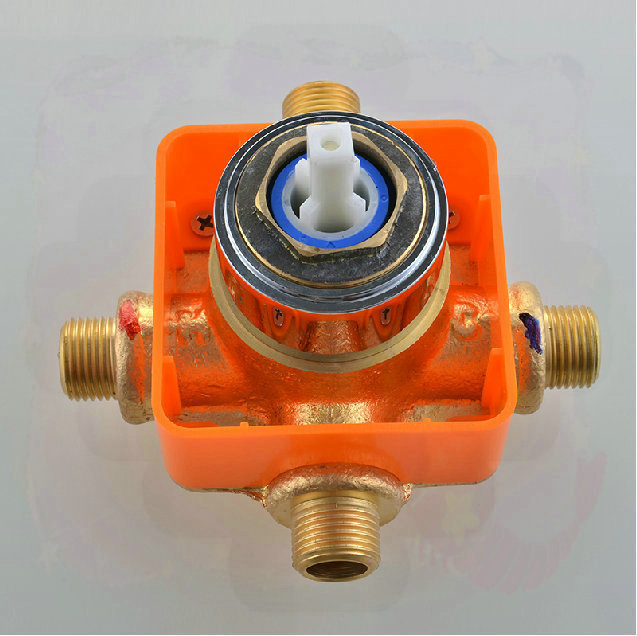
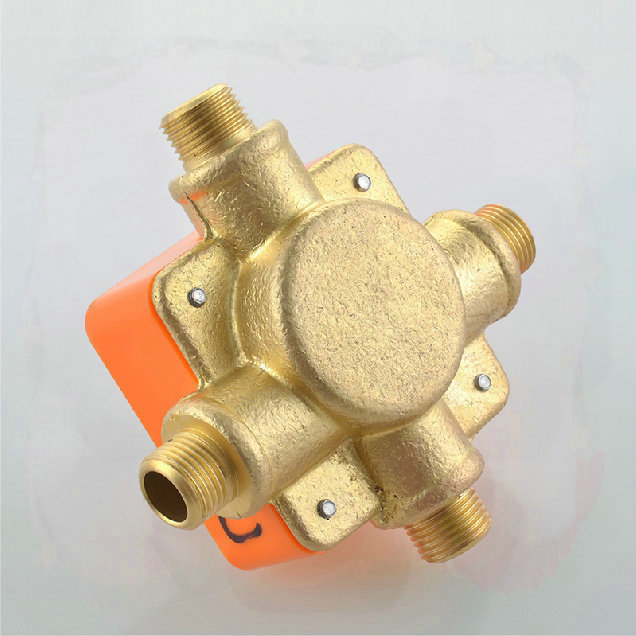
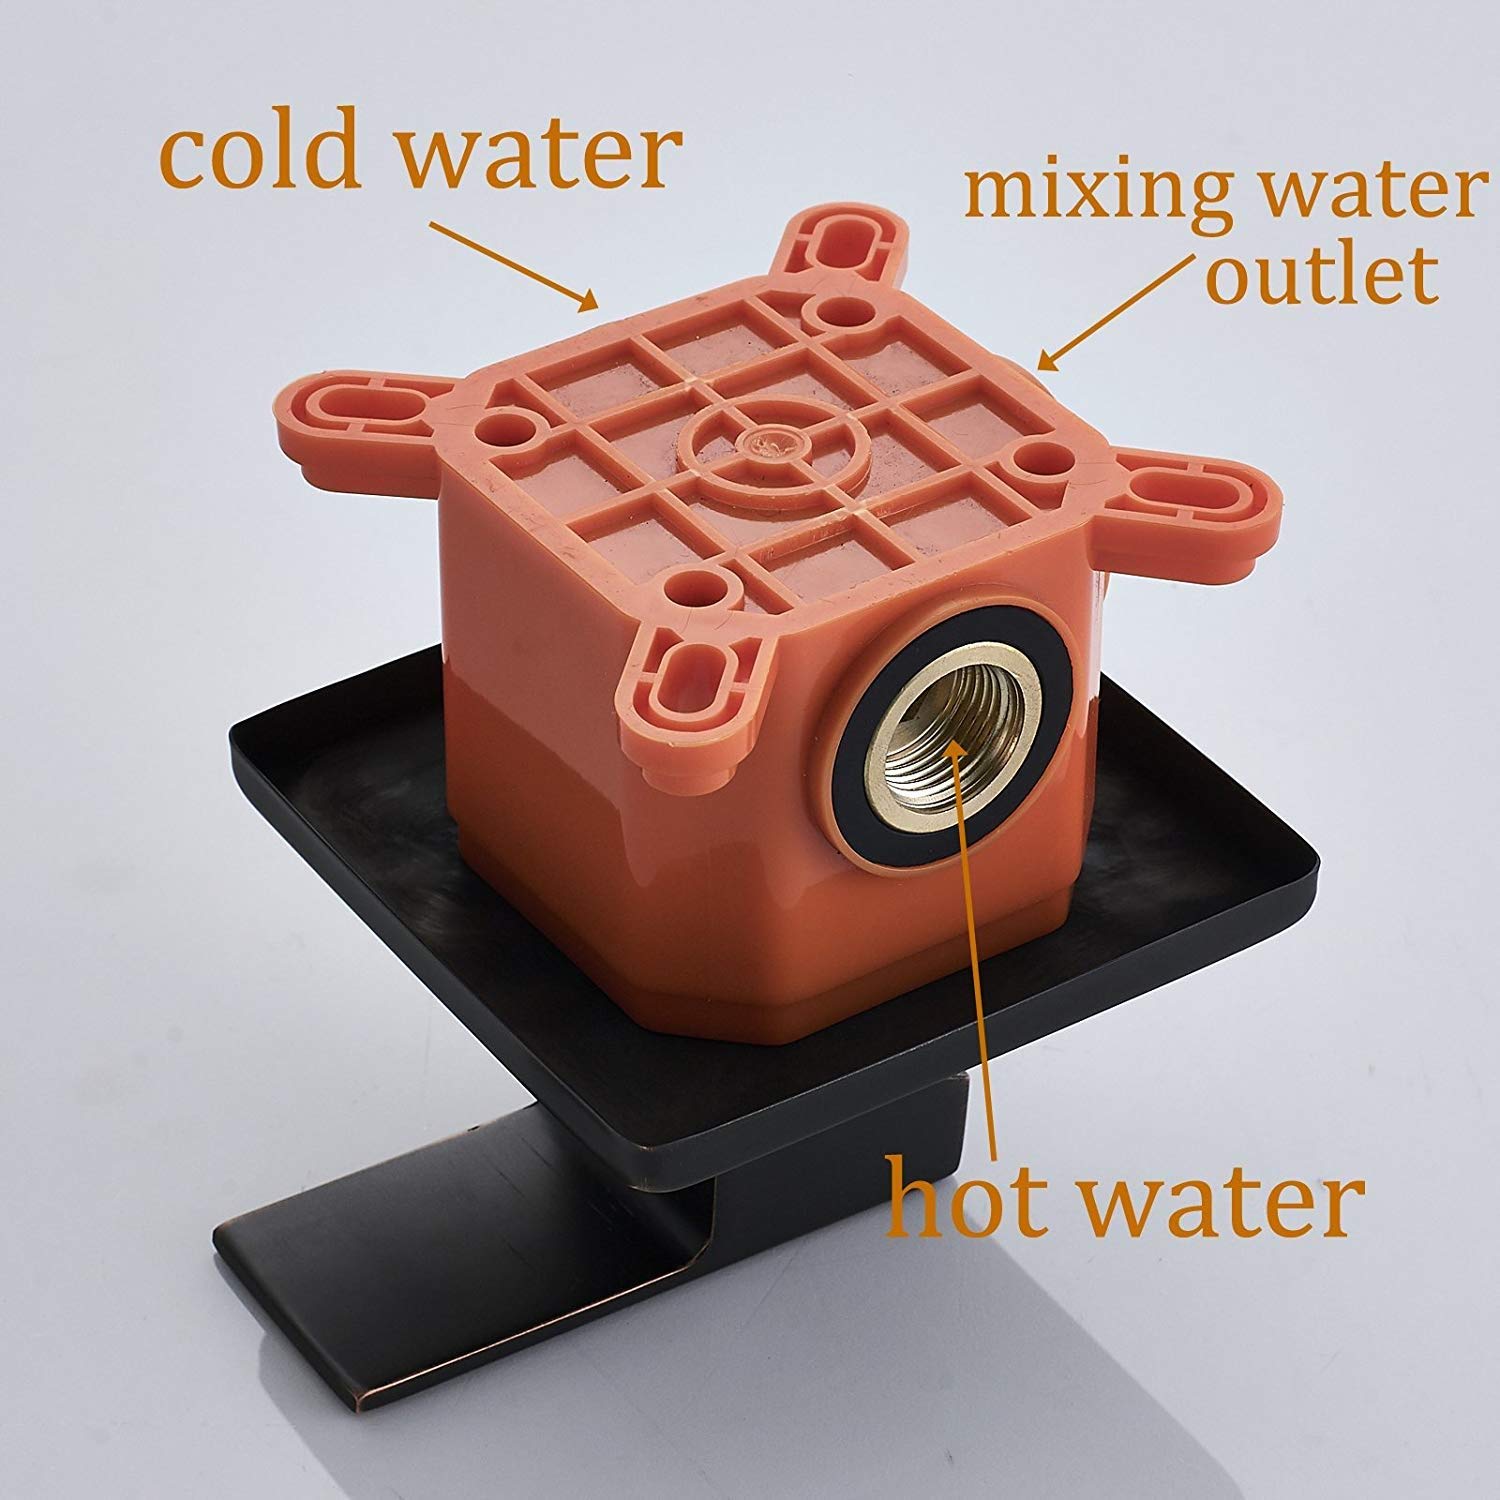
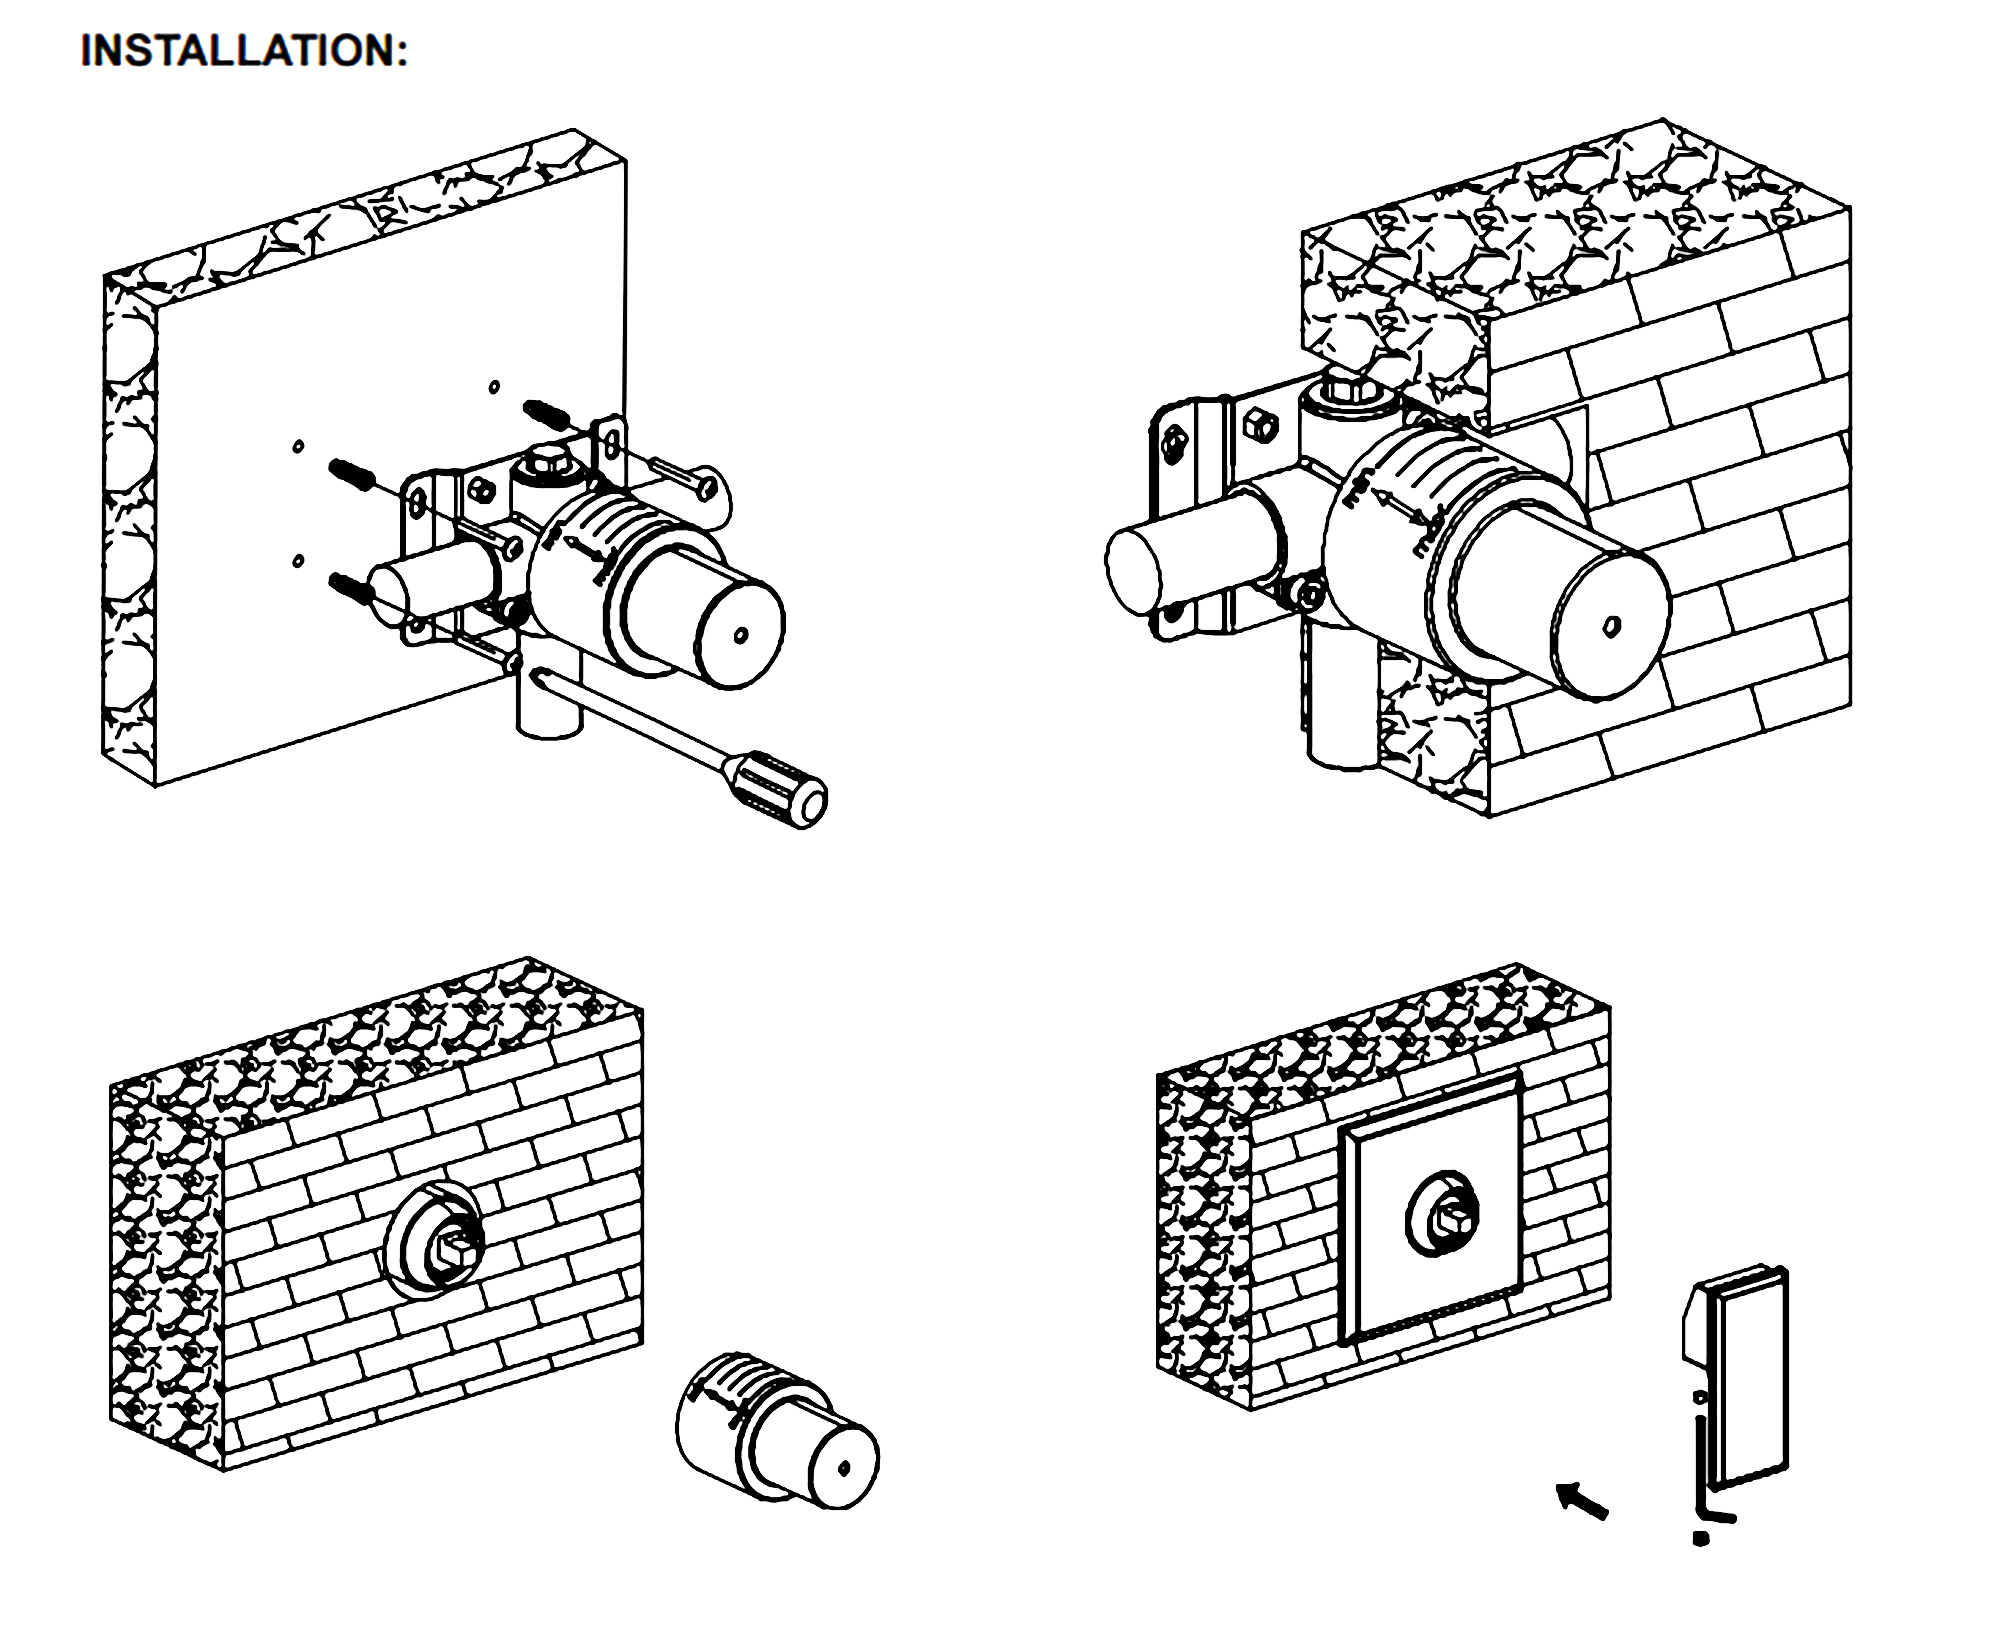
    1. Install the valve body. Wrap the threaded portion of the joints in Teflon tape and connect the water inlet and outlet.
    2. Put the protective cover on the valve body and finish the shower wall.
    3. When the finished wall is complete, remove the protective cover.
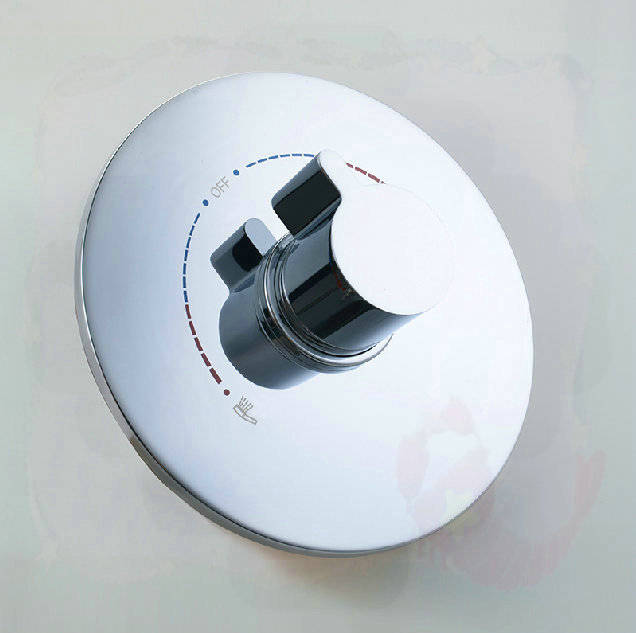
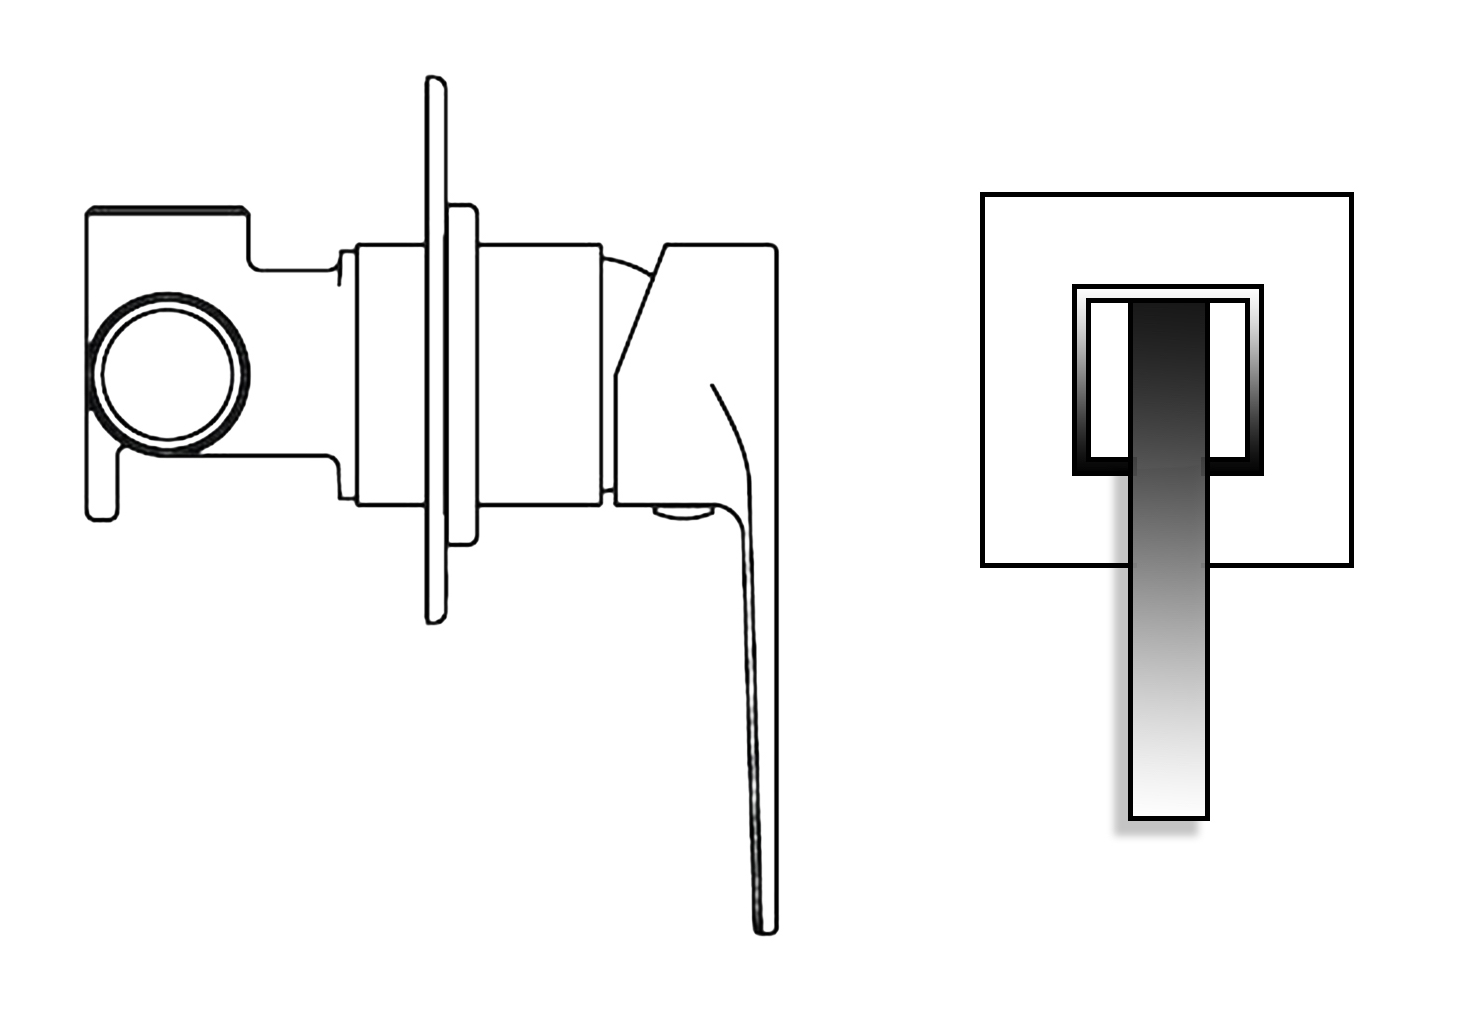
    4. Install the escutcheon, and handle. Tighten the set screw with an Allen wrench to secure.
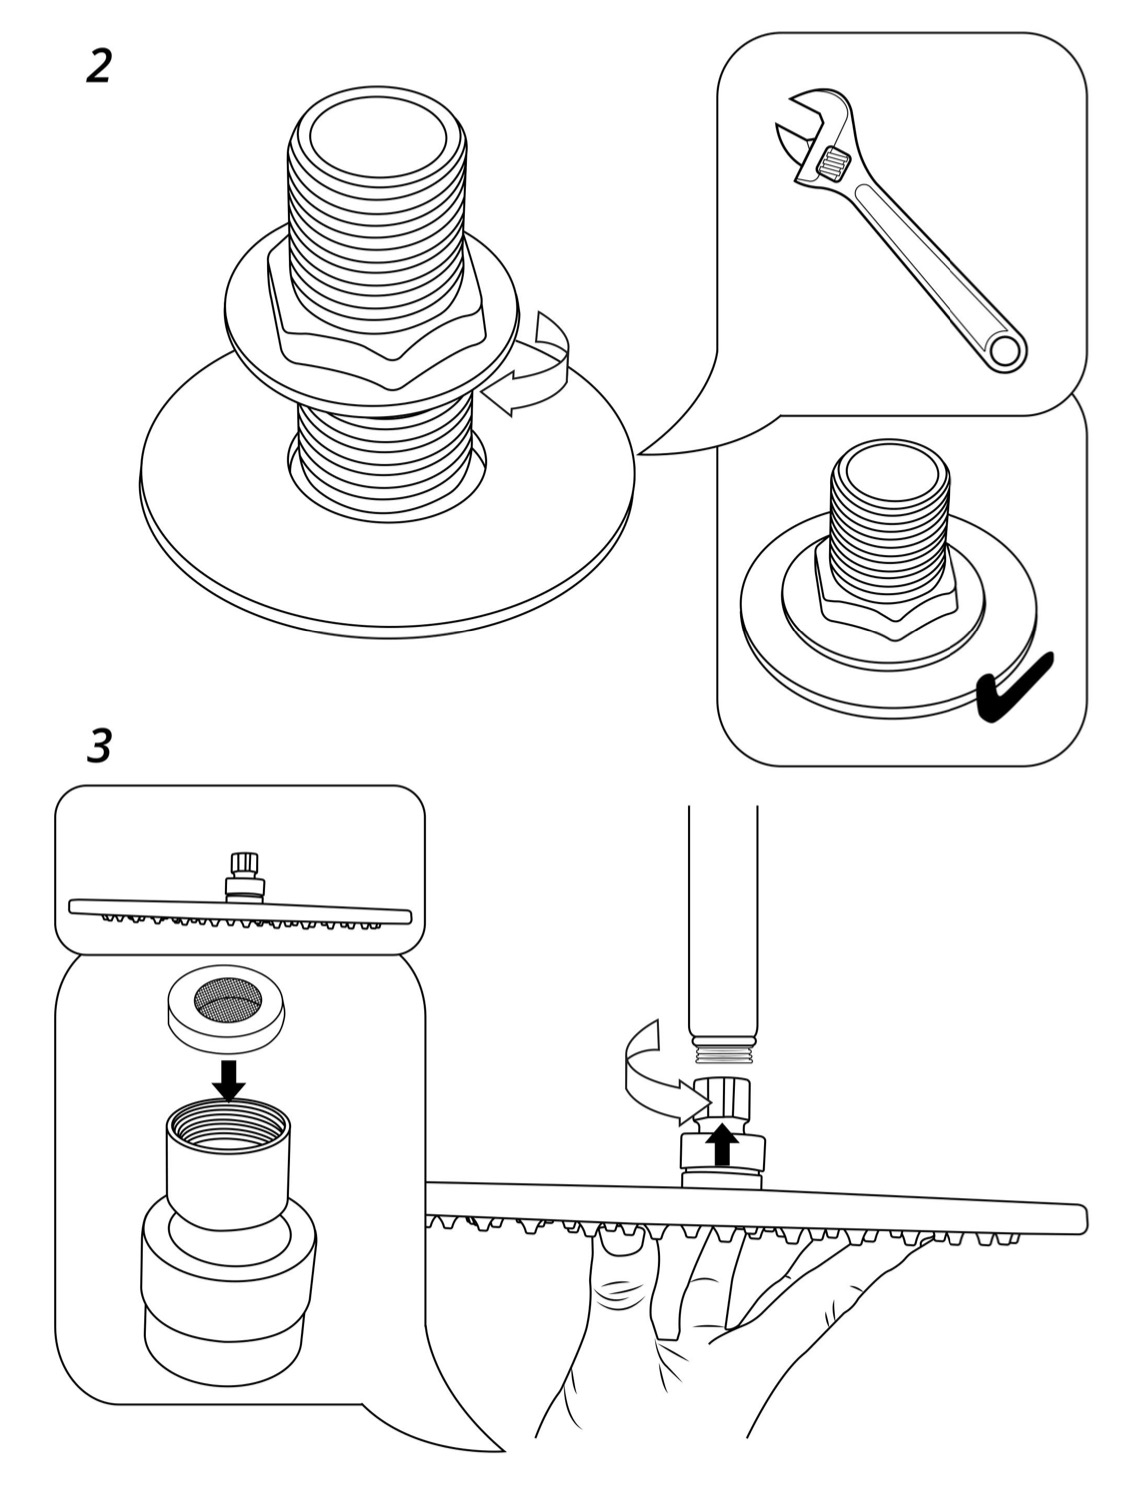
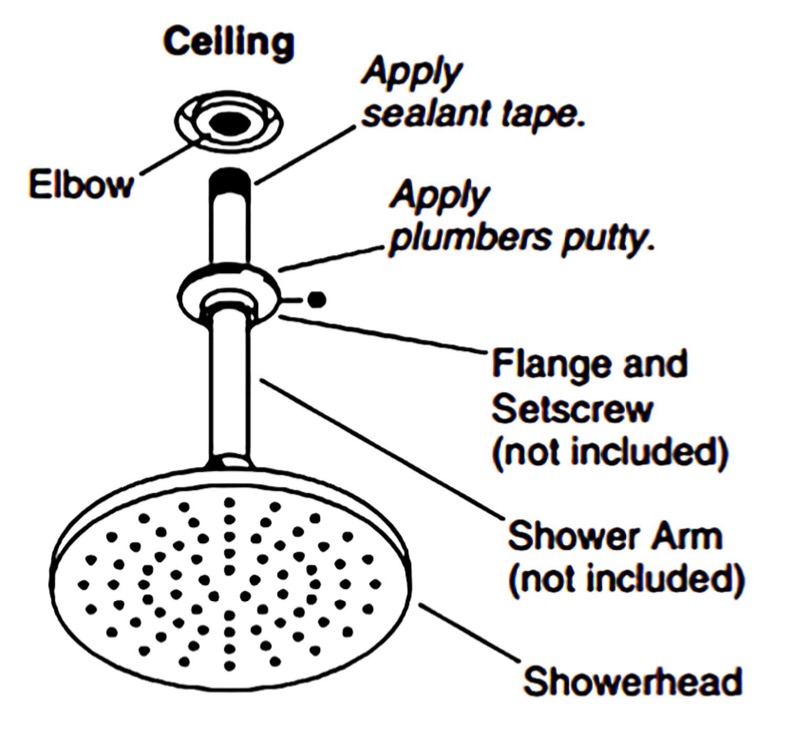
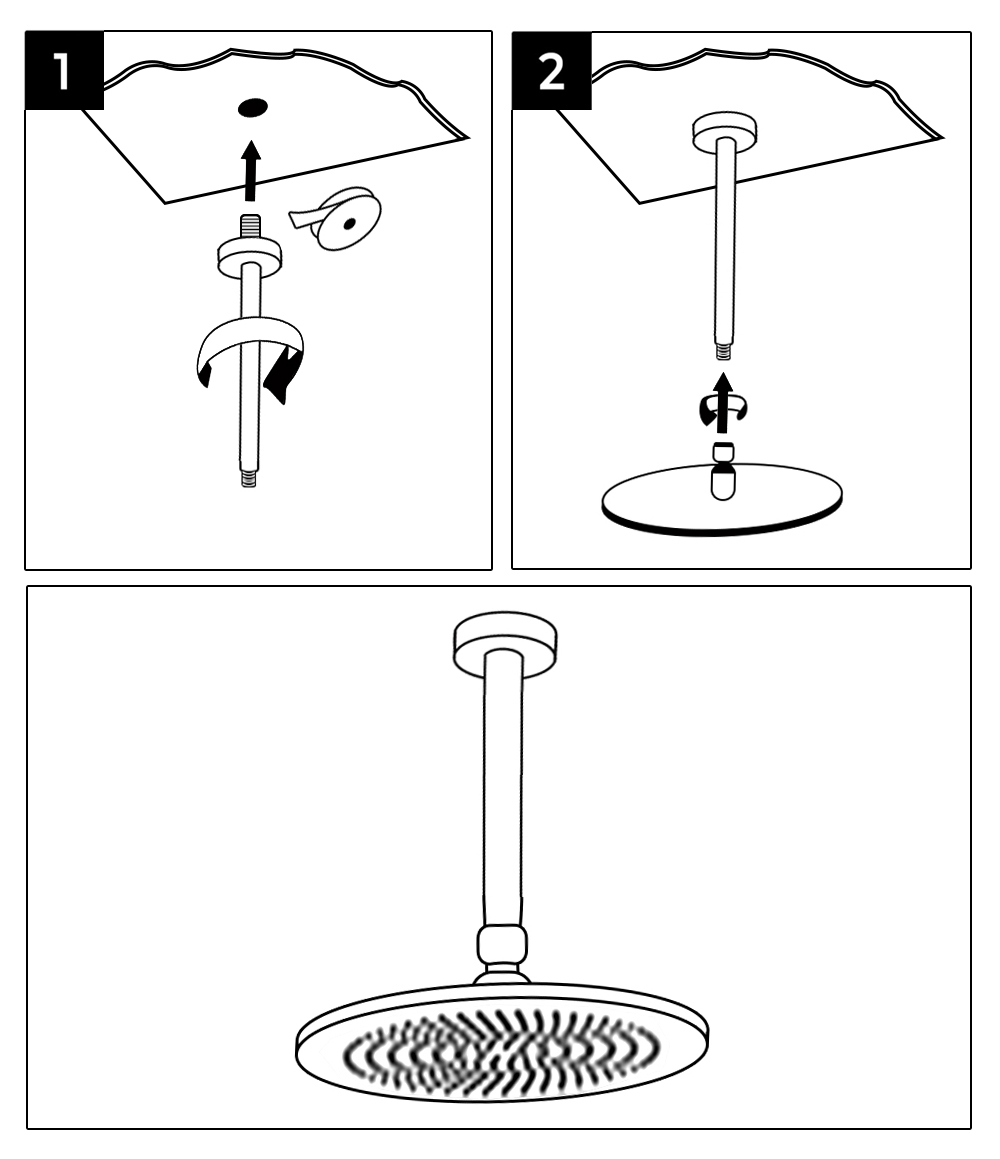
    5. Attach the shower arm escutcheon to the shower arm. Wrap the threaded portions of the shower arm with Teflon tape and connect the arm to the shower inlet. Adjust the direction of the water flow as needed. Attach the rainfall shower head to the shower arm.

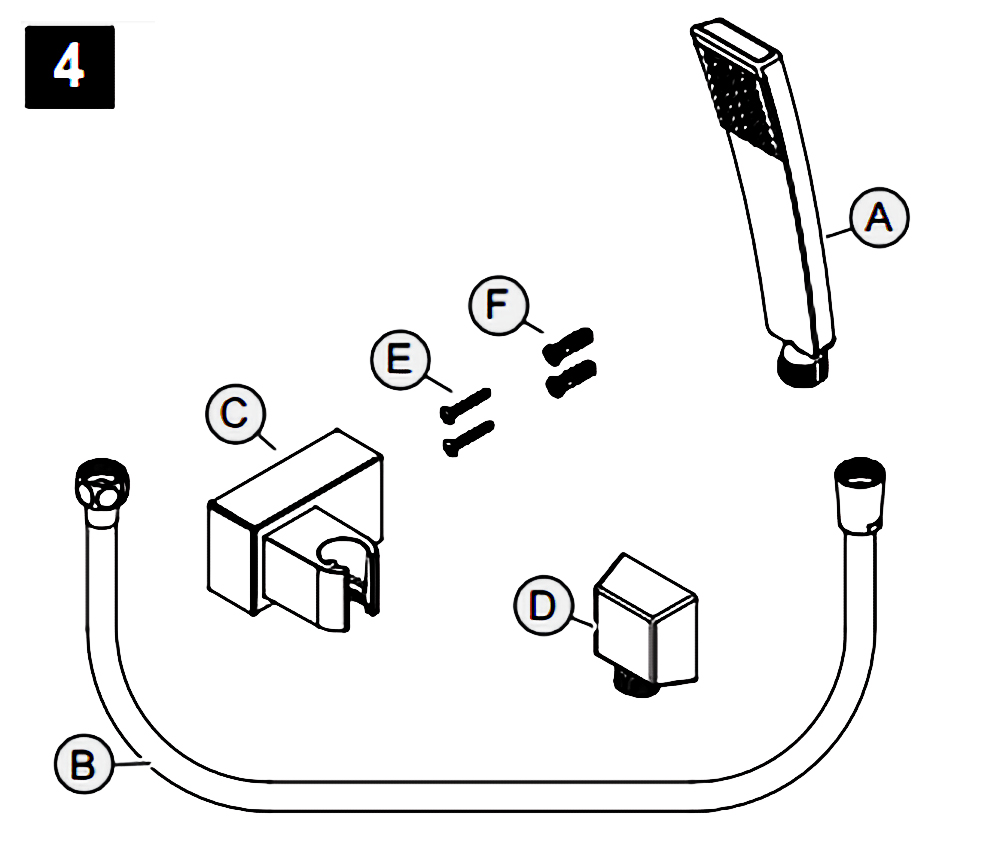
    Hand-Held Shower Instructions


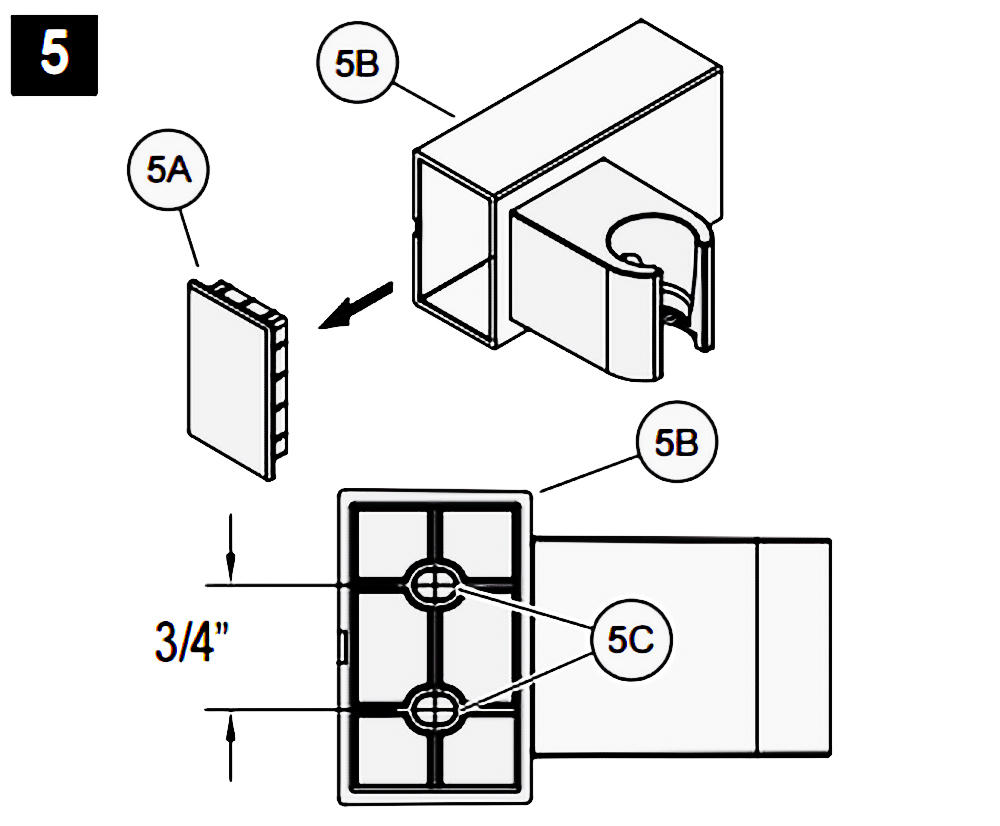
    5. Hole Locations For Wall Mount
    Remove Front Cover (5A) from Wall Mount (5B). Use Wall Mount Screw Holes (5C) to place the desired location. Using a punch or awl, tap the screw hole locations. Holes must be vertically aligned.

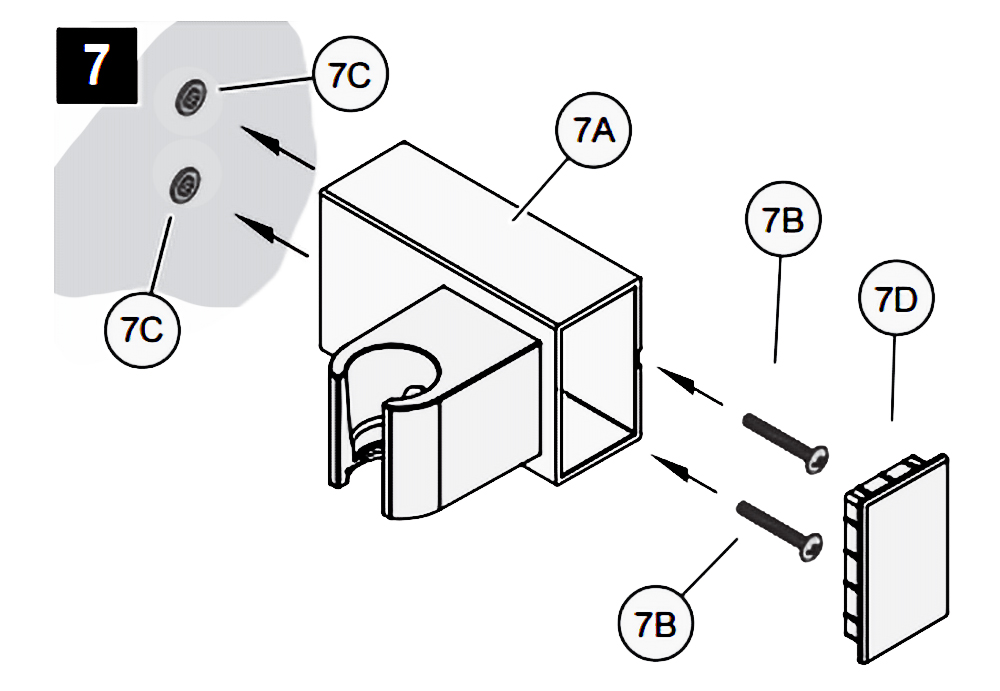
    7. Wall Mount Installation
    Place Wall Mount (7A) into wall and inset Mounting Screws (7B) through Wall Mount Holes (7C) and tighten until Wall Mount (7A) is flush with the wall. Do Not Over Tighten! Insert Front Cover (7D) into Wall Mount (7A).


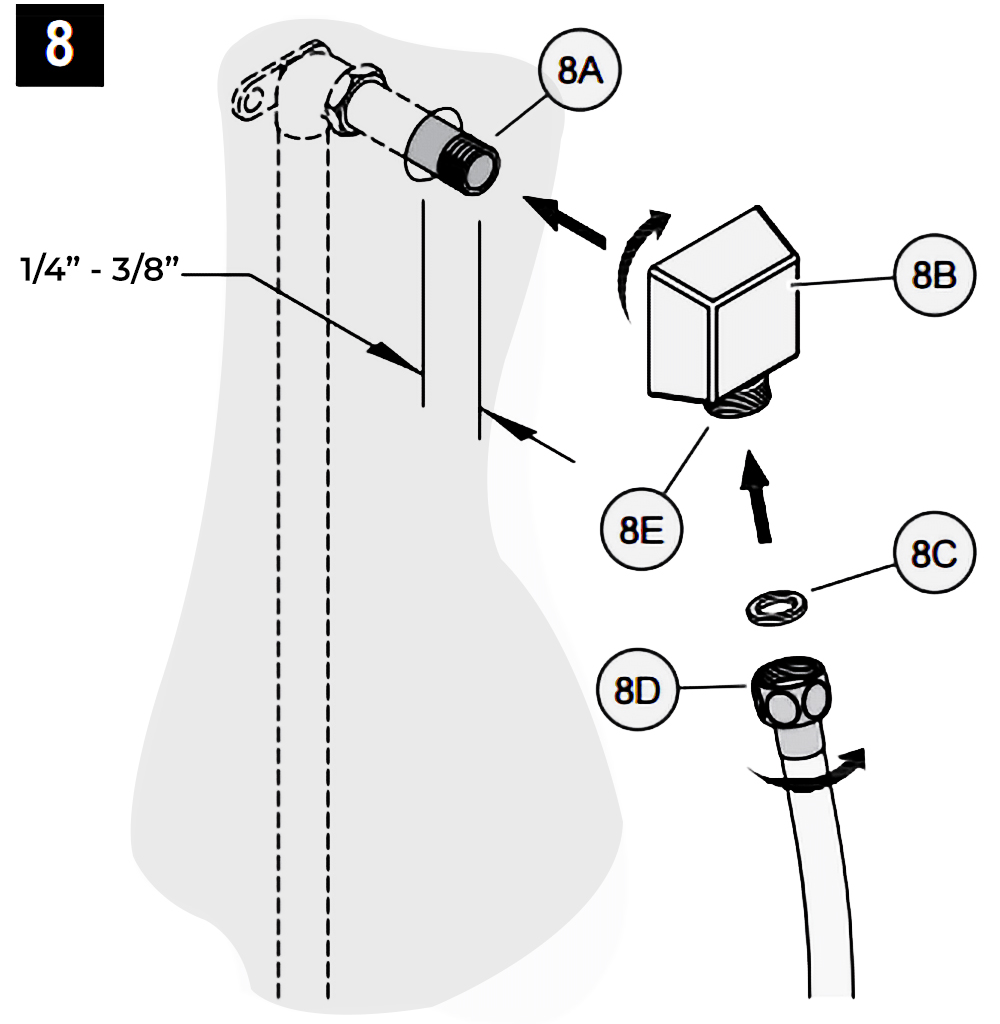
    8. Drop Elbow & Hose Installation
    Apply PTFE plumbers tape on both ends of Pipe Nipple (8A) (not included). Screw Pipe Nipple (8A) into the elbow inside the wall. The Pipe Nipple (8A) is to project 1/4” – 3/4” from the finished wall. Screw Drop Elbow (8B) onto Pipe Nipple (8A) and tighten until Drop Elbow (8B) is property positioned and flush to the finished wall.
    Place Rubber Seal (8C) inside Hex Hose Fitting (8D). Connect Hex Hose Fitting (8D) into Drop Elbow Outlet (8E) by turning Hex Hose Fitting (8D).


    9. Unit Start Up
    Turn on hot and cold water supplies, and check al connections for leaks.


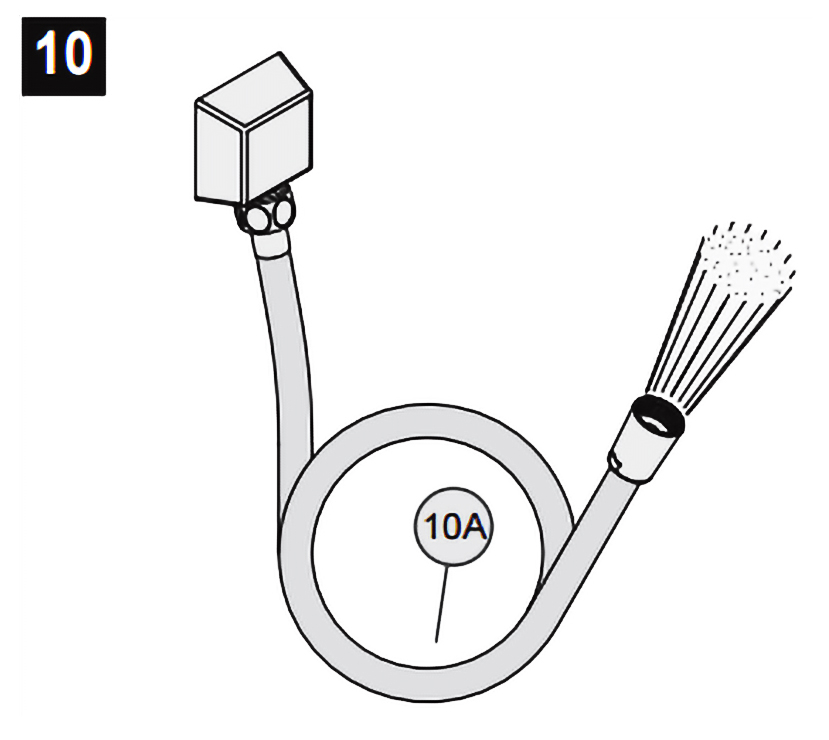
    10. Final Flushing
    For final flushing, turn valve on and allow water to run through the Hose (10A) for several minutes. Allow water to run for several minutes until all foreign matter clears the line.


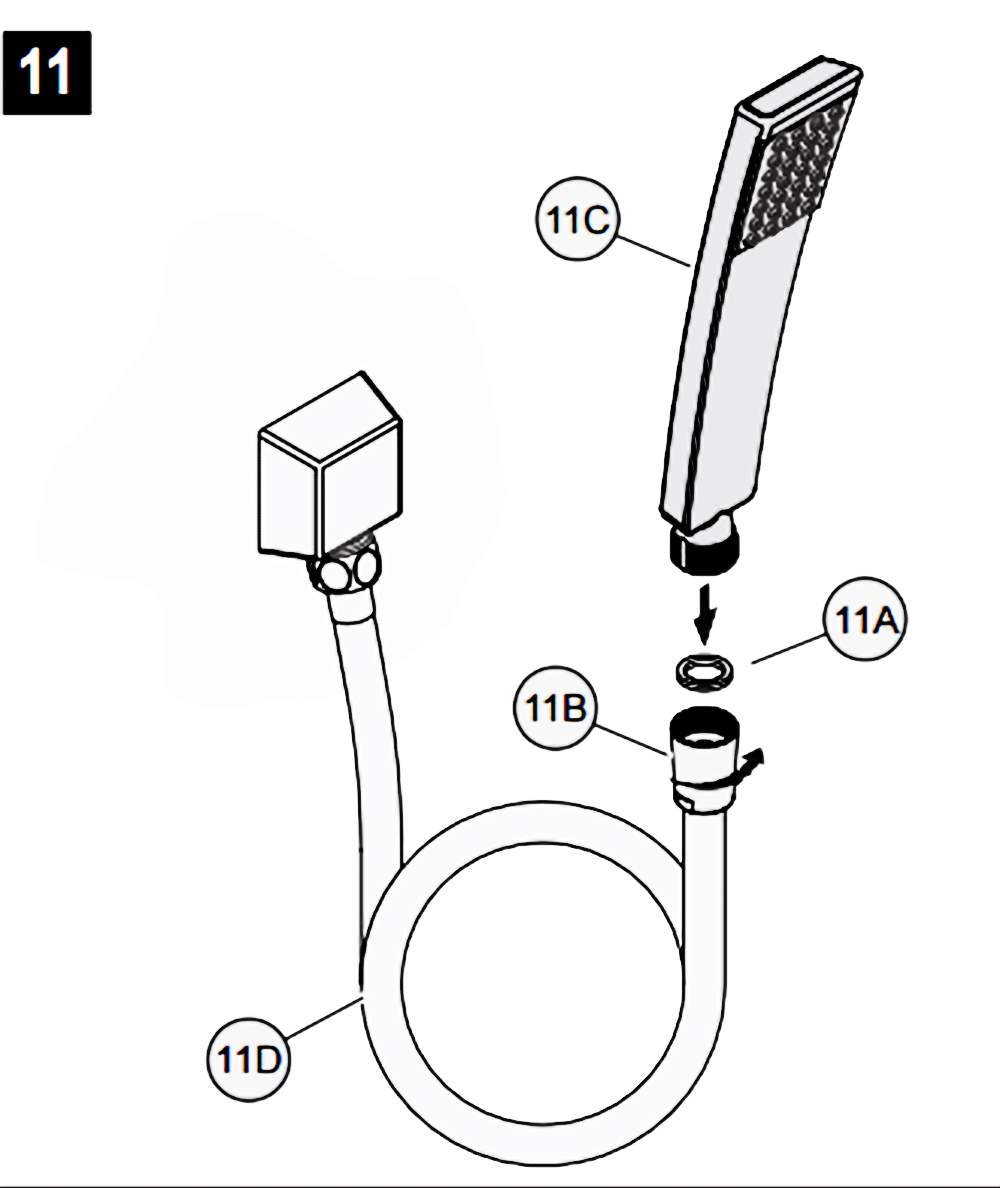
    11. Shower Arm Installation
    Place Rubber Seal (11A) inside Tapered Hose Fitting (11B). Conned Hand Shower (11C) to Hose (11D) by turning Tapered Hose Fitting (118) clockwise.

    Waring: Make sure Hand Shower (11C) is securely tightened to Hose (11D).


    The installation and illustrations provided are for informational purposes only.

    For detailed and accurate installation instructions, please refer to the

    product specifications or the corresponding BIM file.


    Luxury Showers

    Experience unparalleled luxury and rejuvenation with our designer shower.

    Luxury Bathroom Faucet

    Advanced technology with customizable water pressure and temperature.

    Unique Designs Showers

    Revitalize with our opulent showers for ultimate indulgence.