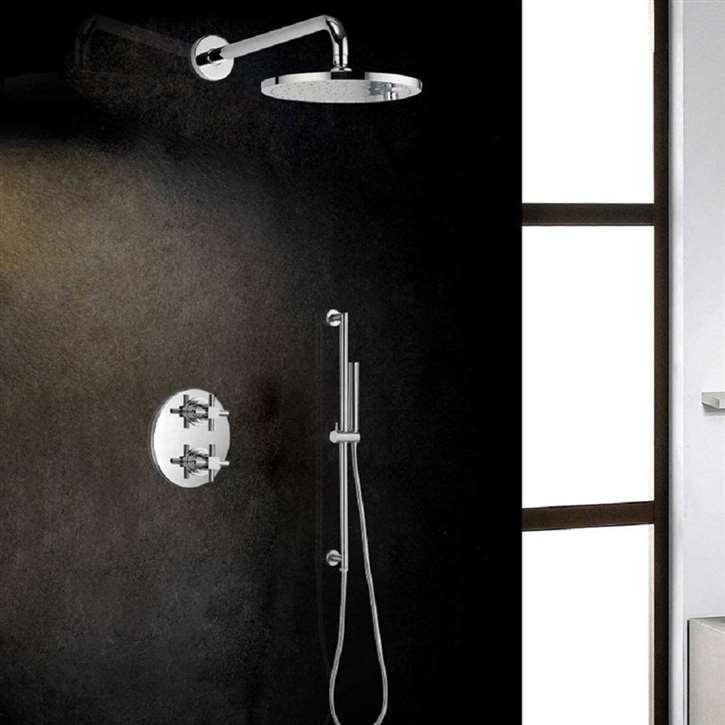
Fontana Lima Superior Quality Chrome Finish Thermostatic Round Rainfall Showerhead
This Lima Superior quality bathroom brass thermostatic concealed rain shower head round shower provides a luxurious showering experience and is the perfect complement to any modern bathroom. The modern design handheld shower, and an easy-to-use mixer valve, both made from high-quality solid brass. Dual handle bathroom shower head in chrome finish is the perfect complement to today's modern home. Chrome finish has rapidly become one of the trendiest finishes across décor styles in the bathroom. Be sure, when it comes to a new bathroom shower, FontanaShowers is offering shape, finish, and styles you're looking for.
Fontana Lima Superior Quality Chrome Finish Thermostatic Round Rainfall Showerhead Finish Feature:
|
Brand Name: FontanaShowers
Model Number: FS9566
Surface Finish: Chrome
Number of Handles: Dual Handle
Bath & Shower Faucet Type: In-Wall B & S Faucets
Style: Contemporary
Feature:: Metered Faucets, Thermostatic Faucets
Valve Core Material: Ceramic
Material: Brass Main Body
Type: Bath & Shower Faucets
Hot & Cold: Yes
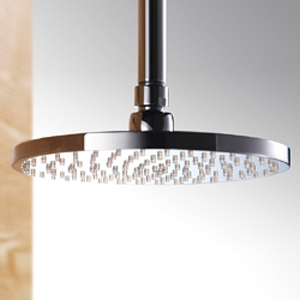
Shower Head Shape: Round
Number of Handles: 2 Cross Handles
|
|
FontanaShowers® Product Warranty Information 
|
|
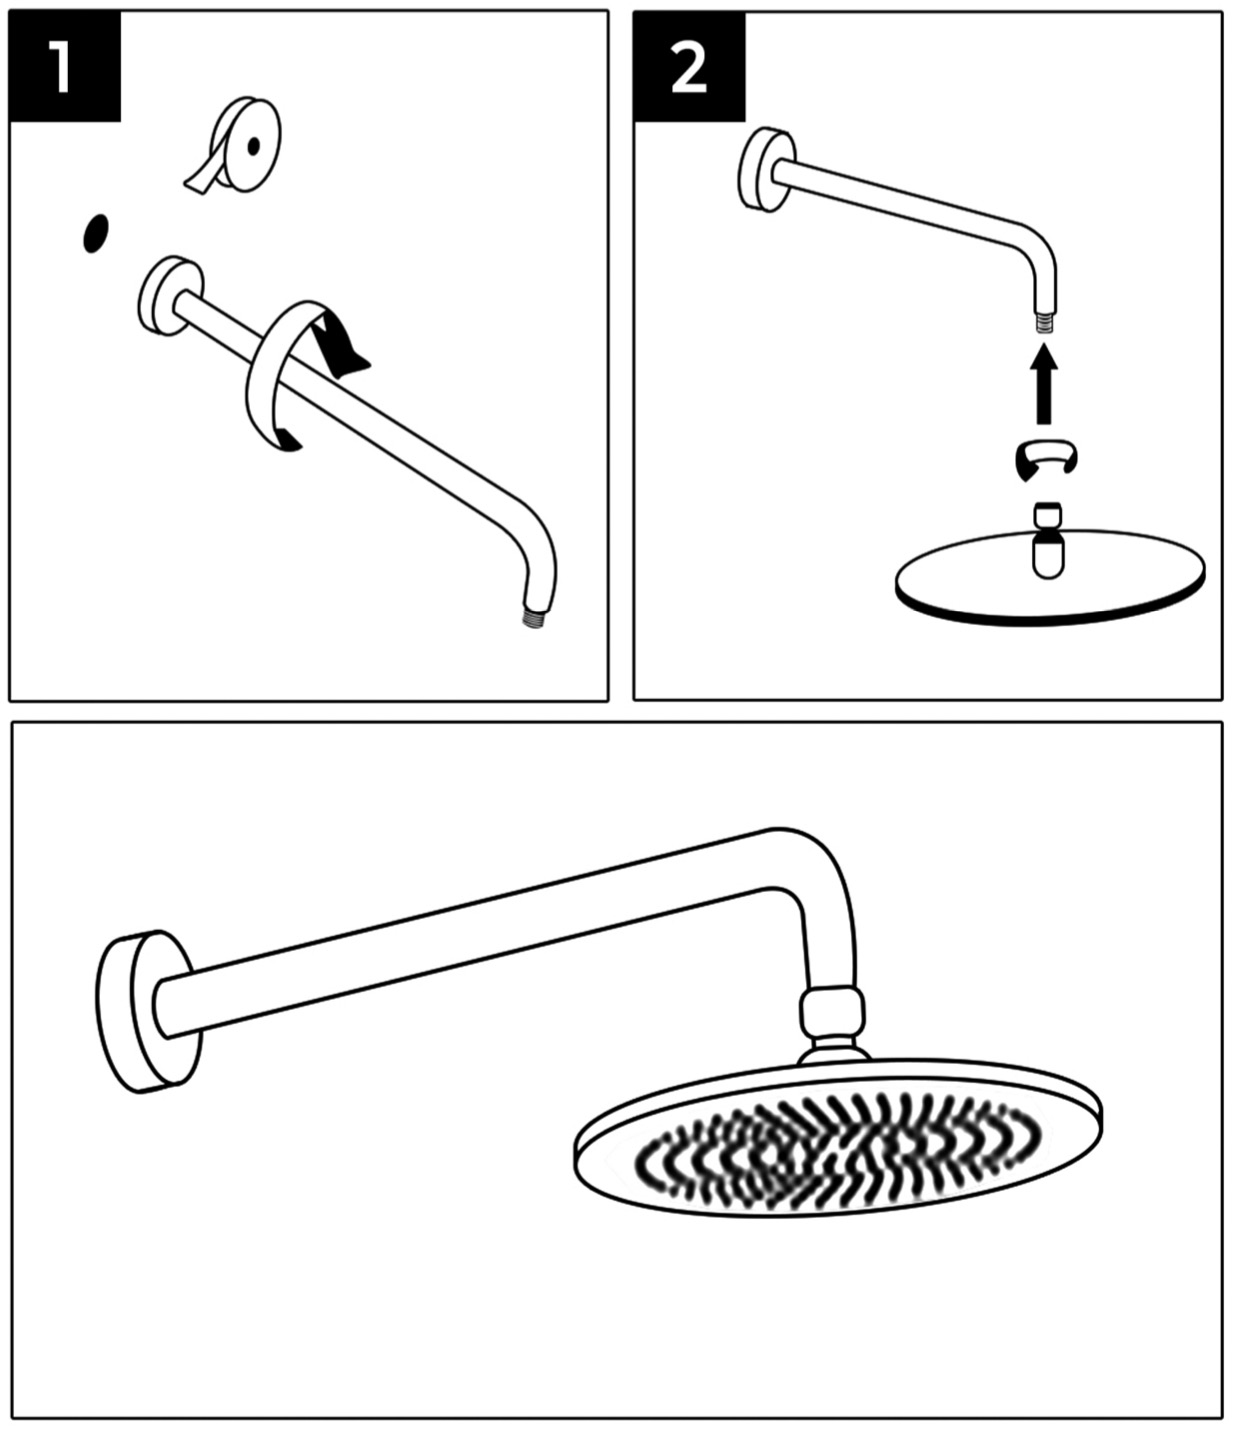
- Use your hands counterclockwise to unscrew the old showerhead and removed it.
- Take out the showerhead, make sure the shower filter is placed in the connector.
- Ensure the showerhead full horizontal alignment wall mounted shower arm thread.
- Use your hands clockwise to tighten showerhead.
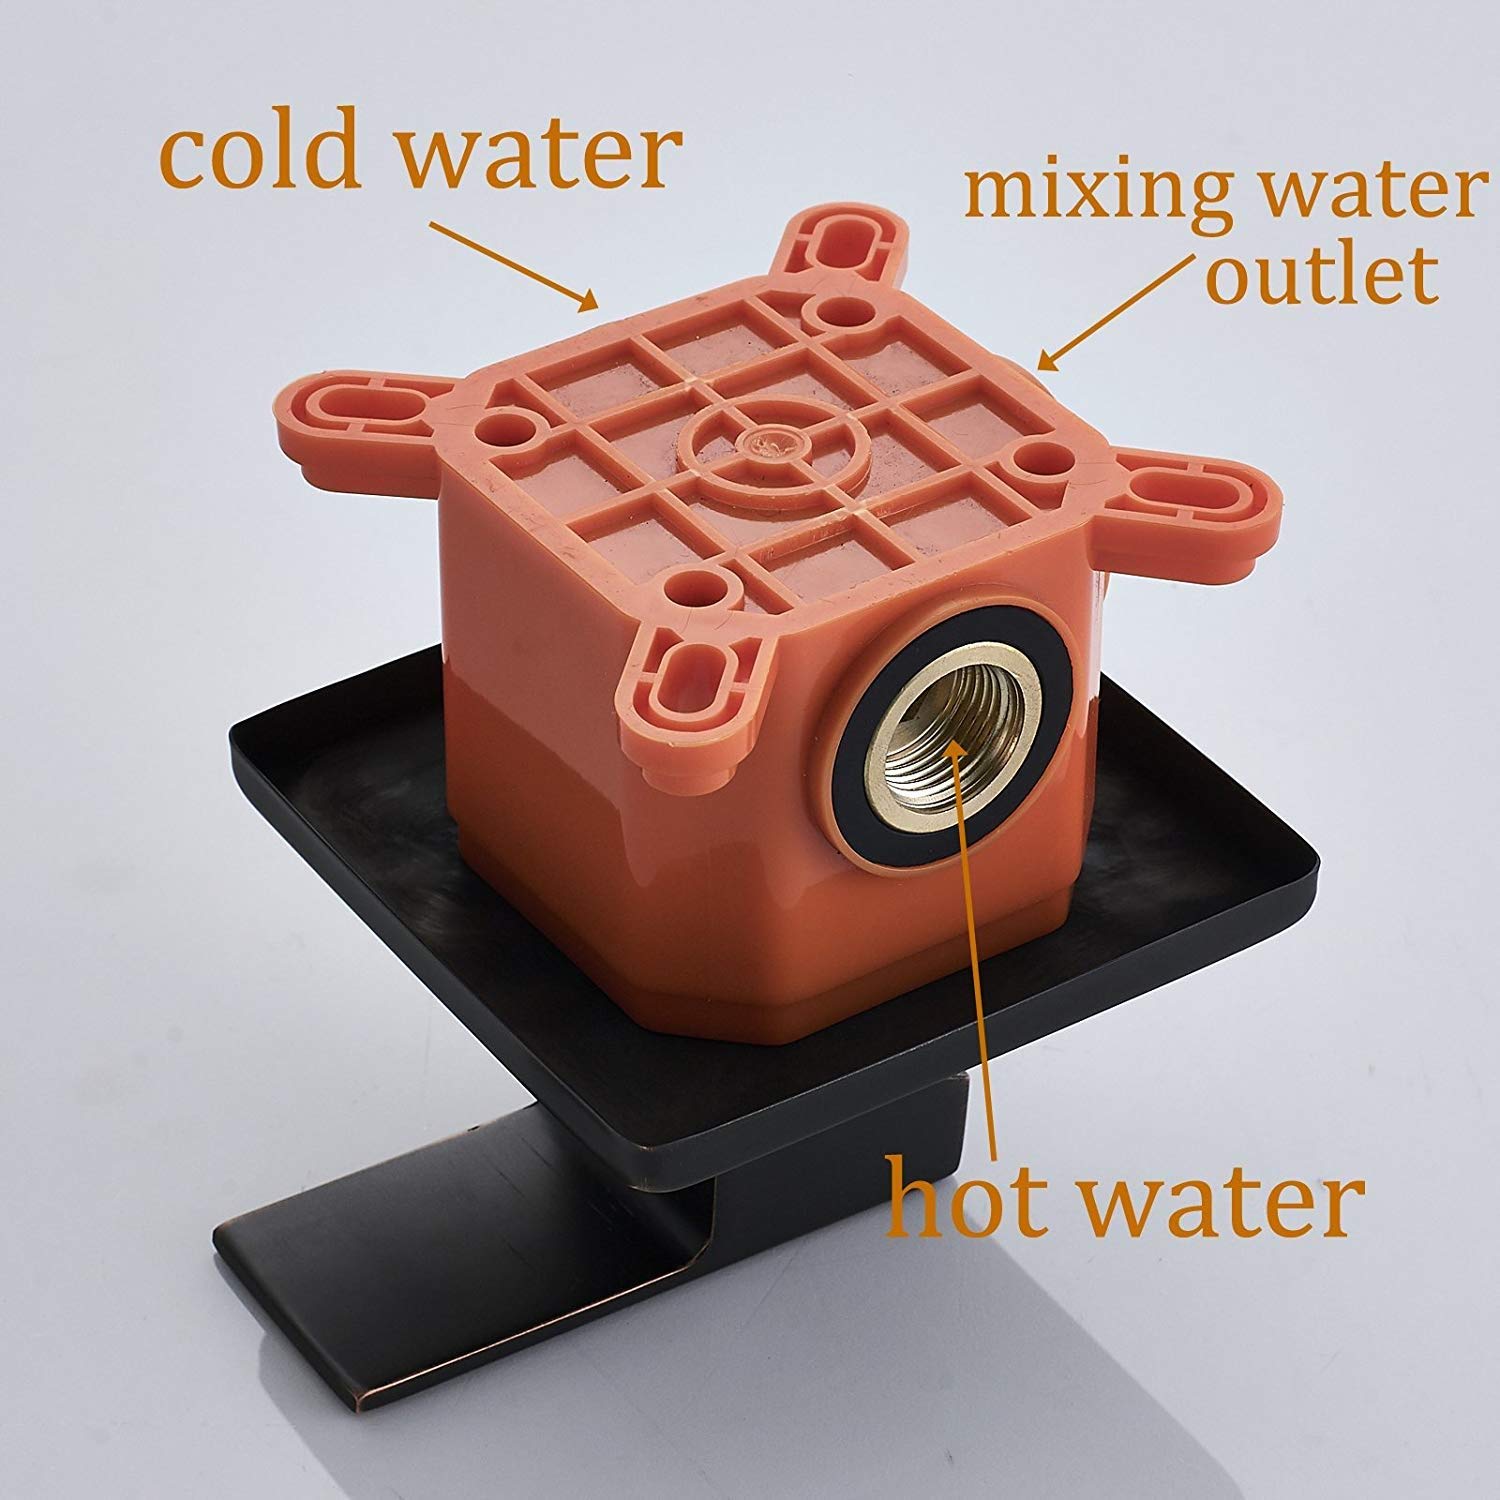
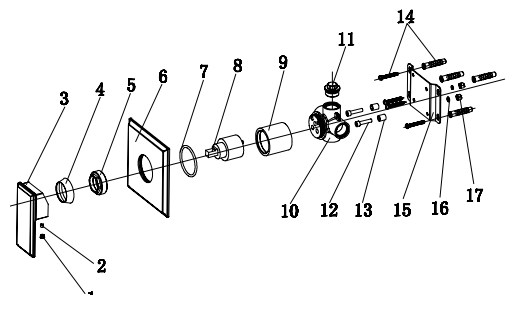
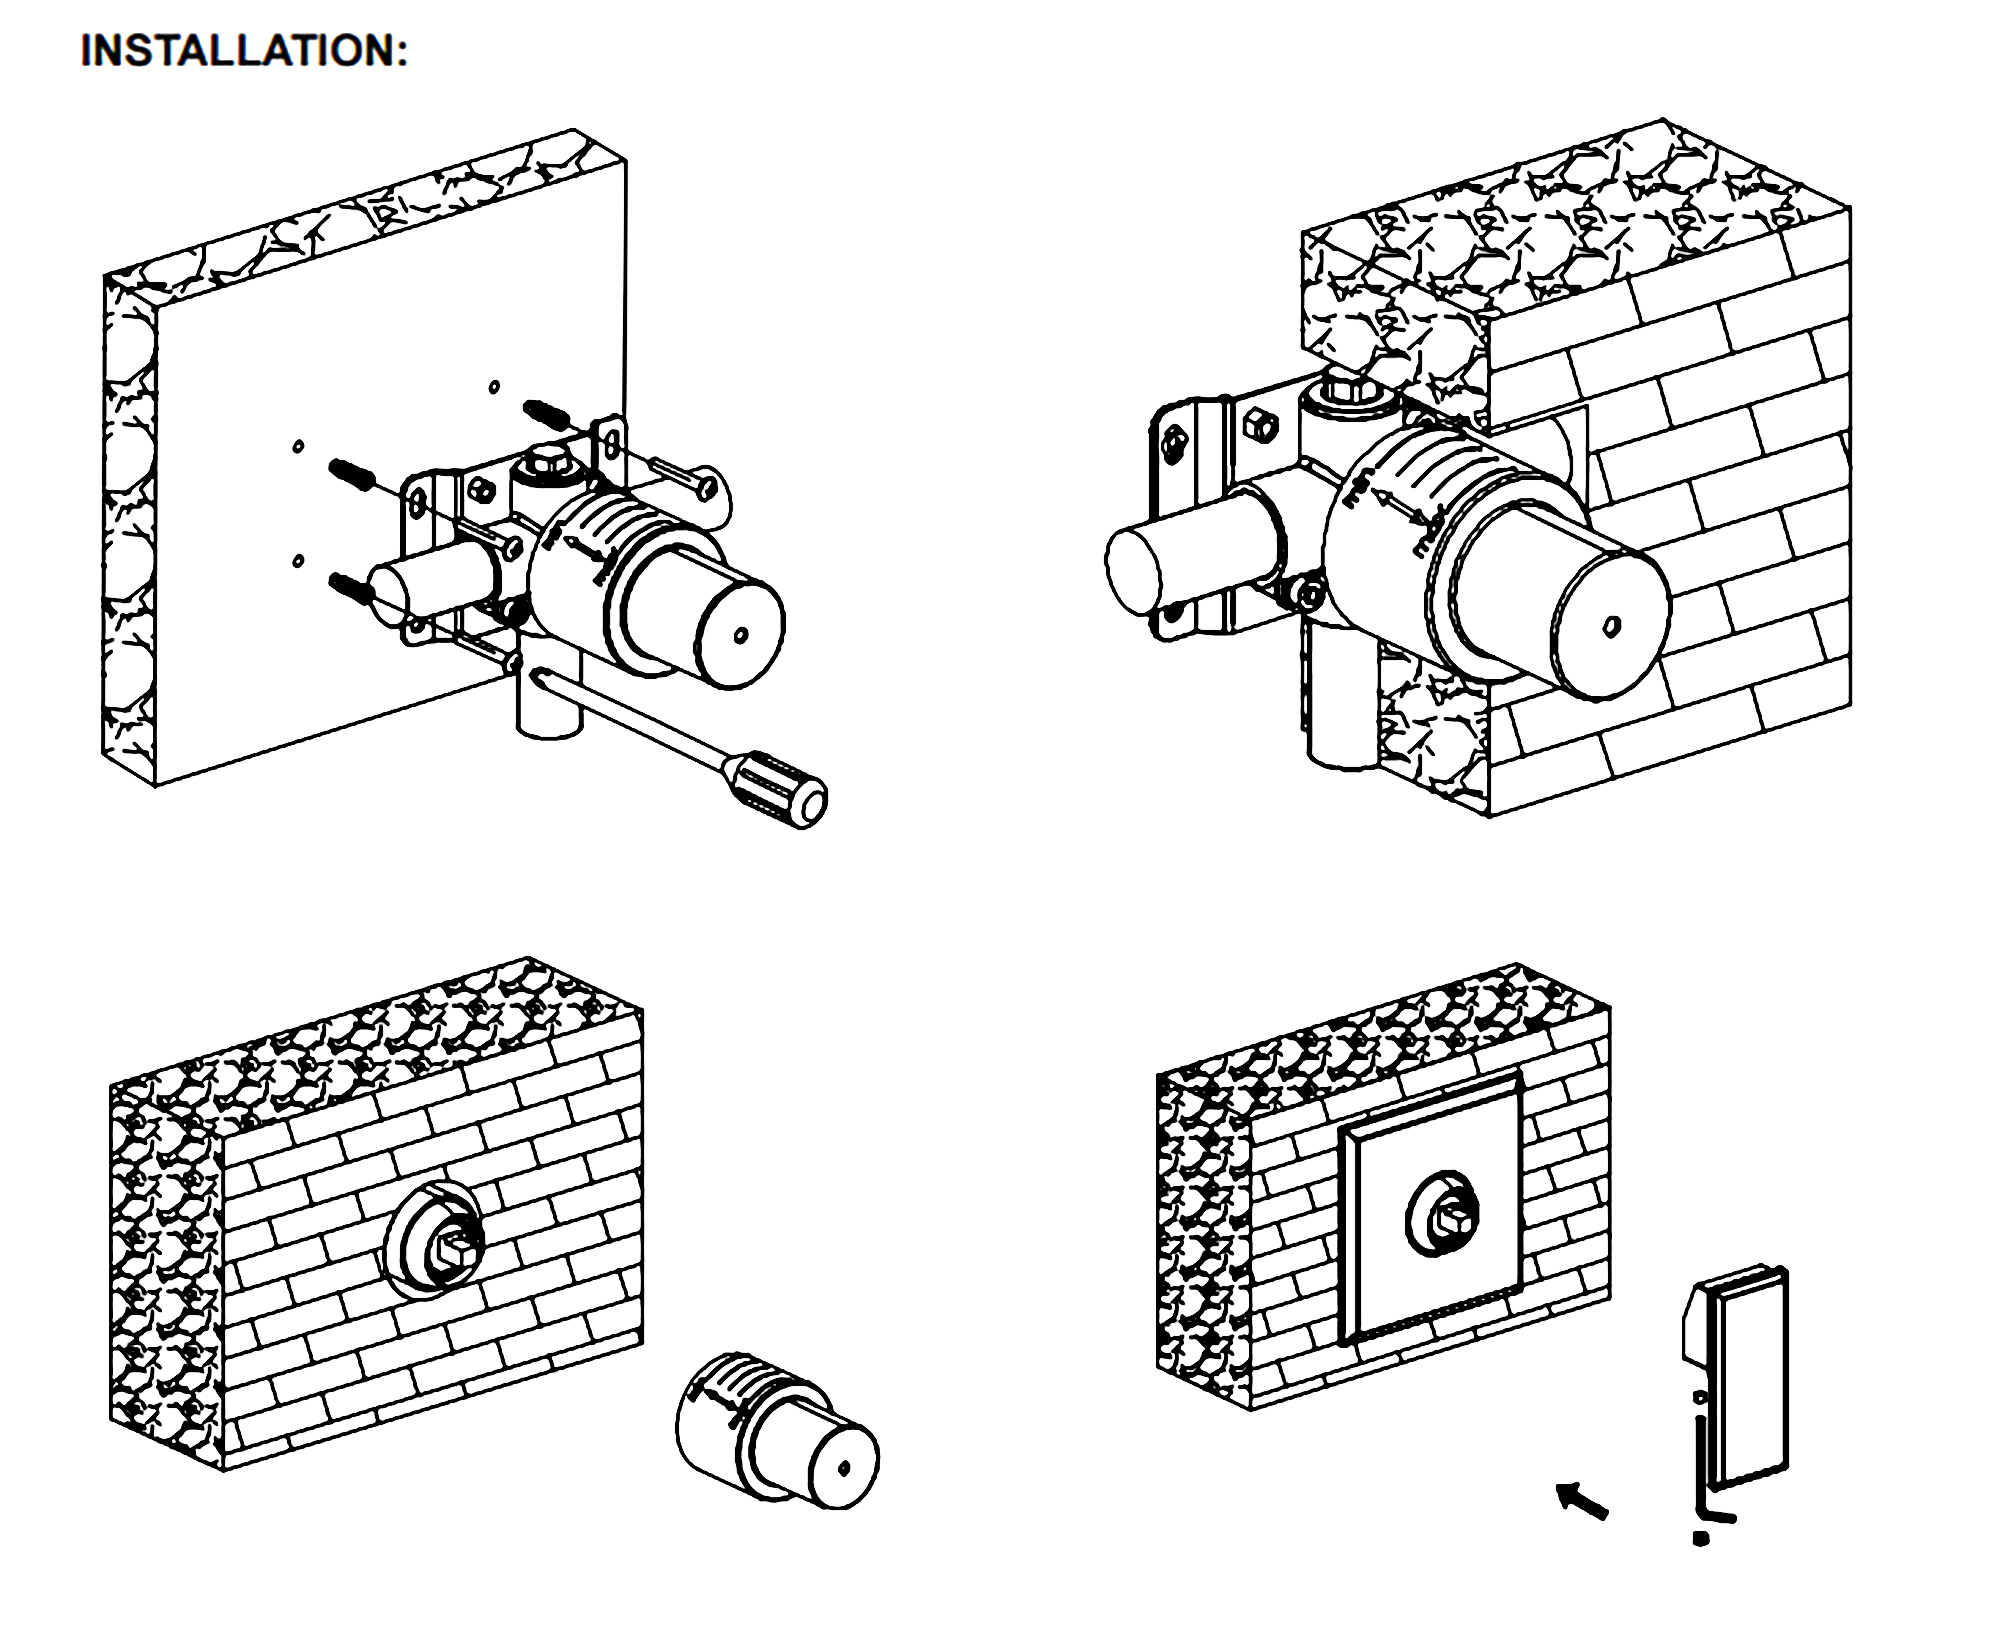
1. Install the valve body. Wrap the threaded portion of the joints in Teflon tape and connect the water inlet and outlet.
2. Put the protective cover on the valve body and finish the shower wall.
3. When the finished wall is complete, remove the protective cover.
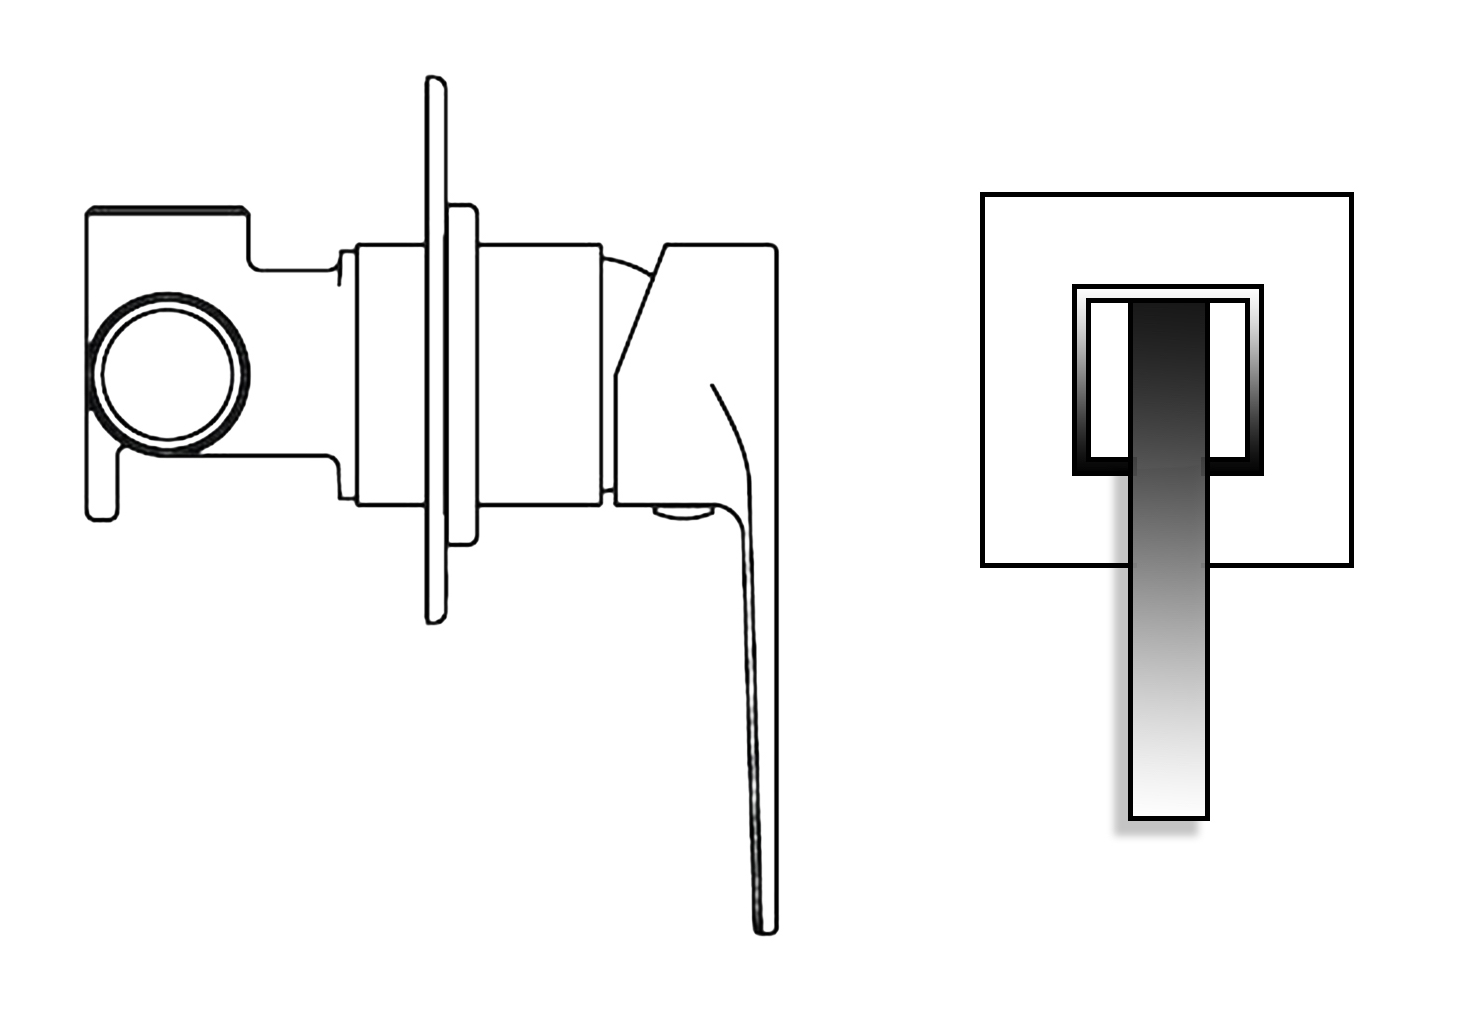
4. Install the escutcheon, and handle. Tighten the set screw with an Allen wrench to secure.
5. Attach the shower arm escutcheon to the shower arm. Wrap the threaded portions of the shower arm with Teflon tape and connect the arm to the shower inlet. Adjust the direction of the water flow as needed. Attach the rainfall shower head to the shower arm.
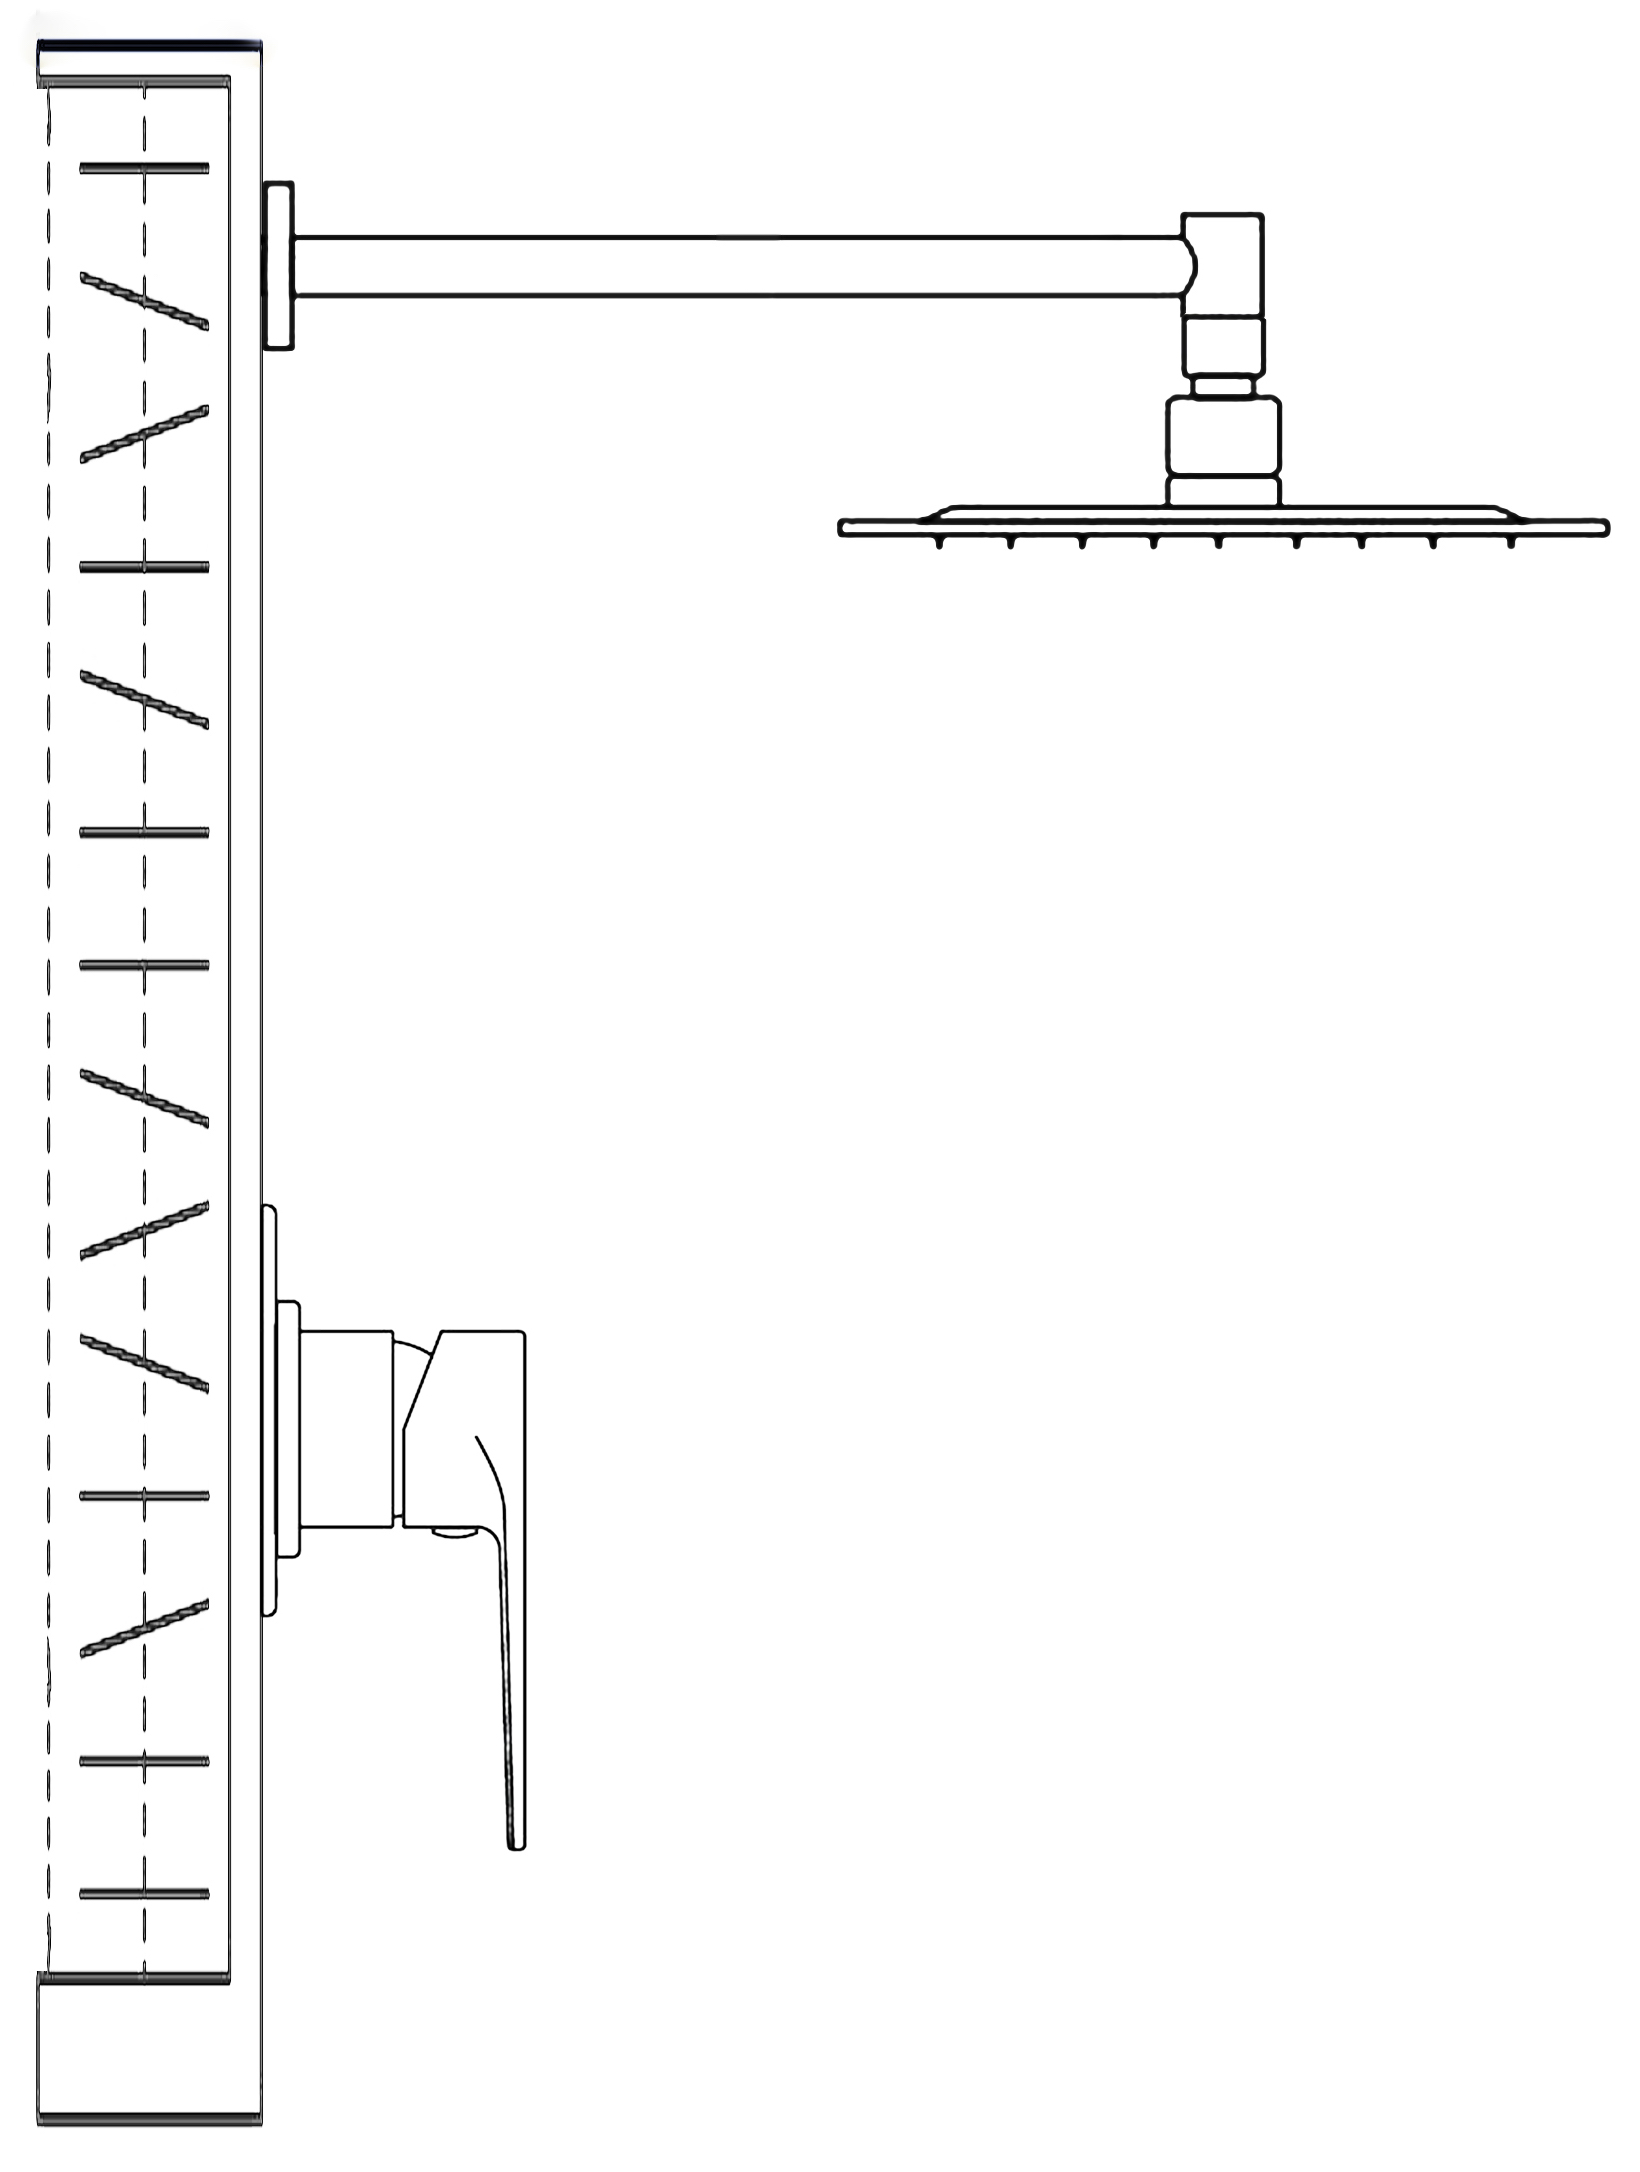 allation allation
Hand-Held Shower Instructions
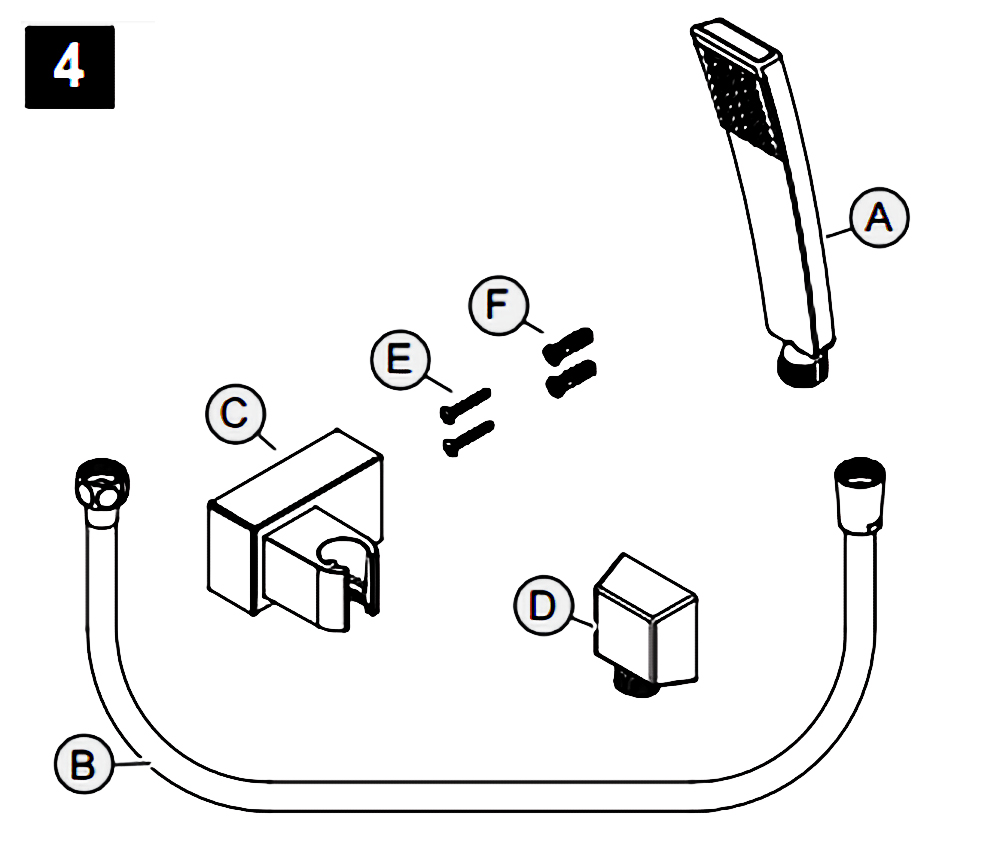
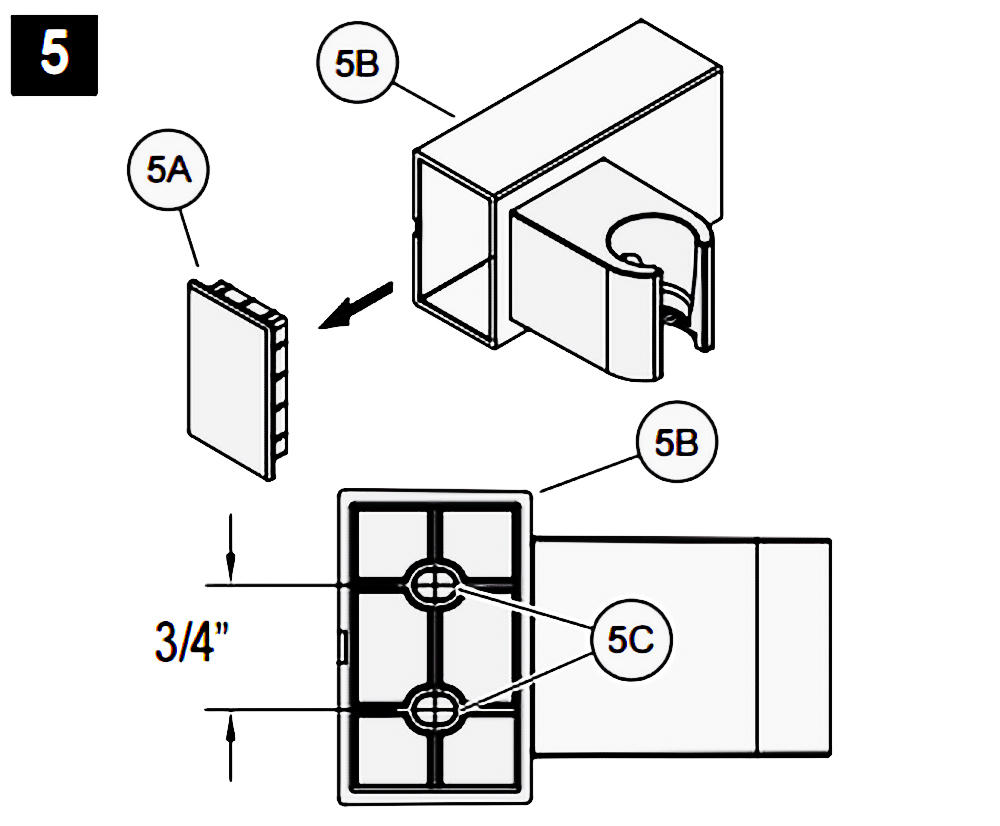
5. Hole Locations For Wall Mount
Remove Front Cover (5A) from Wall Mount (5B). Use Wall Mount Screw Holes (5C) to place the desired location. Using a punch or awl, tap the screw hole locations. Holes must be vertically aligned.
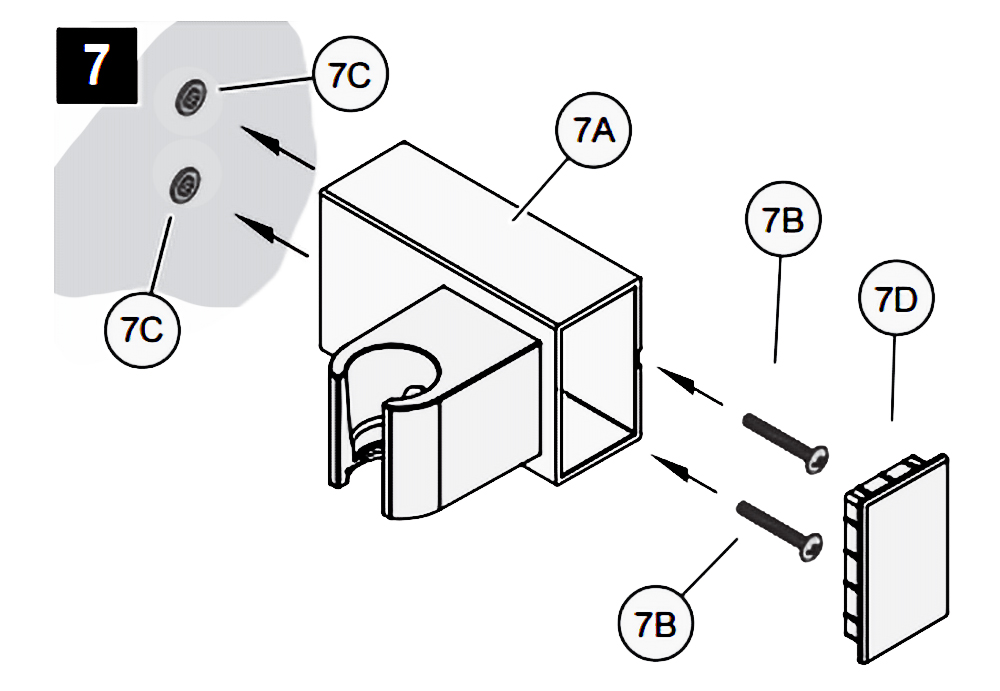
7. Wall Mount Installation
Place Wall Mount (7A) into wall and inset Mounting Screws (7B) through Wall Mount Holes (7C) and tighten until Wall Mount (7A) is flush with the wall. Do Not Over Tighten! Insert Front Cover (7D) into Wall Mount (7A).
 8. Drop Elbow & Hose Installation
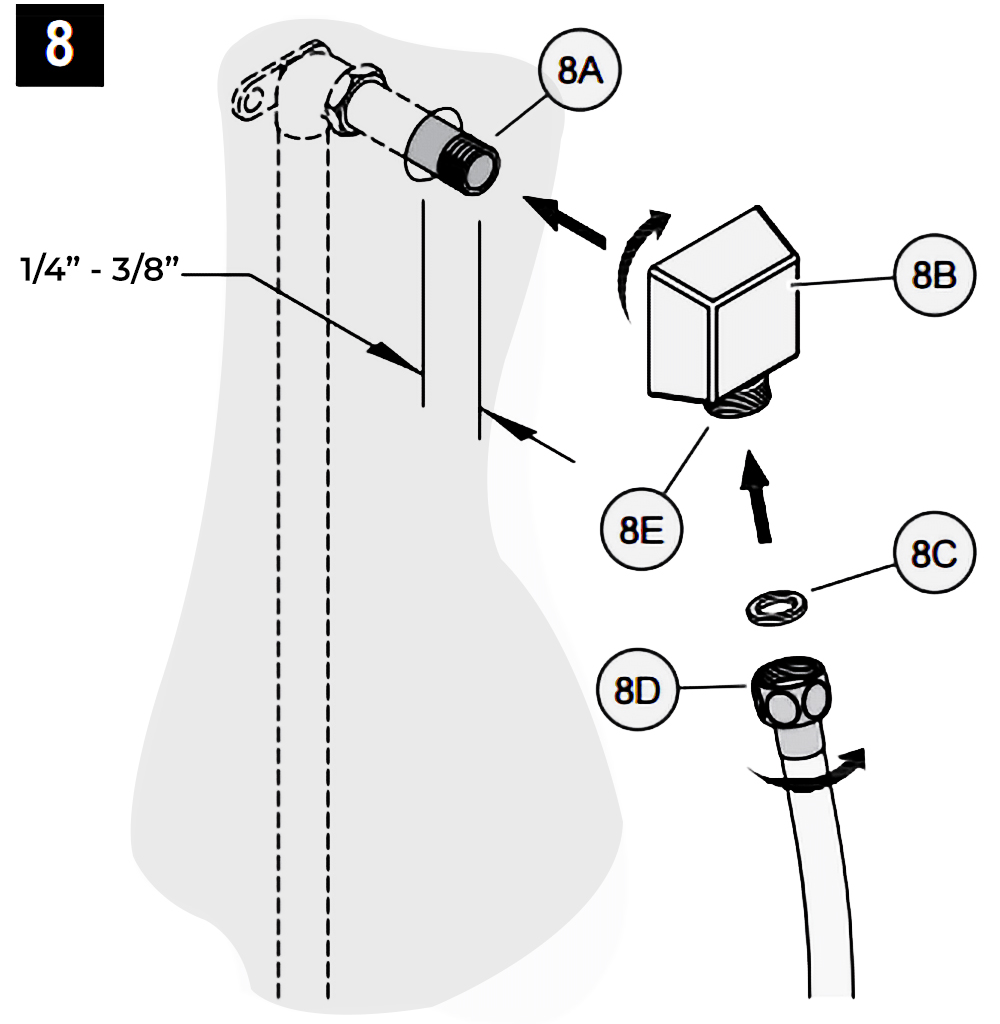
Apply PTFE plumbers tape on both ends of Pipe Nipple (8A) (not included). Screw Pipe Nipple (8A) into the elbow inside the wall. The Pipe Nipple (8A) is to project 1/4” – 3/4” from the finished wall. Screw Drop Elbow (8B) onto Pipe Nipple (8A) and tighten until Drop Elbow (8B) is property positioned and flush to the finished wall.
Place Rubber Seal (8C) inside Hex Hose Fitting (8D). Connect Hex Hose Fitting (8D) into Drop Elbow Outlet (8E) by turning Hex Hose Fitting (8D).
9. Unit Start Up
Turn on hot and cold water supplies, and check al connections for leaks.
 10. Final Flushing
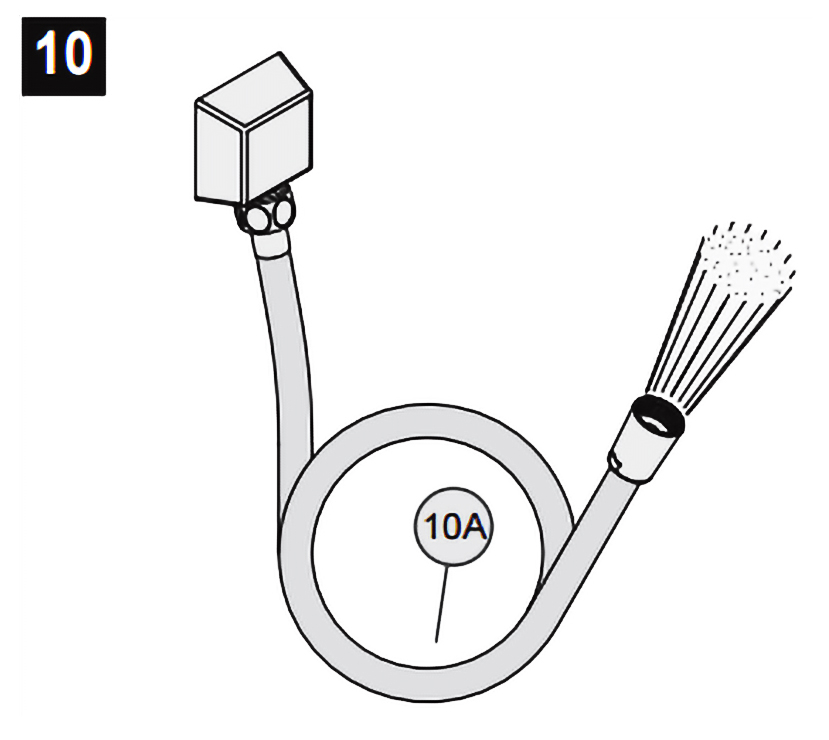
For final flushing, turn valve on and allow water to run through the Hose (10A) for several minutes. Allow water to run for several minutes until all foreign matter clears the line.
11. Shower Arm Installation
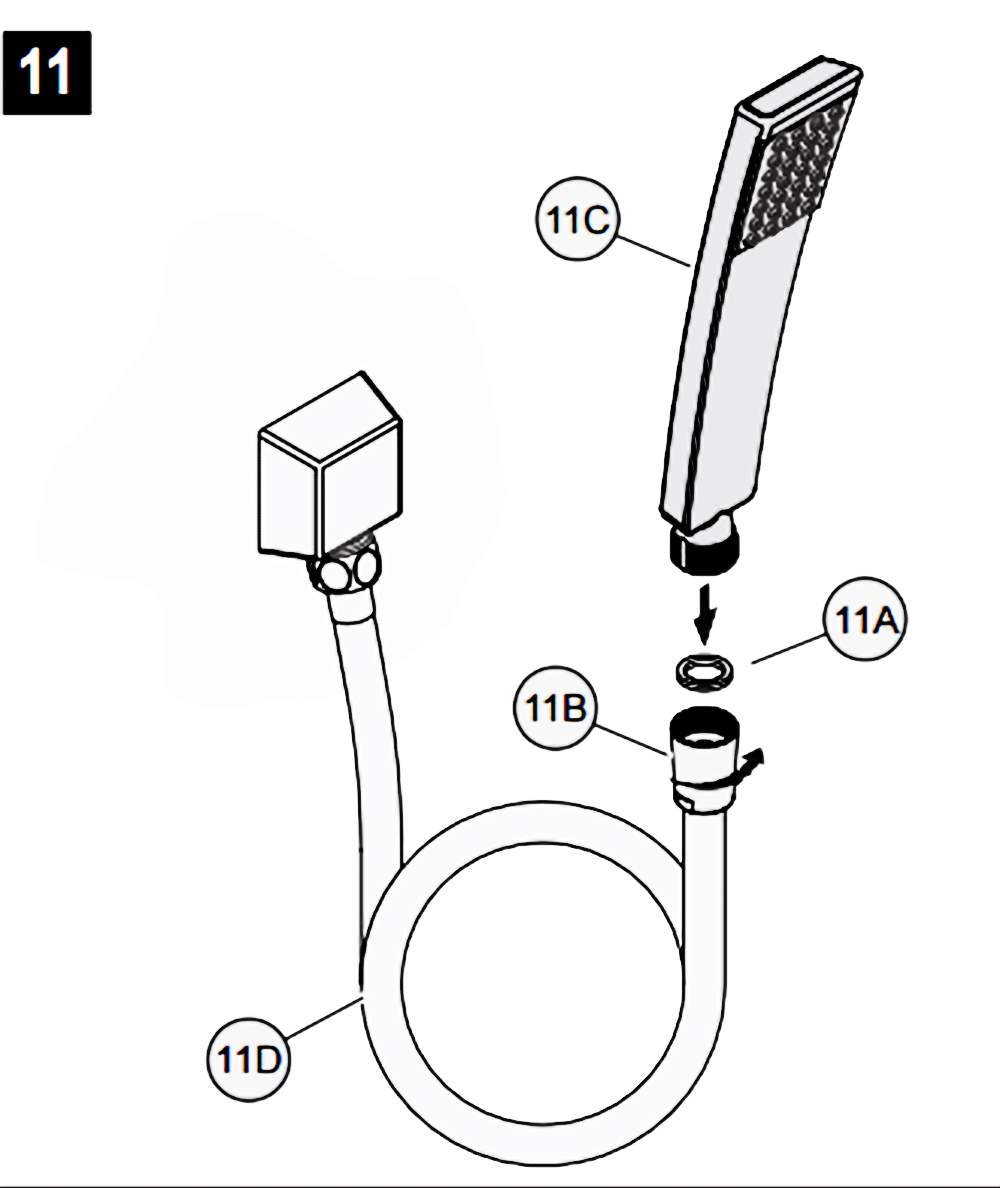
Place Rubber Seal (11A) inside Tapered Hose Fitting (11B). Conned Hand Shower (11C) to Hose (11D) by turning Tapered Hose Fitting (118) clockwise.
Waring: Make sure Hand Shower (11C) is securely tightened to Hose (11D).
|
|
Fontana Lima Chrome Shower Installation Resources
Complete the Lima Chrome Shower Installation
Coordinate the shower assembly, concealed controls, outlet placement, water performance and chrome-finish protection from rough-in through final commissioning.
Installation Guides
Rain Shower
Mixer and Valve
Chrome Finish
Other Outlets
Project Files
Fontana Lima Chrome Installation Questions
What should be completed before installing the chrome trim?
Complete pressure testing, flushing, waterproofing and finished-wall verification before unpacking and fitting the exposed components.
Review Shower Installation Details
How can the polished chrome finish be protected?
Avoid abrasive pads, aggressive chemicals and direct tool contact; use a soft cloth and approved cleaning products.
Open Chrome Care Guidance
What should final shower commissioning include?
Check outlet selection, water coverage, temperature stability, drainage and all exposed and concealed connection points.
Review Rain-Shower Requirements
Where is the main FontanaShowers installation hub?
Use the installation hub to reach related shower-head, mixer, handheld and rough-in guidance.
All FontanaShowers Installation Guides
The installation and illustrations provided are for informational purposes only.
For detailed and accurate installation instructions, please refer to the
product specifications or the corresponding BIM file.
Create a refined ambiance with our sophisticated luxury faucets
Savor every moment with our opulent faucet offerings.
Redefine your space with our luxurious and functional faucets.
|
|
|