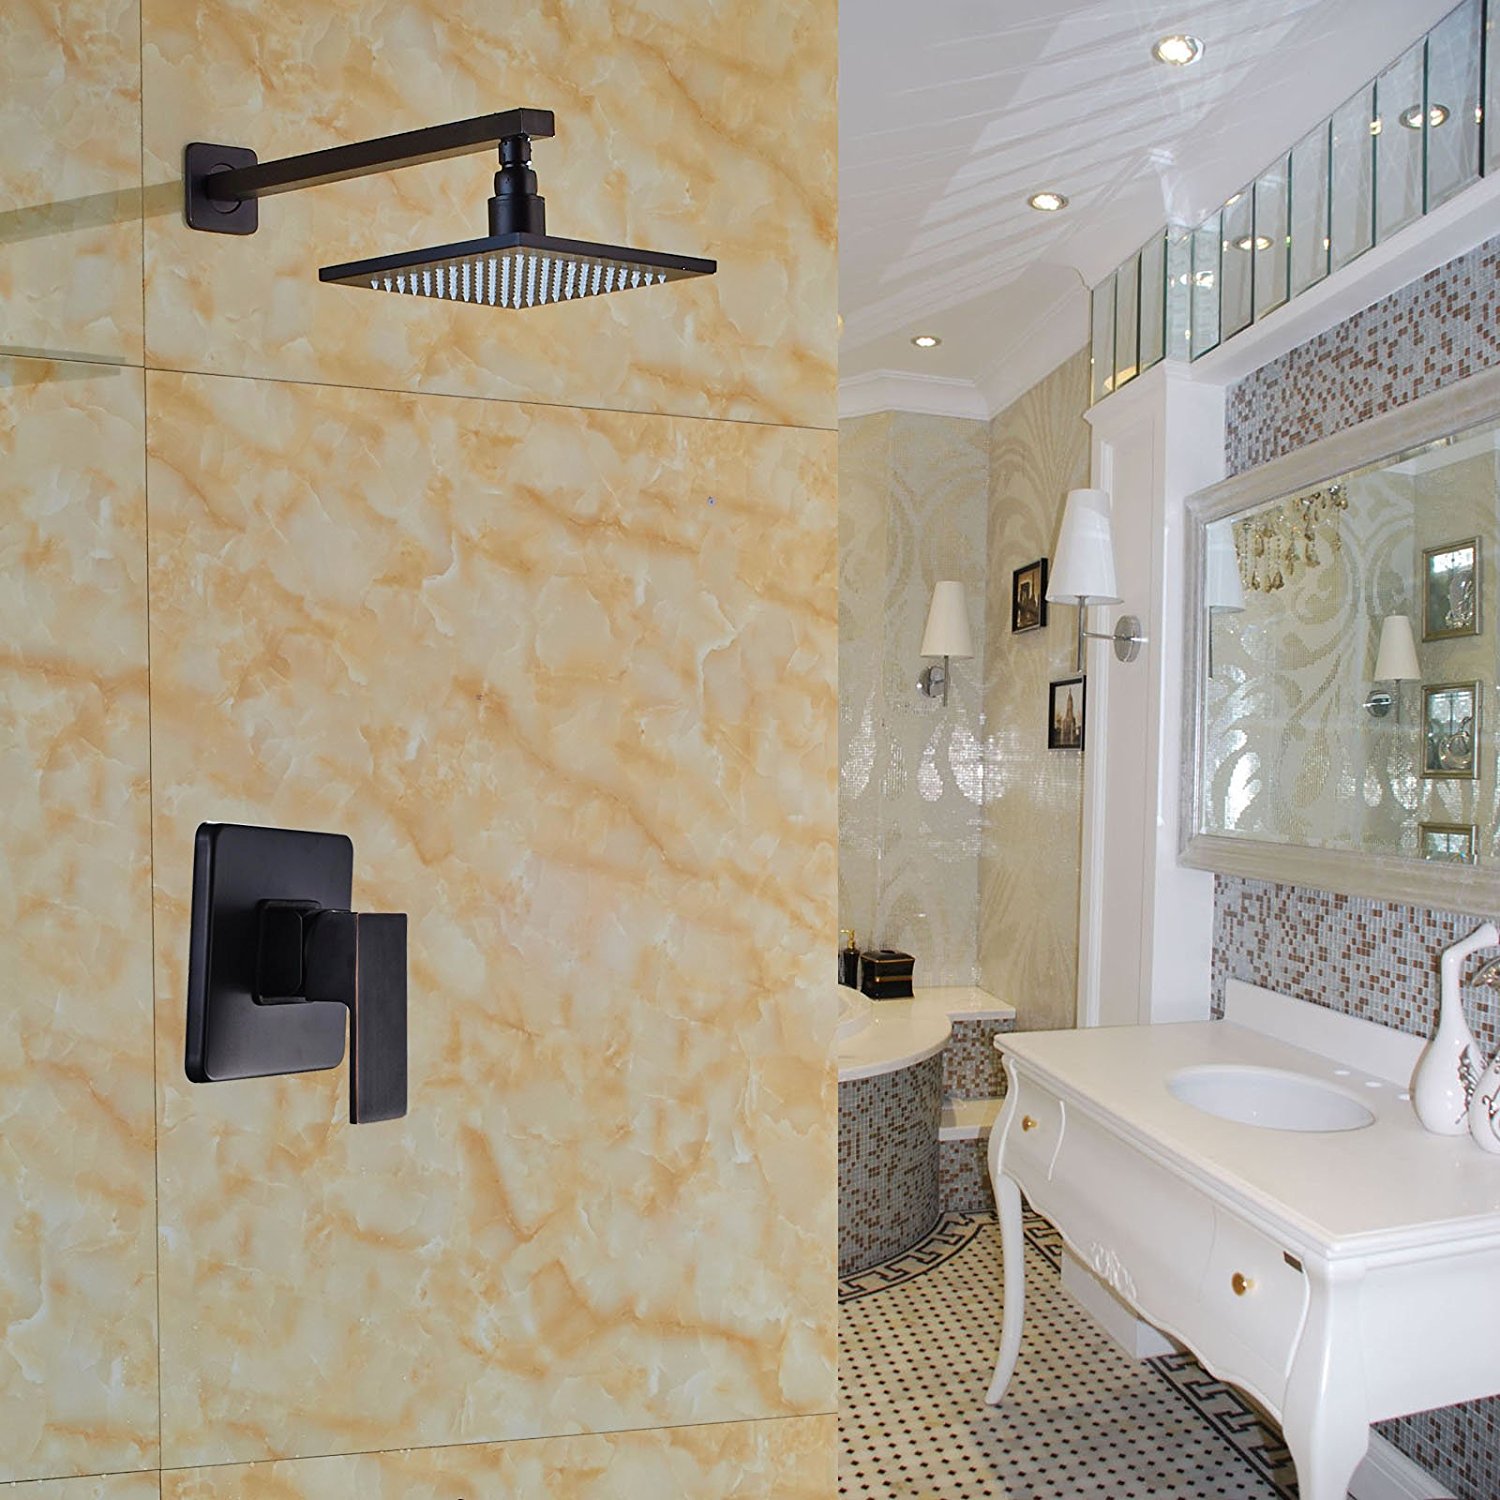
Seine-Maritime Wall Mounted Oil Rubbed Bronze Shower Set
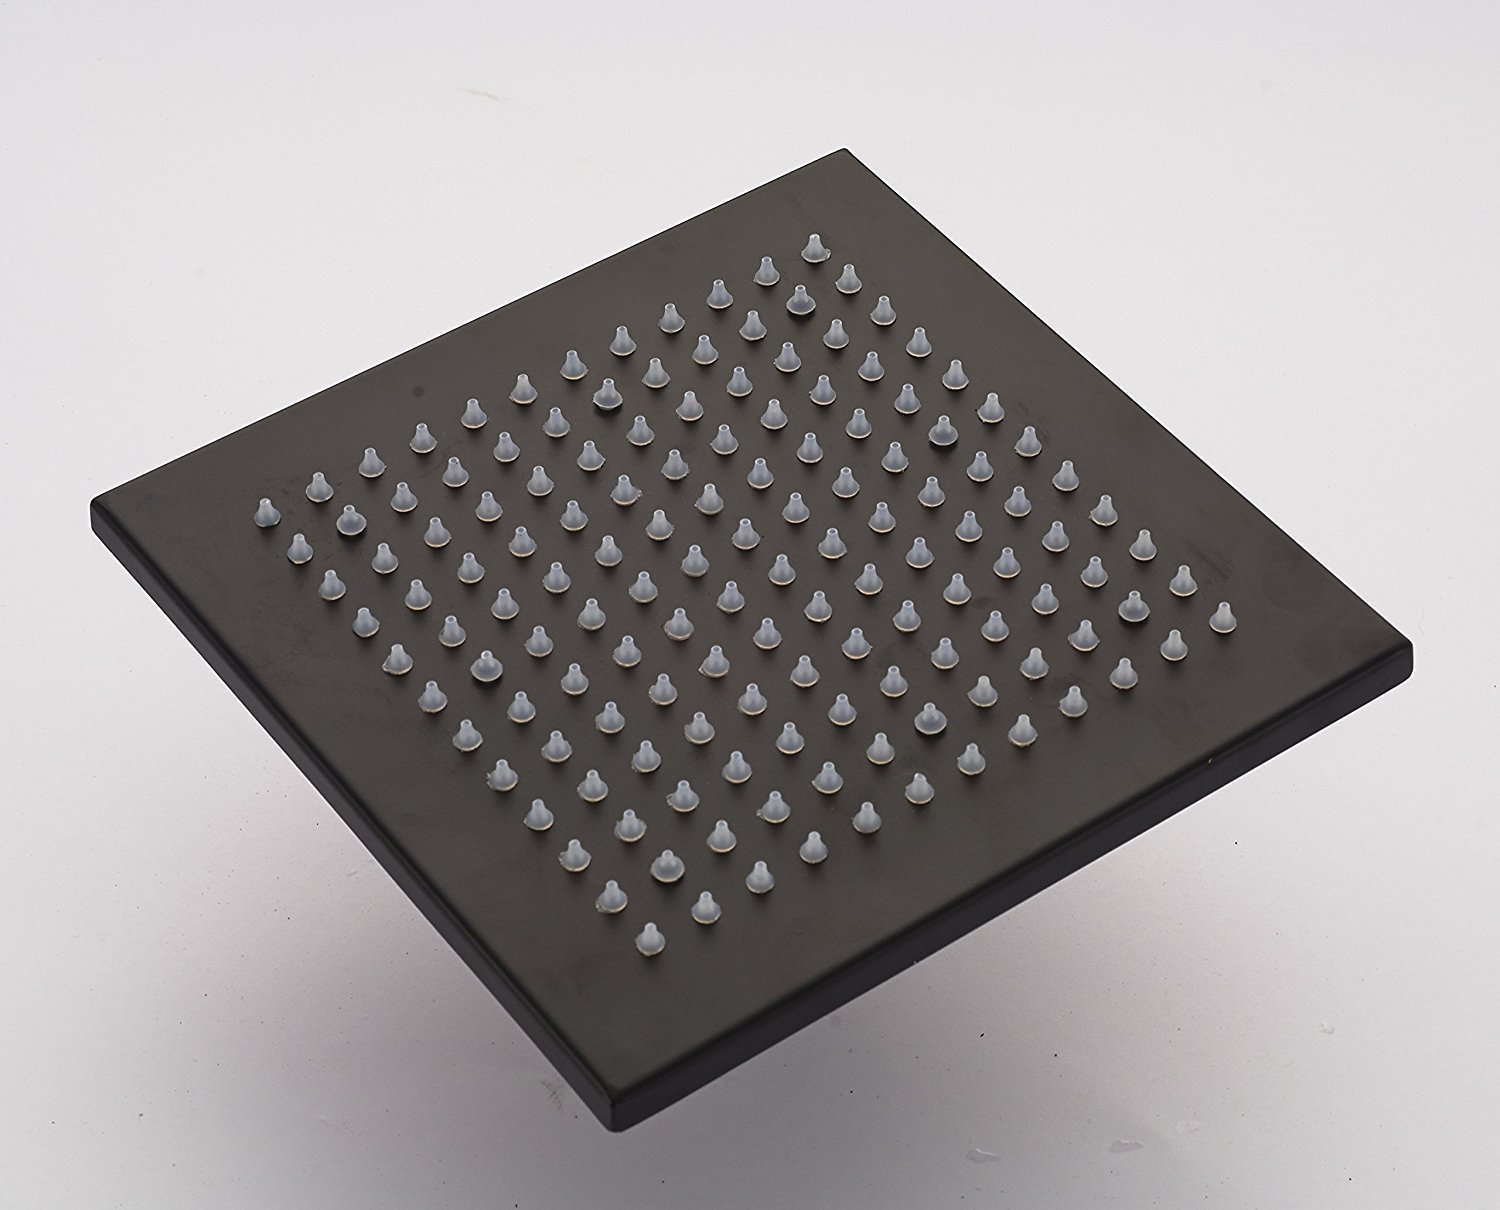
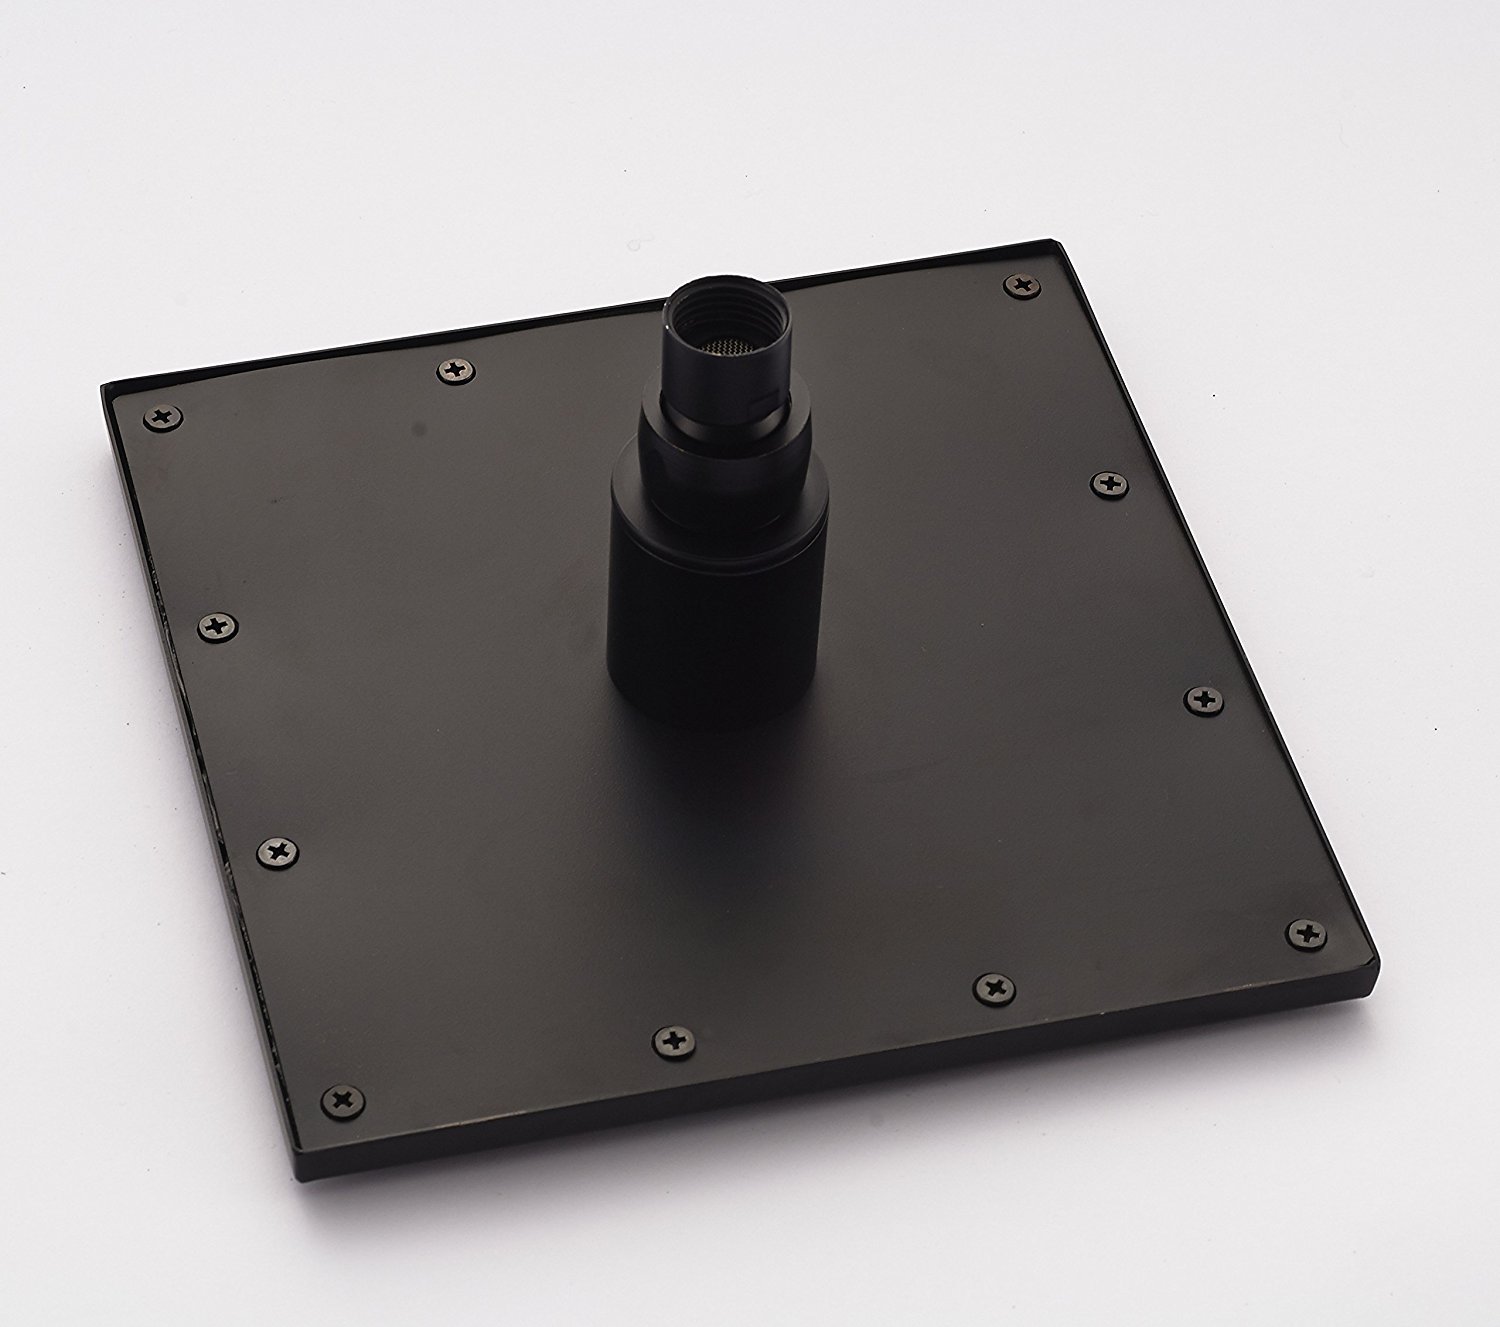
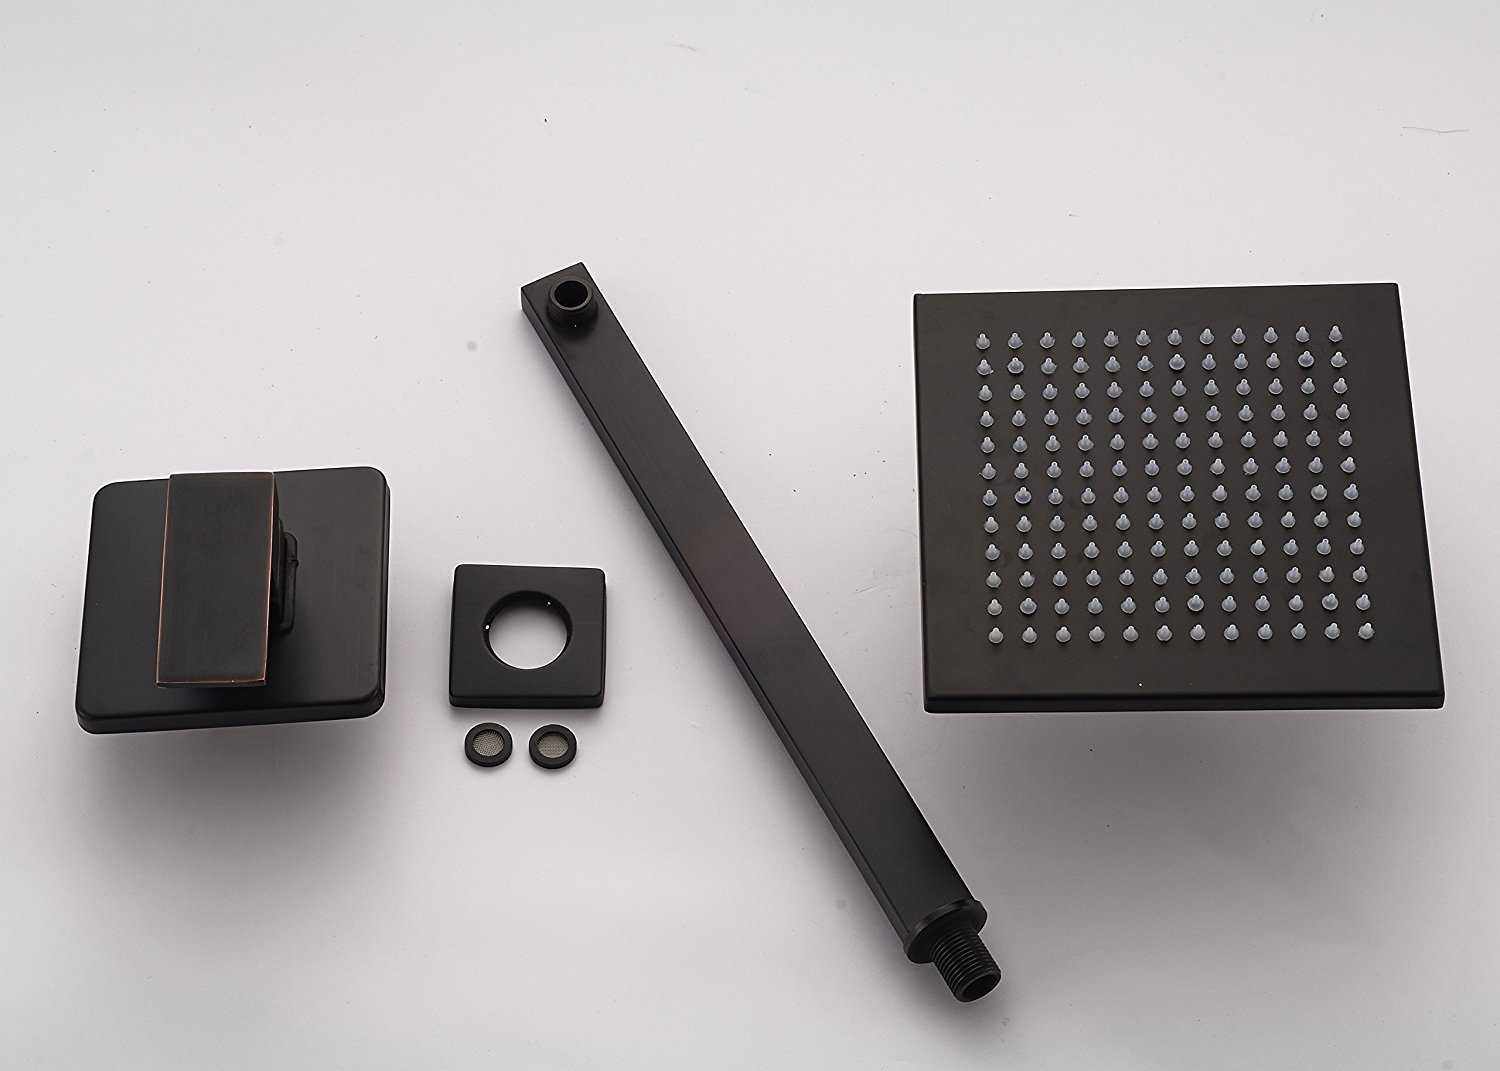
The Seine-Maritime is a wall mounted shower set, simple and classy. It comes in dark oil rubbed bronze finish, easy to install and to maintain. It has a single handle, with built-in hot and cold water mixer. The square rainfall shower head is available in four different sizes: 8, 10, 12 and 16 inch and the shower arm is included. Only the best quality materials have been used – the faucet and the shower head are made of solid brass and the valve comes with ceramic core material, for a long lasting life time. It comes complete with accessories and installation instructions.
Seine-Maritime Shower Set Specifications
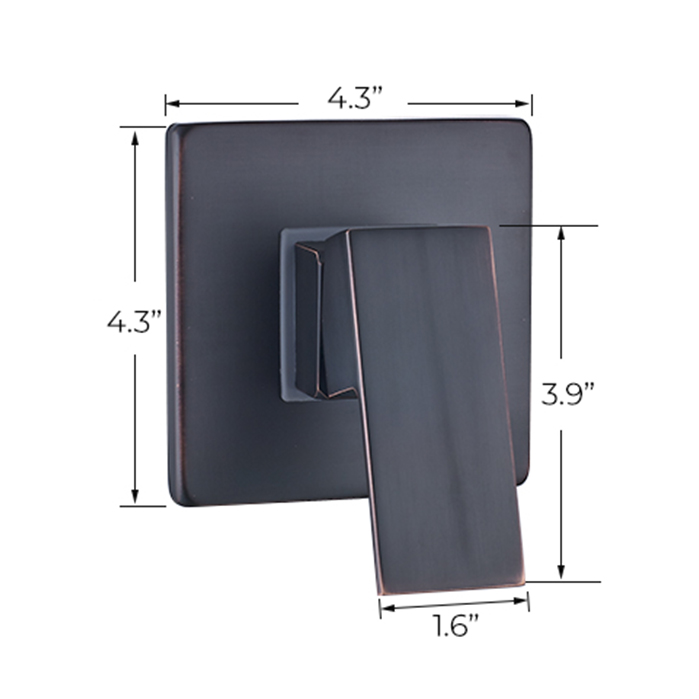
- Faucet Material : Solid Brass
- Finish : Oil Rubbed Bronze
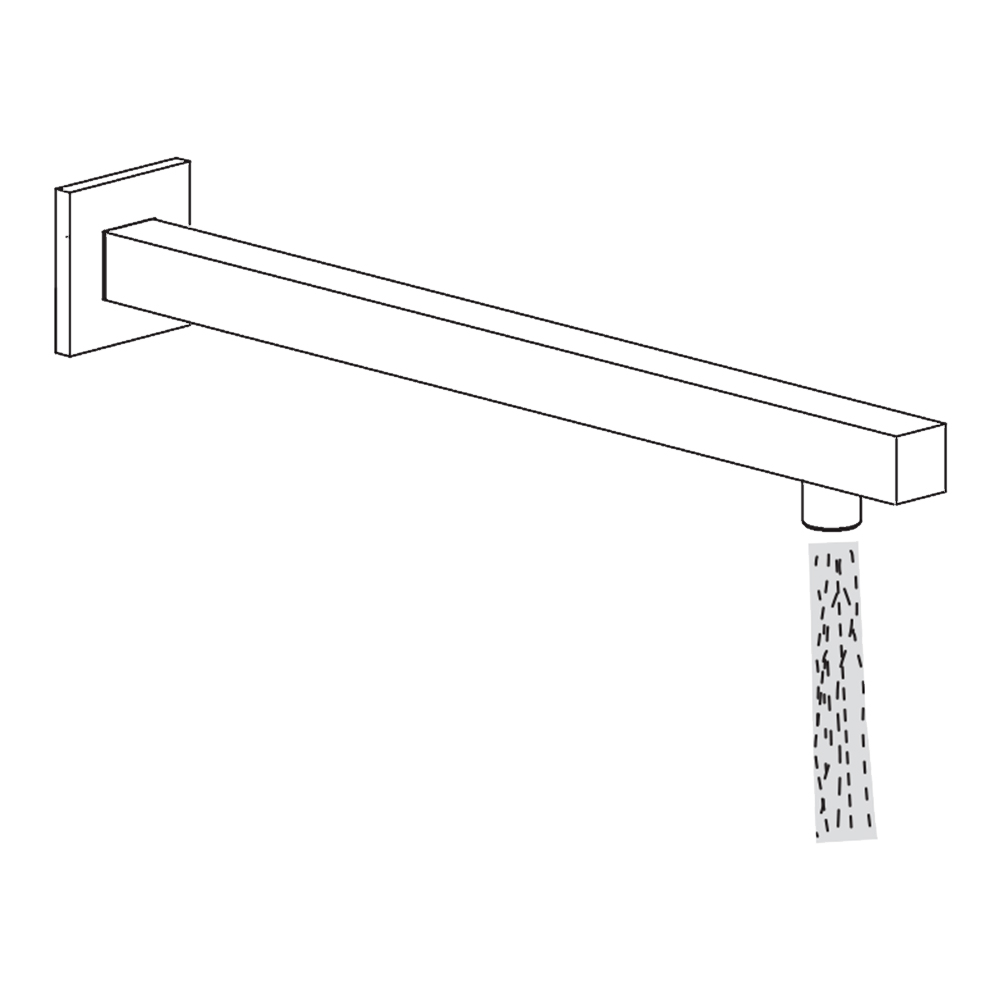
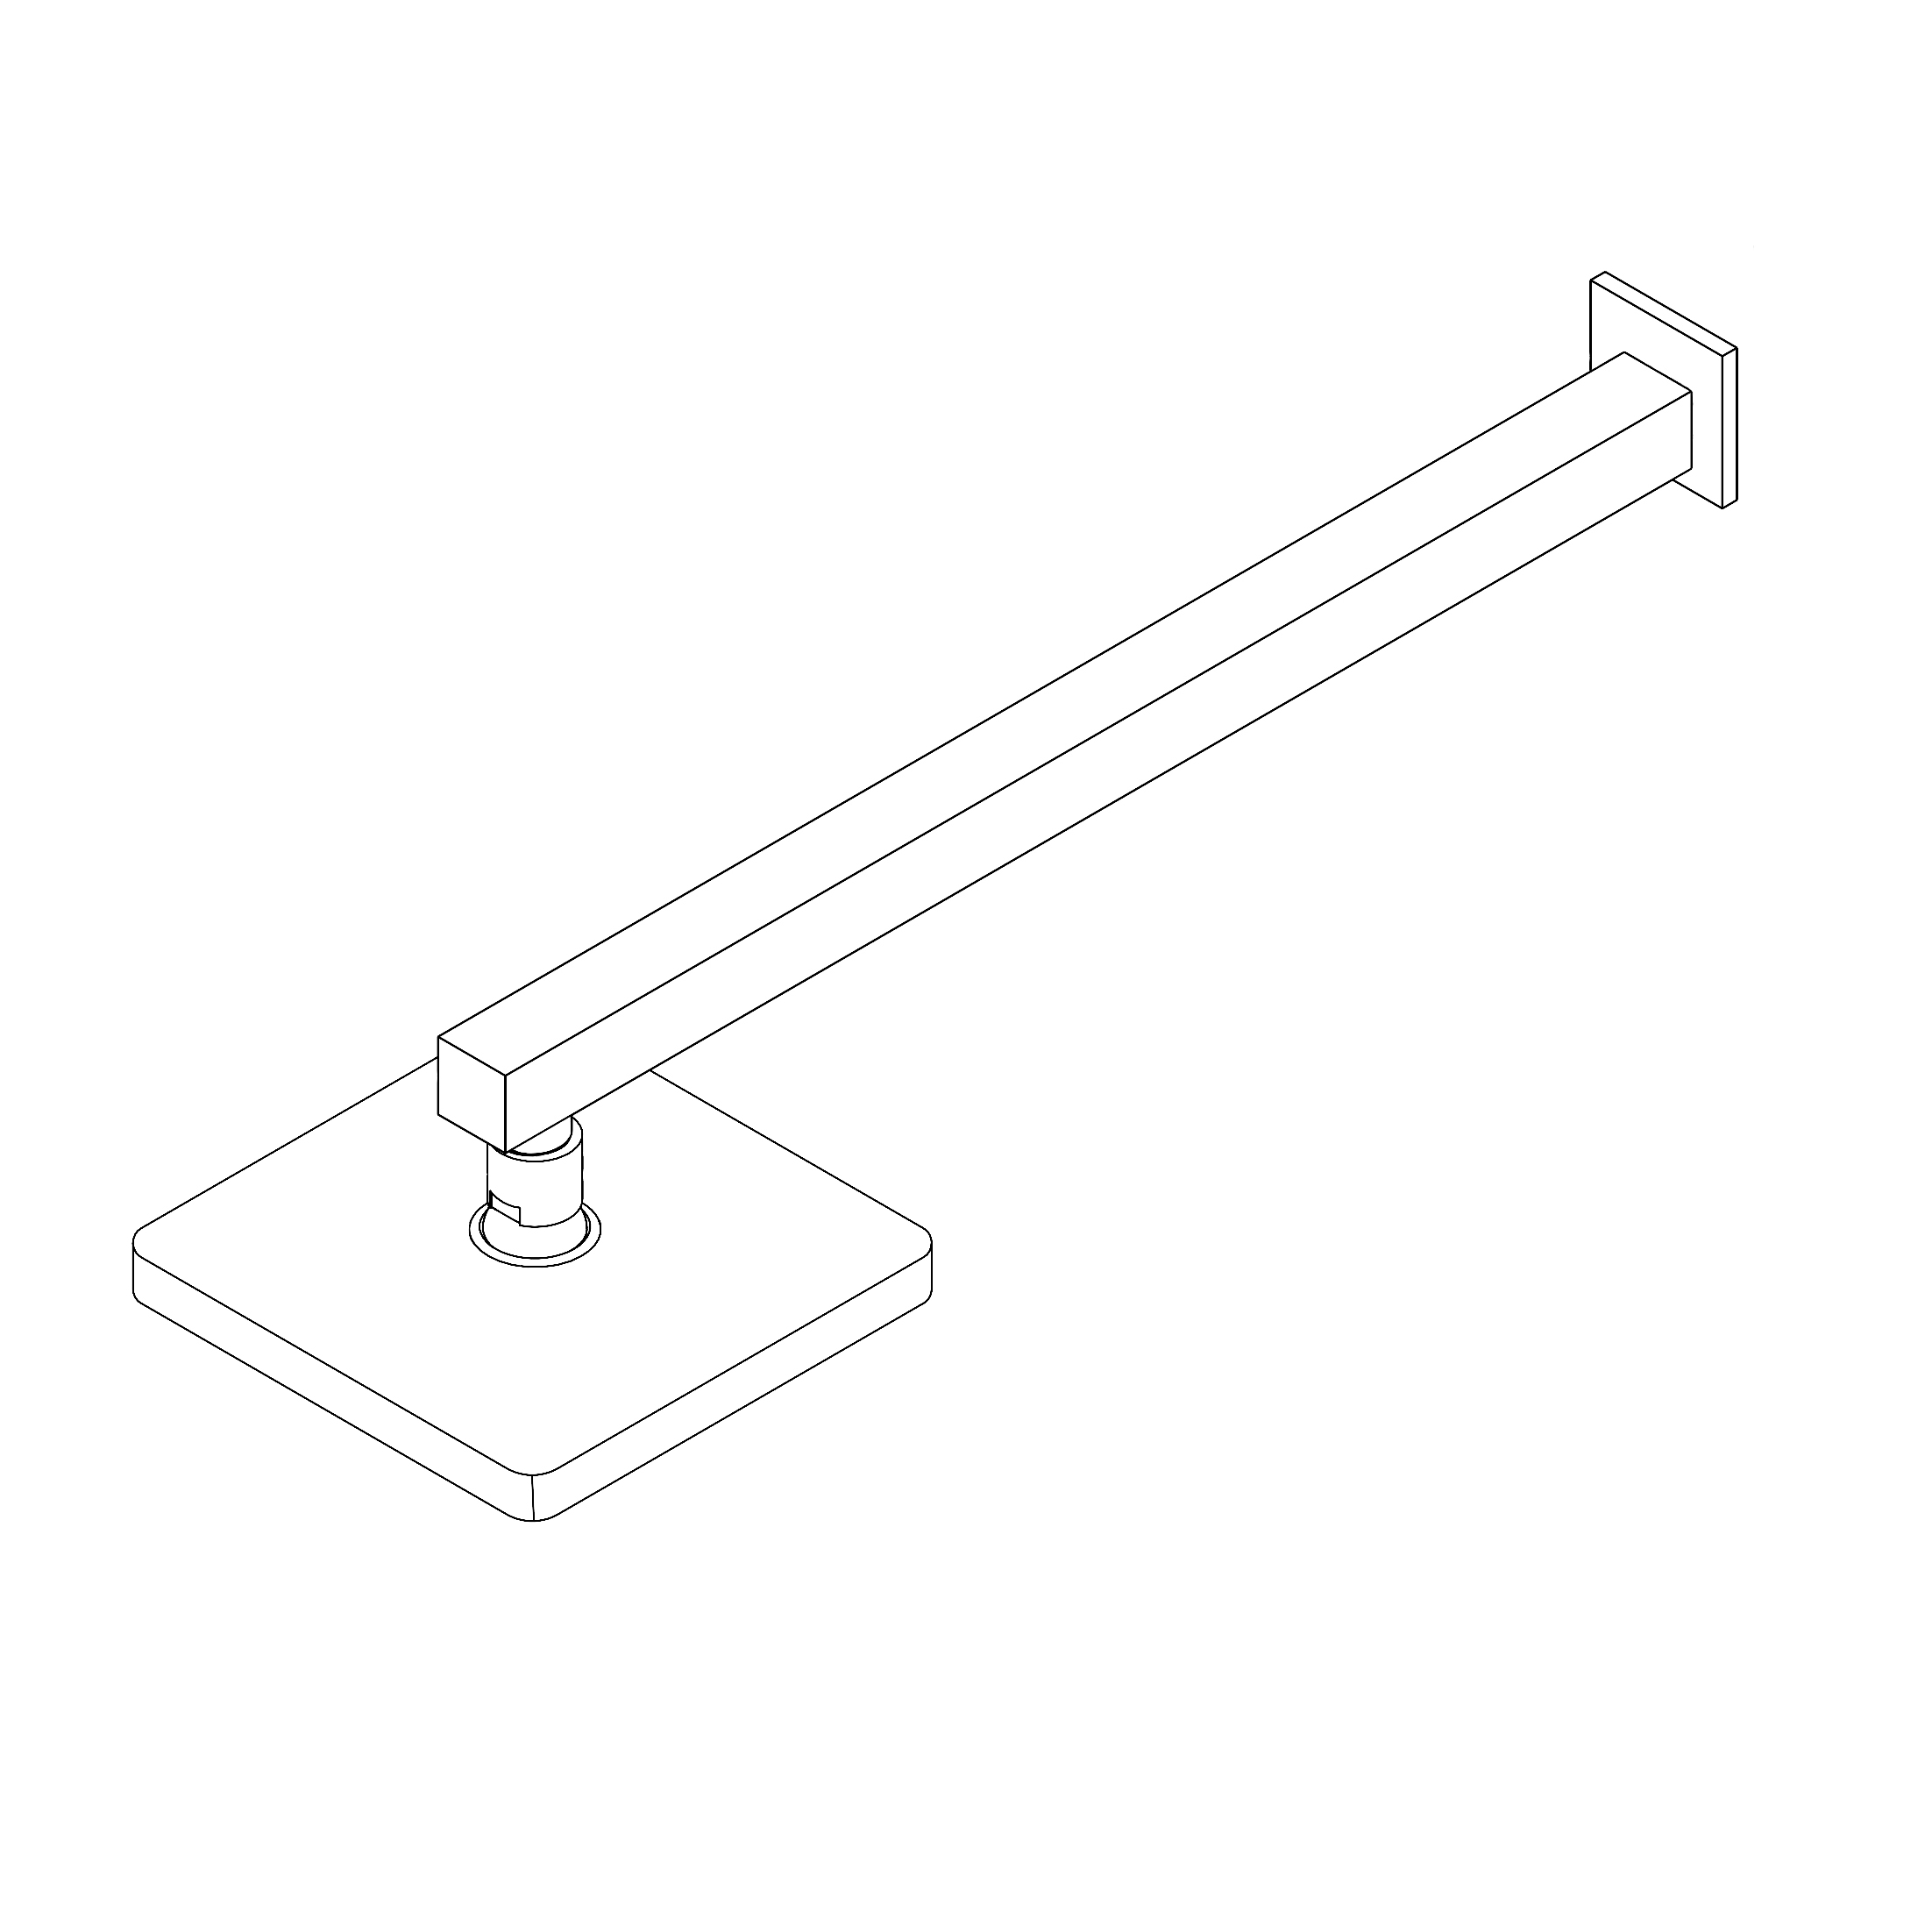
- Shower Head : 8-inch (20cm)
- Shower Arm : 14.5-inch(37cm)
- Shower Head Material : Brass
- Color : Oil Rubbed Bronze
- Finish : Oil Rubbed Bronze
- Installation Method : Wall-Mounted
- Special Features : Easy to Install, Rainfall
|
|
FontanaShowers® Product Warranty Information 
- Before you begin, please read the installation instructions below. Observe all local building and safety codes.
- Unpack and inspect the product for any shipping damages. If you find damages, do not install.
- Please note all showers must be installed by a professional and certified plumber otherwise warranty might be voided.
|
shower
|
|

|
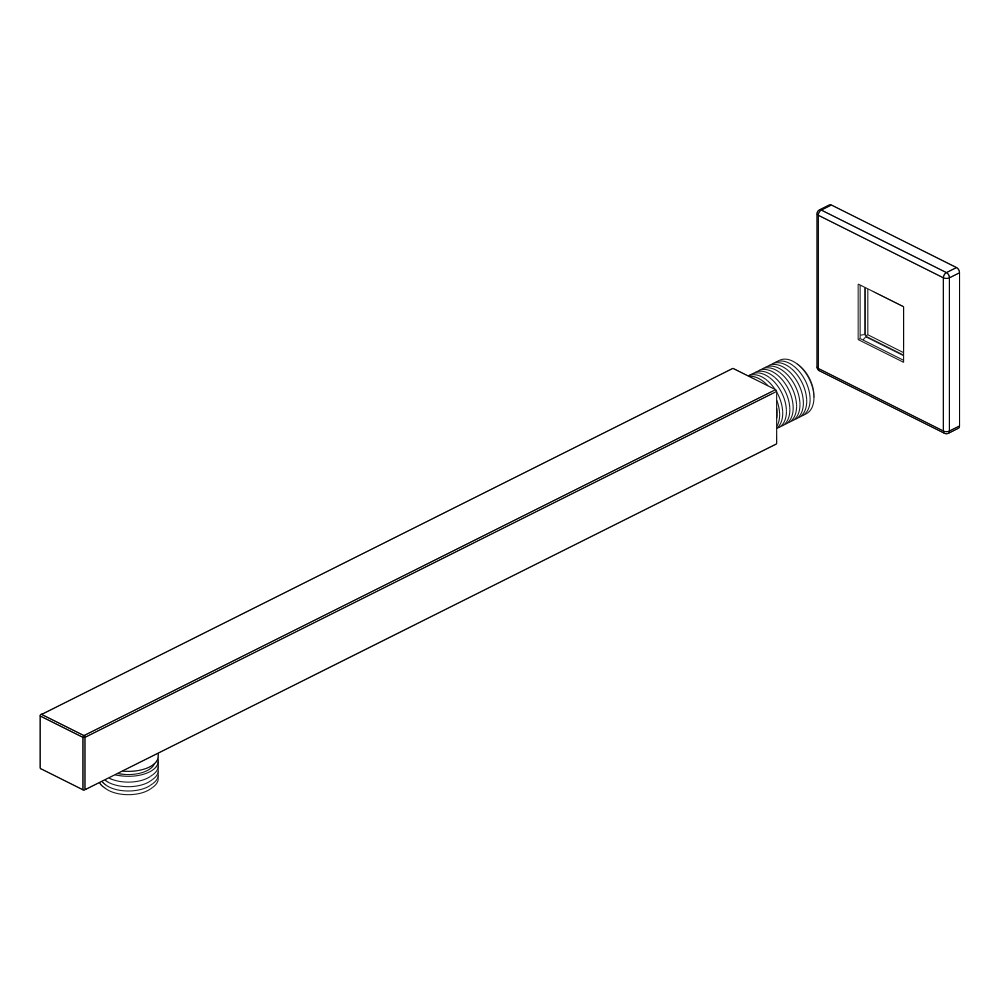
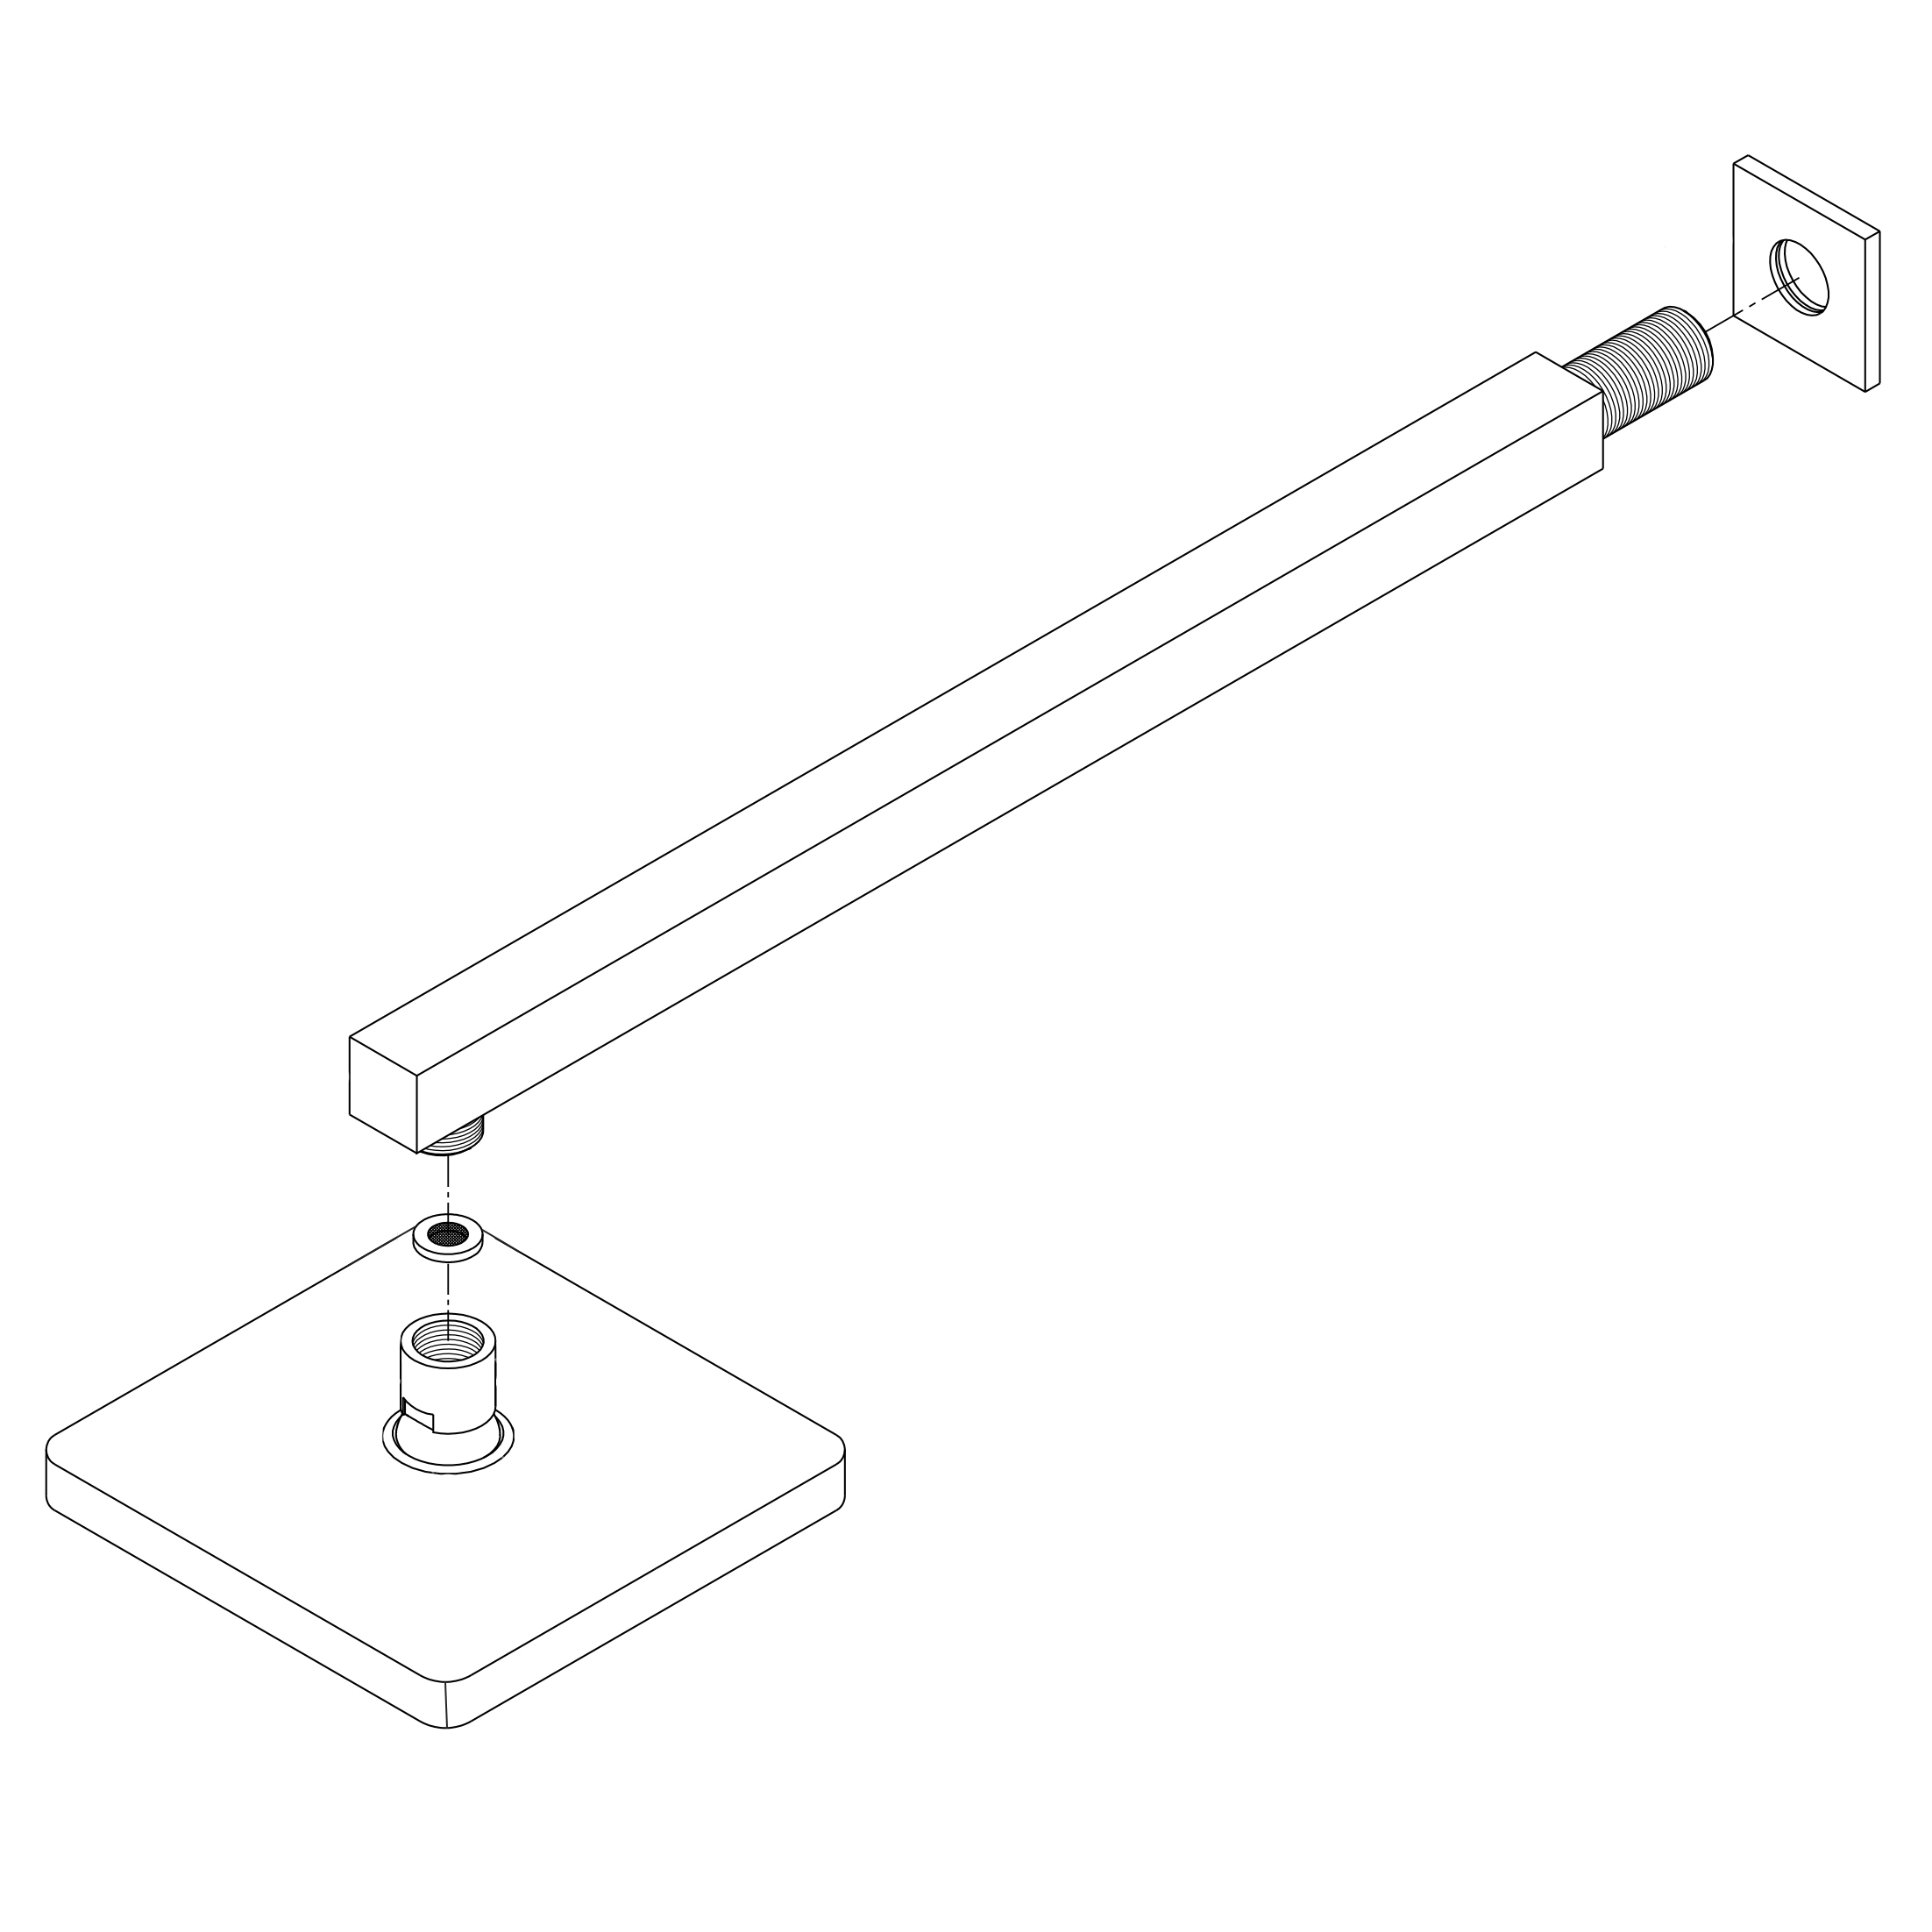
Shower Head Installation Instructions
|
|
|
|
|
|
|
|
Step 1:
|
shower
|
Step 2:
|
|
|
|
|
|
|

|
|
|
|
|
|
|
|
|
|
|
|
|
|
|
Step 3:
|
|
Step 4:
|
|
|
|
|
|
|
|
|
|
|
|
|
|
|
|
|
|
|
|
|
|
Step 5:
|
|
Step 6:
|
|
|
|
No tools required, ½ connector fits standard-sized shower plumbing.
|
|
|
|
|
|
|
|
|
|
|
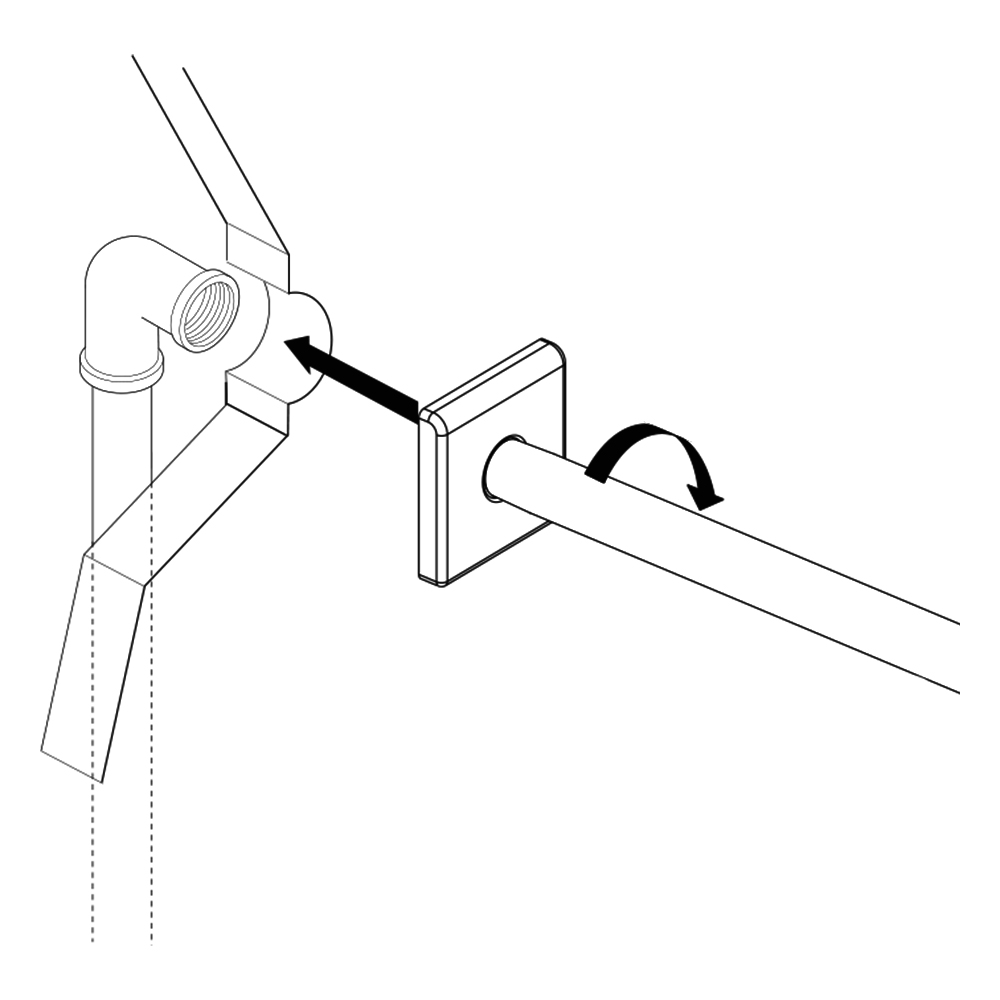
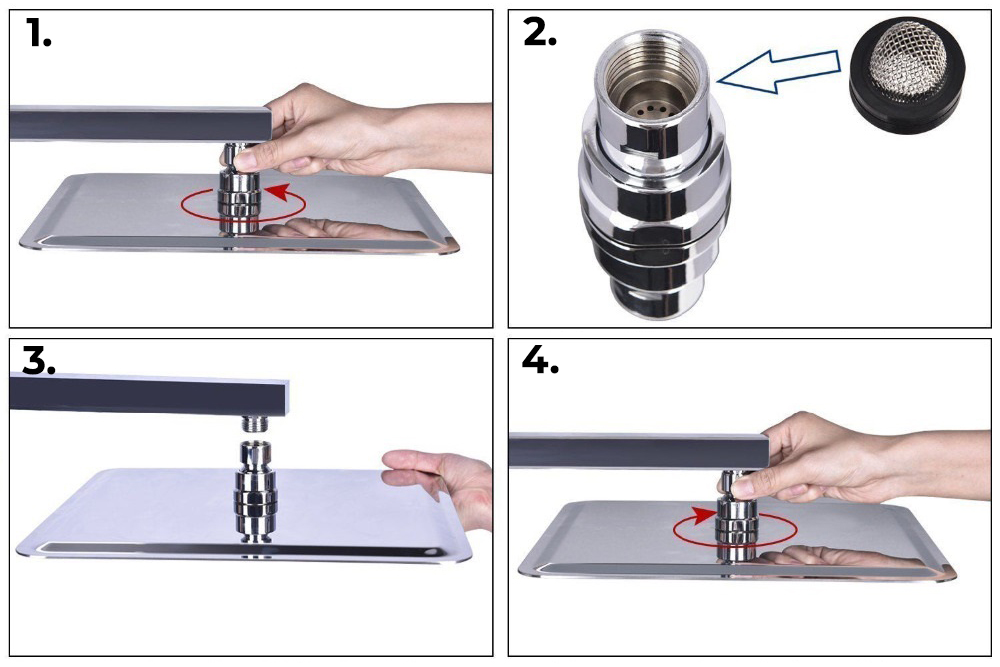
1. Apply plumber's tape to the threads on both ends of the shower arm and slide on the decorative escutcheon.
2. Insert the new arm into the fitting in the wall and twist to tighten. Finish tightening with your adjustable wrench. Wrap a dry cloth around the shower arm to protect the finish while tightening with an adjustable wrench.
3. Thread the new shower head onto the arm and hand-tighten. Hold the shower arm in place with groove joint pliers and finish tightening the shower head with your adjustable wrench. Wrap both in a dry cloth to protect the finish.
4. Before securing the decorative escutcheon, turn on the water supply to make sure that all connections are tight and there is no leaking. If no leaks are detected, continue with the installation. If leakage does occur, use your adjustable wrench to tighten the connections as necessary.
5. Apply a bead if silicone sealant to the back of the escutcheon and press firmly into place against the installation surface. Wipe away any excess sealant with your damp cloth.
|
|
|
|
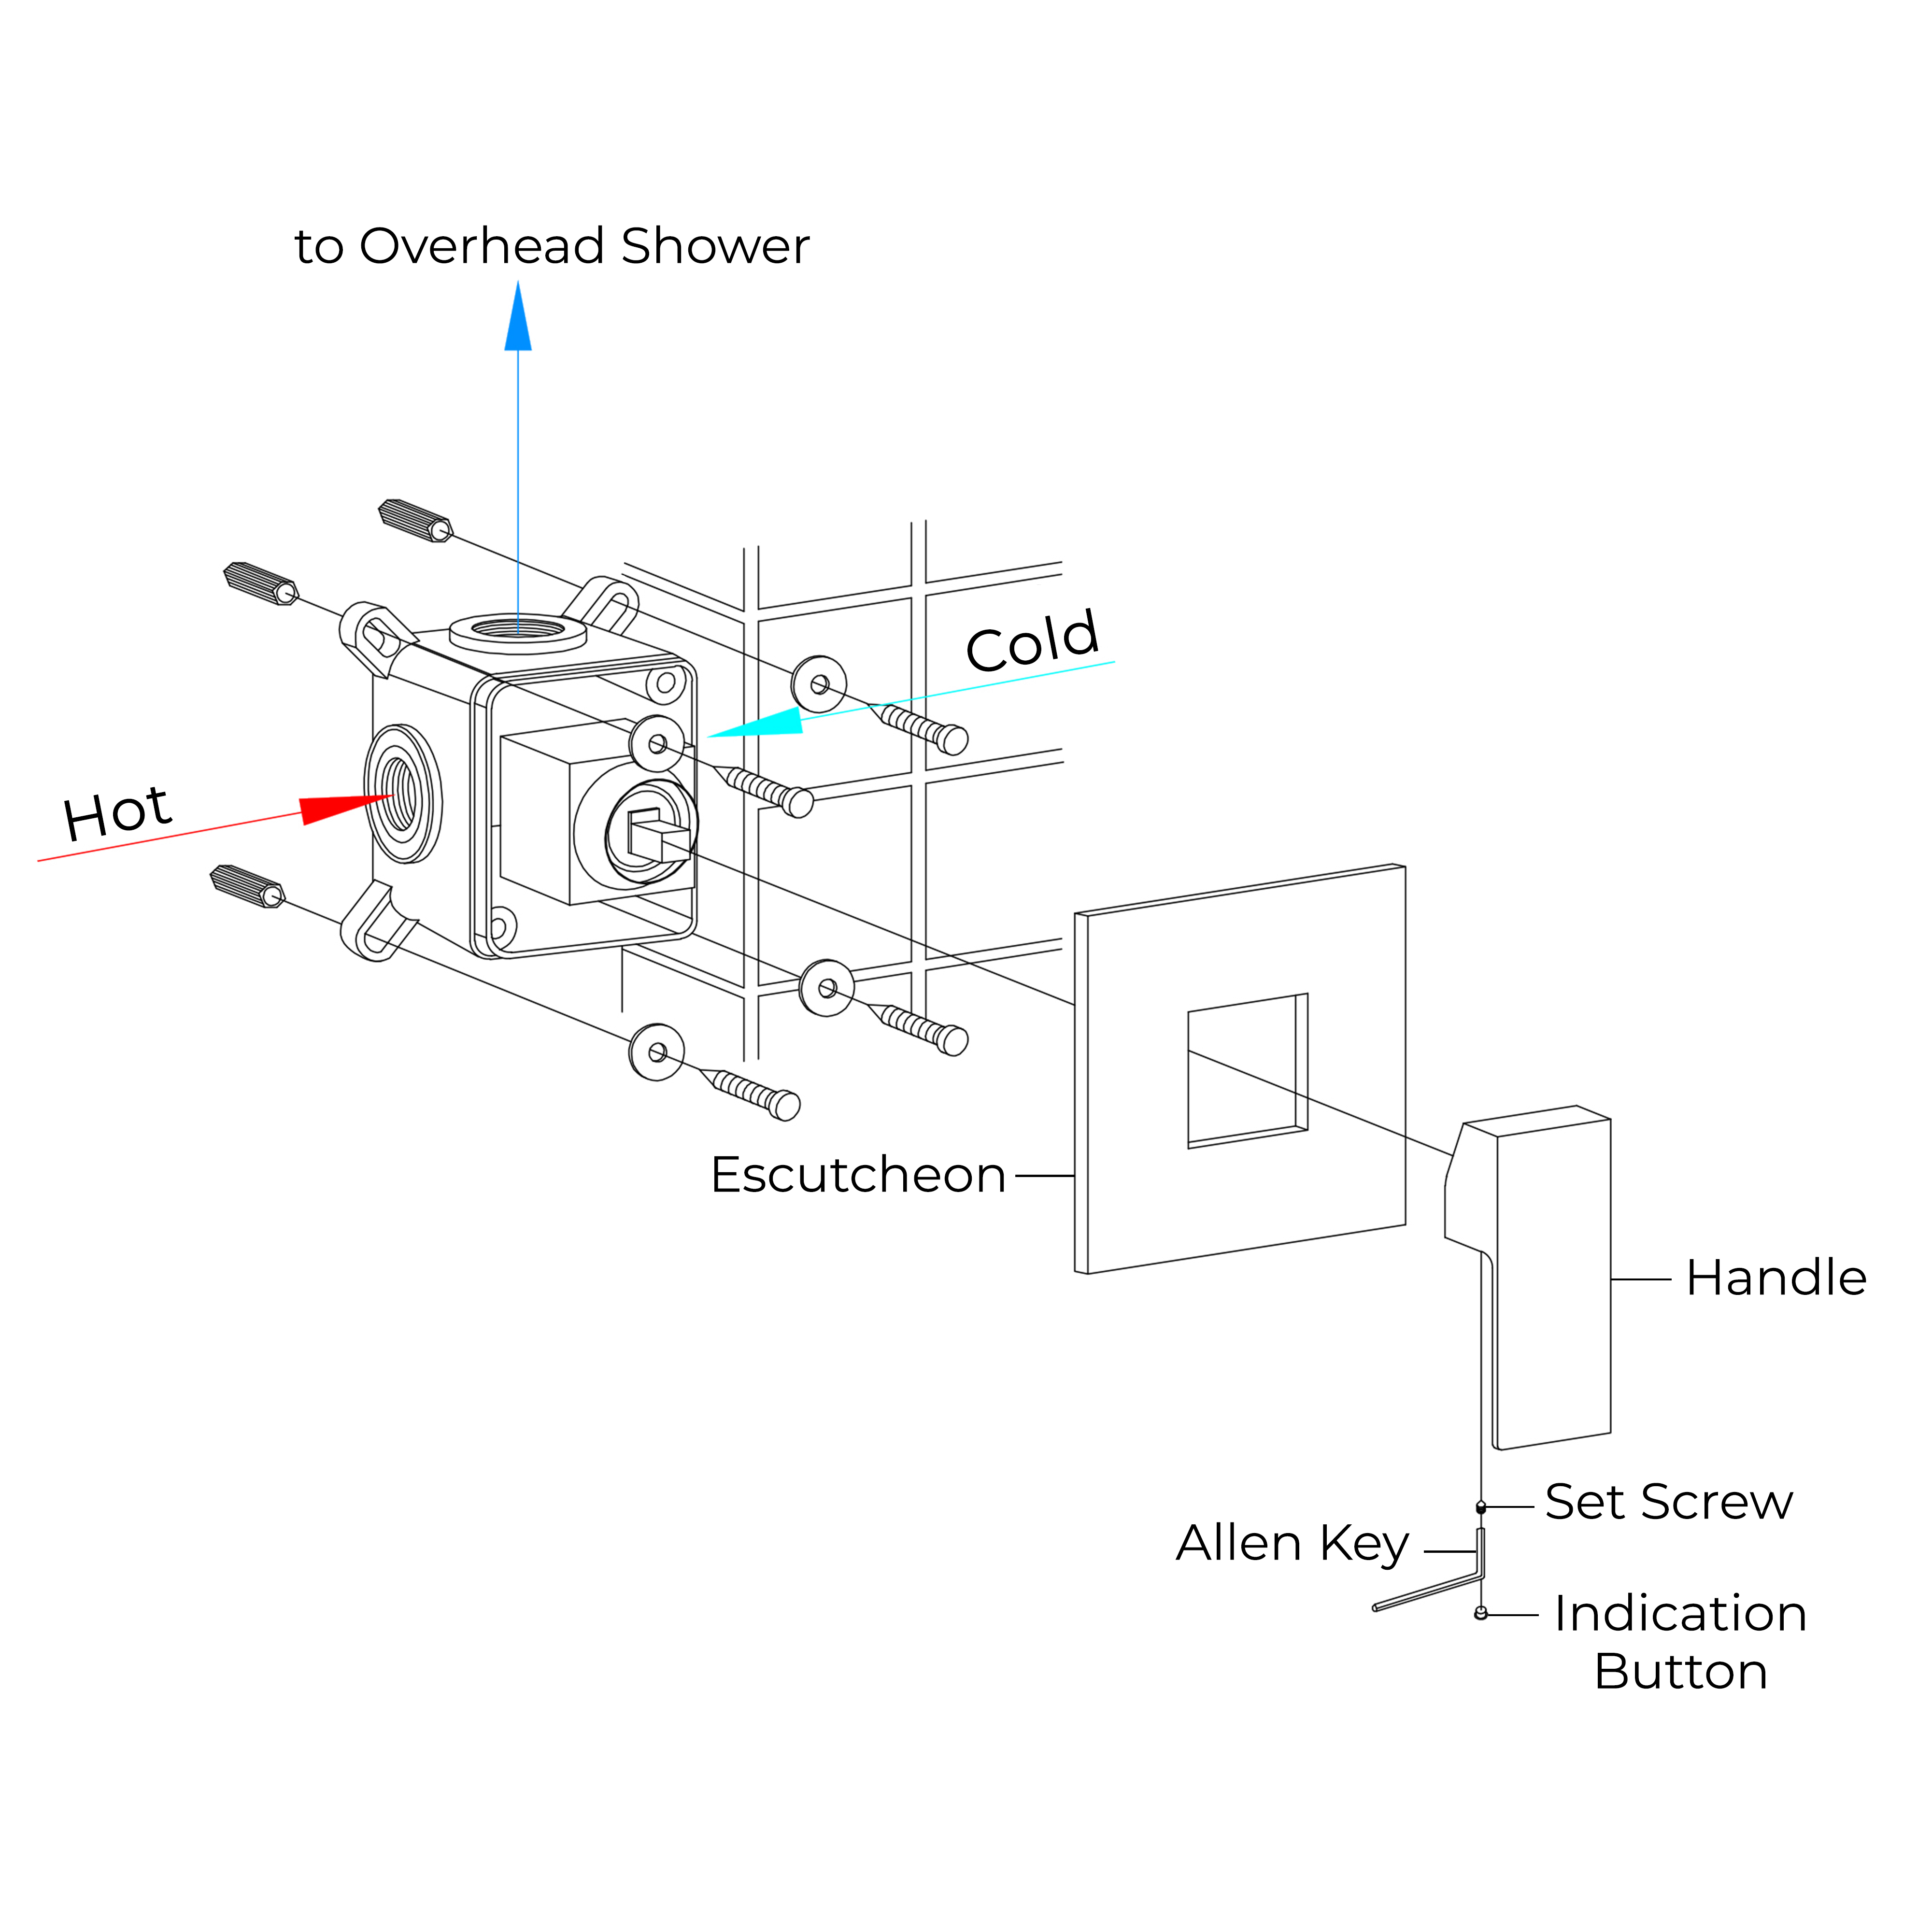
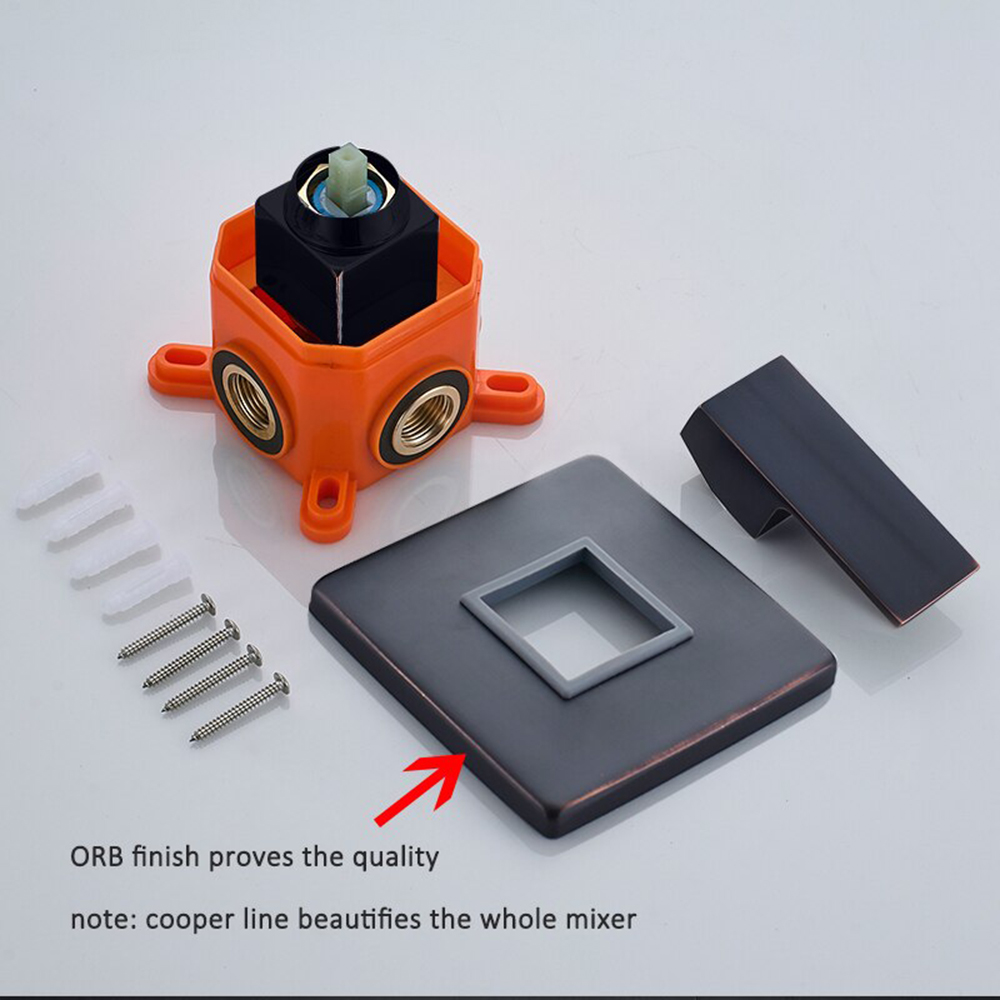
Shower Valve Mixer Installation Instructions
|
Step 1:
|
|
Step 2:
|
|
shower
|

|
|
|
|
|
|
Step 3:
|
|
Step 4:
|

|
|
|
|
|
|
|
1. Fix the shower valve into the wall with nuts and screws. Use a level to ensure that the valve is straight and level. (Important: Flush the water supply to remove any dirt and debris before installing the valve body.)
2. Wrap Teflon tape around the pipe threads. Connect hot and cold water supply lines and all the in-wall pipes (not included) as desired to the shower valve.
3. Turn on the water supply and open the cartridge. Make sure that no leakage occurs. (Note: Test the water pressure after the pipe connections have been made and before the finished wall material is installed.)
4. Put on the protective cover and finish the wall surrounding the shower.
5. Remove the protective cover when the finished wall is complete. Then, install the escutcheon and press it against the finished wall.
6. Install the handle to the valve and tighten the set screw. Then, put on the indication button.
|
|
|
|
|
|
|
|