How to install Fontana Warsaw Waterfall & Rainfall LED Shower System| FSNX-57-WATERFALL-SHOWER-FAUCE
Installation Instructions for Bathroom Shower Set
- Before you begin, please read the installation instructions below. Observe all local building and safety codes.
- Unpack and inspect the product for any shipping damages. If you find damages, do not install.
- Please note all products must be installed by a professional and certified plumber otherwise warranty might be voided.
| | shower | 
|
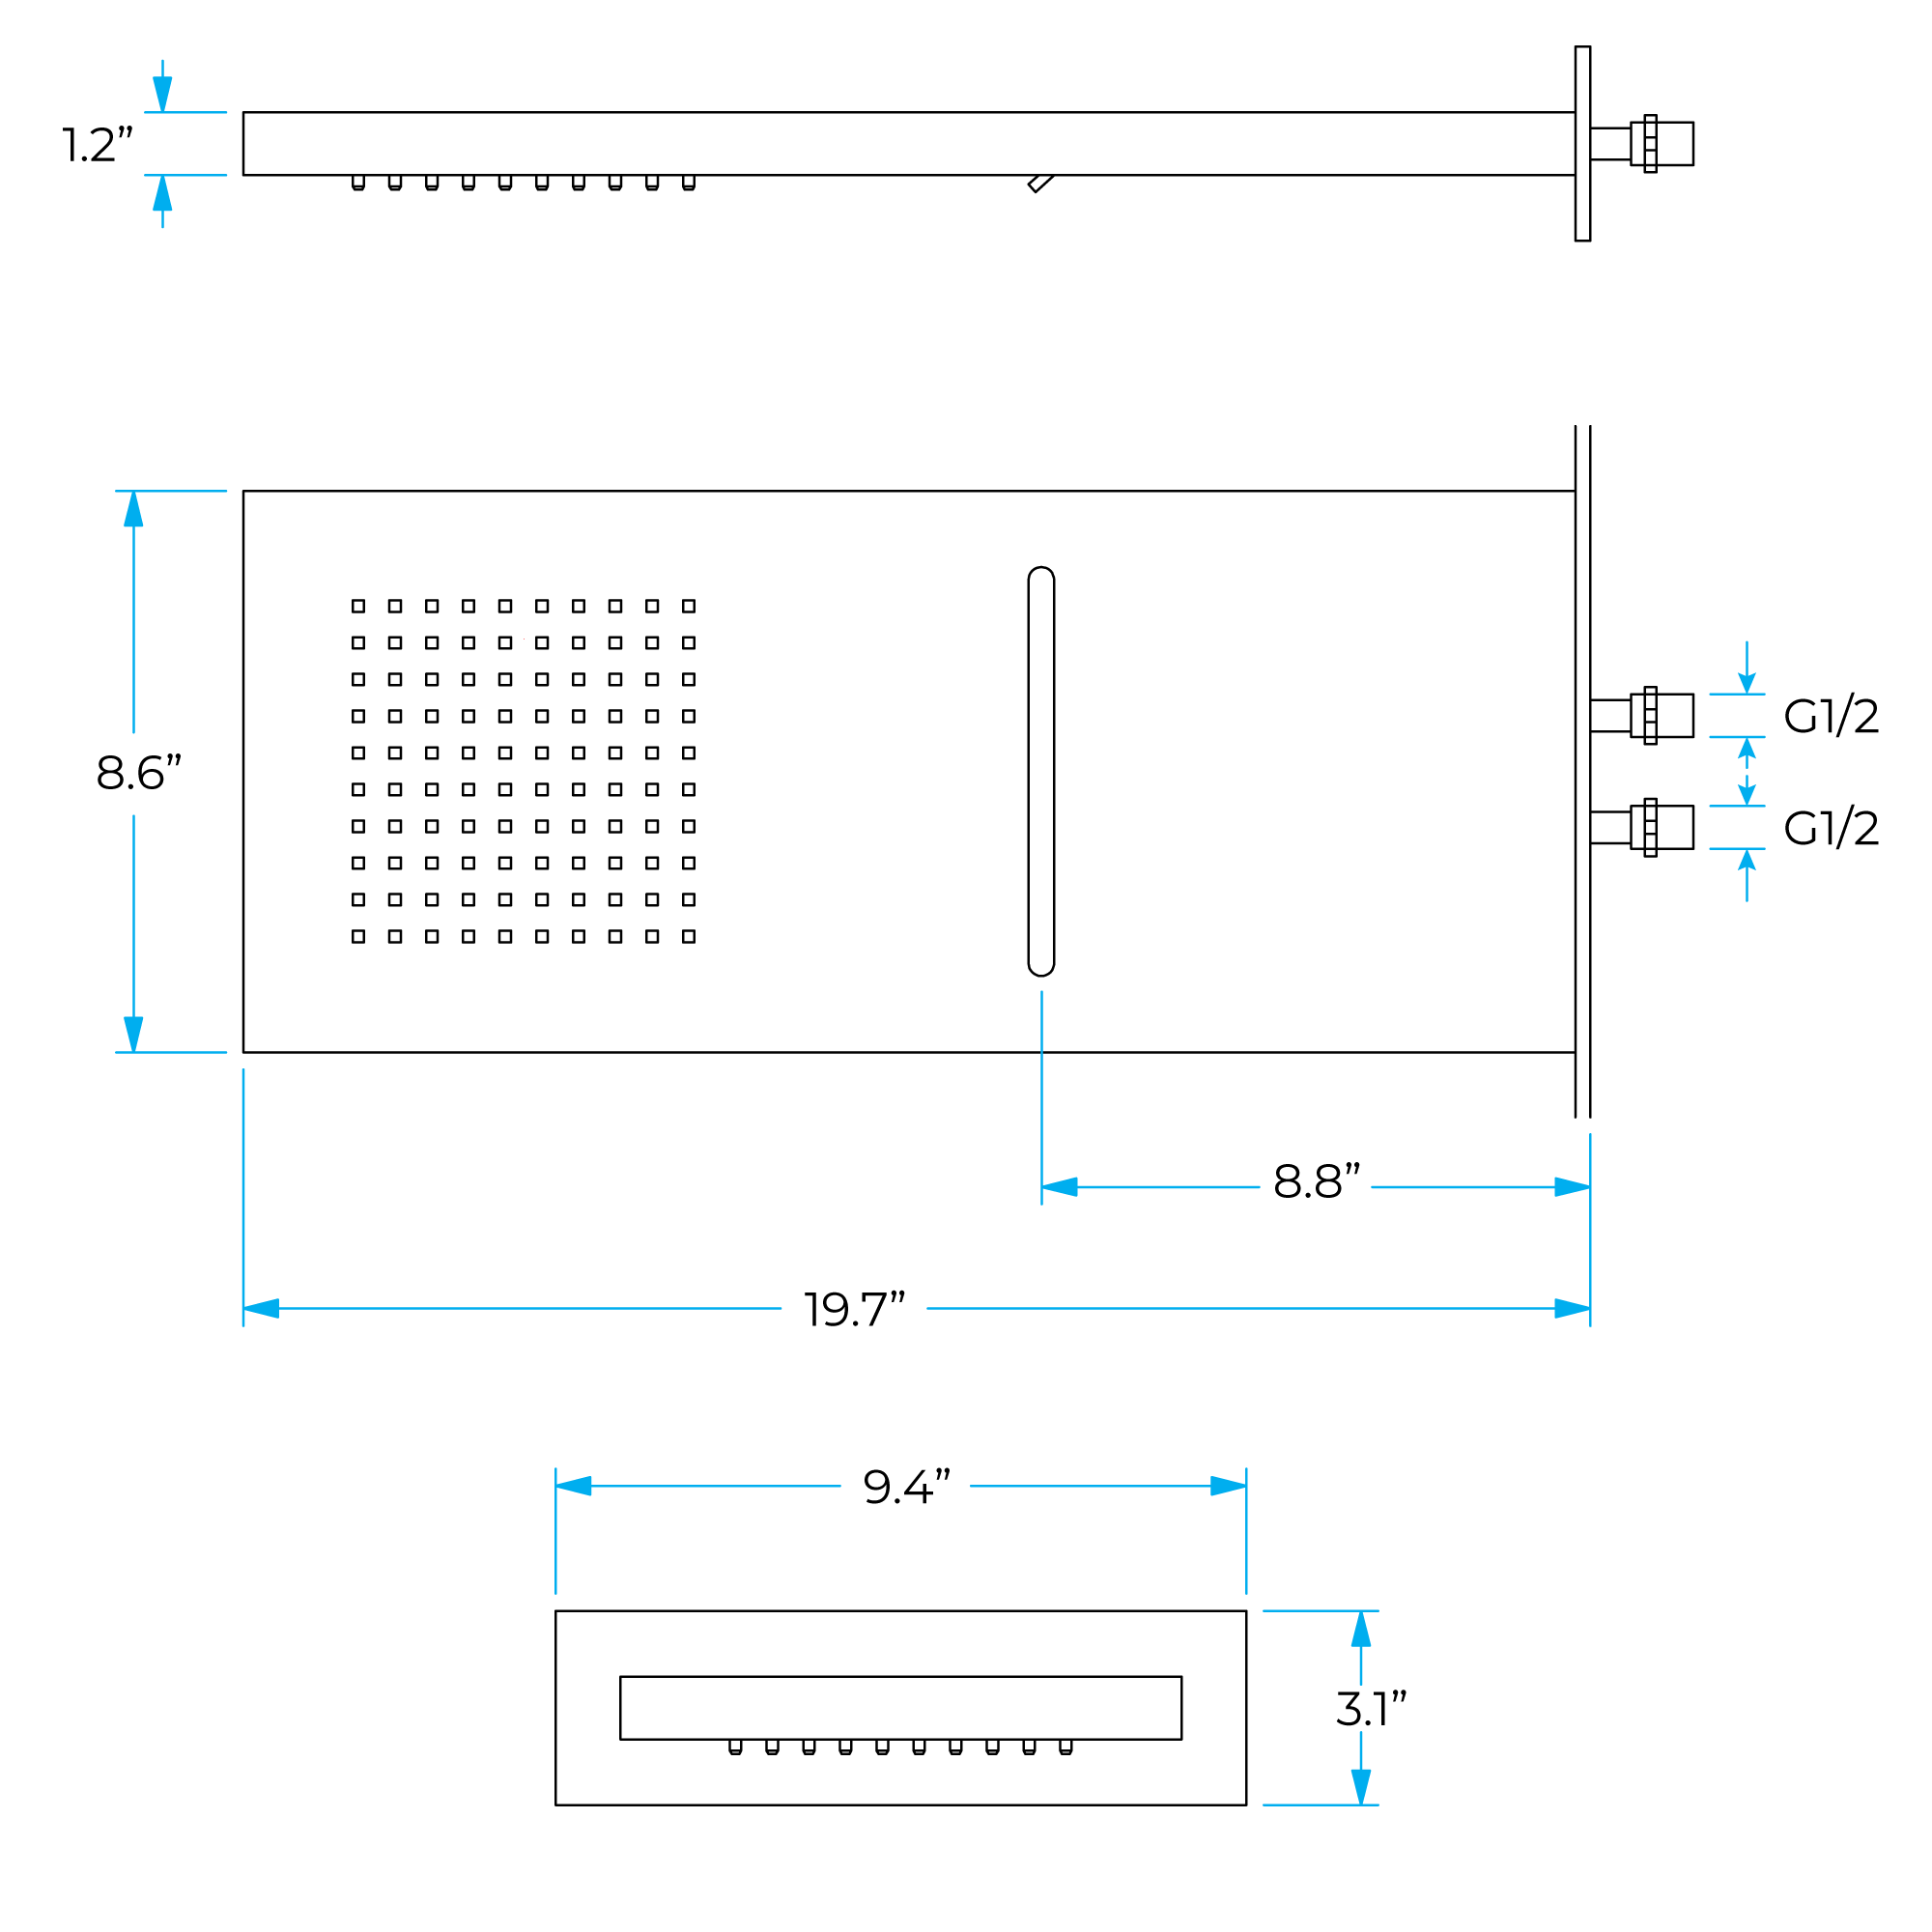
Shower Head Installation Instructions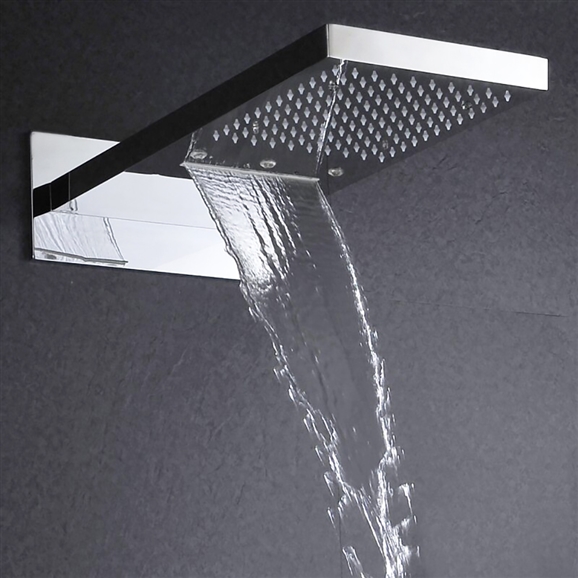 Size: Size:
 | | 
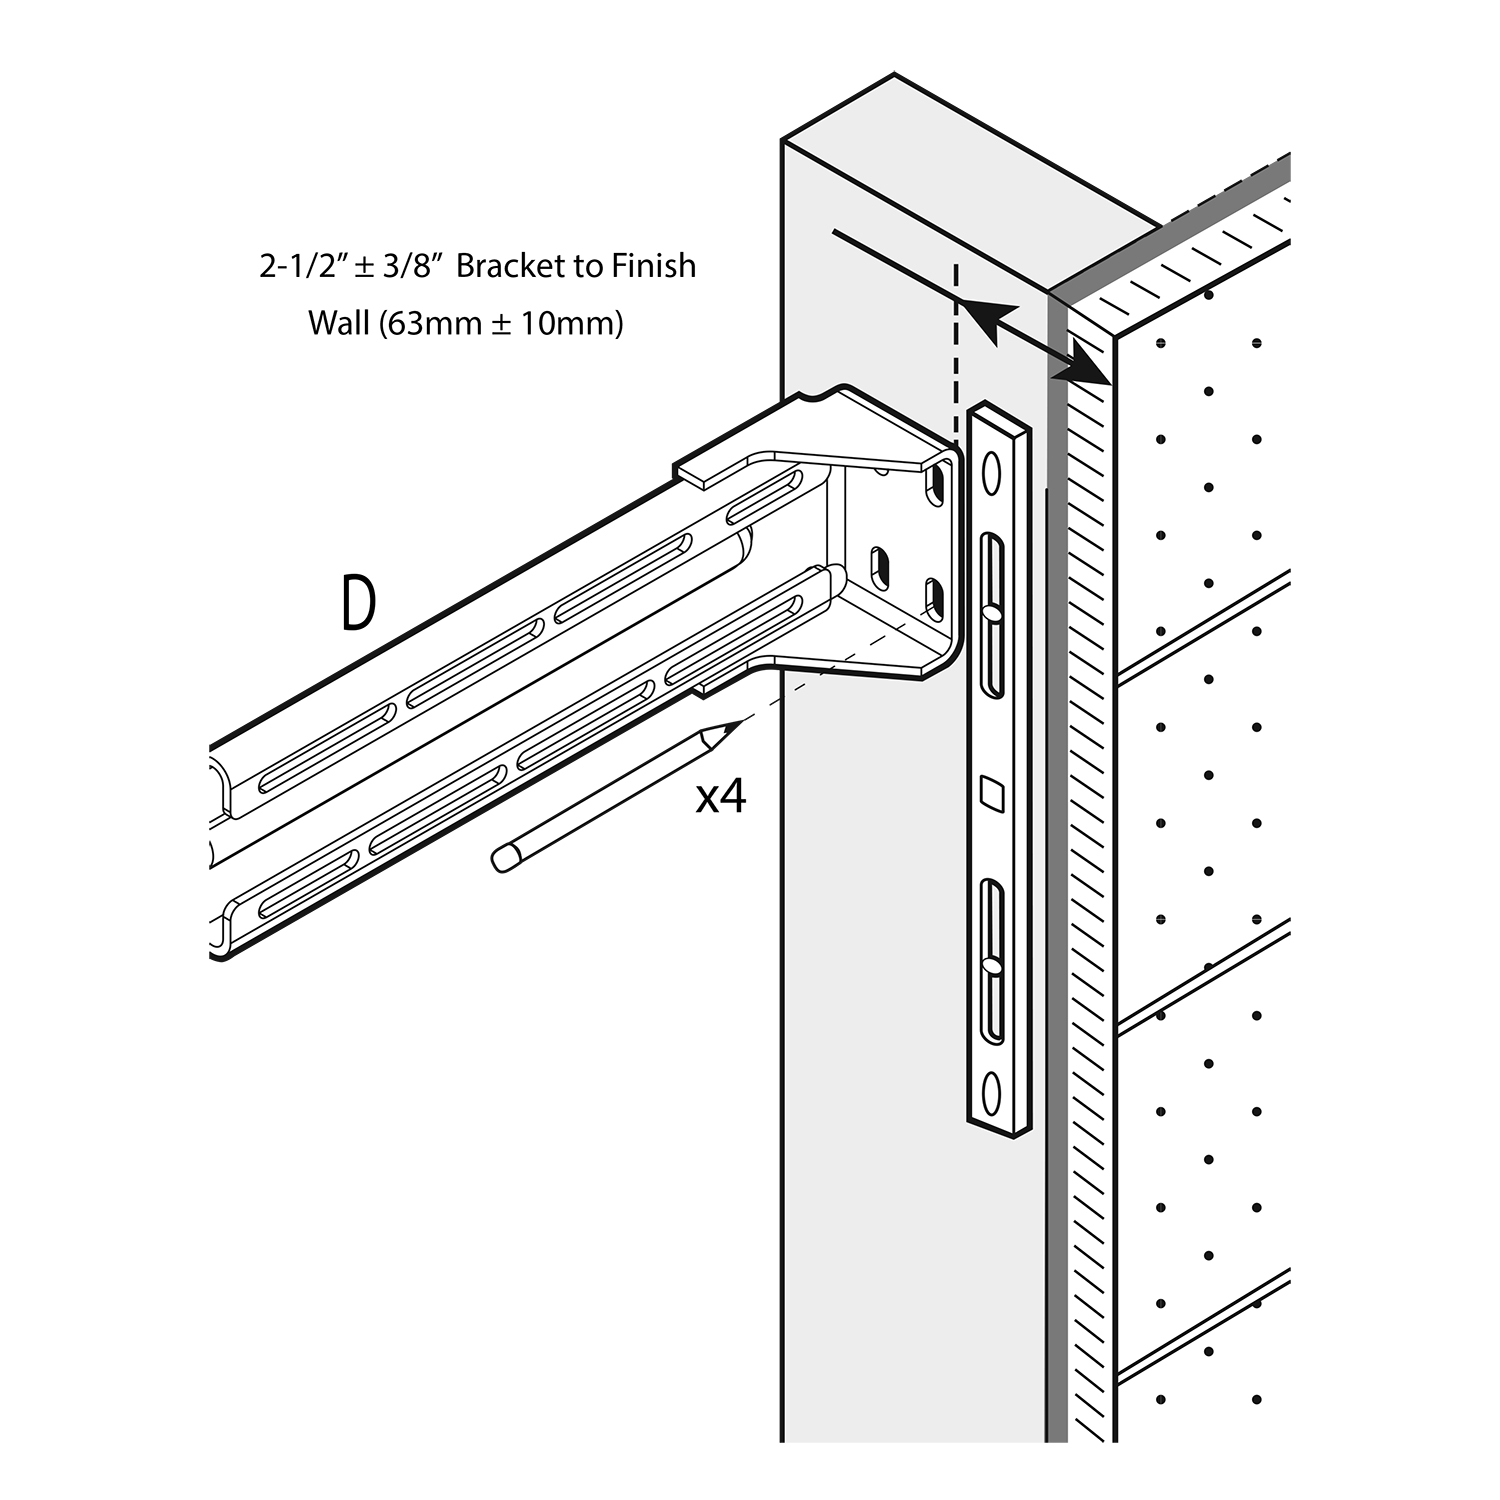
| Open the top cover and drill according to the marked position.
1. Mark by the position of the four holes.
2. Take care to avoid wires and pipes to prevent damage.
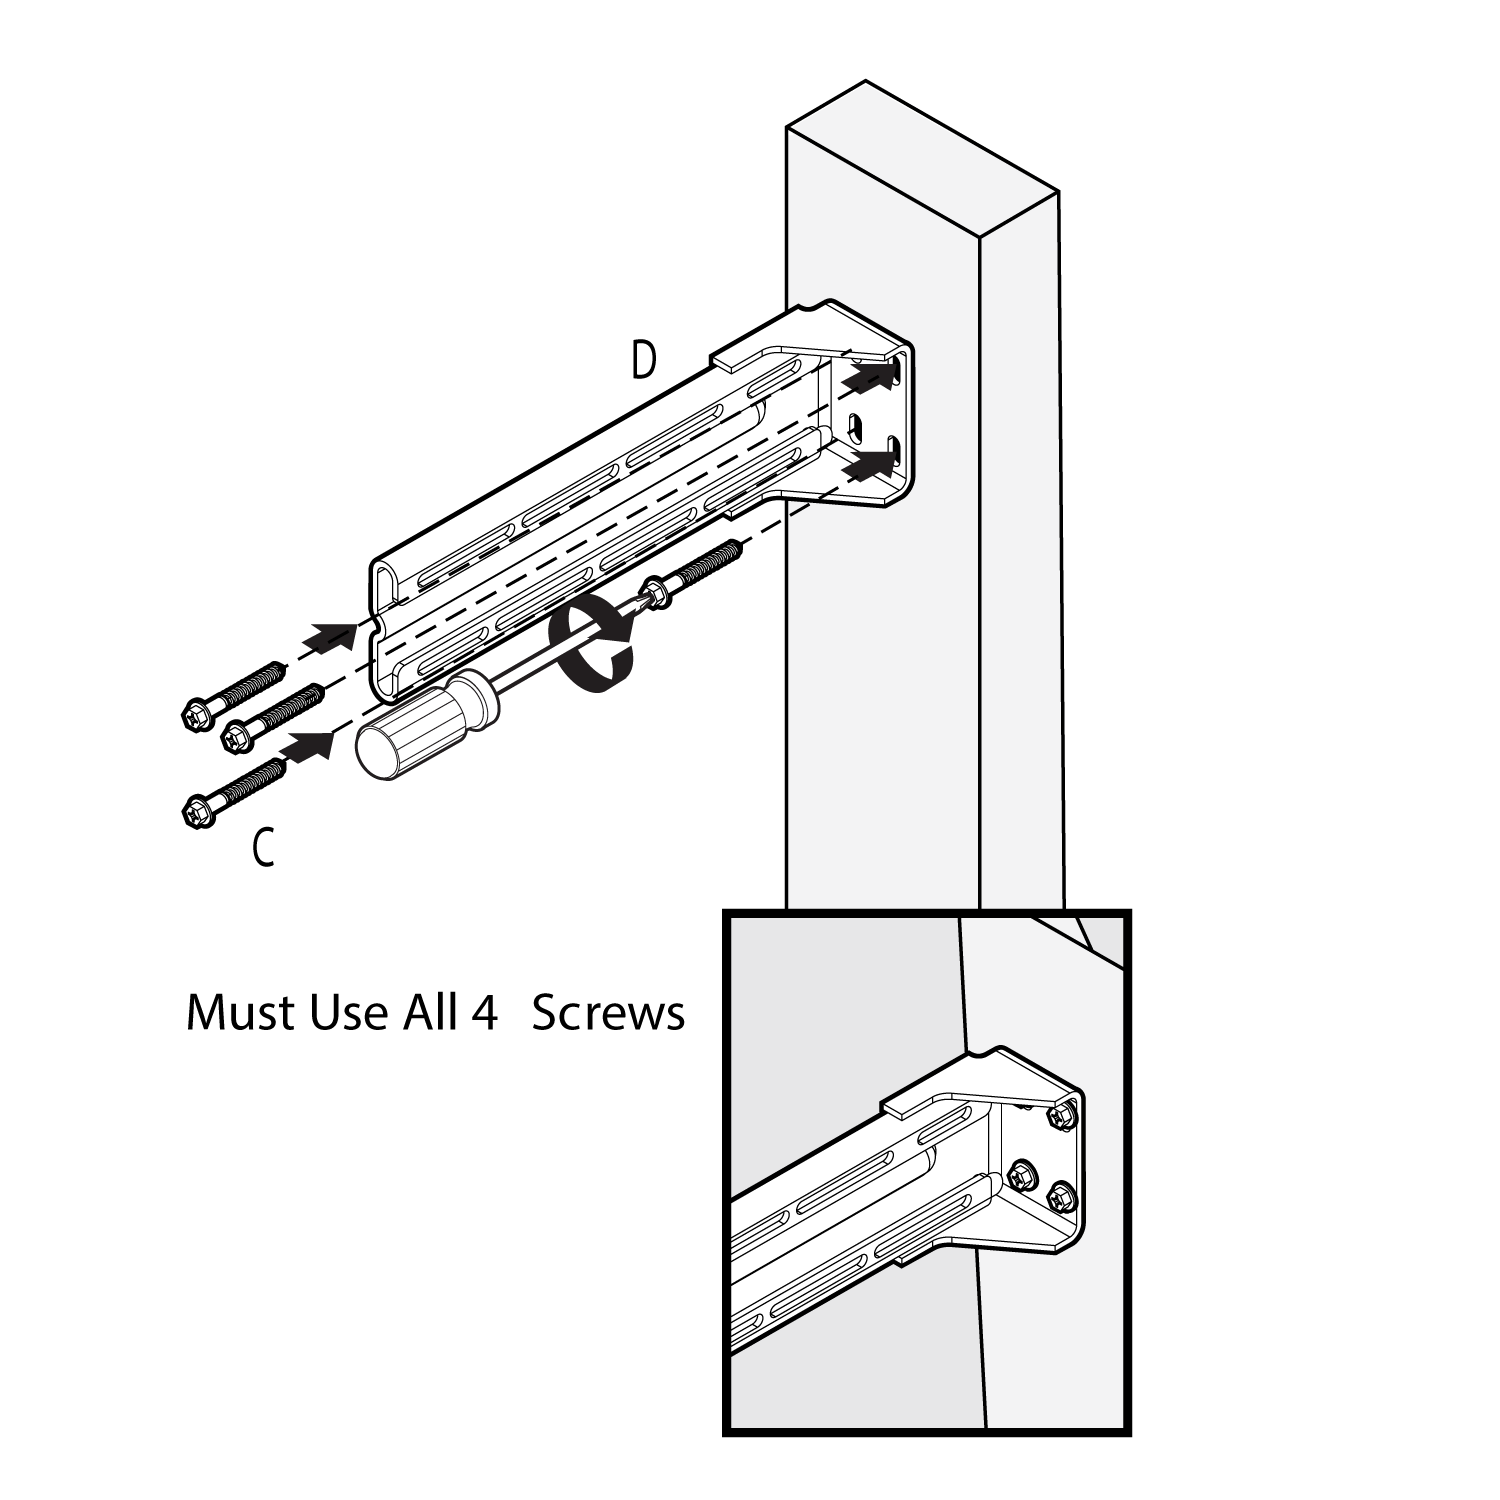
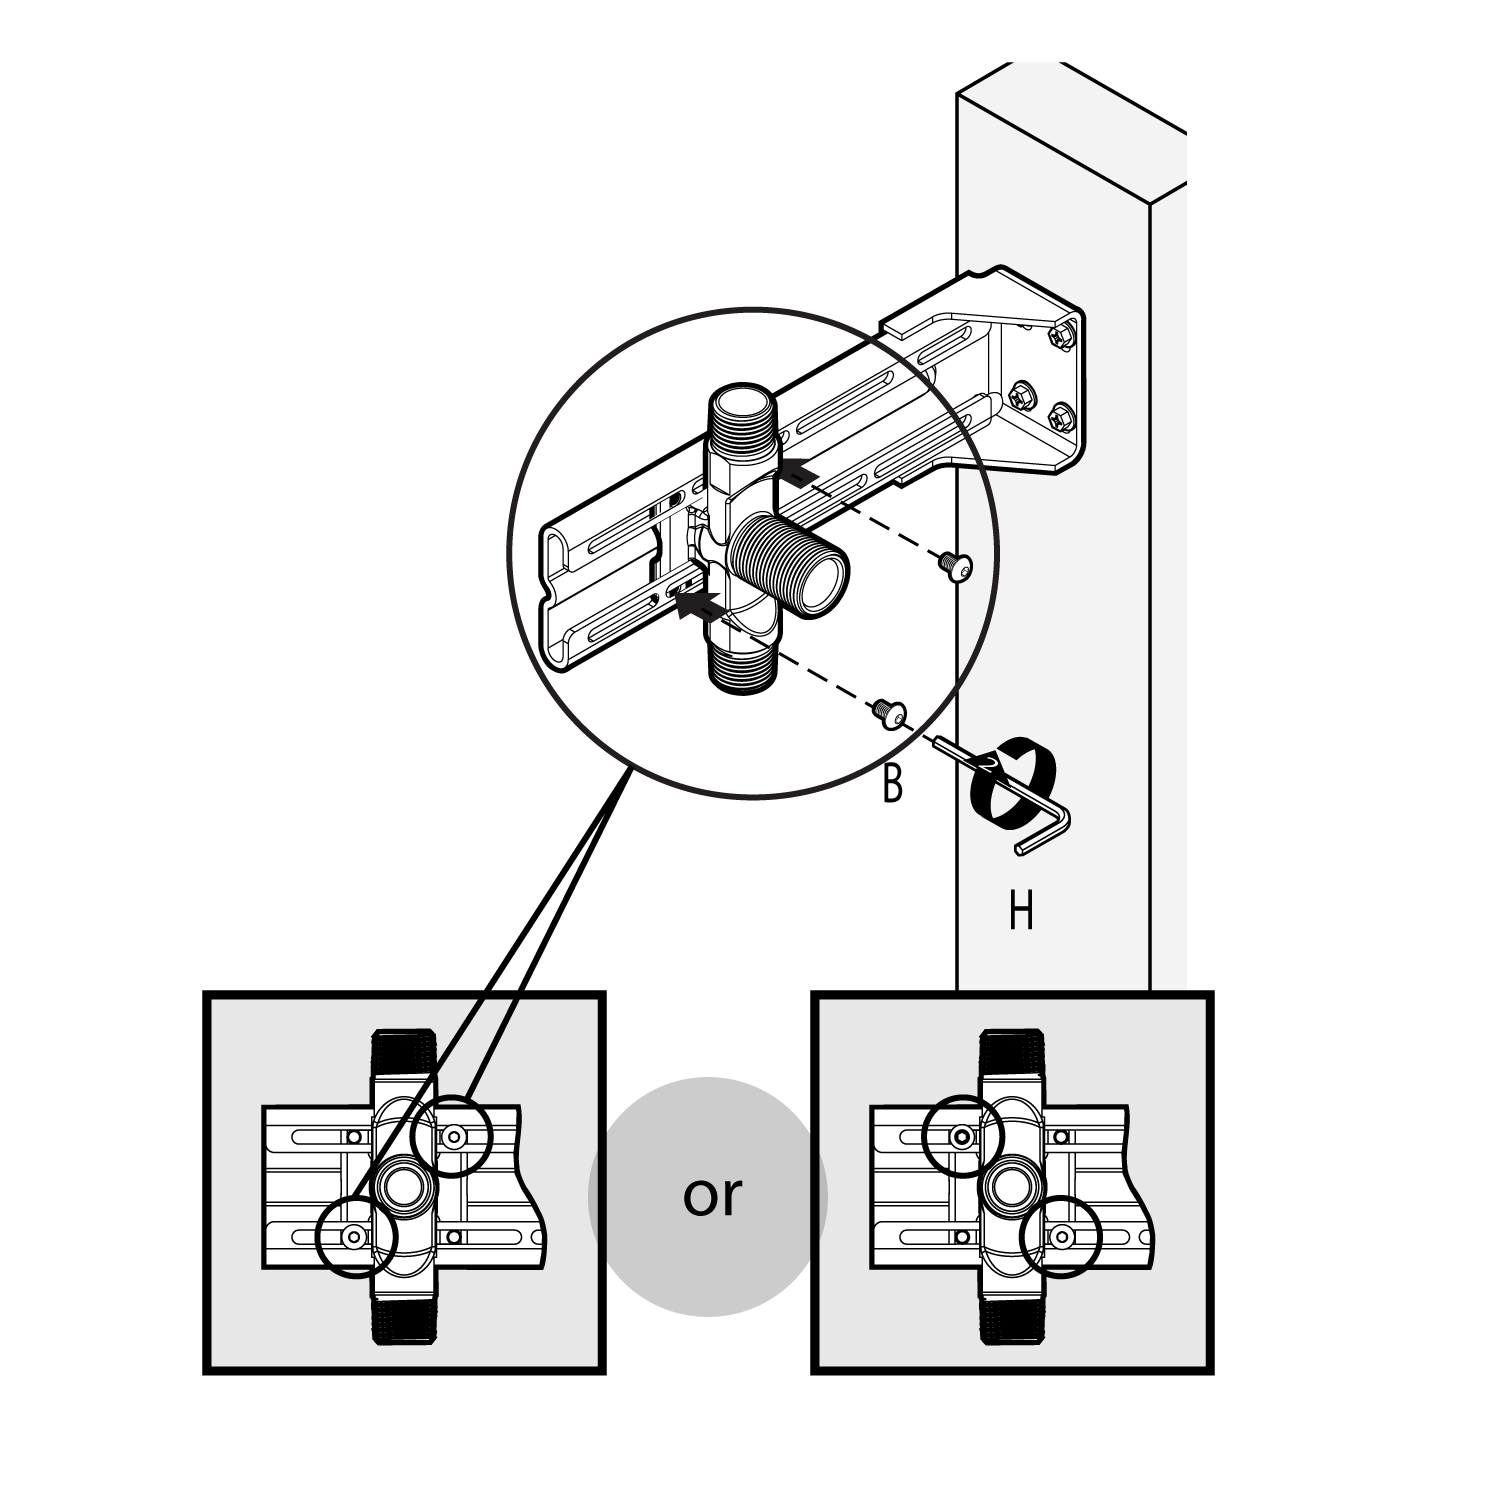
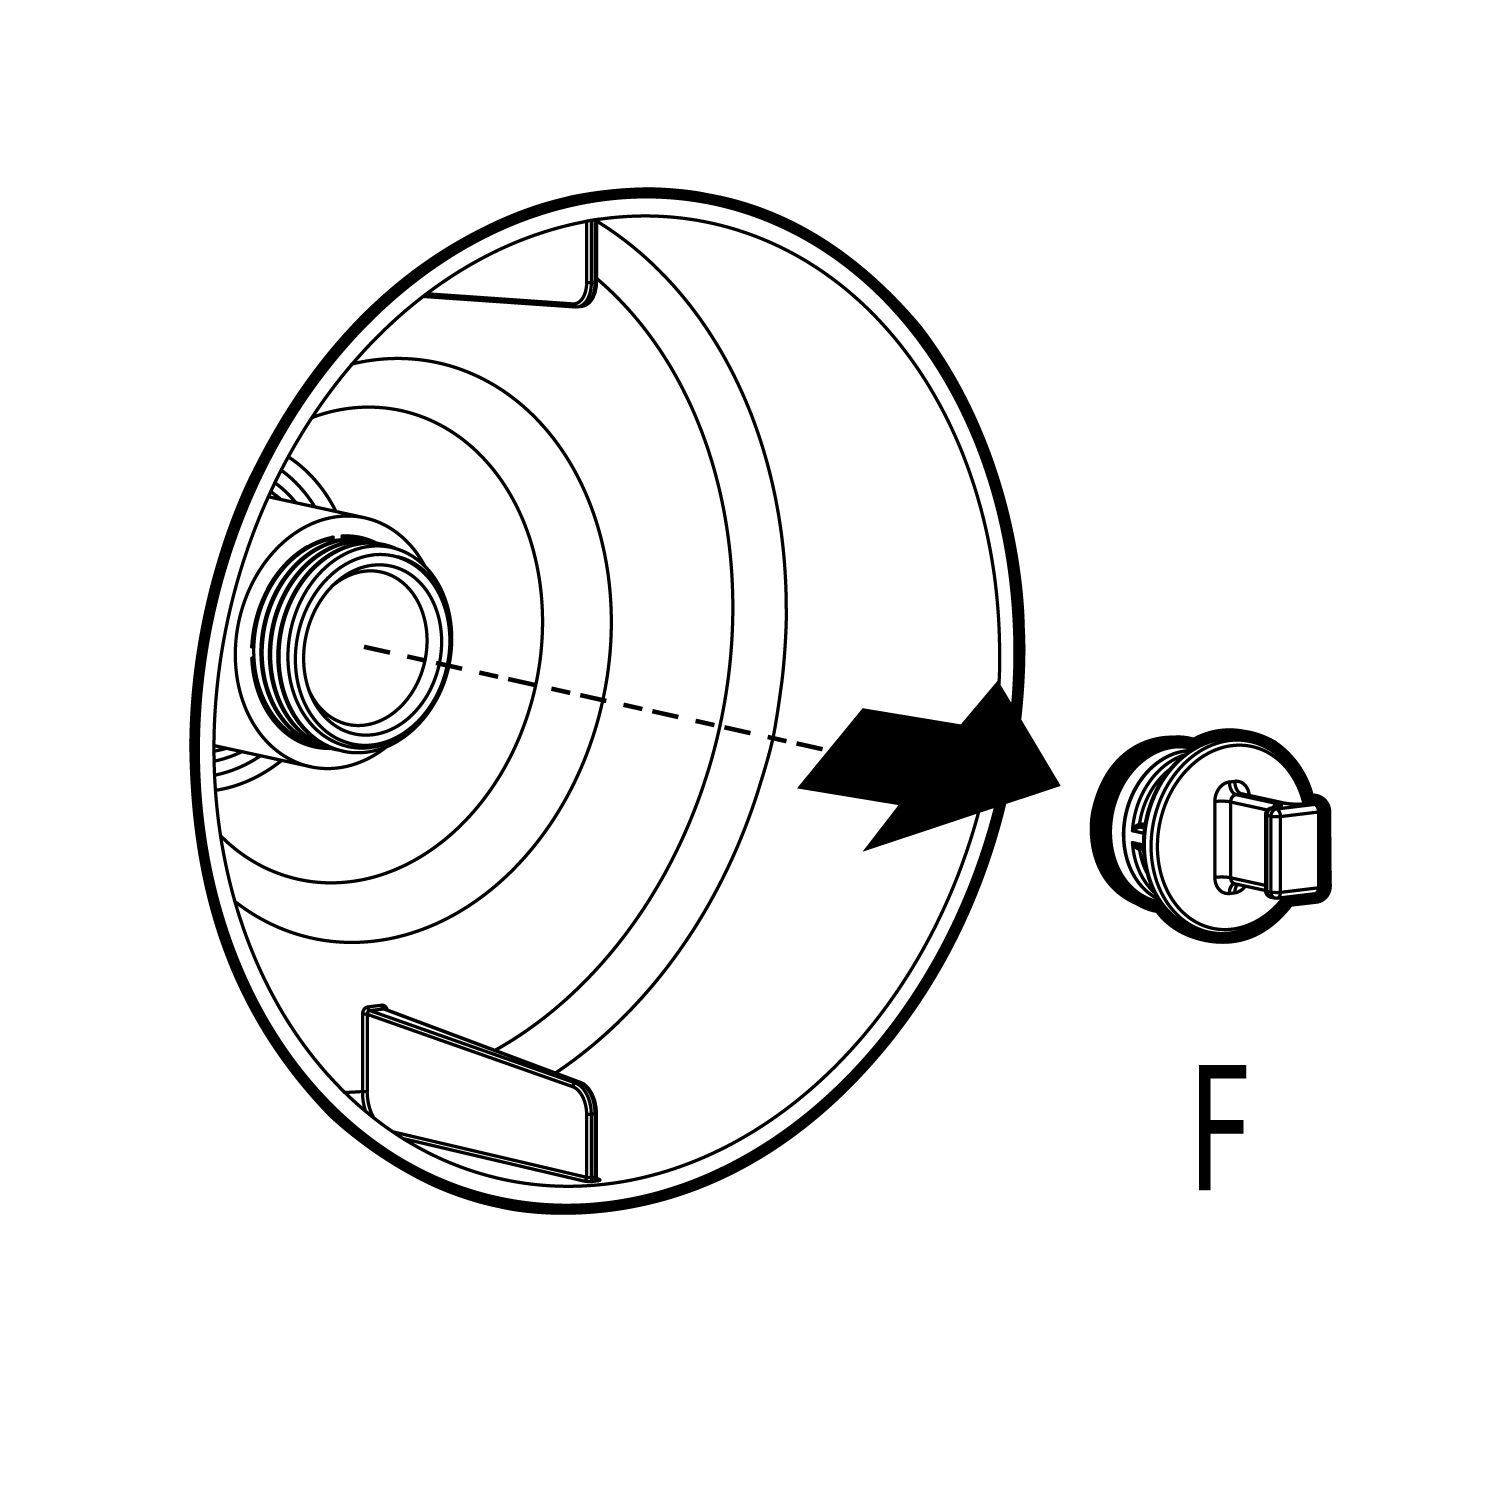
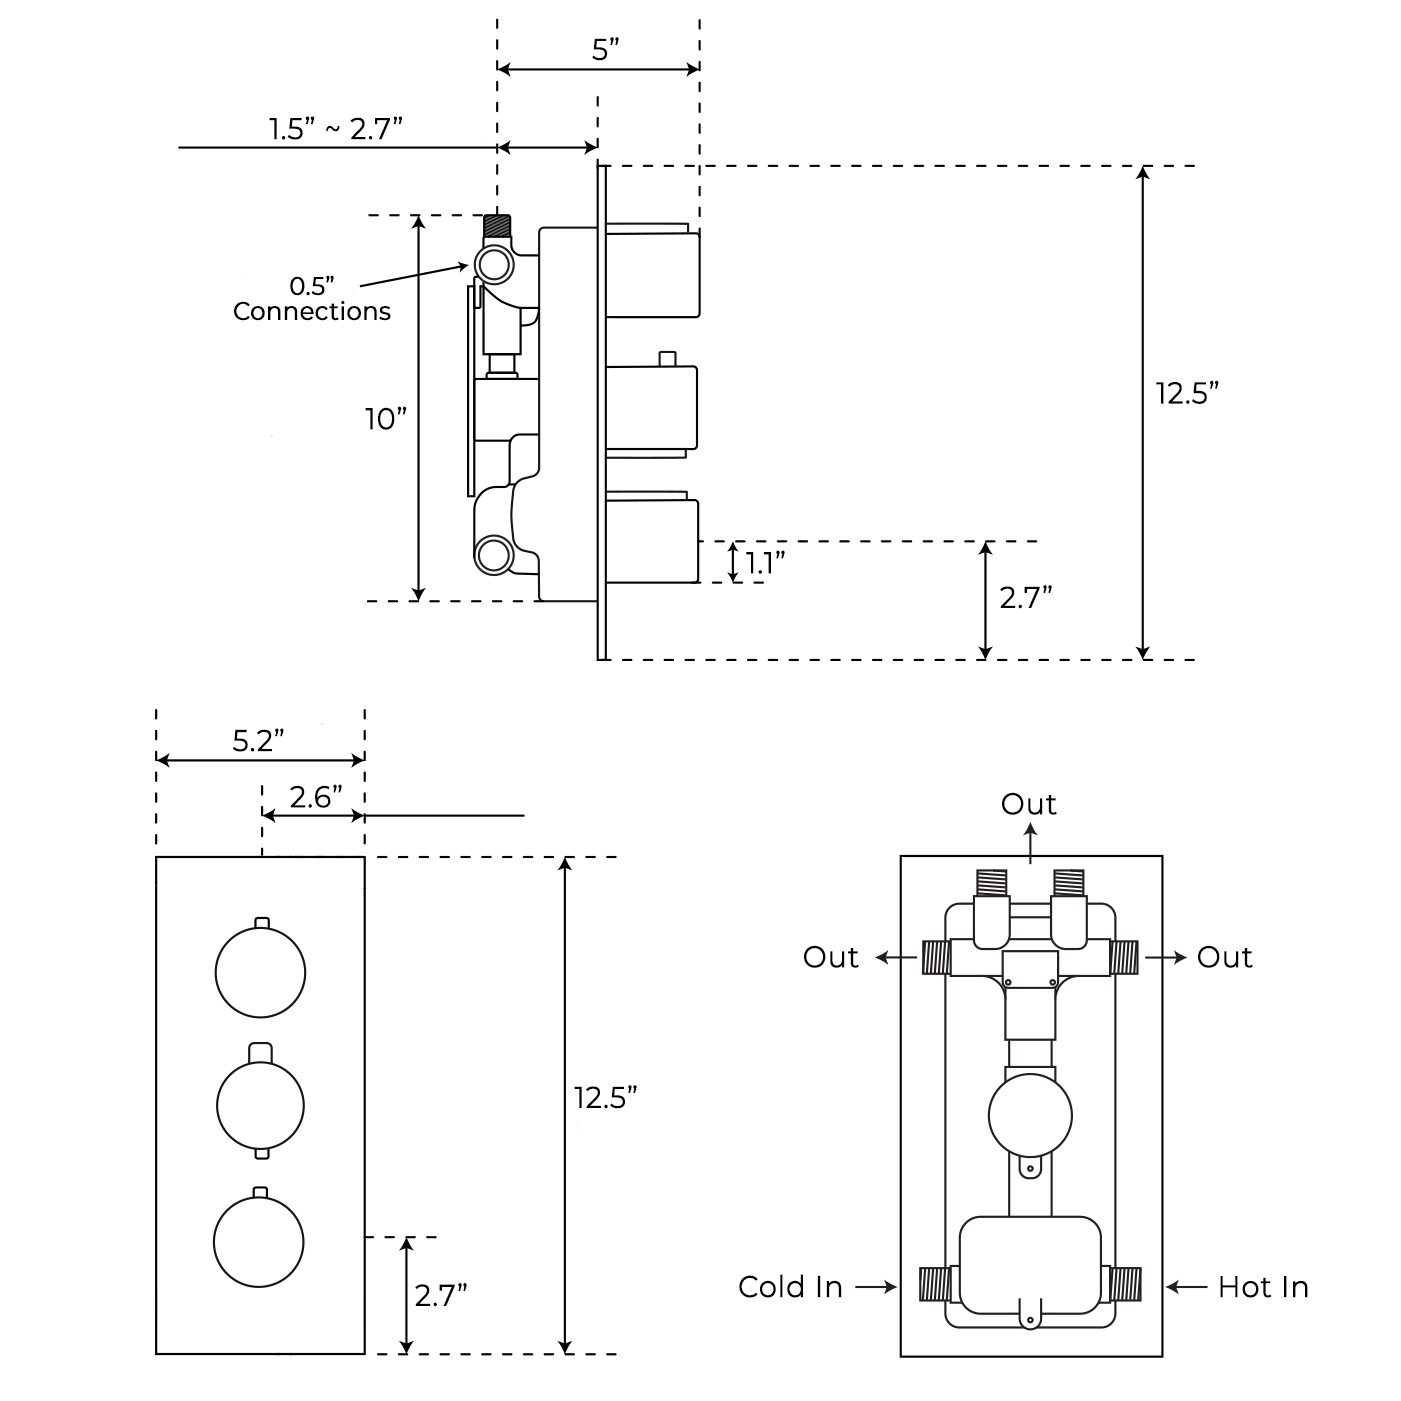
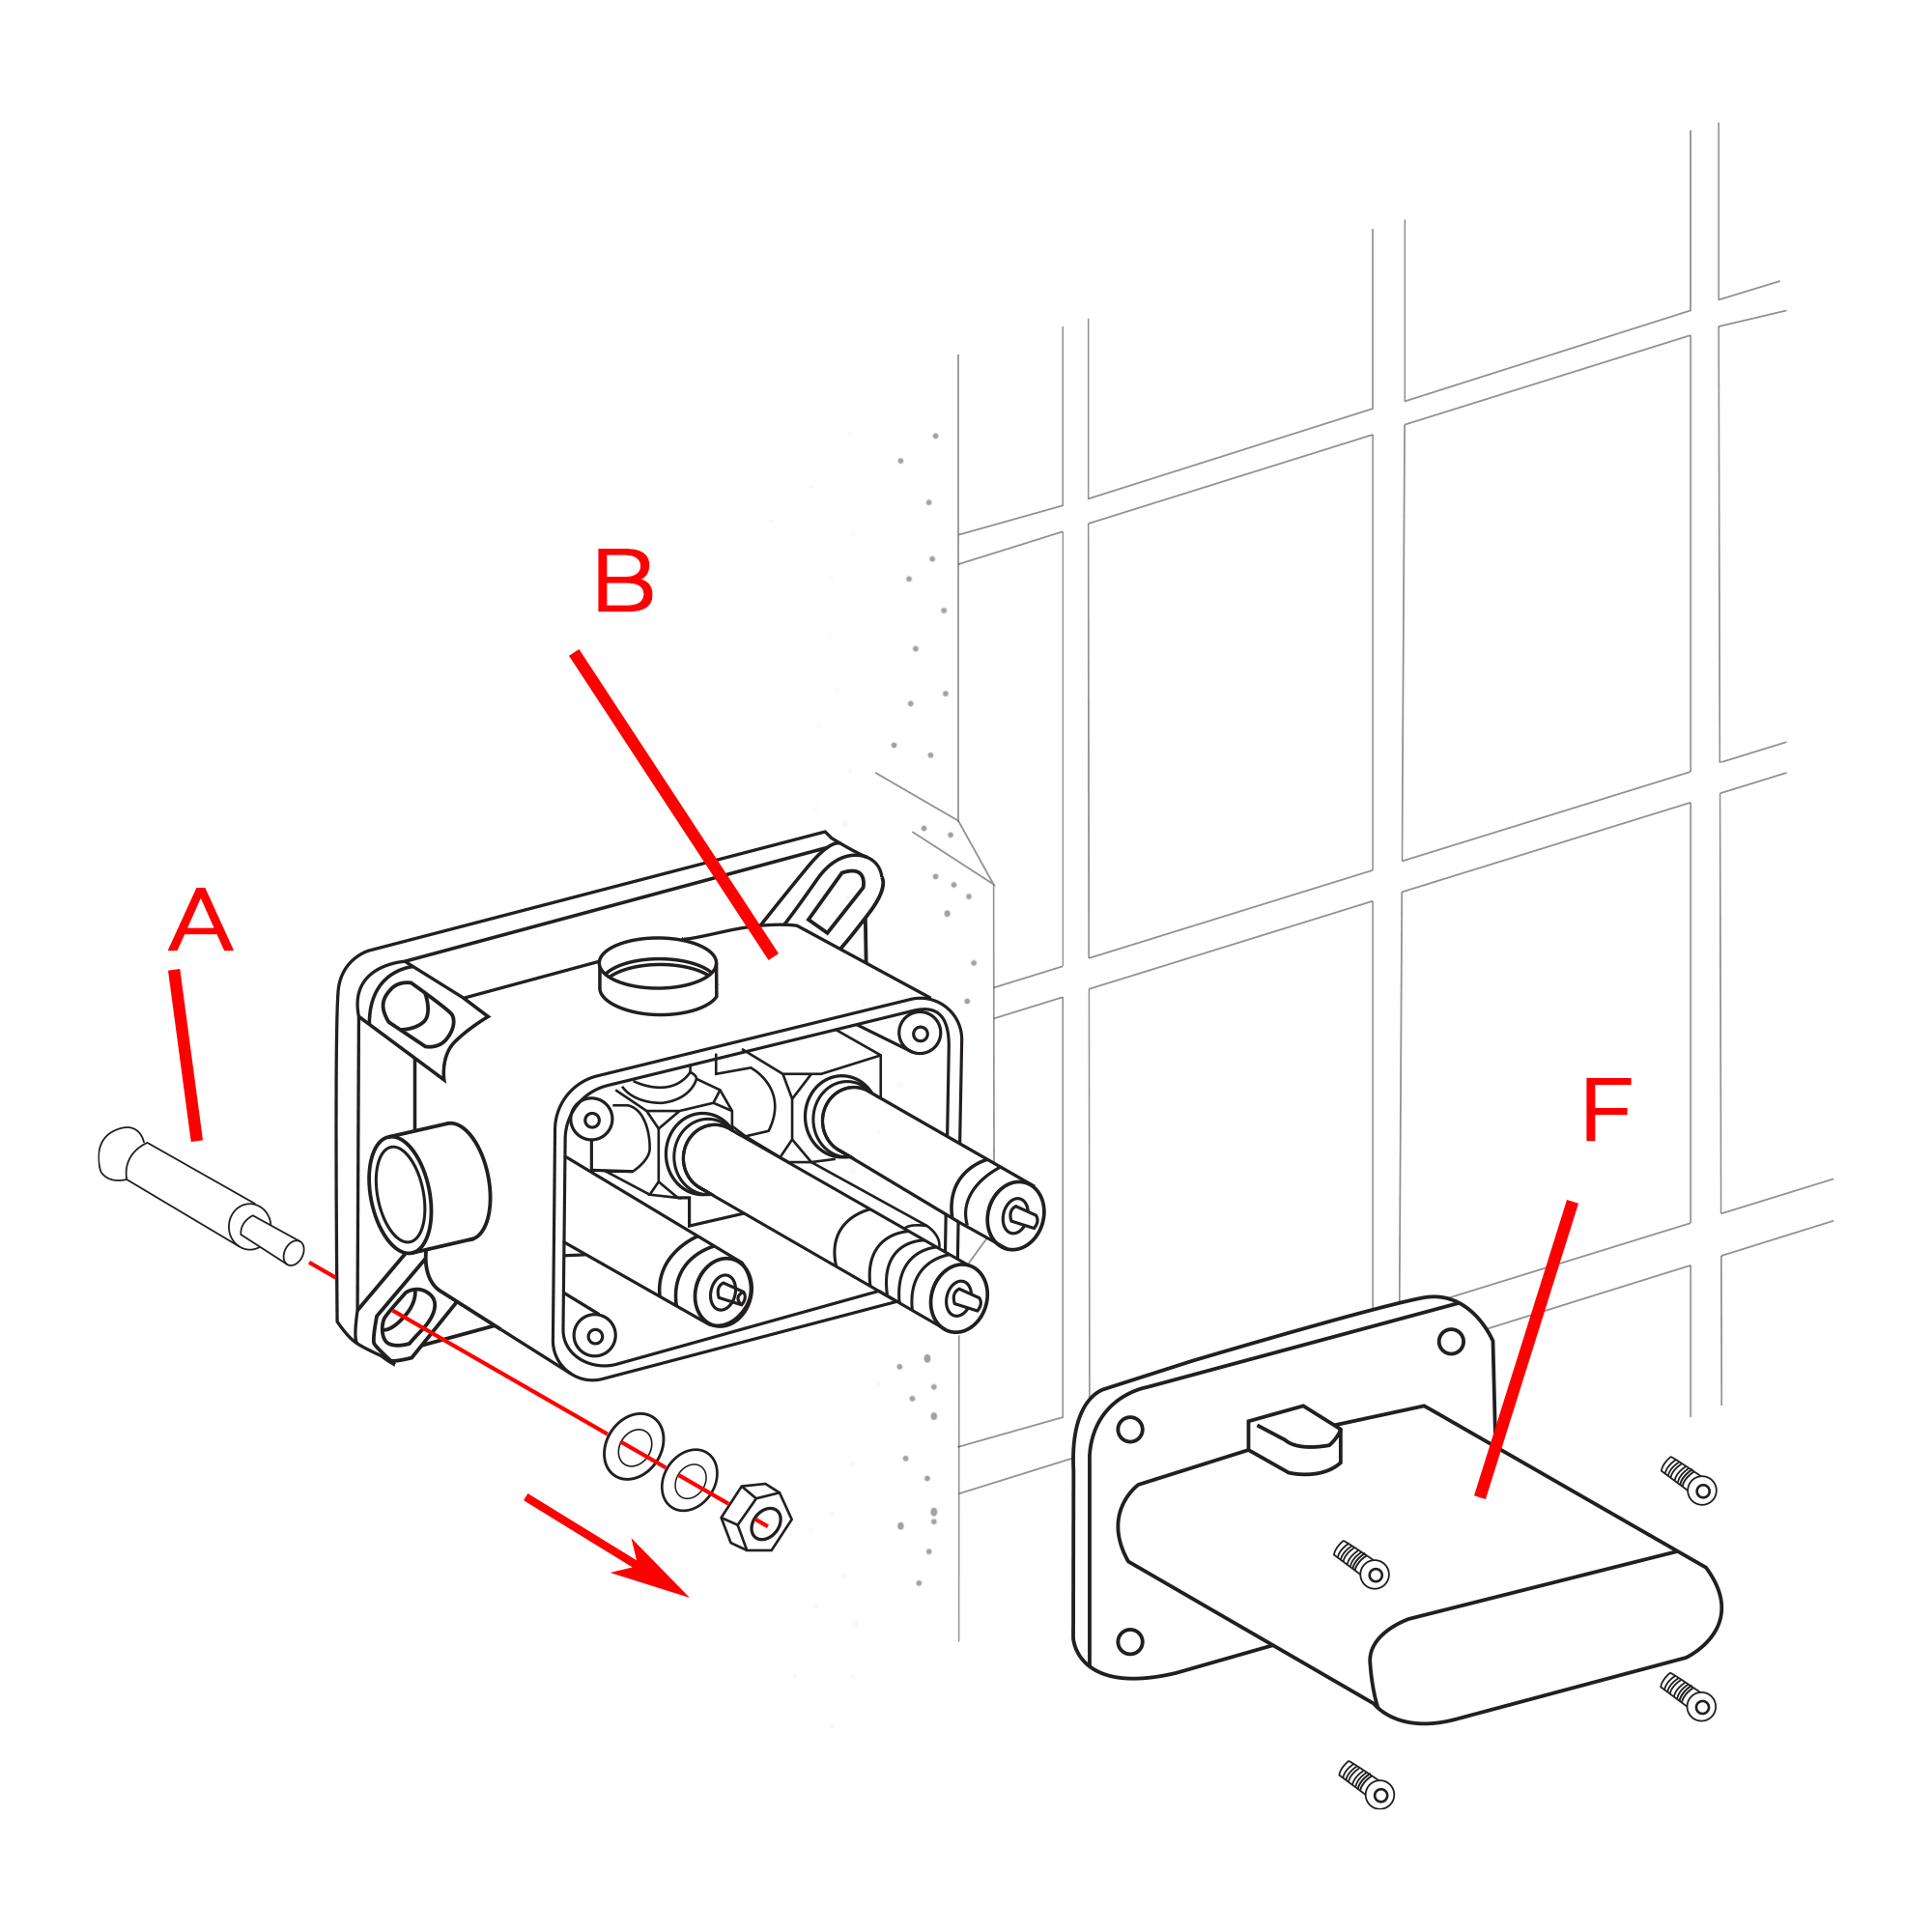
3. Be sure to confirm that the four holes are on the same horizontal line. | | Remove the protective cover (F). Mark the positions and drill holes to suit the anchors (A). Install the anchors (A) and fix the rough-in valve (B) into the wall with screws. Use a level to ensure that the rough-in valve (B) is straight and level. (Important: Flush the water supply to remove any dirt and debris before installing the valve body).
| 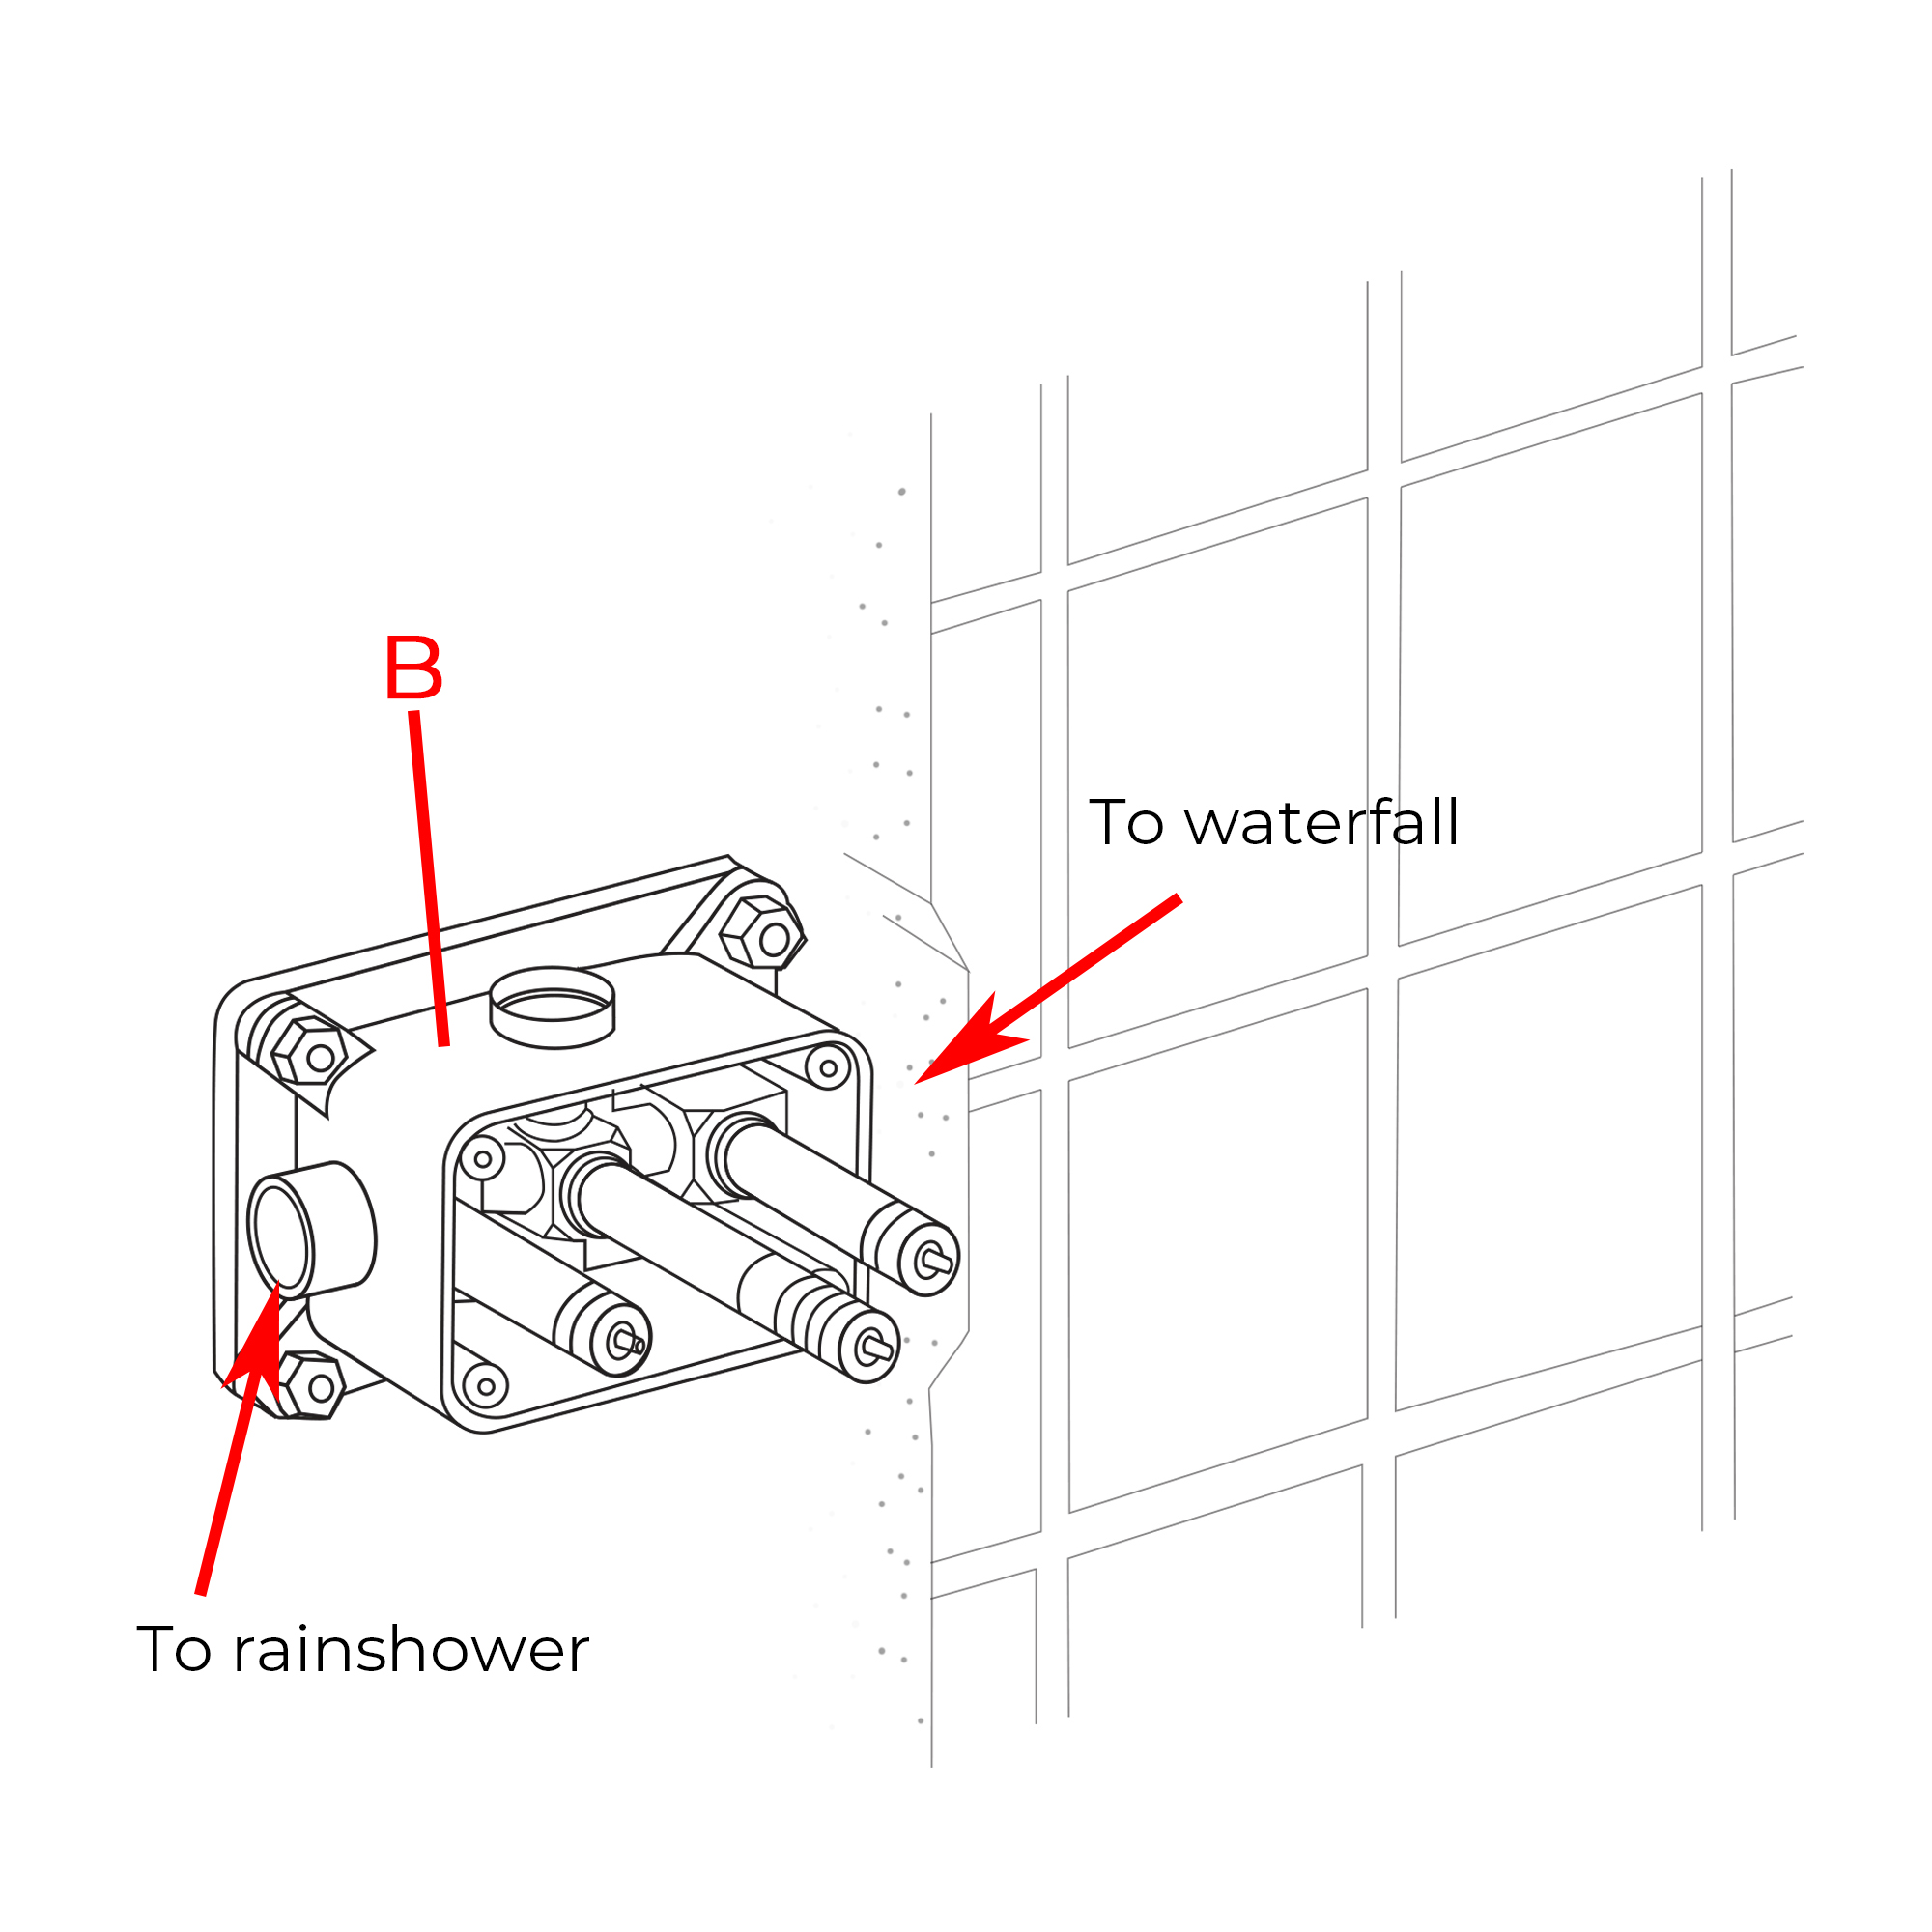
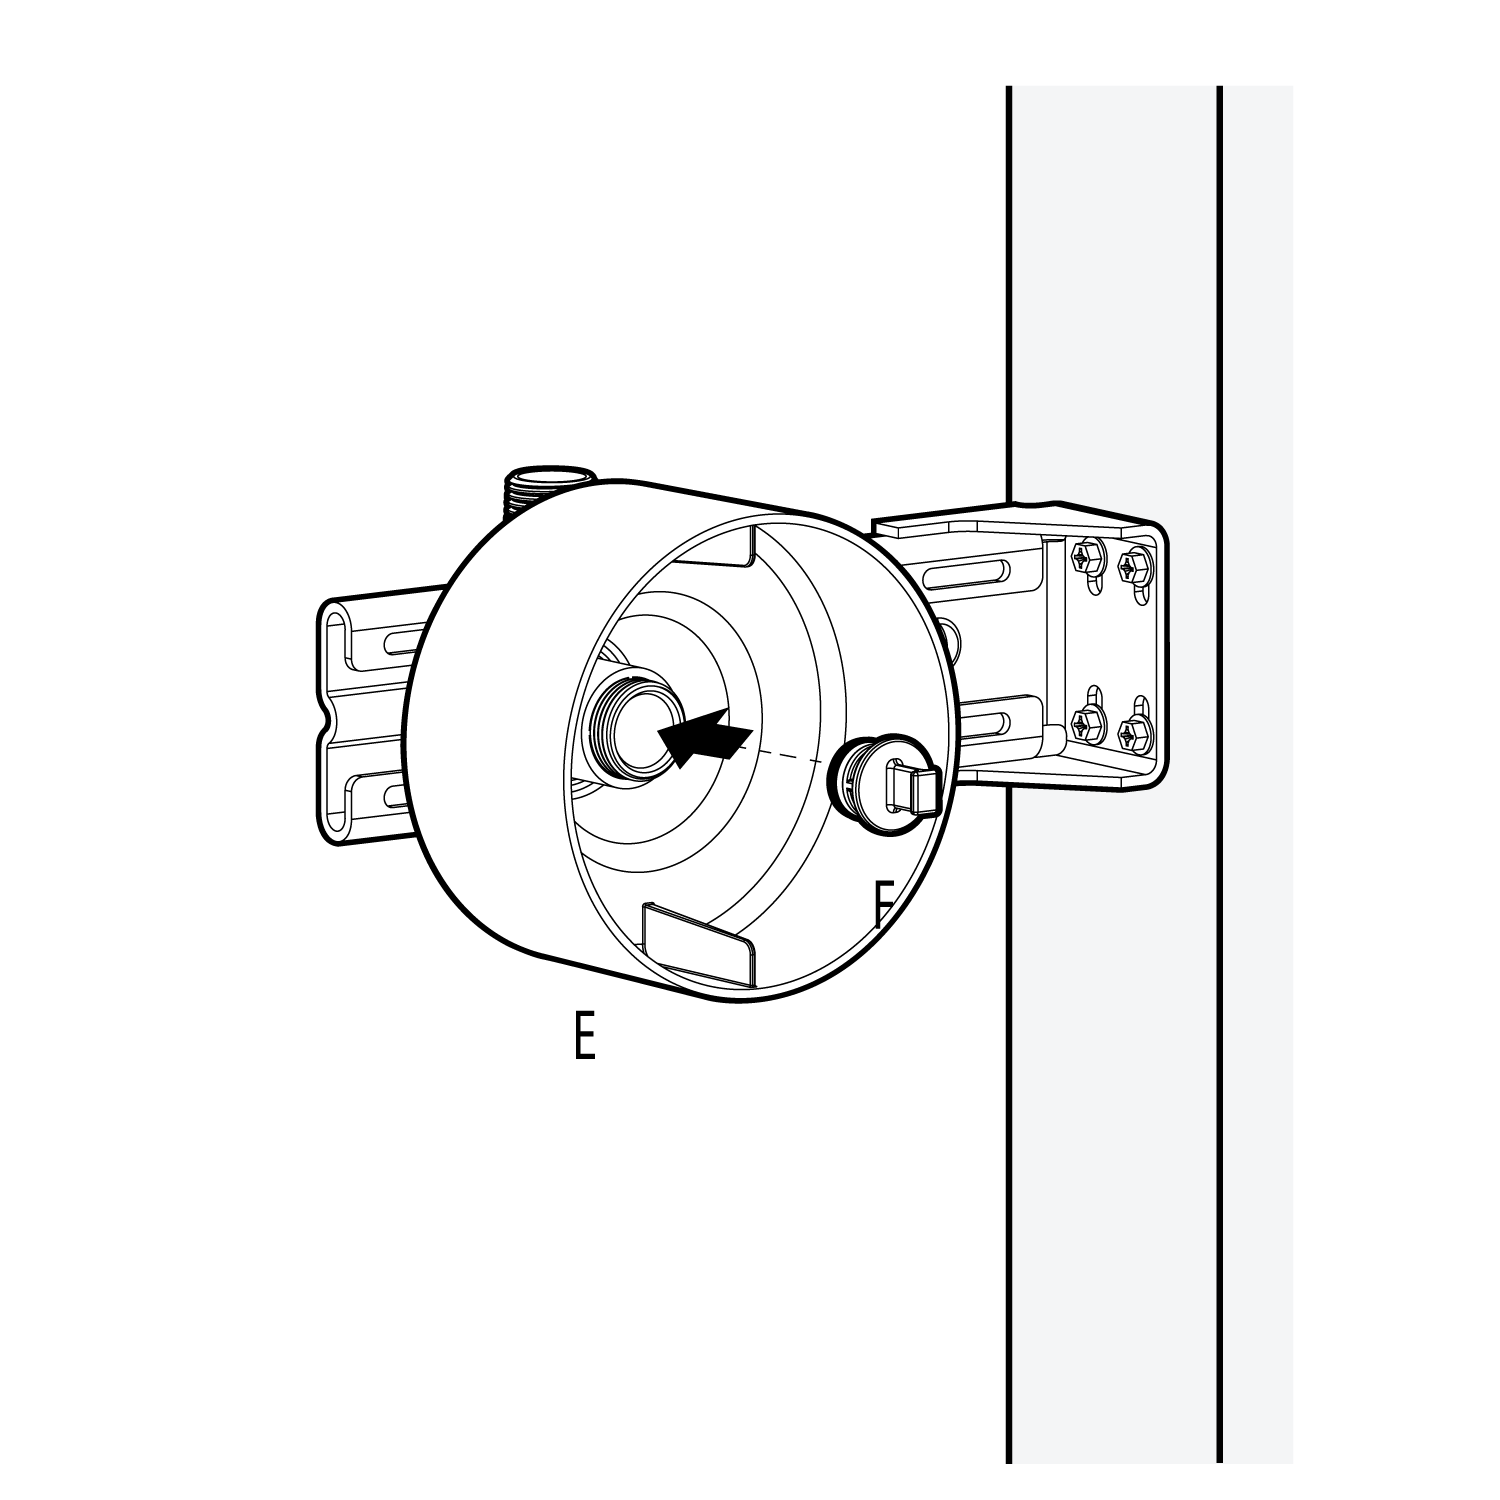
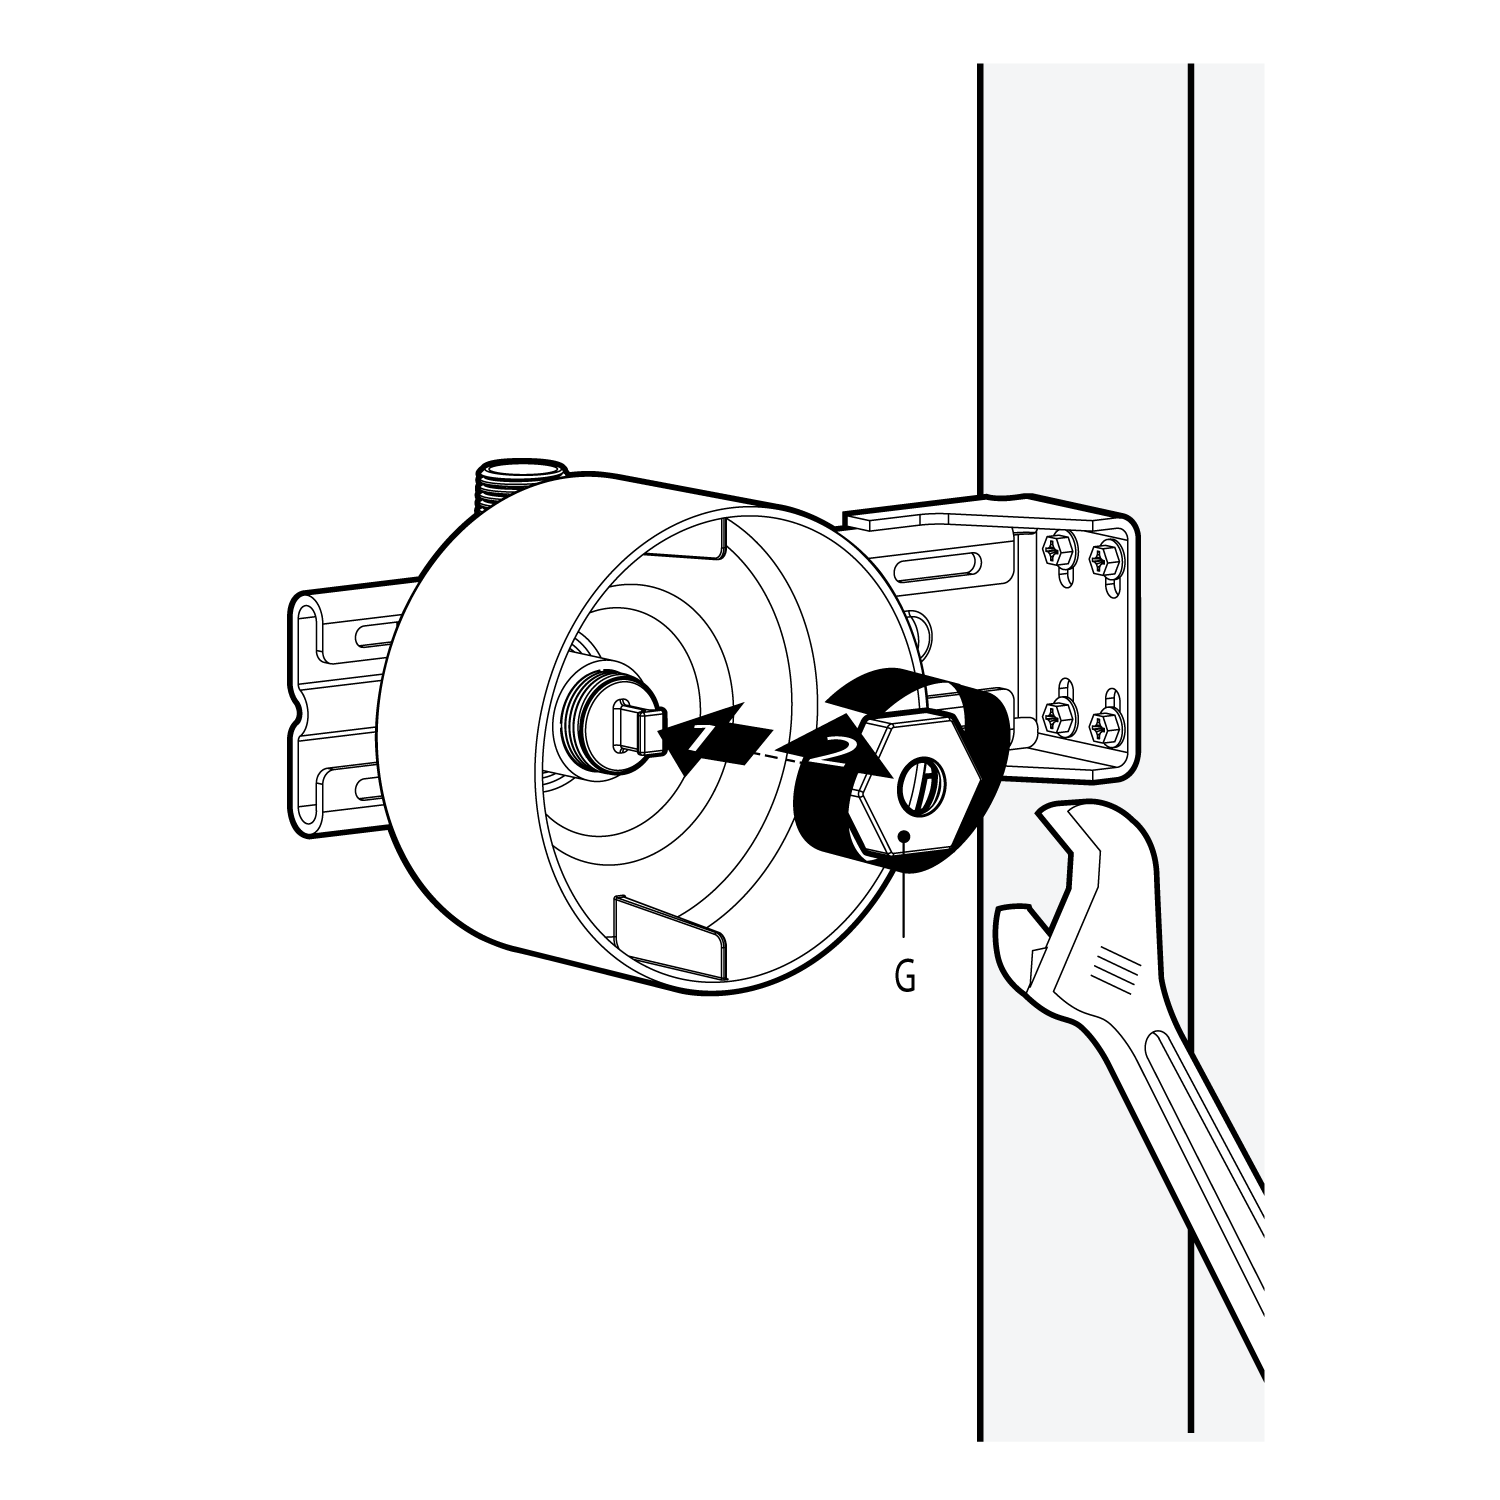
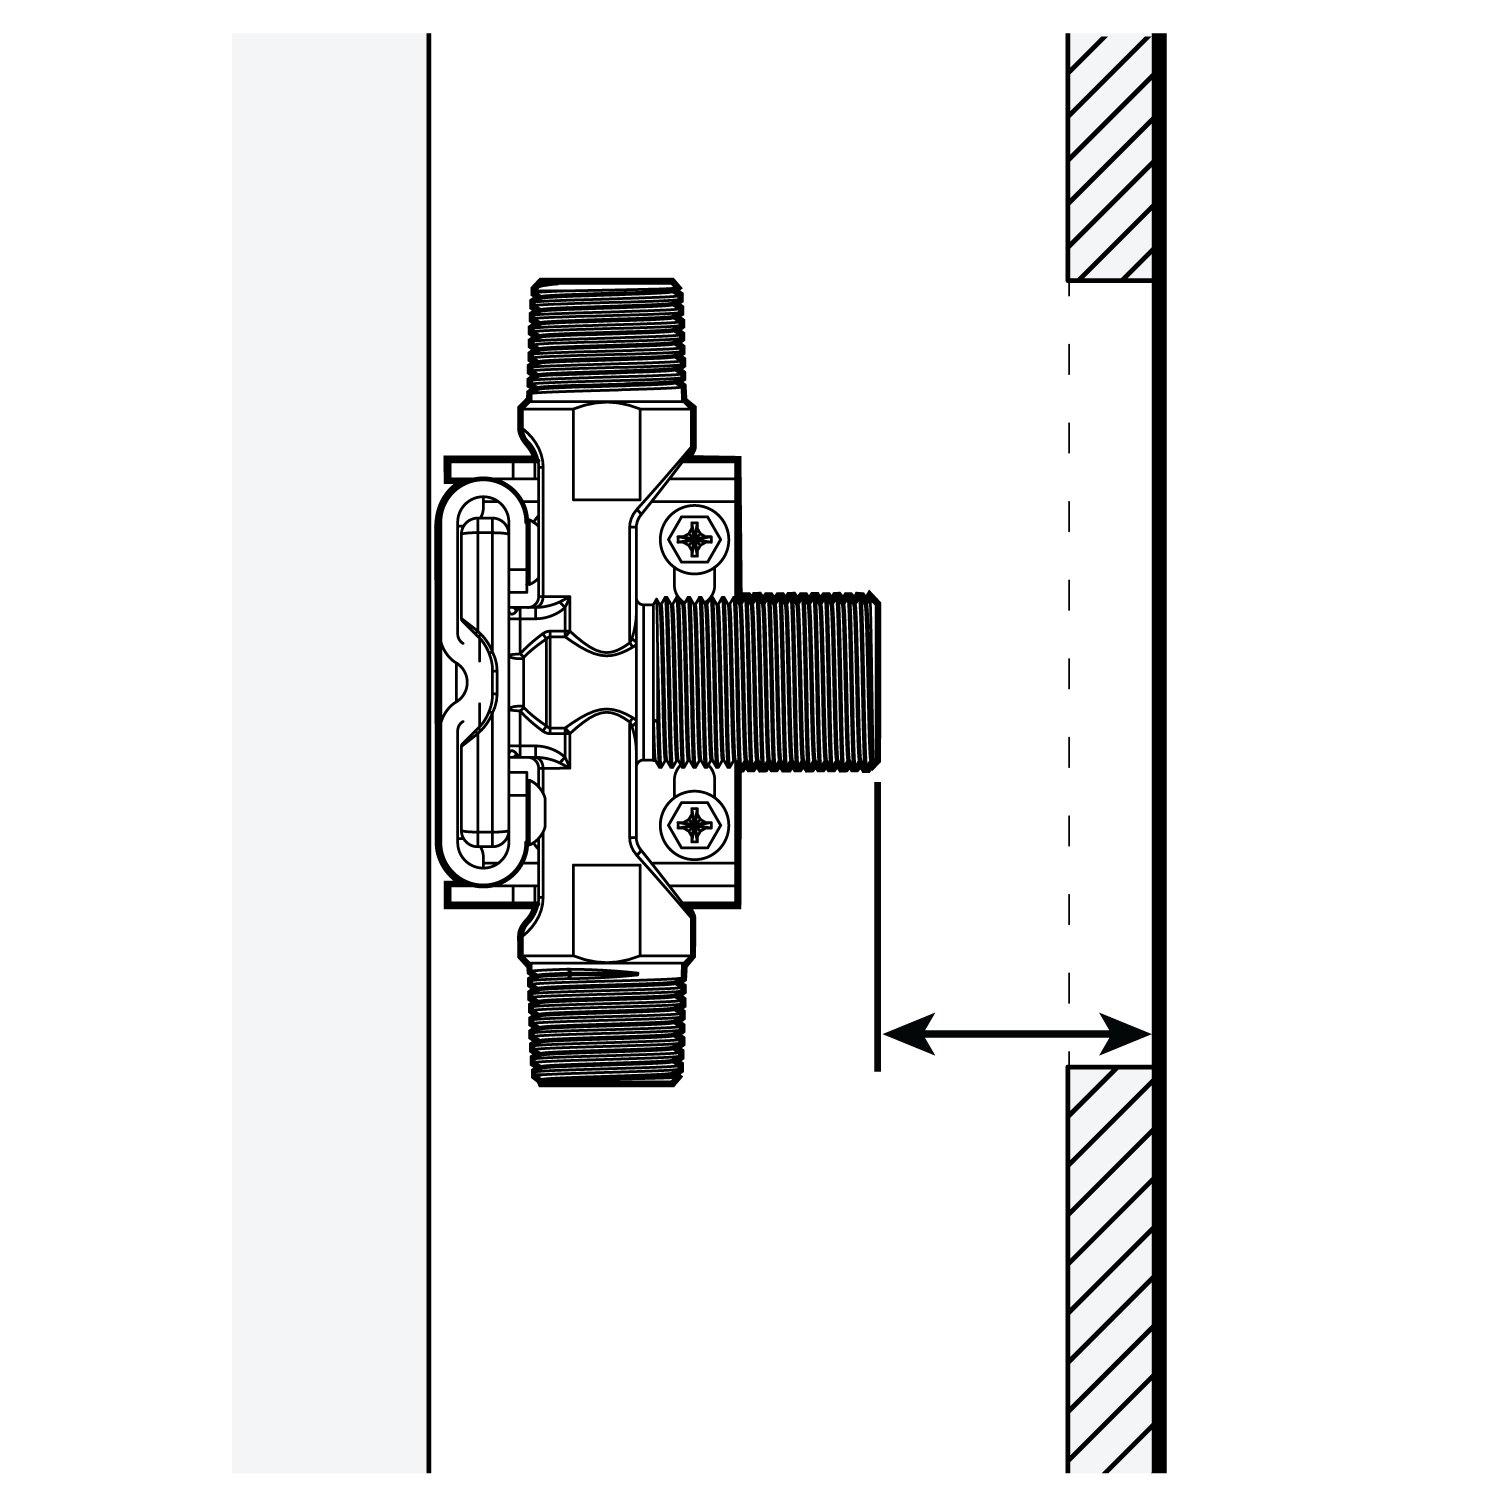
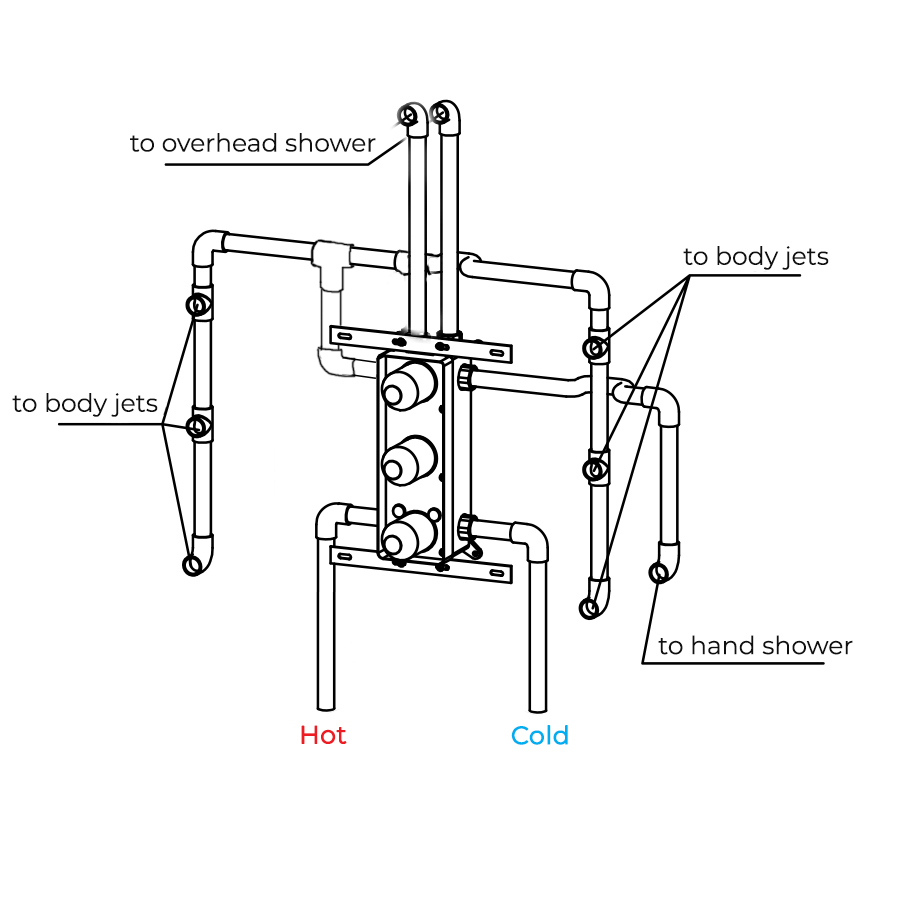
| |  | Wrap Teflon tape around the pipe threads and connect water supply lines and in-wall pipes (not included) as desired to the rough-in valve (B). Turn on the water supply and open the cartridge to check for leakage. Then put on the protective cover and finish the wall surrounding the valve. (Note: Test the water pressure after the pipe connections have been made and before the finished wall material is installed).
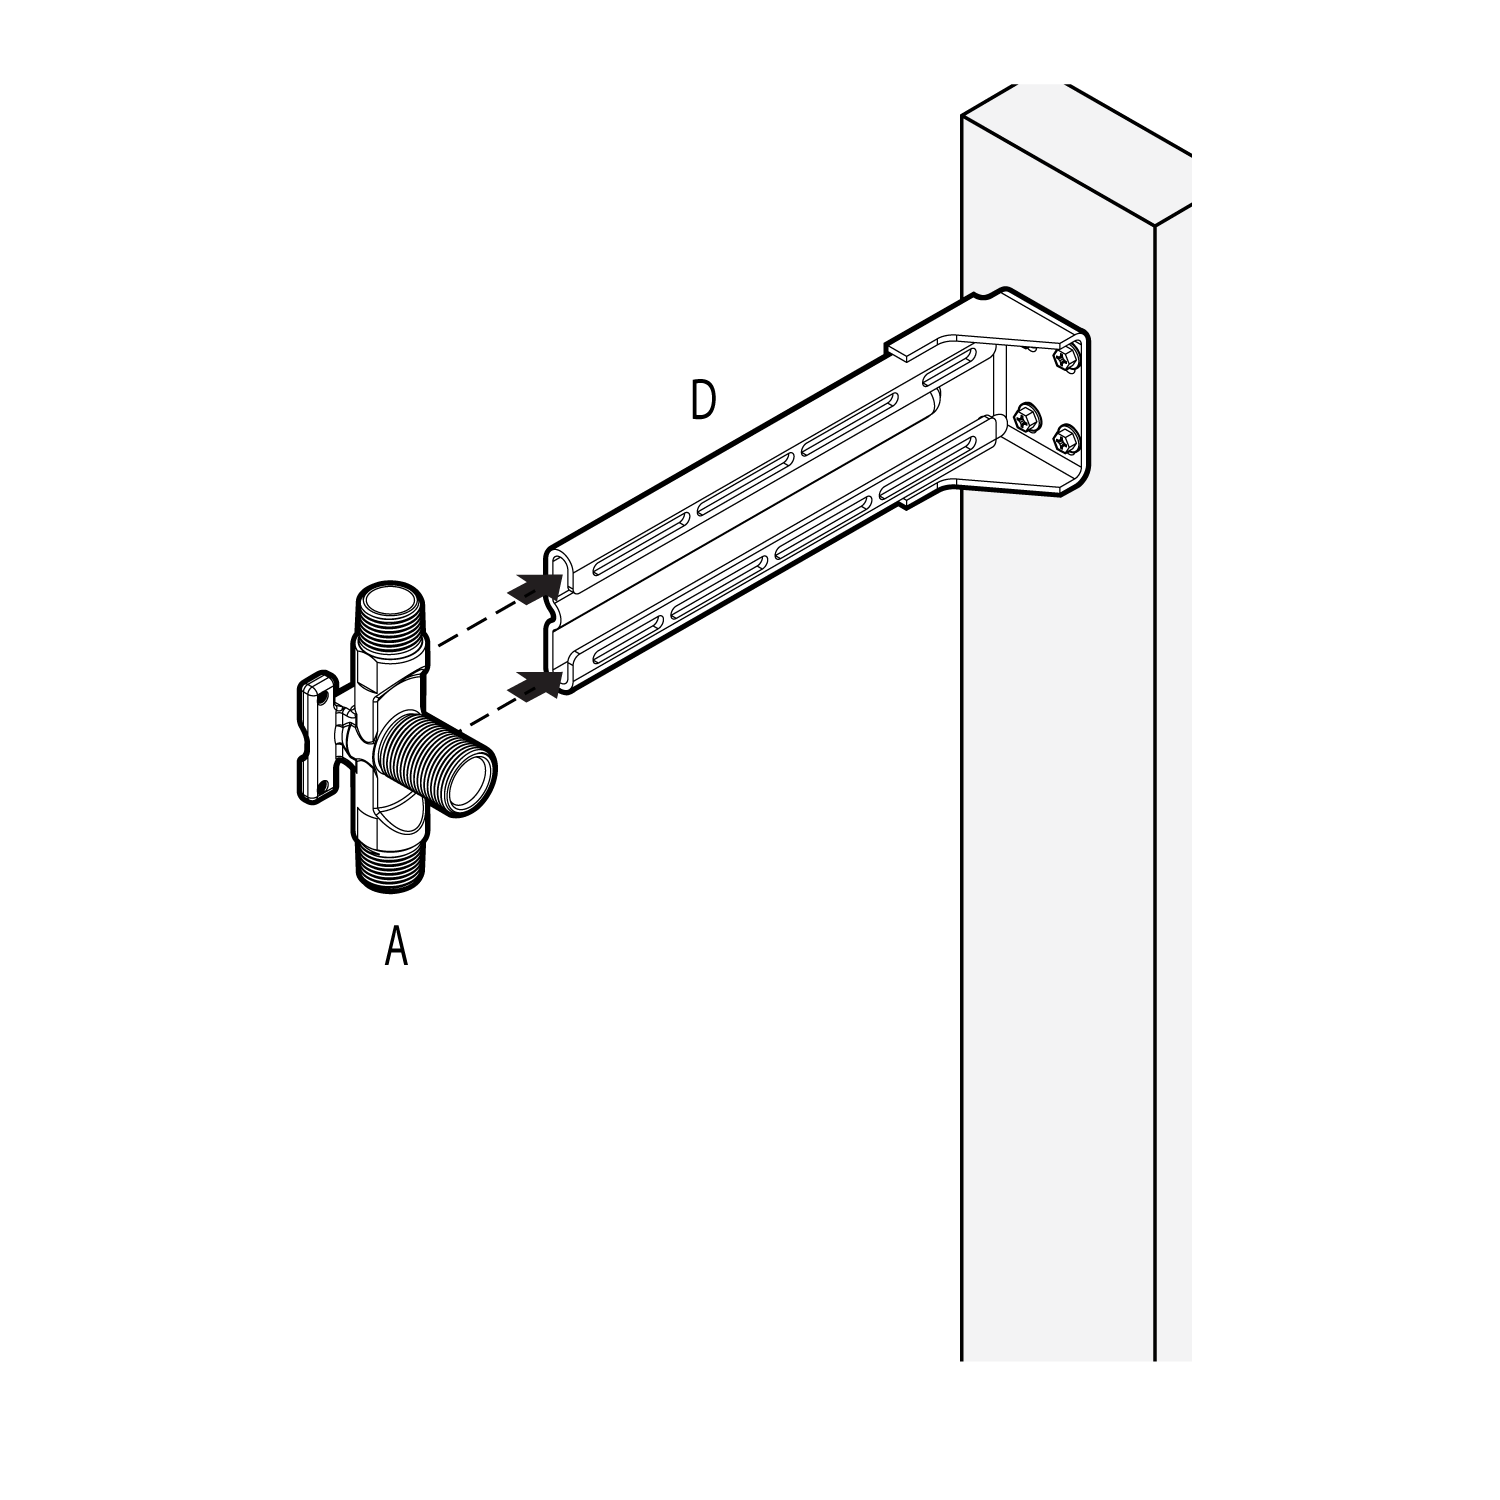
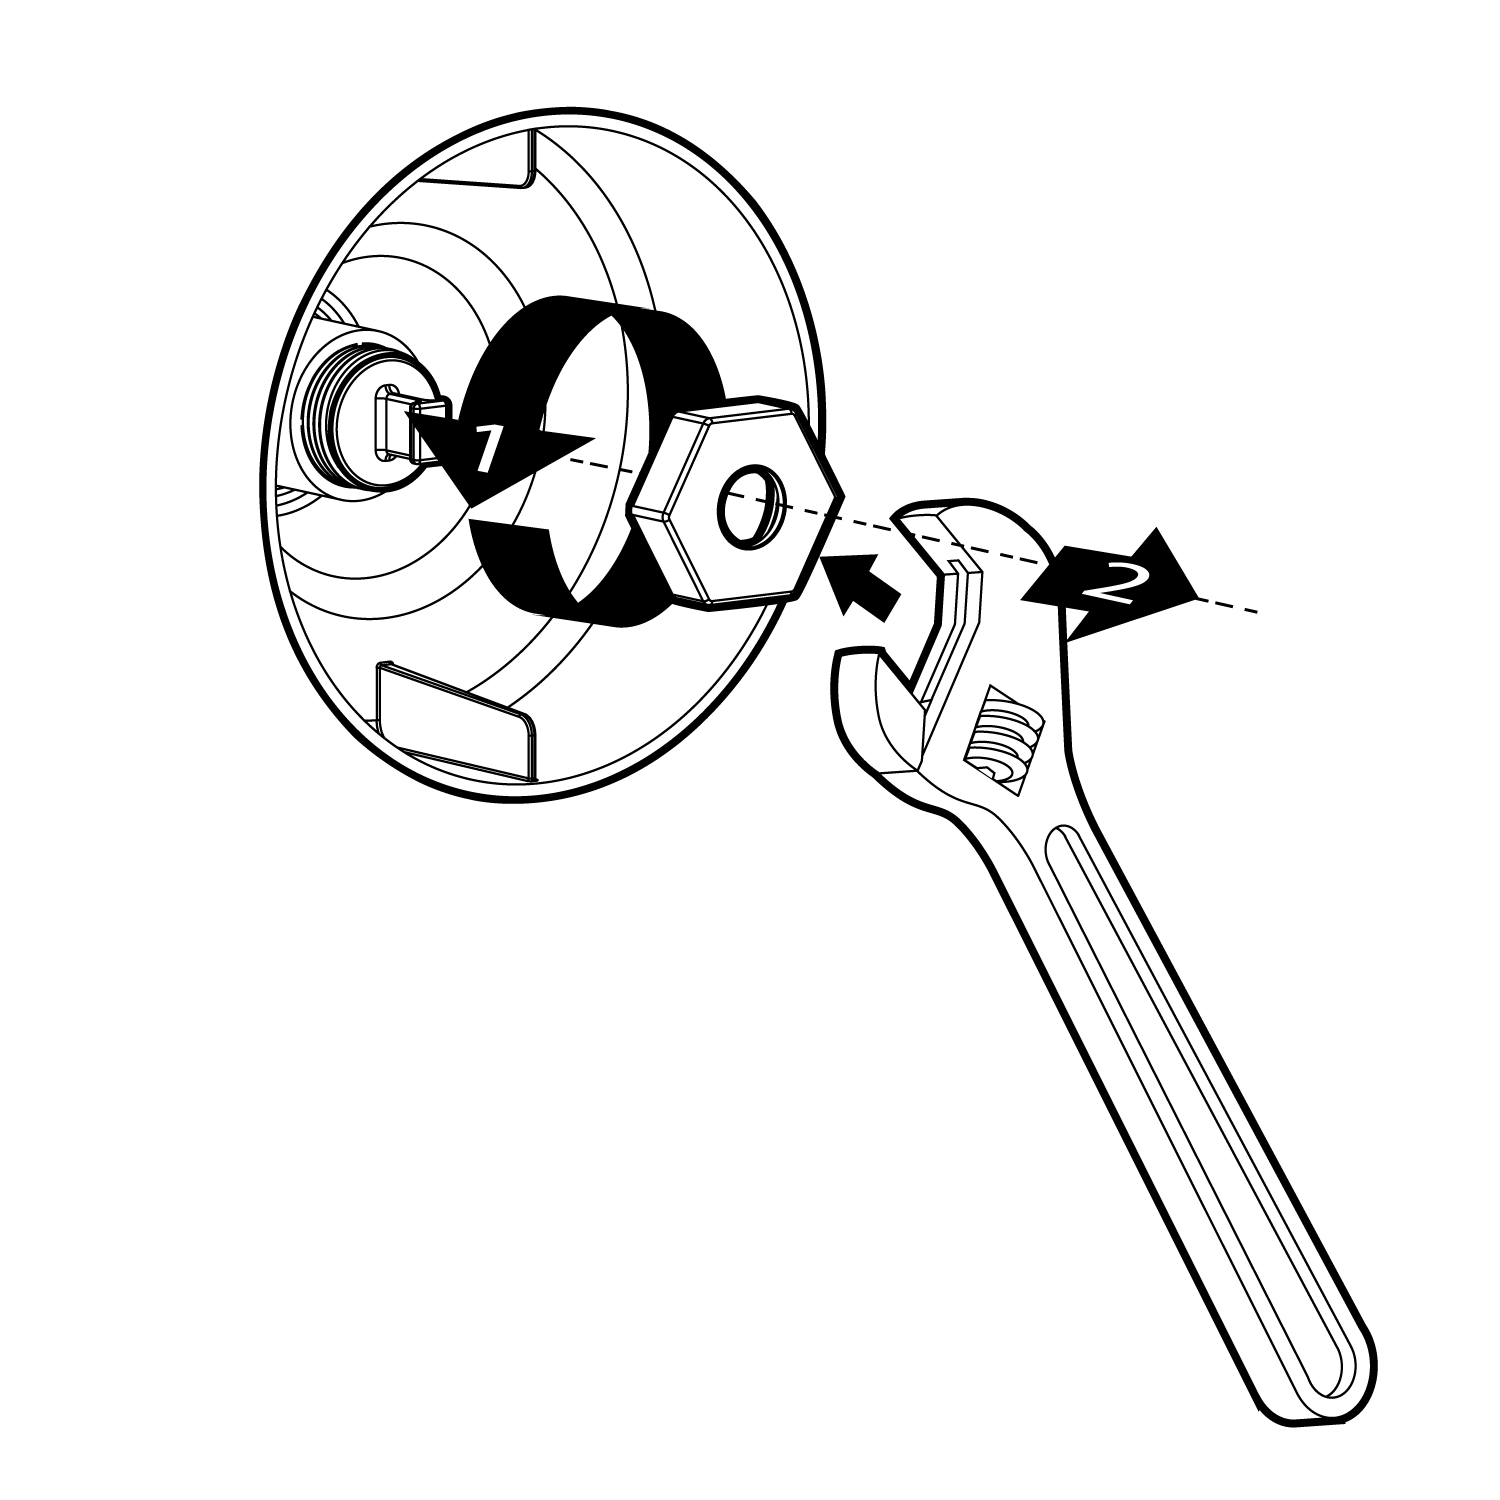
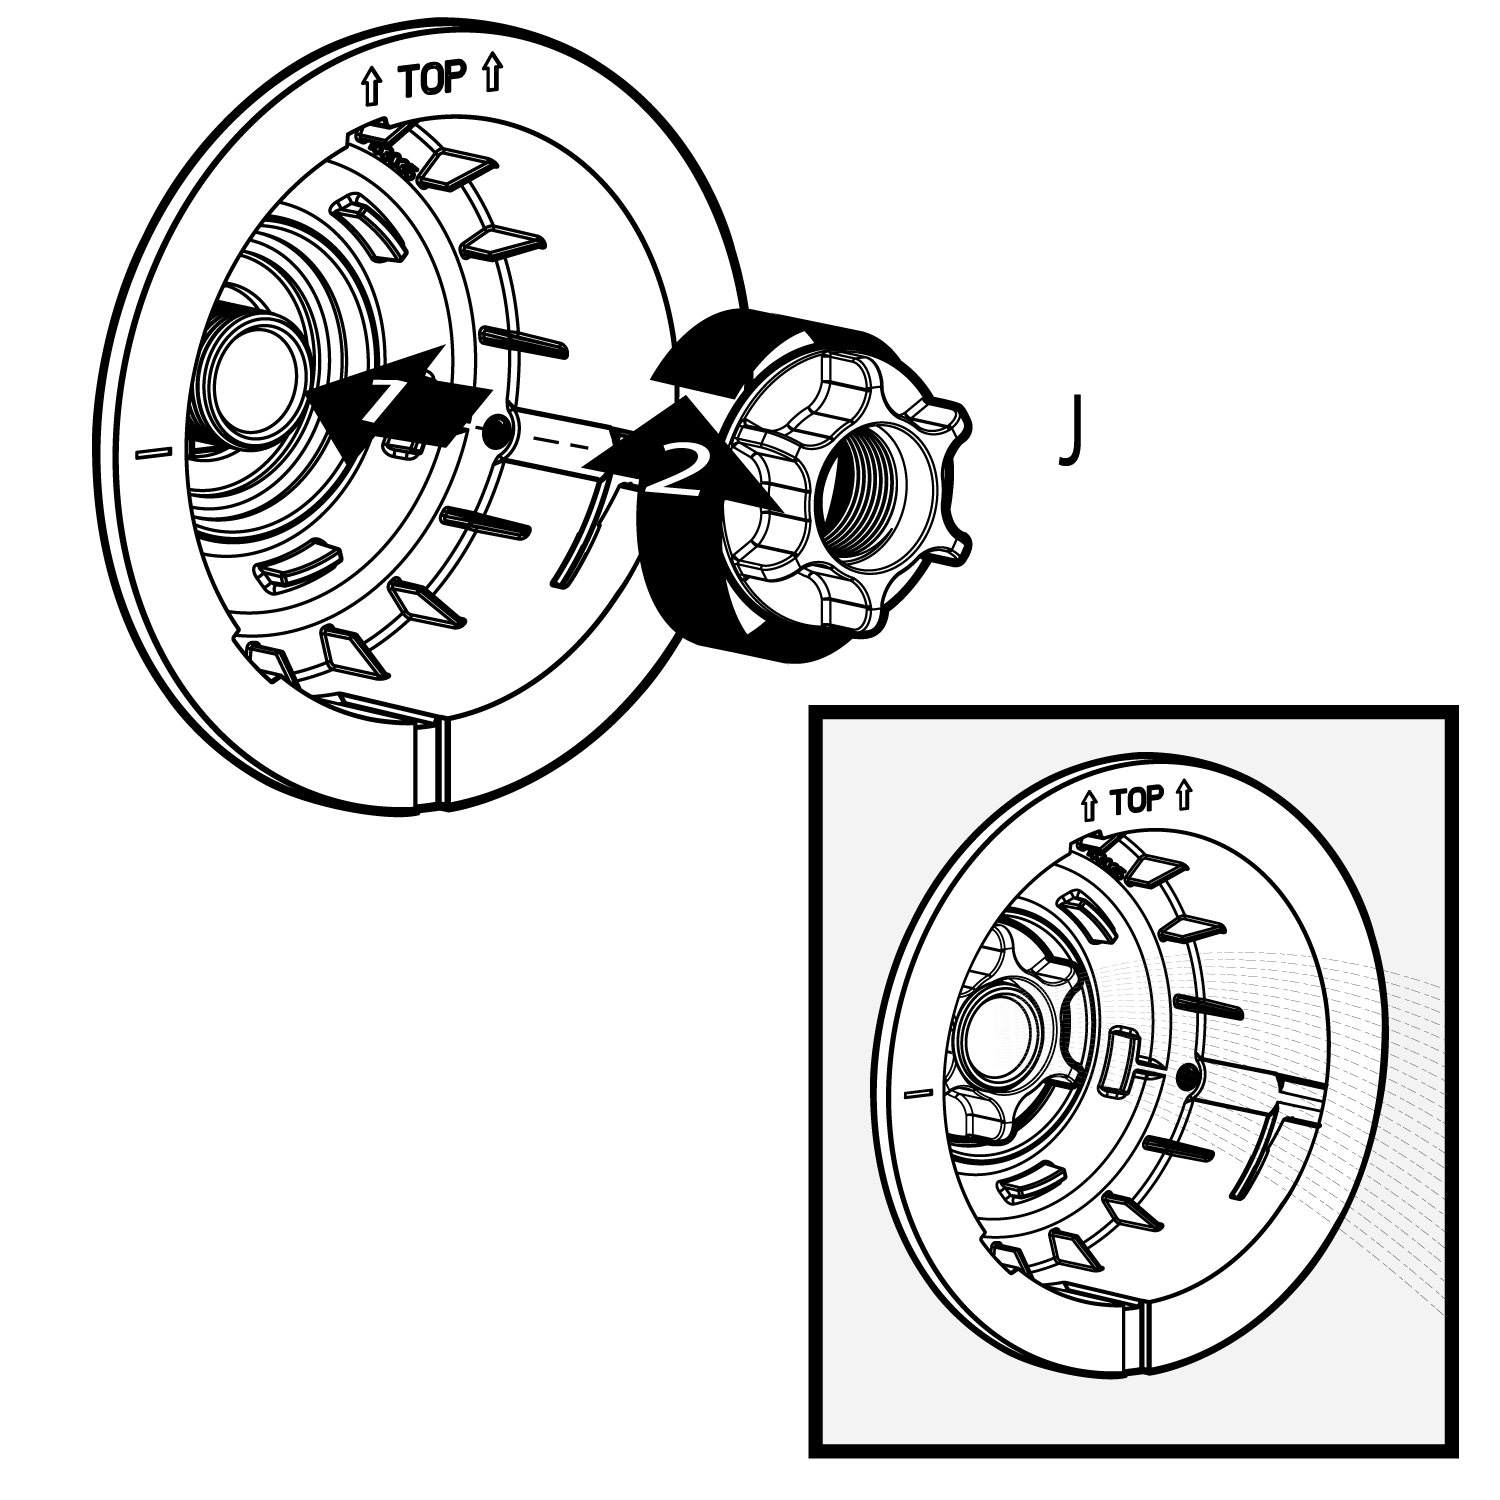
| | Two inlet fittings are connected to the pipe joint of the wall; then the nut, expansion screw, and inlet pipe are connected.
|  | | 
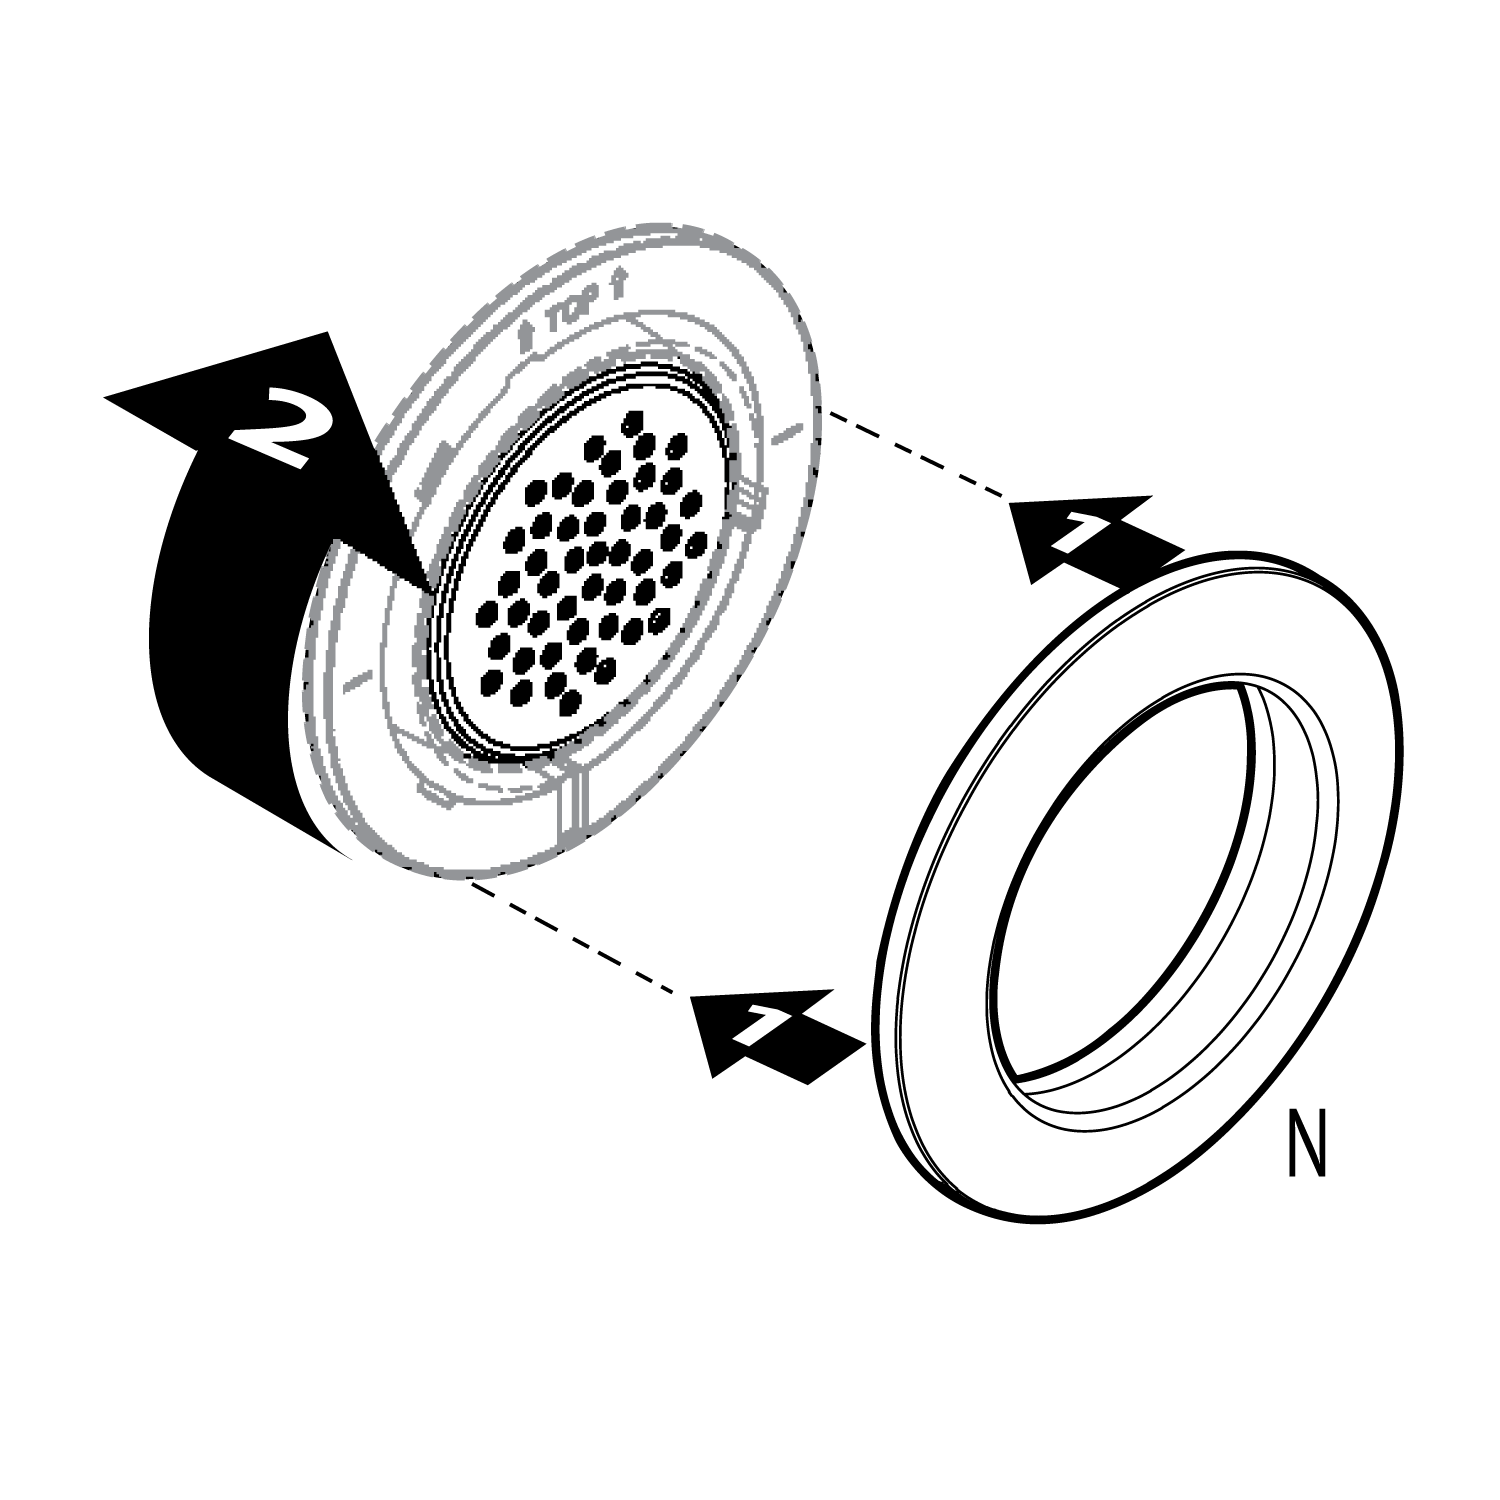
| Reinstall the top cover.
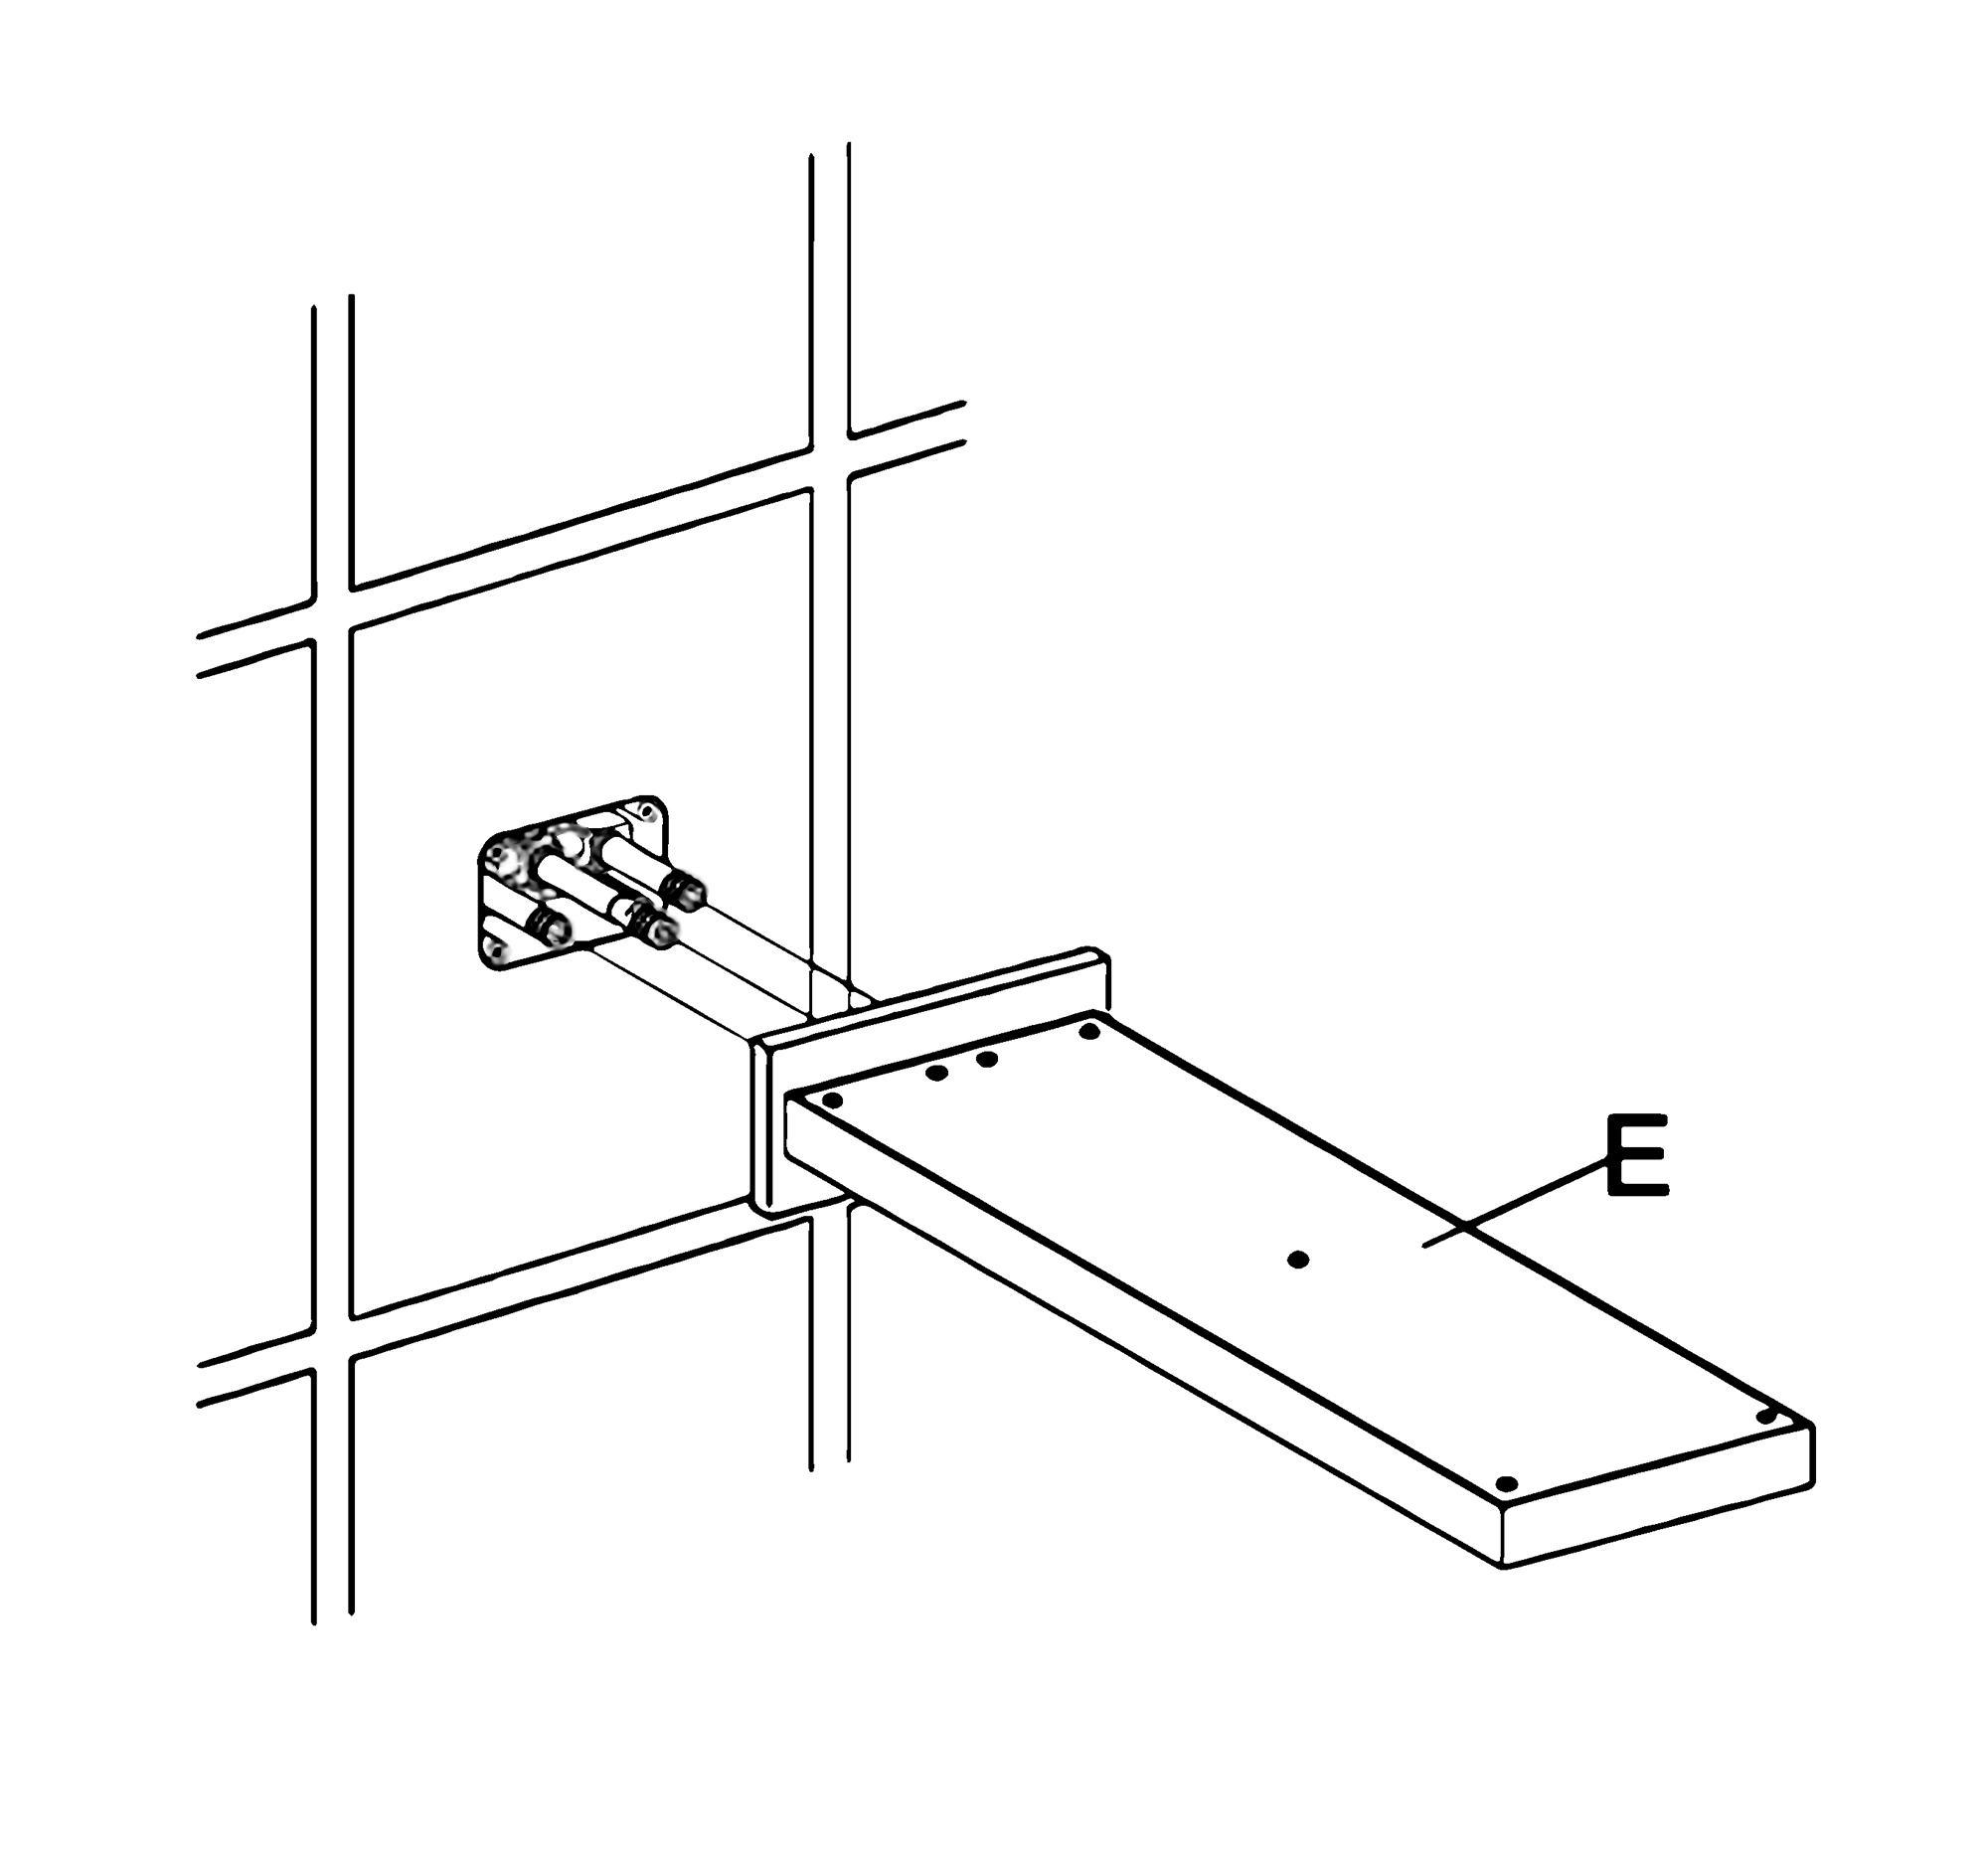
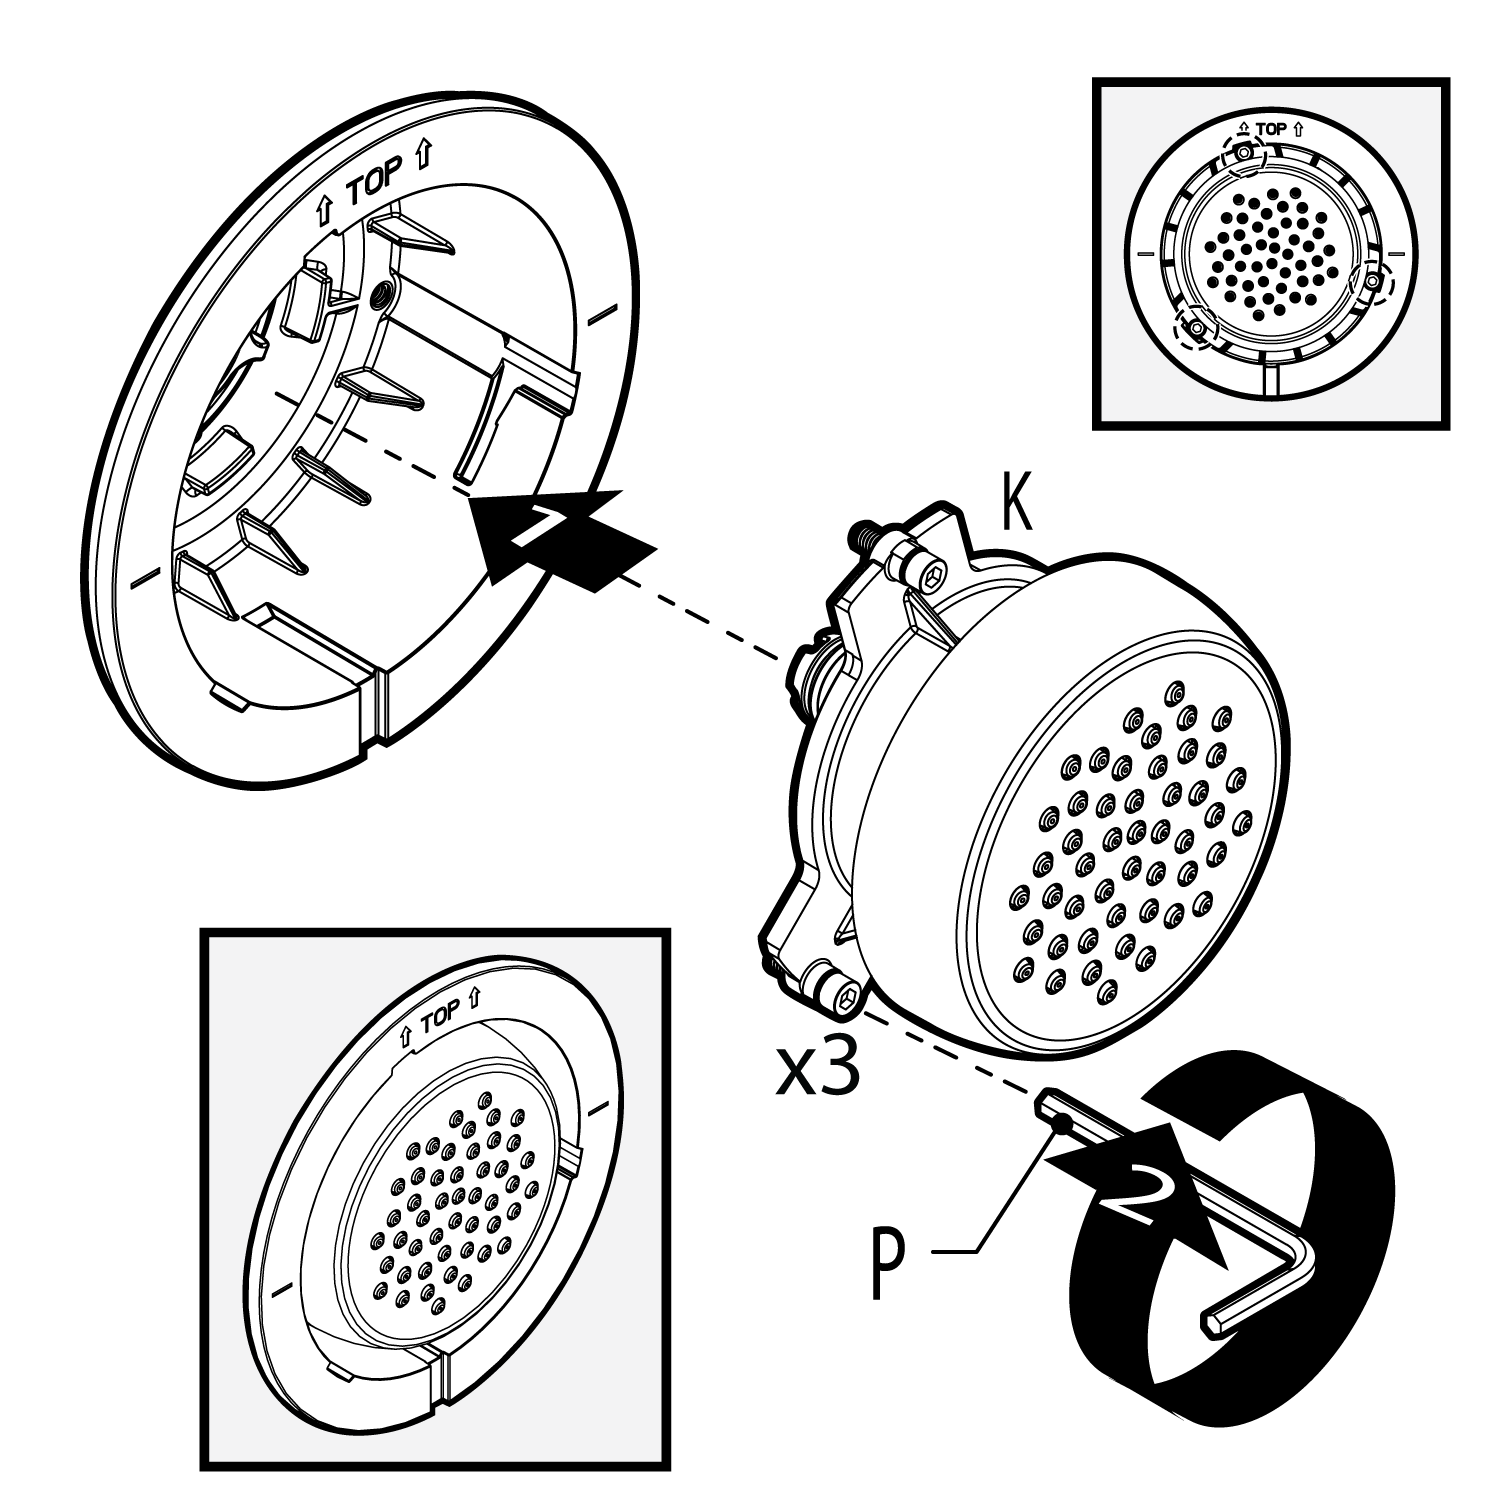
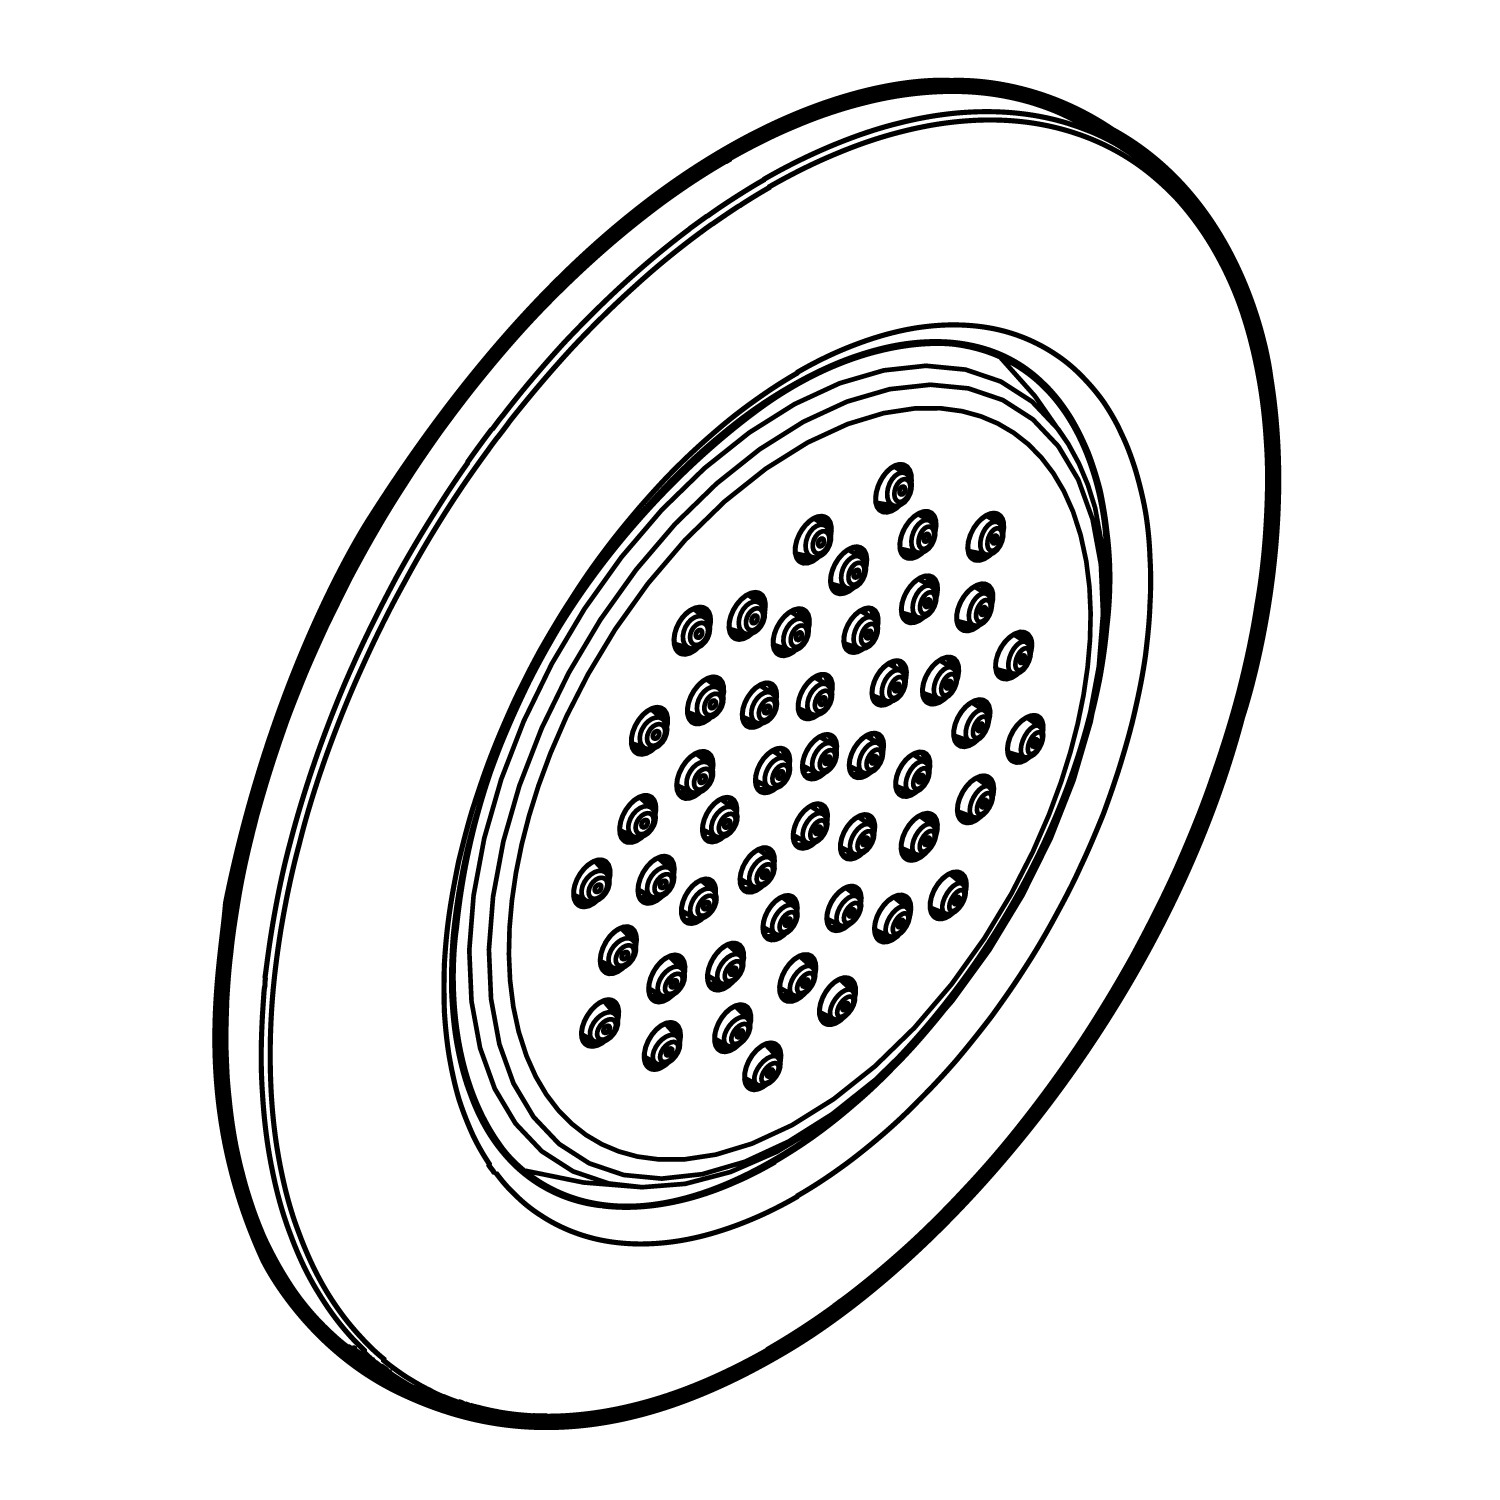
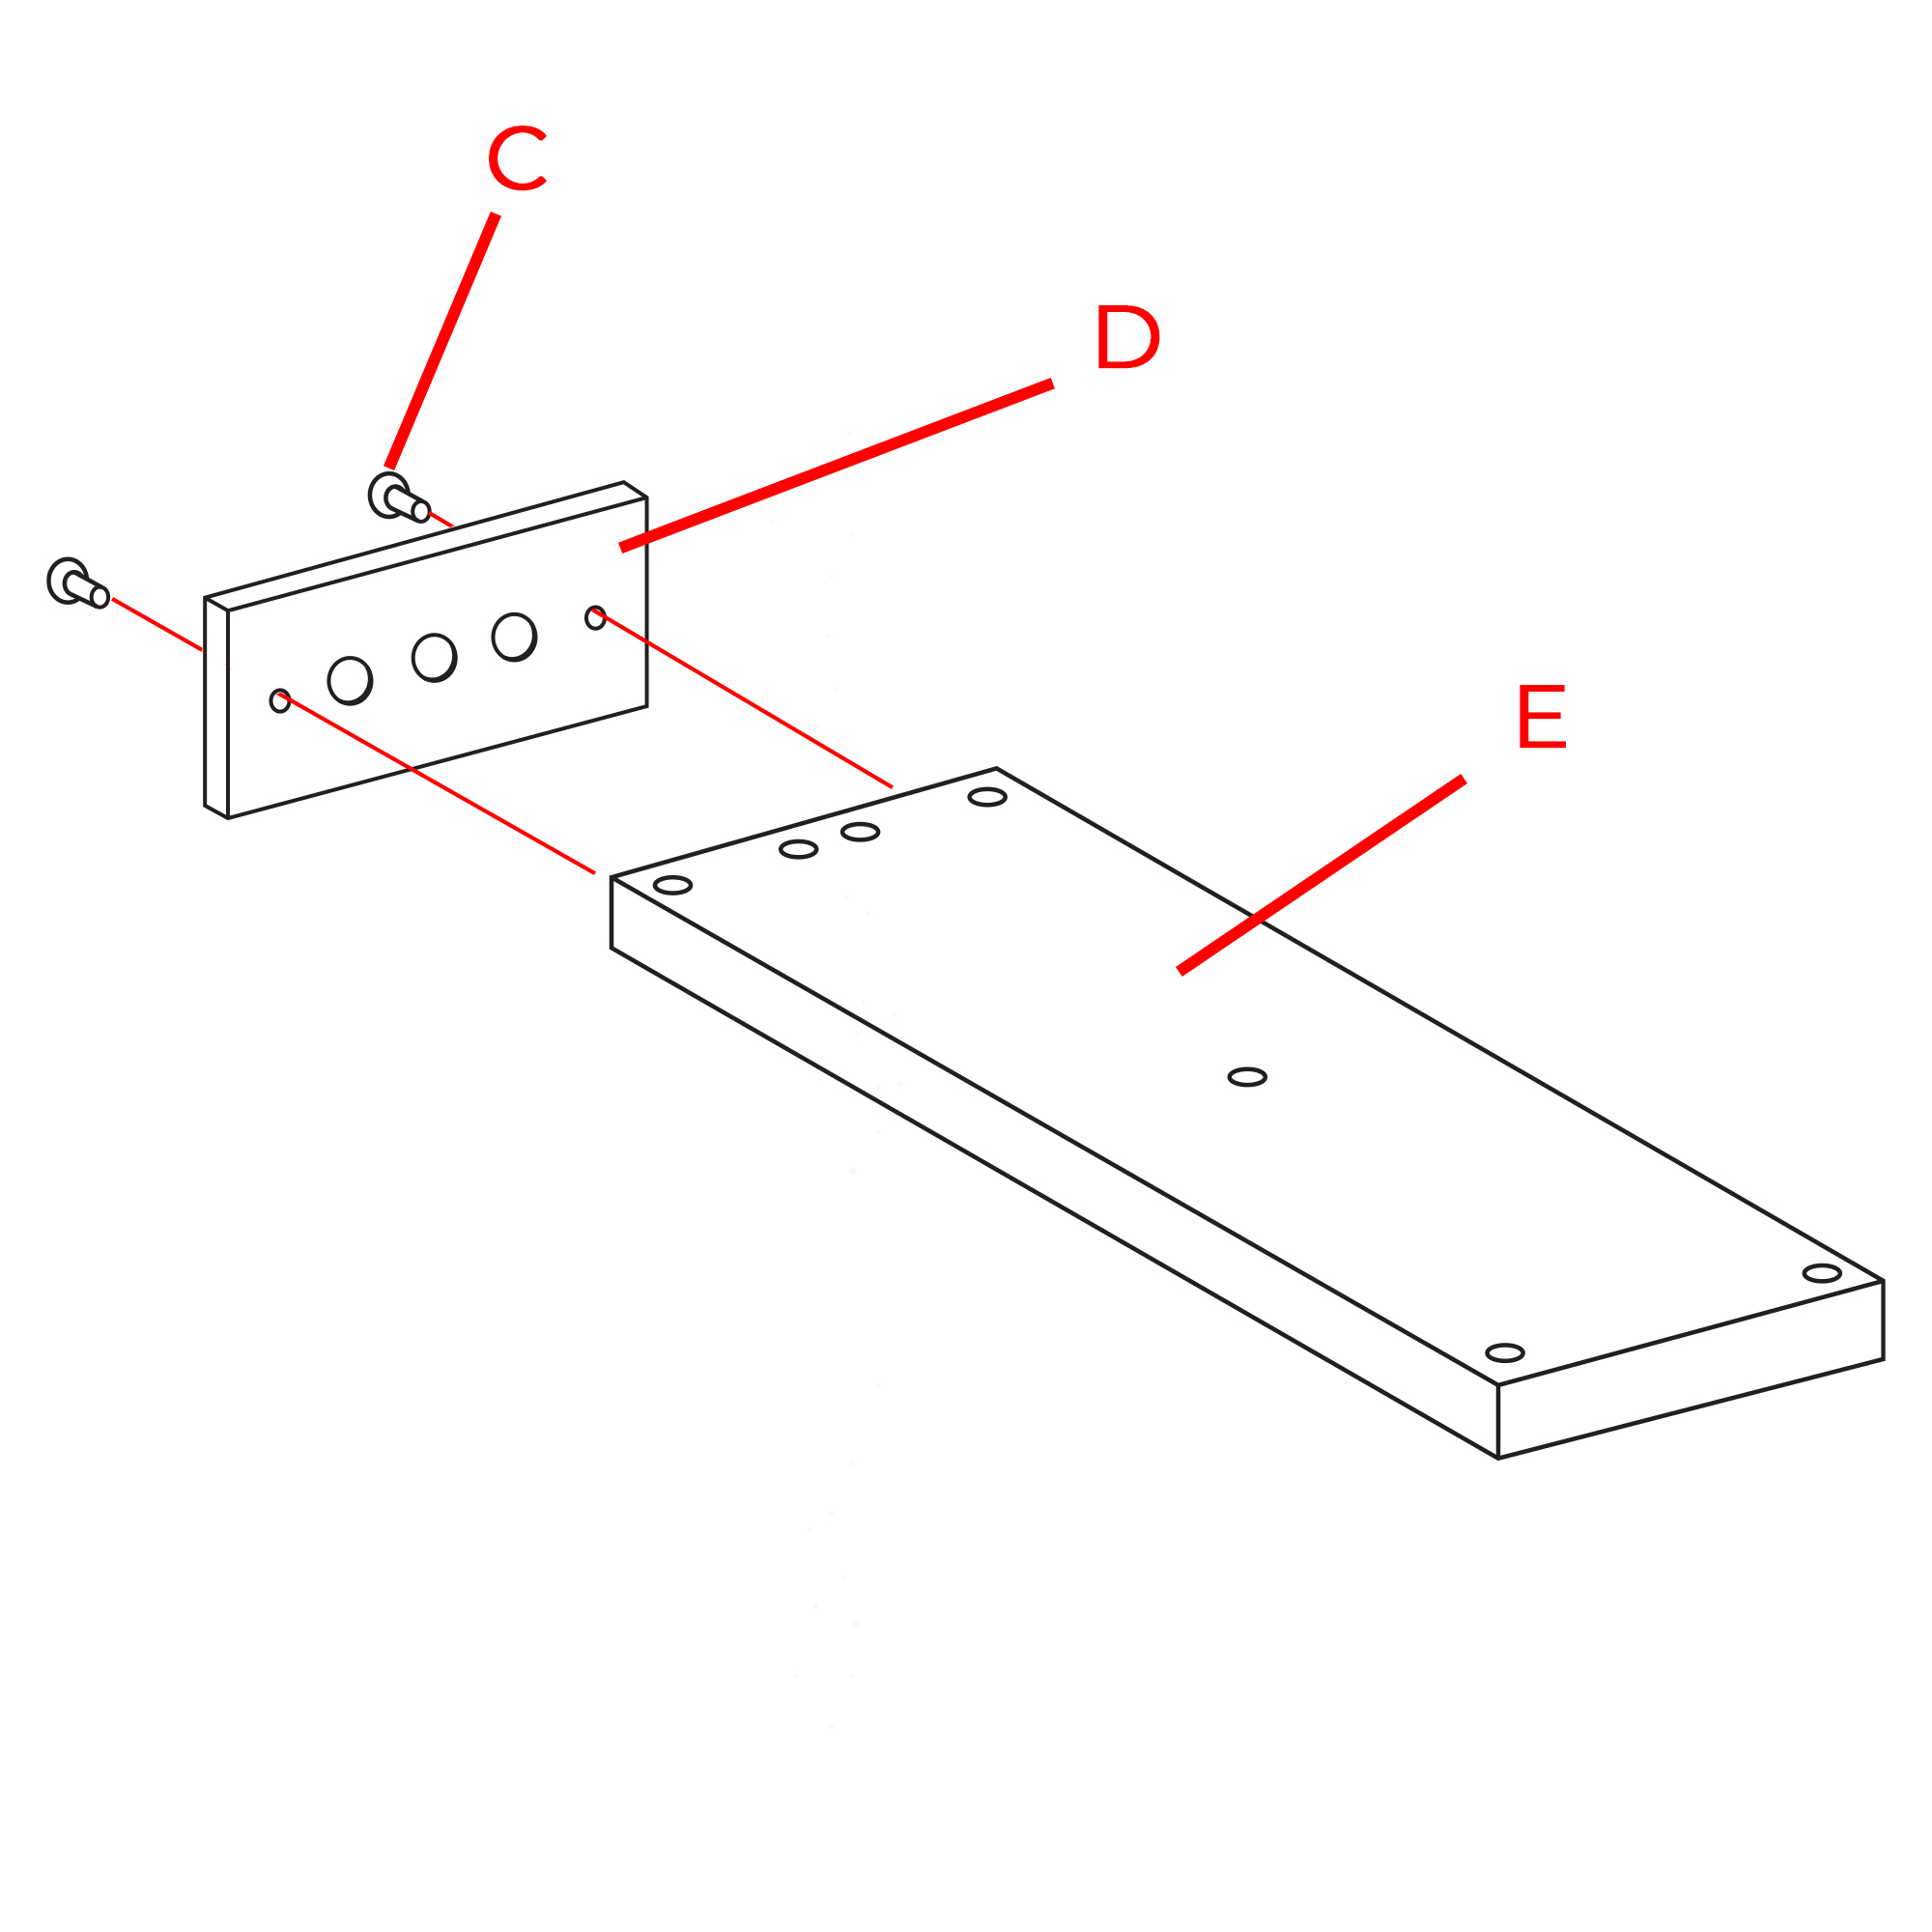
| | Fix the escutcheon (D) to the showerhead (E) with screws (C).
| 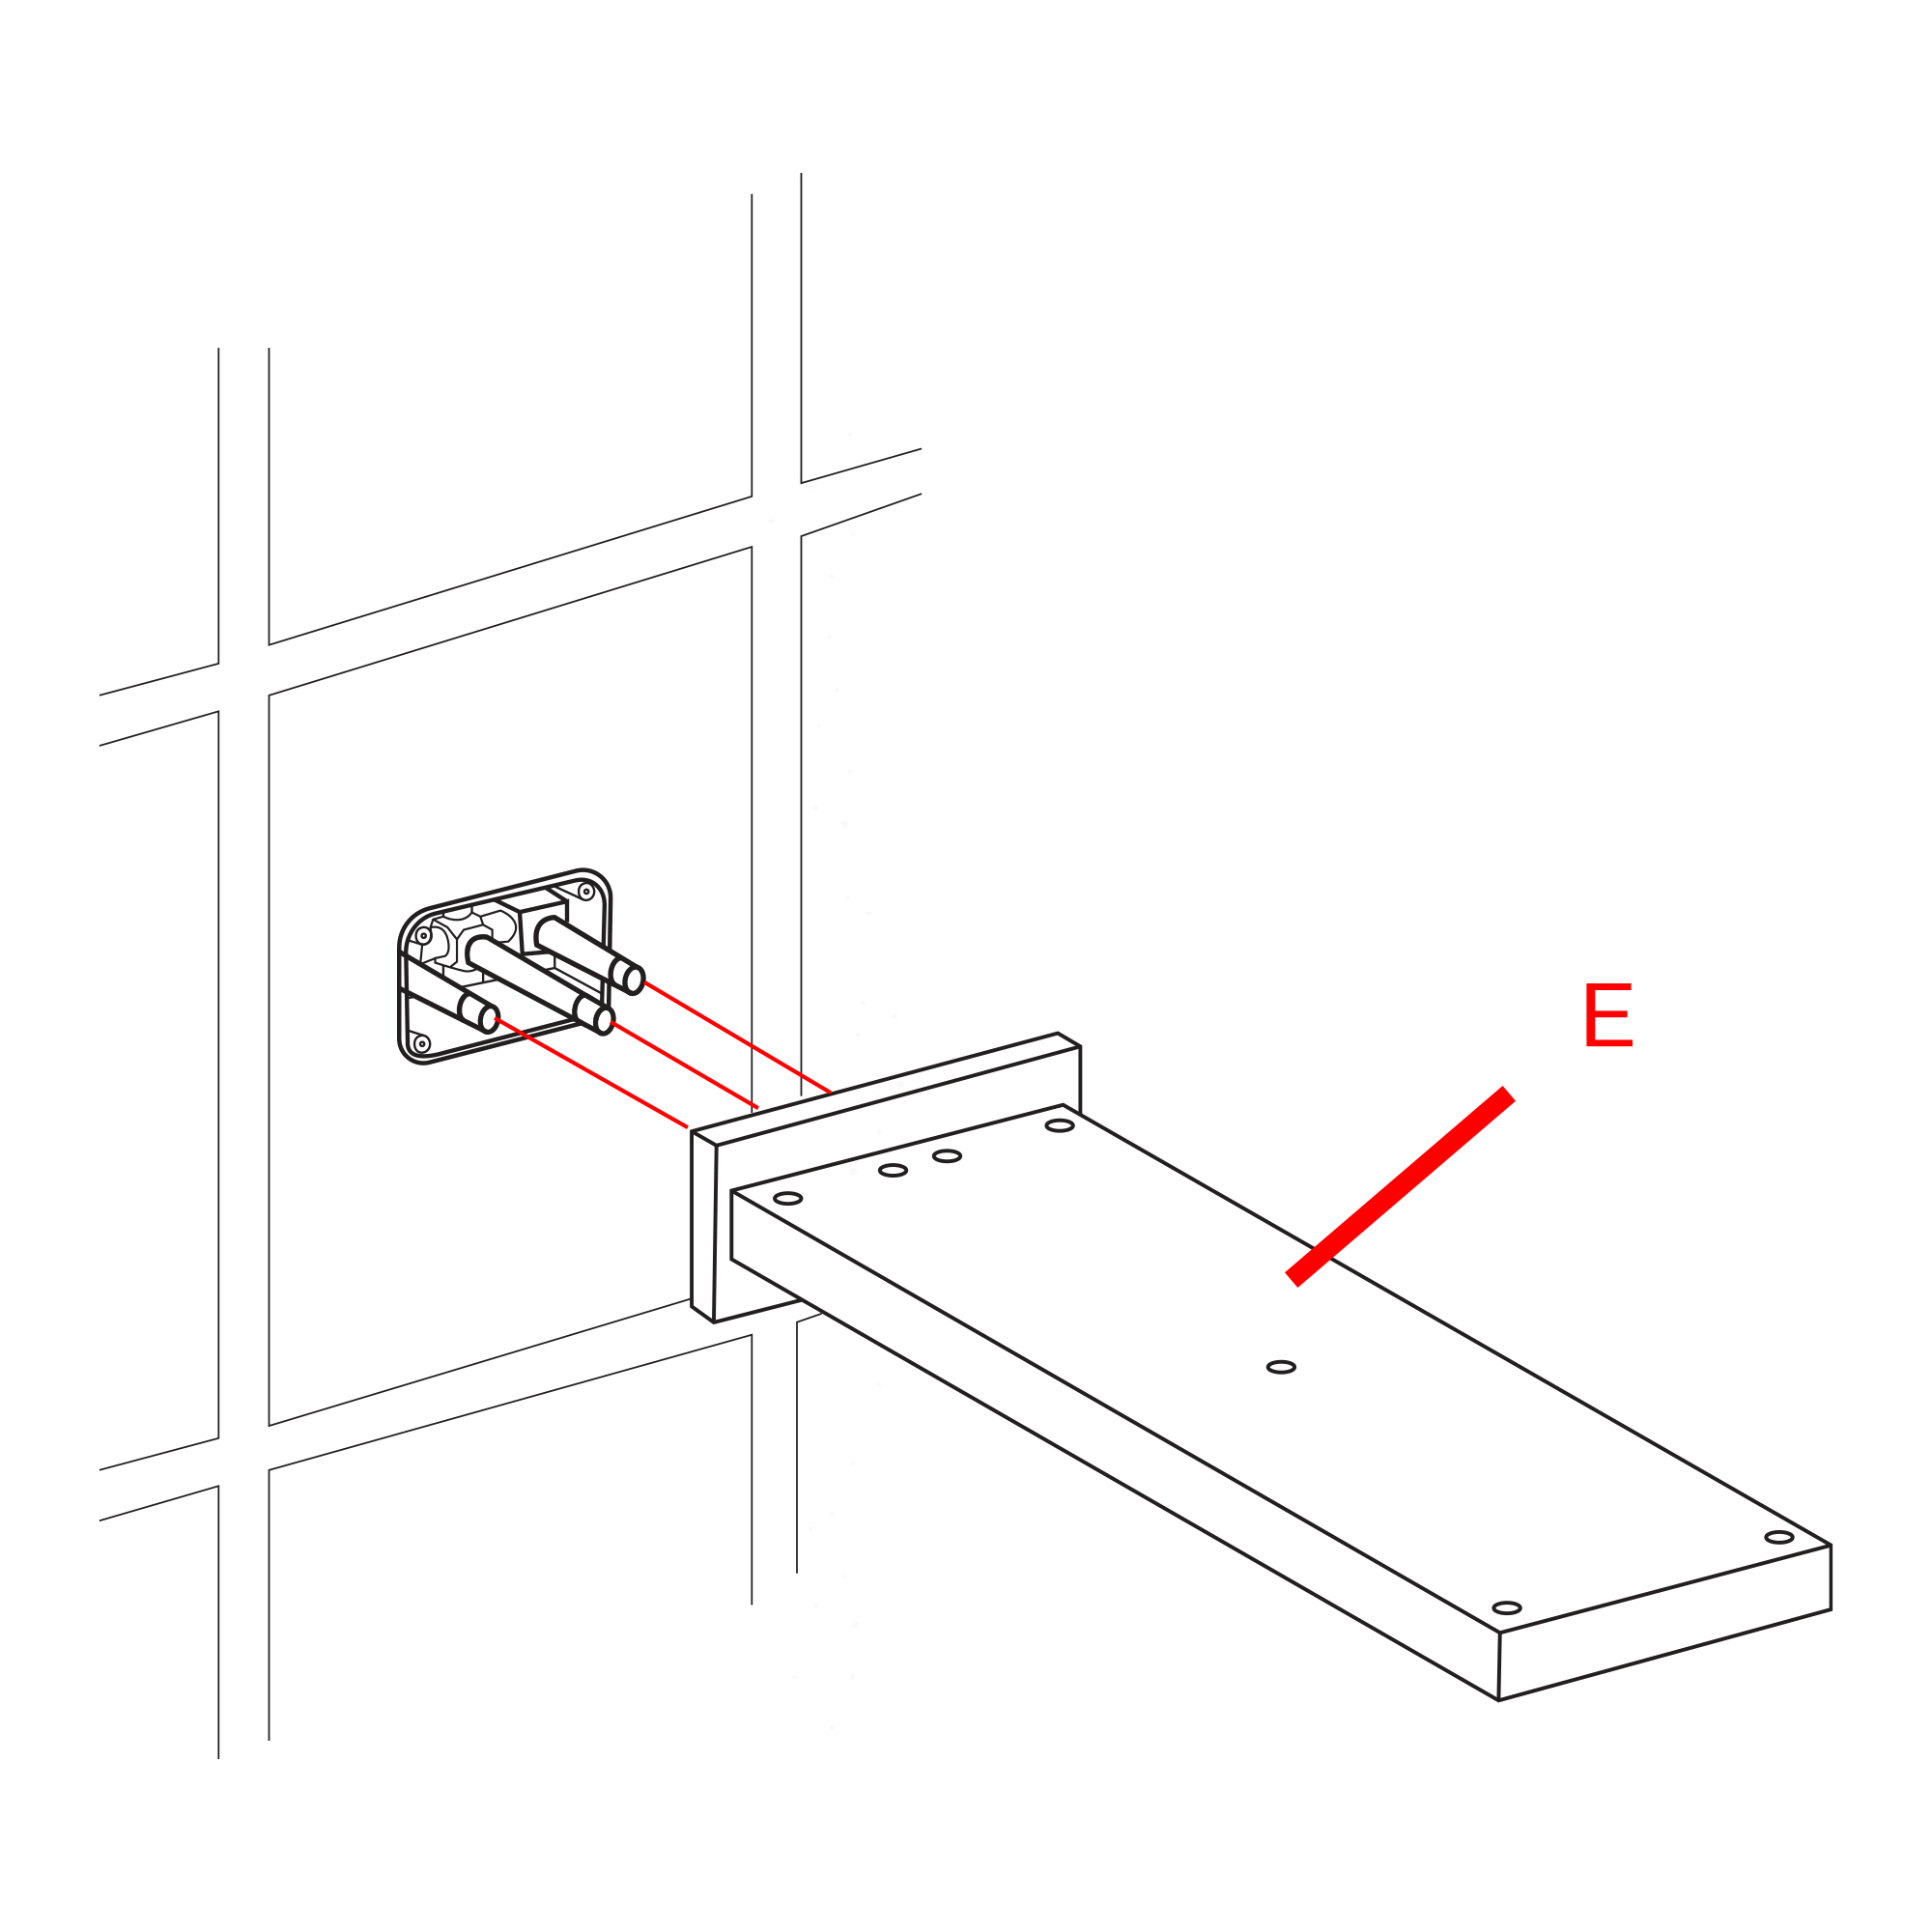
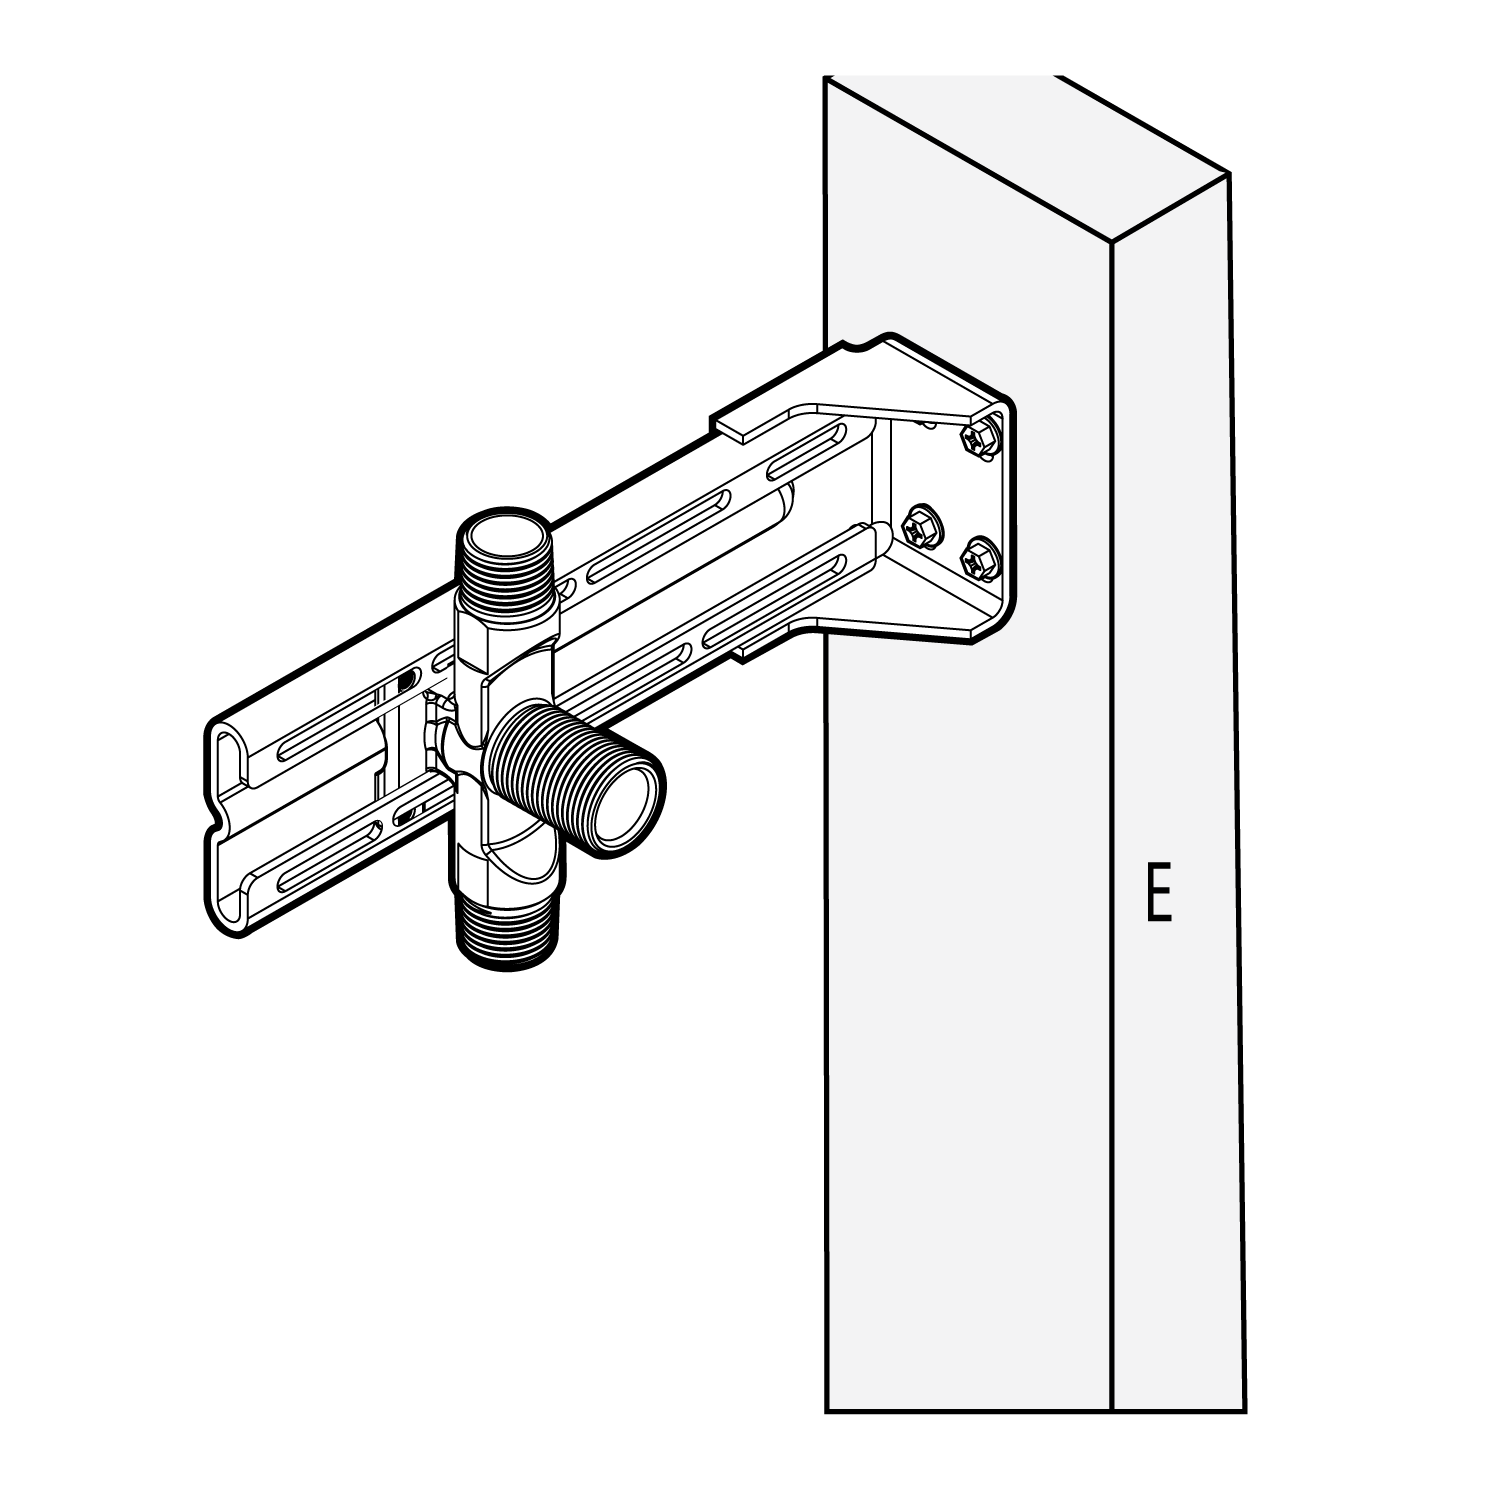
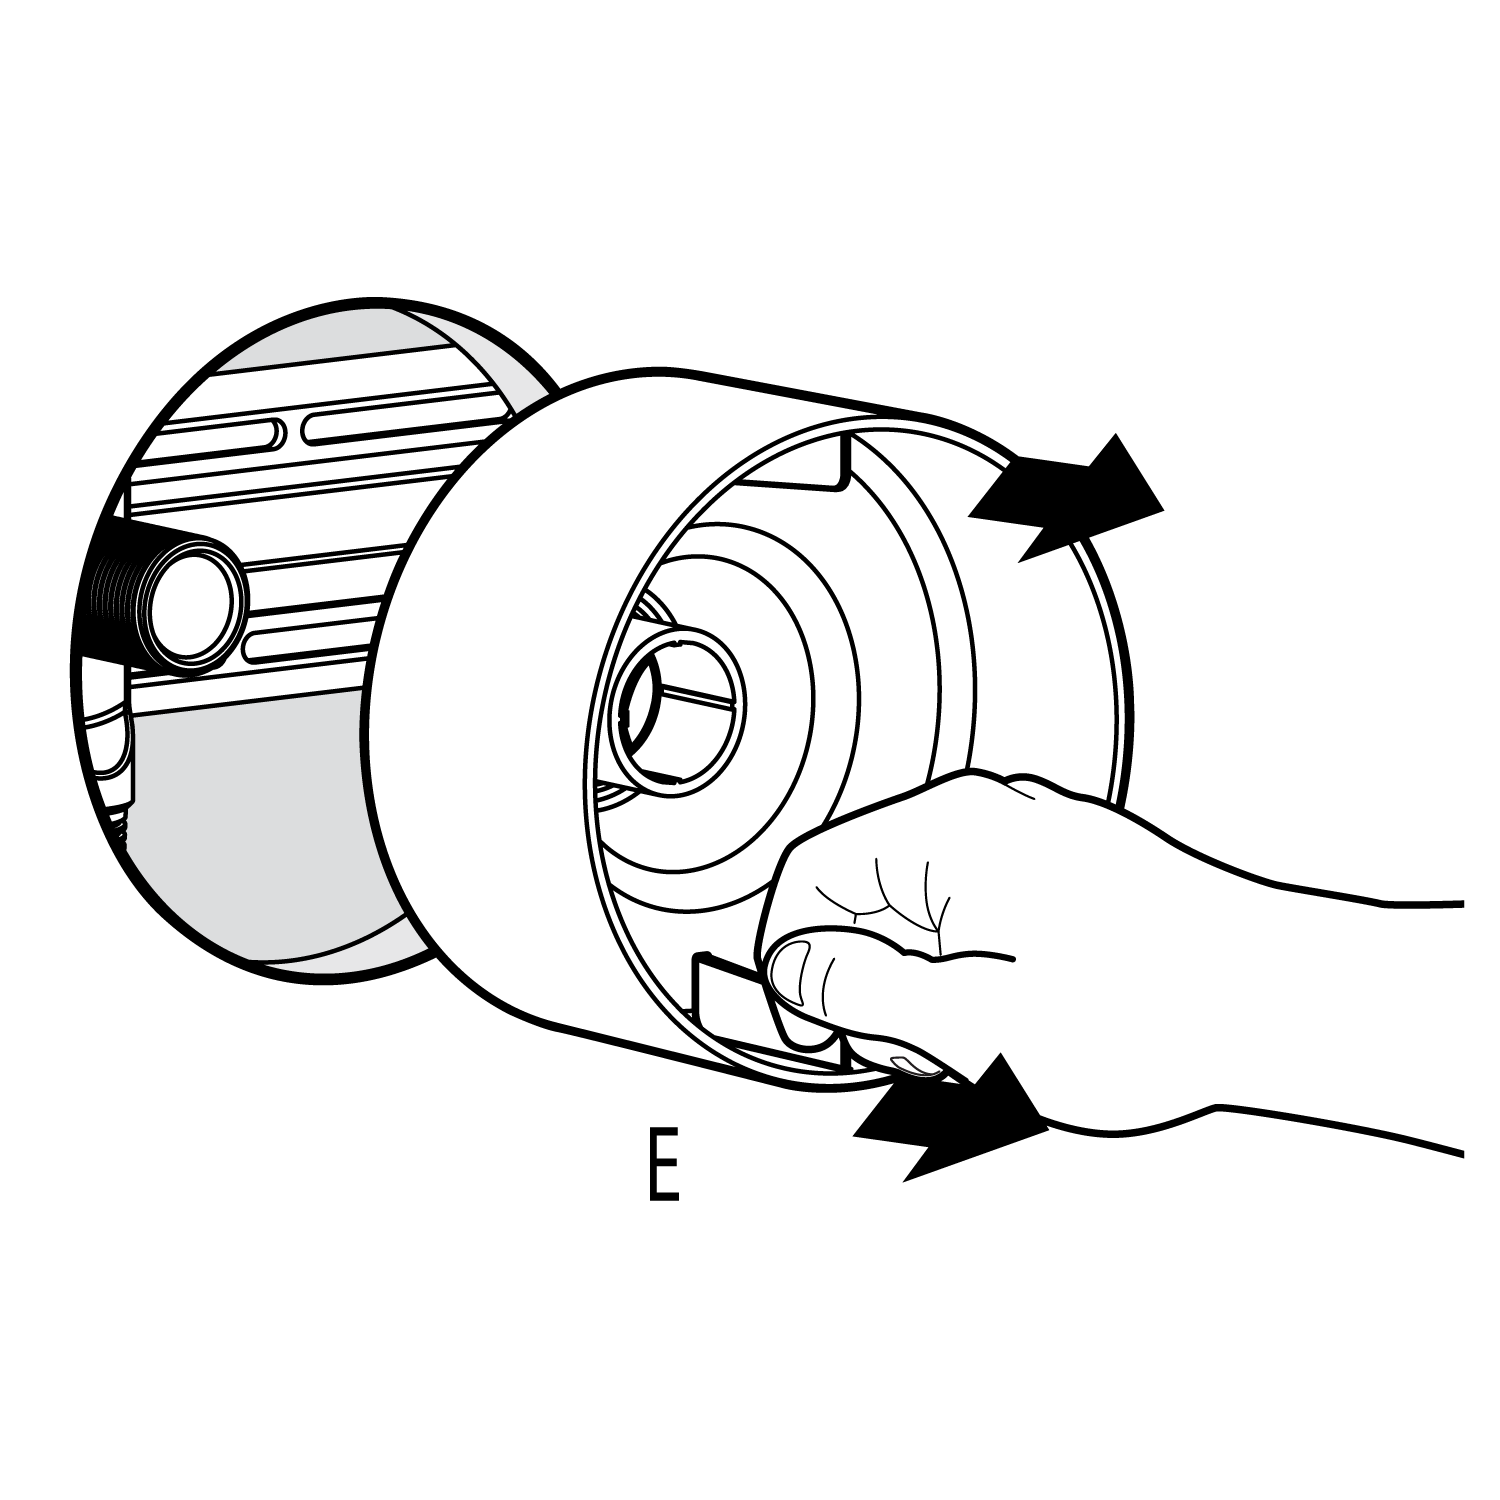
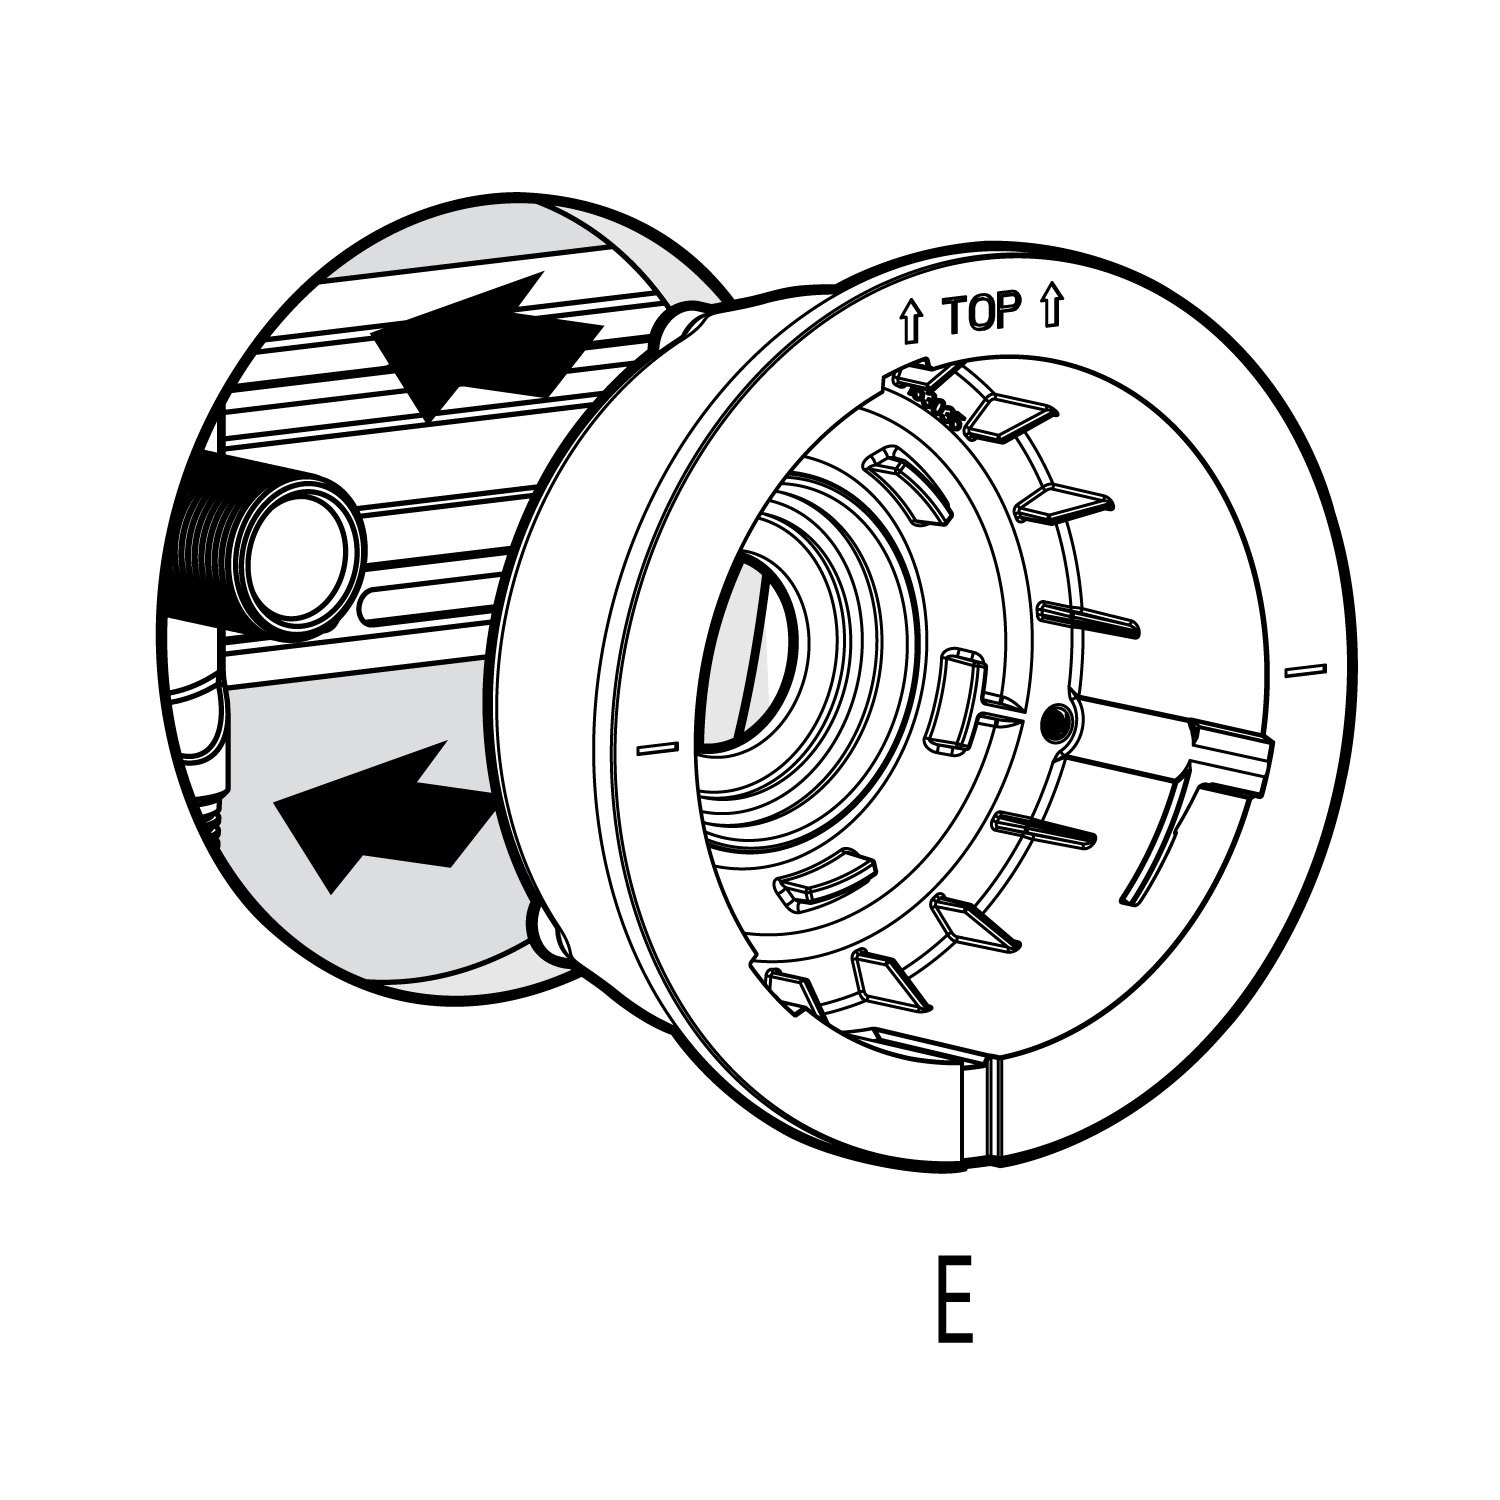
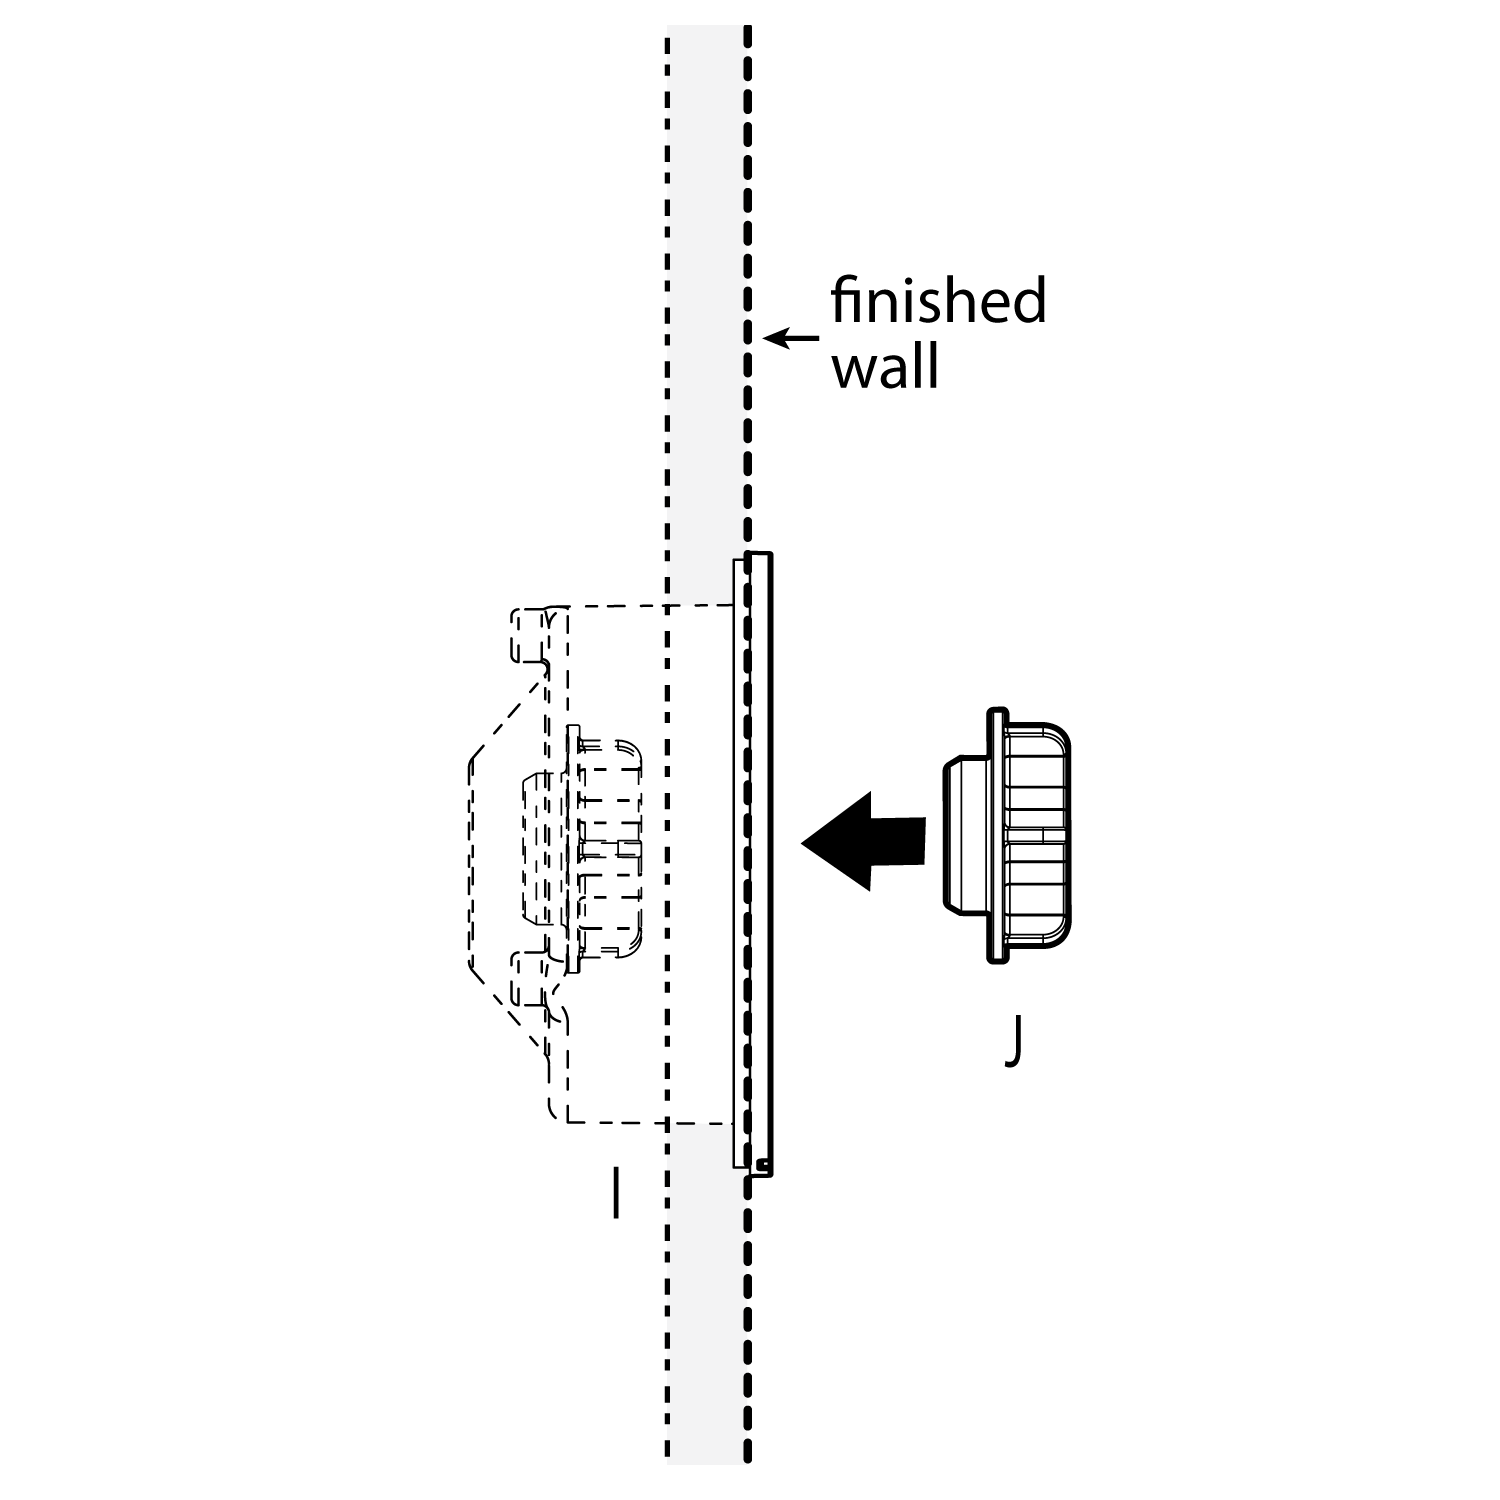
Remove the protective cover when the finished wall is completed. Then, install the showerhead (E) and press it against the finished wall | |
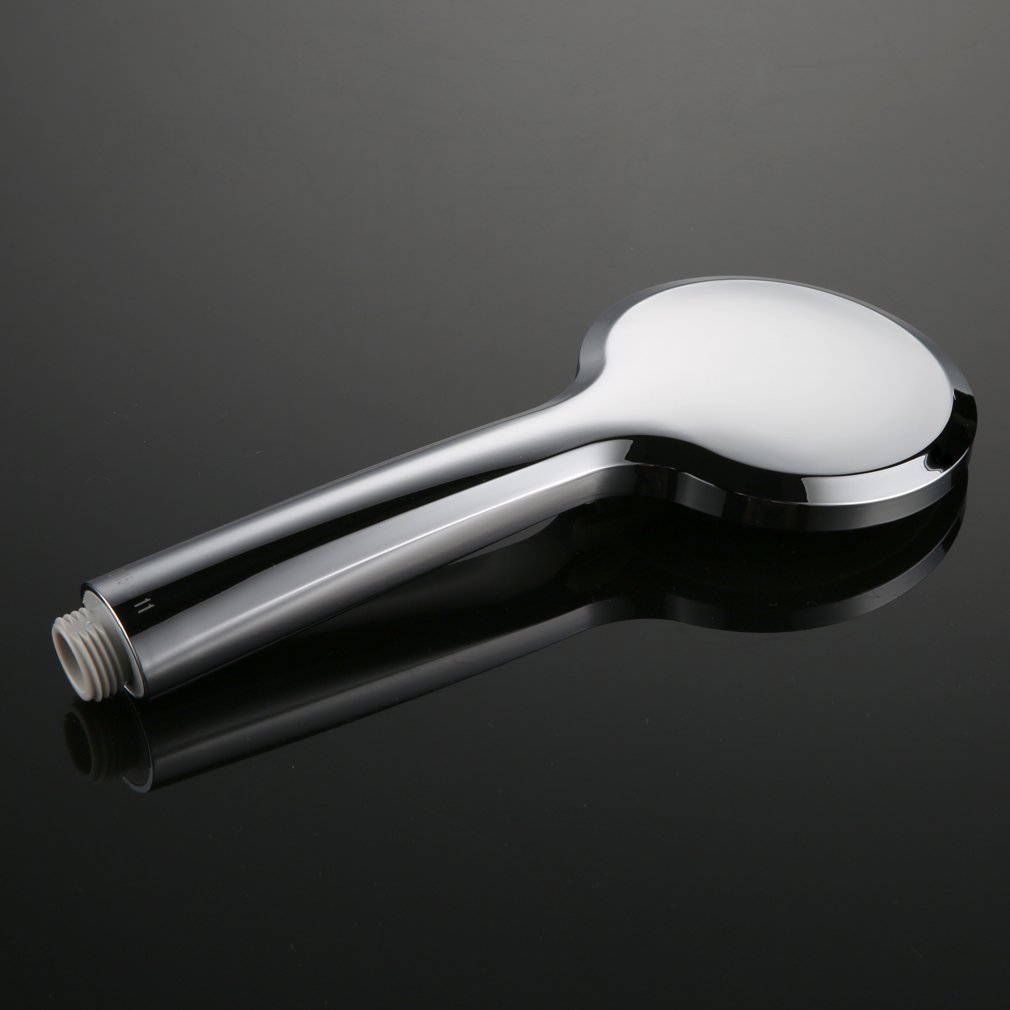
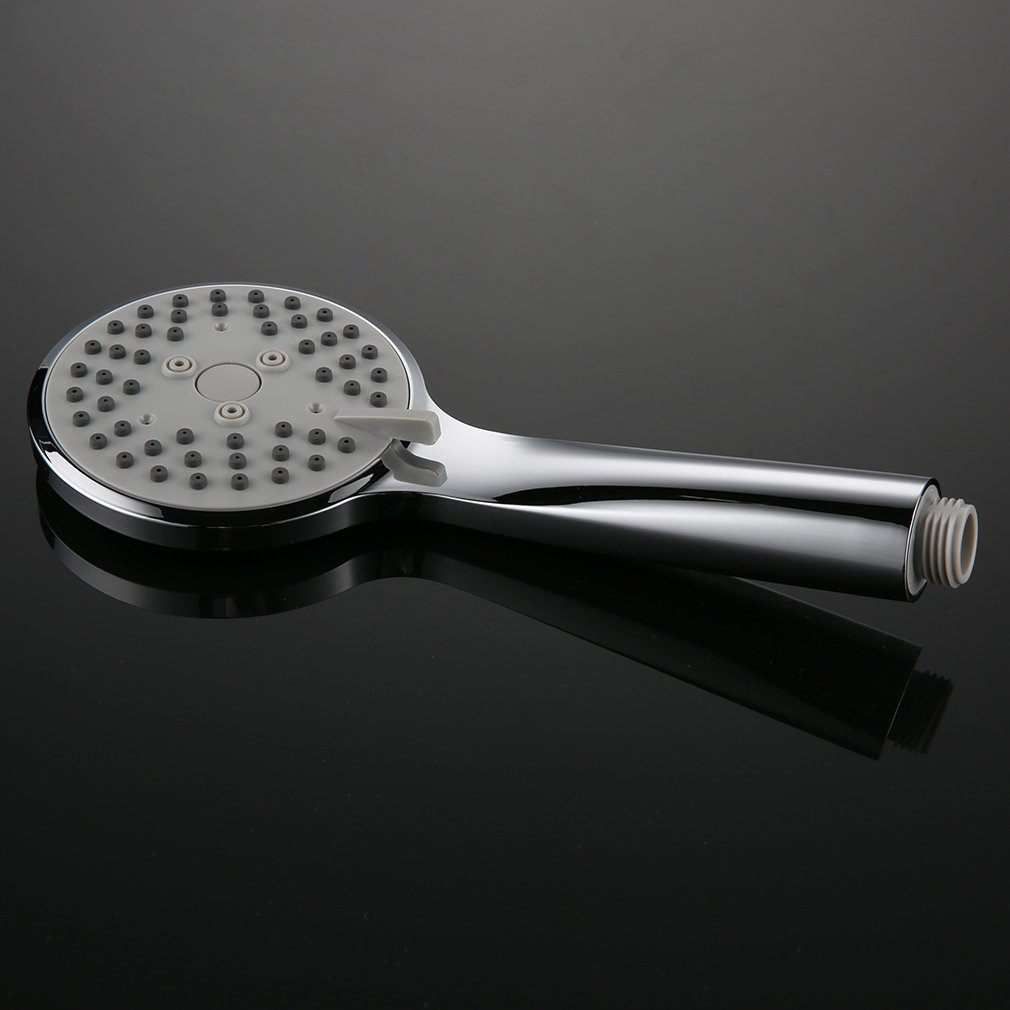
  Hand Held Shower Installation Instructions
| Step 1: | hand shower | Step 2: | | |  |
|  | HAND
HELD
SHOWER |
|
| |
| | | | Step 3: | | Step 4: | | | 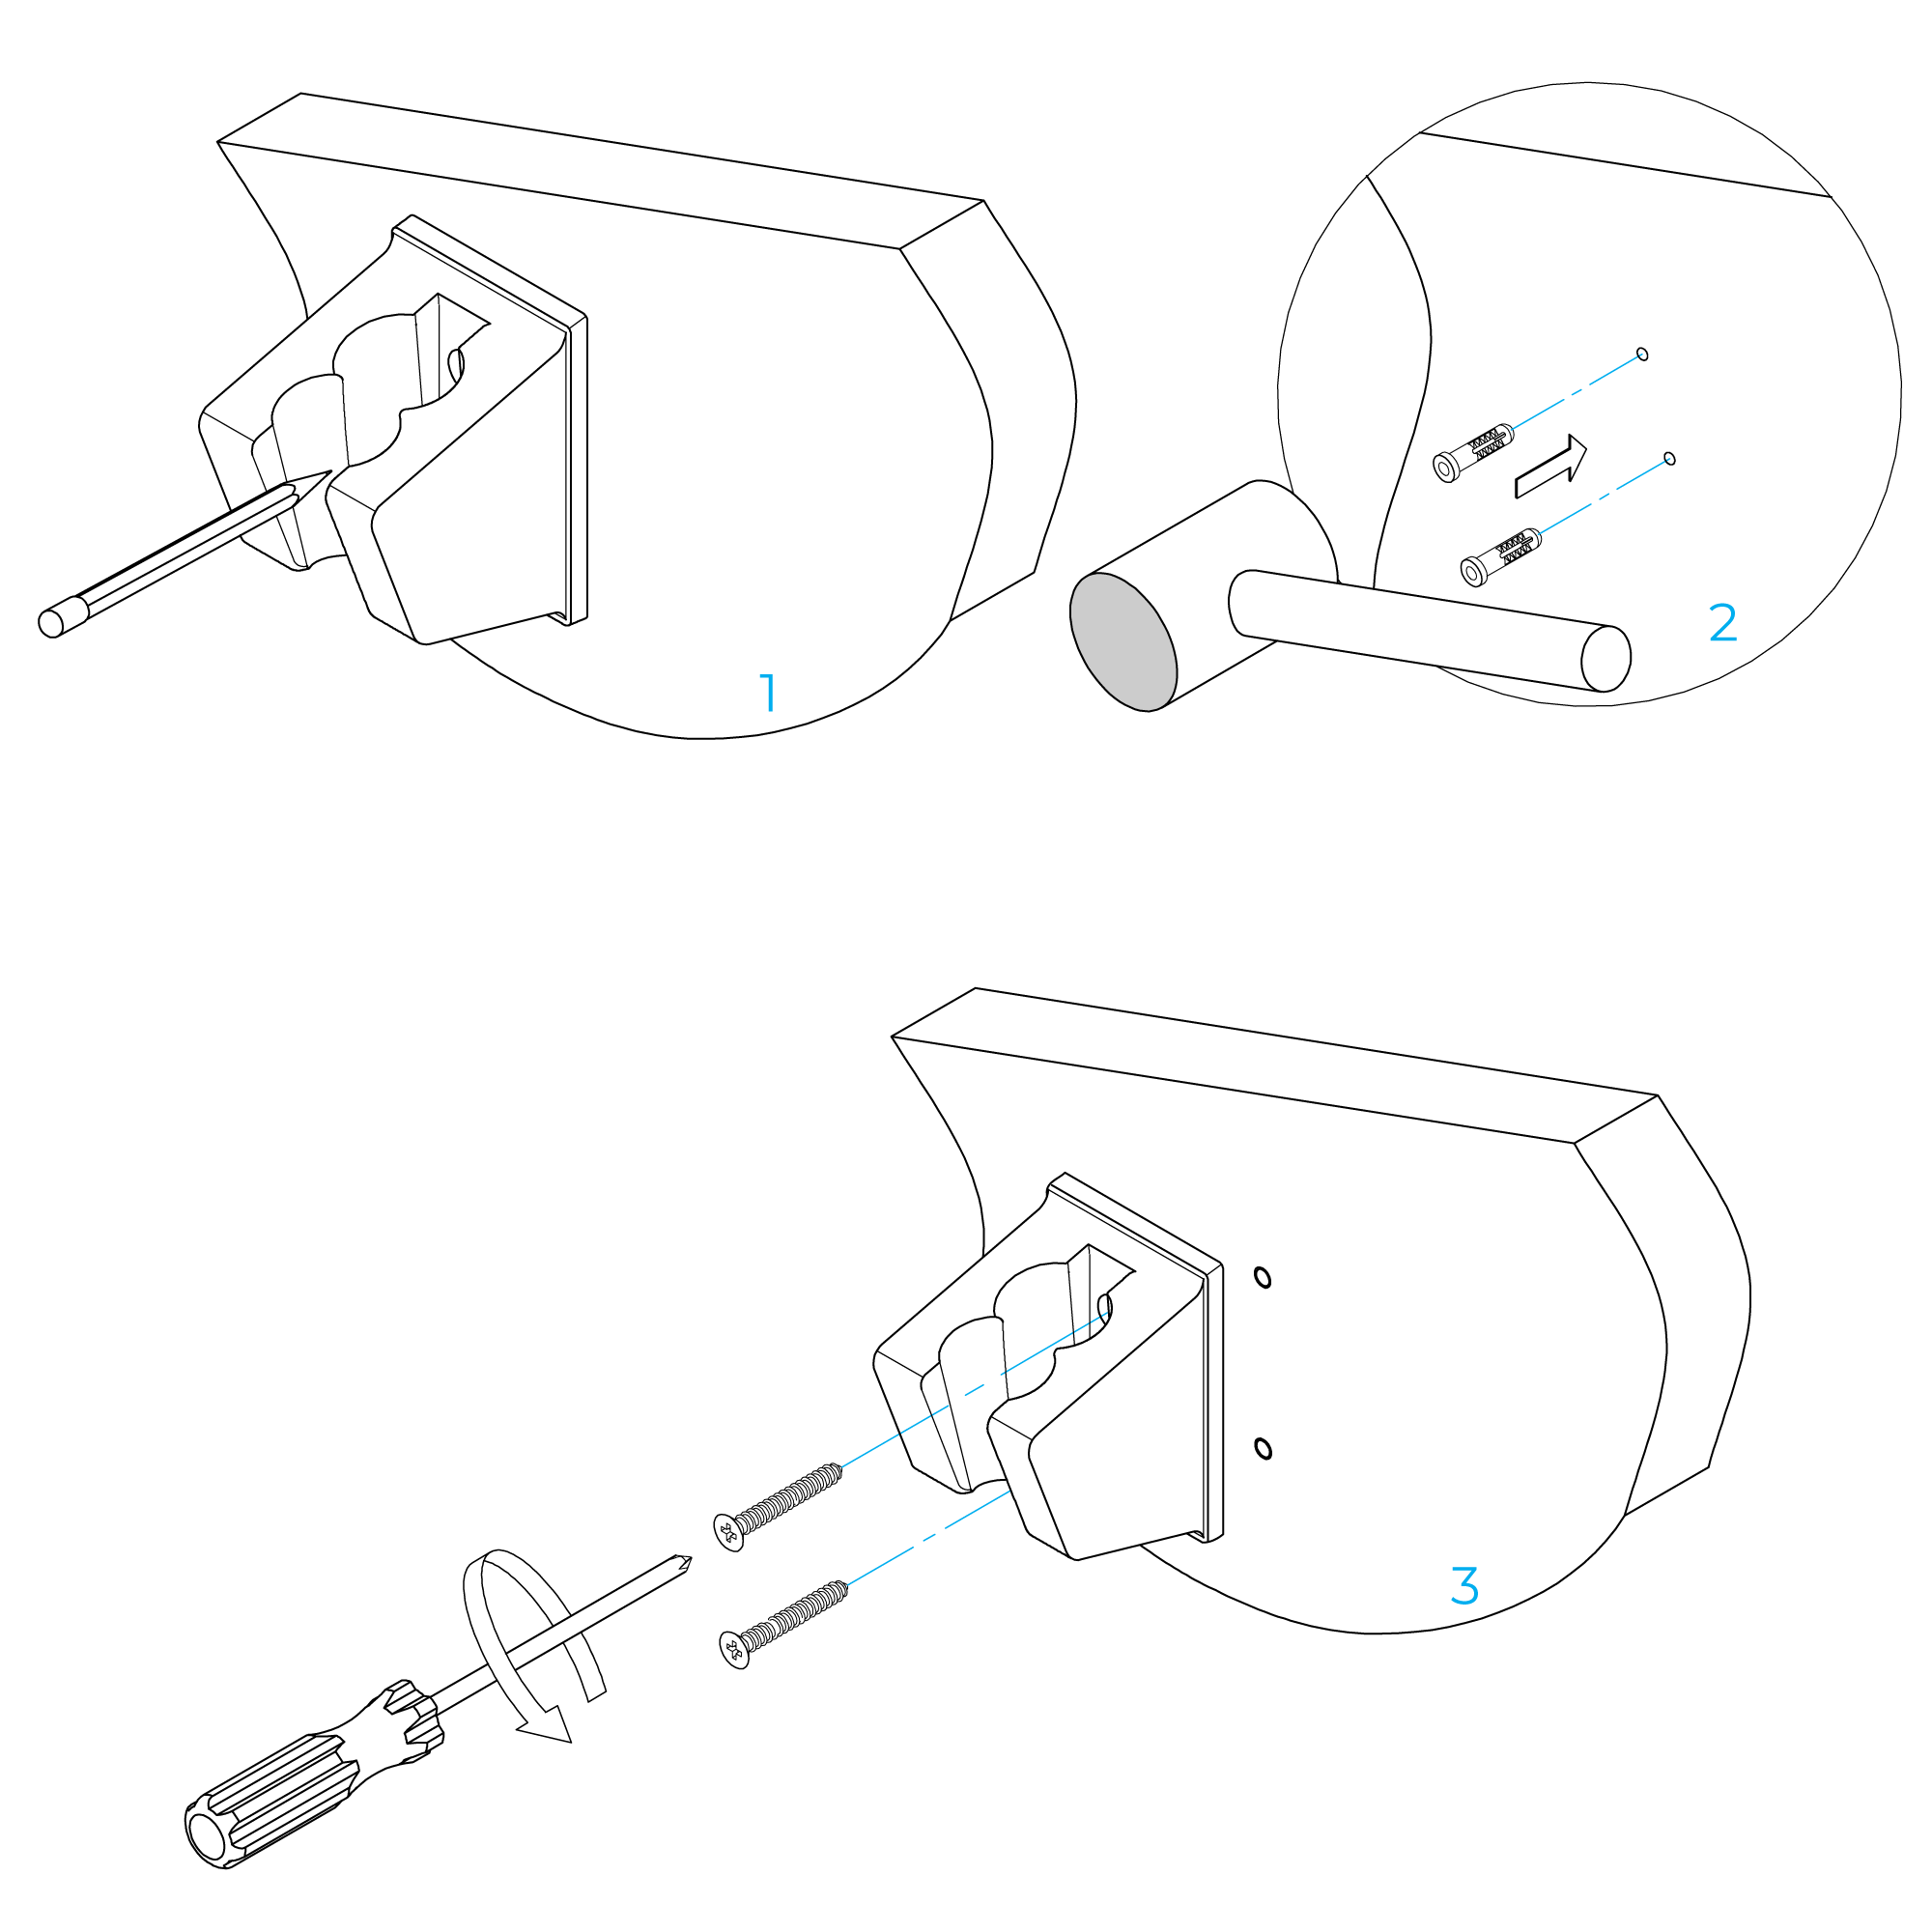
| |  | | | | | | | | | Step 5: | | | | |  | | | | | | | | | |
Hand Shower Elbow Installation
• Complete the outlet pipework ensuring it ends in an appropriate 15mm x 1/2" BSP female thread elbow.
Note: This fitting is not supplied as variations in installations require the selection of a suitable solder or compression fitting.
• Install the 'Wall Outlet', thread long male 1/2" BSP into the appropriate female fitting using PTFE tape to give a watertight joint.
Note: The thread can be cut to size if required. Make sure that all debris is removed from the connector and the section that has been cut is dressed correctly, before installation.
1. Attach the escutcheon to the supply elbow.
2. Apply Teflon tape to the threaded tailpipe of supply elbow.
3. Screw the supply elbow into the female fitting of water supply.
4. Press the escutcheon against the finished wall.
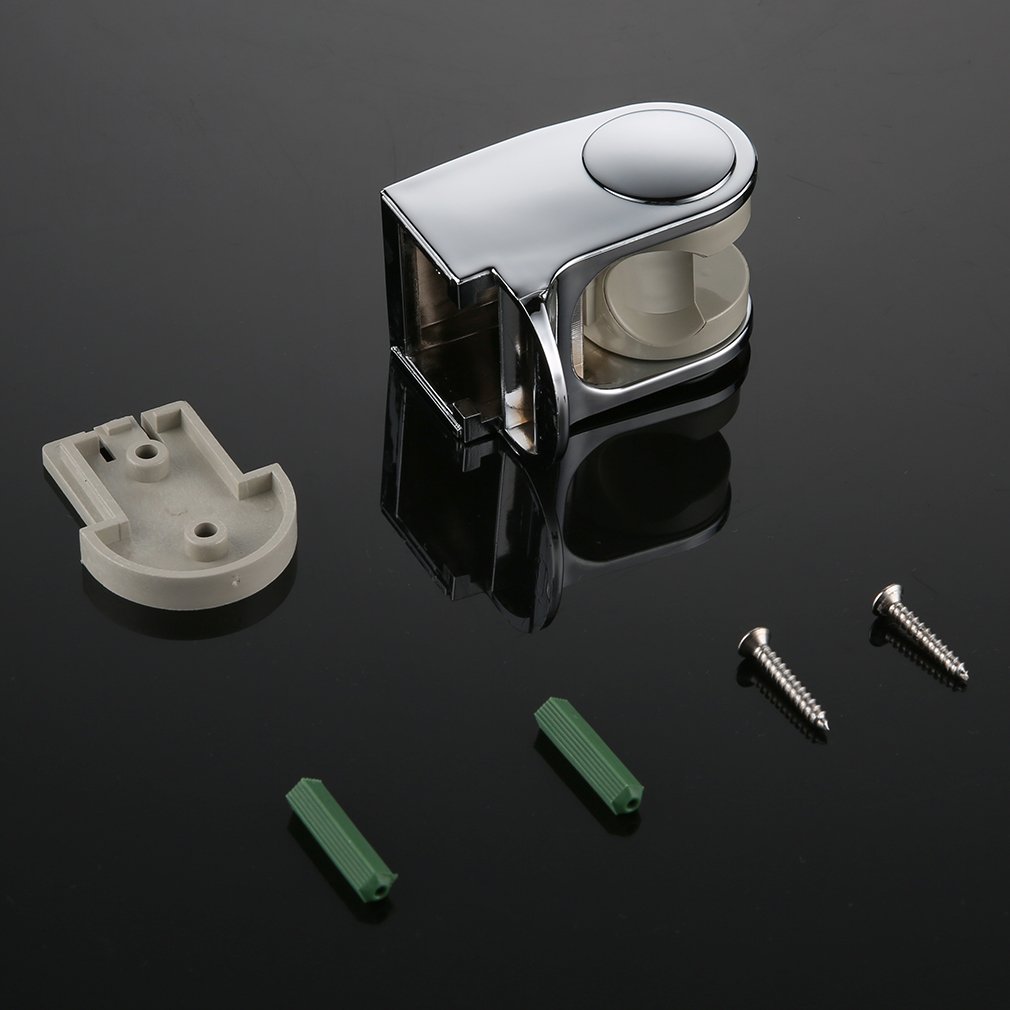
Hand Shower Wall Bracket Installation
Decide the position for the shower head holder on the wall within the bath showering area and proceed as follows:
• Hold the hand shower head holder fixing plate in a suitable position on the wall, mark out the position of the holder. Mark the two locating holes.
• Drill and plug the wall. Use an appropriate masonry drill, but if the wall is plasterboard or a soft building block, use special wall plugs and an appropriate drill bit.
• Slide the inserts onto the screws in the orientation. Secure the inserts by tightening the screws.
• Slide the hand shower head holder body onto the inserts and secure by tightening the grub screw facing down.
| |  |
| | |
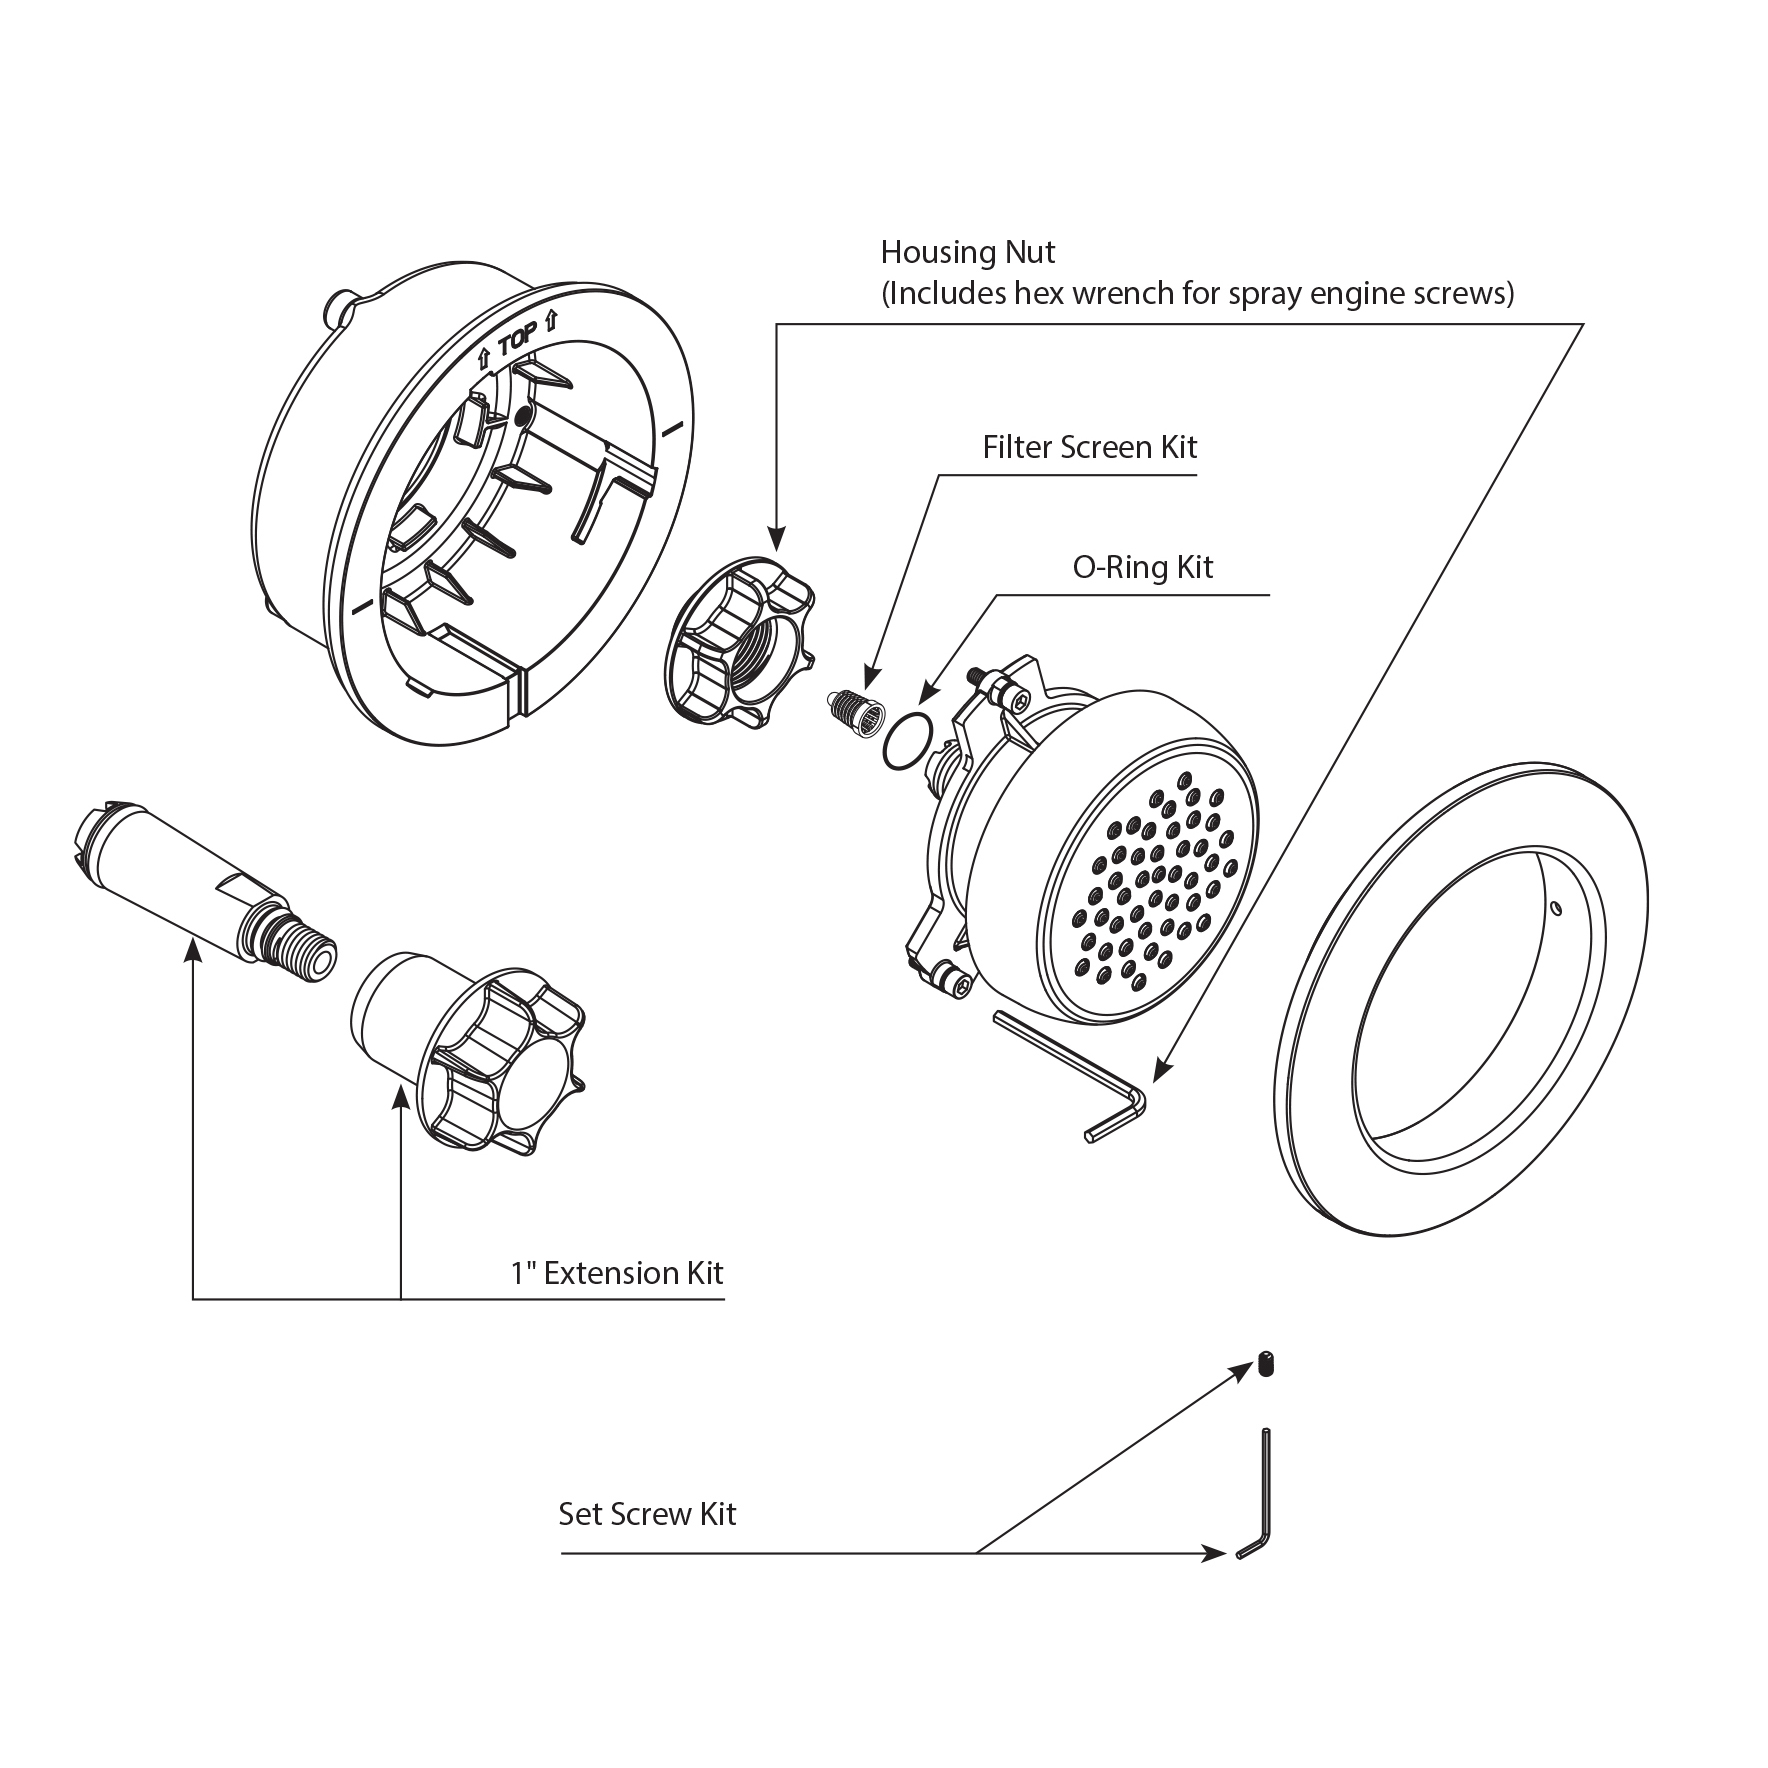
Shower Body Sprays Installation Instructions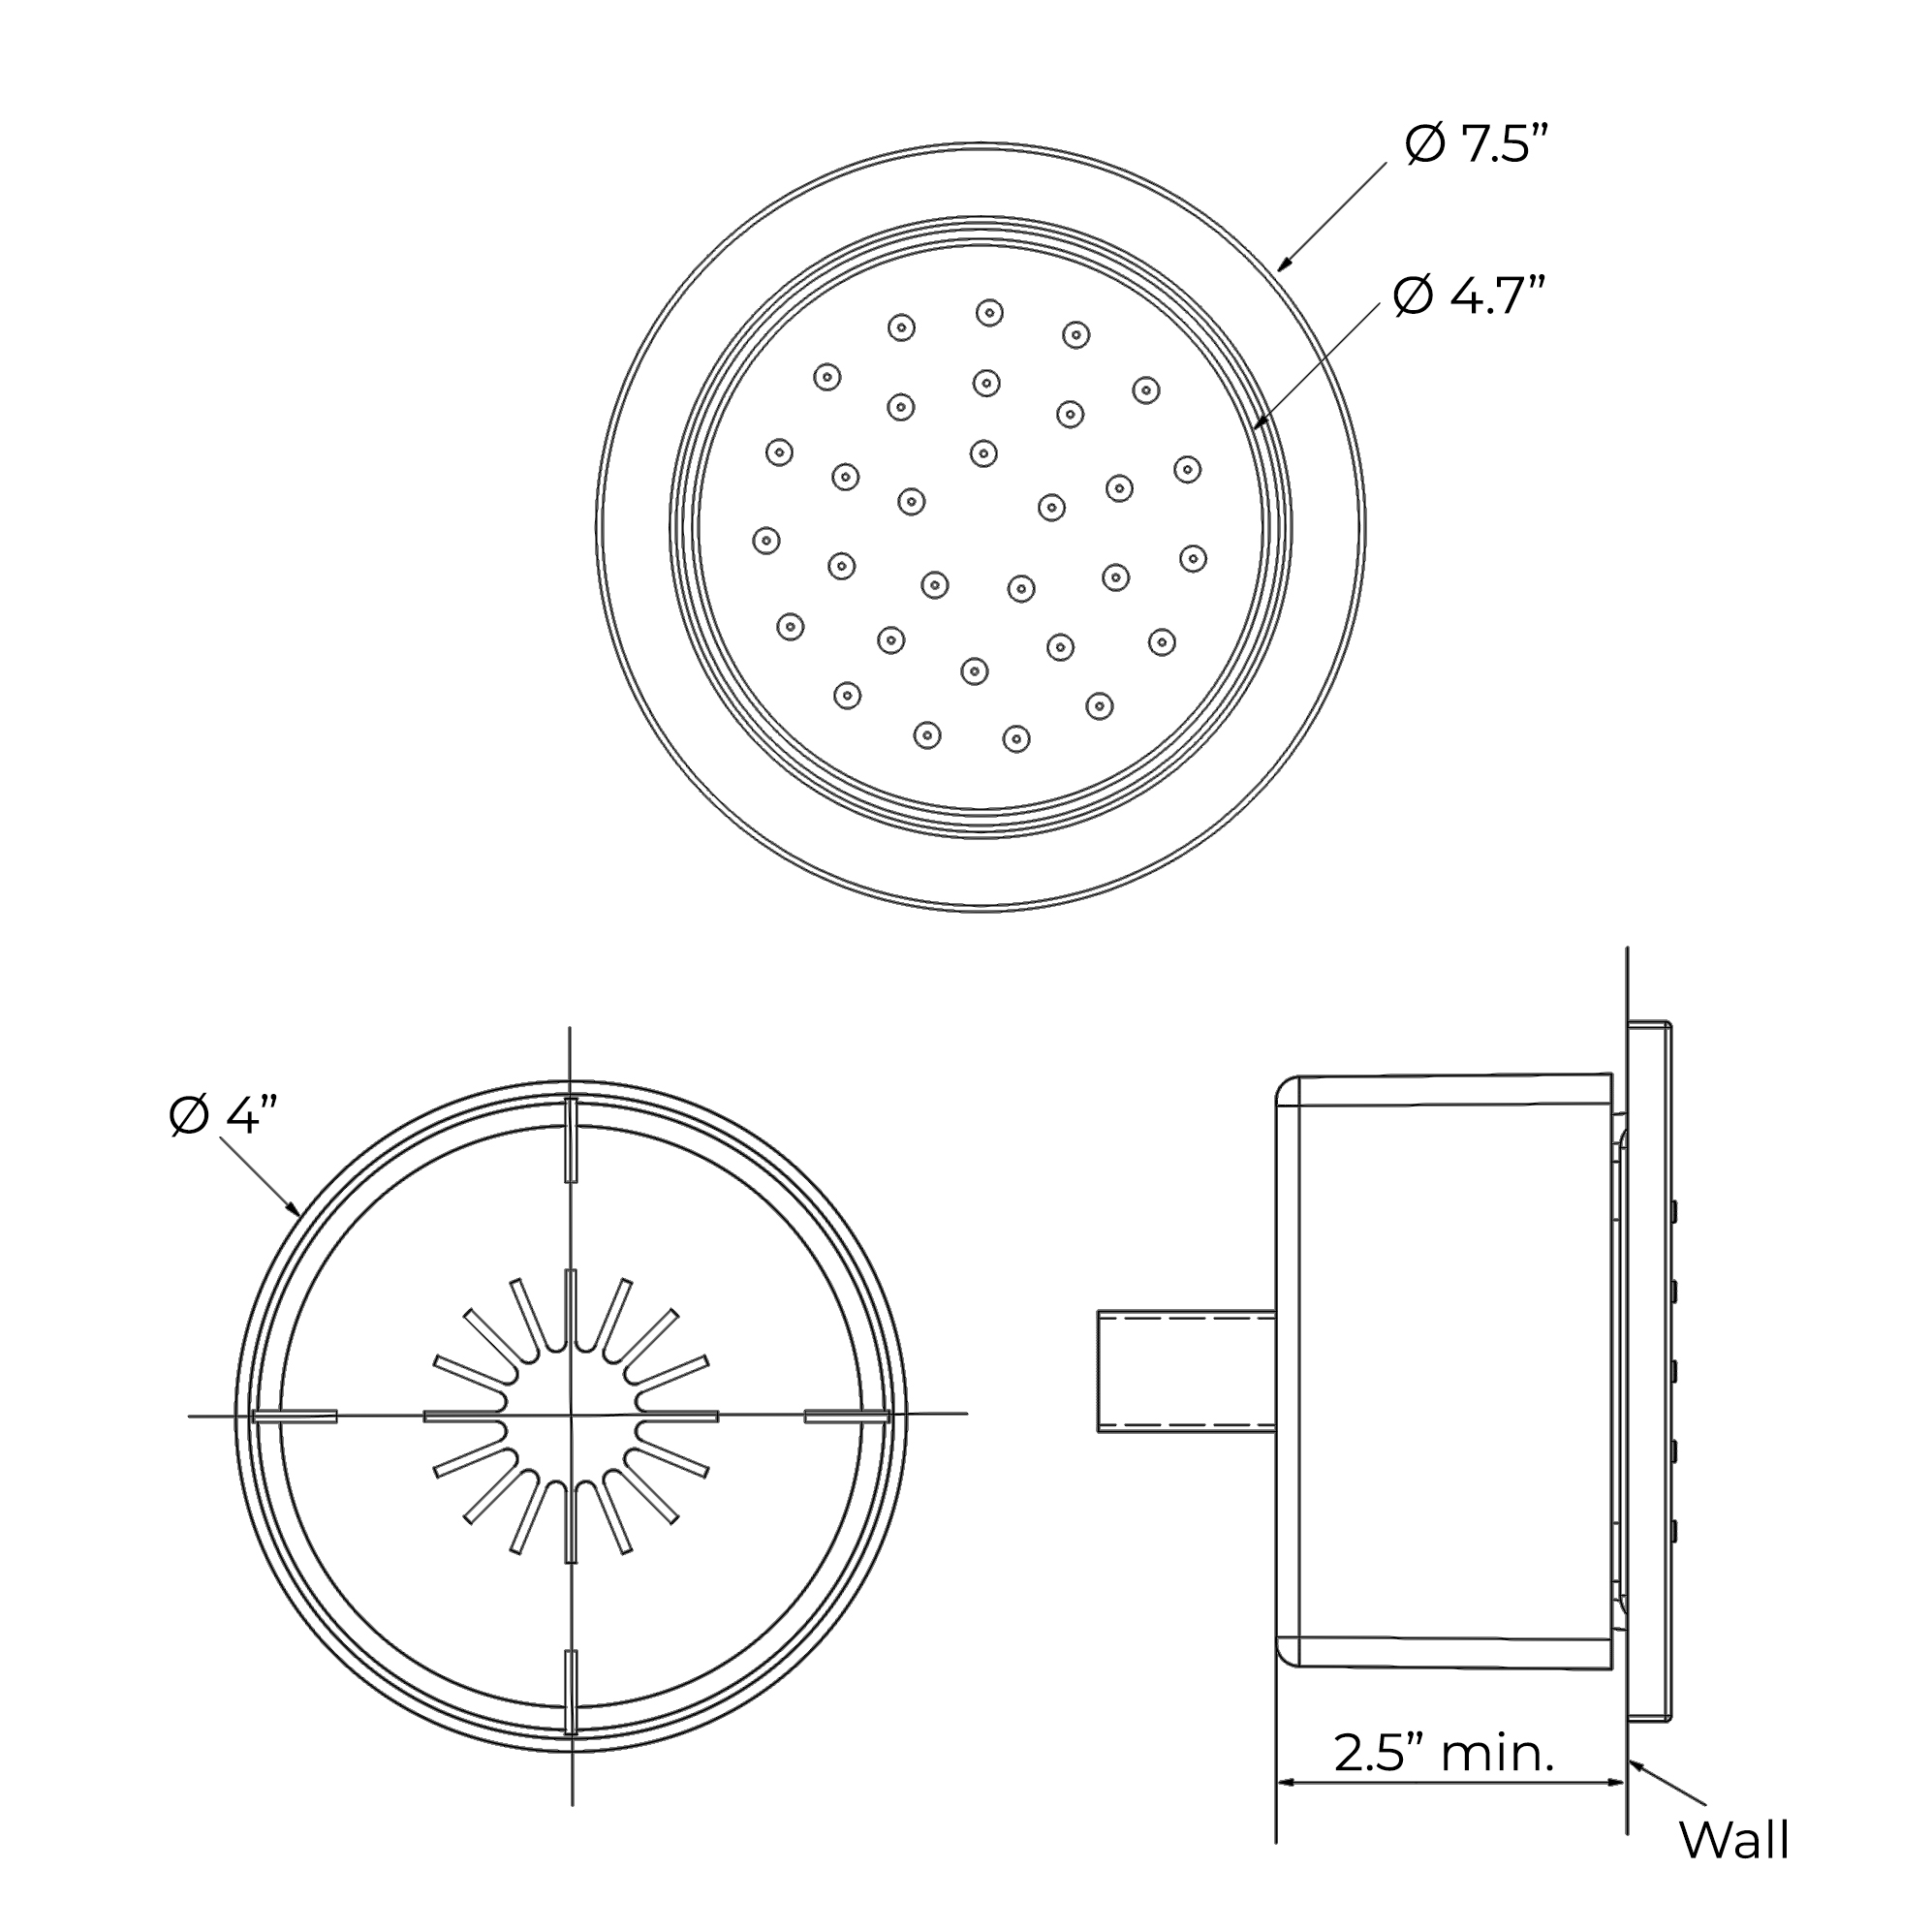
Bodyspray placement:
Custom shower systems are sized to the user or users. Bodysprays are normally placed at the upper back, middle back, and upper thigh. Always position bodysprays according to the preferences of the user(s).
|
|  | | |
Shower Mixer Installation InstructionsParts:
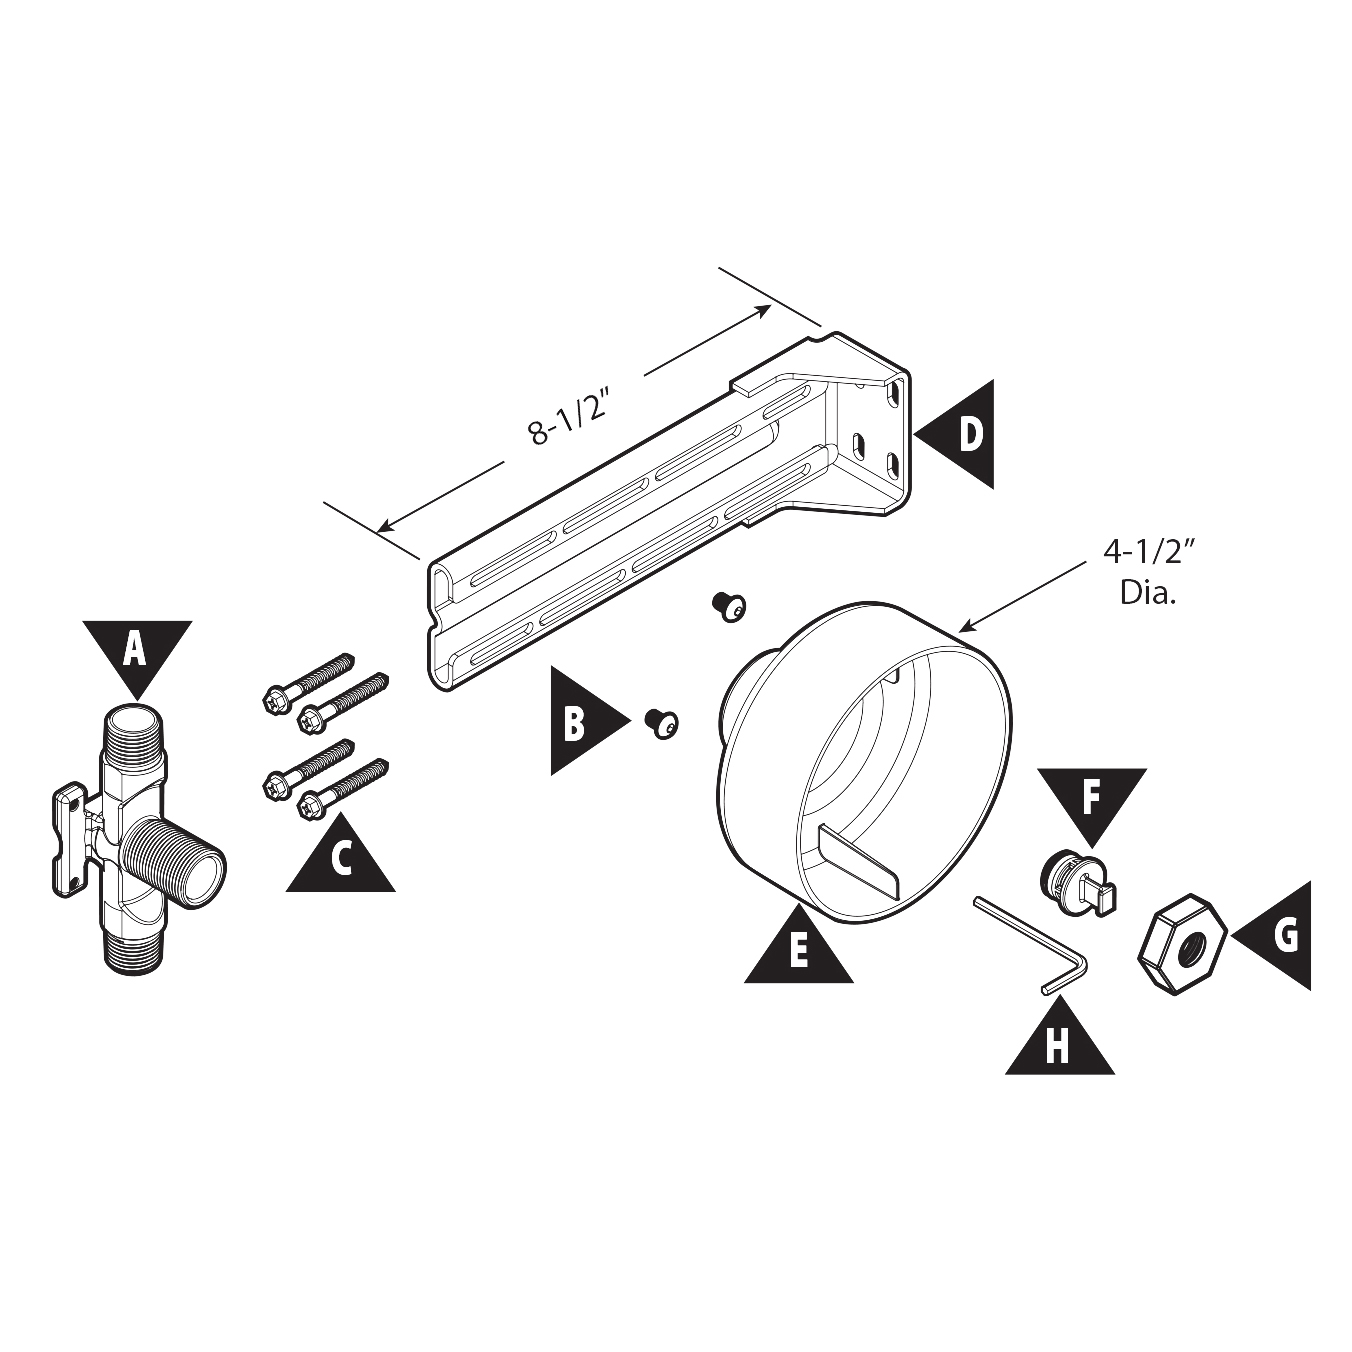
1. Rough-In Body x1
2. Anchor x4
3. Positioning Bar x2
4. Tapping Screw 1 x4
5. Tapping Screw 2 x4
6. Plate x1
7. Cover x3
8. Button x3
9. Screw 1 x3
10.Diverter Handle x1
11. Temperature Handle x1
12. Volume Handle x1 | Shower
Mixer | 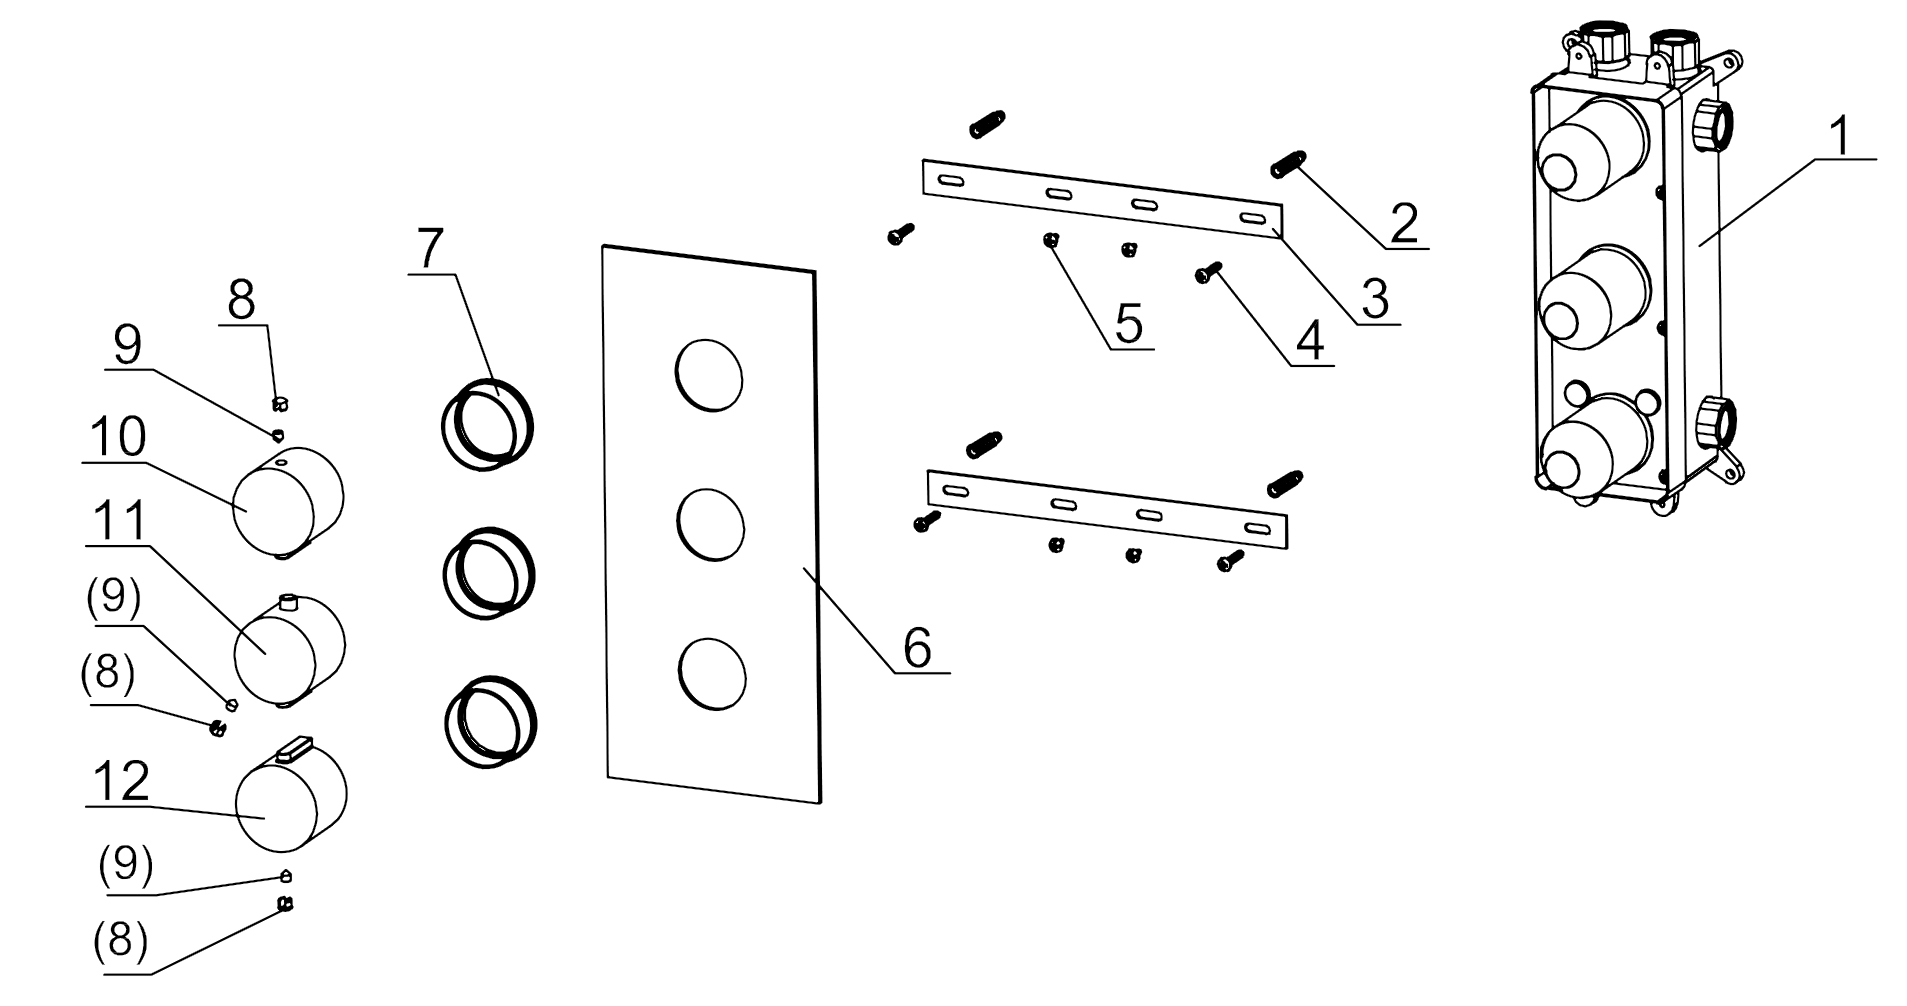 |
| | |
| Step 1: | | Step 2: | | 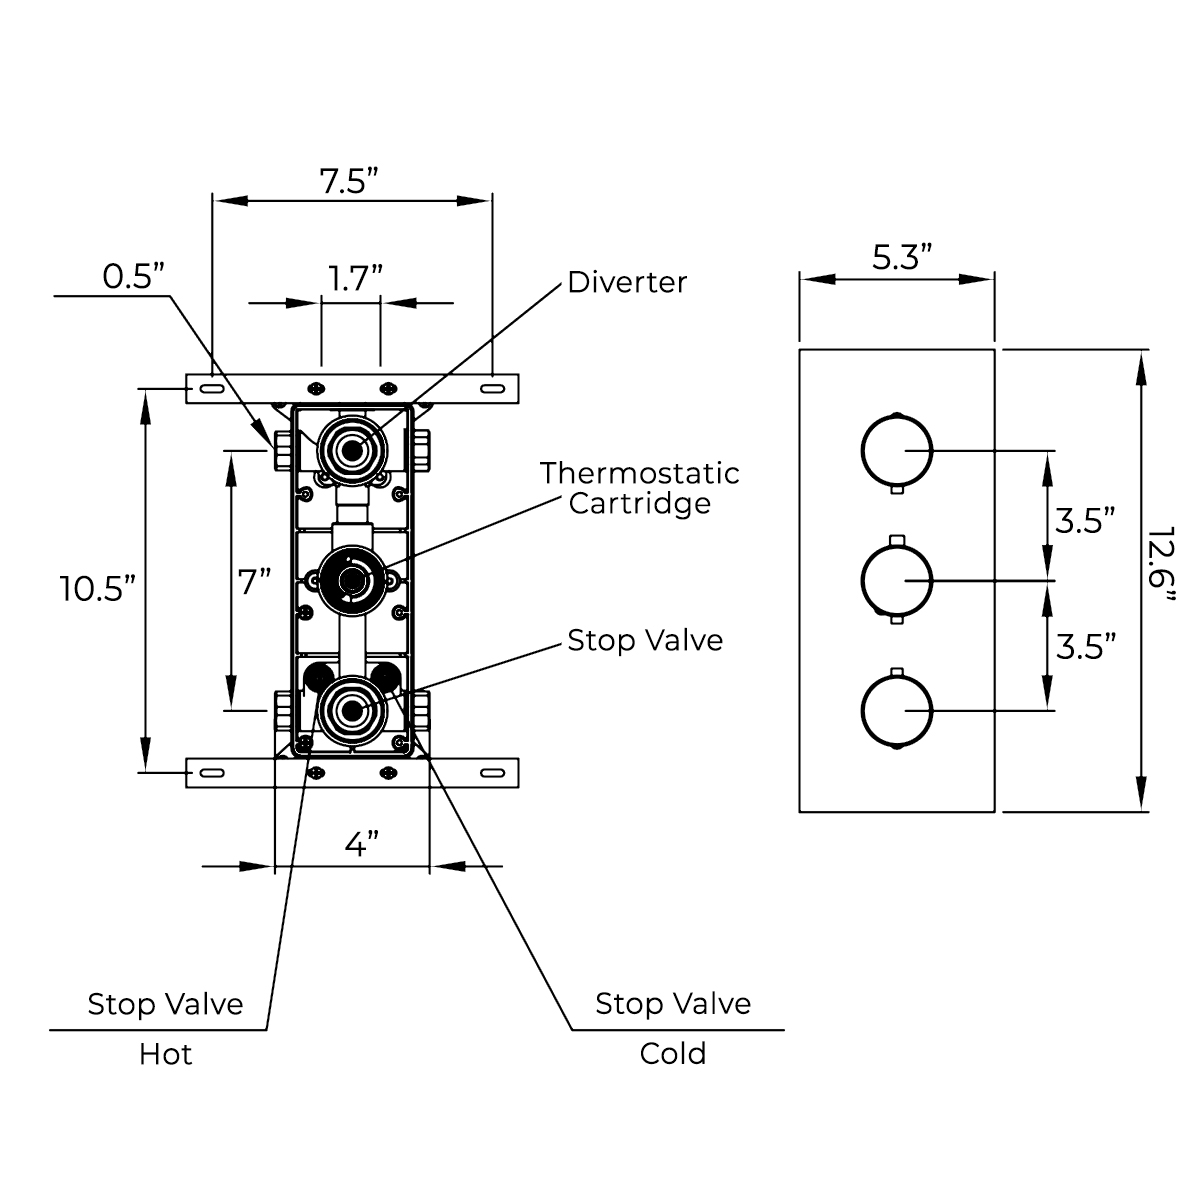 | Shower
Mixer | 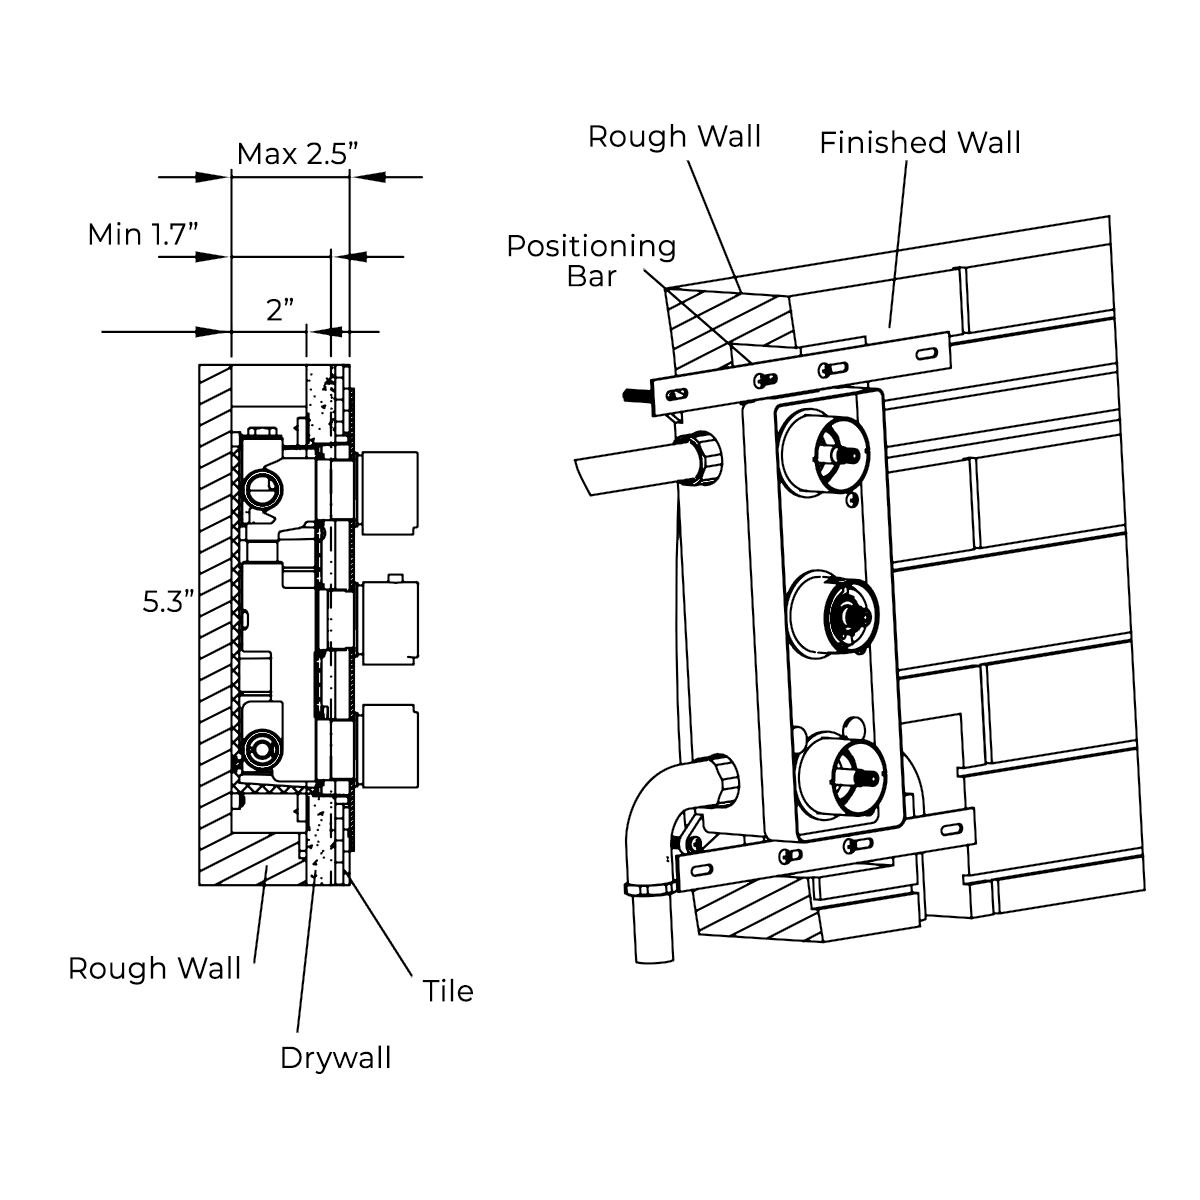 | |
| Step 3: | | Step 4: | | 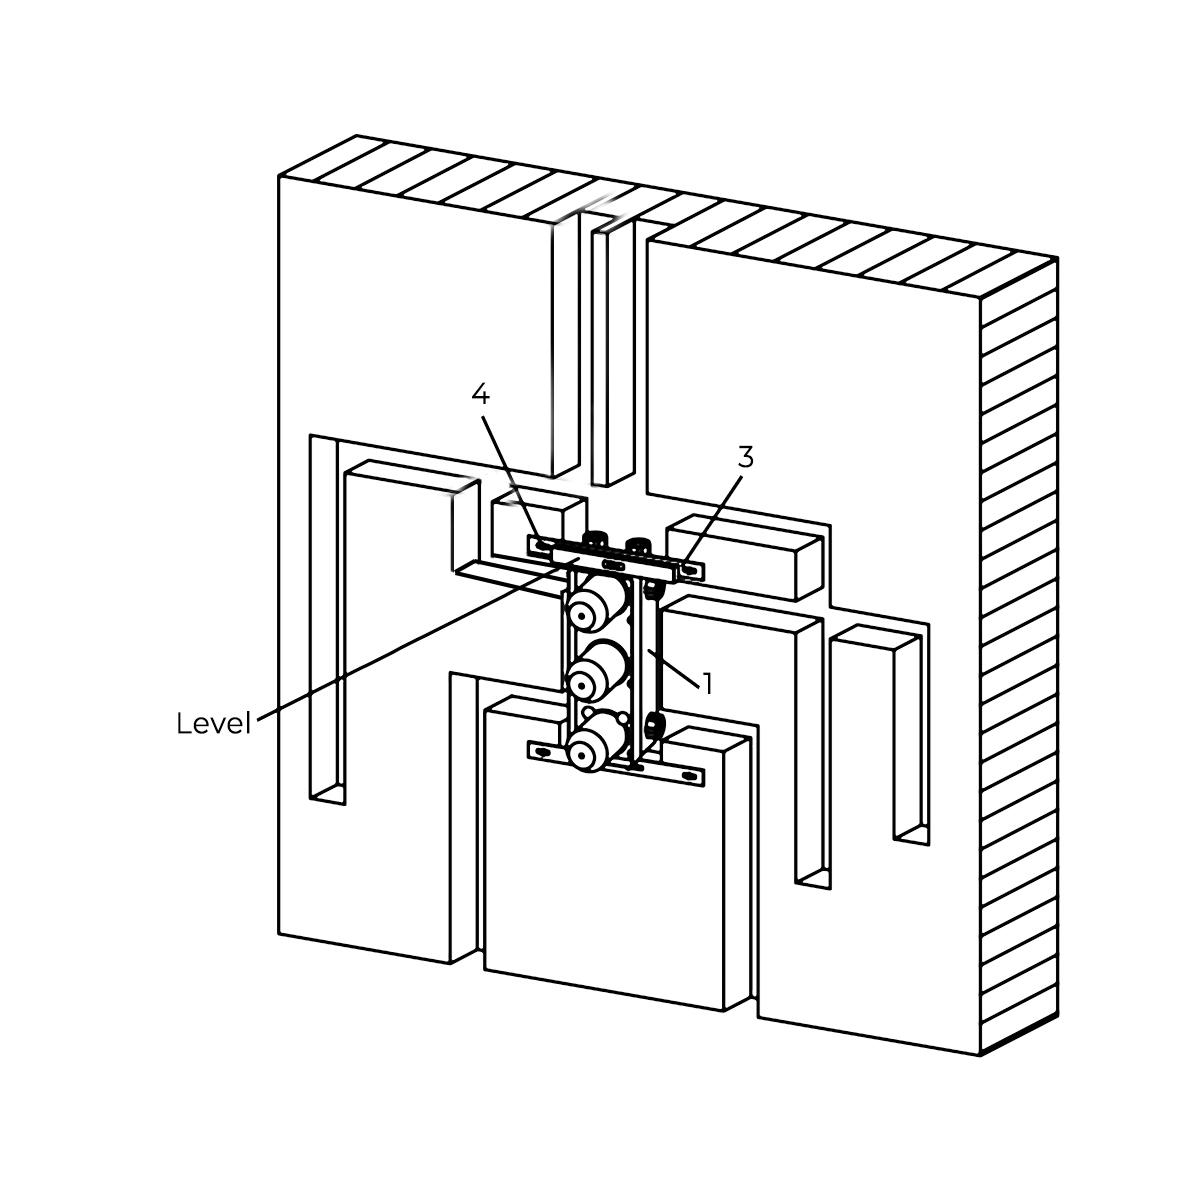
| shower
mixer |
|  |
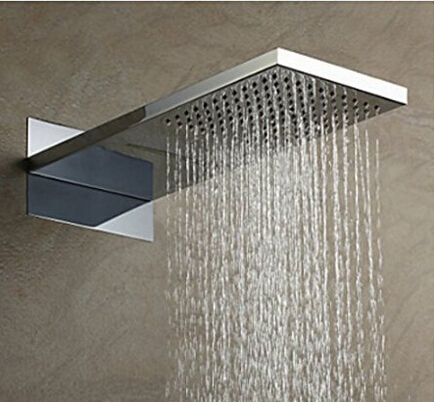
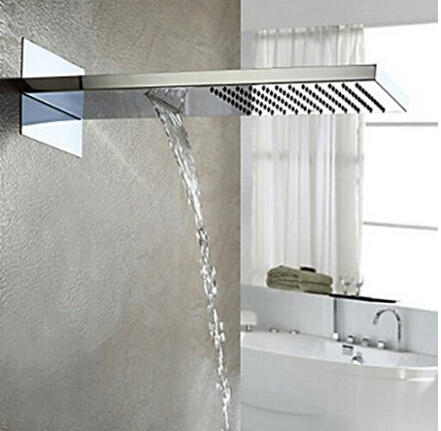
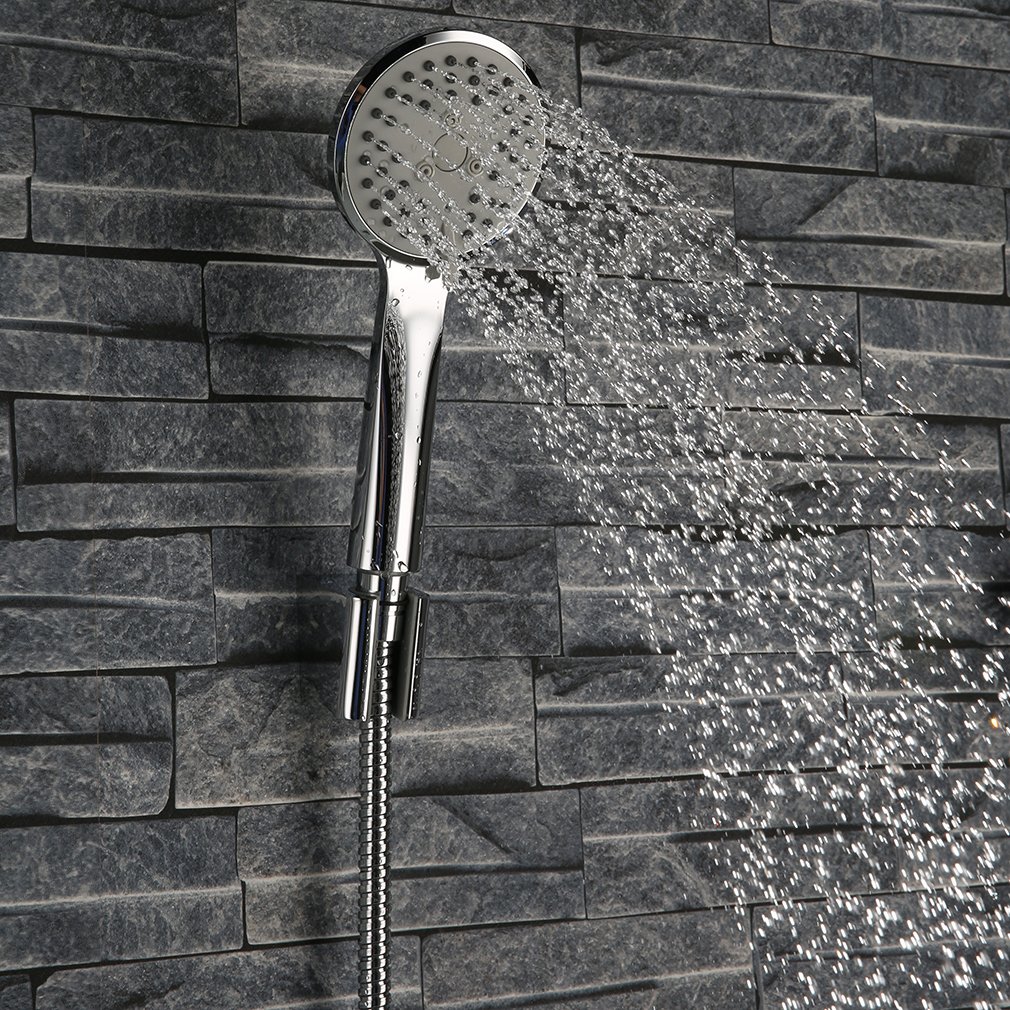
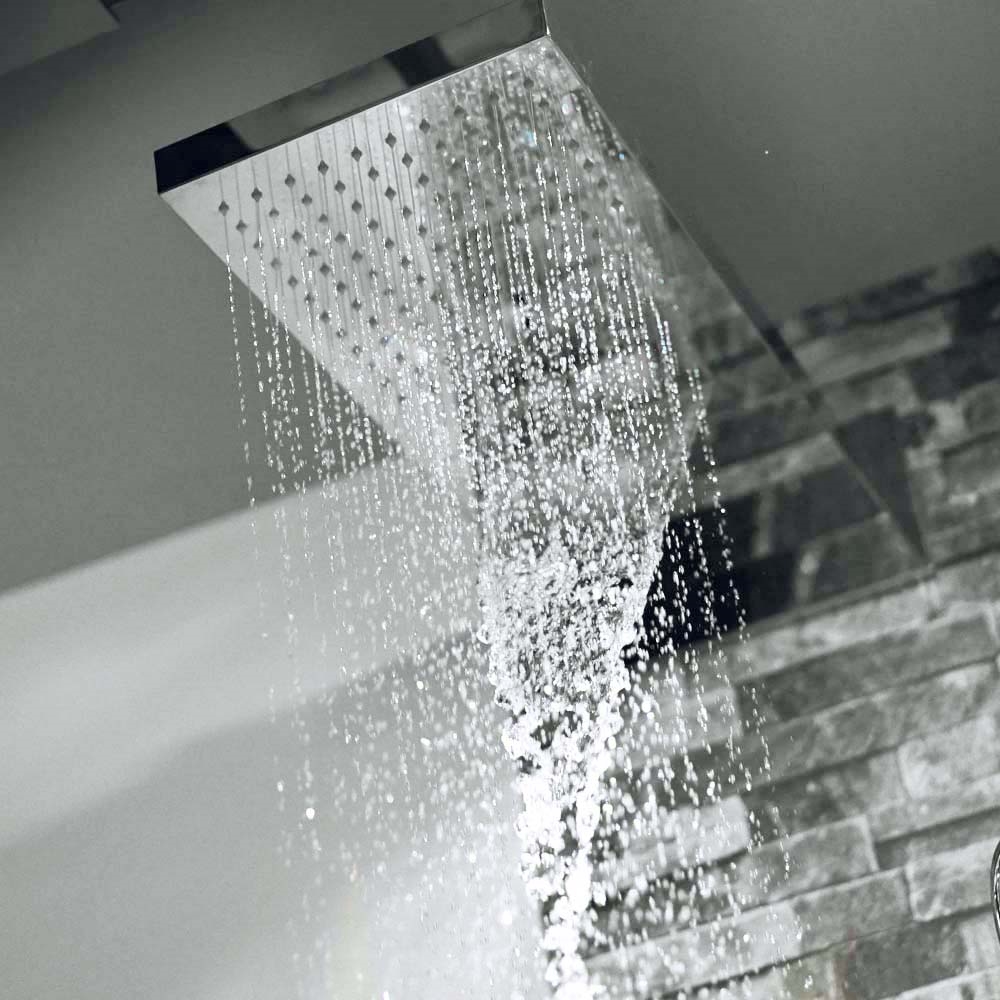
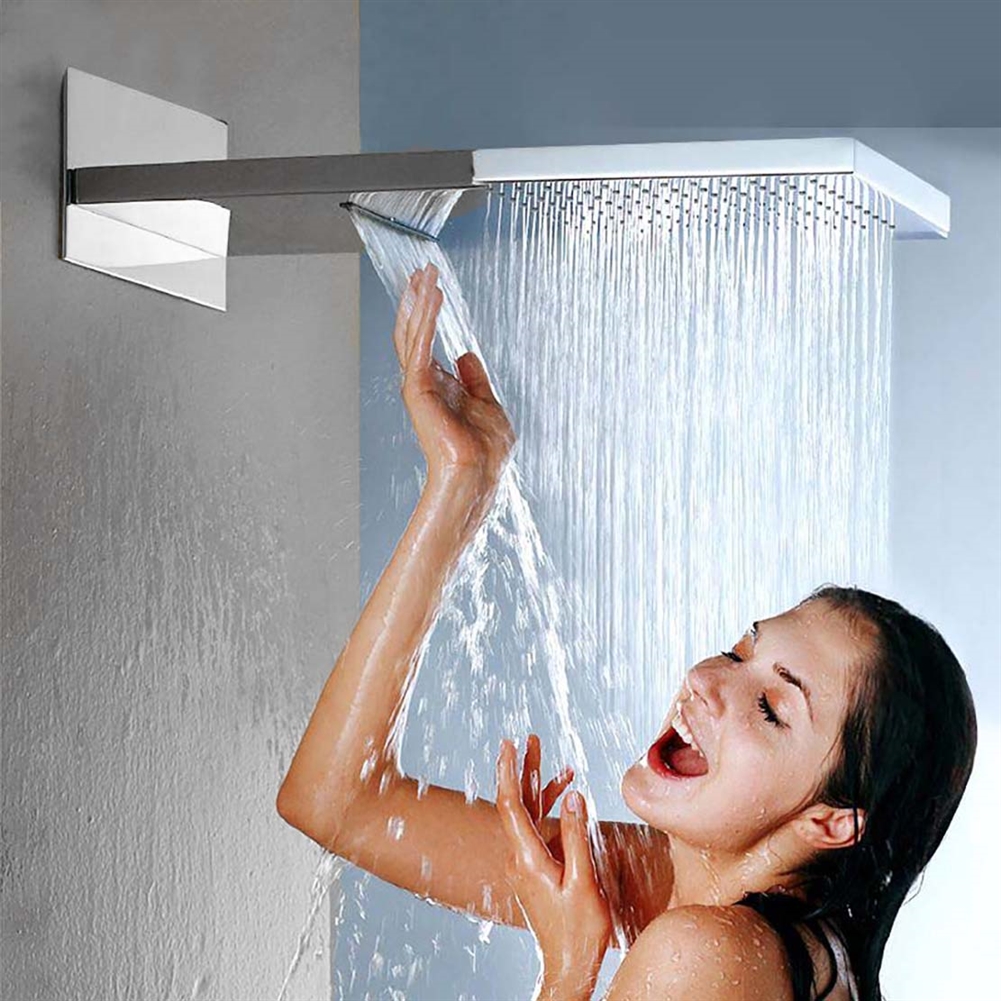
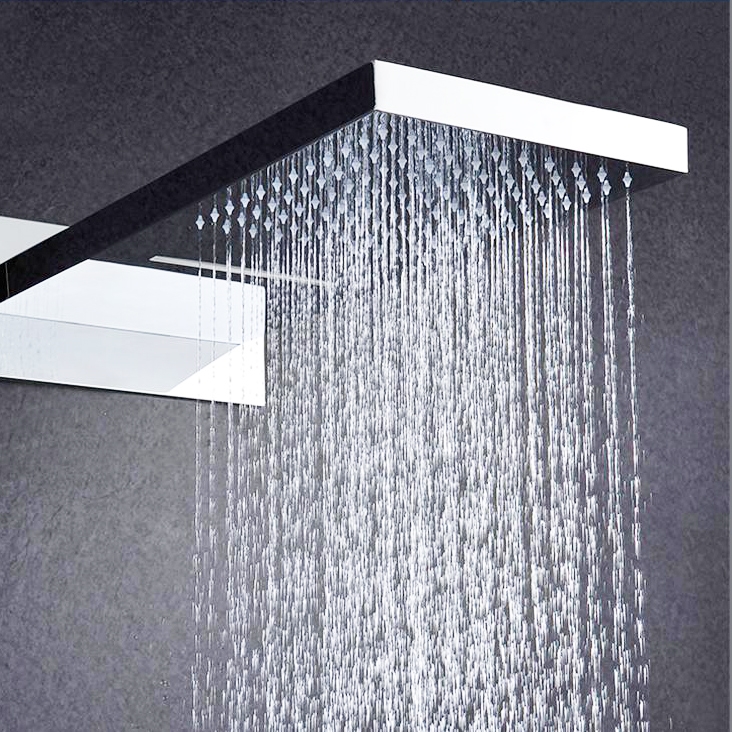
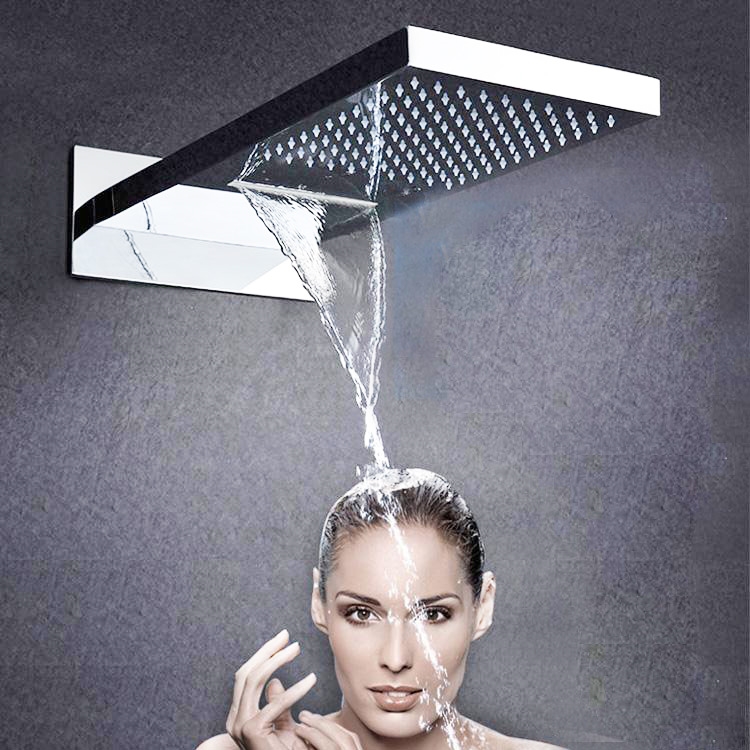
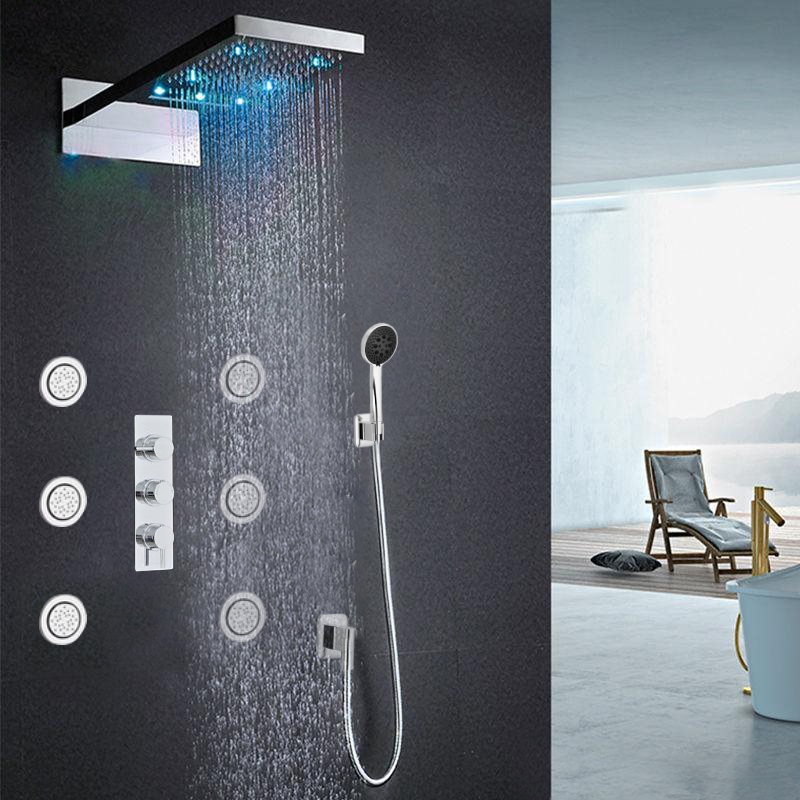
Fontana Warsaw Waterfall Shower & Rainfall LED Shower SystemThis complete waterfall shower system from FontanaShowers will exceed all expectations from aesthetics to function, longevity and everything in between. The shower head offers two options, waterfall and rainfall. Six large massage body shower jest Sprays that are adjustable body jets - perfect for a refreshing and rejuvenating shower after a long, tiring day. The handheld shower wand is a wonderful addition, giving you more versatility and flexibility with your showering choices. Built-in hydro-powered device powers the LED lights, which provide visual shower temperature cues to reduce water waste. Fontana Warsaw Waterfall & Rainfall LED Shower System change color by detecting water temperature. When water temperature is ≤89 °F (≤32 °C), Blue color will show automatically; When water temperature is between 97 to 107 °F (36-42 °C), Green color will show automatically; When water temperature is between 109 to 122 °F (43-50 °C), Red color will show automatically; When water temperature is above 122 °F (>50 °C), Red color will flash immediately. The shower head comes with waterfall and rainfall feature, and you can enjoy either the waterfall shower or the rainfall shower or the combination of both. When it comes to new bathroom rain shower faucets, FontanaShowers is offers the shape, finish and styles you're looking for.
Features:
- Shower Brand Name: FontanaShowers
- Shower Model Number: FSNX-57-WATERFALL-SHOWER-FAUCE
- Function: Waterfall/Rainfall shower Set
- Massage: 6 Larges Massage Body Shower Jest Sprays
- Feature: Wall Mount
- Style: Contemporary
- Shower Head: Waterfall, Rainfall
- Number of Handles: Three Handles
- Valve Type: Ceramic Valve
- Shower Body Material: Brass
- Showerhead: 22.5" x 9" (572mm x 230 mm
- Handheld Shower Material: Brass
- Finish: Chrome
- Water Flow rate: 18 (L/Min) 1.8 GPM
- Water Pressure: 1.6 mpa
| | 
|
|
|
|