Bravat Dark Oil Rubbed Bronze Square Shower Set With Valve Mixer 3-Way Concealed Wall Mount
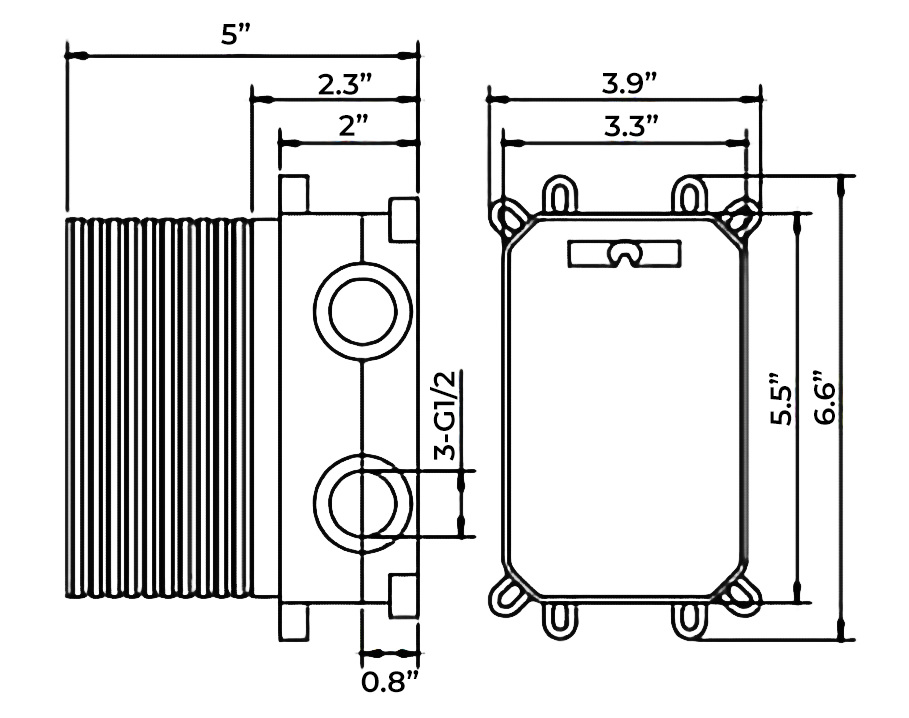
The Bravat Dark Oil Rubbed Bronze Square Shower Set With Thermostatic Valve Mixer 3-Way Concealed Wall Mount is one of the most trendiest finishes across decor styles in the bathroom. It has a contemporary style with a beautiful Dark Oil Rubbed Bronze finish. When it comes to new bathroom upgrades, FontanaShowers is offering shape, finishes and styles that you've looking for. Bravat Dark Oil Rubbed Bronze Square Shower Valve Mixer 3-Way Concealed Wall Mounted Features:| Brand Name: FontanaShowersModel Number: FS1058Type: Shower Set & Shower MixerStyle: ContemporaryType: Fixed Support TypeSurface Finish: Dark Oil Rubbed BronzeInstallation Type: Wall MountNumber of Jets: FourControl Type: Single Holder Dual ControlSize: 7.91"-11.85" (201-300mm)Surface Treatment: PolishedValve Core Material: CeramicBath Shower Type: In-Wall Shower MixerValve Type: Ceramic ValveFaucet Handle Material: Zinc AlloyMixer Body Material: BrassValve Included: Yes Embedment Depth: 2.16" (55mm)Valve Panel Dimension: 6.29"x6.29" (160x160mm)Connector: G1/2"B (Standard) | 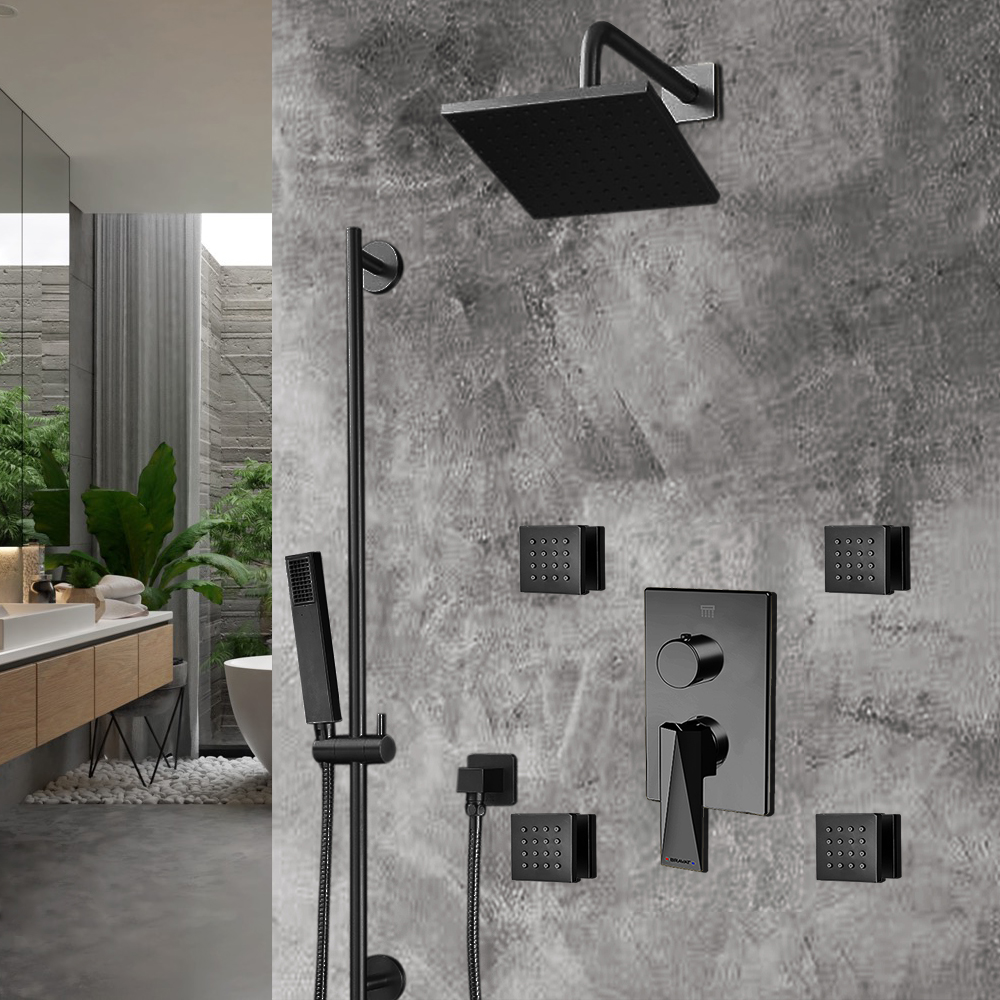 |
FontanaShowers® Product Warranty Information 
Before you begin, please read the installation instructions below. Observe all local building and safety codes.
- Unpack and inspect the product for any shipping damages. If you find damages, do not install.
- Please note all showers must be installed by a professional and certified plumber otherwise warranty might be voided.
|
shower
|
|
|
|
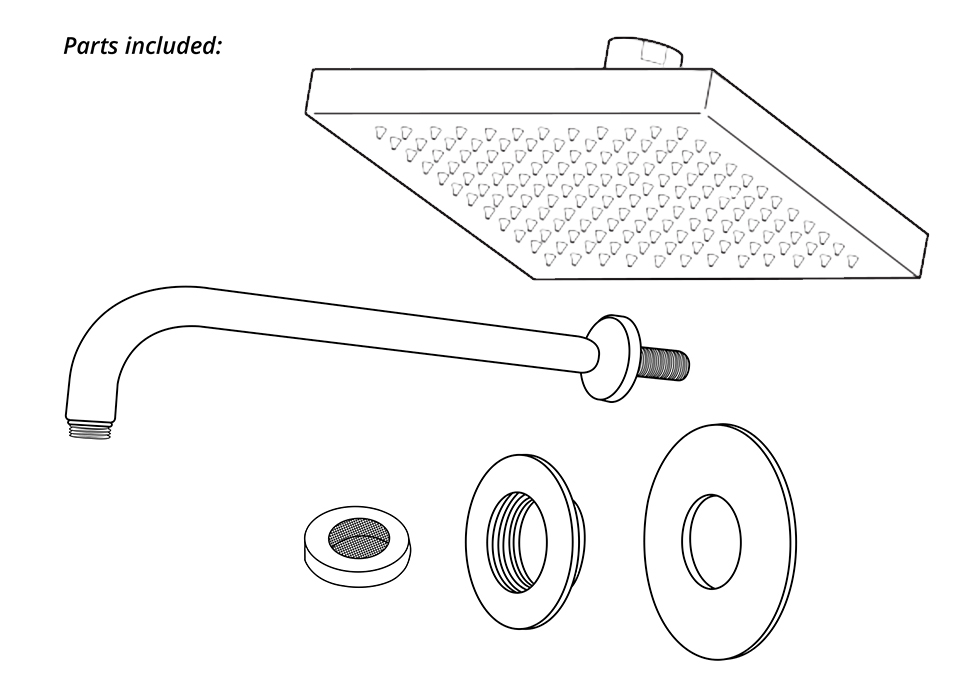
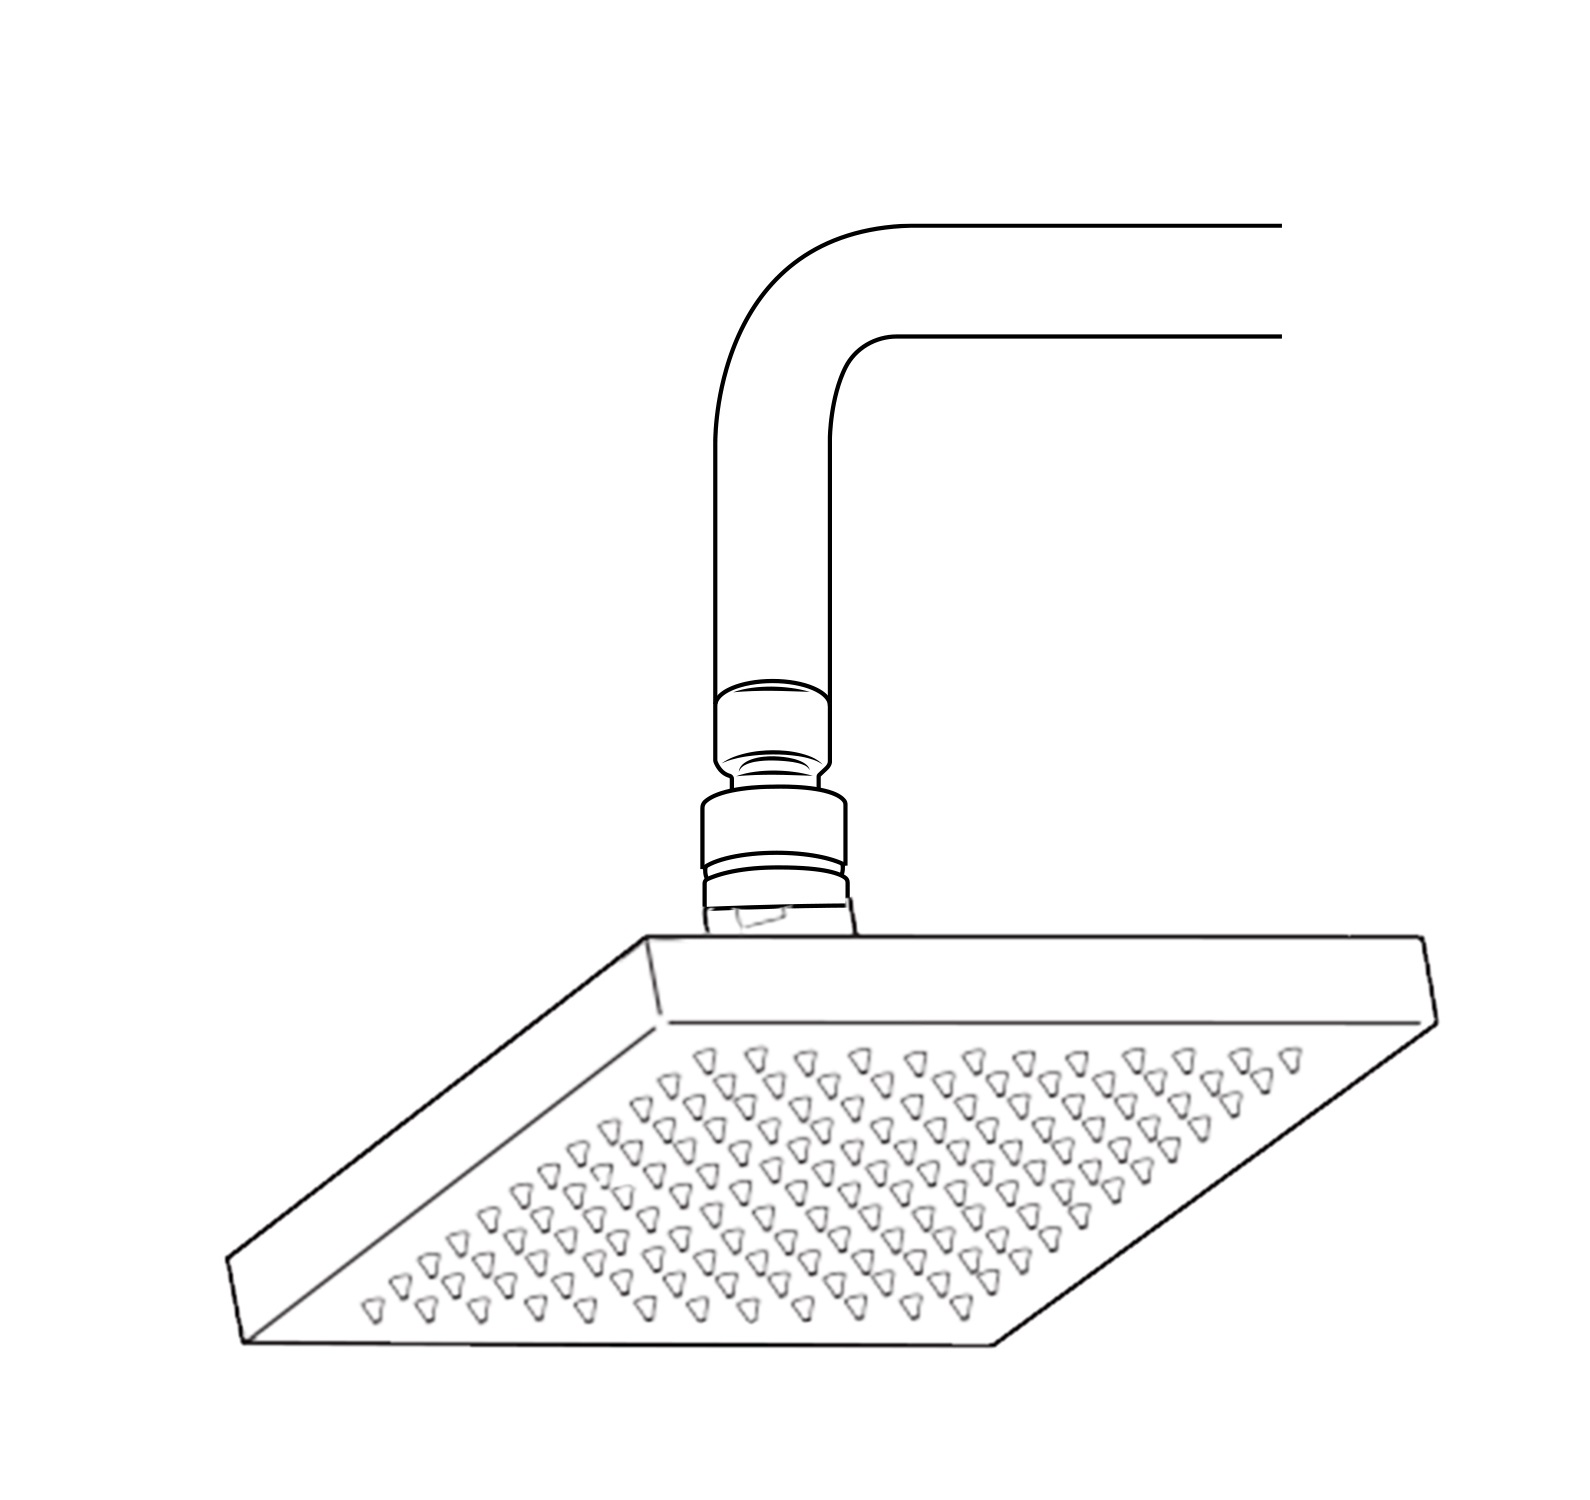
Shower Head Installation
Shower Head Parts Included:
- Wall Mounting Arm
- Locking nut
- Wall trim
- Shower arm
- Showerhead
- Fixing screws and wall plugs (not shown)
|
shower
|
|
Step 1
|
|
Step 2
|
Step 3
|
|
Step 4
|
Step 5
|
|
Step 6
|
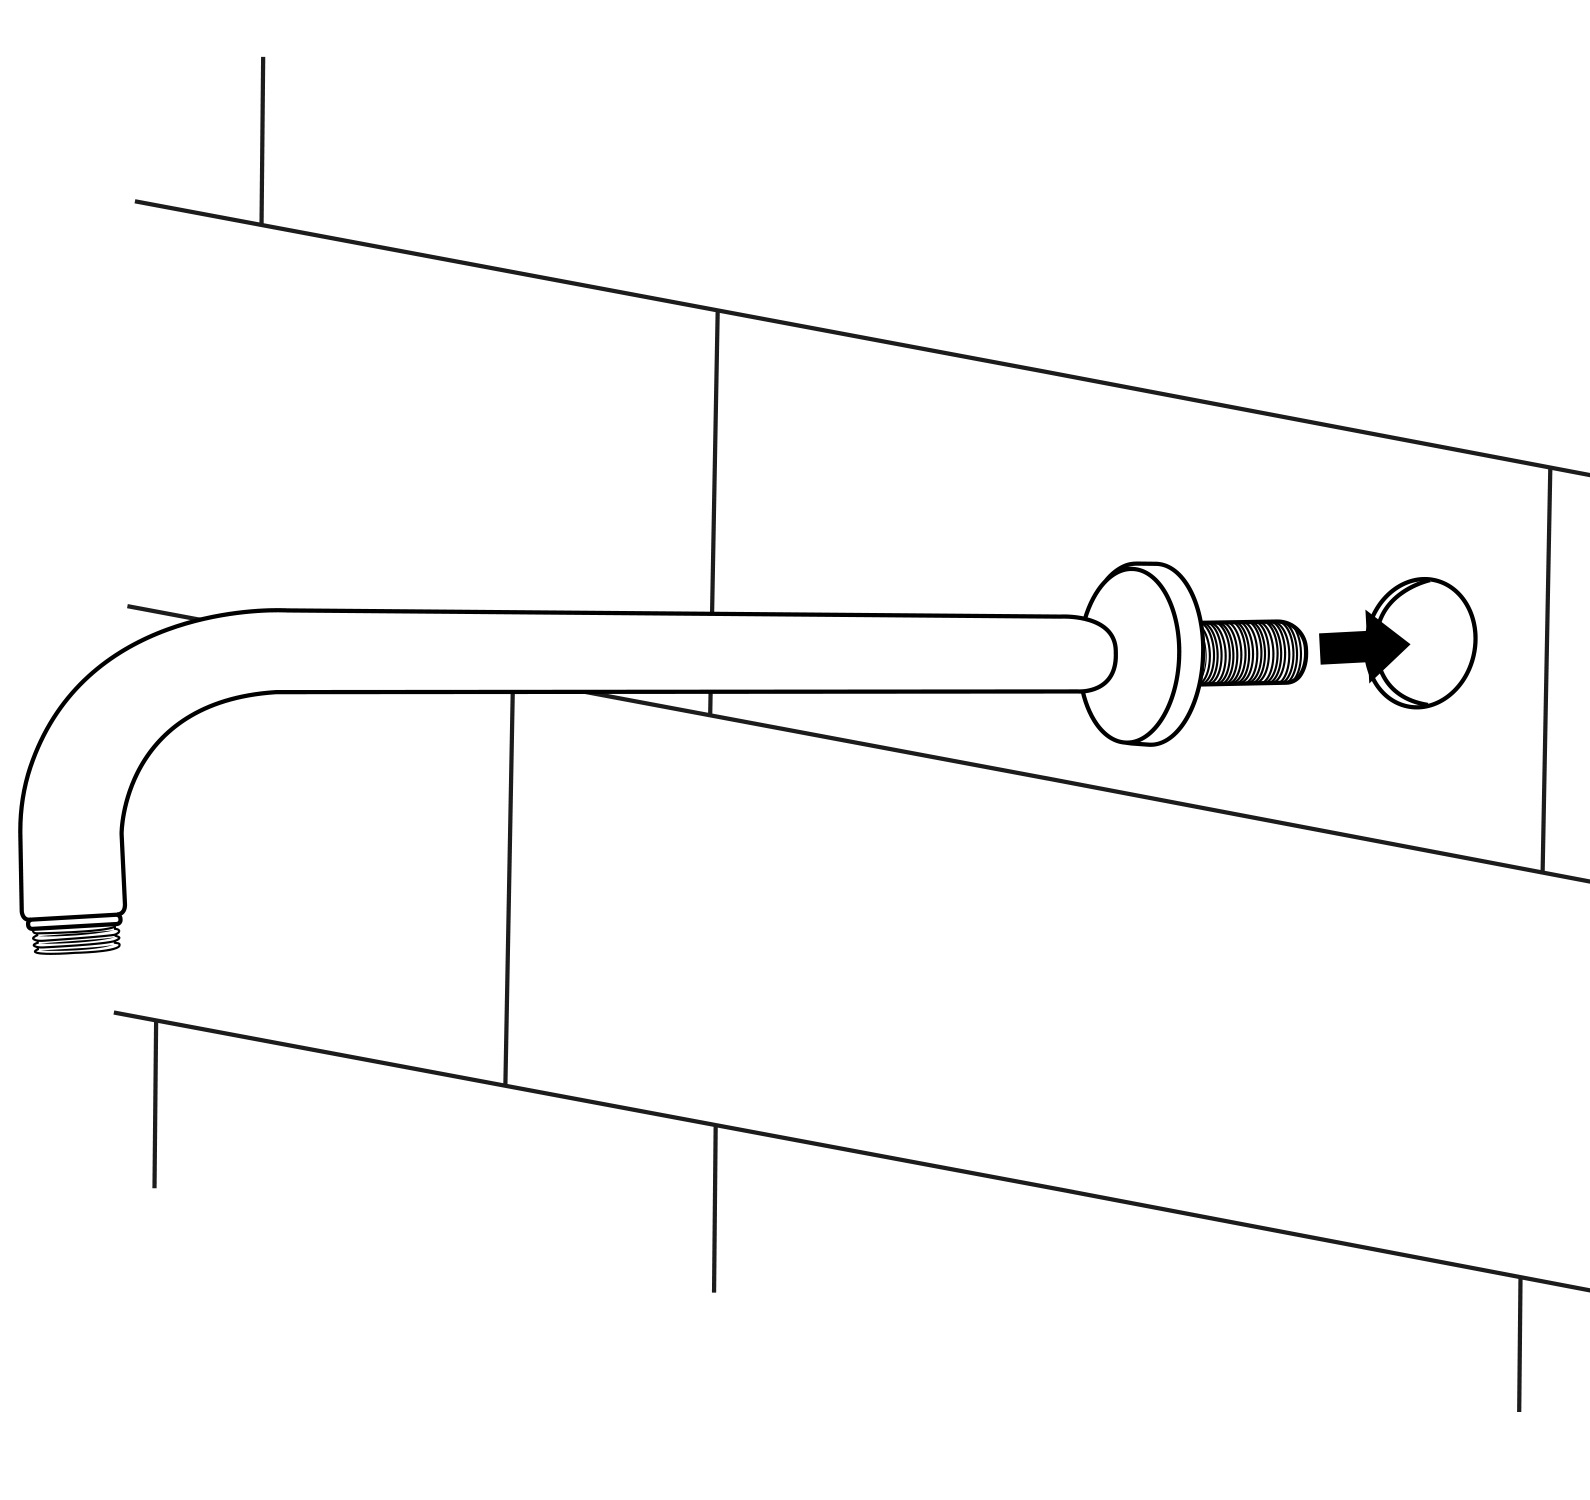
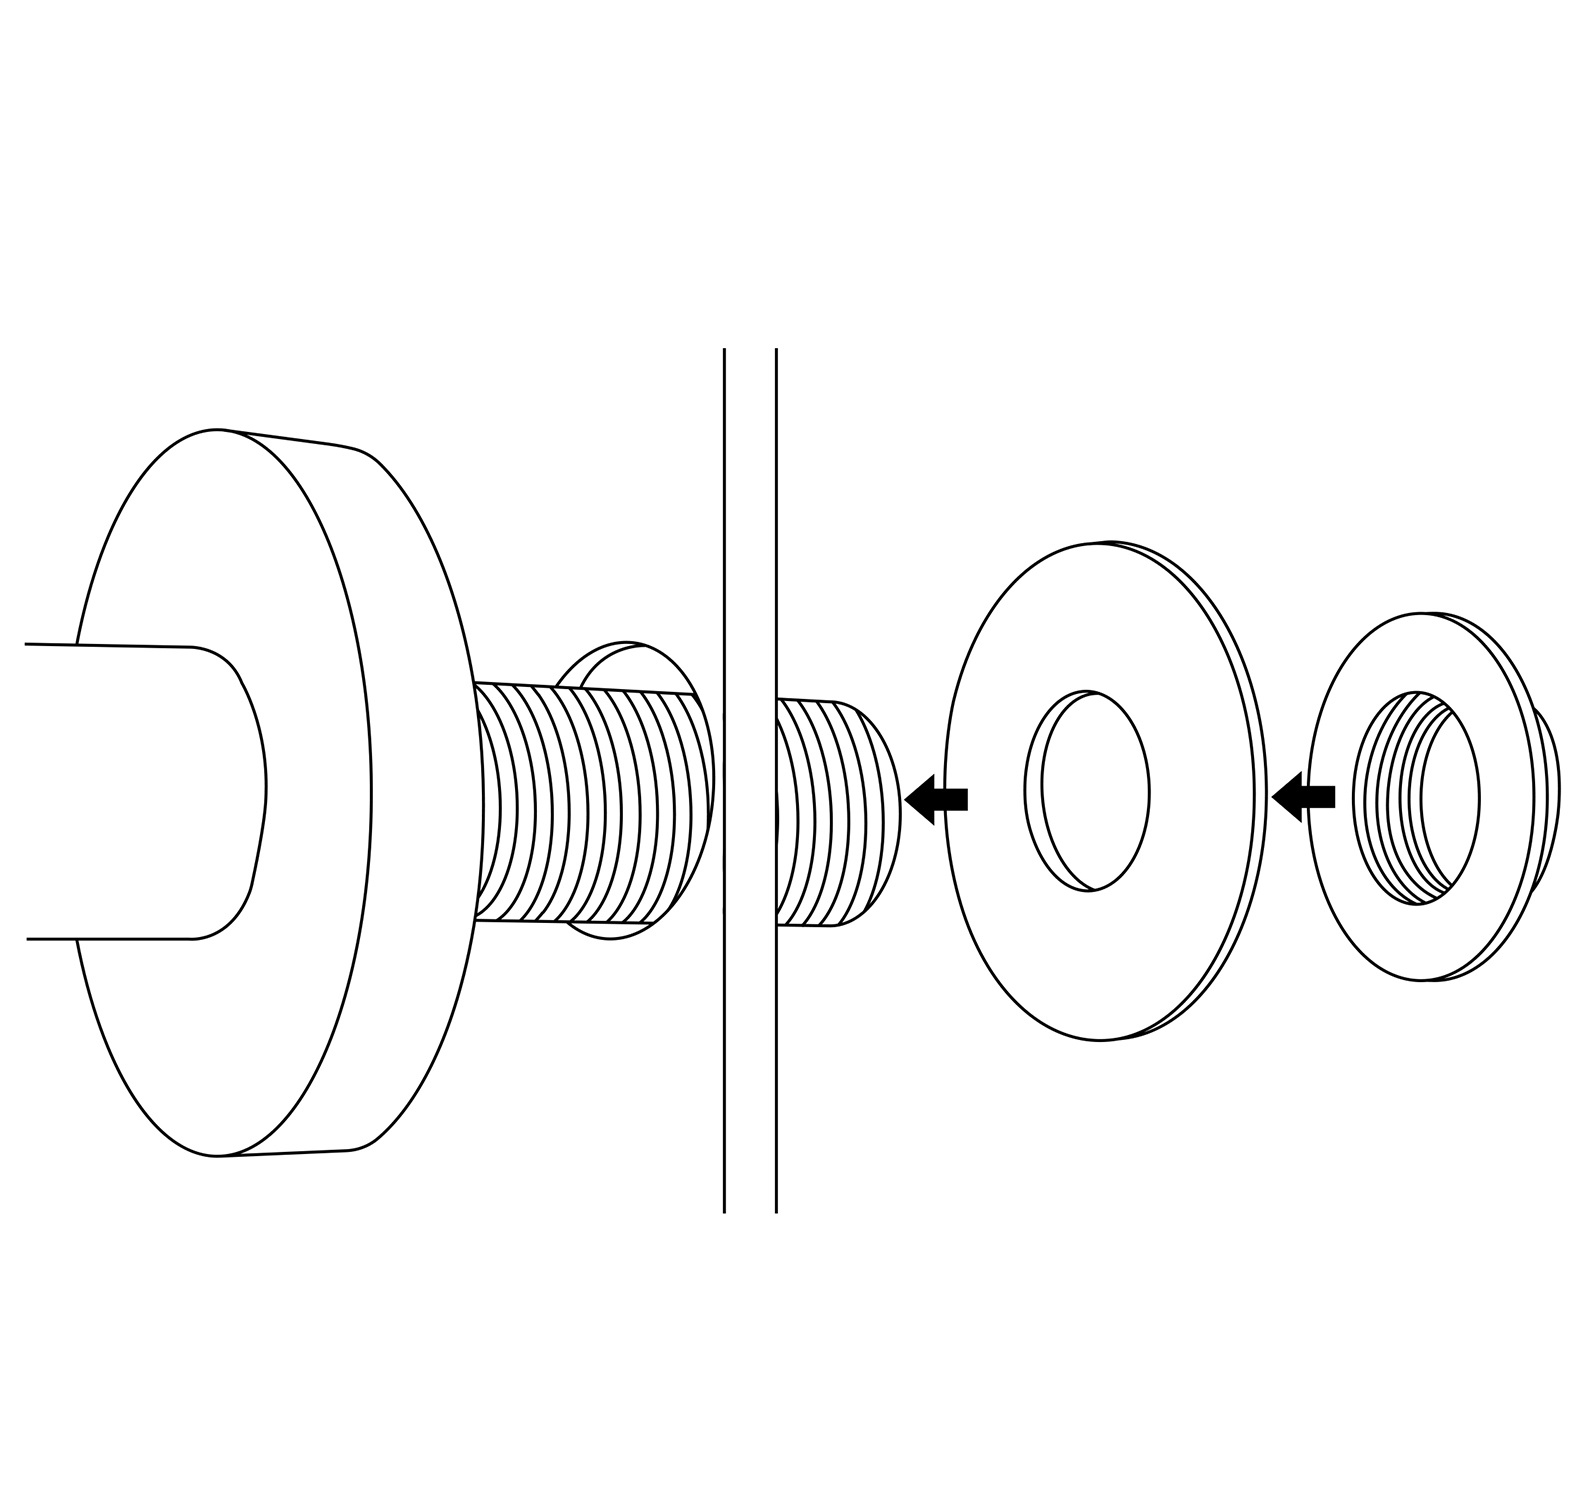
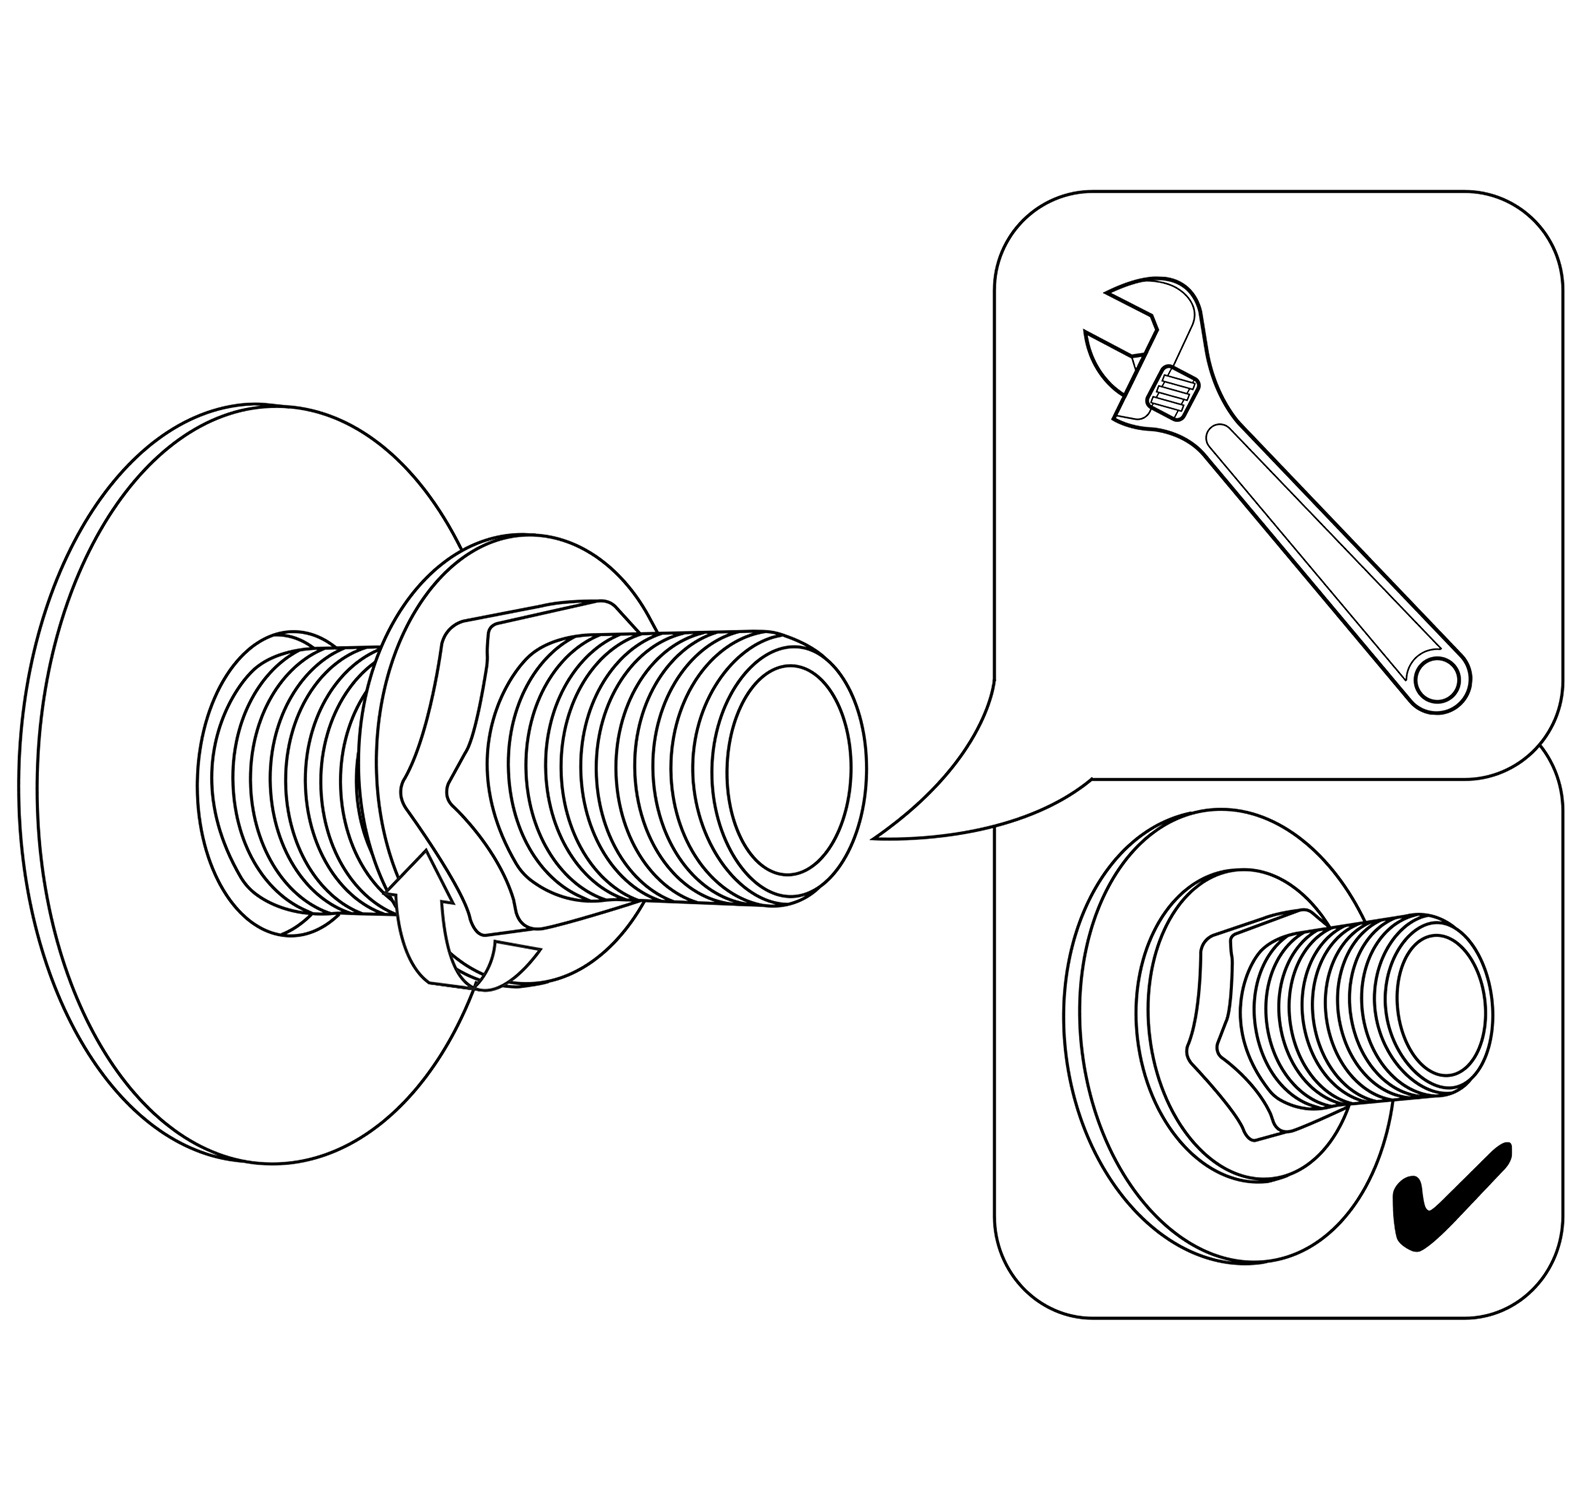
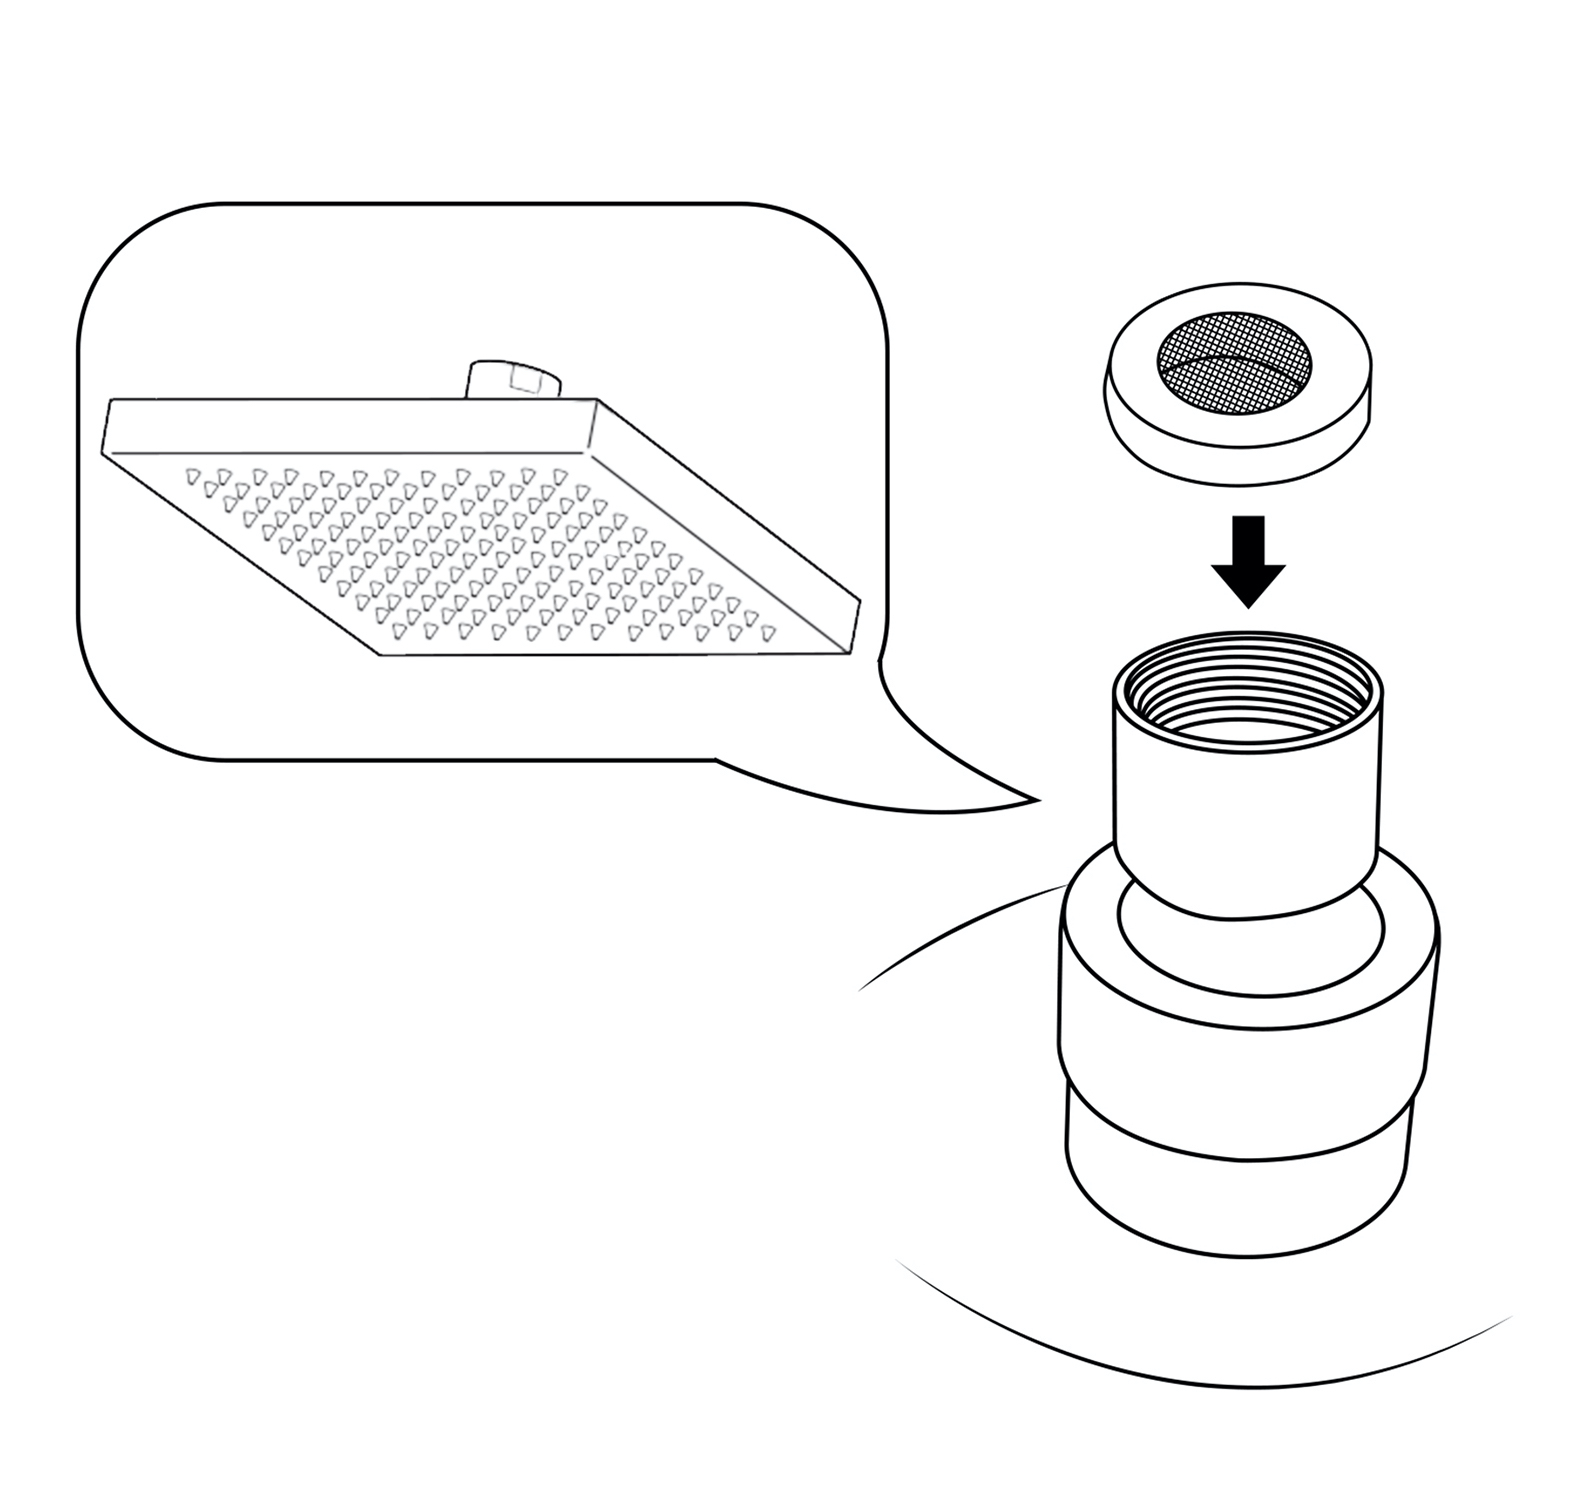
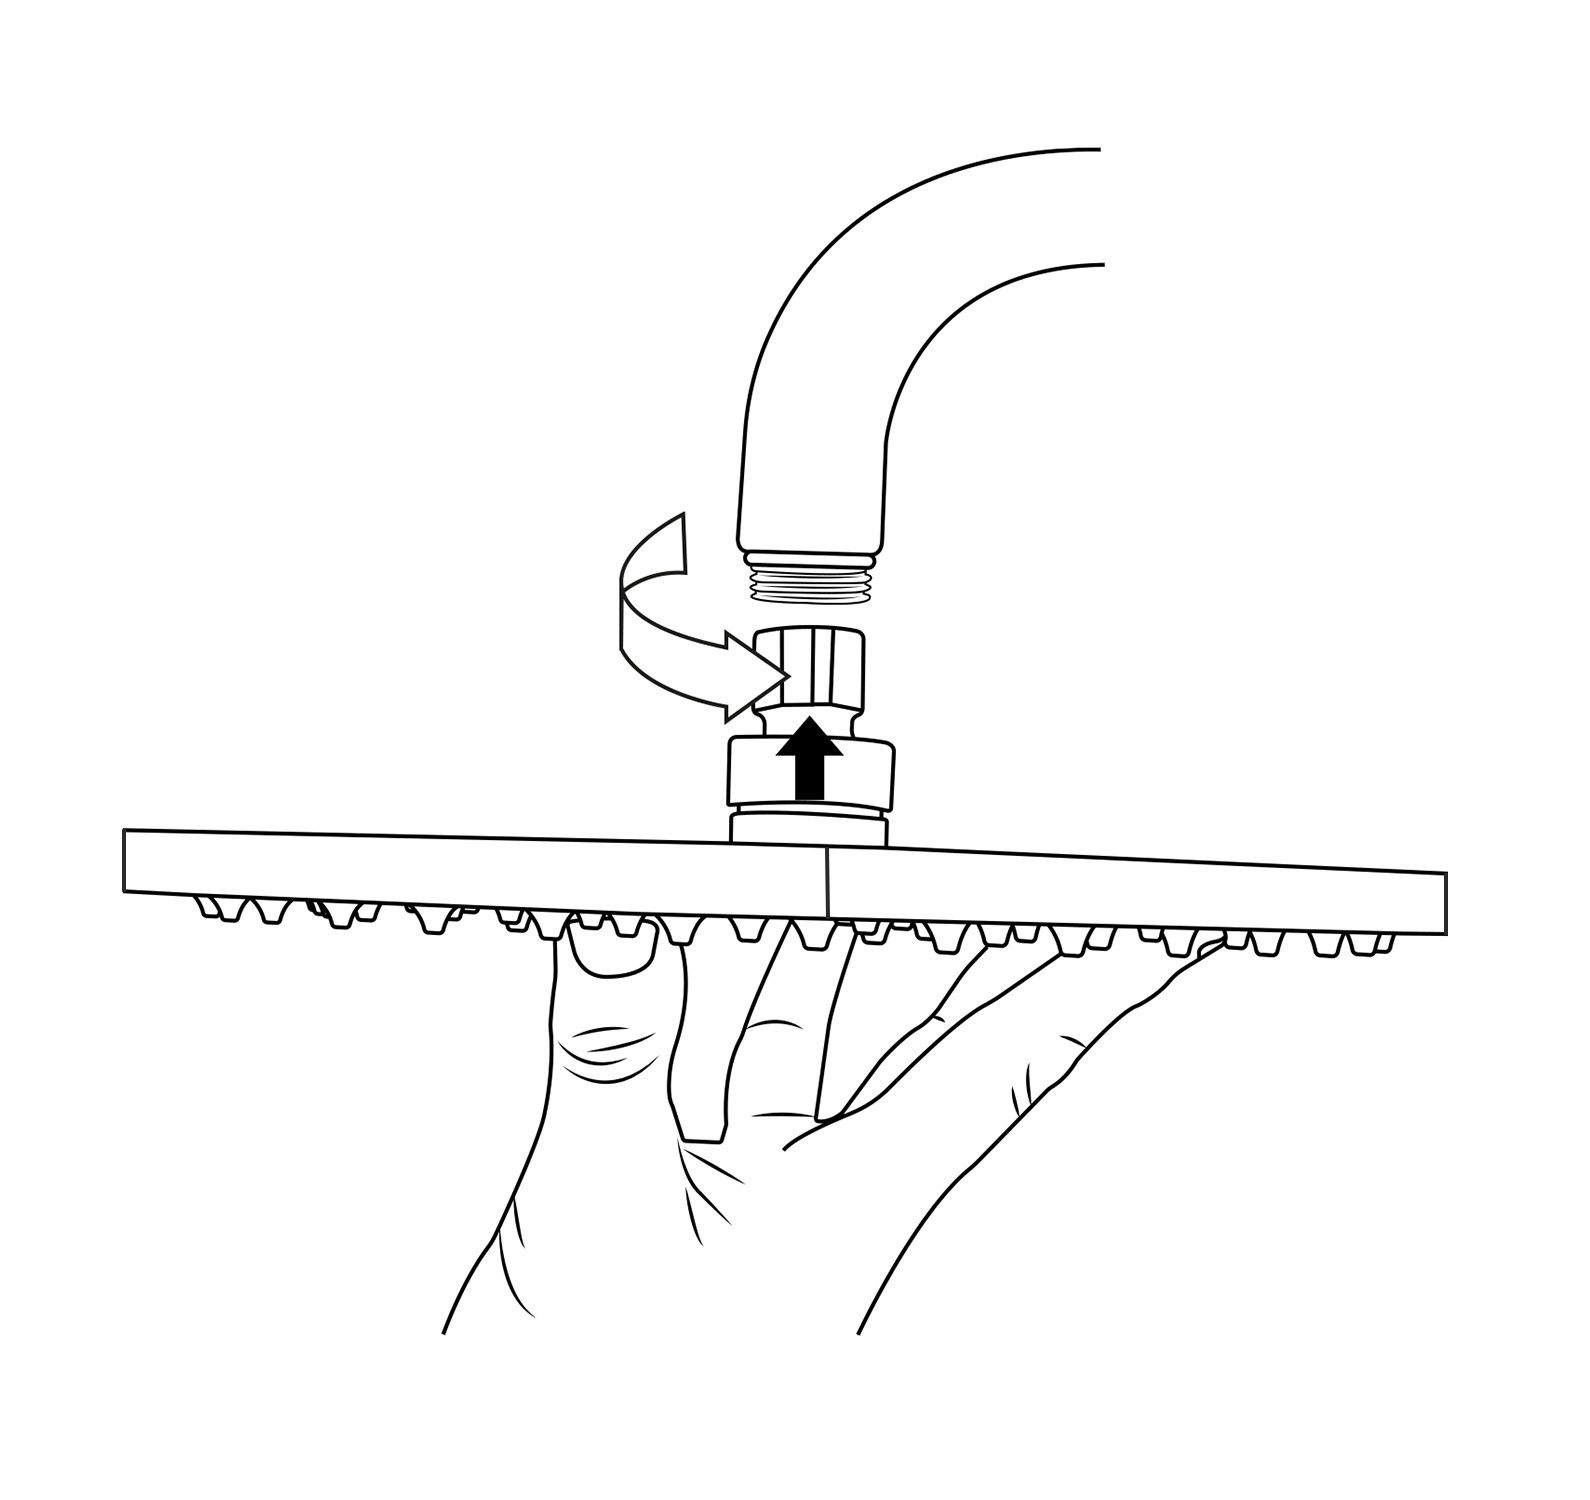
- Use your hands counter clockwise to unscrew the old showerhead and removed it.
- Take out the showerhead, make sure the shower filter is placed in the connector.
- Ensure the showerhead full horizontal alignment wall mounted shower arm thread.
- Use your hands clockwise to tighten showerhead.
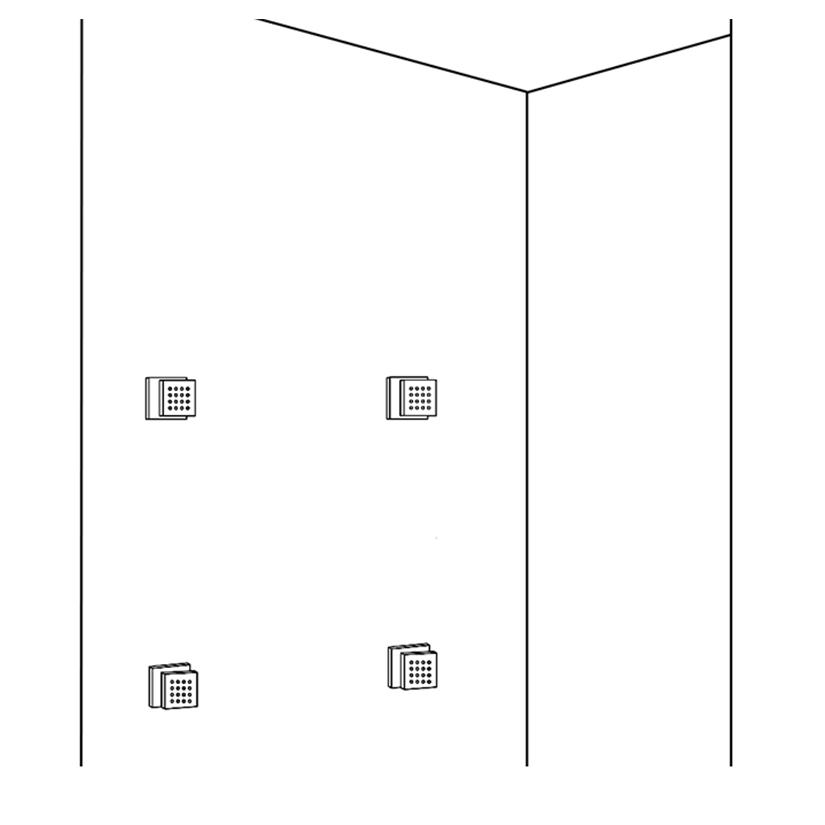
Shower Body Jets Installation Instructions
Step 1
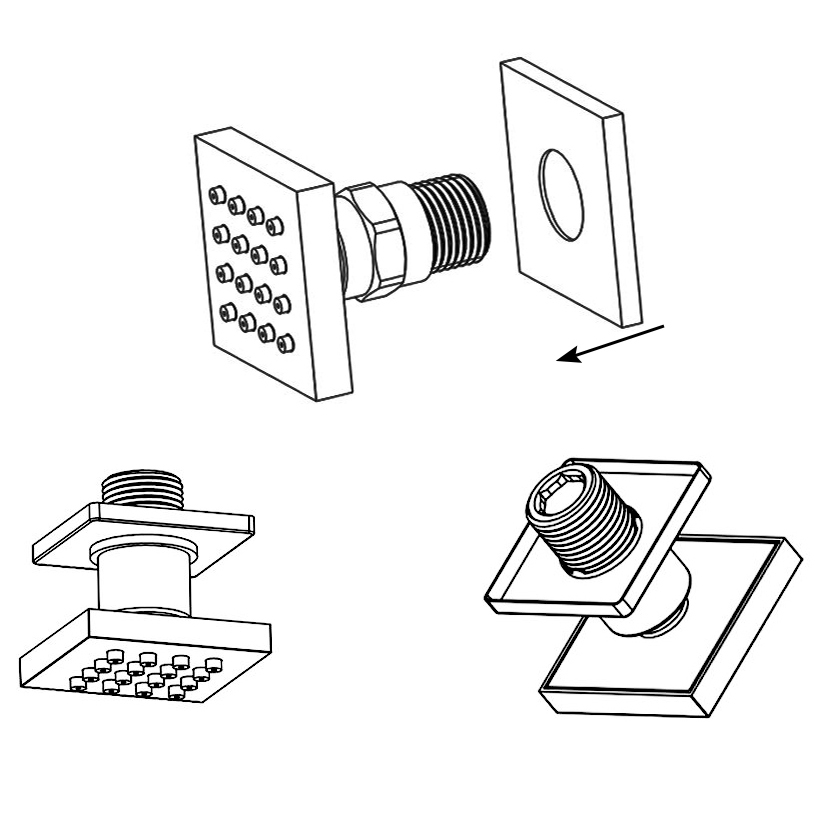
Set the decorative cover on the body jet.
|
shower
|
Step 2

Roll the raw material belt in the thread screws.
|
shower
|
Step 3
Use a wrench to tighten 6 body jets on the water outlet holes in a clockwise direction.
|
|
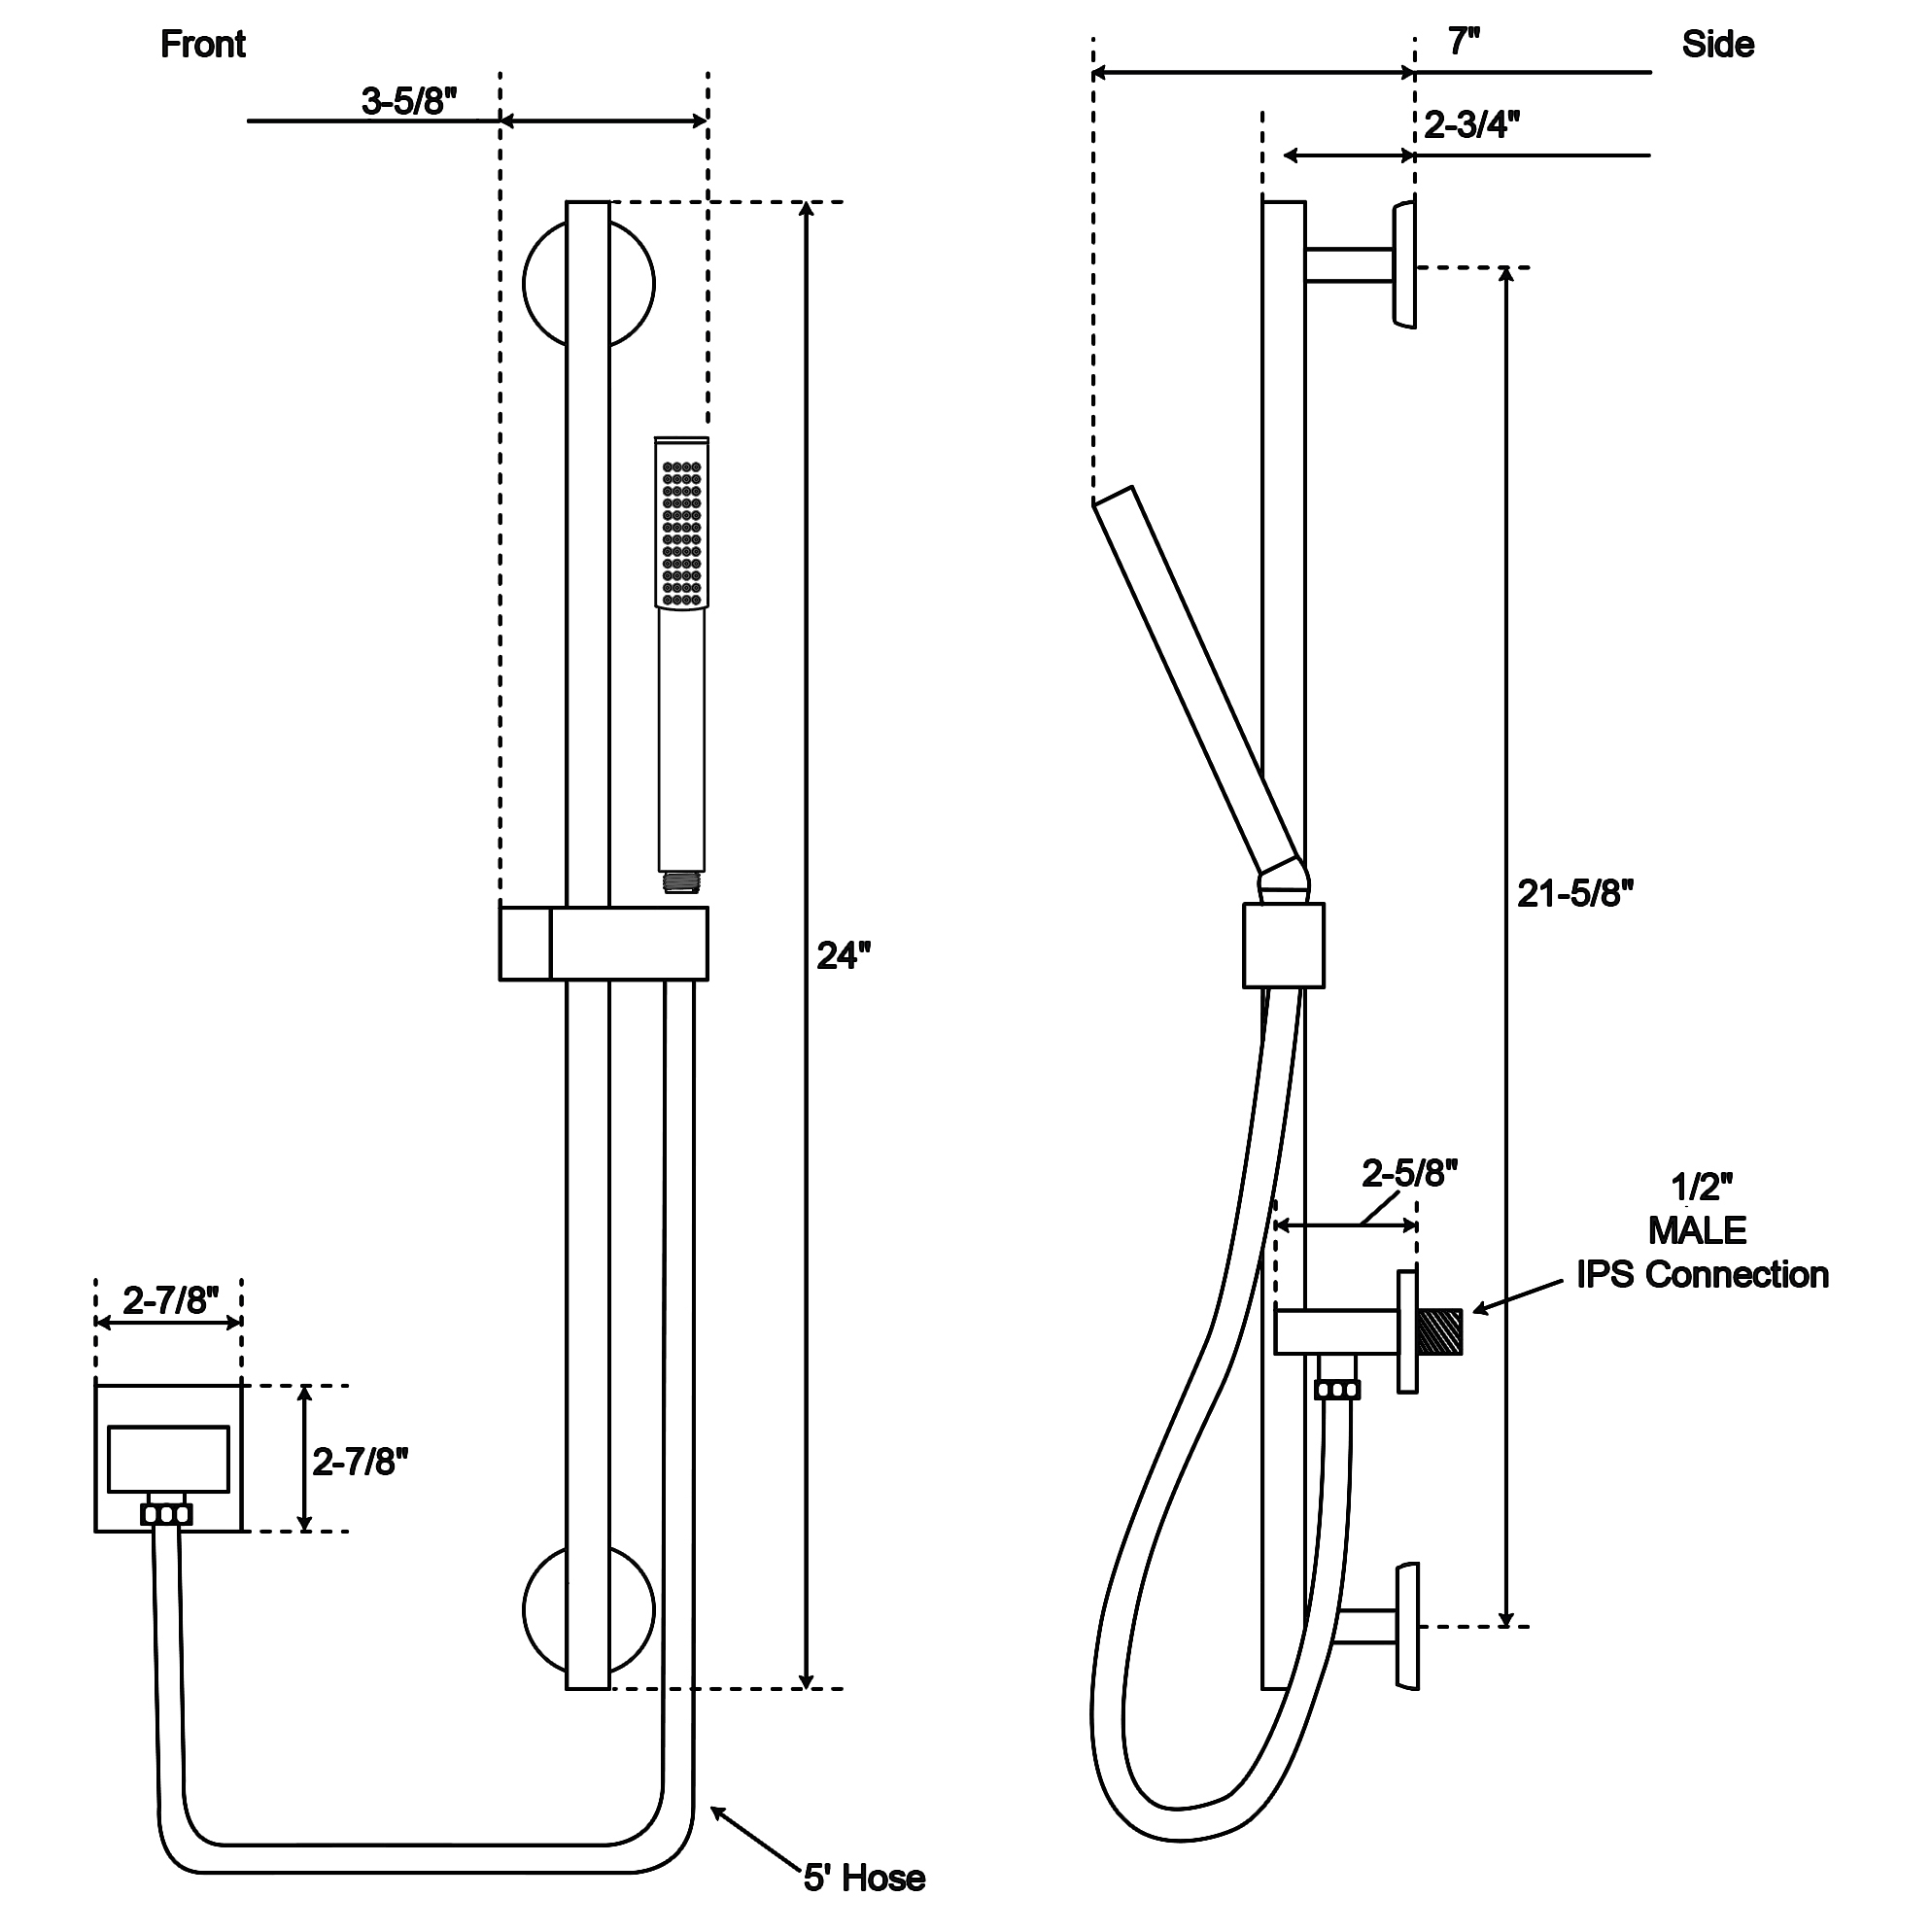
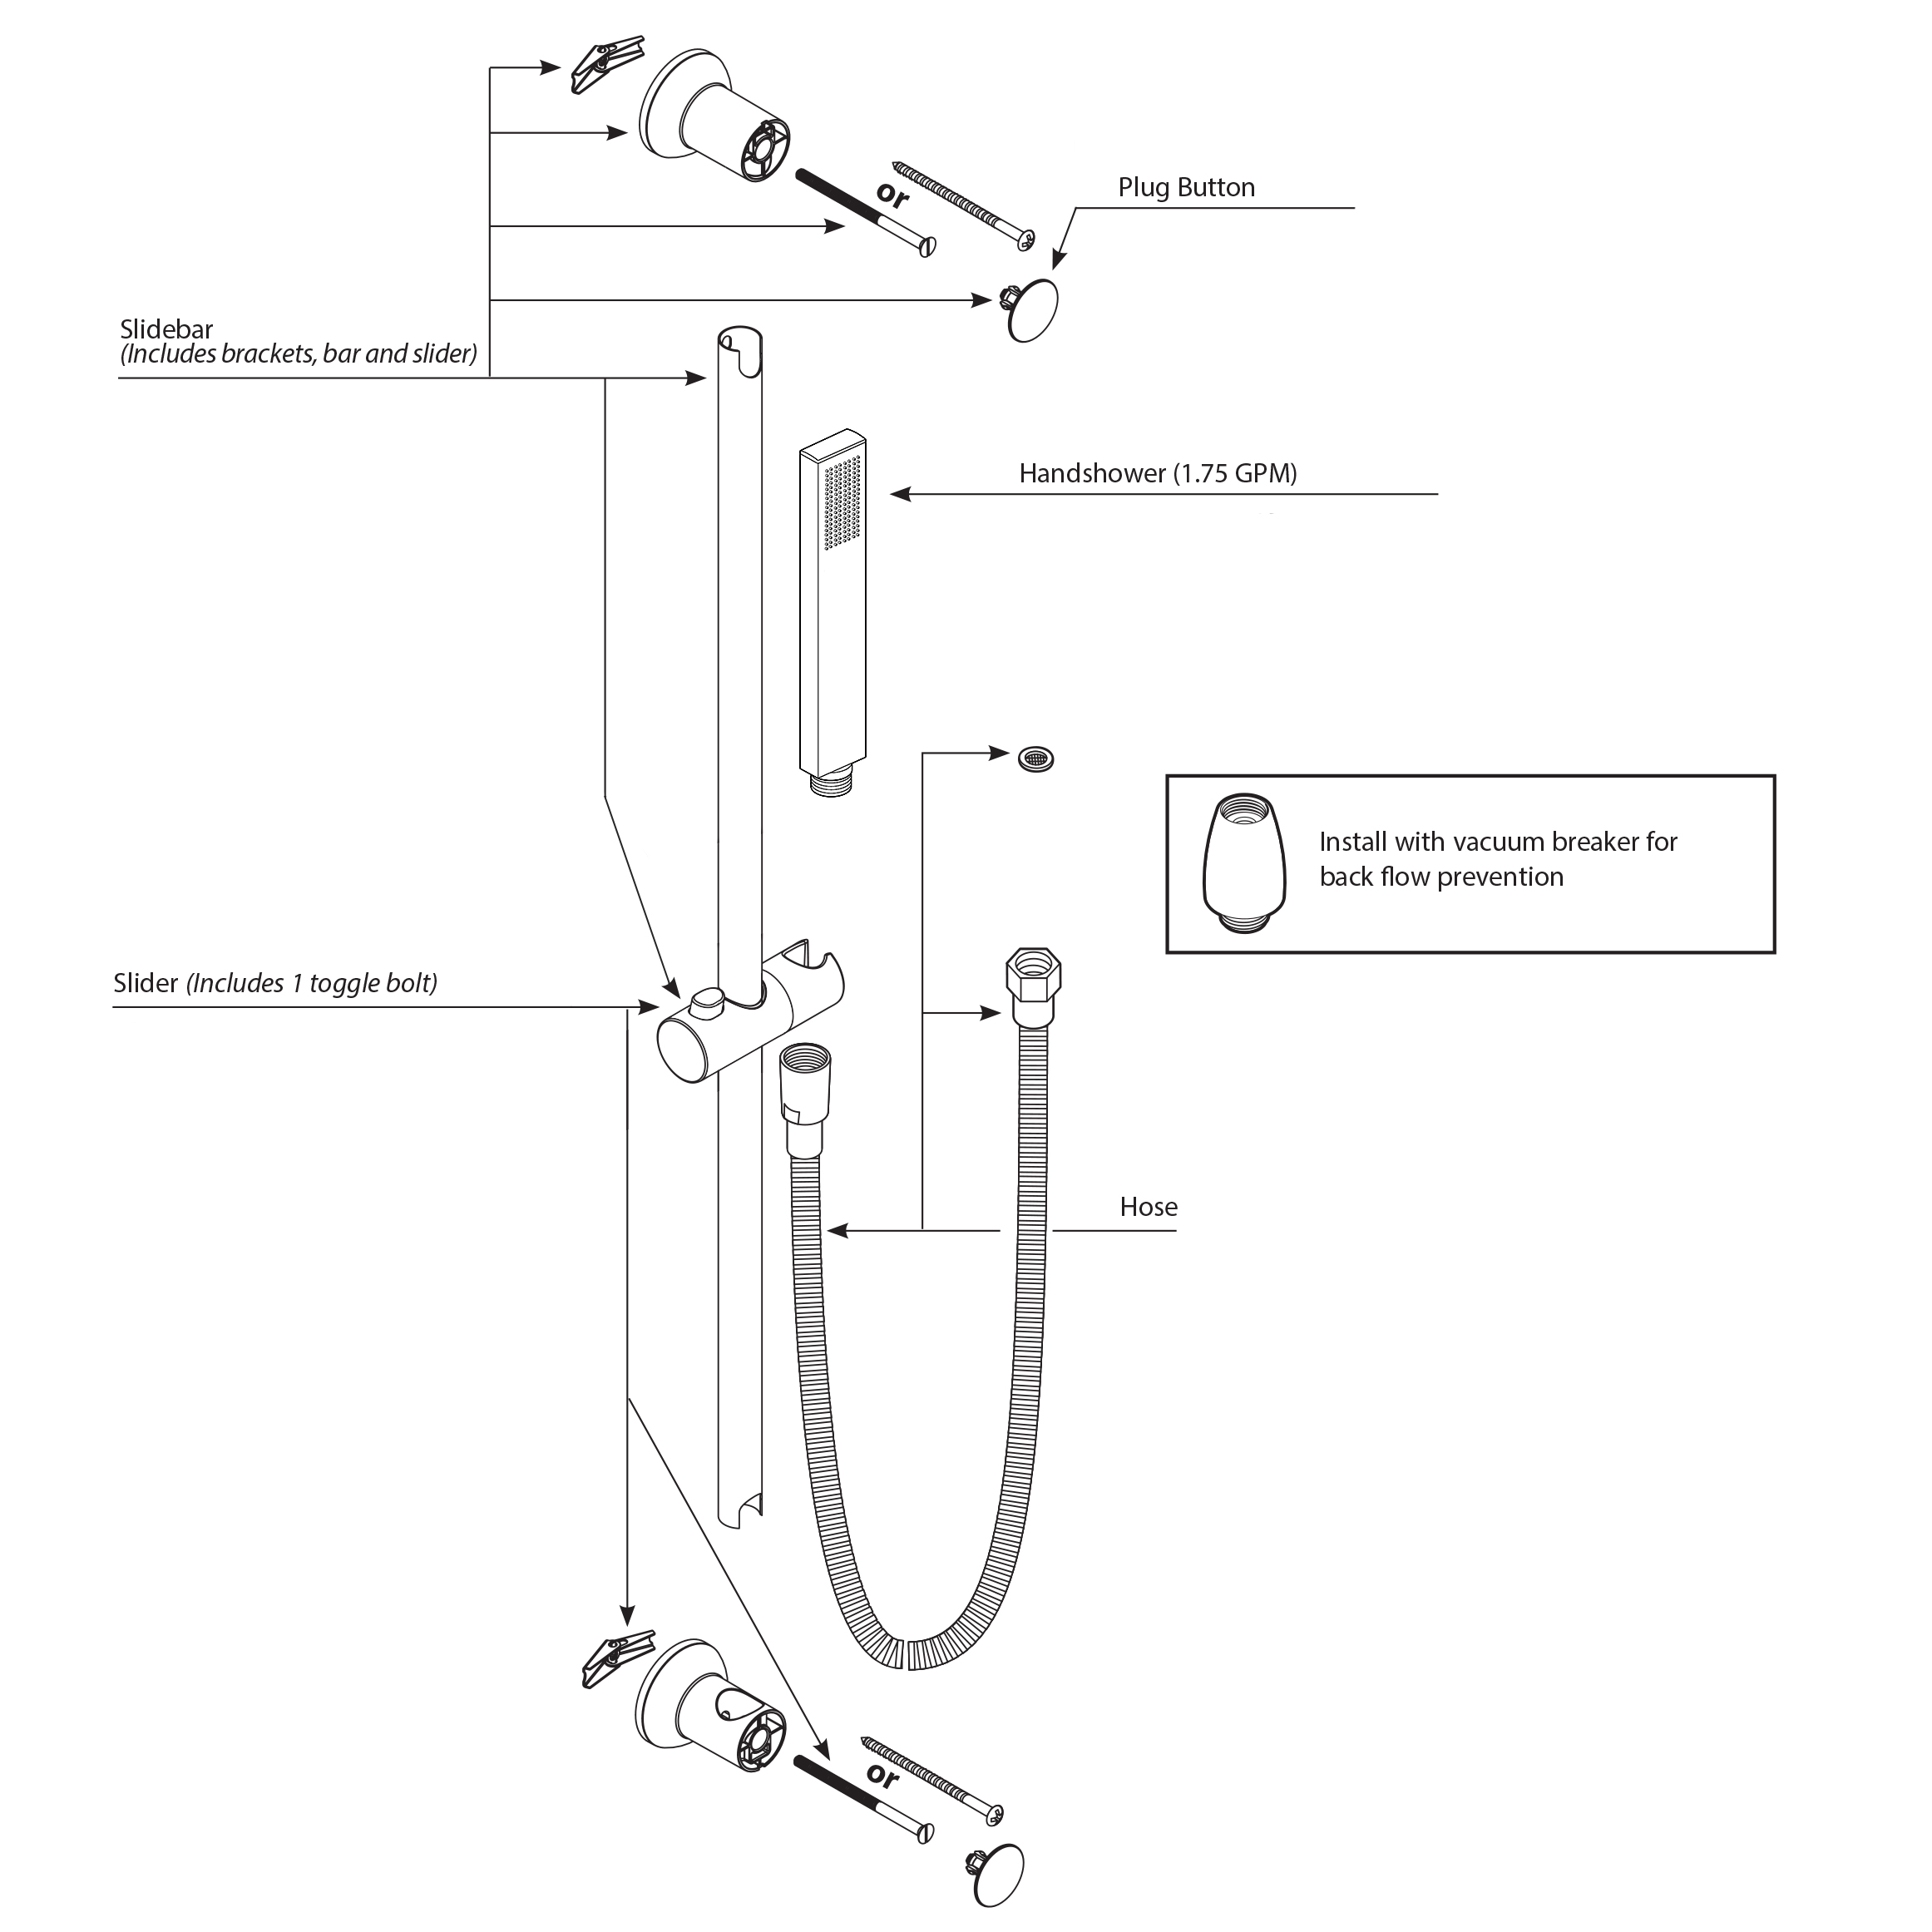
Hand-Held Shower Installation Instructions
Step 1
|
shower
|
Step 2
|
|
- Open the closed cover of the shower holder and take out the screws.
- Drill two holes size 0.2" (6mm) on the wall according to the hole position of the shower holder.
- Use a hammer to break 2 plastic wall plug into two holes. Tighten the screws with the plastic wall plug and locking with the shower holder. Then install the closed cover.
- Connect the shower hose with the water outlet connection part and hand shower. Plug the hand shower in the shower holder.
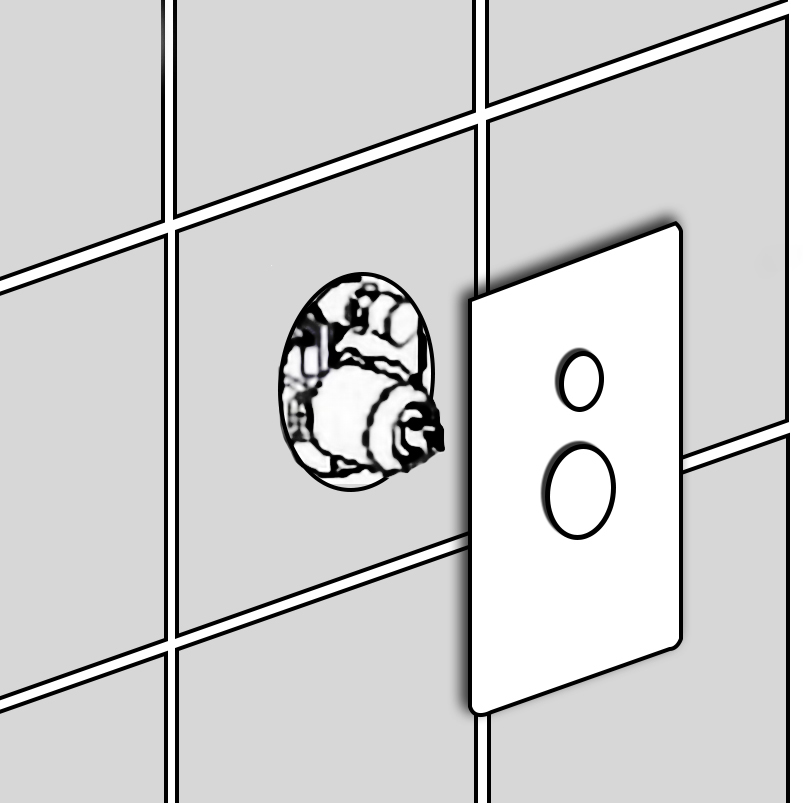
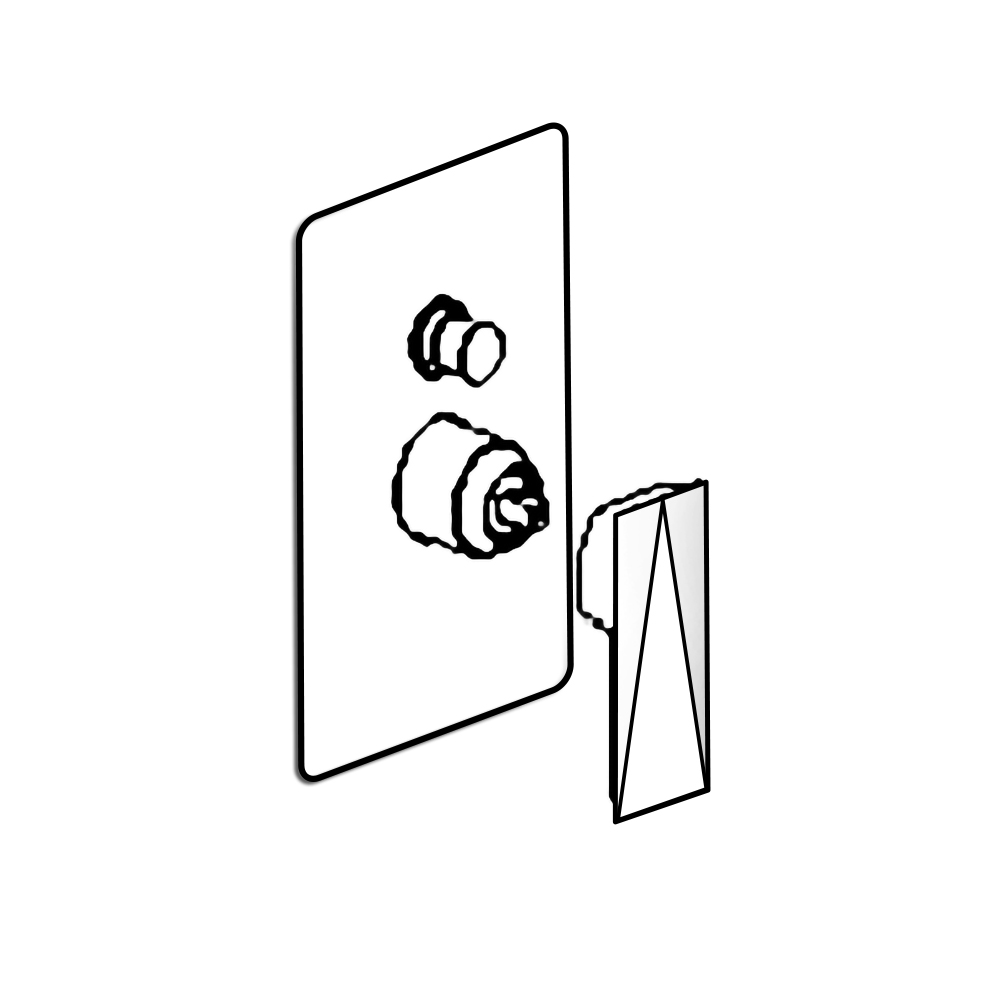
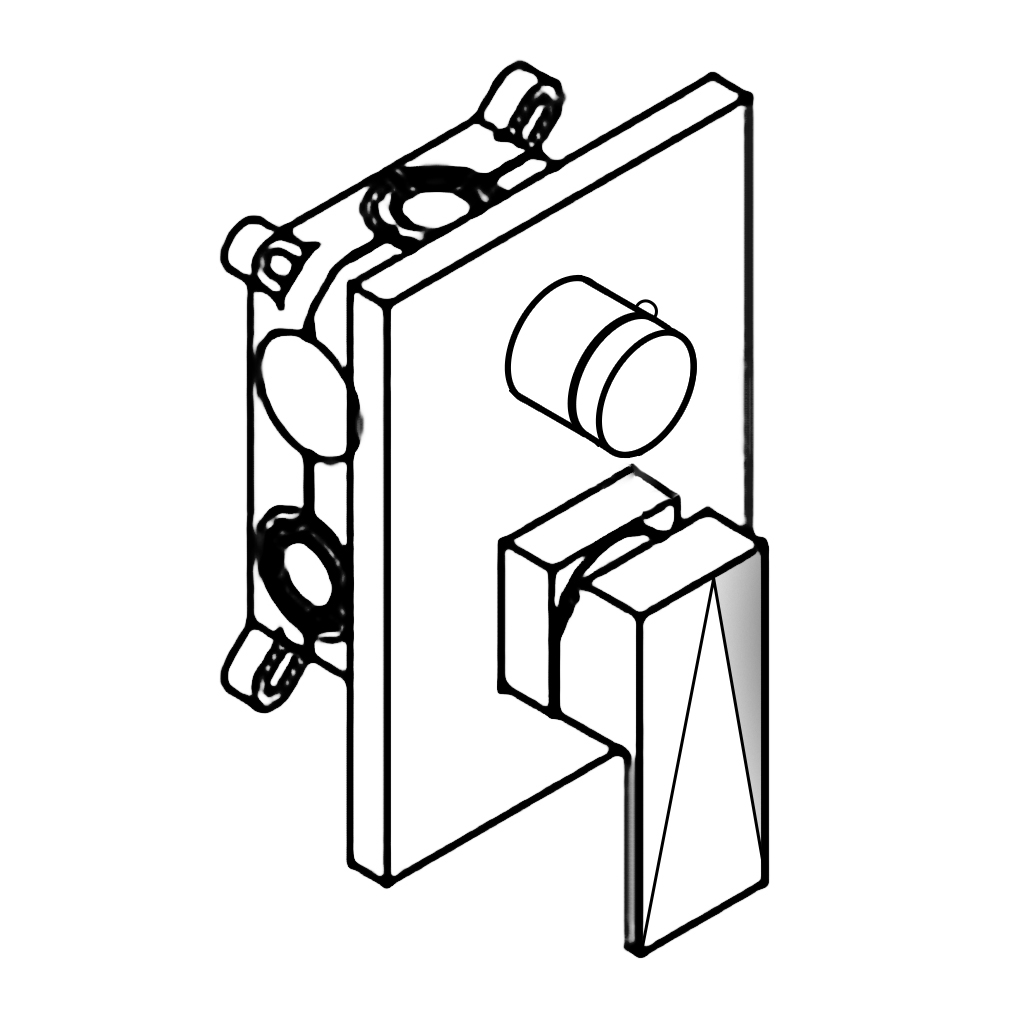
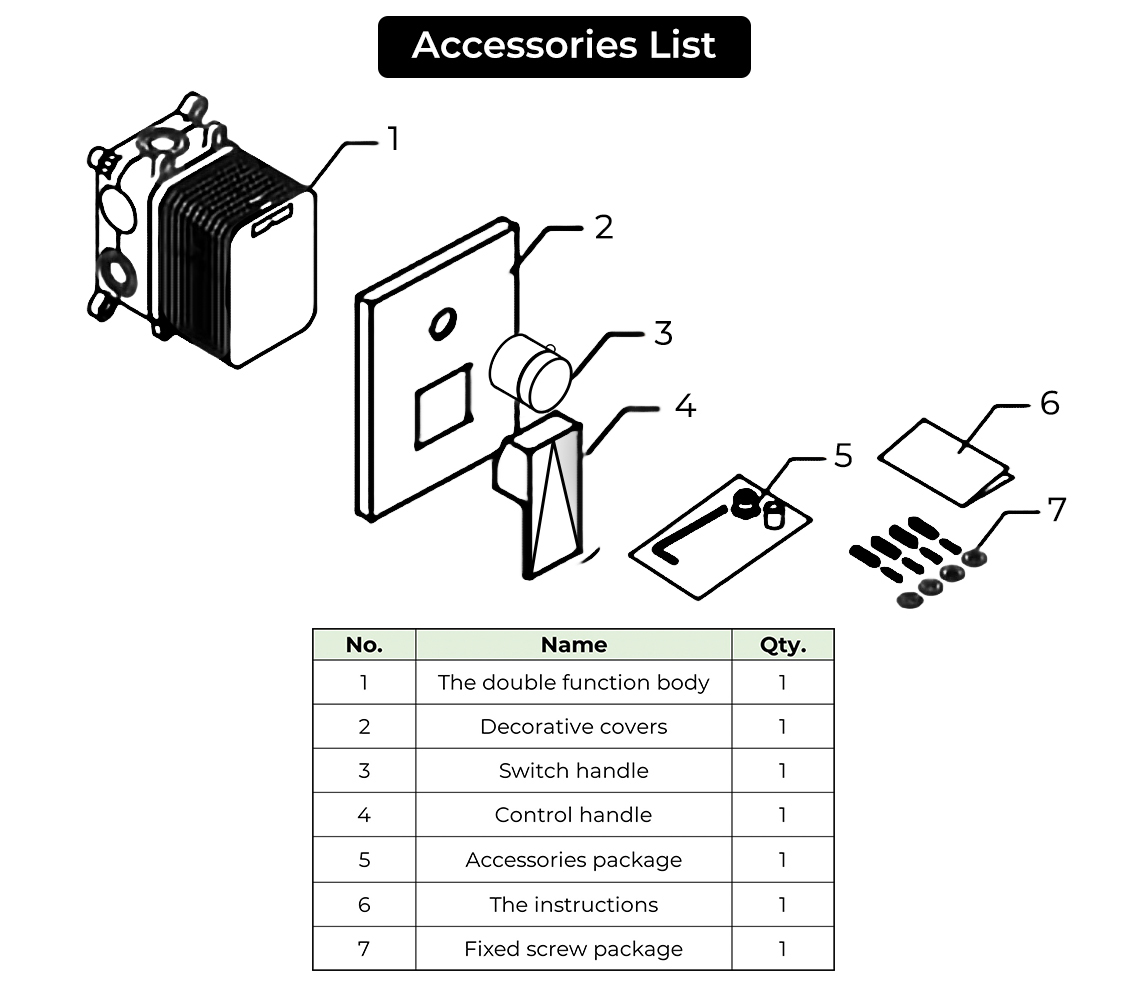
3-way Mixer Installation
Step 1
|
mixer
|
Step 2
|
Step 3
|
|
Step 4
|
Step 5
|
|
Step 6
|
Step 7
|
mixer
|
|
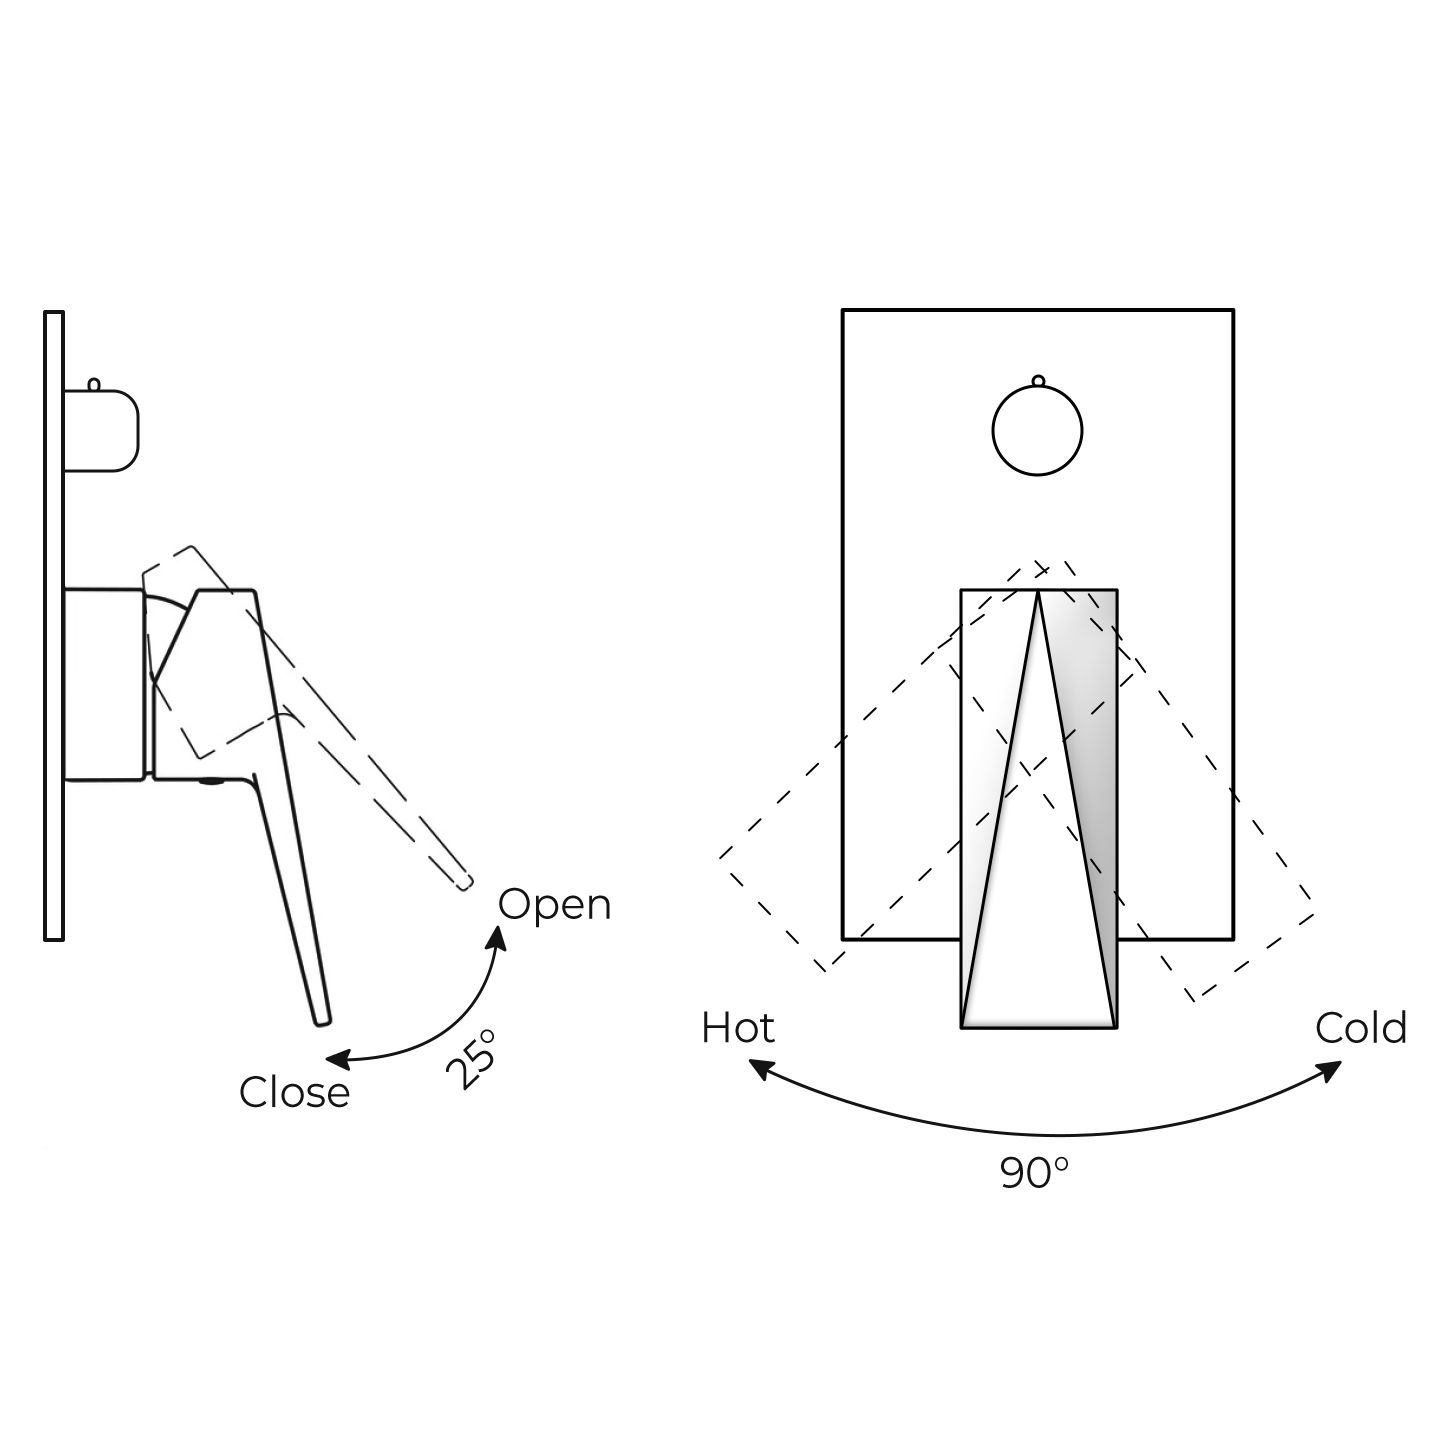
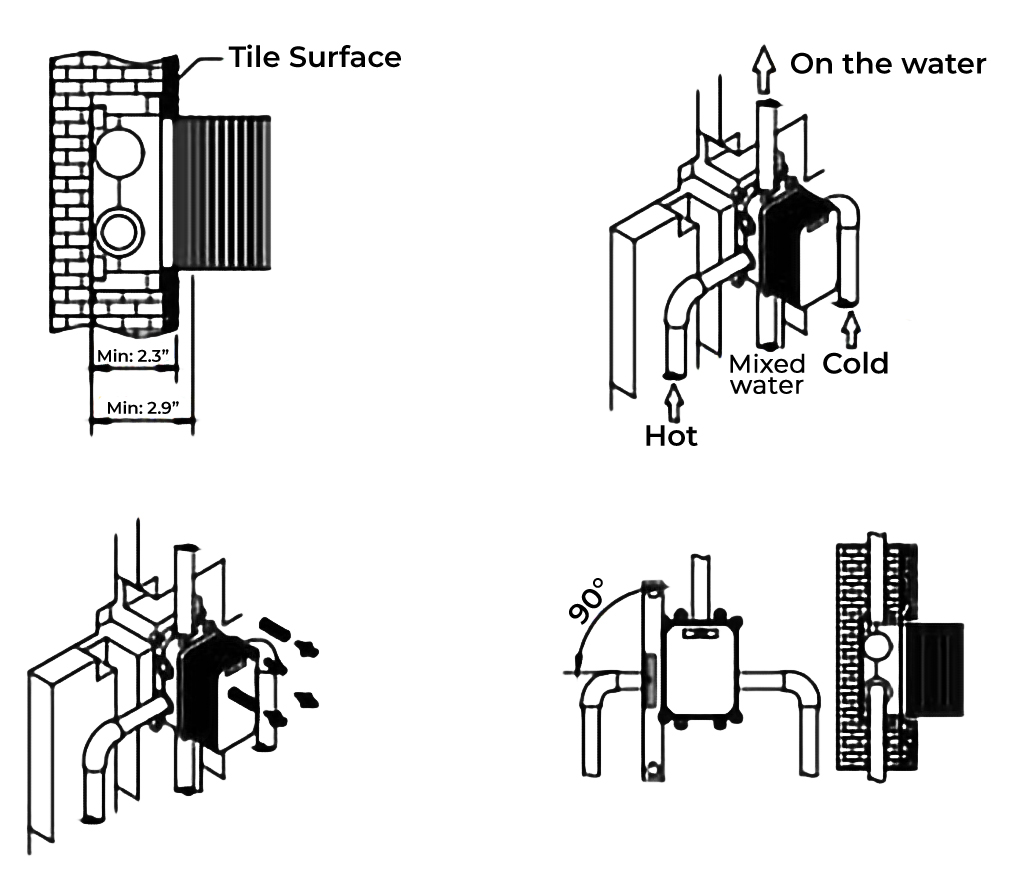
- Basic-size, according to the embedded box to open the hole on solid wall, should consider installing the metope of the distance between 60-75mm, for example, after blank wall in the shop, the ceramic tile surface to increase the thickness of the 20 mm, so PiQiang in the depth of the hole should be chosen 40 to 55 mm.
- Hole bottom should remain flat so that subsequent adjustment embedded box of vertical and horizontal convenient installation for the principle
- Pay attention to the direction of the up and down or so embedded box, on the left by hot water pipes, right after the cold water pipes, pick up and down the mixed water pipes.
- After the pipe connection, according to the pipeline arrangement, and open the corresponding channel slot tube in the blank wall.
- Embedded box fixed before, to embed box and trial test and pipe water clean connection pipe, and test before mixing water channels should be open.
- Test, before opening the switch valve core, open the water to test around inlet pipe, is connected closely with no leakage and the water pipe test after dosing open state, whether to test on the mixed water pipe connection without leakage. At the same time clean tube foreign bodies in case of influencing water control valve function.
- It will be embedded in a box into the solid wall with a self-tapping screw that is fixed on the wall.
- With parallel ruler for correction of the embedded box of horizontal and vertical direction to embed box into a level with the ground and metope as 90°. In the absence of good correction will influence the control panel installation effect.
|
Step 8
|
|
|
Bathroom Touchless Faucets
Artistic Elements ...
Bathroom Fixtures
INNOVATIONS
Architectural Waterfall Deck-Mount Faucet in Gold Finish
The Gold Waterfall Deck-Mount Faucet is an architectural statement for sophisticated bathrooms, with a dramatic cascade flow that is reminiscent of natural water features. This fixture's metallic gold finish is reflective of sophistication and complements any design scheme, from minimalist to opulent. Engineered for quick installation, it's the perfect choice for a high-impact focal point.
Read More Here
Pessac Antique Bronze Oval Sink in Solid Brass
Designed for spaces requiring traditional aesthetic and modern functionality, this Pessac Oval Sink in Antique Bronze provides warm antique bronze finishes that go well with the surface it surrounds. Being an ultra-durable, yet versatile piece, this counter-top sink is made ideal for a variety of surface types while designed towards lifetime performance and ease of service.
Read More Here
Bravat Commercial Wall-Mounted Brushed Nickel Faucet
This very flexible, space-saving solution offers great looks for both residential and commercial use. A minimalist look with upscale finishing, it is strong on wear. Architecturally efficient, this faucet would find its perfect place in sleekly streamlined interiors where form meets functionality.
Read More Here
Bravat Square Shower System in Oil Rubbed Bronze
It features geometric elegance as a solution to the environment of shower, perfect for spa-inspired spaces. This product provides rich oil-rubbed finishes that give the capability to complement different textural finishes and organic materials found in modern or transitional bathrooms. Its features in the form of numerous spray functions can meet up with all types of individual preferences in users and allow the added comfort and space adaptability.
Read More Here
Brizo Litze Collection Luxe Gold Shower Fixture
The Brizo Litze Collection is an exquisite addition in high-end showers with its Luxe Gold Shower Fixture. The reflective gold finish makes it a perfect addition, increasing the diffusion of light within the bathroom, therefore giving an inviting and rich look to the bathroom, all while being engineered from performance and design, adding its fit within architectural spaces which focus on precision and balance.
Read More Here
Dijon Deck-Mounted Touch-Free Soap Dispenser
Designed for sanitary and high-traffic settings, the Dijon Deck-Mounted Touch-Free Soap Dispenser merges seamlessly with countertops. With its streamlined profile and touchless action, it contributes to clean-lined design schemes that focus on hygiene and user accessibility, making the Dijon an outstanding choice for both commercial and residential projects that feature a modern, open plan aesthetic.
Read More Here
La Rochelle Jade-Inlaid Gold-Plated Faucet
The La Rochelle Jade-Inlaid Gold-Plated Faucet is a beautiful blend of antique sophistication and modern design. With its gold-plated body and jade details, this faucet has that touch of sophistication perfect for high-end, architecturally refined bathrooms. It is ideal for spaces where luxury and unique design details are emphasized, serving as a functional and decorative piece.
Read More Here
La Niña Dubai Fixtures
The La Niña Dubai Fixtures are made up of great workmanship and grace. This collection caters to many people regarding their bathroom design statement. Having so many types of finishes and materials, the collection harmonizes and adds beauty to the traditional, modern, or other contemporary settings in existence. It supports the user to achieve a whole high visual impression while also ensuring strong functionality, provided style comes first.
Read More Here
Naples Square Sink with Overflow for modern bathroom
The Naples Square Sink with Overflow is a solid addition to modern bathrooms, showing off clean lines and functional design. Its built-in overflow will help manage water and square shapes will always add a little geometrical touch to the space. Practical and really stylish, it complements minimalist interiors where efficiency and style go hand in hand.
Read More Here
Moen Automatic Shut-Off Filter Faucet Collection
For space that cherish green design, the Moen Automatic Shut-Off Filter Faucets are meant. The built-in automatic shut-off mechanism at the faucet reduces water waste and leakage. Sleek and modern, these faucets will fit most decorative themes and shall support Green Architecture in commercial and residential applications.
Read More Here

|
|
|


