Home > Fontana LED WaterFall Gold Finish Shower Head Installation Instructions

Fontana LED WaterFall/RainFall Brushed Gold Shower Head


When it comes to new bathroom upgrades, FontanaShowers is offering shape, finishes and styles that you've looking for. Give your bathroom an elegant glance with our Fontana LED WaterFall/RainFall Brushed Gold Shower Head. This is one of the most trendiest finishes across decor styles in the bathroom. This has an elegant design and elevates the appeal of your decor made from the highest quality and for great tastes. It comes super seal technology inside, capable of delivering superior performance with a solid construction for long durability that will upgrade your bathroom with a modern and cool look for a long period of time.

Fontana LED WaterFall/RainFall Brushed Gold Shower Head Features:

  • Brand Name: FontanaShowers
  • Model Number: FS1009
  • Type: Shower Head
  • Style: Single Head
  • Control Type: Single Holder Dual Control
  • Shape: Rectangular
  • Type: Fixed Support Type
  • Installation: Wall Mount
  • Type: Shower Head
  • Features: Rainfall
  • Finish: Brushed Gold
  • Material: Brass
  • Size: 55×23cm
  • Fontana LED WaterFall/RainFall Brushed Gold Shower Head

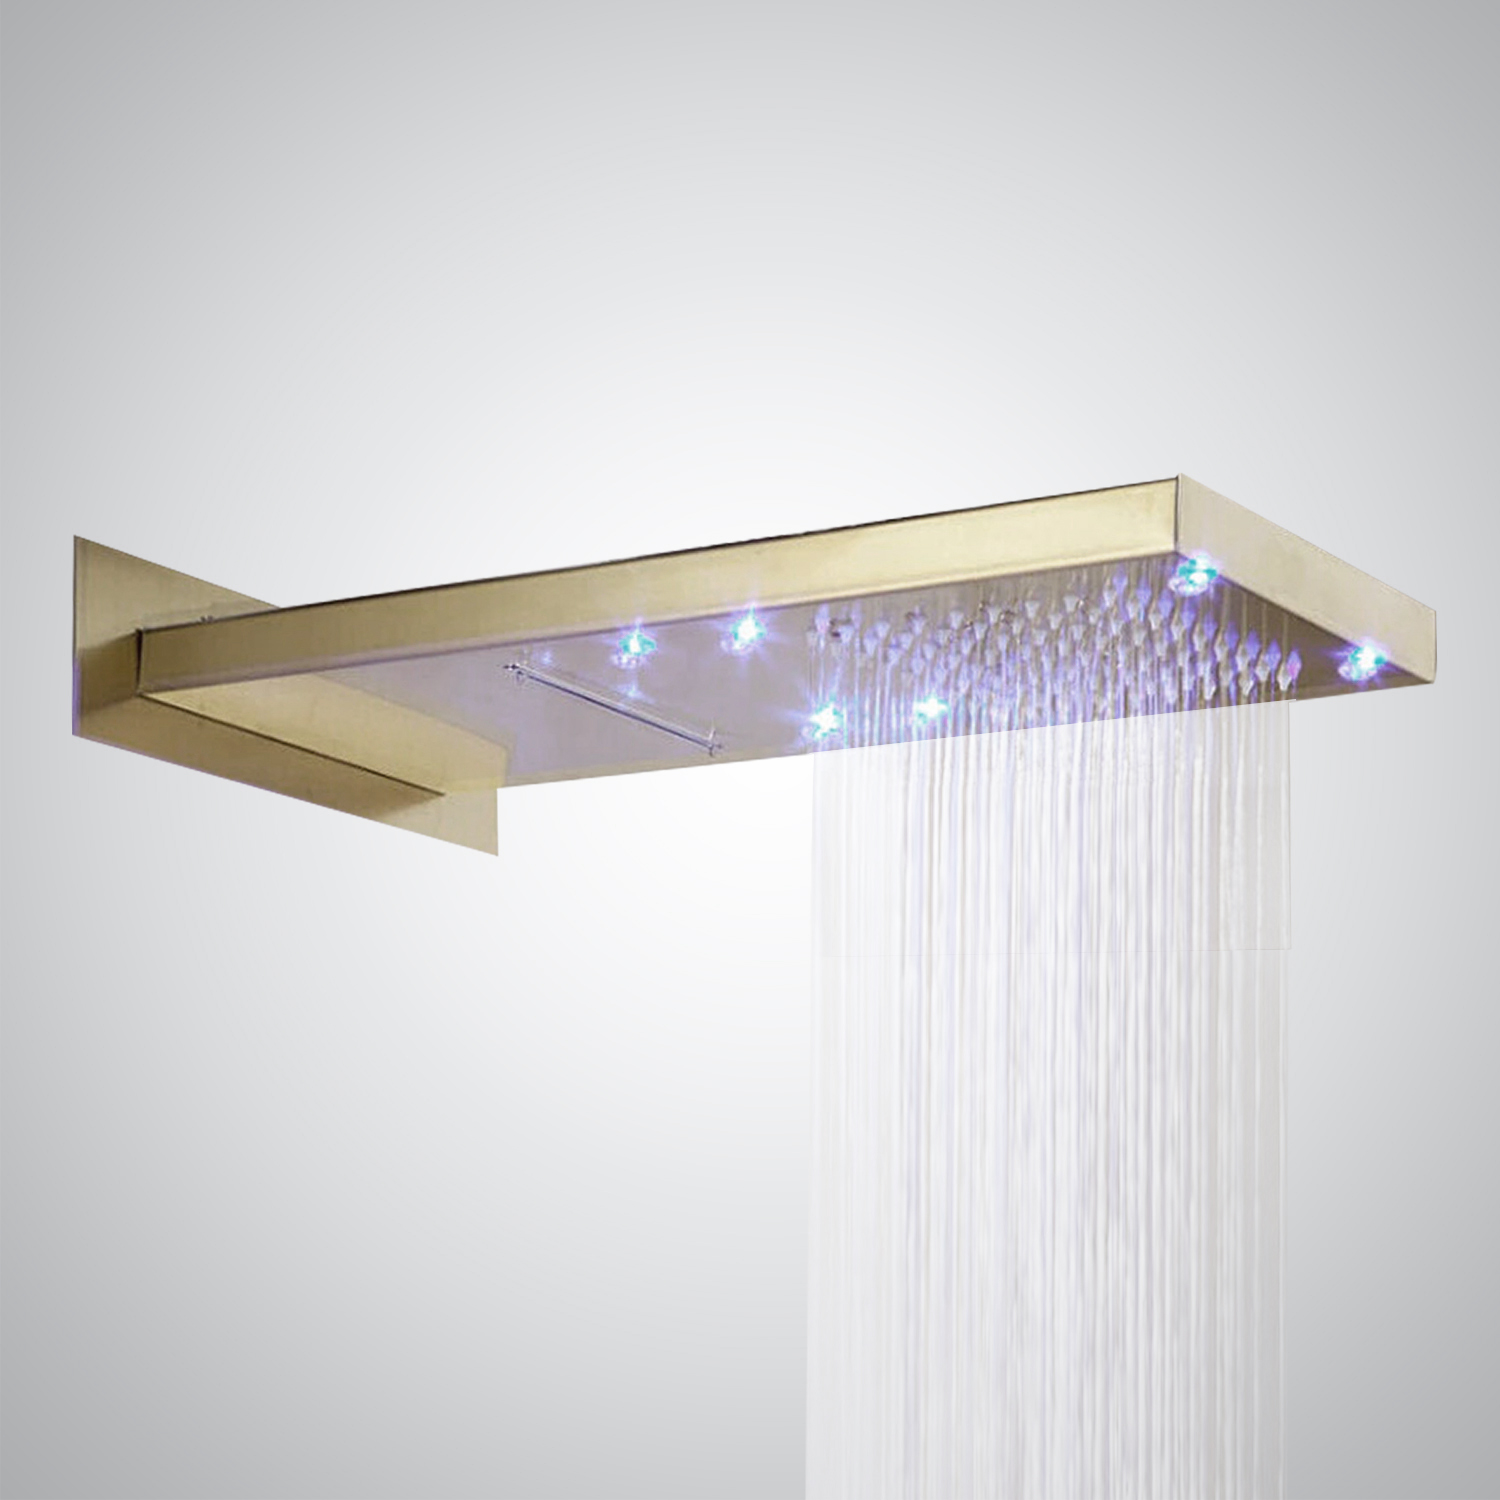
    FontanaShowers® Product Warranty Information FontanaShowers Product Warranty

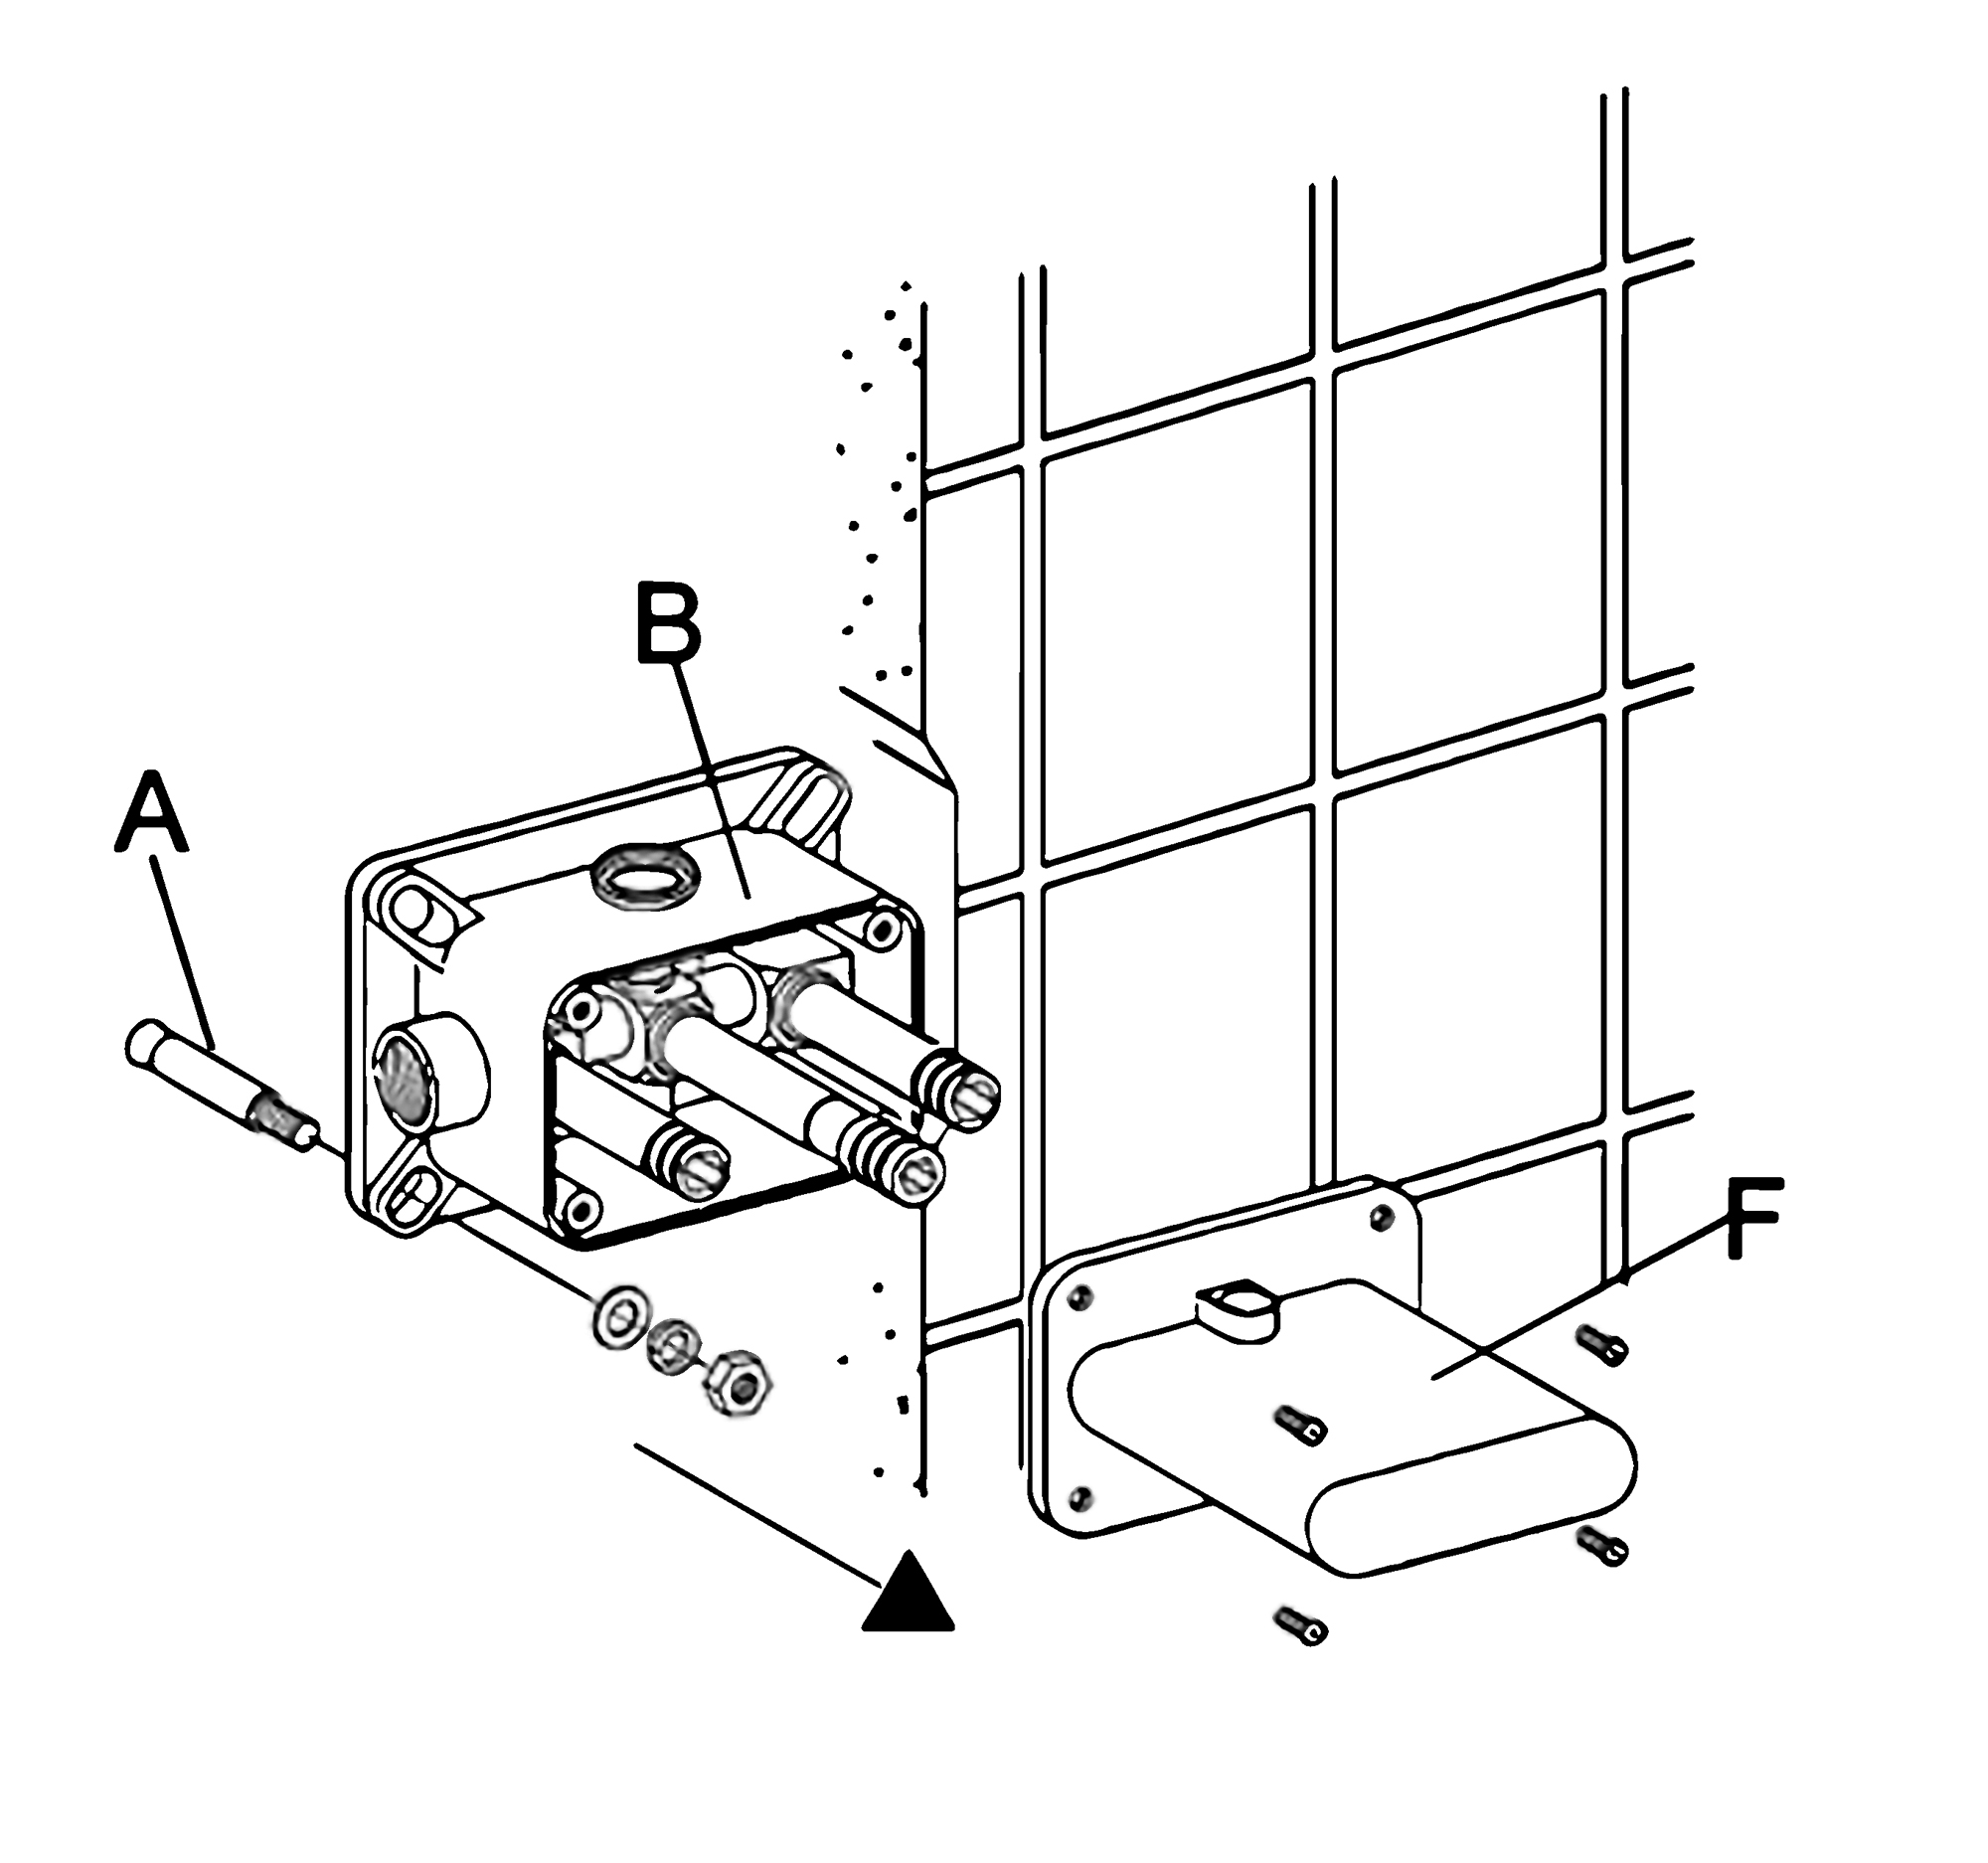
    Before you begin, please read the installation instructions below. Observe all local building and safety codes.
    • Unpack and inspect the product for any shipping damages. If you find damages, do not install.
    • Please note all showers must be installed by a professional and certified plumber otherwise warranty might be voided
    shower shower

    Gold Finish Shower Head Installation Instructions


    Step 1
    shower head
    shower Step 2
    shower head
    Step 3

    shower head
    Step 4

    shower head

    1. Remove the protective cover (F). Mark the positions and drill holes to suit the anchors (A). Install the anchors (A) and fix the rough-in valve (B) into the wall with screws. Use a level to ensure that the rough-in valve (B) is straight and level. (Important: Flush the water supply to remove any dirt and debris before installing the valve body).
    2. Wrap Teflon tape around the pipe threads and connect water supply lines and in-wall pipes (not included) as desired to the rough-in valve (B). Turn on the water supply and open the cartridge to check for leakage. Then put on the protective cover and finish the wall surrounding the valve. (Note: Test the water pressure after the pipe connections have been made and before the finished wall material is installed).
    3. Fix the escutcheon (D) to the showerhead (E) with screws (C).
    4. Remove the protective cover when the finished wall is completed. Then, install the showerhead (E) and press it against the finished wall.

    BathSelect Ancient Round Antique Rainfall Wall ShoweBathSelect Ancient Round Antique Rainfall Wall Shower Head Installation Instructions Head Installation Instructions