Bravat Brushed Gold Square Shower Set With Valve Mixer 3-Way Concealed Wall Mount
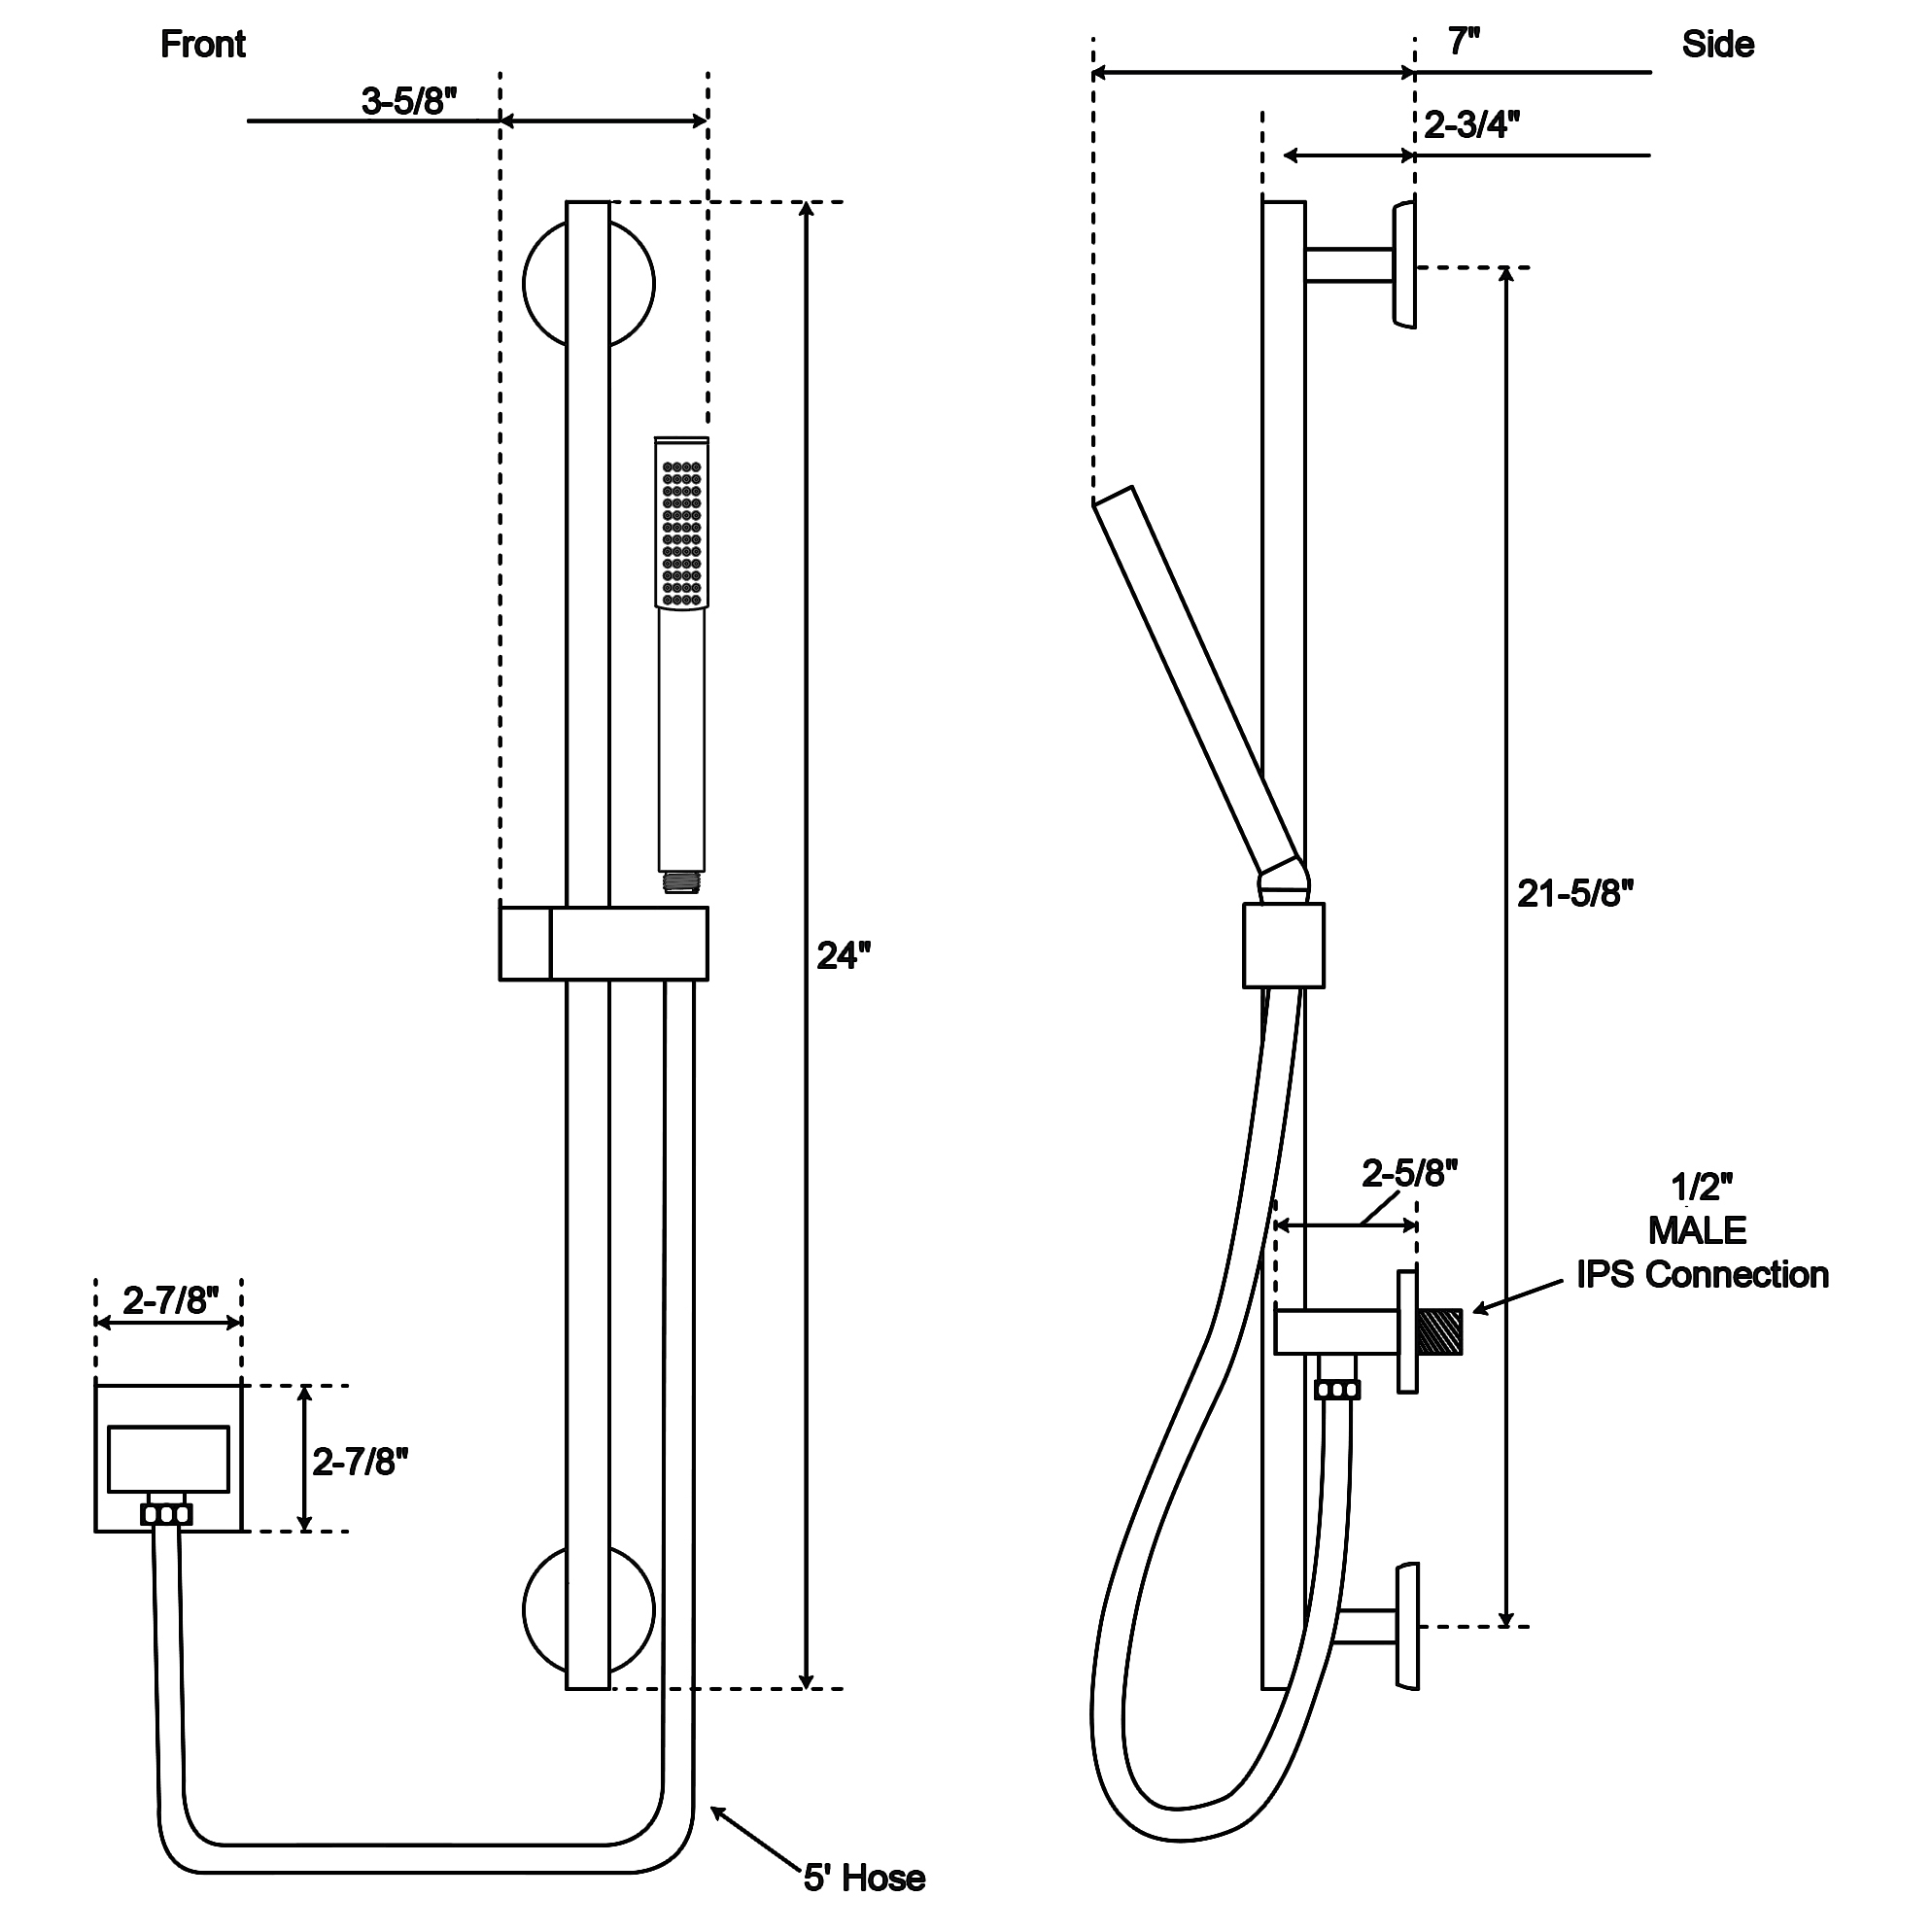
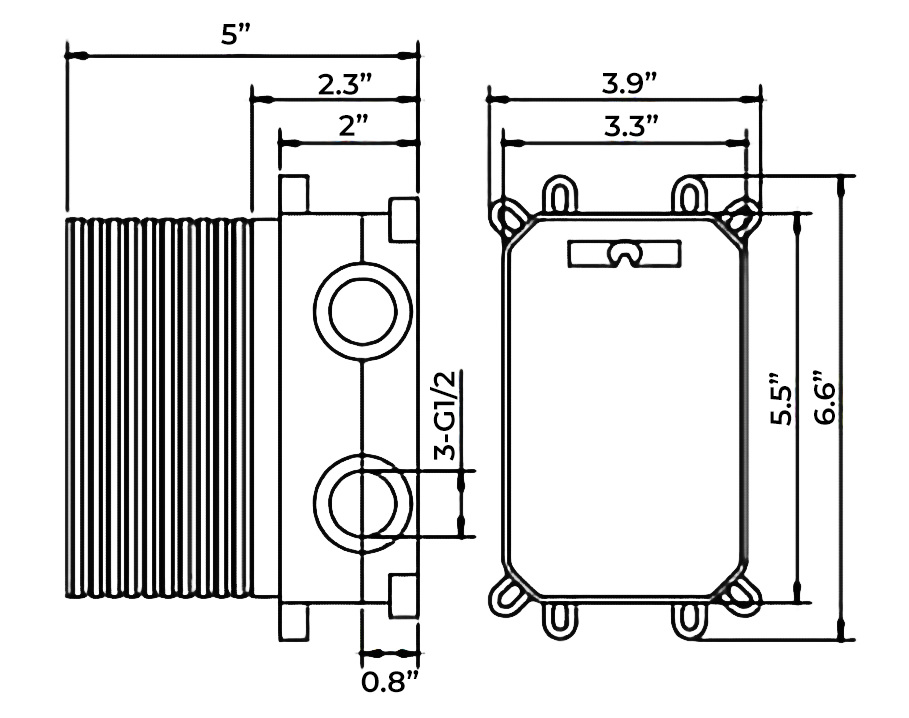
The Bravat Brushed Gold Square Shower Set With Valve Mixer 3-Way Concealed Wall Mount is one of the most trendiest finishes across decor styles in the bathroom. It has a contemporary style with a beautiful gold finish. When it comes to new bathroom upgrades, FontanaShowers is offering shape, finishes and styles that you've looking for. Bravat Brushed Gold Square Shower Valve Mixer 3-Way Concealed Wall Mounted Features:| Brand Name: FontanaShowersModel Number: FS1051Type: Shower Set & Thermostatic Shower MixerStyle: ContemporaryType: Fixed Support TypeSurface Finish: Brushed GoldInstallation Type: Wall MountNumber of Jets: FourControl Type: Single Holder Dual ControlSize: 7.91"-11.85" (201-300mm)Surface Treatment: PolishedValve Core Material: CeramicBath Shower Type: In-Wall Shower MixerValve Type: Ceramic ValveFaucet Handle Material: Zinc AlloyMixer Body Material: BrassValve Included: Yes Embedment Depth: 2.16" (55mm)Valve Panel Dimension: 6.29"x6.29" (160x160mm)Connector: G1/2"B (Standard) | 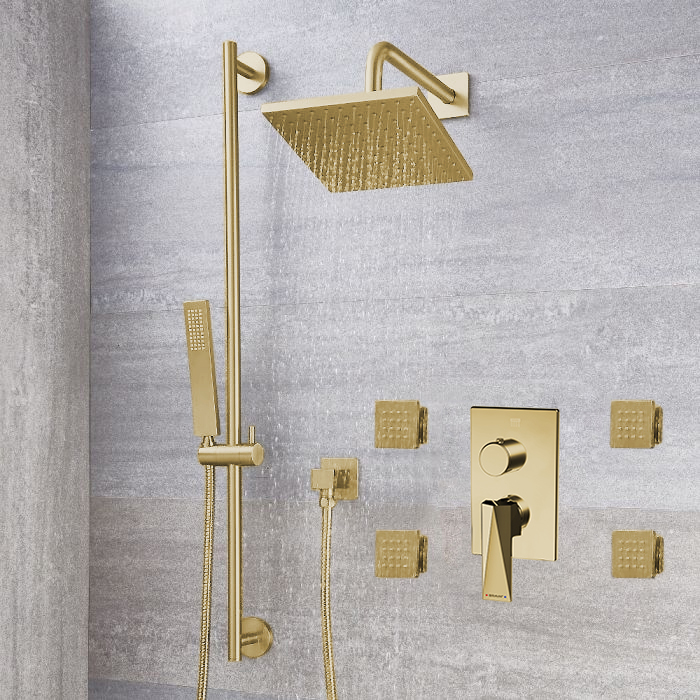 |
FontanaShowers® Product Warranty Information 
Before you begin, please read the installation instructions below. Observe all local building and safety codes.
- Unpack and inspect the product for any shipping damages. If you find damages, do not install.
- Please note all showers must be installed by a professional and certified plumber otherwise warranty might be voided.
|
shower
|
|
|
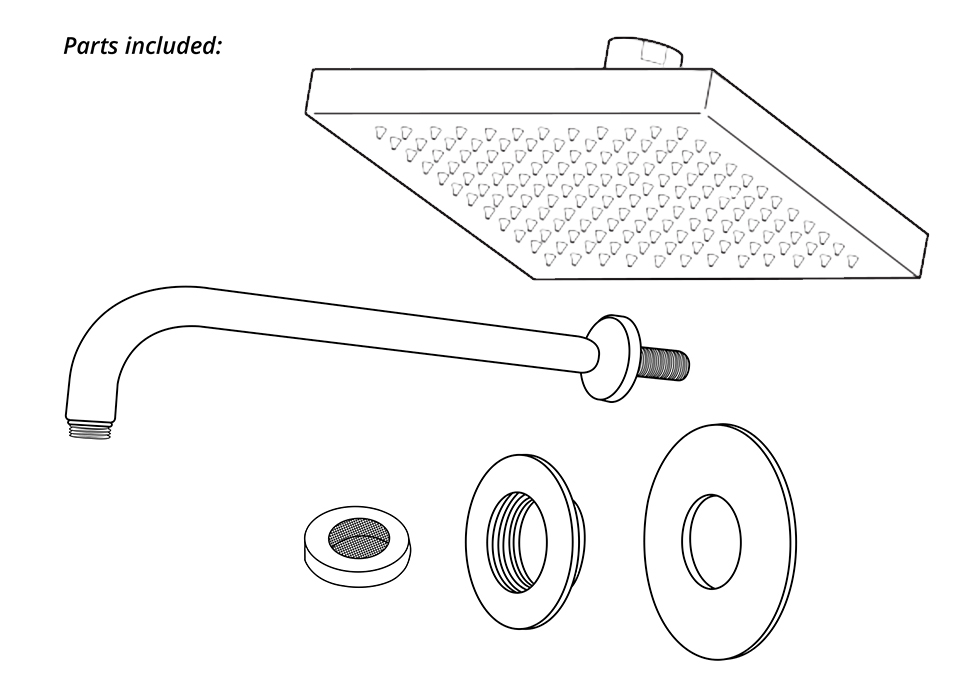
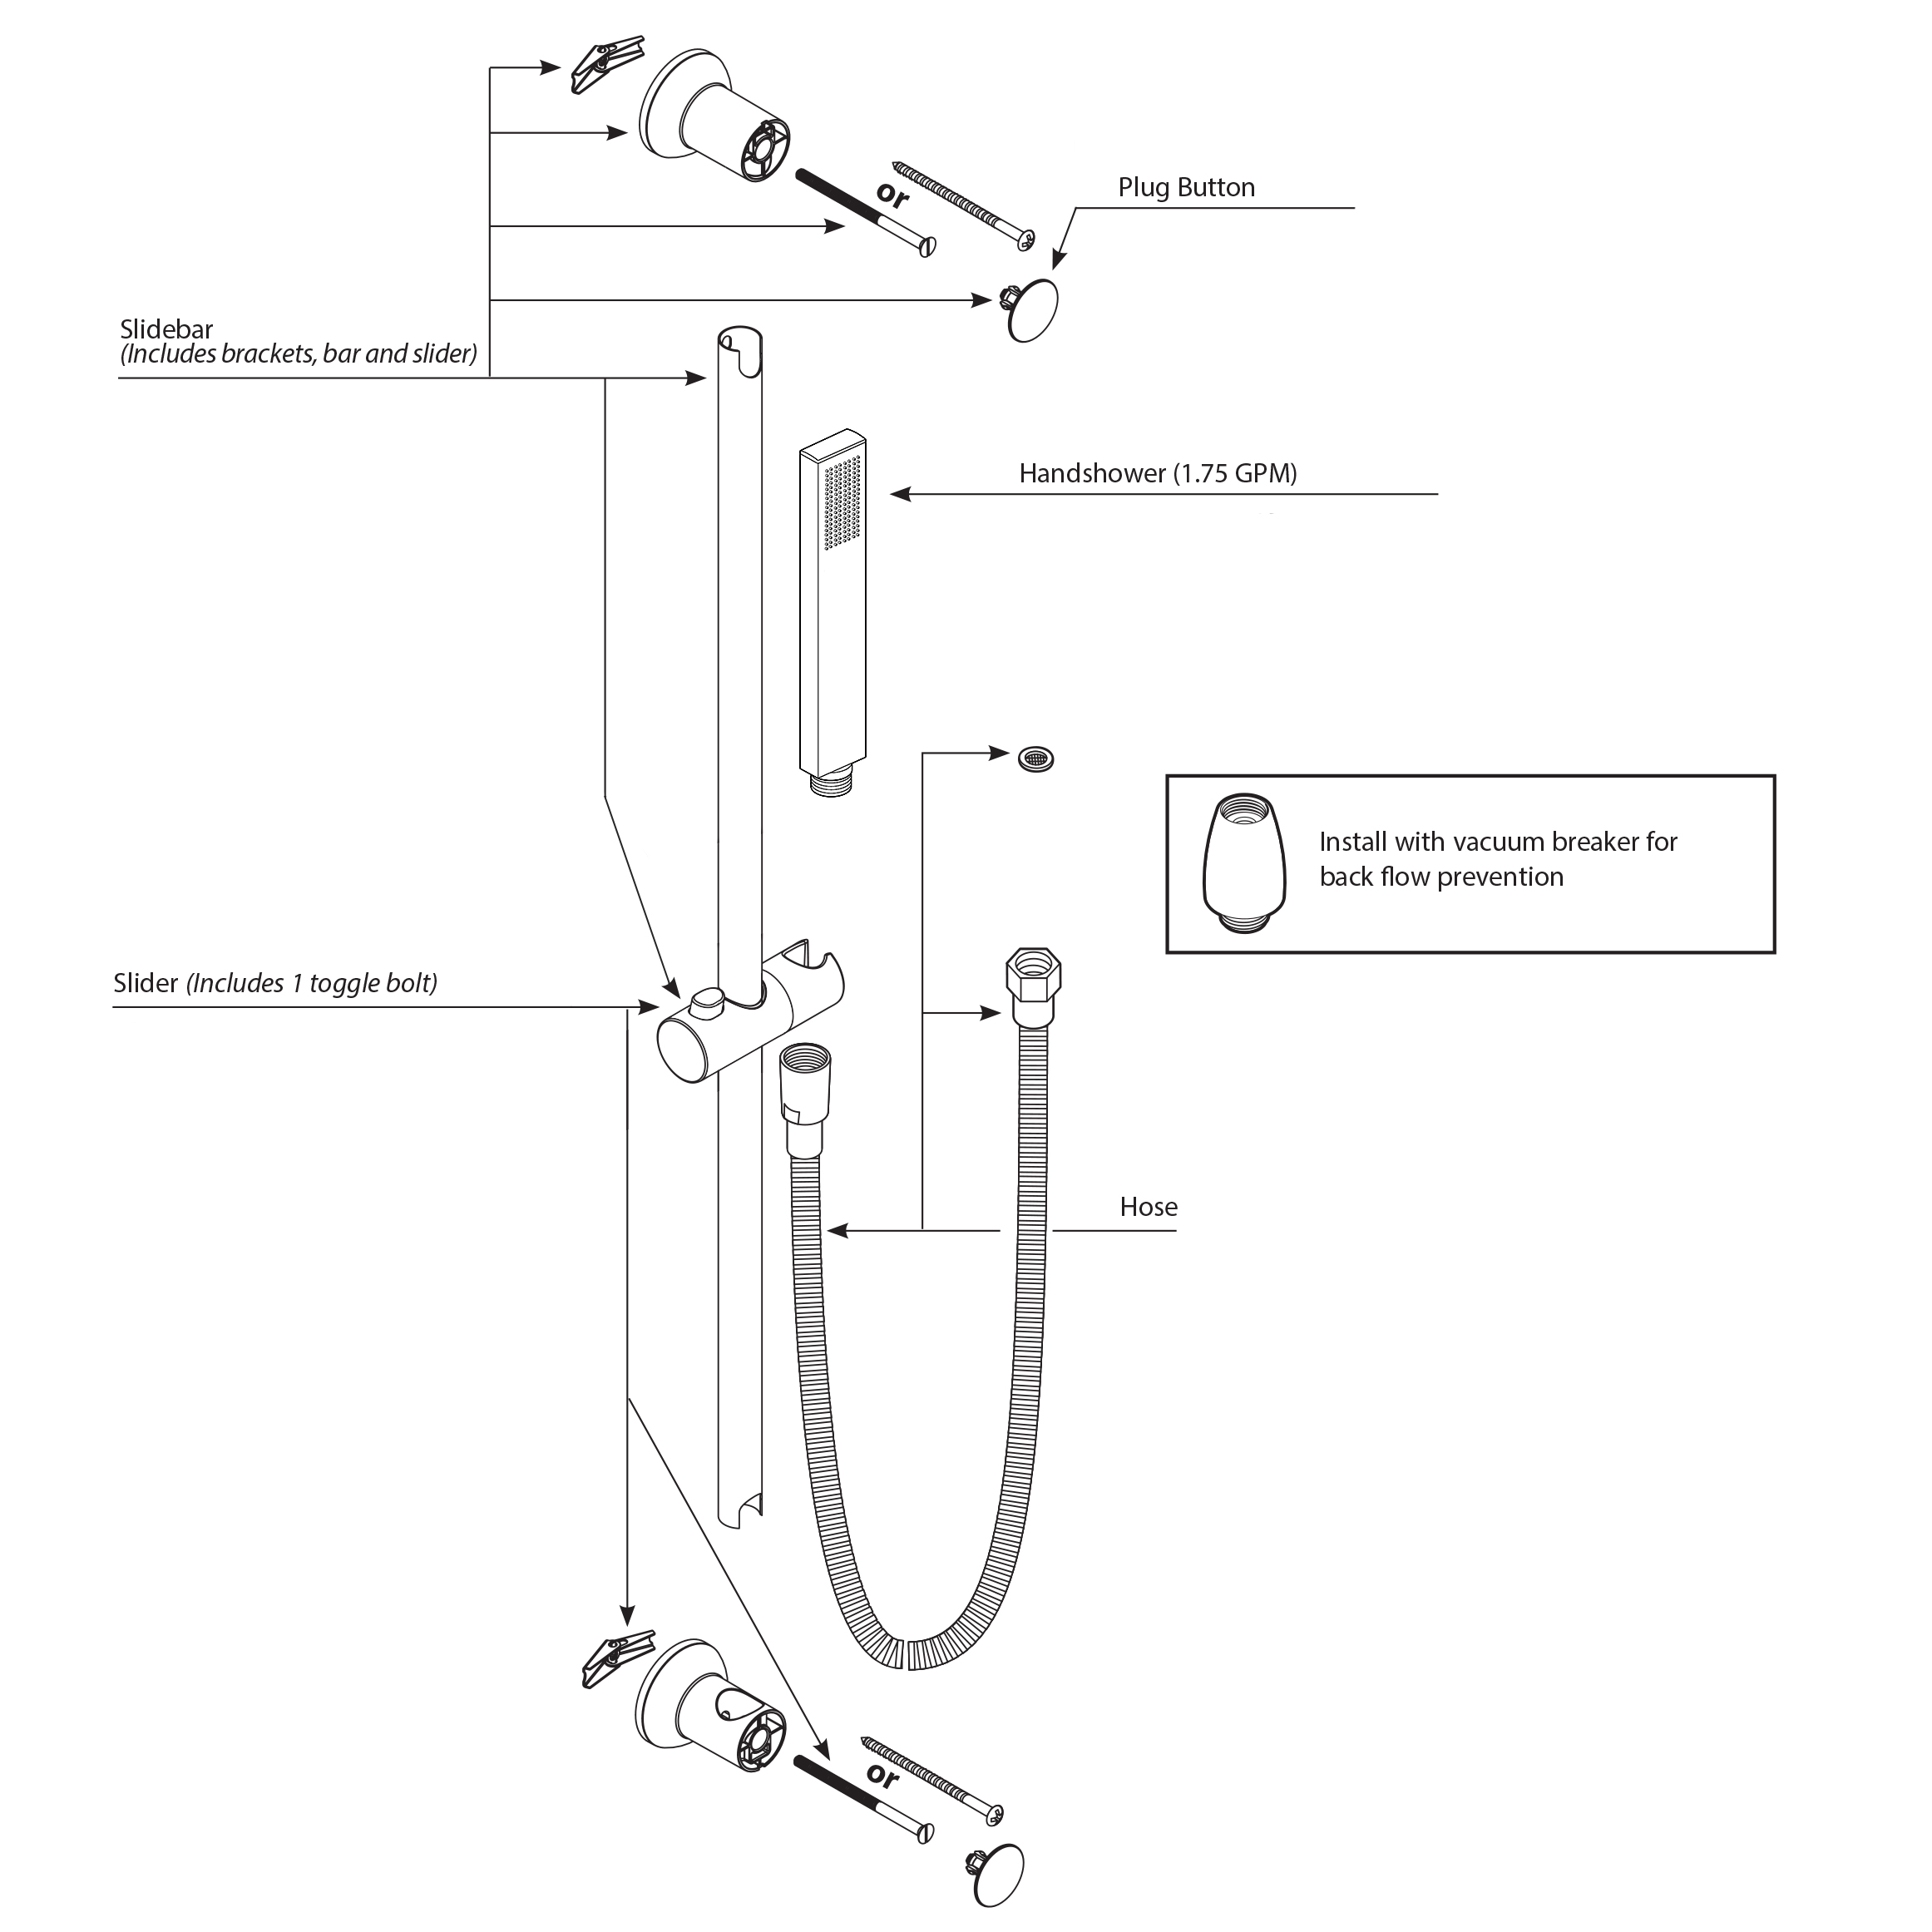
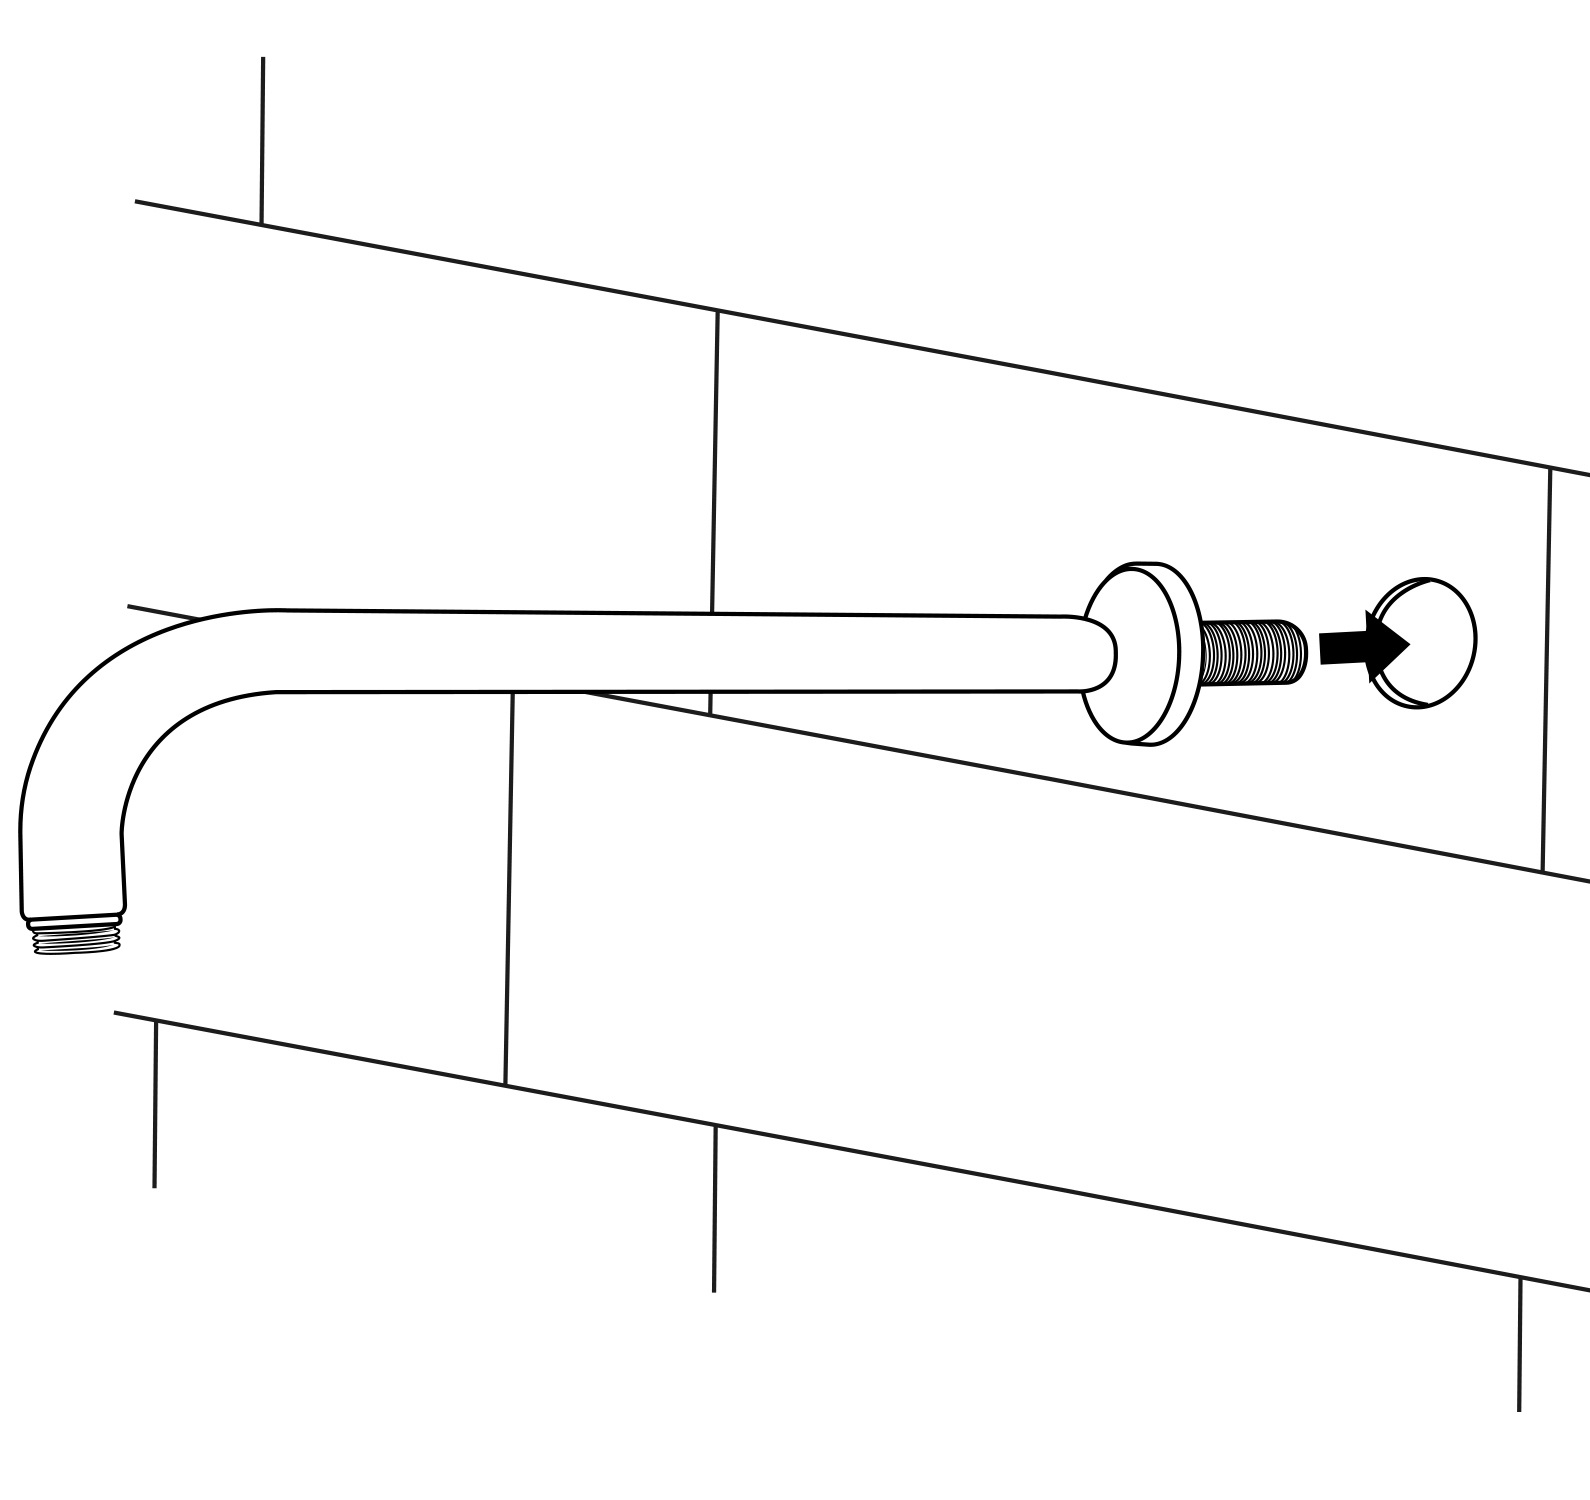
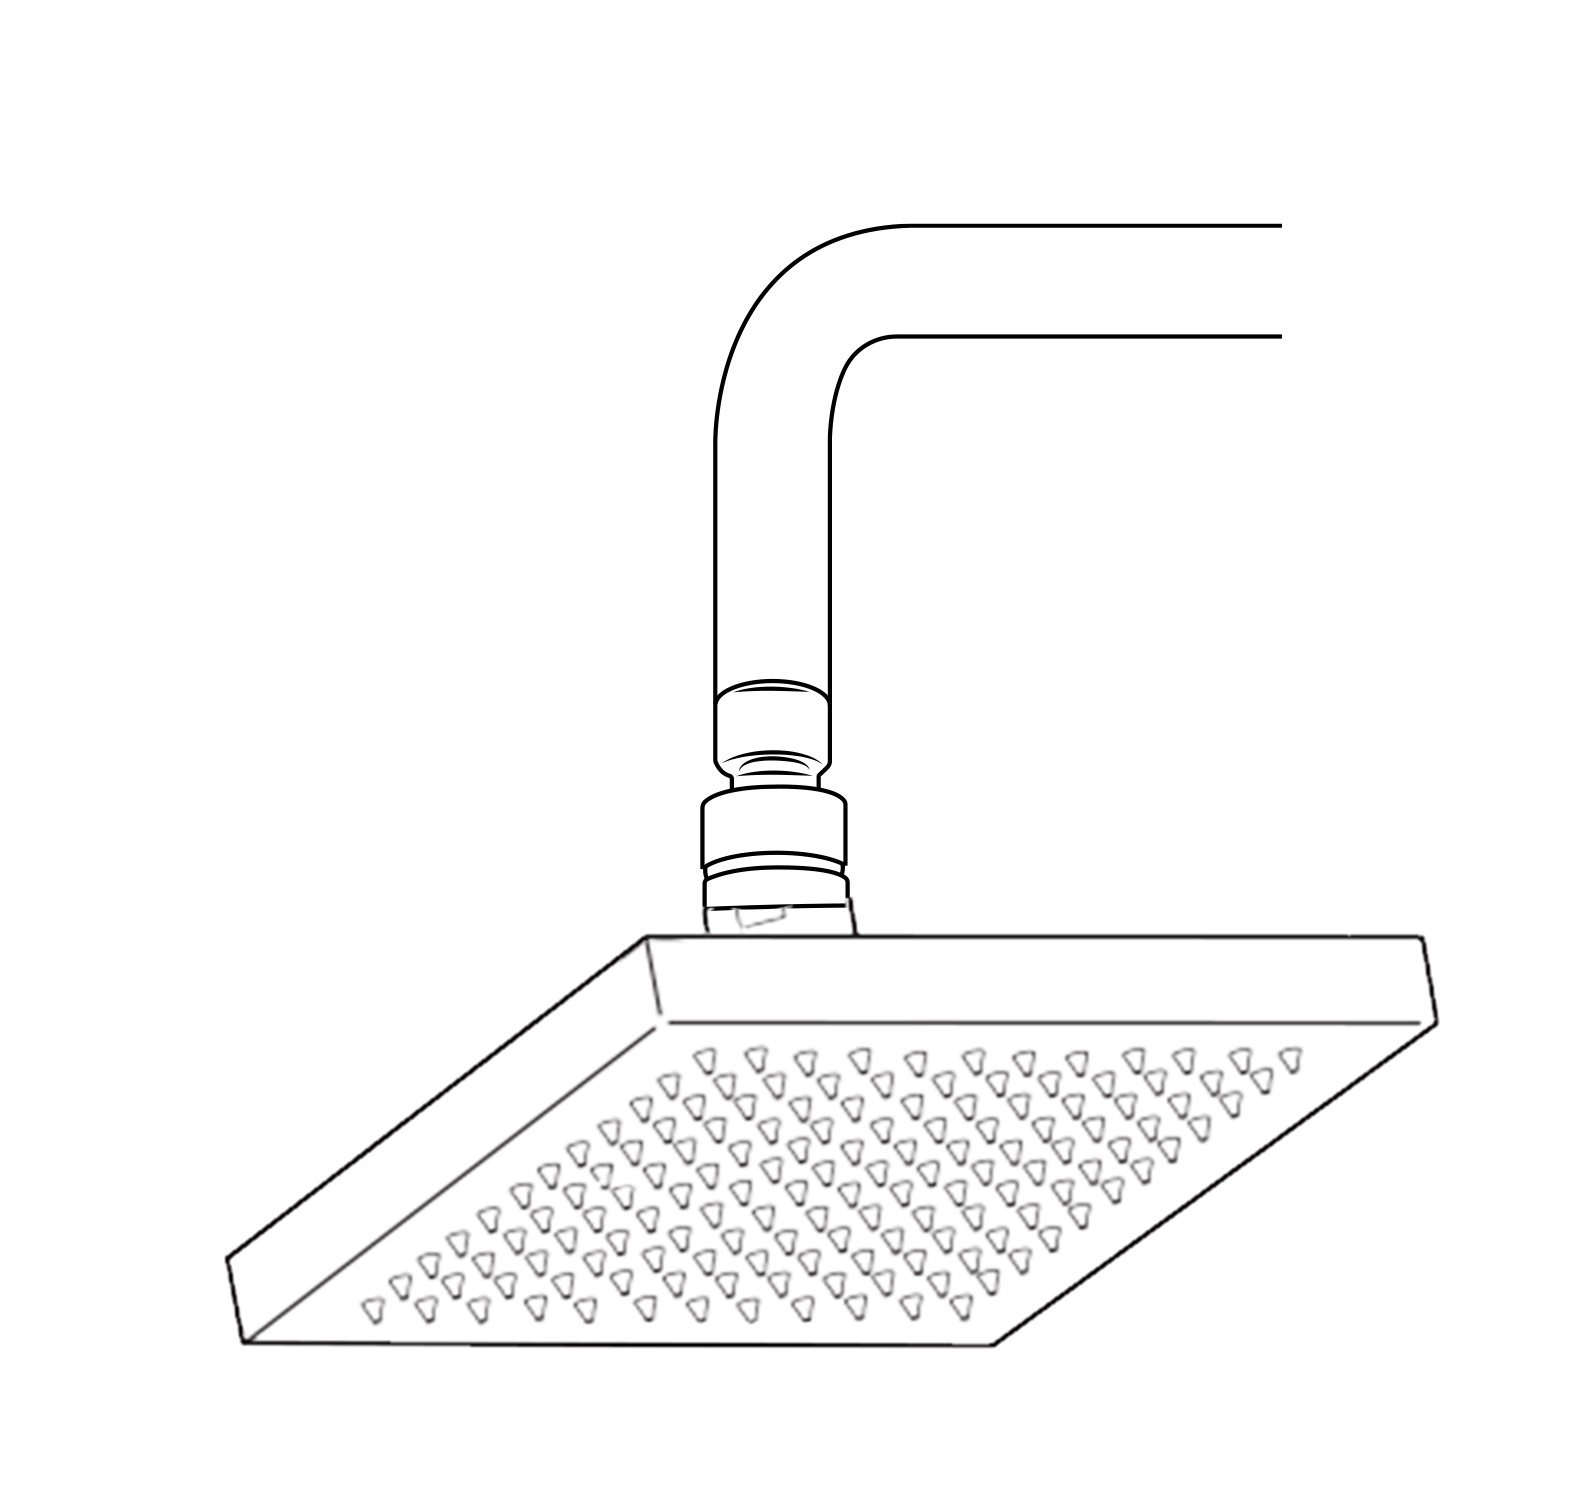
Shower Head Installation
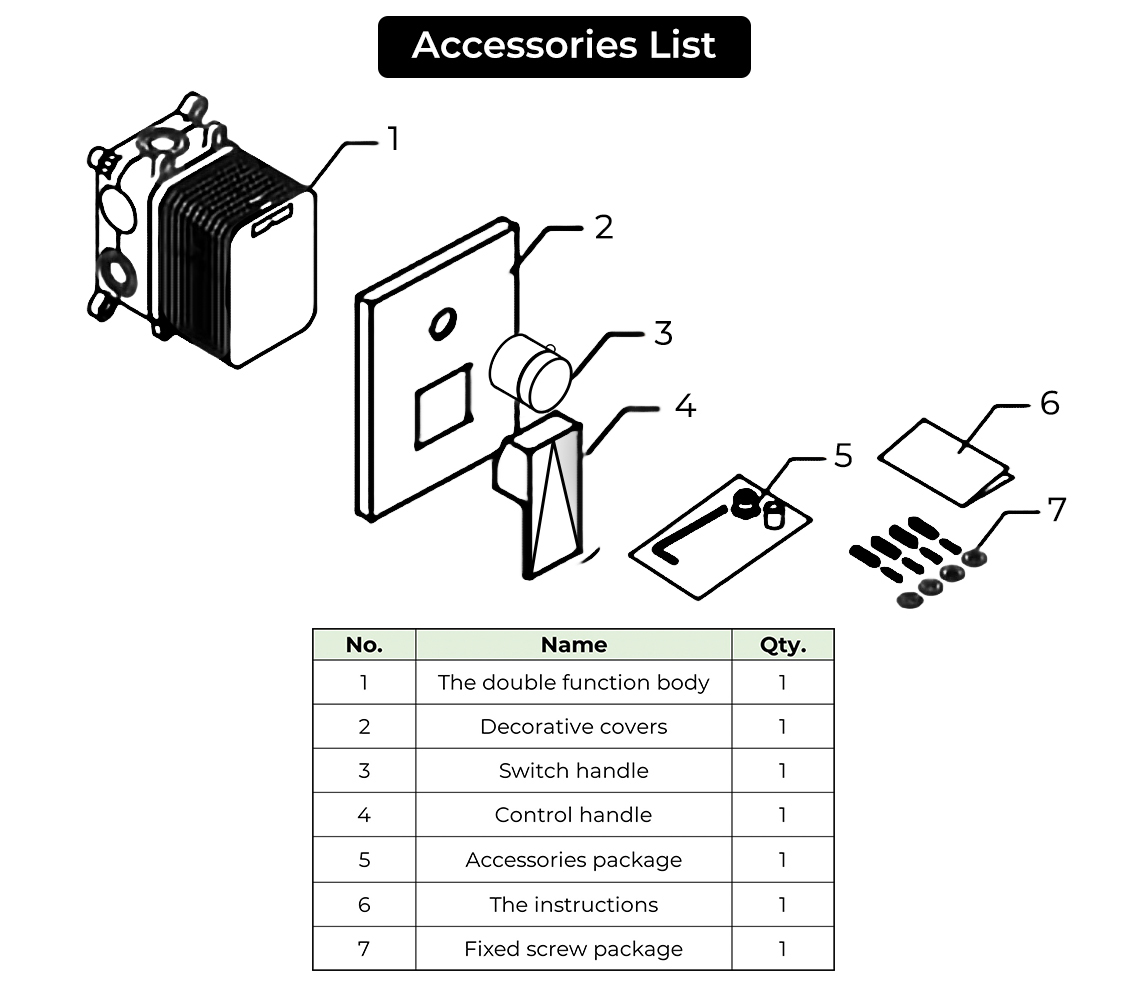
Shower Head Parts Included:
- Wall Mounting Arm
- Locking nut
- Wall trim
- Shower arm
- Showerhead
- Fixing screws and wall plugs (not shown)
|
shower
|

|
Step 1
|
|
Step 2
|
Step 3
|
|
Step 4

|
Step 5

|
|
Step 6
|
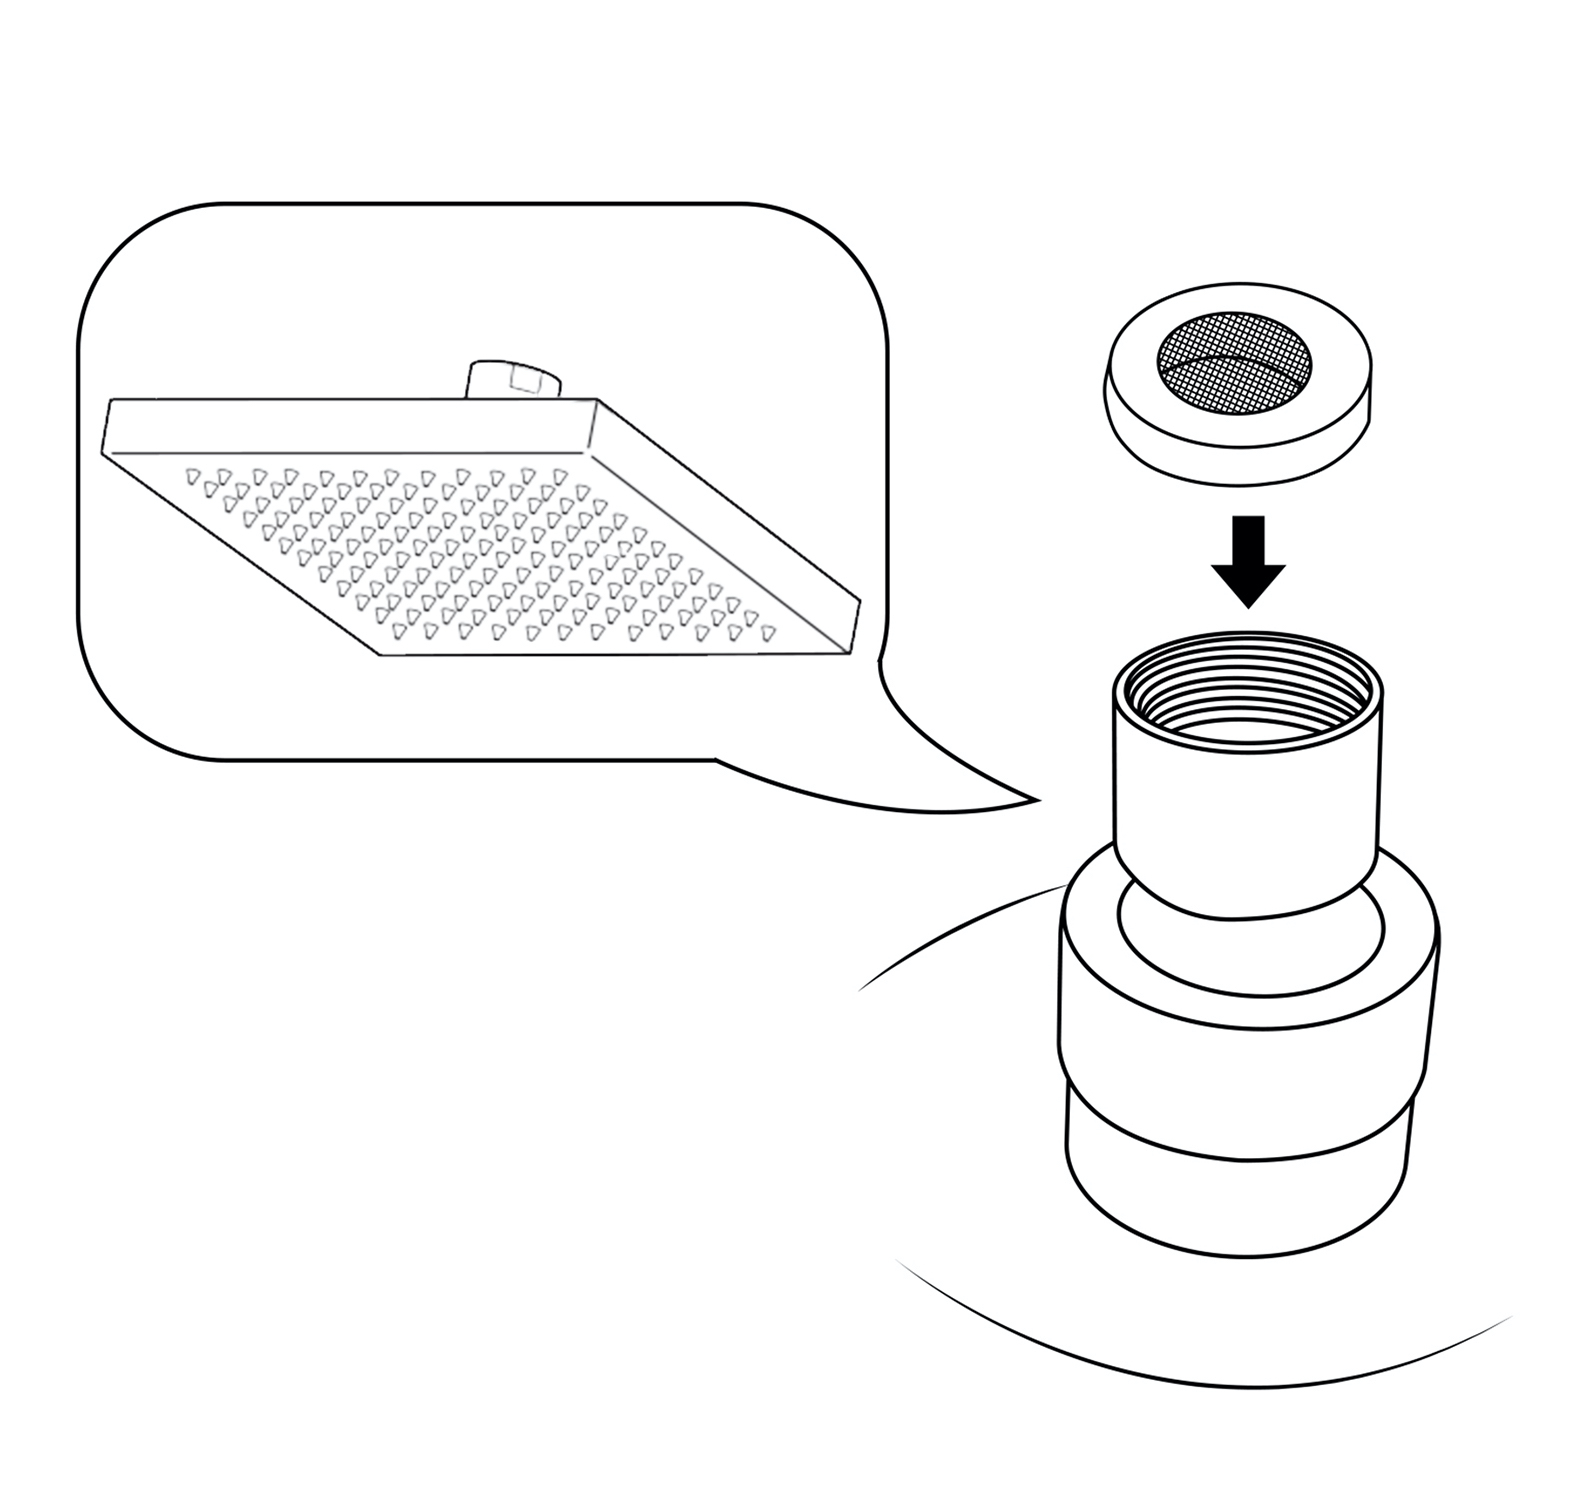
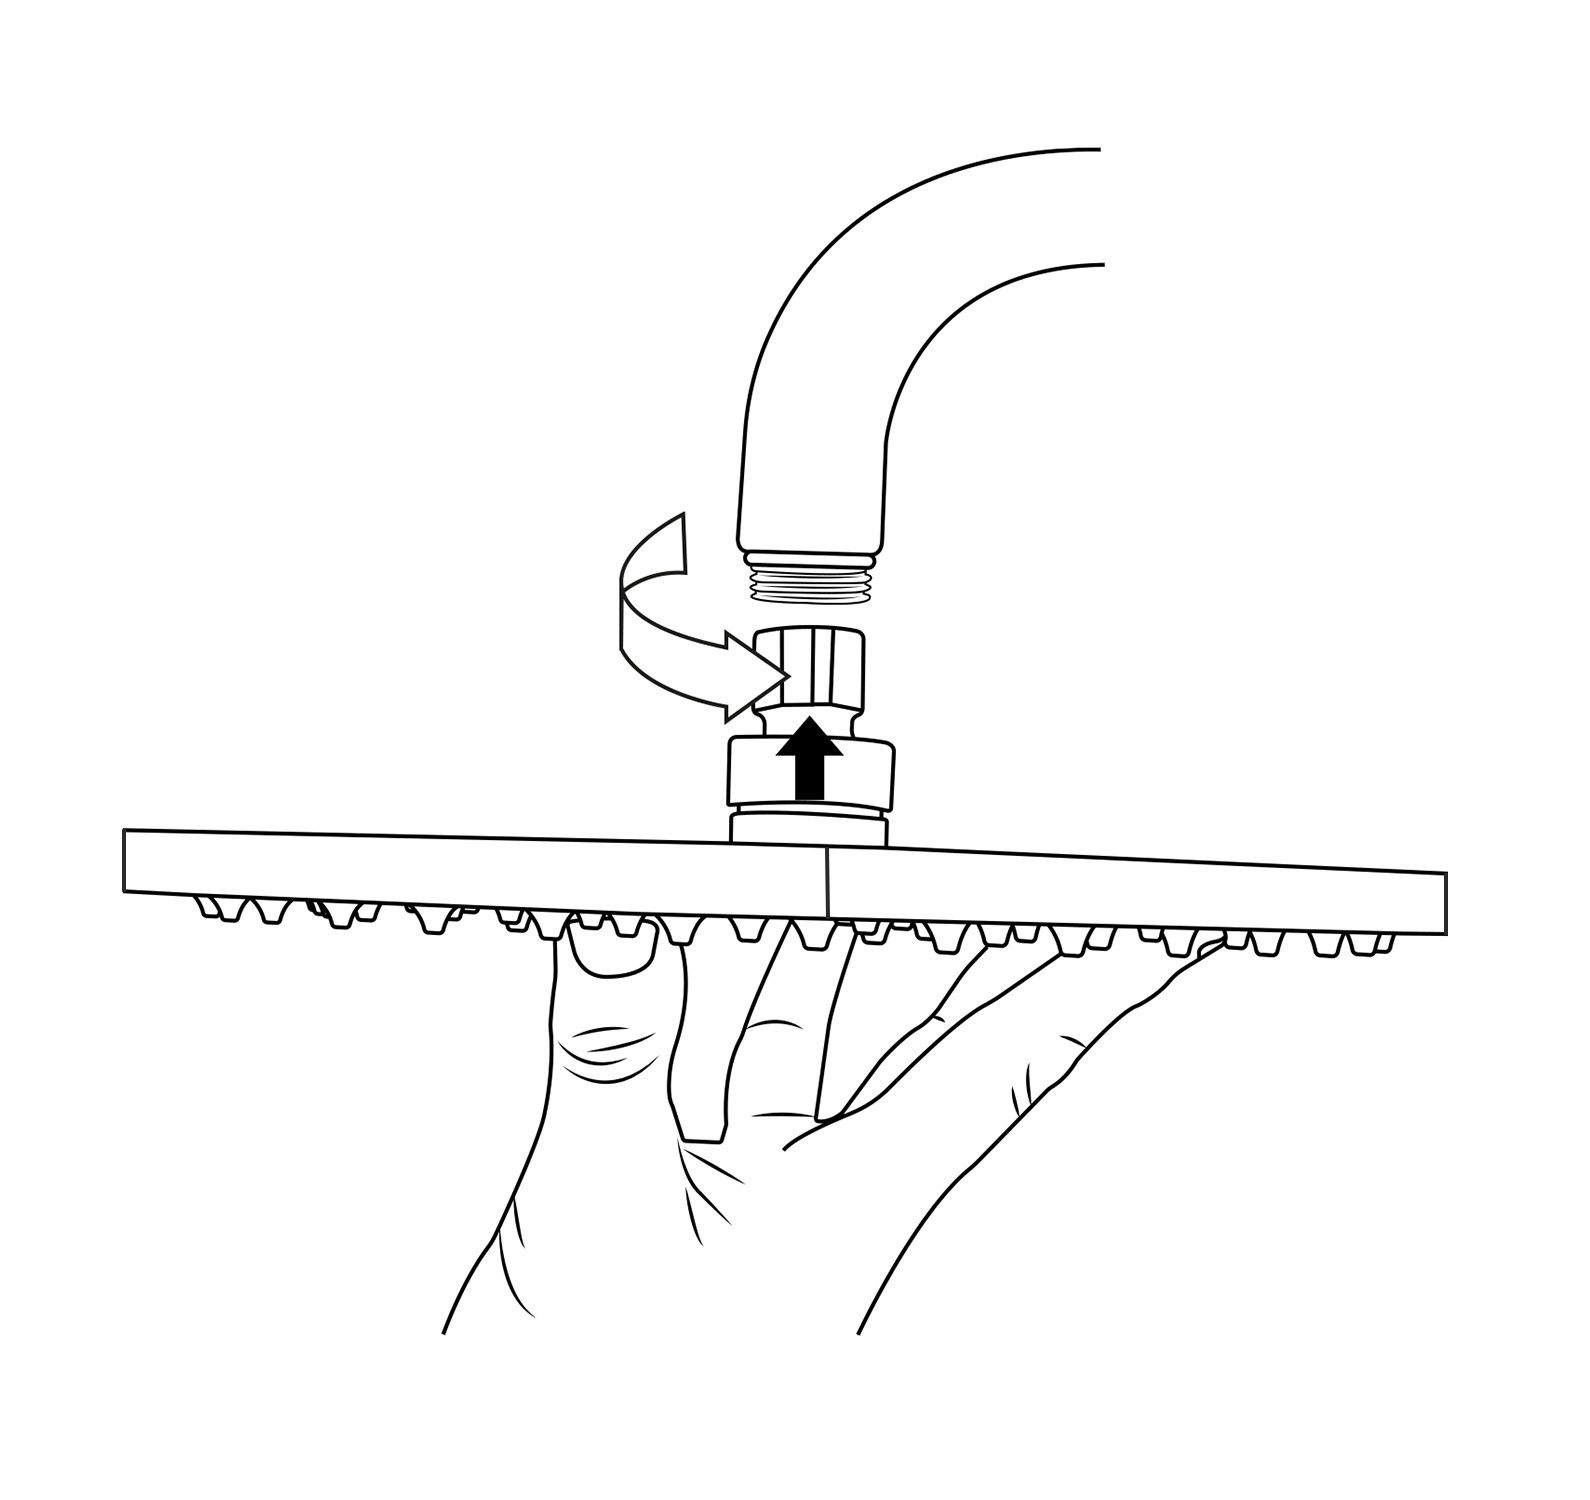
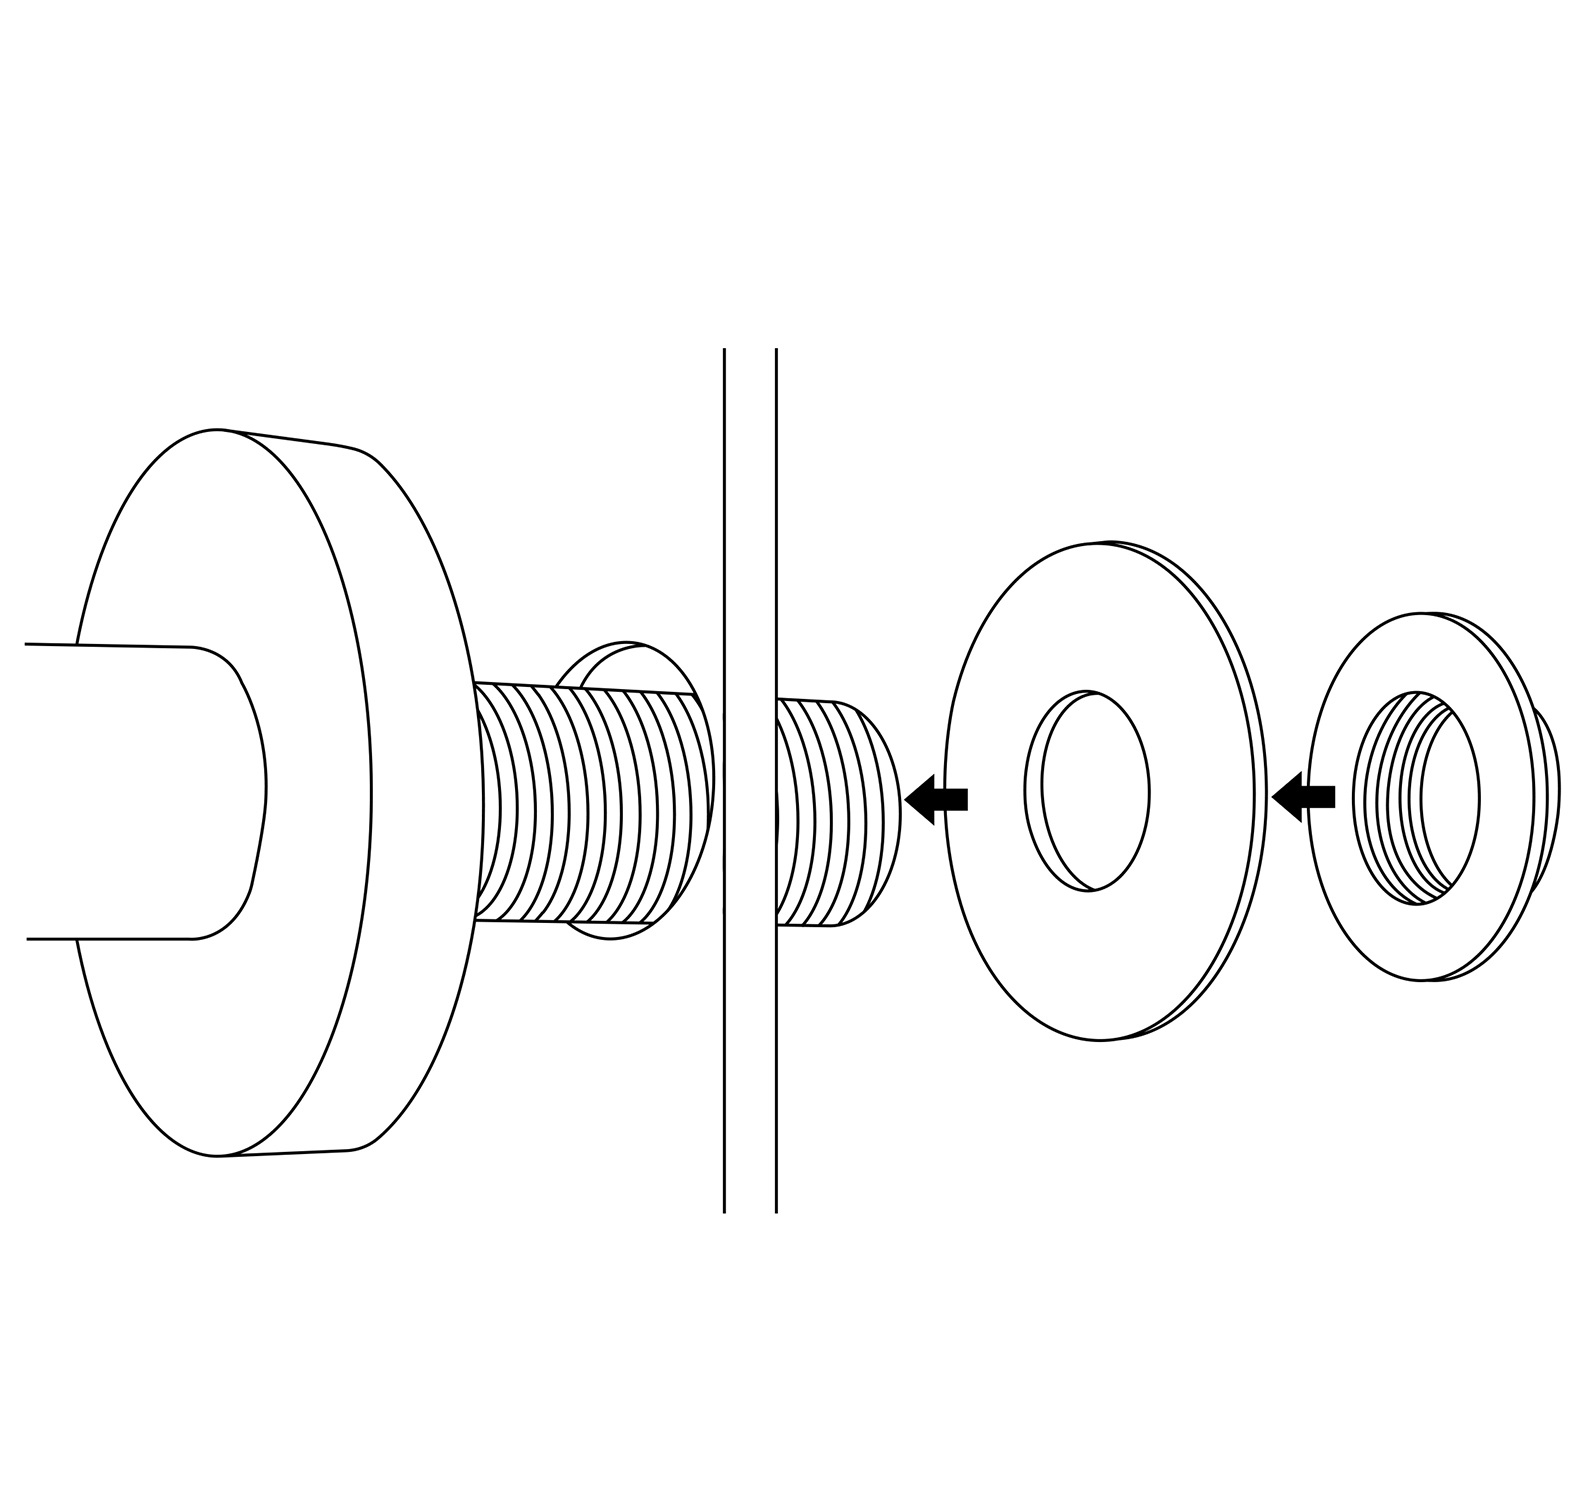
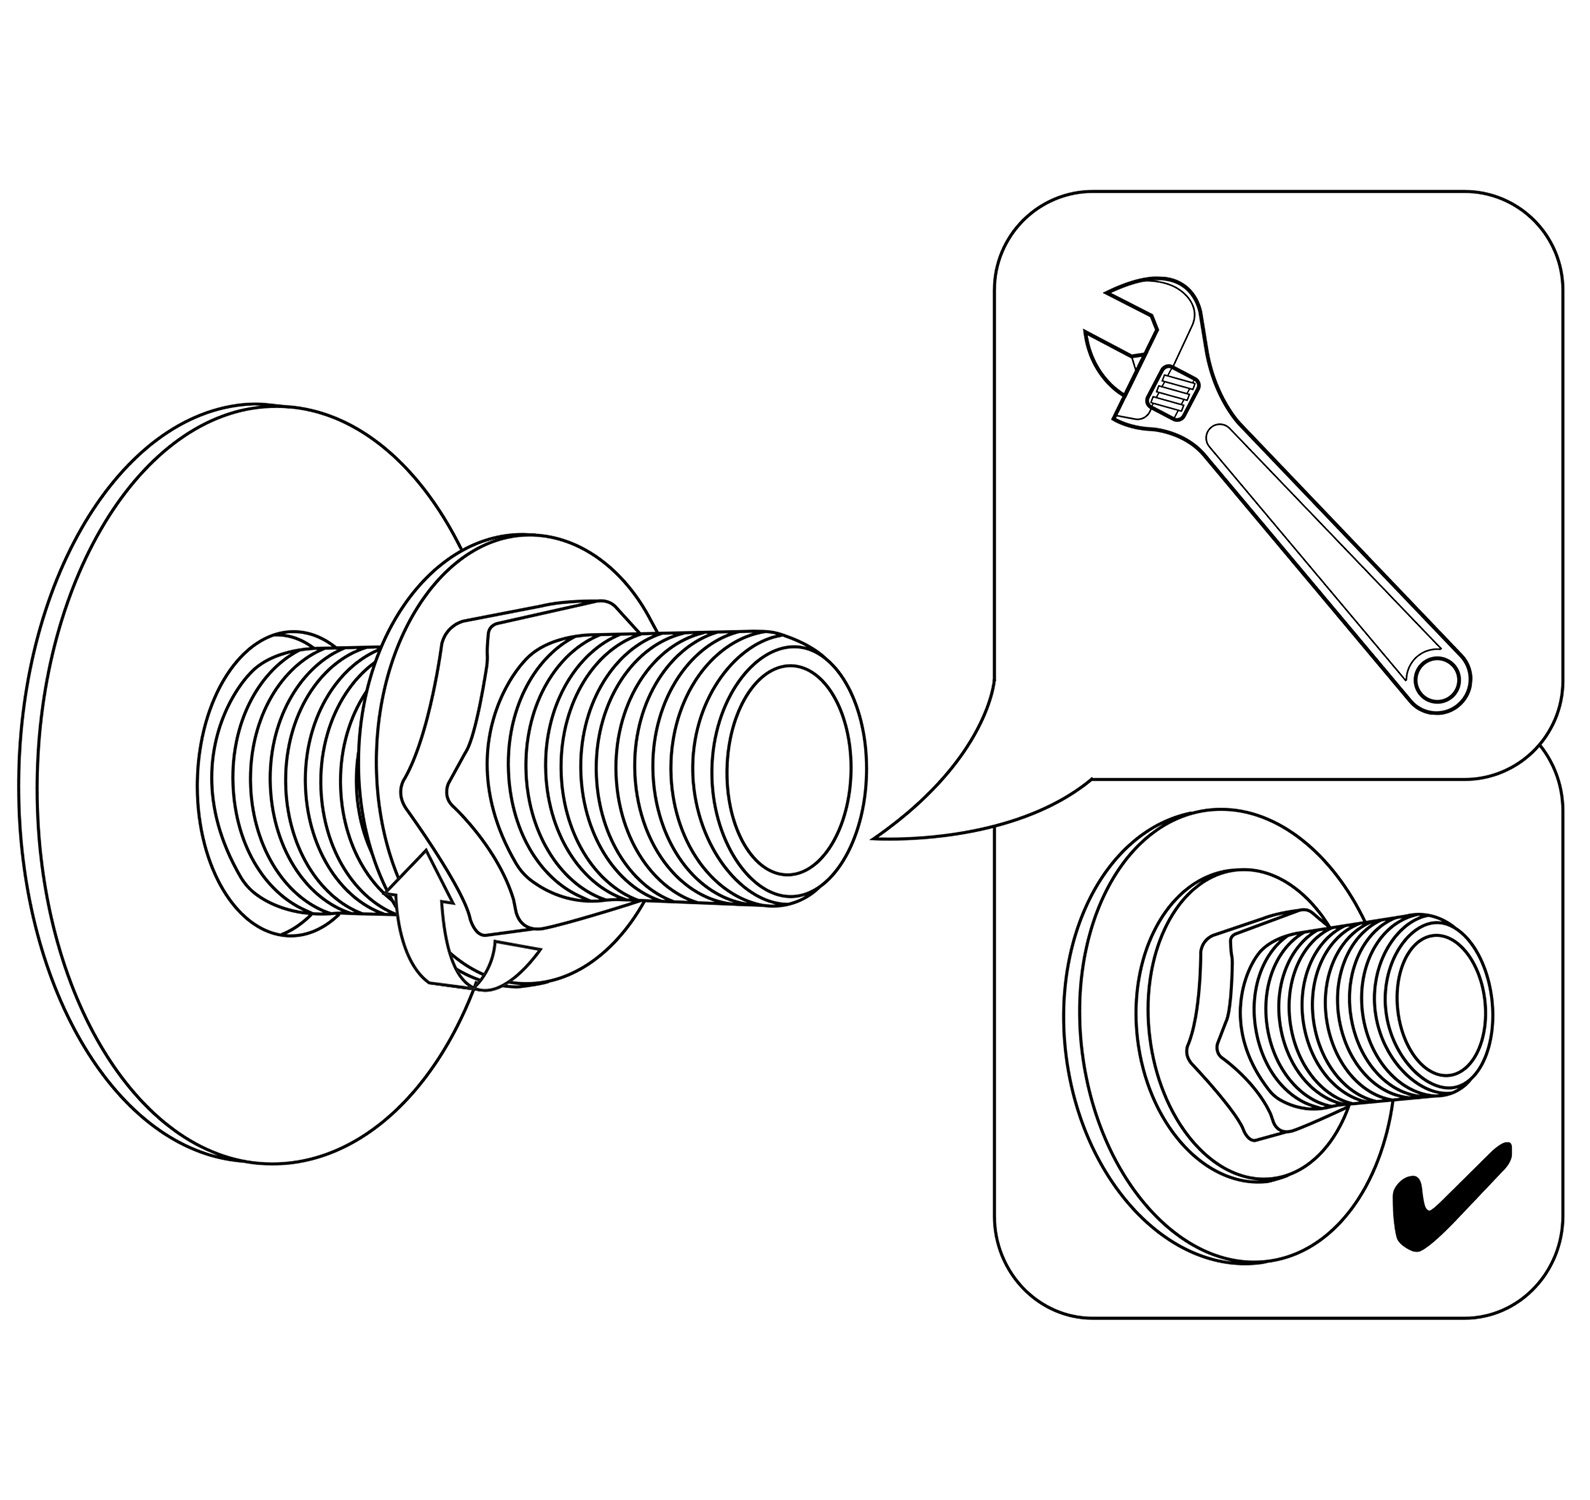
- Use your hands counter clockwise to unscrew the old showerhead and removed it.
- Take out the showerhead, make sure the shower filter is placed in the connector.
- Ensure the showerhead full horizontal alignment wall mounted shower arm thread.
- Use your hands clockwise to tighten showerhead.
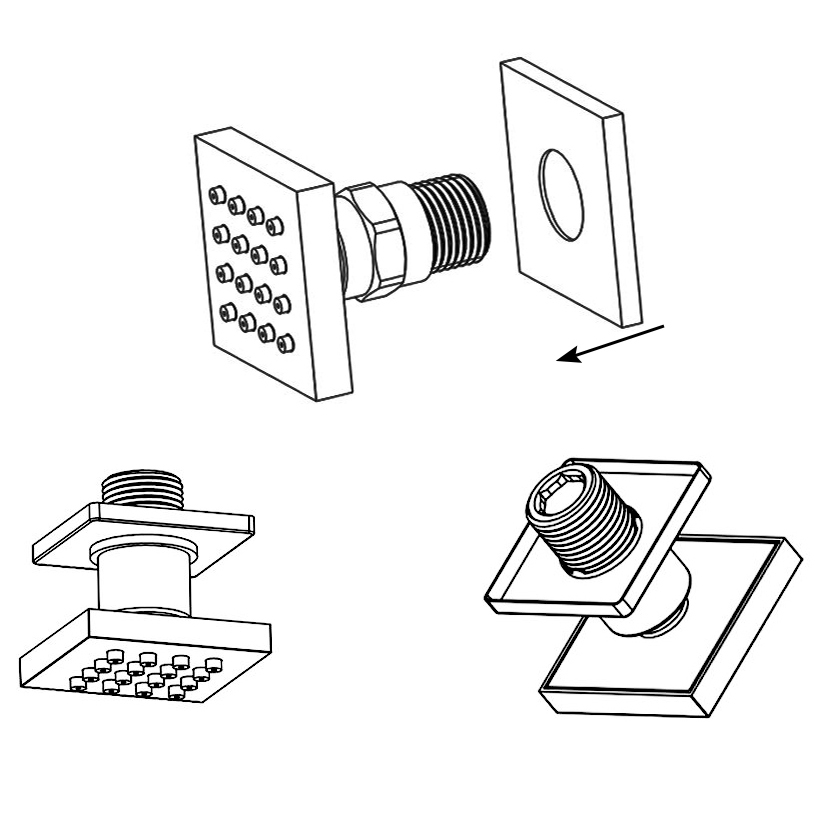
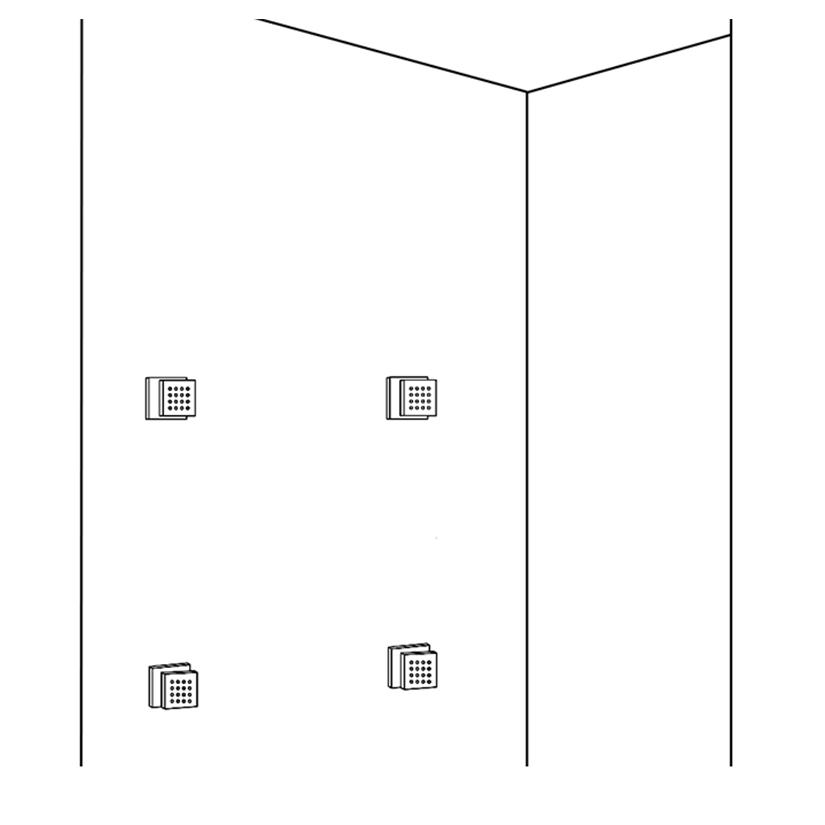
Body Jets Installation Instructions
Step 1

Set the decorative cover on the body jet.
|
shower
|
Step 2

Roll the raw material belt in the thread screws.
|
shower
|
Step 3

Use a wrench to tighten 6 body jets on the water outlet holes in a clockwise direction.
|
|
Hand-Held Shower Installation Instructions
Step 1
|
shower
|
Step 2

|
|
- Open the closed cover of the shower holder and take out the screws.
- Drill two holes size 0.2" (6mm) on the wall according to the hole position of the shower holder.
- Use a hammer to break 2 plastic wall plug into two holes. Tighten the screws with the plastic wall plug and locking with the shower holder. Then install the closed cover.
- Connect the shower hose with the water outlet connection part and hand shower. Plug the hand shower in the shower holder.
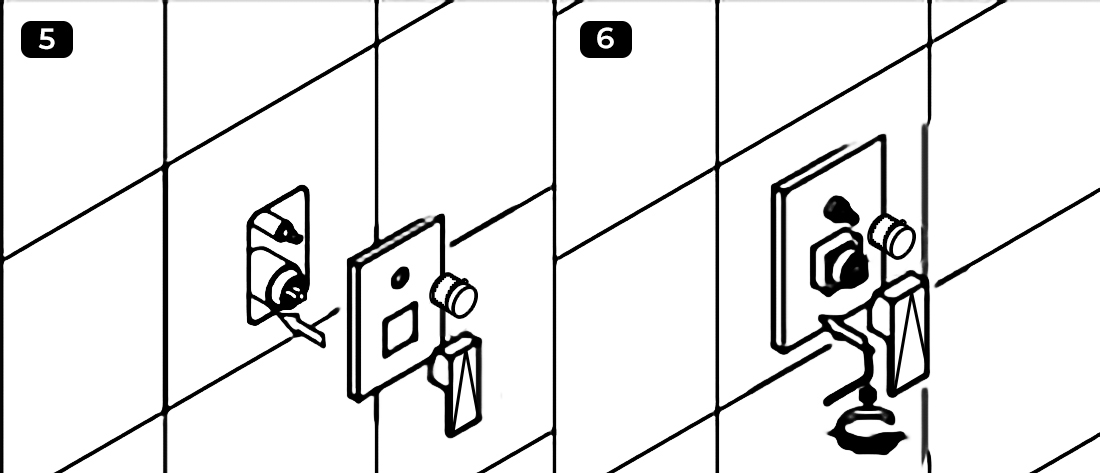
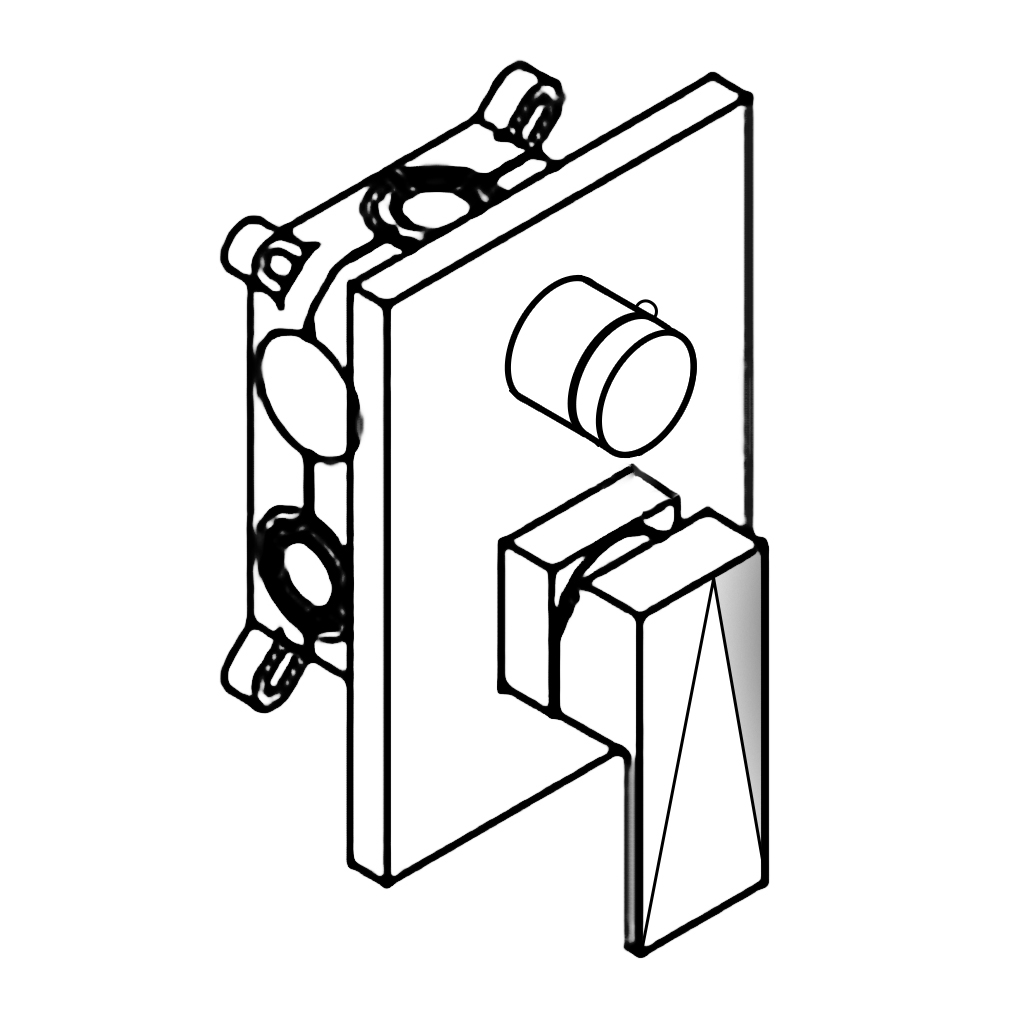
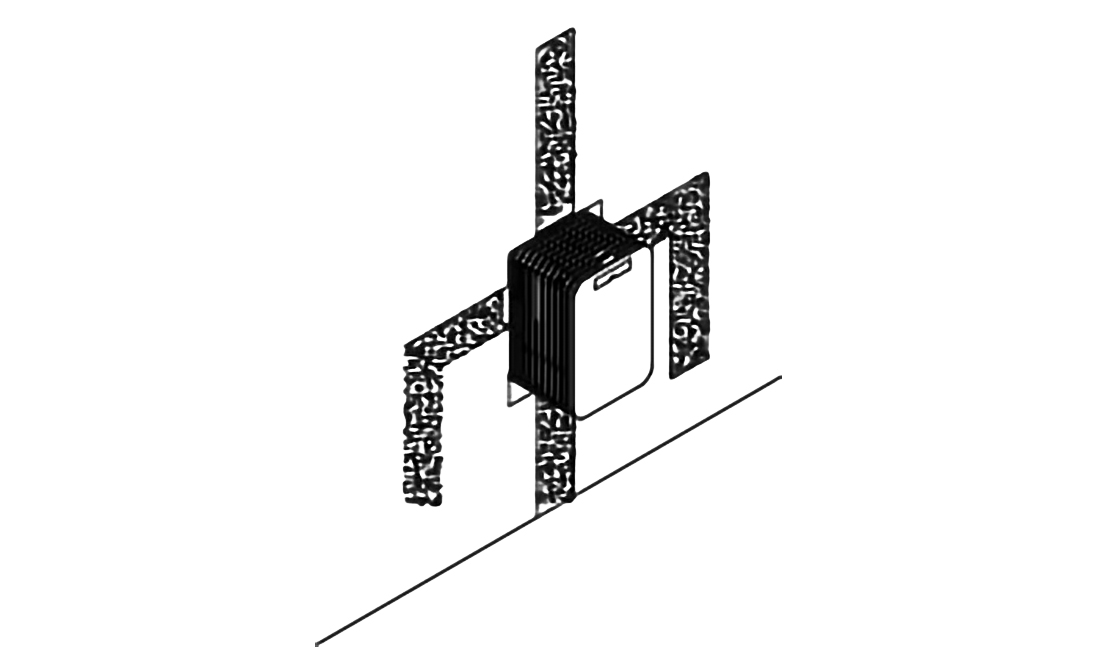
3-way Mixer Installation
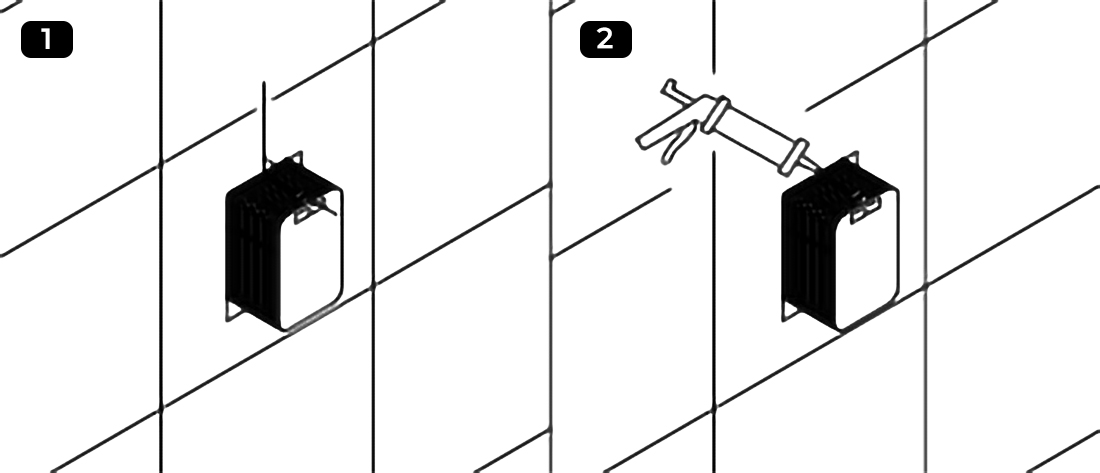
Step 1
|
mixer
|
Step 2
|
Step 3
|
|
Step 4
|
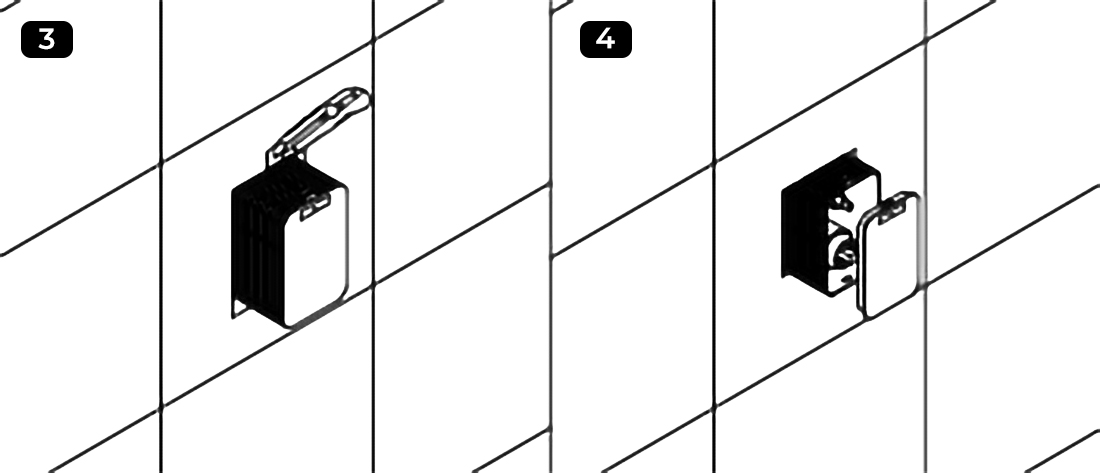
Step 5
|
|
Step 6
|
Step 7
|
mixer
|
|
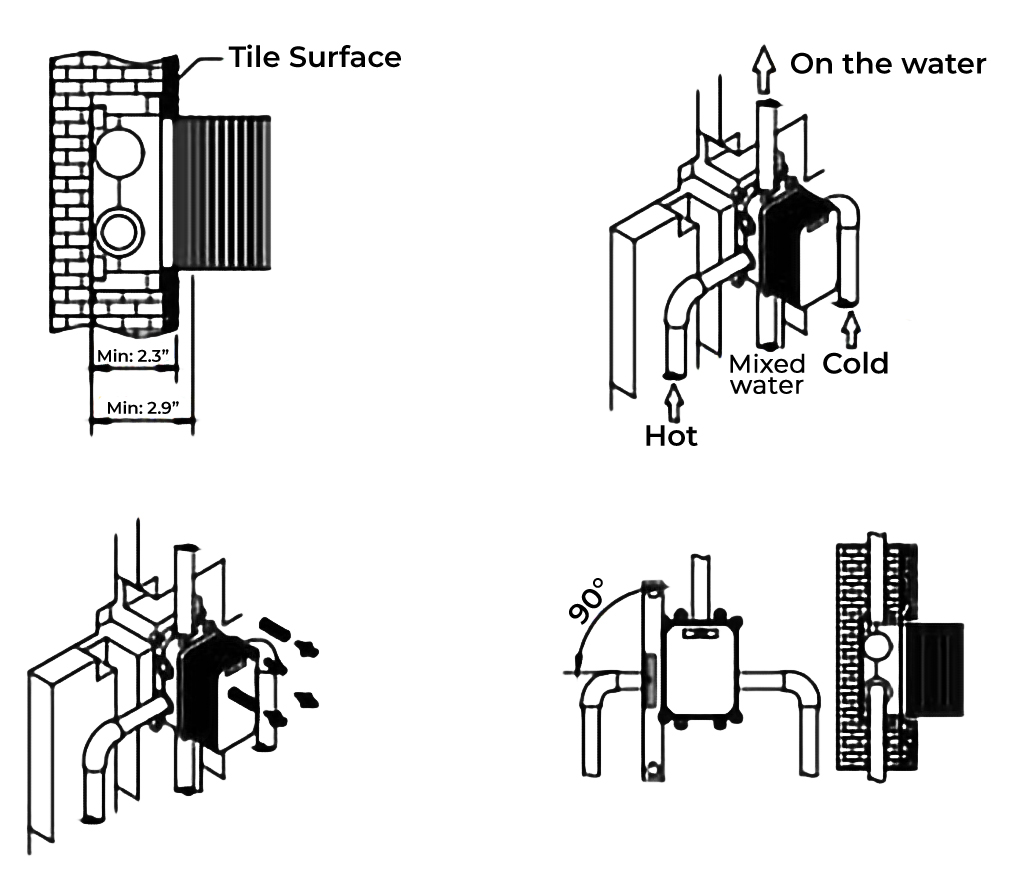
- Basic-size, according to the embedded box to open the hole on solid wall, should consider installing the metope of the distance between 60-75mm, for example, after blank wall in the shop, the ceramic tile surface to increase the thickness of the 20 mm, so PiQiang in the depth of the hole should be chosen 40 to 55 mm.
- Hole bottom should remain flat so that subsequent adjustment embedded box of vertical and horizontal convenient installation for the principle
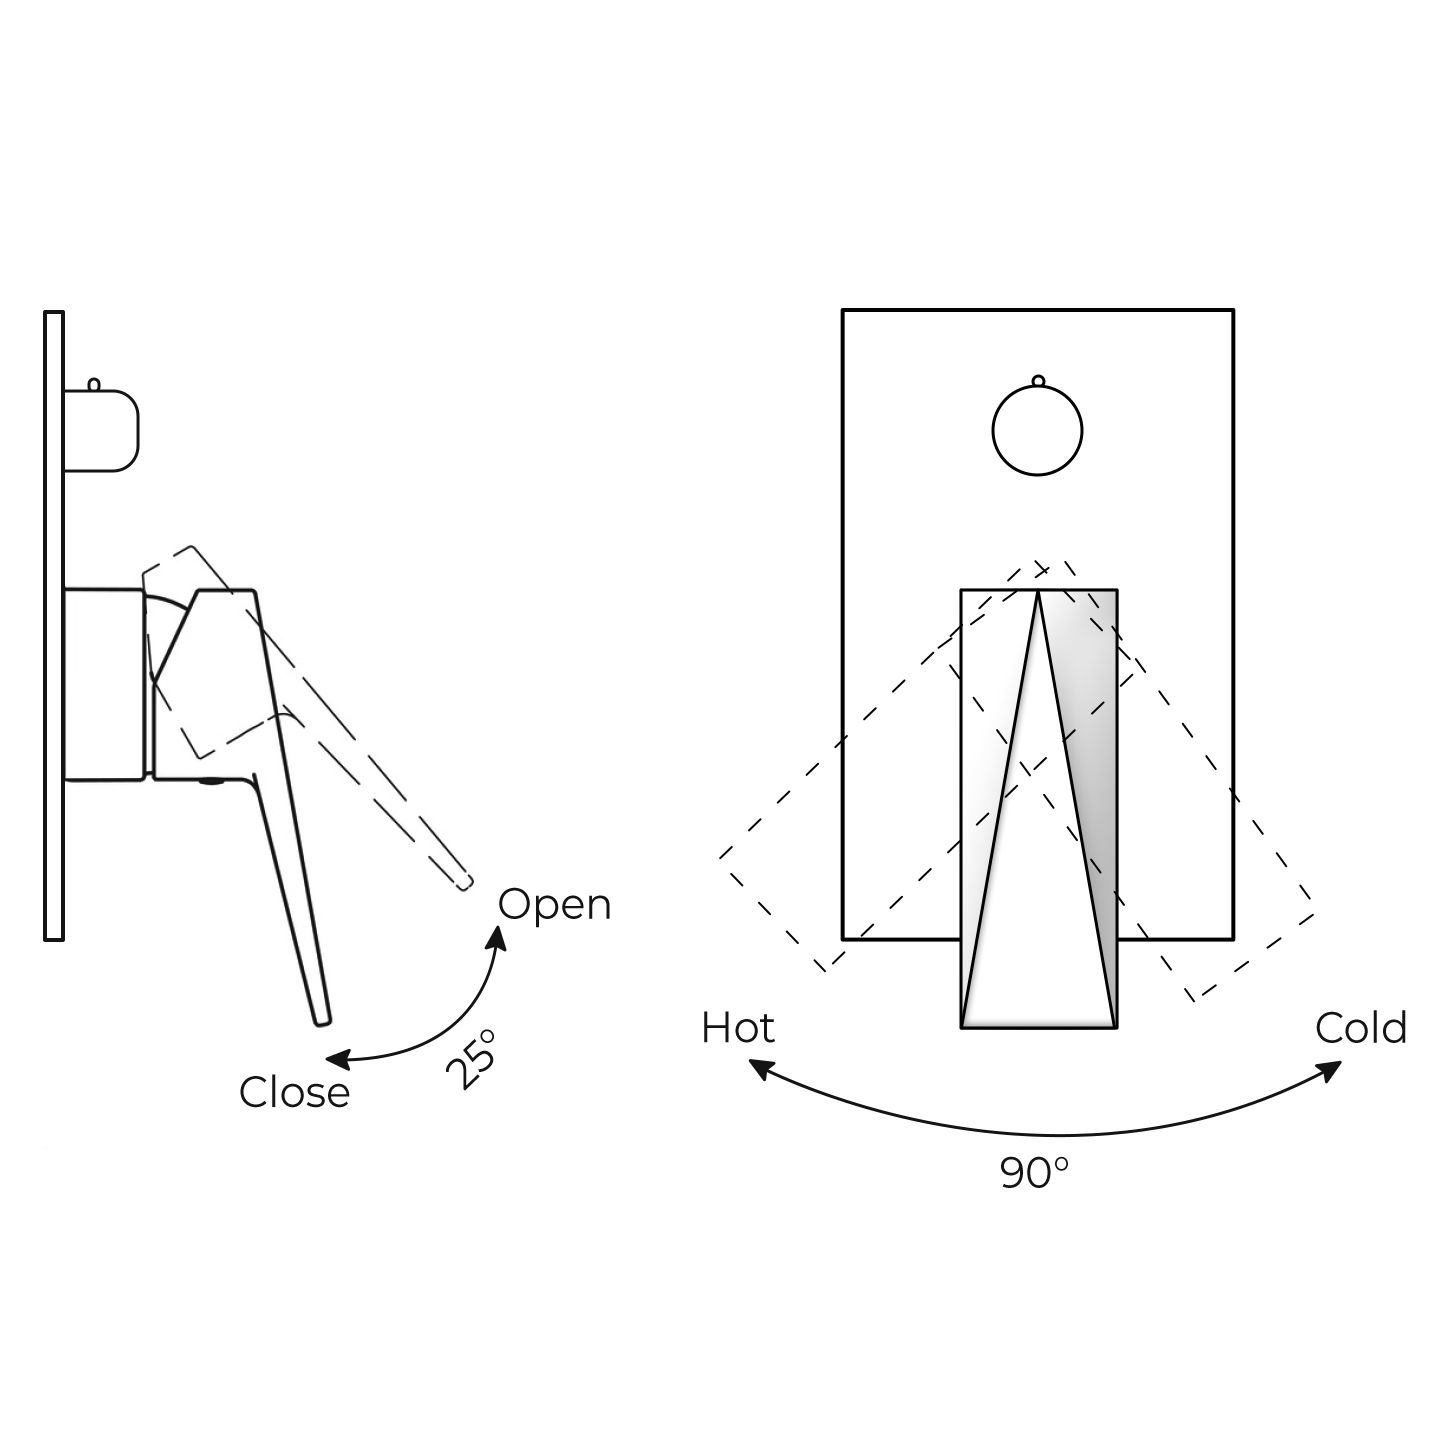
- Pay attention to the direction of the up and down or so embedded box, on the left by hot water pipes, right after the cold water pipes, pick up and down the mixed water pipes.
- After the pipe connection, according to the pipeline arrangement, and open the corresponding channel slot tube in the blank wall.
- Embedded box fixed before, to embed box and trial test and pipe water clean connection pipe, and test before mixing water channels should be open.
- Test, before opening the switch valve core, open the water to test around inlet pipe, is connected closely with no leakage and the water pipe test after dosing open state, whether to test on the mixed water pipe connection without leakage. At the same time clean tube foreign bodies in case of influencing water control valve function.
- It will be embedded in a box into the solid wall with a self-tapping screw that is fixed on the wall.
- With parallel ruler for correction of the embedded box of horizontal and vertical direction to embed box into a level with the ground and metope as 90°. In the absence of good correction will influence the control panel installation effect.
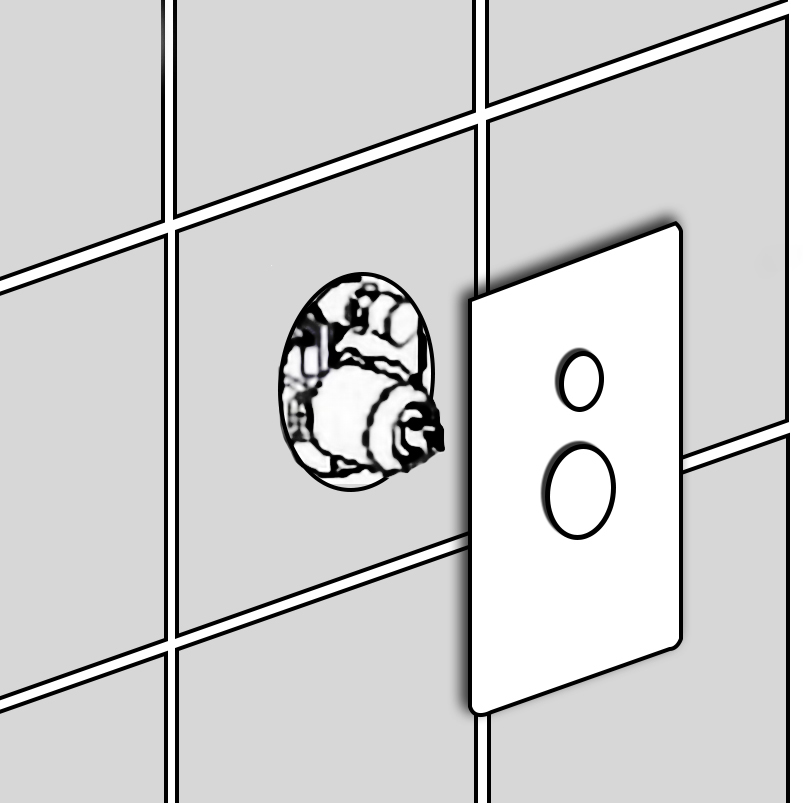
|
Step 8
Once again confirm the pipe connection is correct, try no leakage, water shower other embedded with the packing box and pipe joint is fixed
Solid wall embedded box is installed, laid our behind the wall can be a follow-up control valve installation
|
|
|
Step 9
The lying of the wall not to embed box is open, lest the box into the packing after solidification effect of control valve installation
Control valve set surface for plating and smooth surface should be kept inside the original packaging before installation to prevent scratches, corrosion, and lost.
|
Step 10
1. Laid metope ceramic tile or other adornment metope, keep the metope smooth, with the embedded box into 90″ vertically
2. Along with the embedded highlights, the glass on the edge glue, embedded box to improve waterproof performance prolongs service life.
|
|
|
Step 11
3. Cut oof using a cutting tool embedded box of highlightings, keep away from the wall 2-4mm highly advisable.
4. Try yo remove embedded lifted the lid plate and water components
|
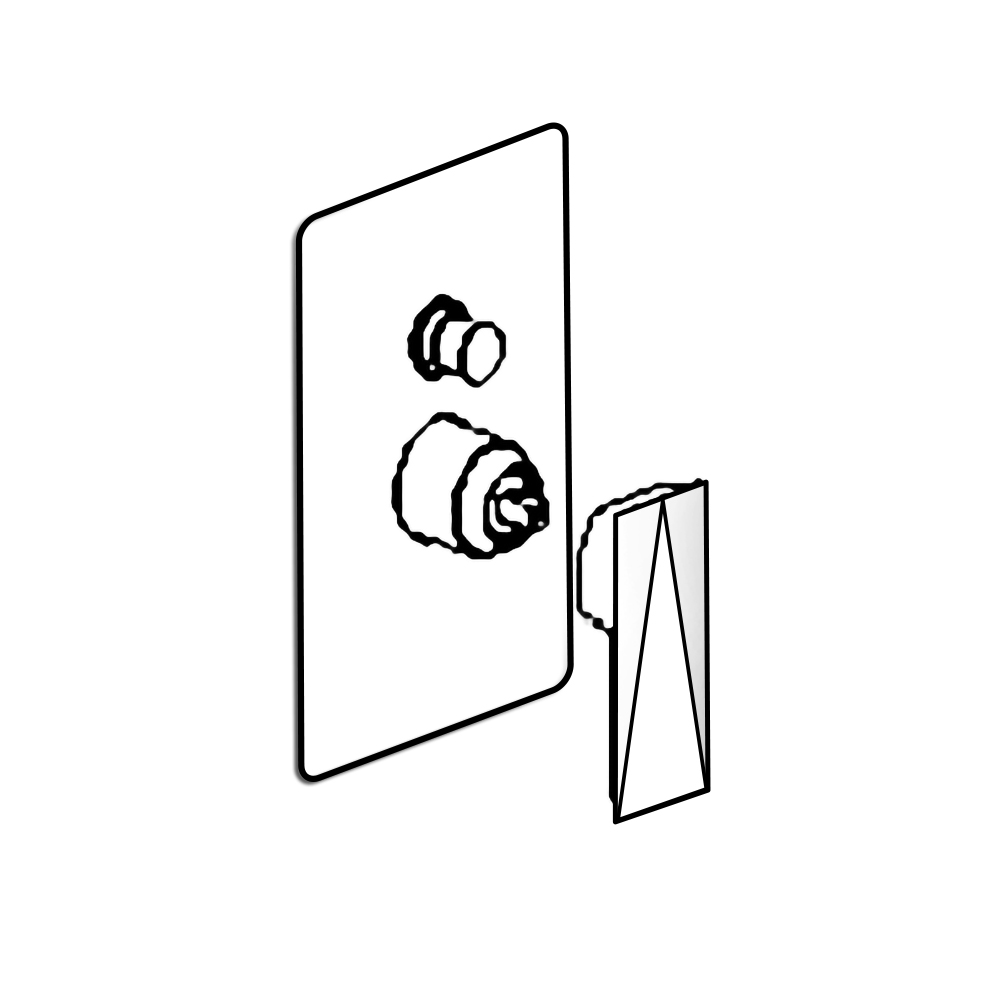
5. Installed control panel, check on panel hole protecting glue before the set cut, such as unprotected glue set directly into the panel is easy to scratch panel
6. Install the switch handle, with packing with small hexagonal wrench clockwise to switch handle is fixed on a main valve spool control valve in, install
|