How to install Aurélie Antique Brass Wall Mounted Shower Set | FS881LIB
|
Installation Instructions for Exposed Pipe Shower Set
|
|
Visit Product Page 
|
|
- Before you begin, please read the installation instructions below. Observe all local building and safety codes.
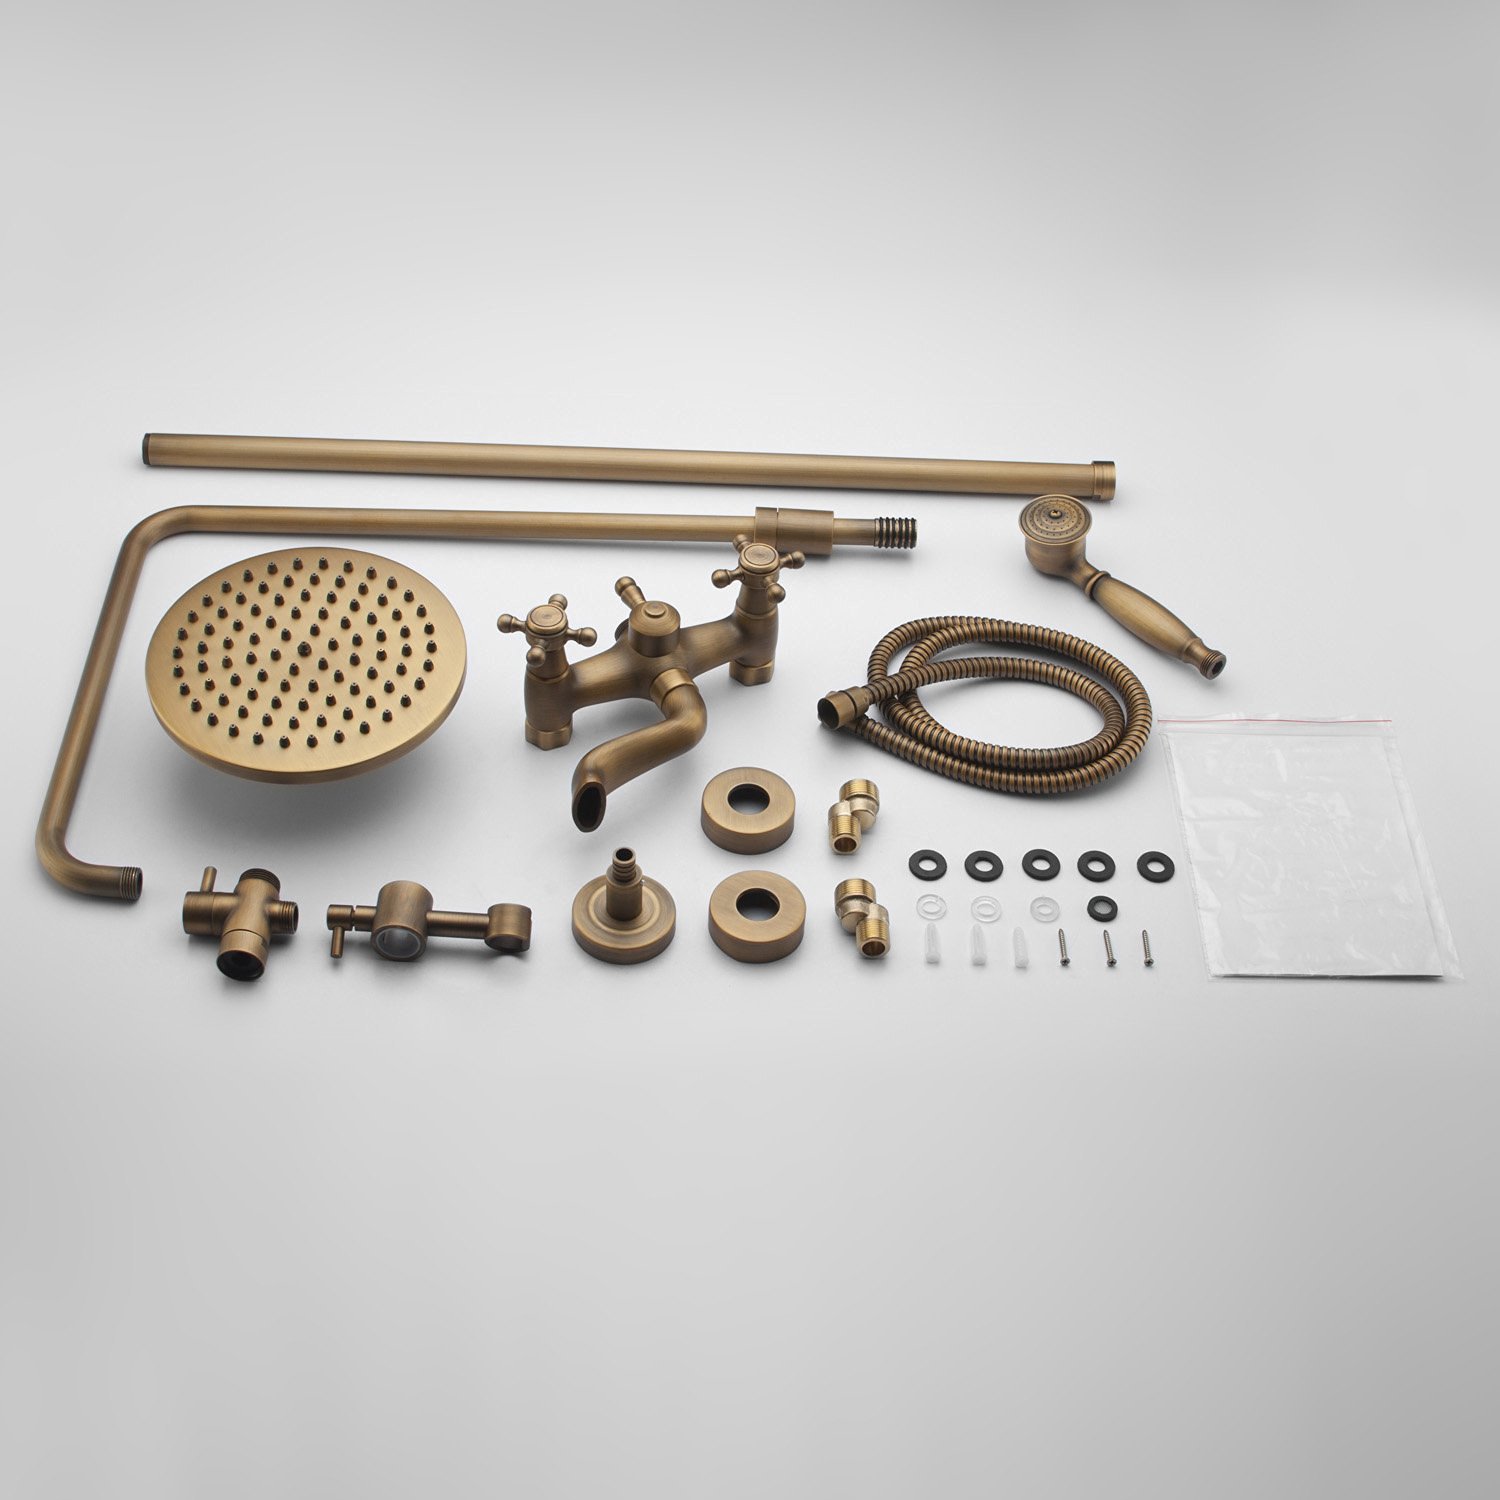
- Unpack and inspect the products for any shipping damages. If you find damages, do not install.
- Please note all products must be installed by a professional and certified plumber otherwise warranty might be voided.
|
shower
|
|
|
Shower Set Installation Instructions
|
Step 1:
|
|
Step 2:
|
|
|
shower
|

|
|
|
|
|
|
|
|
Step 3:
|
|
Step 4:
|
|

|
|
|
|
|
|
|
|
|
|
Step 5: (Riser Rail)
|
|
Step 6:
|
|
|
|

|
|
|
|
|
|
|
|
Step 7:
|
|
Step 8:
|
|

|
|

|
|
|
|
|
|
|
|
Step 9:
|
|
Step 10:
|
|
|
|
|
|
|
|
|
|
|
|
Step 11:
|
|
Step 12:
|
|
|
|
|
|
|
|
|
|
|
|
|
|
|
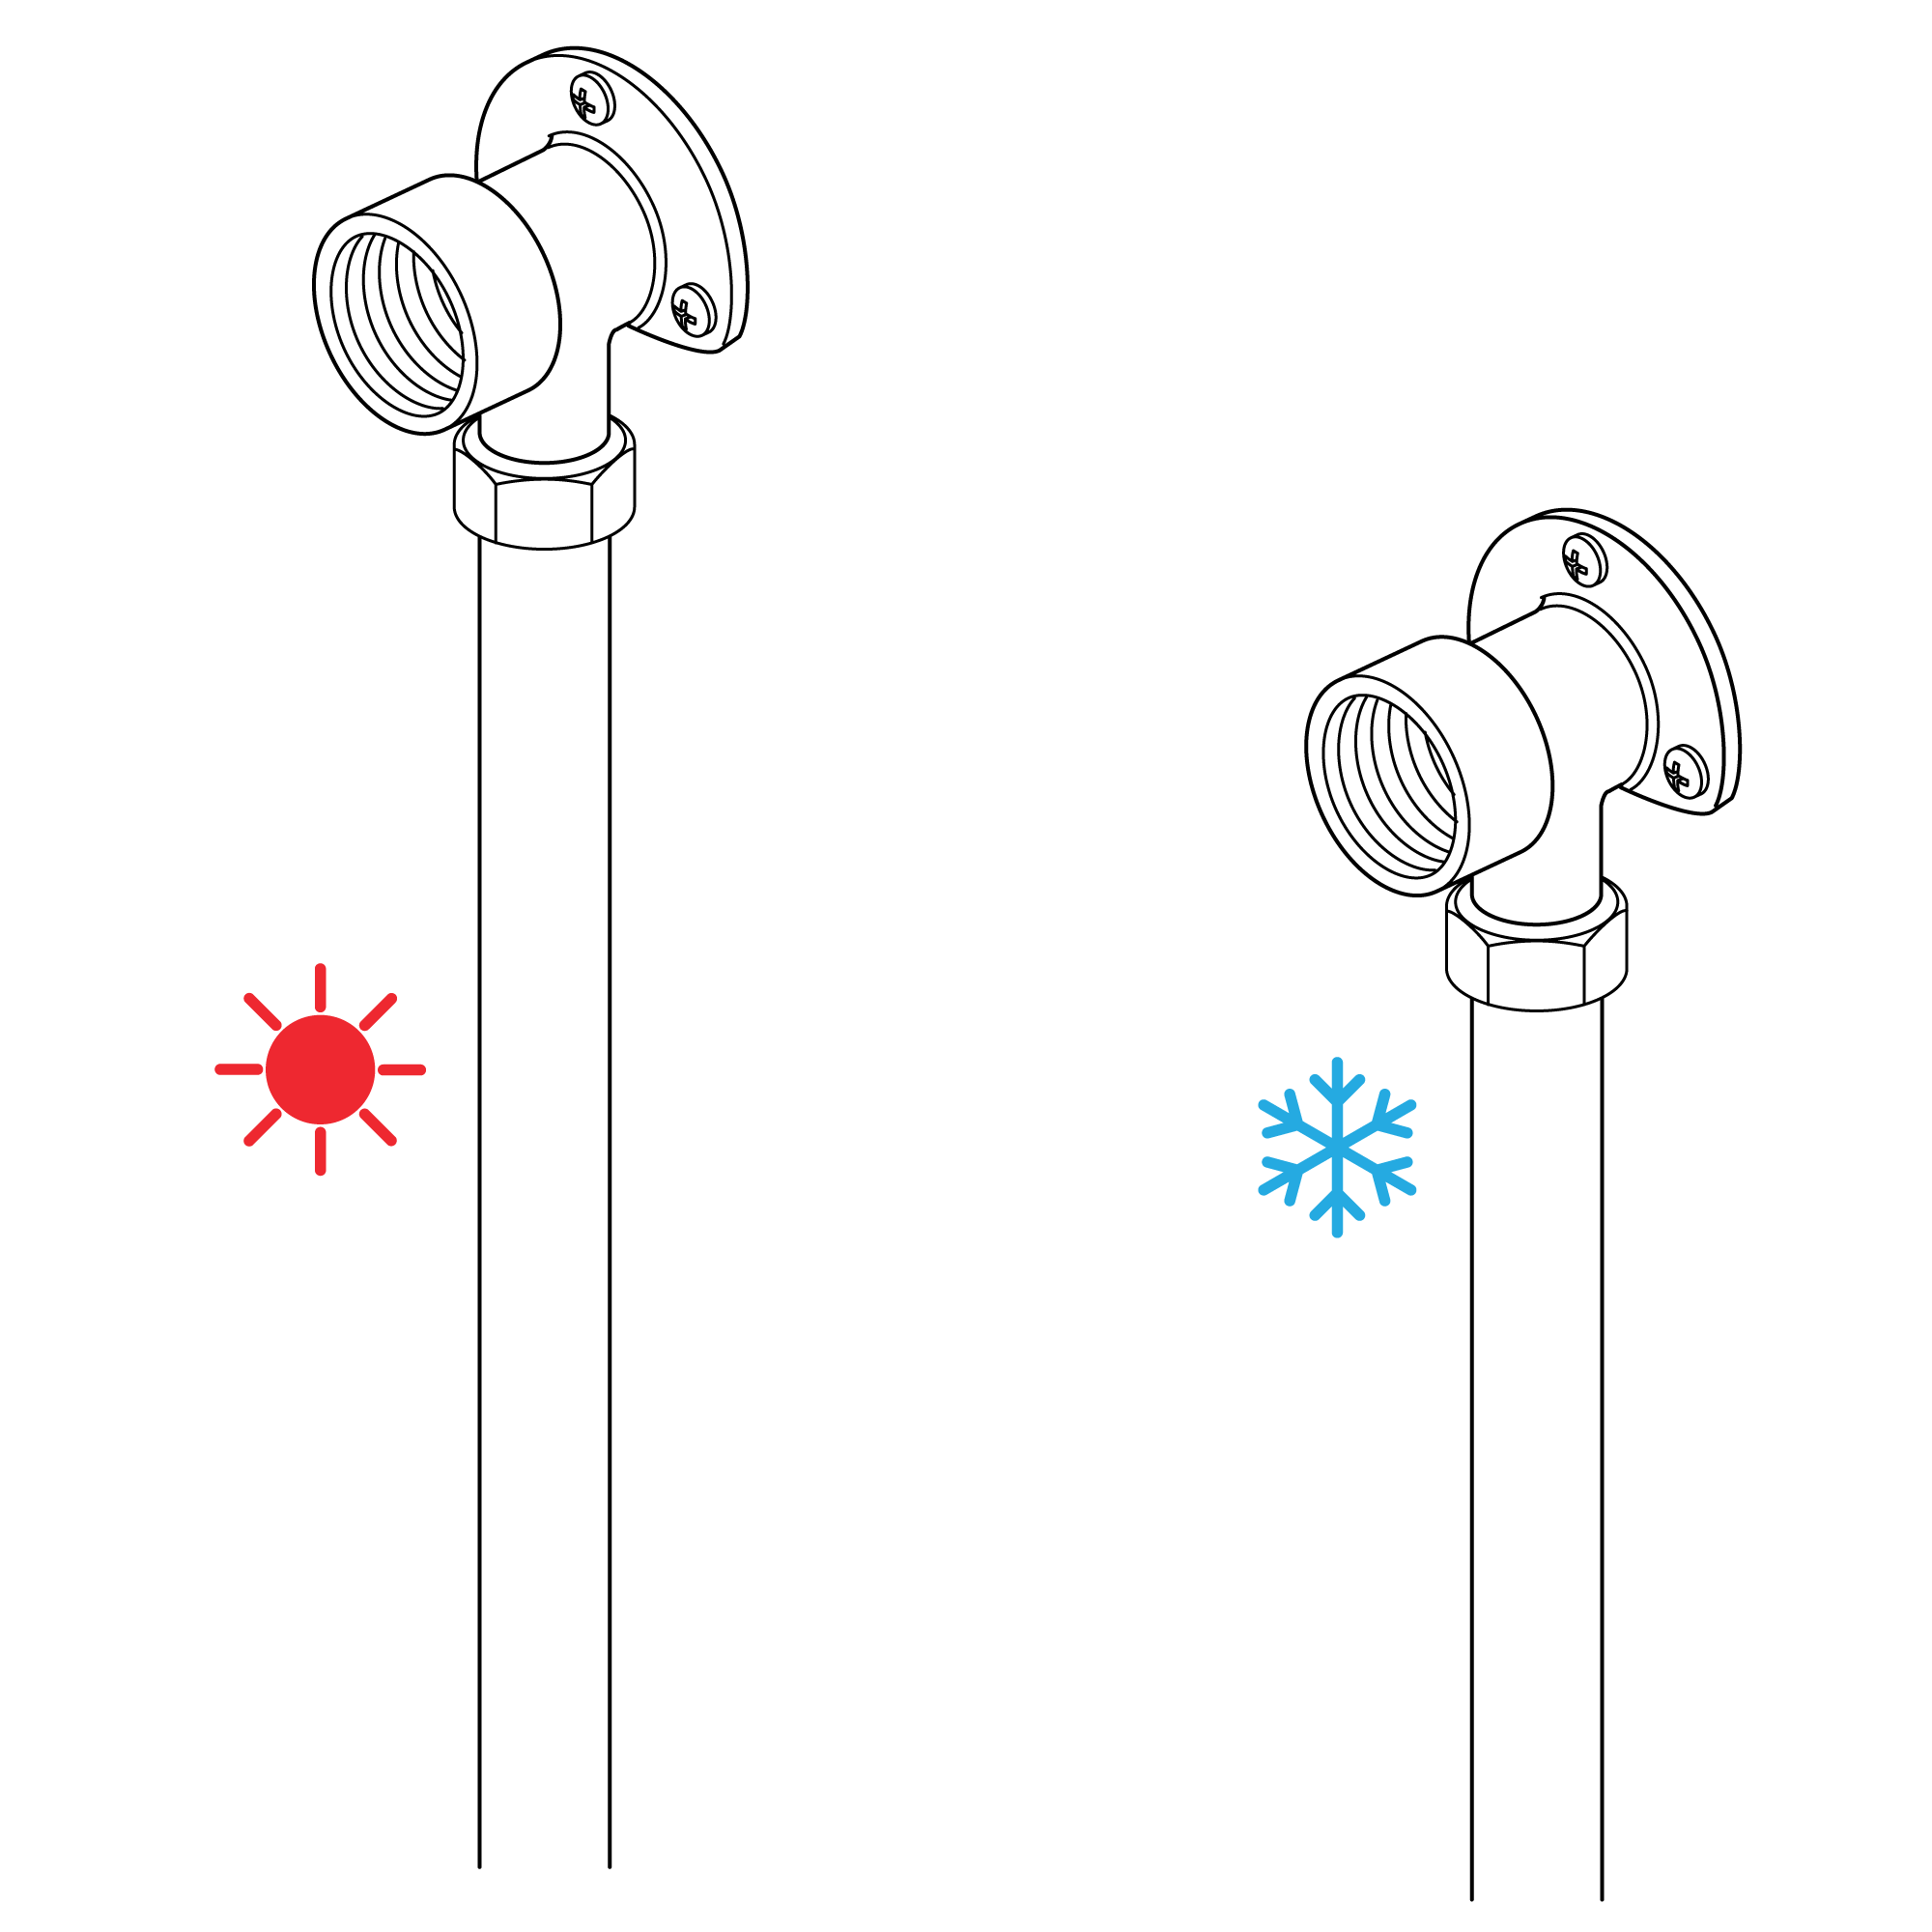
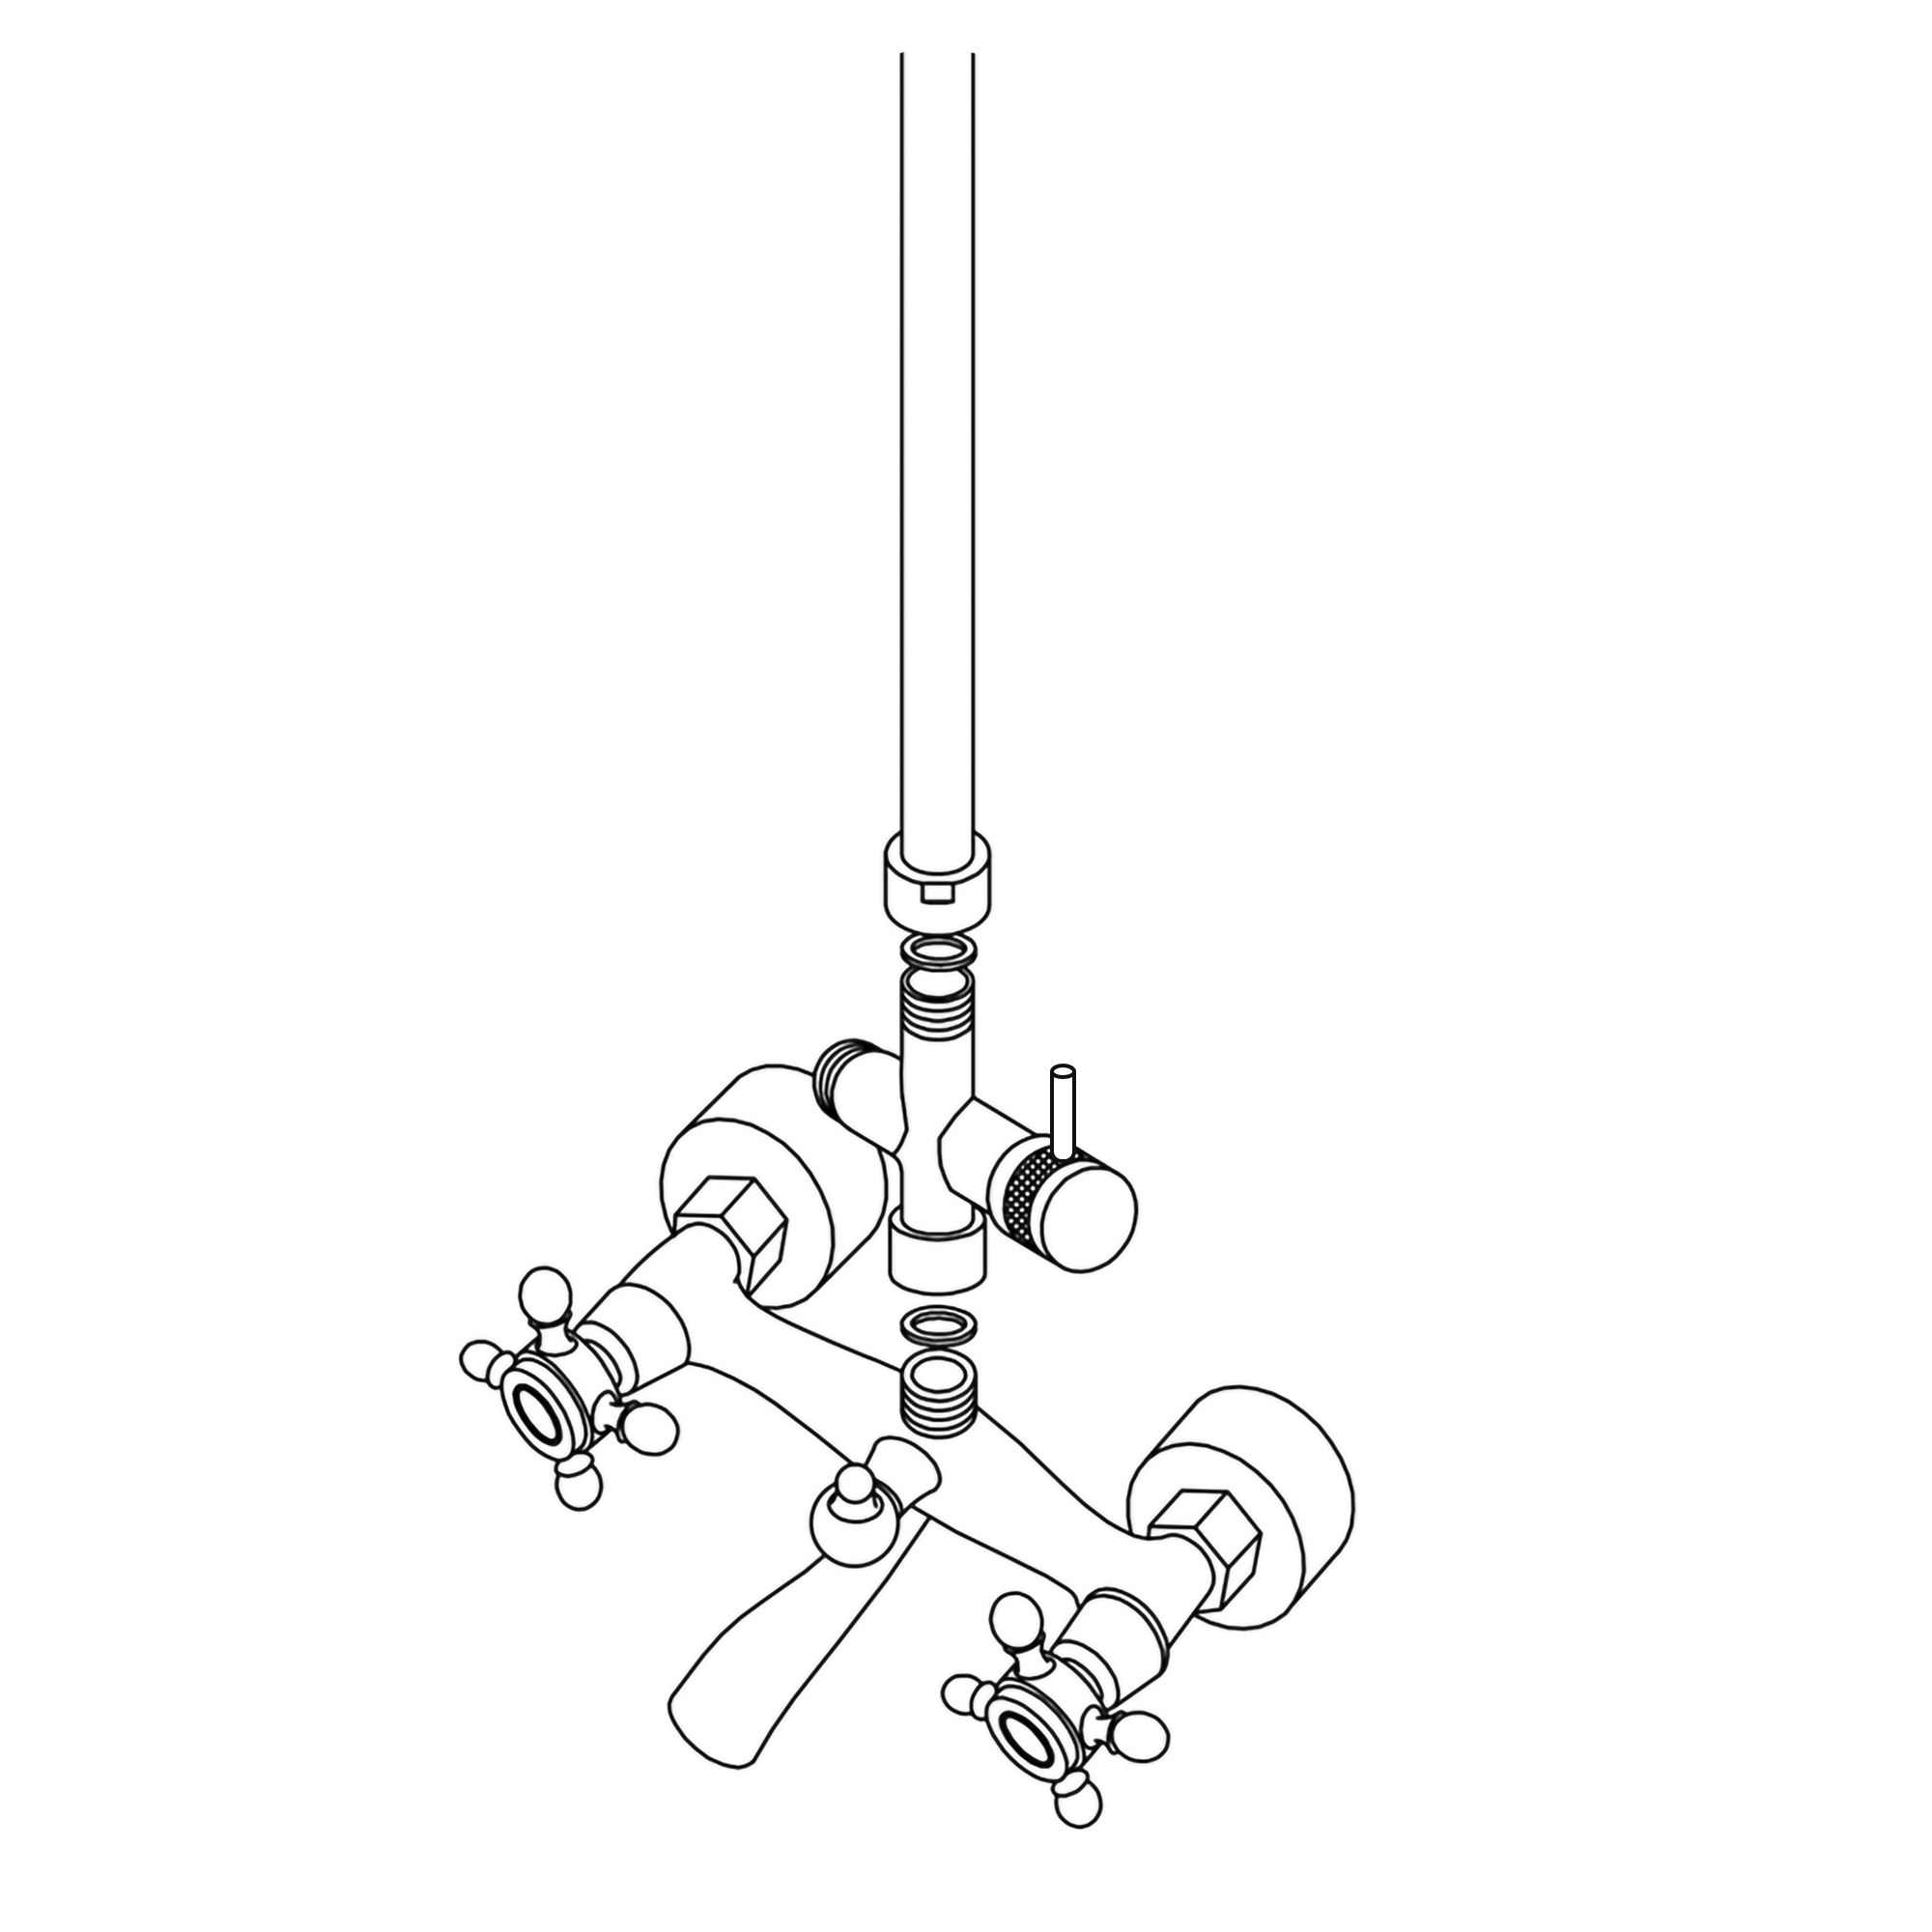
1. As specified in diagram, attach the shower base to the hot and cold water supply pipes in the wall.
2. Wrap the S-connectors with Teflon tape, and thread the connectors onto the supply pipes. Tighten with your adjustable wrench.
3. Use a level to verify the connectors are aligned properly. Adjust as necessary.
4. Thread the inner rings onto the S-connectors, keeping the threaded portion facing outward. Place the escutcheons on the inner rings with the horn mouth facing inward, and push them against the wall.
5. Attach the connecting nuts to the S-connector, and tighten.
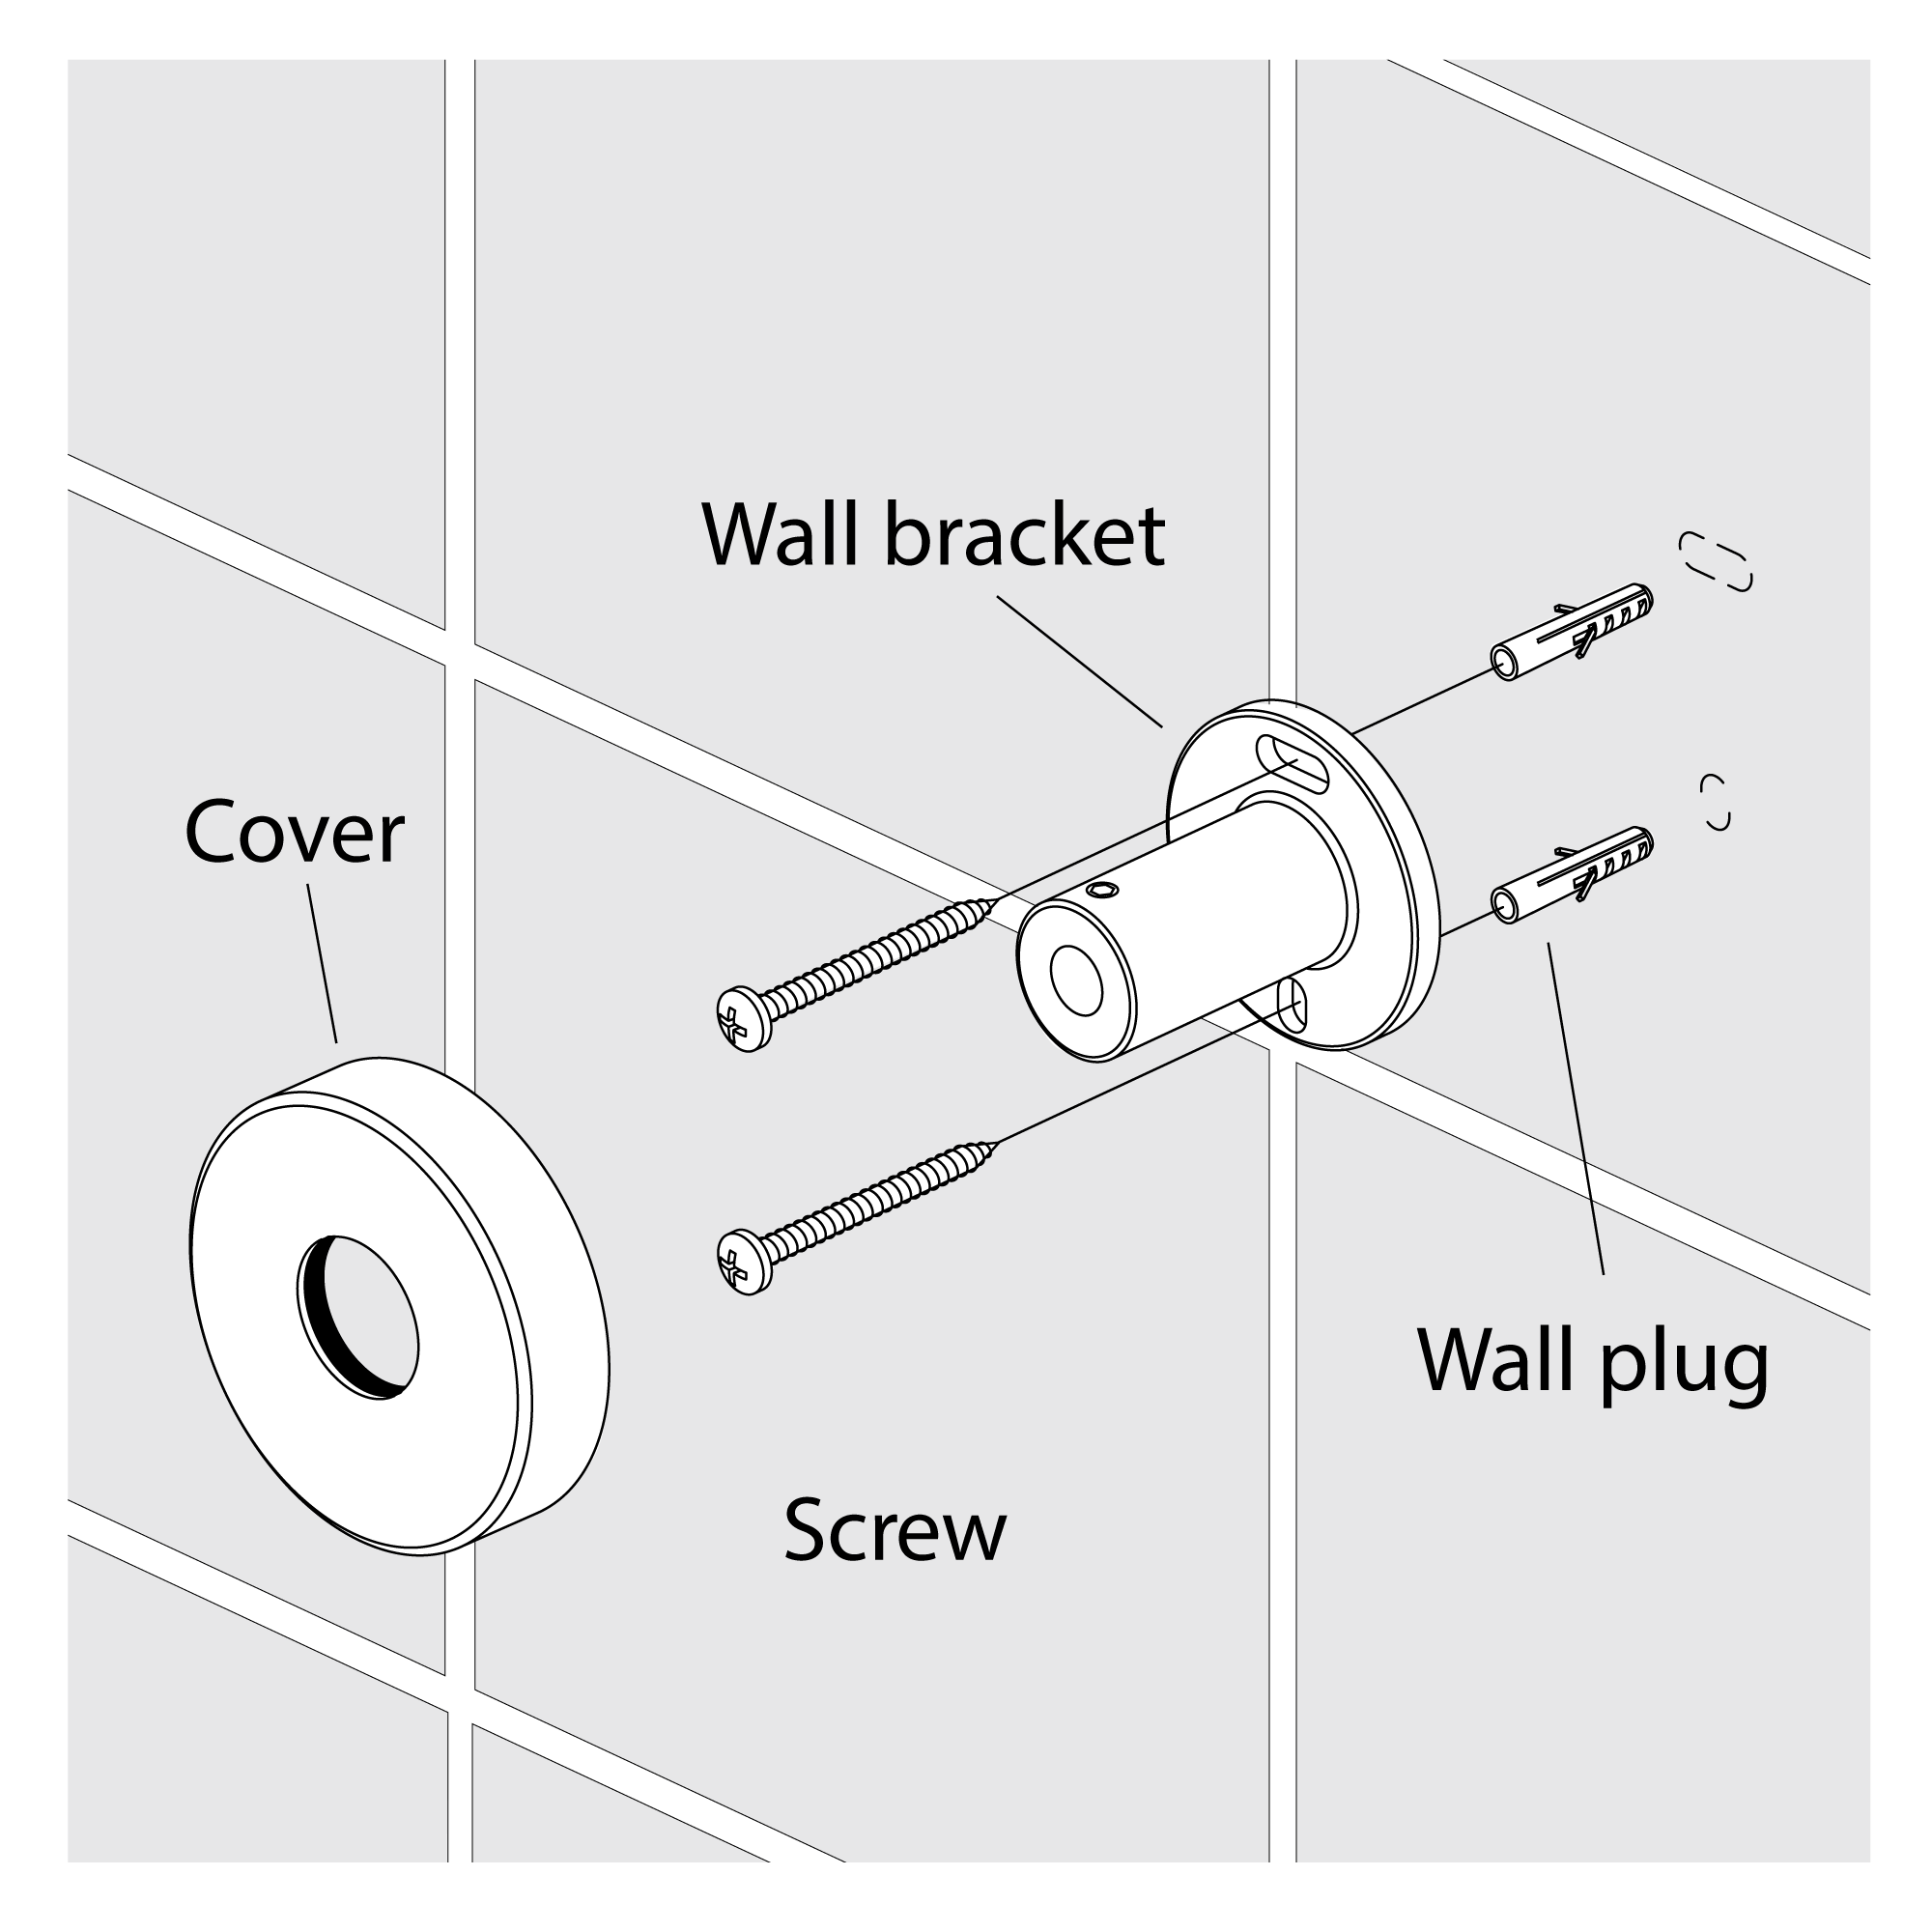
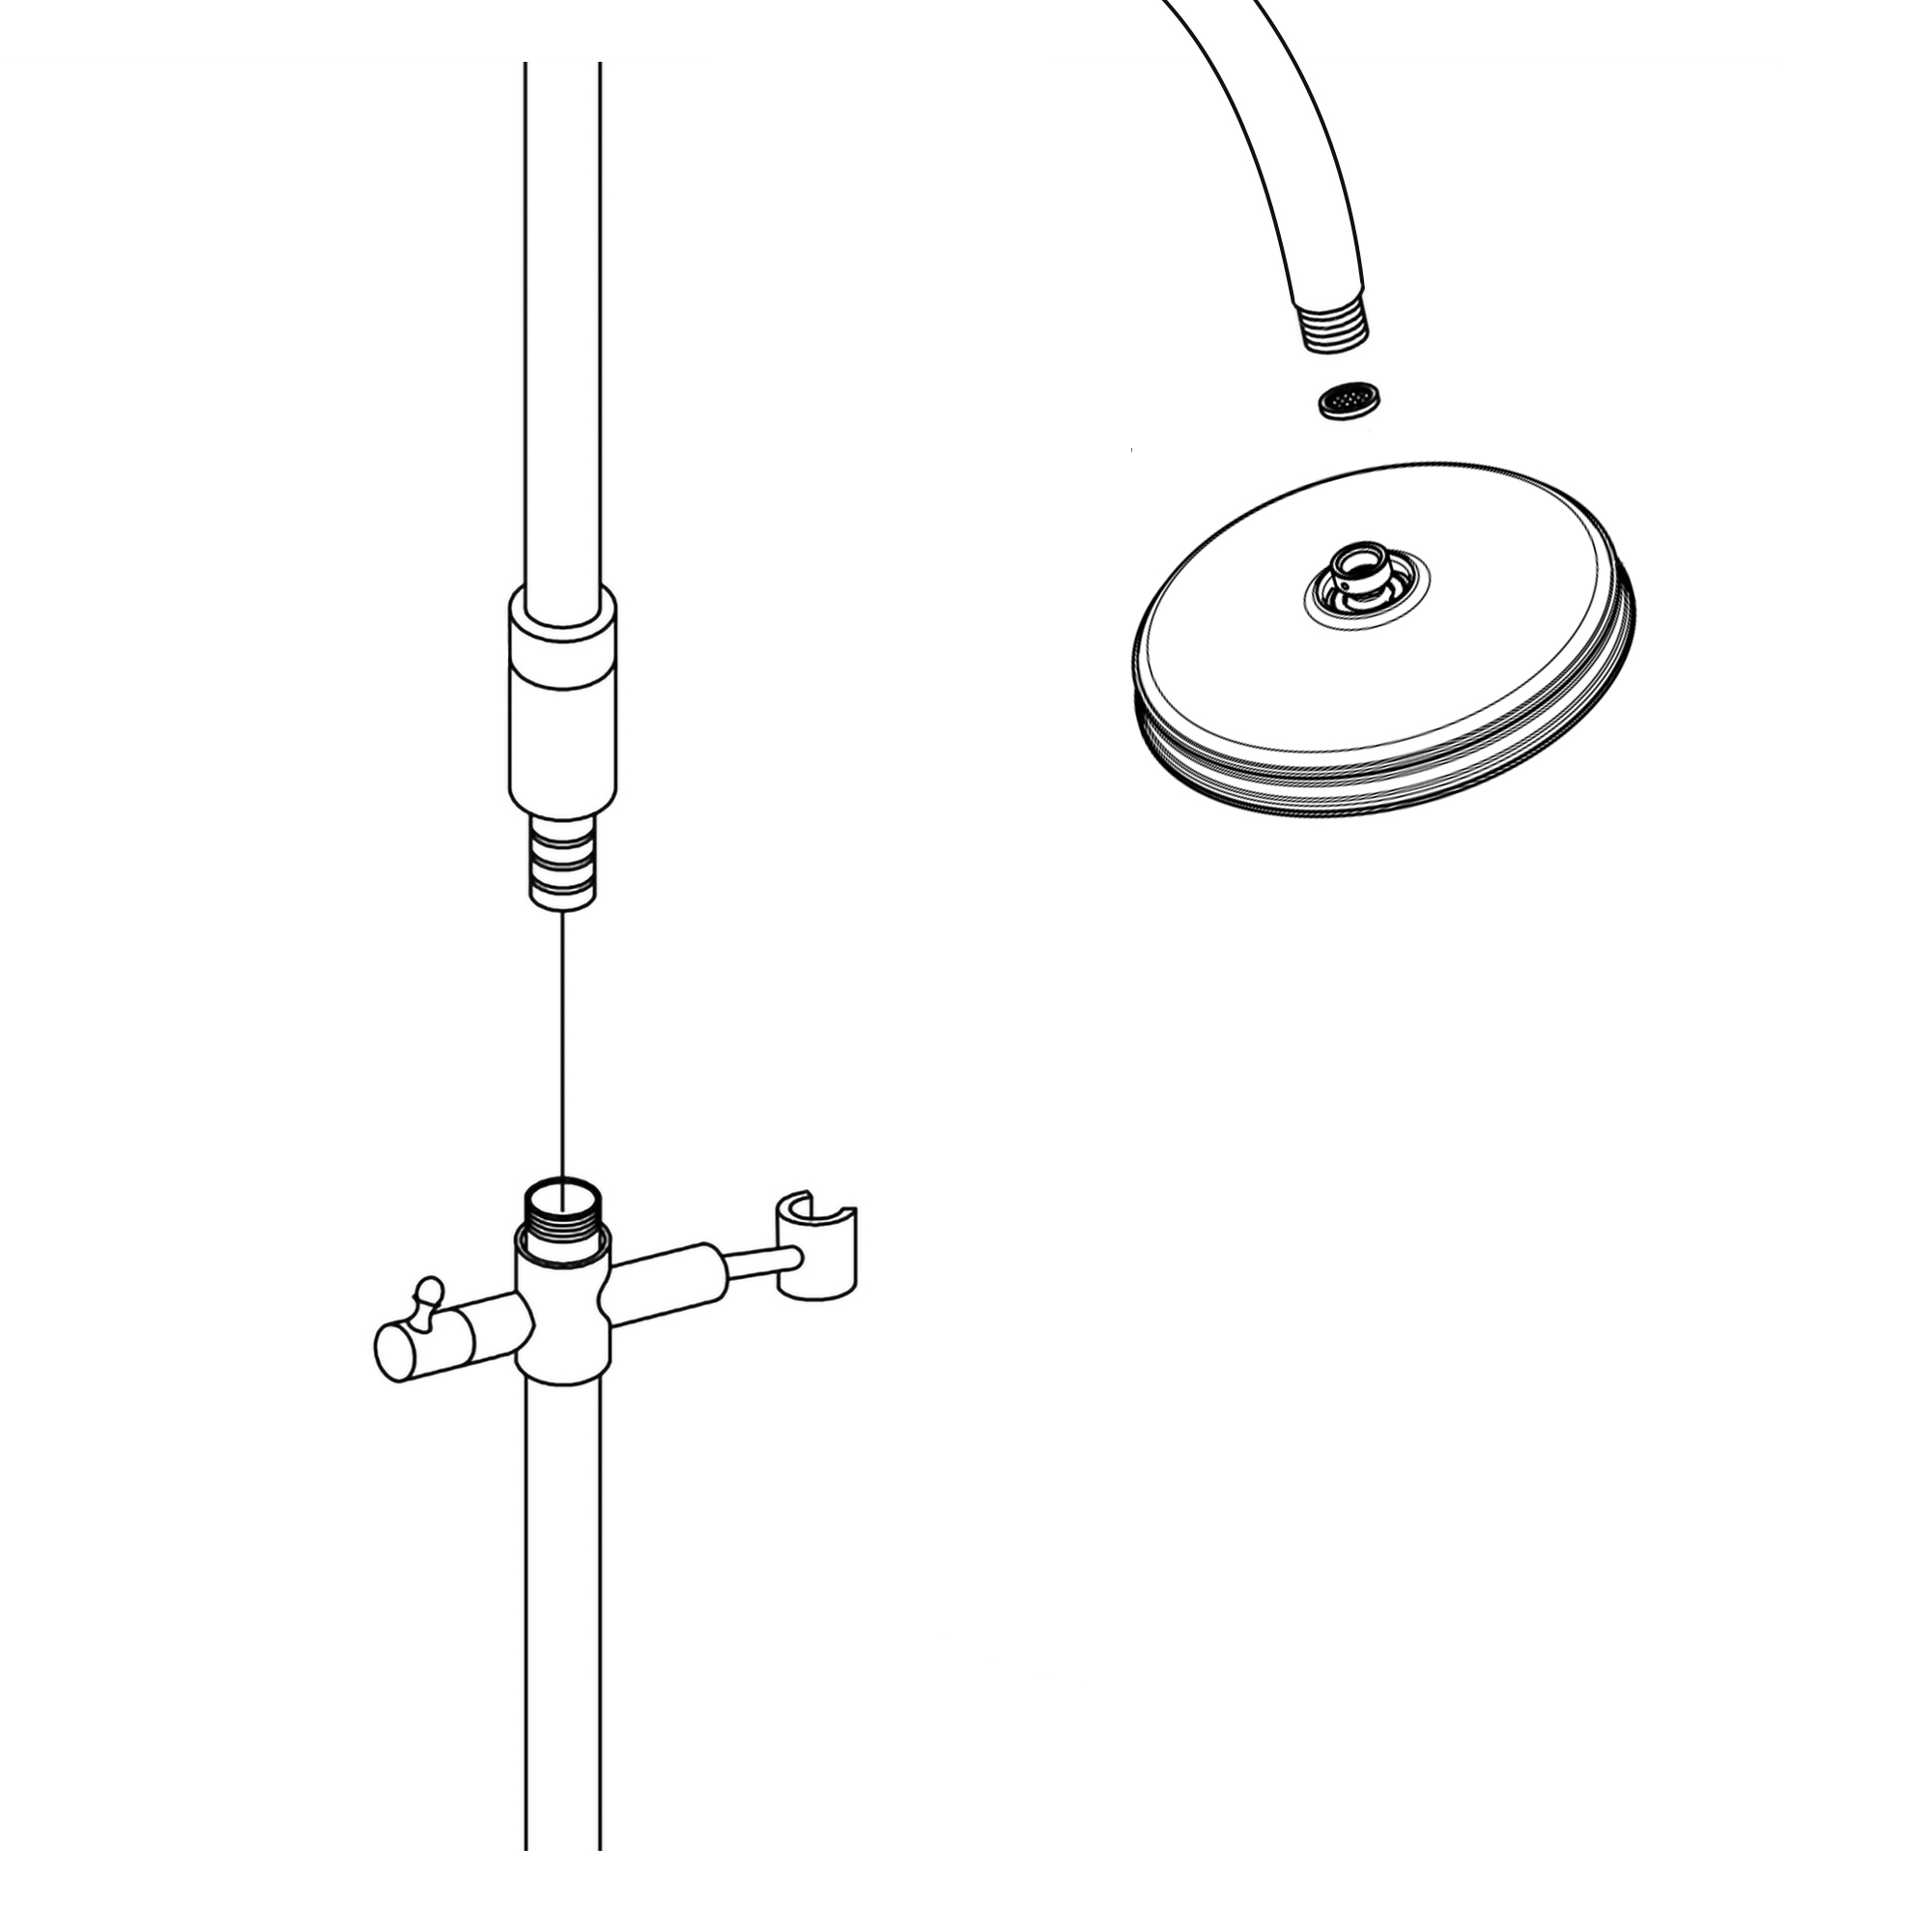
6. Attach the connecting rod to the middle shower riser. Hold the mounting bracket in place in the desired mounting location.
7. Attach the middle shower riser to the shower body. Use a level to very that the shower riser is in the proper location. When all pieces are properly aligned, mark the location of the mounting bracket on the wall.
8. Remove the middle shower riser, and drill two holes at the locations marked in the previous step. Insert the wall anchors. Attach the mounting bracket to the wall with mounting screws. Attach the escutcheon to the mounting bracket.
9. Attach the shower support and the middle shower riser. Connect the bottom of the riser to the shower body and the top of the riser to the mounting bracket. Tighten the screw to secure.
10. Thread the shower head onto the shower support. Tighten the locking nut and showerhead to secure.
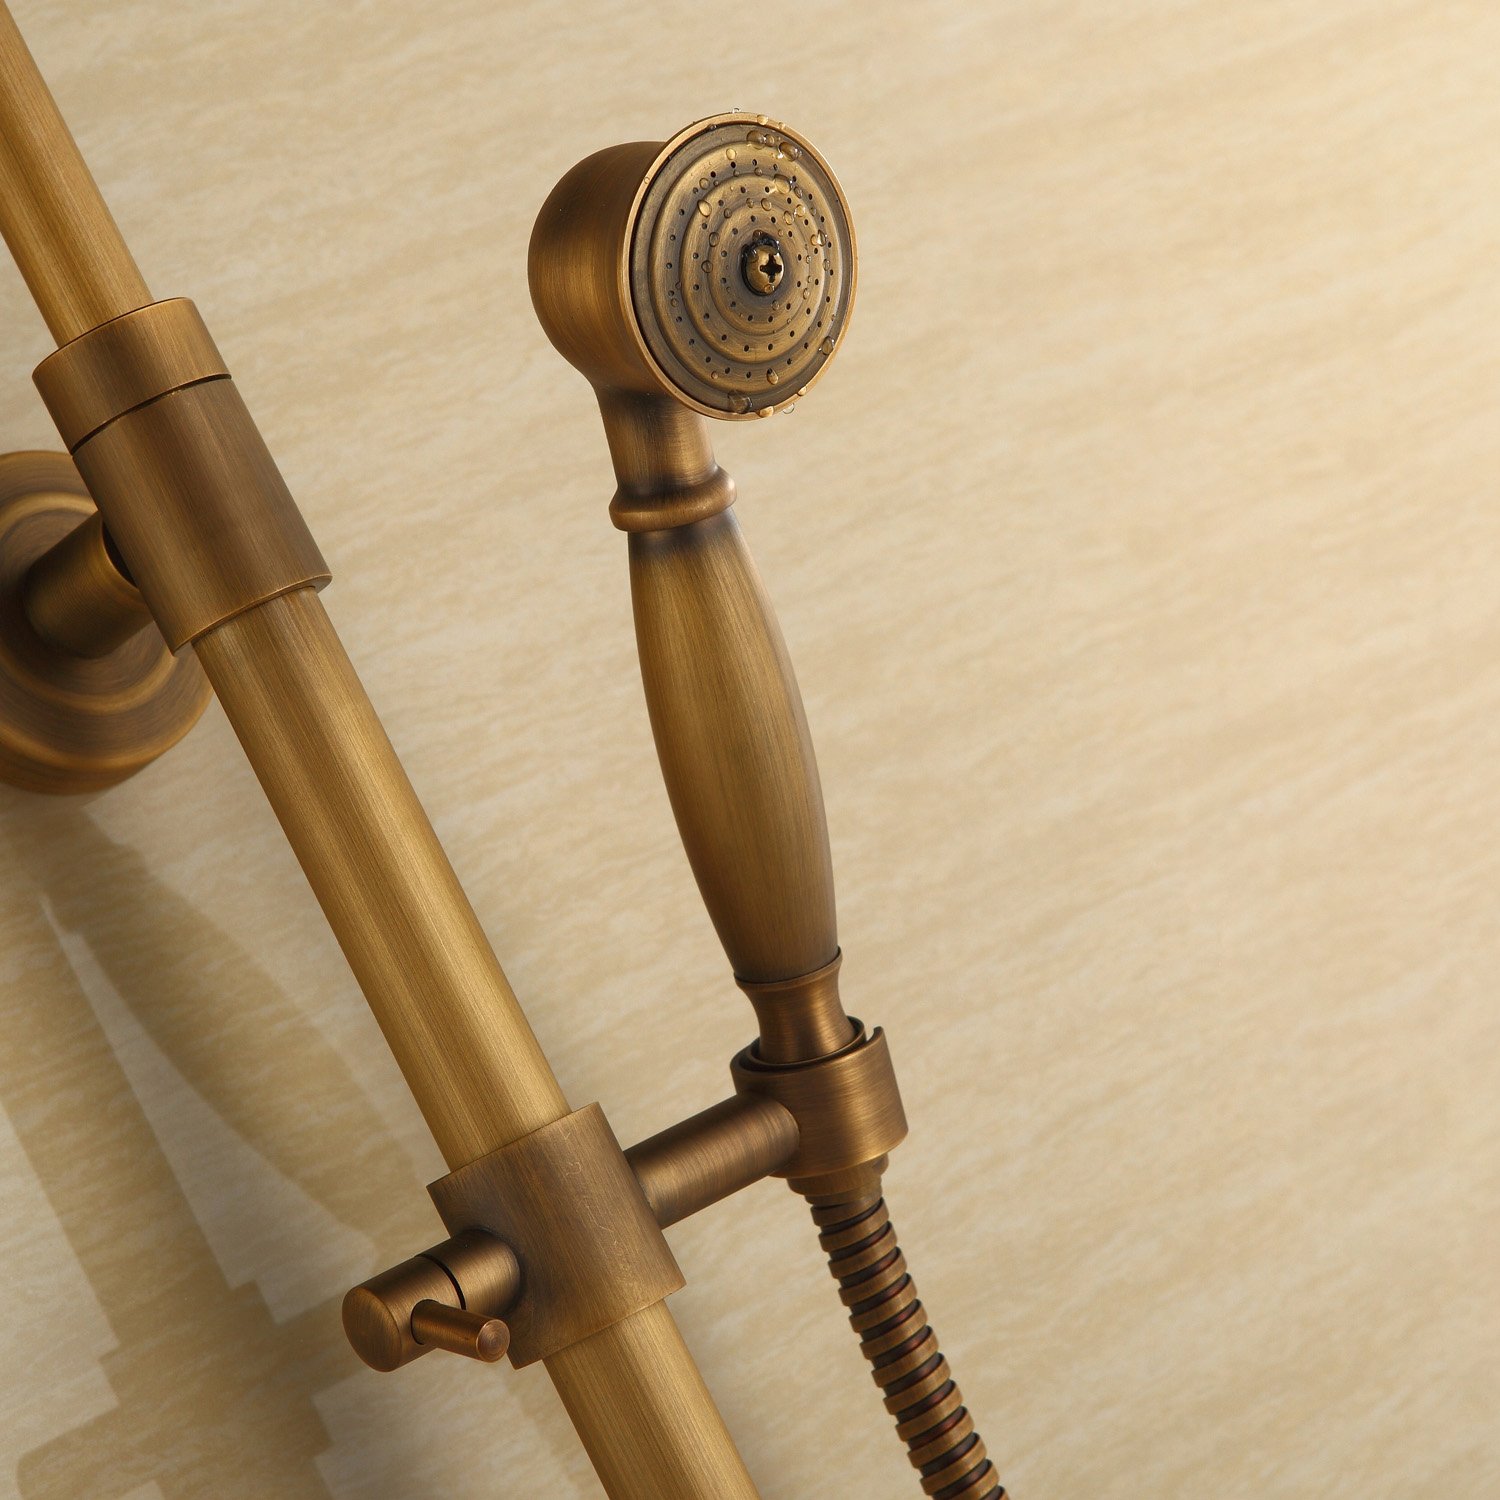
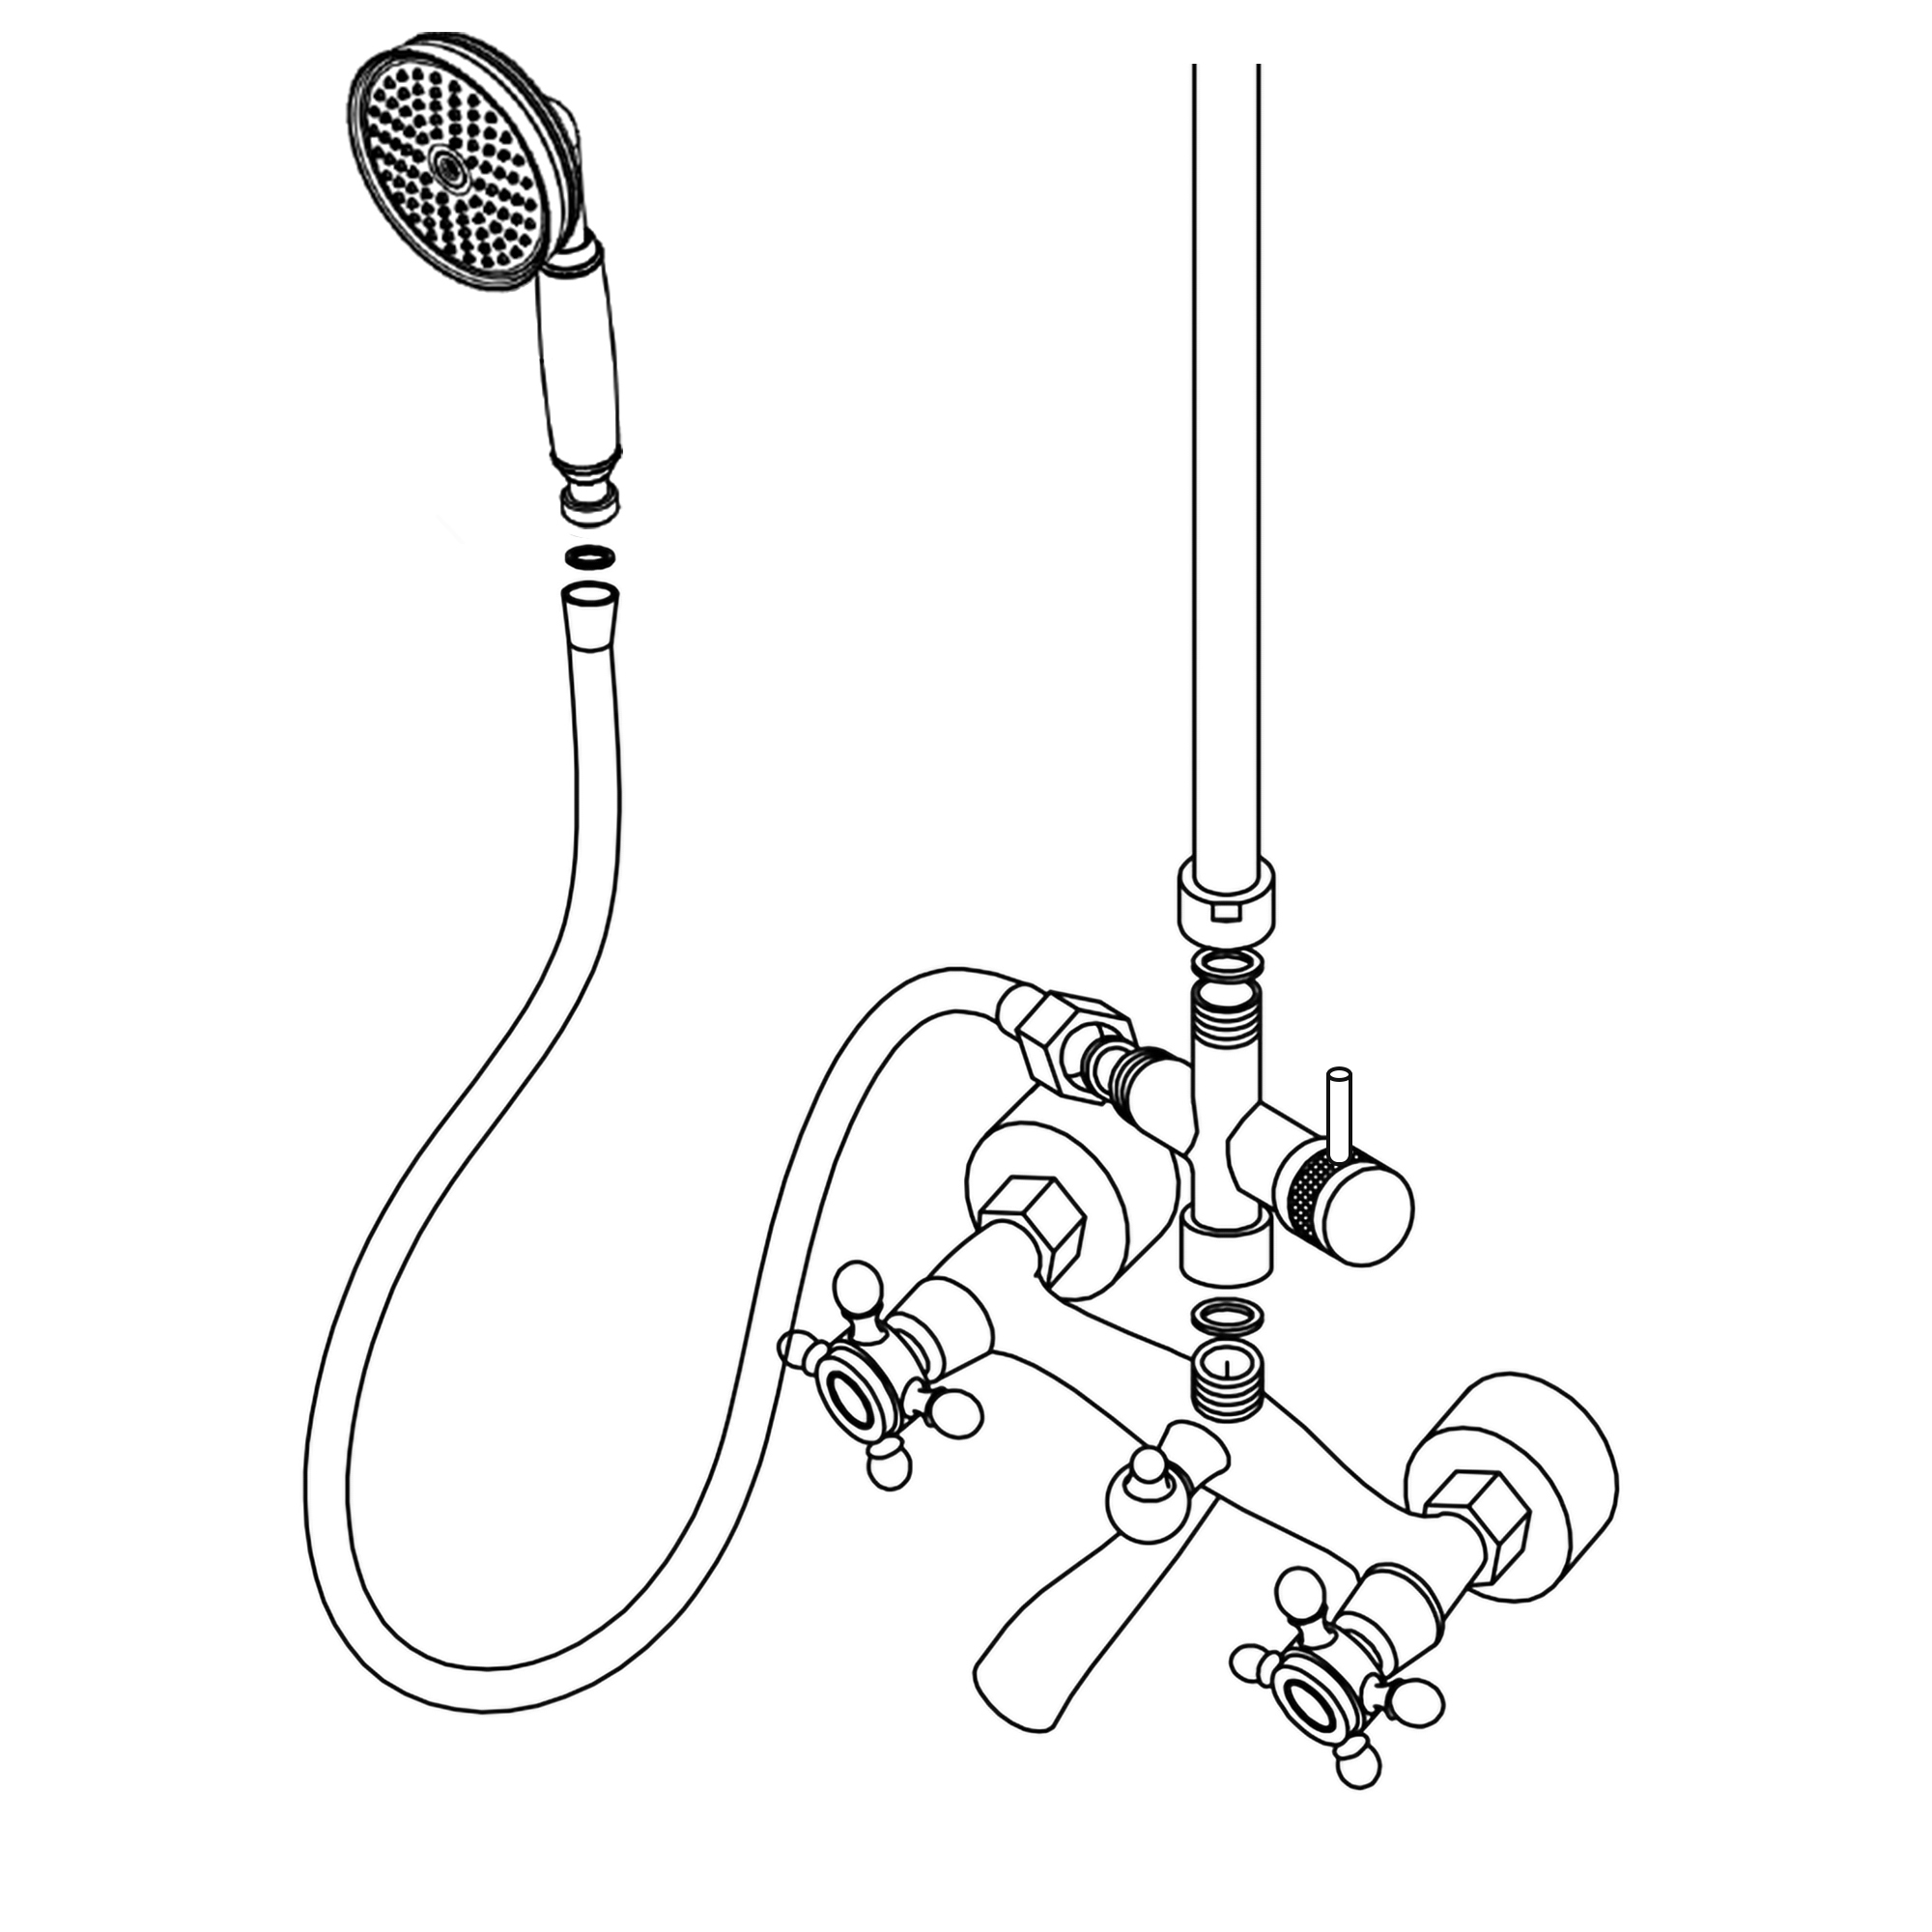
11. Connect the hand shower and shower hose.
Shower head - Make sure there is a rubber washer in place in the shower head and screw onto the riser arm.
Handshower - Place one of the rubber washer into the cone end of the hose and screw to the handset.
Valve - Place the second rubber washer into the nut end of the hose and attach it to the valve outlet.
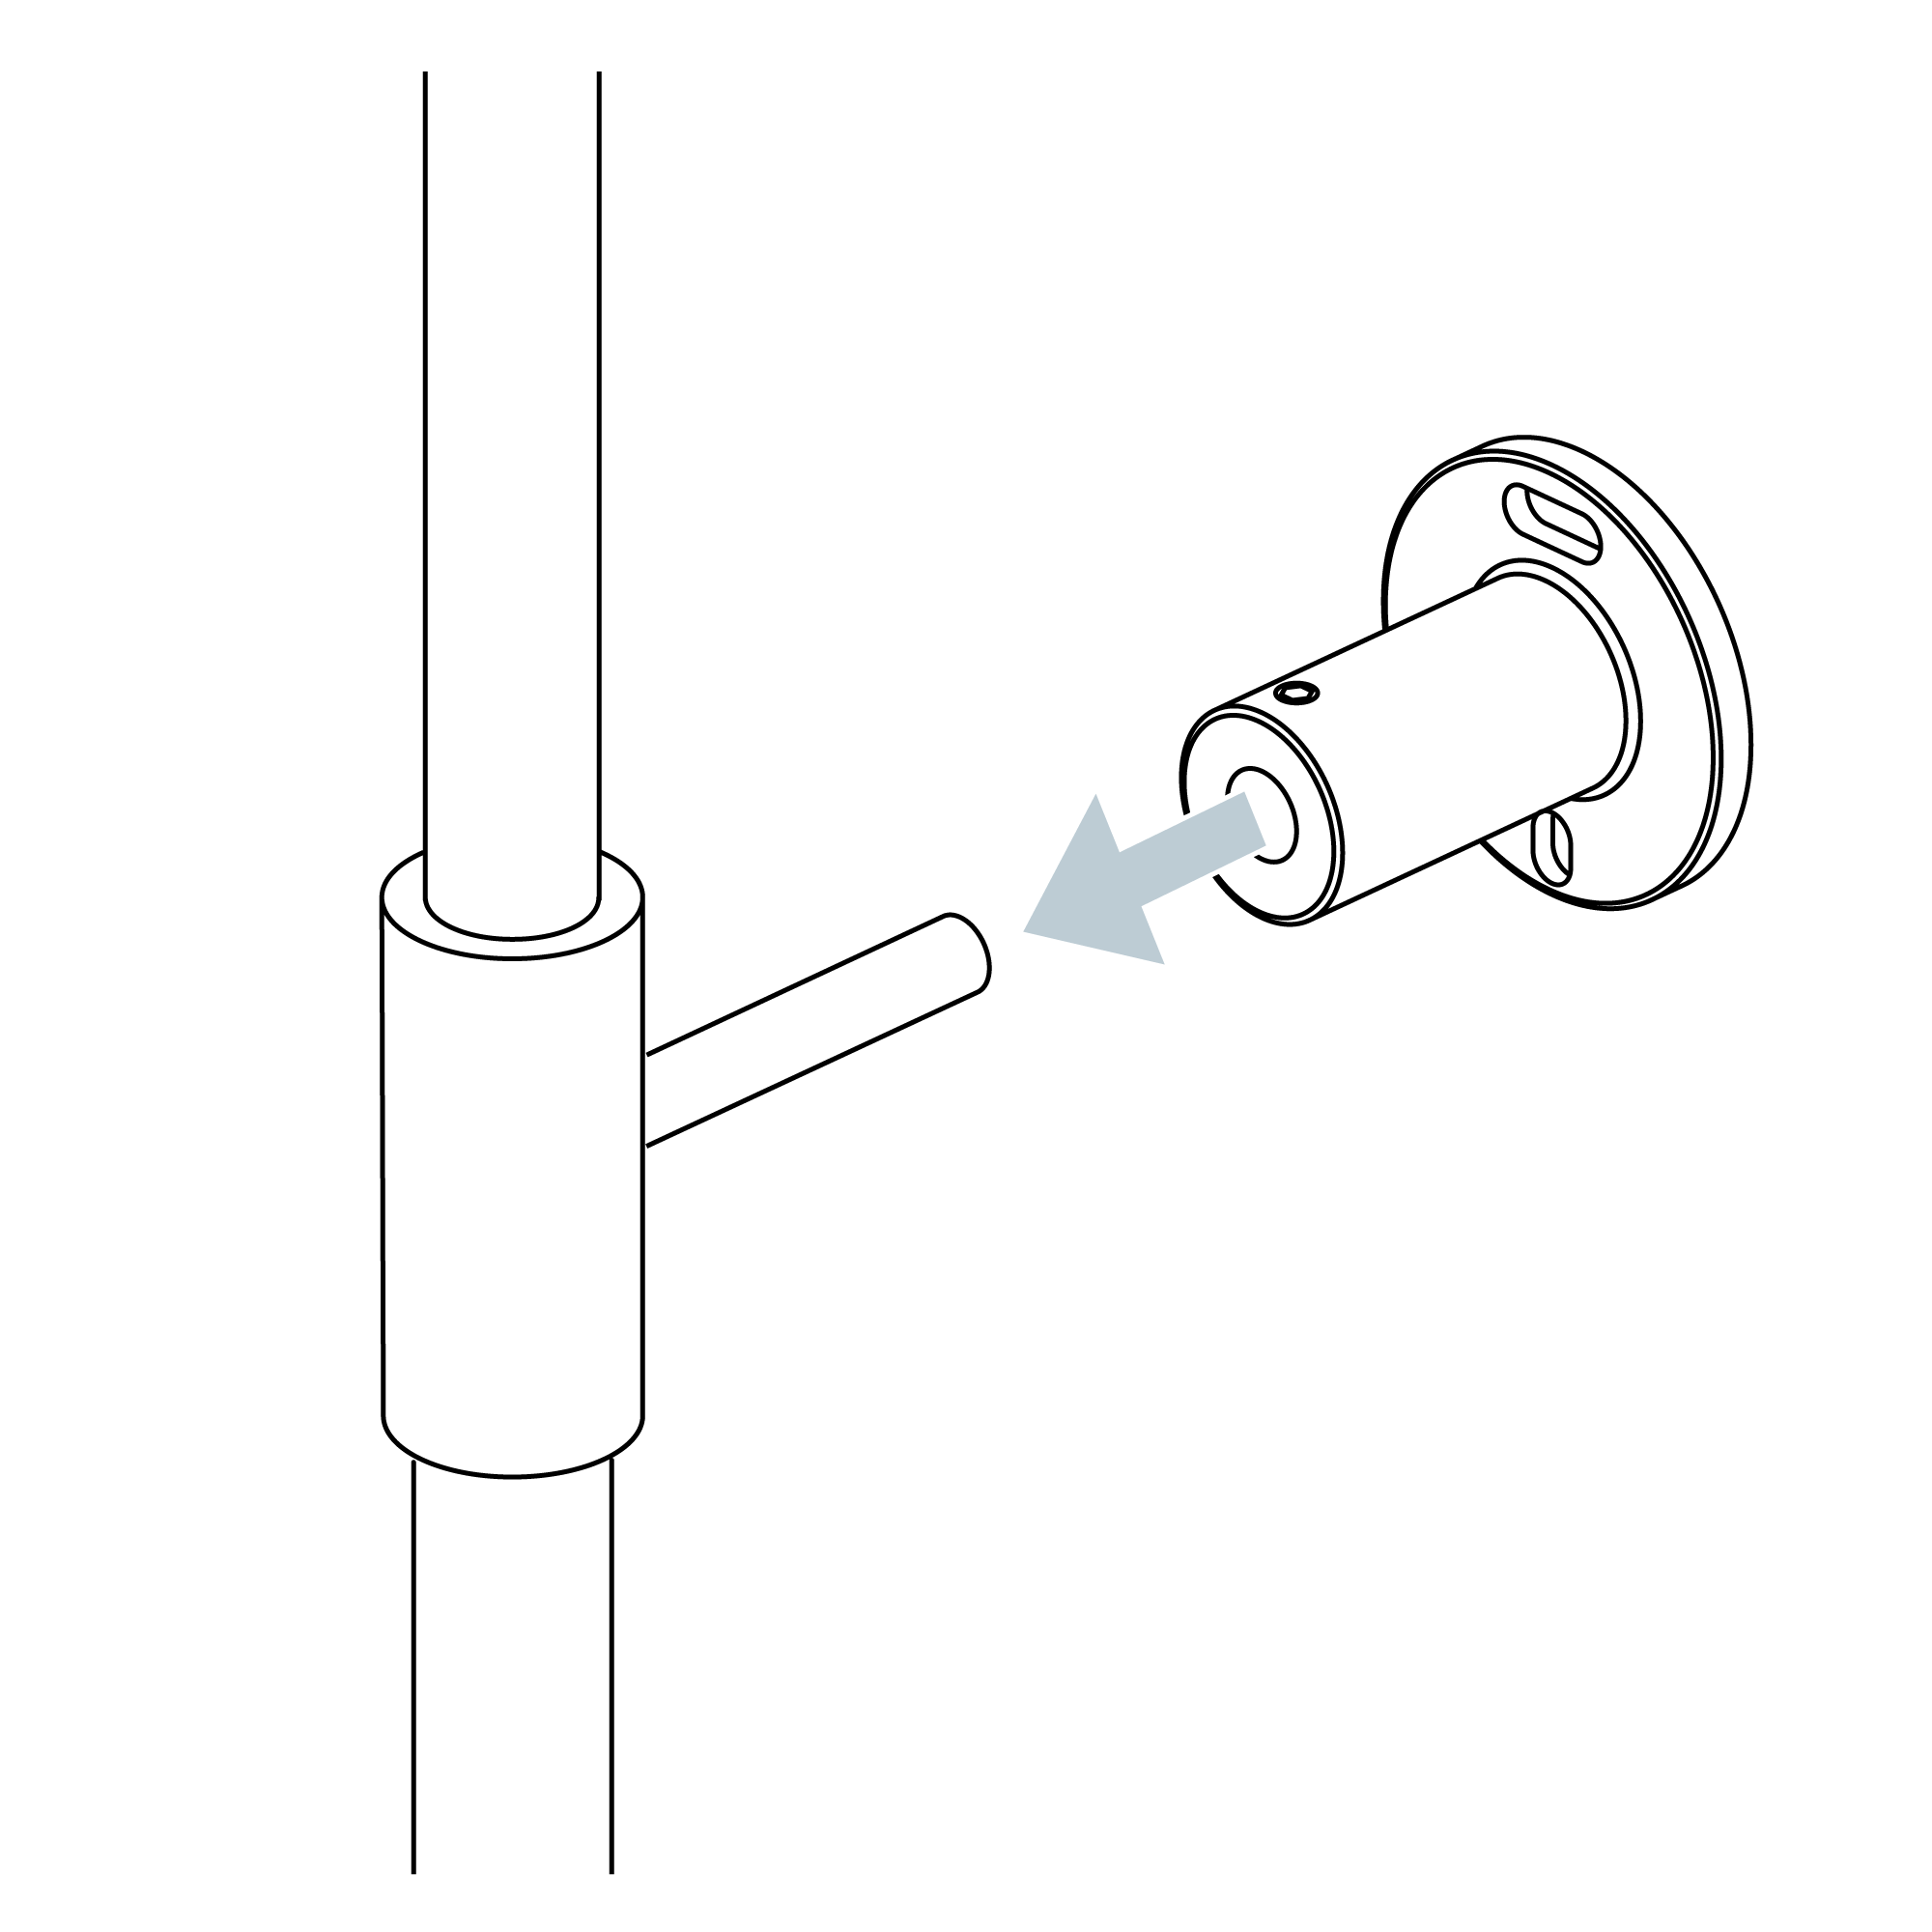
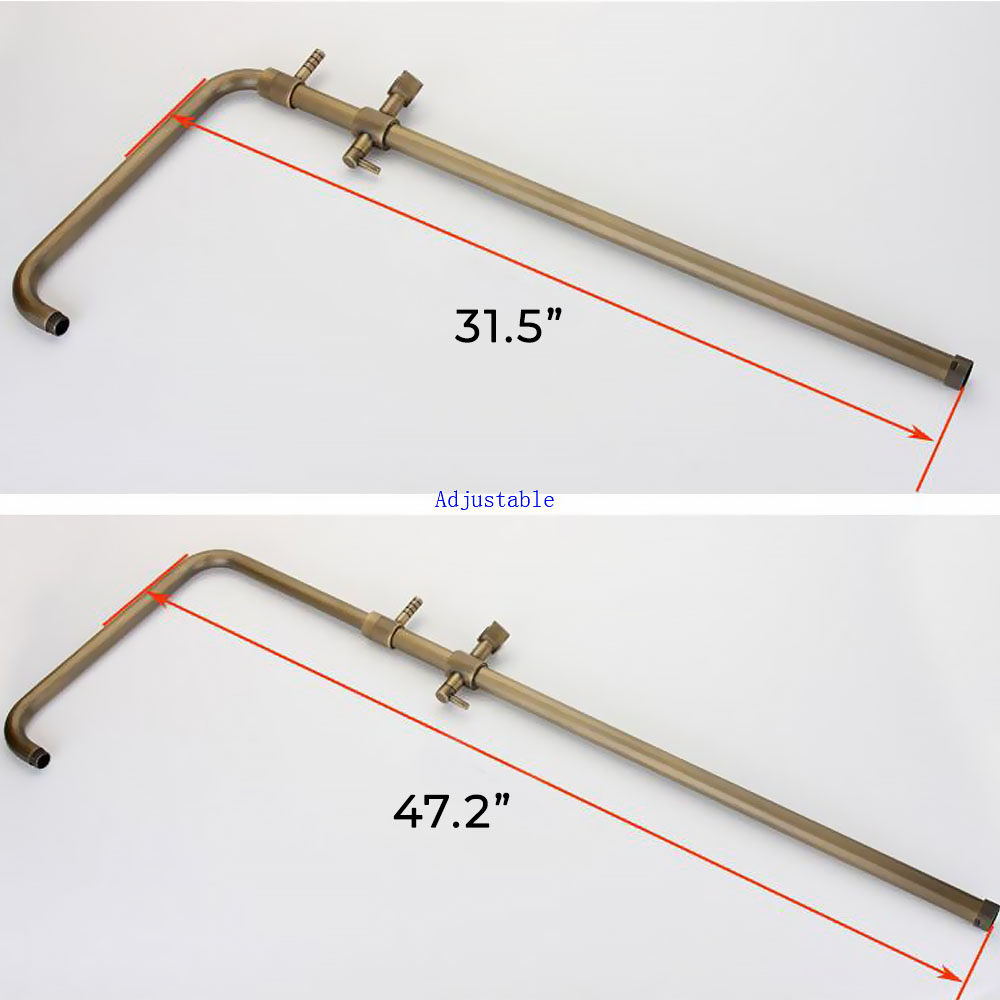
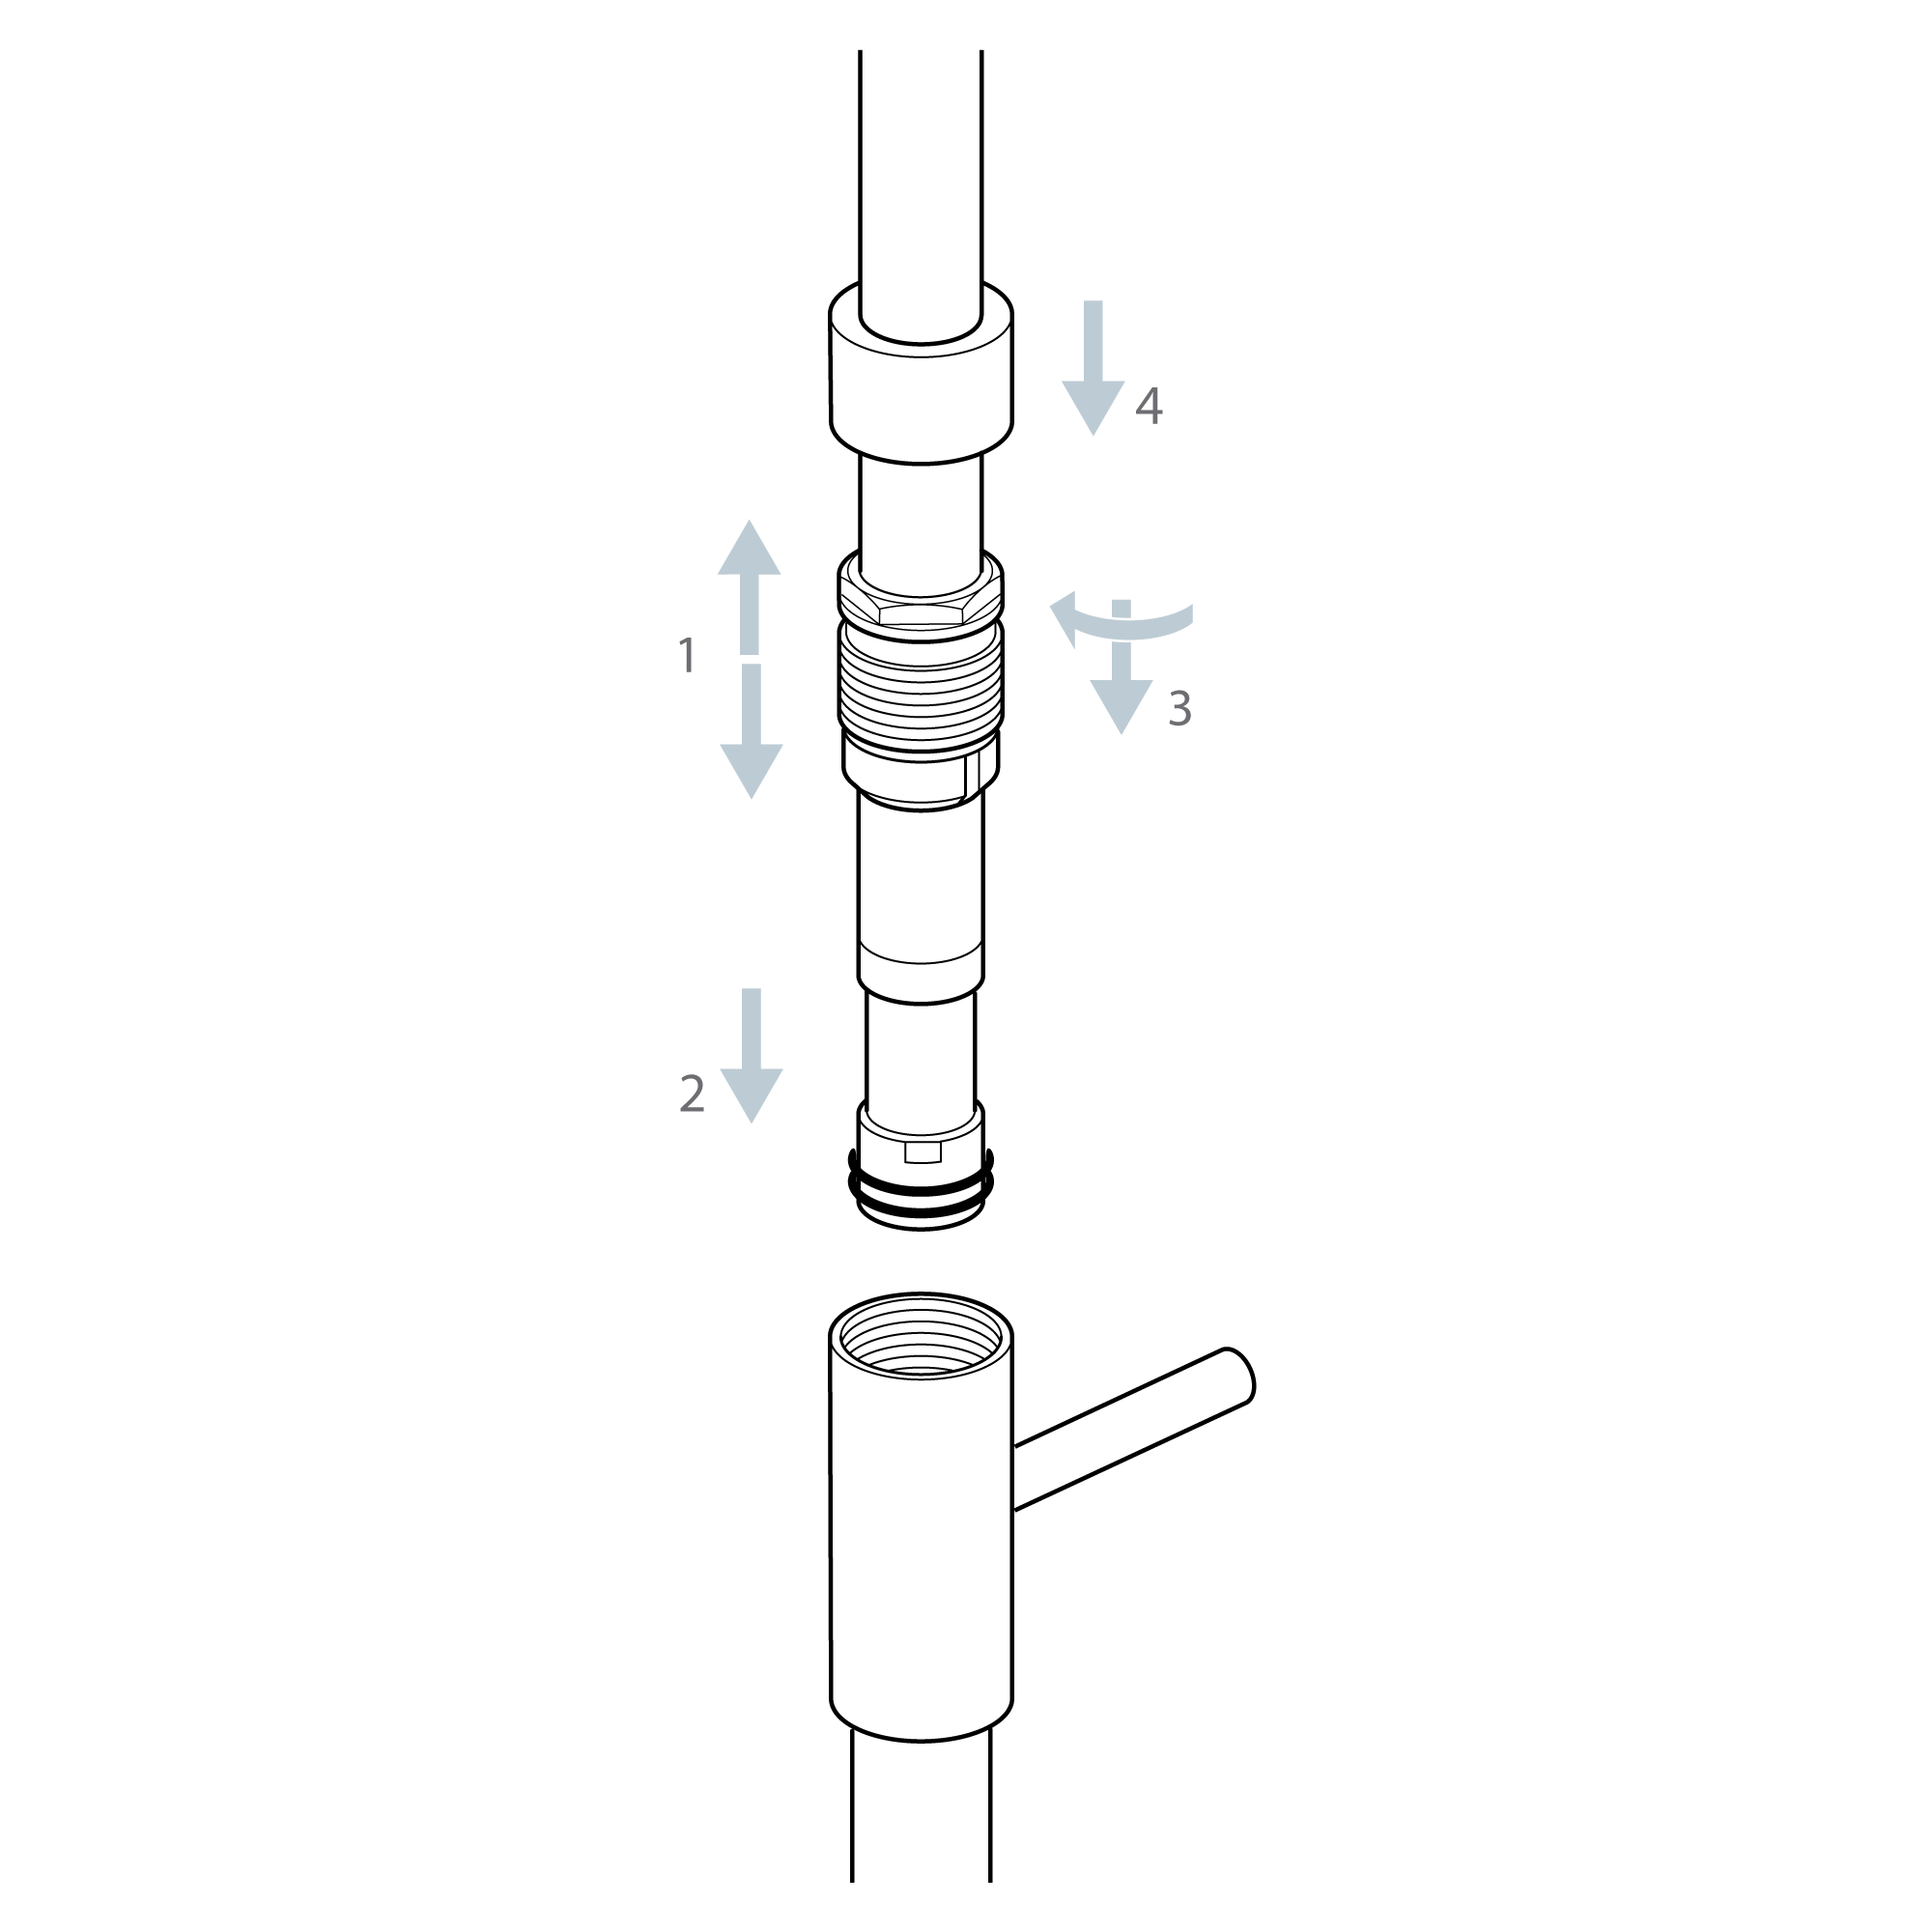
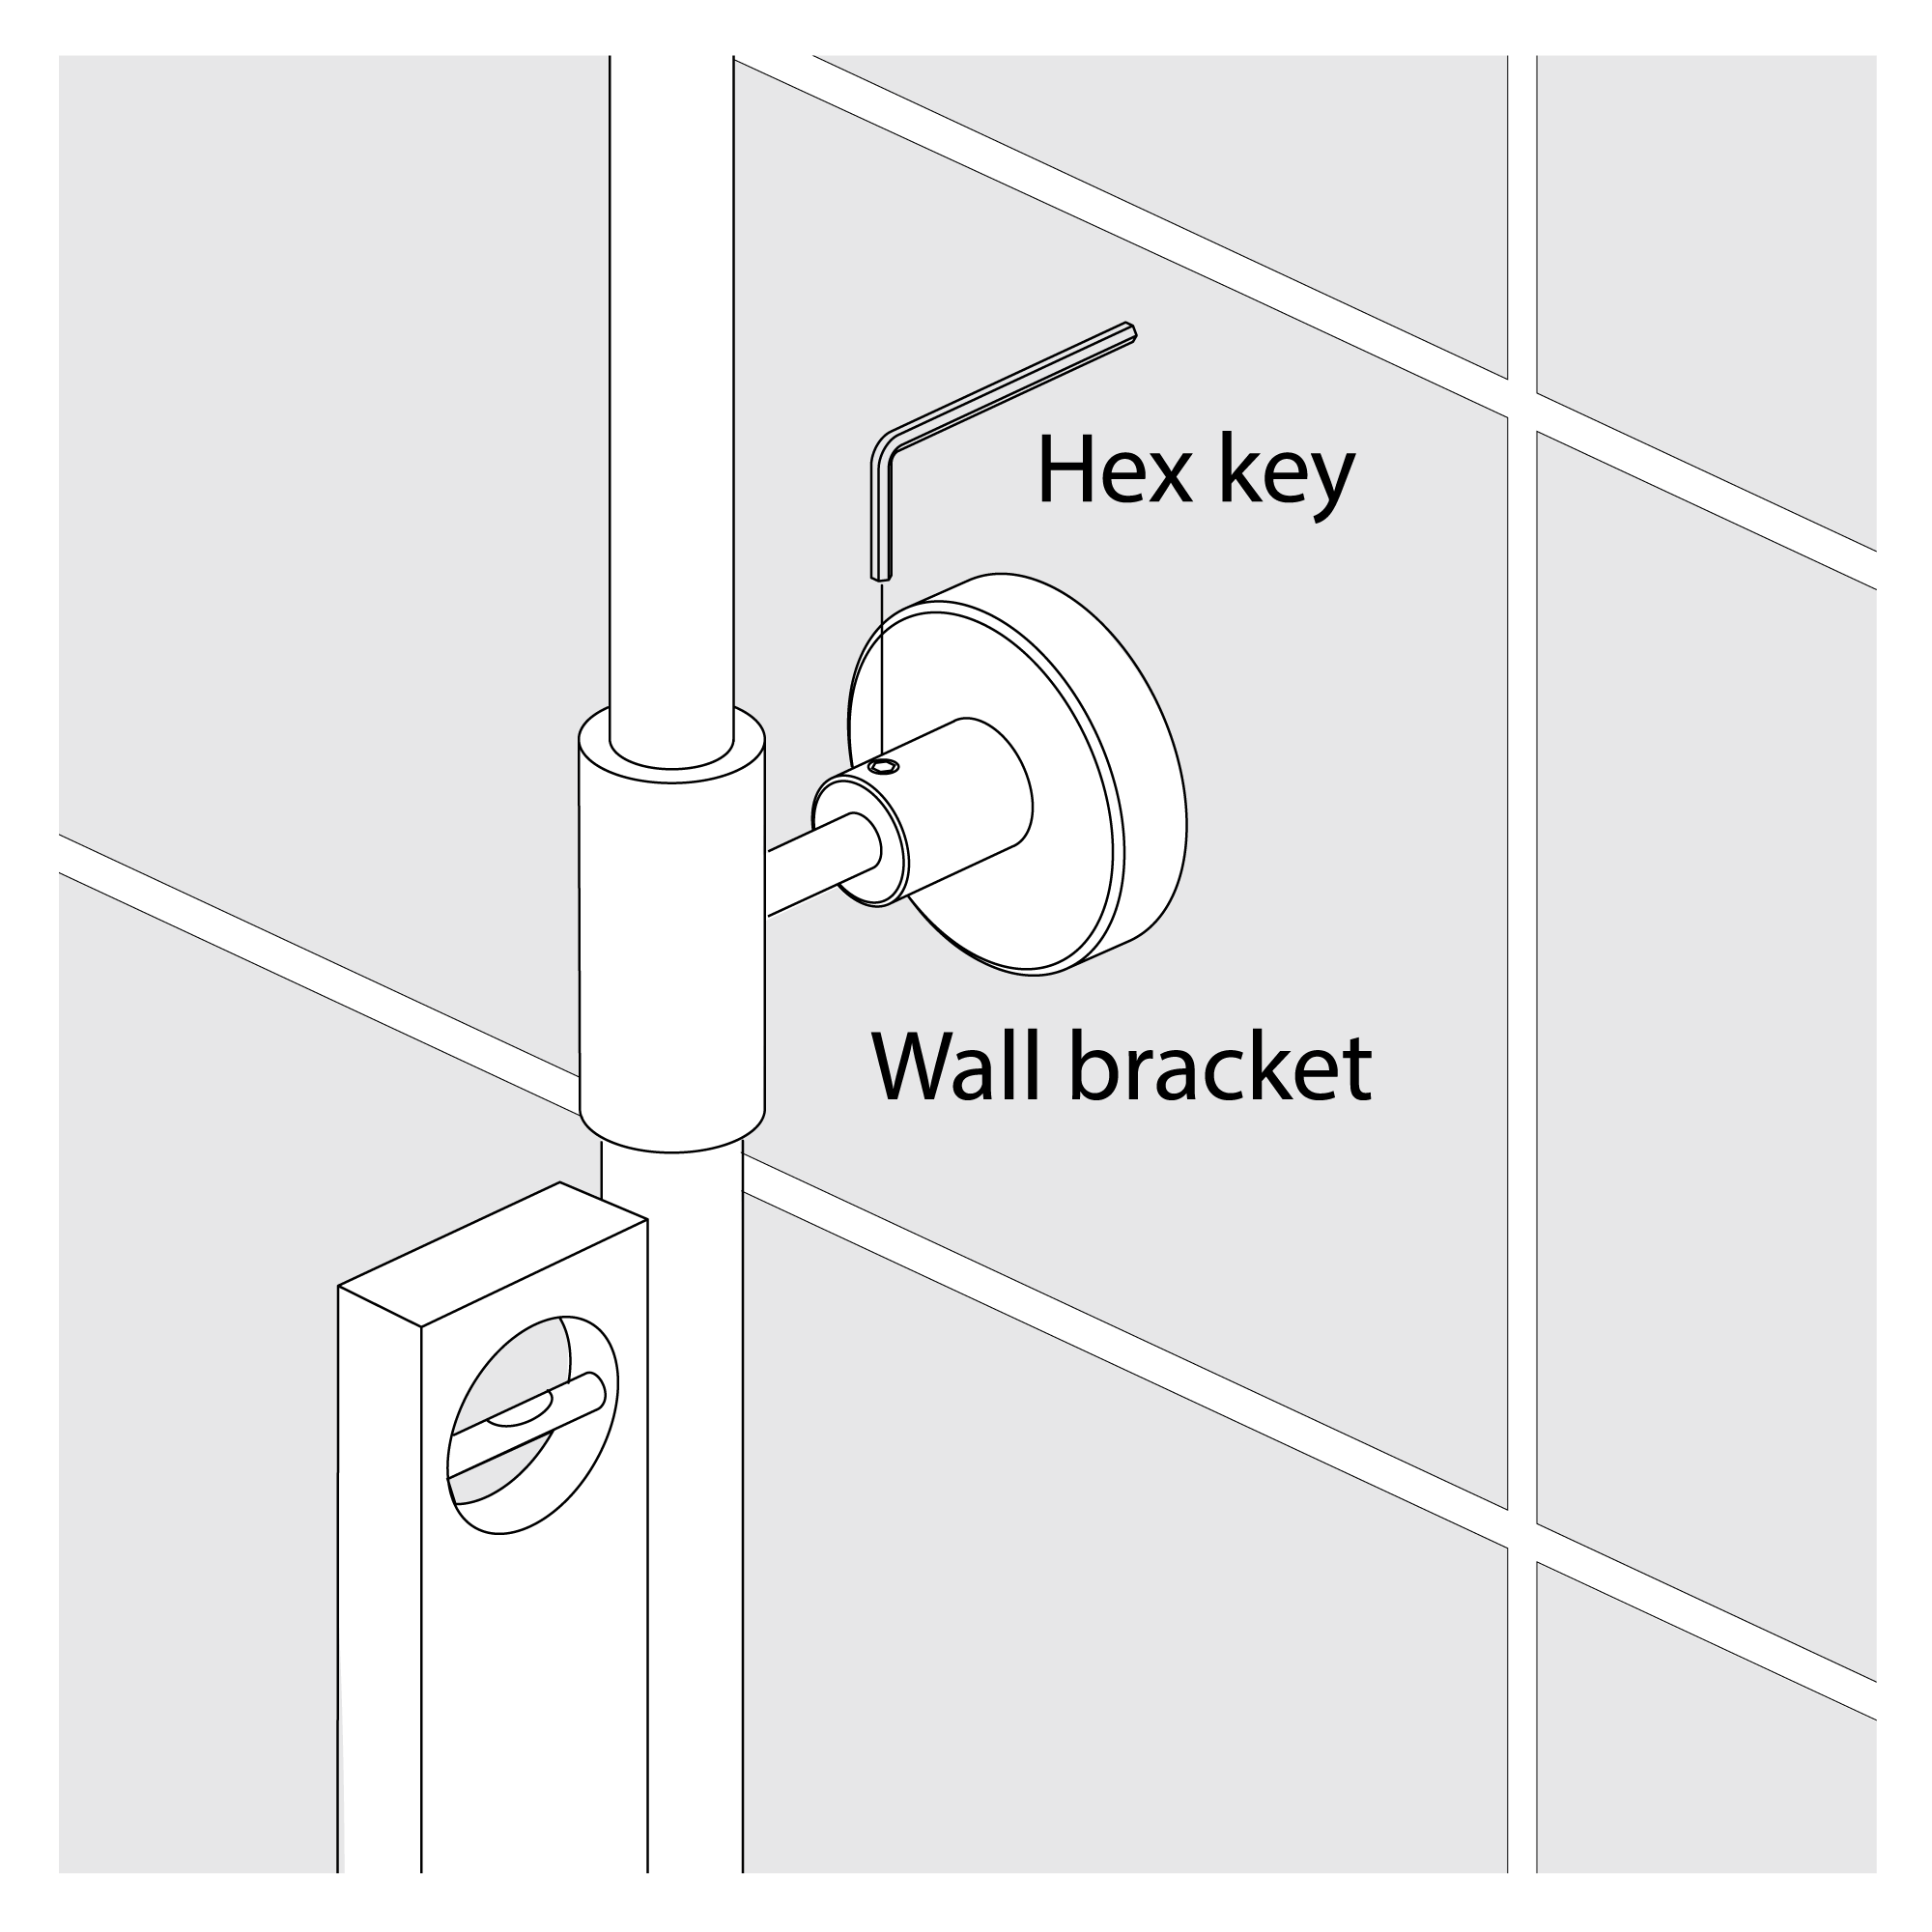
Riser rail - You can adjust the height of the riser to suit your requirements.
Carefully push the riser arm into the riser until you reach the required position. Slide the securing nut down and into the riser, tighten the nut.
Pull the cover down over the nut.
Remove the nut and seal from the top of the valve and slide onto the riser rail. Push the riser onto the connection on the top of the valve, slide down the seal and tighten the nut.
Slide the wall bracket onto the riser bracket.
Before installing your new mixer, flush through the pipe work to ensure removal of debris, turn off the water supply.
Note: Make sure that the valve is positioned to allow room for the riser rail to be fitted later.
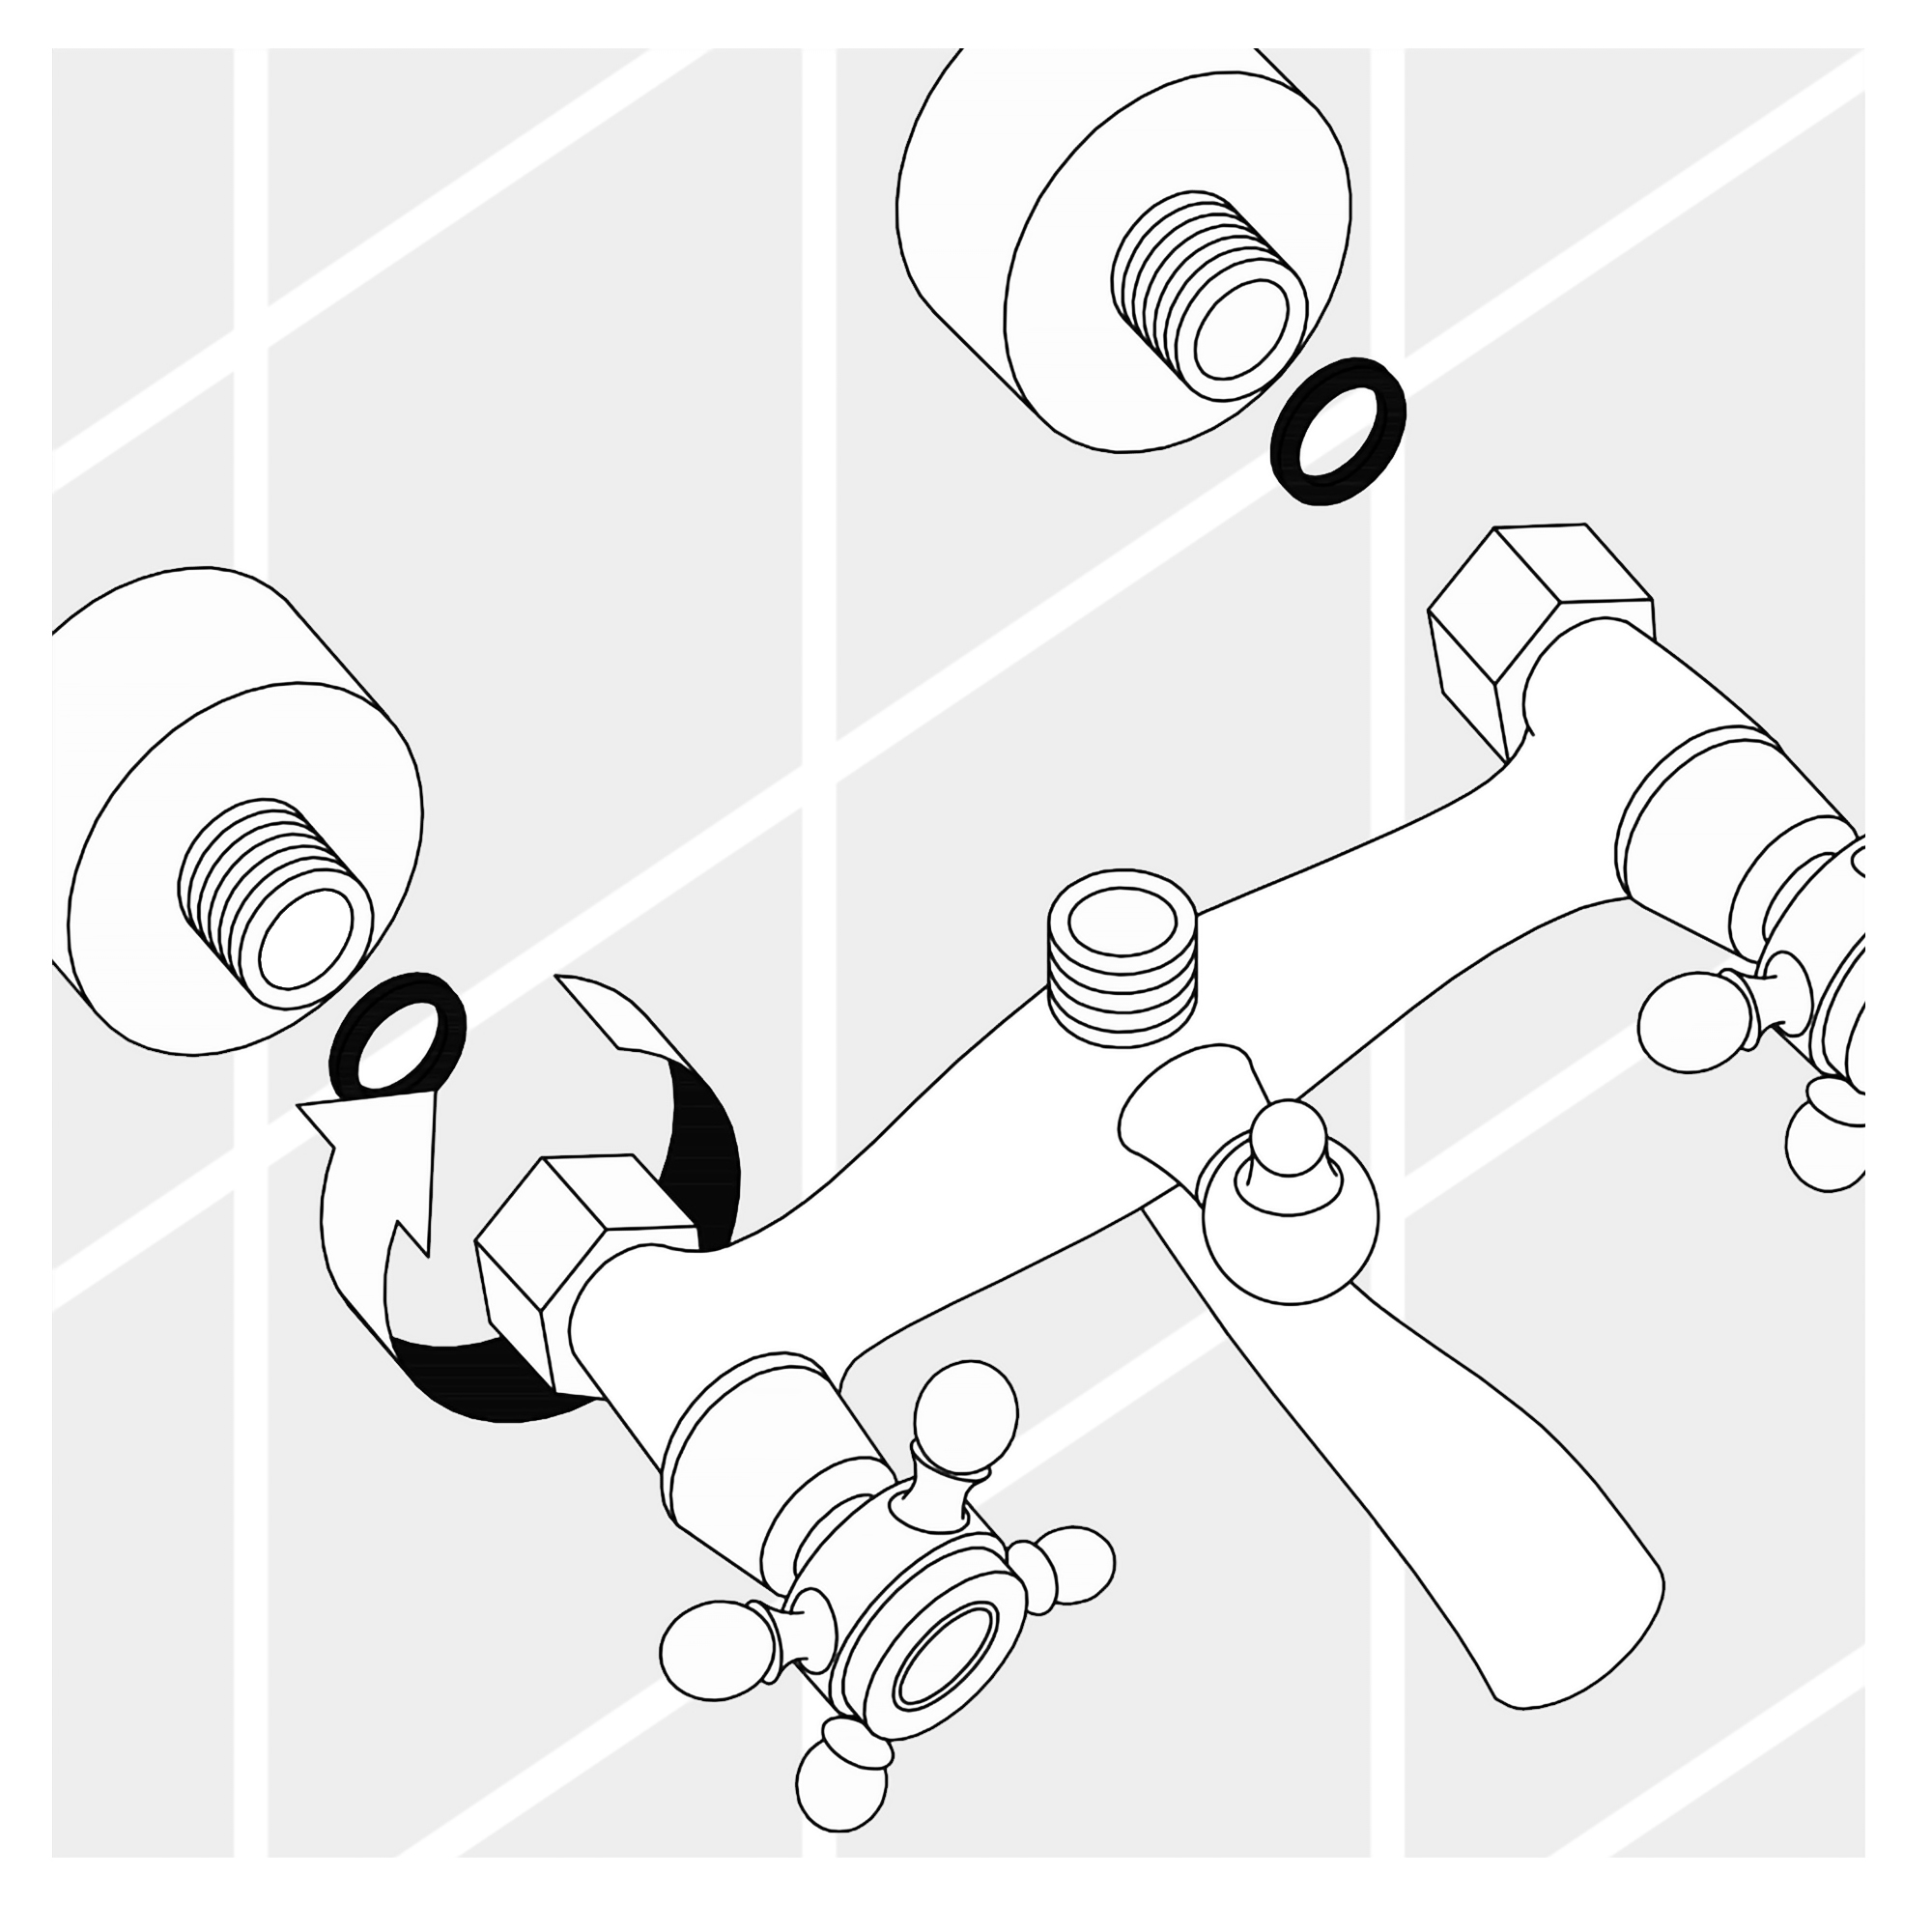
Prepare the wall with 2 flush 1/2” connectors. Connect the water supply to the inlet pipes. The hot water should be connected to the left hand pipe.
Using PTFE tape screw on the 2 offset connectors followed by the covers.
Place a rubber filter/washer in each of the locking nuts on the valve and screw onto the connectors, some adjustment can be made to the offset connectors to align the centers and level up the valve.
Note: The valve must be connected to rigid pipework for support.
|
|

|
|
|
|
|
|
shower
|
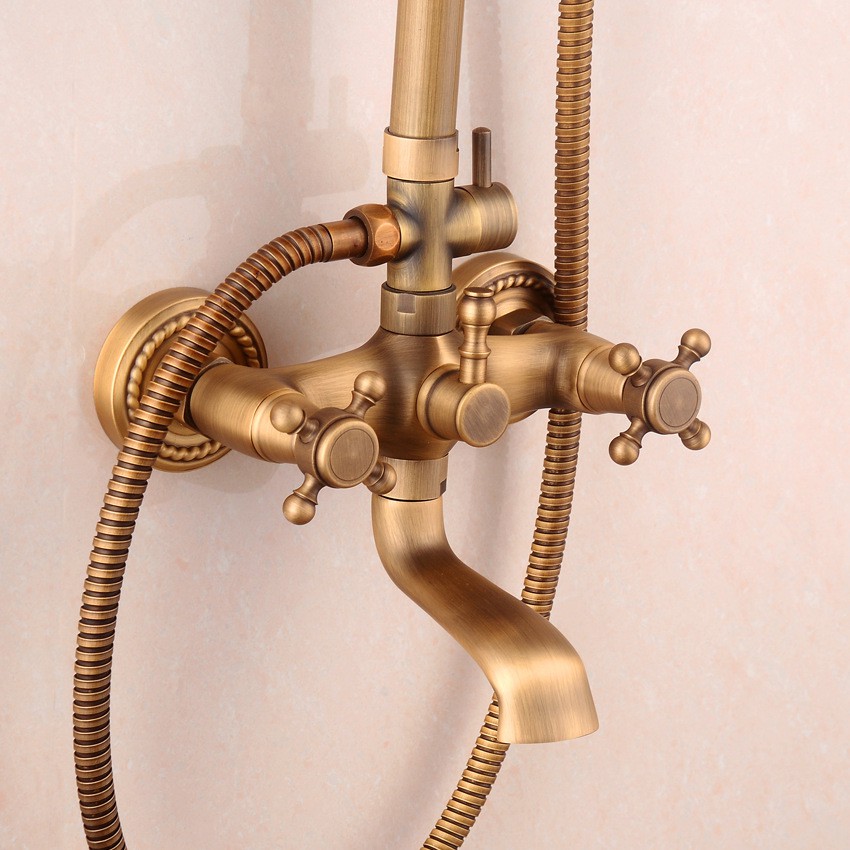
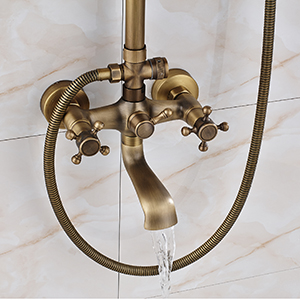
Tub Spout
360°Rotatable tub spout is easy to fit the tub position.
|
|
|
|
|
|
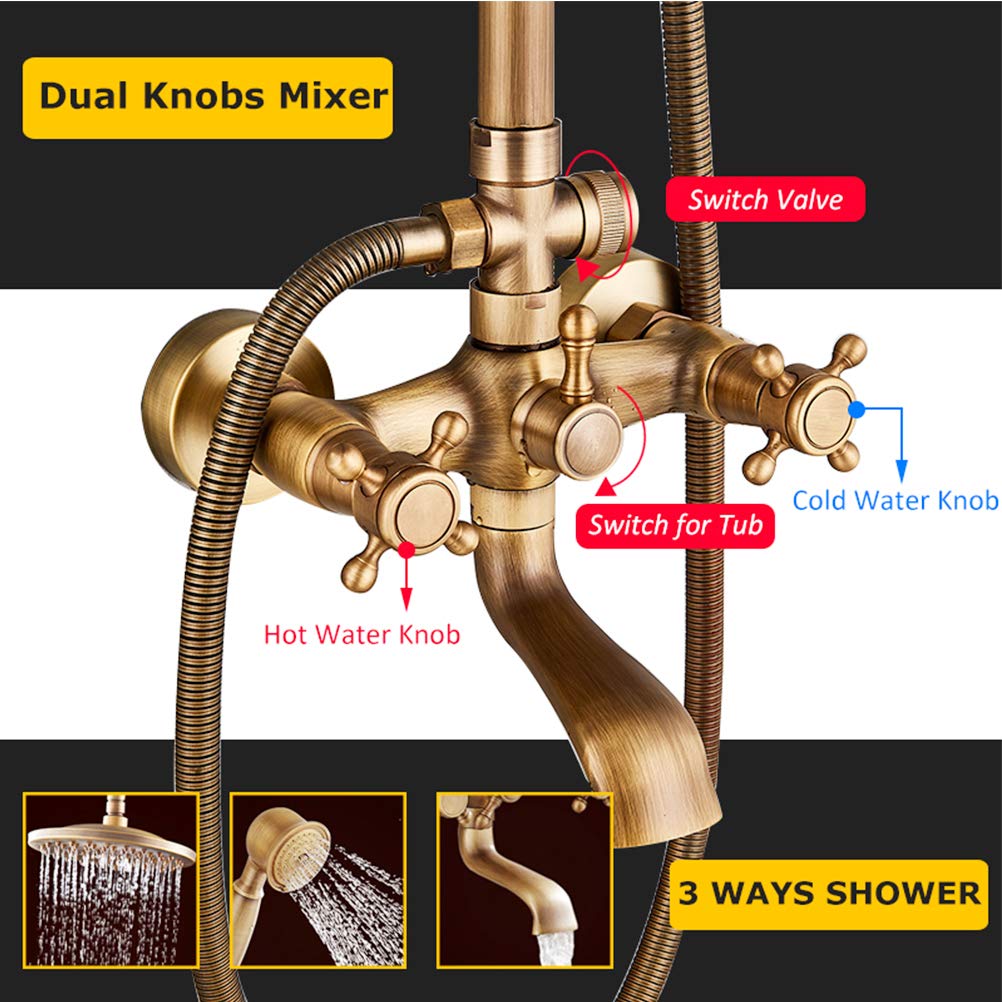
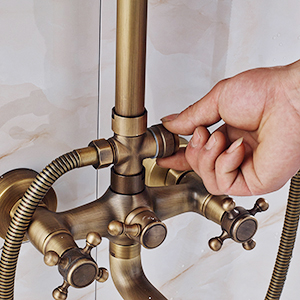
Switch handle
The plum handle design is not easy to skid water is convenient.
Turn the left handle is hot water, and the right handle is for cold water.
|
|
|
|
|
|
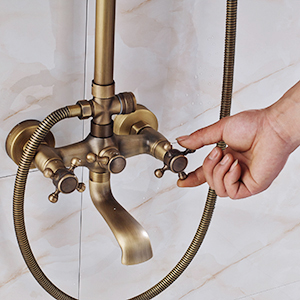
Diversion Swivel
This handle is to choose the water outlet method: top shower head, hand shower, and tub spout.
|
|
|
|
|
|
Flexible Shower Set
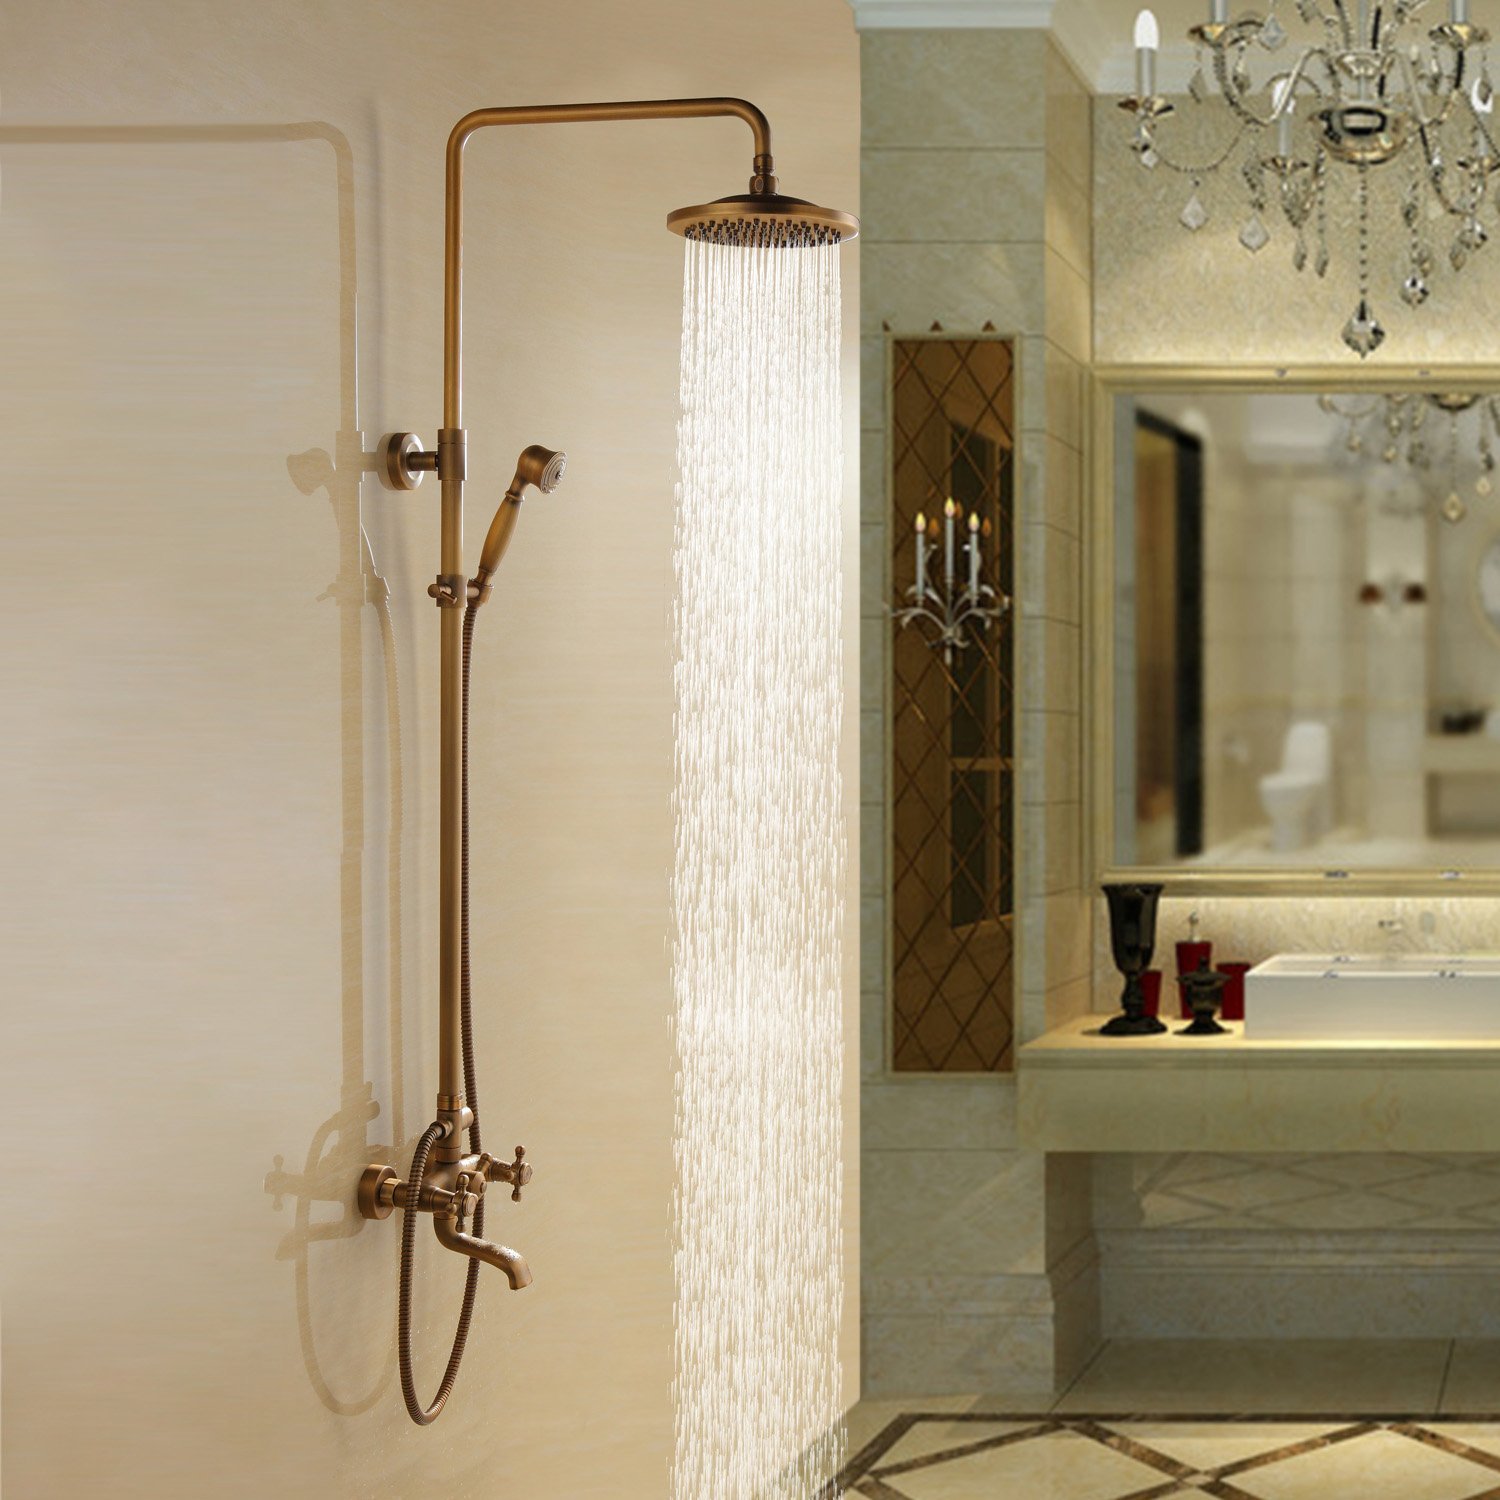
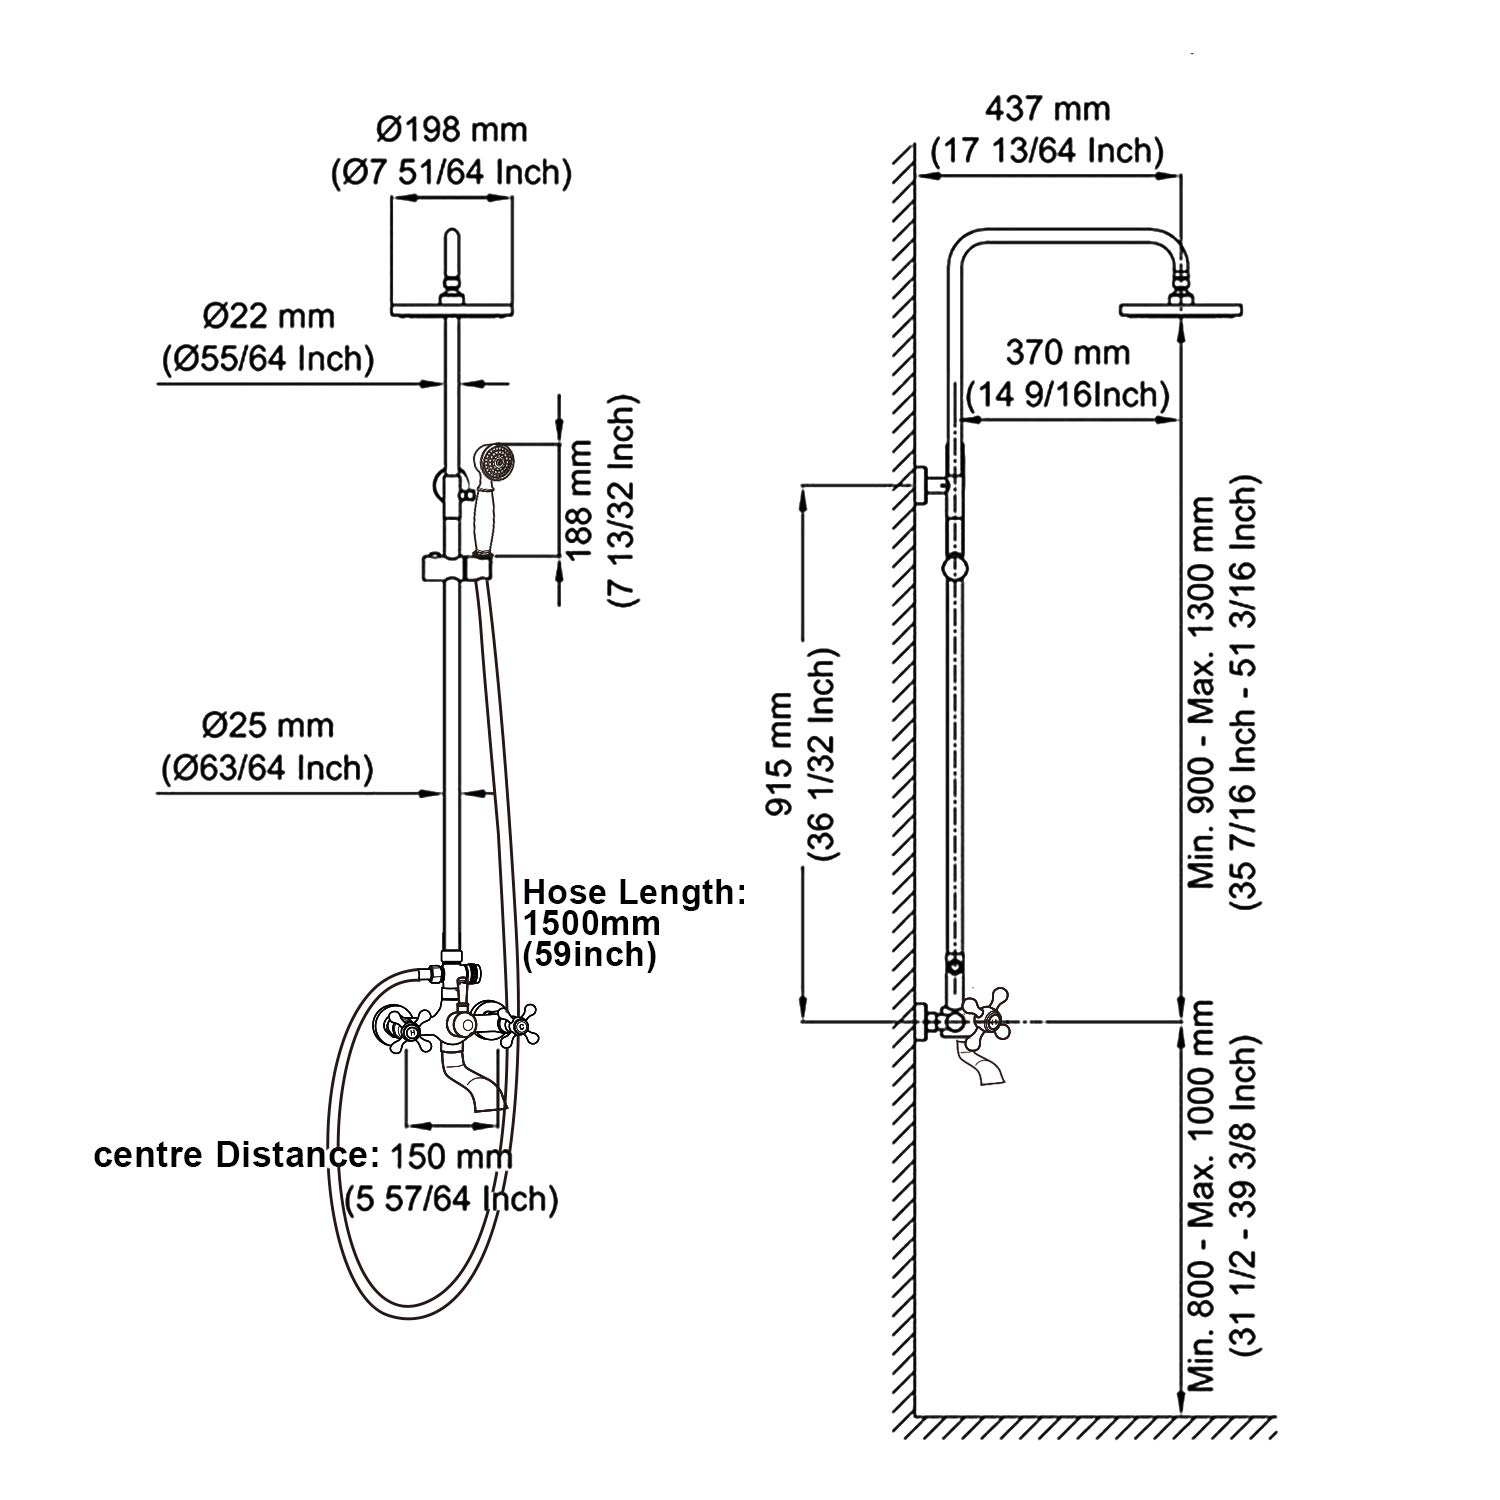
Adjustable Height - The height of this shower set is adjustable: 85-120cm (33.46inch-47.24inch).
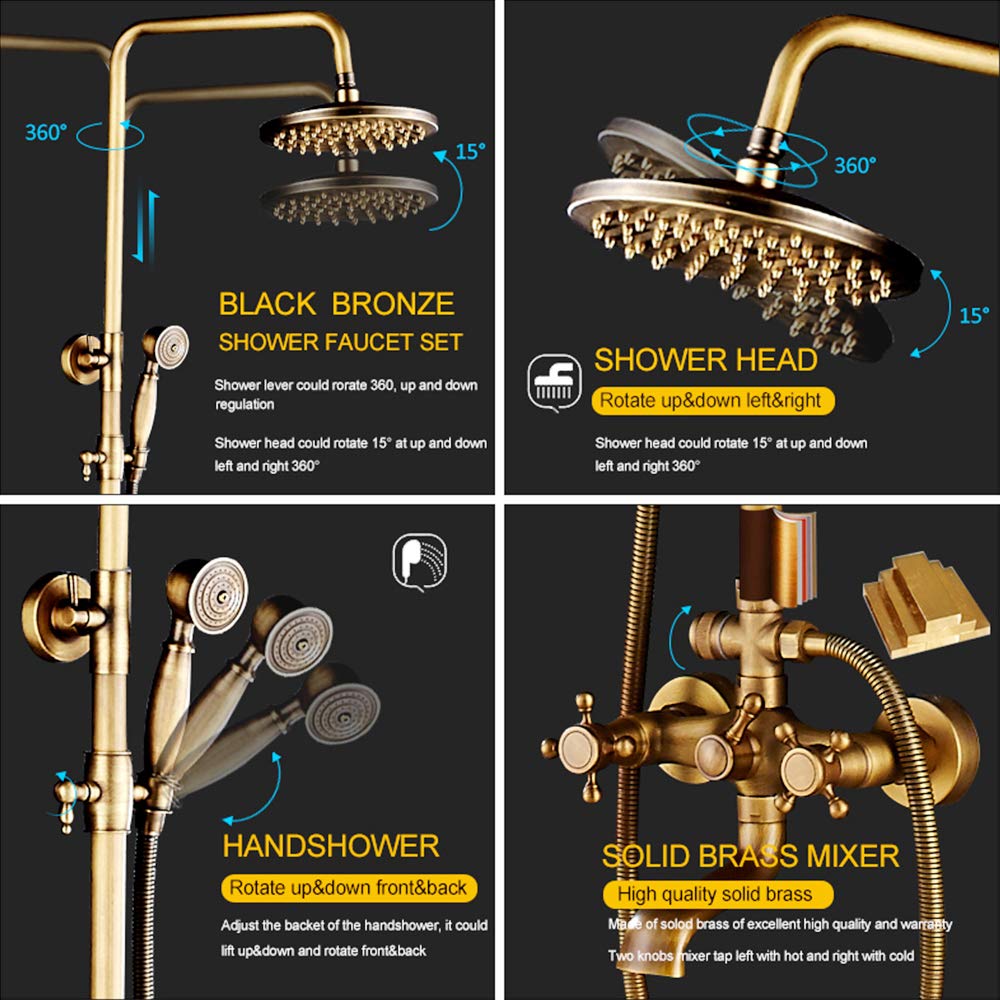
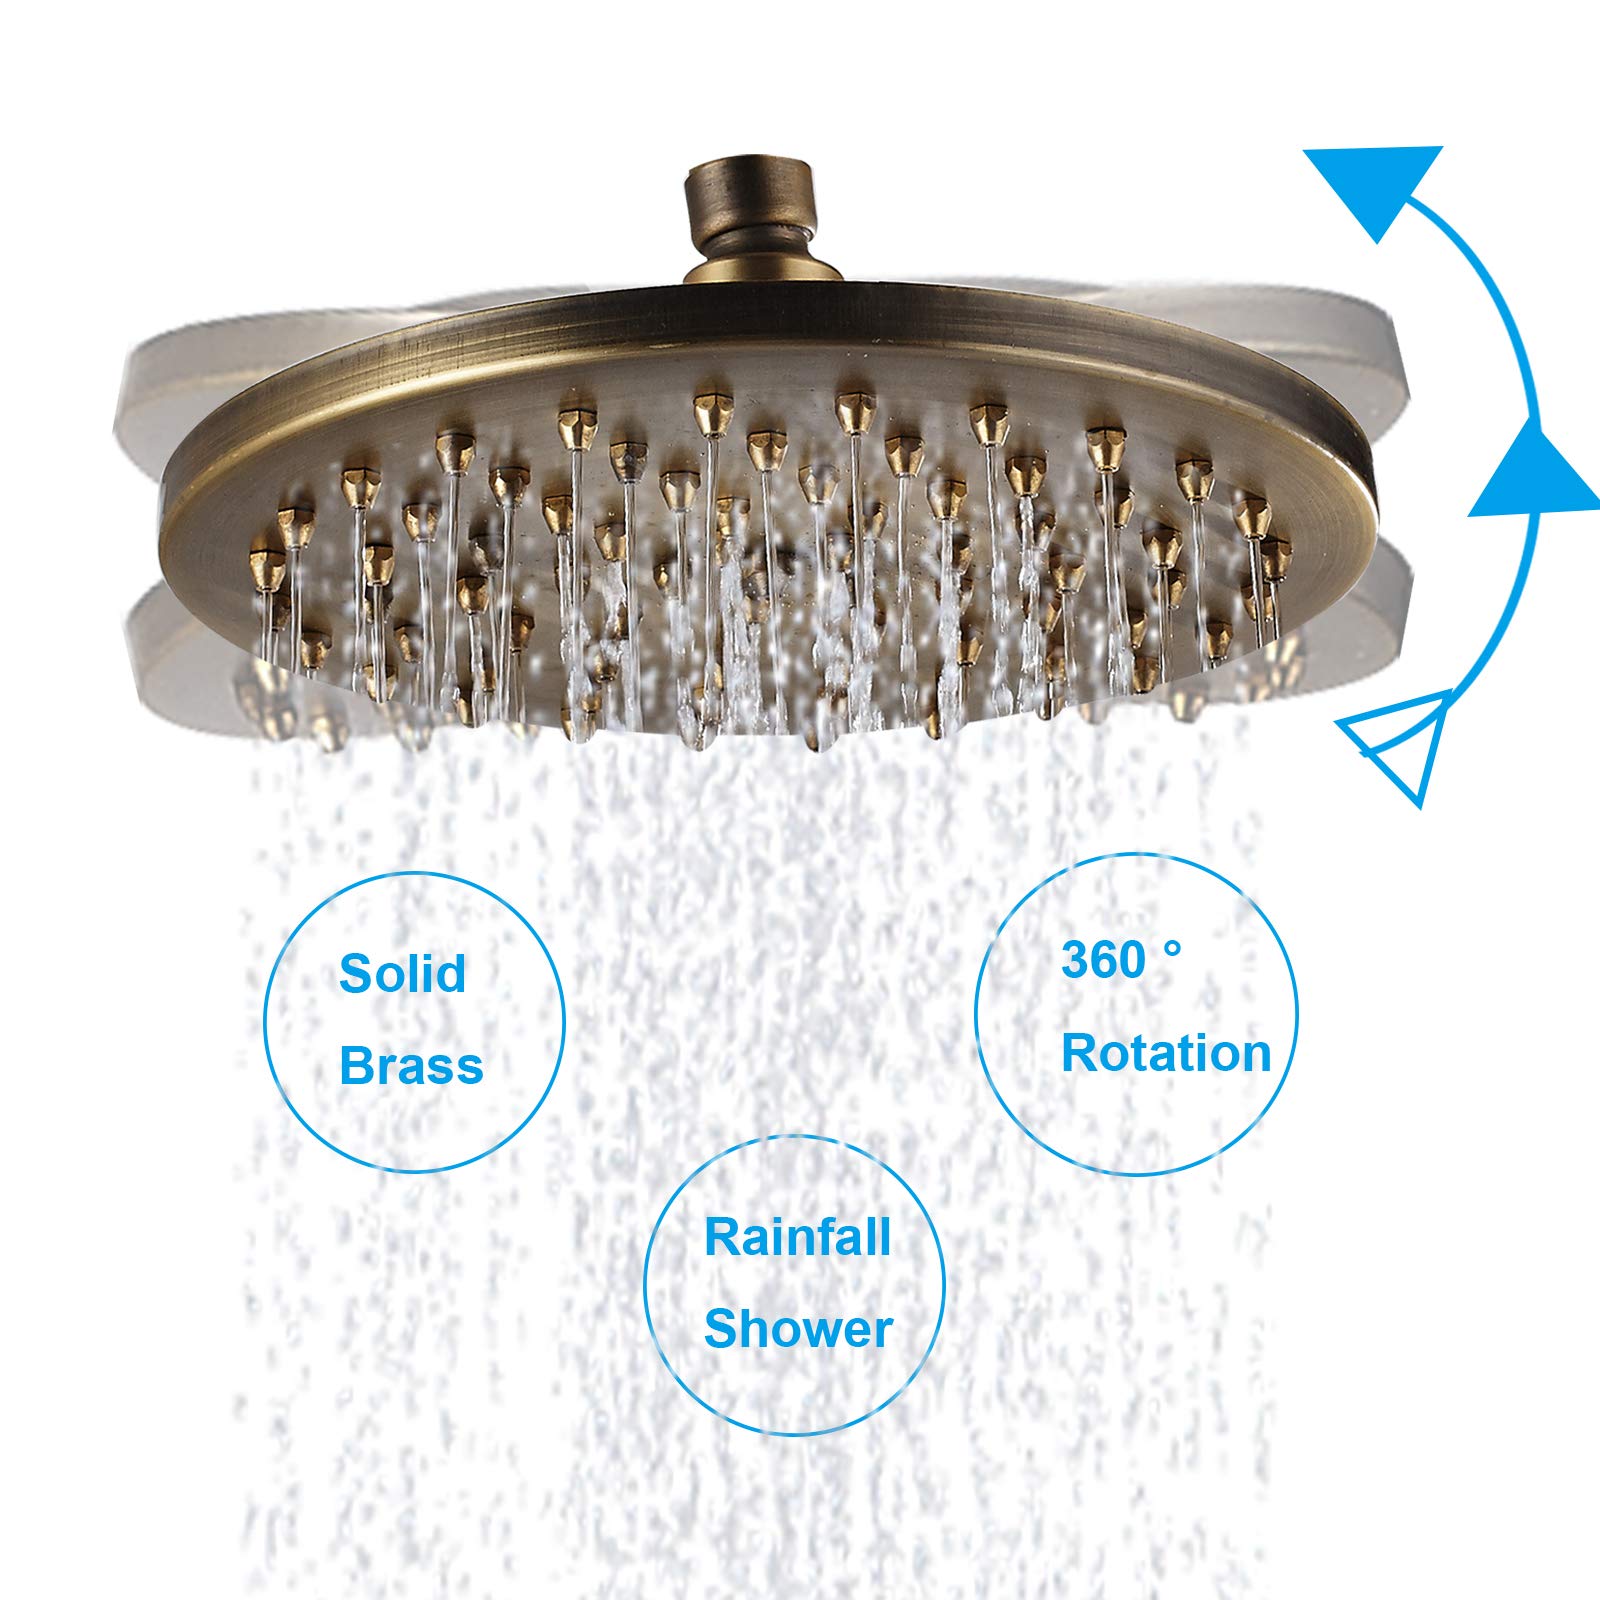
Flexible Shower Head - You could adjust the corner of the showerhead to the best shower experience.
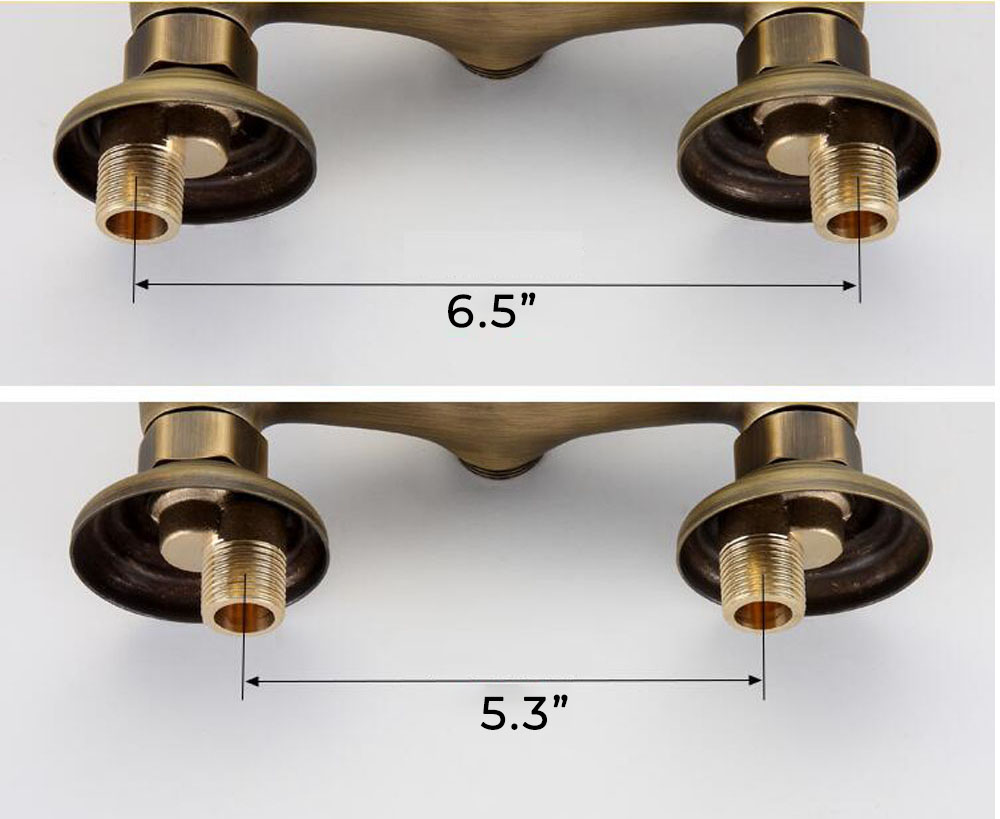
Hole Distance - The hole distance could be 13.5-17cm (5.3-6.7"), is convenient for installation.
|
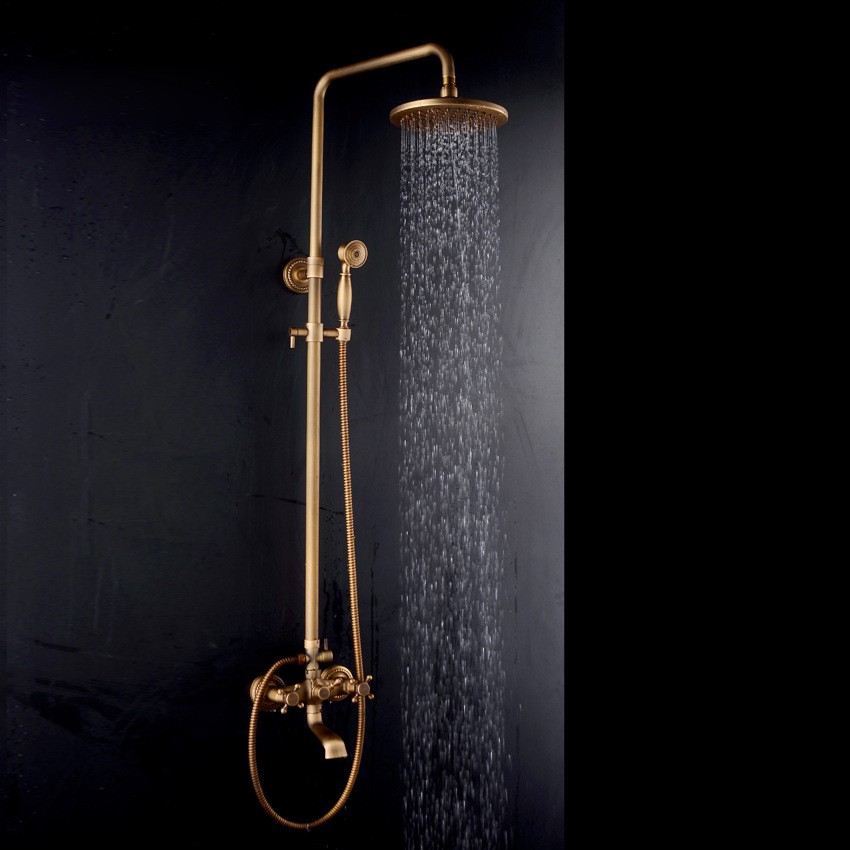
Aurélie Antique Brass Wall Mounted Shower Set
|
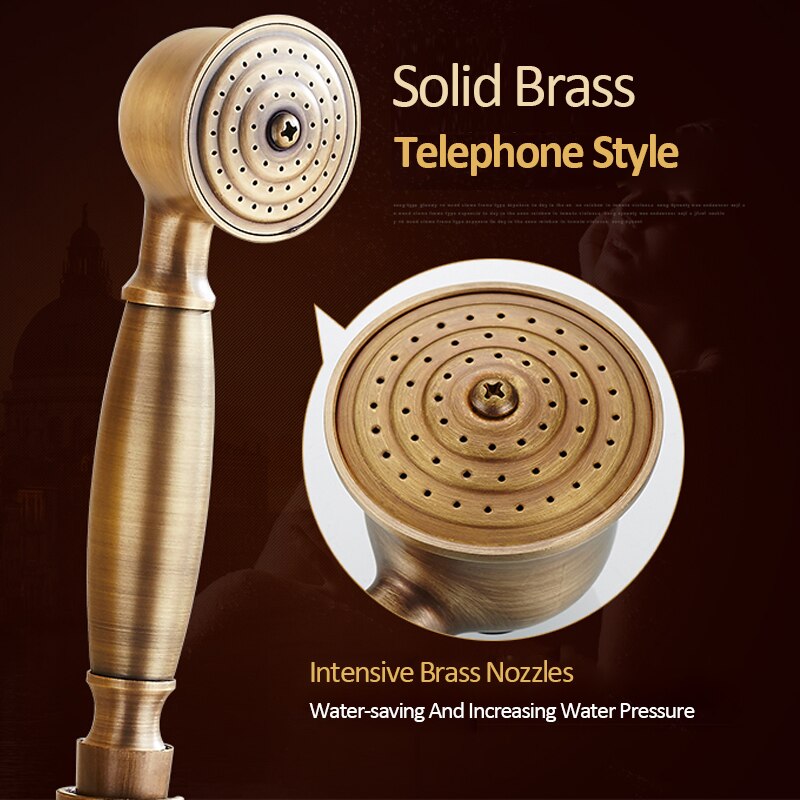
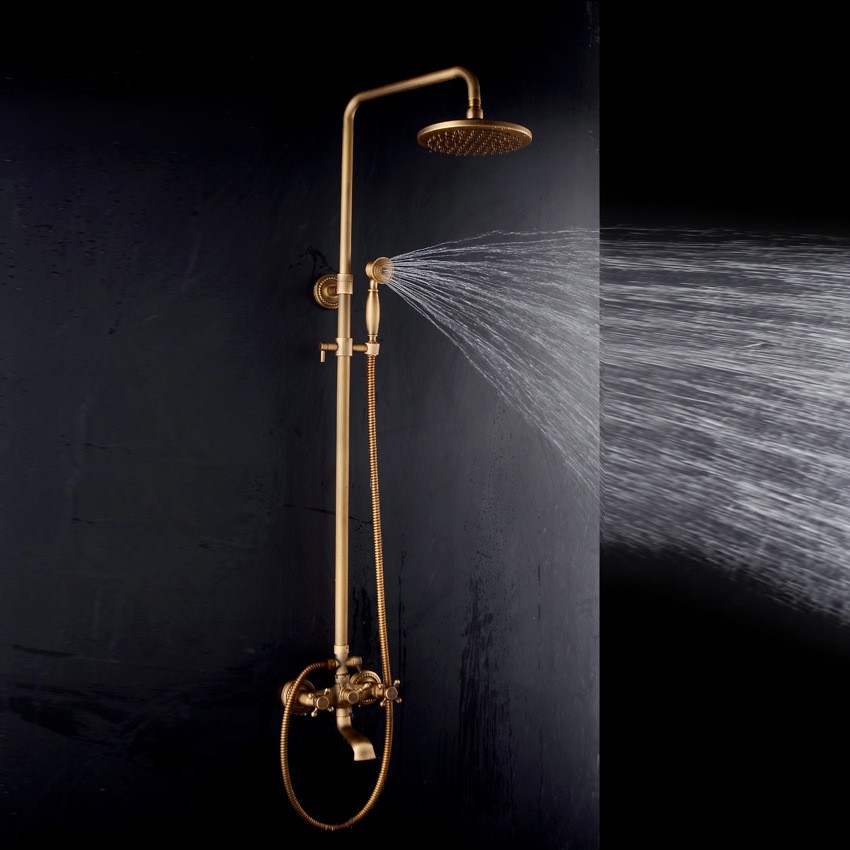
If you want an antique touch in your bathroom, the Aurelie brass shower set is perfect for the job. This brass shower is easy to install and convenient to use, it will perfectly fit for your Venetian style modern shower enclosures. The antique brass finish will make it stand out from the other bathroom fixtures, or depending on your bathroom design, it will seamlessly blend in. It comes with both rainfall shower head and a hand held shower for your convenience. Only the best quality materials have been used – the shower heads, as well as the faucet handle and body are made of brass and the valve comes with ceramic core material for a long-lasting life time. It comes complete with accessories and installation instructions.
|
|

|
|
|
|
Features:
- Features : Hand shower Included,Rain Shower
- Installation Type : Wall Mounted
- Installation Holes : Three Holes
- Number Of Handles : Two Handles
- Flow Rate : 1.8 GPM (6.81 L/min)
- Cold and Hot Switch : Yes
- Valve Type : Ceramic Valve
- Overall Height : 53.34" (135.5cm)
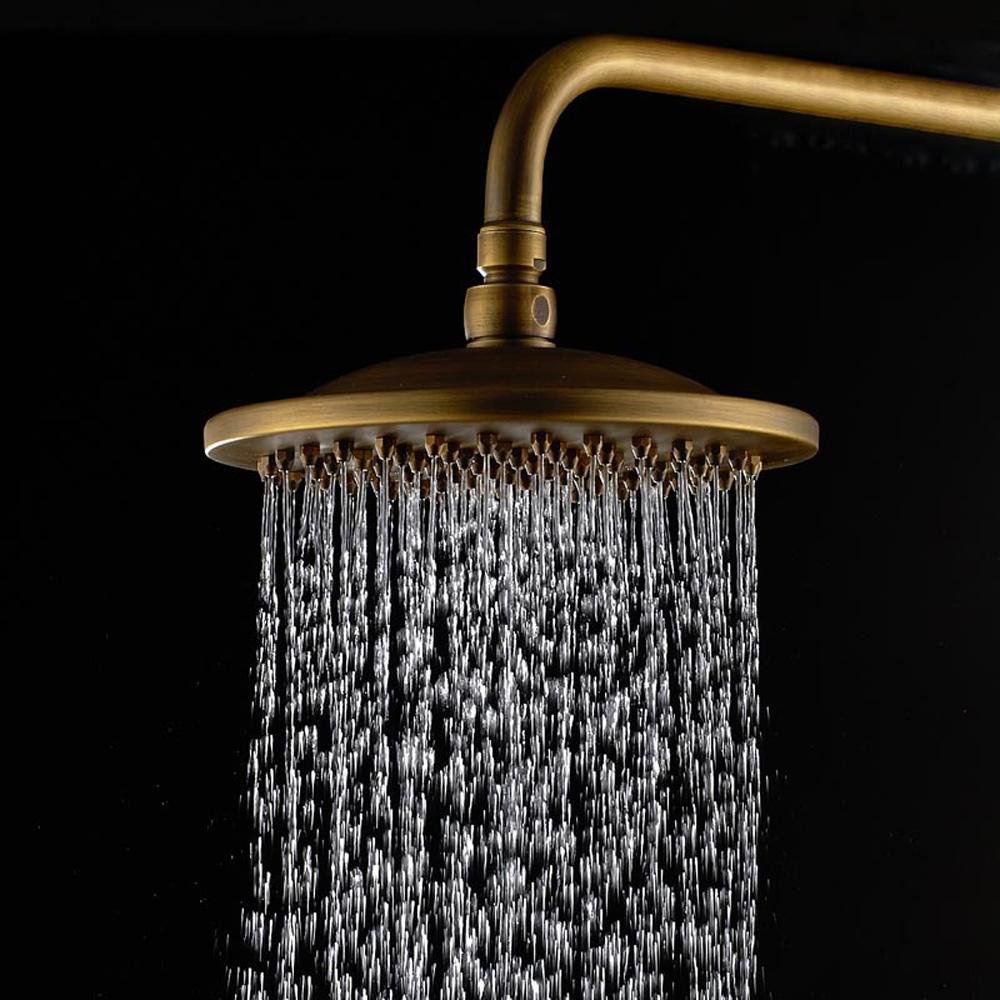
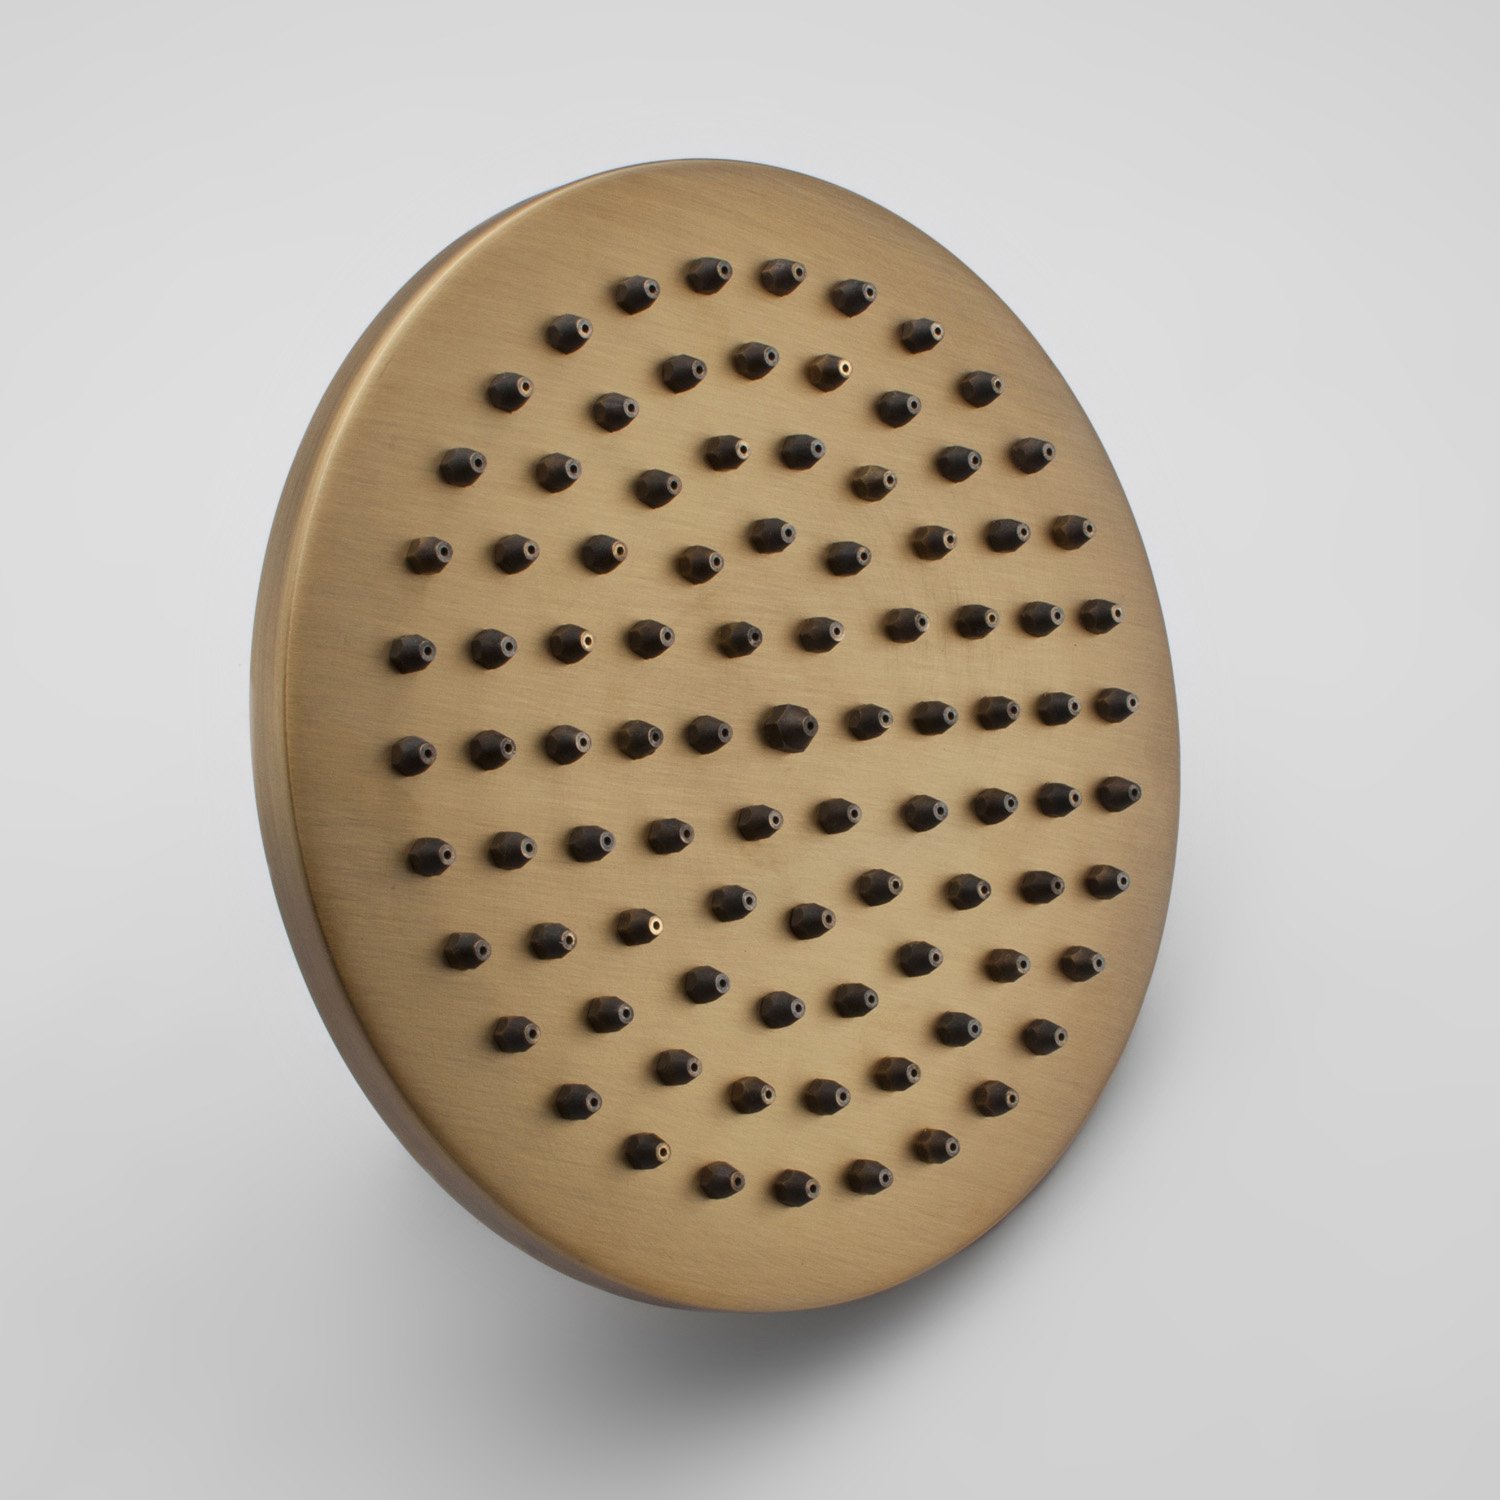
- Shower head Width : Diameter 8"(20.3cm)
- Rain Shower Material : Brass
- Faucet Handle Material : Brass
- Hand shower Material : Brass
- Faucet Body Material : Brass
- Rain Shower Included : Yes
- Shower Arm Included : Yes
|

|
|
|
|