How to install Fontana Creteil Brushed Gold Bathroom Thermostatic Button Shower System Set | FS1156
Installation Instructions for Bathroom Shower Set
Visit Product Page
Before you begin, please read the installation instructions below. Observe all local building and safety codes.
Unpack and inspect the product for any shipping damages. If you find damages, do not install.
Please note all products must be installed by a professional and certified plumber otherwise warranty might be voided.
shower
Shower Head Installation Instructions
COMPLETE KIT: Including 12 x 8 inch Rectangular rain shower head(Brass), handheld shower head(Brass), 16 inches shower arm(Brass), 59 inch shower hose(304 stainless steel),shower holder(Brass), shower mixer control valve(Brass). 4 Pcs Body jets ( Brass ).
STANDARD THREADS: Shower bracket holder,shower arm and body jets are 1/2" NPT threaded. Standard U.S. connection size, ensuring easy and fast installation.
EASY OPERATION: Button design for effortless flow and tempreture control. You can switch the Button to open rain shower head , handheld shower head and shower body jets as you like ( can use together at the same time ).
RAIN SHOWER HEAD 12 x 8 Type: Fixed Rain Showerhead Material:Brass Color:Brushed Gold finish Feature: Big Enough to Cover Your Body Connection:G1/2" Standards
RAIN SHOWER ARM 16" Type: Wall Mounted Shower Arm Material:Brass Color:Brushed Gold finish Feature:16 Inch Long Shower Arm with Flange Straight Connection:1/2" NPT Standards
HAND SHOWER HEAD Type:Handheld Showerhead Material: Brass Color:Brushed Gold finish Feature: Easy for the Elderly and Children to Shower Connection:G1/2" Standards
Shower Mixer Valve Control Features:Thermostatic design (can use together at the same time) Material: Brass & Ceramic valve Color: Brushed Gold finish Connection:1/2" Standards
SHOWER HOSE 59" Type:59 Inch Stainless Steel Shower Hose Material:Stainless Steel Color:Brushed Gold finish Feature: Flexible and does not kink, Very easy to install. Connection:G1/2" Standards
Step 1:
shower
Step 2:
Step 3:
Step 4:
Step 5:
Step 6:
Step 7:
Step 8:
1. Apply plumber's tape to the threads on both ends of the shower arm and slide on the decorative escutcheon.
2. Insert the new arm into the fitting in the wall and twist to tighten. Finish tightening with your adjustable wrench. Wrap a dry cloth around the shower arm to protect the finish while tightening with an adjustable wrench.
3. Thread the new showerhead onto the arm and hand-tighten. Hold the shower arm in place with groove joint pliers and finish tightening the shower head with your adjustable wrench. Wrap both in a dry cloth to protect the finish.
4. Before securing the decorative escutcheon, turn on the water supply to make sure that all connections are tight and there is no leaking. If no leaks are detected, continue with the installation. If leakage does occur, use your adjustable wrench to tighten the connections as necessary.
5. Apply a bead if silicone sealant to the back of the escutcheon and press firmly into place against the installation surface. Wipe away any excess sealant with your damp cloth.
Hand Held Shower Installation Instructions
Step 1:
Step 2:
Hand
Held
Shower
Hand Held Shower
Handheld Shower
Step 3:
Size:
Handheld Shower
Holder Size
Hand Shower Outlet Installation • Complete the outlet pipework ensuring it ends in an appropriate 15mm x 1/2" BSP female thread elbow. Note: This fitting is not supplied as variations in installations require the selection of a suitable solder or compression fitting.
• Install the 'Wall Outlet', thread long male 1/2" BSP into the appropriate female fitting using PTFE tape to give a watertight joint. Note: The thread can be cut to size if required. Make sure that all debris is removed from the connector and the section that has been cut is dressed correctly, before installation.
The minimum required water pressure is 0.05 MPa (0.5 bar). Flow rate 2.5 GPM (9.5 LPM).
Shower Body Sprays Installation Instructions
Step 1:
Step 2:
Body Sprays installation
Step 3:
Step 4:
Step 5: (Pressure Balancing Loop)
Rough-in Suggestion: This installation requires a 1/2" male threaded pipe fitting to extend 1/4" beyond the finished surface. The plumber should install a properly anchored 1/2" female pipe fitting (i.e. a drop-ear ell) recessed into the wall, into which a brass pipe nipple of proper length can be fitted once the finished wall is complete. Note: The hole size opening should be 1.5" max diameter. Bodyspray placement: Custom shower systems are sized to the user or users. Bodysprays are normally placed at the upper back, middle back, and upper thigh. Always position bodysprays according to the preferences of the user(s).
Pressure Balancing Loop: If installing bodysprays in a bank of 3 or fewer, a pressure balancing loop is not necessary. If installing bodysprays in a bank of 4 or greater, a pressure balancing loop must be used to keep the pressure even between the bodysprays.
Instructions
Body jets should be arranged in your system to provide the necessary spray outlets to suit the application. 1. Identify all components and check for completeness, particularly before arranging fitting. 2. Depending on the application the body jet can be panel mounted using a backnut (not supplied) or set into the wall on rigid pipe work. If panel mounting care should be taken to ensure connection can be made after securing with the backnut. 3. Connect body jet to pipe work using recommended ½” BSP connections (not provided) with thread sealing compound where necessary. Note: - Before finishing wall turn on water supplies to check both correct system function and for leaking from joints/connections. 4. Complete wall finish.
Digital Shower Mixer Controller Installation Instructions
Step 1:
Step 2:
thermostatic
Step 3:
Step 4:
Step 5:
Step 6:
Step 7:
Step 8:
Step 9:
Step 10:
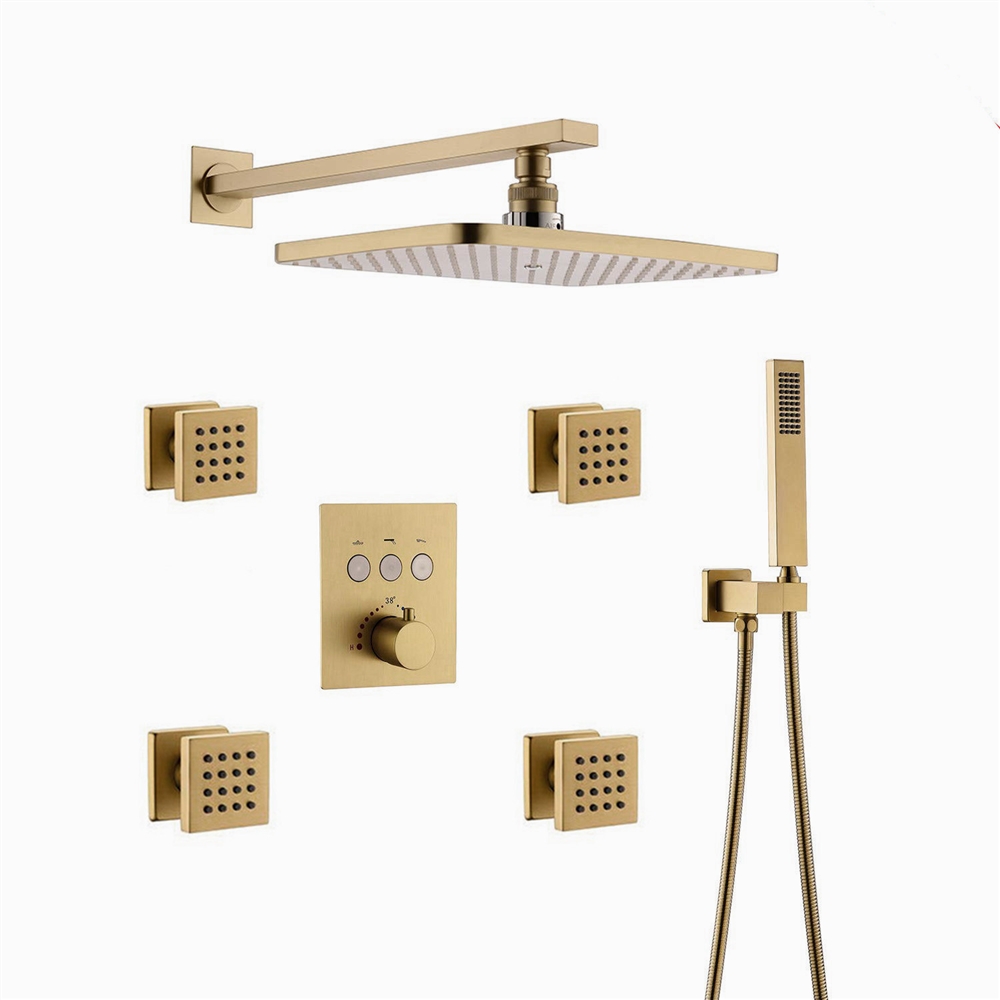
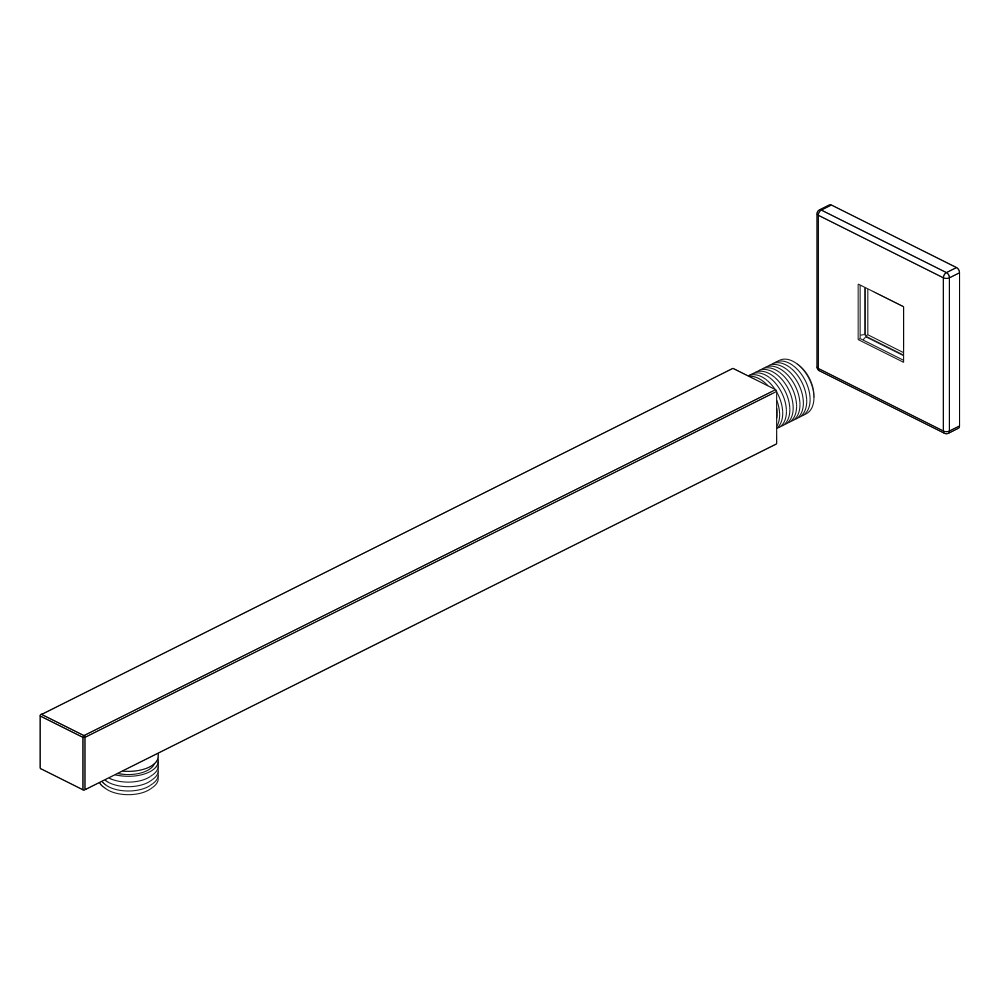
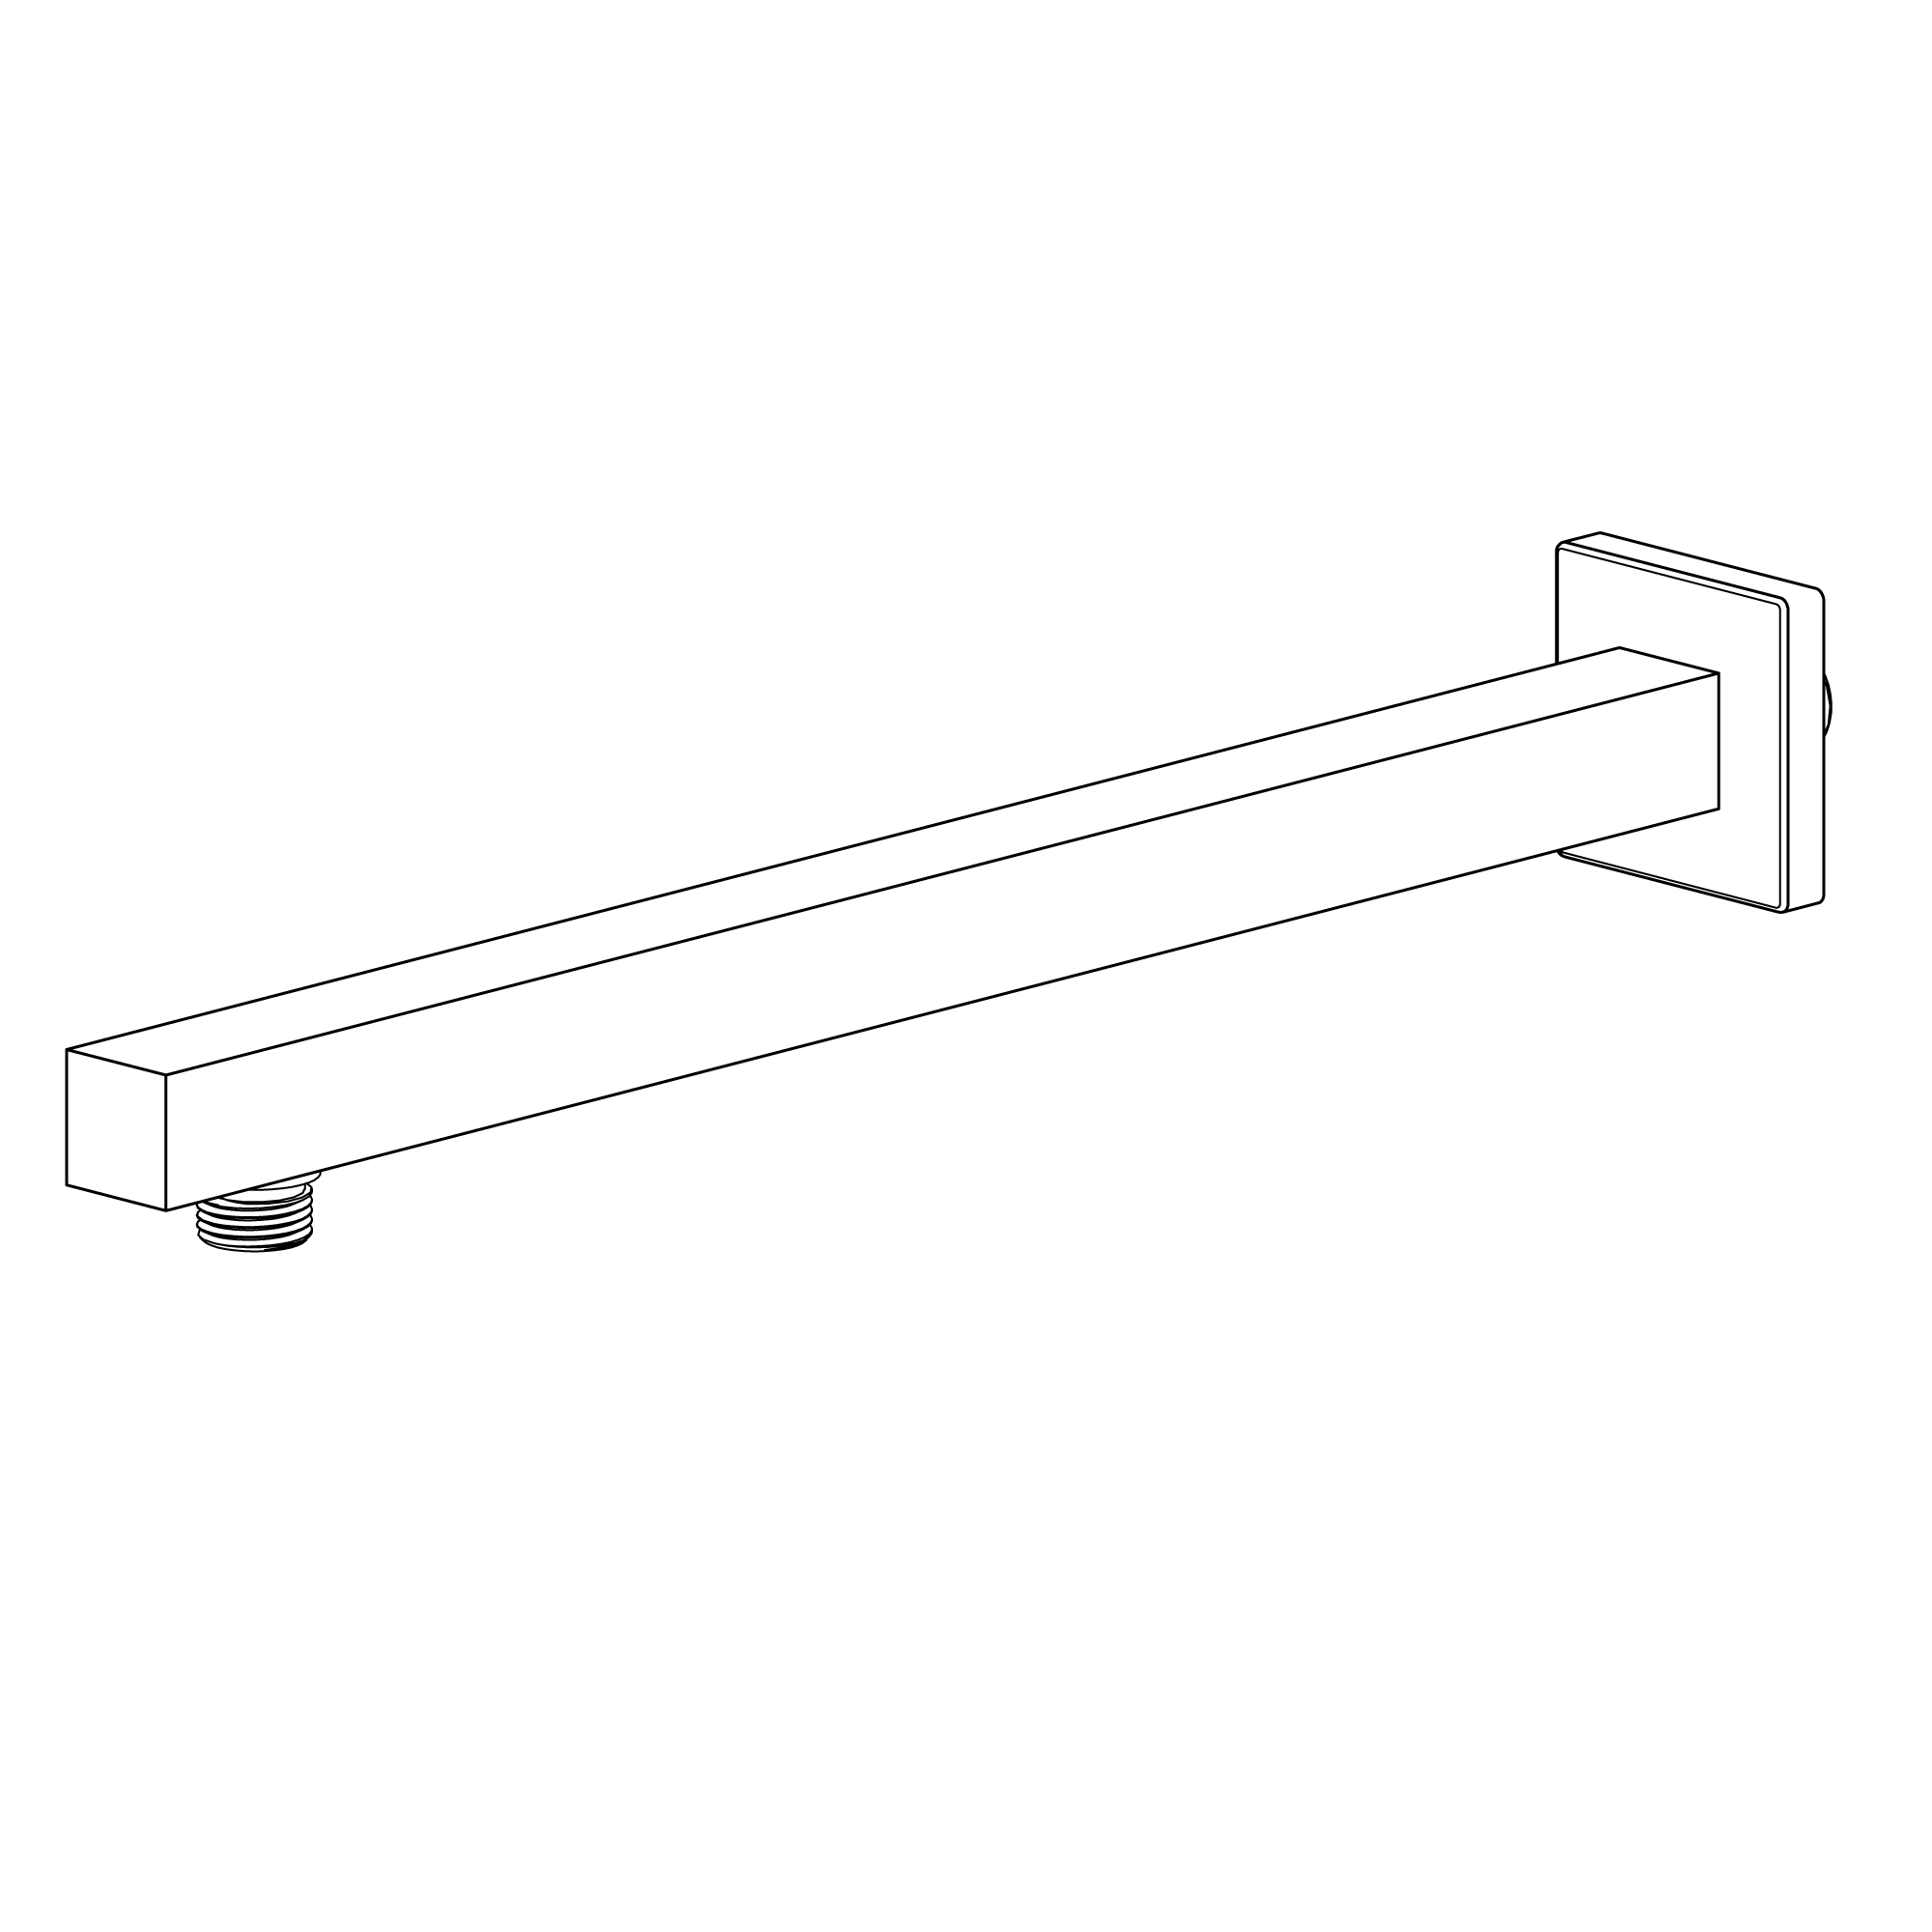
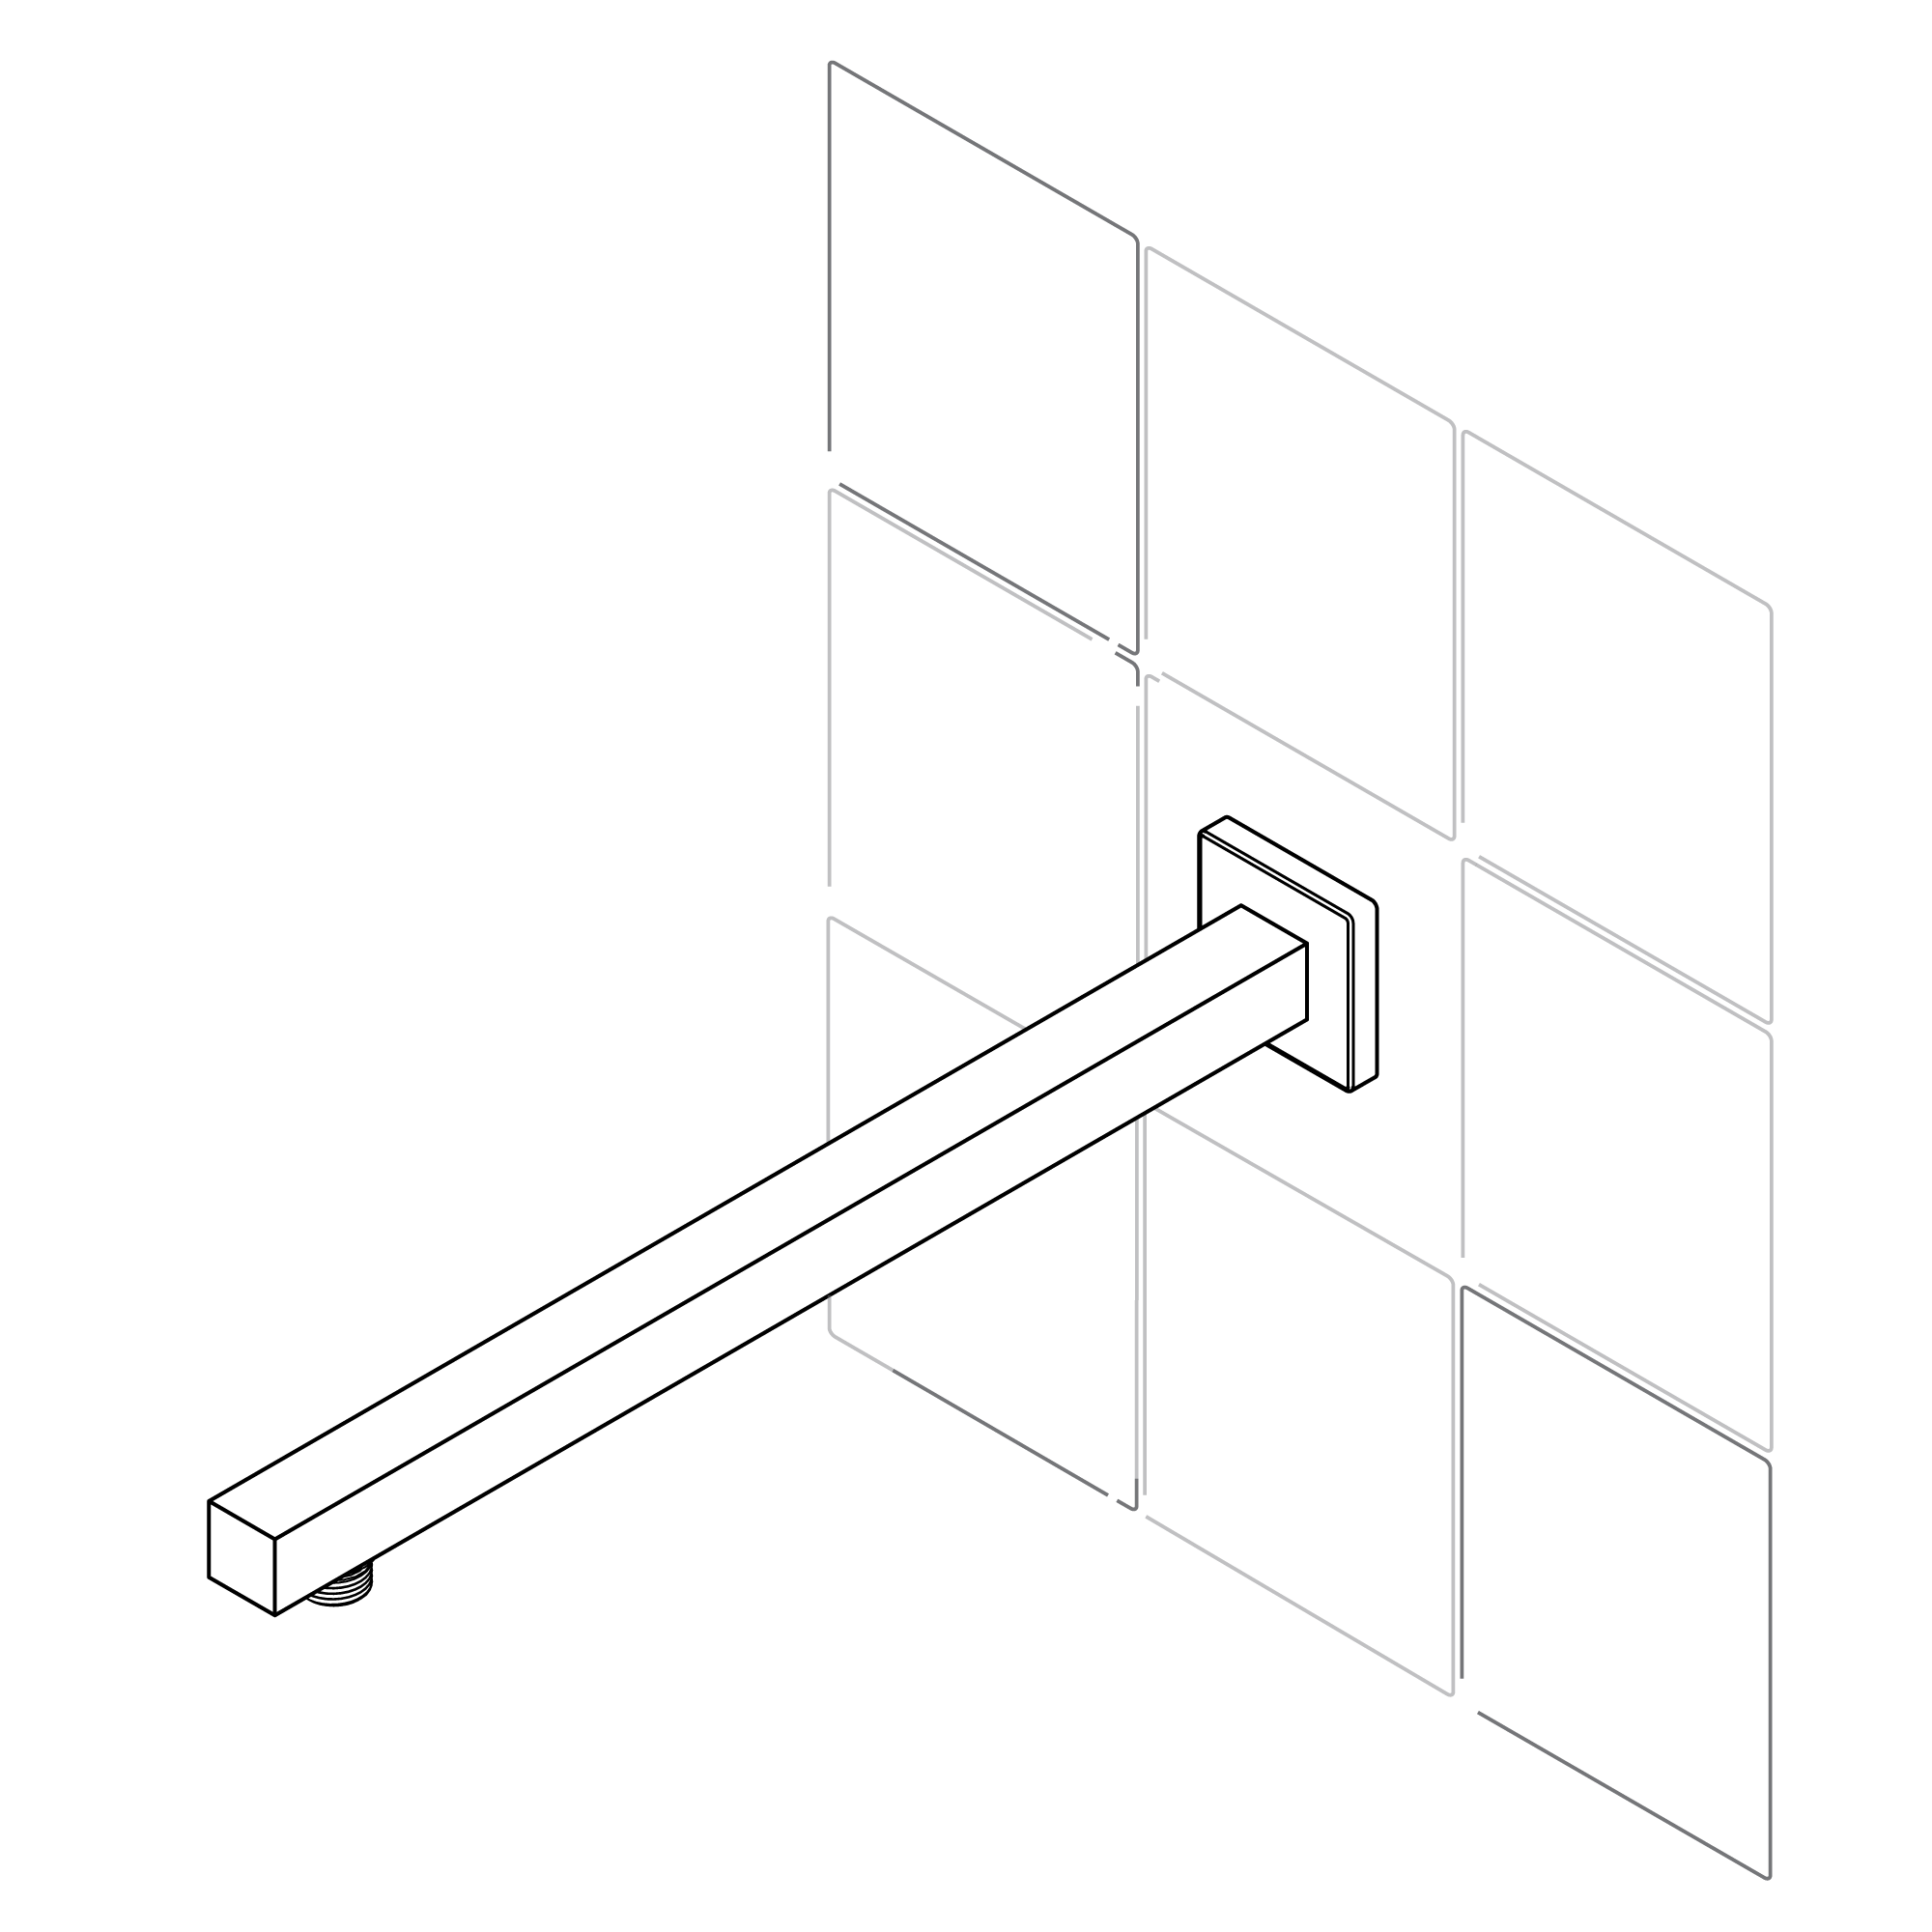
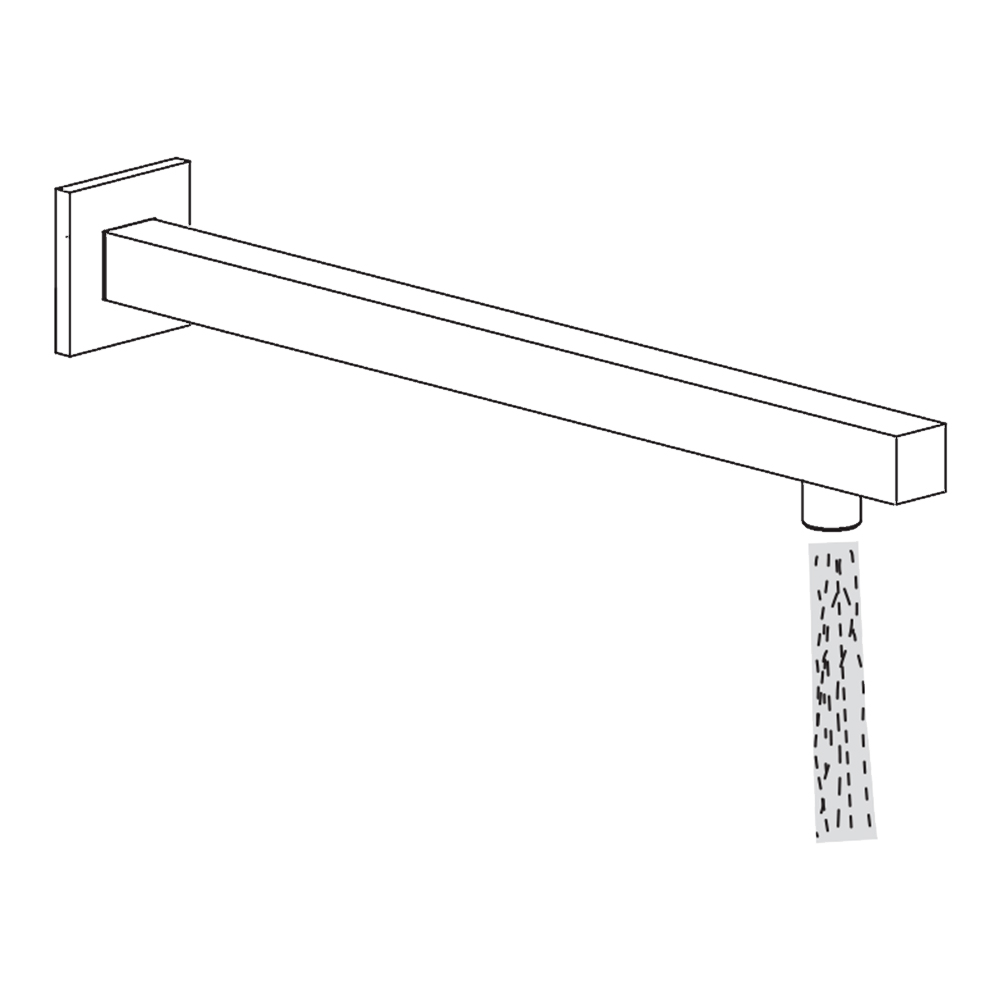
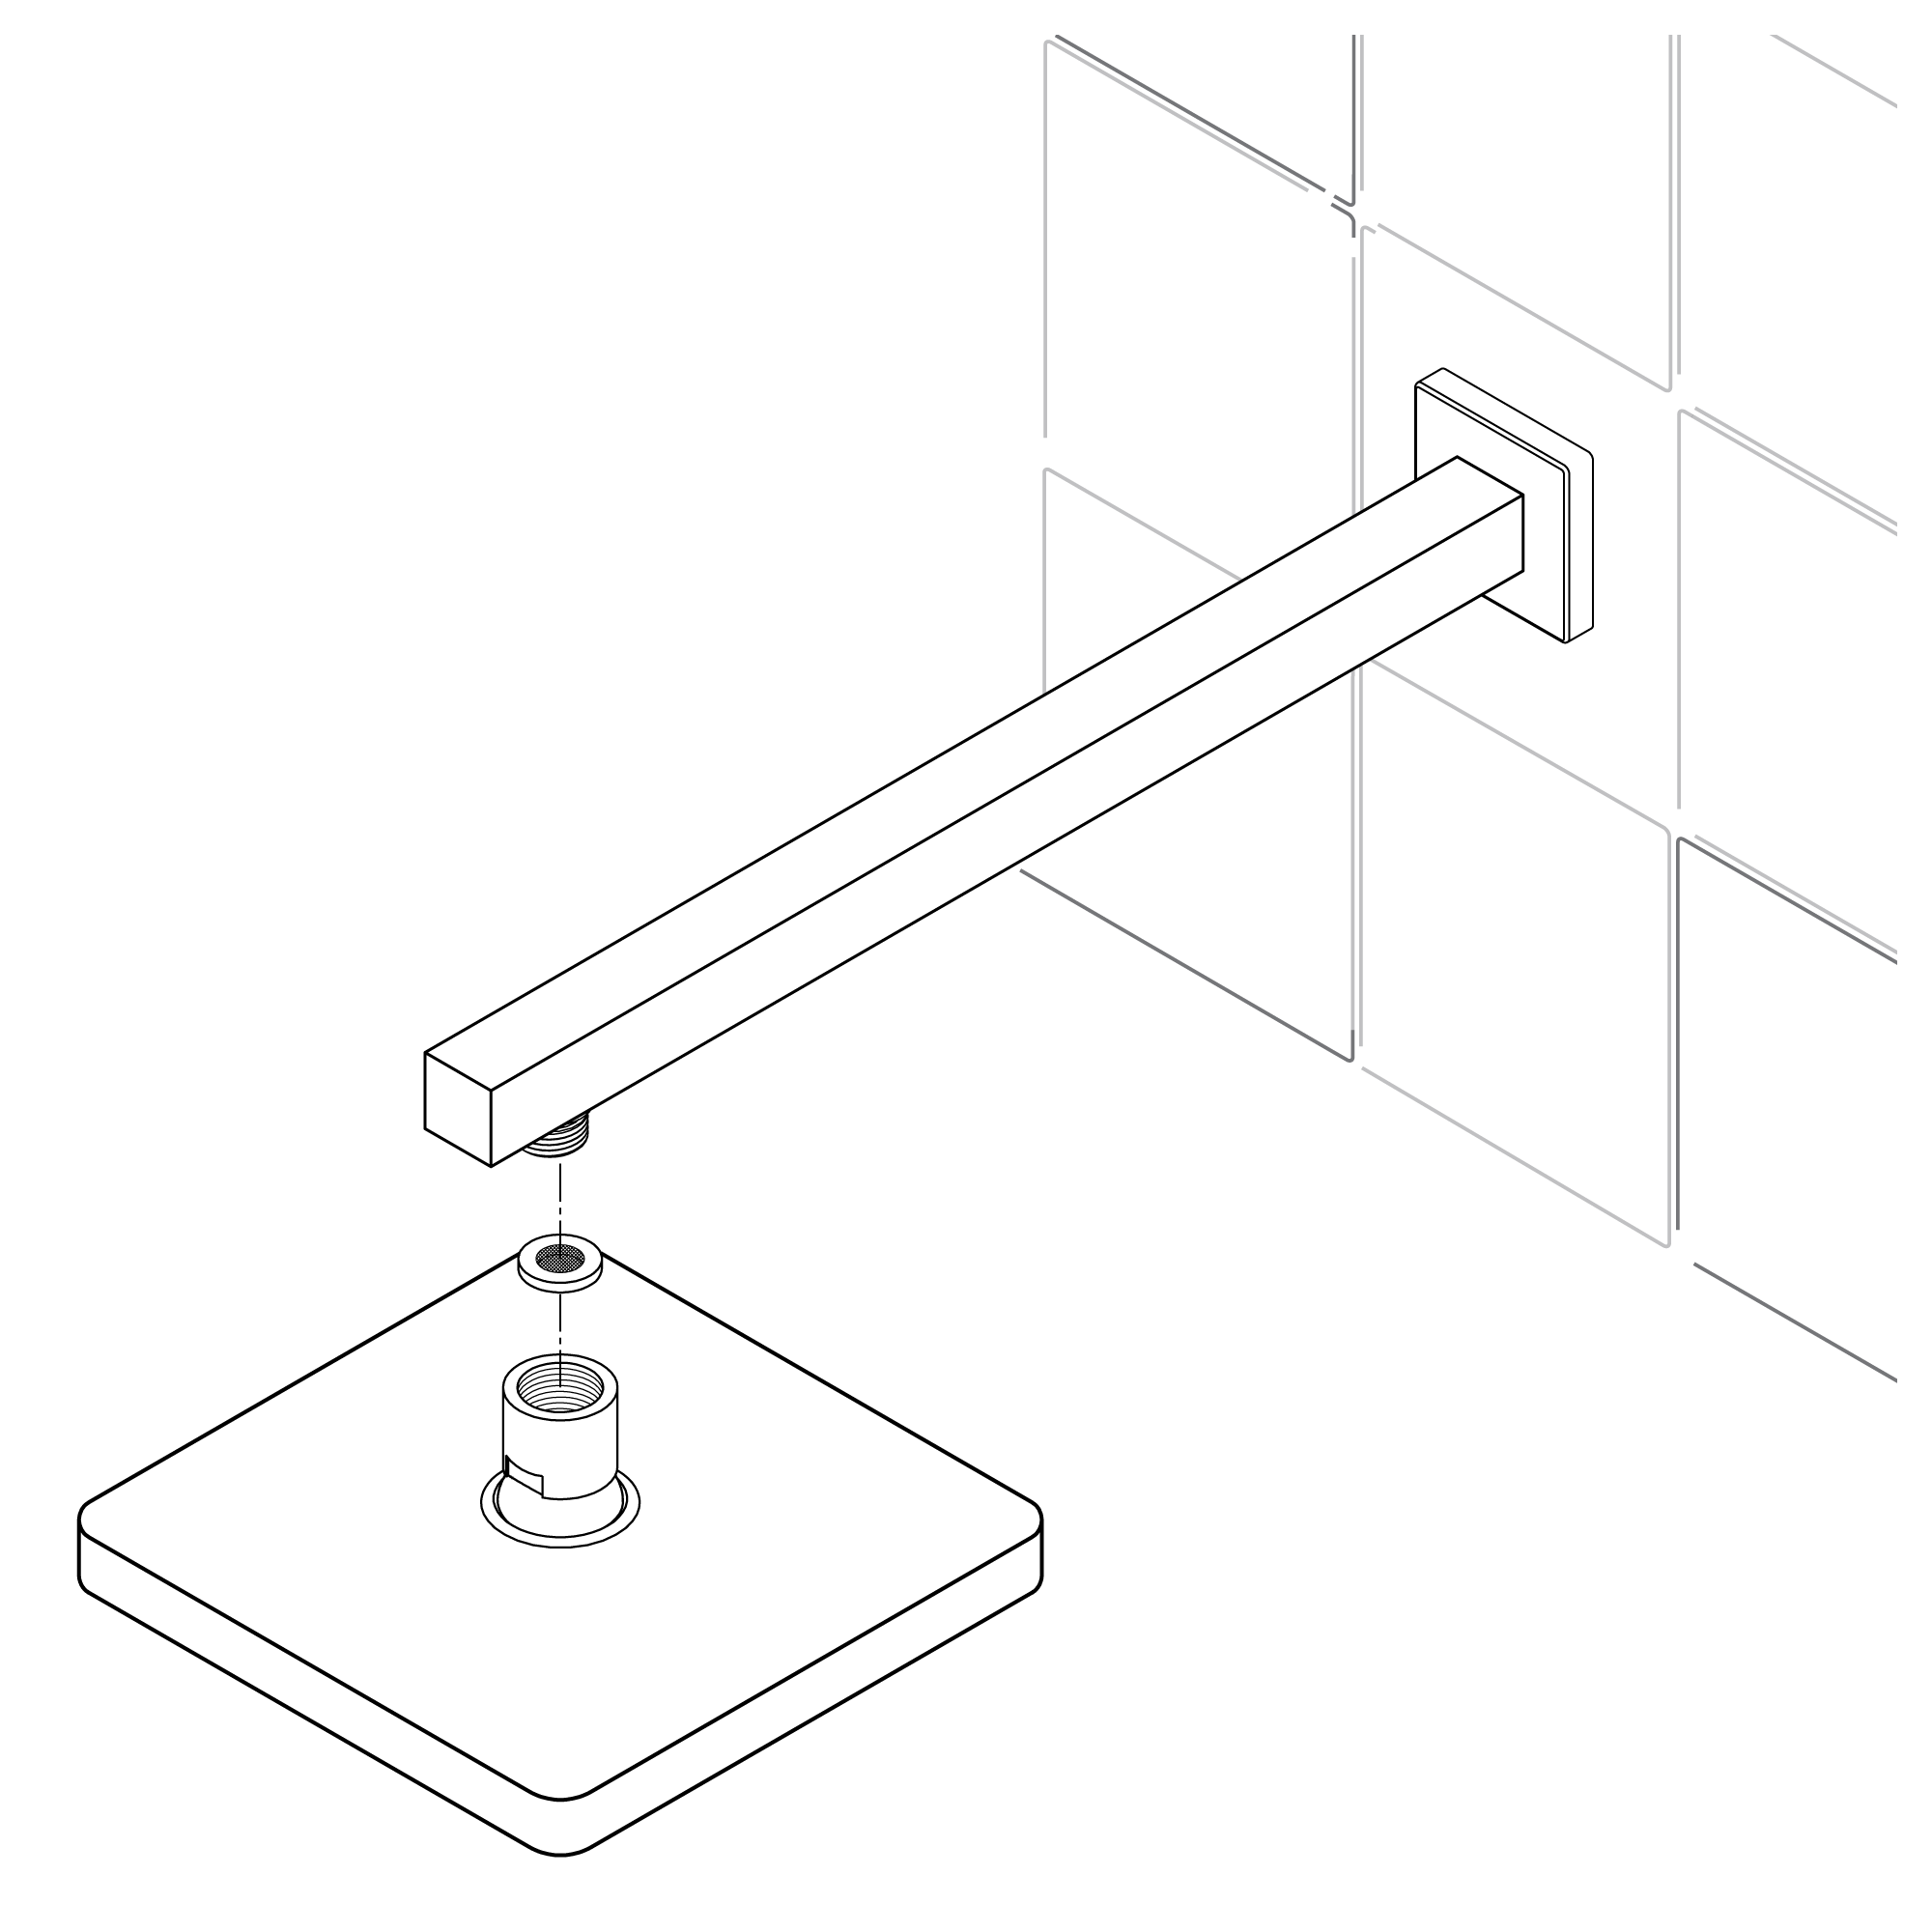
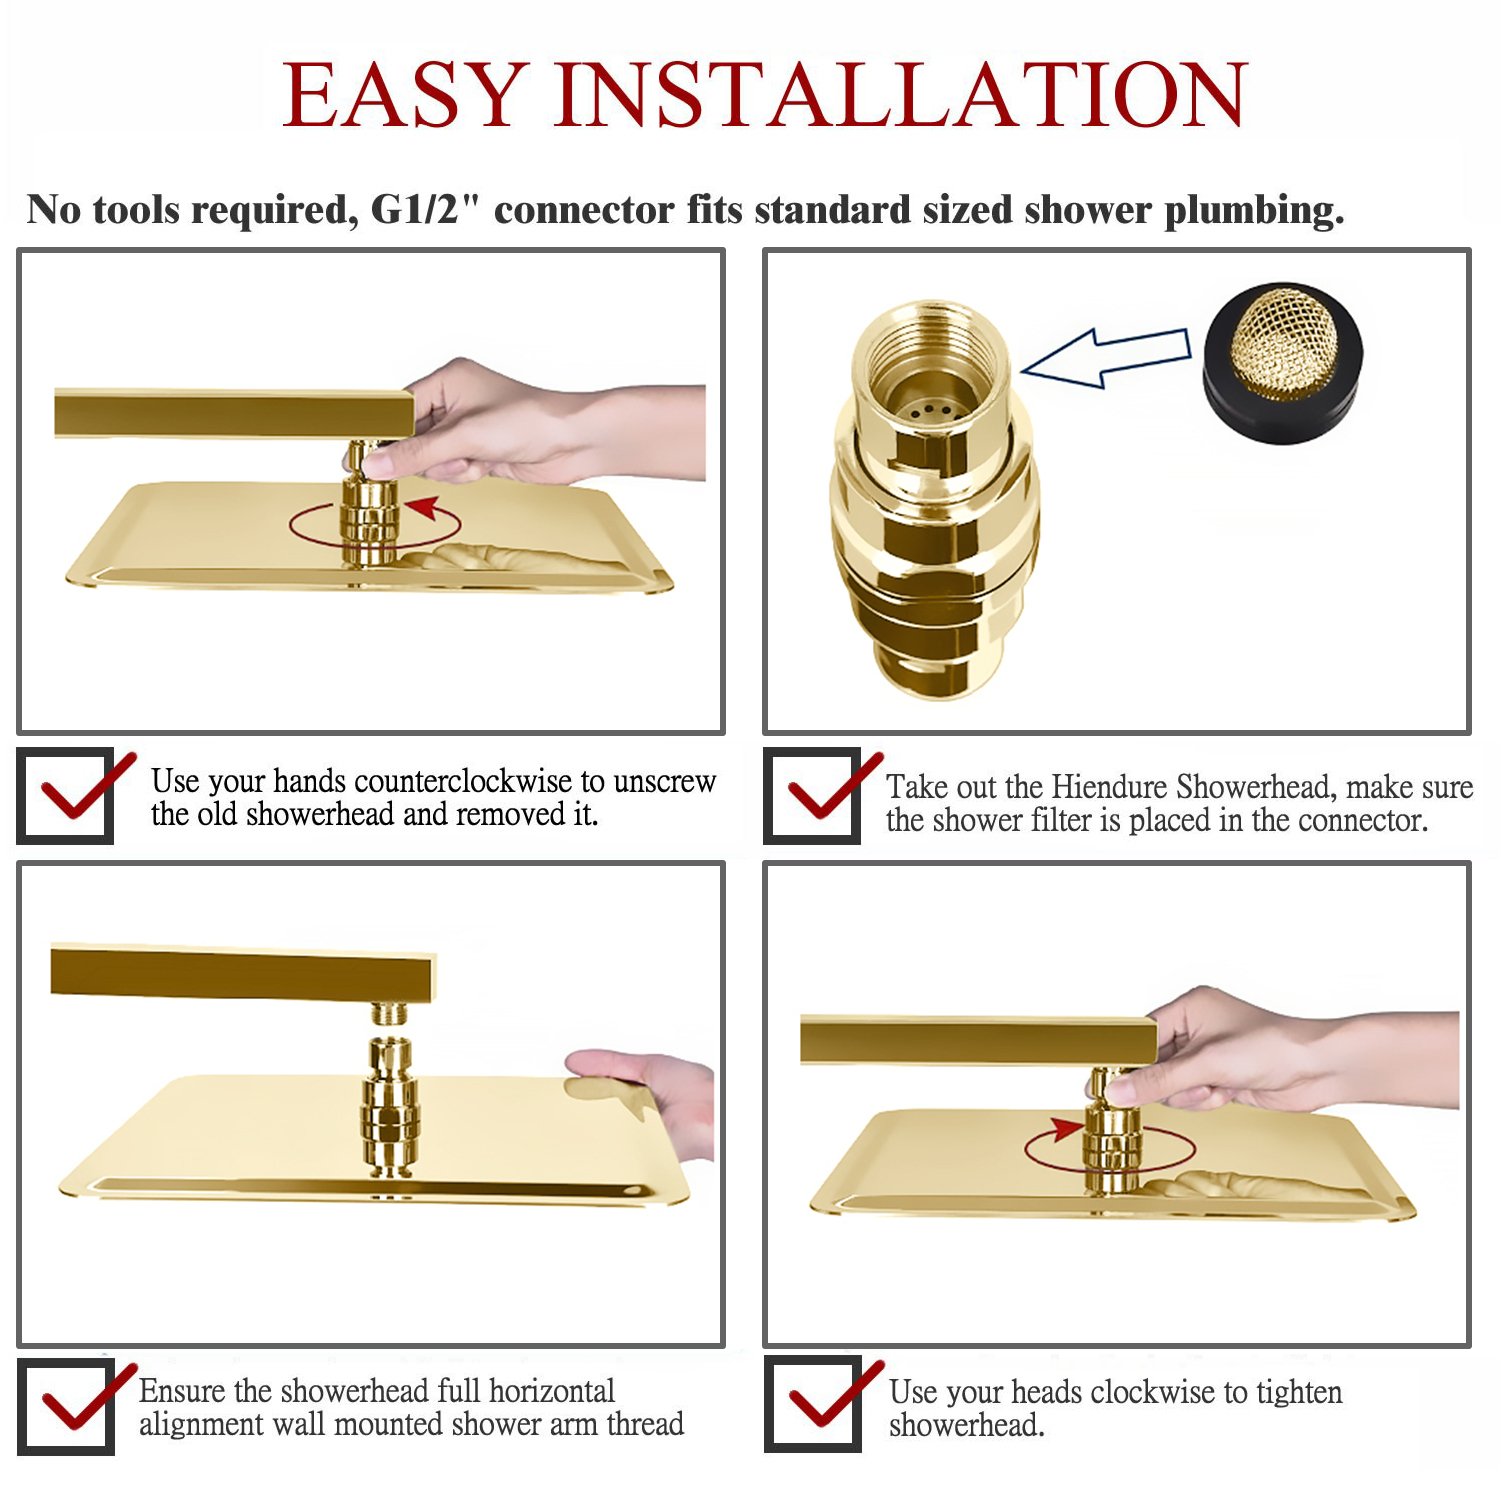
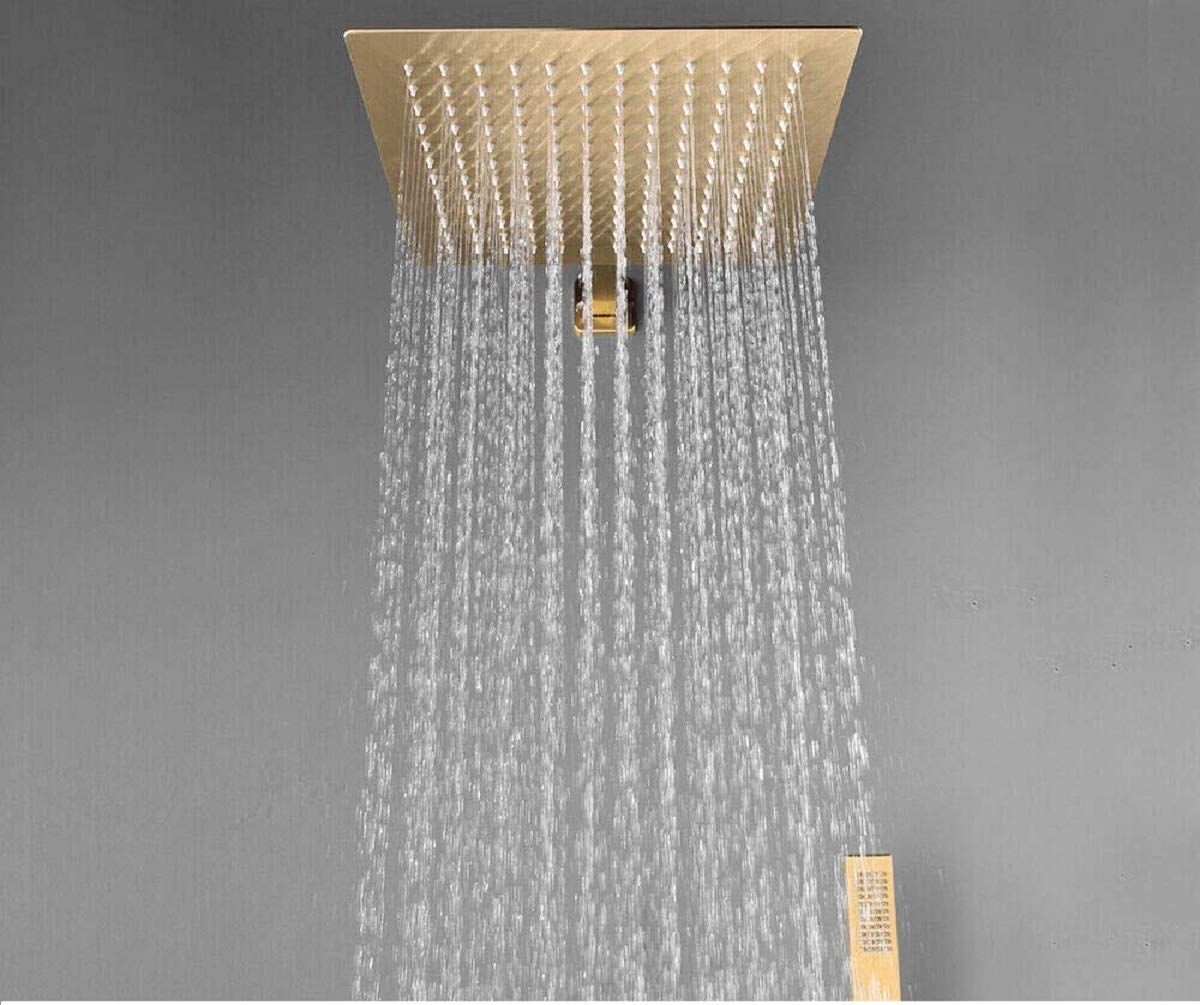
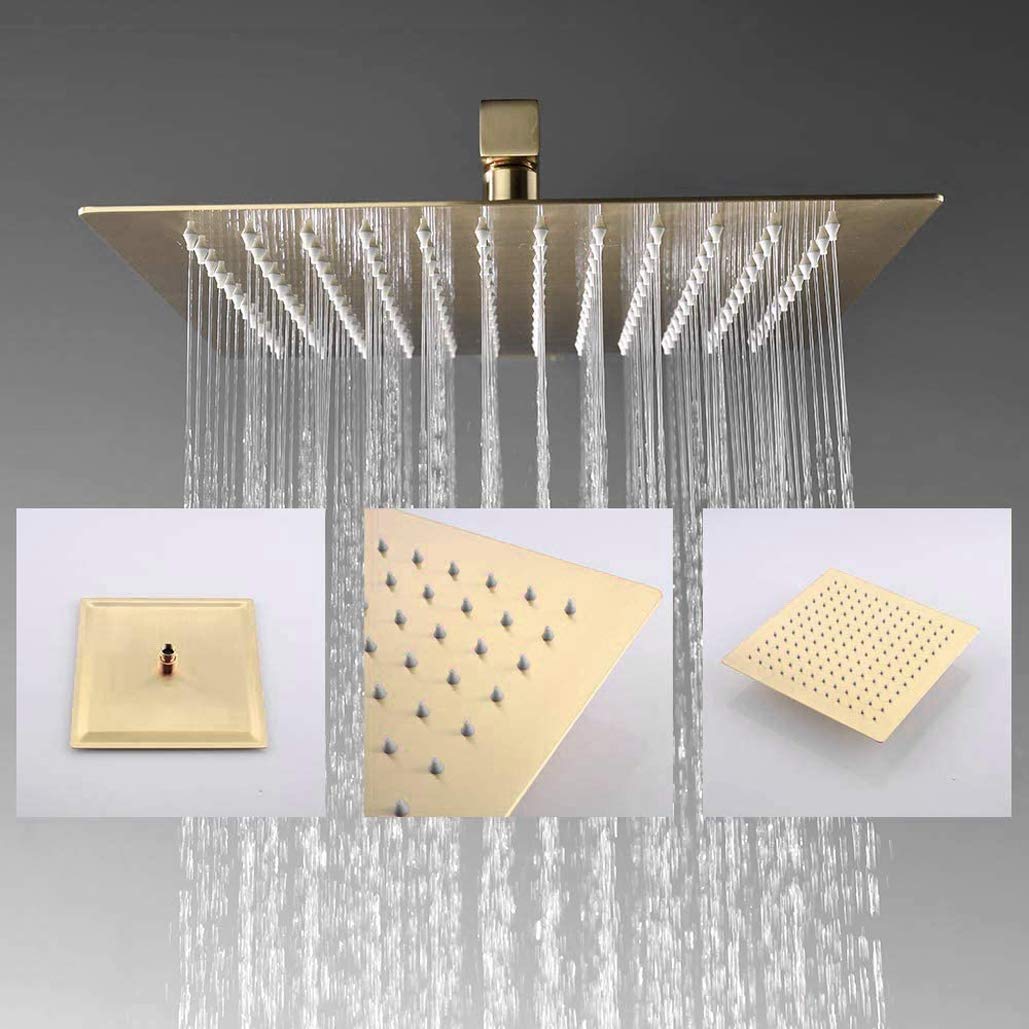
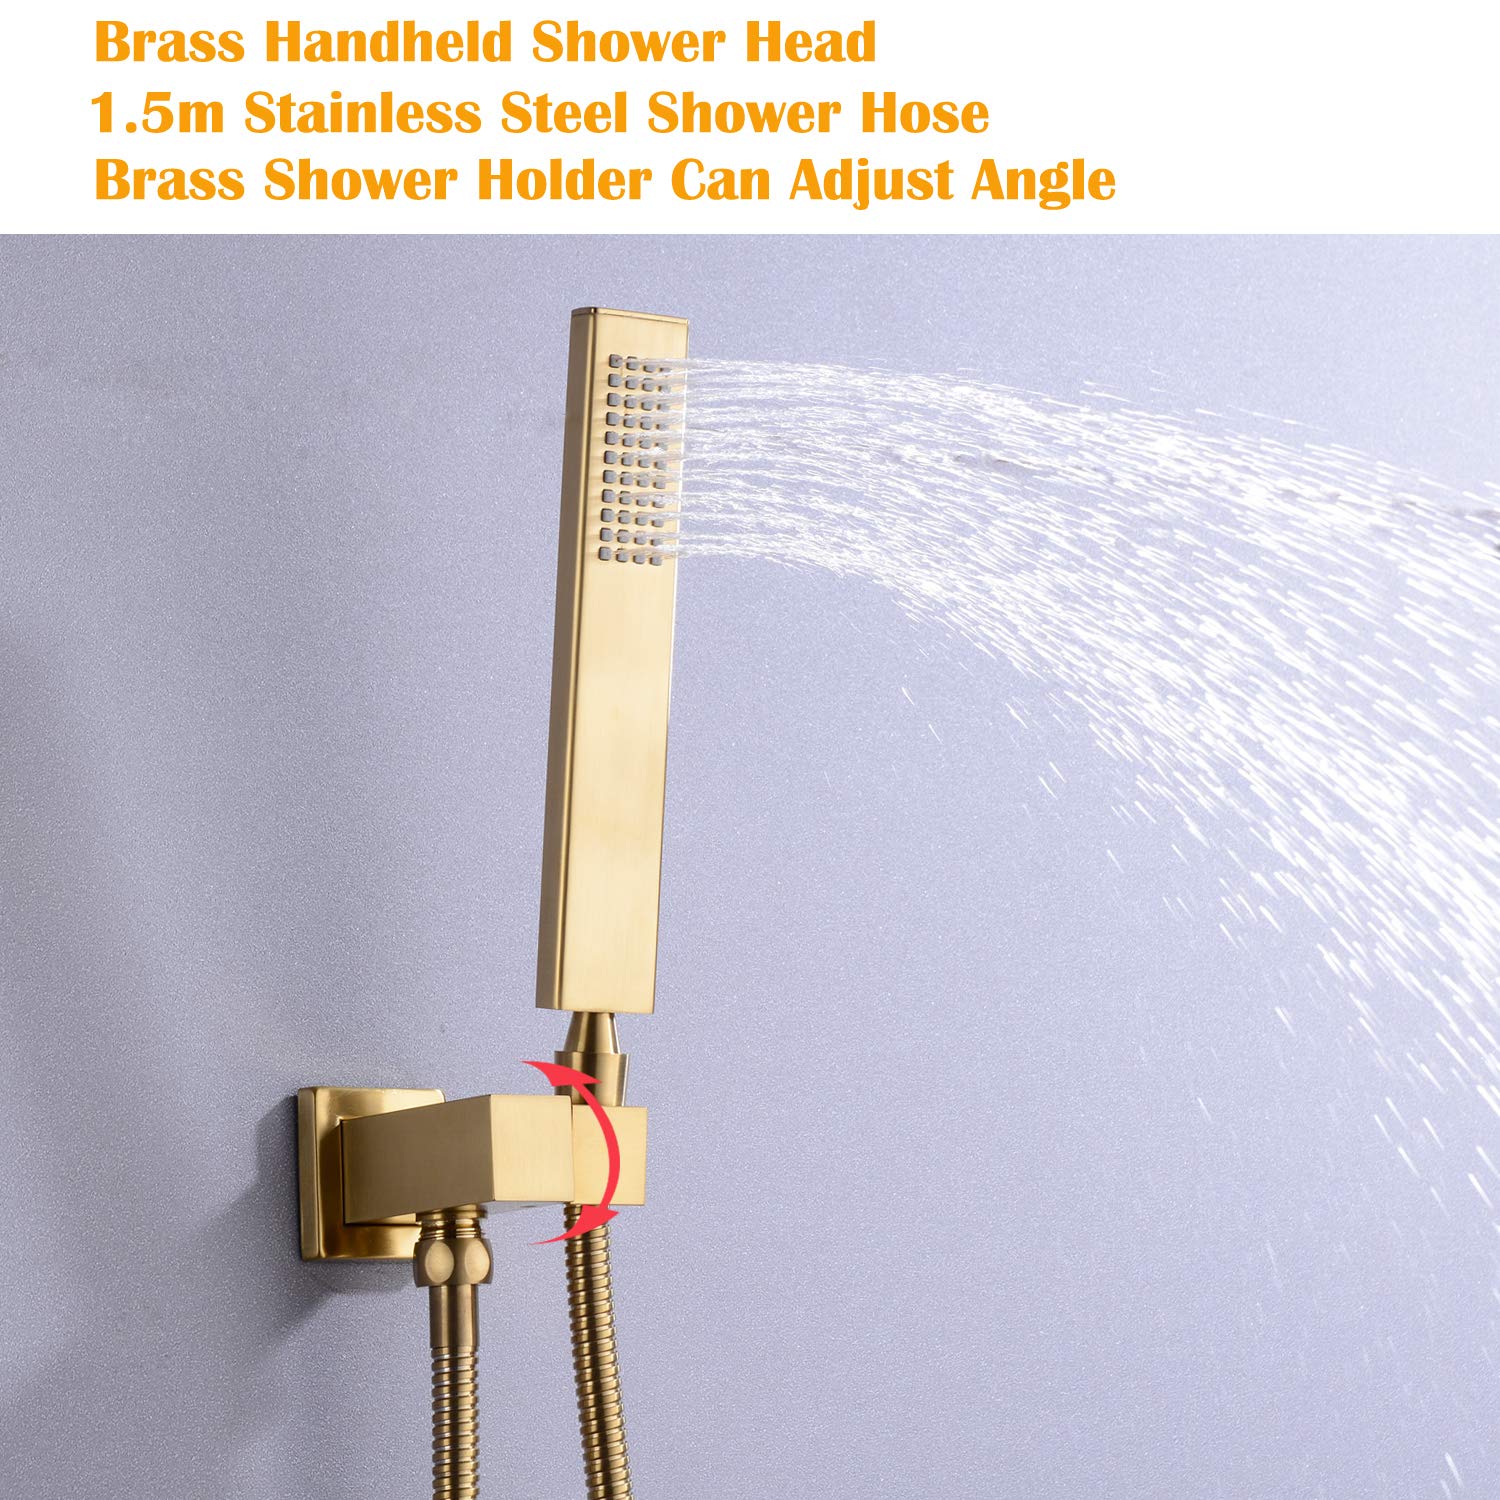
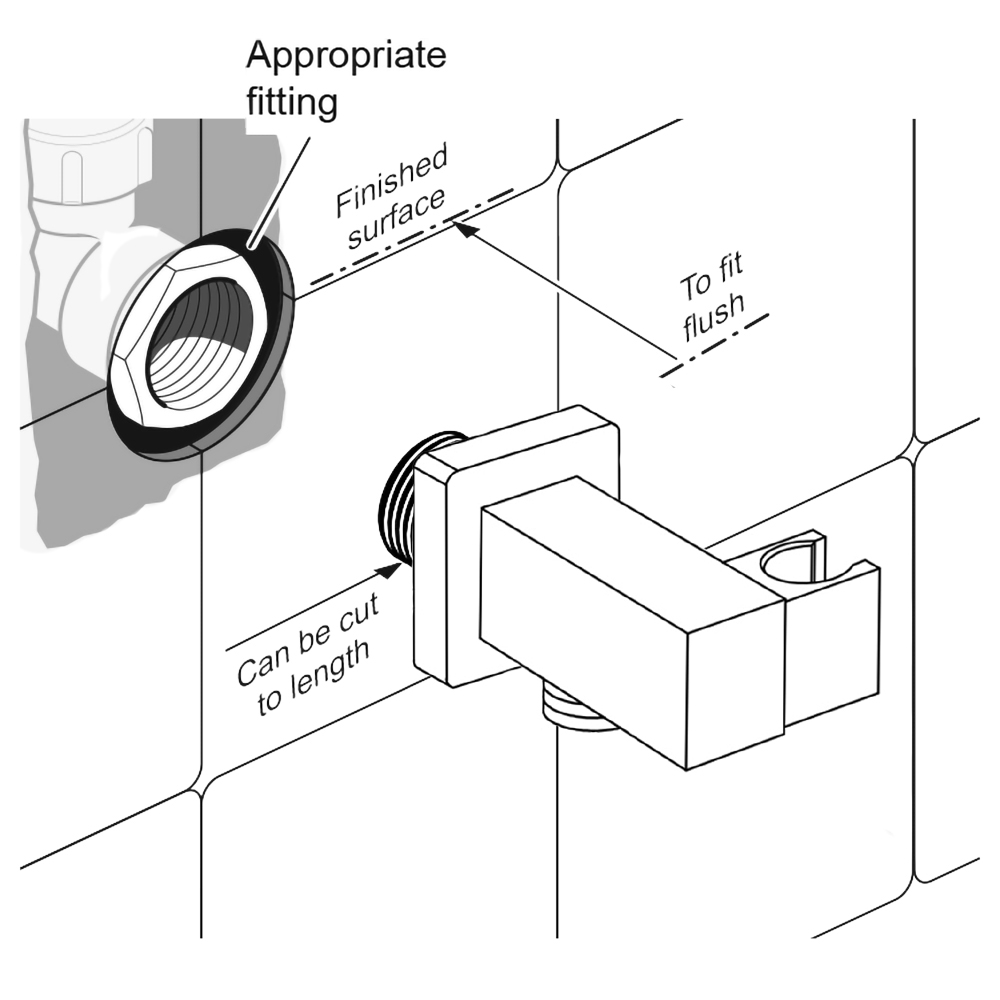
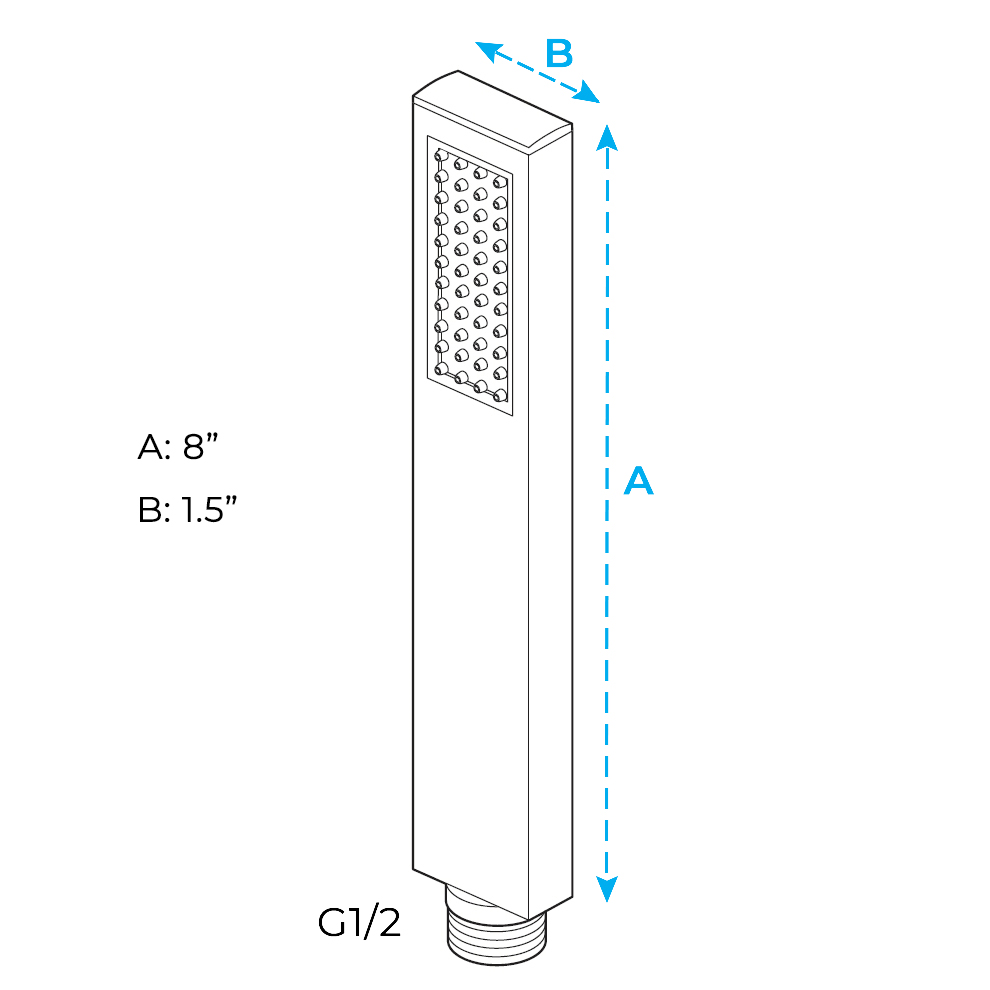
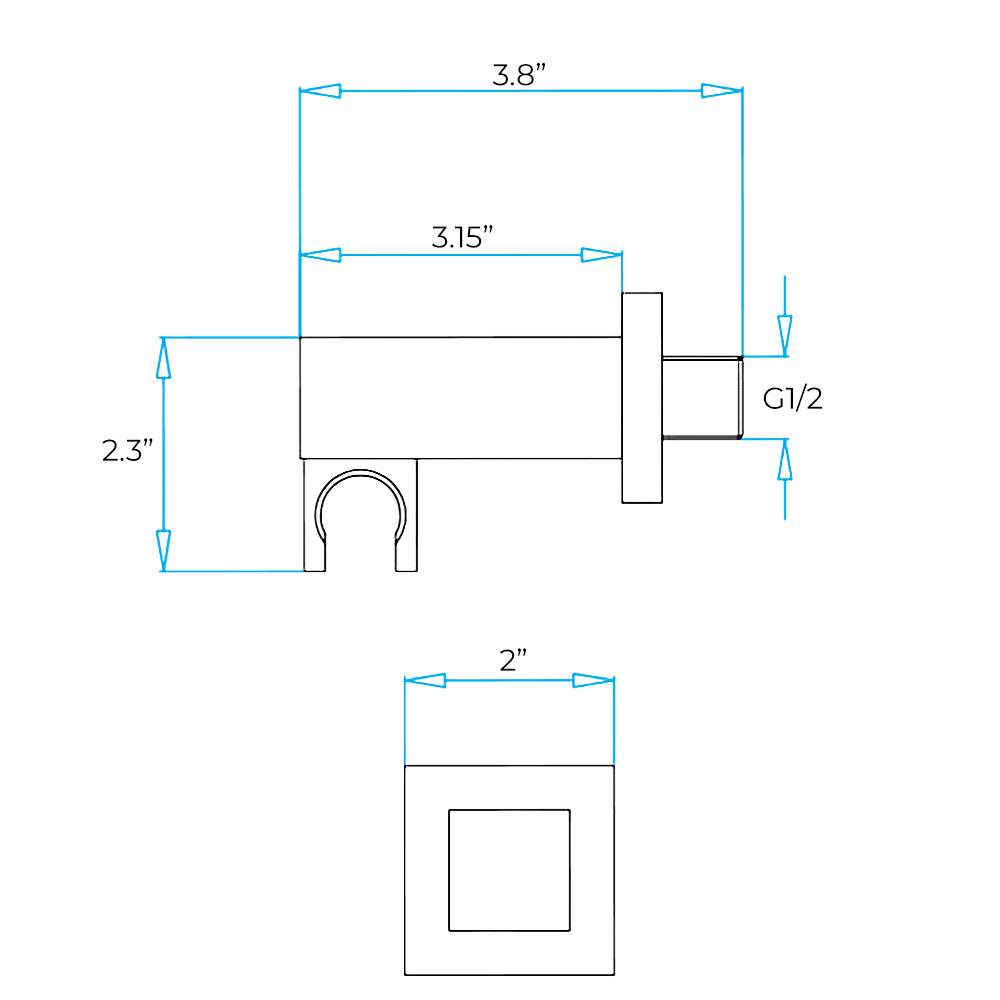
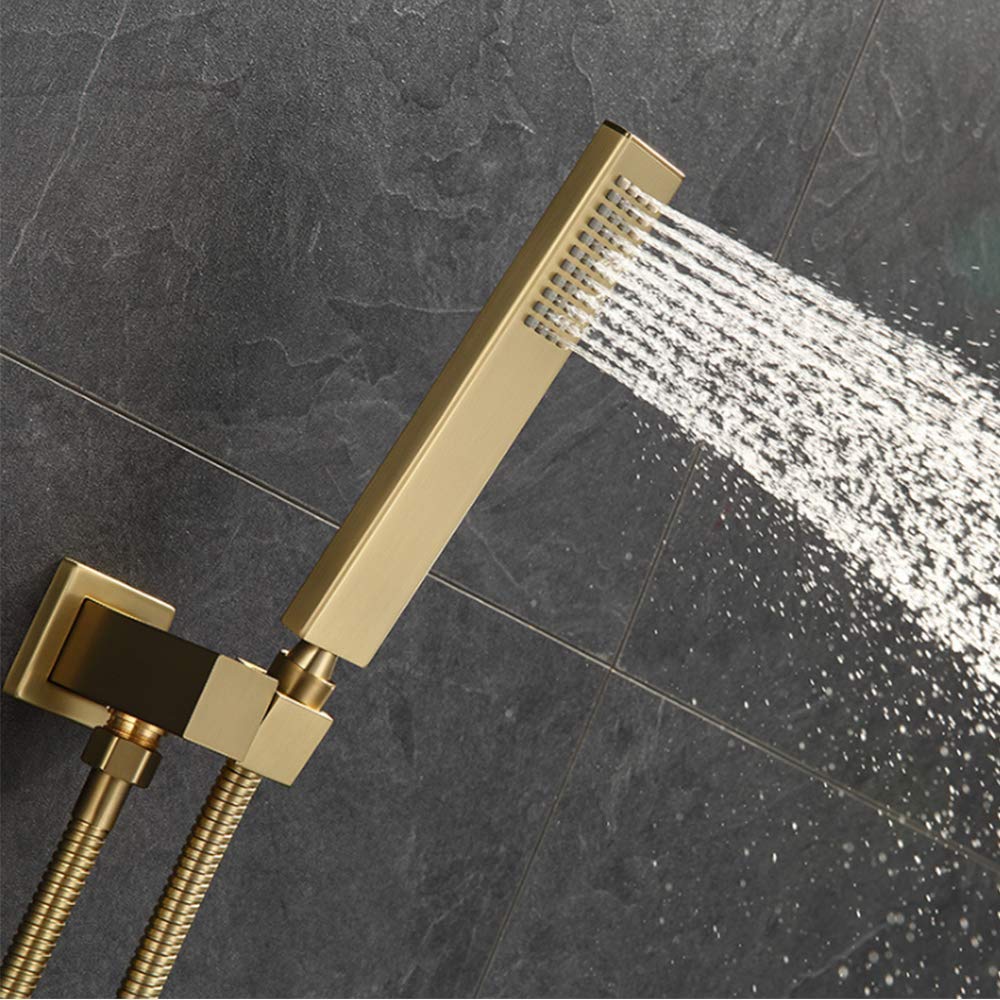
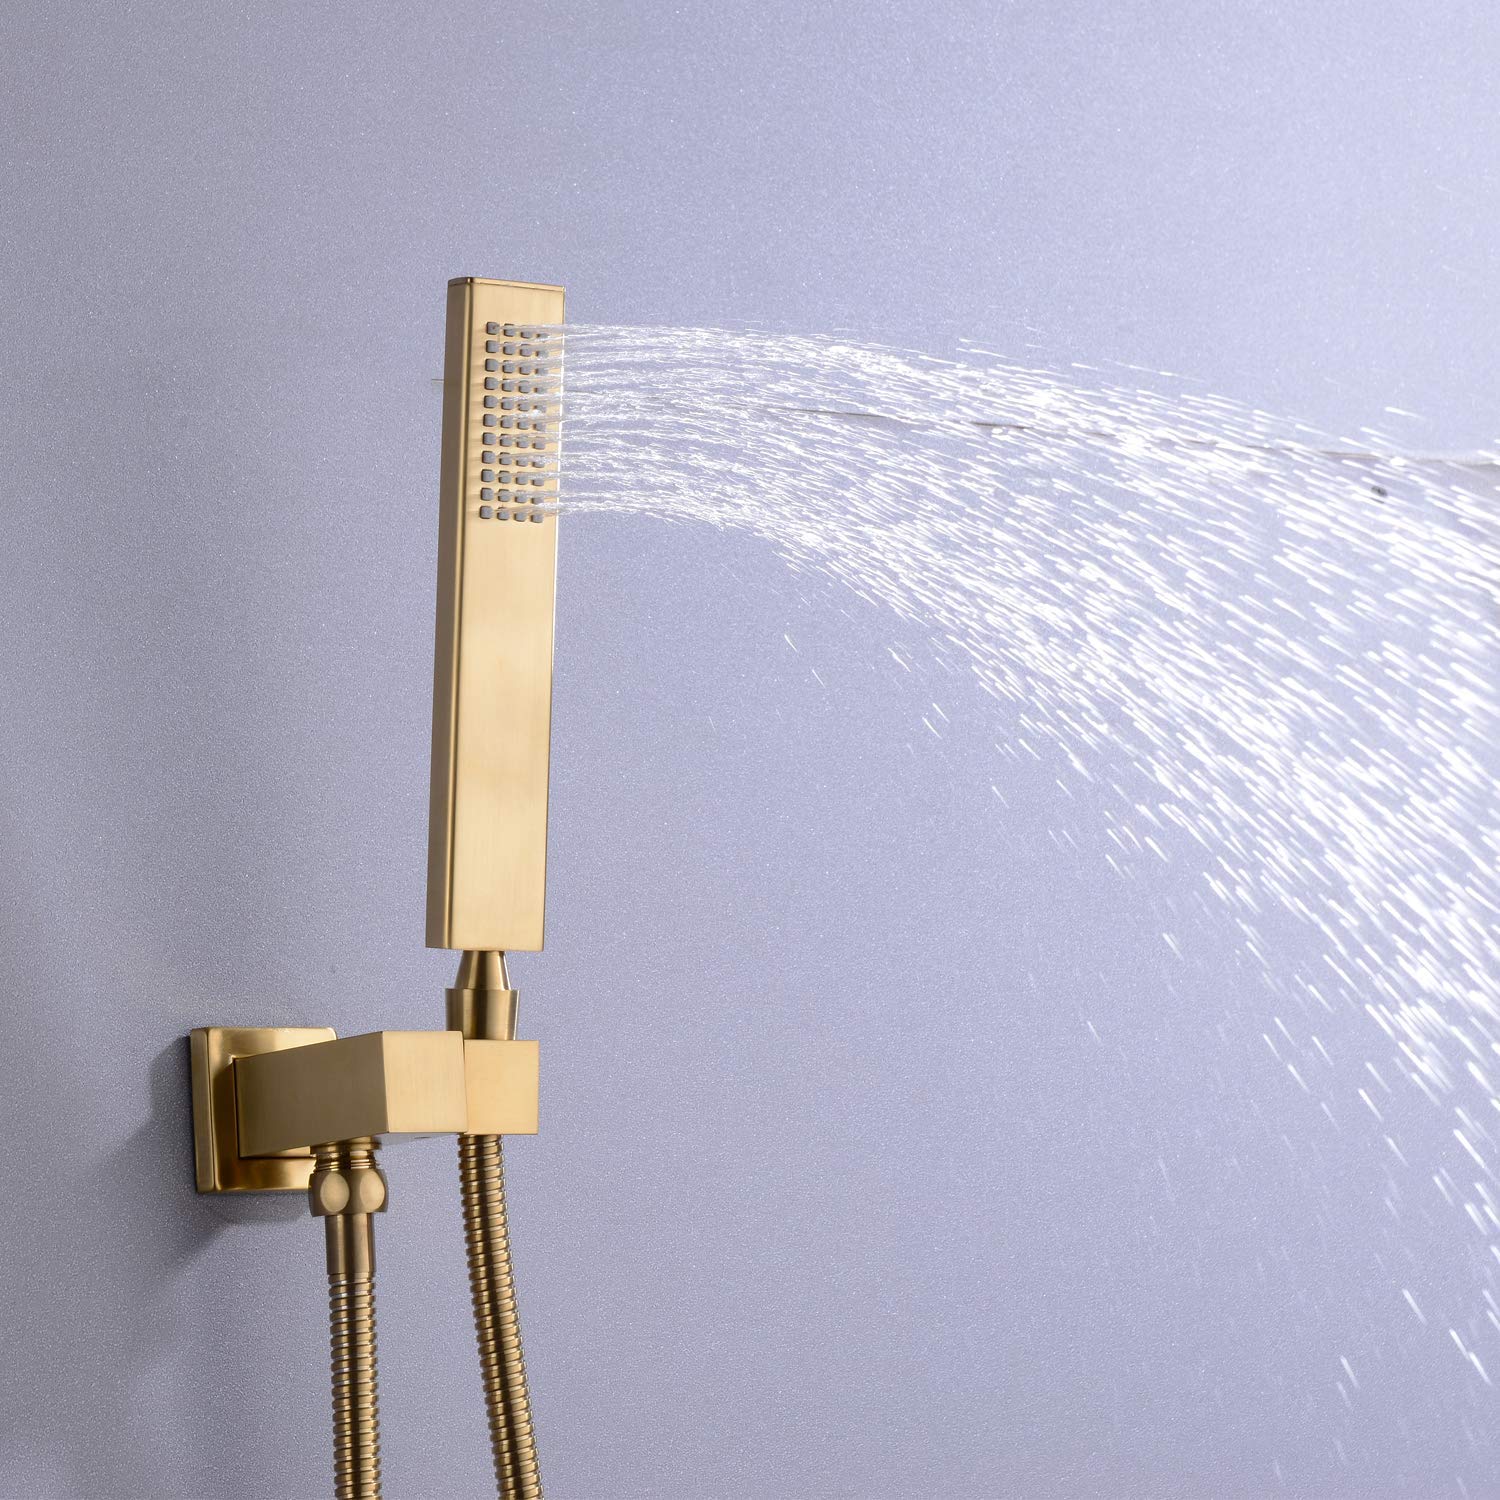
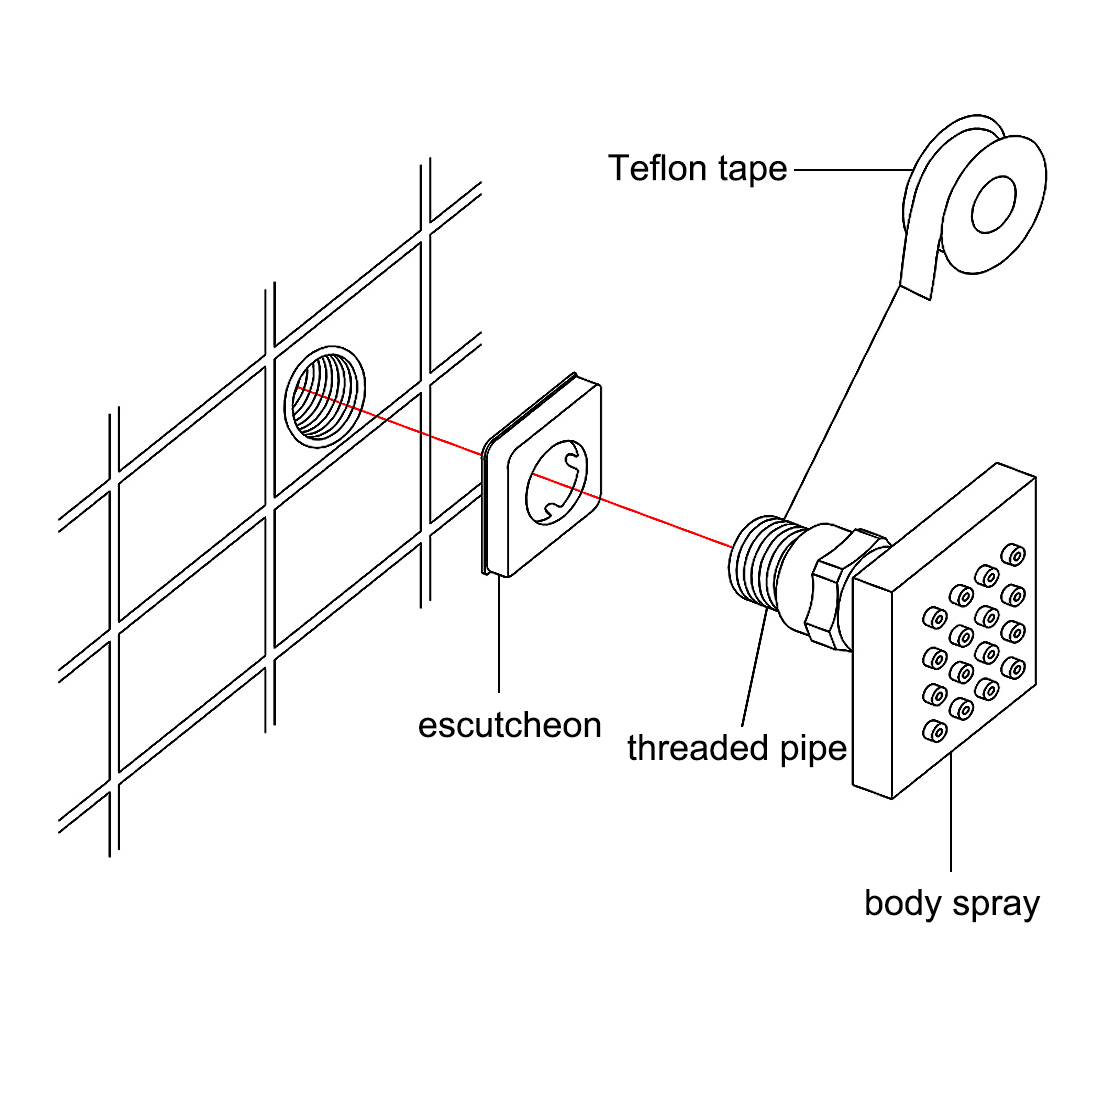
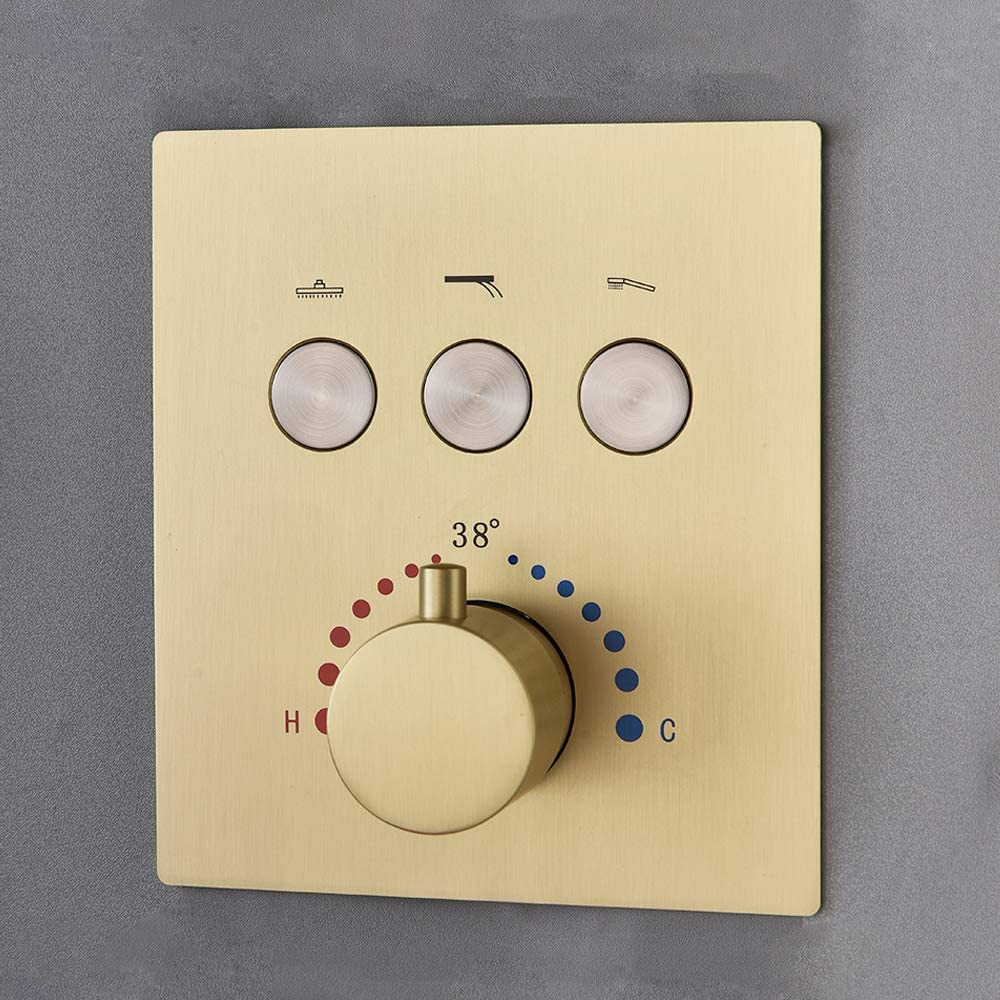
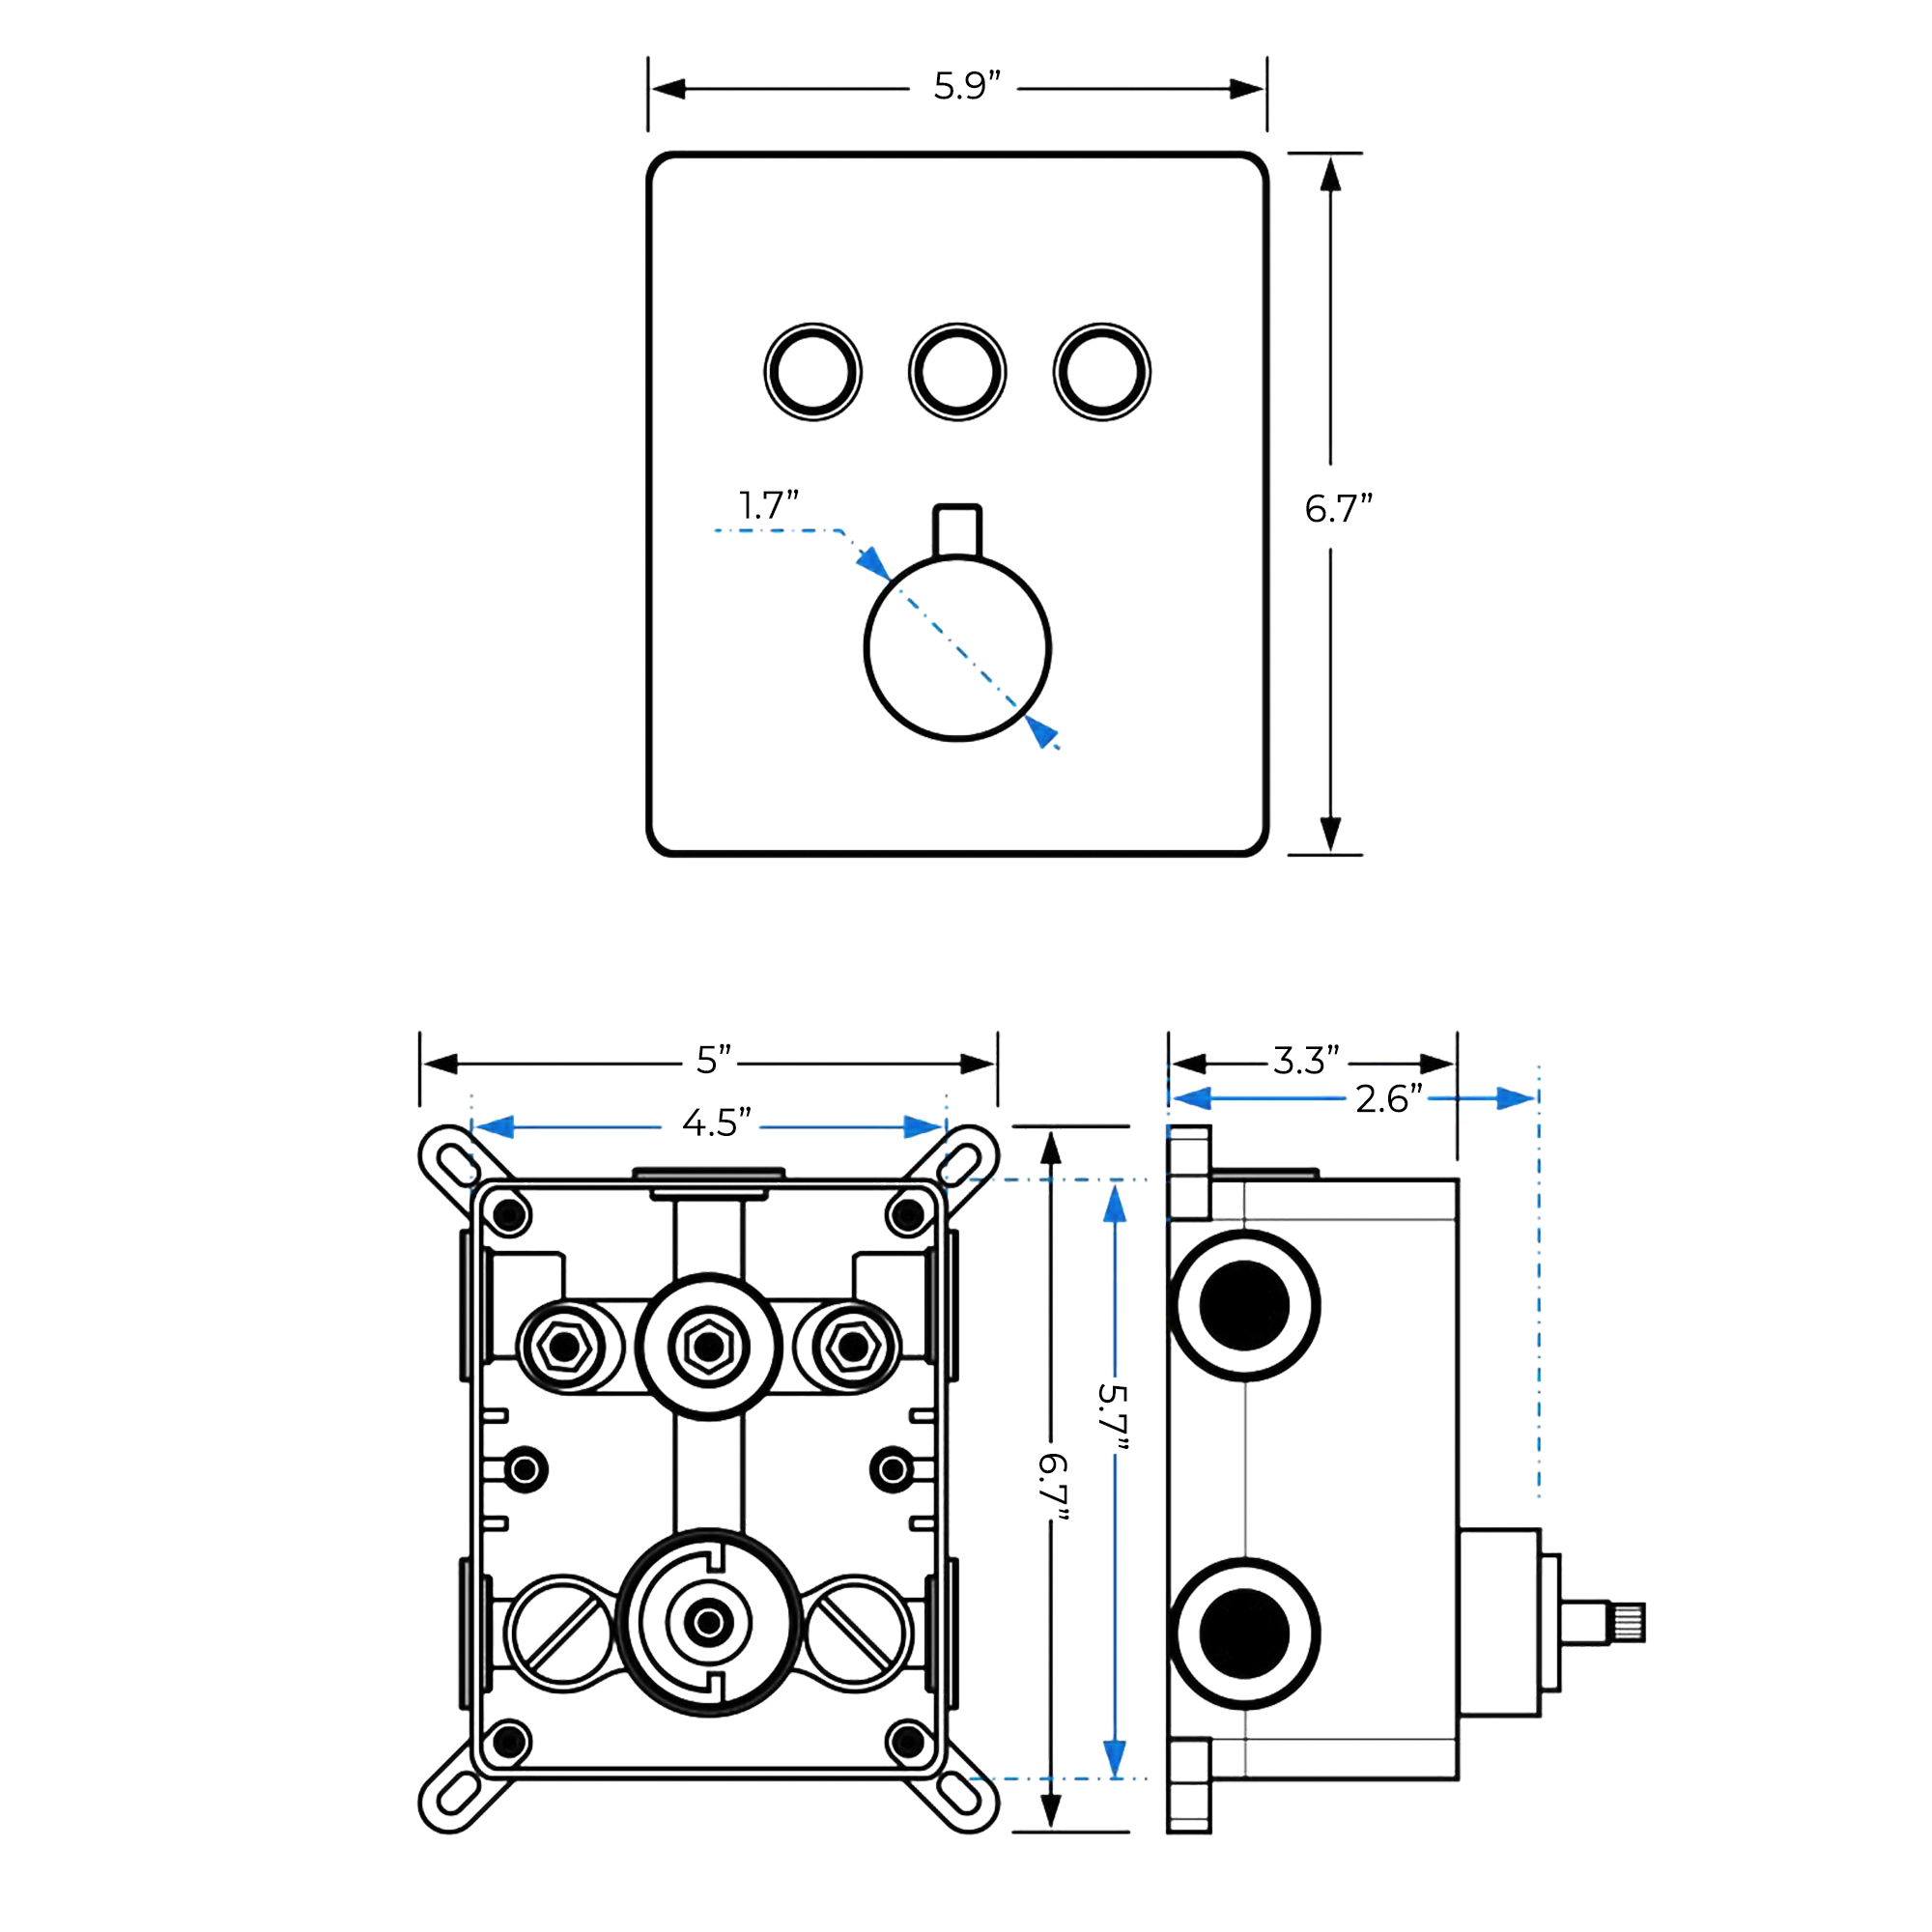
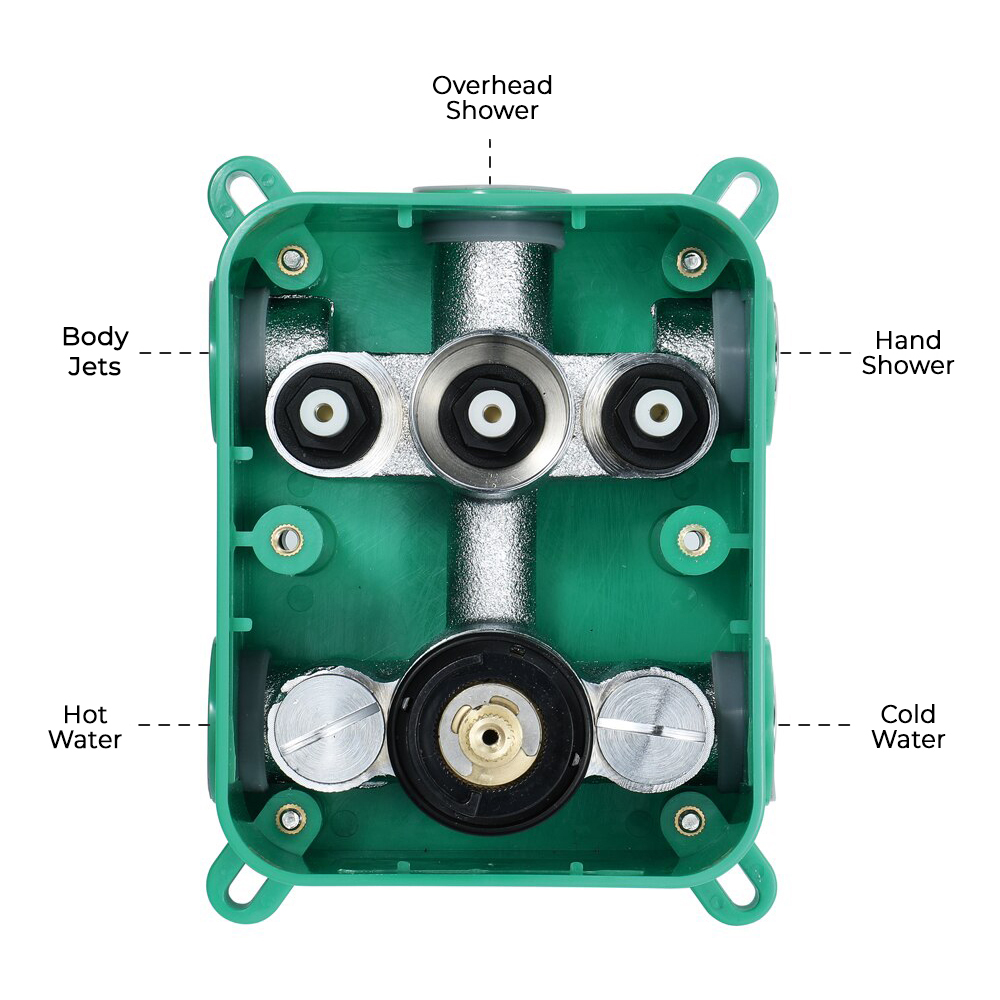
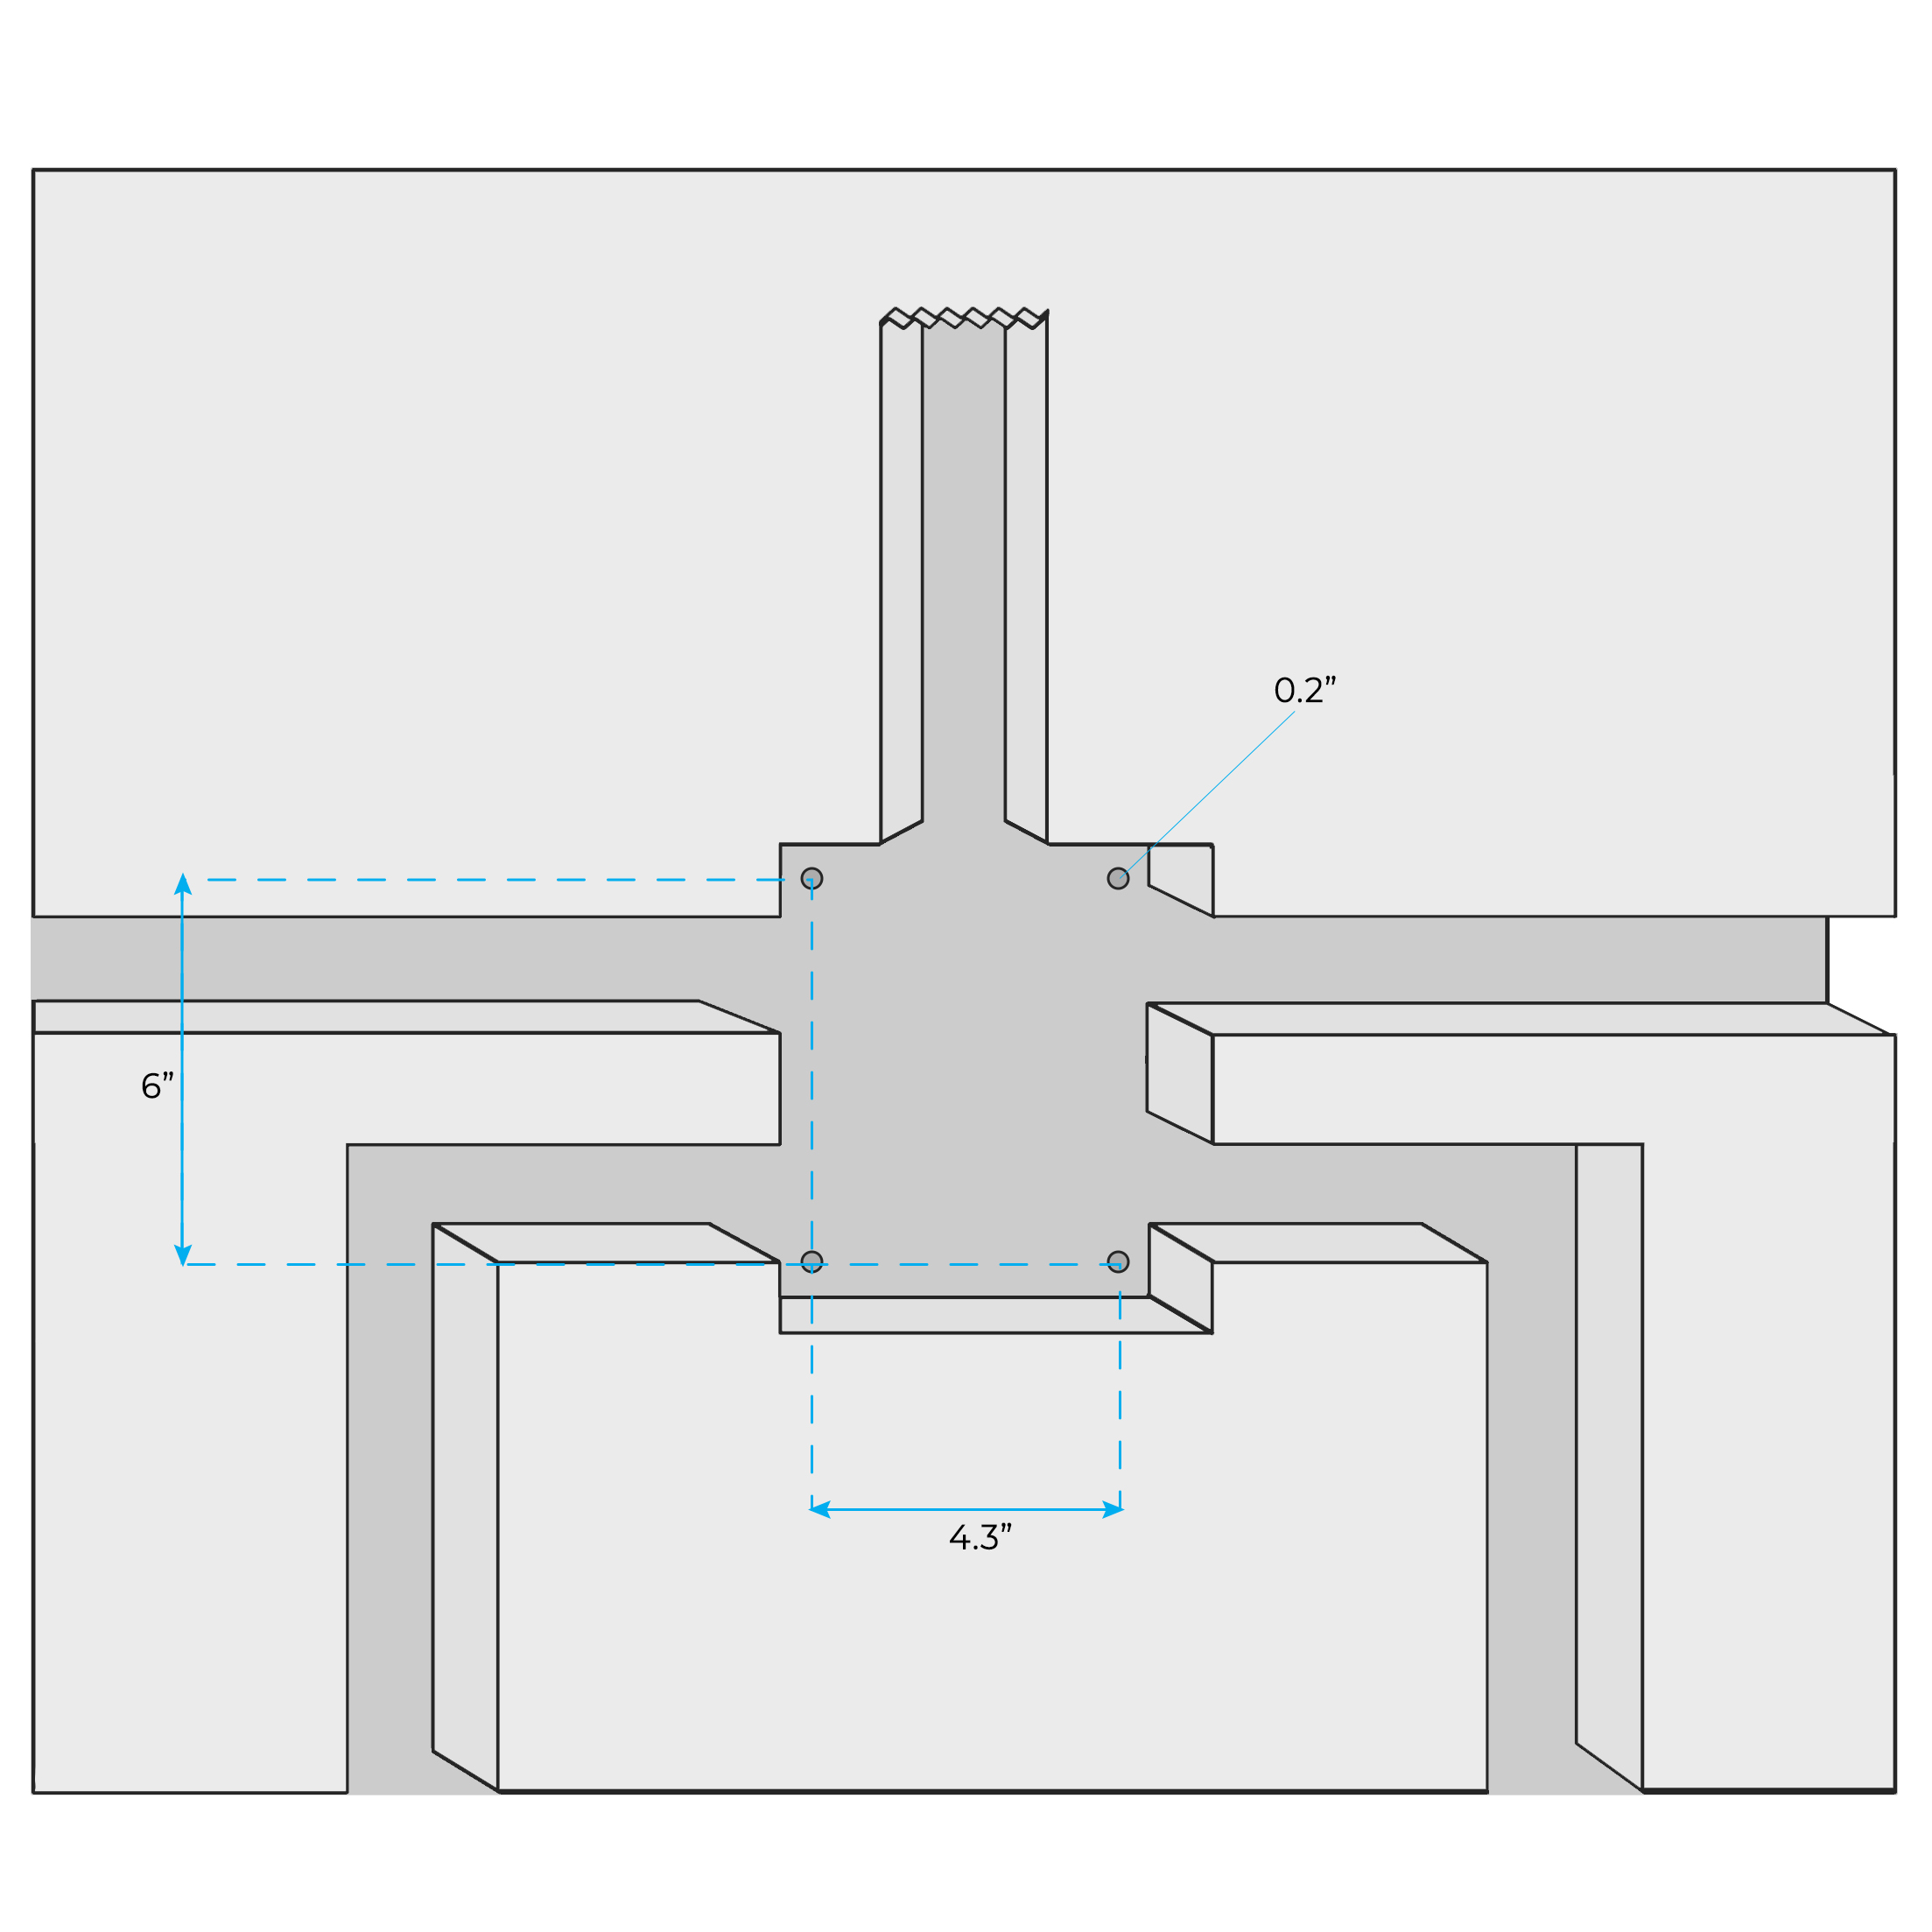
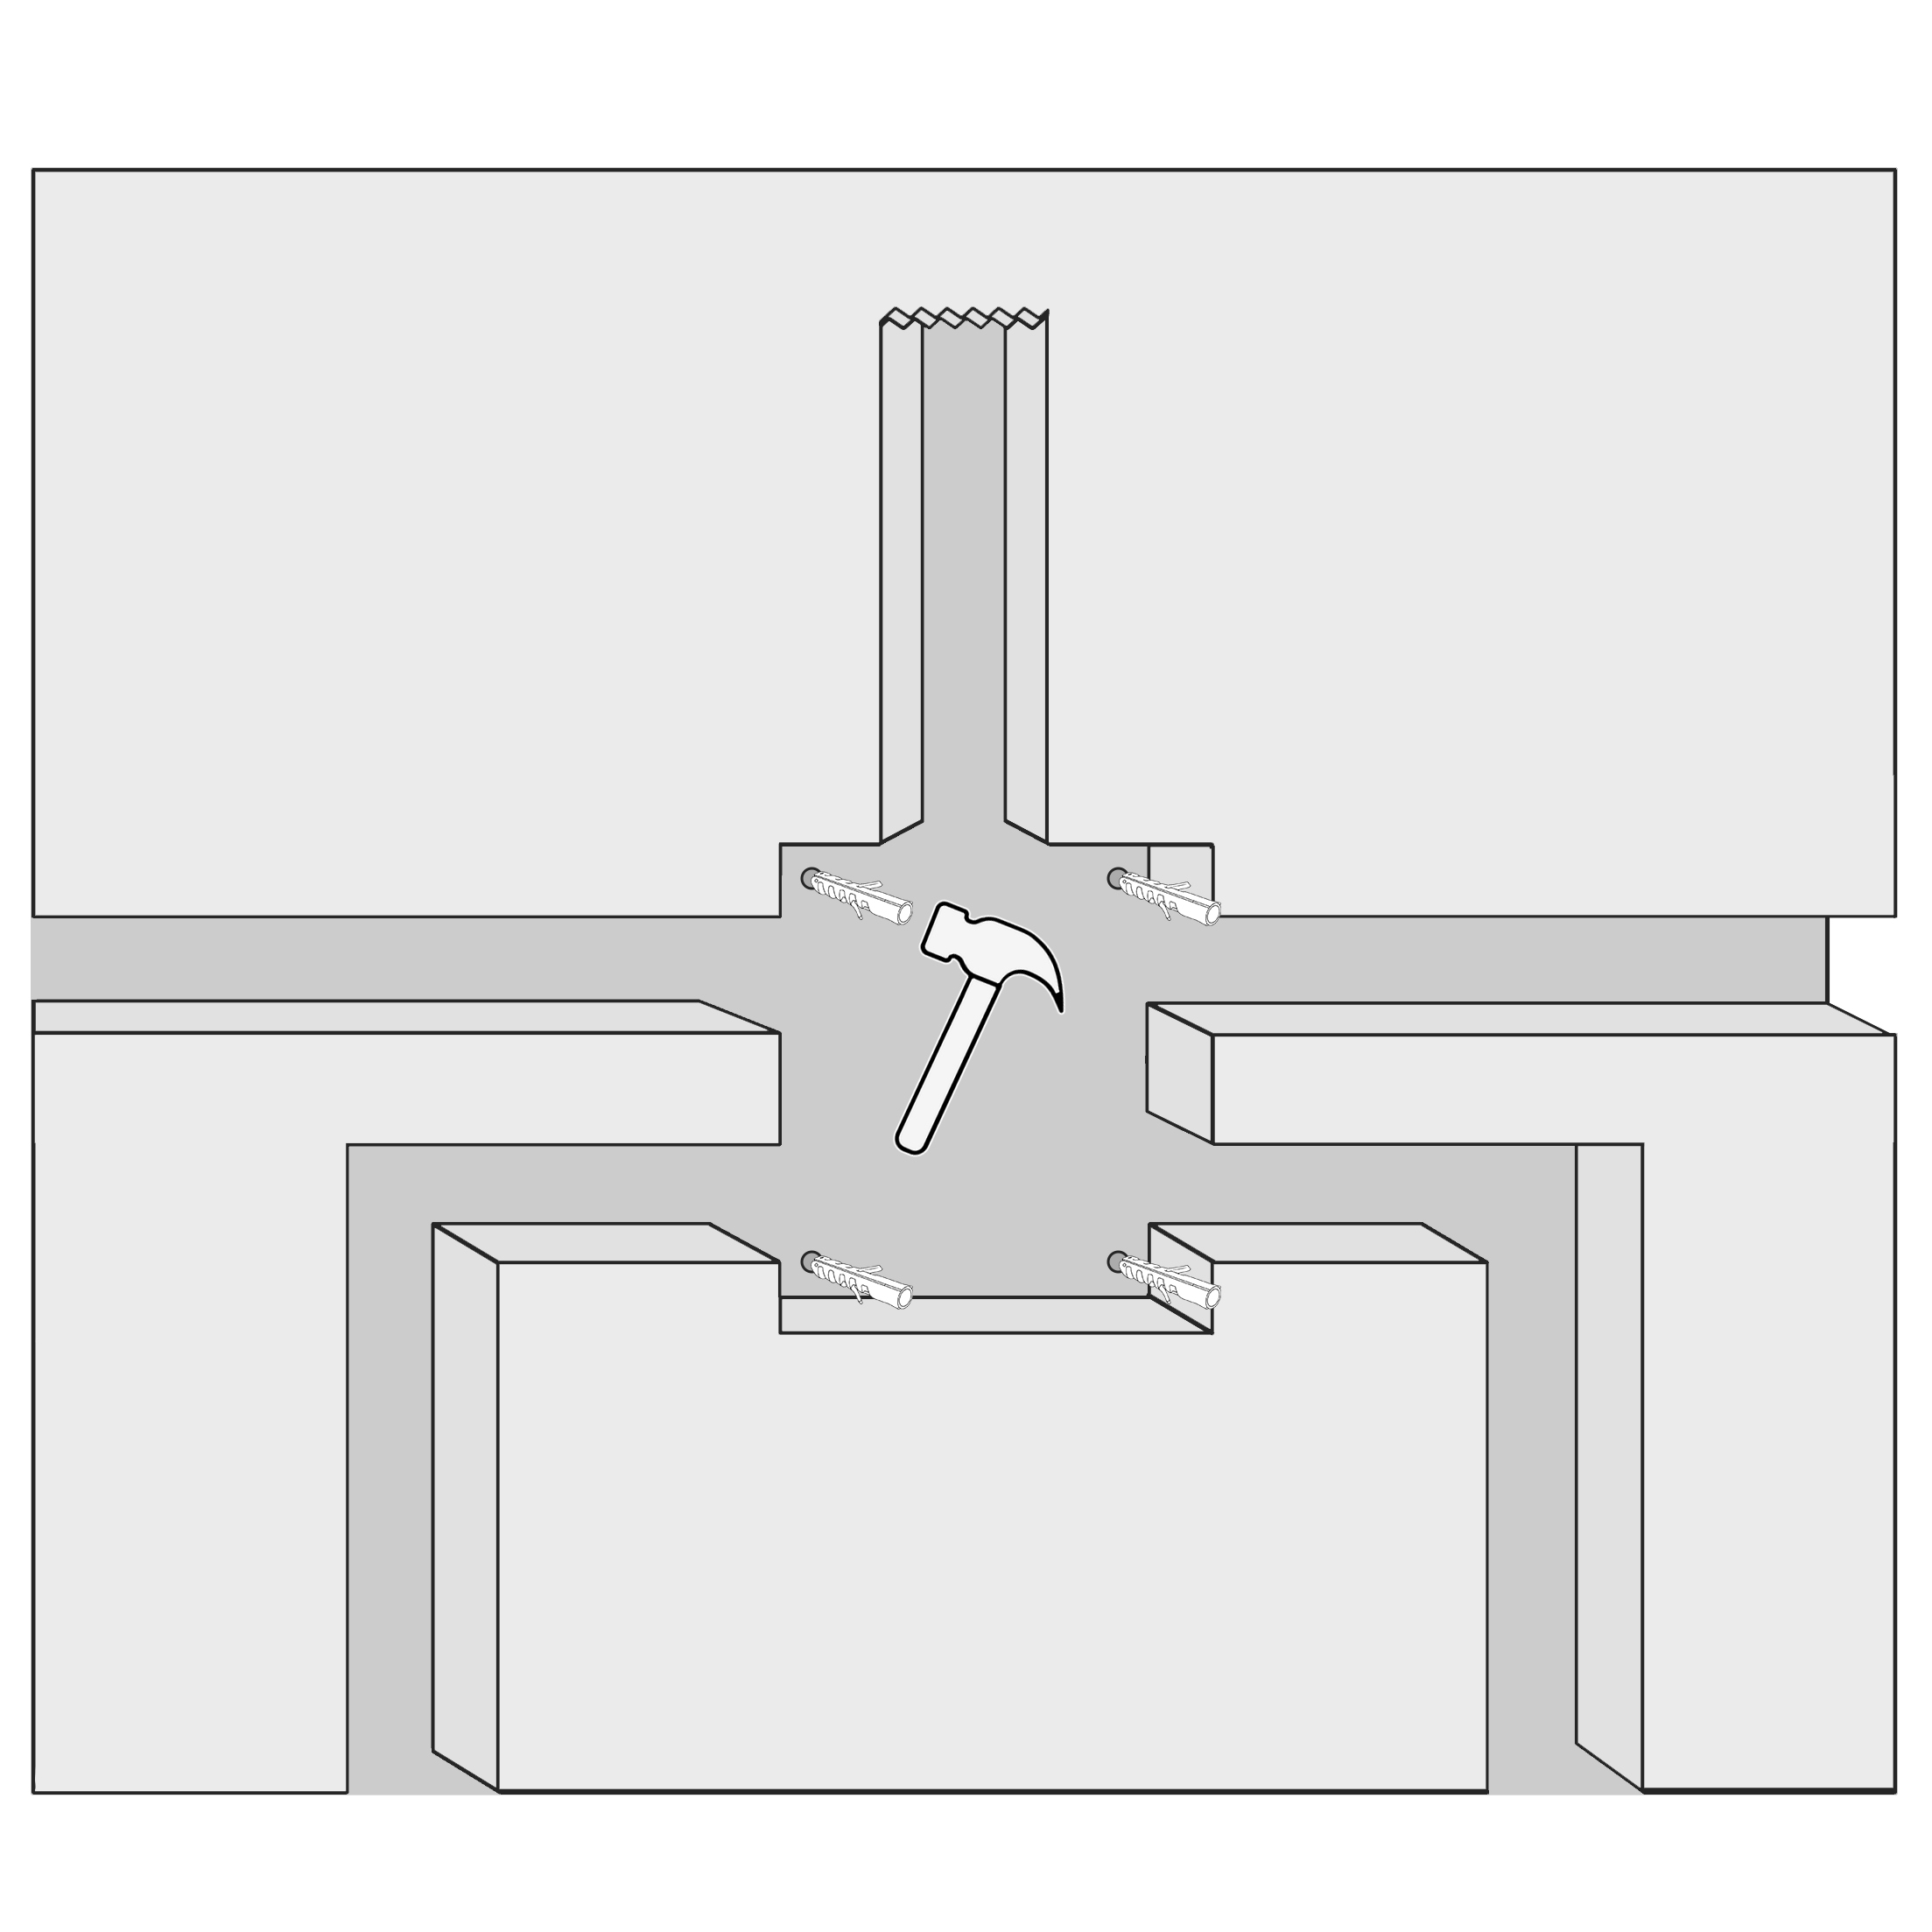
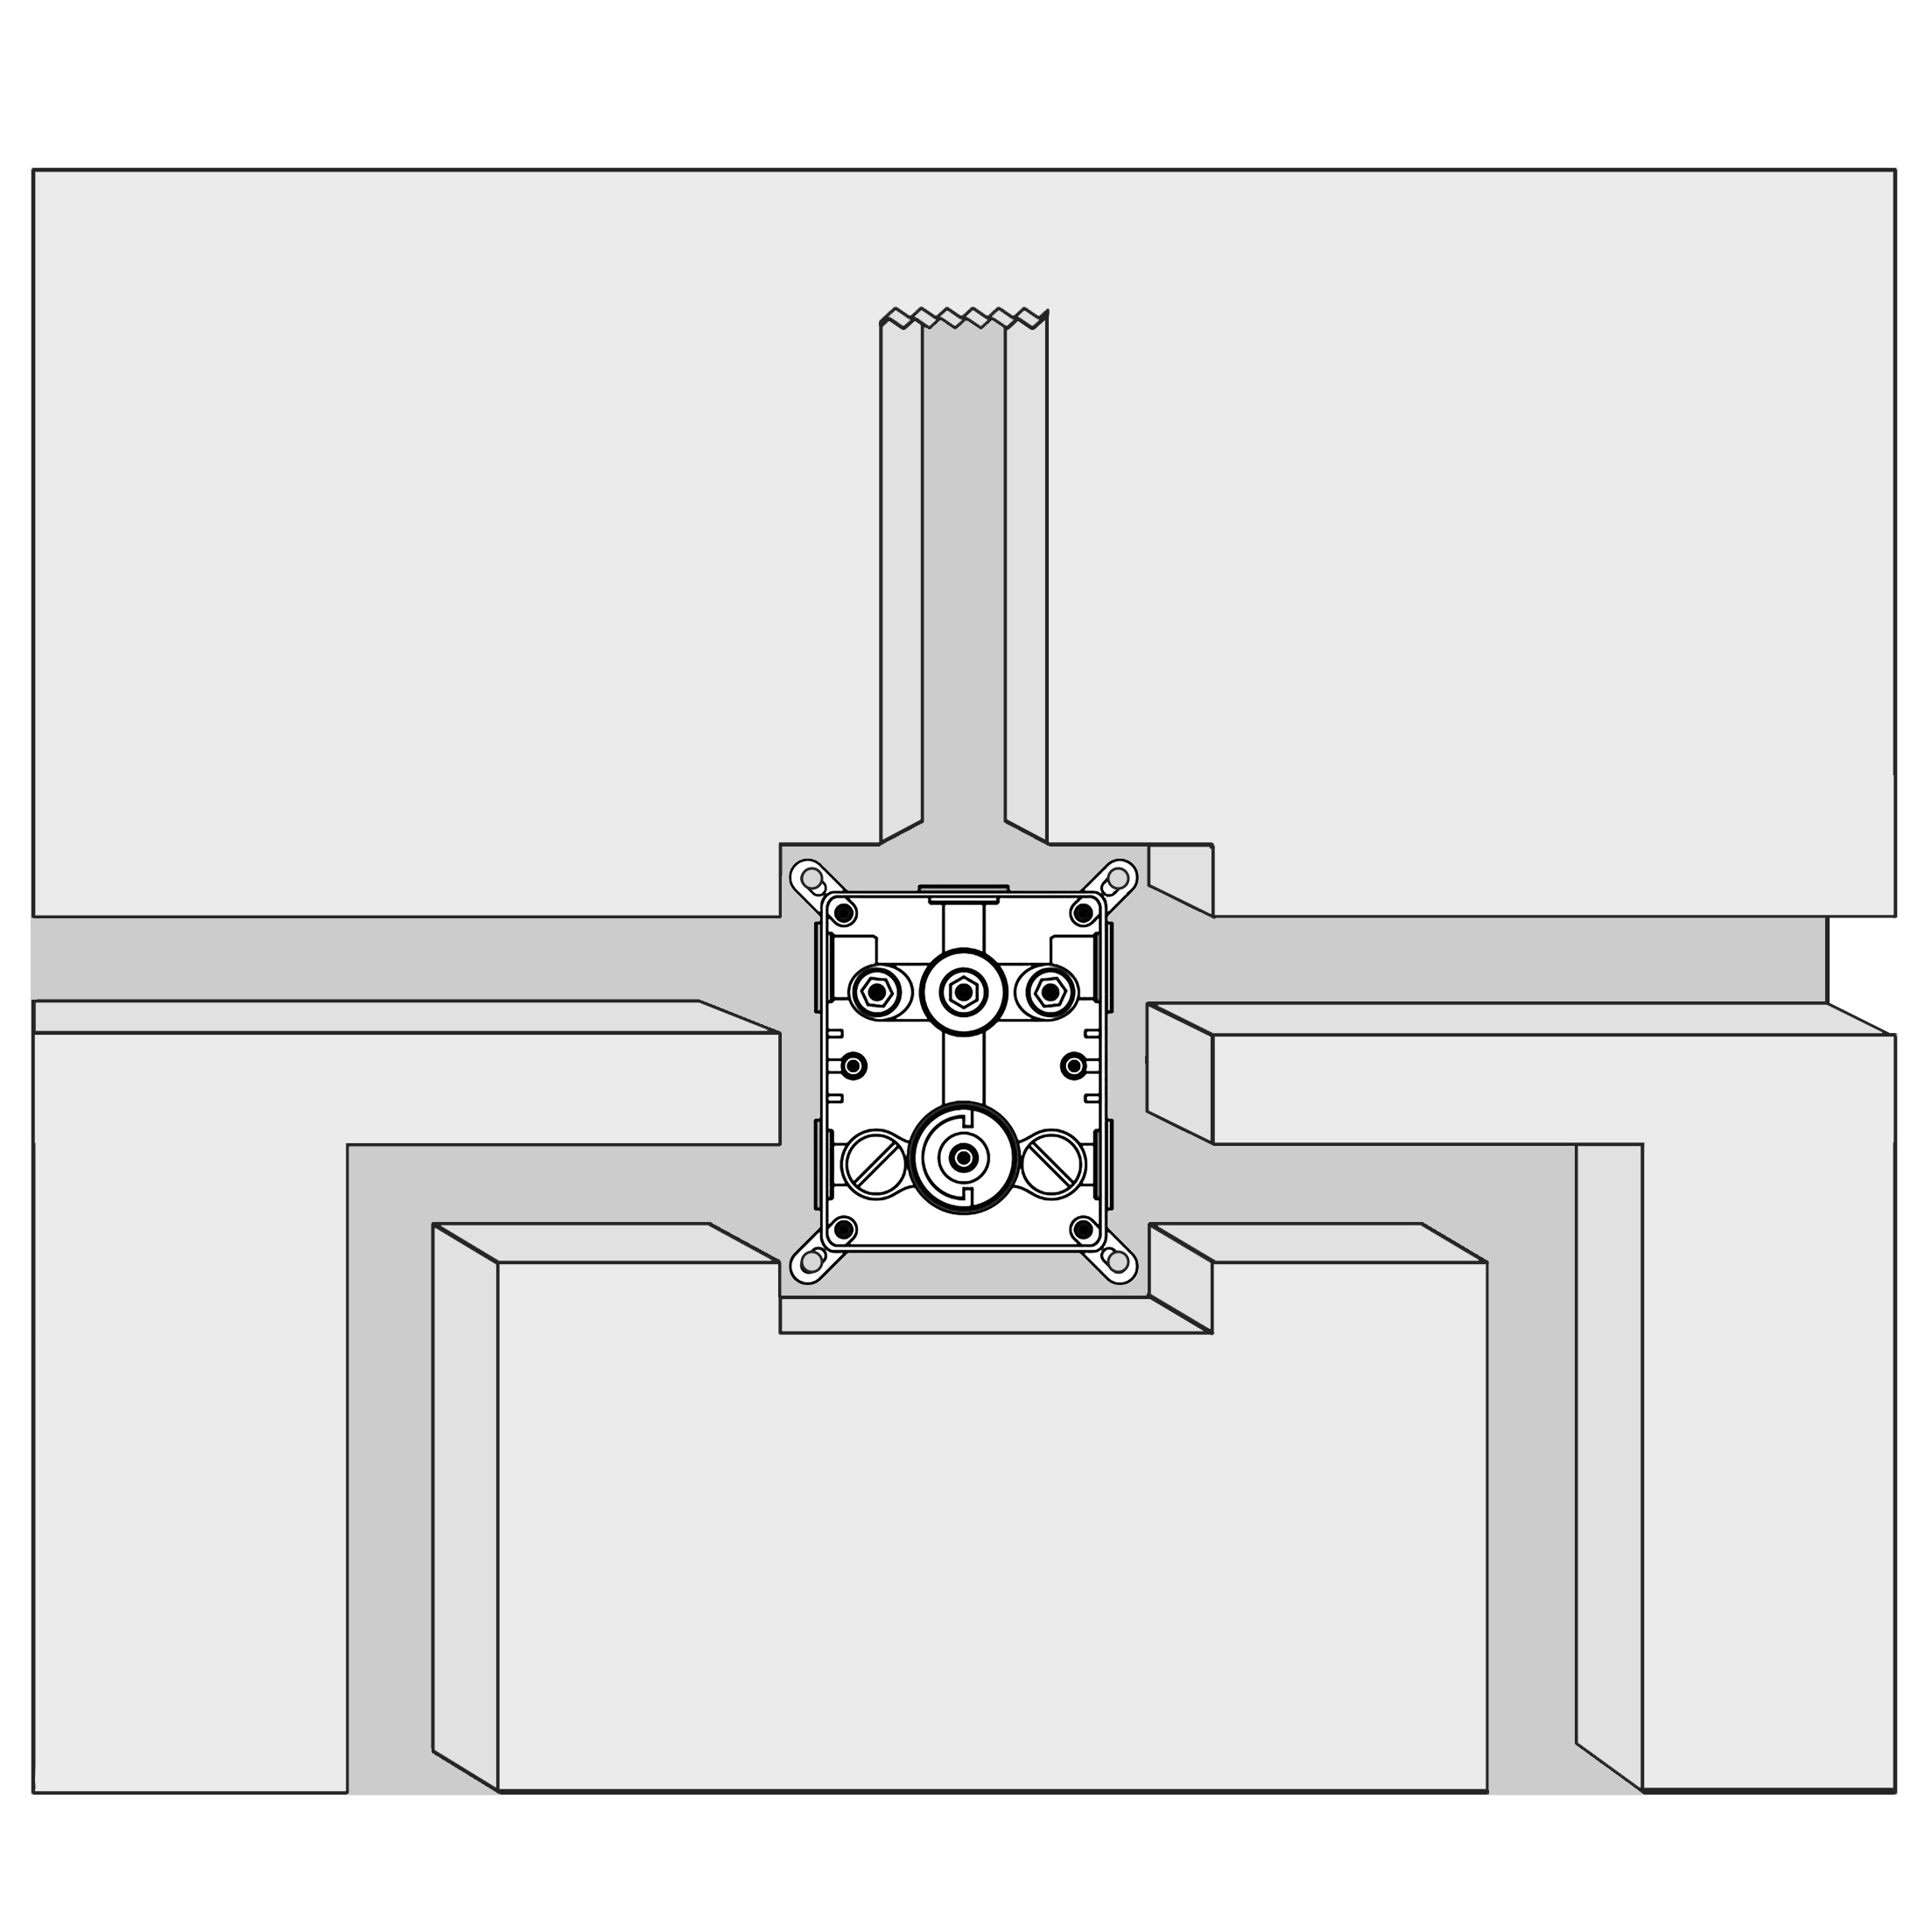
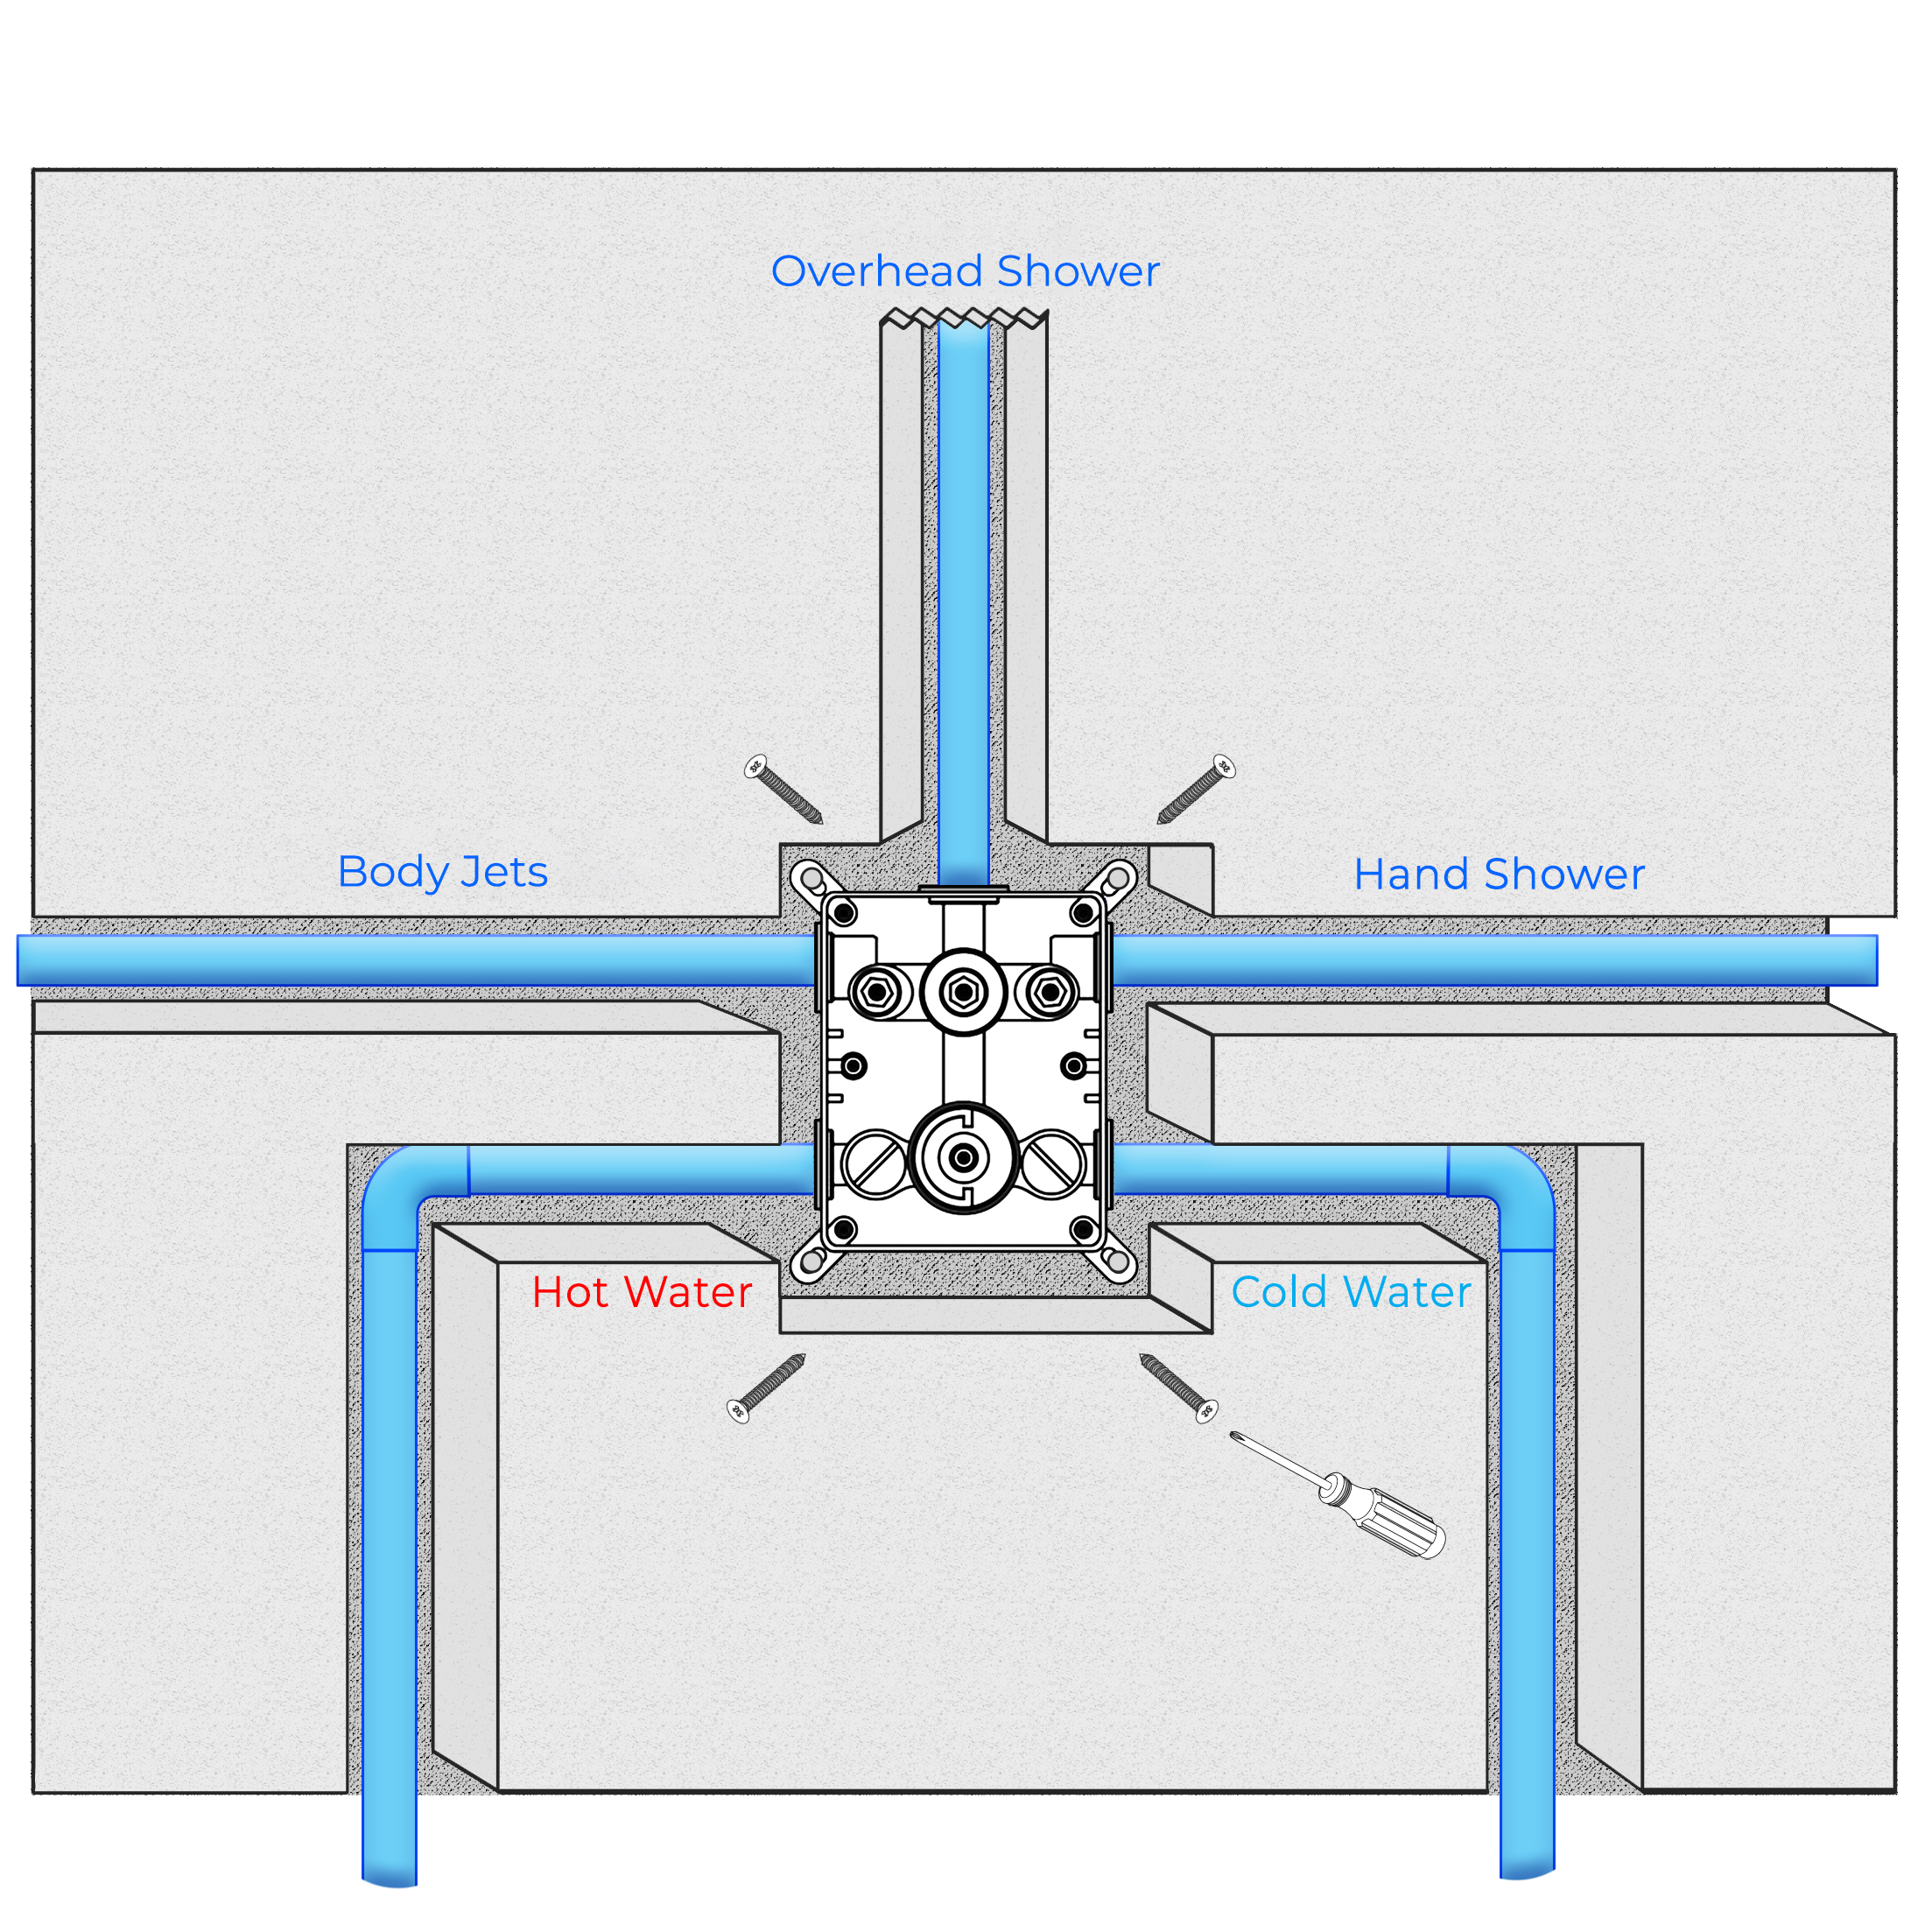
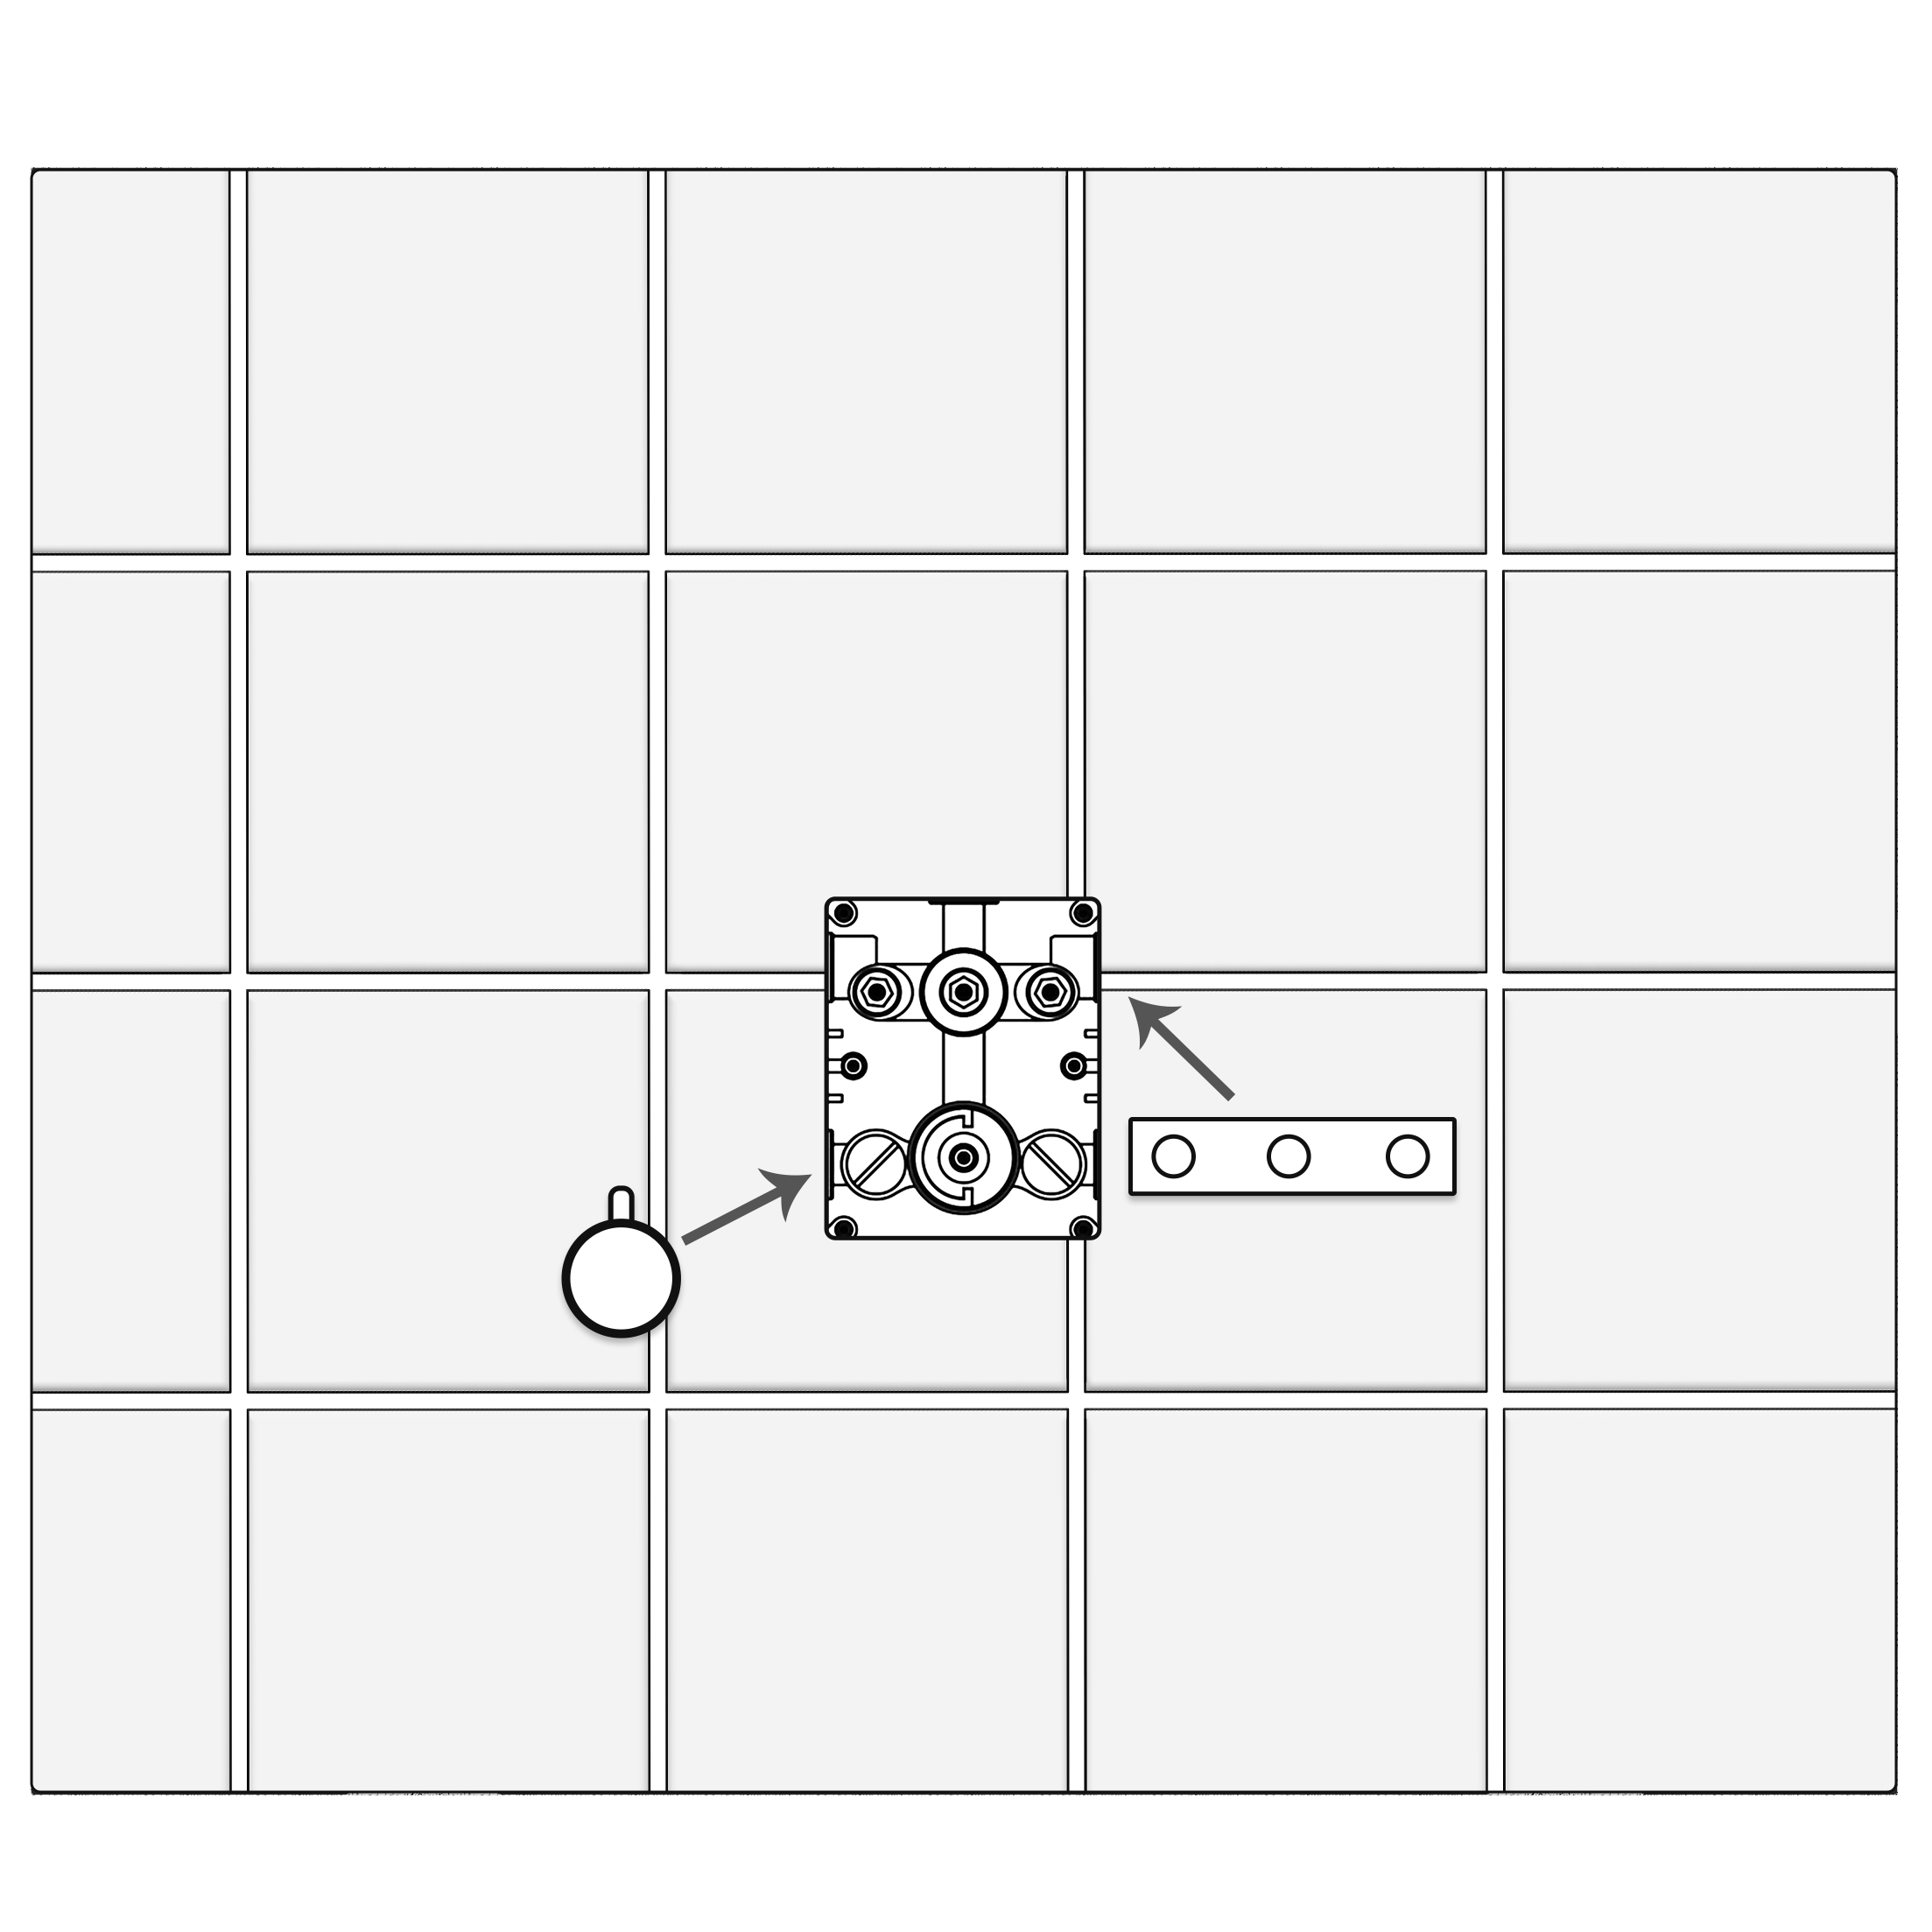
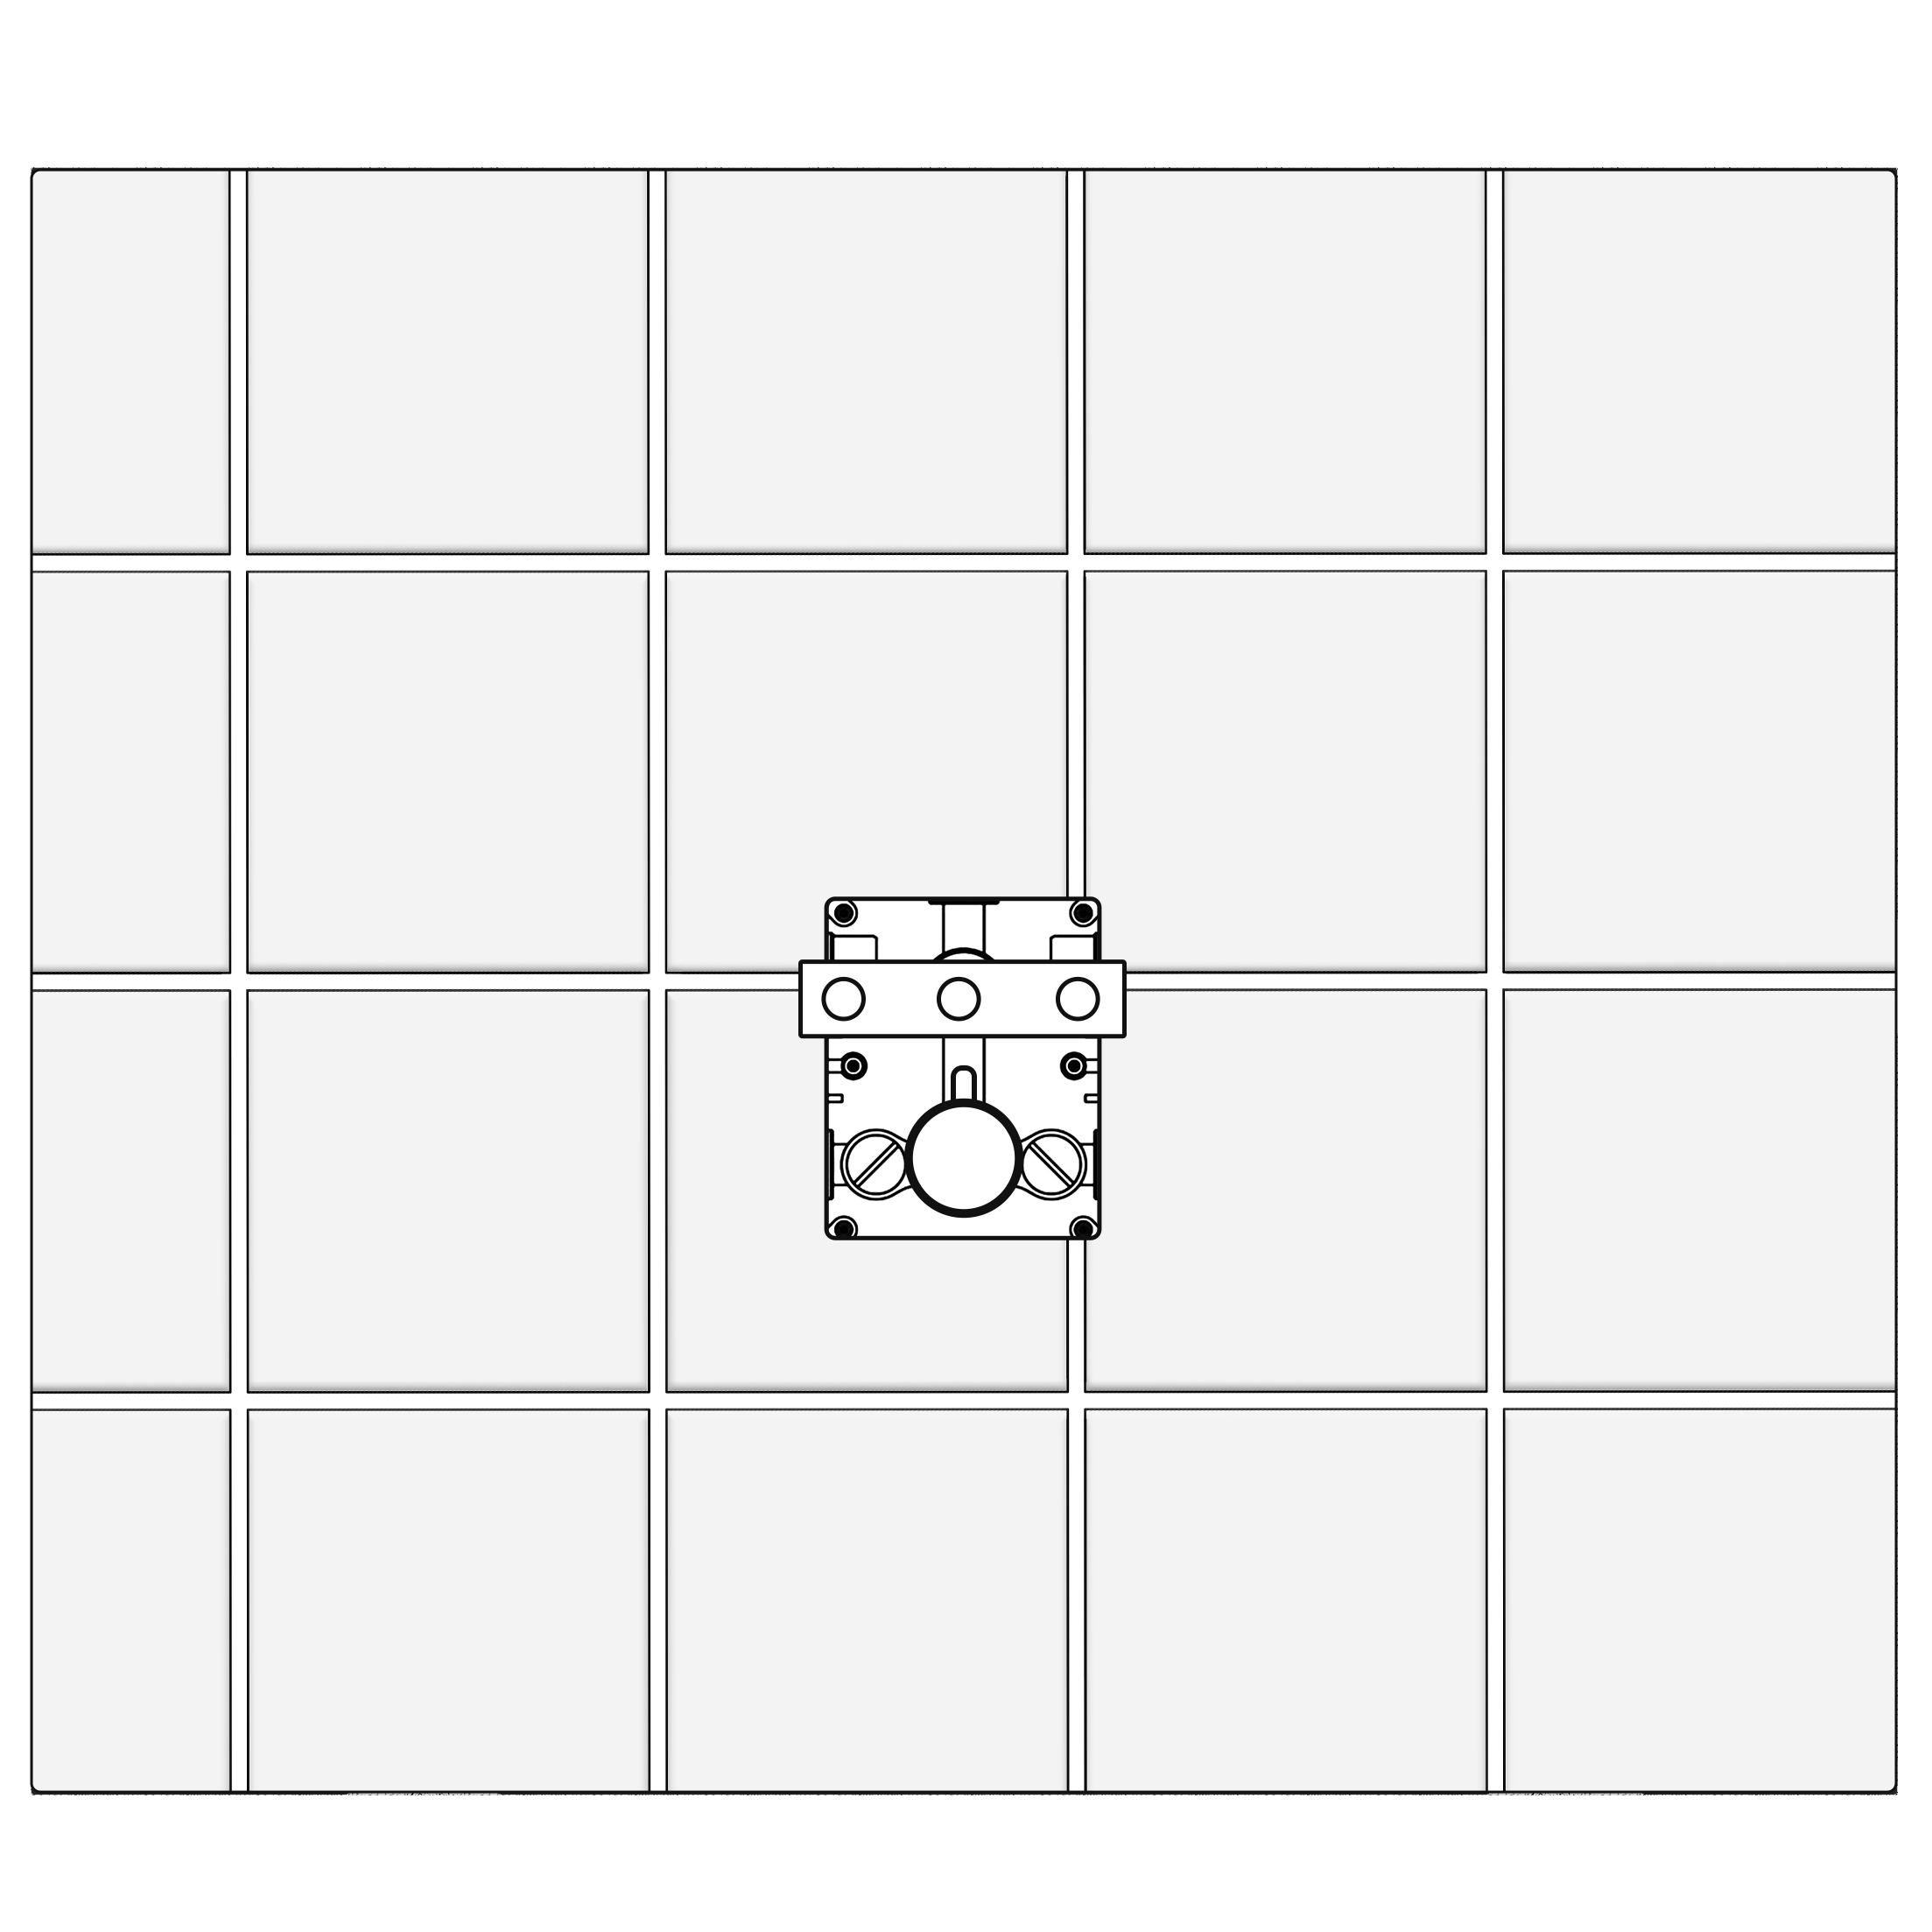
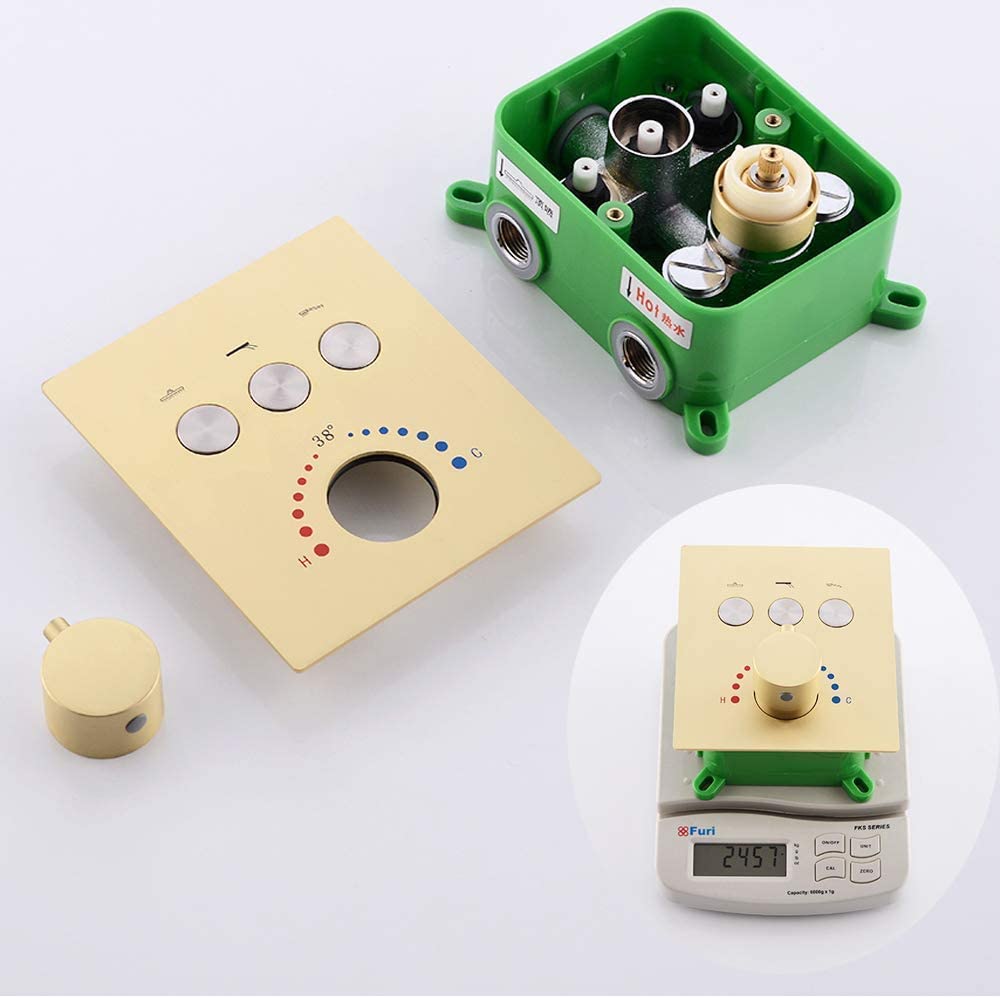
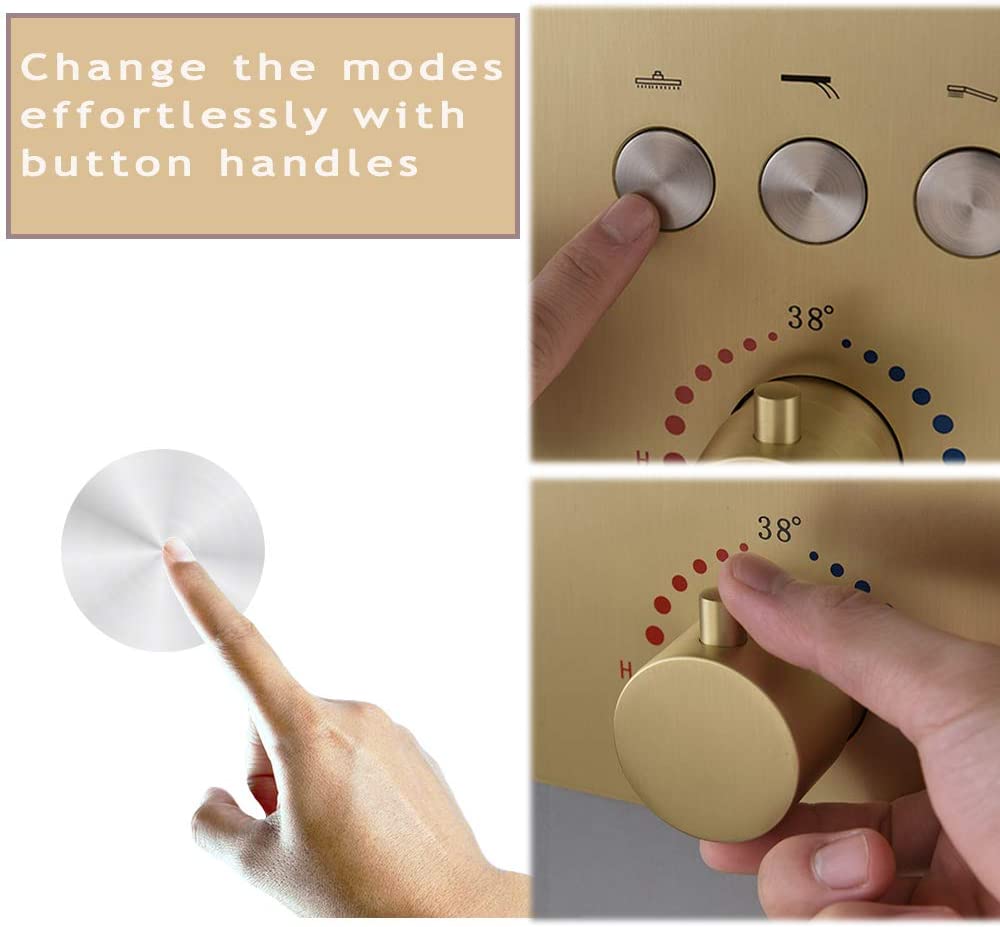
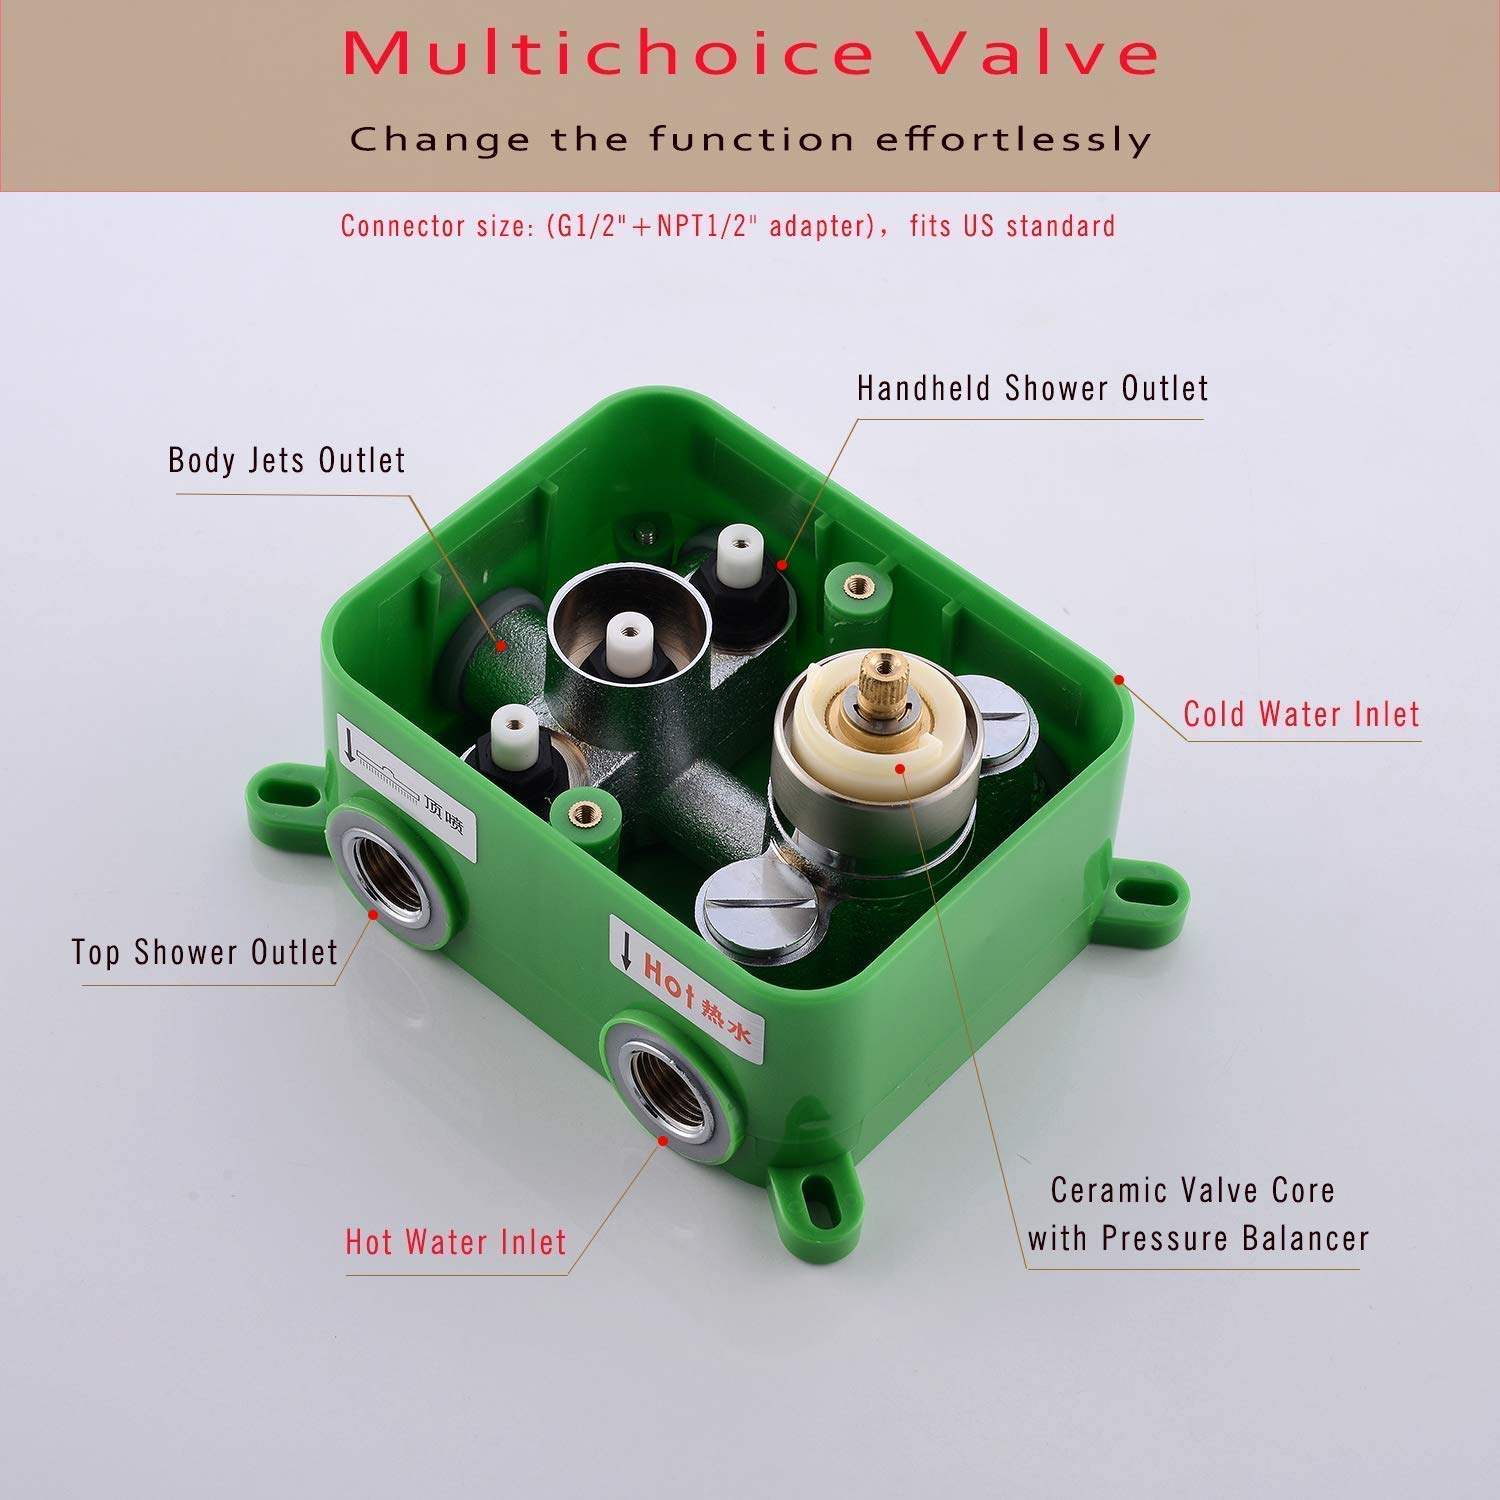
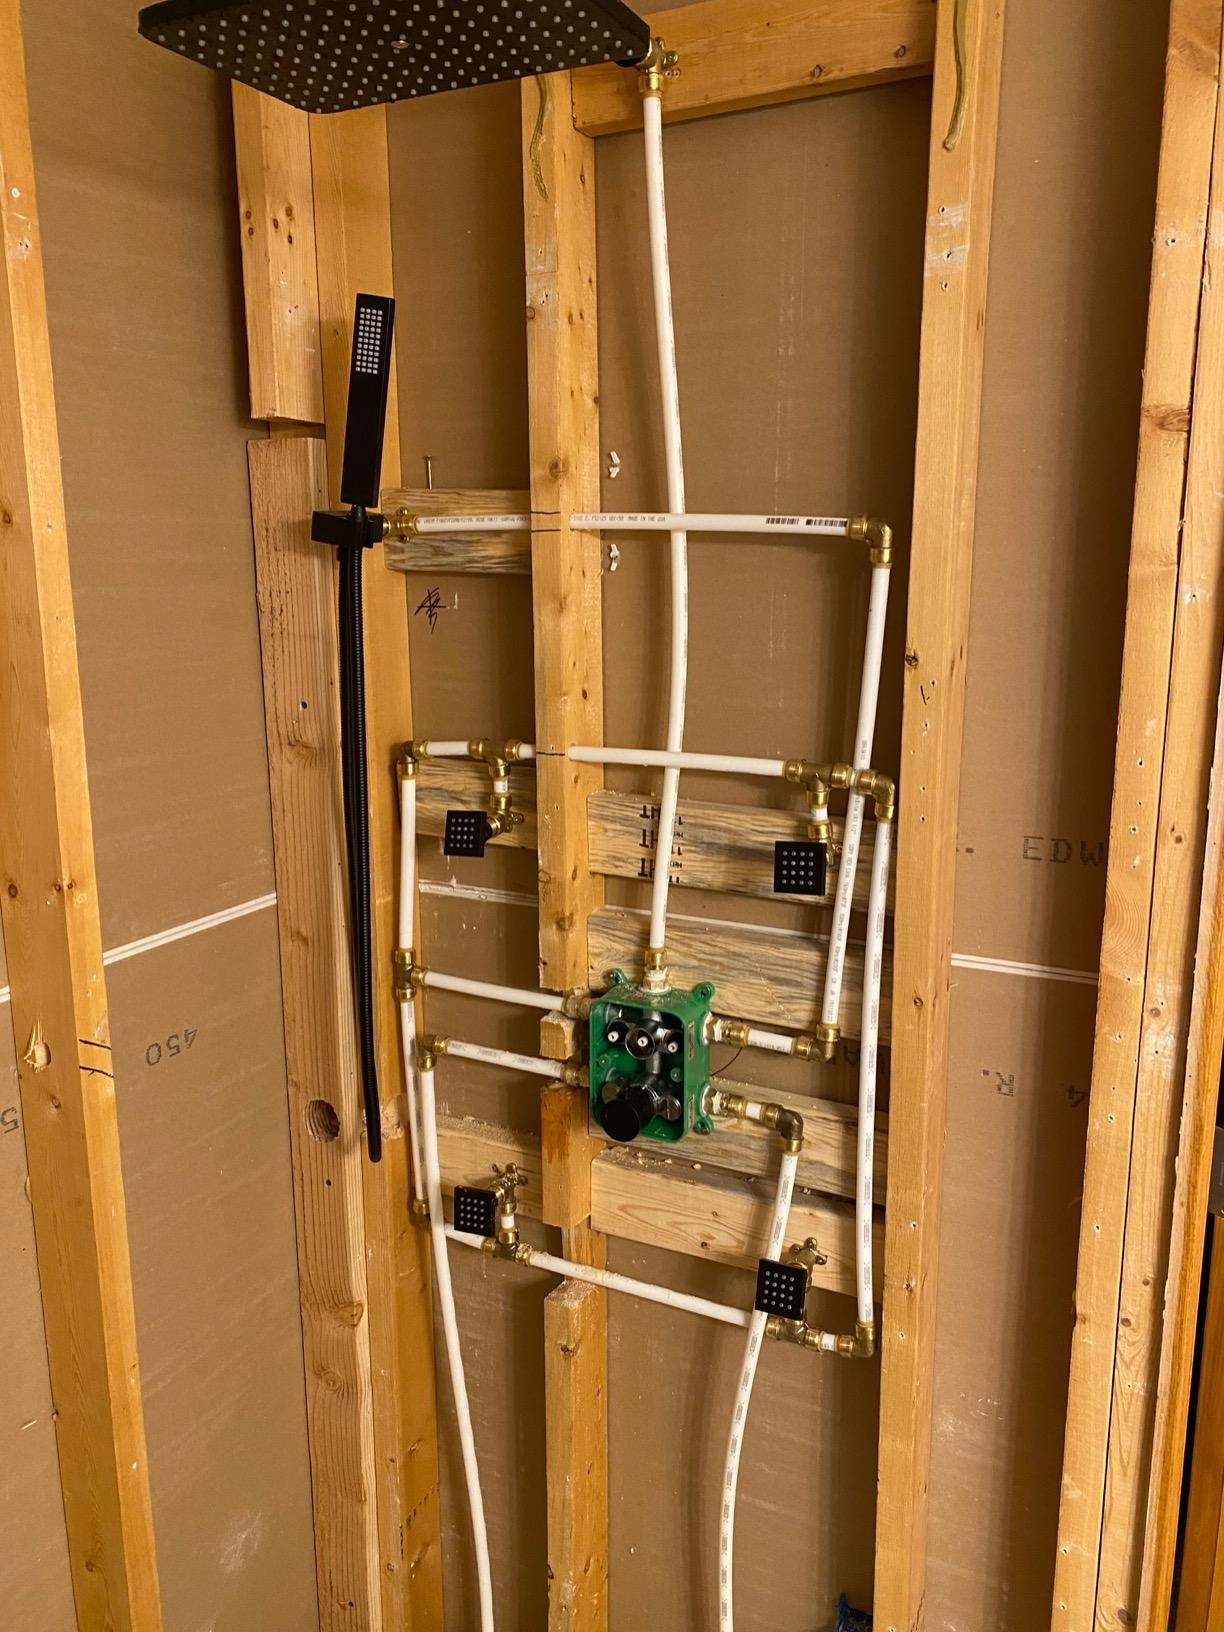
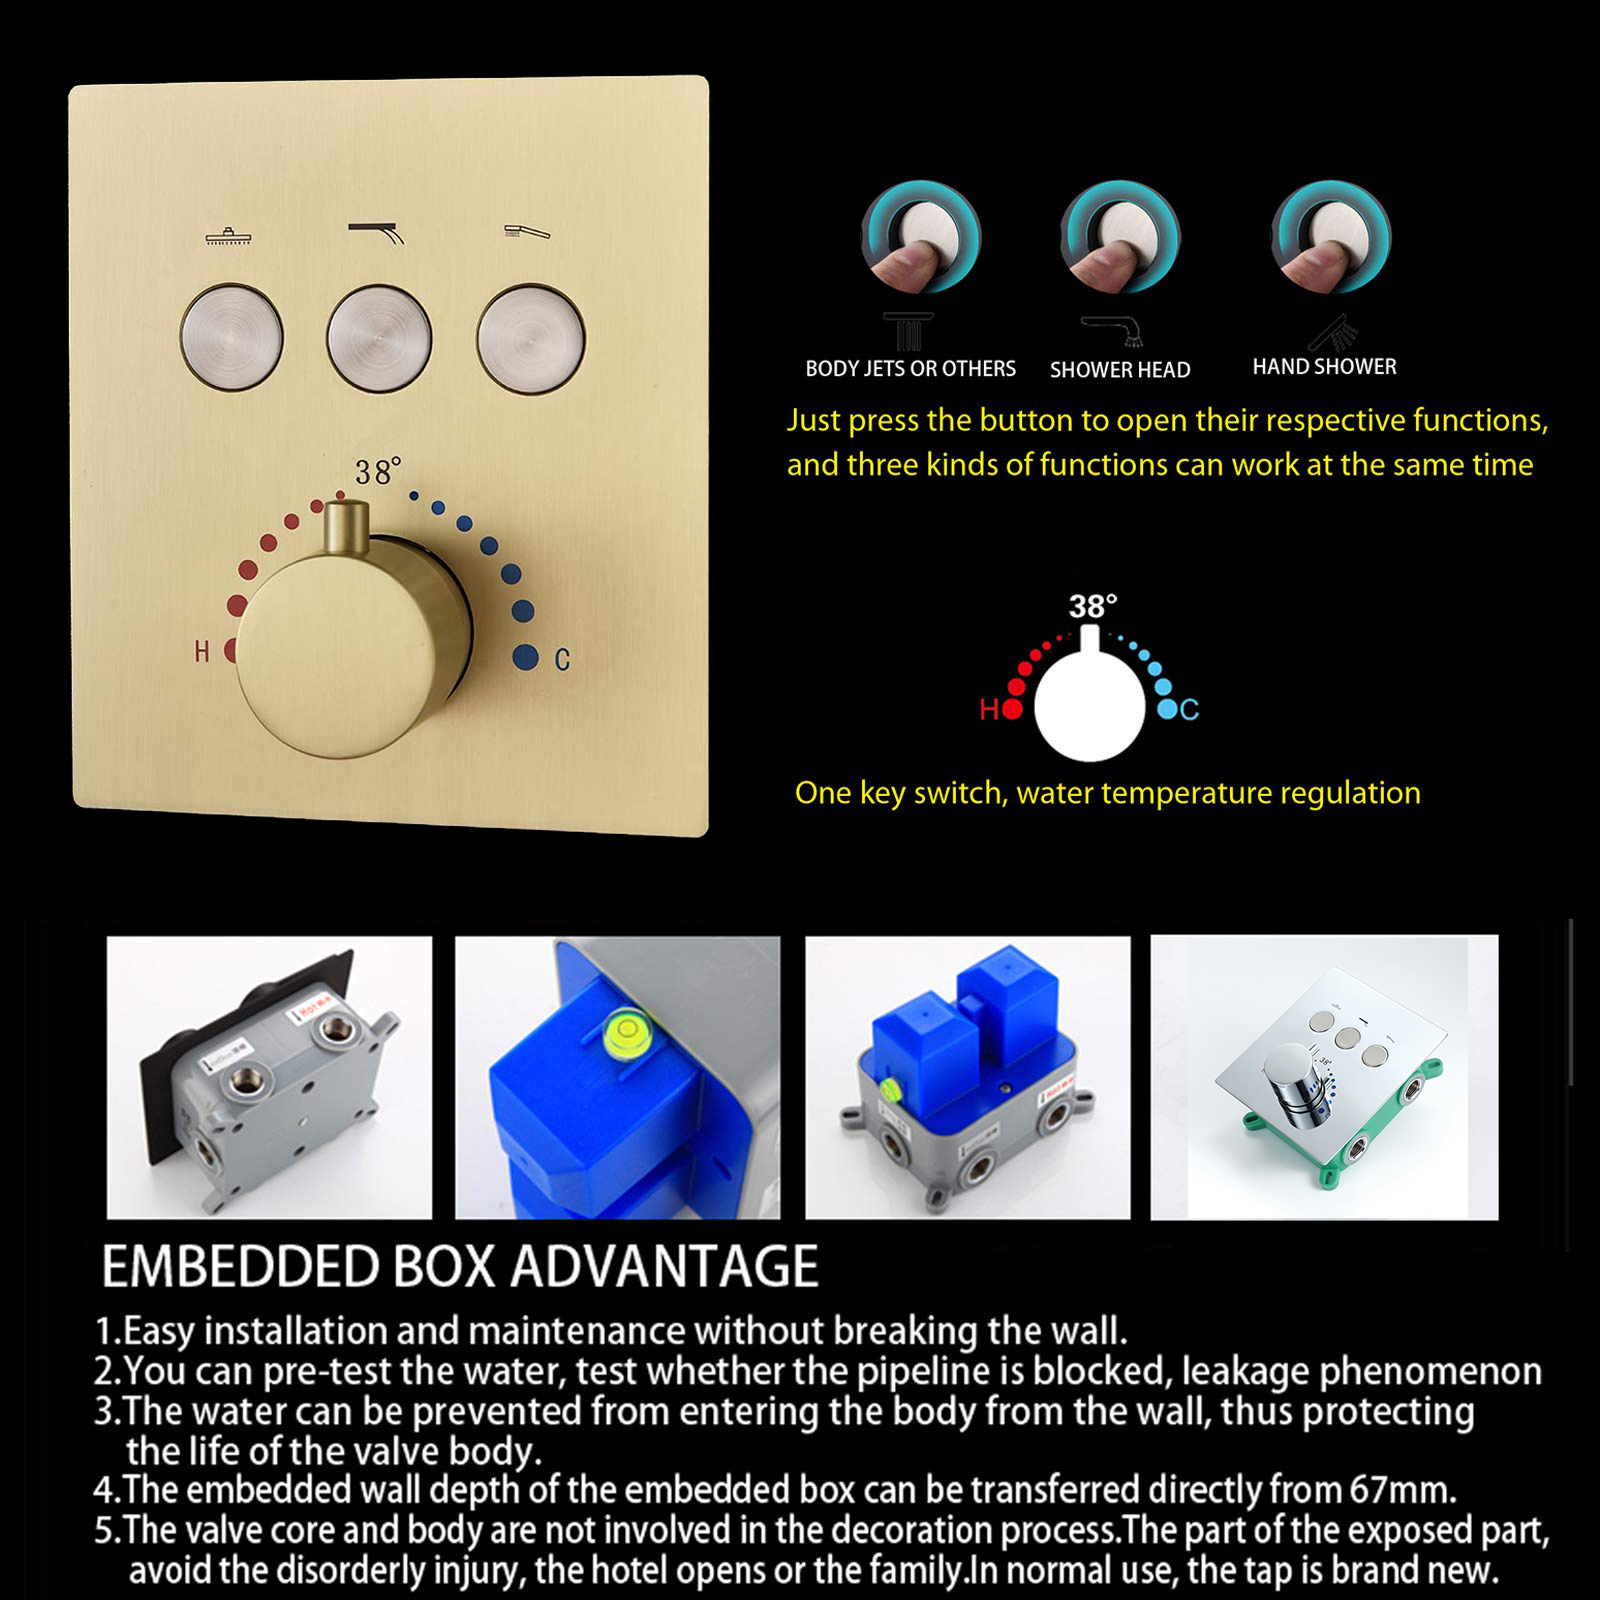
• According to the basic picture of the product, refer to the above picture, open the wall to dig the main body embedded port, the hot and cold water inlet, and the mixed water outlet.
• Drill5 6mm(0.2") holes with impact drill according to product size.
• Use a hammer to break four expanded capsules into the drilled holes.
• Connect each takeover, then connect the water source to confirm that there is no leakage.
• Adjust the embedded body to the horizontal line, and fix the embedded body on the wall with a cross screwdriver to lock the 4 self- tapping screws. Seal the pipeline with cement filler.
• Loosen the two M5 screws on the sheath counter-clockwise with a cross screwdriver and remove the sheath.
First, remove the color button of the constant temperature handwheel, loosen the main handwheel in the counterclockwise direction with the 2.5mm hex plate, and remove it. When taking out the constant temperature handwheel, do not turn the constant temperature handwheel to ensure that the constant temperature handwheel button is aligned with the 38-degree dial line on the panel.
• Tighten the three long poles on the key-value core, flatten the wall on the set, and cut off the extra parts with a cutting machine or blade to extend the positioning plate plane of the long rod. Then go to the positioning board and press the icon.
Positioning board
Long pole
The excess part of the long bar.
Tight on the wall.
• Balance the panel on the main body. Put the accessories of the constant temperature handwheel in the opposite direction of the unloading on the main body,(pay attention to the constant temperature handwheel installation to ensure that the valve core does not turn, the button direction is aligned with the direction of the outlet pipe.)
Fontana Creteil Brushed Gold Bathroom Thermostatic Button Shower System Set
This Fontana Creteil Brushed Gold Bathroom Thermostatic Button Shower System Set with Slide Bar comes with solid construction for long durability that will upgrade your bathroom with a modern and cool look. Triple thermostatic button with knob style for easy flow and temperature management and a rainfall shower head that is a self-cleaning, hand spray with slide bar and 4 adjustable body jets for better showering experience. You may even have more time to enjoy your shower with a rainfall feeling. Effortlessly provides superior water pressure. Optimal performance even in low water pressure. This shower set can be easily put in without the need for professional skills. When it comes to new bathroom upgrades, FontanaShowers is offering shape, finishes, and styles that you've looking for.