How to install Fontana Bollnäs 16" LED Intelligent Thermostatic Digital Display Touch Panel Wall Mounted Shower System | FS15046
| Installation Instructions for Bathroom Shower Set
|
|
Visit Product Page 
|
|
- Before you begin, please read the installation instructions below. Observe all local building and safety codes.
- Unpack and inspect the product for any shipping damages. If you find damages, do not install.
- Please note all products must be installed by a professional and certified plumber otherwise warranty might be voided.
|
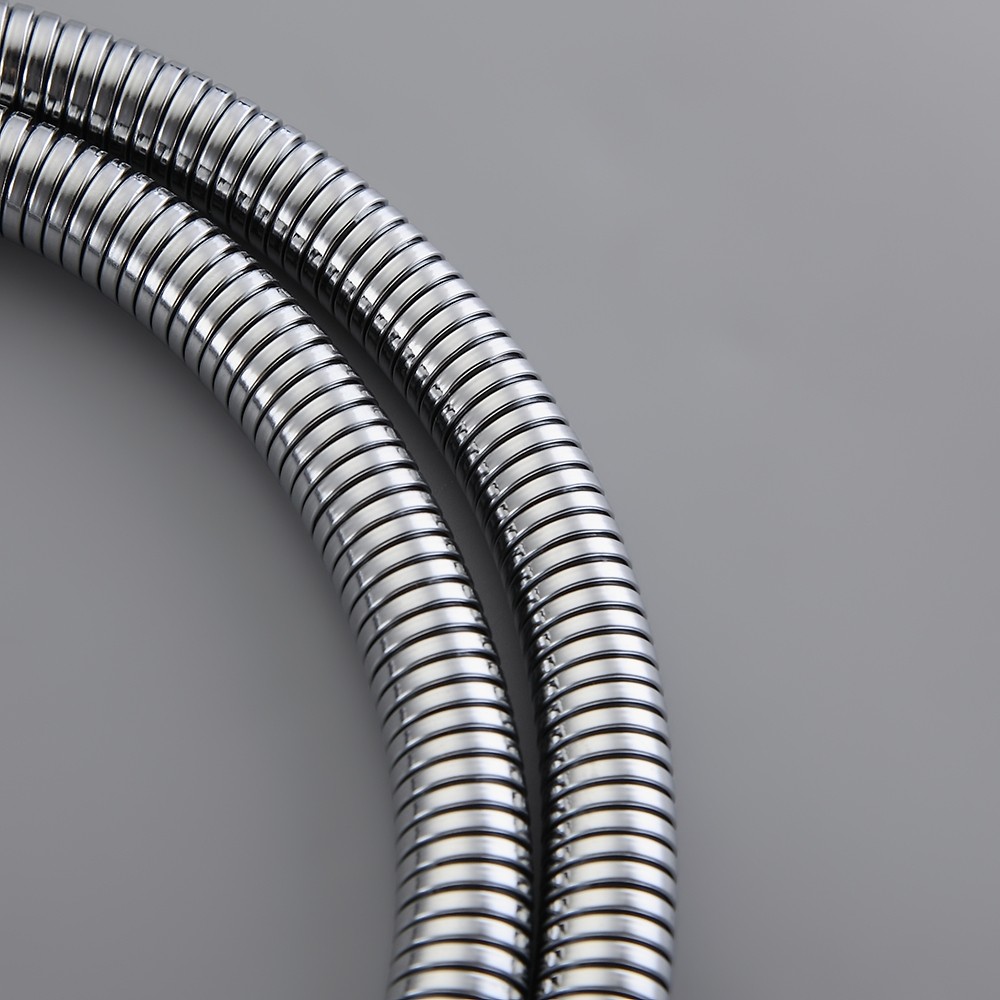
shower
|

|

|
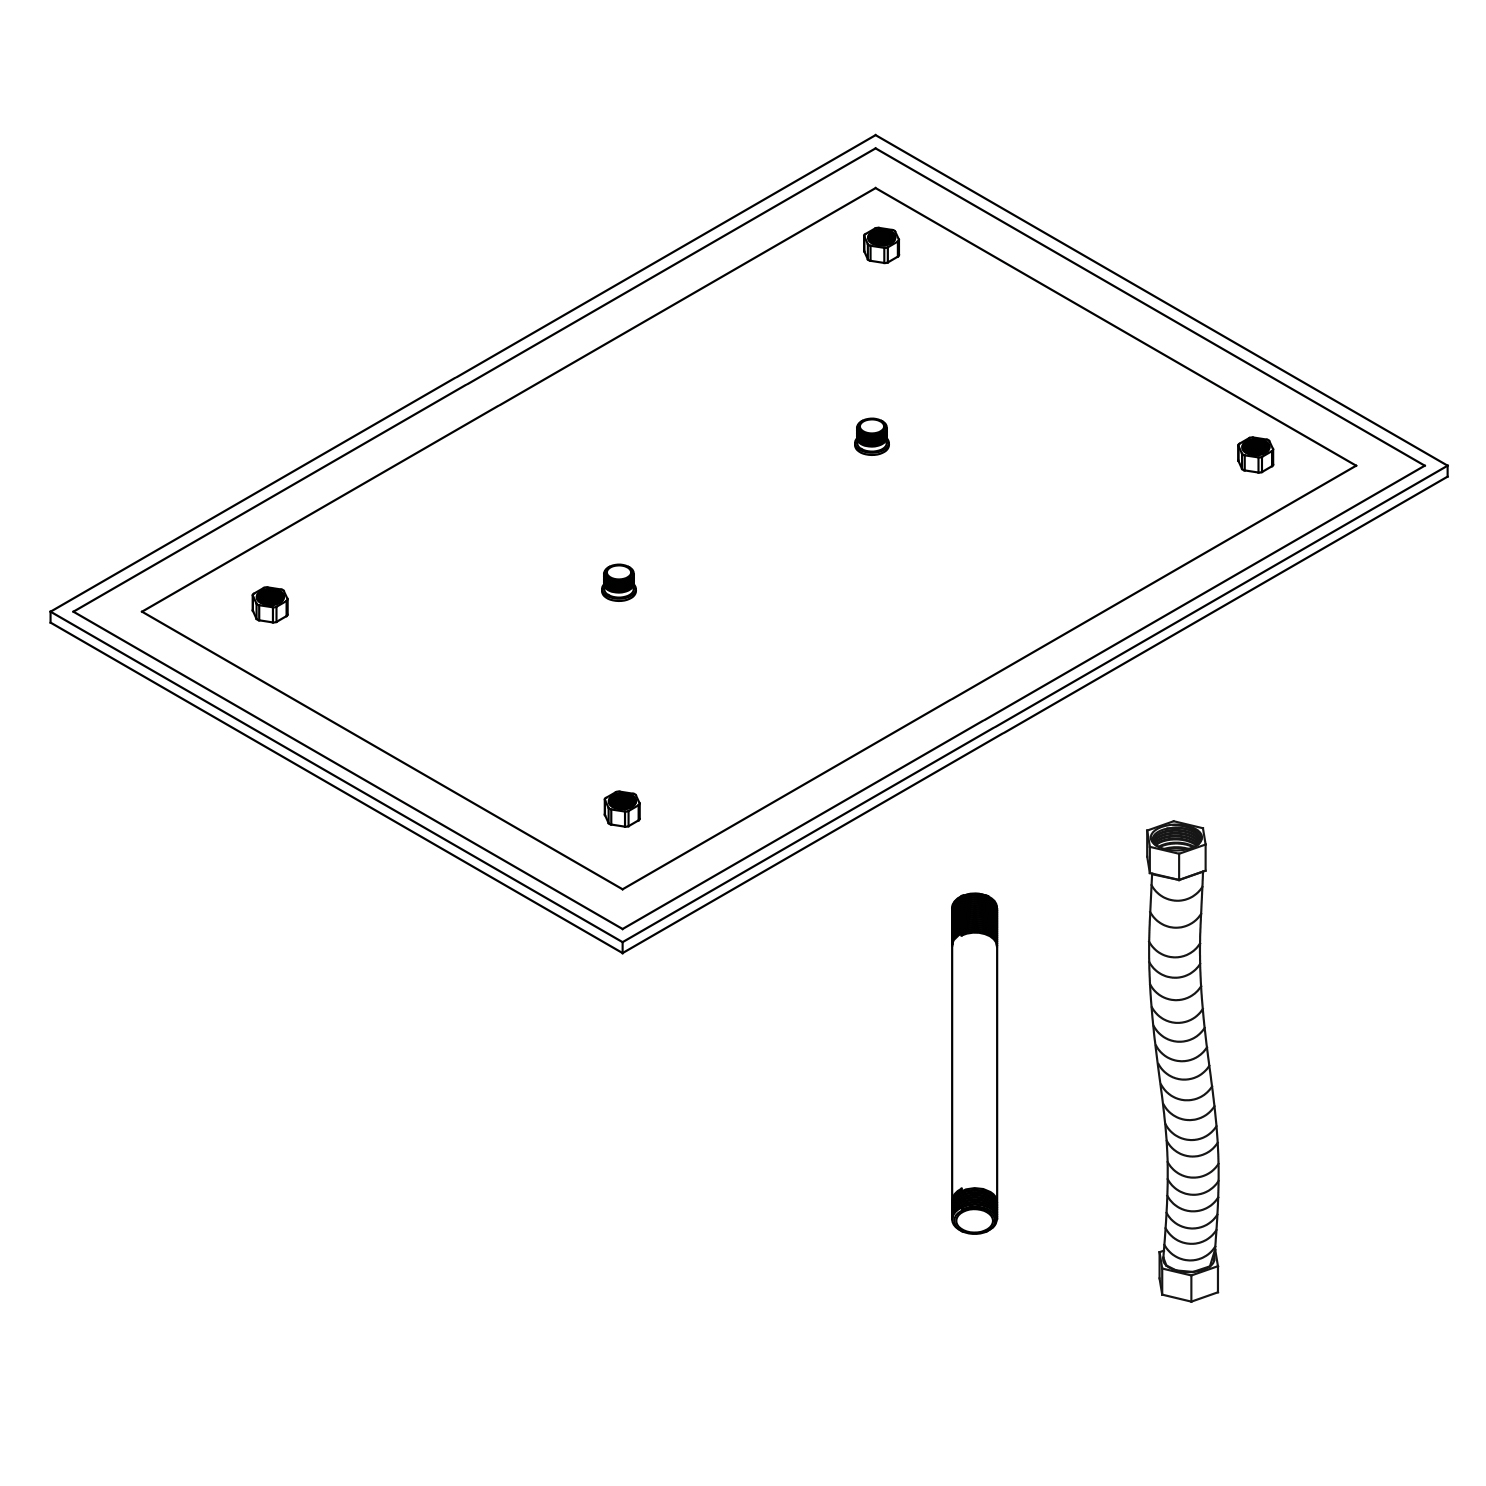
Shower Head Installation Instructions
Additional Information:
- The LED lights are powered by water flow and will be activated once the water is turned on.
- The LED light will change its color by detecting water temperature:
- 0-30 °C (32-86 °F): Blue LED
- 30-40 °C (86-104 °F): Green LED
- 40-50 °C (104-122 °F): Red LED
- 50-100 °C (122-212 °F): Flashing Red LED
| | | |
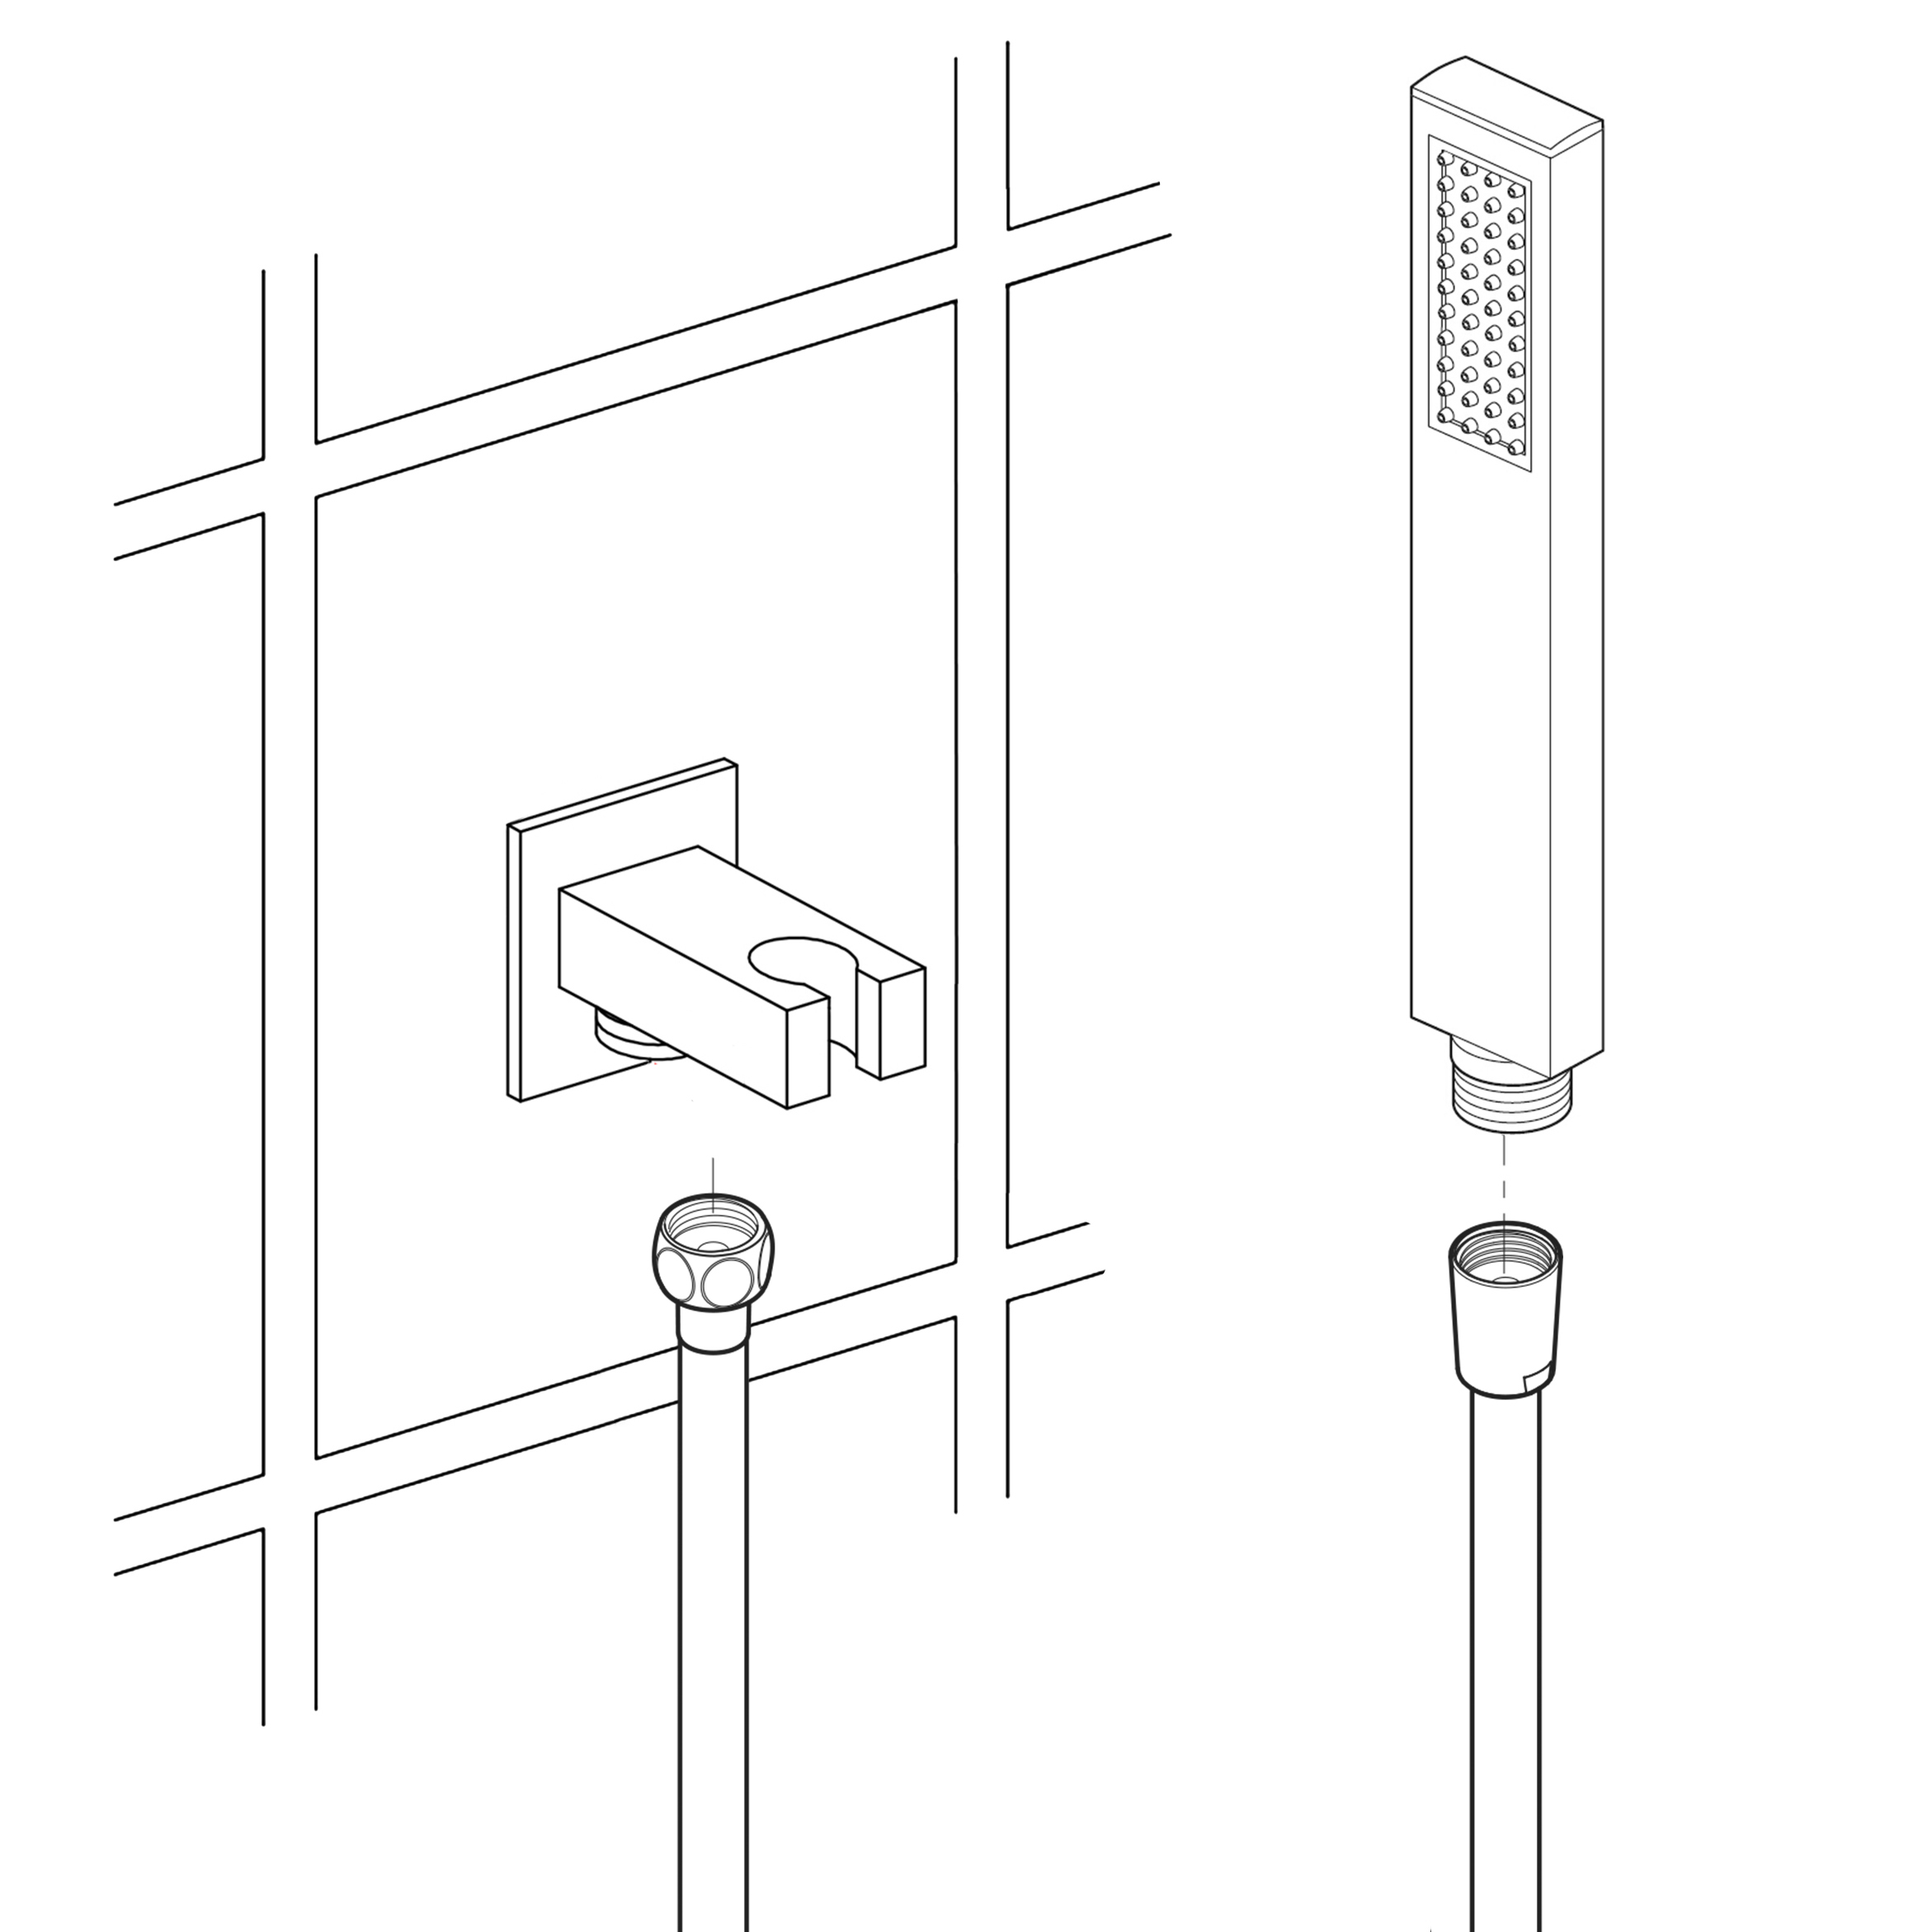
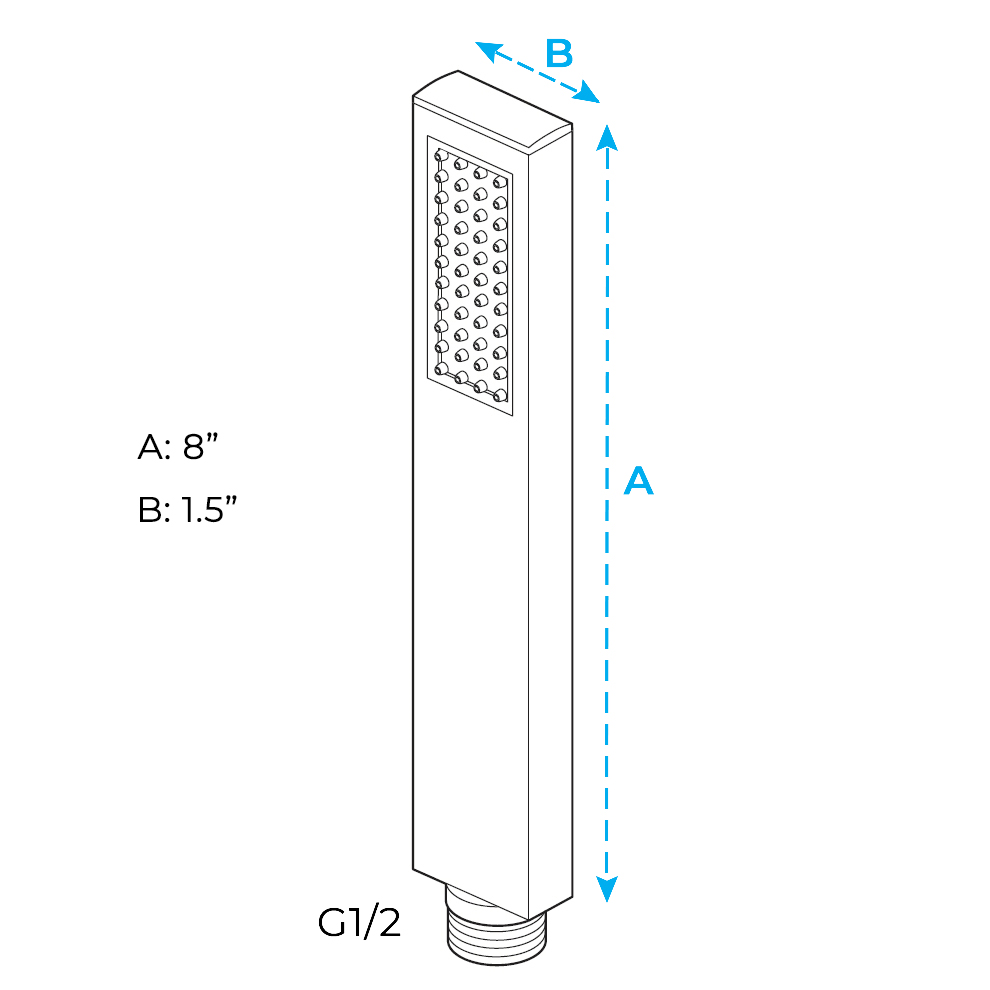
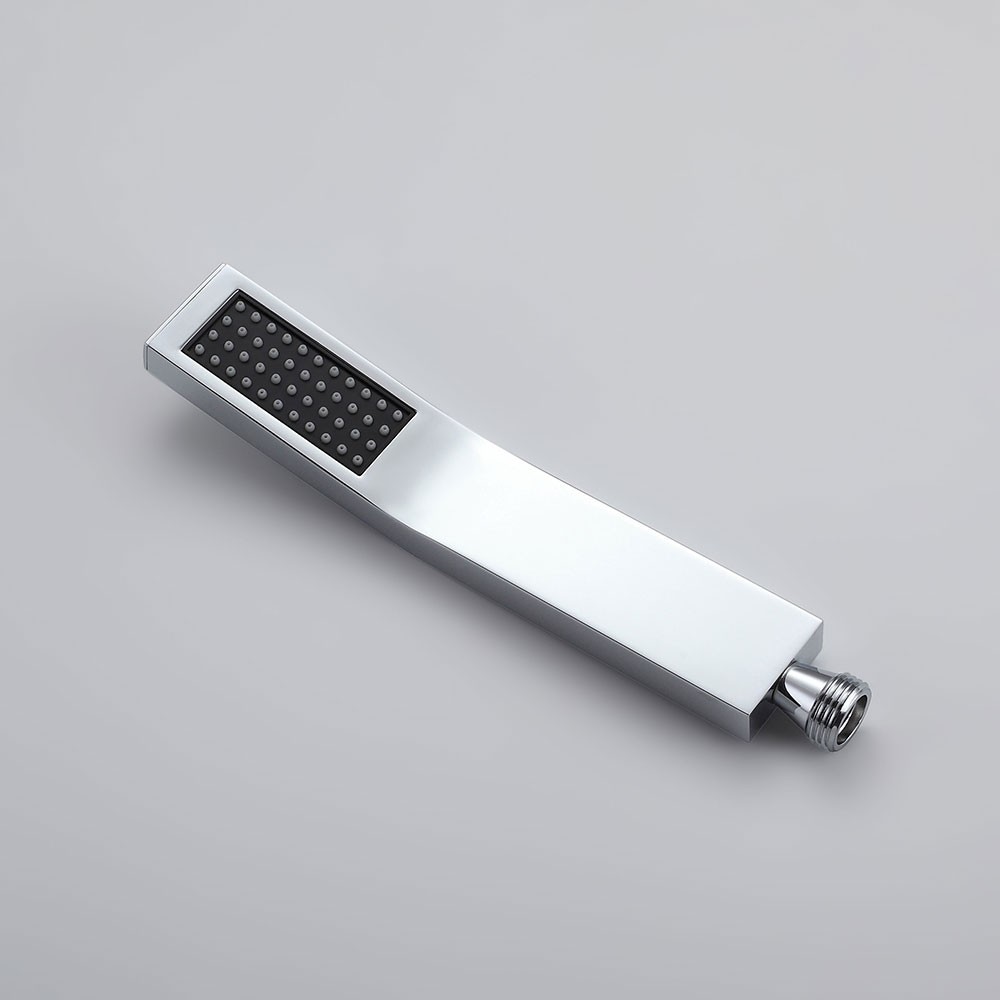
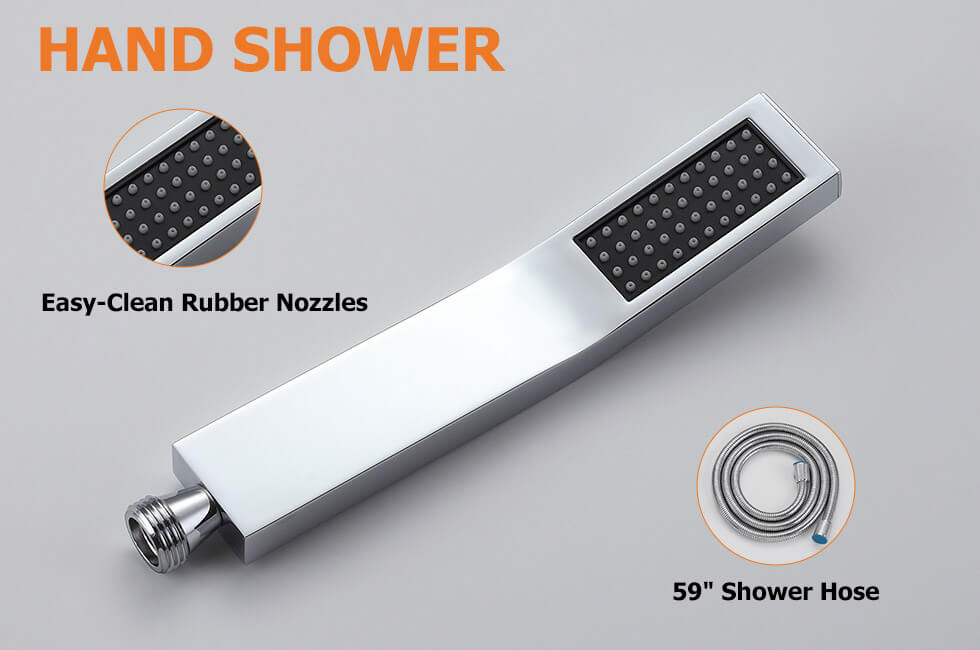
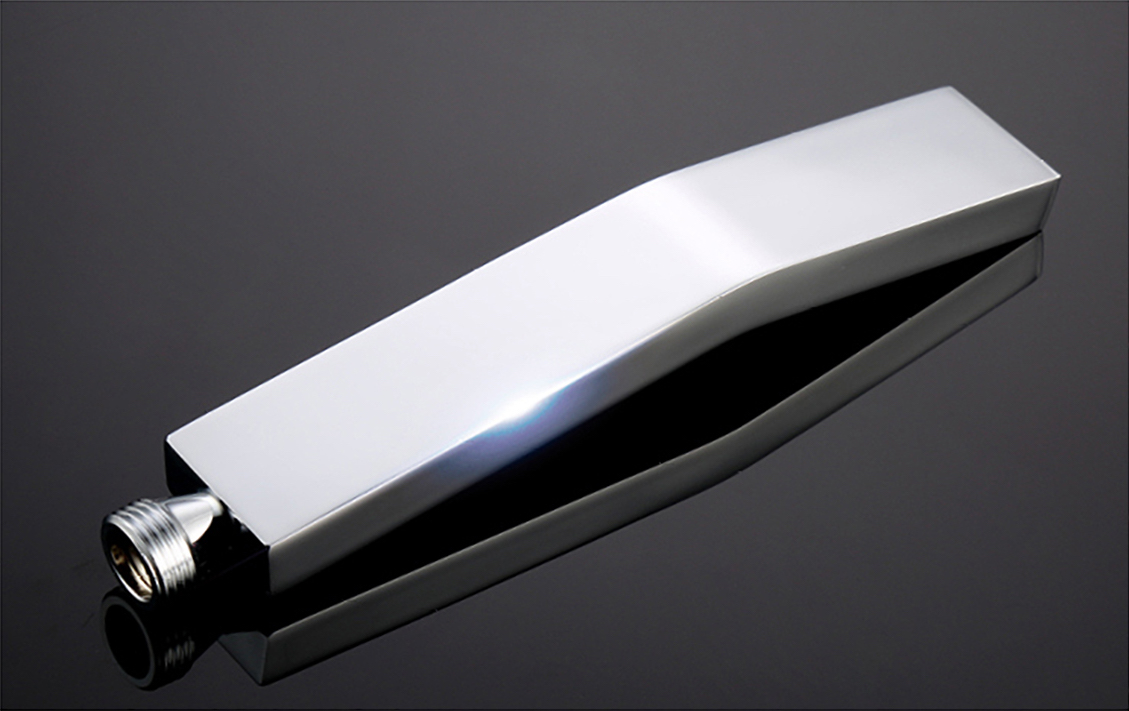
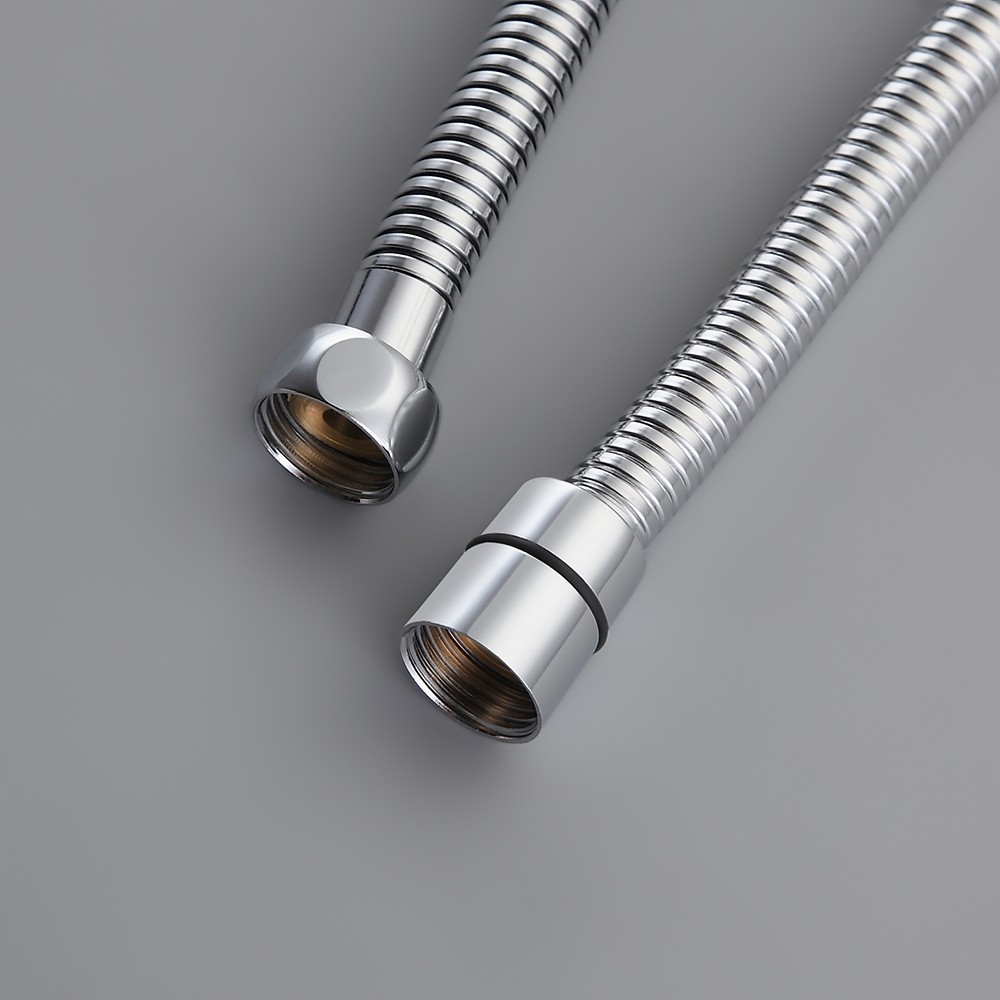
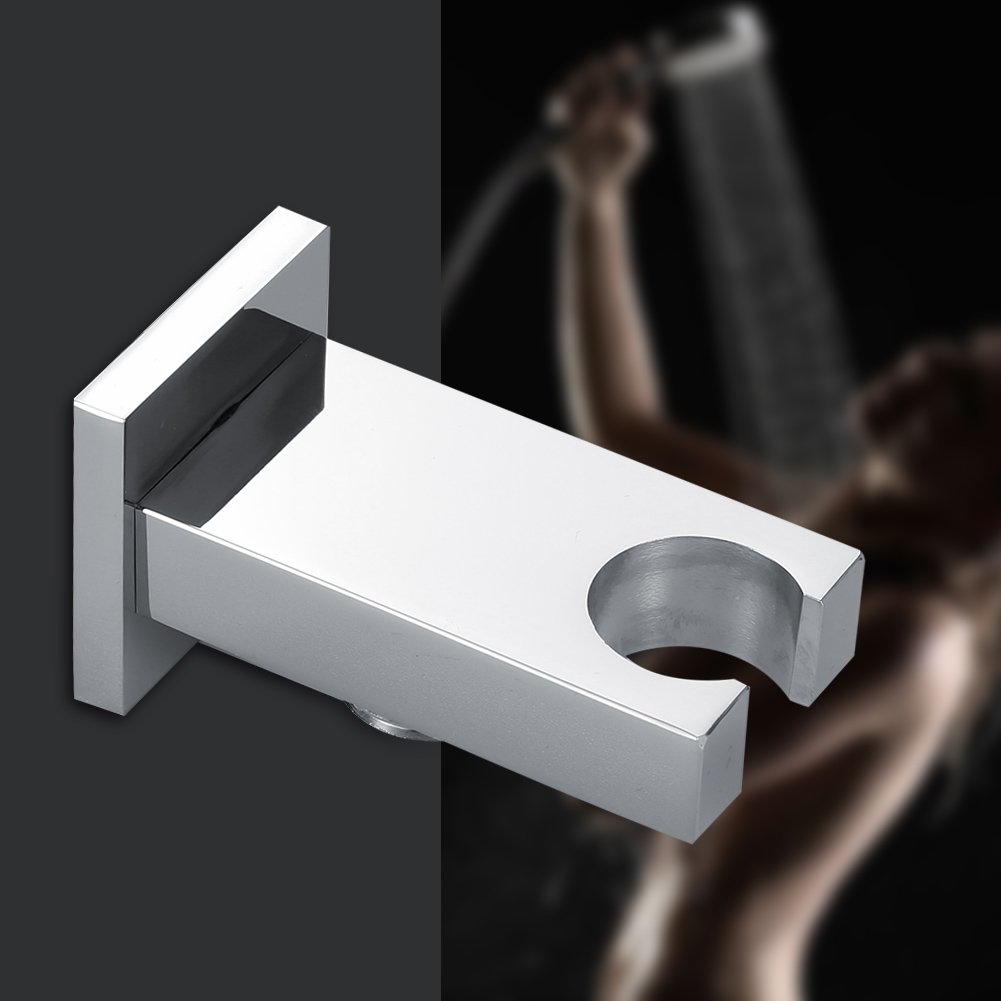
Hand Held Shower Installation Instructions
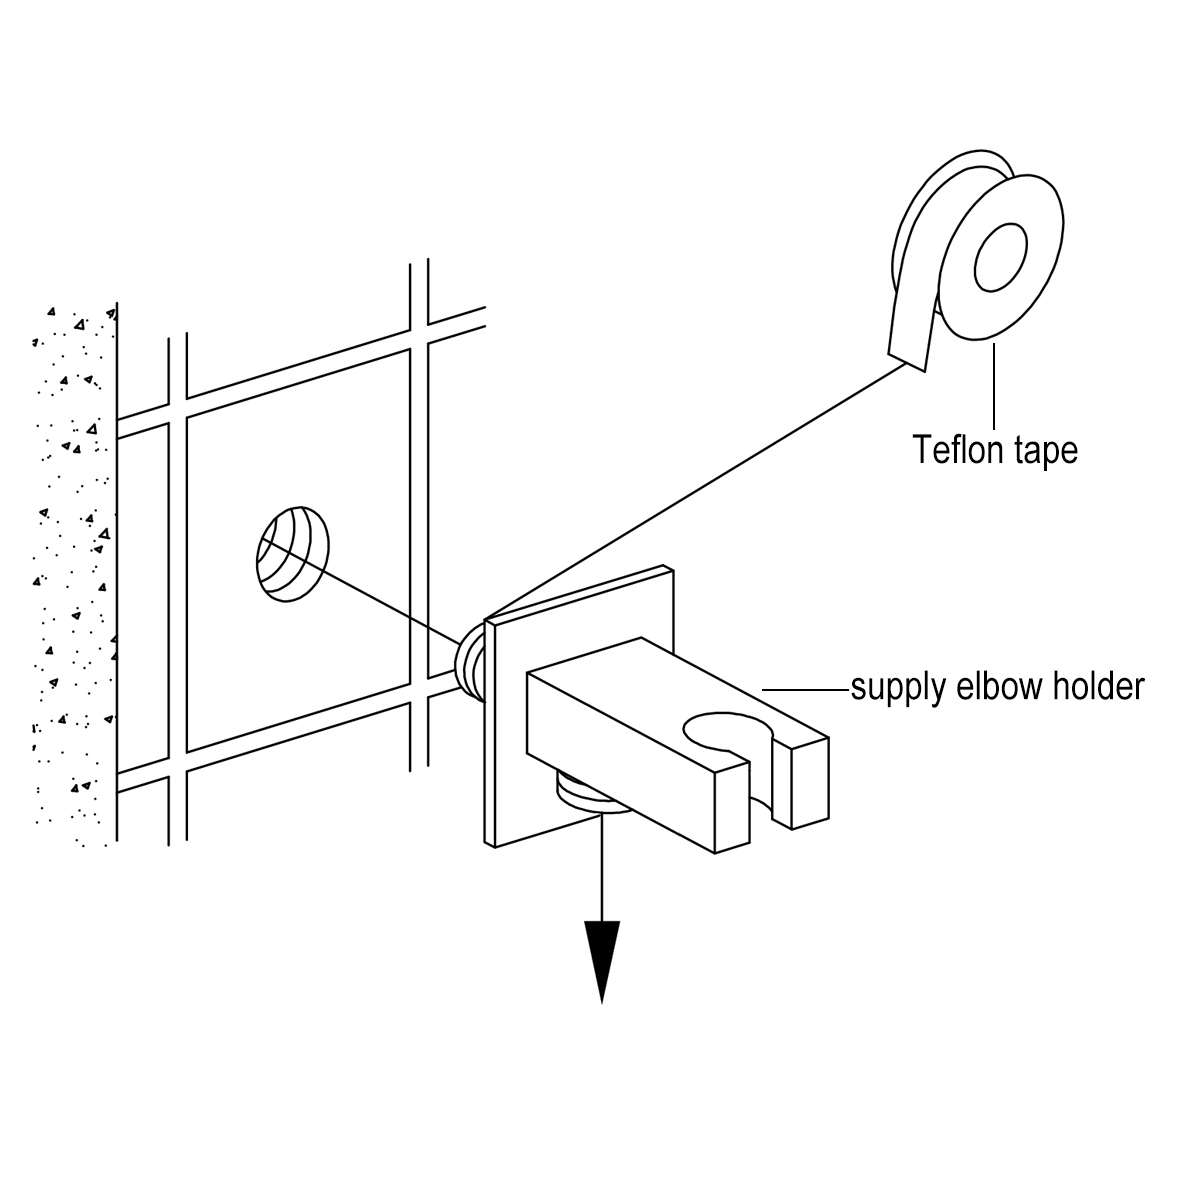
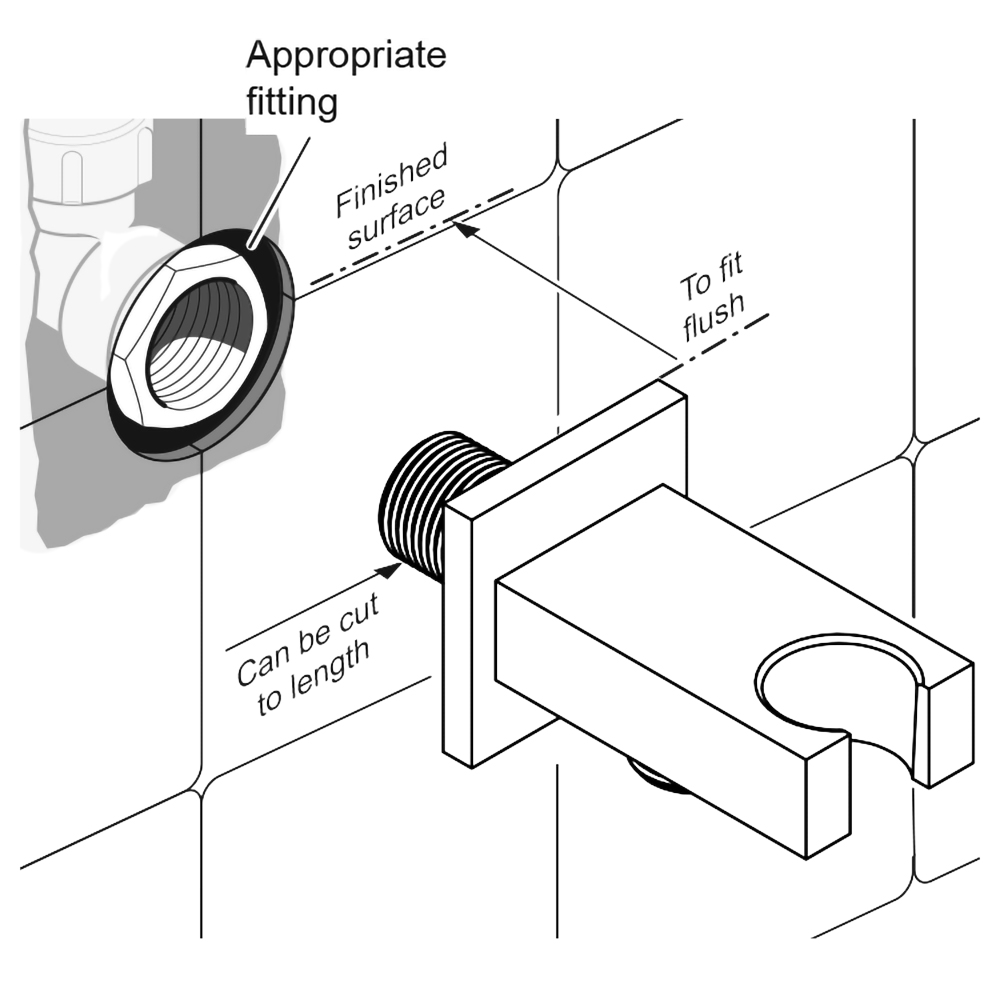
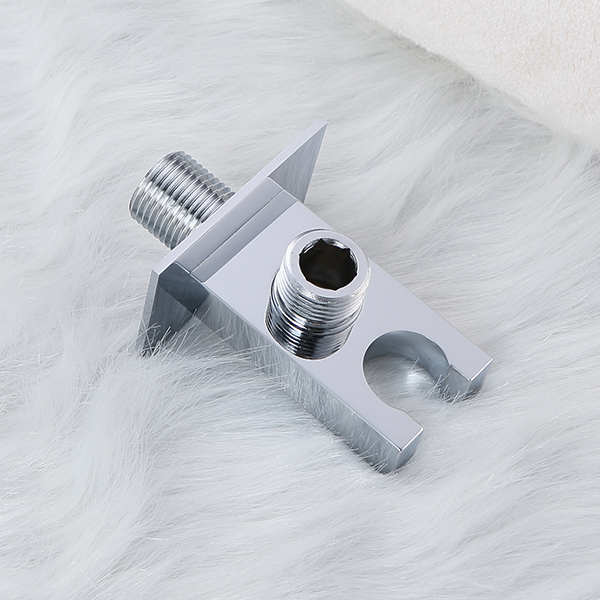
Hand Shower Outlet Installation
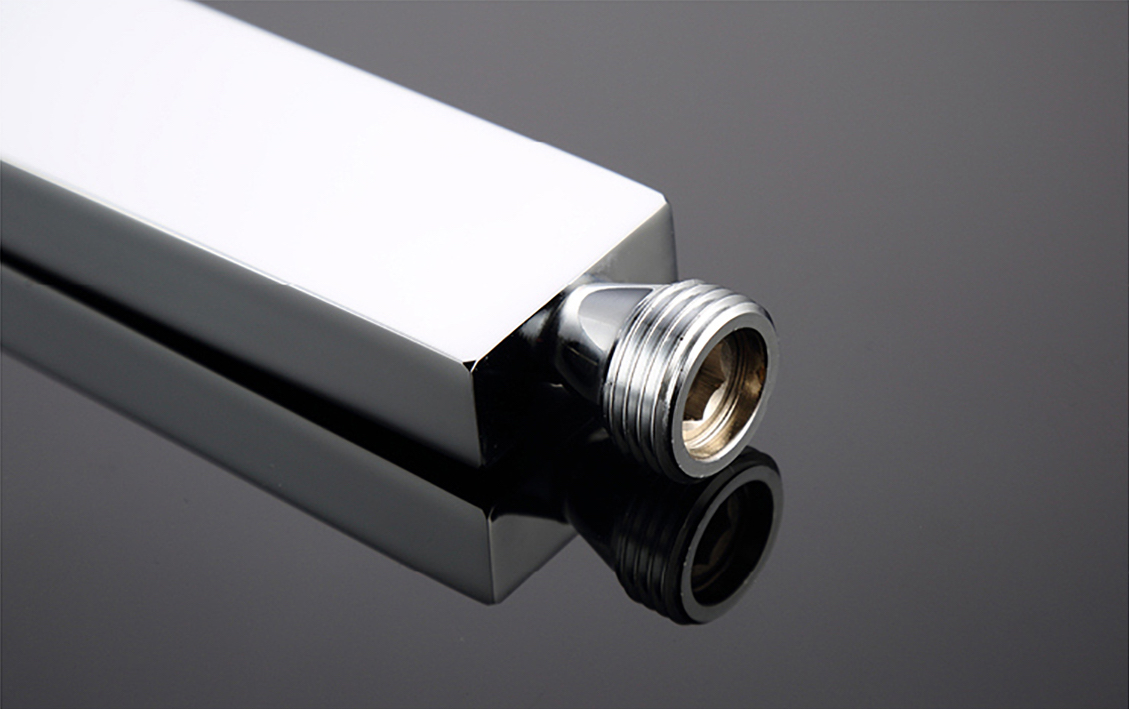
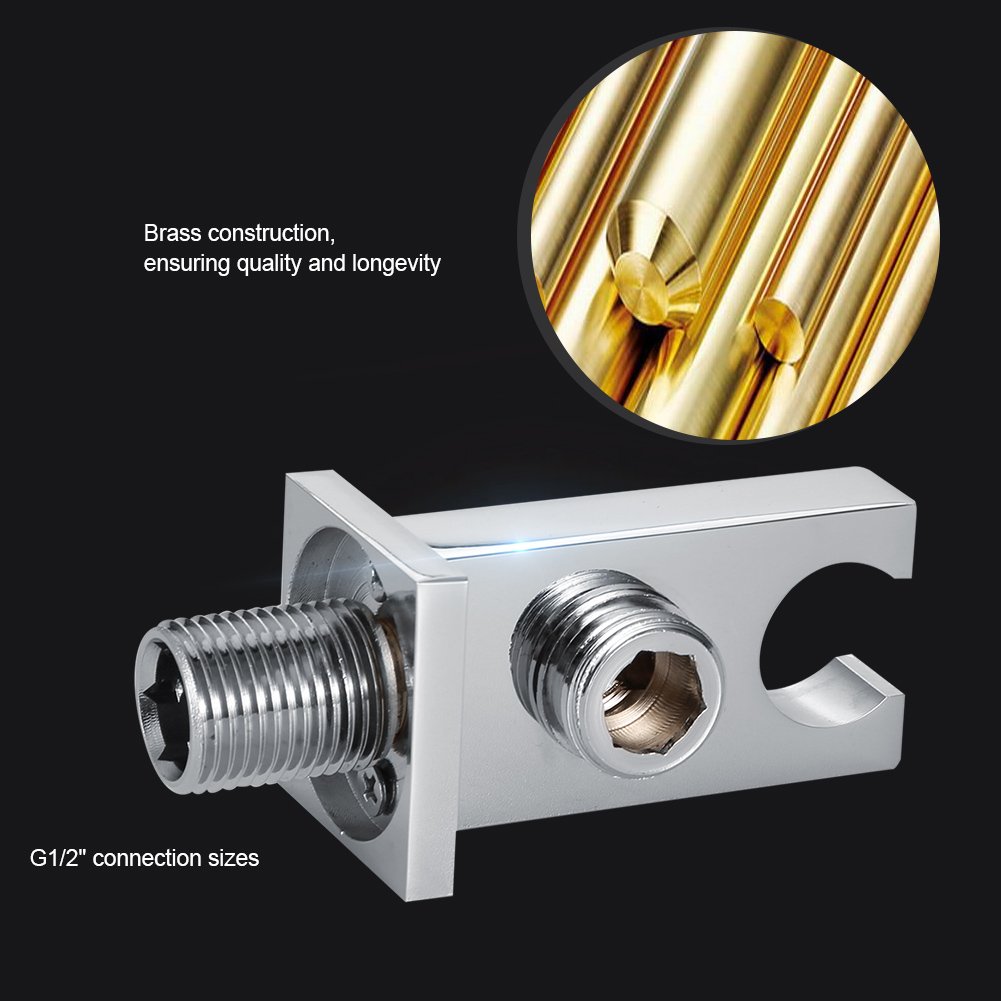
• Complete the outlet pipework ensuring it ends in an appropriate 15mm x 1/2" BSP female thread elbow.
Note:
This fitting is not supplied as variations in installations require the selection of a suitable solder or compression fitting.
• Install the 'Wall Outlet', thread long male 1/2" BSP into the appropriate female fitting using PTFE tape to give a watertight joint.
Note: The thread can be cut to size if required. Make sure that all debris is removed from the connector and the section that has been cut is dressed correctly, before installation.
The minimum required water pressure is 0.05 MPa (0.5 bar).
Flow rate 2.5 GPM (9.5 LPM).
|
|
|
|
|
Digital Shower Mixer Controller Installation Instructions
|
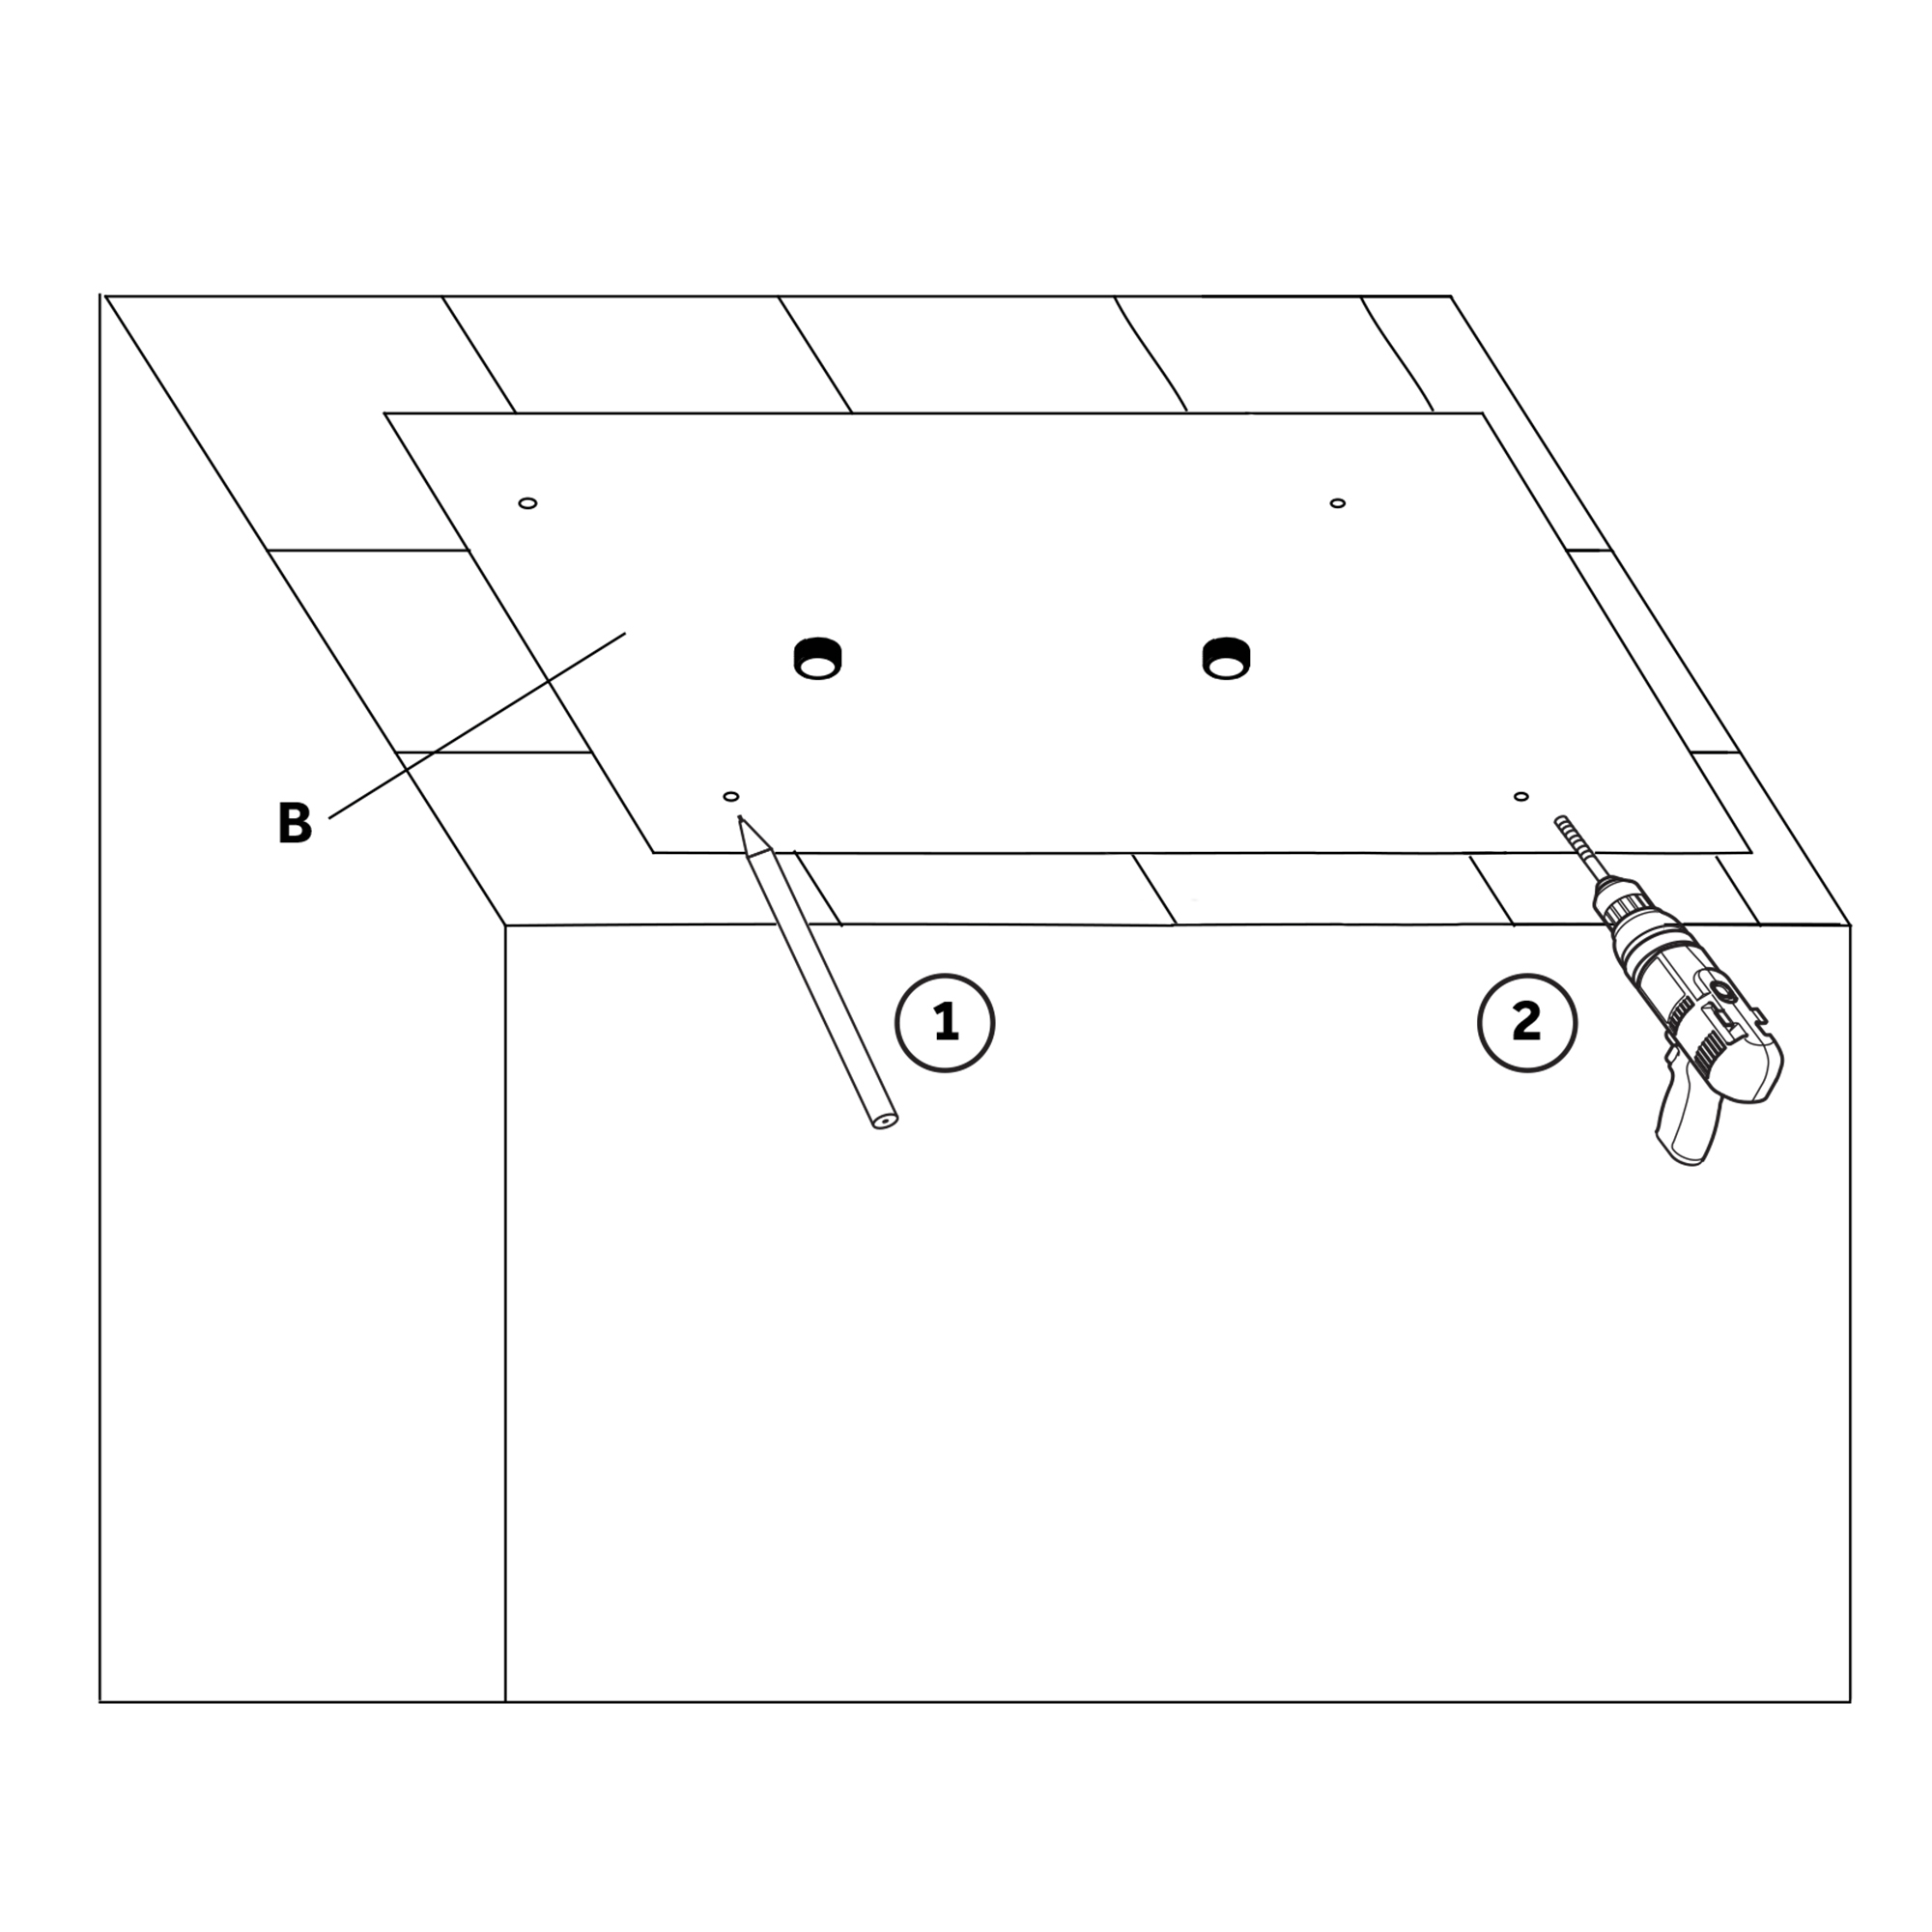
Step 1:
|
shower
control
|
Step 2:
|
|

|
|
|
|
Dimensions
|
|
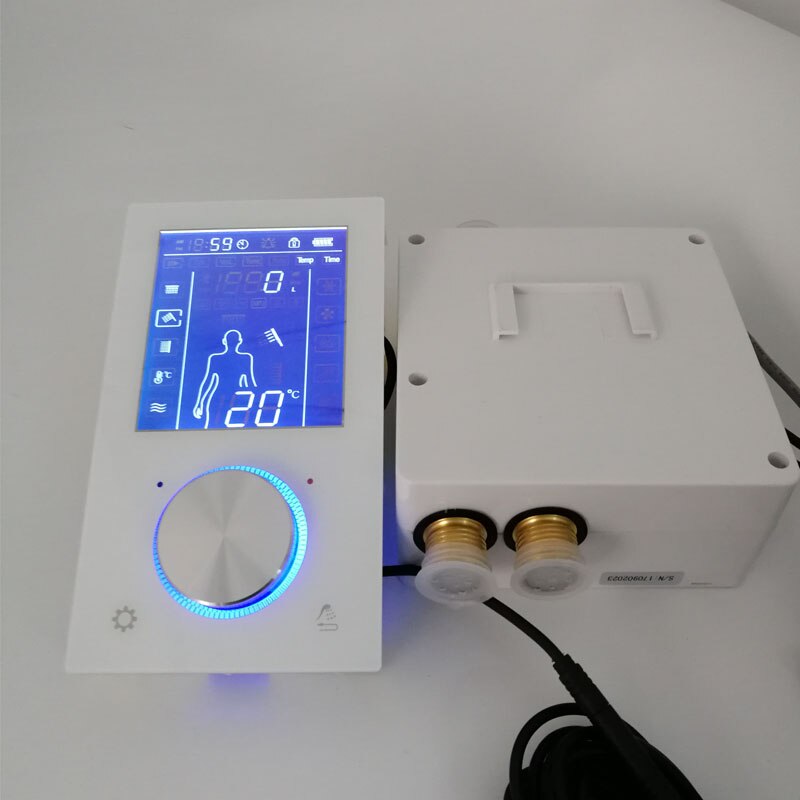
Control Box
|
|
|
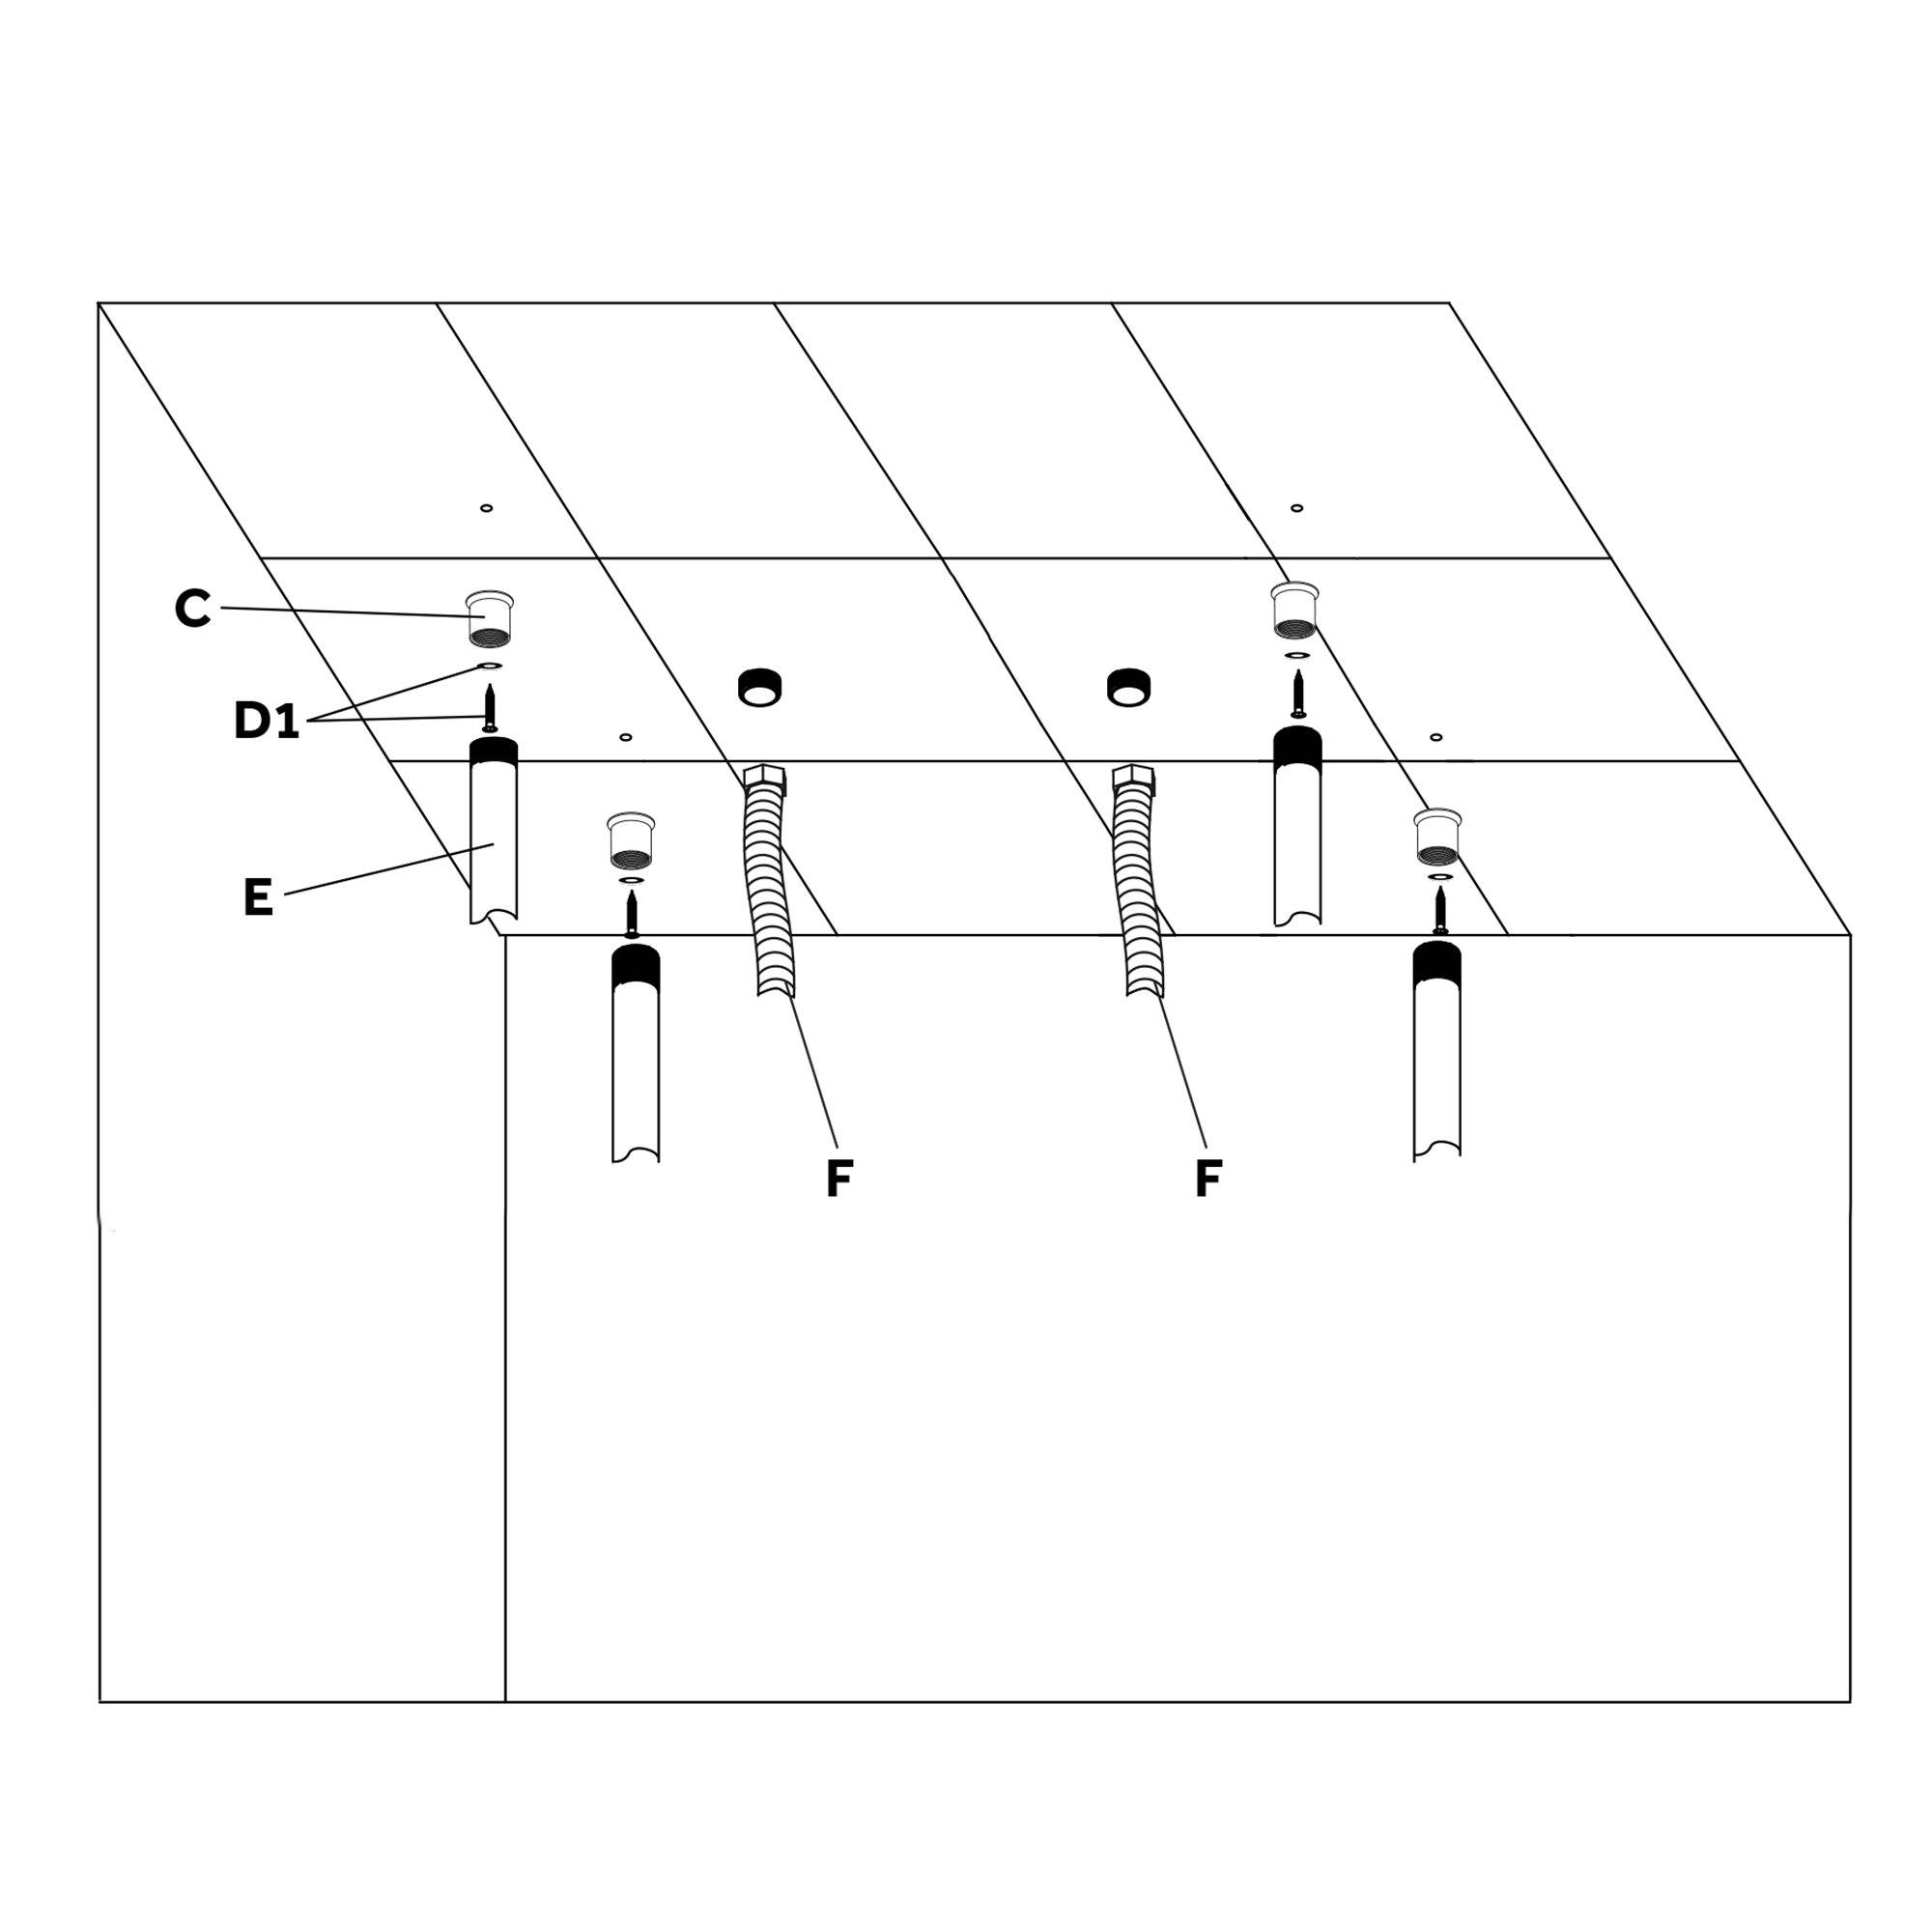
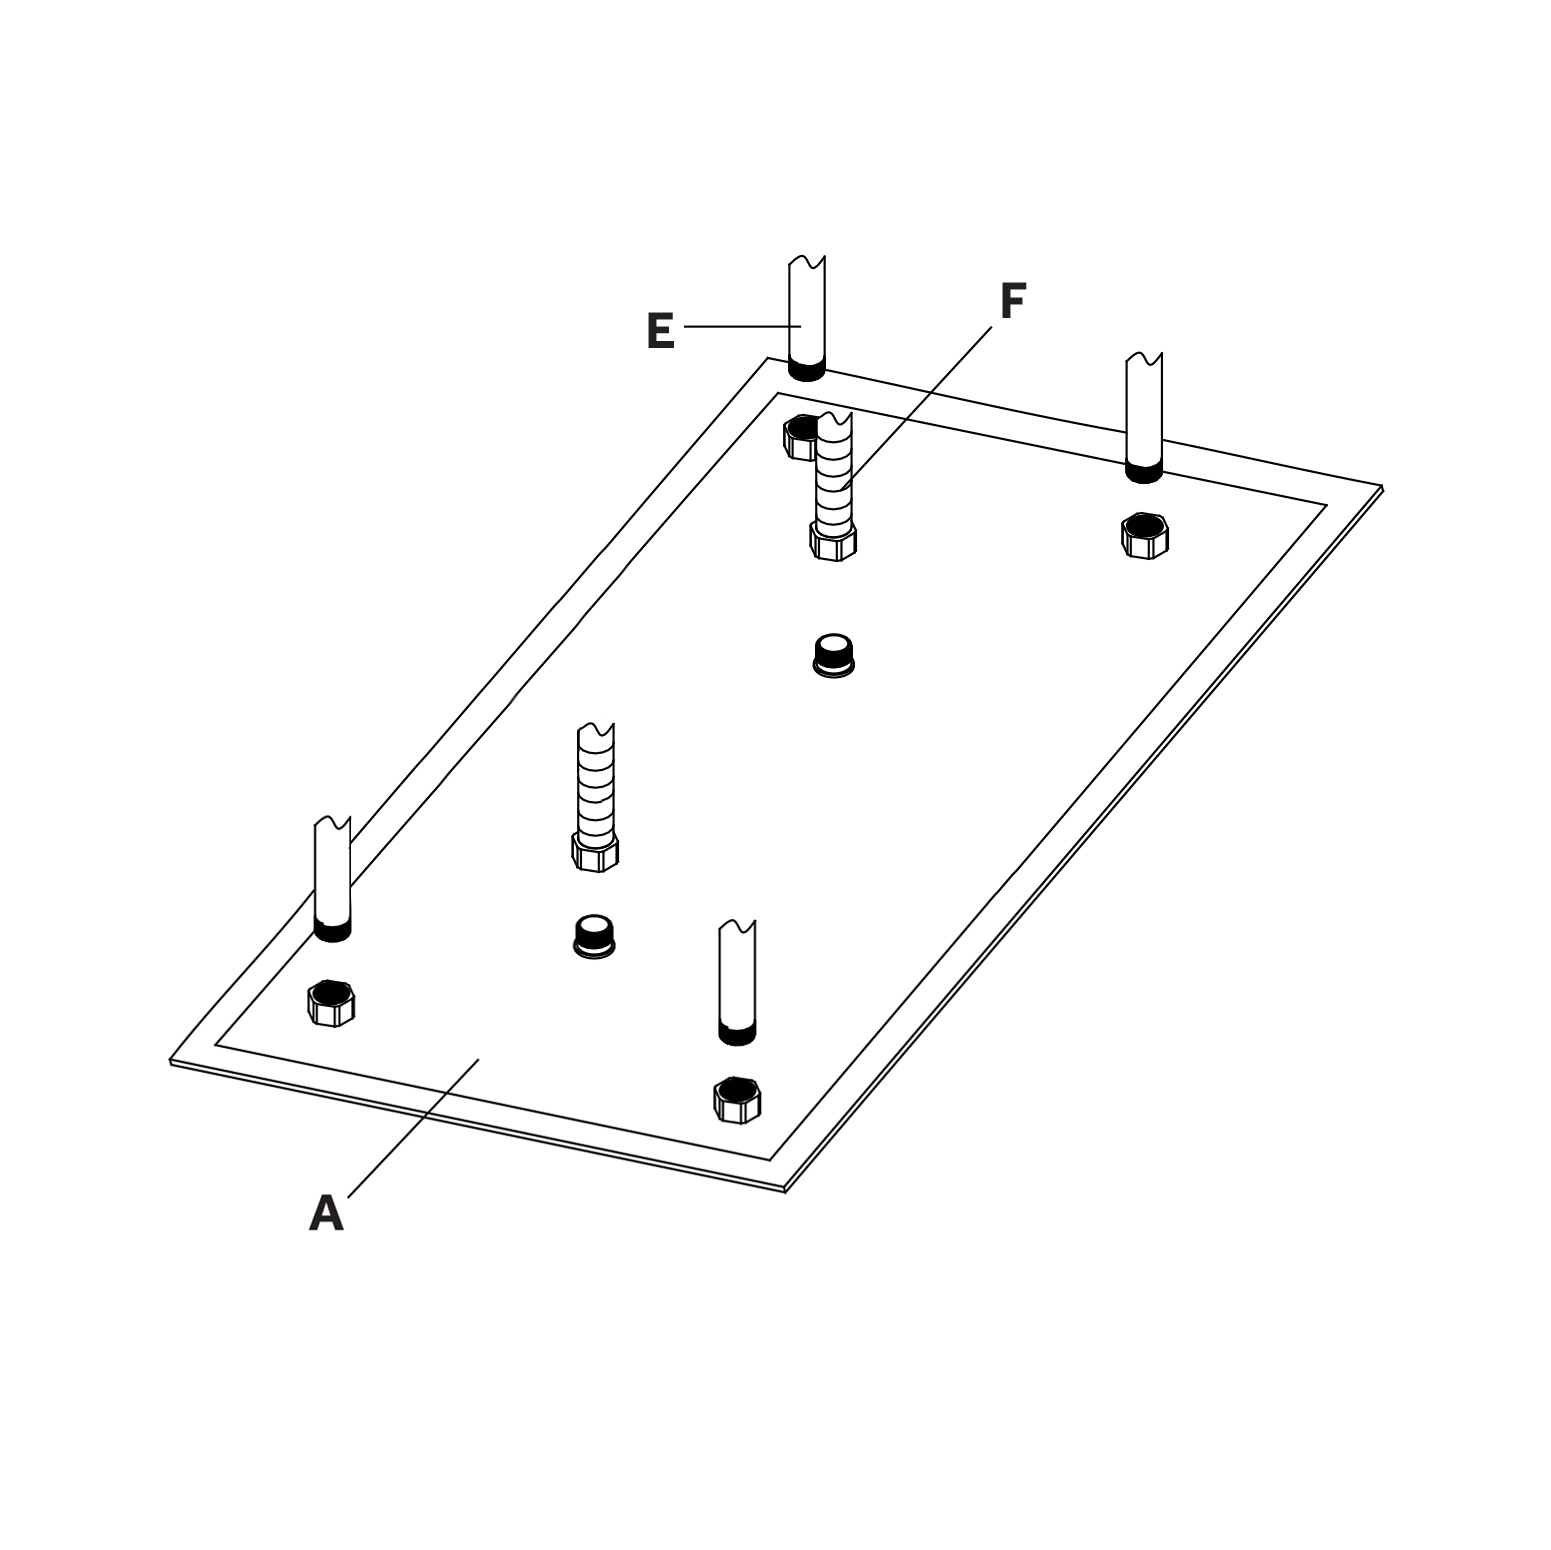
Step 3:
|
|
Step 4:
|
|
|
|
|
|
|
|
|
|
|
|
|
|
|
|
Step 5:
|
|
Step 6:
|
|
|
|
|
|
|
|
|
|
|
|
|
|
|
|
Step 7:
|
|
Step 8:
|
|
|
|
|
|
|
|
|
|
|
|
|
|
|
|
Step 9:
|
|
Step 10:
|
|
|
|
|
|
|
|
Connections Structure
|
|
|
|
|
|
|
|
Instructions
|
|
|
|
|
Step 11:
|
|
Step 12:
|
|
|
|
|
|
|
|
|
|
|
Step 13: (Host Box)
|
|
Step 14: (Operation)
|
|

|
|
|
|
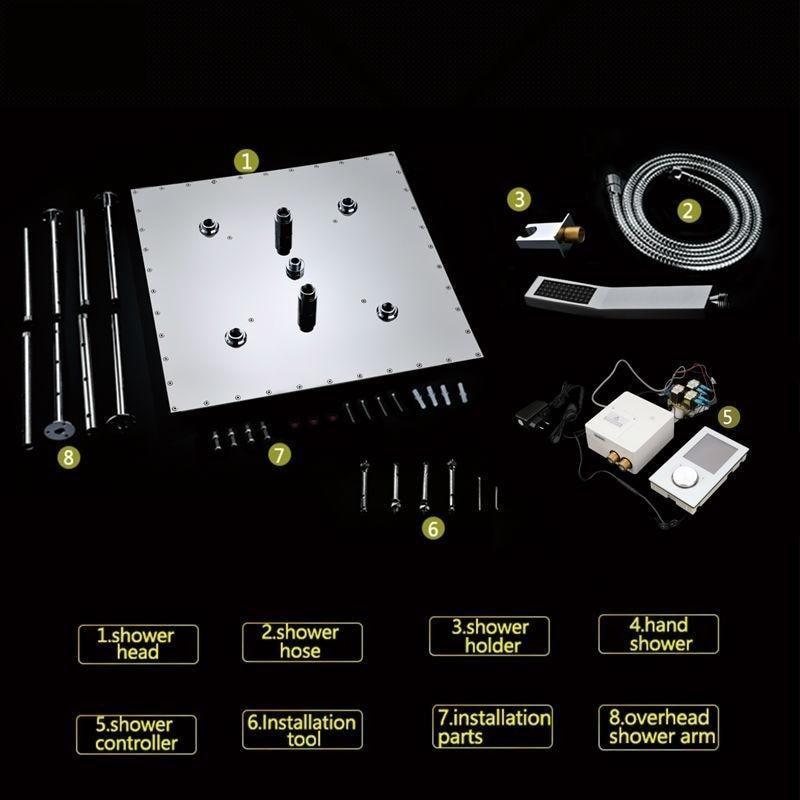
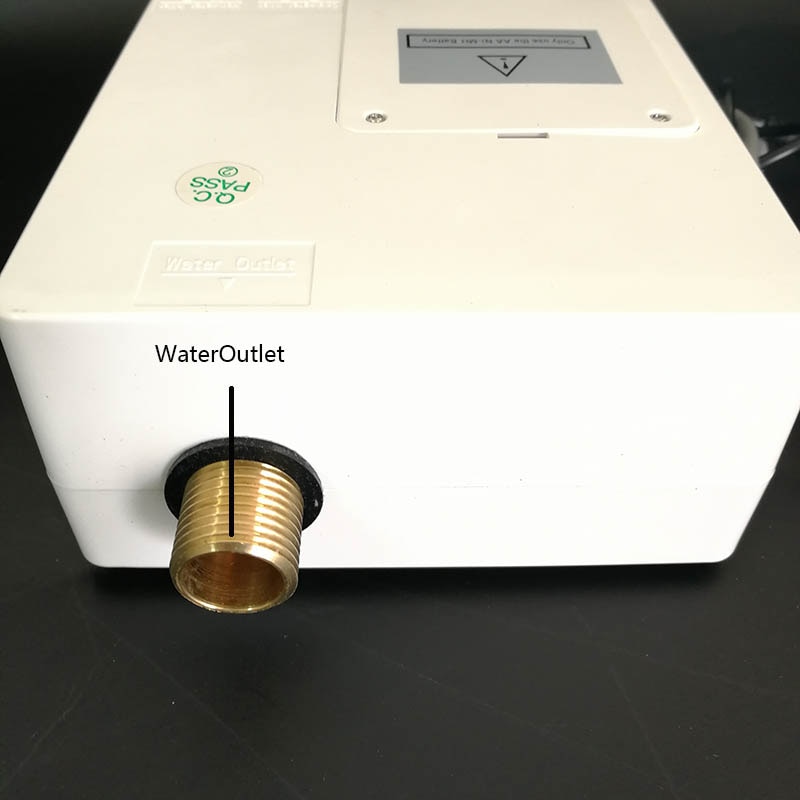
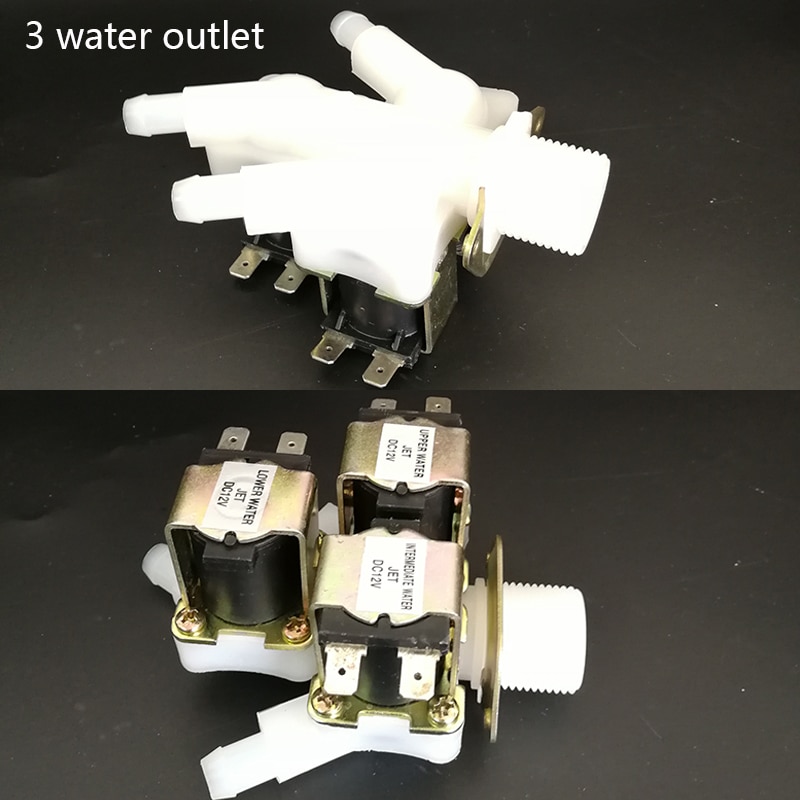
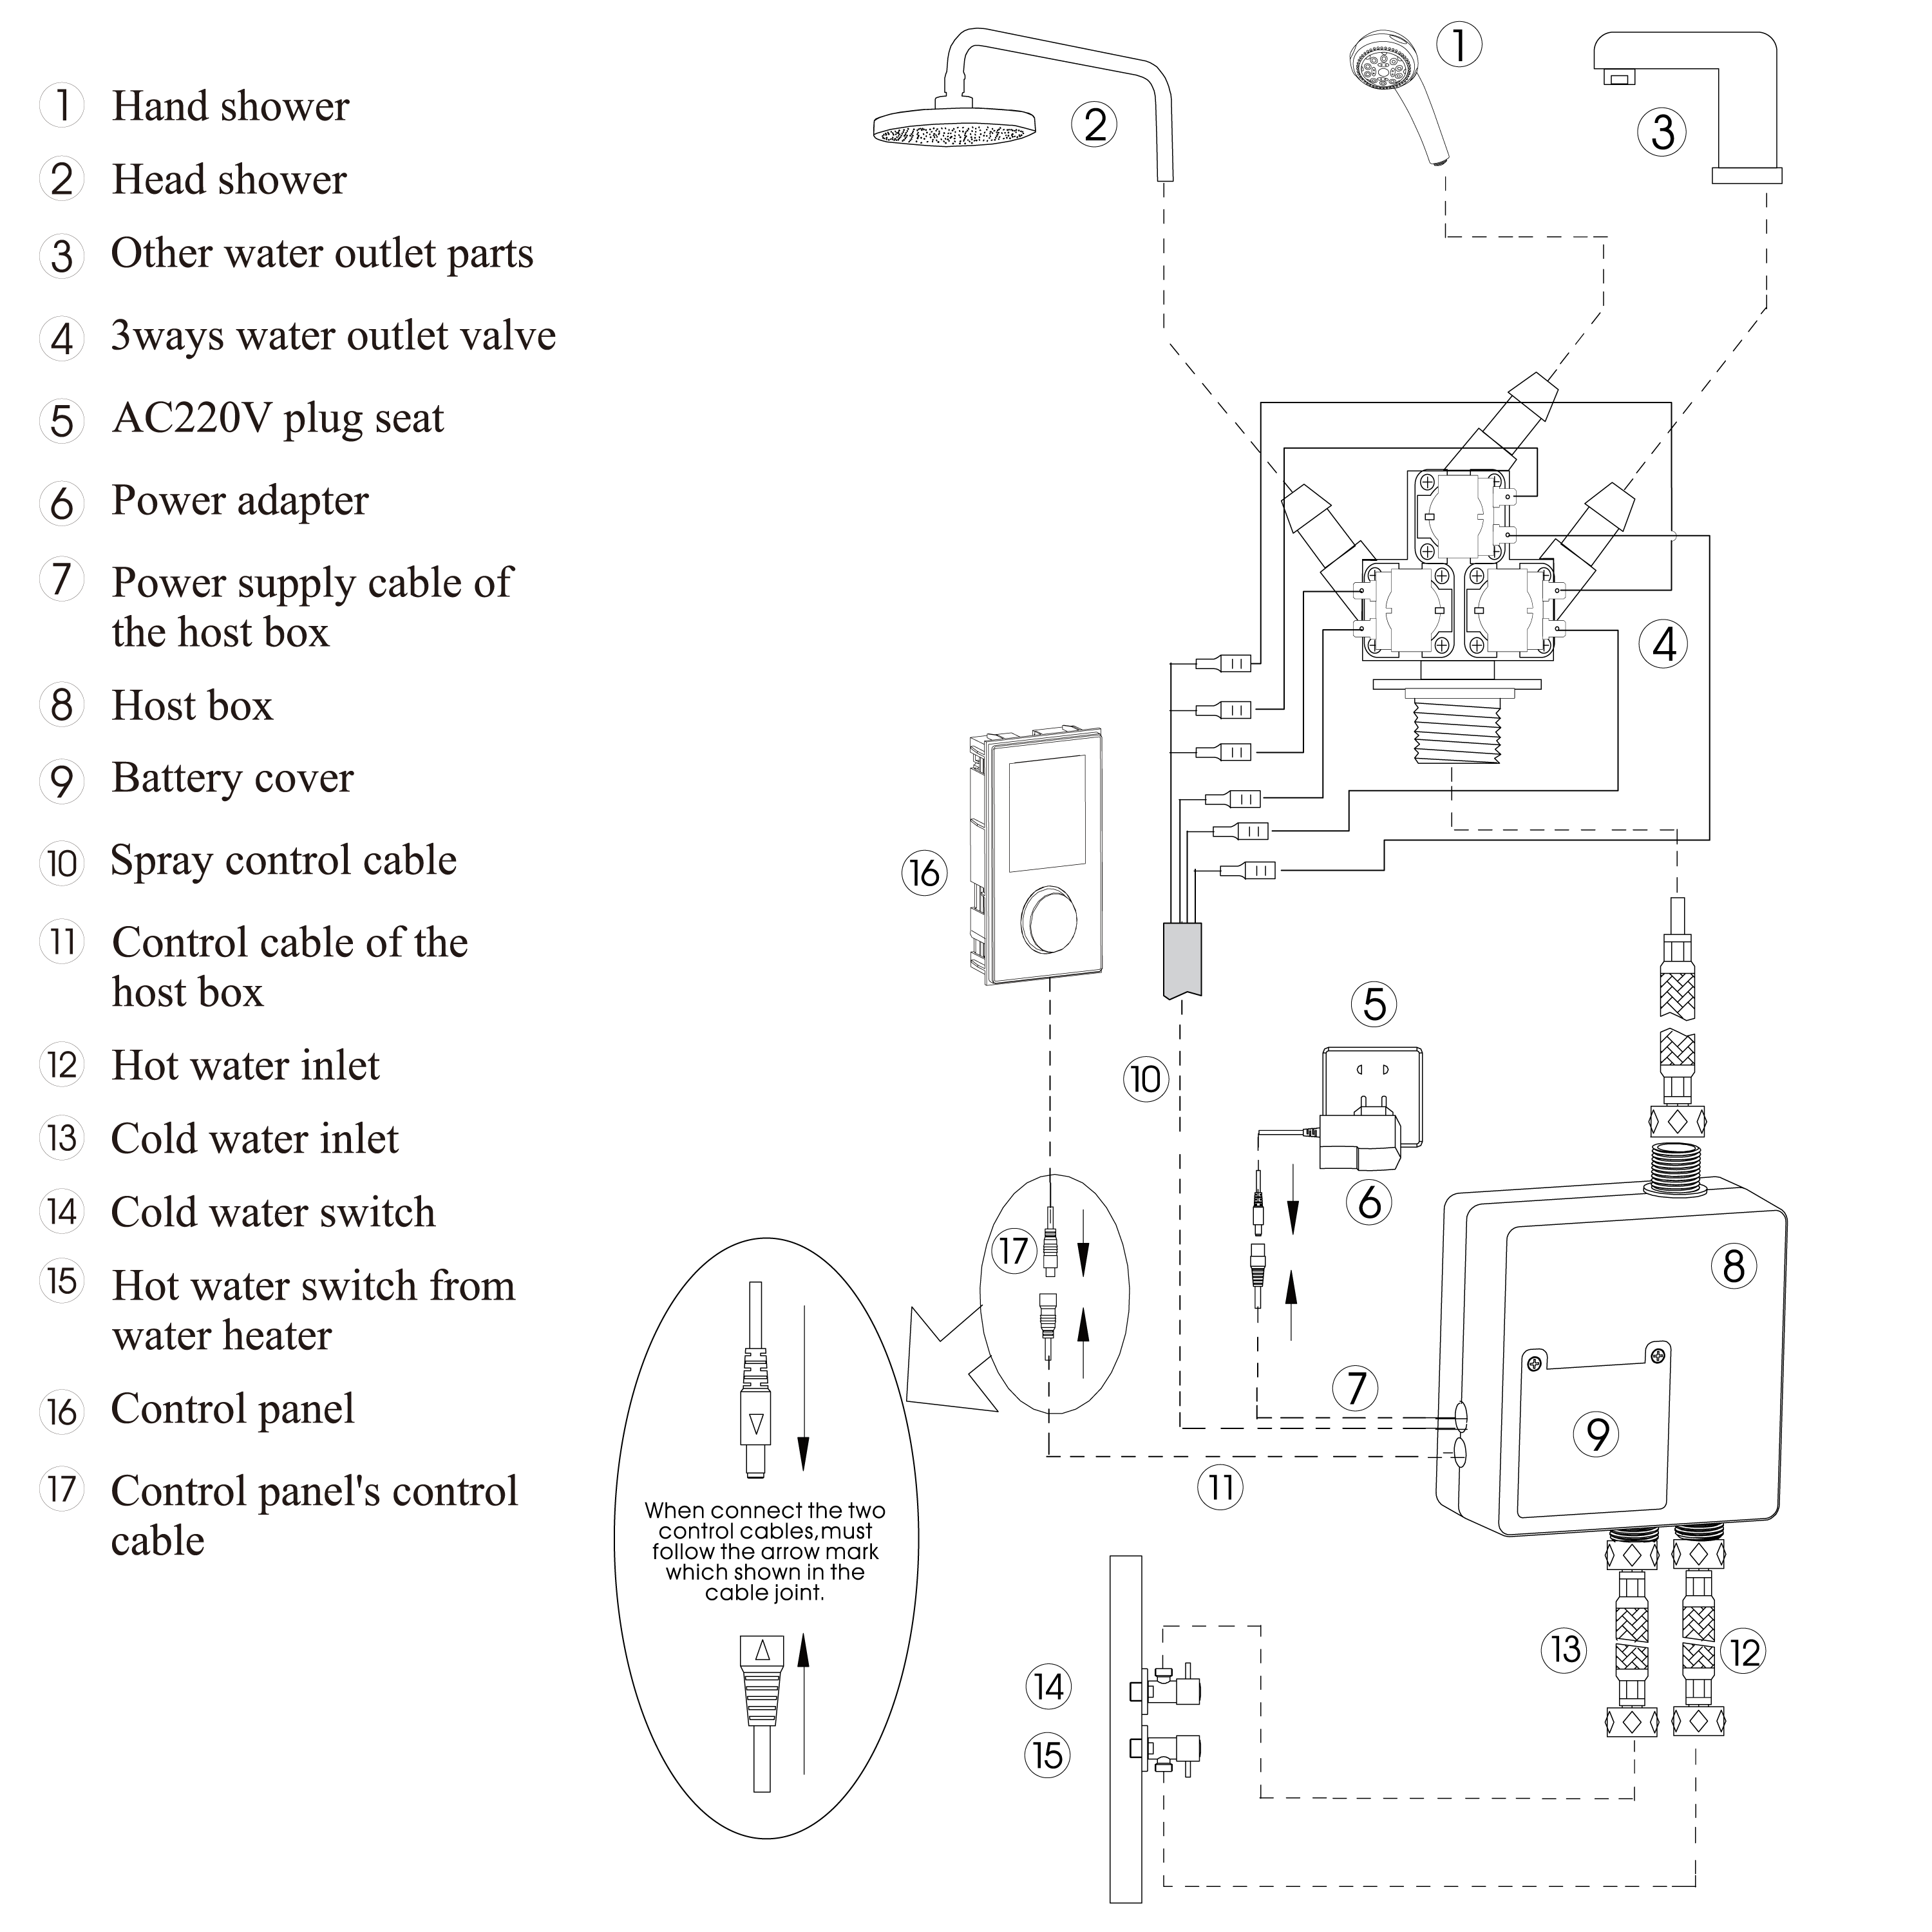
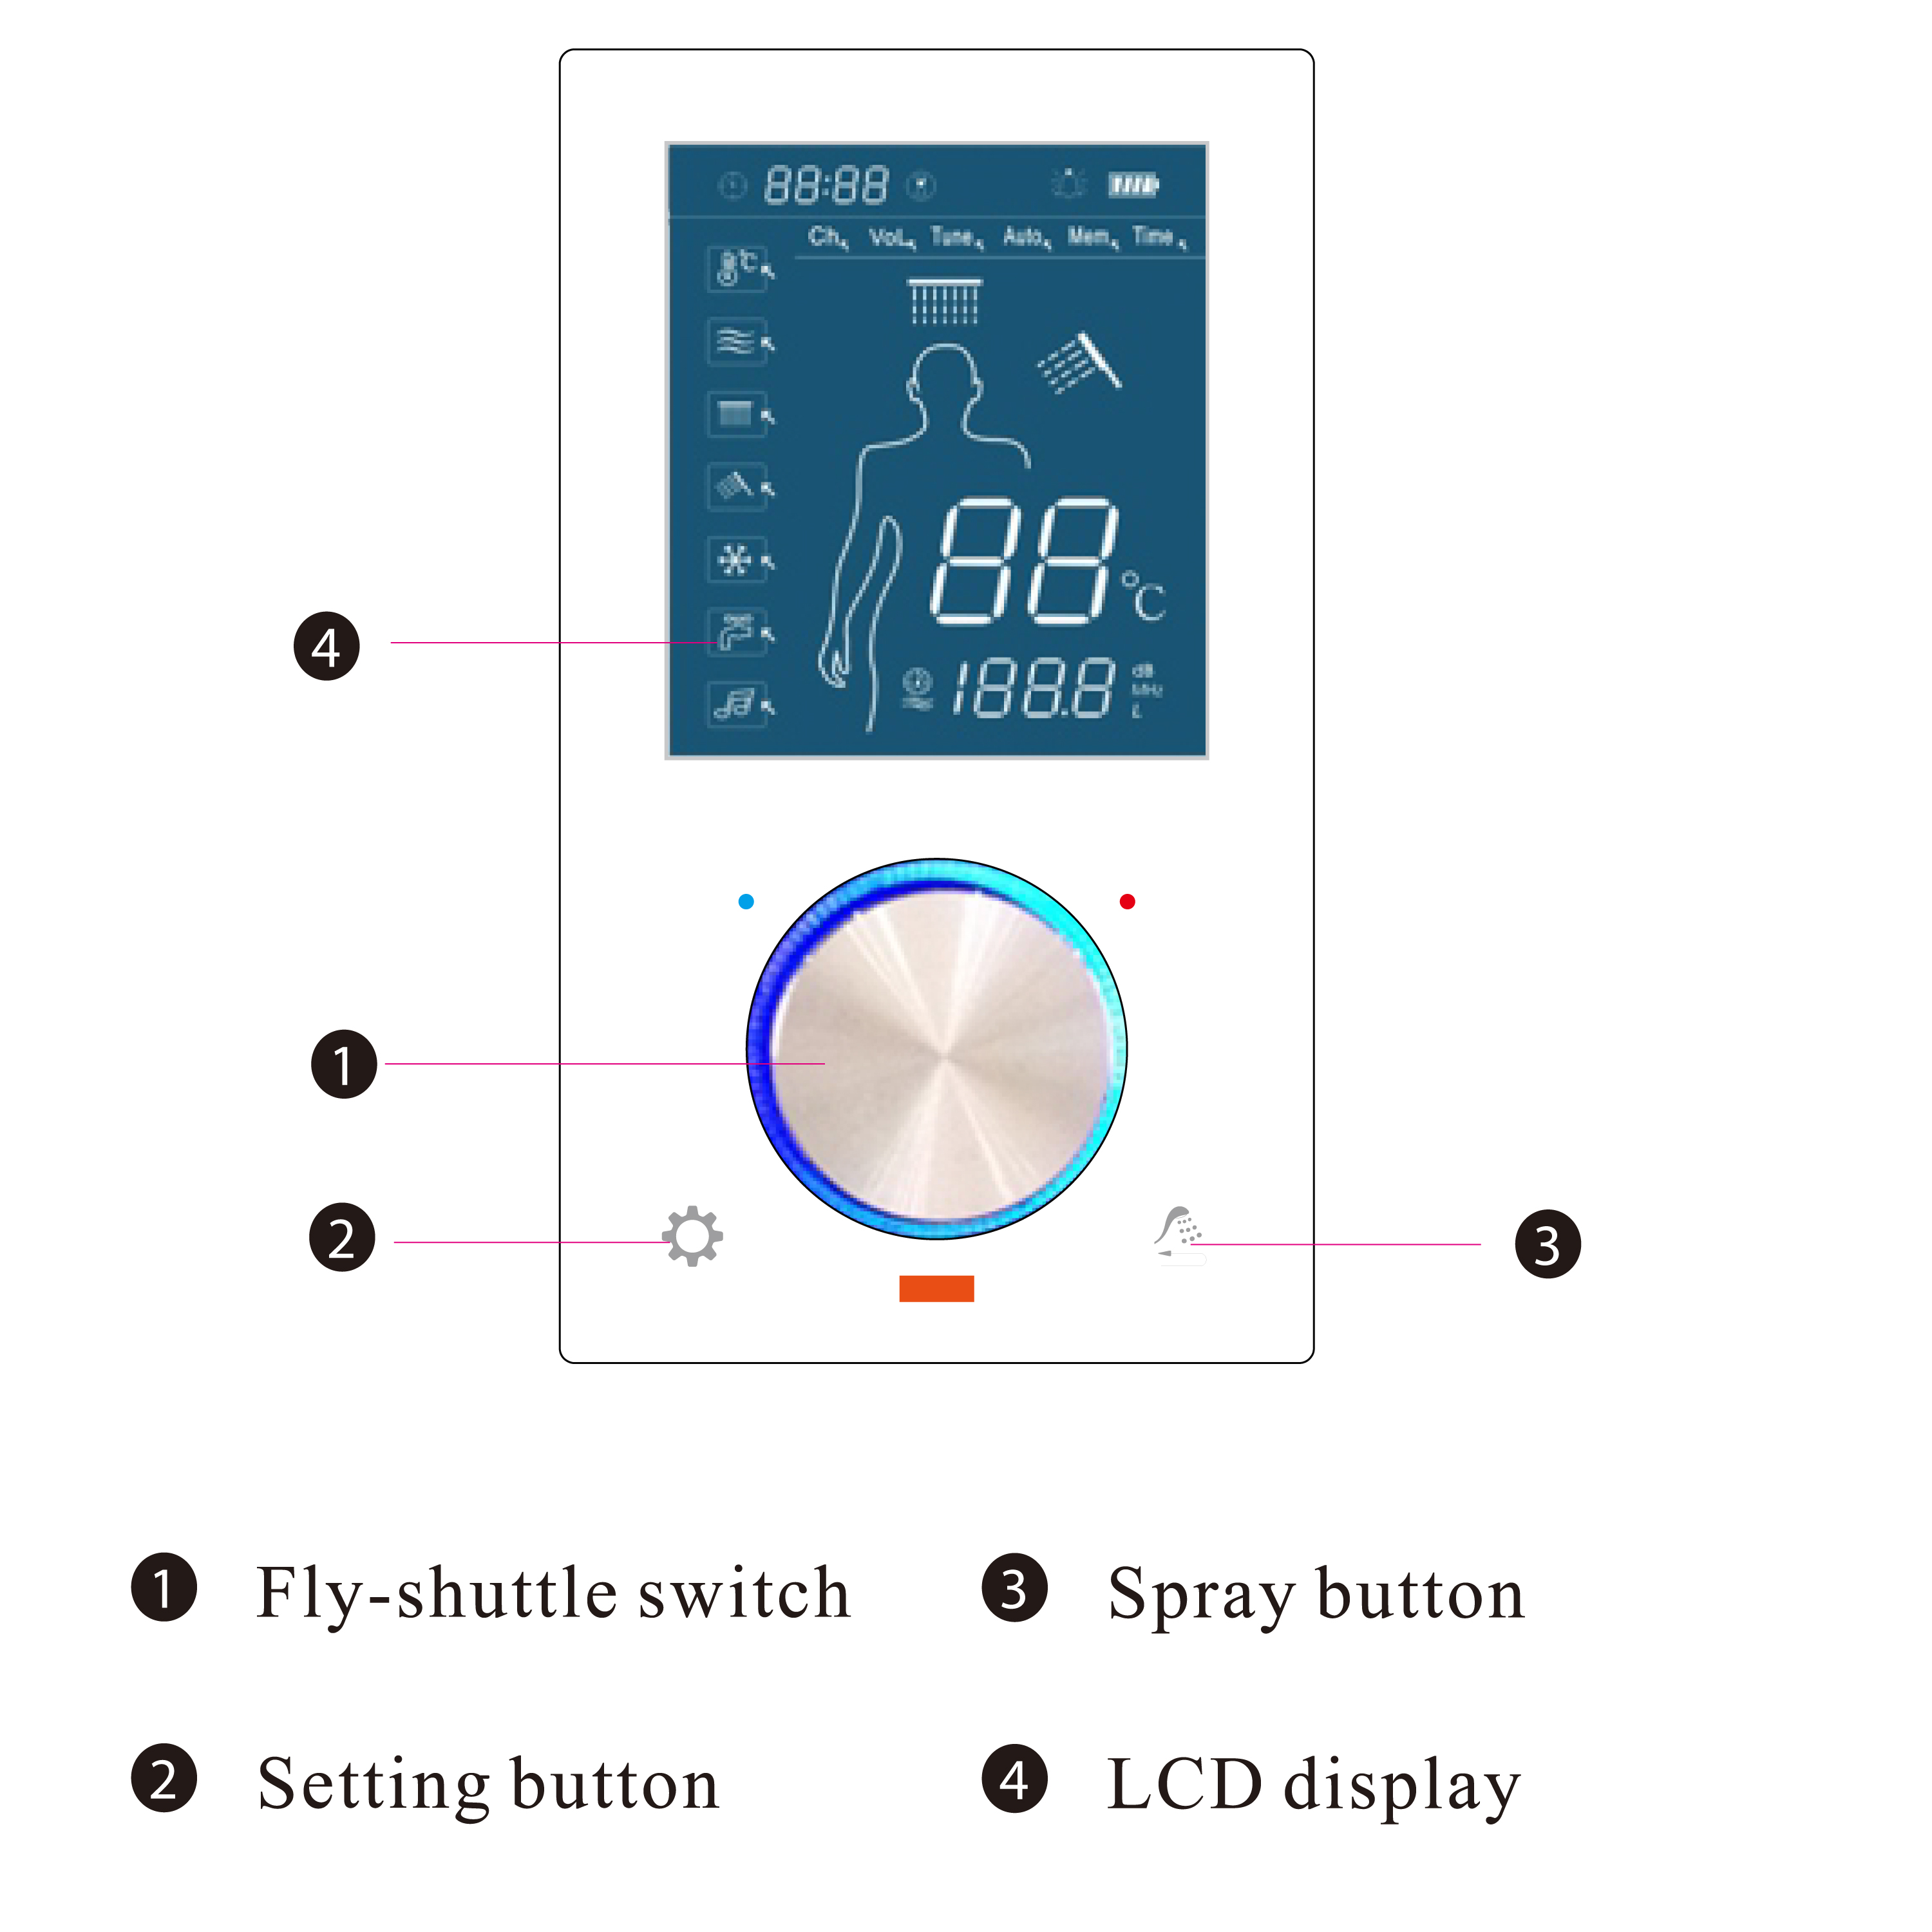
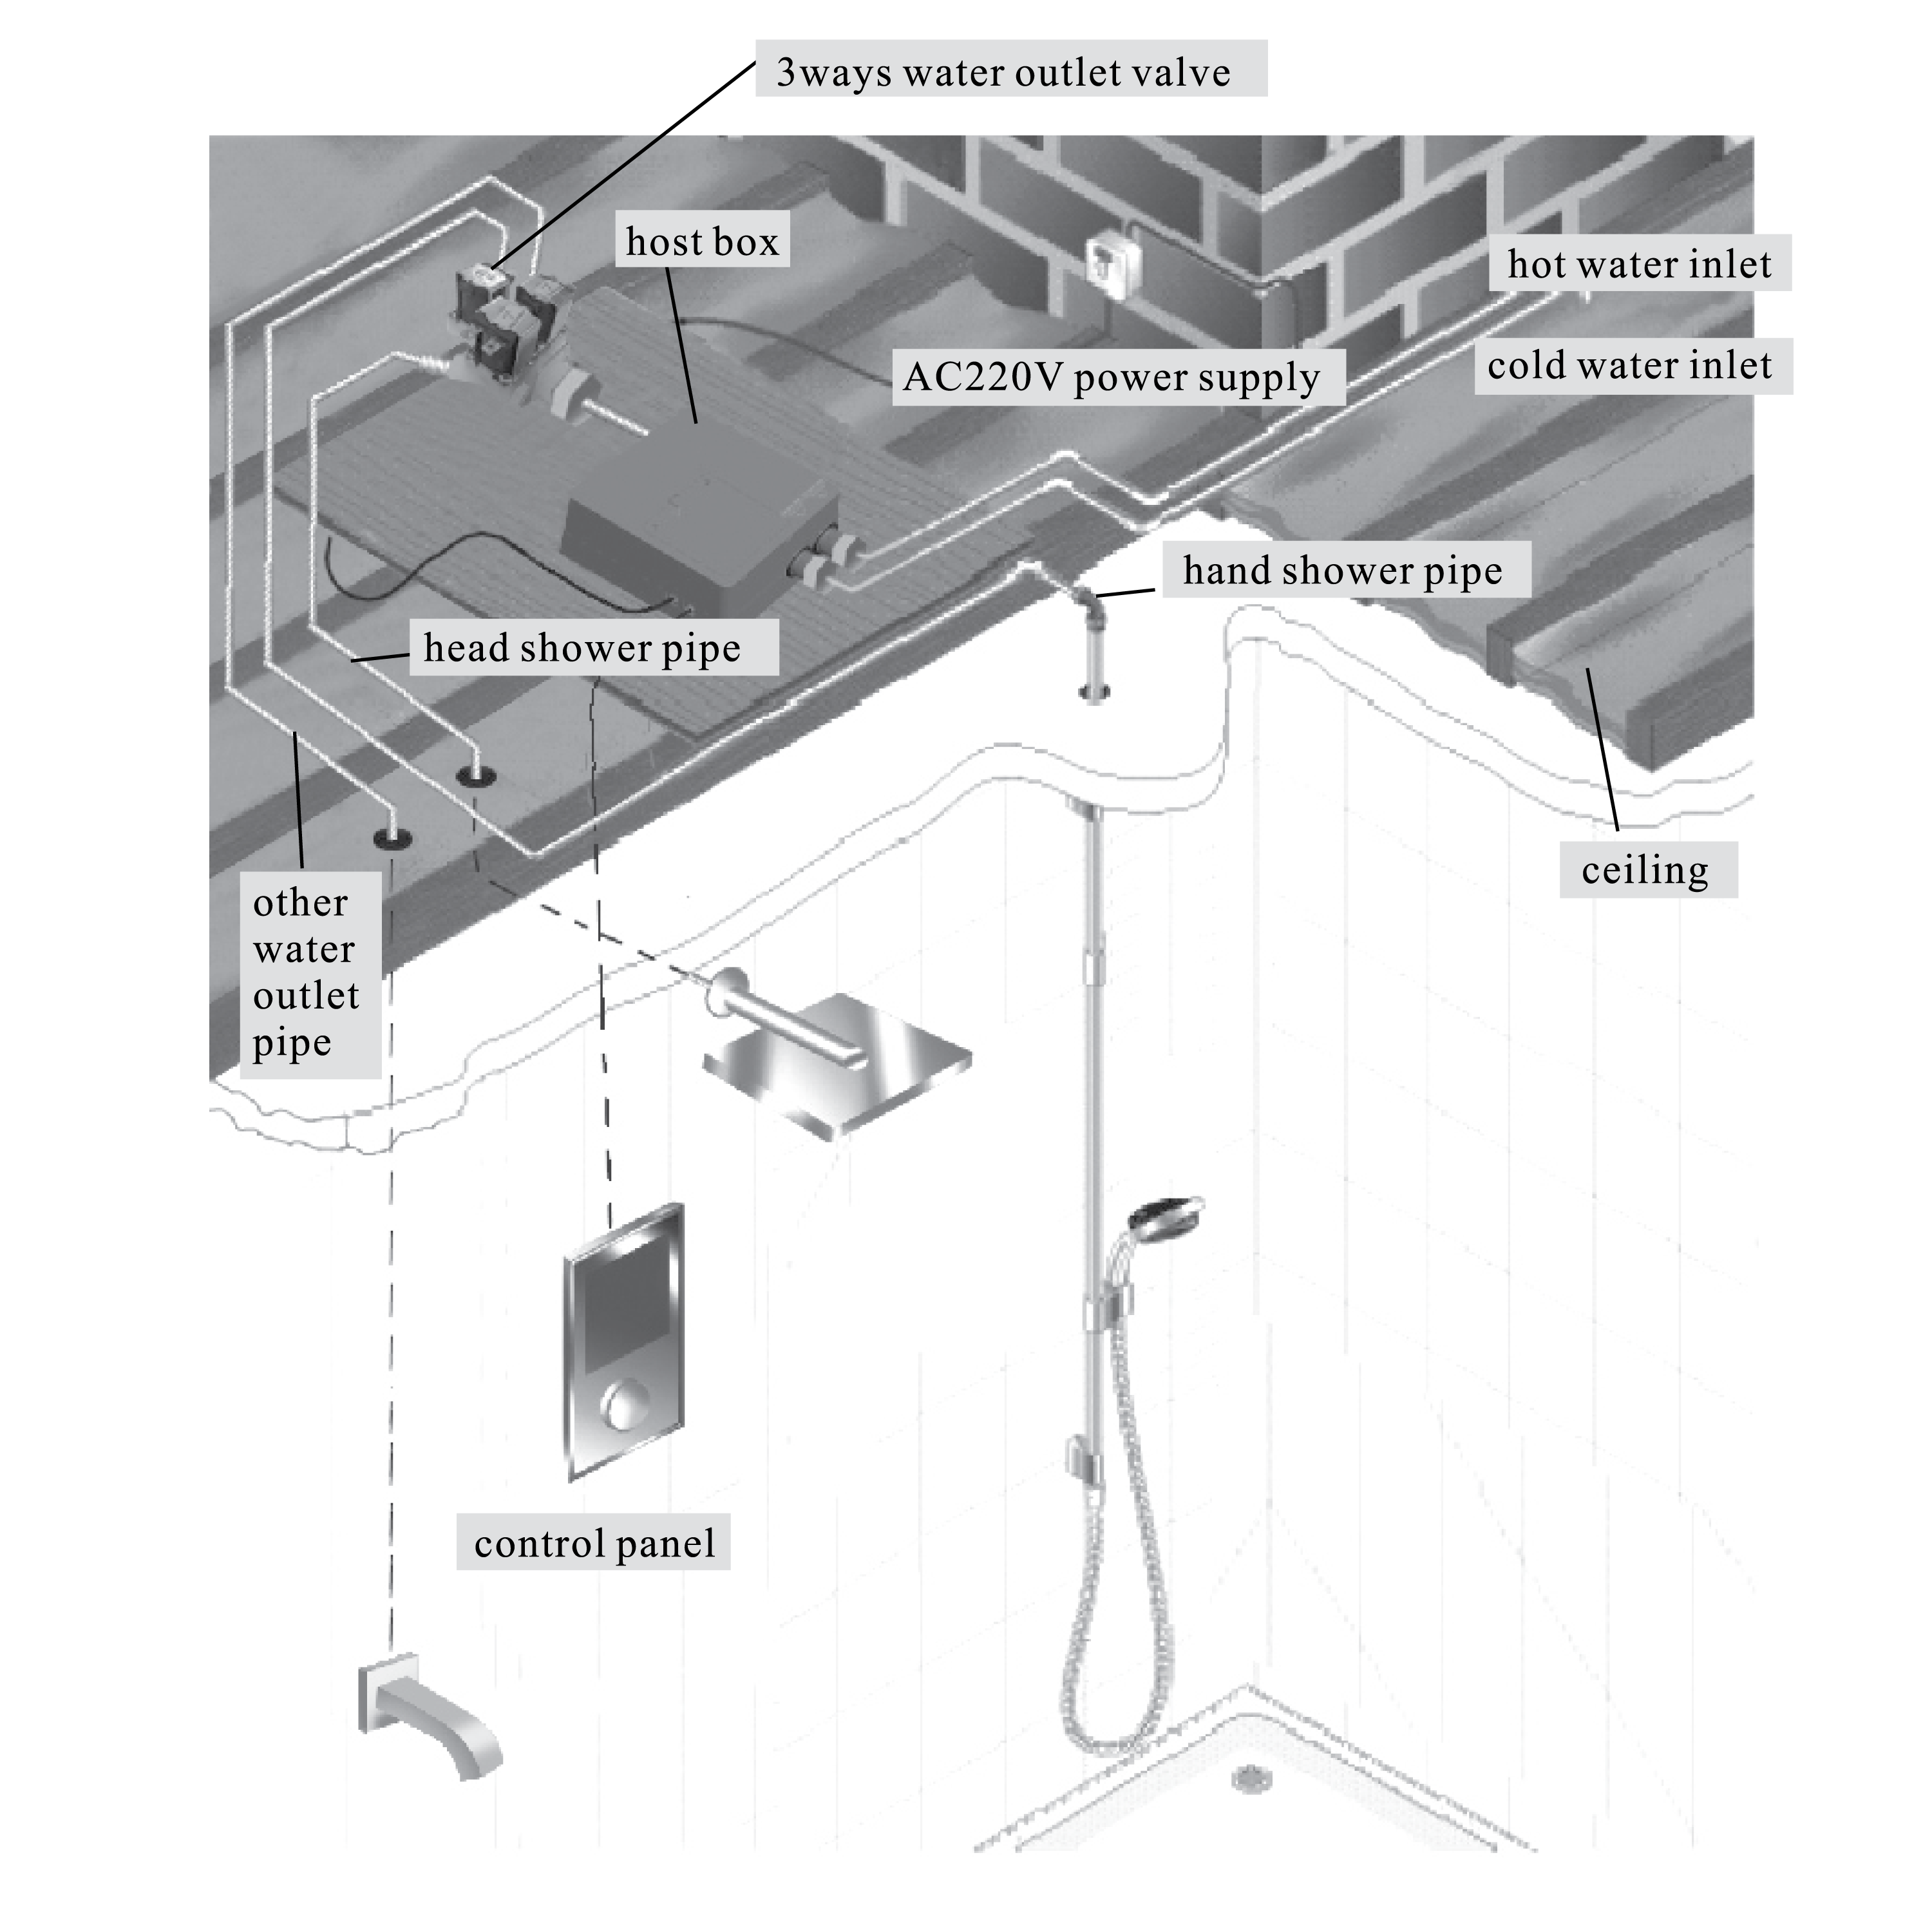
1. Hand shower's mixer water outlet
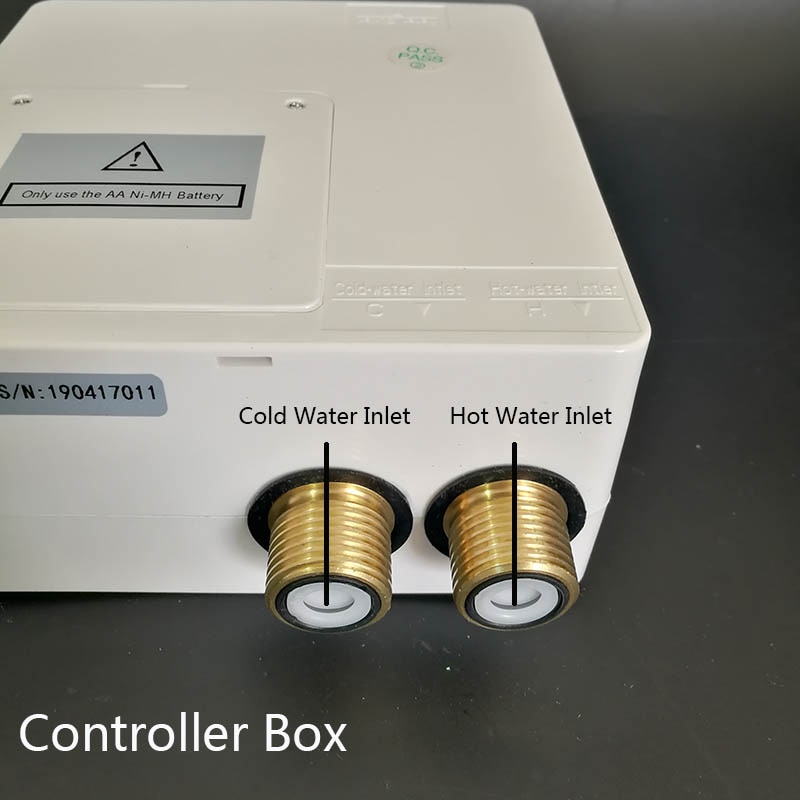
2. Hot water inlet 3. Cold water inlet
4 & 5. The Control Cable
6. The host box installation bracket
7. 3 way water outlet valve
8. The control panel installation bracket
|
|
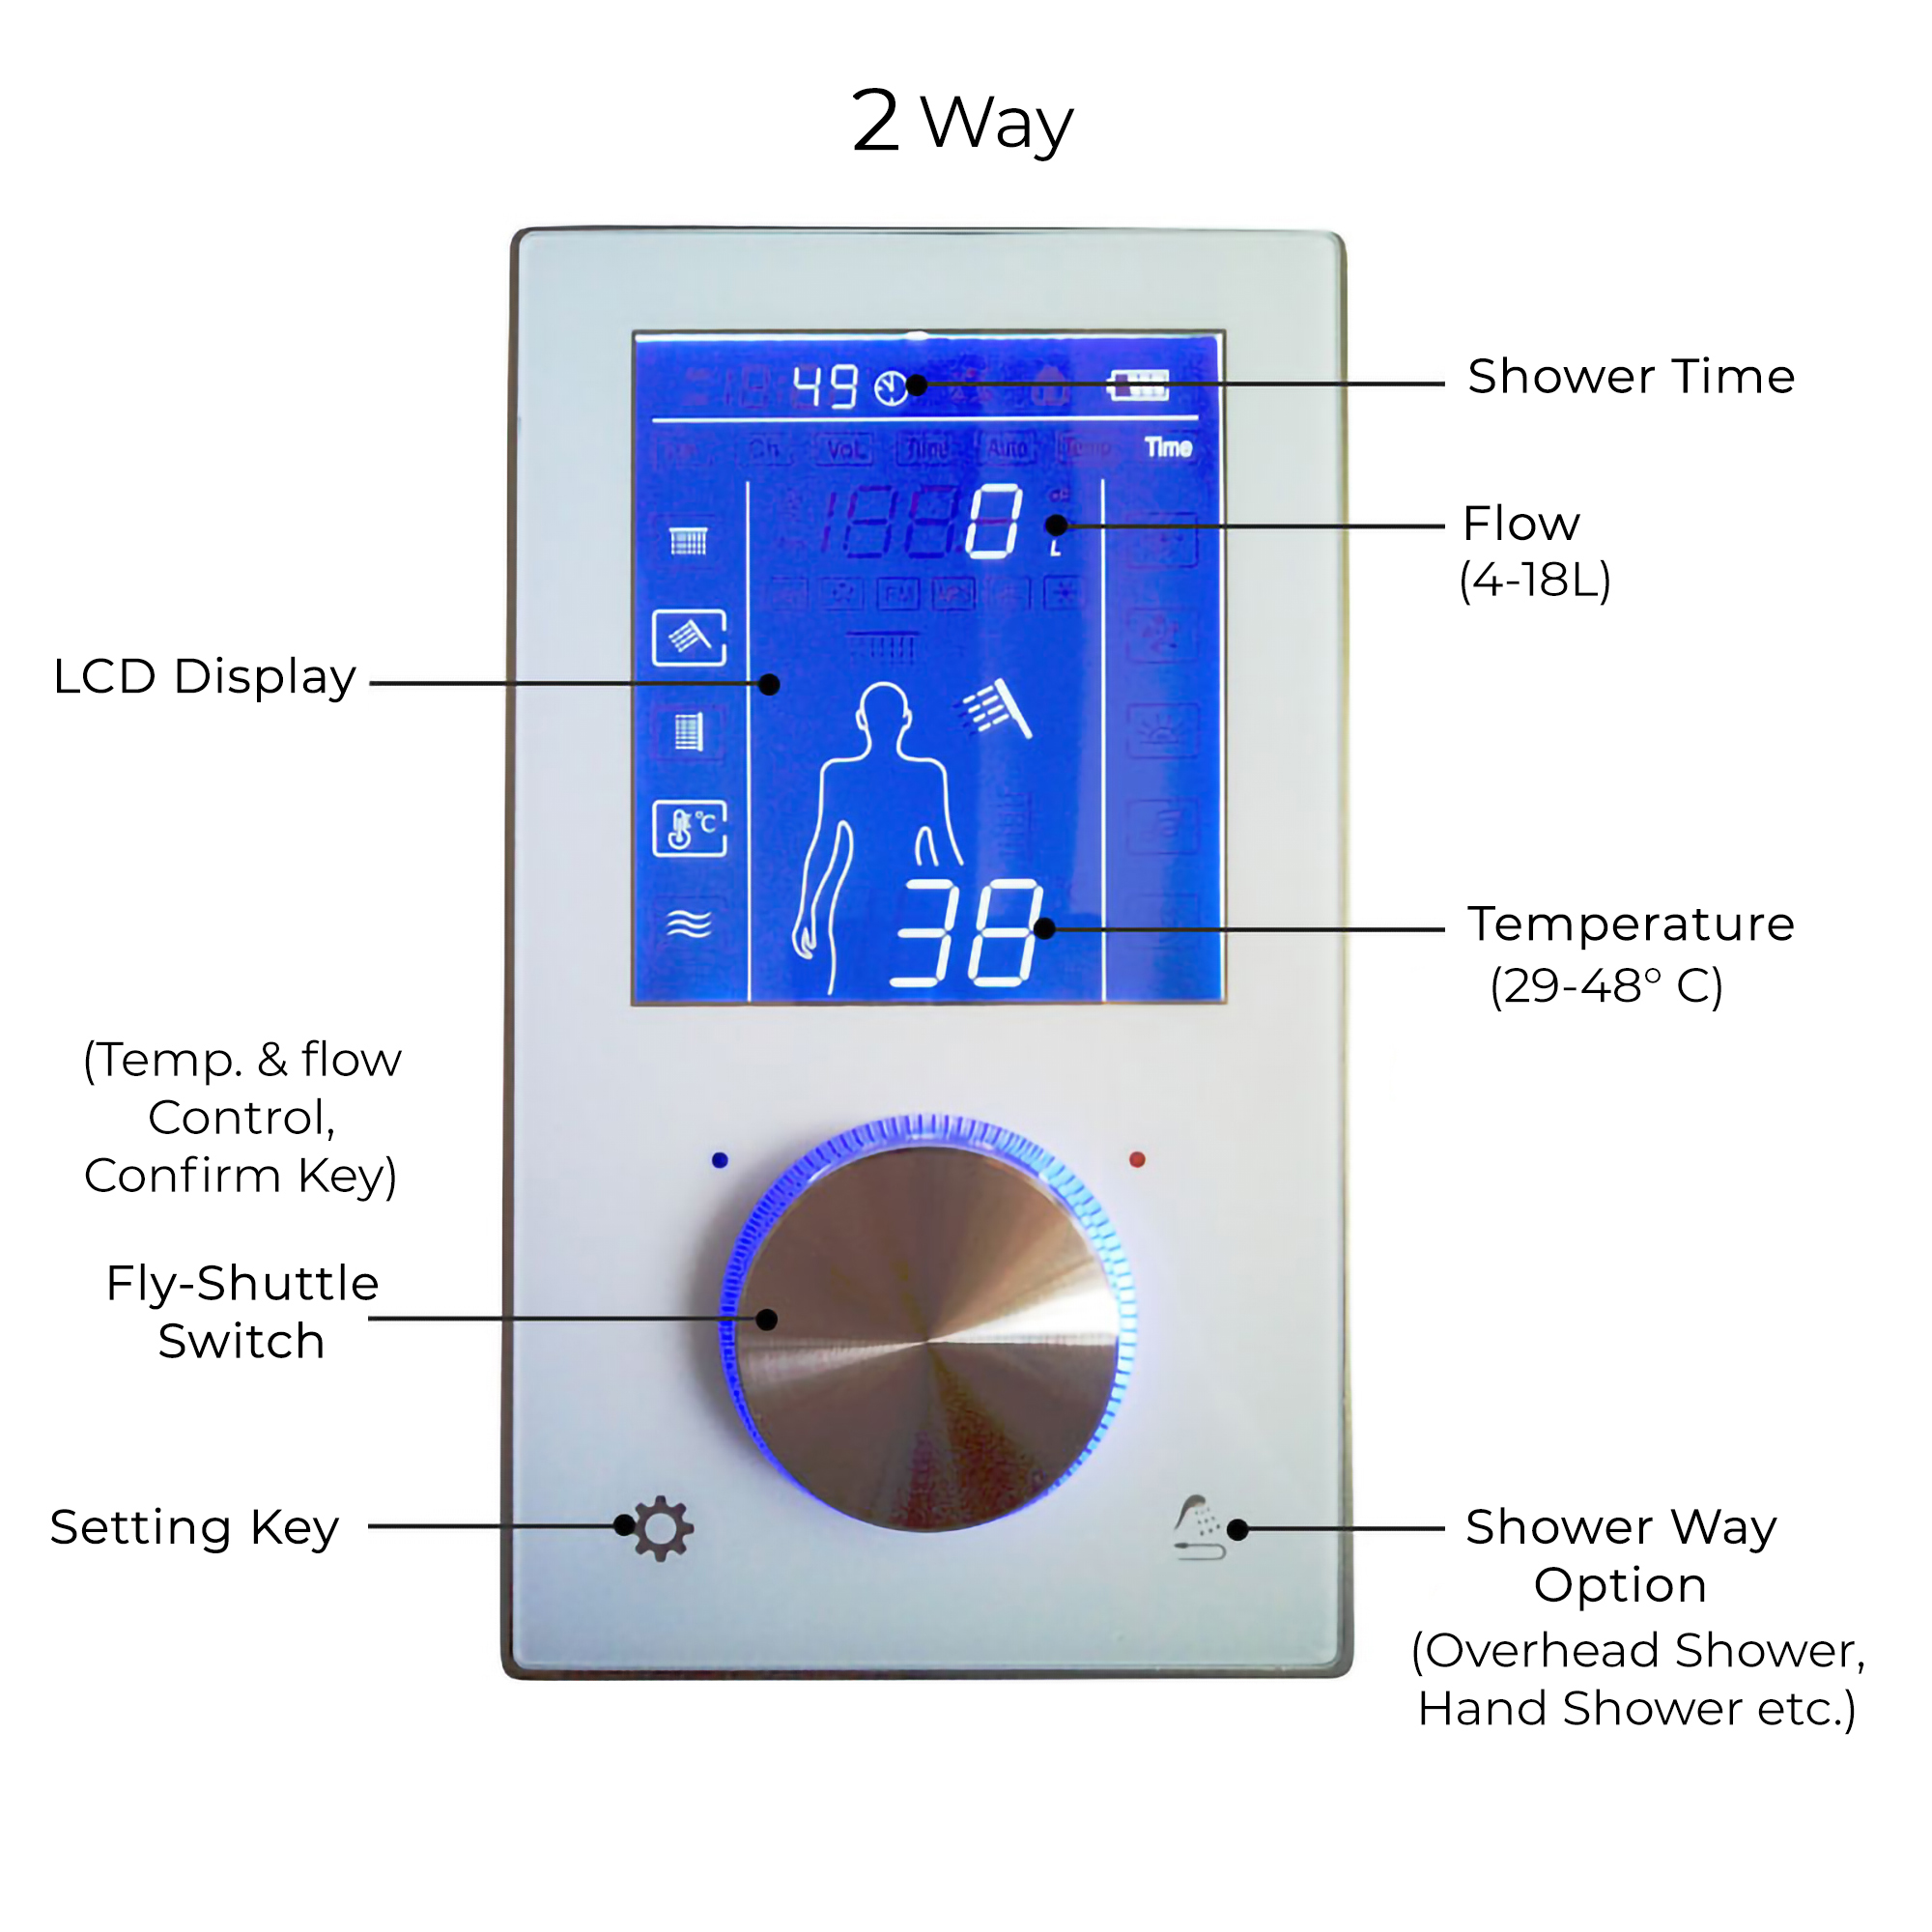
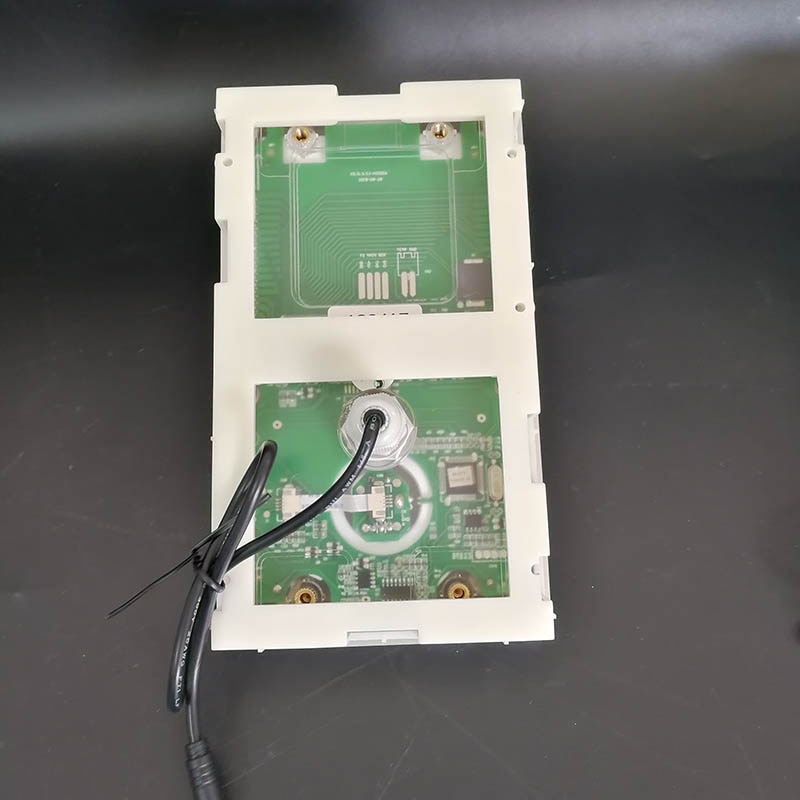
1. Fly-shuttle switch
2. Setting
3. Spray Button
4. LCD Display
|
|
|
Step 15: (Battery Installation)
|
|
Step 16:
|
|
|
|
|
|
|
|
|
|
|
Step 17:
|
|
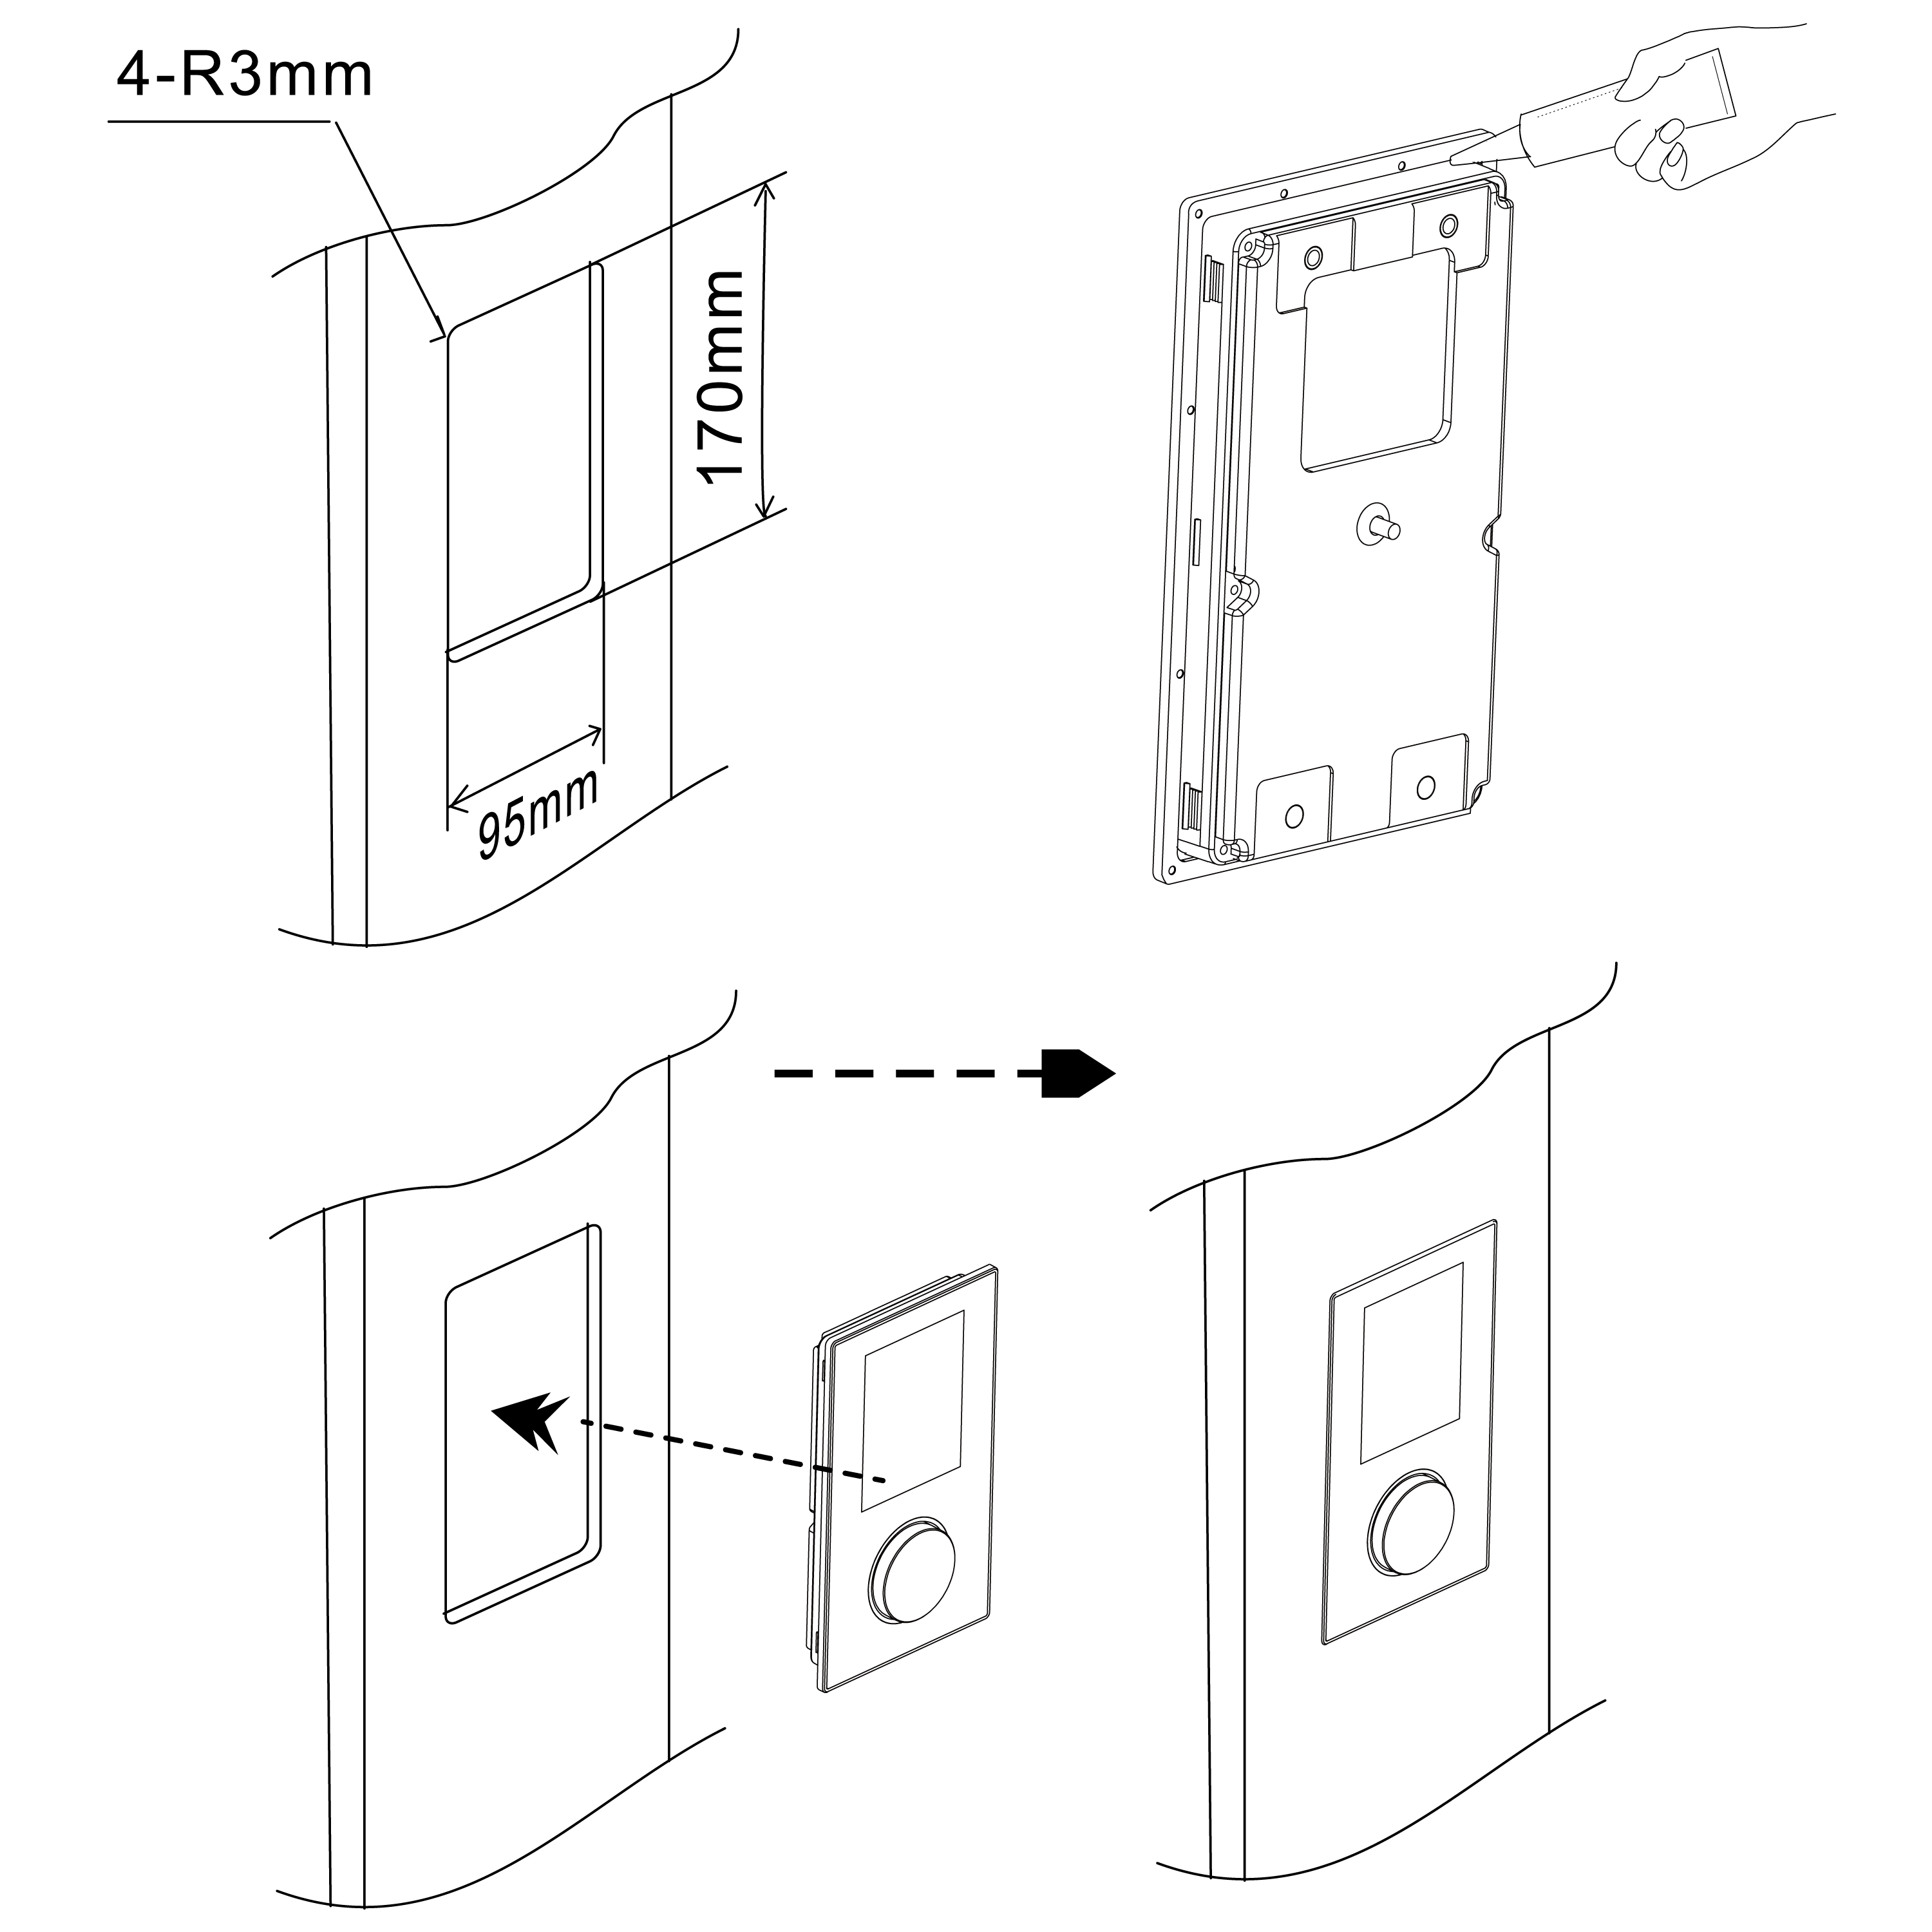
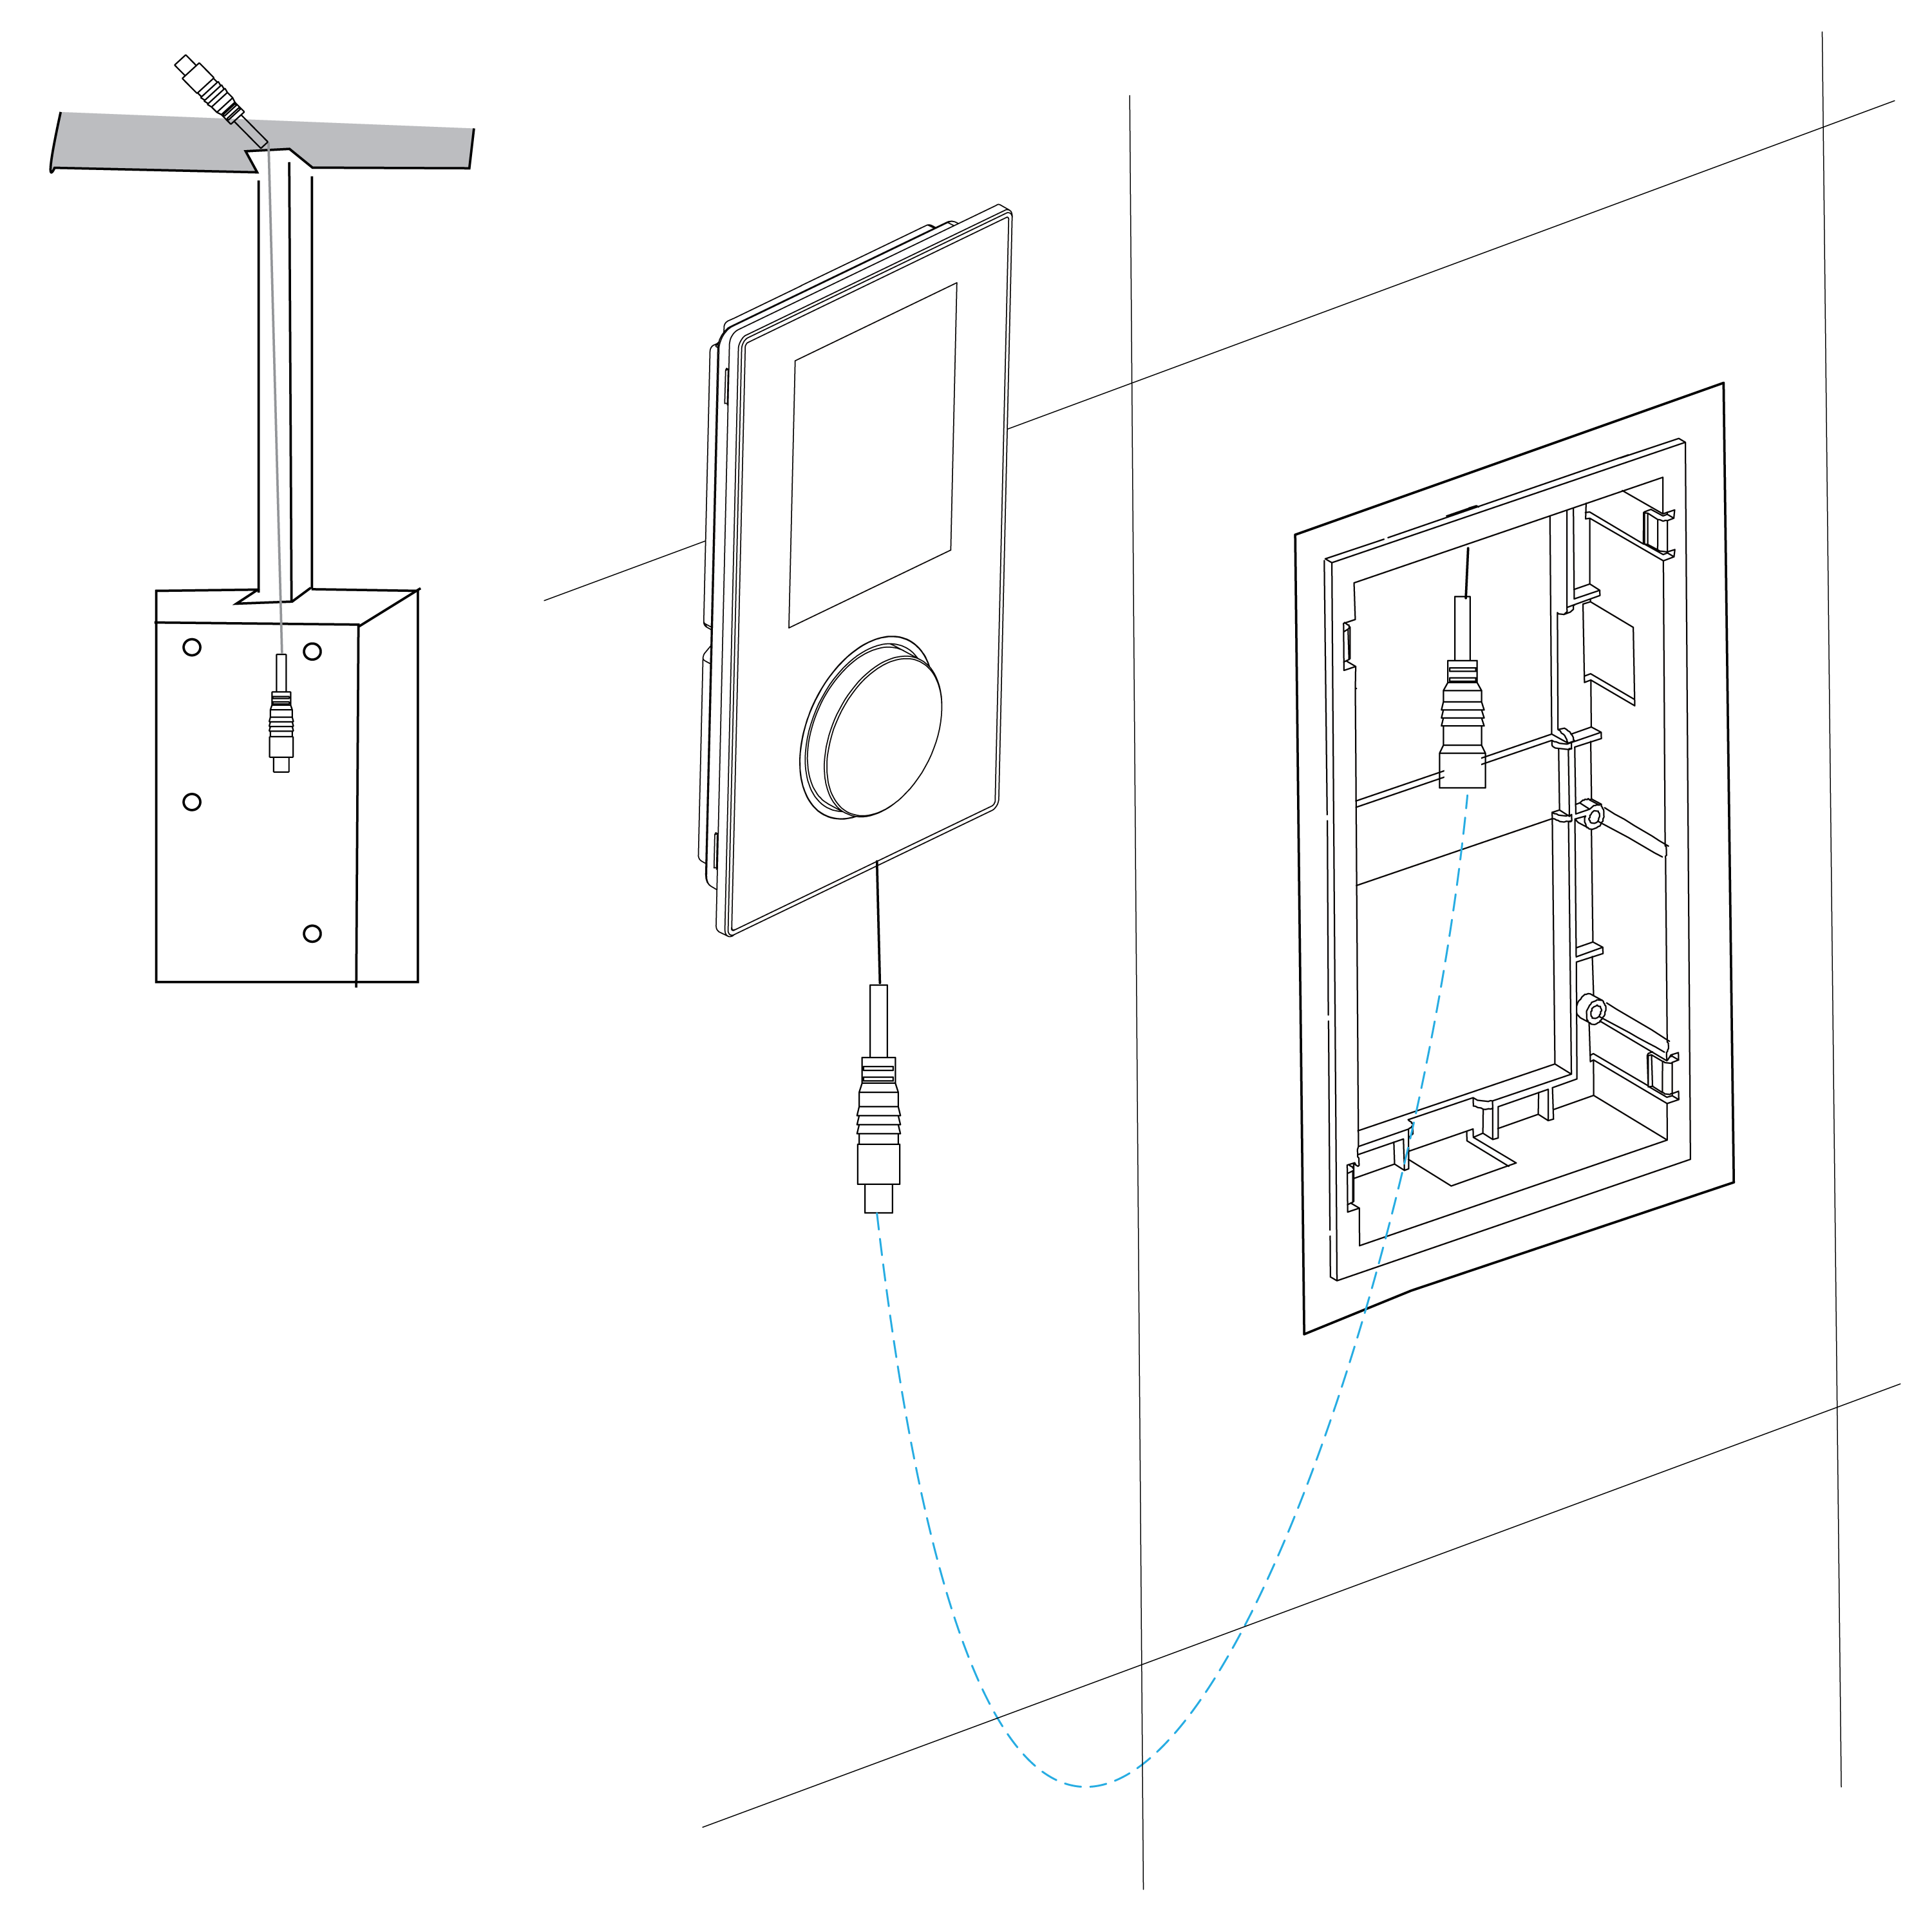
Step 18: (Installation of Control Panel)
|
|
|
|
|
|
|
|
|
|
|
Step 19:
|
|
Step 20:
|
|

|
|
|
|
|
|
|
|
|
Step 21:
|
|
Step 22: Recess mounted into wall |
|
|
|
|
|
|
|
|
|
|
Step 22:
|
|
Step 23:
|
|
|
|
|
|
|
|
|
|
|
Step 24:
|
|
|
|

|
|
|
|
|
|
|
|
|
|
|
|
|
Features
Touch control panel - With the touch control panel, easy to use.
Digital thermostat - Keep outlet water TEMP stable, the TEMP accuracy within ±1°C.
Overheat protection - When the cold water cut off and leads the water TEMP over 49°C, the system will stop the water outlet in 2 seconds to protect the user from hot water.
Water TEMP adjust - You can set the water TEMP as you like with the TEMP setting button, and the control panel can show the ambient TEMP. The user can set the TEMP as needed, according to the personal hobby, health situation, different season.
Water-saving - You can adjust the water flow and working time as you like, the system will shut off automatically after the countdown time is up to save water.
Double power supply, more safety and reliable - When the local power supply is normal, you could use our adapter, which can transfer 100-240V to 12V power supply. 12V is a safe voltage for the human body; When local power cut off by accident, the system still works by a battery inside the host box automatically.
Easy Installation - Our faucet is made of brass, chrome polished, equipped with an installation base and standard pipe connector, easy for installation. It's compact structure, beautiful-looking, harmony with the modern decoration of the bathroom.
Notice
1. The control panel is sensitive, when installing it, please avoid to let it face directly to the water from the hand shower and the head shower, because water will get it misoperation or lock the control panel.
2. The touch button is the best sensitive area.
3. The touch panel has water splash protection technology. When the system detects misoperation, no response and need about 1 second to recover.
Function
1. Water TEMP adjust 2. Hand shower 3. Shower Head 4. Water flow adjust
Operation
1. Power on/off
Power on
A. After electrify (The battery without electricity or not install battery), press the fly-shuttle switch, power on and switch on the head shower automatically, adjust the thermostatic Temp function. When you hear buzzer sound, the fly-shuttle switch and LCD display would be lighting.
B. After electrify (The battery with electricity), press the fly-shuttle switch in 20 minutes from last time turn it off. When power on, open the last time spray mode and TEMP adjustable function (cold water or thermostatic function); if press the fly-shuttle switch from more than 20 minutes from last time turn it off,power on and open the head spray and TEMP adjustable function at the same time. You could hear buzzer sound, the fly-shuttle switch and LCD display would be lighting.
C. When system is on, Water TEMP and water flow will be same as that you set last time. Head shower (or hand shower) shows cursor and icon.
D. If you didn't set working time, default working time is 60 minutes.
Power off
A. When system is on, press the fly-shuttle switch to power off system, you can hear buzzer sound.
B. The system will switch off automatically when working time comes up.
Hand shower and head shower switch
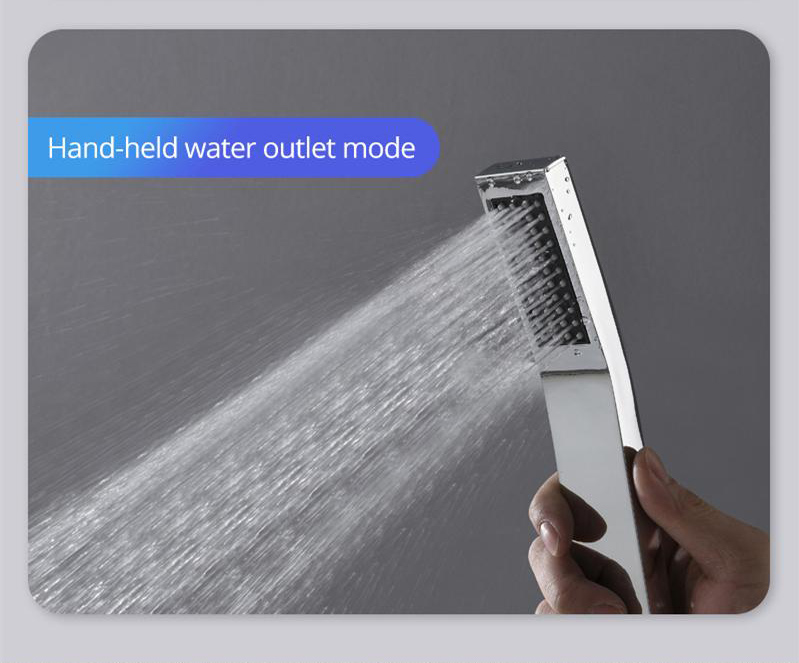
When the system is on, press Spray button on the panel to switch the water outlet way between the shower head, hand shower and body jet, connections are optional, can connect to the desired shower function. When cursor and frame move to the shower head icon, the water flows for hand shower head. When cursor and frame move to the hand shower icon, hand shower comes water.
Setting
When the system is on, rotate the fly-shuttle switch to adjust the water flow, press the Setting button to adjust water TEMP and water flow. Press the Setting button and keep for 3 seconds to set working time. System will restore to adjust water flow if no press any button for 5 seconds.
Water TEMP adjust and cold water mode
When system is on, touch Setting button to enter into TEMP adjusting, cursor and frame will move to TEMP cold icon. The °C icon on the LCD panel flash, at this time you could set water TEMP from 29-48 ℃. Rotate the fly-shuttle to adjust water TEMP and you can hear buzzer sound for each step.
When the TEMP is lowest, rotating the fly-shuttle switch one round counter-clockwise to enter into cold water mode, cursor and frame will move to the cold water icon. You can hear buzzer sound when system enter into cold water mode. If you rotate the fly-shuttle switch one round clockwise, system will enter into the water TEMP adjusting again.
If there's no touch on the panel for 5 seconds, water TEMP will be memory and exit the water TEMP adjusting. Touch Setting button again to enter into water flow adjusting. °C icon on the LCD panel will stop flashing. The fly-shuttle switch backlight color will change according to the water TEMP as below:
blue color: water TEMP <= 33 ℃ blue;
orange color: water TEMP < 41 ℃;
red color: >= 41 ℃.
Setting system on time
When system is on, touch Setting panel switch to system on setting, show  icon. Rotating the fly-shuttle to setting system on time, counterclockwise rotation is to reduce and clockwise rotation is to increase, setting range is 15-60 minutes. You can hear a buzzer sound for each adjustment. icon. Rotating the fly-shuttle to setting system on time, counterclockwise rotation is to reduce and clockwise rotation is to increase, setting range is 15-60 minutes. You can hear a buzzer sound for each adjustment.
Stop setting for 5 seconds or touch Setting button, system on setting time TEMP will be memory and exit system on-time setting, switch to water flow setting, close icon.
Water flow
When system is on, rotating the fly-shuttle switch to adjust water flow by default, if system on other setting state, touching Setting button can switch to water flow setting. Cursor and frame will move to the water flow icon  icon on LCD panel flash, setting range is 4-18L. Rotating the fly-shuttle switch to adjust water flow, counter-clockwise rotating is to reduce flow and clockwise rotating is to increase flow. You can hear a buzzer sound for each adjustment. When water flow reaches the lowest and highest, no buzzer sound. icon on LCD panel flash, setting range is 4-18L. Rotating the fly-shuttle switch to adjust water flow, counter-clockwise rotating is to reduce flow and clockwise rotating is to increase flow. You can hear a buzzer sound for each adjustment. When water flow reaches the lowest and highest, no buzzer sound.
No touch on any button for 5 seconds, the water flow value will be saved. Or when you touch Setting button, water flow value will be saved and switch to TEMP adjusting.
Working time setting
When system is on, keep pressing Setting button for 3 seconds, system will enter into the working time setting icon Time will be shown on the LCD panel. Rotating the fly shuttle switch to adjust the working time. The time range is 15-60 minutes. You can hear a buzzer sound for each adjusting. No touch on any button for 5 seconds or press Setting button, working time value will be saved and switch to TEMP adjusting.
Count down display
When system is on, the LCD panel shows count down for 60 minutes if the head shower or hand shower is open.
Abnormal alarm
When water TEMP is over 49 Celsius degree, system will stop working and no water outlet automatically. You could hear 3 times of buzzer sound. And the LCD panel shows error code “EE”.
Back up battery
1) When system working based on battery, LCD panel shows the current battery status. When system working by the local power supply, and battery is not full, LCD panel shows charging status, until the battery is full.
2) When system working based on battery, the back-light of fly-shuttle button and LCD panel would become dark to save energy.
3) When system working based on battery and battery almost use out, if system is in working state, system will shut off automaticaly.l
There are two kinds of installation ways for the shower controller according to the installation site, one way is to recess mount into the wall. Another way is to build into the shower panel.
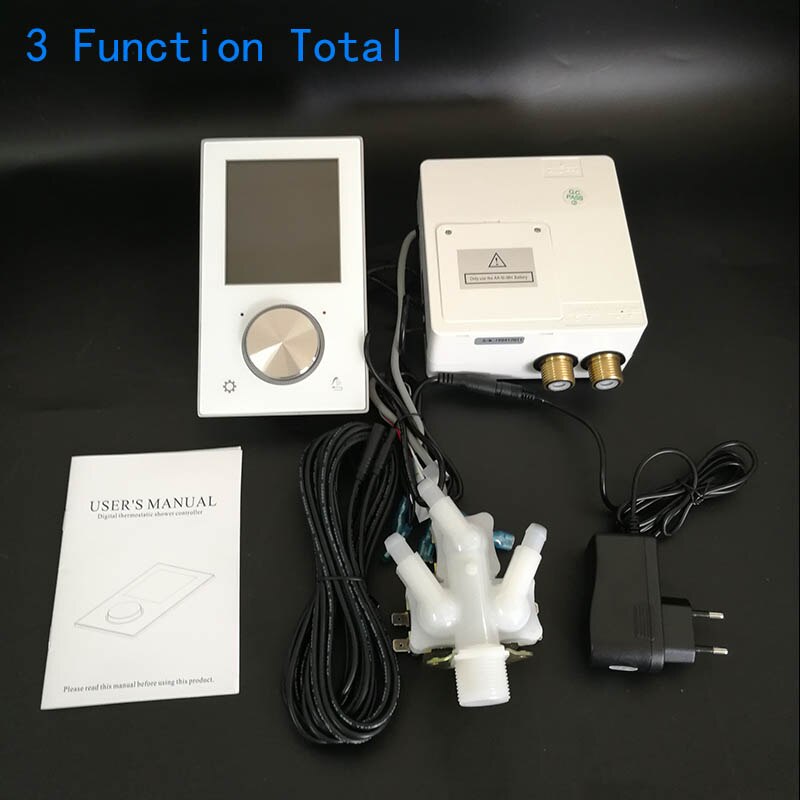
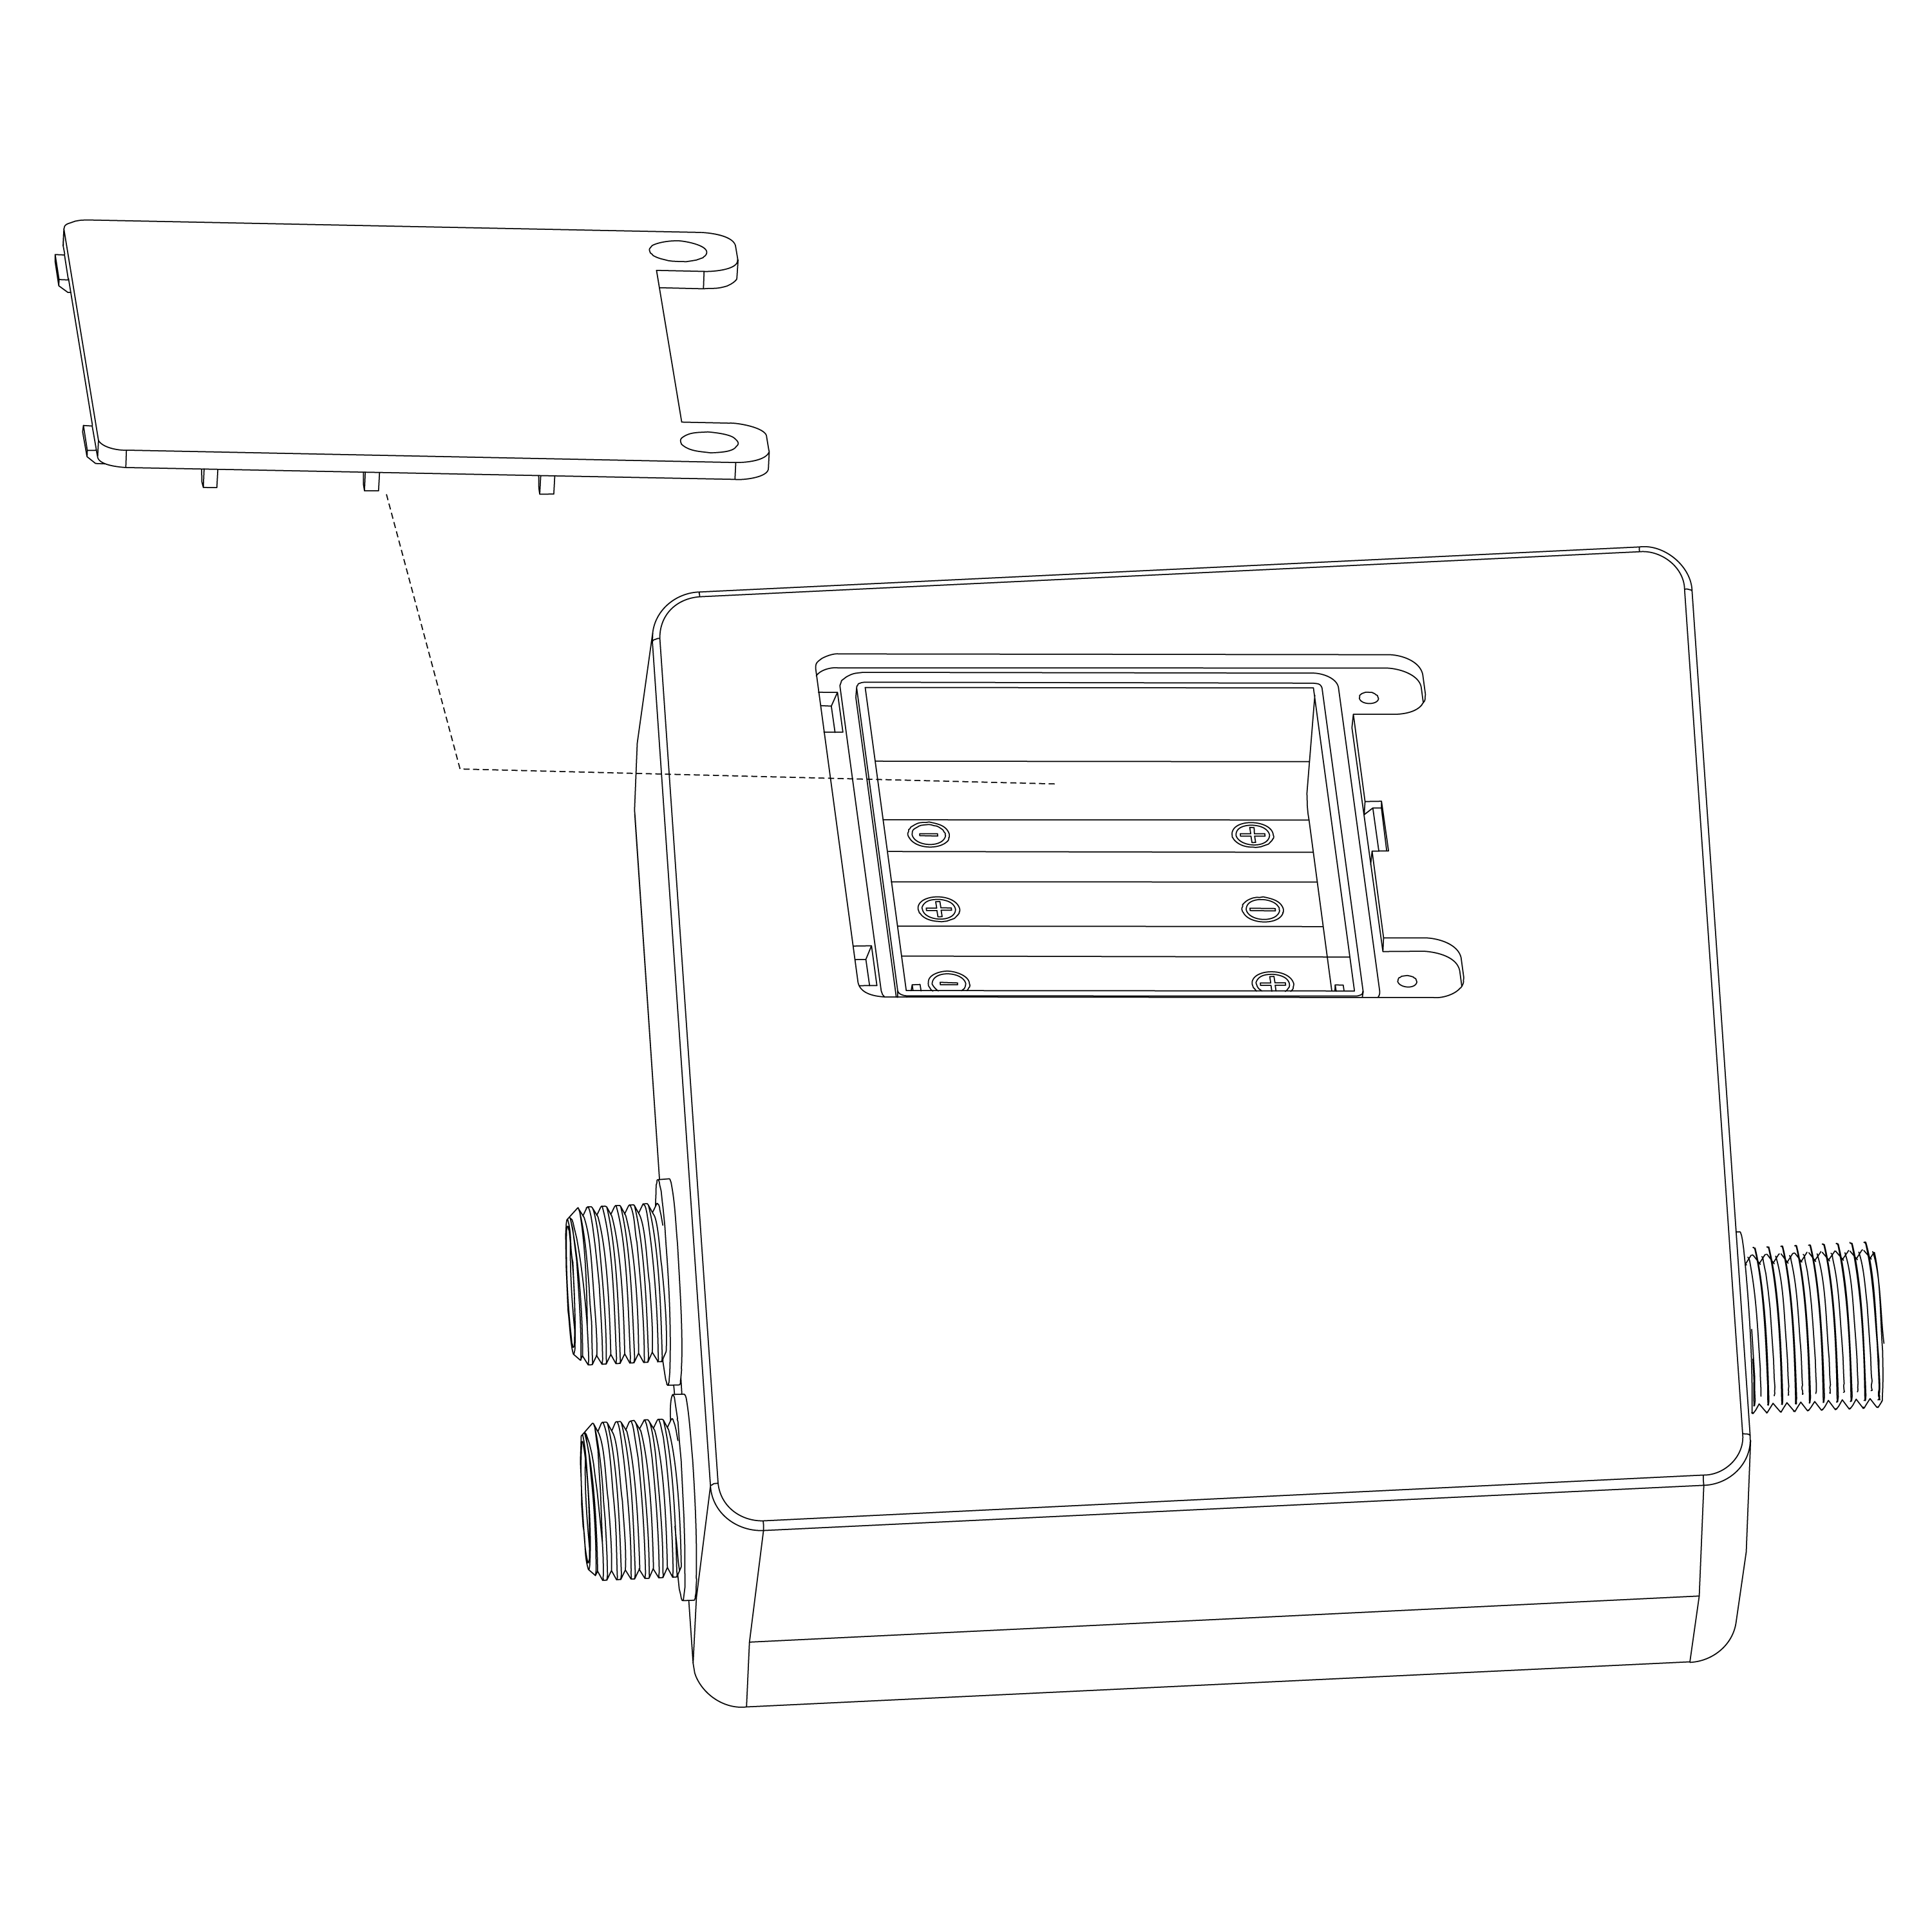
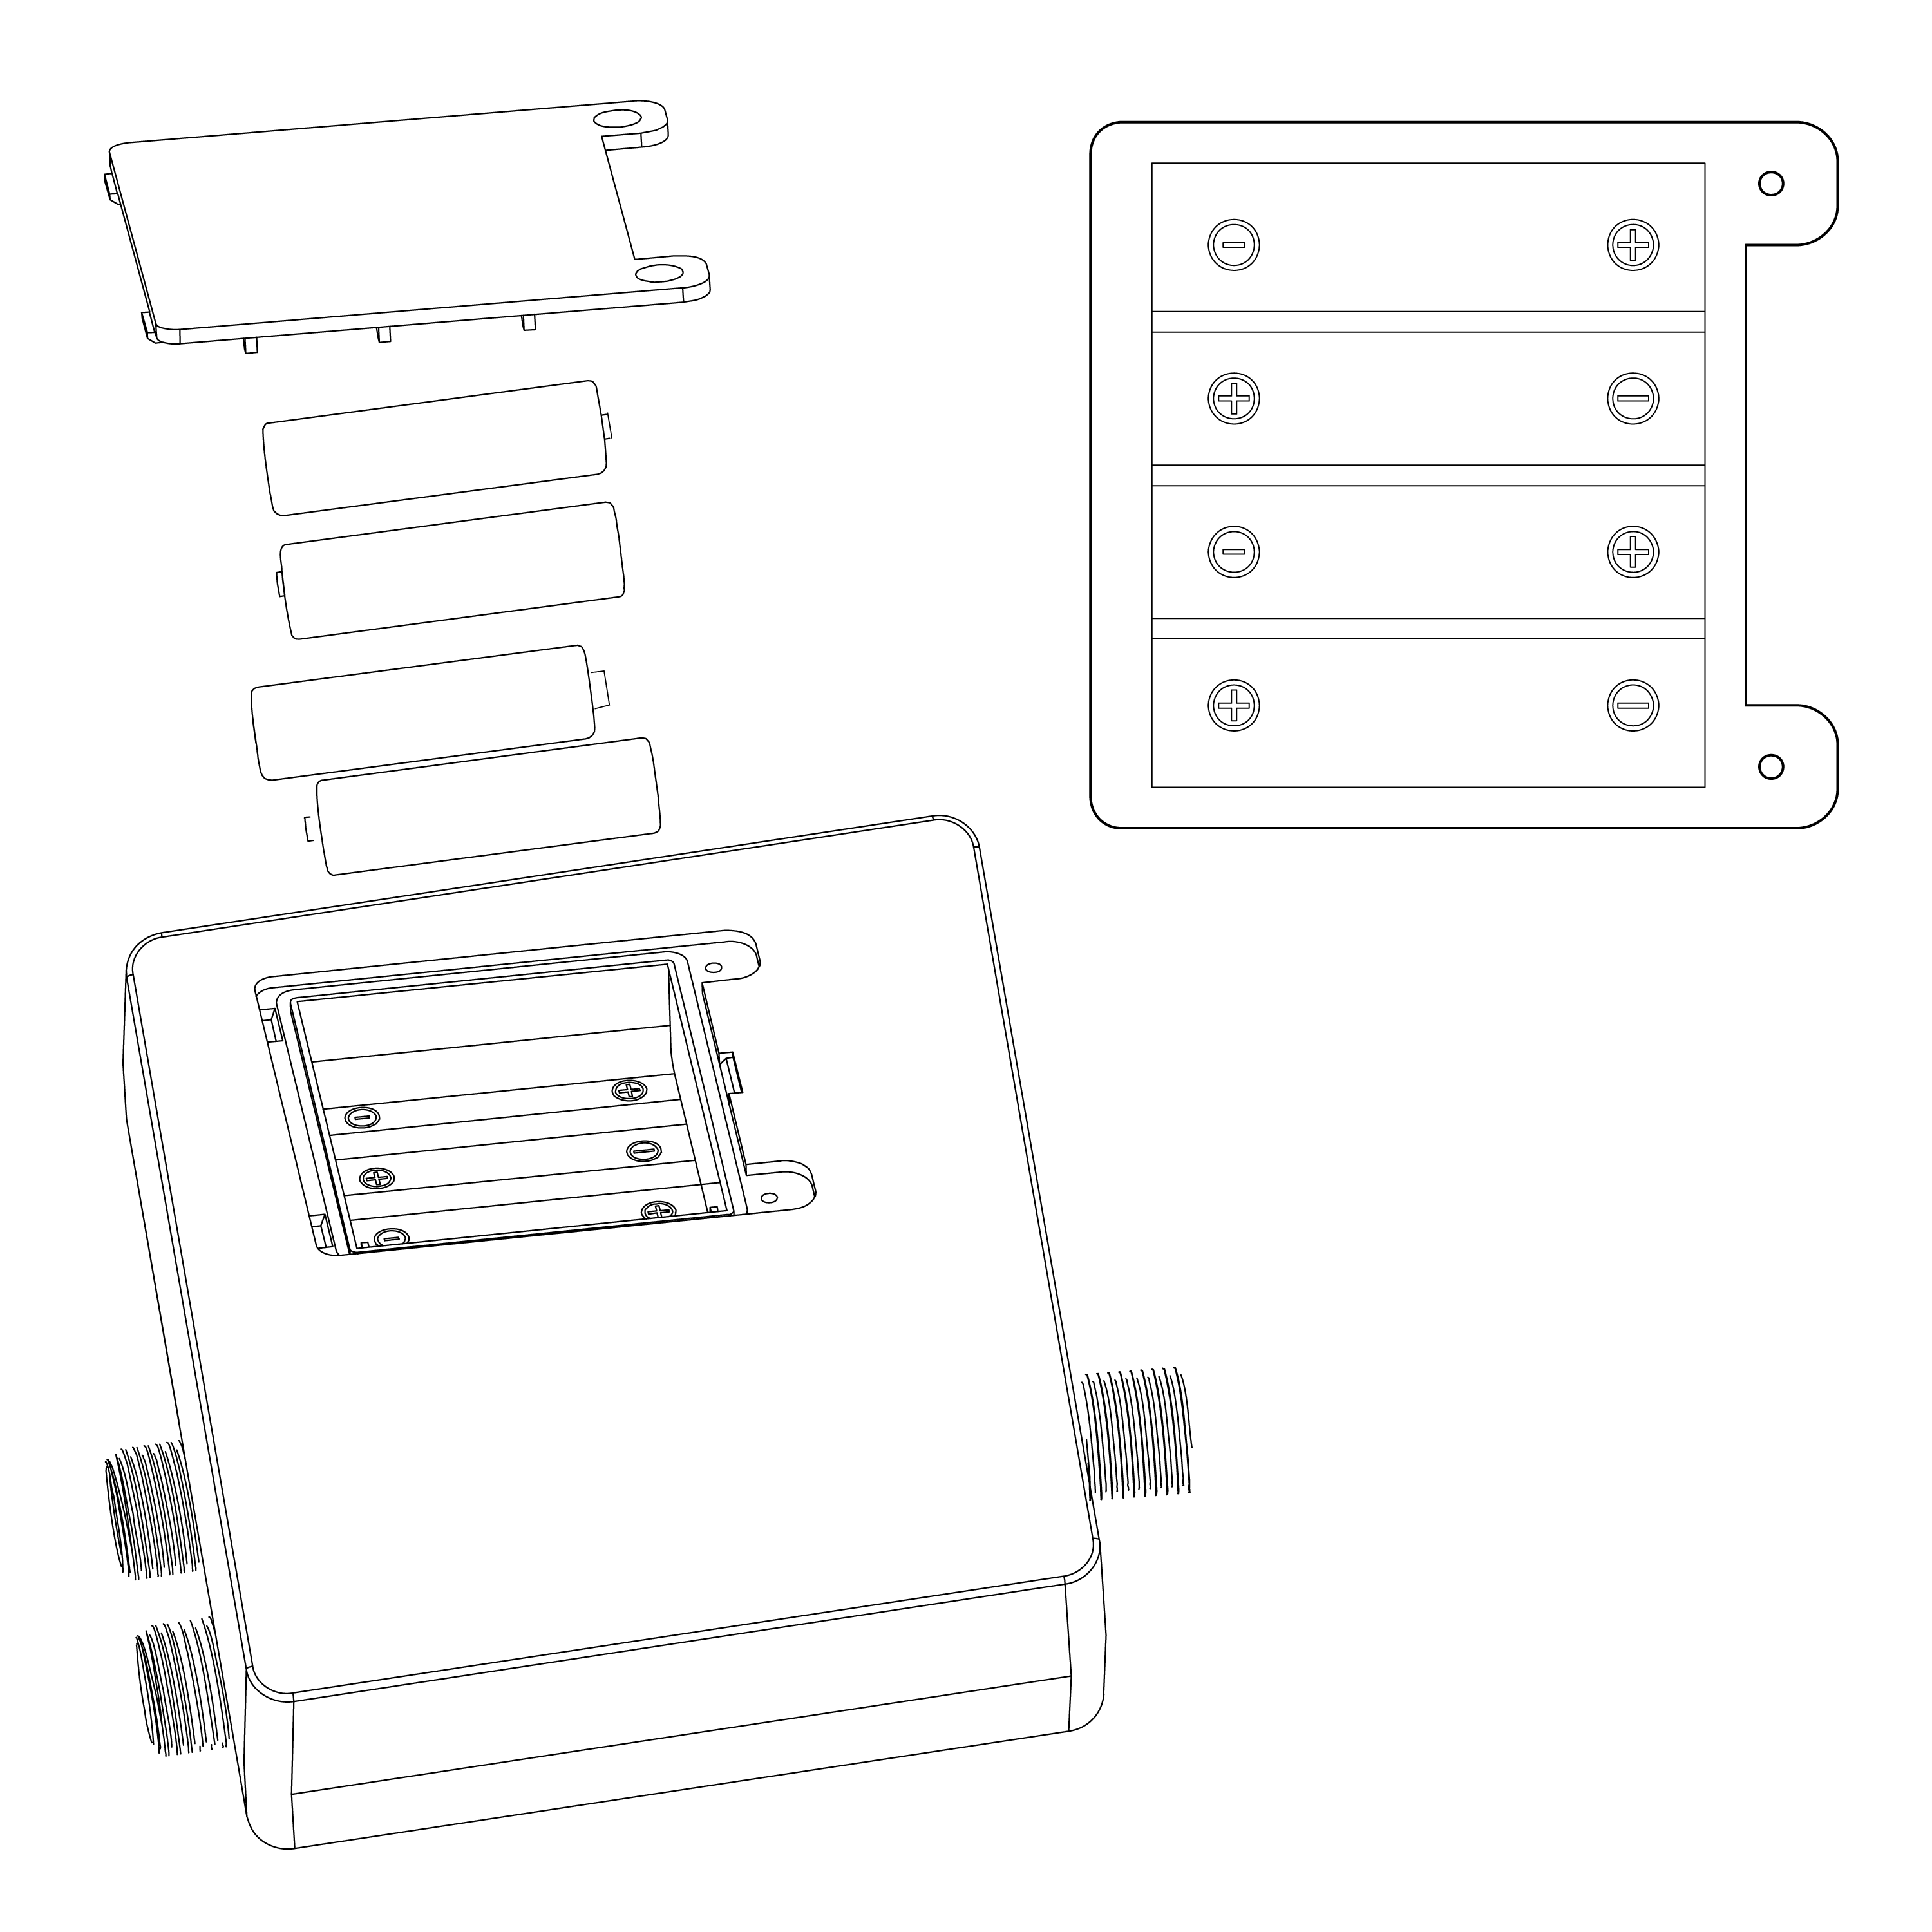
Battery Installation
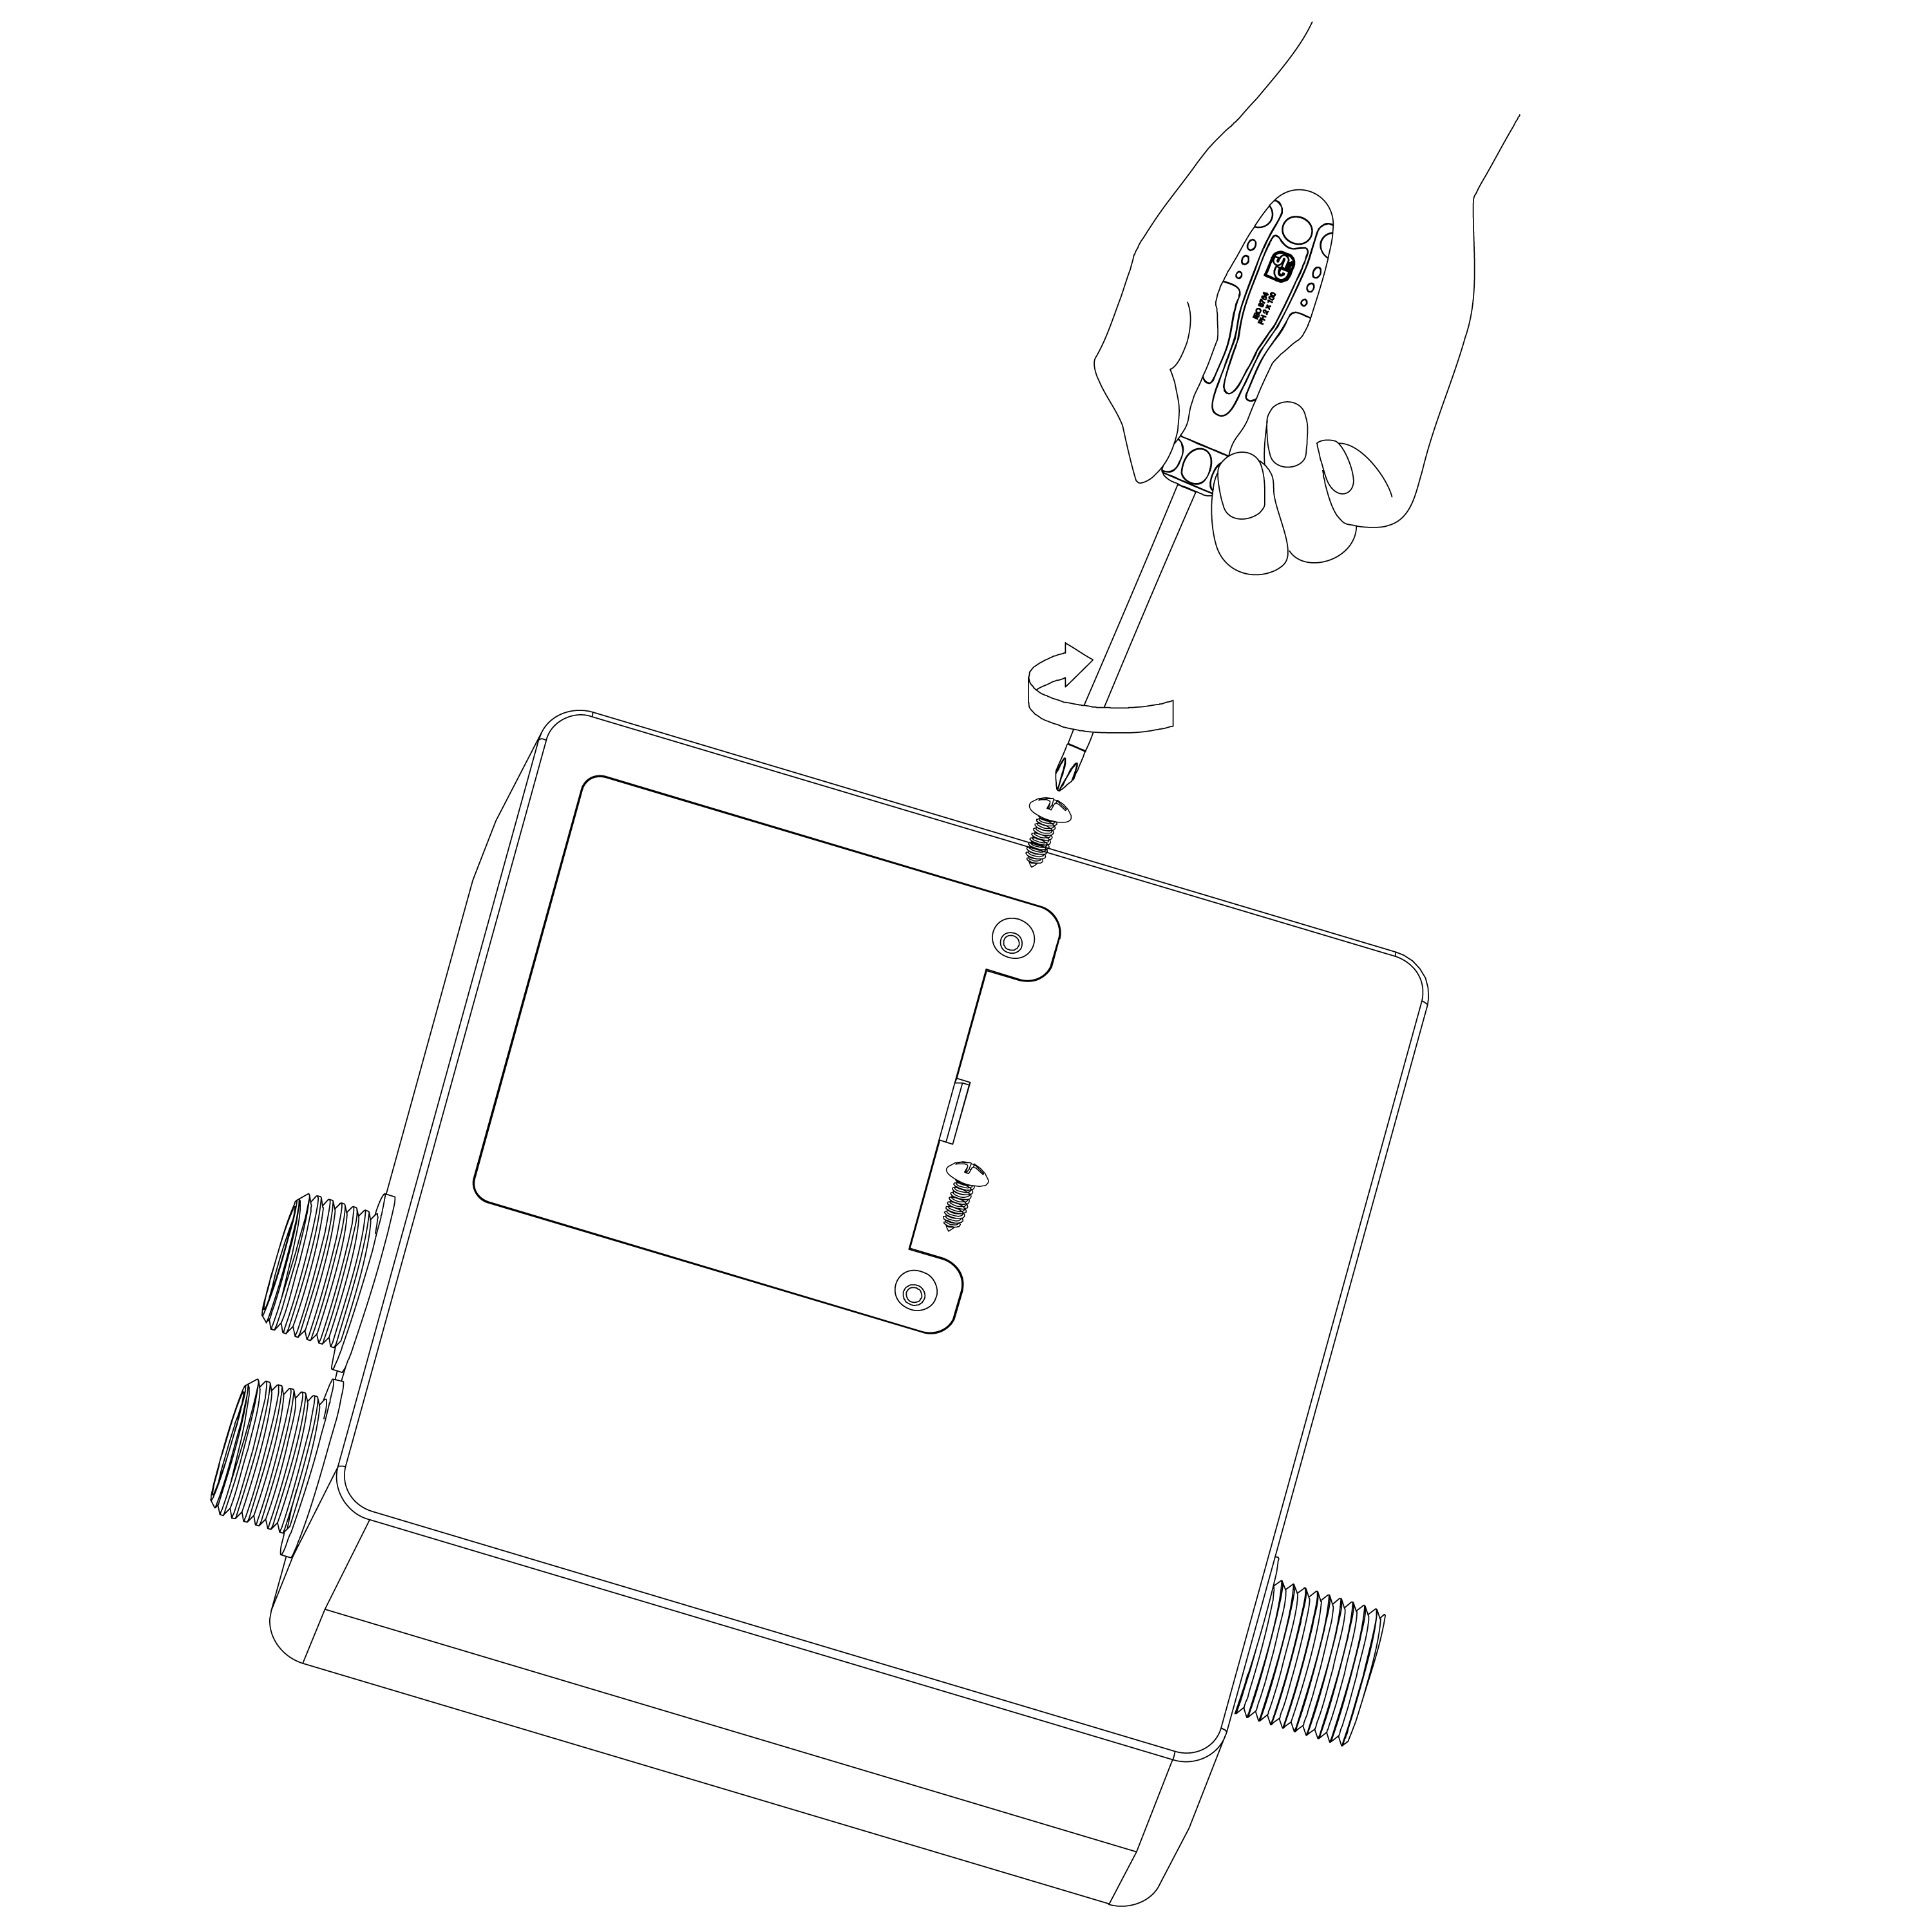
1. Loose the screws on the battery cover and take it off.
2. Putting 4 pcs rechargeable batteries into the battery slot of the host box.
Attention: When putting the battery into the host box, you need to identify the anode and the cathode.
3. Insert the battery cover into the host box, and lock it with the screws.
Caution:
• Using rechargeable NI-MH battery (the 5#(AA) and the capacity is more than 1000Mah).
• After electrify, forbid using the normal 5#(AA) battery. Otherwise, would cause the battery explosion.
• When the power cut, you can use the high quality normal 5#(AA) dry battery as the emergency measure. But you must unplug the adapter.
• When you install the host box, please put the battery into it. If the product hasn't connected with the power in a long time. Please take out the battery from the host box. This way can avoid affecting the battery working life.
• If you want the battery with longer working life, you can charge the battery every some month.
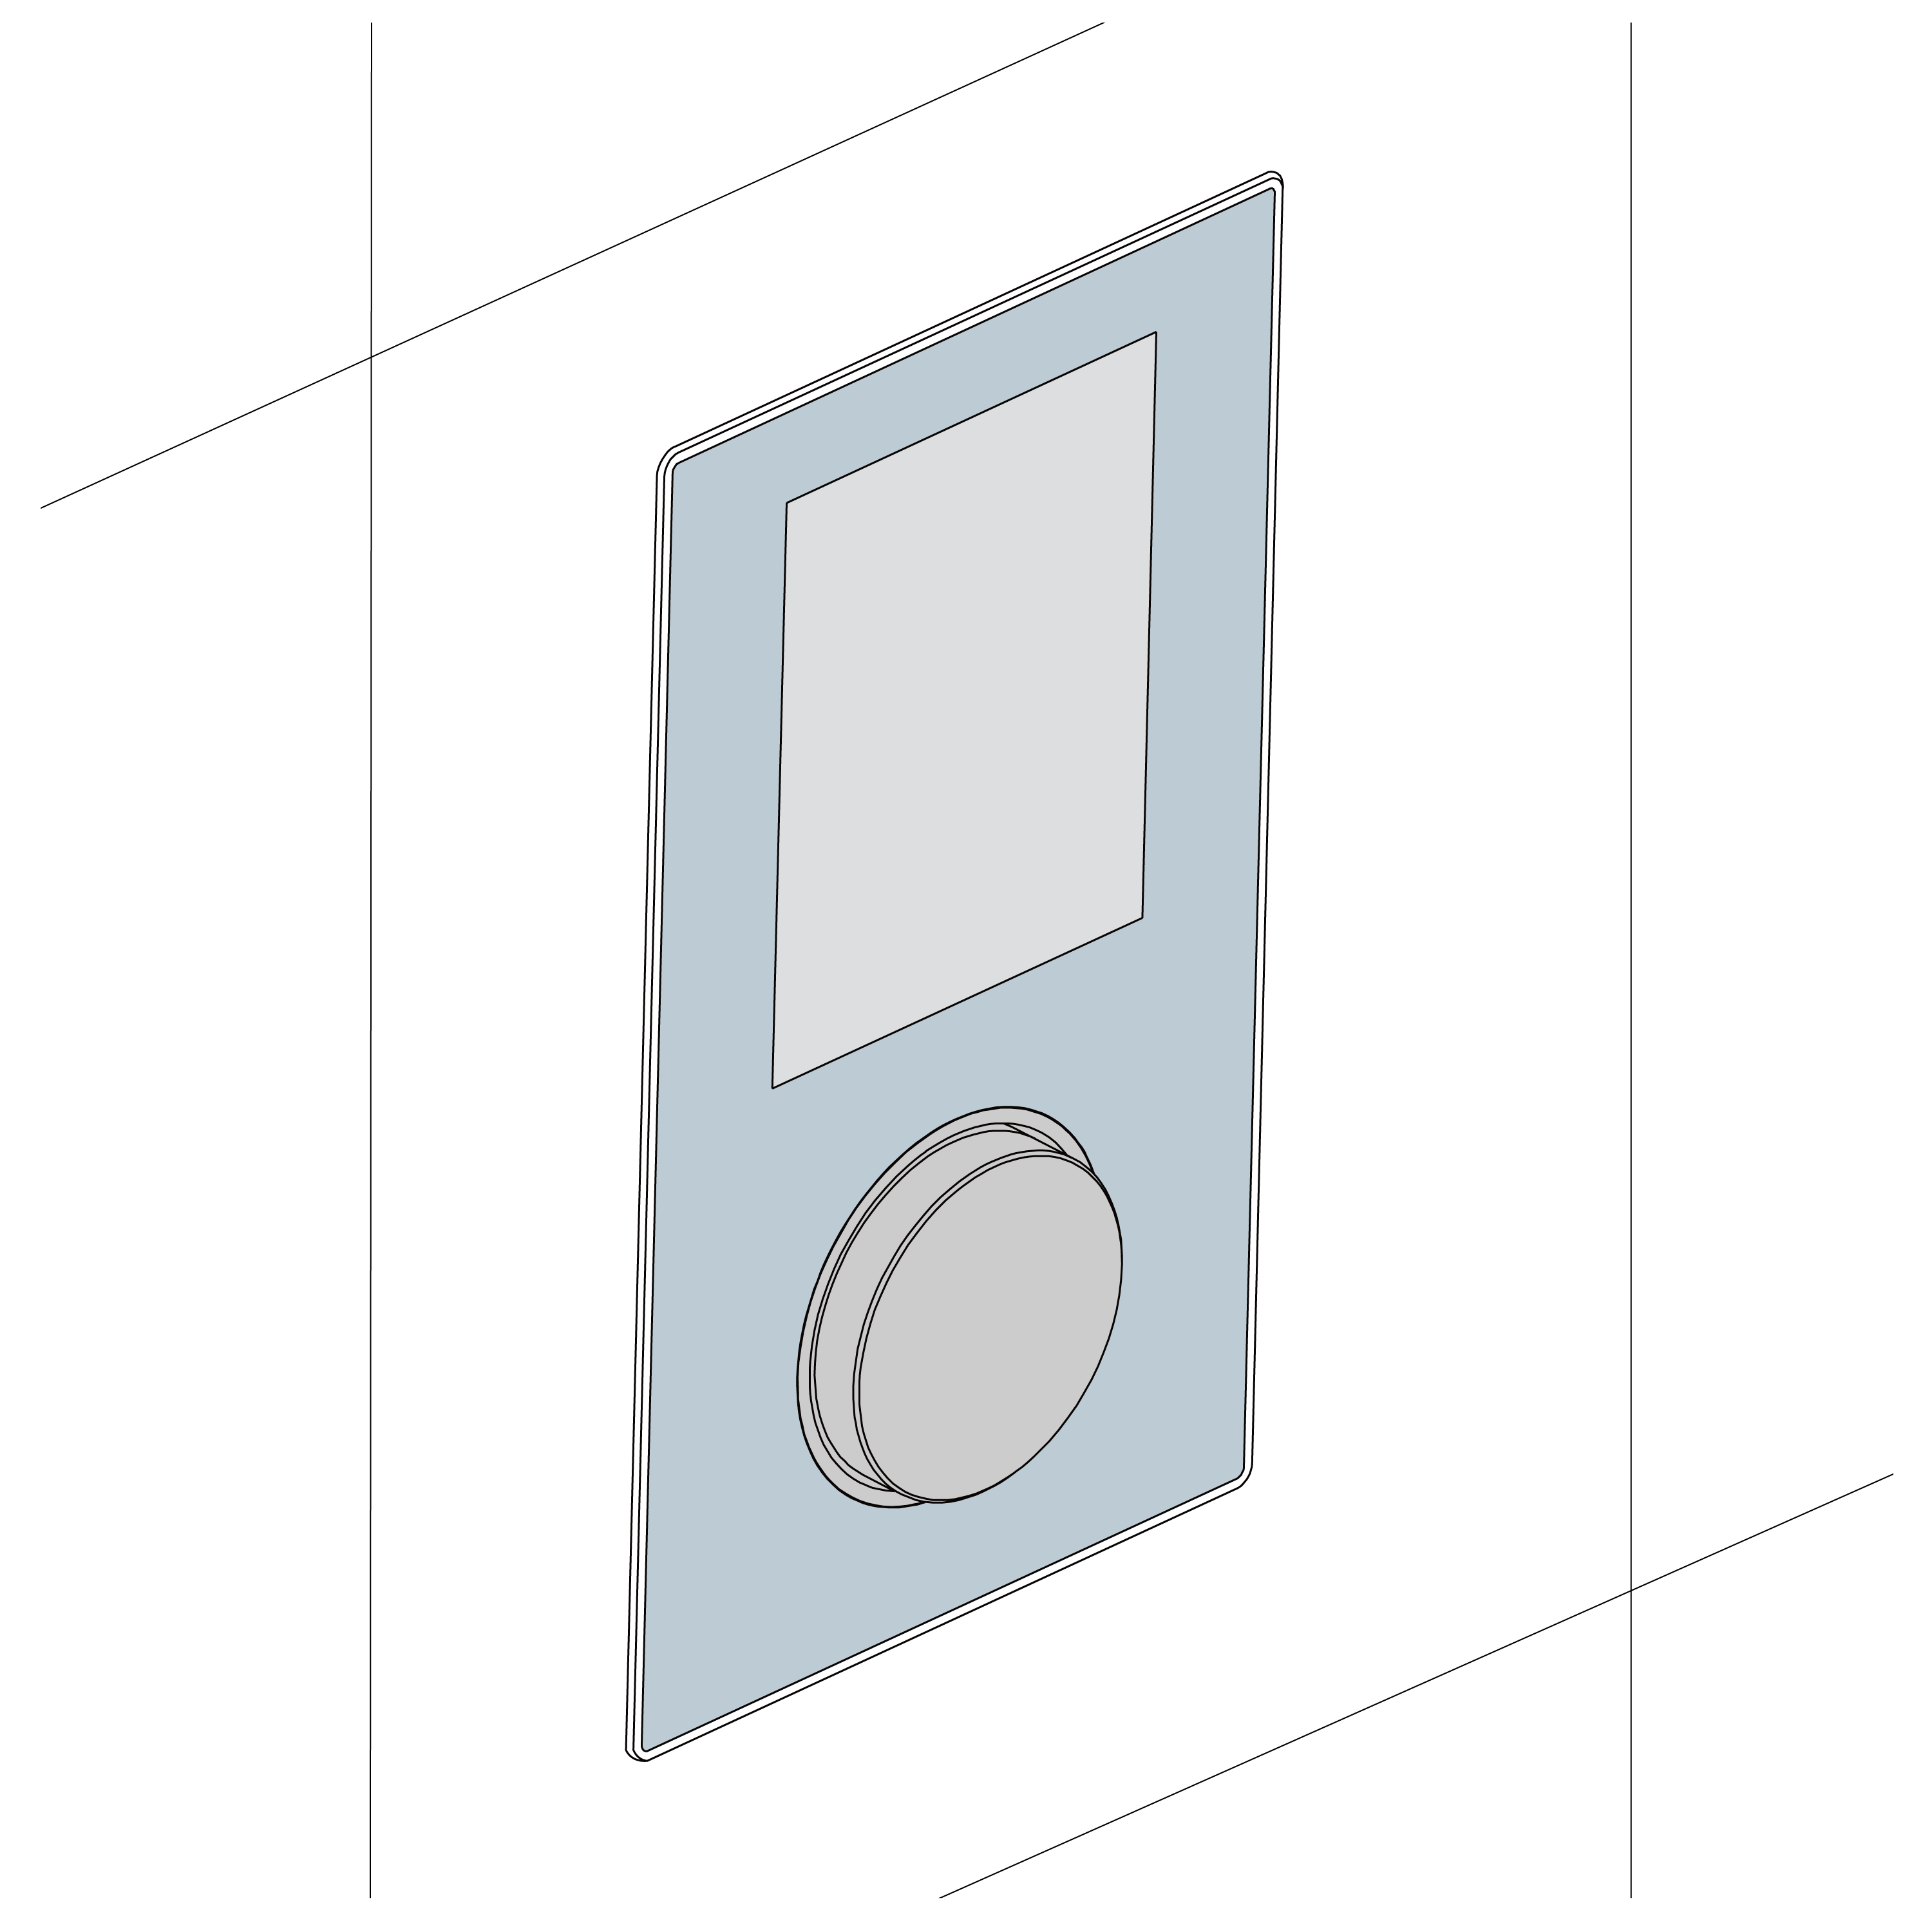
Installation of the Control Panel
1. Build the control panel into the shower panel
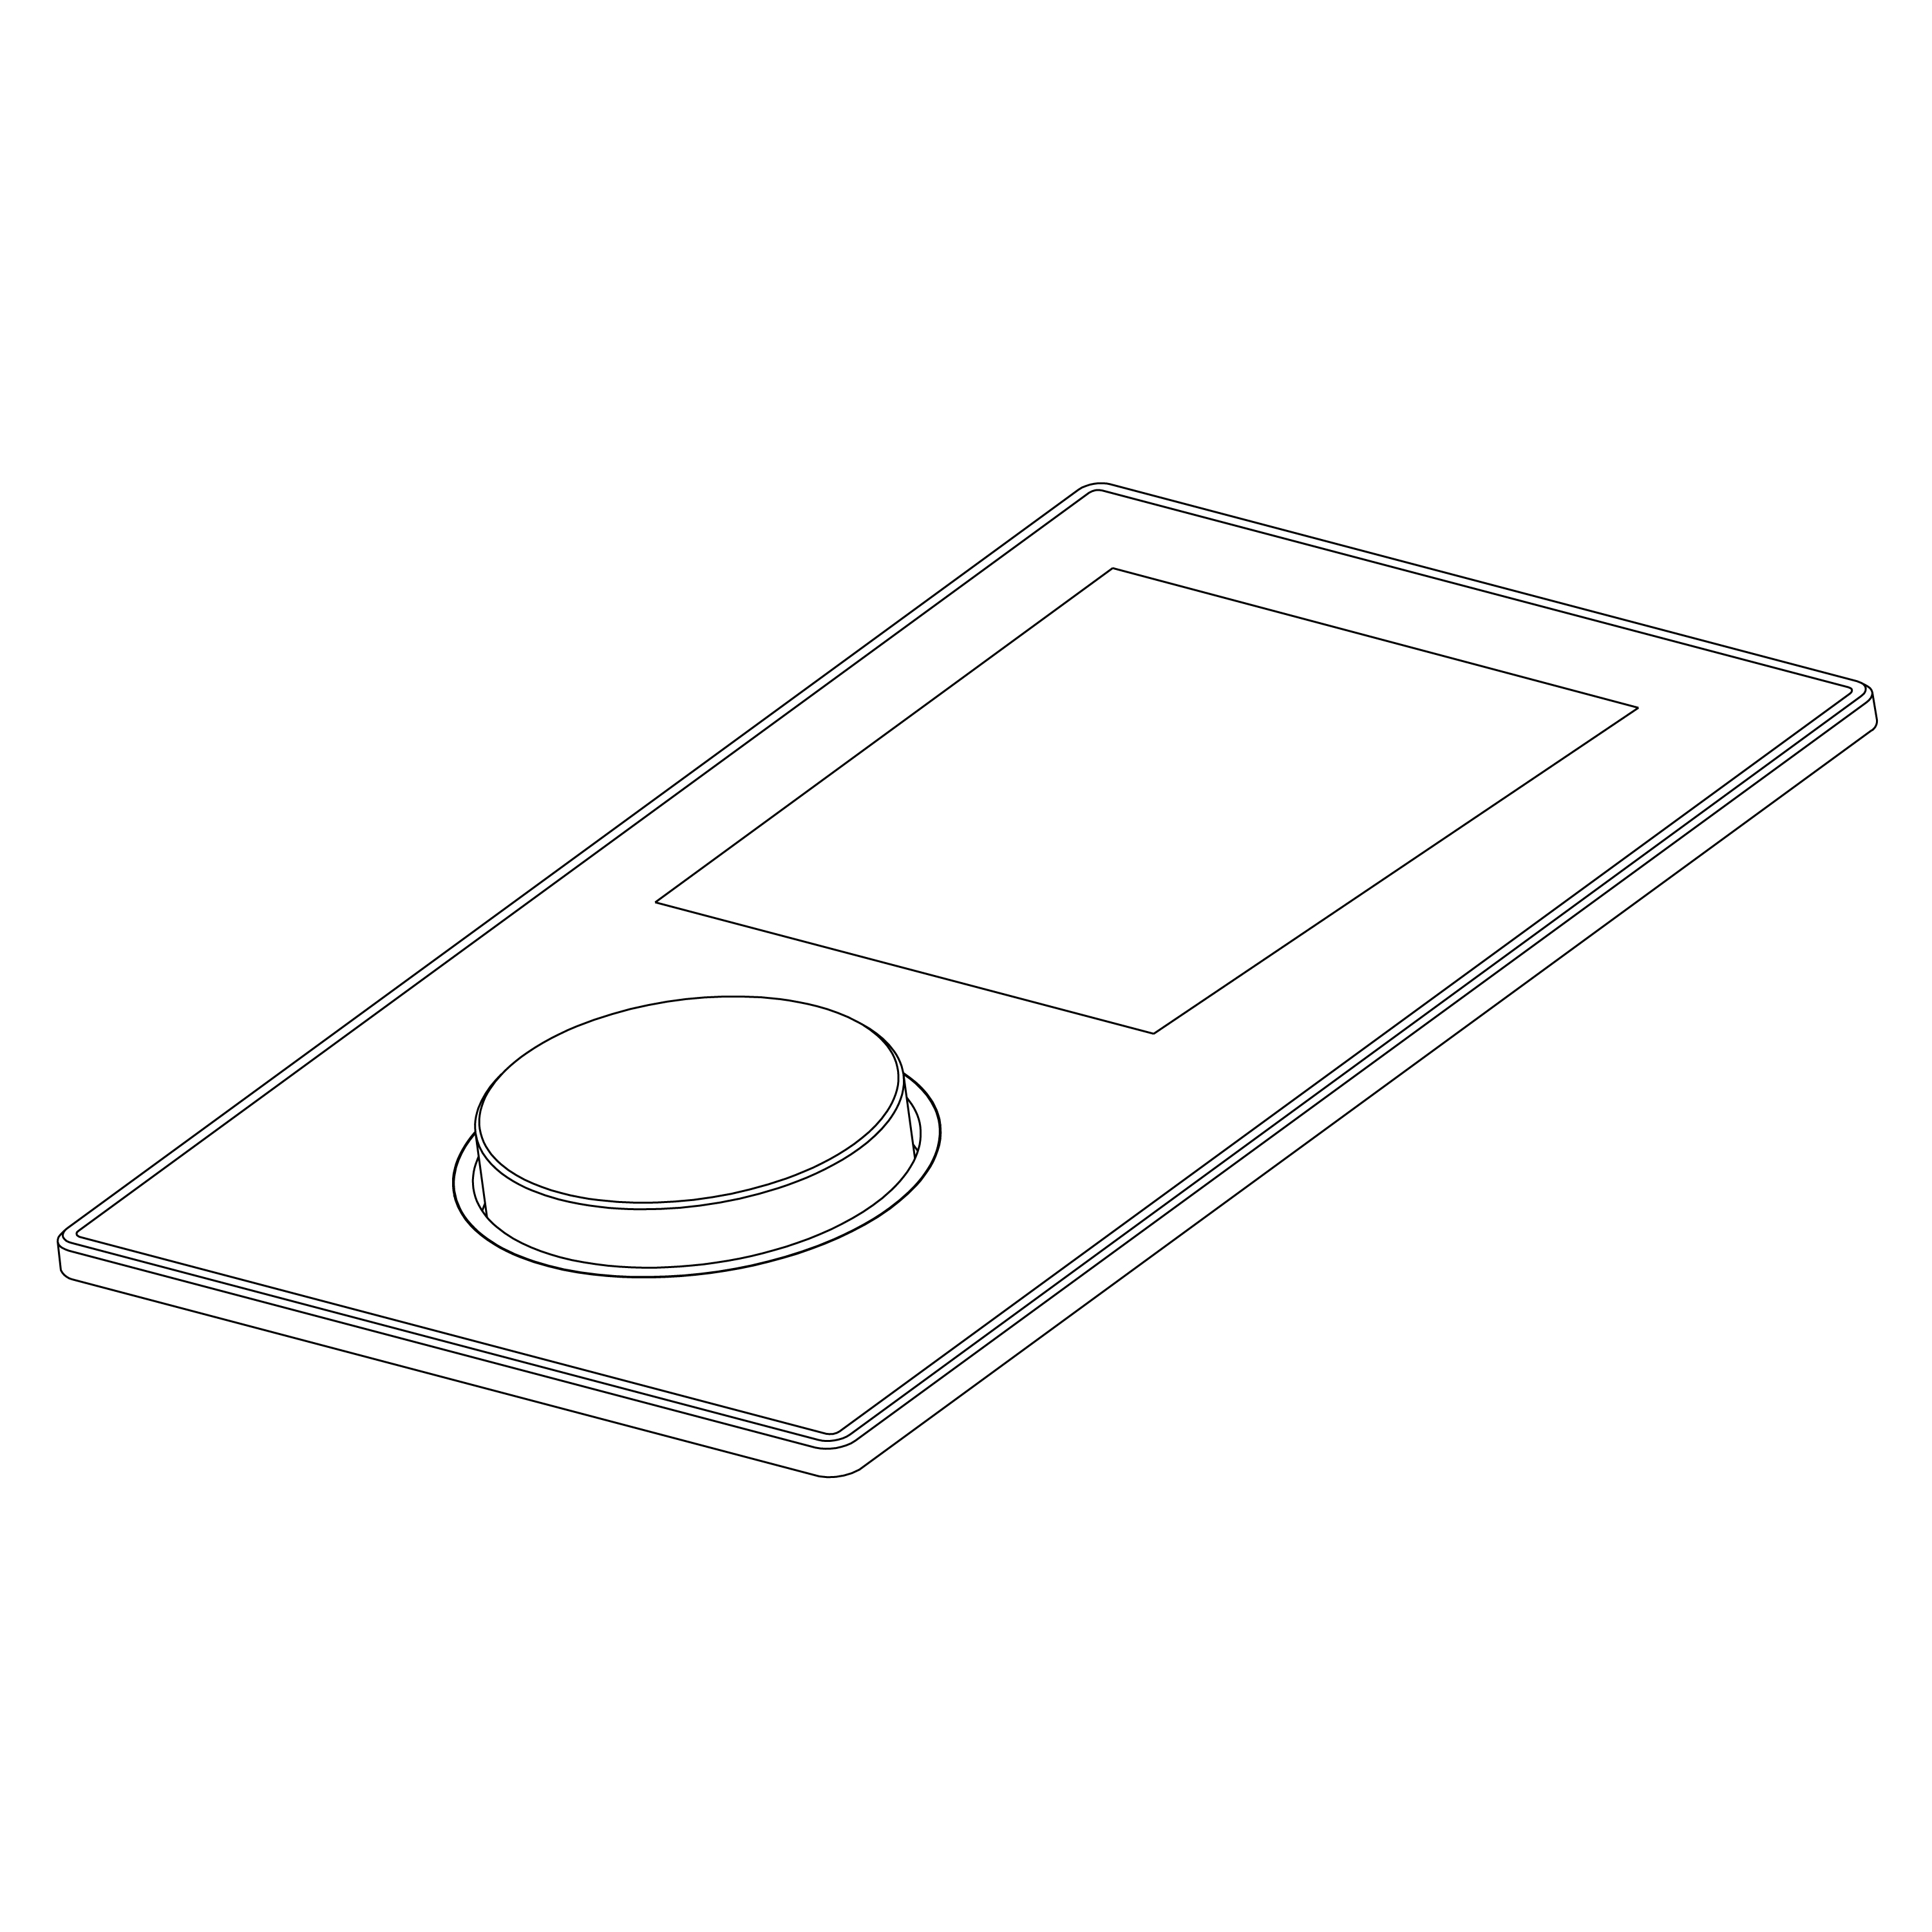
Step 1: Open a hole (6.7" X 3.7") on the shower panel, putting some glass cement around the back of the control panel and fit it in the hole of the shower panel as the picture shows.
Step 2: Fasten the mounting bracket onto the back of the control panel by screws.
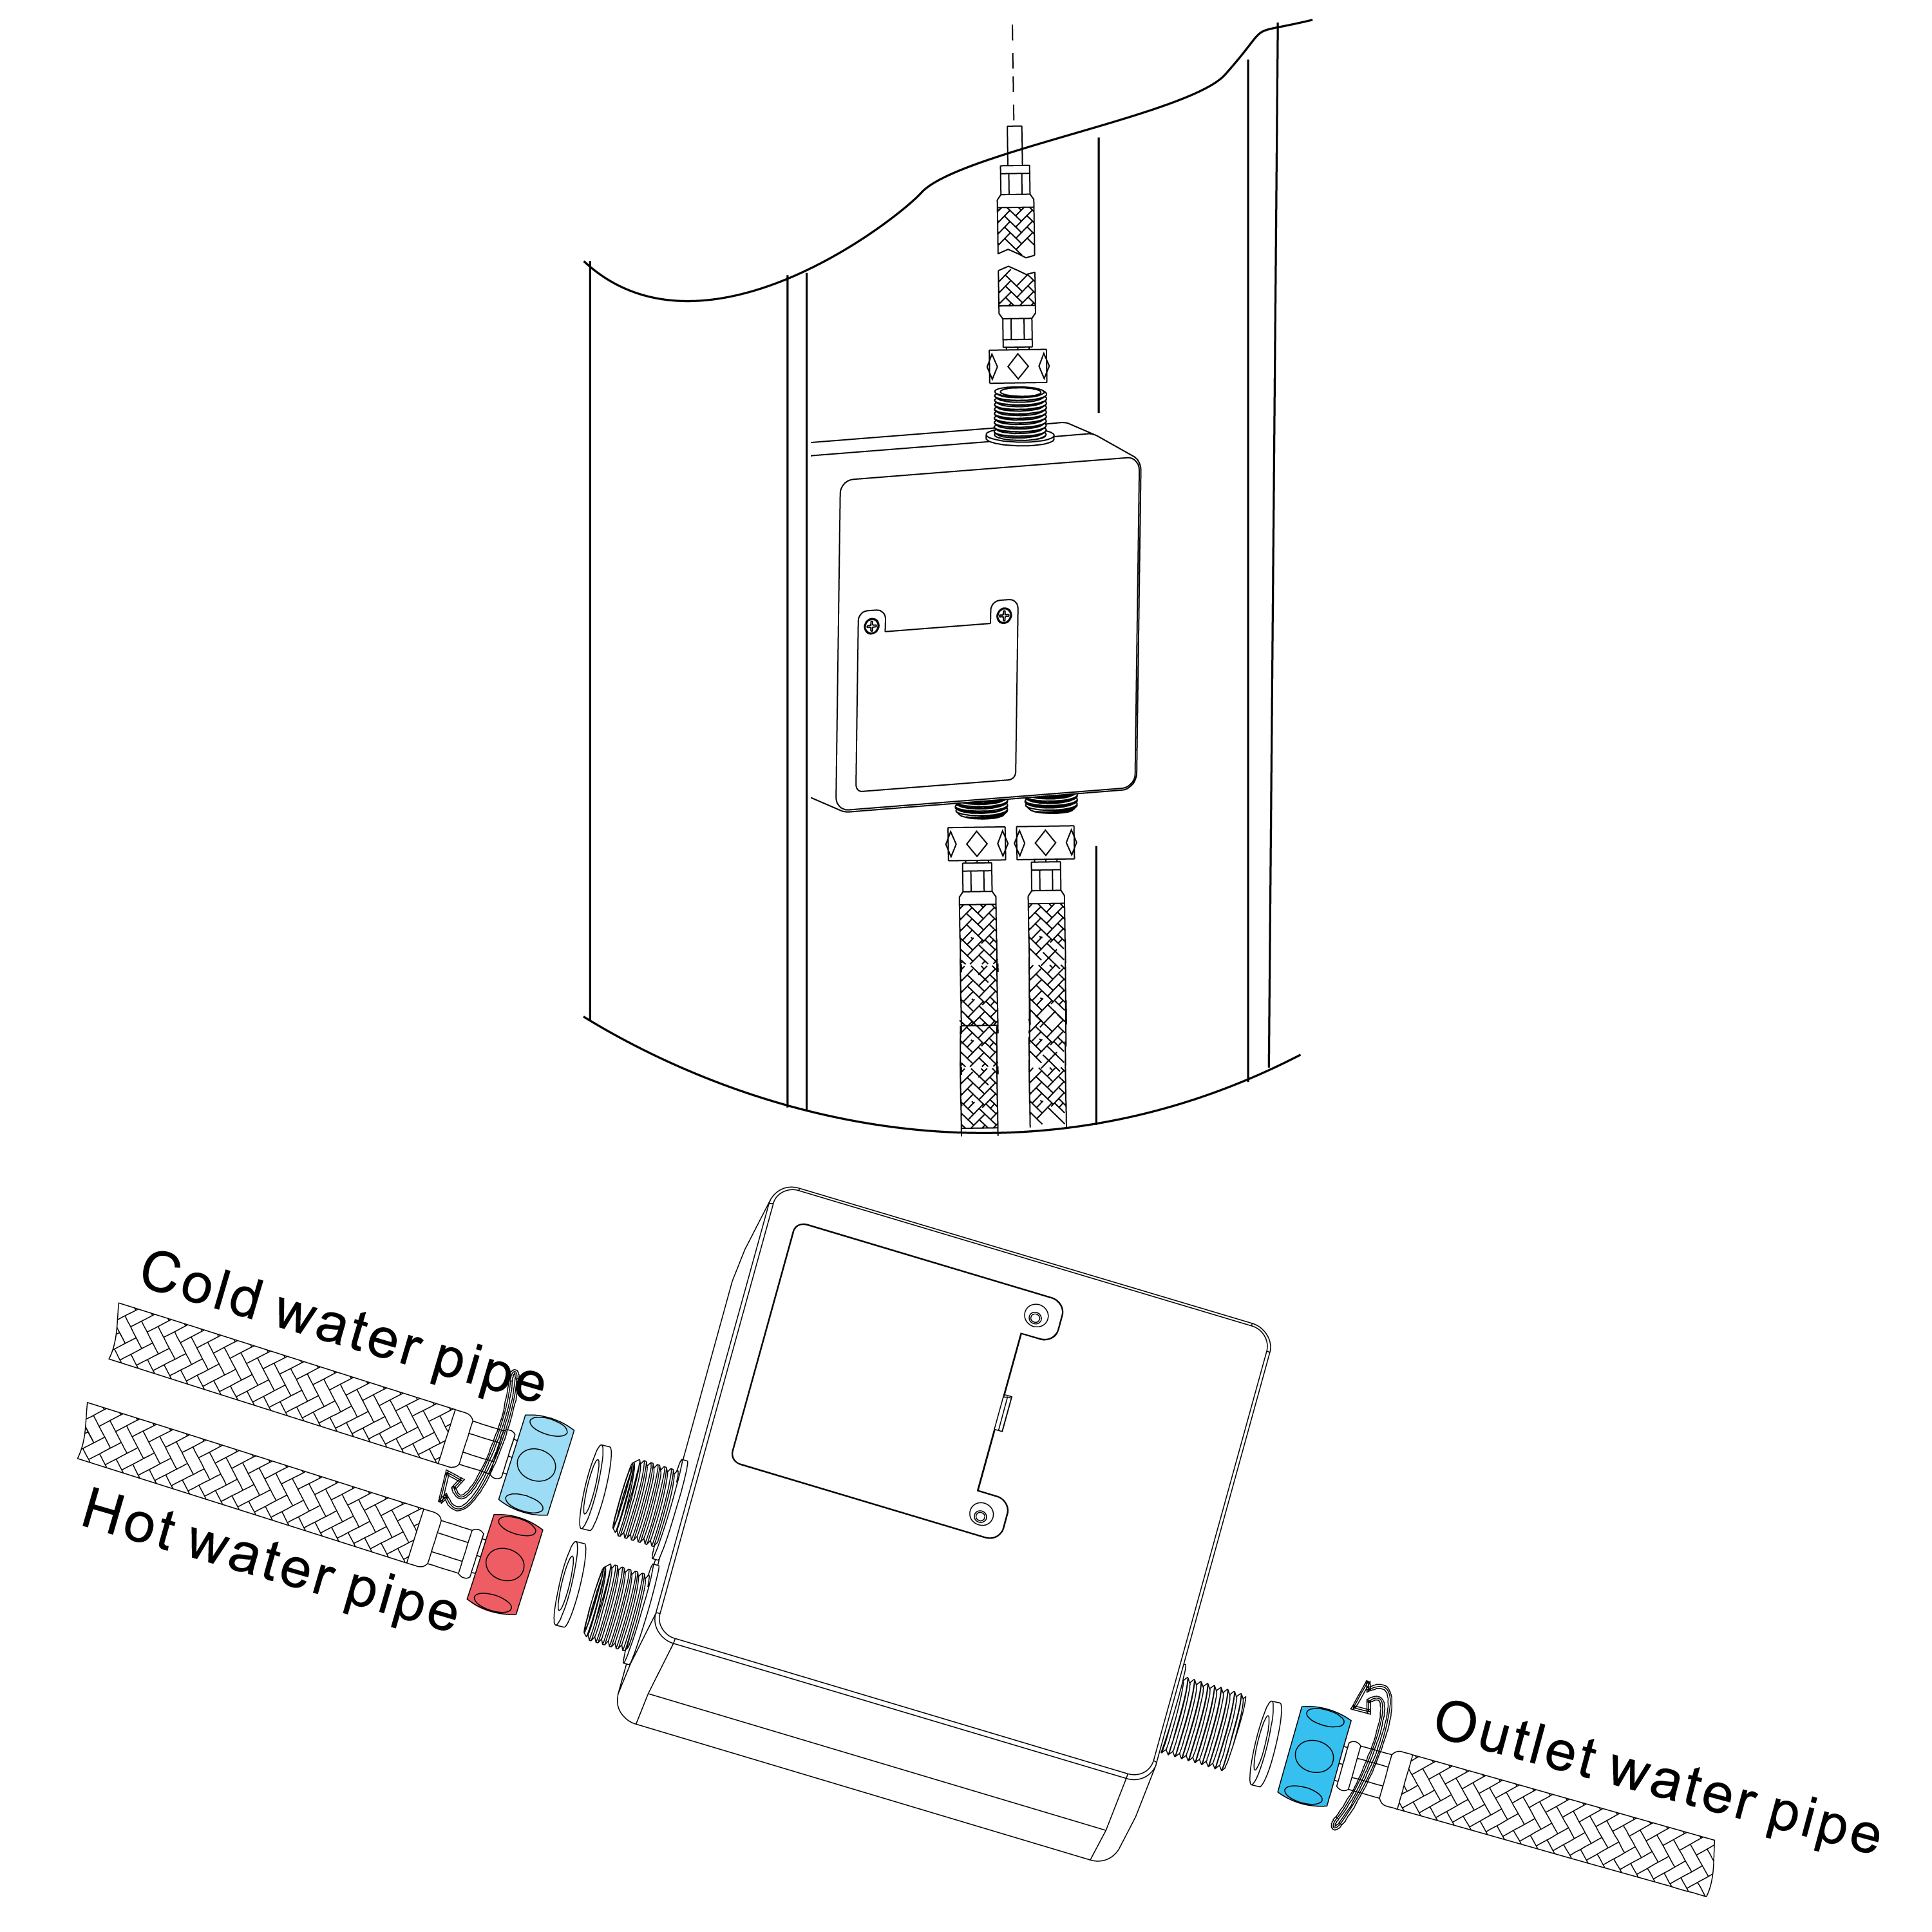
Step 3: Install the host box on the back of the shower panel, connect the cold water and hot water pipe, hand shower, and head shower's pipes.
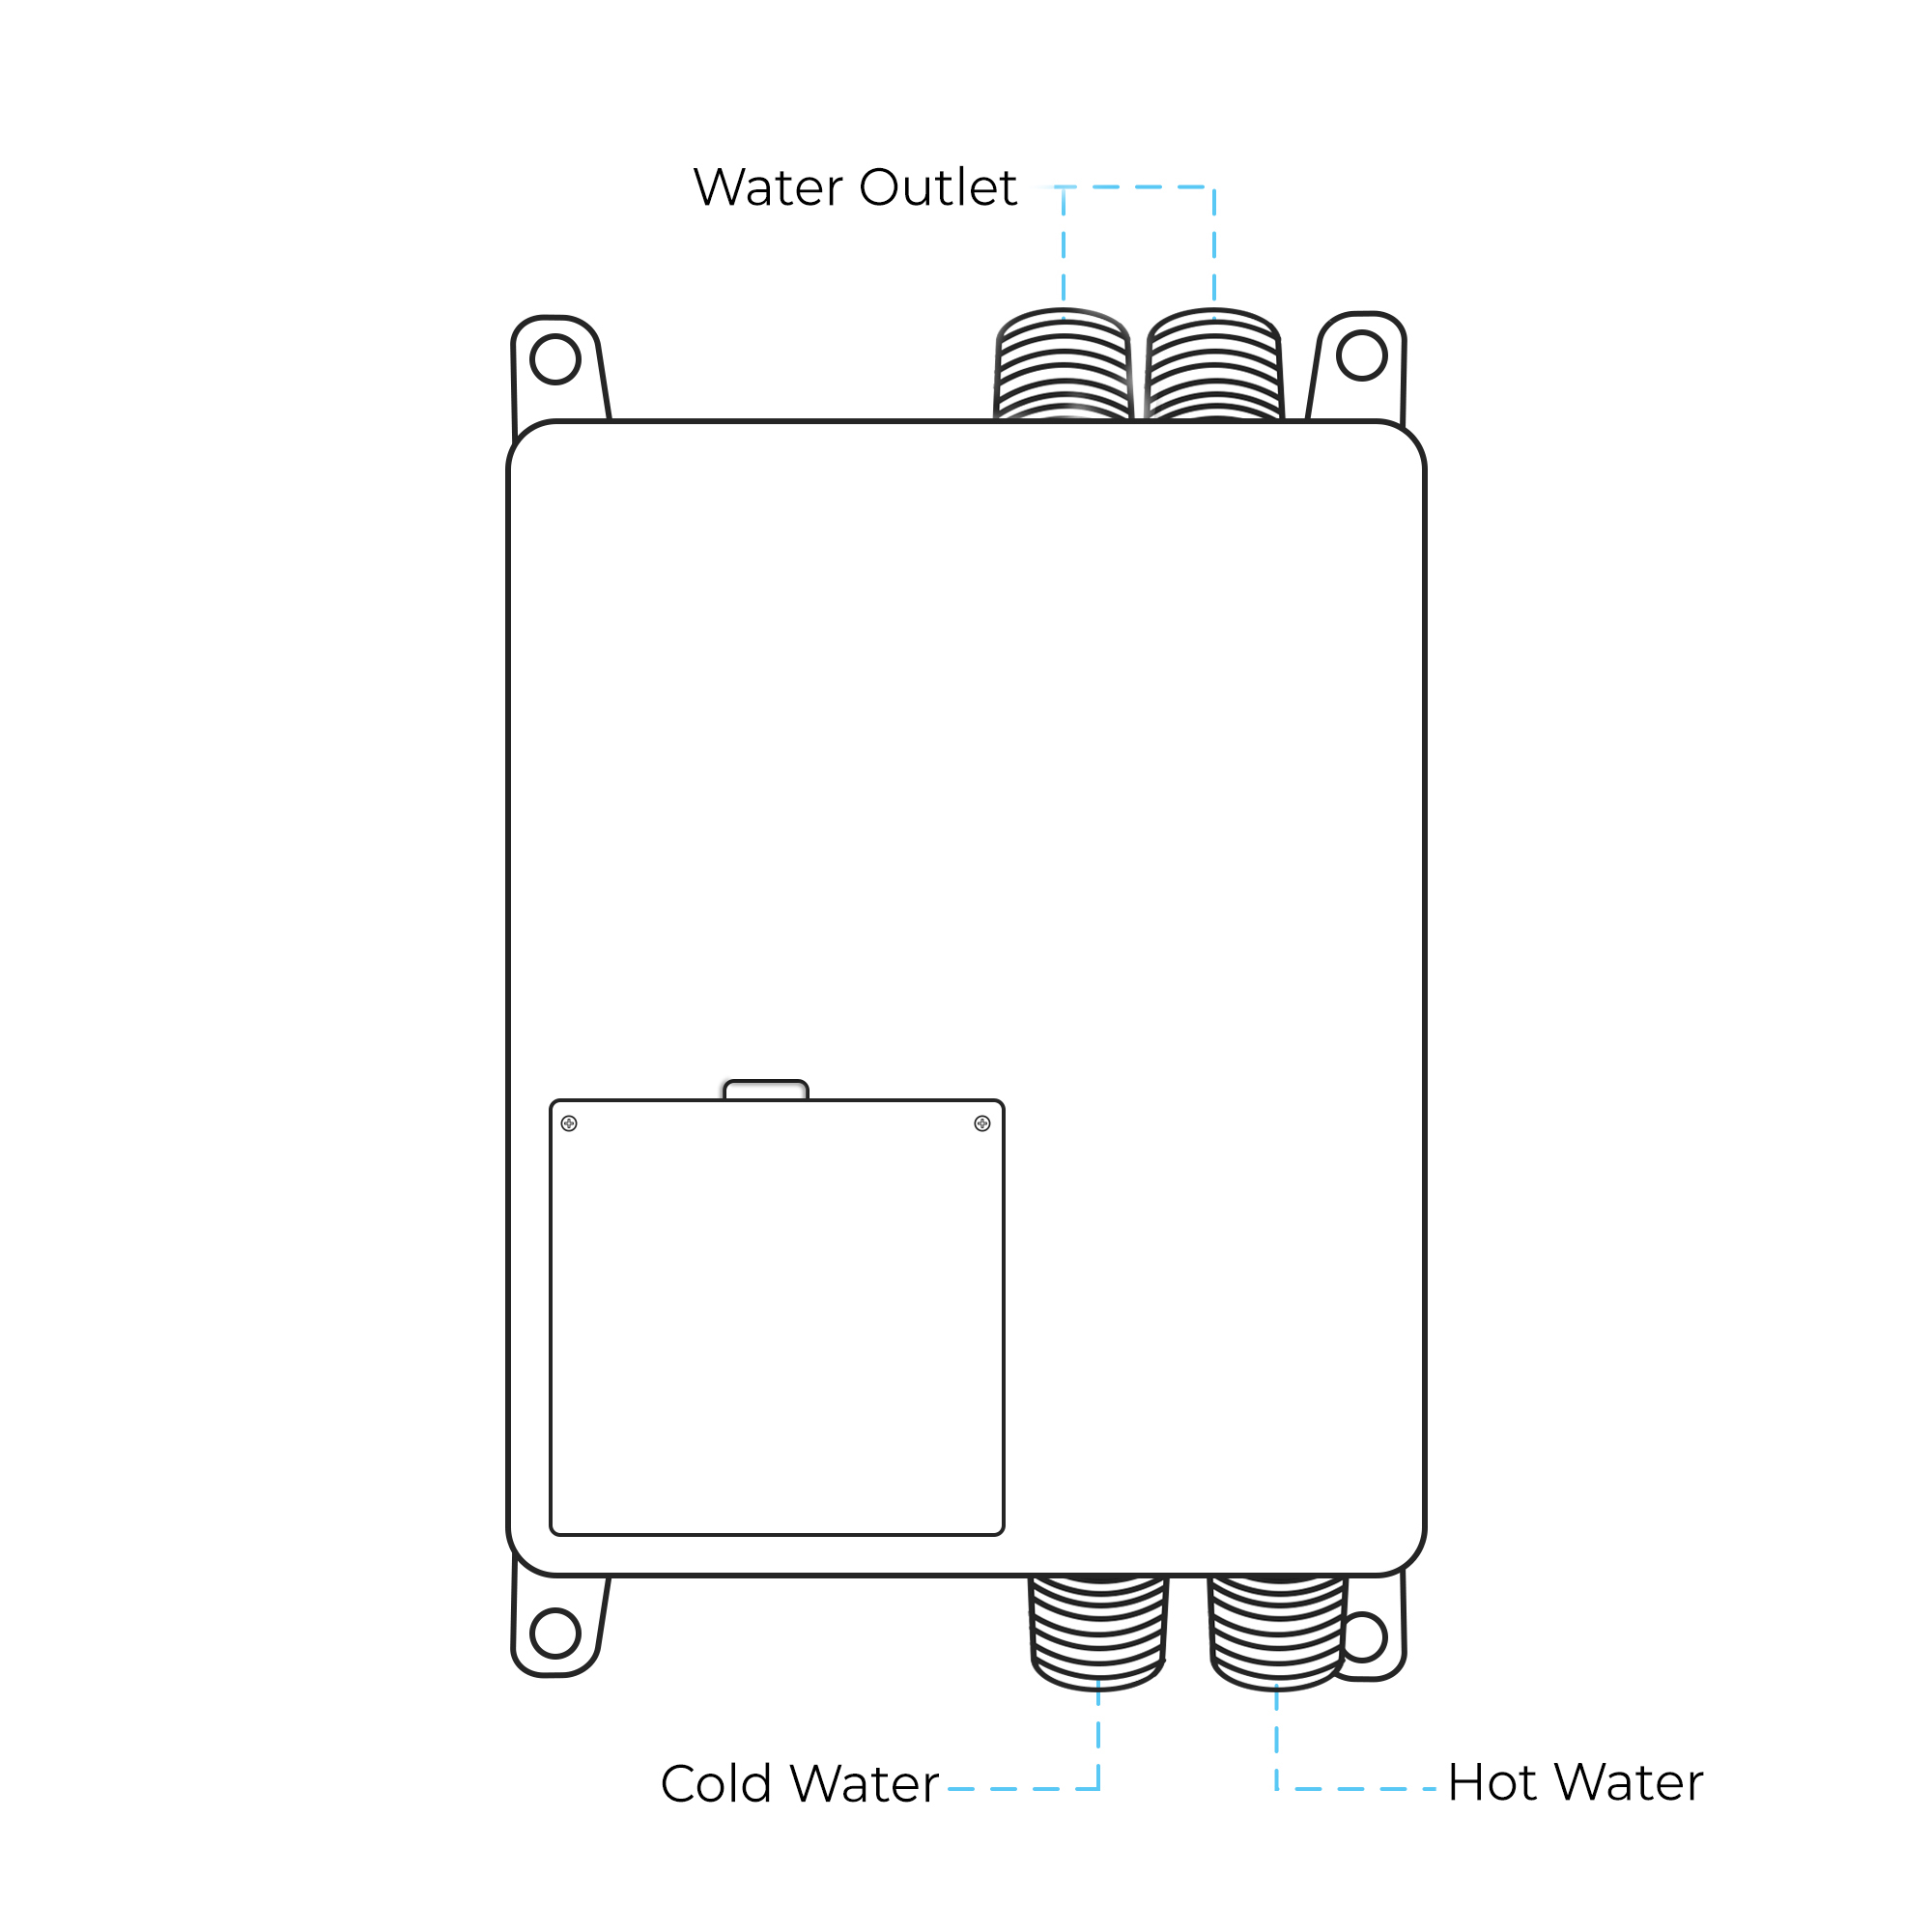
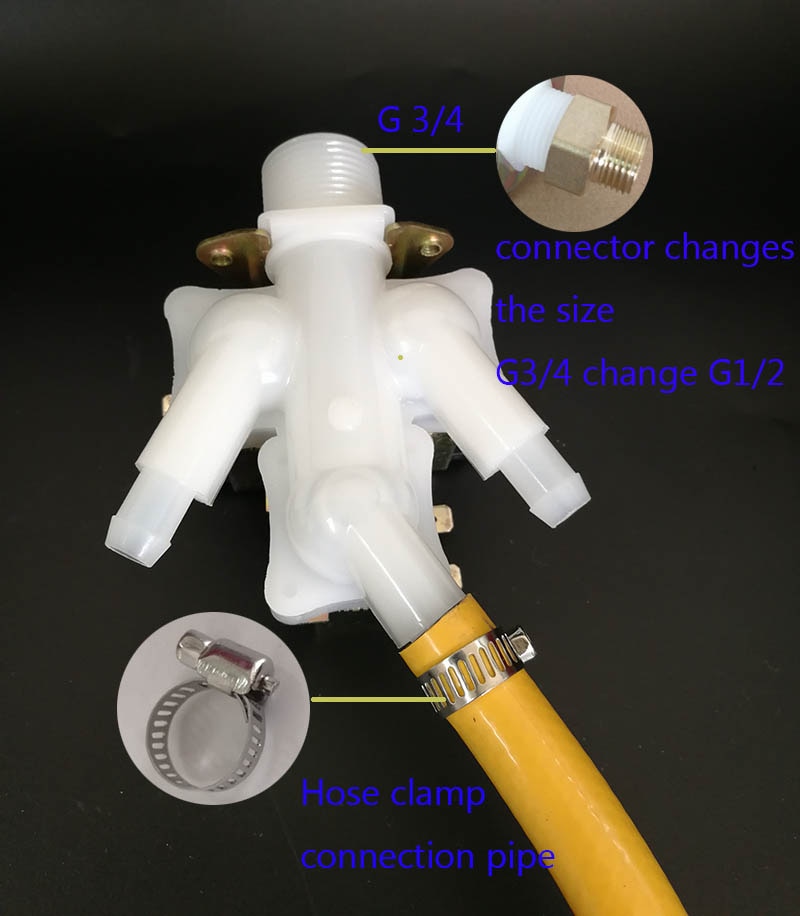
1. Connect the G1/2" hot and cold water inlet pipes to the host box, tighten it and make sure connection is well sealed (as the picture showed).
2. Connect the G1/2" water inlet pipe of the faucet to the water outlet pipe of the host box, tighten it and make sure connection is well seated (as the picture is shown).
Caution:
• When installation, the hot water pipe, and the cold water pipe cannot mix up. Otherwise, the system cannot work.
• When you tighten the connector nut, torque should not exceed 8NM, GB 2.5NM is OK, otherwise, it will damage the connector of the mixing valve and lead to water leaking.
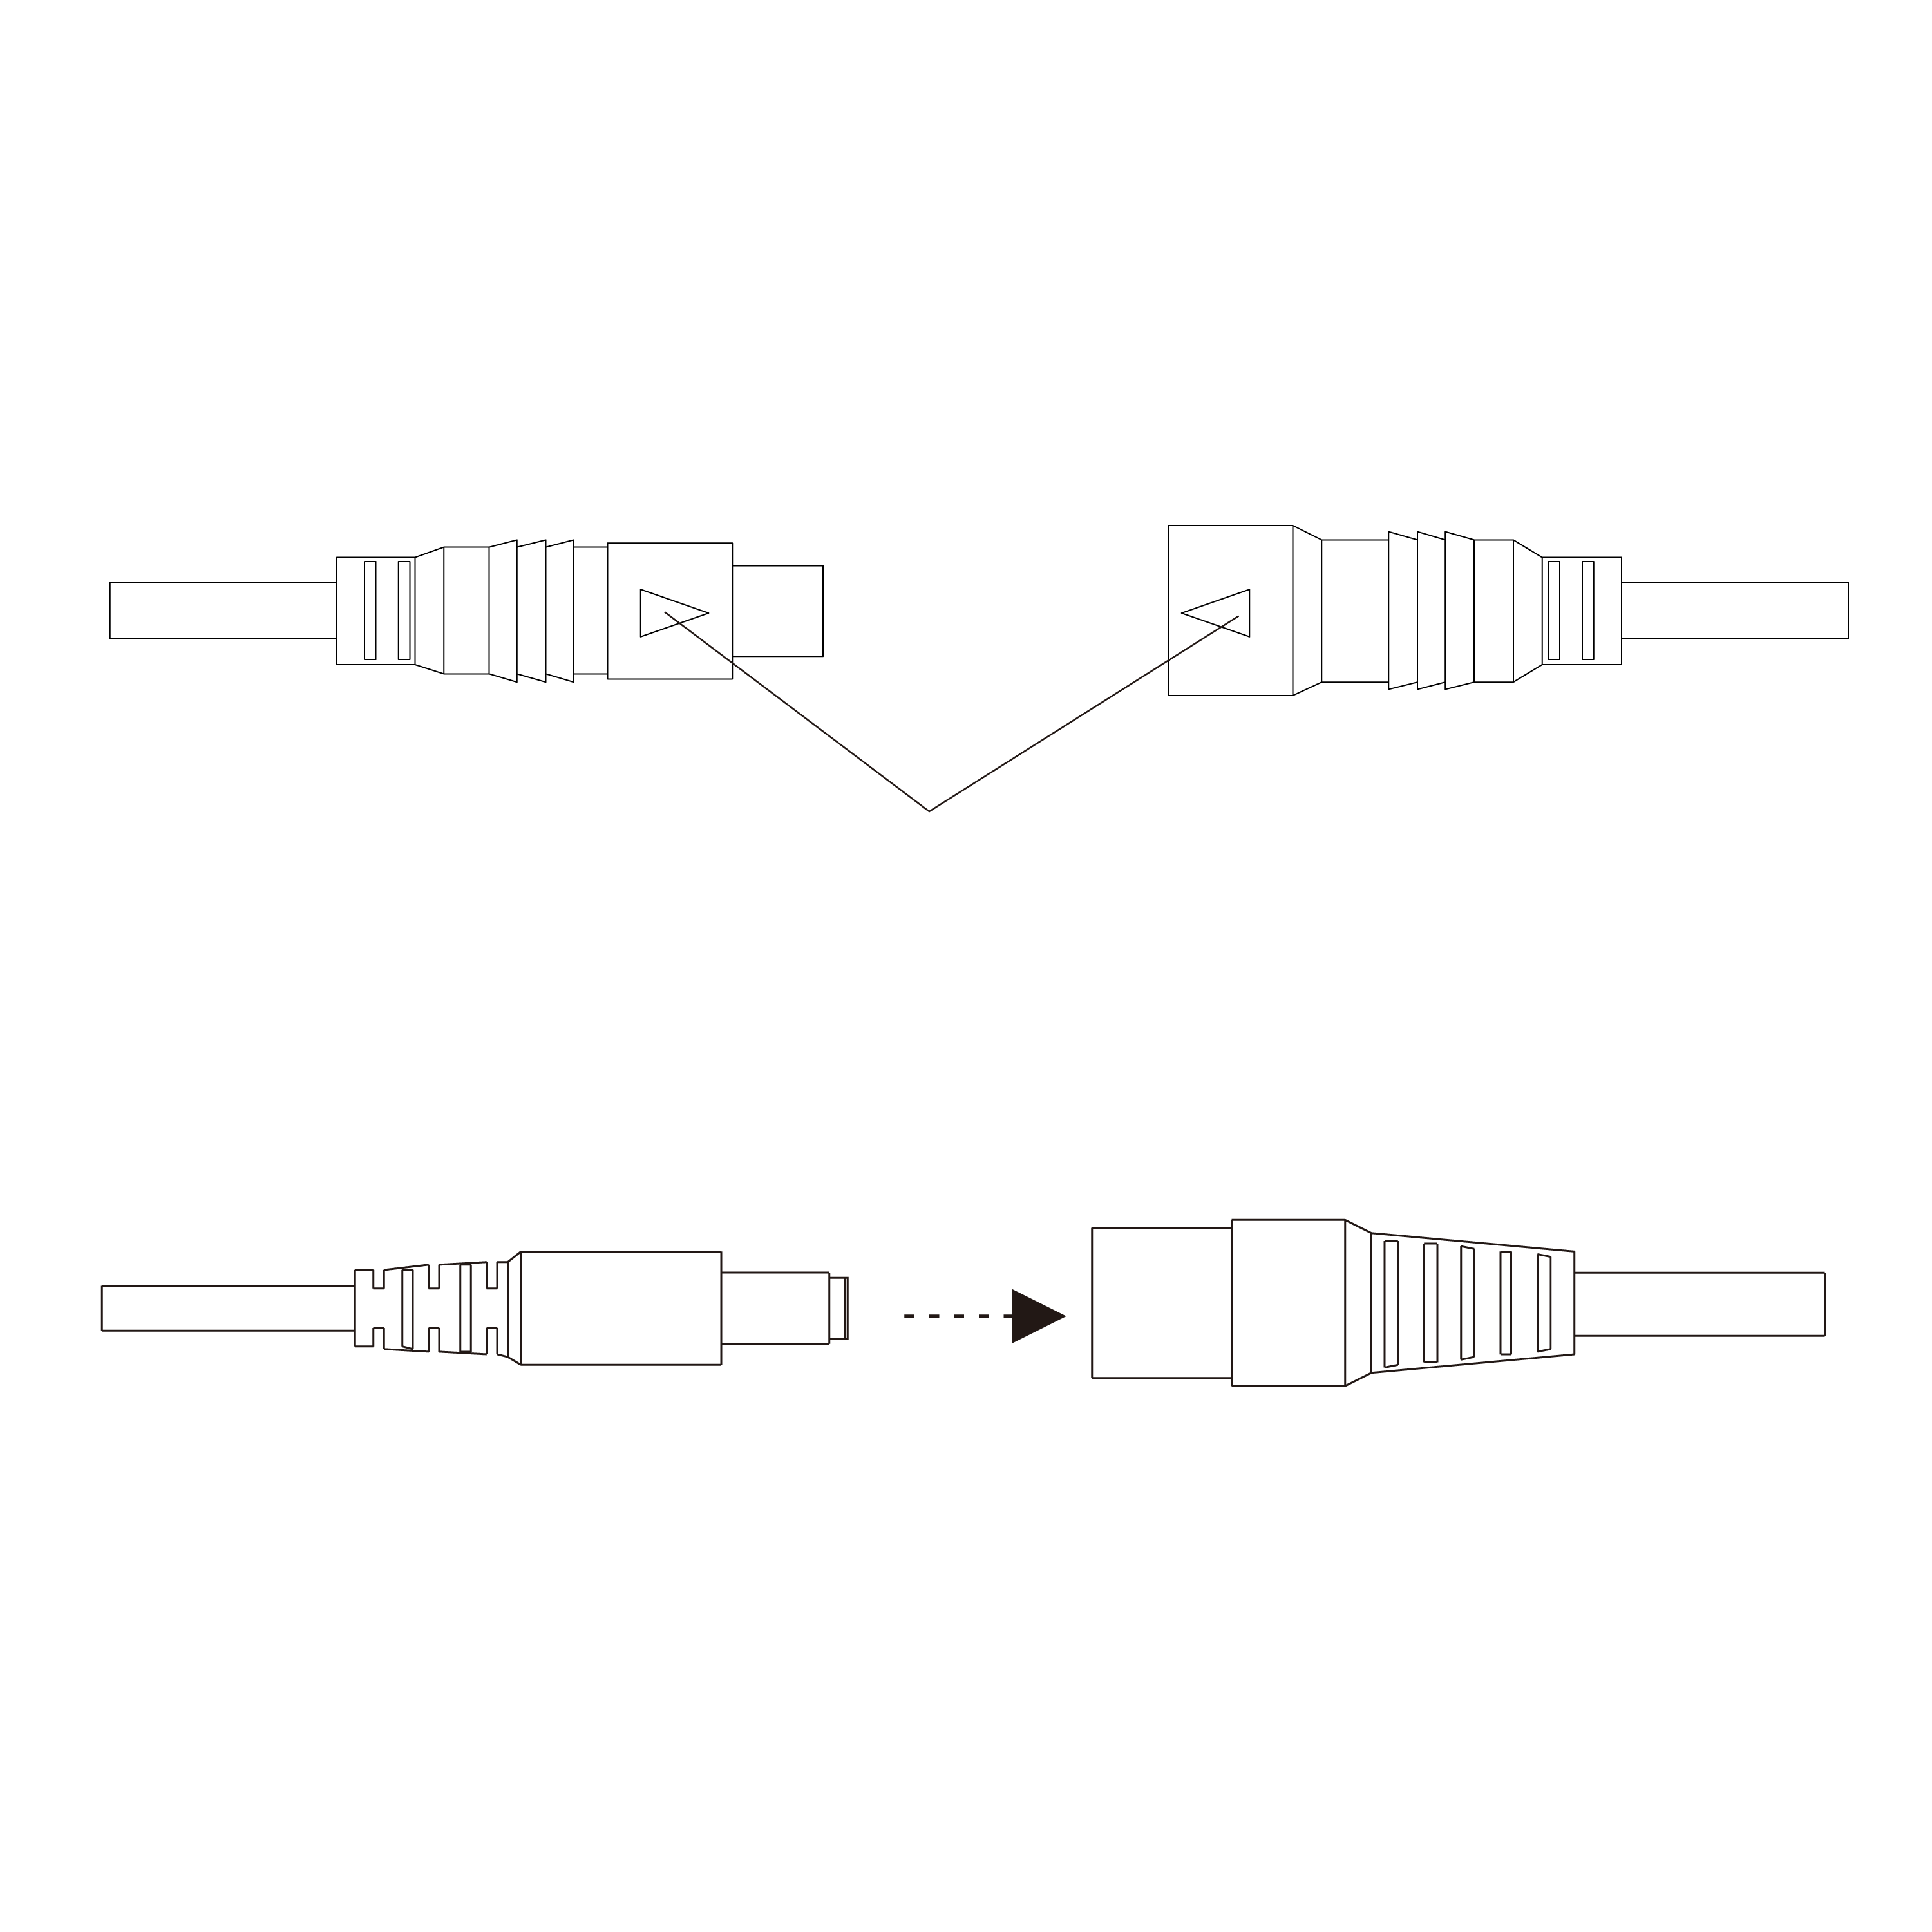
Step 4: Connect the host box control cable with the control cable of shower faucet as an arrow mark on the picture.
Caution: When connecting the two control cables, you must follow the arrow mark which is shown in the cable joint. If not, it will damage the cable joint.
Step 5: Connect the power supply cable of the host box with the adapter.
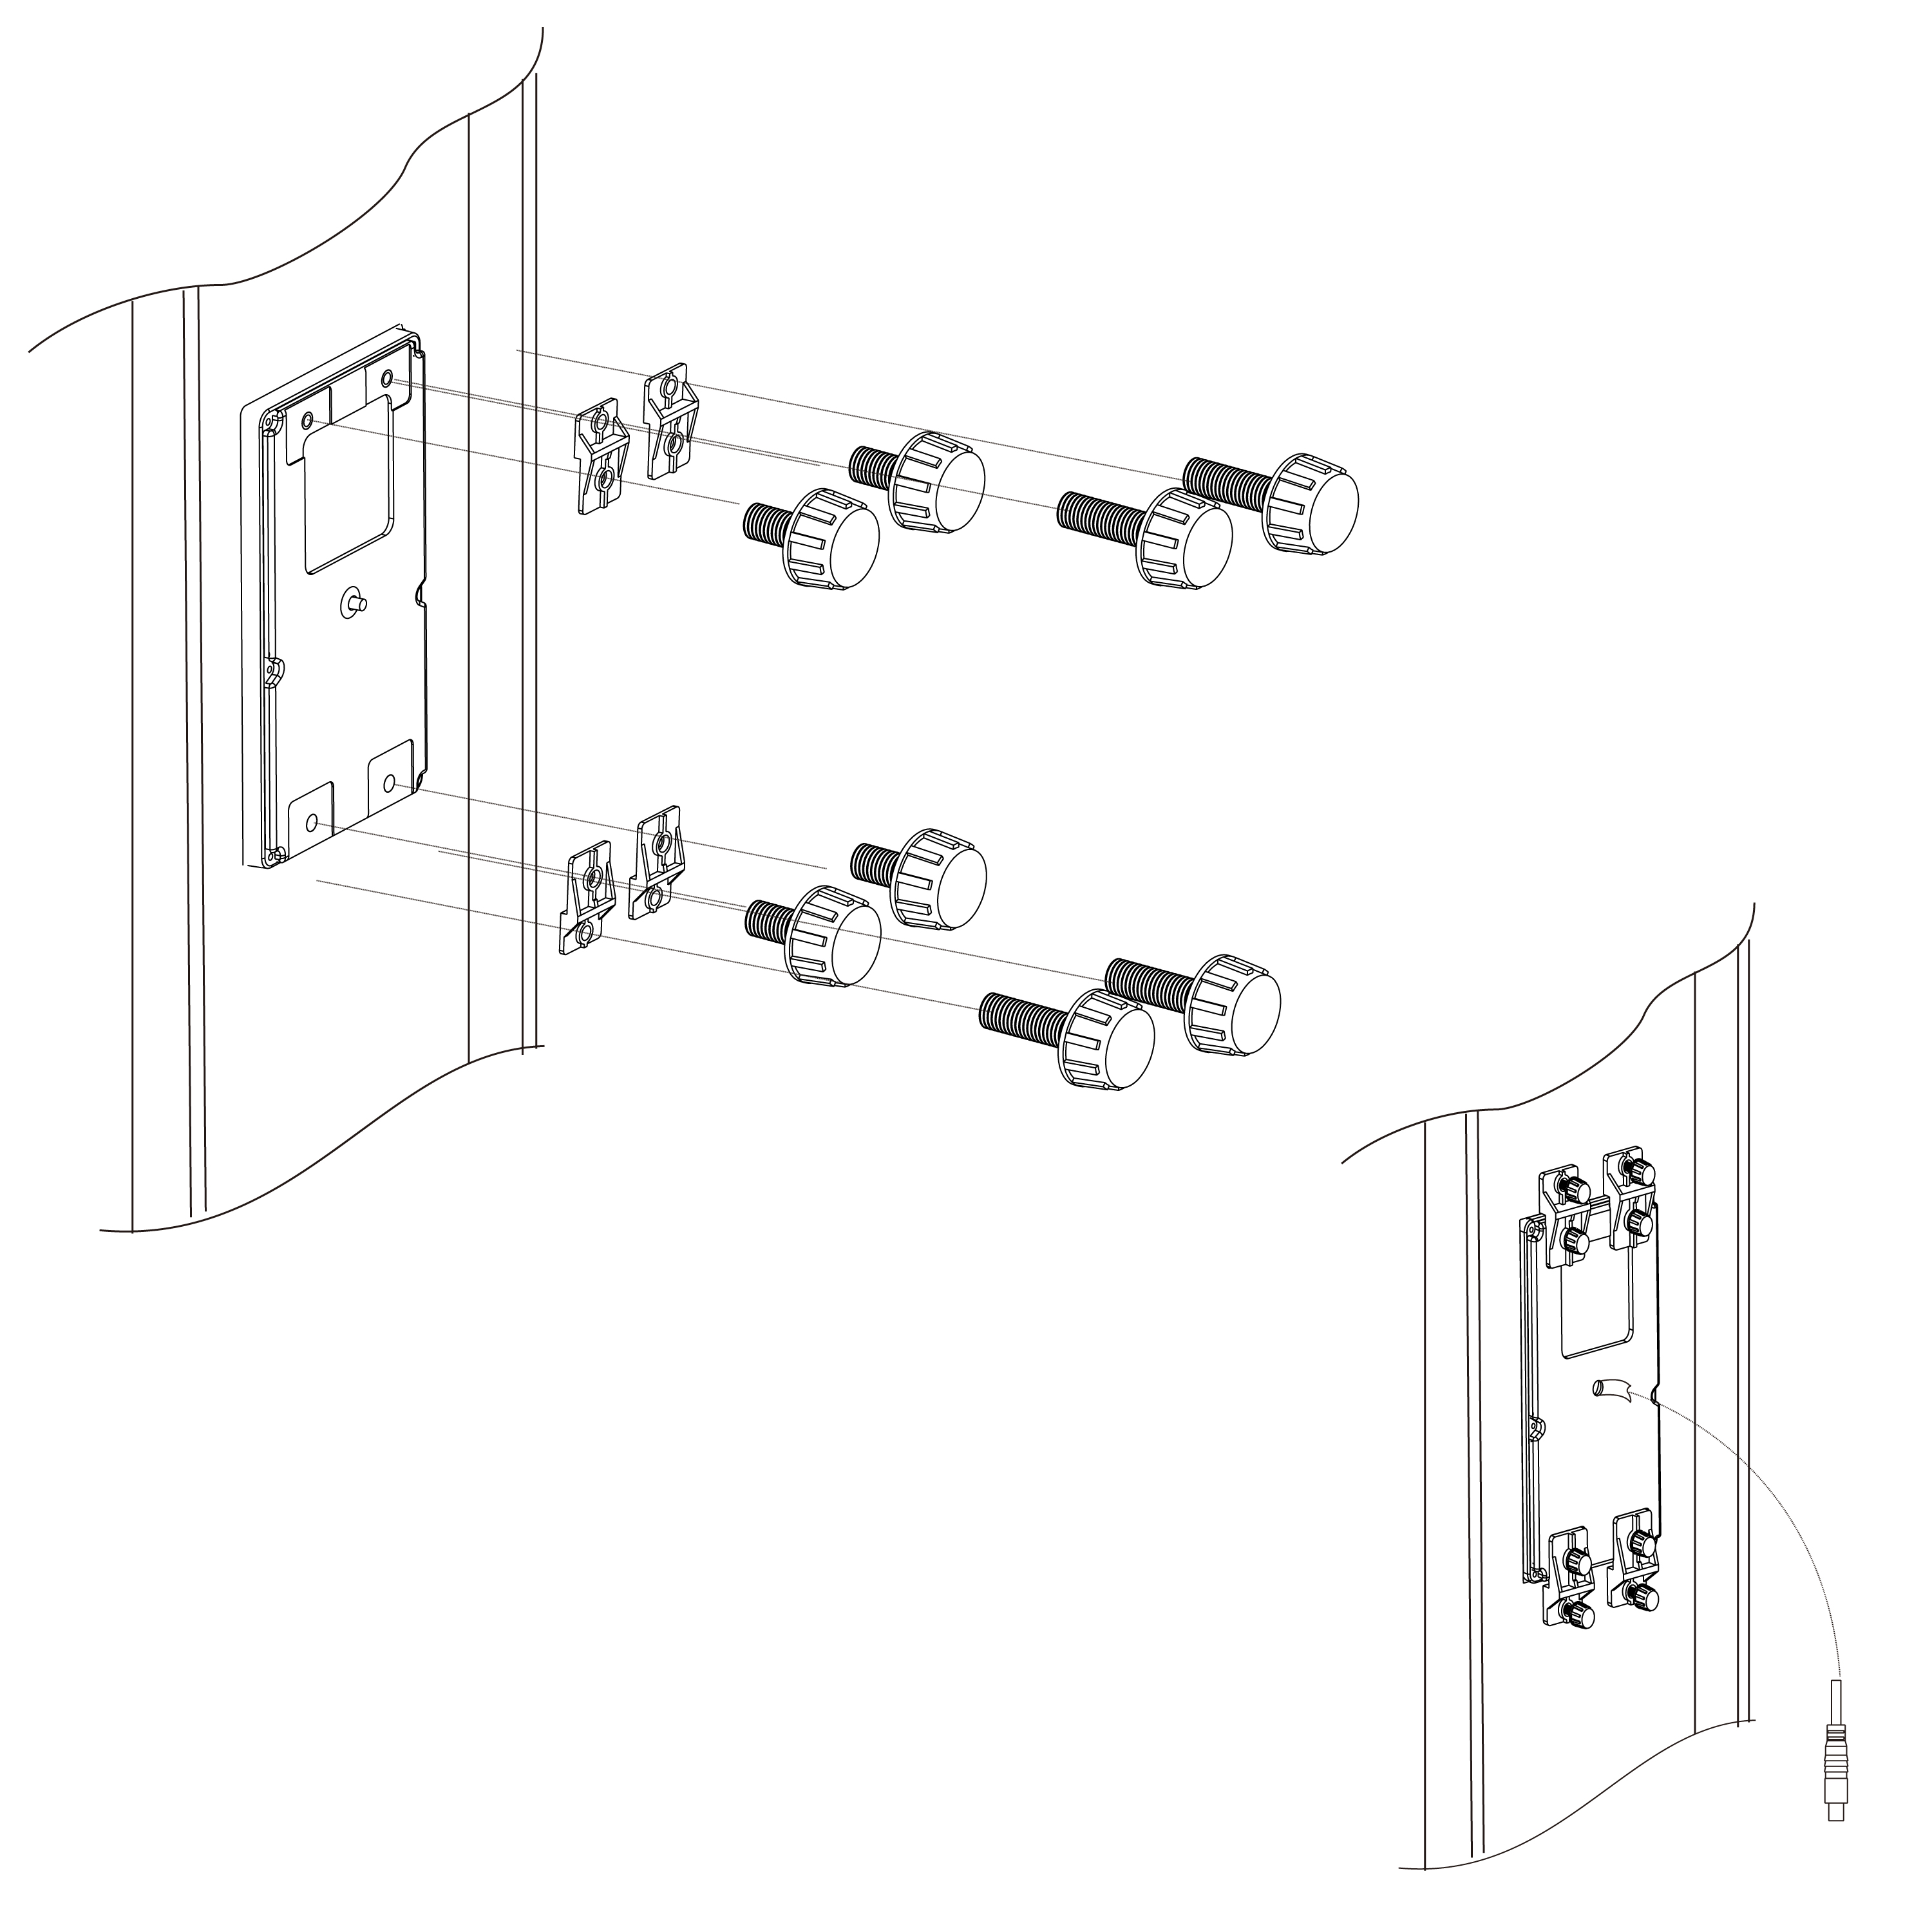
Recess mounted into the wallA: The installation of control panel
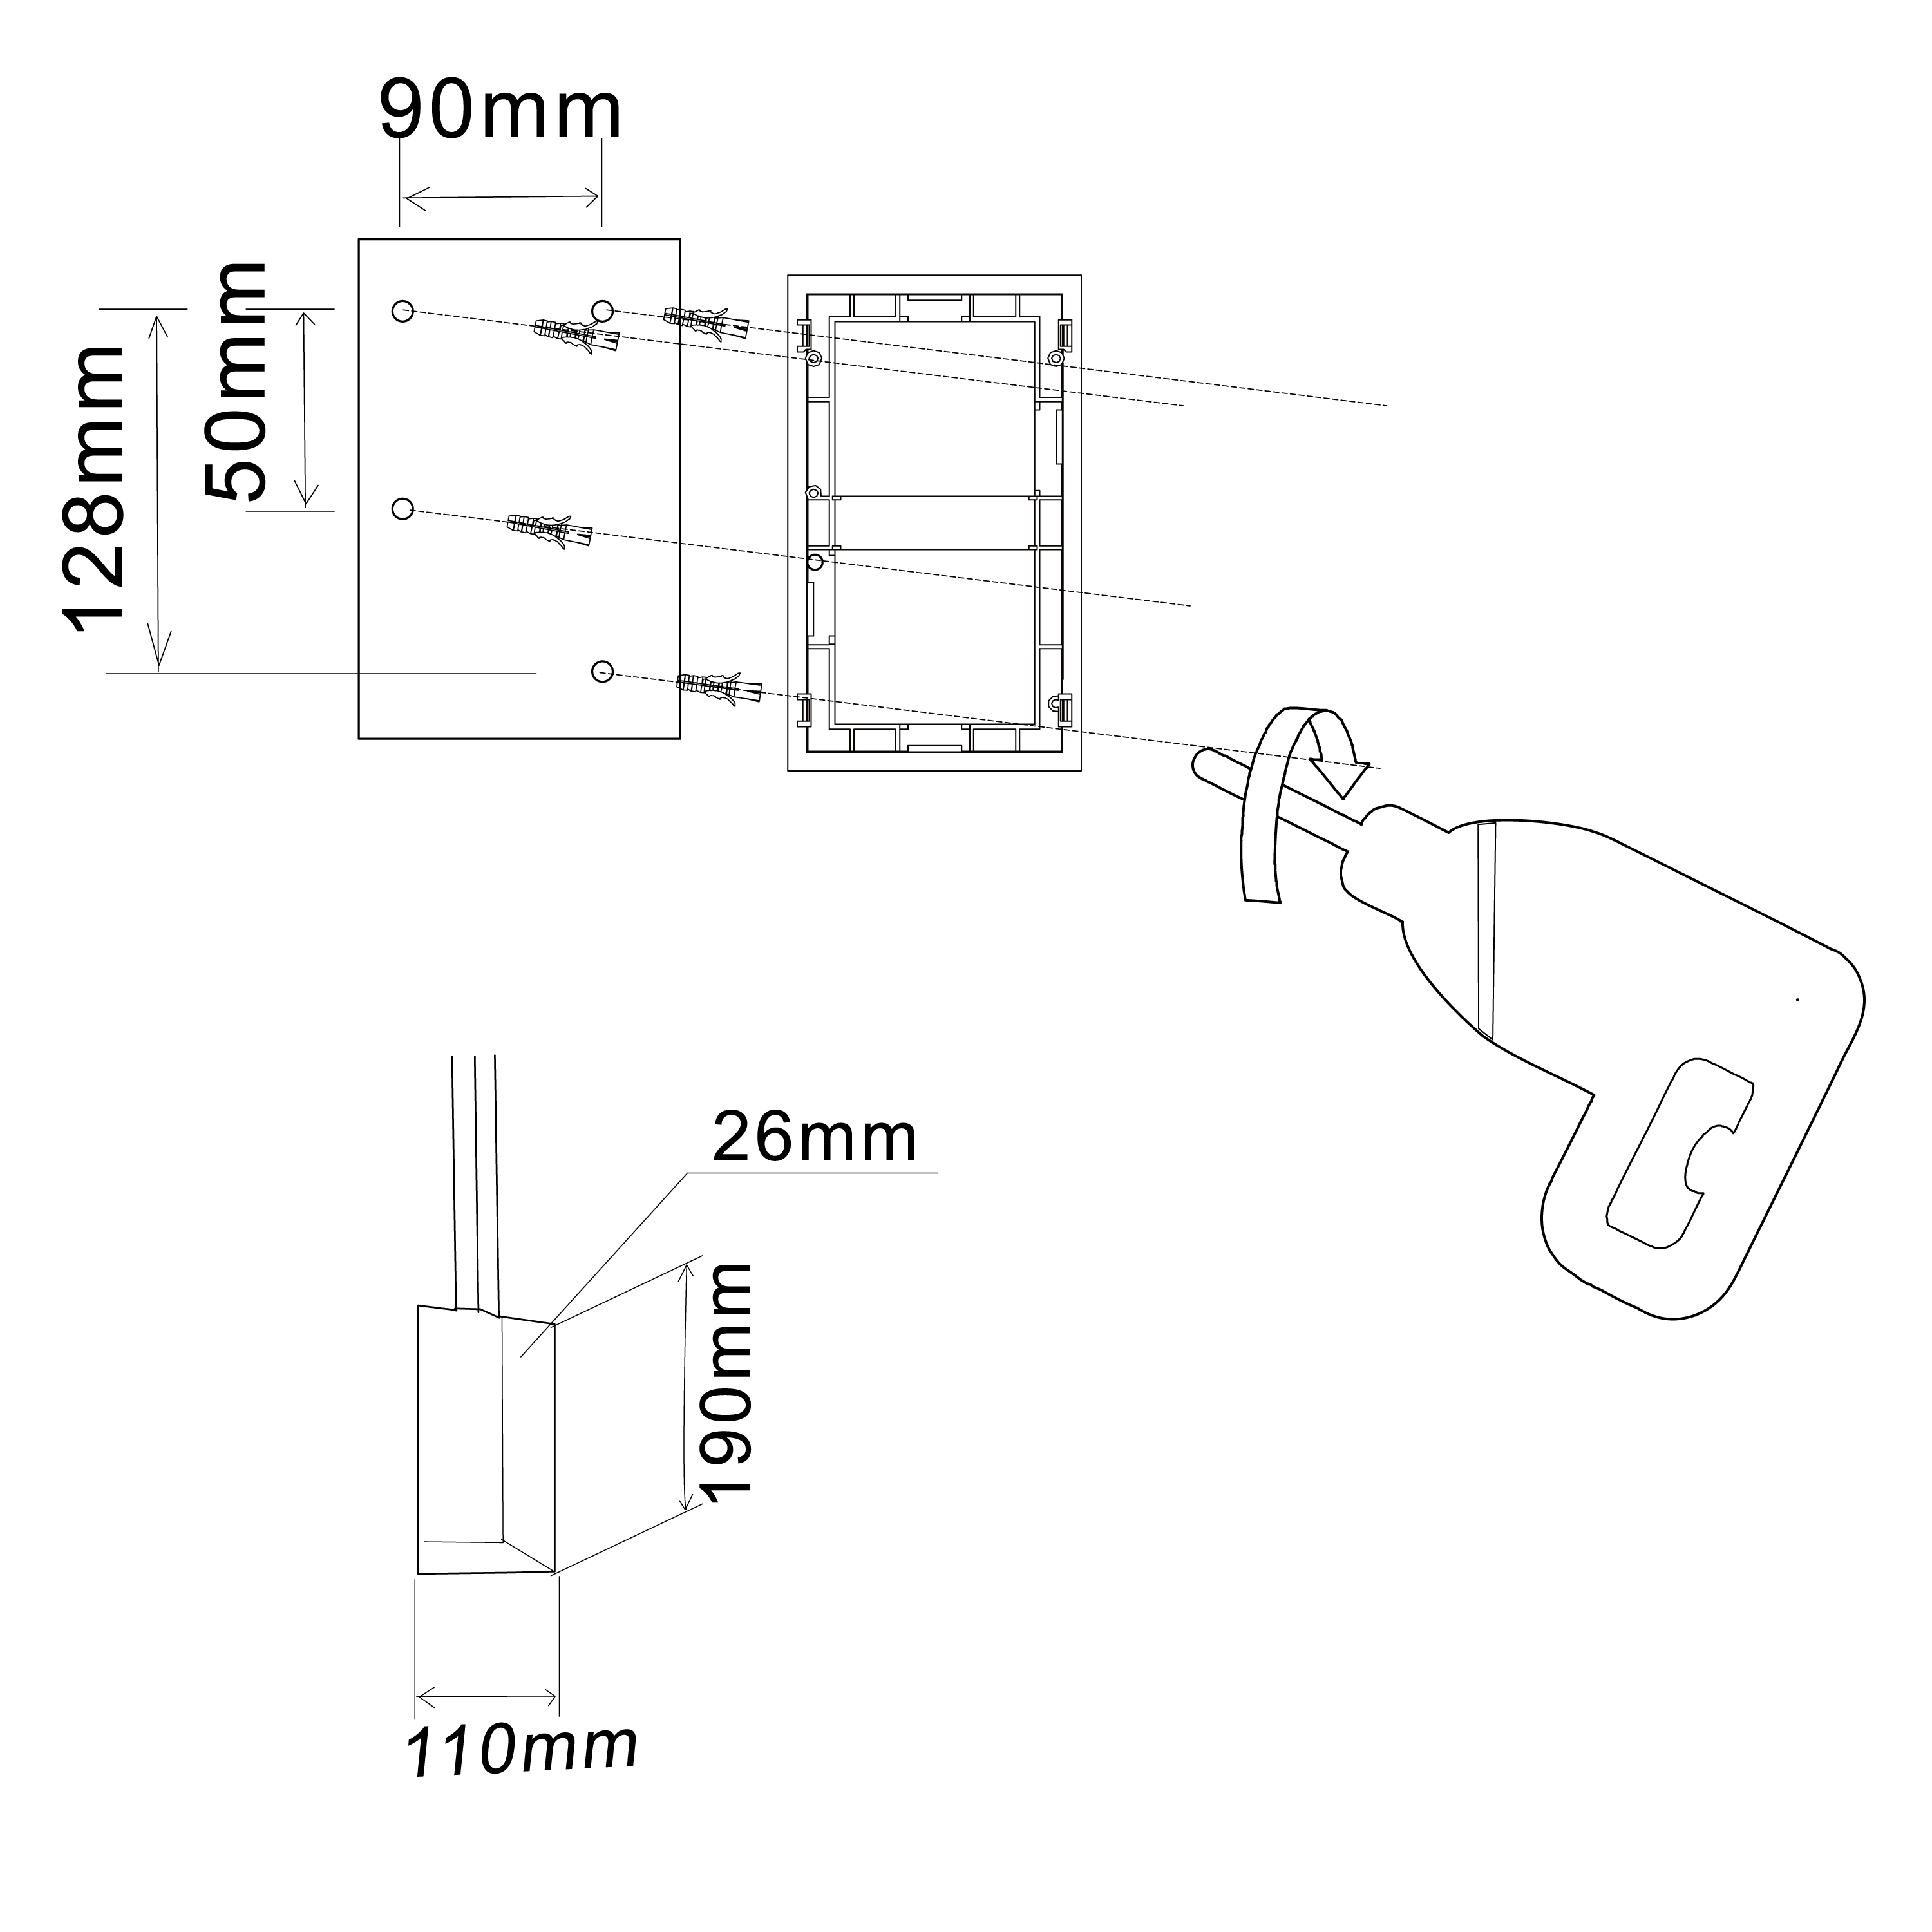
Step 1: Open a slot in the wall for the host box, and prepare the cable pipe for the control cable of the host box.
Step 2: Drill four holes by 6mm diameter on the upside hole for install the wall bracket (as the picture) and put the plastic screw into the hole.
Step 3: Drill four holes by 8mm diameter on the downside hole for the host box installation and put the expansion screws into the hole.
Step 4: Leading the control cable plus from the cable slot and fix it before mounting the control panel.
Step 5: Make sure the control panel bracket is concave the wall surface with 0.5-1mm difference.
Step 6: Connect the control cable between the host box and the control panel, put some silicon on the back case of the control panel and put it on the bracket inside the wall to fasten it.
B: The installation of the host box
1.Choose a suitable place as mentioned before, fasten the host box on the wall by 4pcs holes of the host box.
2. Shut off the cold water and hot water supply, lead cold and hot water pipe from the cold, hot water supply to the cold and hot water inlet of the host box.
3. Connect the head shower and hand shower pipe to the marked water outlet of the host box.
4. Connect the power adapter to the power cable of the host box.
5. Connect the control cable between the control panel and the host box.
6. Get AC220V power supply to the power adapter.
7. Switch on the hot and cold water supply, make sure all water pipe connection is tighten before using.
|
|

|
|
|
|
|
|
|
|
|
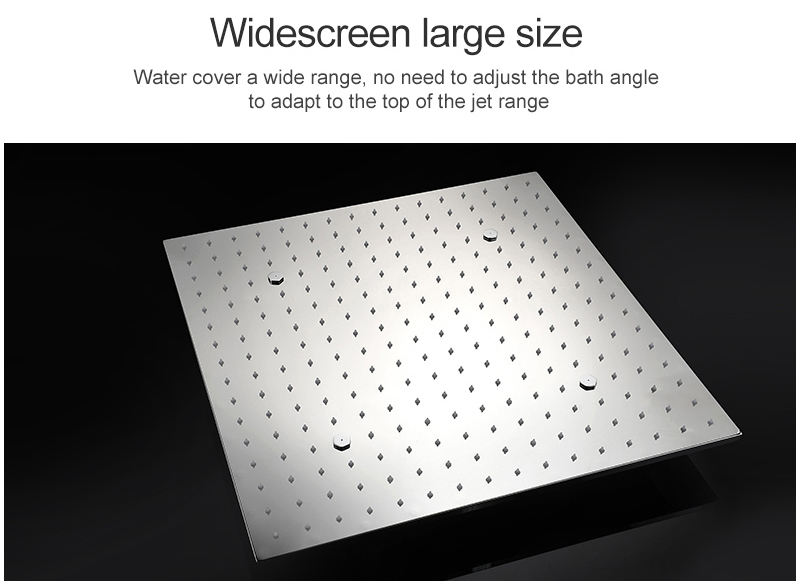
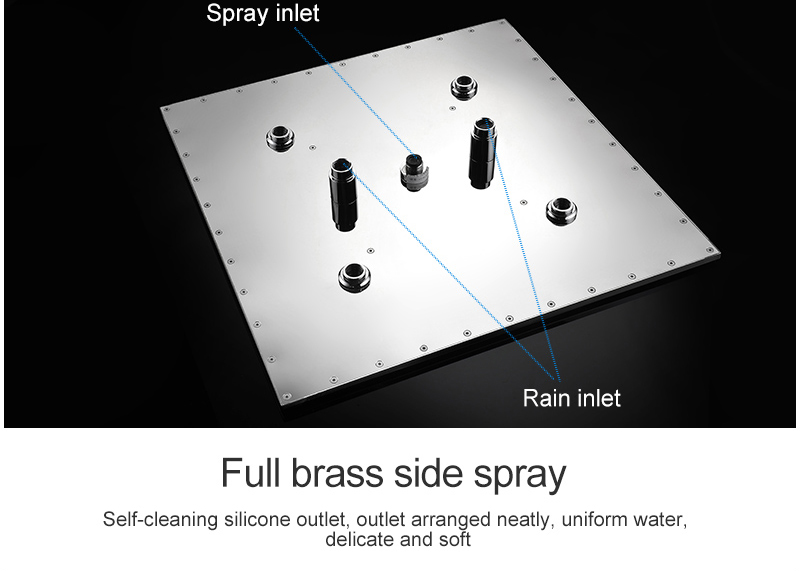
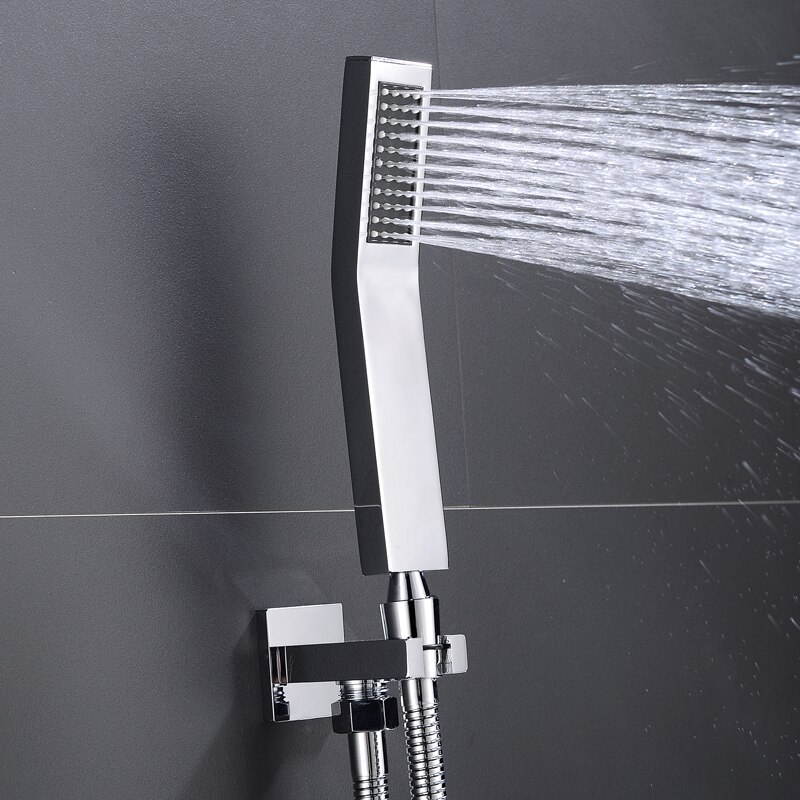
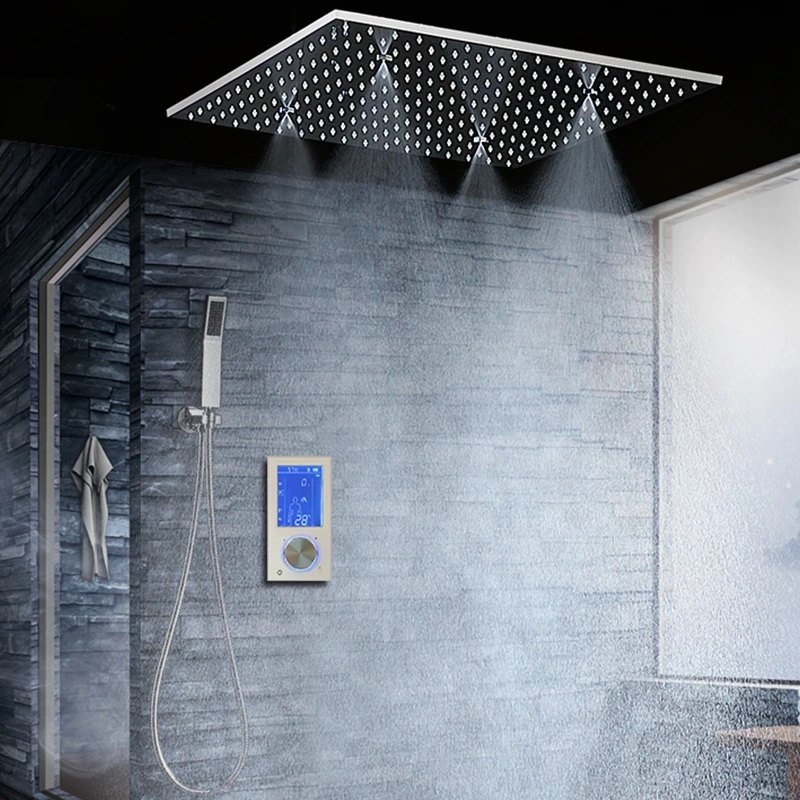
The shower system has 2 different shower modes:
The Rainfall mode: experience the pleasure of a warm summer rain
The Spa Mist mode: spray joy to every inch of your body
The shower set has water temperature controlled led lights, which shine in
blue, when your water is cold, which is from 0 - 29 °C or 32 - 85 °F,
green when the water temperature is medium from 30 - 39 °C or 86 - 103 °F,
red from 40 - 49 °C or 104 - 120 °F and starts to
flash red when the water temperature reaches 50 °C or 121 °F.
The digital display thermostatic mixer with a touch panel makes it not only very easy for you to operate your shower with so many functions but also makes it possible to take your shower always with the same temperature. This is not just enjoyable but also scalding protection, which is especially important for showers used by kids.
Surface Treatment: Polished
Feature: LED Light, Thermostatic Faucets
Cold/Hot Water Control Type: Auto-Thermostat Control
Valve Core Material: Ceramic
Style: Contemporary
Surface Finishing: Stainless Steel
Number of Handles: Intelligent Digital Display Touch
Rain Shower Set Function 1: Rainfall Shower
Rain Shower Function 2: SPA Mist Shower
Shower Set Function 3: Hand Shower Head
Led Shower Function 4: Touch Panel Mixer
Digital Display Touch Shower Function5: Embedded Ceiling Shower Head
Led Shower Set Function 6: LED Chromotherapy
Shower Color Change: LED Temperature Controlled
Water Flow: 14-18 L/min
Type: Bath&Shower Faucets shower set rain panel digital shower control
Bath & Shower Faucet Type: Shower Sets
|
|
|
|
|
|
Fontana Bollnäs 16" LED Intelligent Thermostatic Digital Display Touch Panel Wall Mounted Shower System
| The Fontana Carpi 20" LED Intelligent Thermostatic Digital Display Touch Panel Wall Mounted Shower System is perfect to complement today's modern home. Built from premium materials and finished with elegance. Its turbo pressure boost nozzle technology maximizes your water pressure output performance and steady water flow to provide you a comfortable shower and prevent clogging. You may even have more time to enjoy your shower. Easy-to-install and leak-free. The design was inspired by the FontanaShowers. Be sure, when it comes to new bathroom shower set, FontanaShowers is offering shape, finish and styles you're looking for.
|
|
|
|
|
|
Features:
Brand Name: FontanaShowersModel Number: FS15046Installation Method: Wall Mount
Style: ContemporaryType: Fixed Rotatable TypeFeature: Thermostatic FaucetLED Light: Temperature ControlCold/Hot Water Control Type: Auto-ThermostatShower Material: BrassShower Head Size: 16"Shower Head Shape: SquareSurface Finishing: Stainless SteelSurface Treatment: PolishedValve Core Material: CeramicWater Flow: 14-18L/MINColor: SilverNozzle: SilicaConnection Type: G1/2" Standard
|
 |
|
|
|