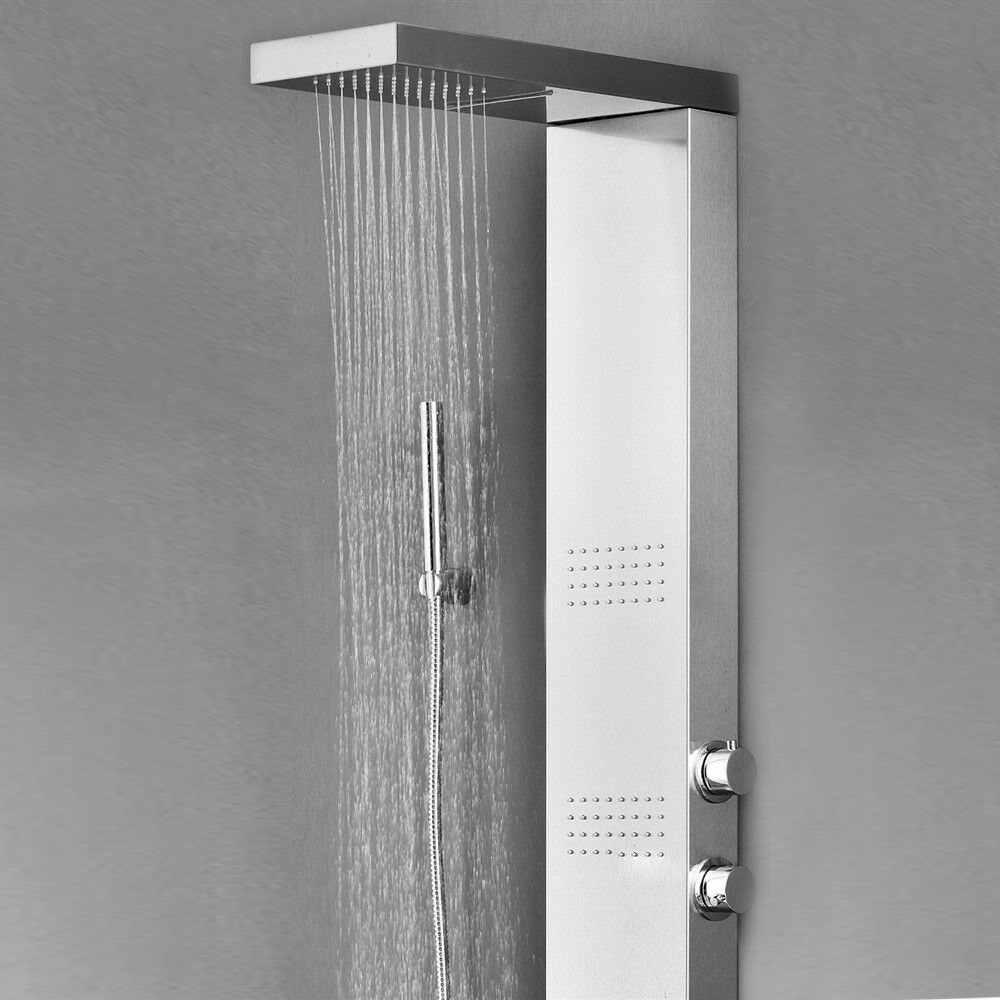
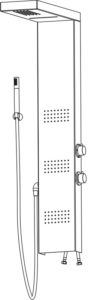
Installation instructions for a fingerprint-resistant stainless frame, brass hand shower, and 4 functions: rainfall, waterfall, massage spray, and hand shower (50 rainfall + 96 massage nozzles).
FONTANASHOWERS RESOURCES
Architect & Specifier
Technical Resources
Open the official BIM/spec hub for project-ready files.
4 stage shower functions (Rainfall, Waterfall, Massage Spray, Hand Shower)
50 rainfall nozzles
96 horizontal spray massage nozzles
Thank you for purchasing Decor Star products. Please read the information below and keep this installation guide for future reference. If you require assistance, please contact our customer service department at
800-204-4483, Or by email at [email protected].
Attention
• This installation guide is subject to change without notice, please contact us to request the most updated version of this installation guide.
• This is a general installation guideline, actual installation may vary. Consult a professional if necessary.
• Product drawings in this installation guide is for illustration purpose only. Actual product may vary depends on model.
• Always take extra precautions and wear appropriate safety equipment when installing this product.
• Proper water pressure needs to be maintained to prevent possible scalding.
• Stainless steel shower panels are handmade and assembled. Product dimensions may vary slightly, always measure the actual product before installation.
You may also need the following tools
1. Thread Sealant Tape, (PTFE Tape)
5. Pencil or Marker
2. Silicon Sealant
6. Level
3. Phillips Screw Driver
7. Hammer
4. Drill with ¼” Drill bit
Before You Begin
• Read and understand this instructions completely before installation.
• Unpack and inspect the shower panel from the package for shipping damage and make sure all parts are included with the shower panel.
• Keep the product in its package until you are ready to install.
• Read and understand this installation guide completely.
• Make sure the installation site is clean and free of dust and debris.
• Please make sure the water supply is shut off to the installation area. If necessary, shut off the water to the entire house.
• Turn on the water at a bathroom faucet in the house to relieve the pressure in the plumbing system.
Rough-In
• Please follow all local building and plumbing codes.
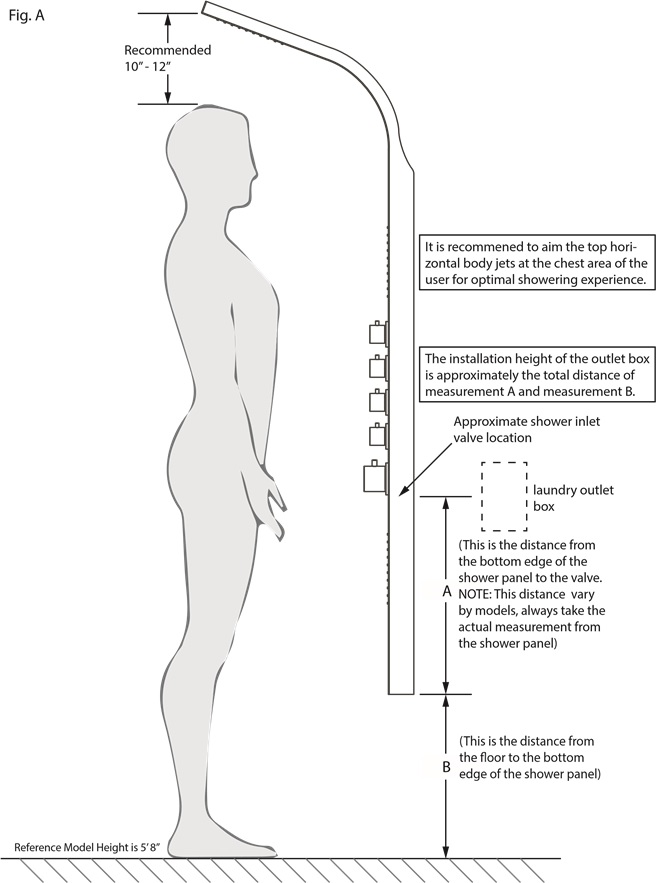
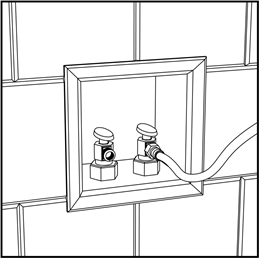
• The height and placement of the shut off valves will be based on the installation height of the shower panel, see figure A. The installation height is approximately the total distance of measurement A and measurement B.
• The finished wall opening for the valves should not be larger than 4.5” wide by 6” tall. Make sure the opening is completely waterproof to prevent any water leaking into the wall space.
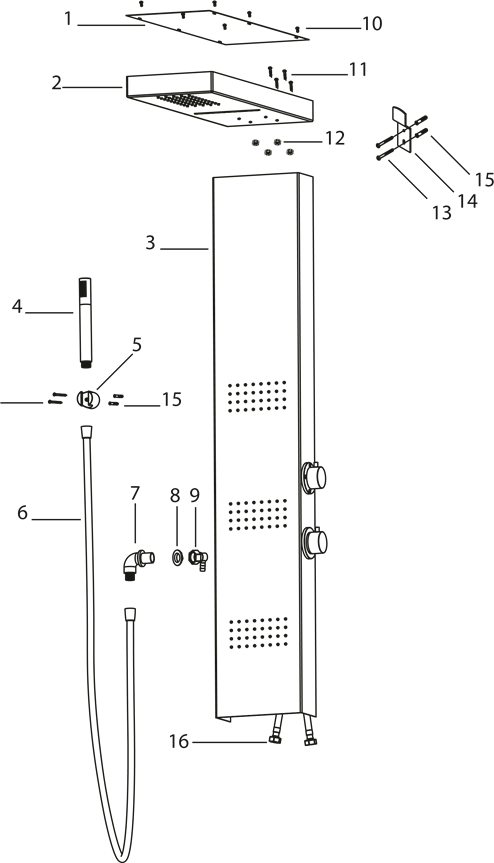
Top Cover
Top Panel
Panel Body
Hand shower
Hand Shower Holder
Hand Shower Hose
Hand Shower Connector
Locking Nut
Water Supply Connector
Top Cover Screws
Bolts
Locking Nuts
Screws x 6
Mounting Brackets x 2
Wall Anchors x 6
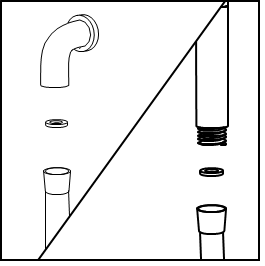
Main Water Supply Hoses
Remove top cover. Attach the top panel to the main body with the supplied screws. Run the water supply hoses through the hole on the top panel.
Trim off excess water supply hoses and attach to the spray head unit according to the hose labels and close the top cover.
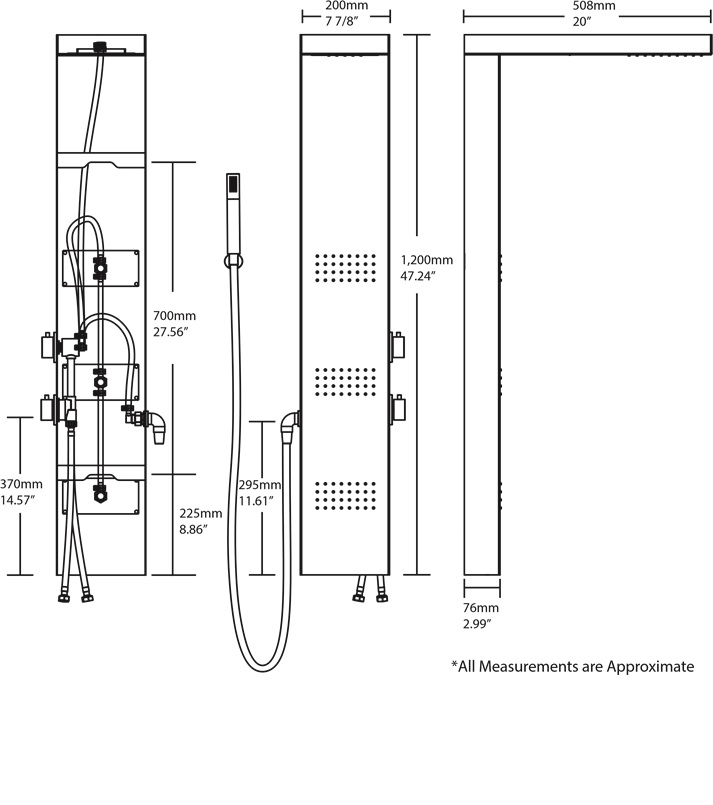
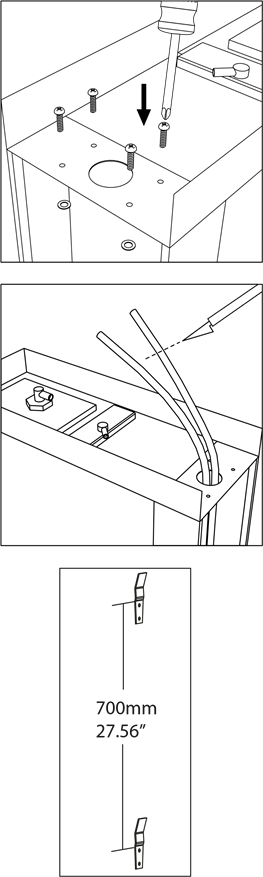
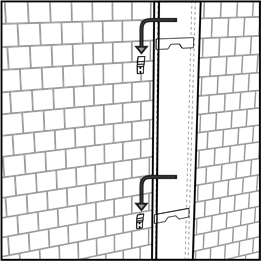
Mark the positions of the 2 brackets on the wall and set a side the panel. (NOTE: The distance between the two brackets should be 700mm or 27.56”)
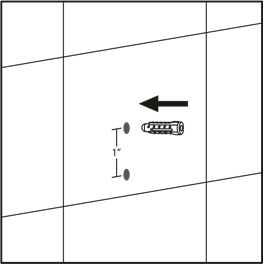
Using a drill with a tile bit, drill the hole slowly into the tile. Do not drill into any piping or wiring in the wall. Insert the anchors into the wall. (NOTE: Before installing the wall anchors, use a small piece of painters tape or masking tape over the drill area. This will prevent damages to the tile)
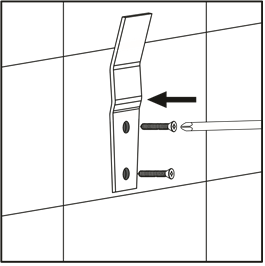
Secure the mounting brackets to the wall.
Apply thread sealant tape to the threading on the shut off valves before connect both hot and cold water supply hoses to the valves. Turn on the valves and check all connections for possible leaks.
Hang the unit on the wall to complete the installation. Make sure the unit is seated properly. Apply silicon sealant on left and right sides of the shower panel. (NOTE: do not seal the bottom of the panel, this will allow any possible future leaks to drain out the panel)
Connect hand shower hose to the main panel body. Attach the hand shower to the hose. (NOTE: Install the rubber washer to prevent leak.)
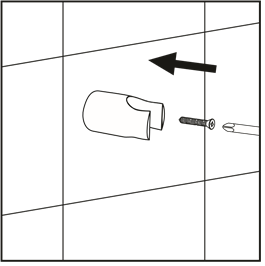
Place the hand shower cradle at desired location (preferably on the left side of the panel) and follow step 4 when drilling and mounting the cradle.
Operation 1. To operate the unit turn the bottom knob counter-clockwise to set water flow and temperature. 2. Turn the top knob to select desired water function.
Overhead Jets Handheld Shower
Horizontal Body Jets Overhead Waterfall
Maintenance Guide Please follow the cleaning material manufacturer’s instructions. In addition, pay attention to the following points: 1. Regular cleaning can prevent mineral build up on shower head and handheld shower. 2. Use a mild detergent such as liquid dish washing soap and warm water for cleaning. 3. Do not use abrasive / harsh chemical when cleaning the fixture as they will damage and dull the finish. 3. Carefully read the cleaner product label to ensure the cleaner is safe for use on the material. 4. Test the cleaner on a small area before using on the entire surface. 5. Do not leave the cleaner on the fixture longer than necessary. 6. When using spray cleaners, spray frst onto a soft cloth or sponge. Never spray directly onto the faucet as droplets can enter openings and gaps and cause damage. 7. After cleaning, rinse thoroughly with clean water to remove any cleaner residue.


 Horizontal Body Jets
  Overhead Waterfall


