|
Shower Head Installation Instructions
|
Step 1:
|
|
|
Step 2:
|
|
|
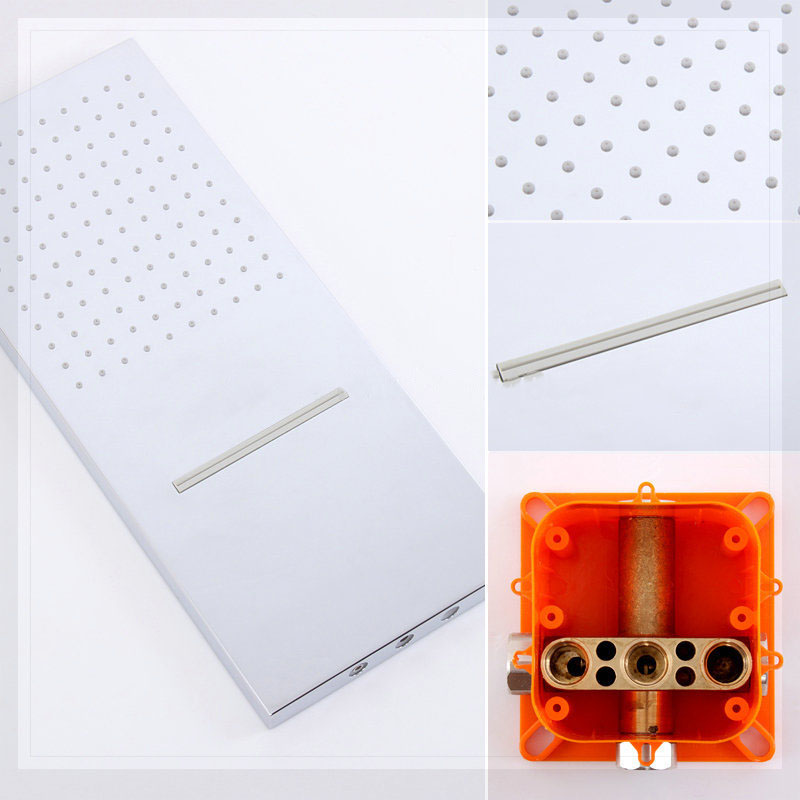
shower
|
|
|

|
Open the top cover and drill according to the marked position.
1. Mark by the position of the four holes.
2. Take care to avoid wires and pipes to prevent damage.
3. Be sure to confirm that the four holes are on the same horizontal line.
|
|
|
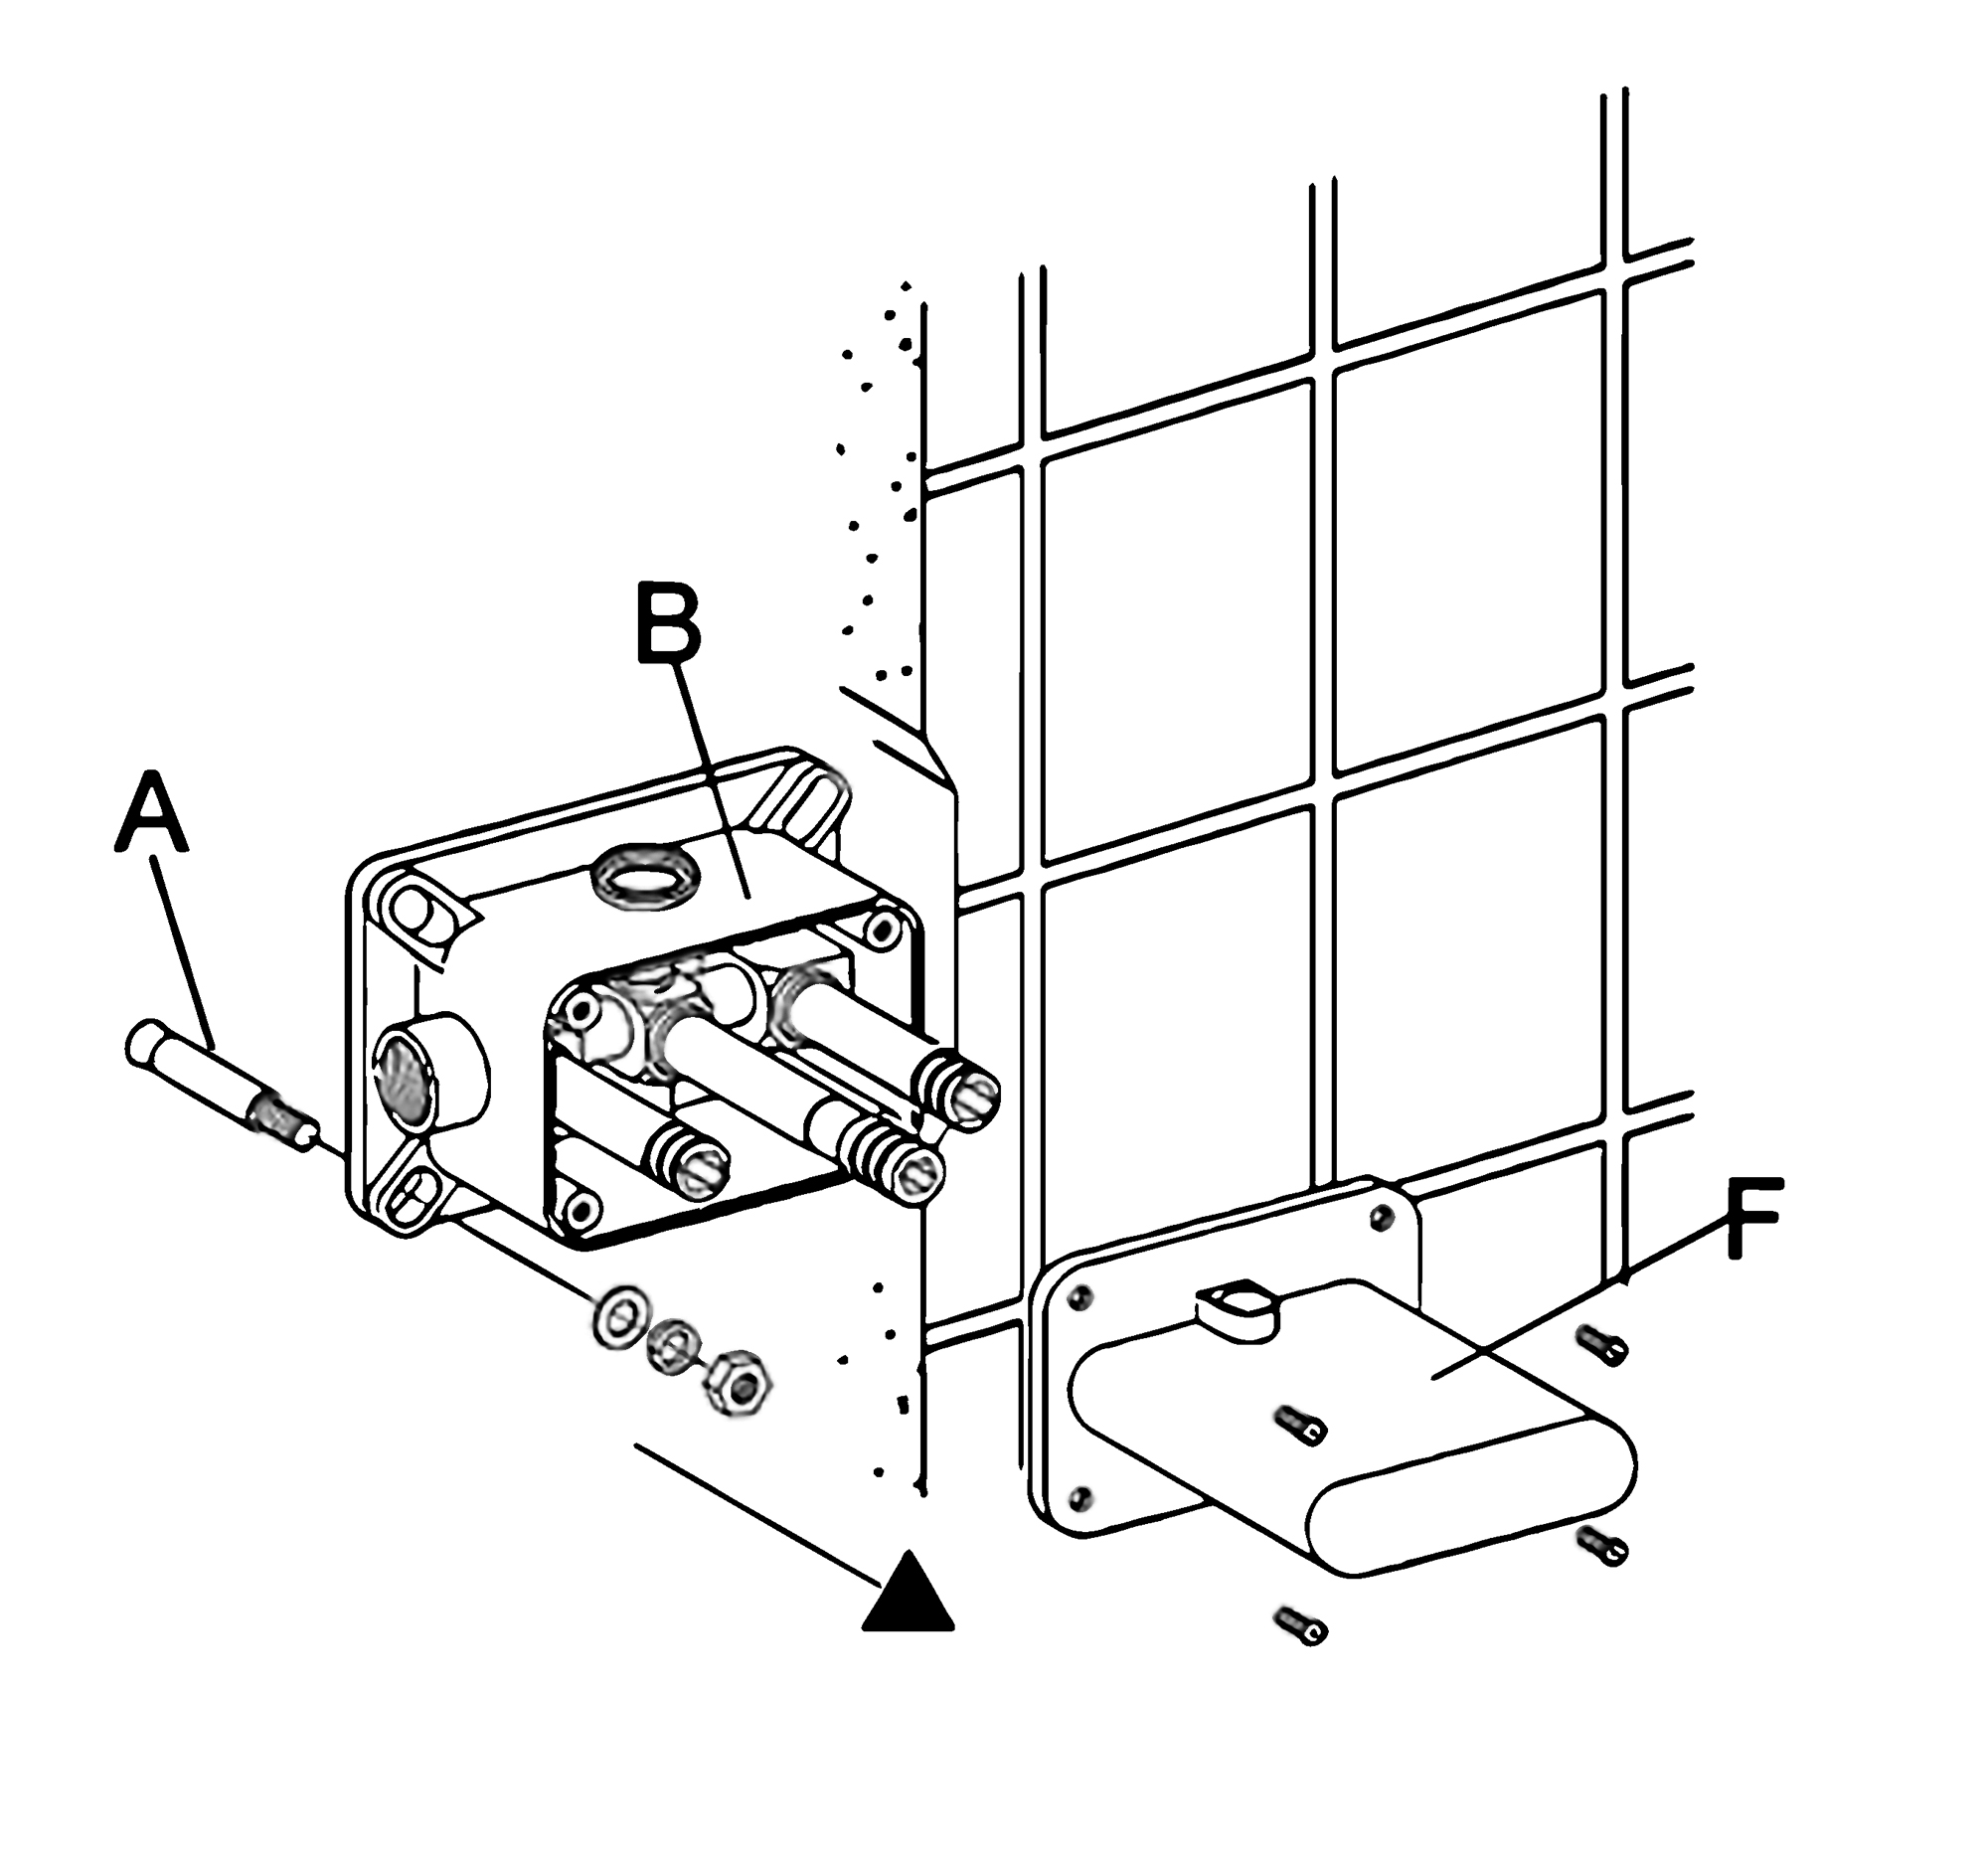
Remove the protective cover (F). Mark the positions and drill holes to suit the anchors (A). Install the anchors (A) and fix the rough-in valve (B) into the wall with screws. Use a level to ensure that the rough-in valve (B) is straight and level. (Important: Flush the water supply to remove any dirt and debris before installing the valve body).
|
|
Shower Head Installation Instructions
|
|
|
|
|
|
Step 3:
|
|
|
Step 4:
|
|
|
|
|
|
|
|
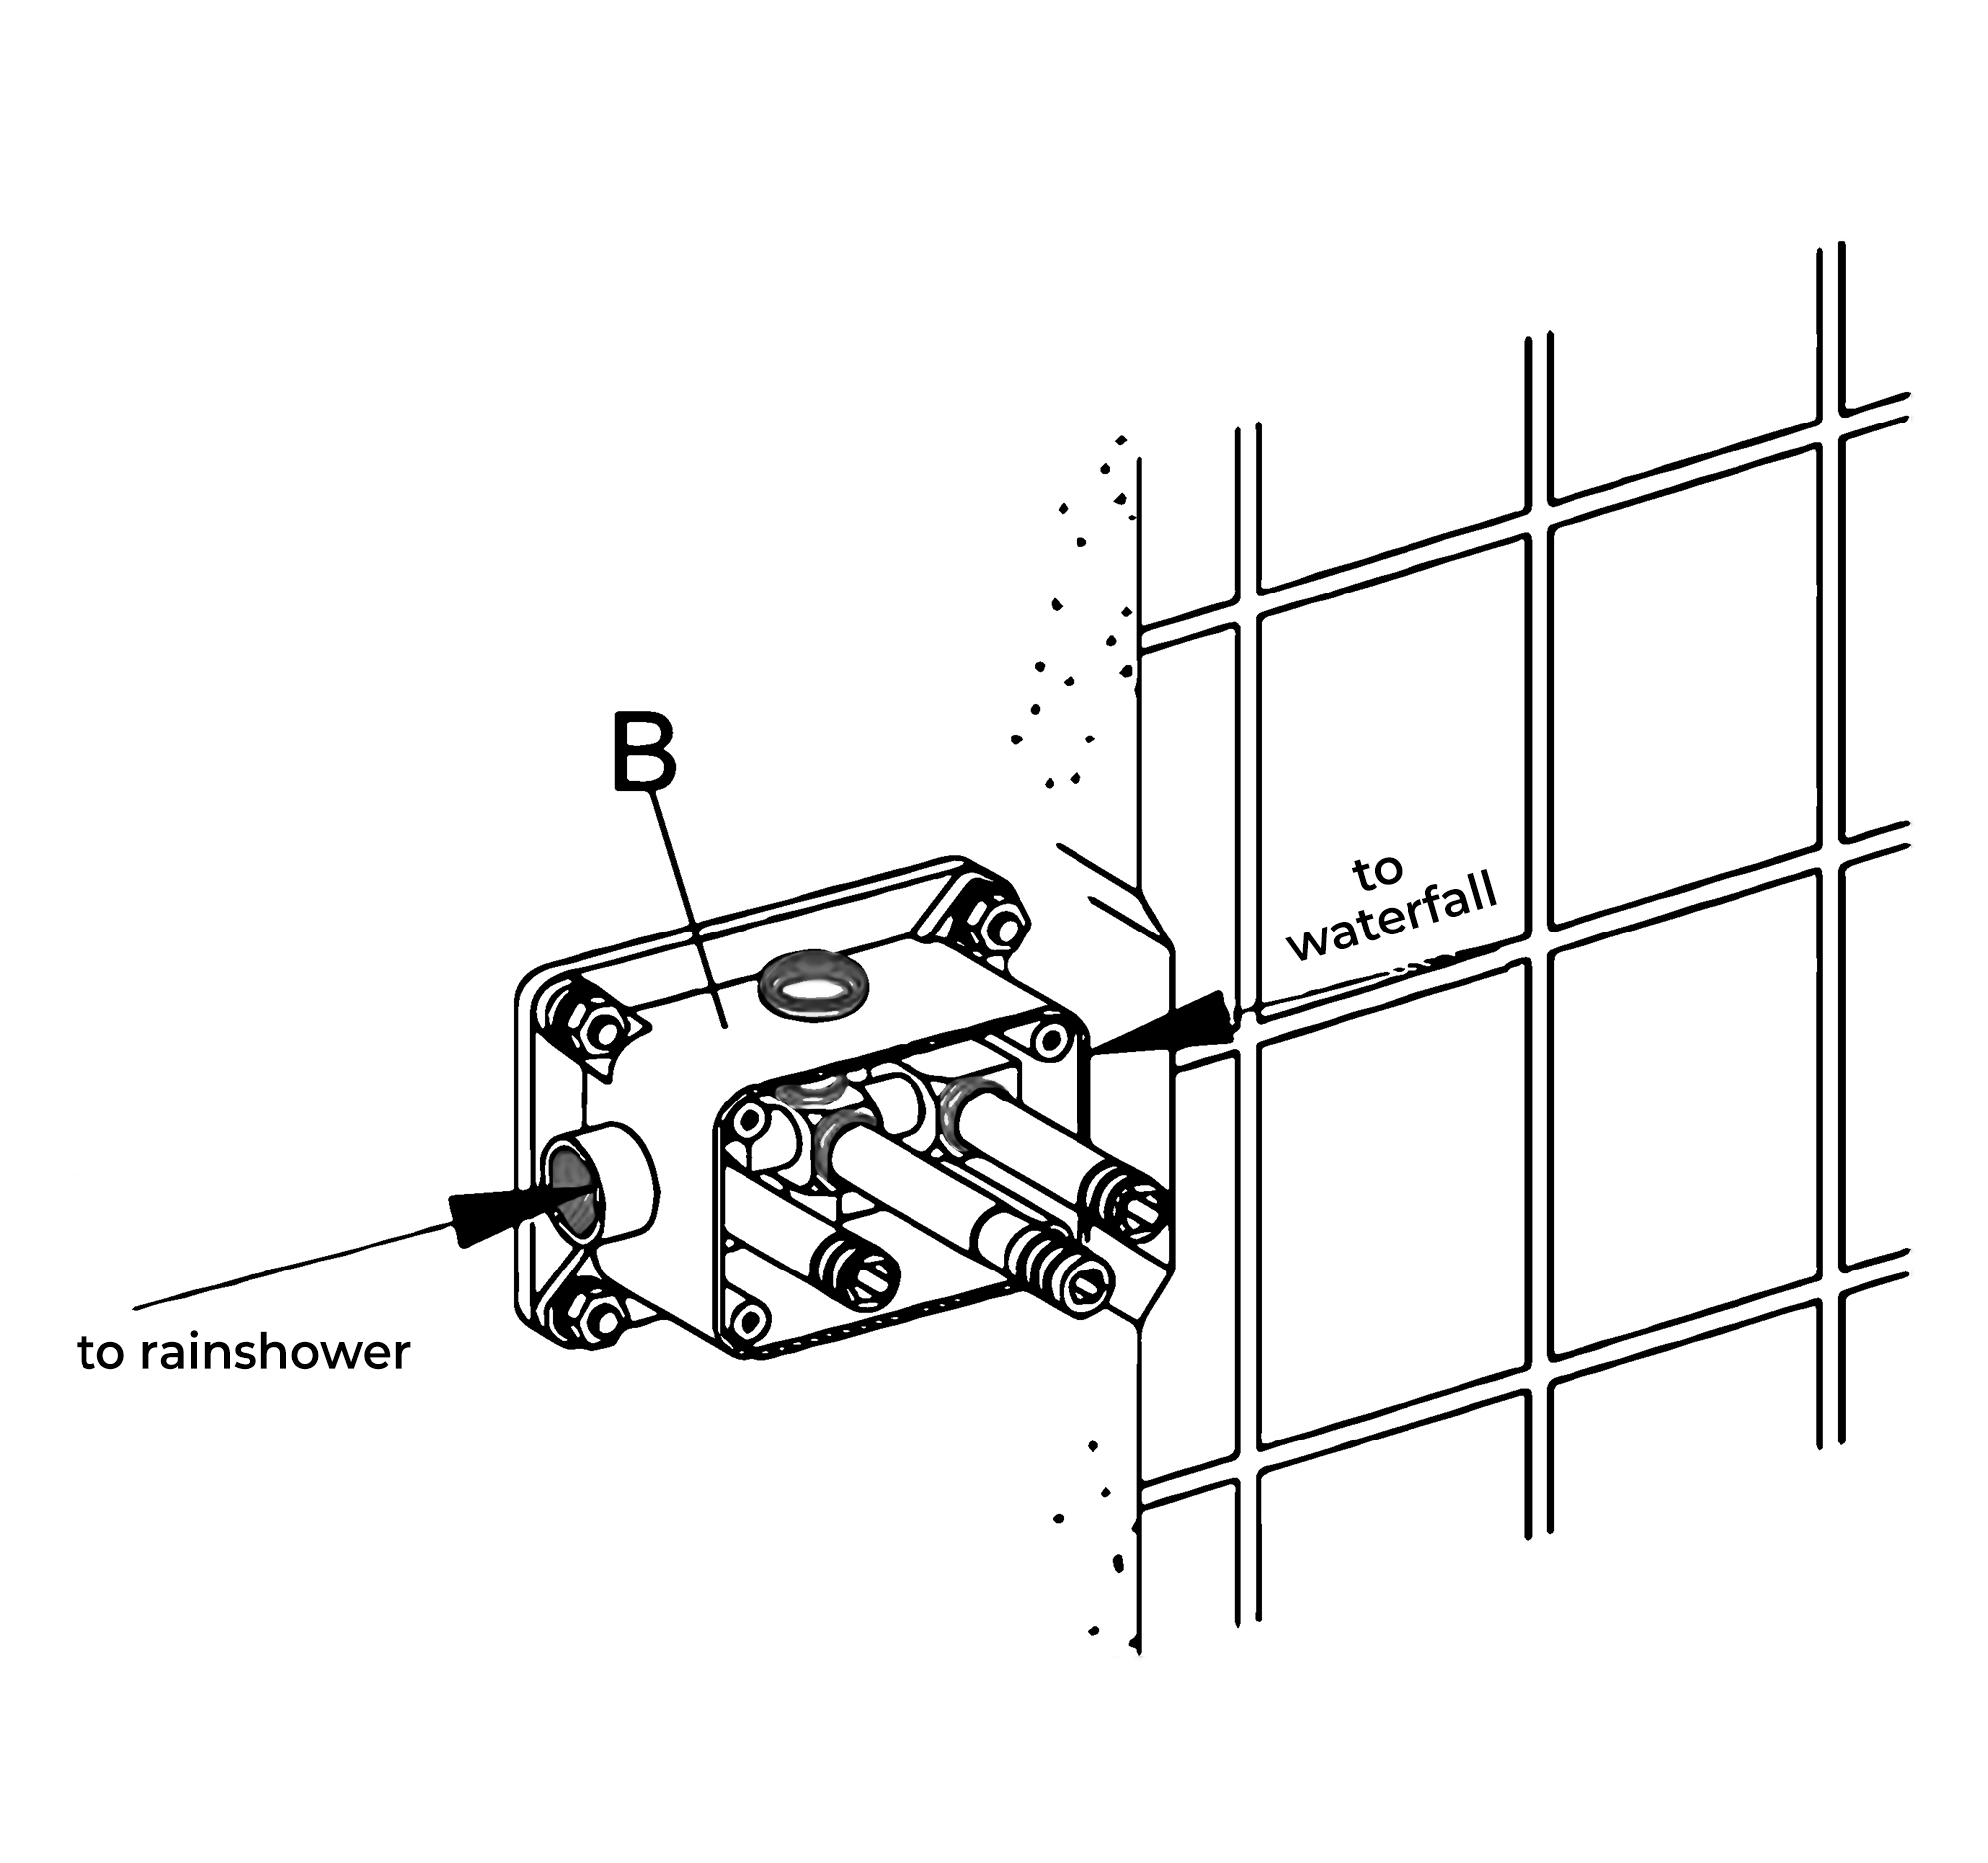
Wrap Teflon tape around the pipe threads and connect water supply lines and in-wall pipes (not included) as desired to the rough-in valve (B). Turn on the water supply and open the cartridge to check for leakage. Then put on the protective cover and finish the wall surrounding the valve. (Note: Test the water pressure after the pipe connections have been made and before the finished wall material is installed).
|
|
|
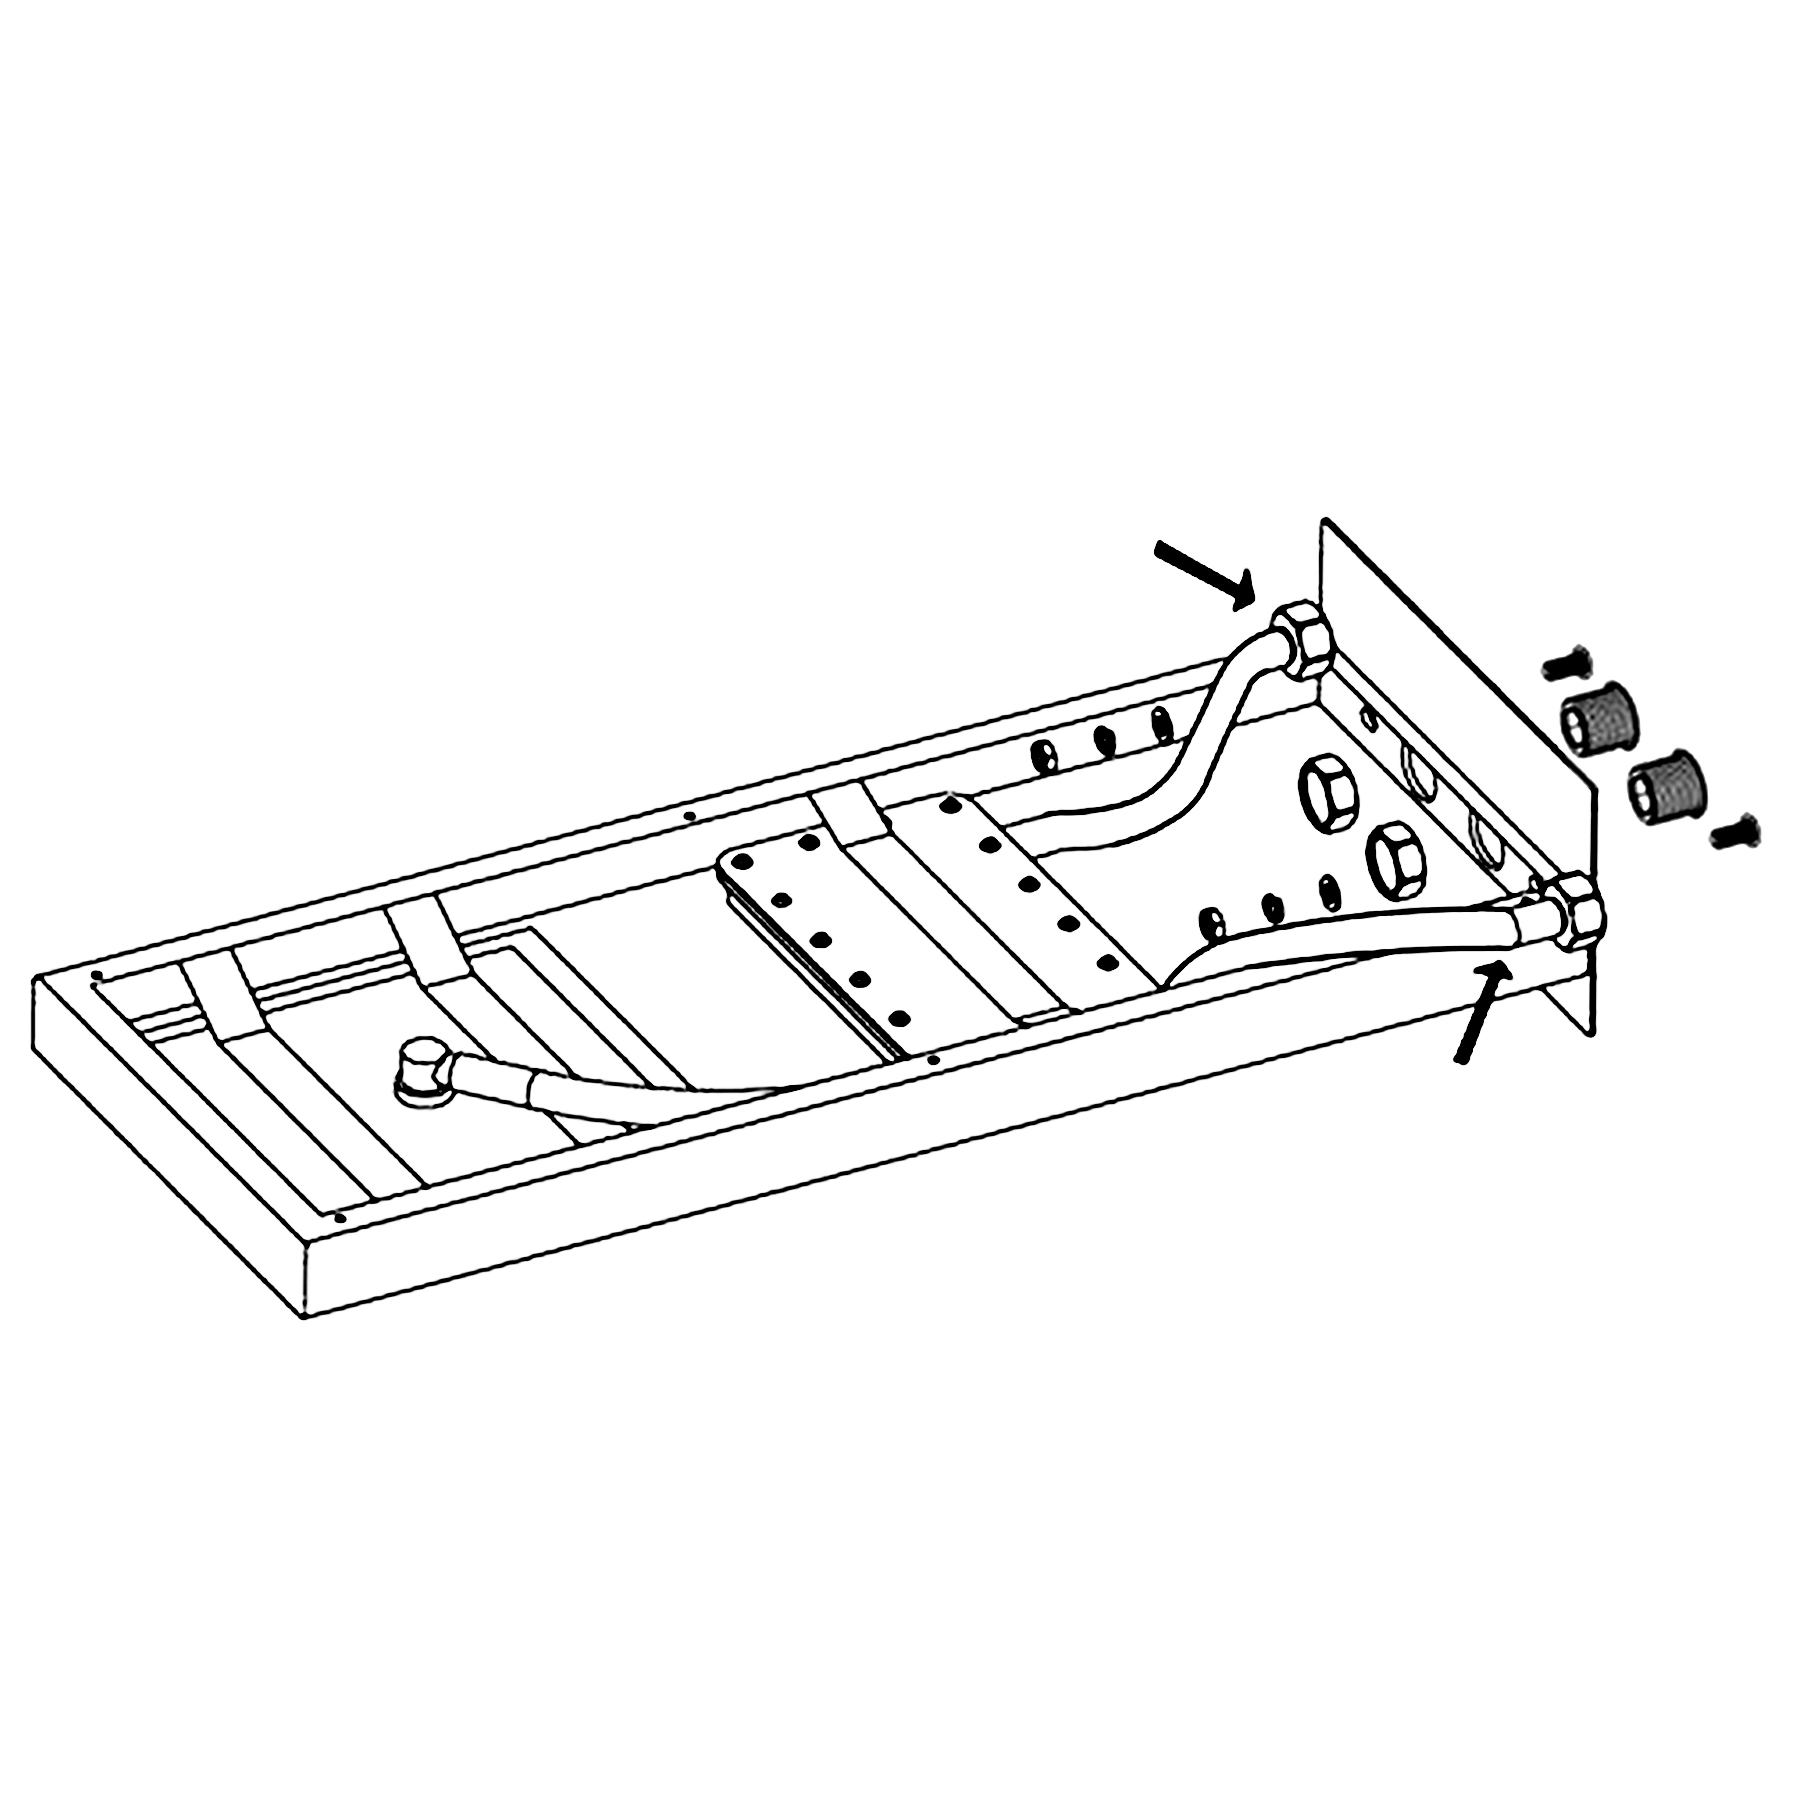
Two inlet fittings are connected to the pipe joint of the wall; then the nut, expansion screw, and inlet pipe are connected.
|
|
|
Shower Head Installation Instructions
|
|
|
|
|
|
Step 5:
|
|
|
Step 6:
|
|
|
|
|

|
|
Reinstall the top cover.
|
|
|
Fix the escutcheon (D) to the showerhead (E) with screws (C).
|
|
|
Shower Head Installation Instructions
|
|
|
|
|
|
|
|
|
|
|
Step 7:
|
|
|
|
|

|
|
|
|
|
|
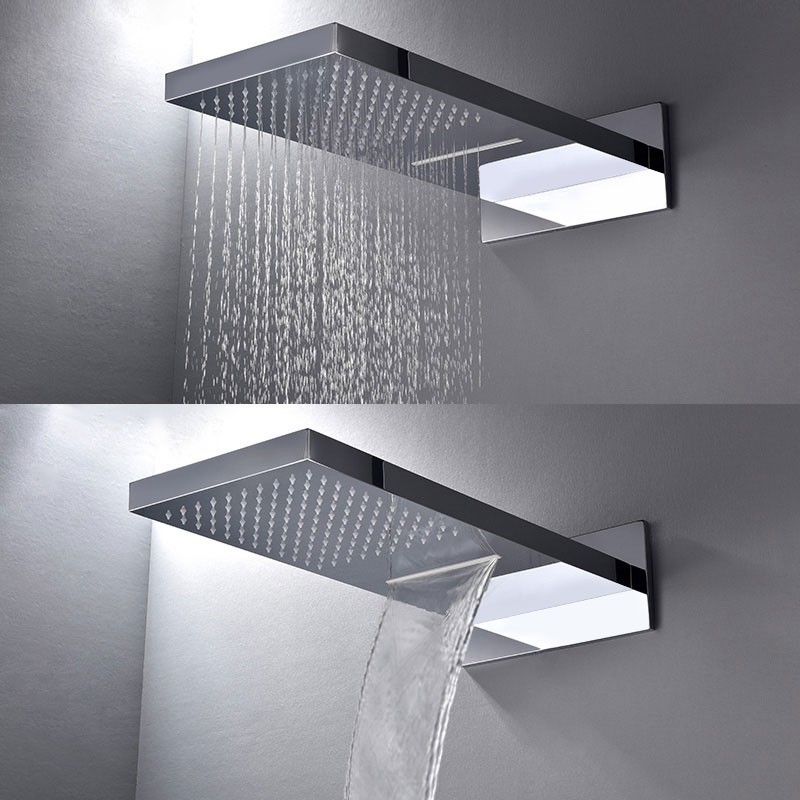
Remove the protective cover when the finished wall is completed. Then, install the showerhead (E) and press it against the finished wall.
|
|
|
|
|
|
Shower Head Installation Instructions
|
|
|
|
|
|
Shower Head Installation Instructions
|
|
|
|
|
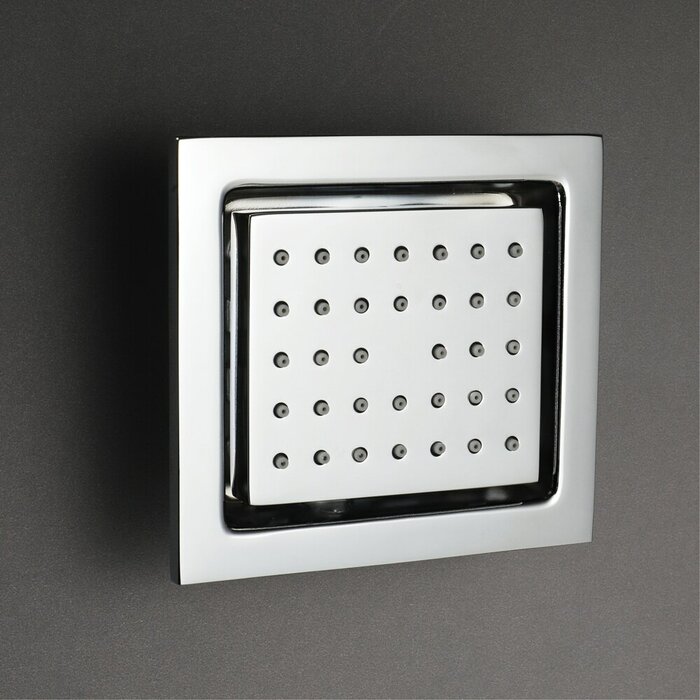
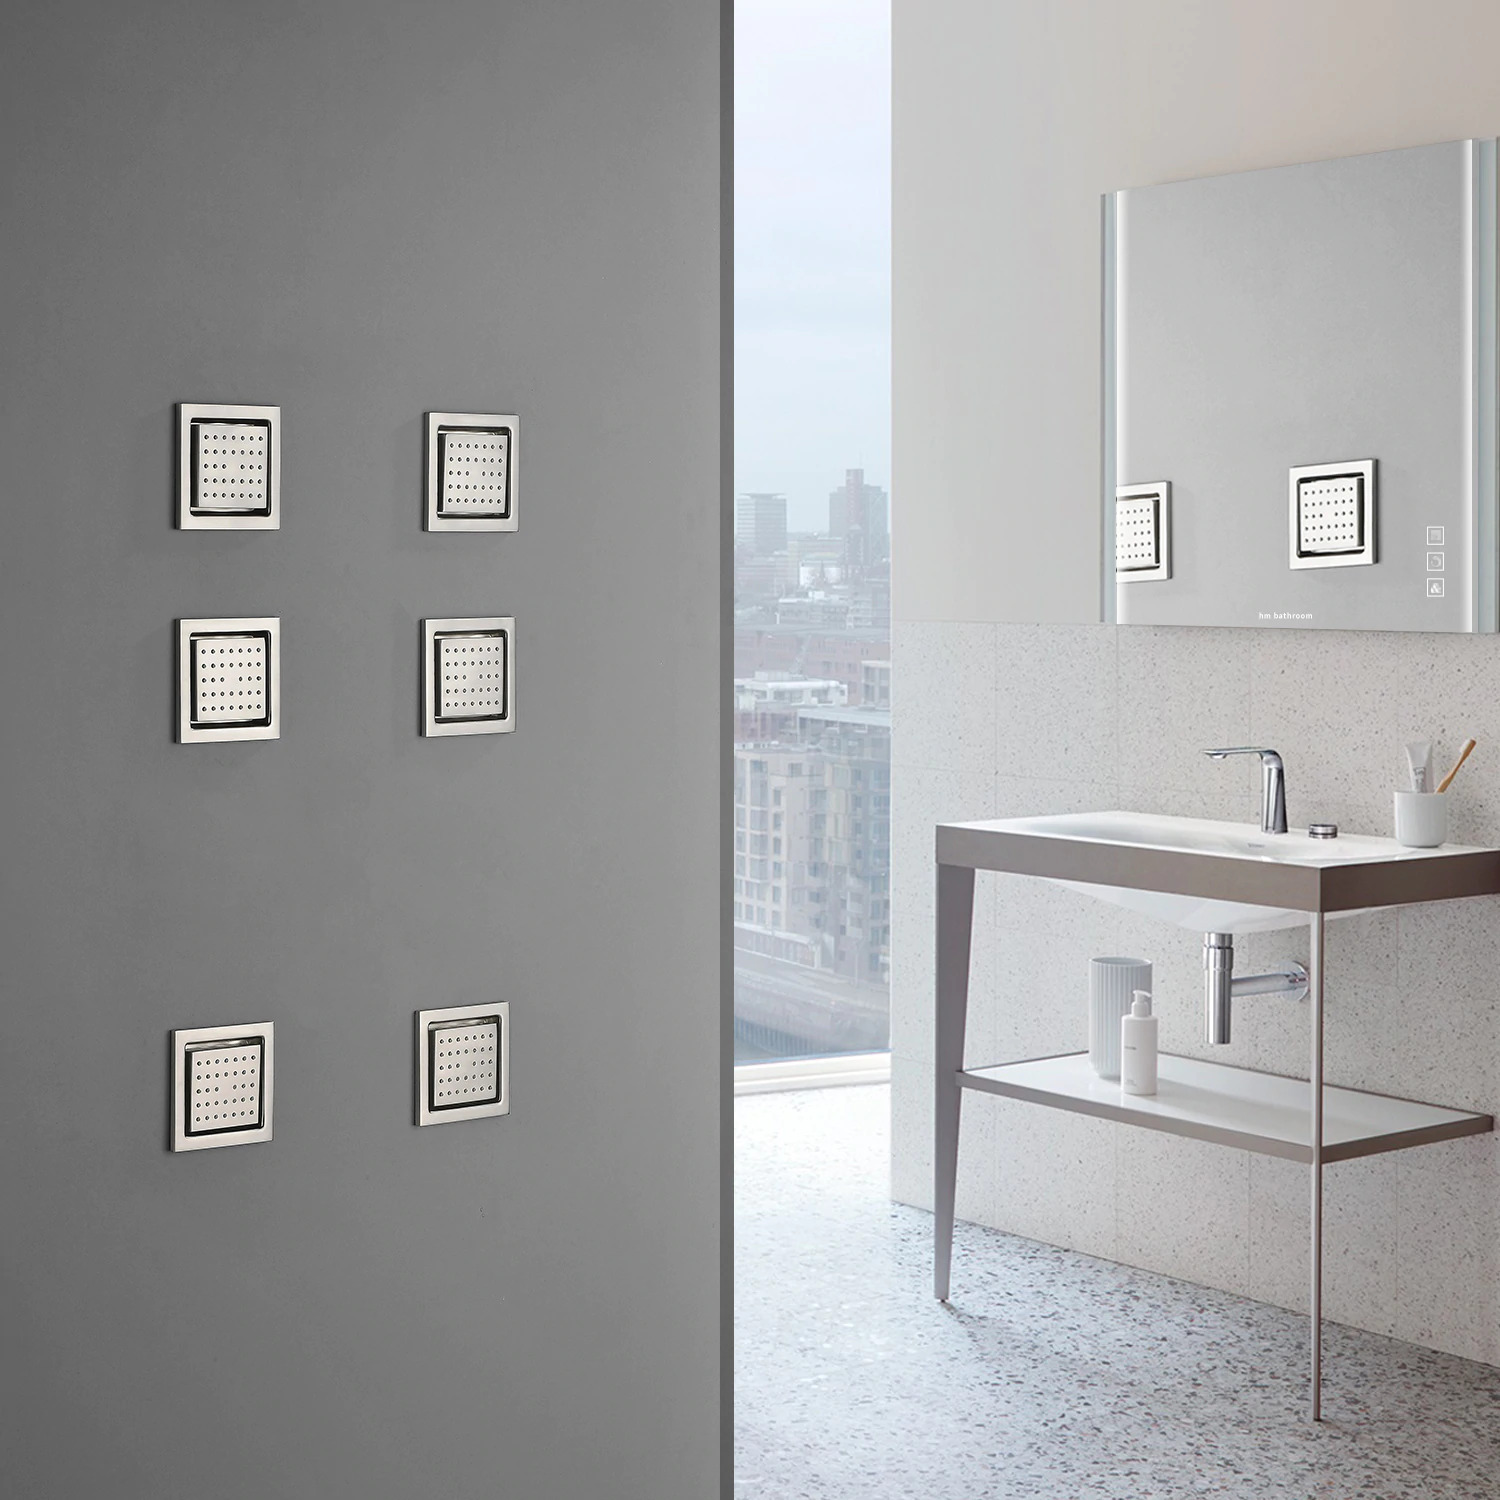
Body Jets Installation Instructions
|
Step 1:
|
|
|
Step 2:
|
|
|
Body sprays
|
|
|
|
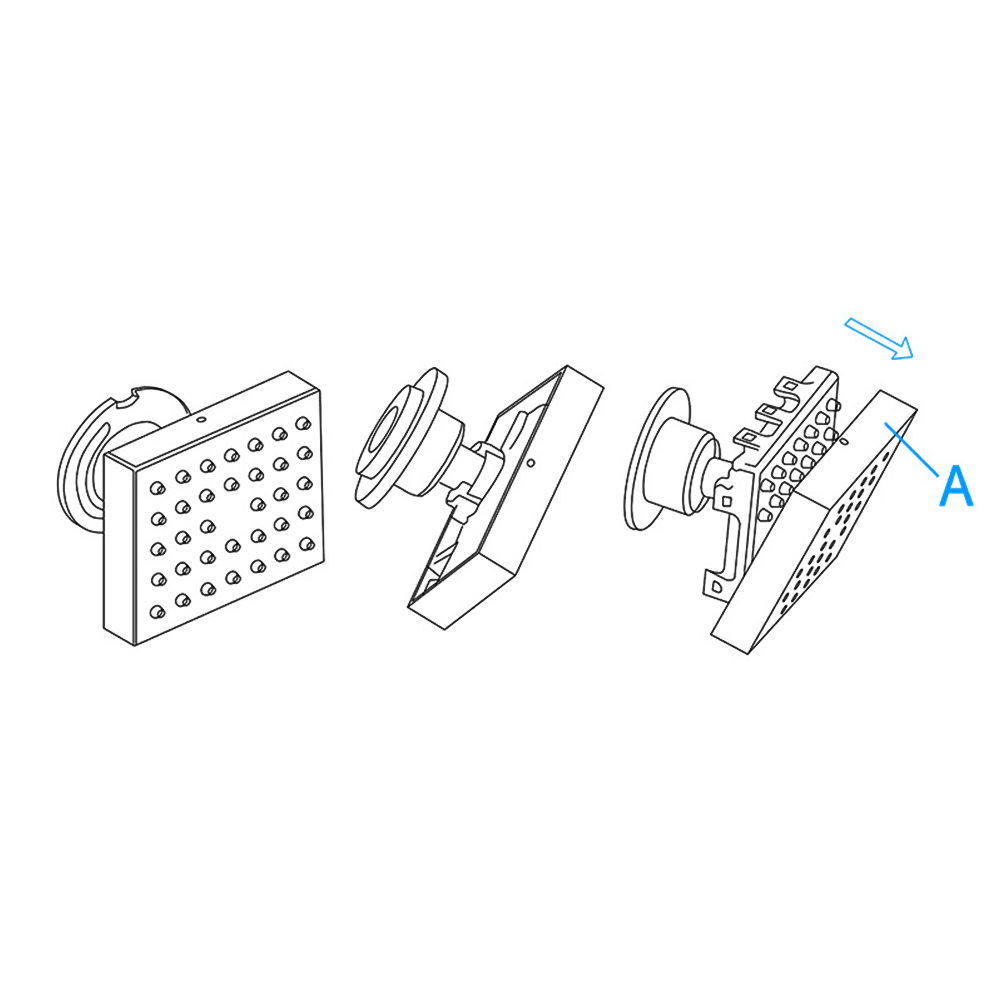
Remove the decorative plate (A) out of the body.
|
|
|
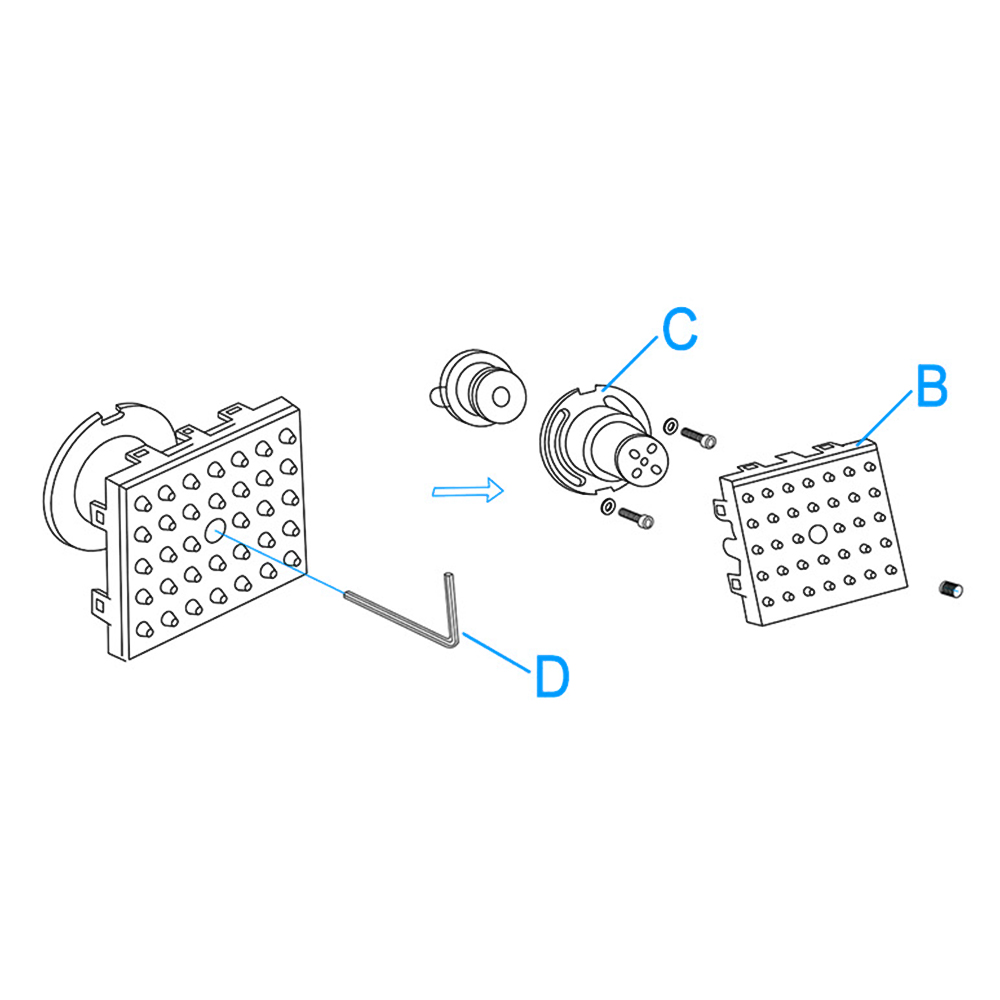
Remove the screws from the outlet face (B) and connector body (C) with the Allen key (D).
|
|
Body Spray Installation Instructions
|
|
|
|
|
|
Step 3:
|
|
|
Step 4:
|
|
|
|
|
|
|
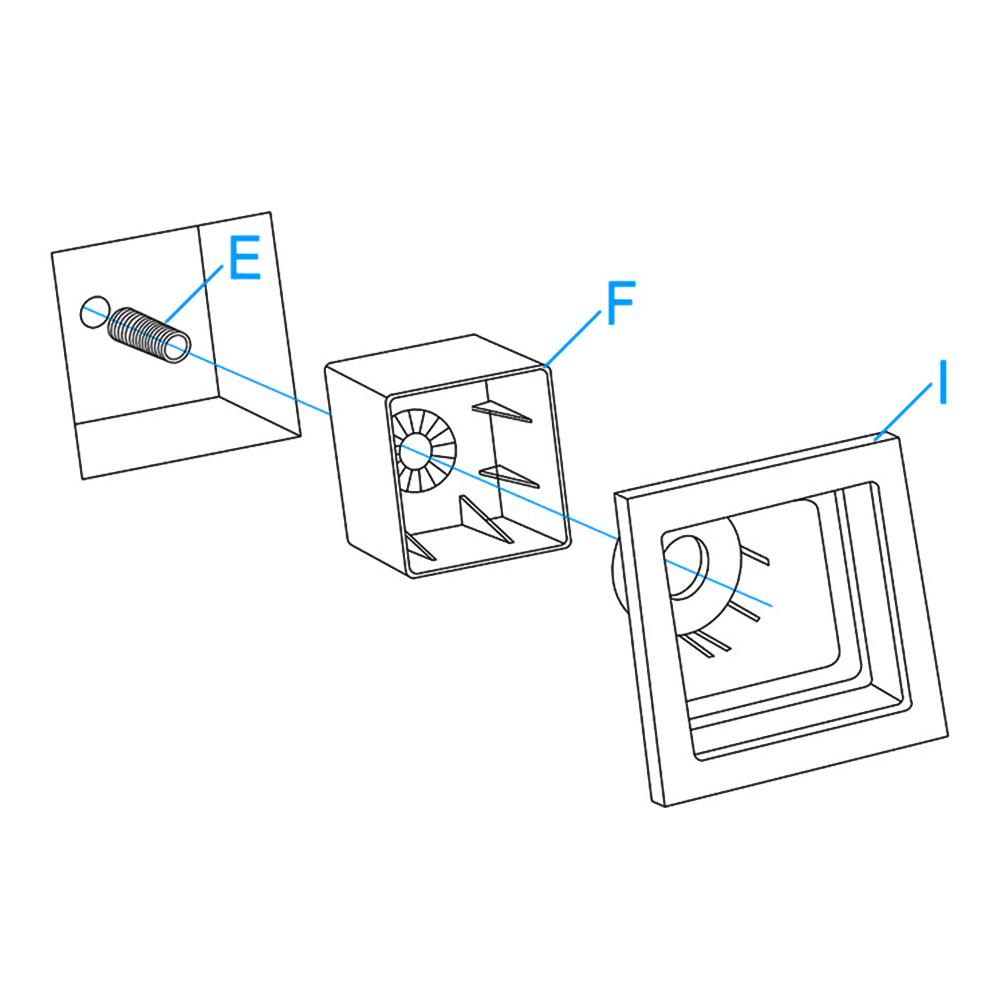
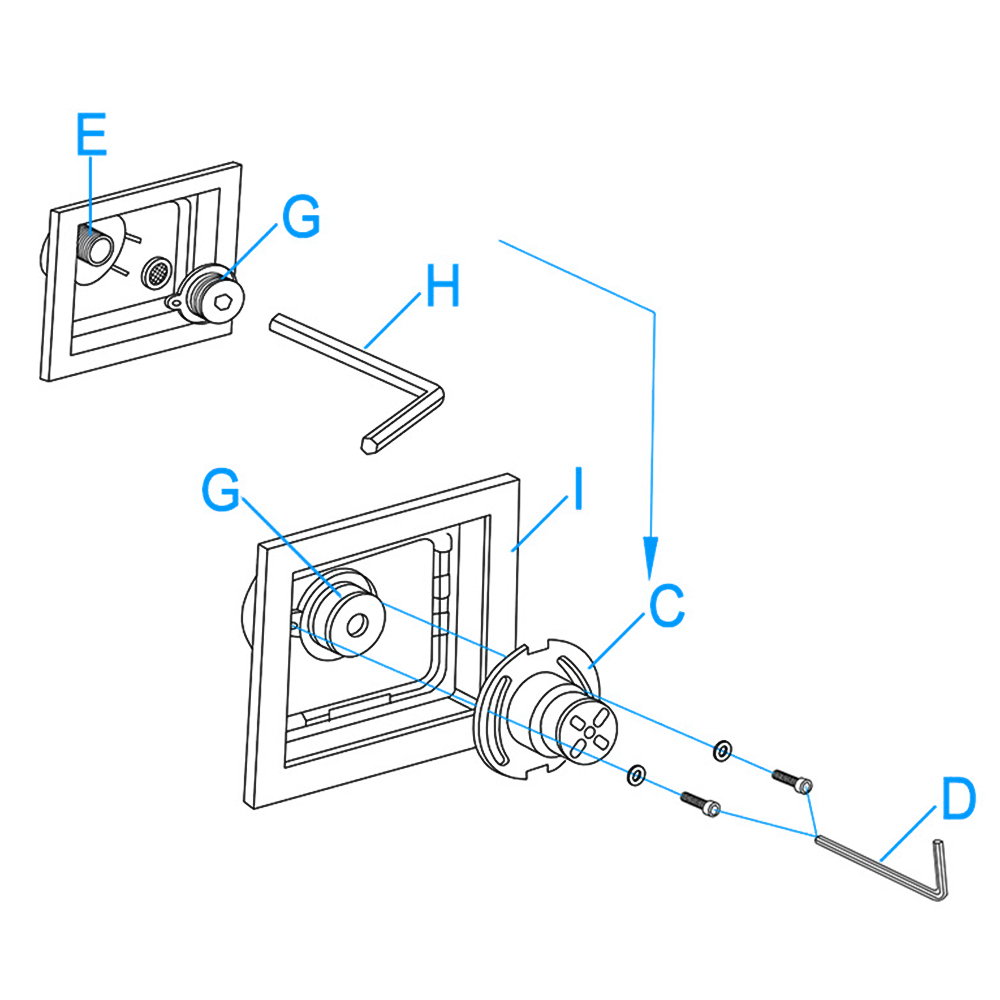
Screw the threaded pipe (E) to the water supply fittings. Push the plastic box (F) into the wall through the threaded pipe (E). Then, install the decorative plate (I) into the plastic box (F). Make sure the position is correct according to the diagram.
|
|
|
Screw the connector (G) into the threaded pipe (E) with the Allen key (H). Install the connector body (C) to the connector (G). When finish installation, please check to make sure the connection is completed. Then, fix the screws into the body (C) with Allen key (D) and make sure the body (C), connector (G) and decorative plate (I) are tightened. Make sure the one side with the bulge is in the top position.
|
|
|
Body Spray Installation Instructions
|
|
|
|
|
|
Step 5:
|
|
|
Step 6:
|
|
|
|
|

|
|
|
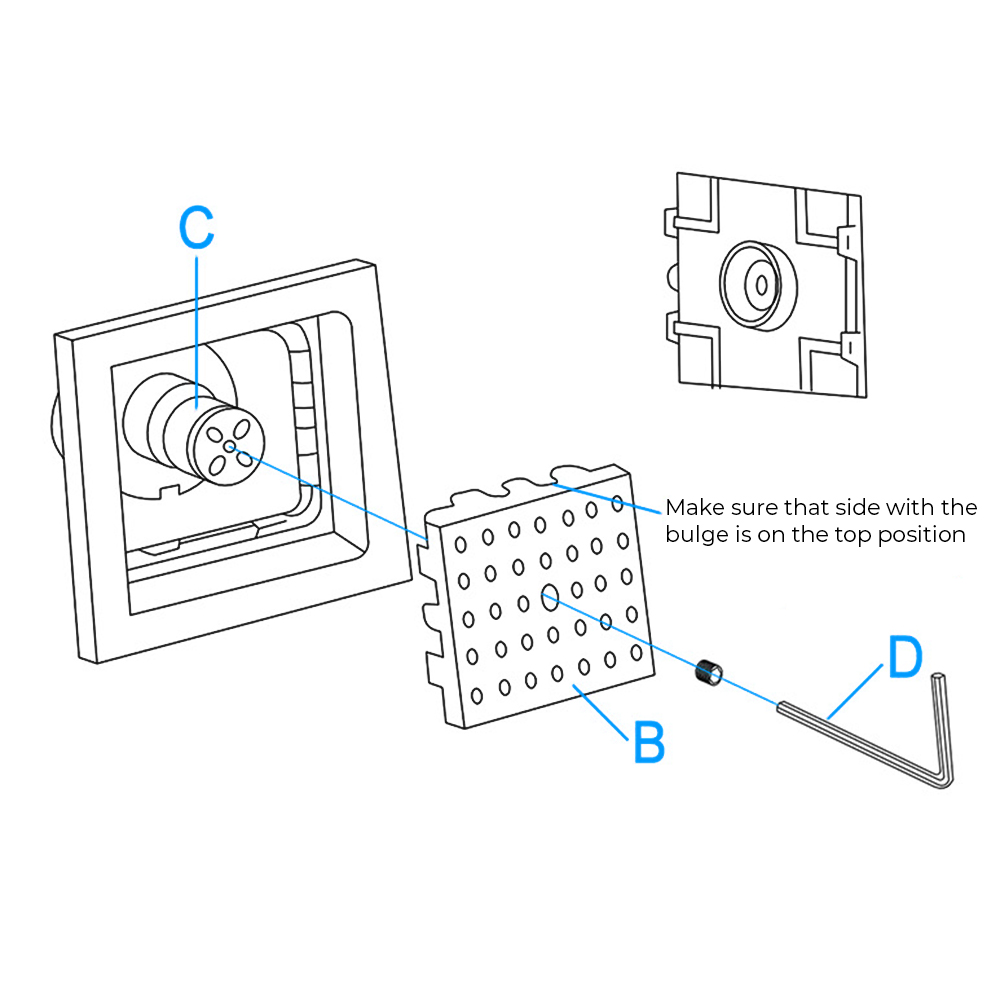
Install the outlet face (B) to the body (C). Make sure the connection of body (C) and outlet face (B) are completed. Tighten the screw through the outlet face (B) into the body (C) with the Allen key (D).
|
|
|
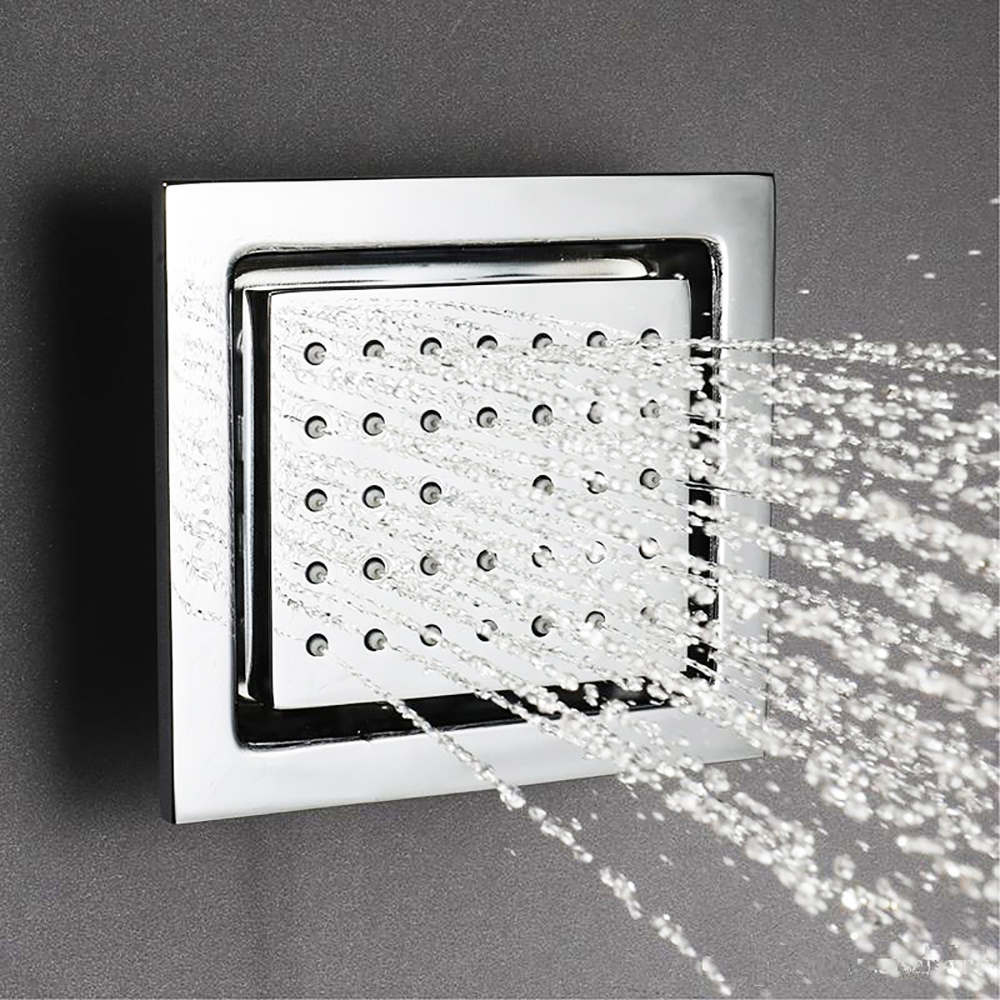
Install the decorative plate (A) into the outlet face (B) tightly. Make sure the hole and the raised dot are in the correct position when you push the decorative plate (A) into the outlet face (B).
|
|
|
Body Spray Installation Instructions
|
|
|
|
|
|
|
|
|
|
|
Body Spray Installation Instructions
|
|
|
|
|
|
|
|
|
|
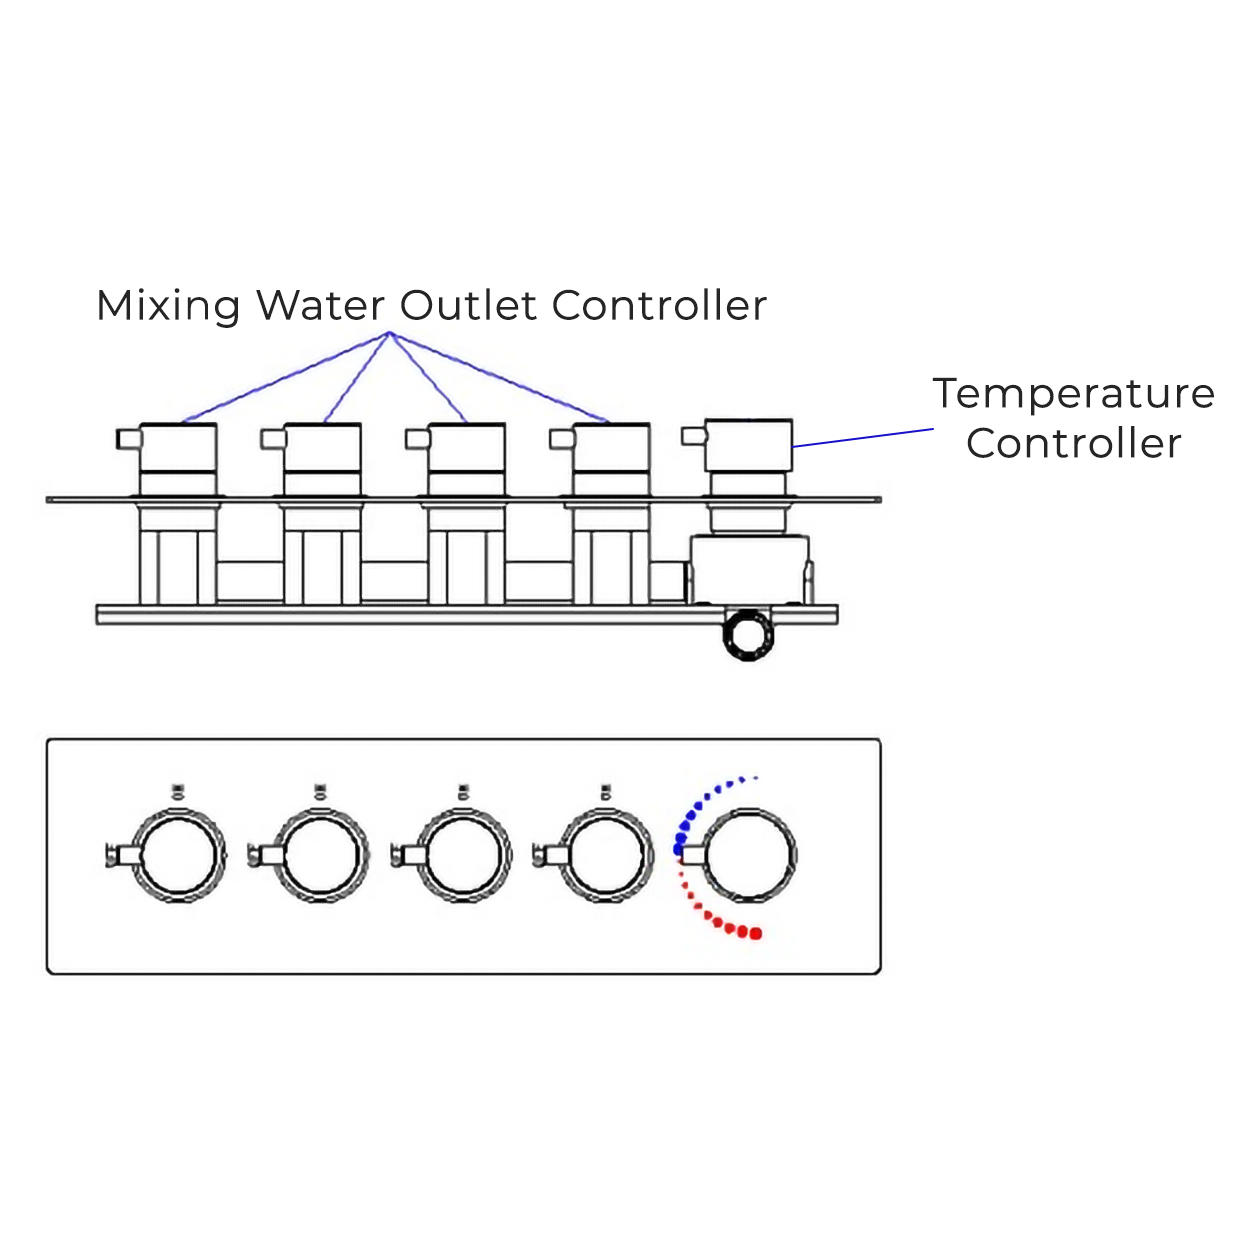
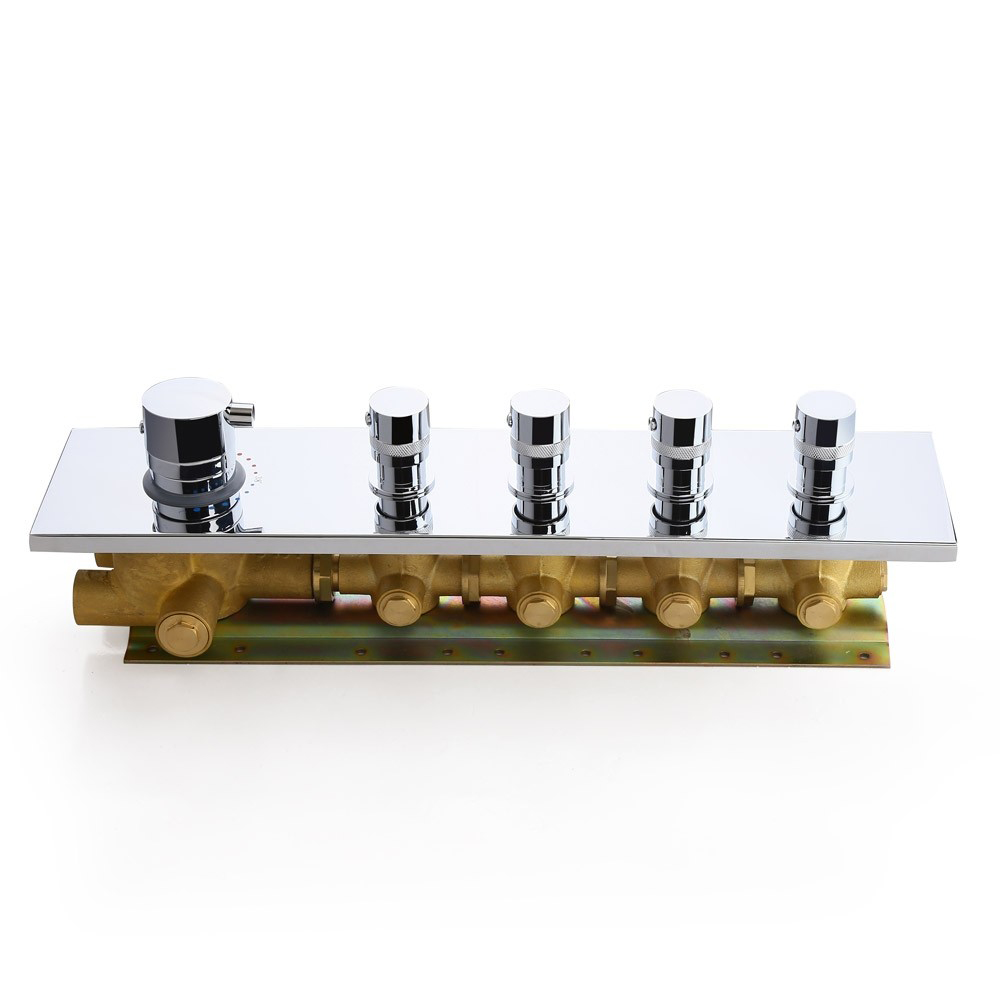
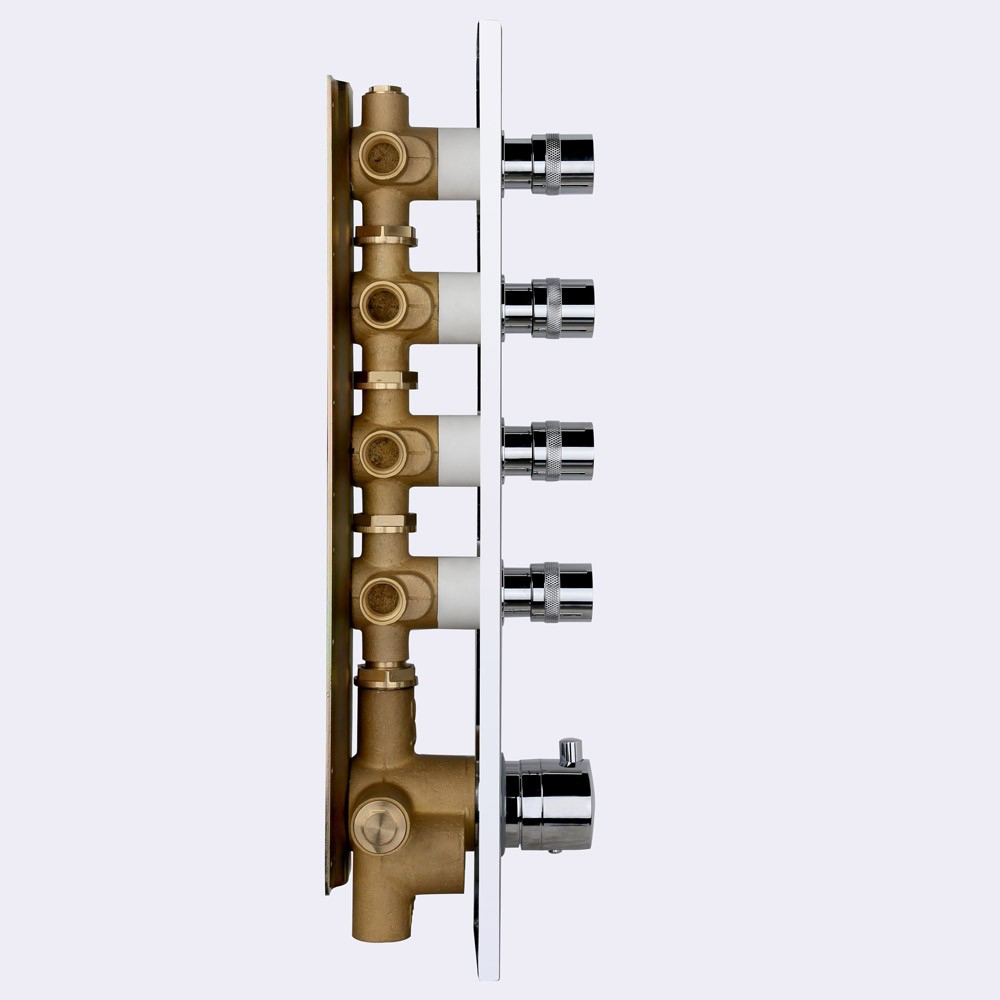
Thermostatic Mixer Installation Instructions
|
Step 1:
|
|
|
Step 2:
|
|

|
Mixer
|
Valve
|
|
|
|
|
|
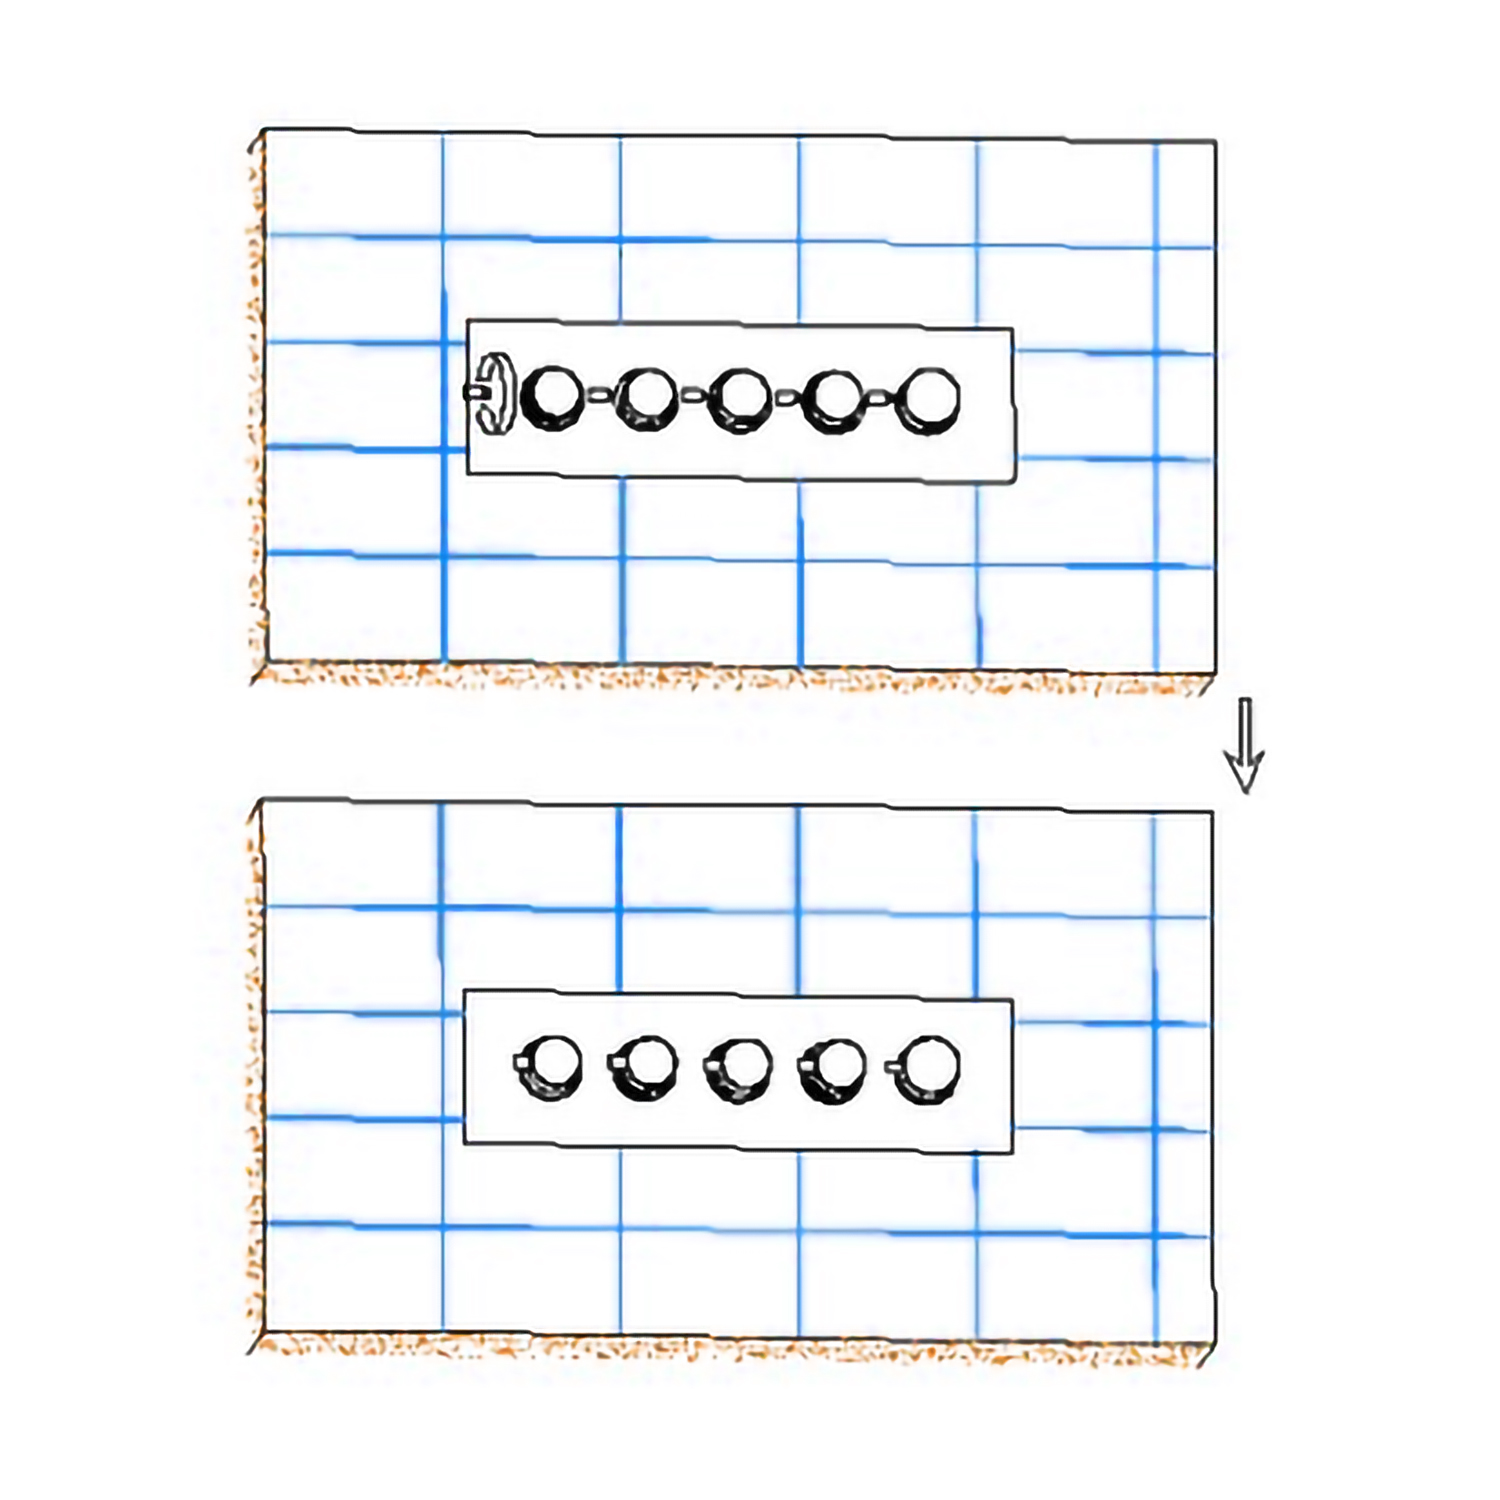
Release 4 handwheel levers according to the above directions.
Take apart the embed valve, panel, and handwheel.
|
|
Mixer Control Valve Installation Instructions
|
|
|
|
|
|
Step 3:
|
|
|
Step 4:
|
|
|
|
|
|
|
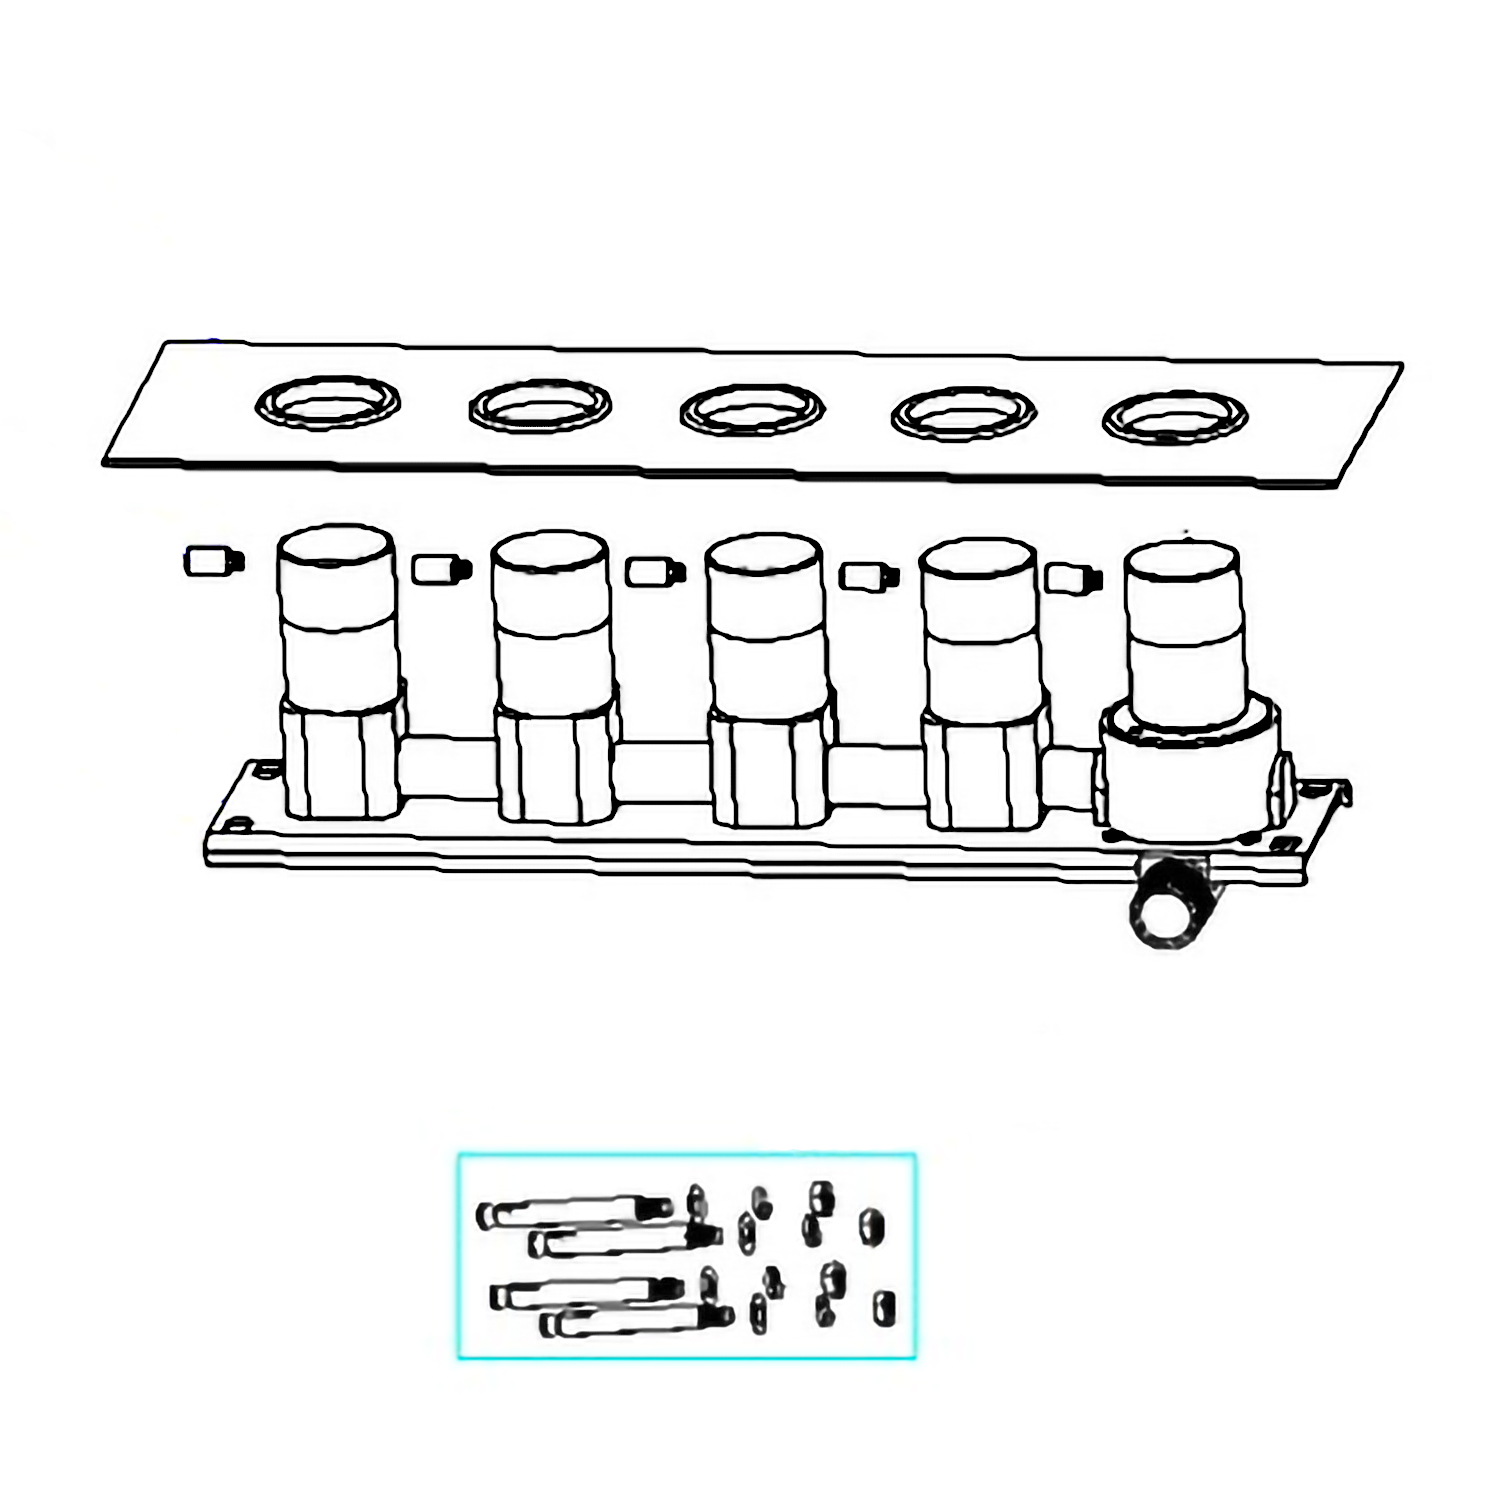
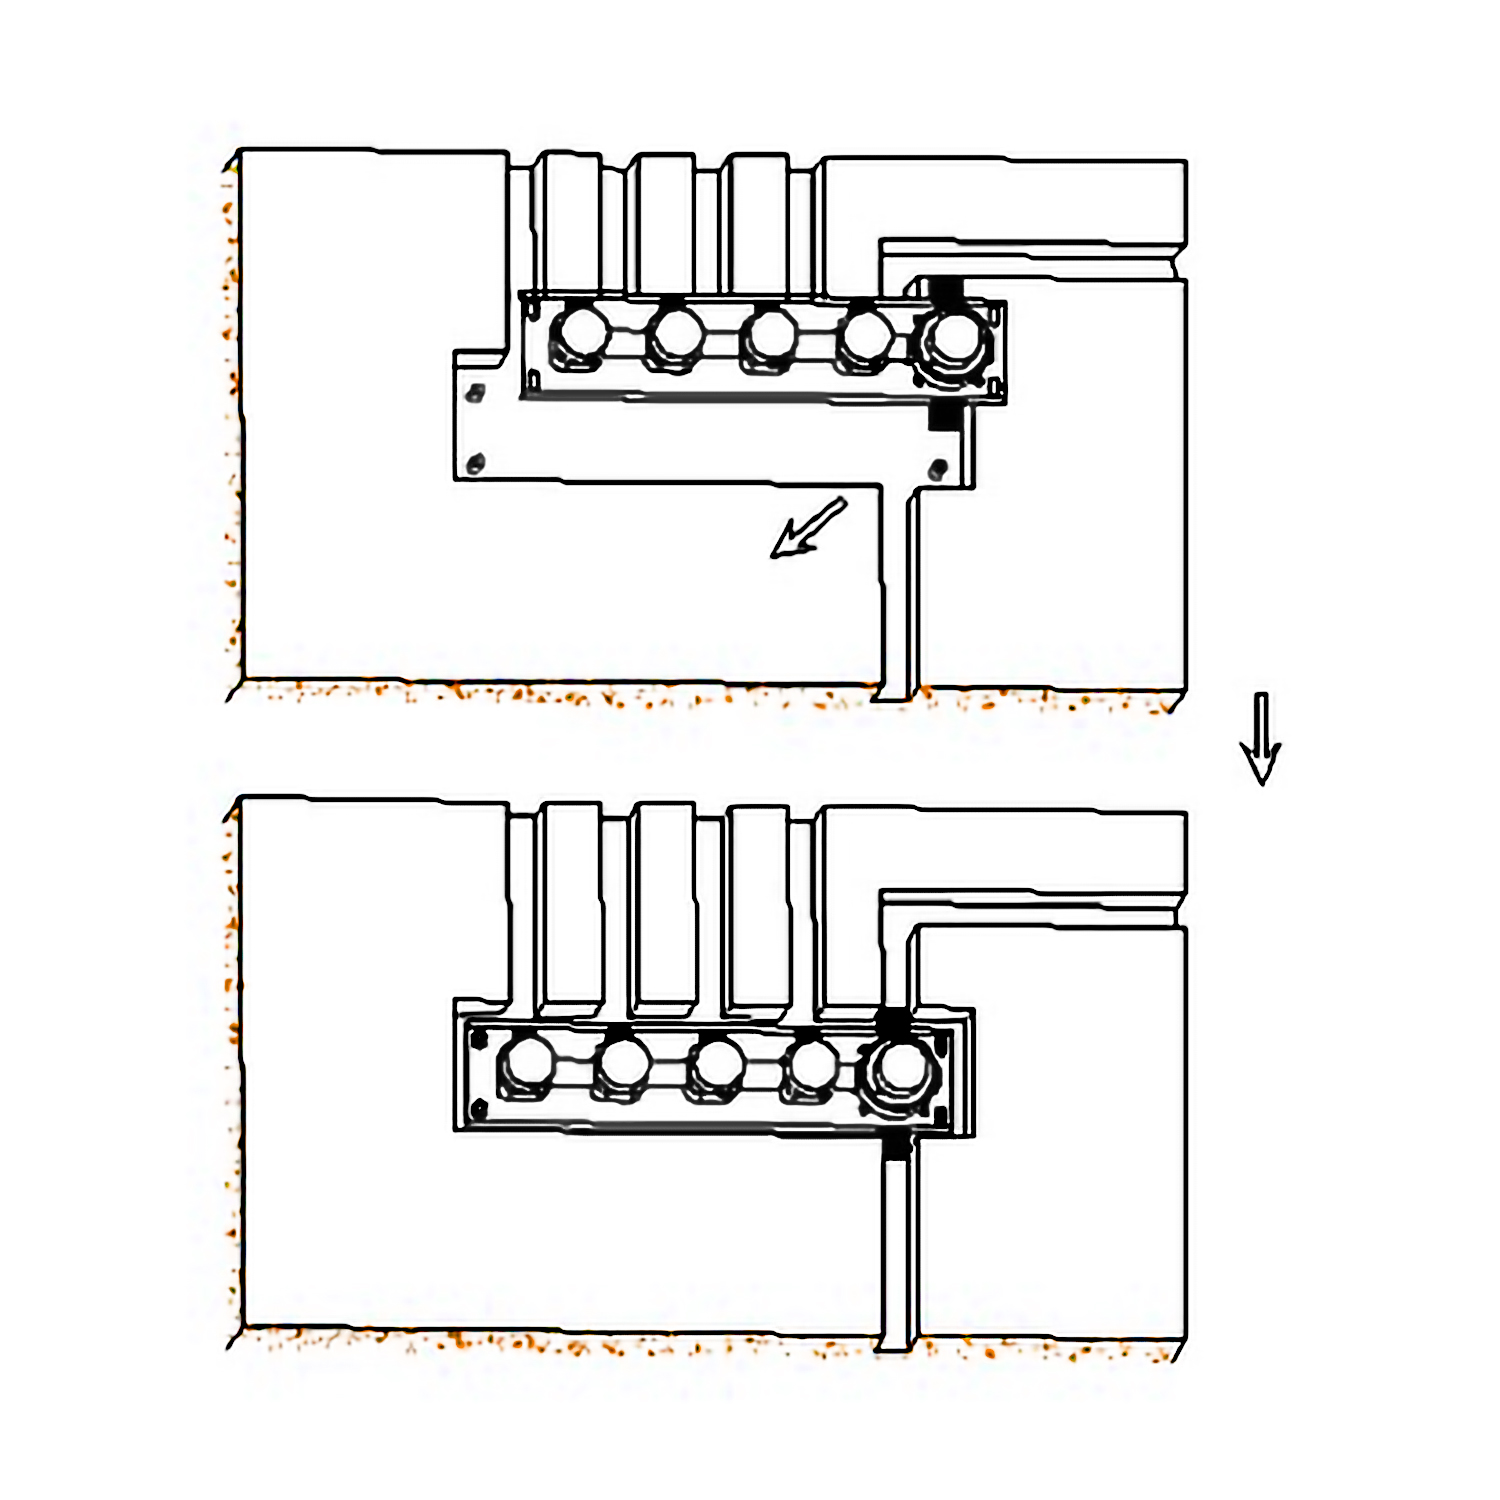
Dig the embed space for the pipe on the wall according to the specification of the valve.
Dig 4 holes according to the position of the screws.
|
|
|
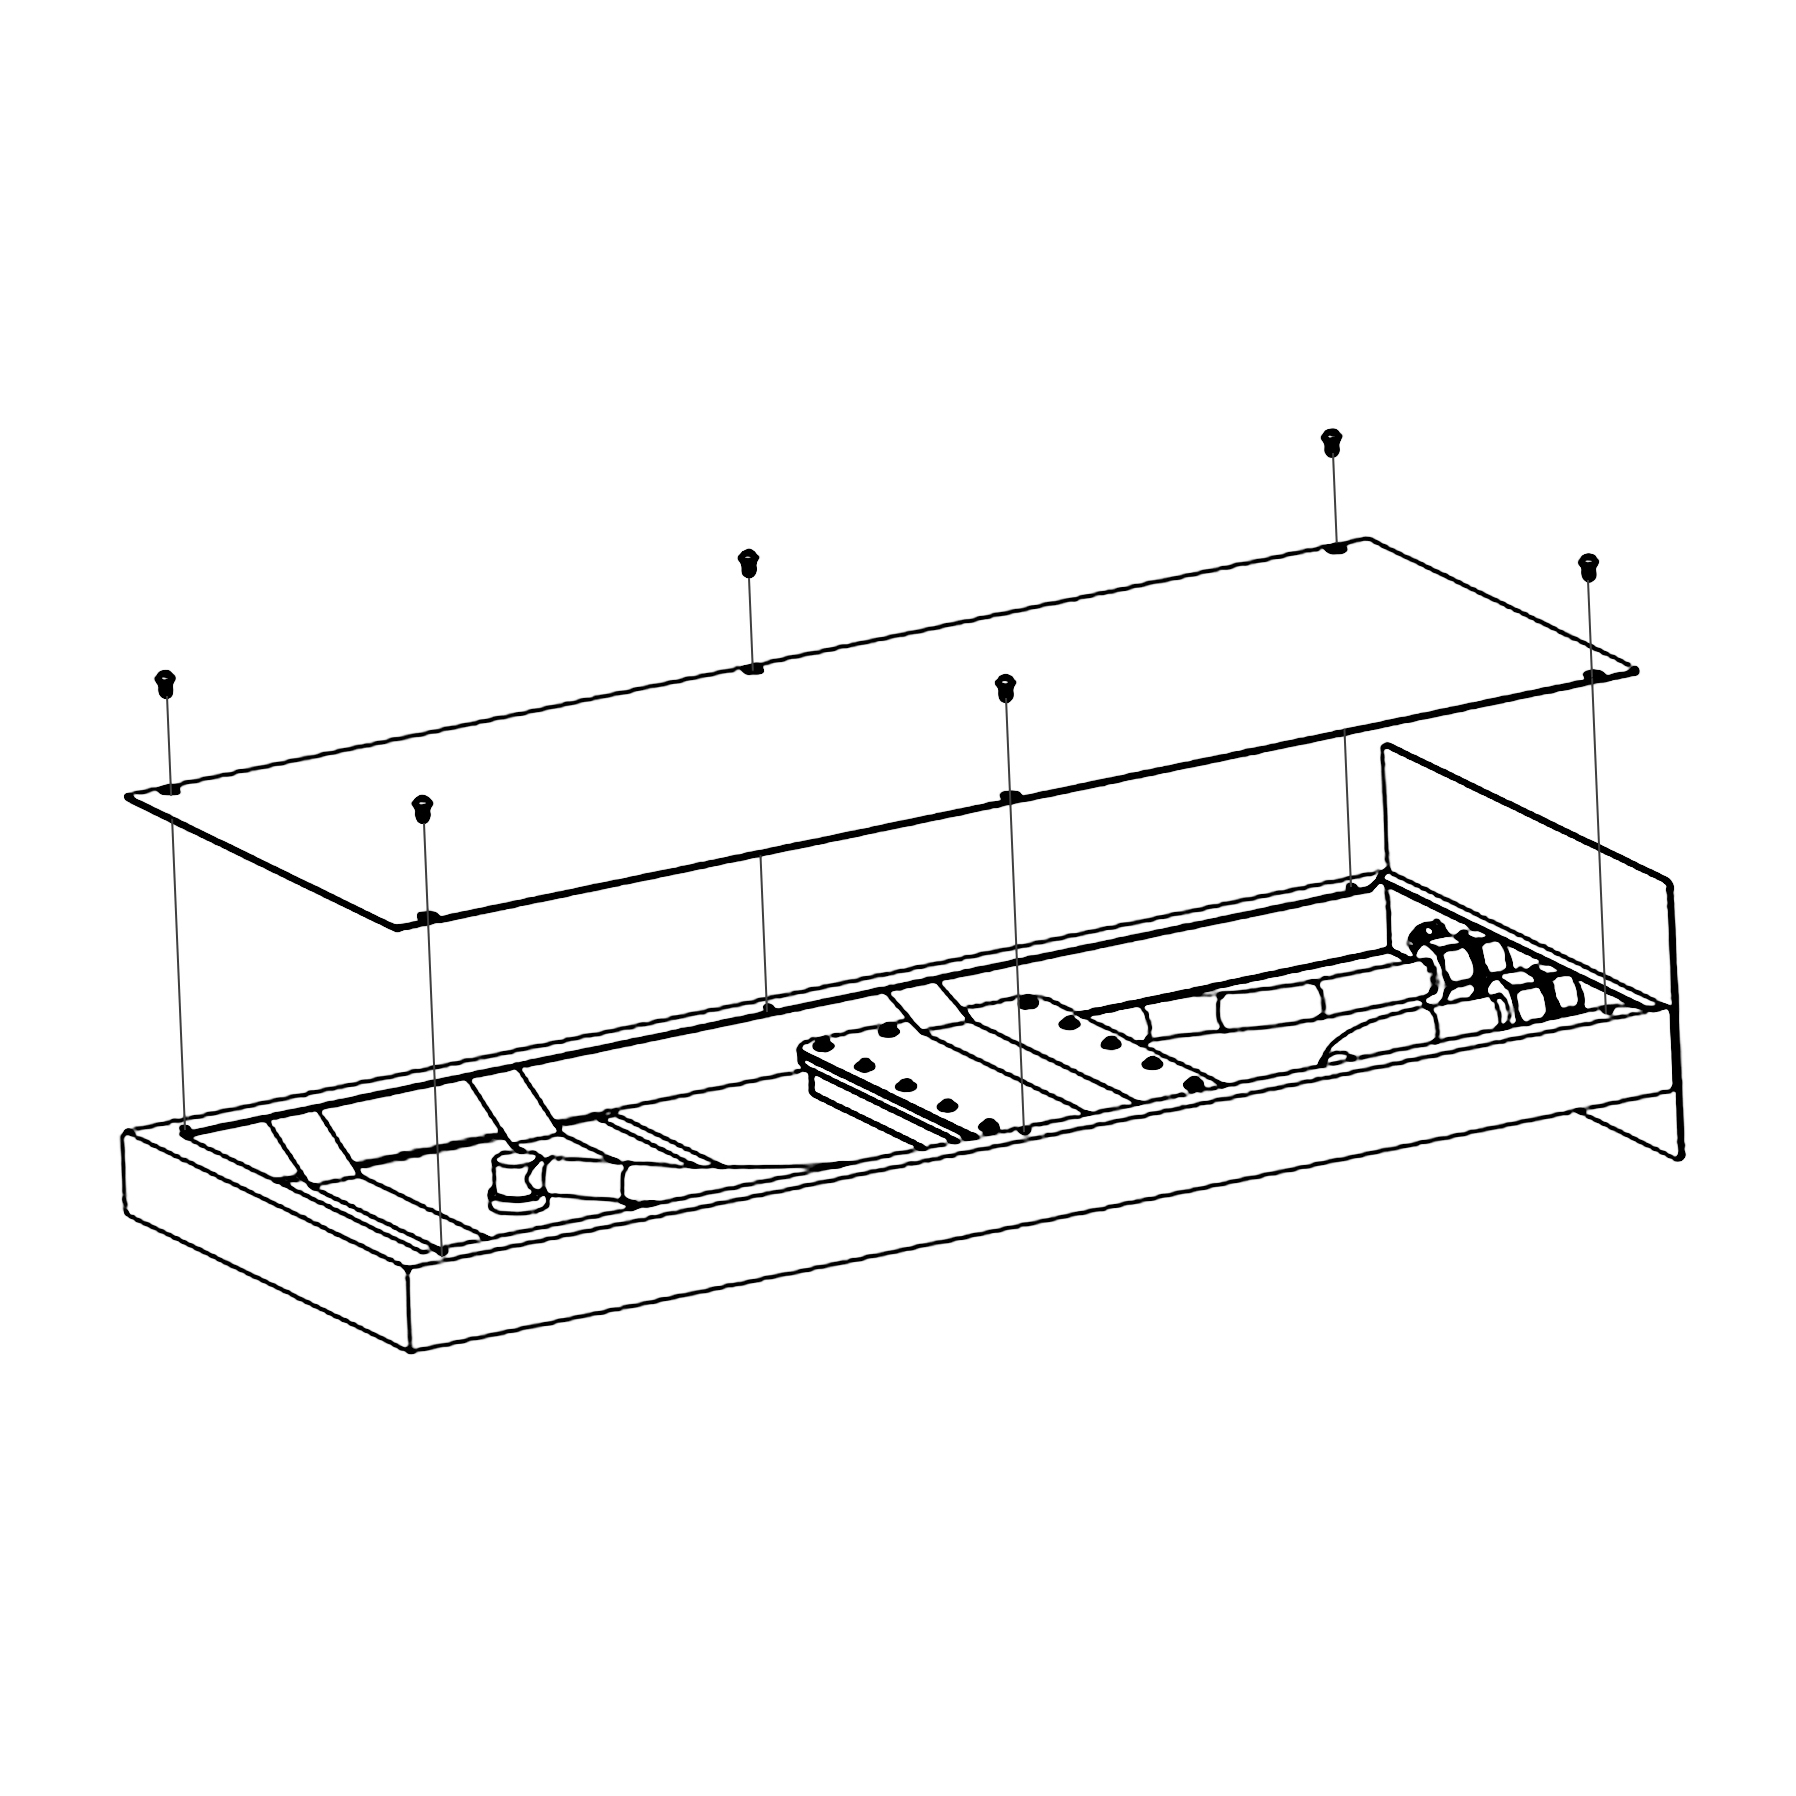
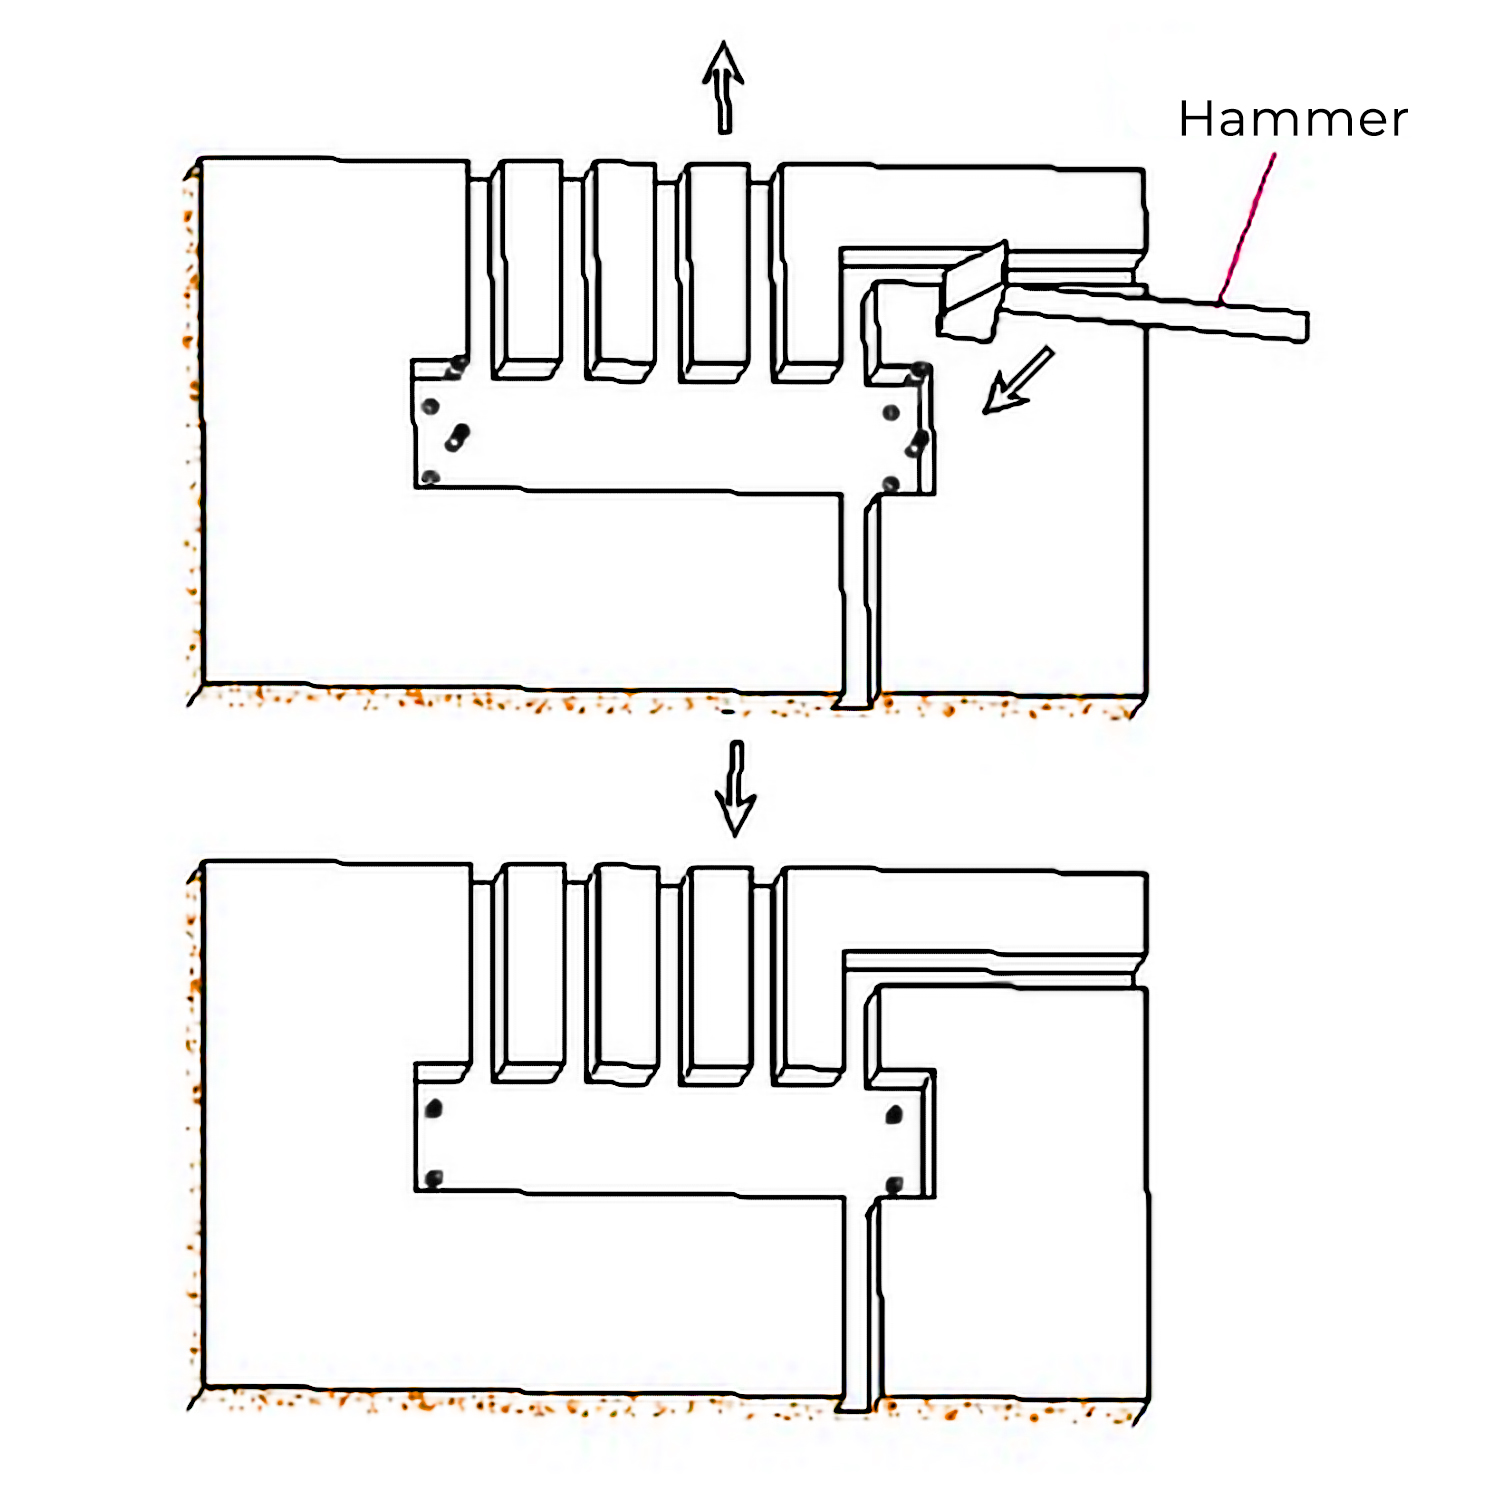
Use a hammer to thwack the screws into 4 holes.
Fix the valve body with 4 screws.
|
|
|
Mixer Control Valve Installation Instruction
|
|
|
|
|
|
Step 5:
|
|
|
Step 6:
|
|
|
|
|
|
|
|
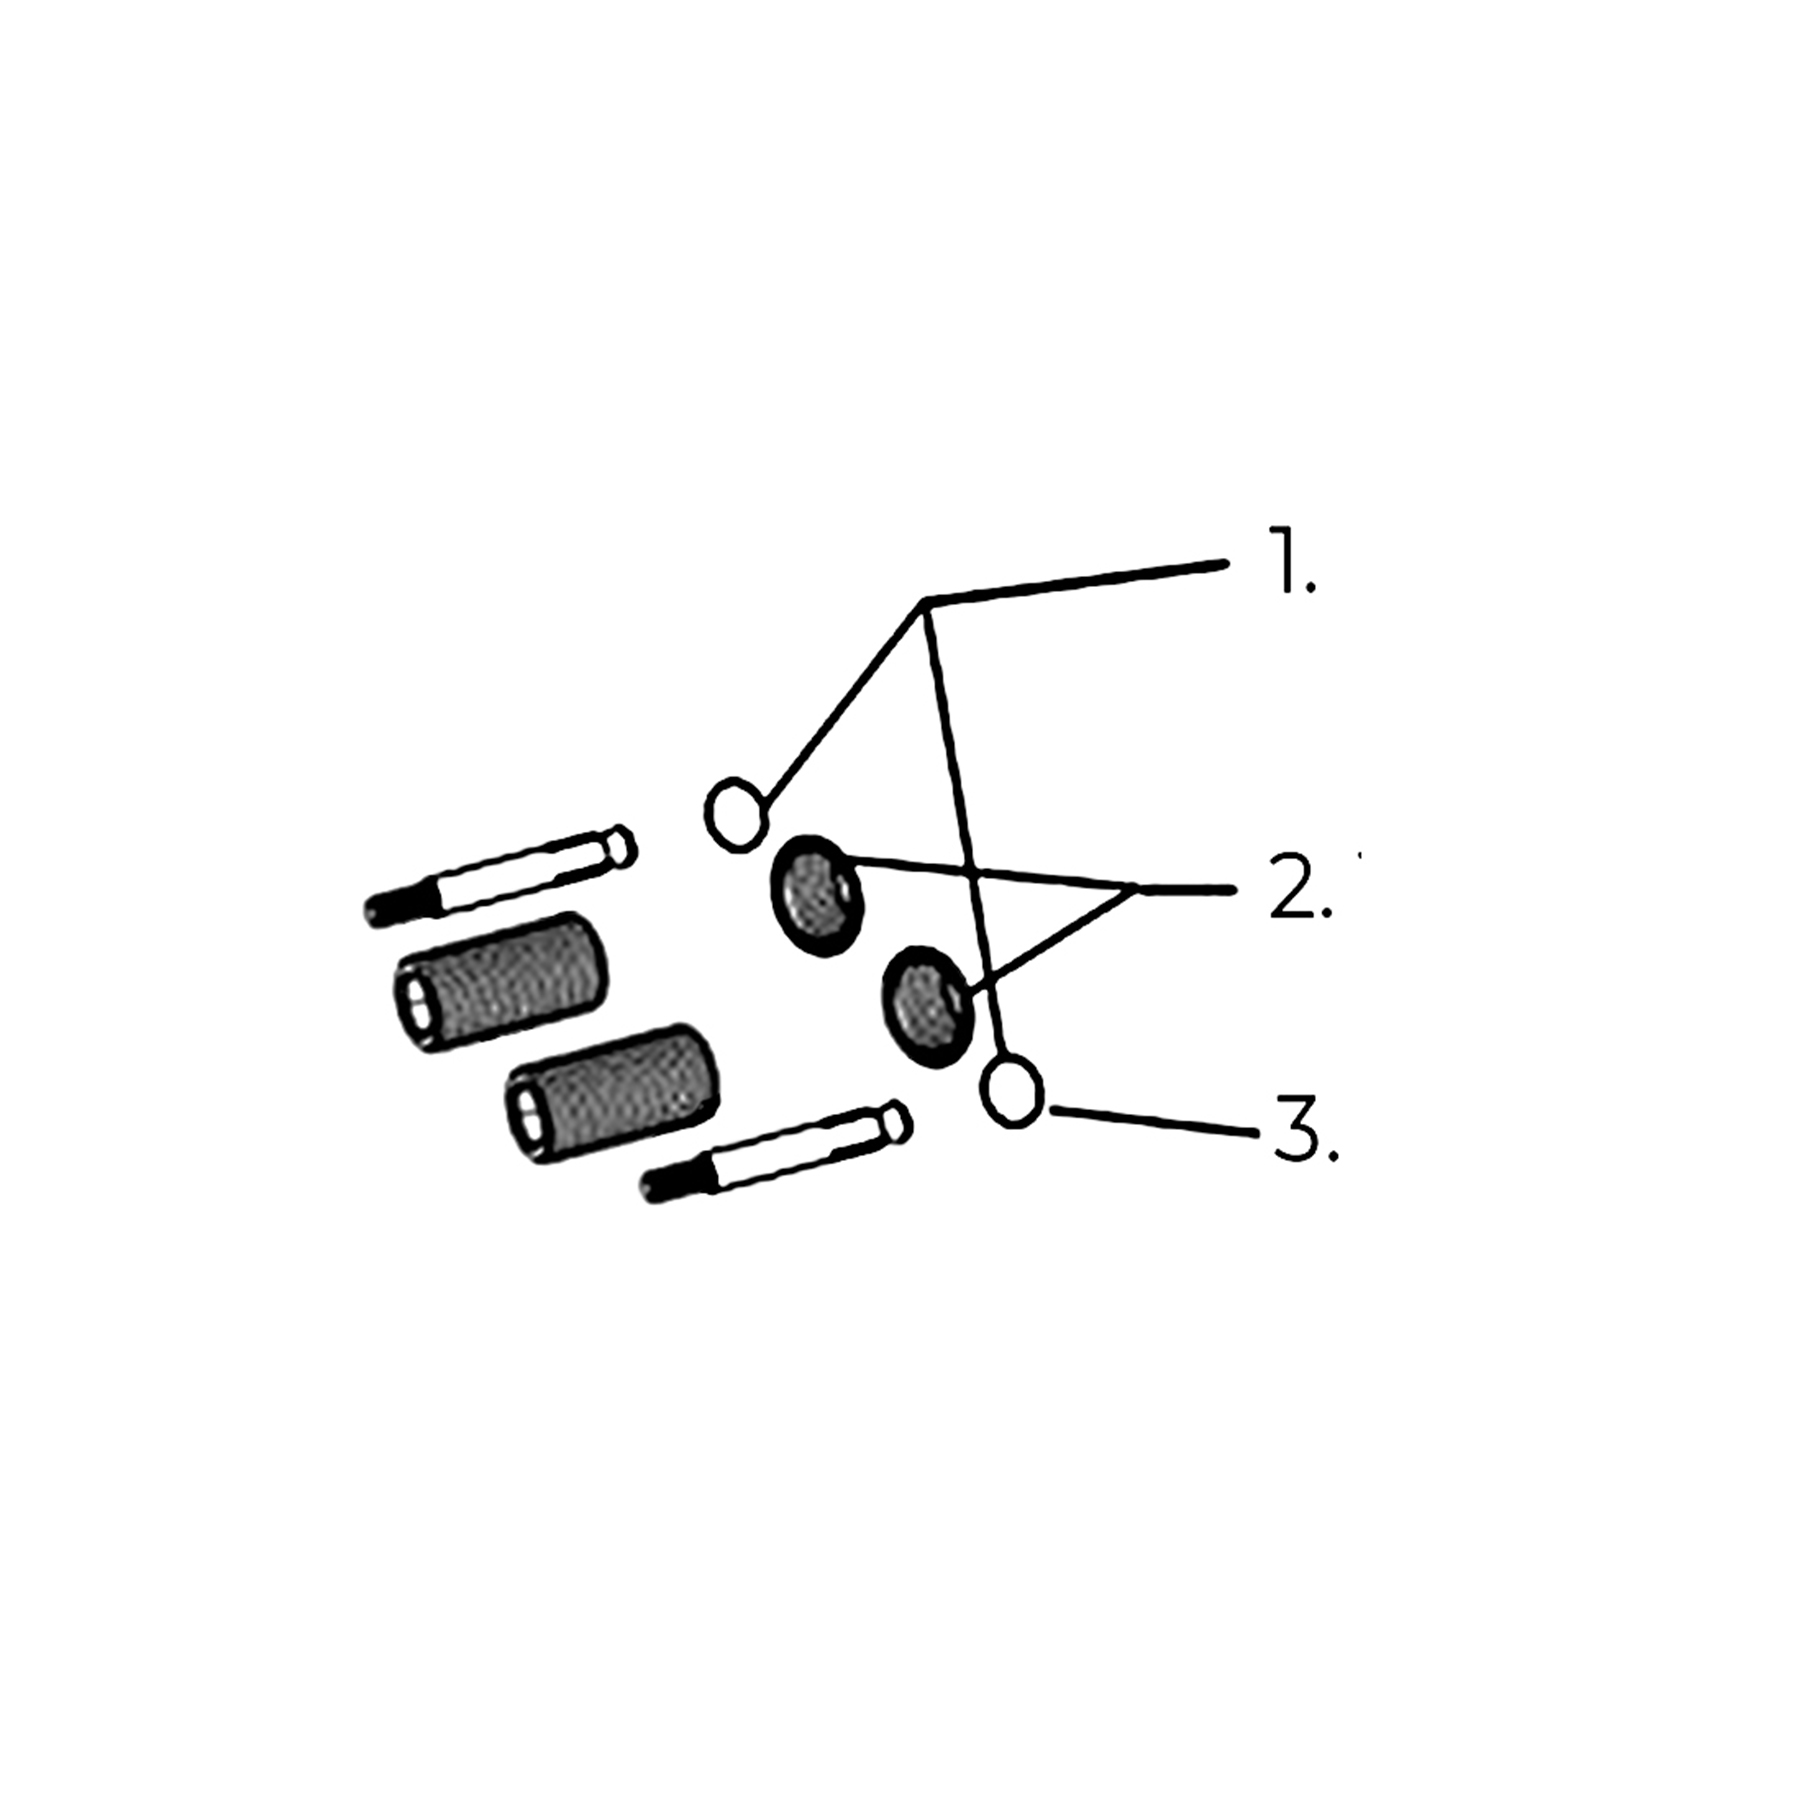
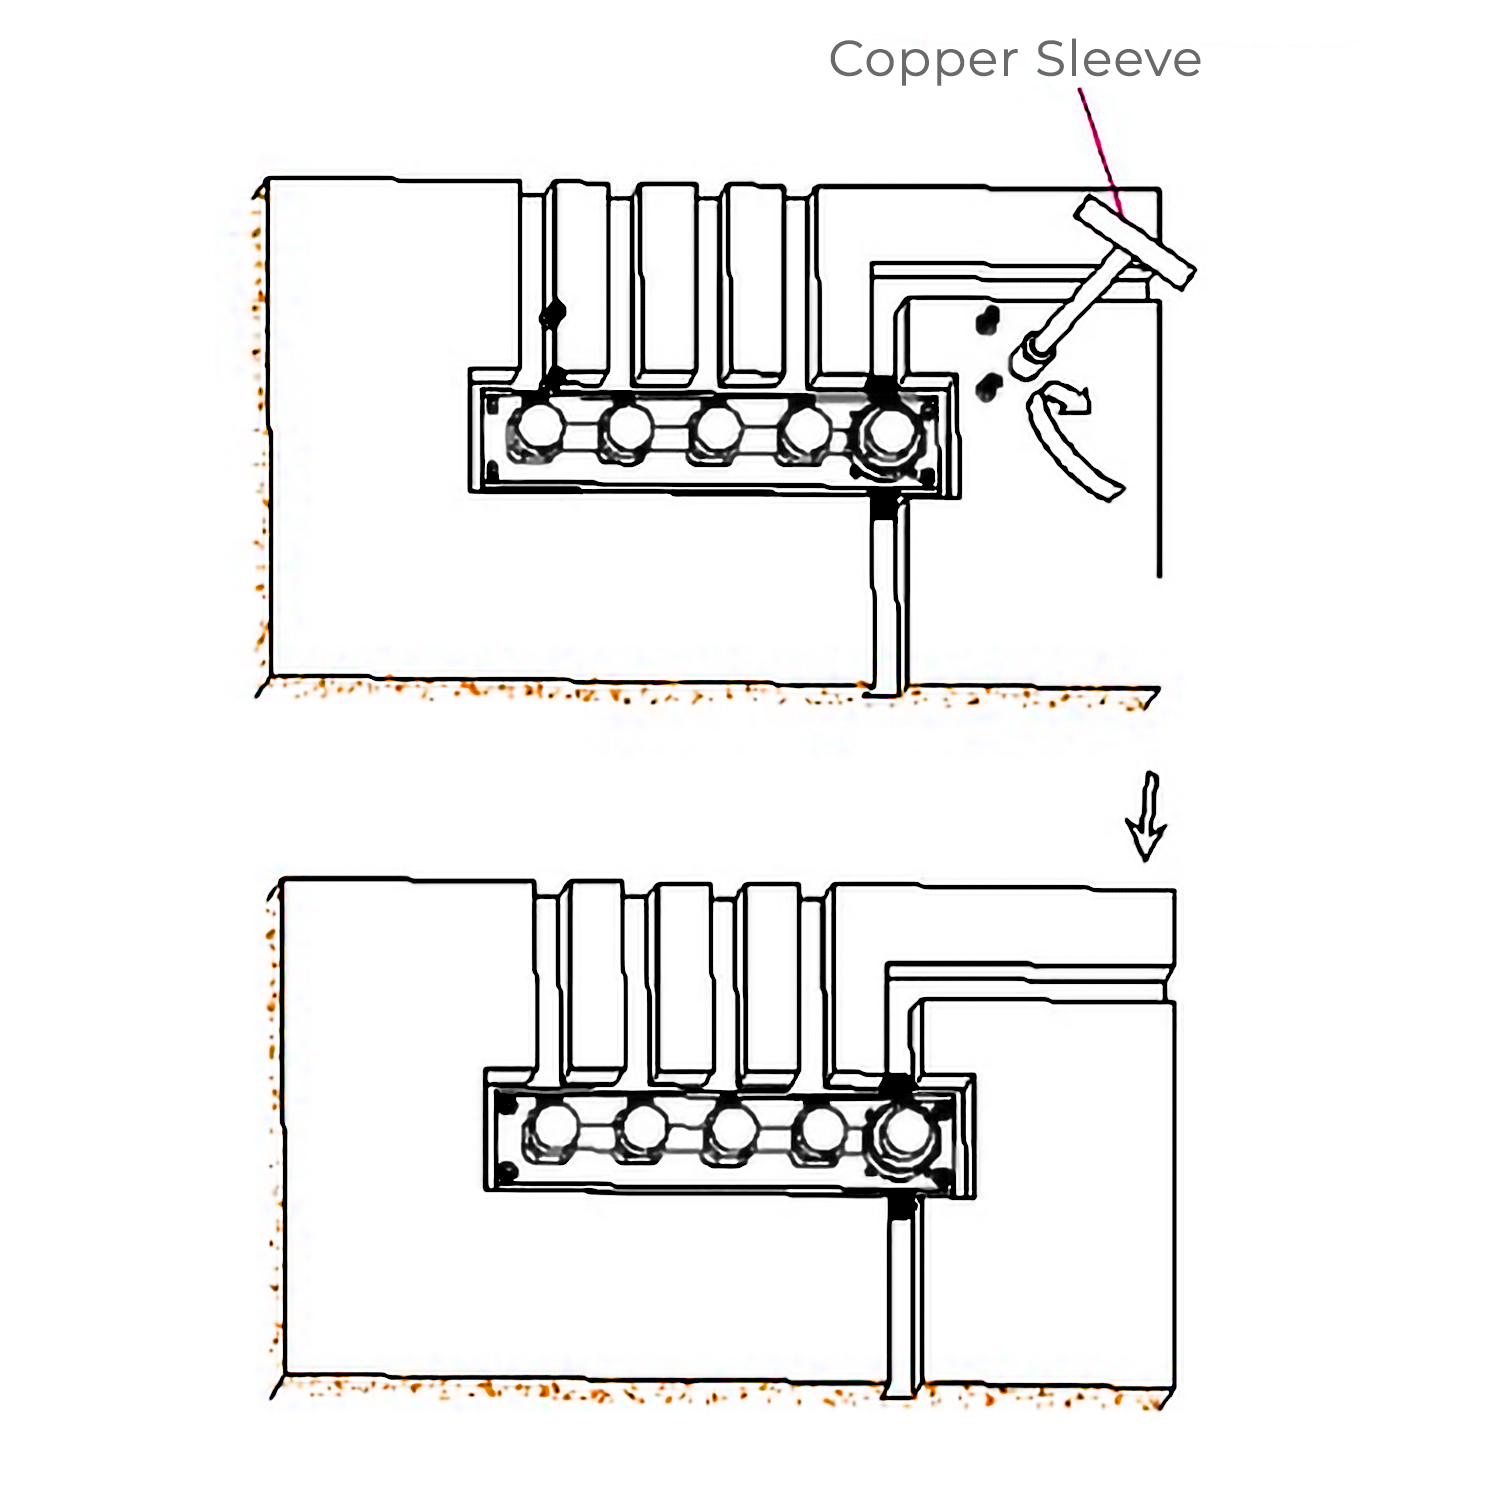
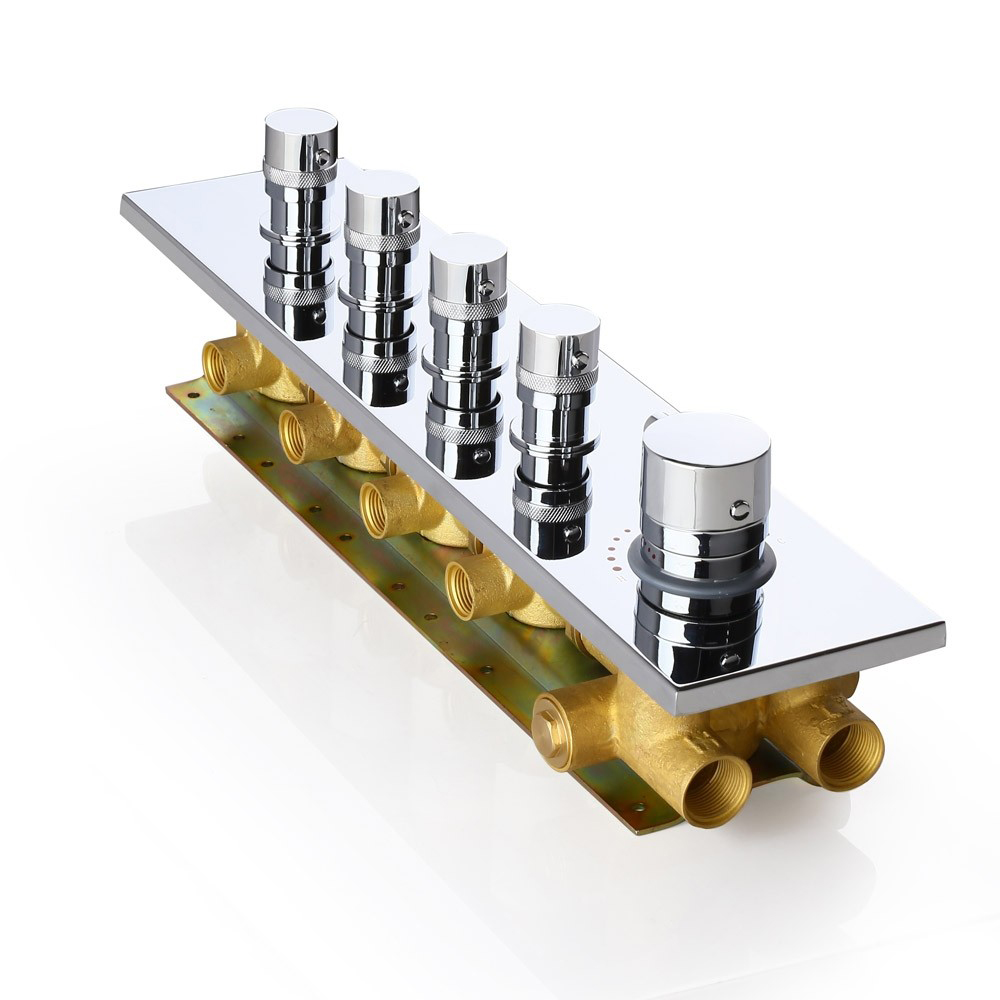
Find out the expansion screw heads with washer and spring washer. Use copper sleeve wrench to lock the screw heads with the embed valve body.
|
|
|
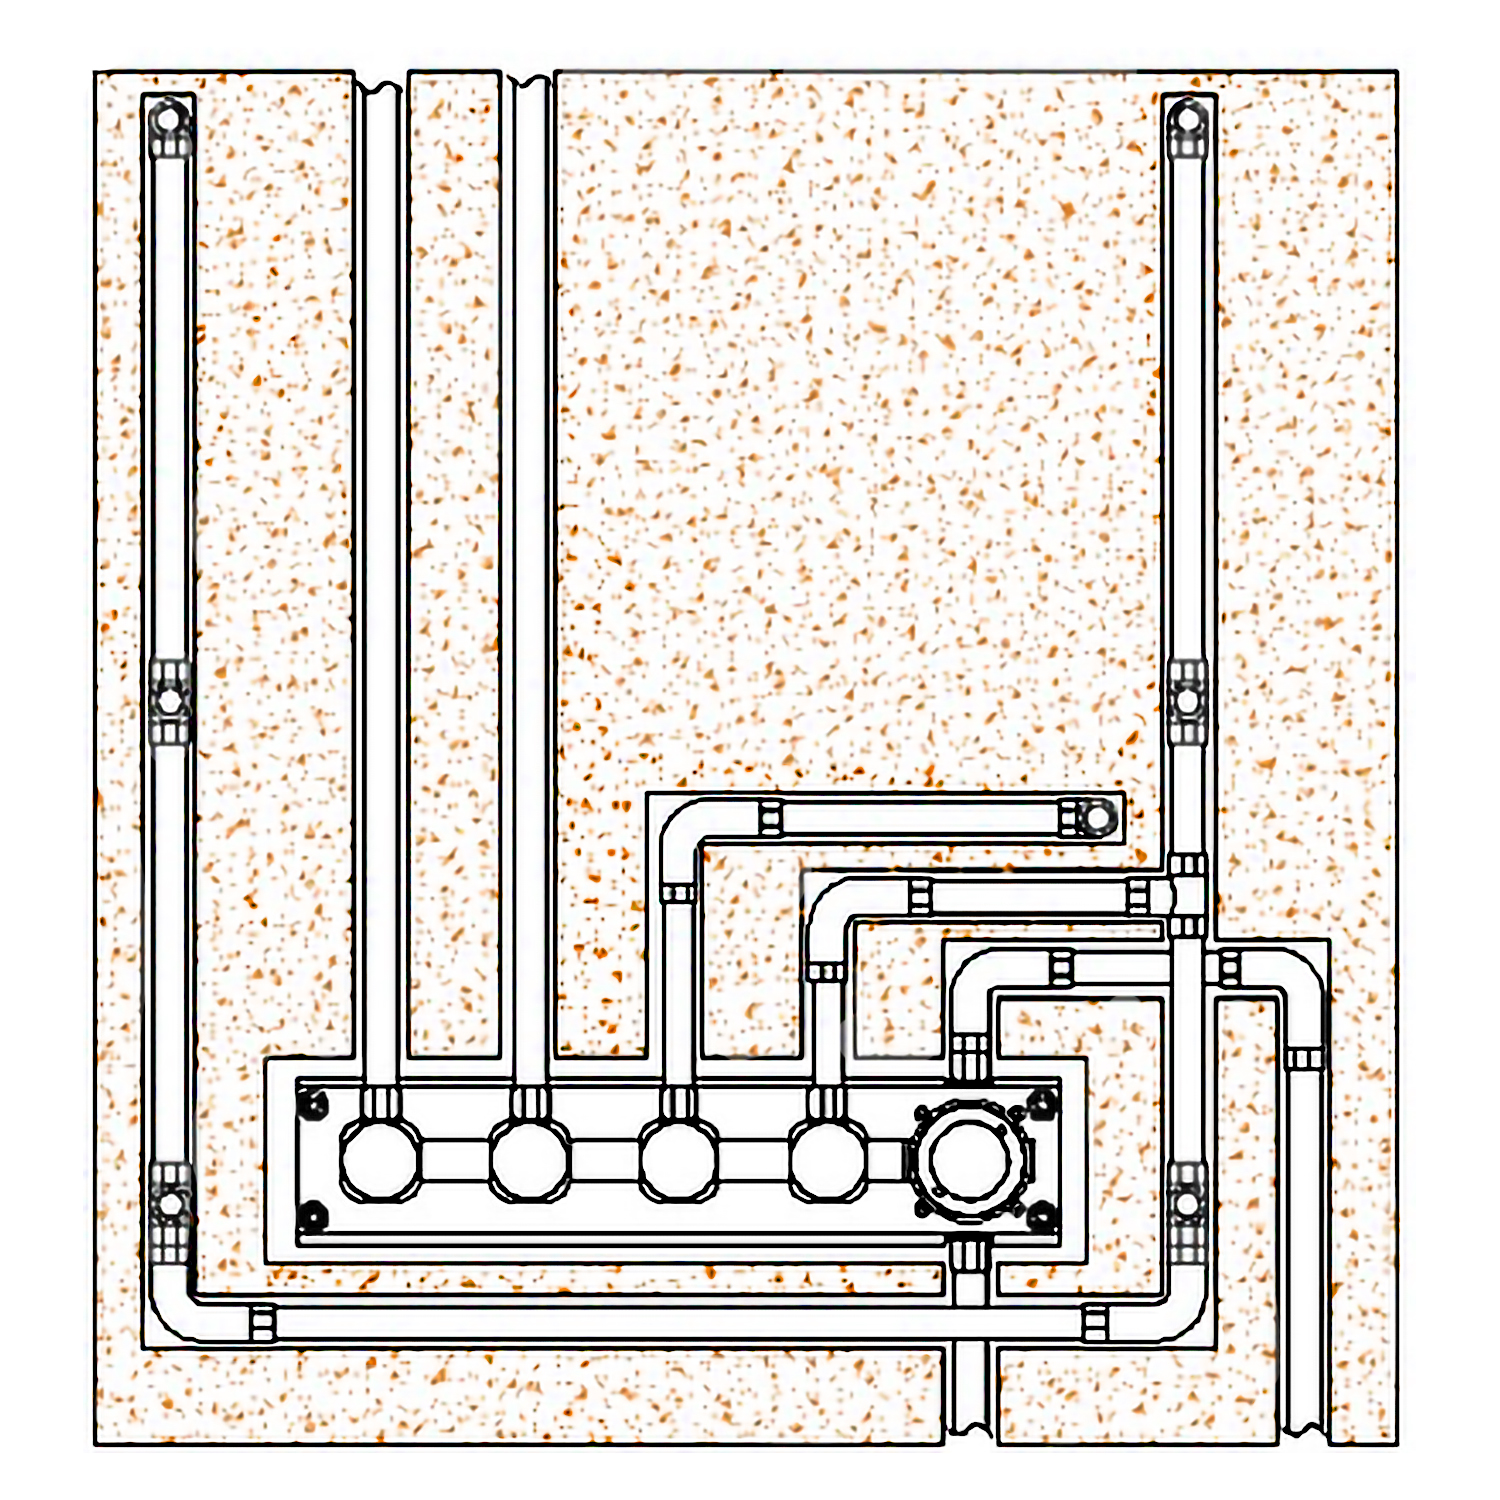
After connecting all the pipes and before sealing the wall with concrete, confirm no leaking problem occurs when you turn on the water.
|
|
|
Mixer Control Valve Installation Instruction
|
|
|
|
|
|
Step 7:
|
|
|
Step 8:
|
|
|
|
|
|
|
|
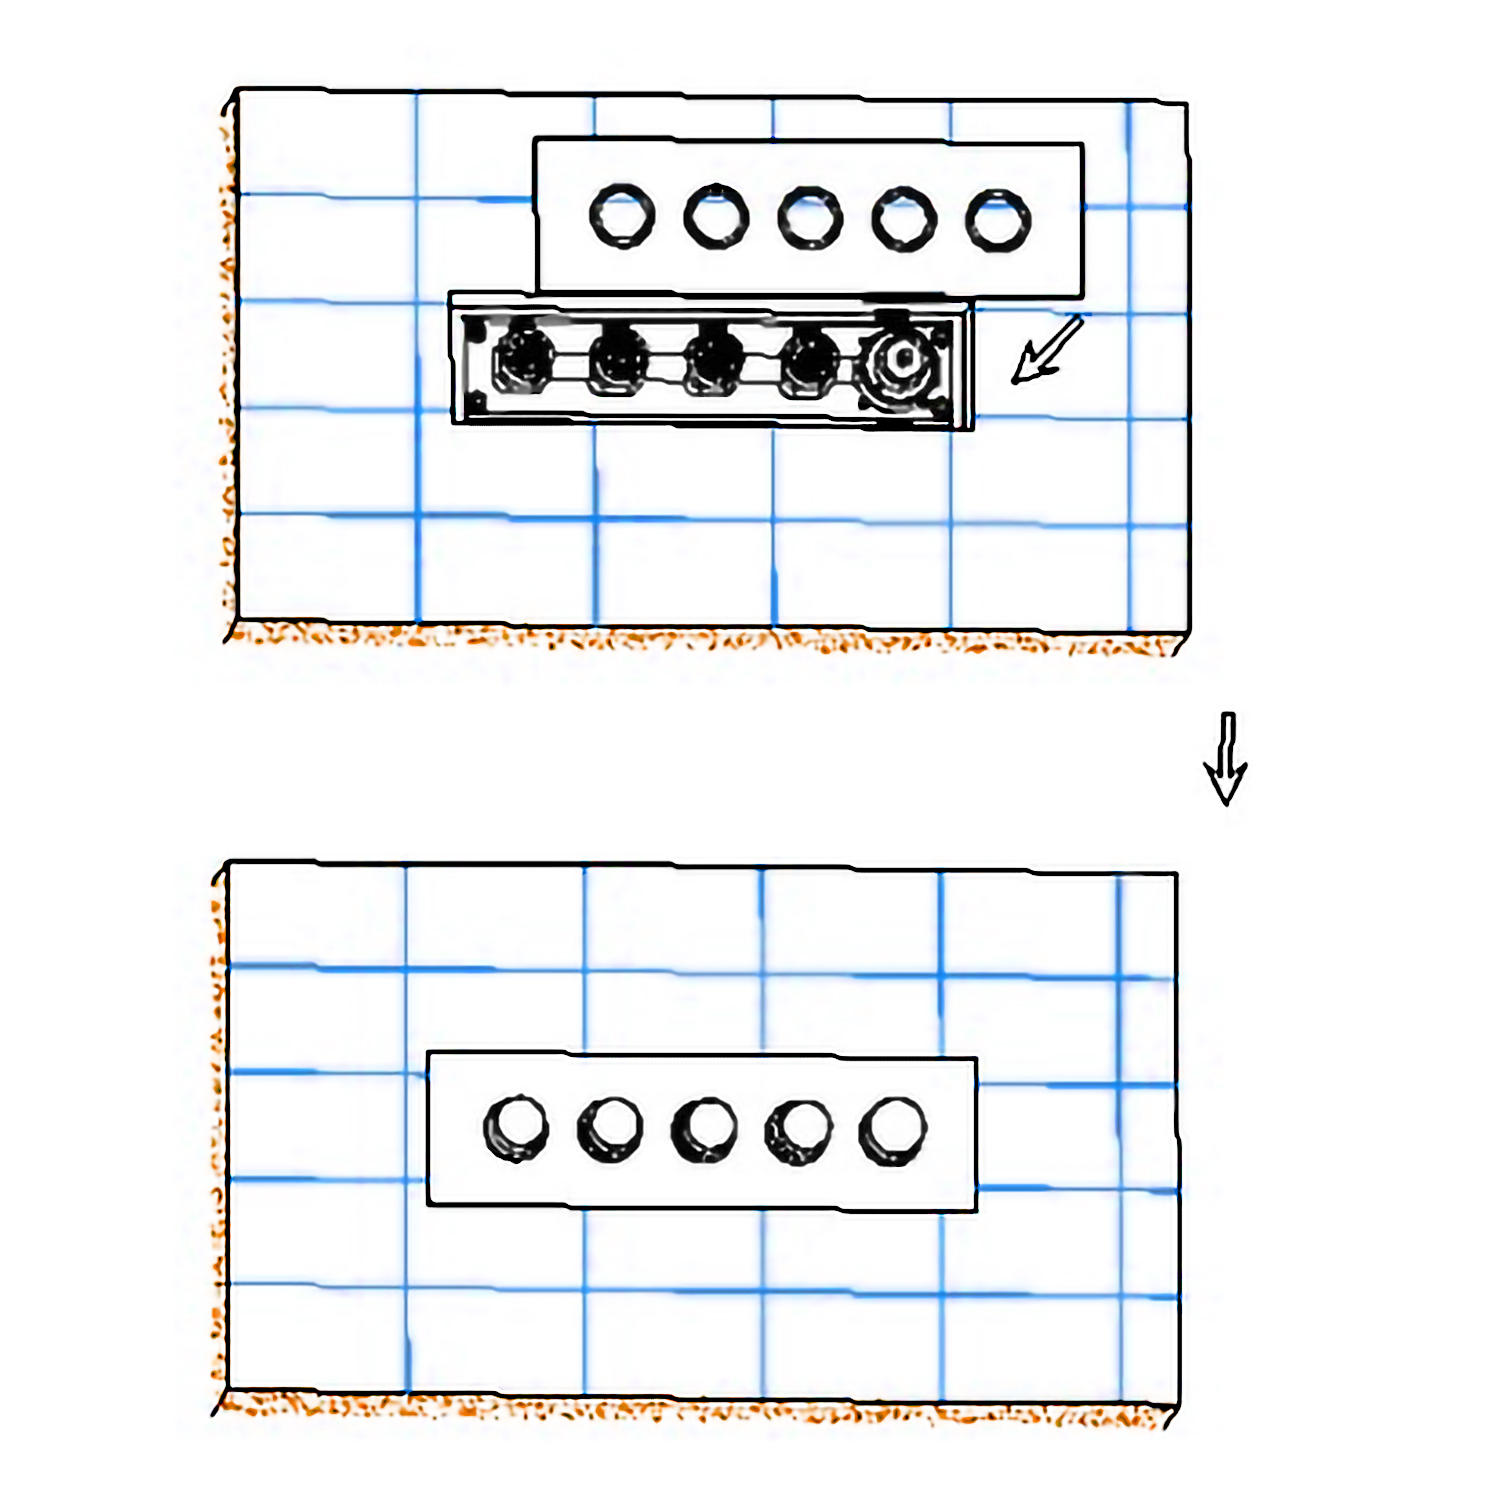
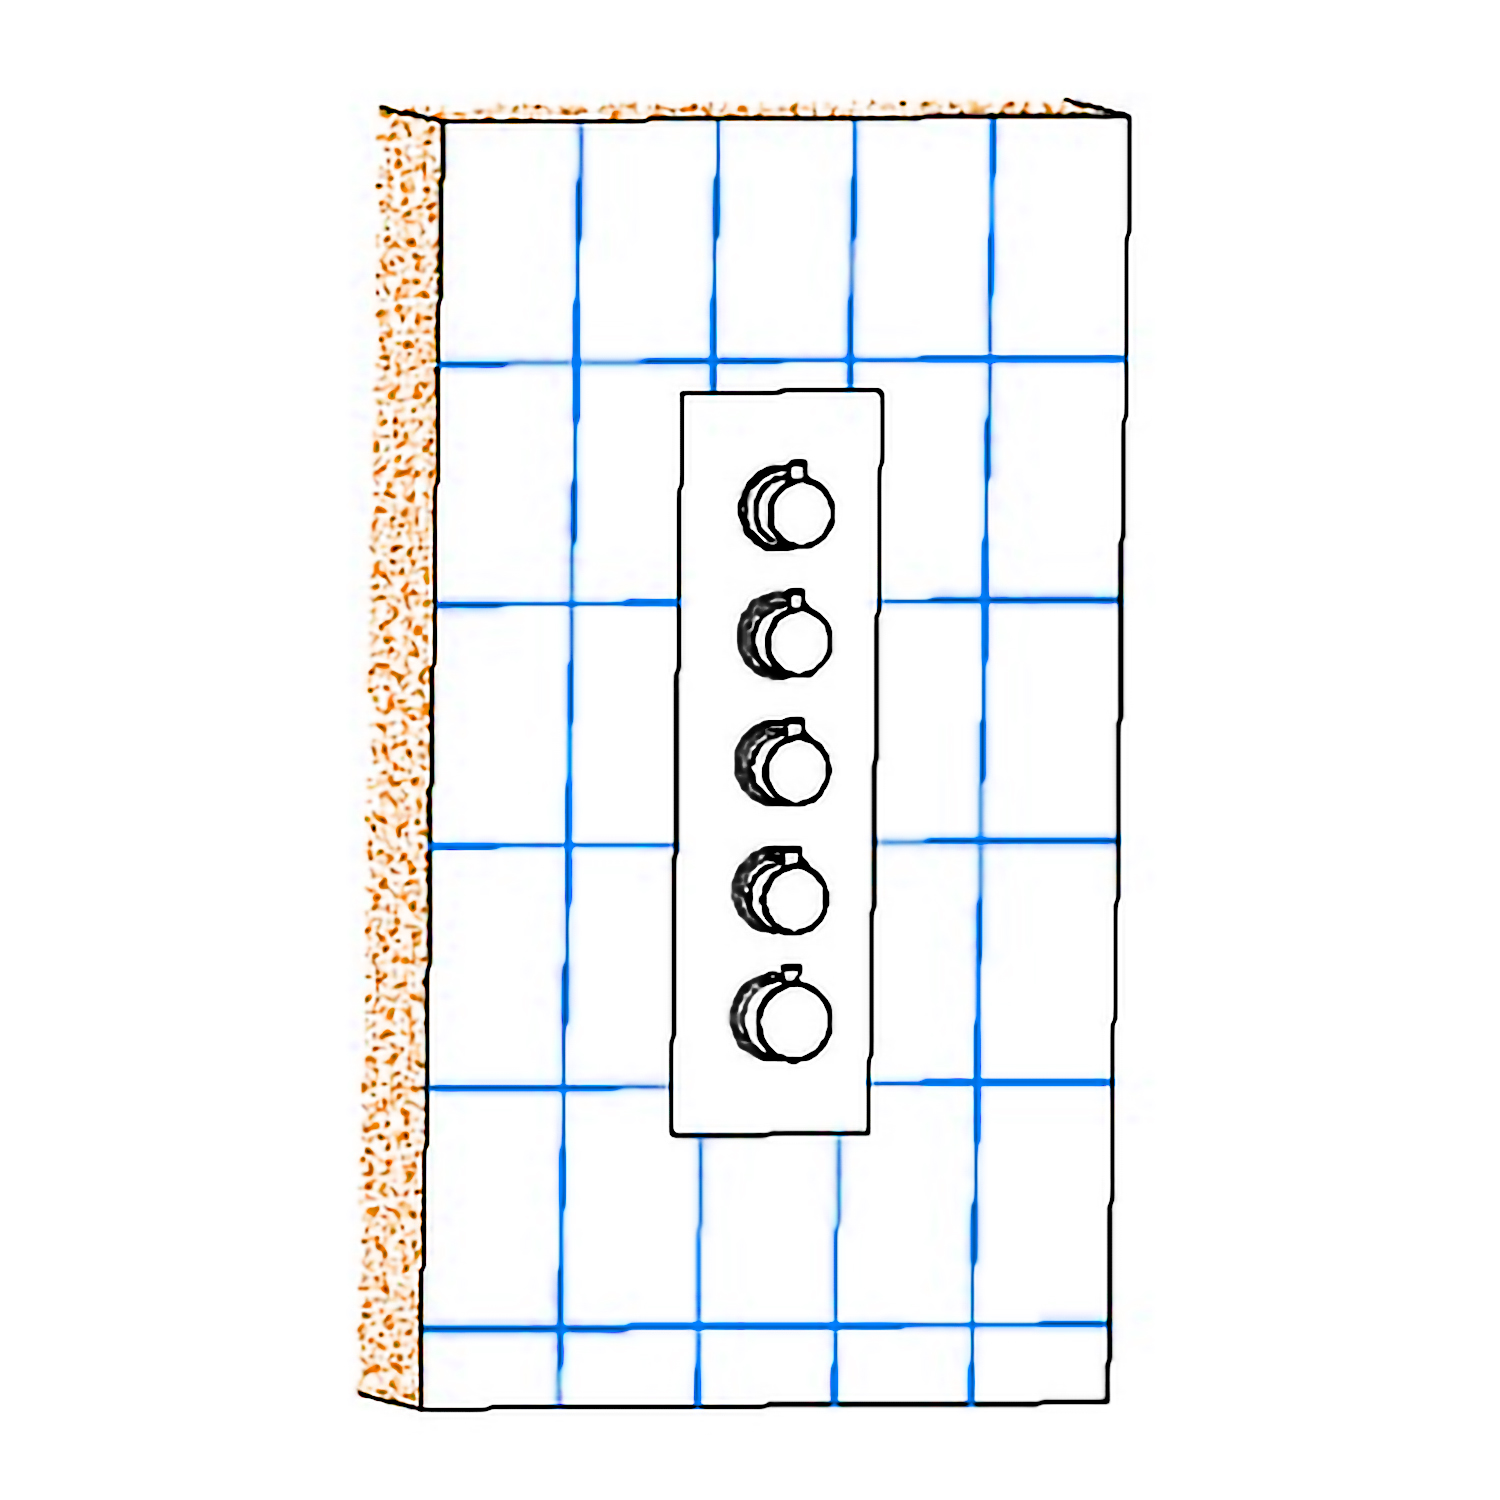
Fix the decorative panel on the embed valve body.
|
|
|
Screw the handwheel arms with the handwheels.
|
|
|
Mixer Control Valve Installation Instruction
|
|
|
|
|
|
Step 9:
|
|
|
Step 10:
|
|
|
|
|
|
|
|
|
|
|
|
|
|
Mixer Control Valve Installation Instruction
|
|
|
|
|
|
Step 11:
|
|
|
Step 12:
|
|
|
|
|
|
|
|
Mixer Control Valve Installation Instruction
|
|
|
|
|
|
Step 13:
|
|
|
|
|
|
|
|
|
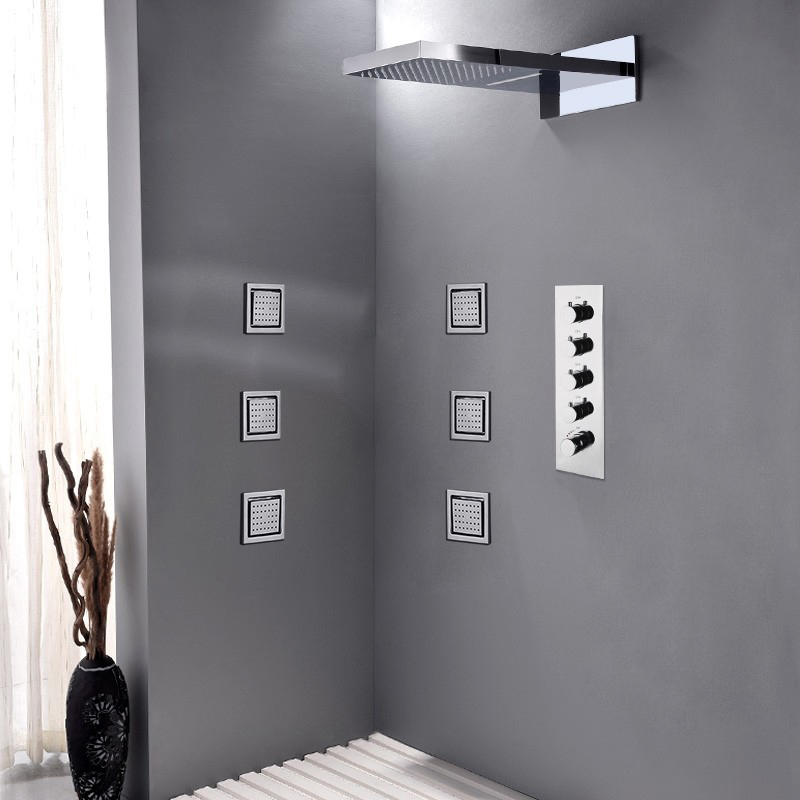
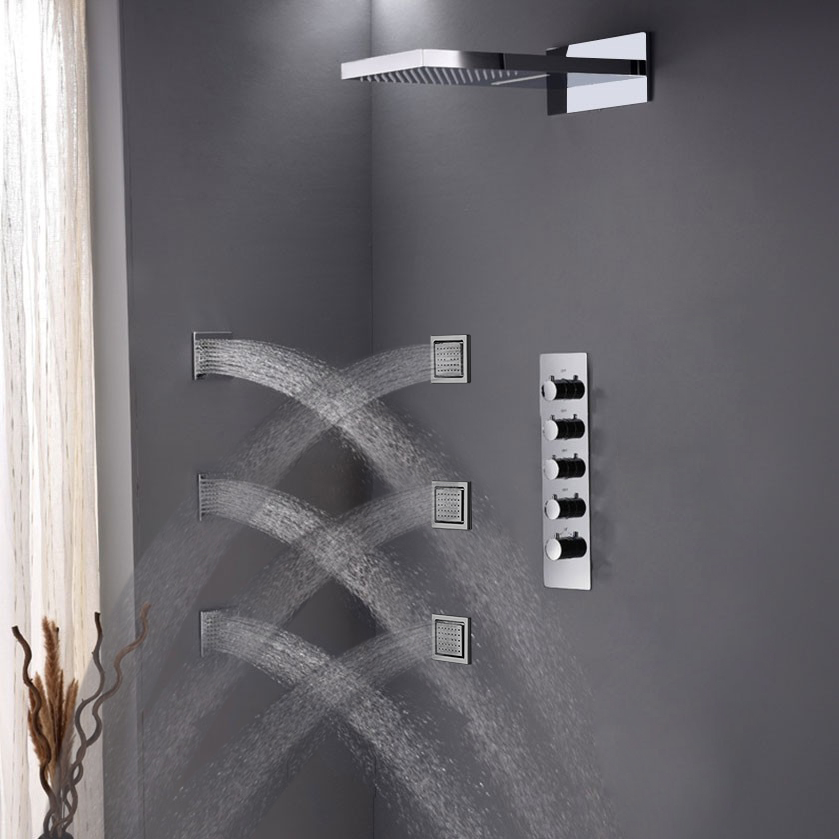
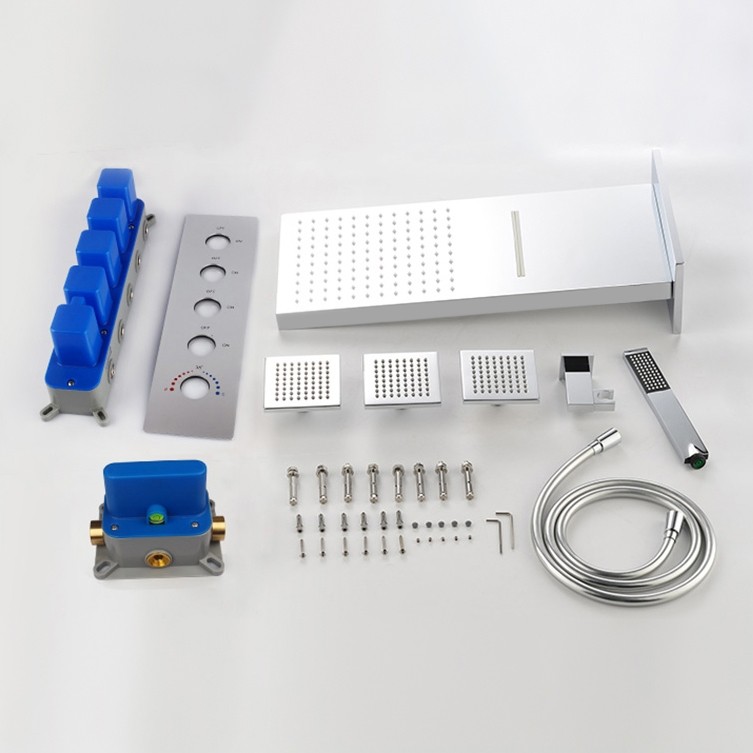
How to install the Shower Set with Wall Mount Showerhead, Body Jets and Shower Mixer
|