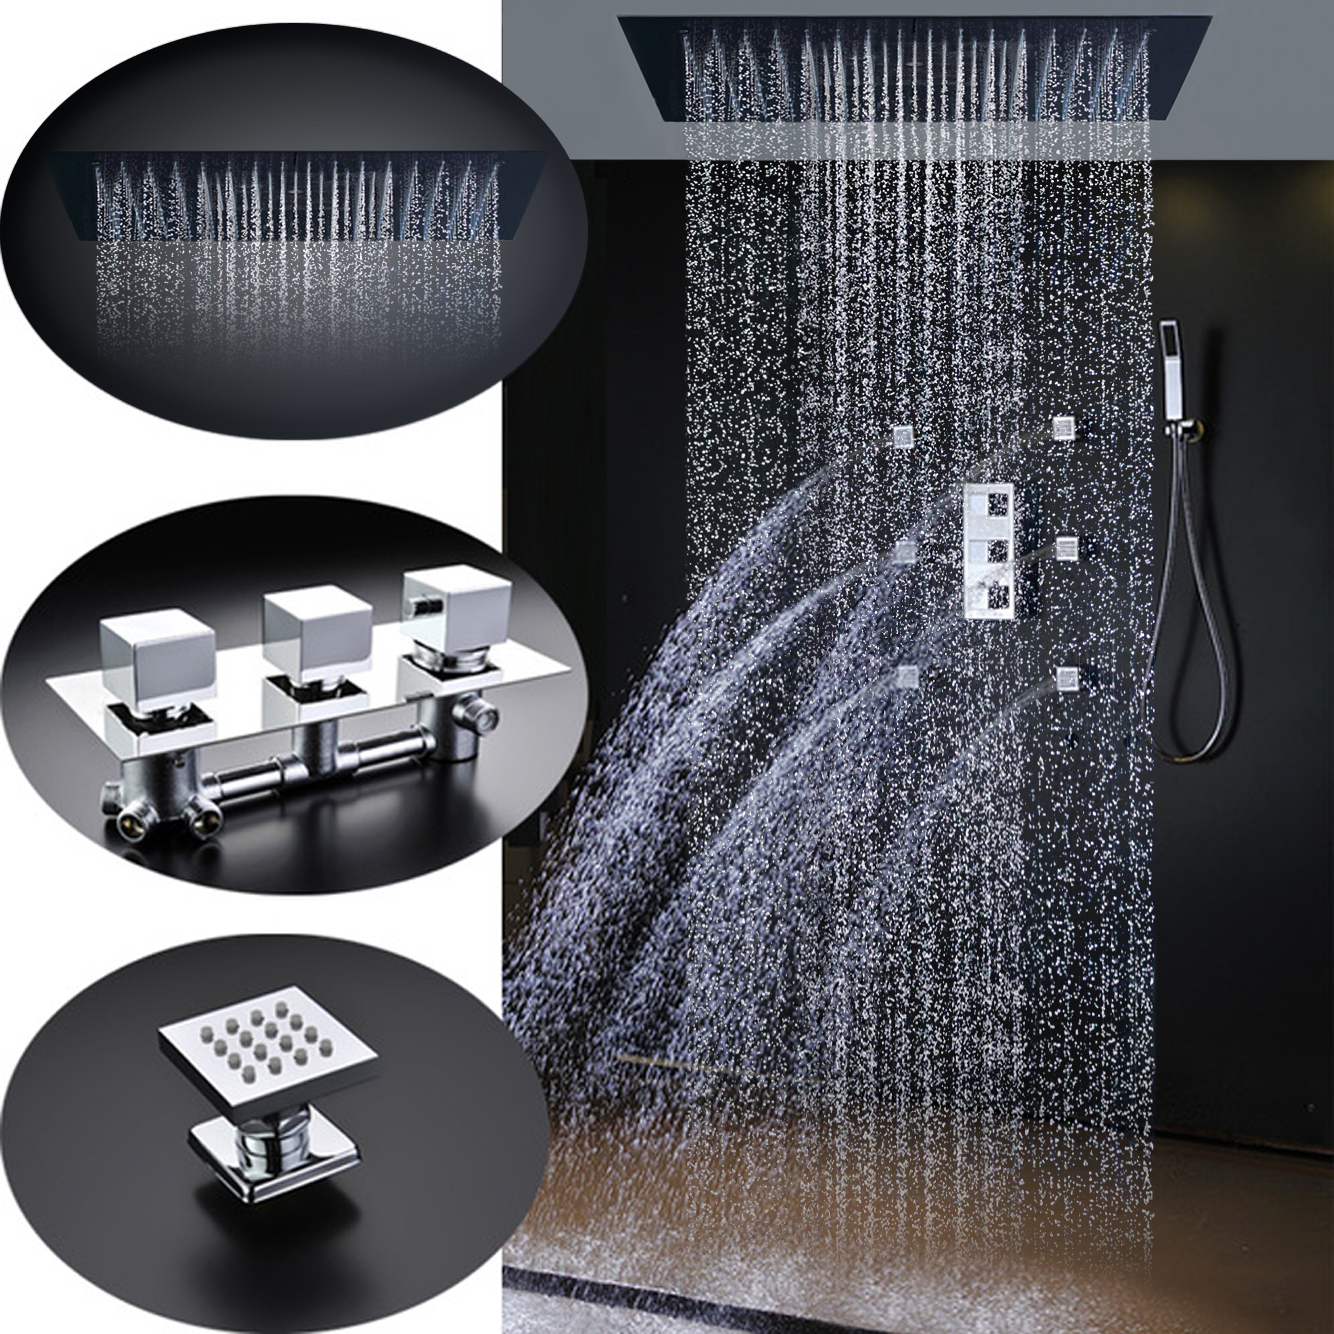
Val-de-Marne 20" * 40" Large Chrome Rain Shower Head with Body Jets & Handheld Shower
Val-de-Marne Large Chrome Solid Brass Rain Shower Head with Body Jets & Handheld Shower have adjustable shower jets that can be set according to your showering position and can increase and decrease shower jet speed to give you better massage experience. The shower system sonsist of 6 body shower jets, handheld shower hose and 20"*40" Ceiling Mounted Shower Head
Val-de-Marne Technical Specifications
- Material : Solid Brass
- Finish : Chrome
- Style : Contemporary Rain Shower head
- Shower Arm : Included
- Shower head Width :20"
- Shower head Length :40"
- Shower head Style : Contemporary Rain Shower
- Shower head Function: Rainfall
- Mount Method : Ceiling Mounted Installation
- Connection : 1/2" US standard (included)
- Body Jets : Comes with 6 solid brass 360° adjustable Body Jets
- Body Jets size: 5" x 5"
- The flow rate: is 6.6 GPM
|
|
- Unpack and inspect the product for any shipping damages. If you find damages, do not install.
- Please note all showers must be installed by a professional and certified plumber otherwise warranty might be voided
|
shower
|
shower
|
|
|
Shower Head Installation
- Draw size on ceiling
- Install fixing bar on the ceiling
- Install fixing bar on the shower head
- Put shower head bar on ceiling fixing bar.
Step 1
|
shower
|
Step 2

|
|
Step 3
|
|
Step 4
|
|
|
|
|
|
|
|
|
|
|
|
Hole size on ceiling
1. Drawing the line on the ceiling according to the above specification
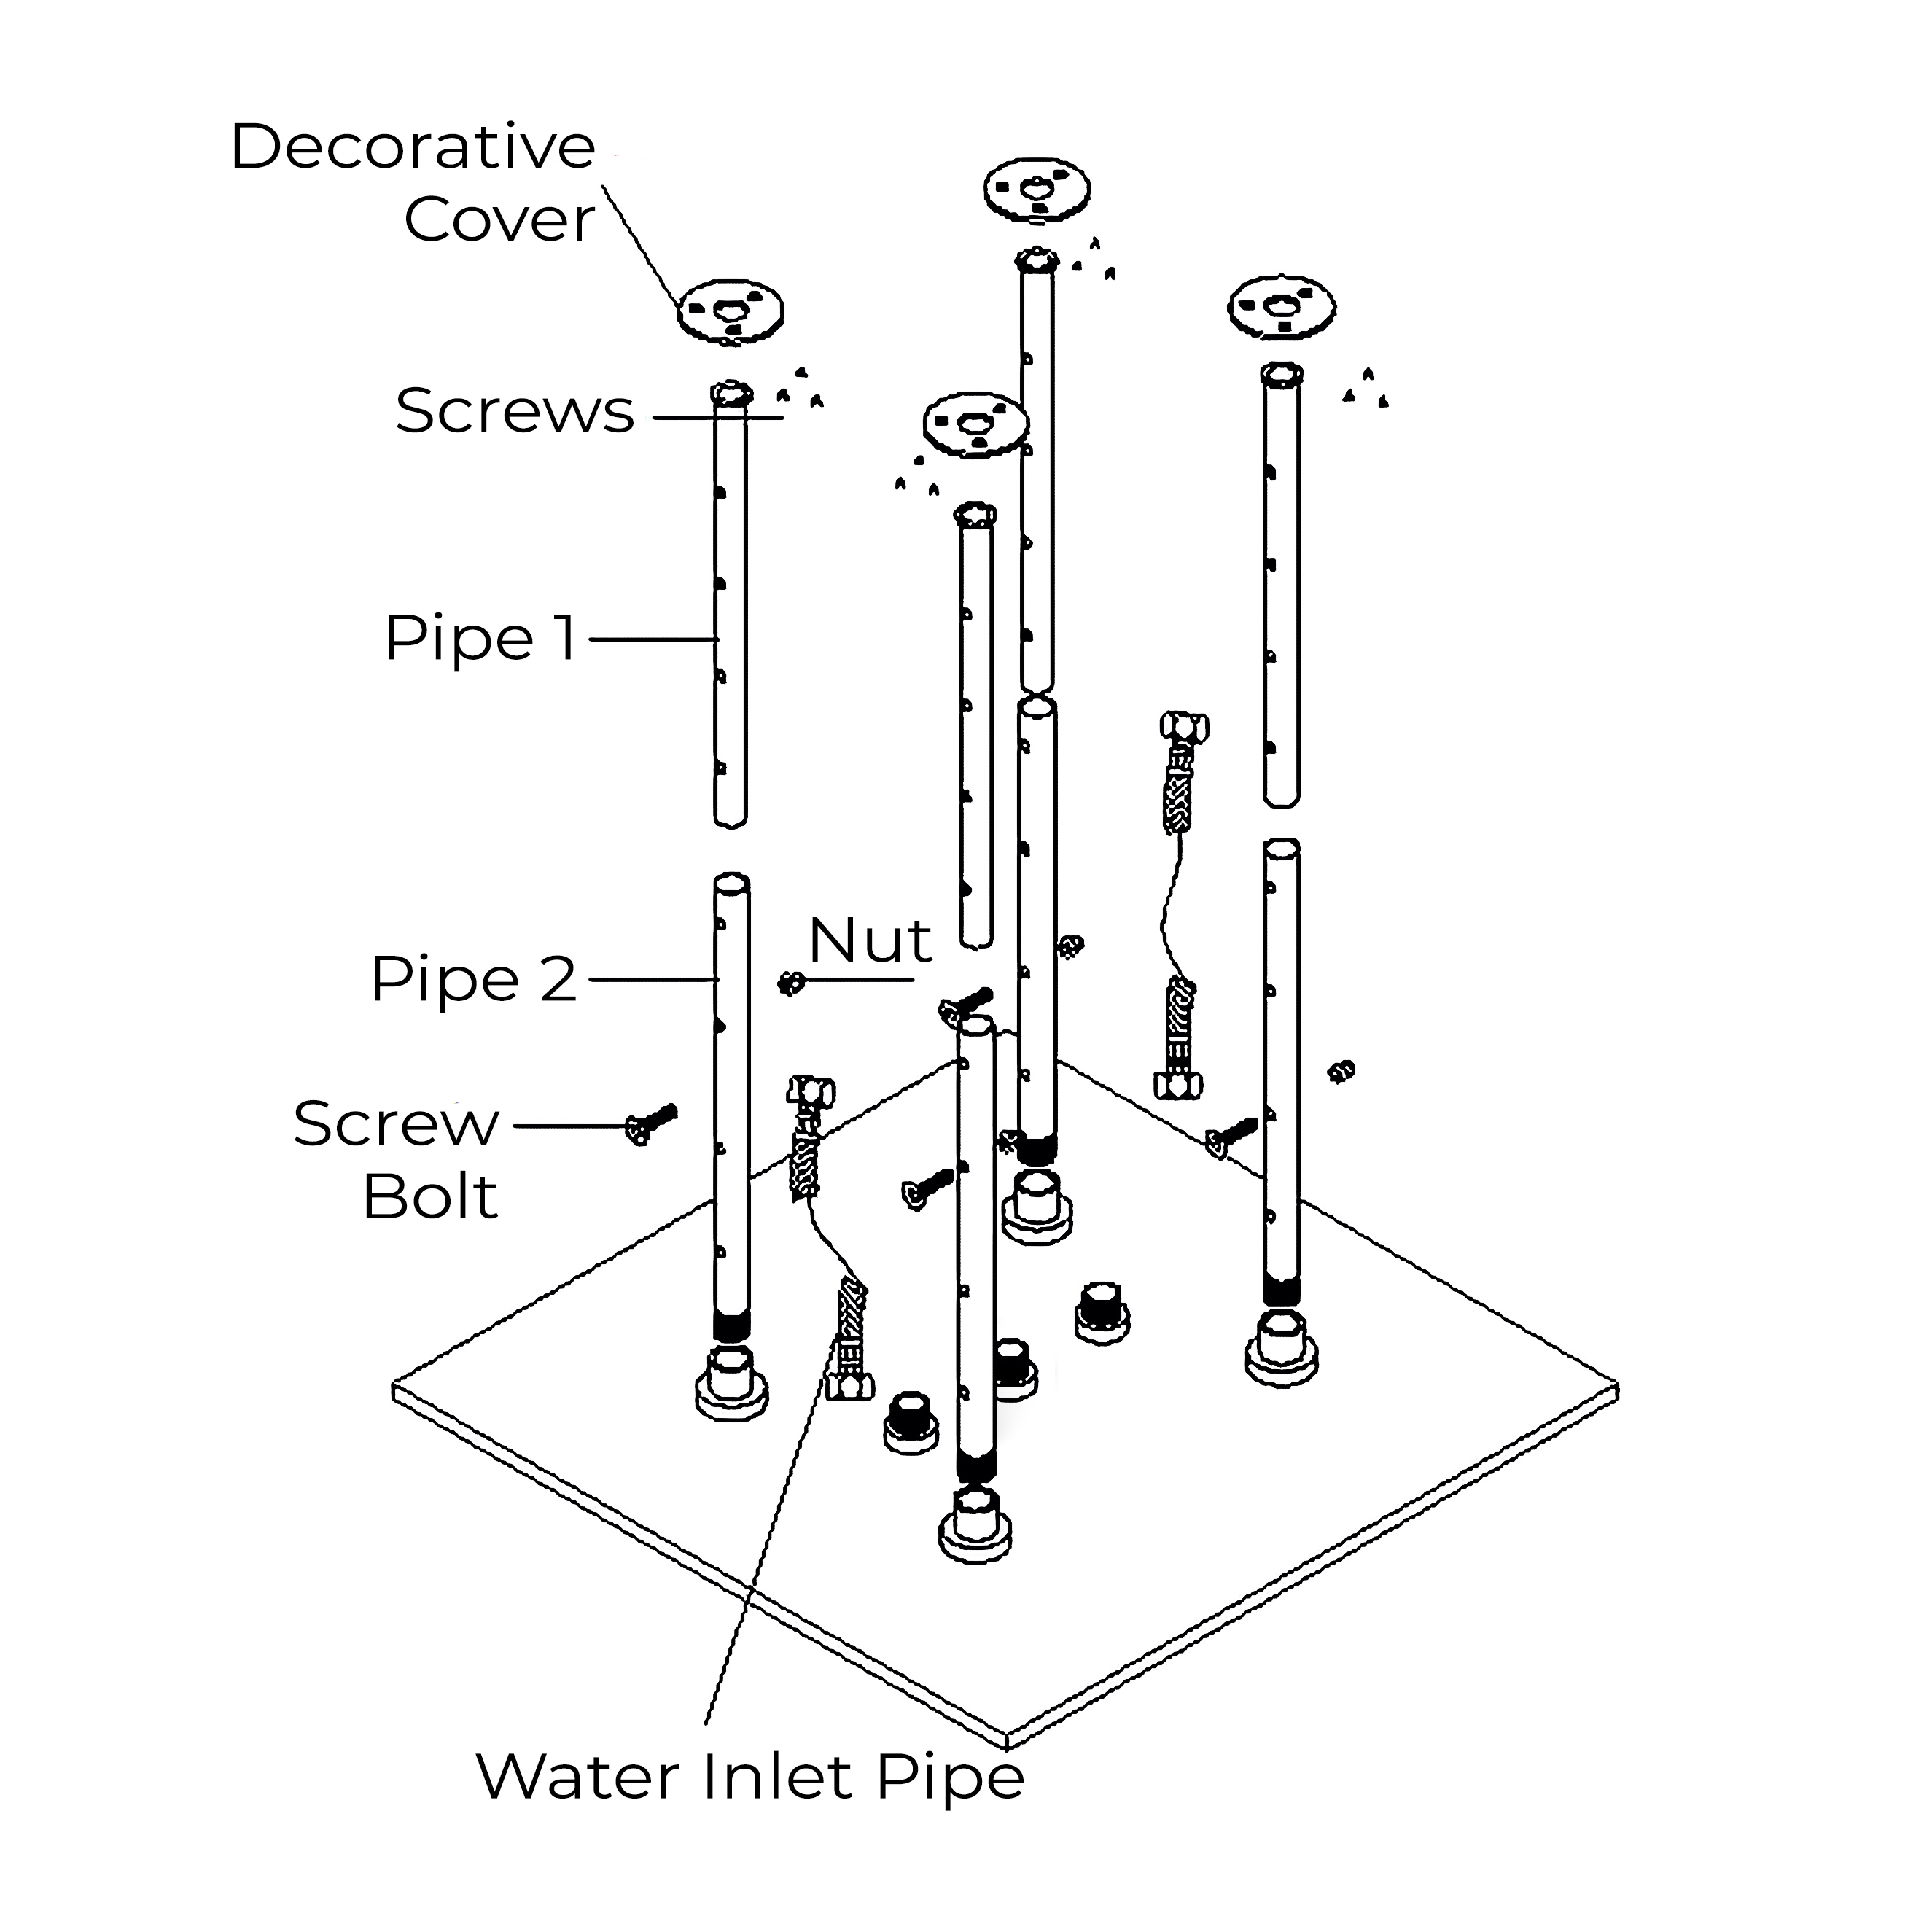
· Decorative Cover
· pipe 1
2. connect pipe 1 with decorative cover
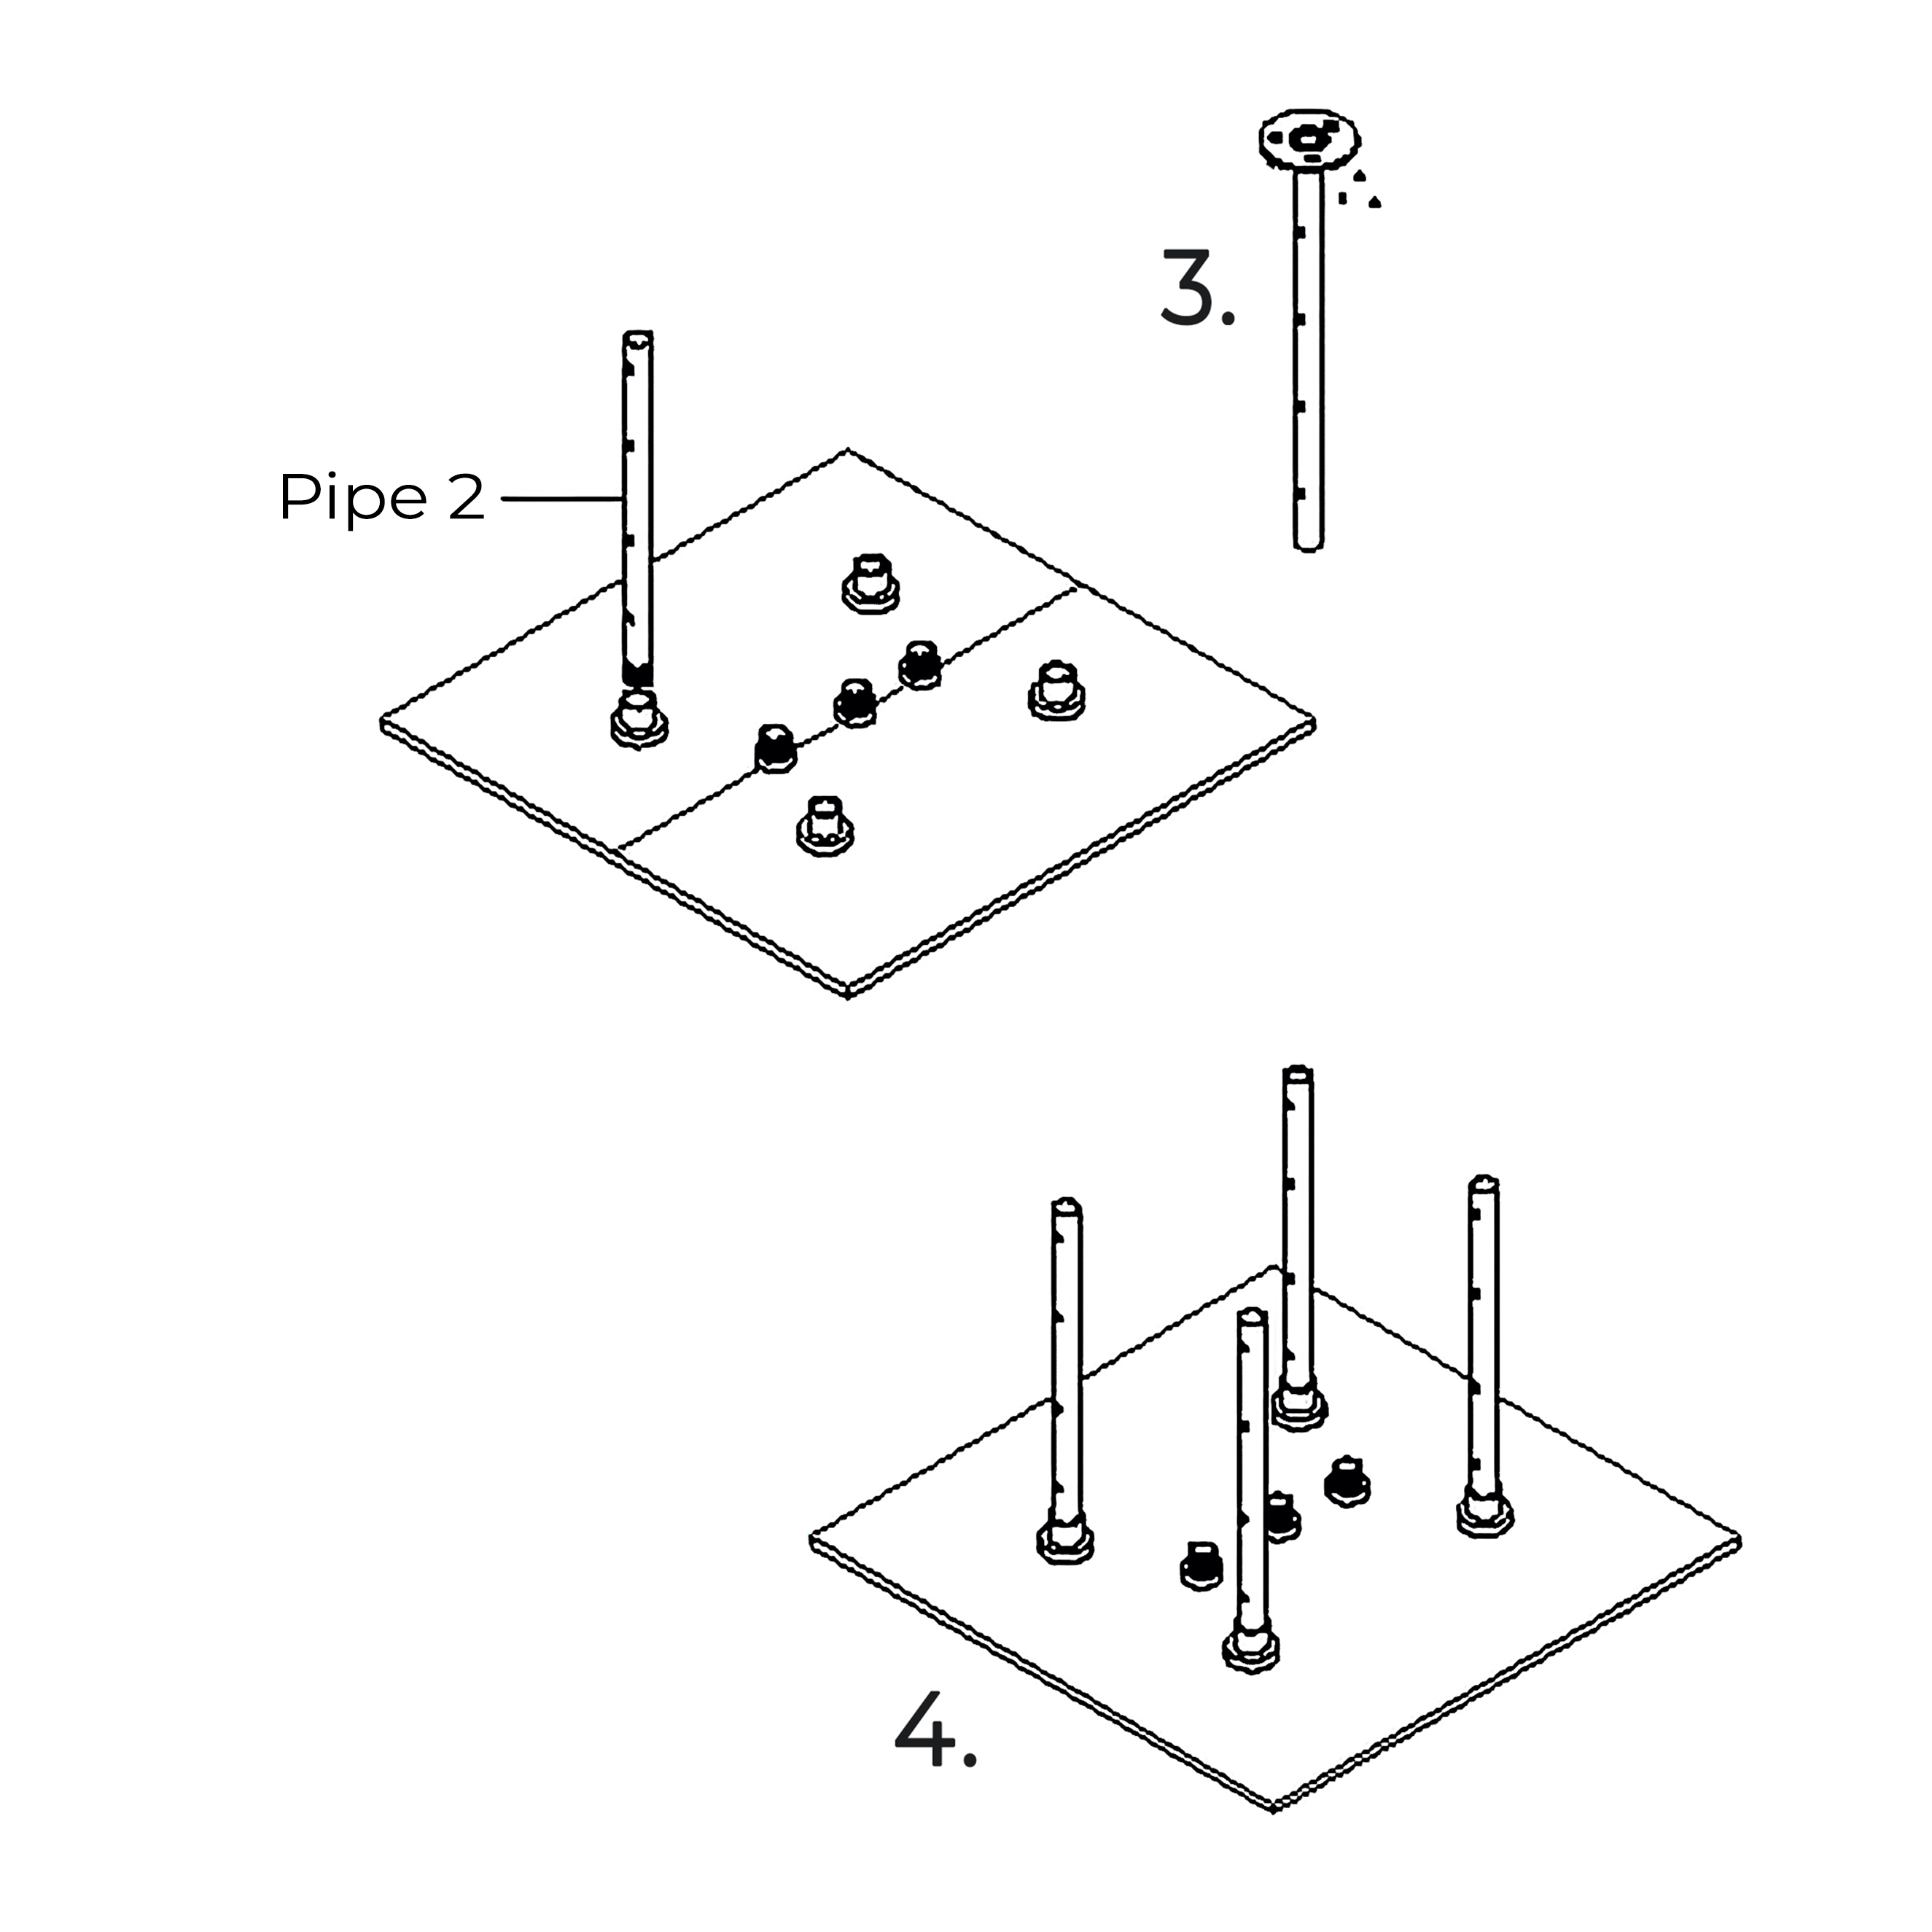
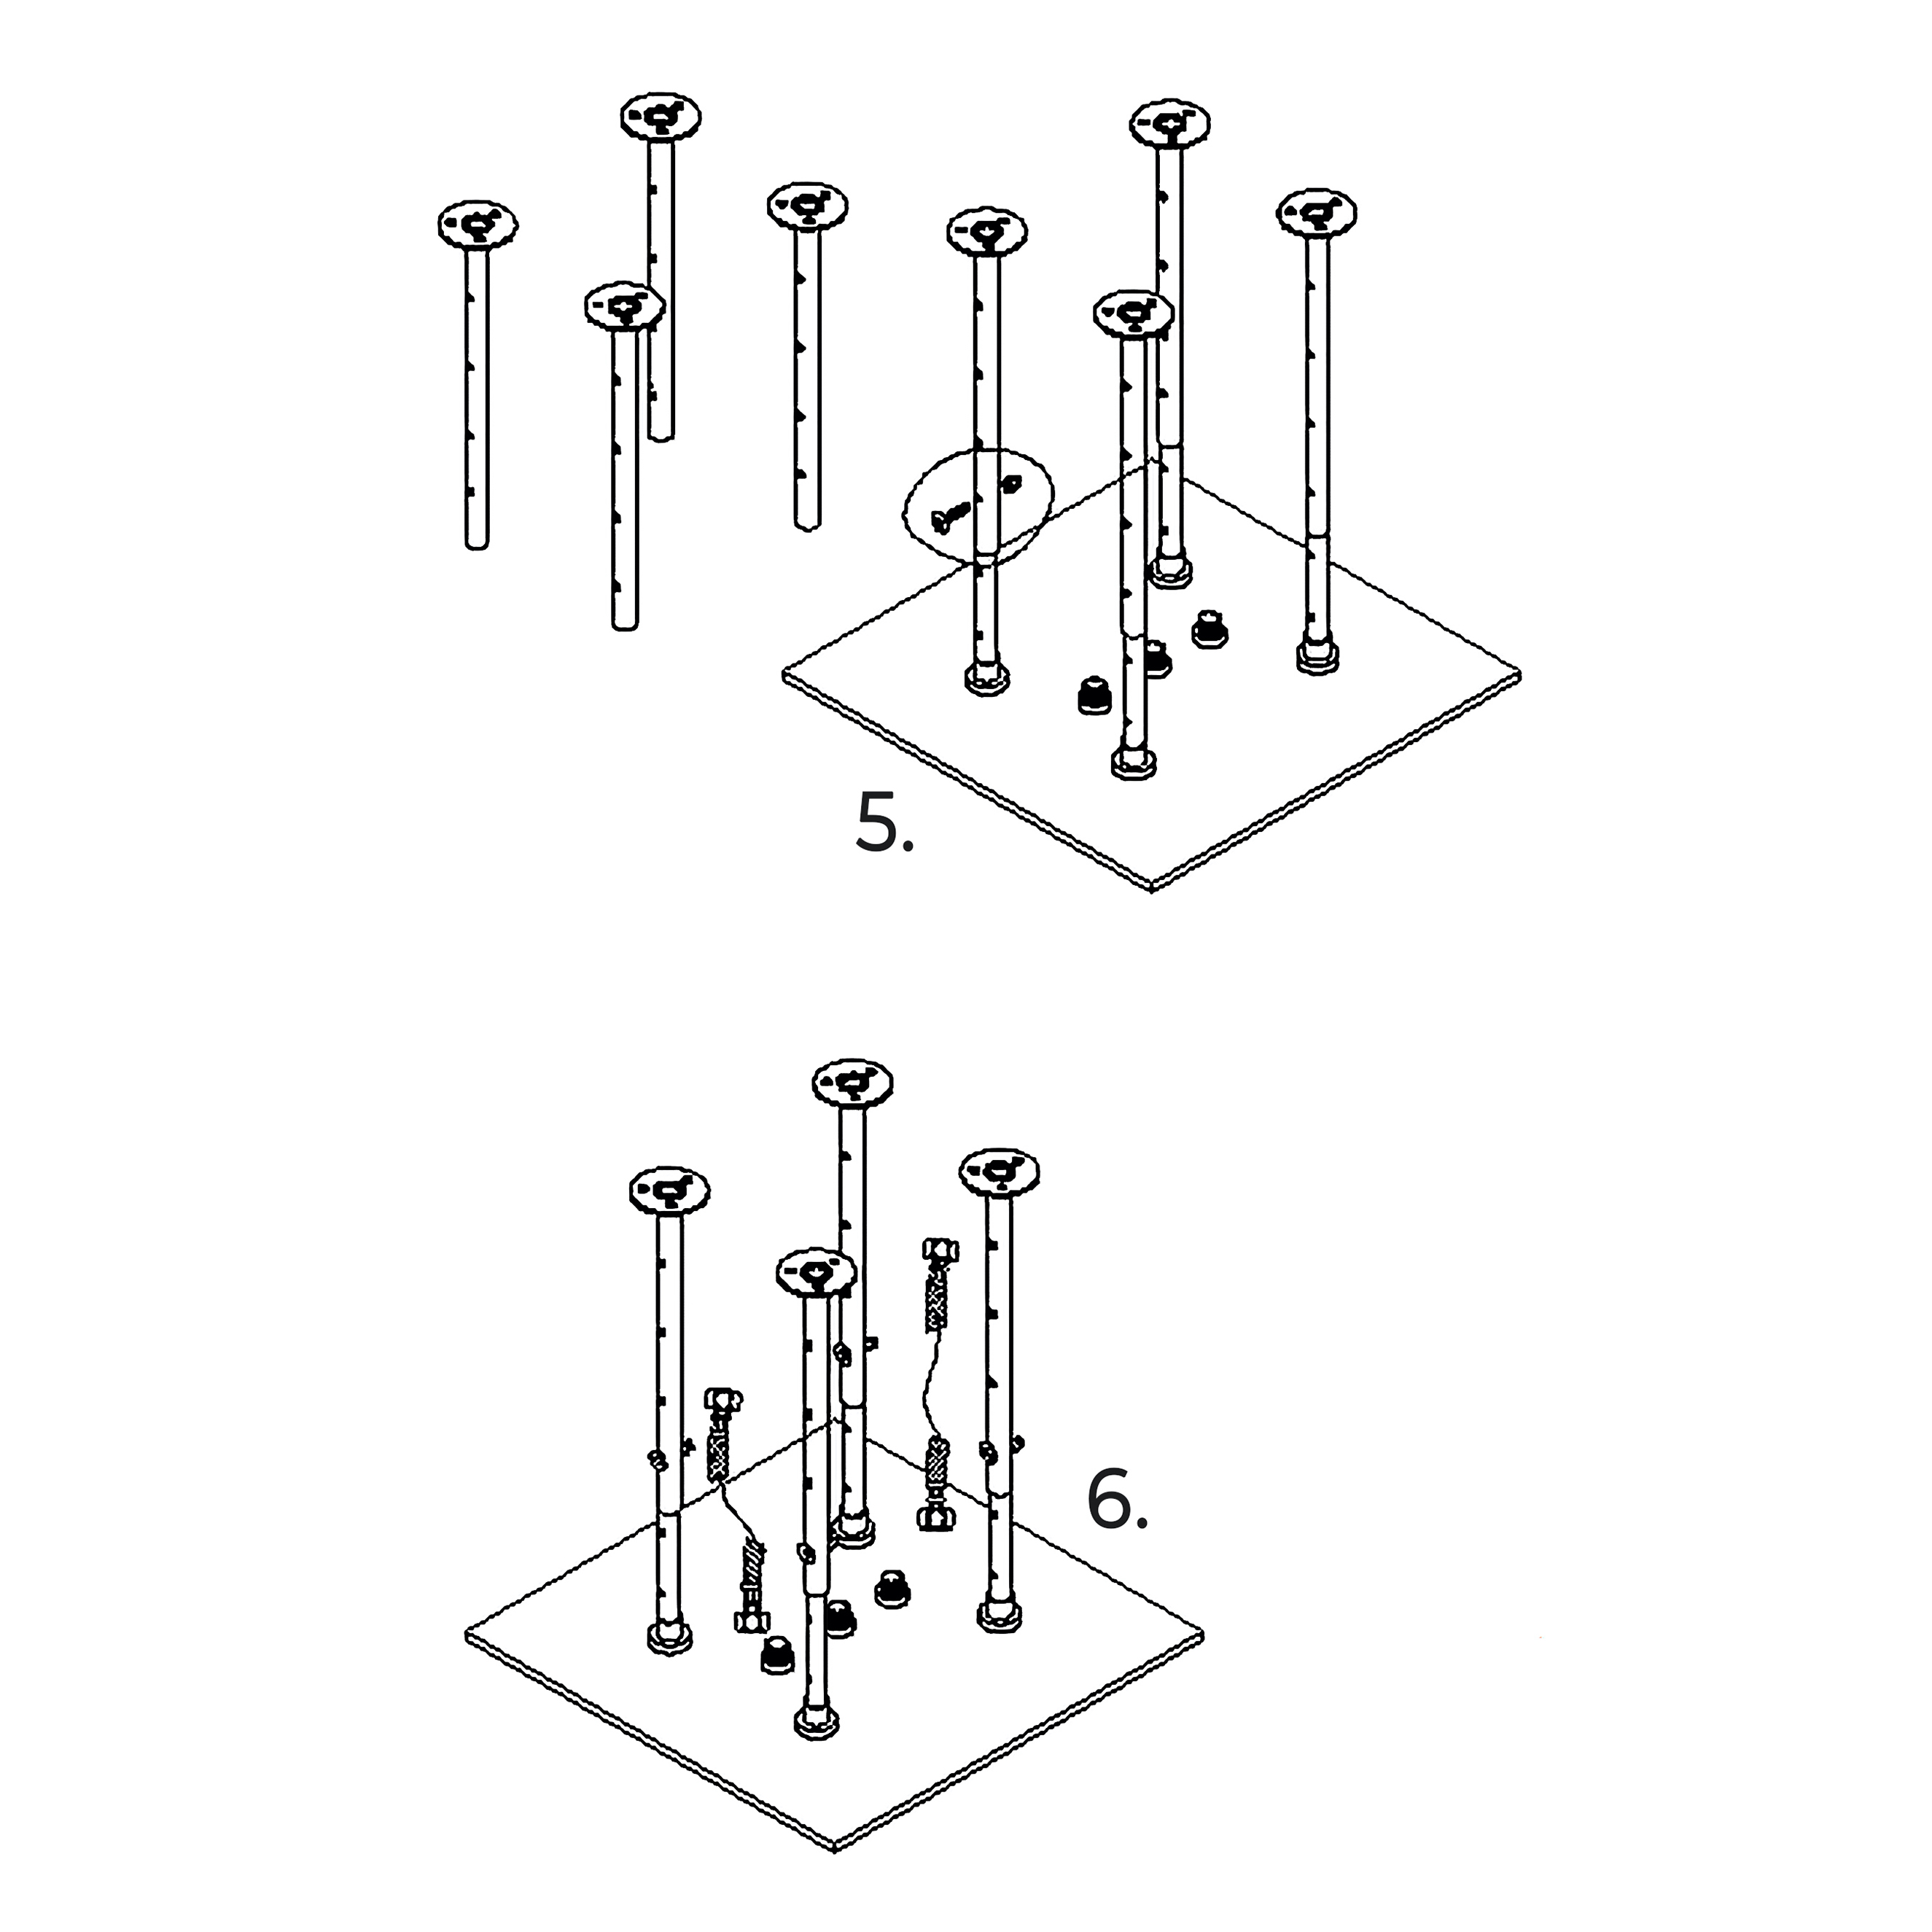
3. Drill the holes on the ceiling according to the above hole specification and install 4 pipes.
4. According to the right drawing, install four-pipe 2 into pipe 1. Put the screw bolts through the hole on the side to lock pipe 2 with pipe 1
5. As the right drawing is shown, install four-pipe 2 on the head shower.
6. After fixing the showerhead on the ceiling, connect the shower hose with 2 water inlet on the showerhead back cover. The other end connects with the water outlet pipe in the wall.
The showerhead installation is now complete.
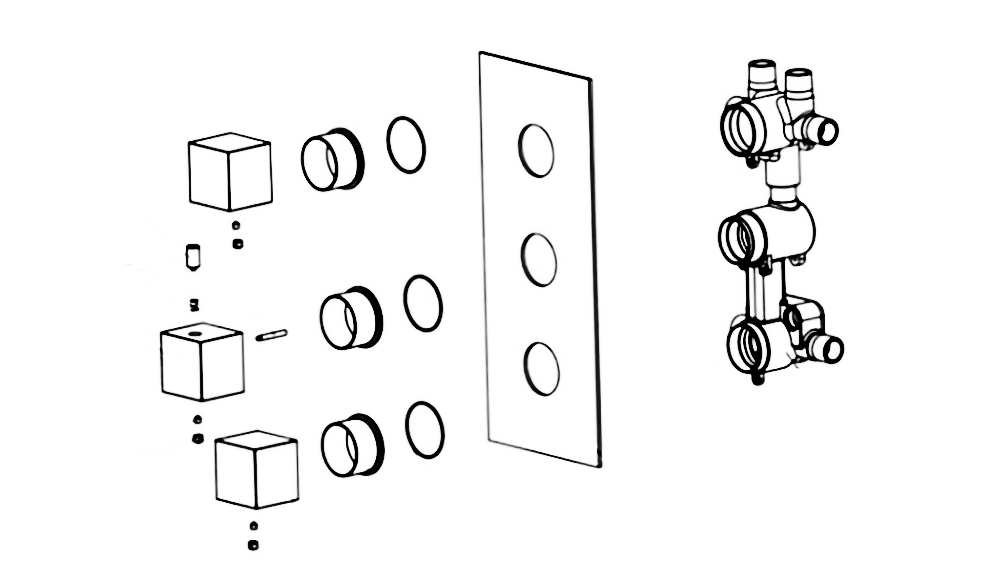
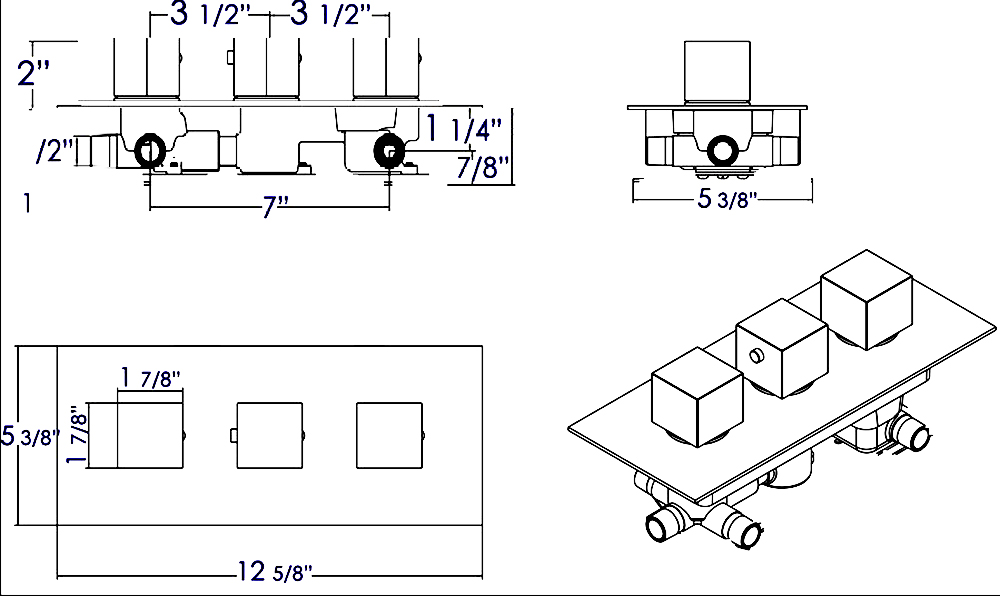
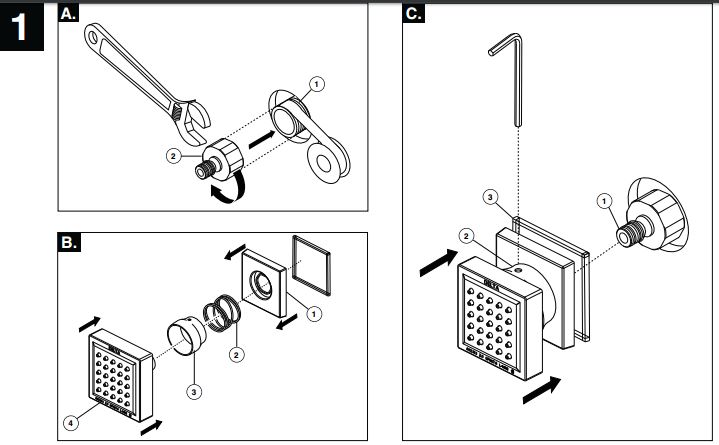
Mixer Installation
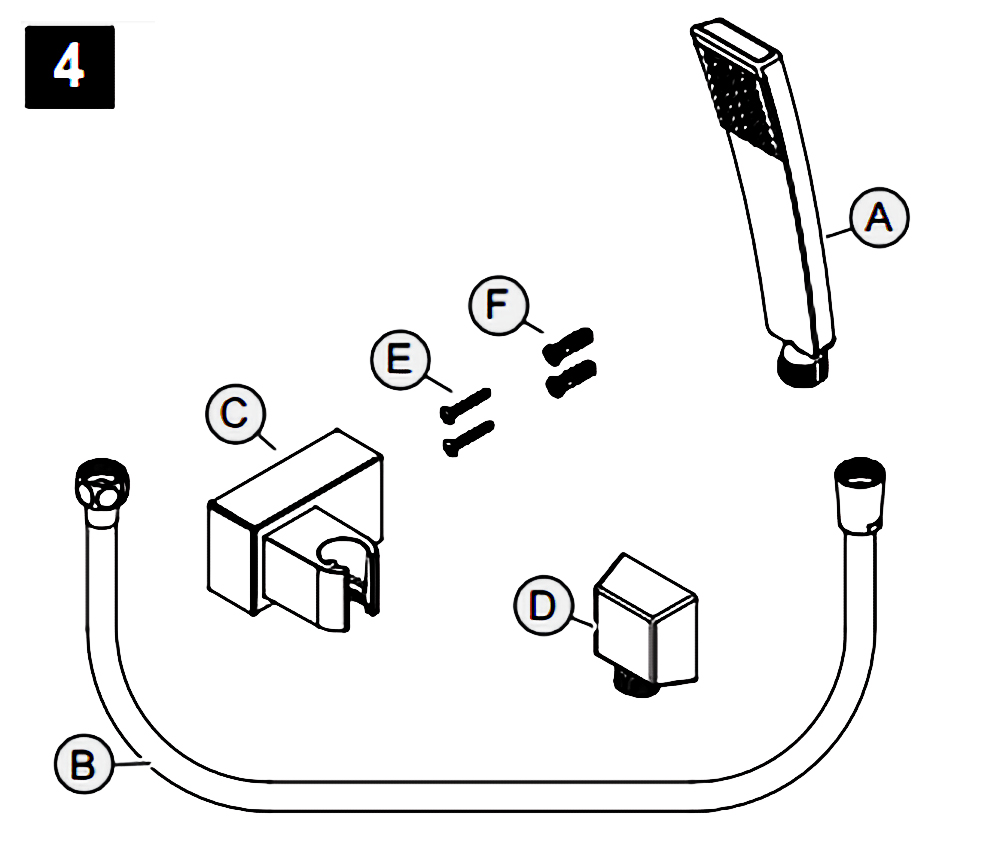
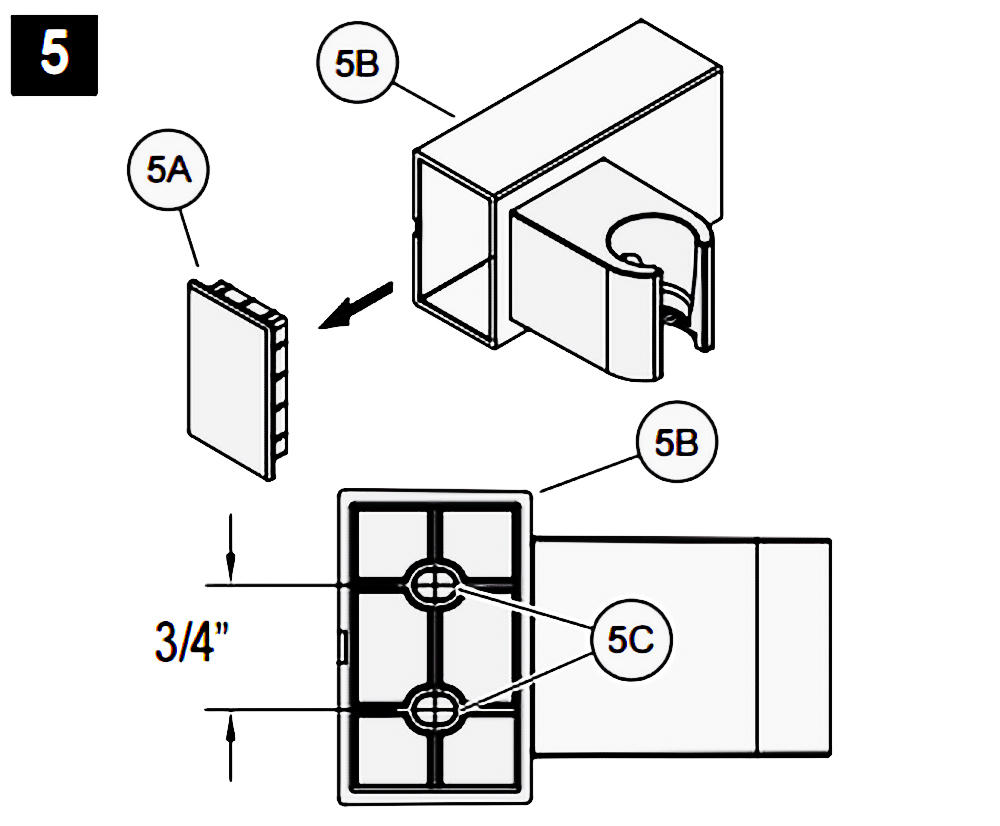
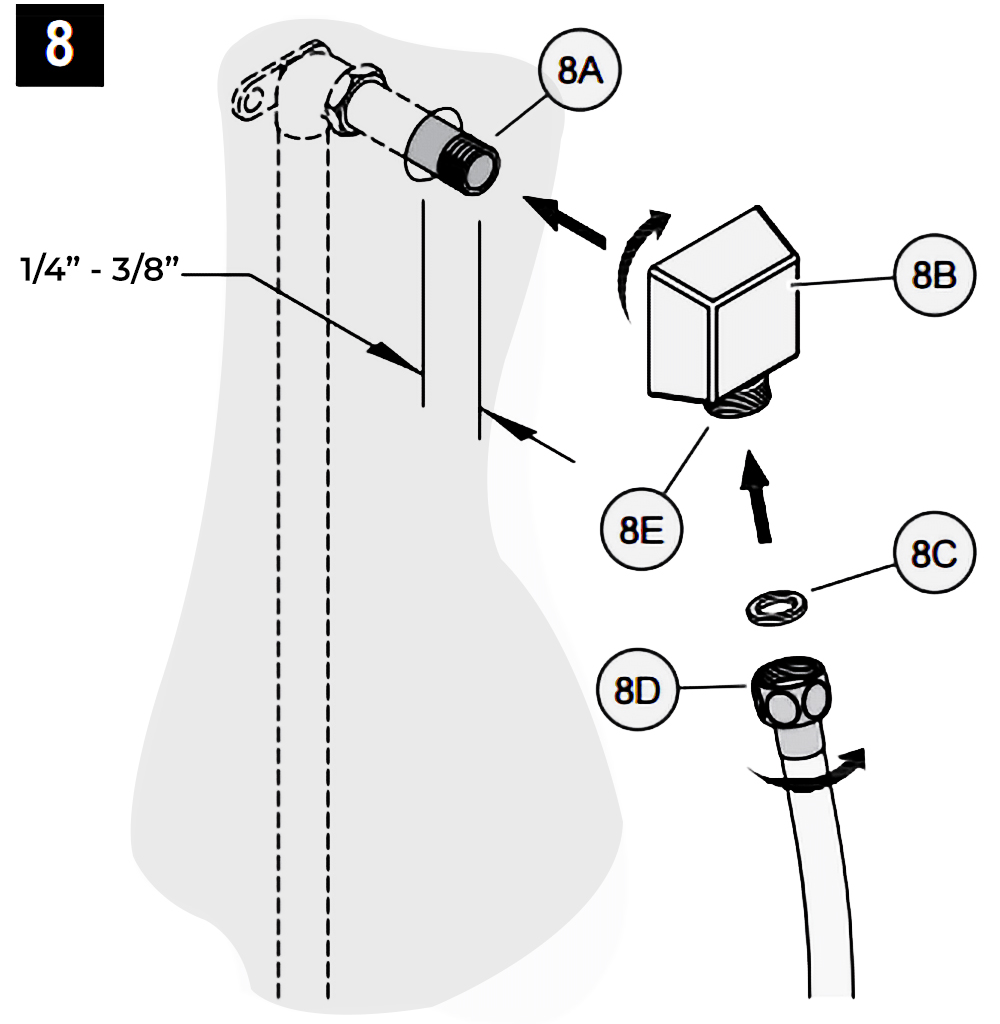
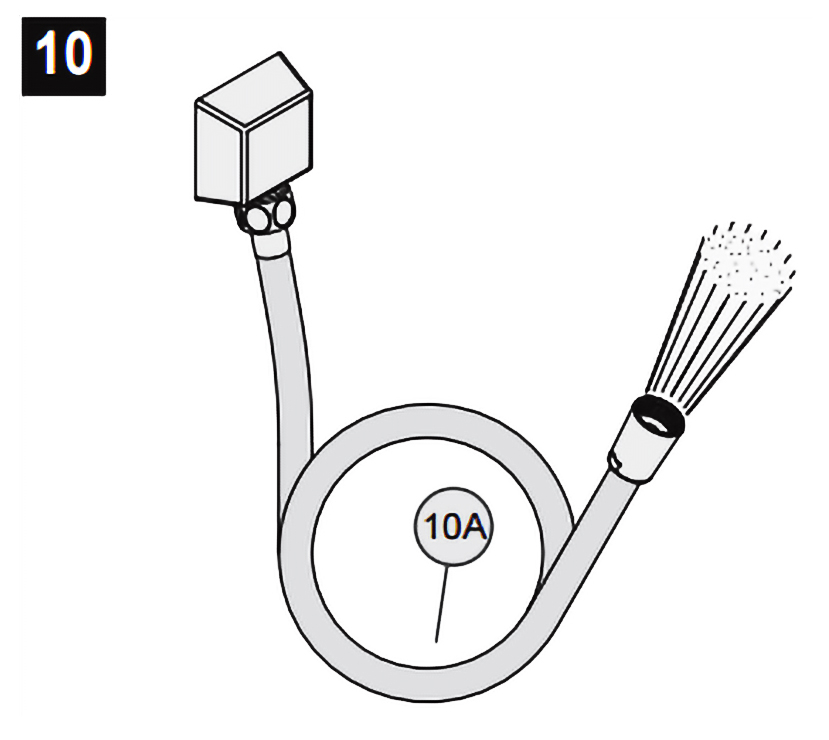
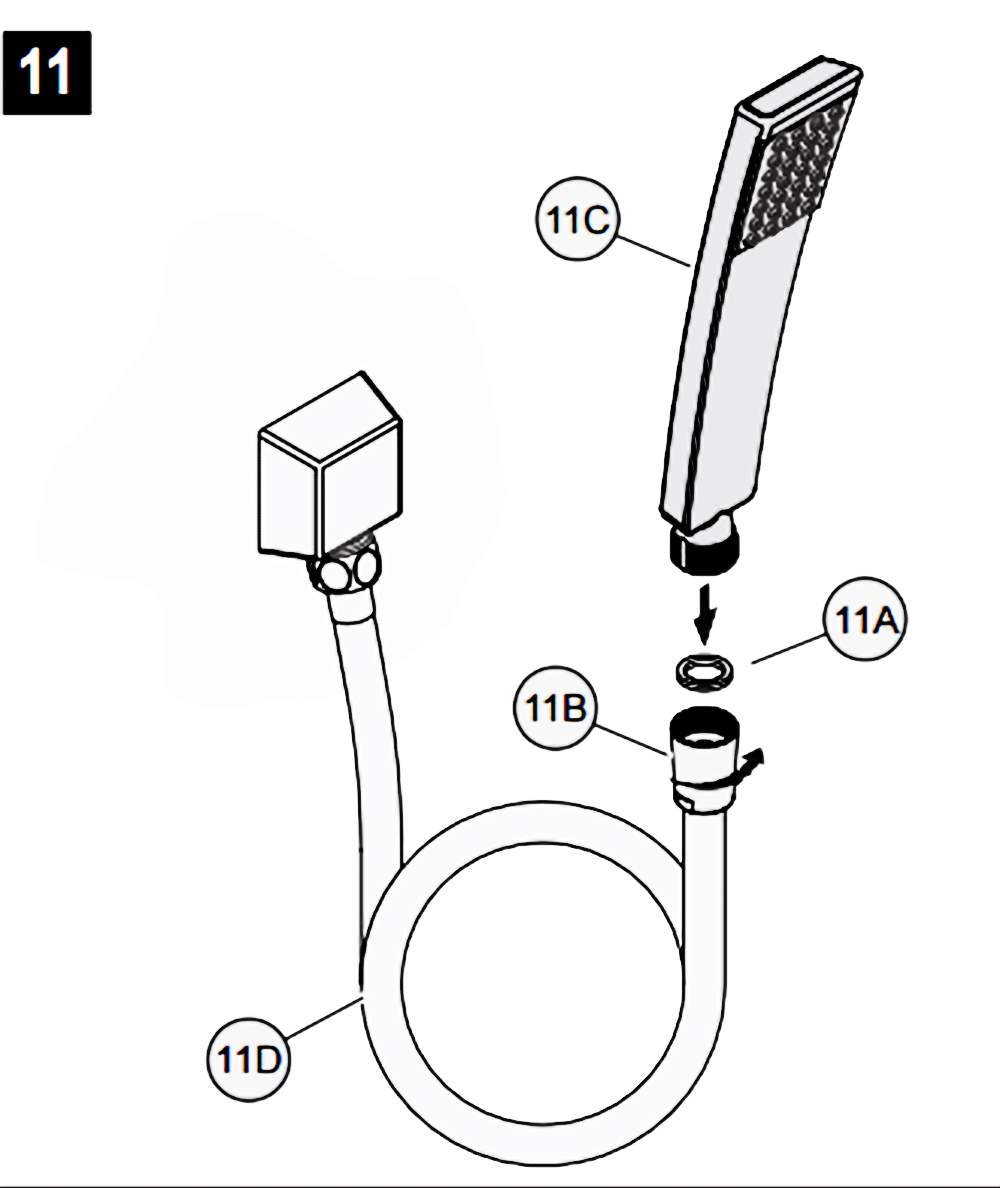
Hand-Held Shower Instructions
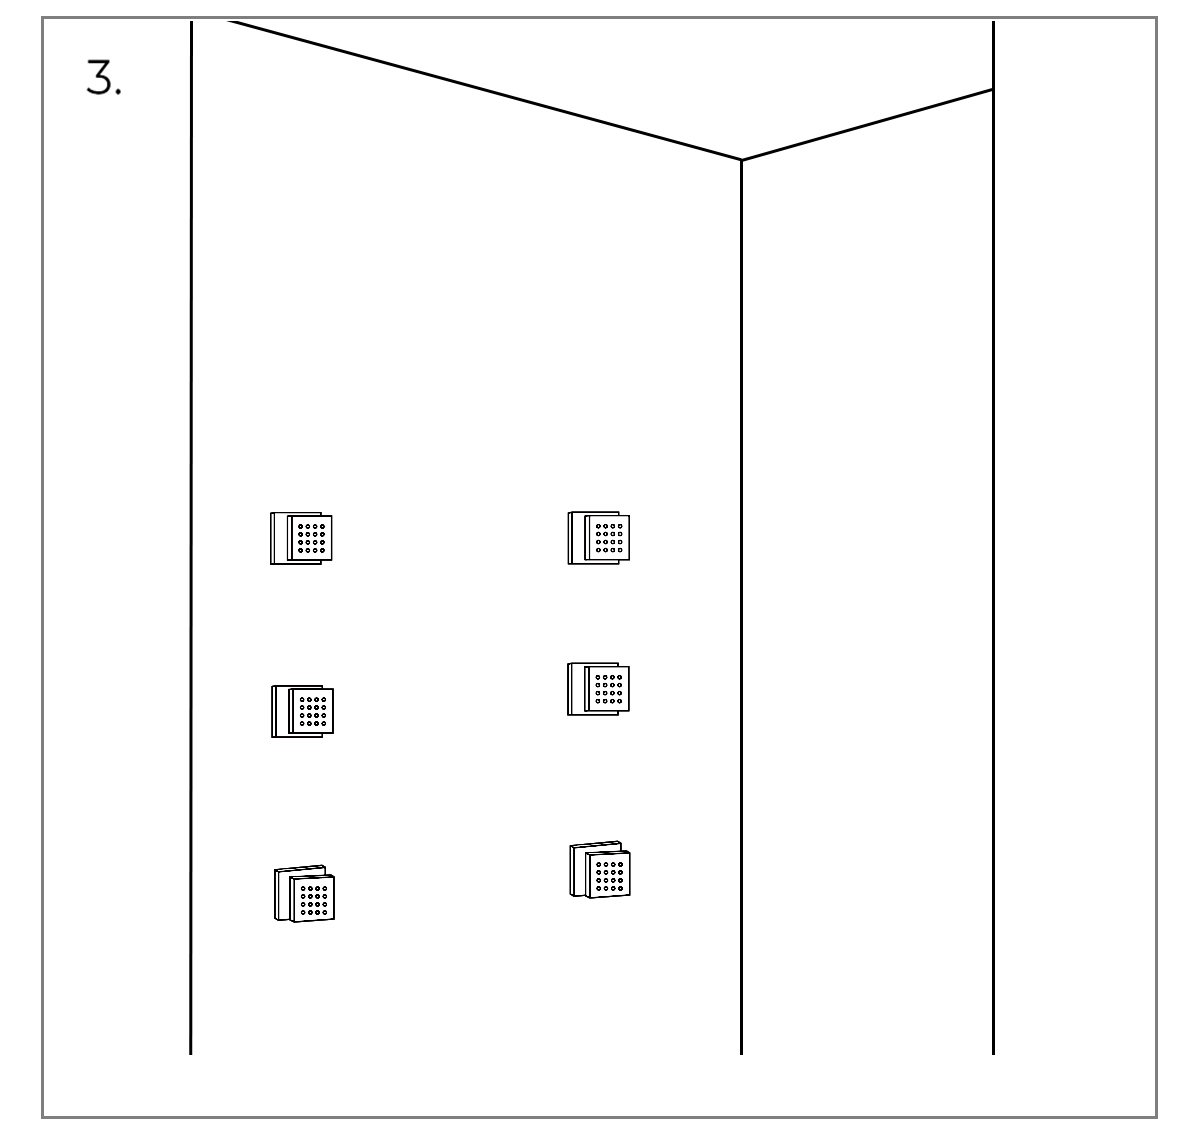
Body Jets Installation
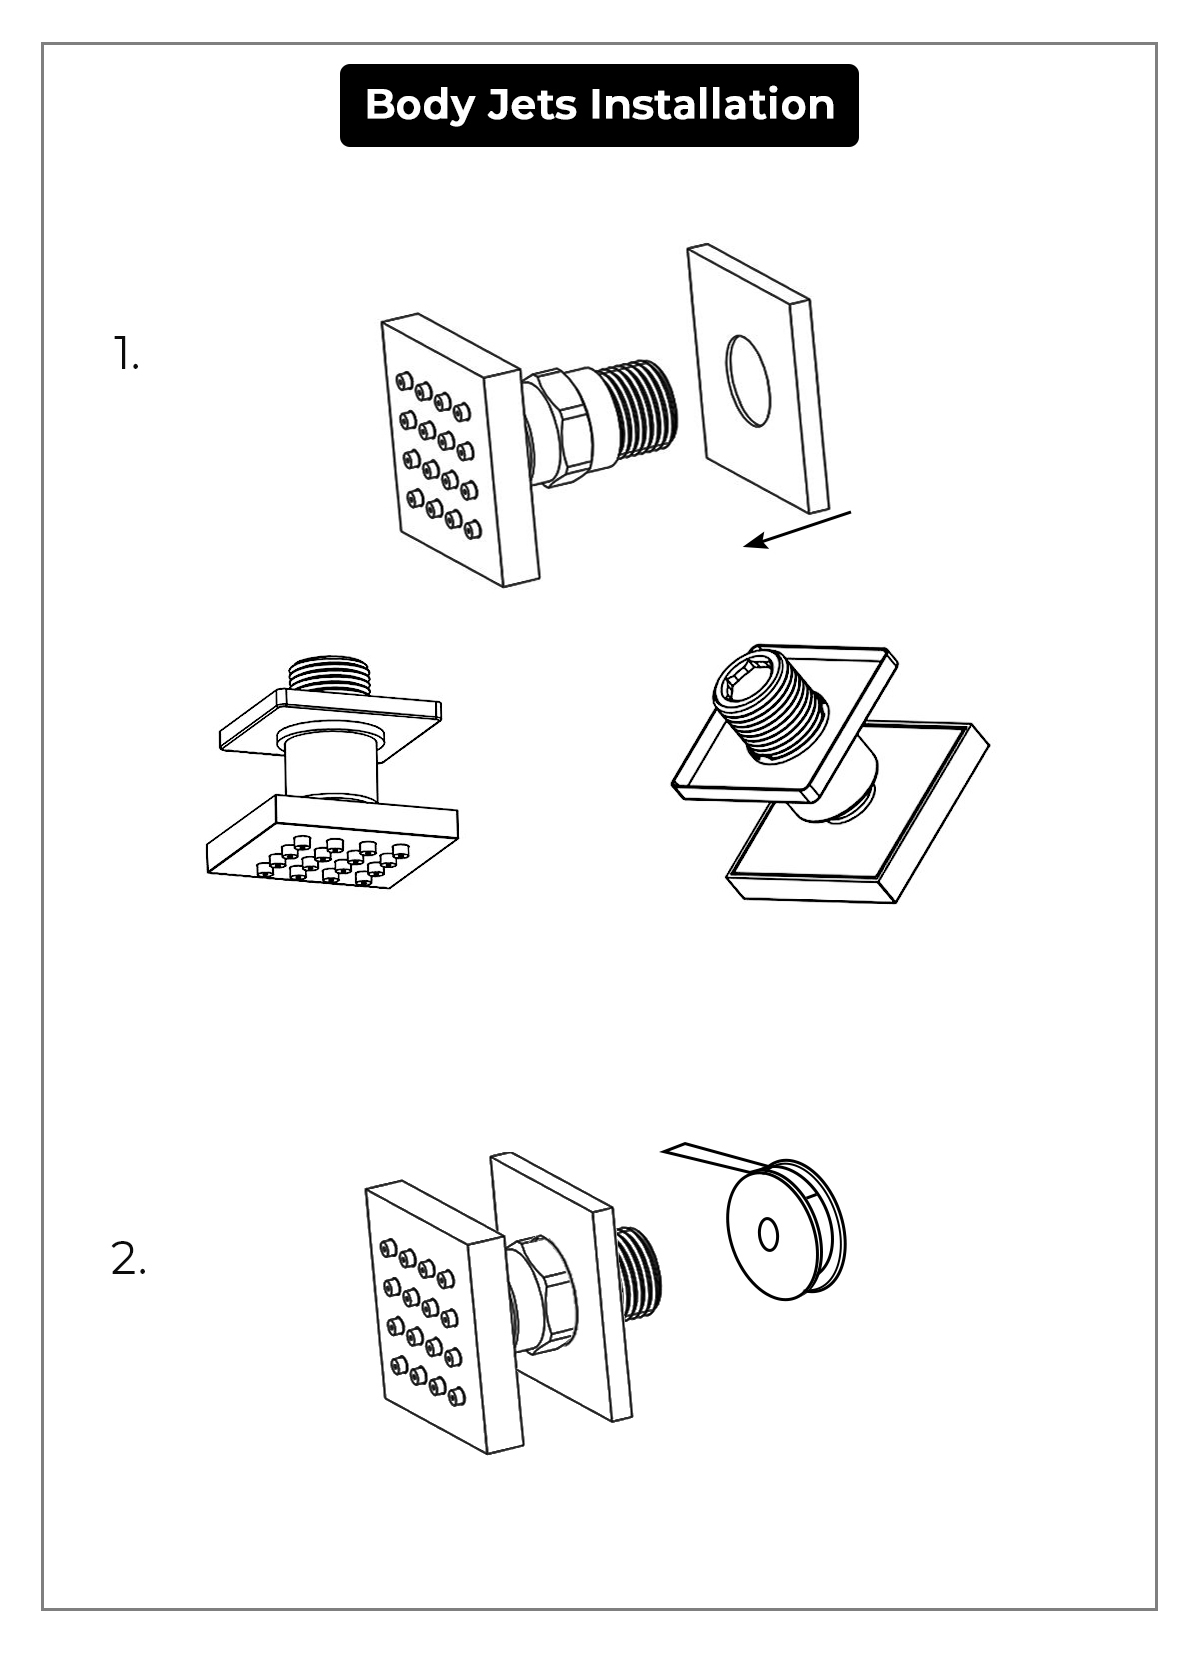
1. Set the decorative cover on the body jet.
2. Roll the raw material belt in the thread screws.
3. Use a wrench to tighten 6 body jets on the water outlet holes in a clockwise direction.
|