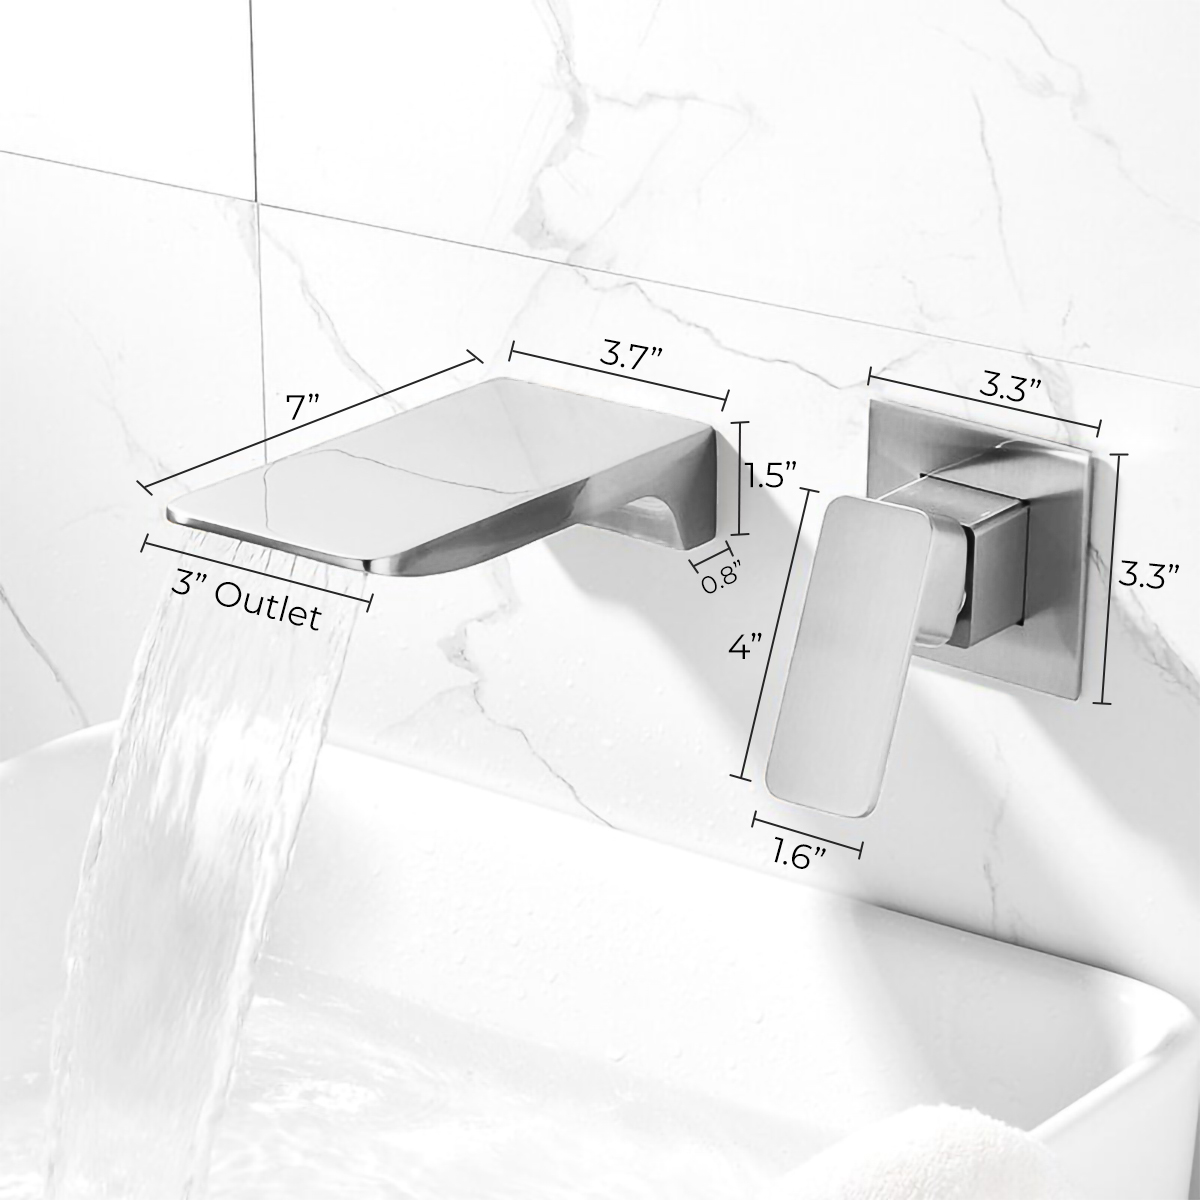
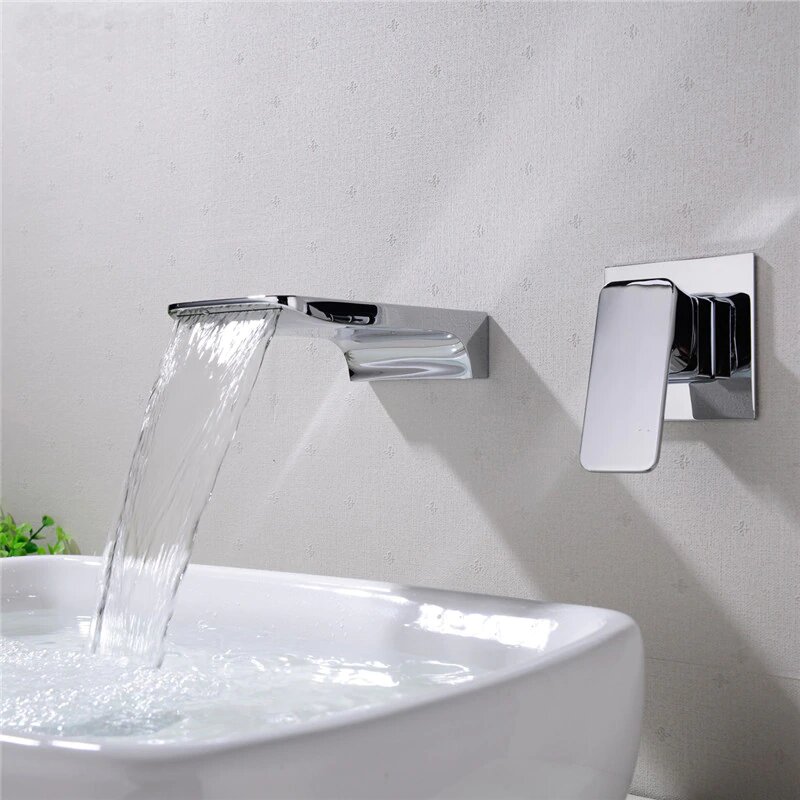
Fontana Napoli Luxury Wall Mount Chrome Finish Sink Faucet
Minimalist design and fluid, contemporary lines combine in this streamlined bathroom faucet. Made from brass in a chrome stylish finish, this set is ceramic disc rough-in valve compatible and requires two faucet wall holes for installation. Chrome finish has rapidly become one of the trendiest finishes across décor styles in the bathroom. The contemporary style enhances the look and fits into your bathroom décor with ease, while the wall-mount installation frees up your countertop or sink. Be sure, when it comes to new bathroom sink faucets, FontanaShowers is offering shape, finish and styles you're looking for.
Fontana Napoli Luxury Wall Mount Chrome Finish Sink Faucet Features:
|
Brand Name: FontanaShowers
Model Number: FS9569
Faucet Type: Sink Faucet
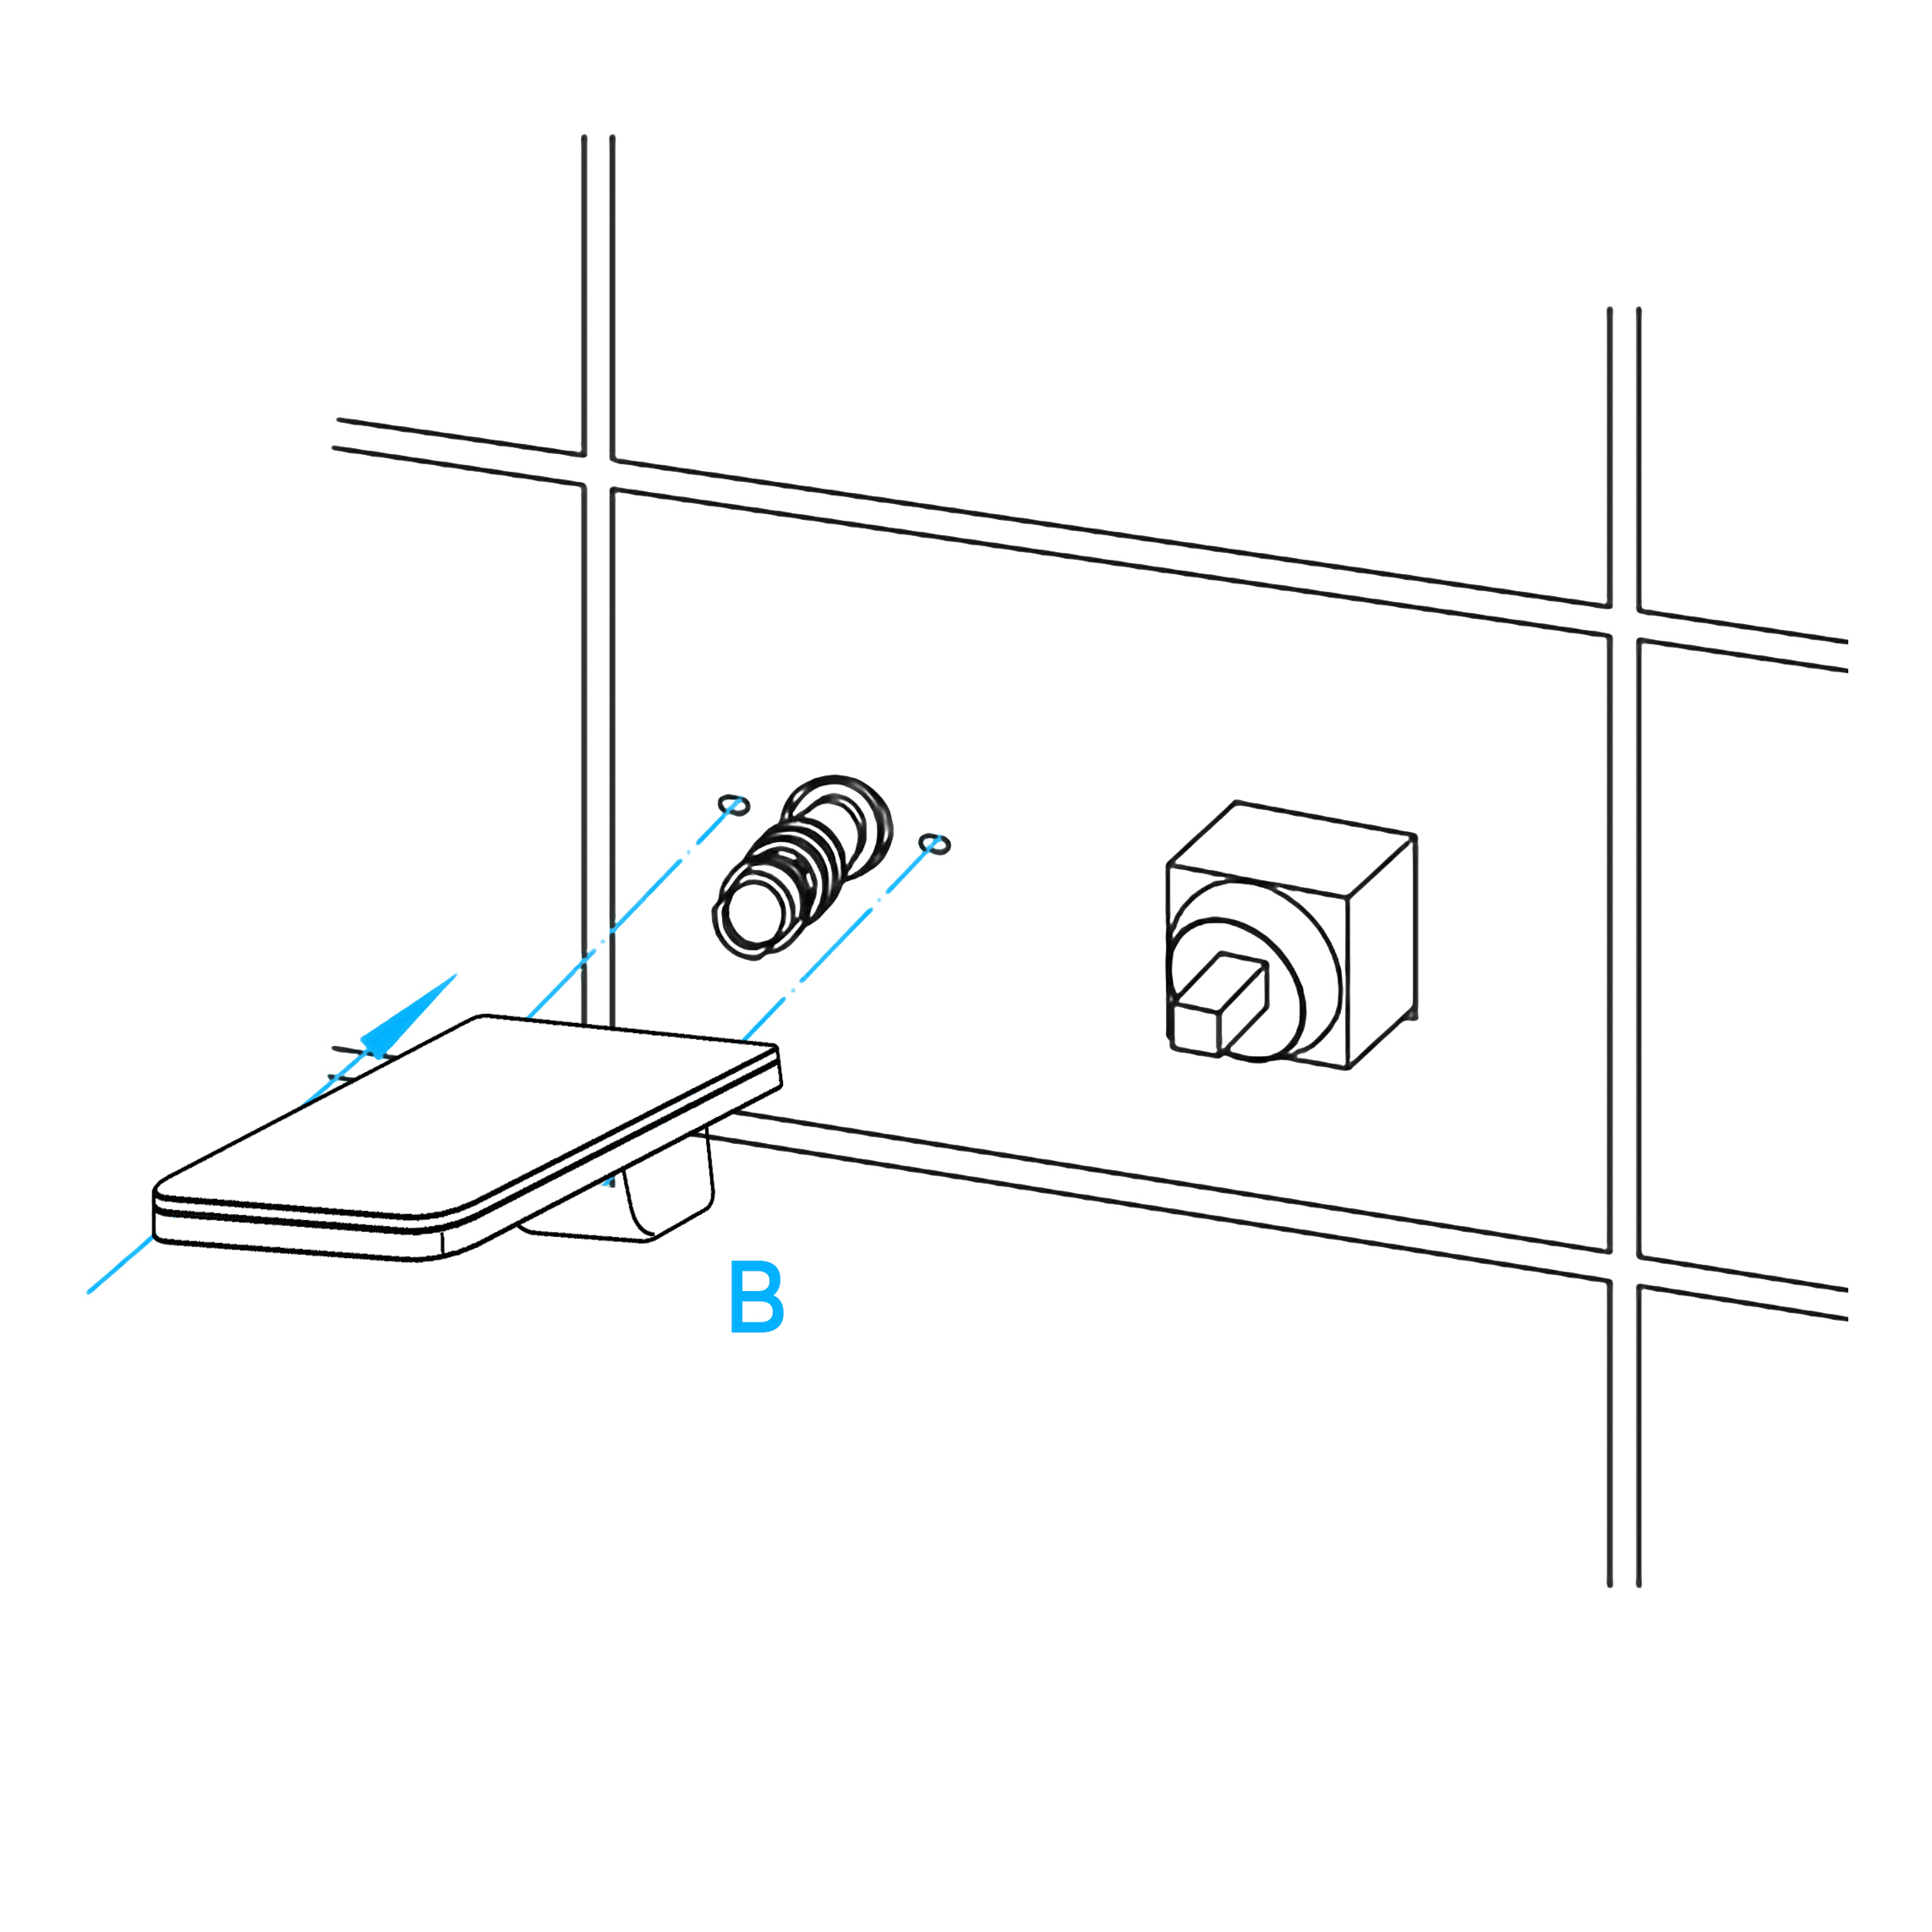
Tap Assembly: 2 Holes
Faucet Style: Contemporary
Surface treatment: Chrome Brushed
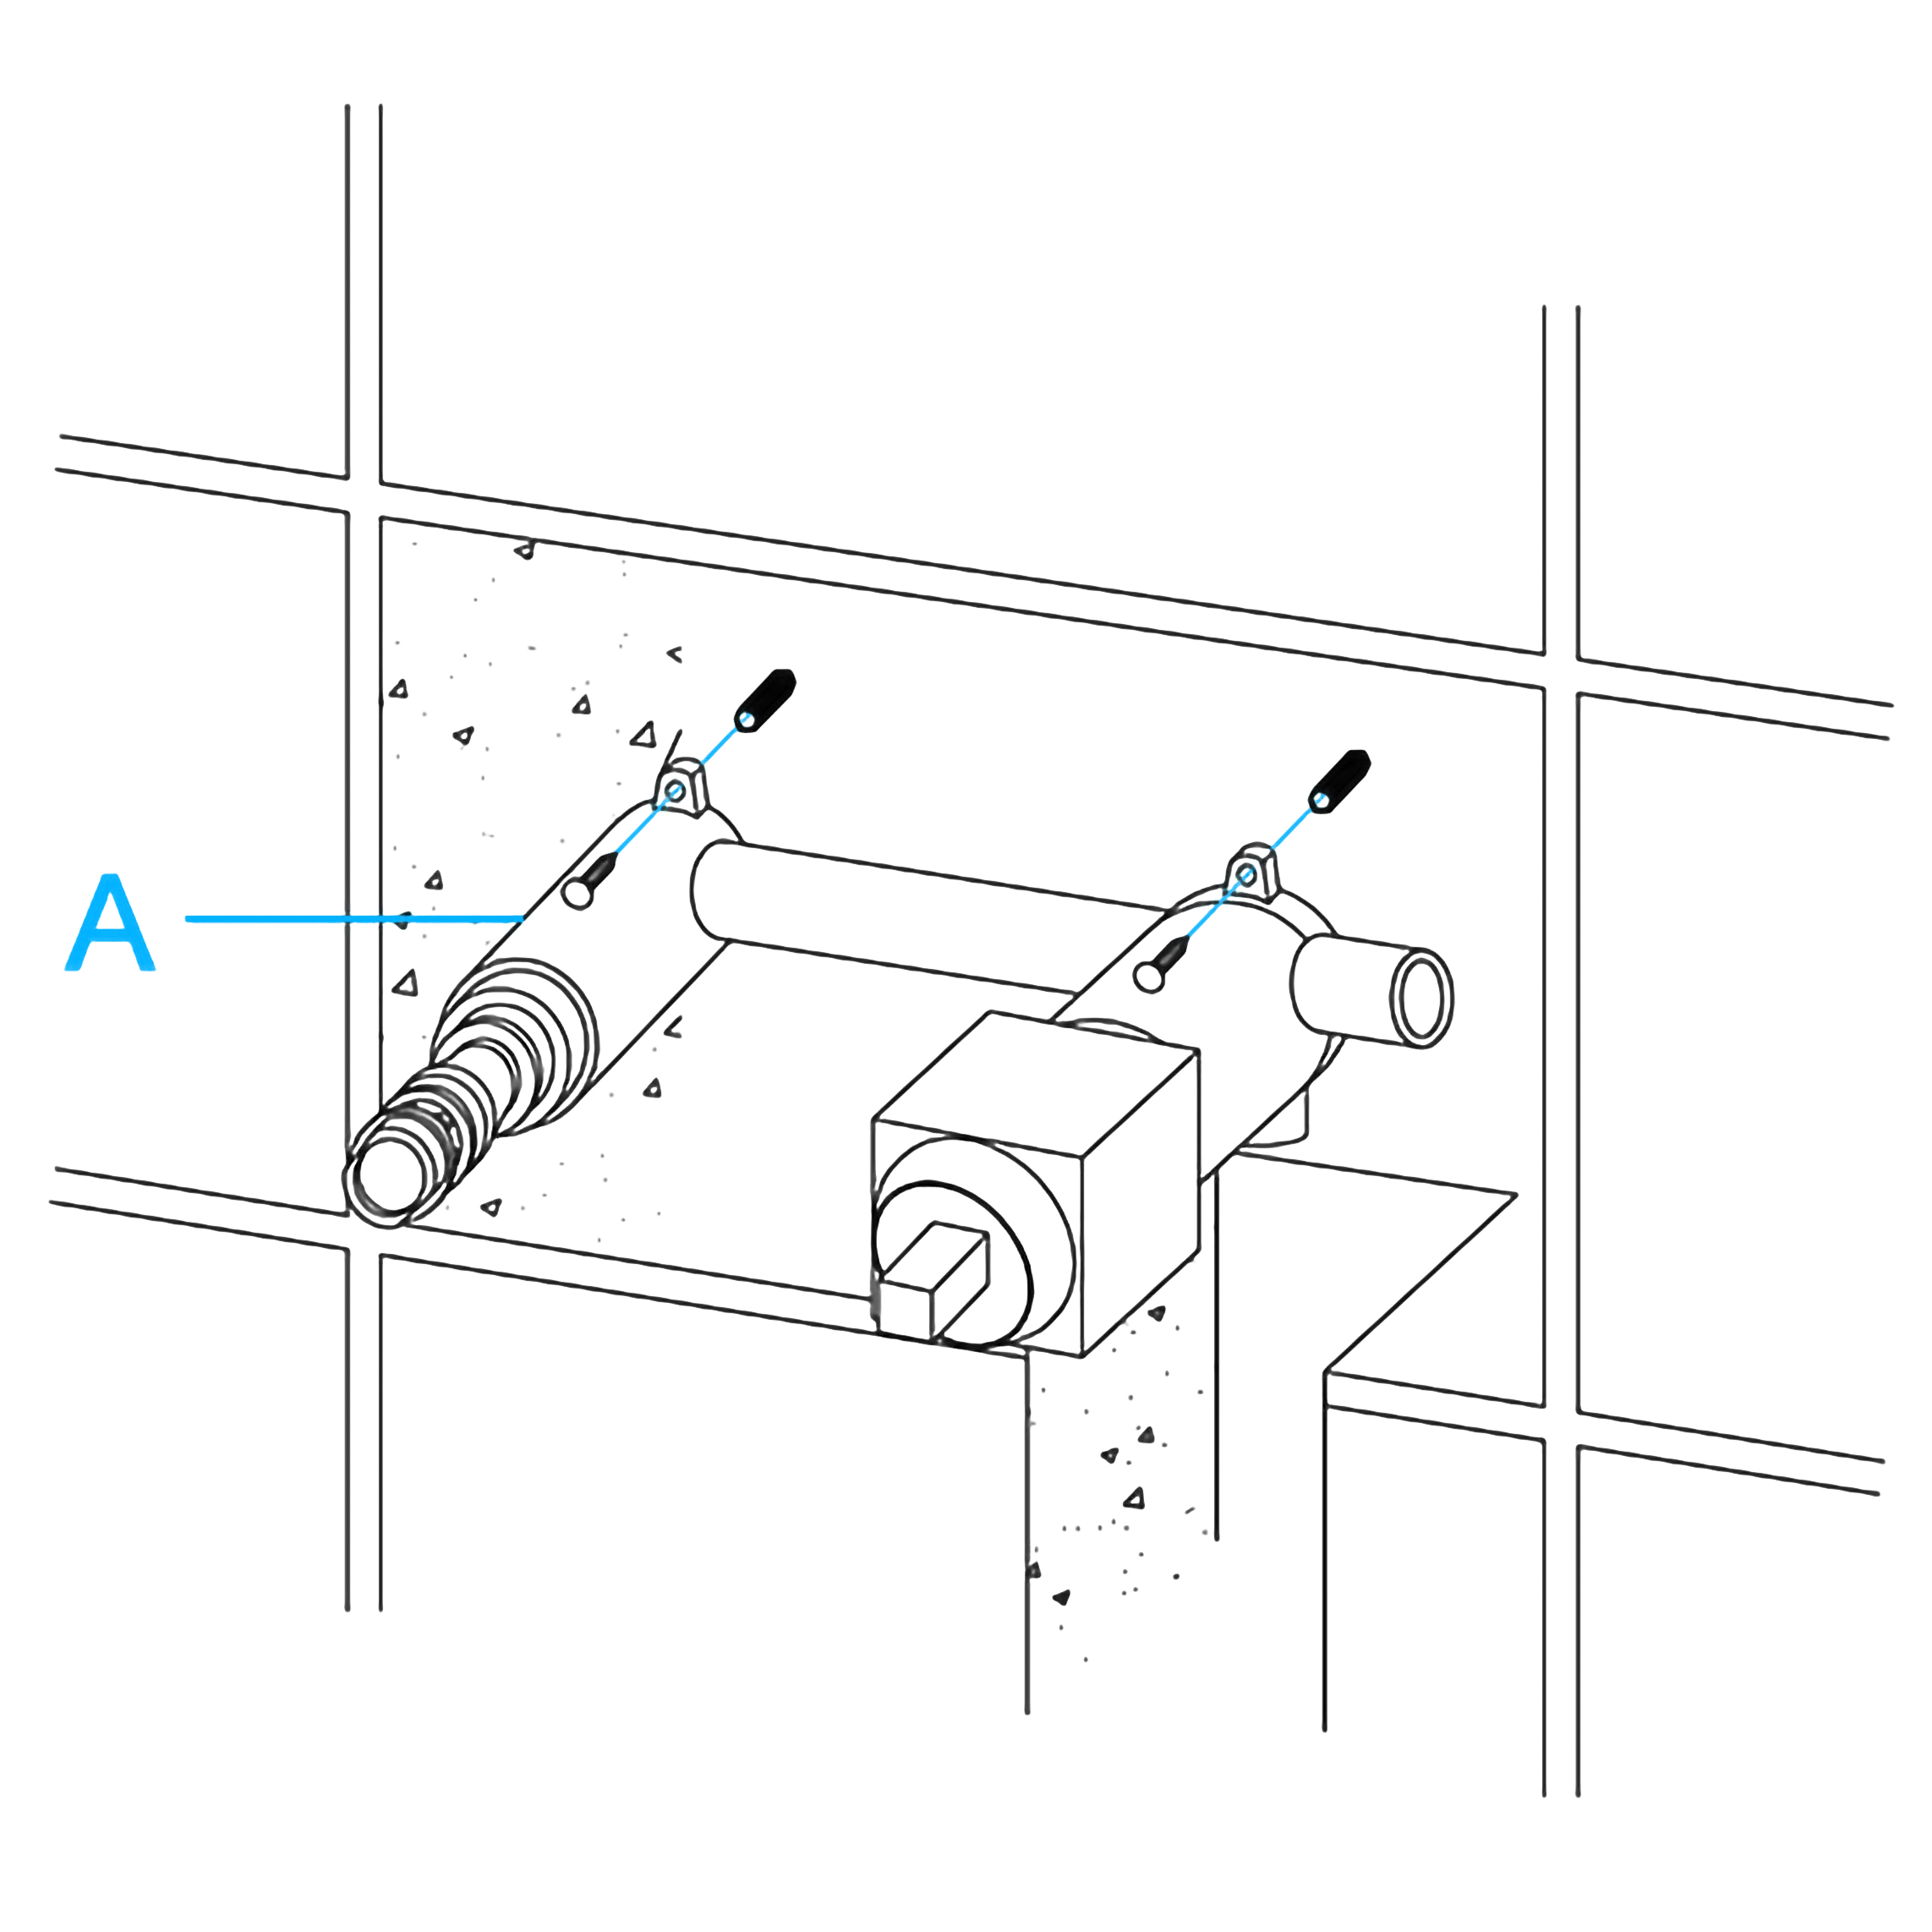
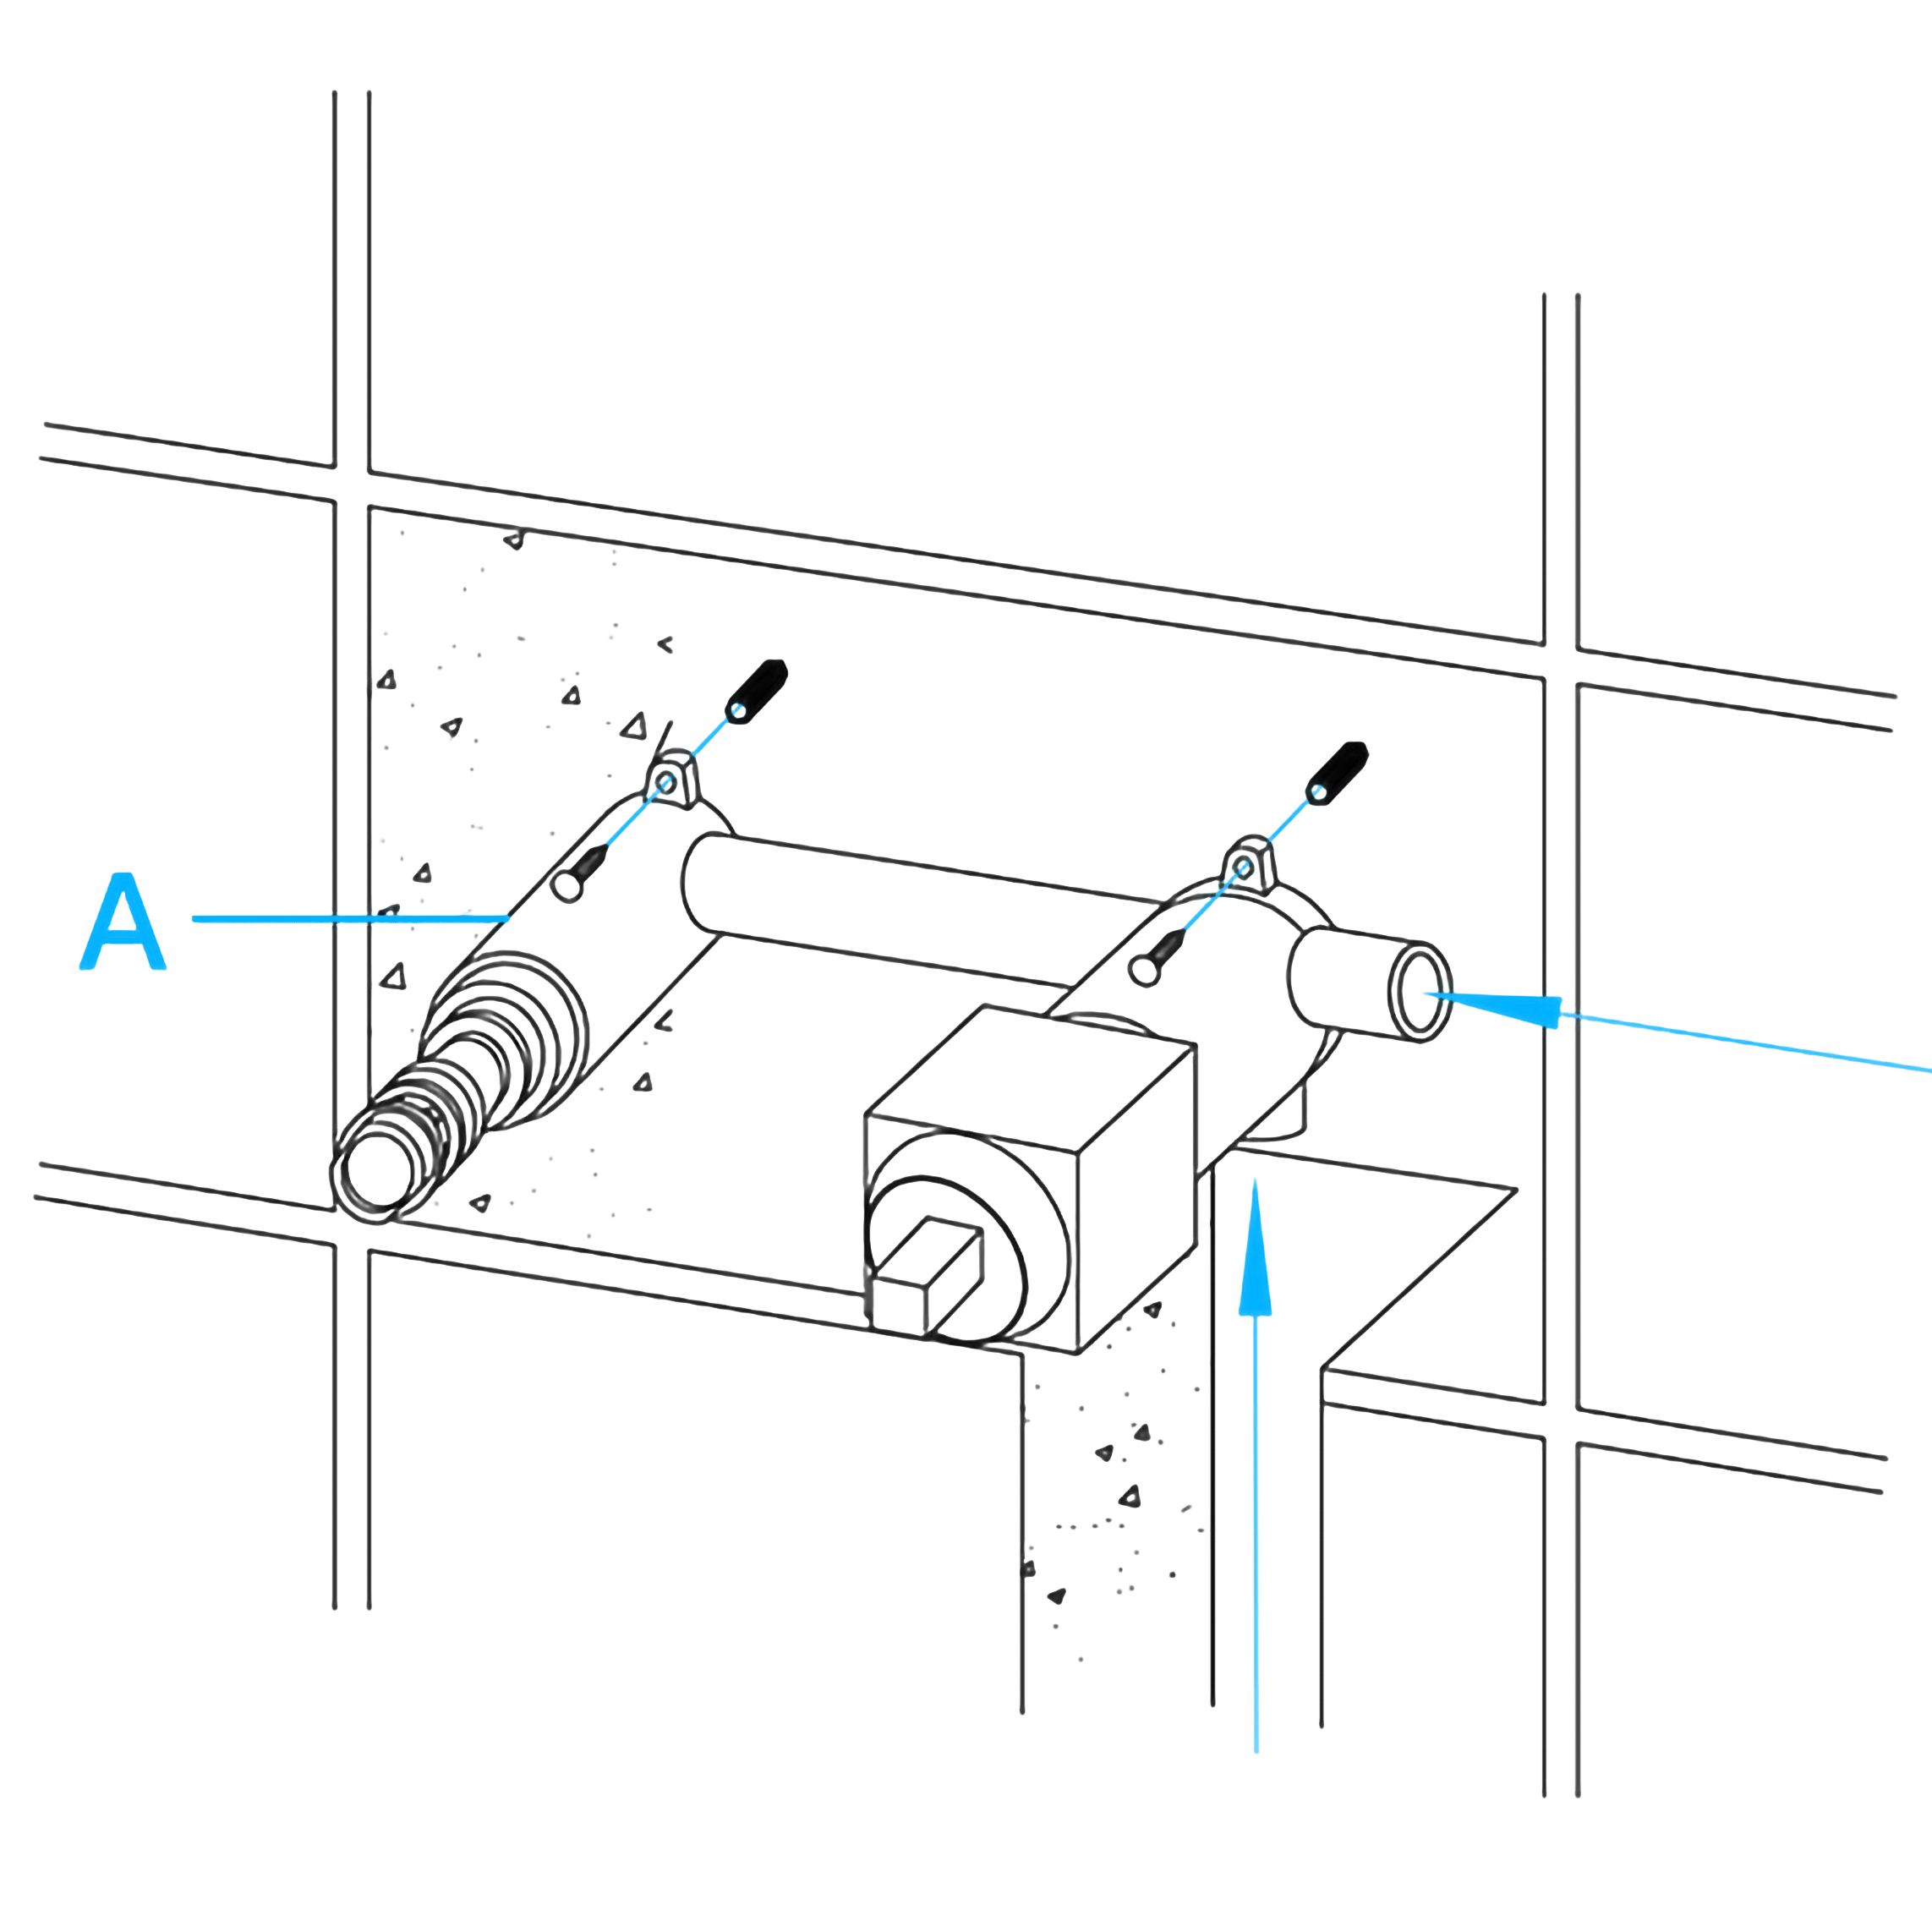
Installation Type: Wall Mount
Core Material: Ceramic
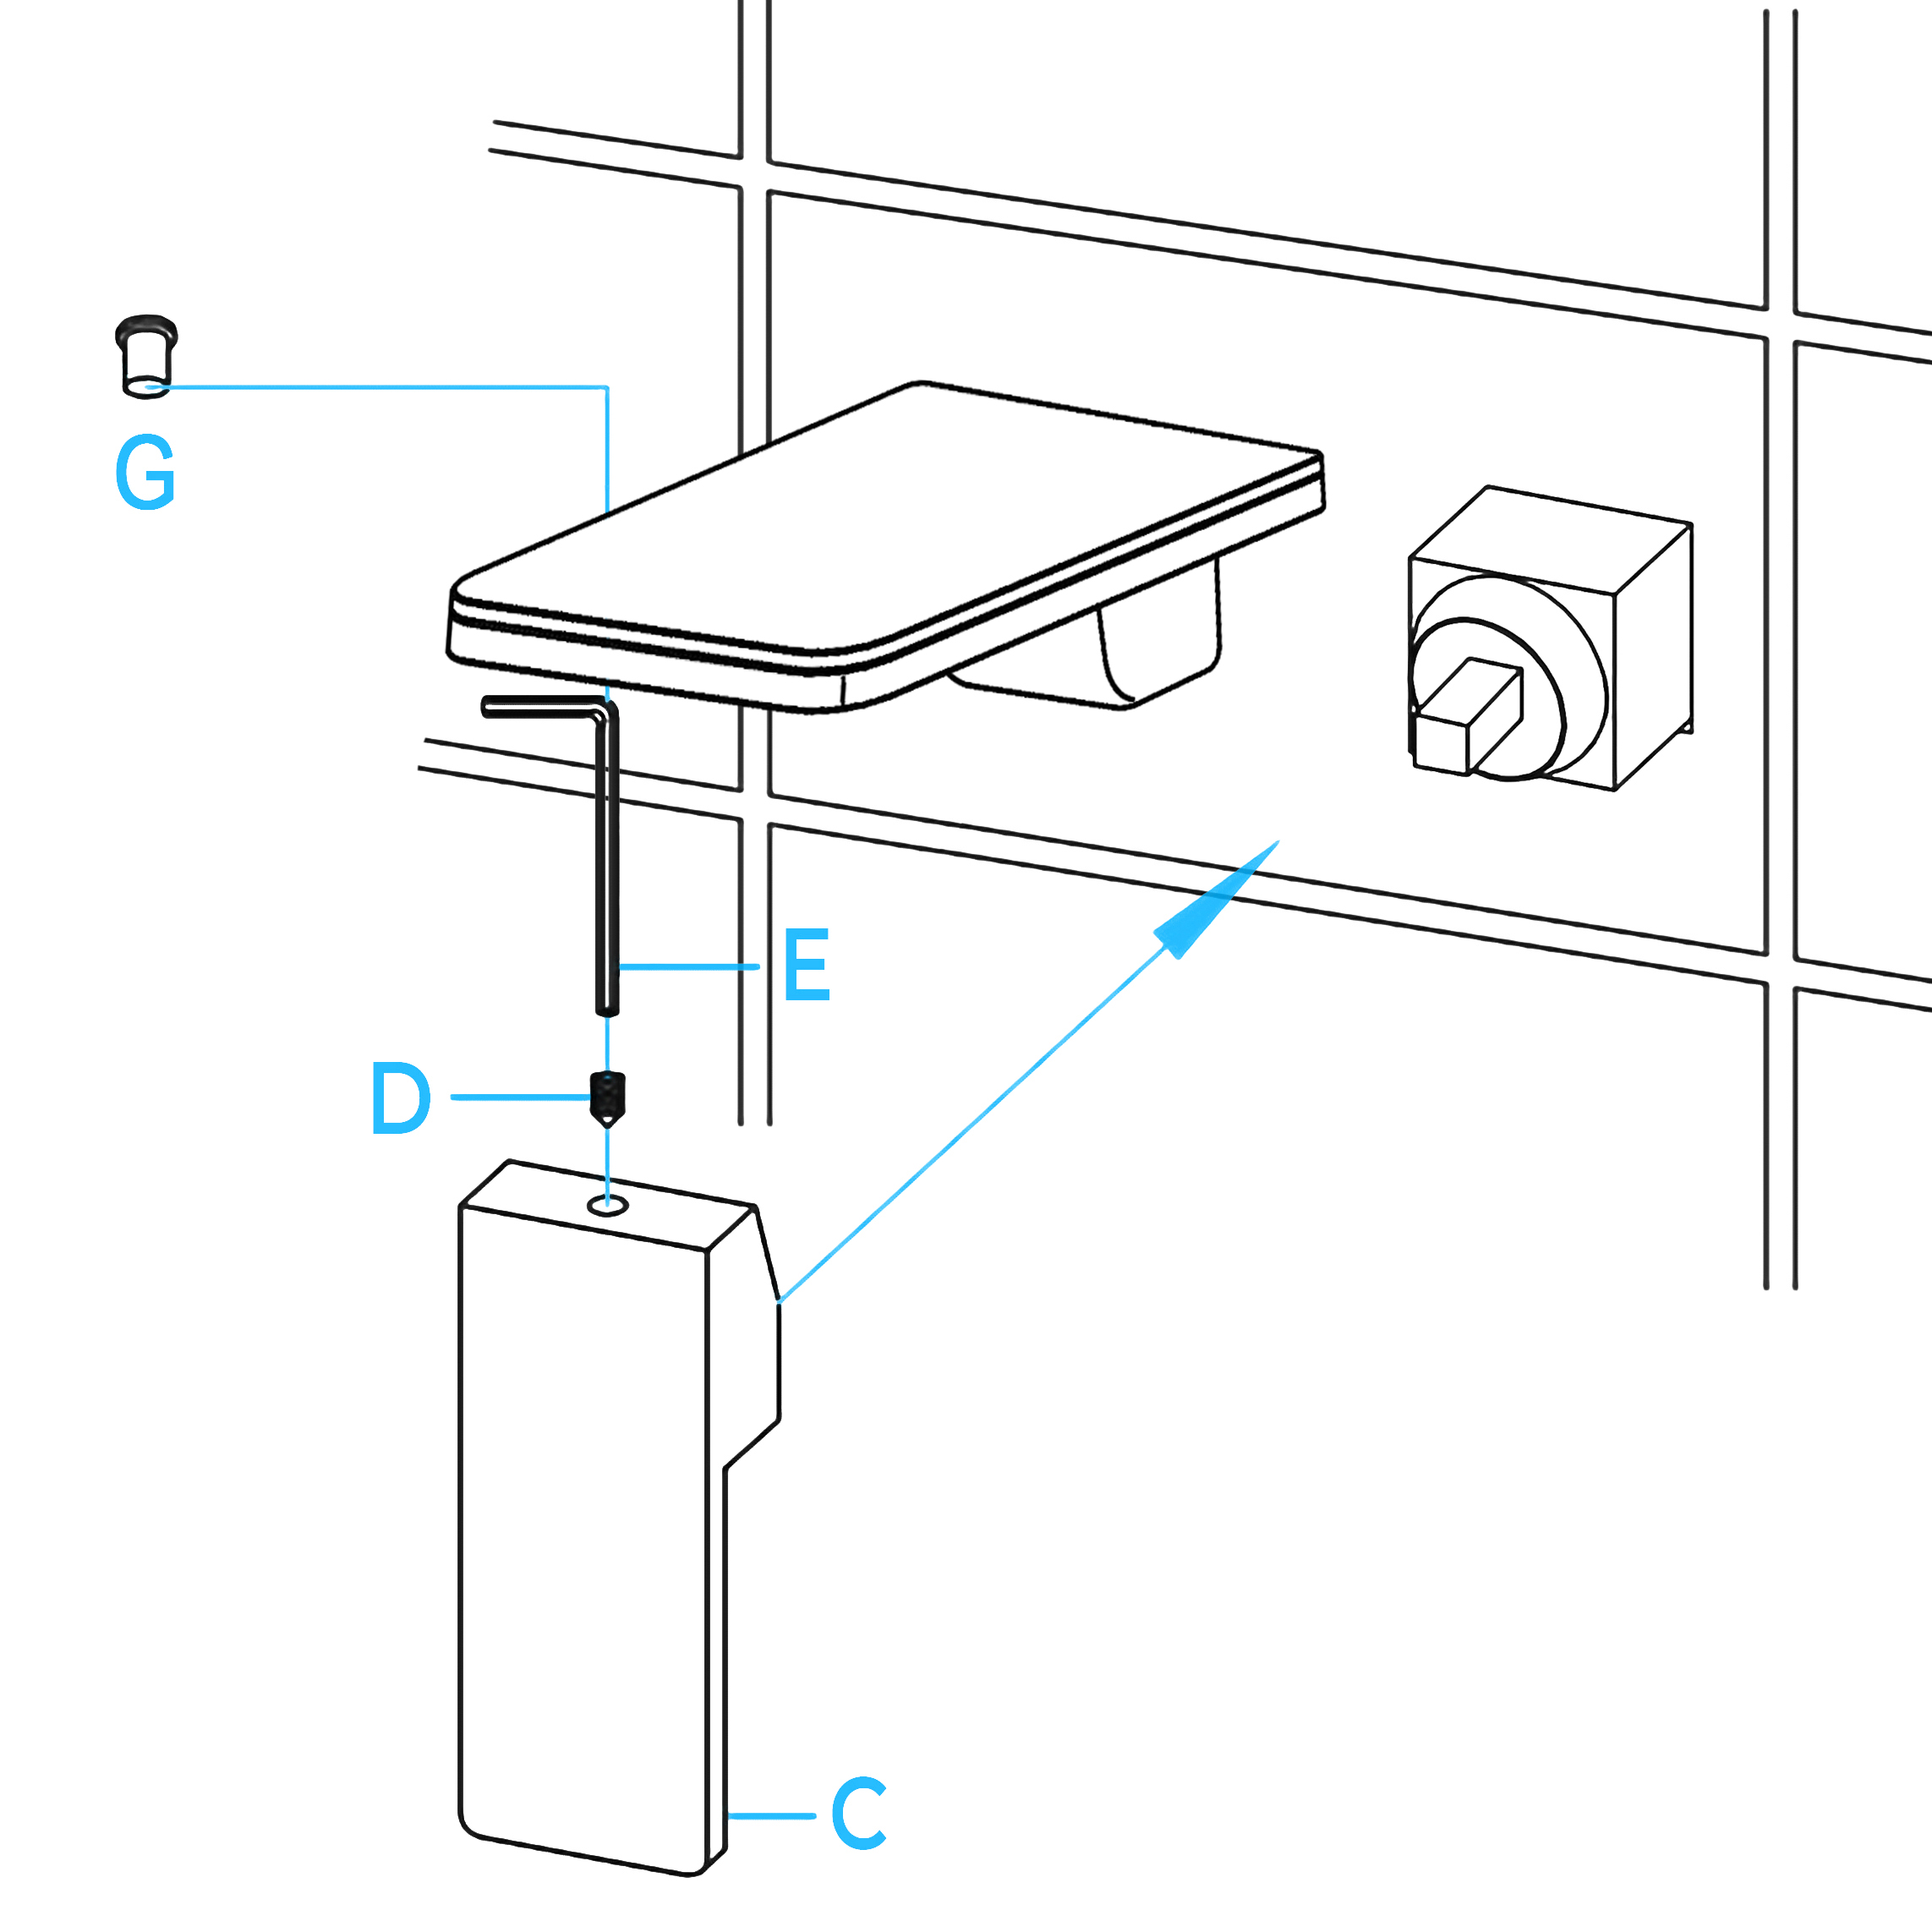
Number of handle: Single Lever
|
|
FontanaShowers® Product Warranty Information 
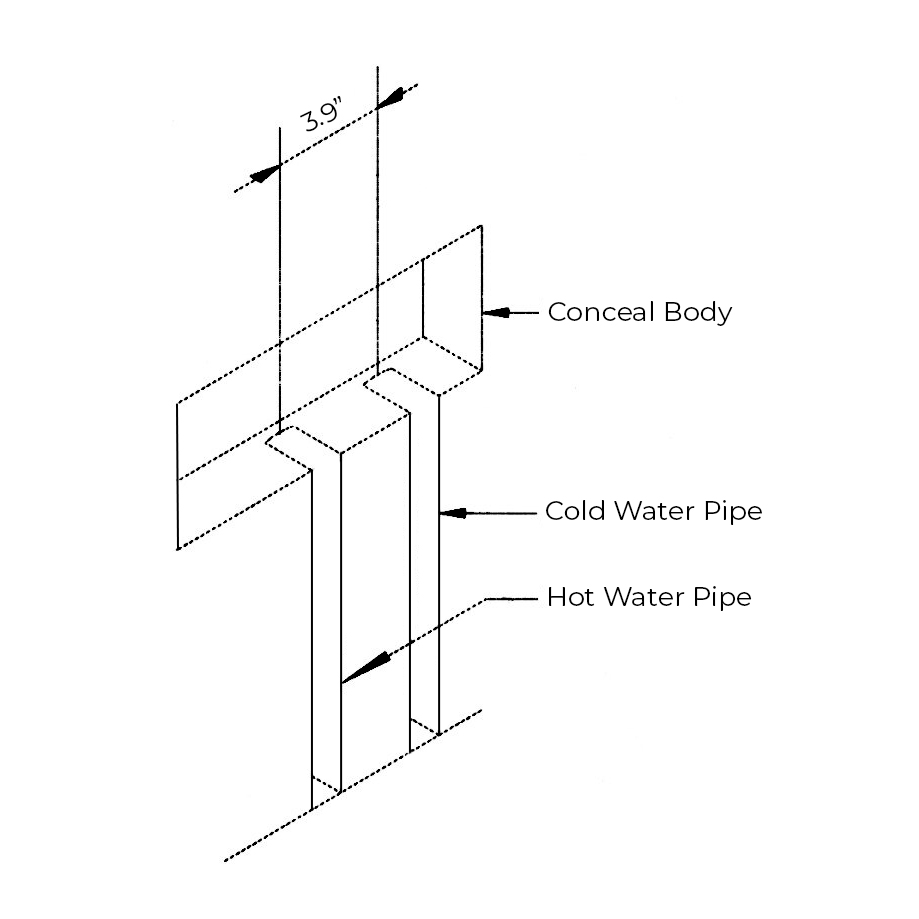
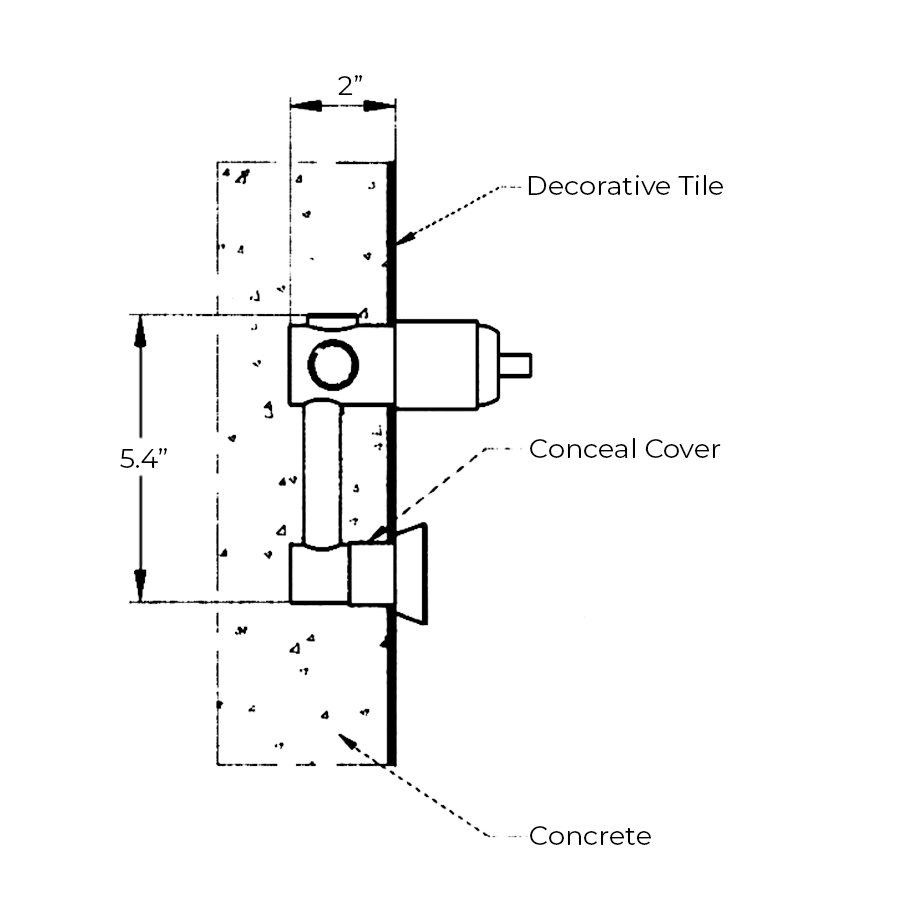
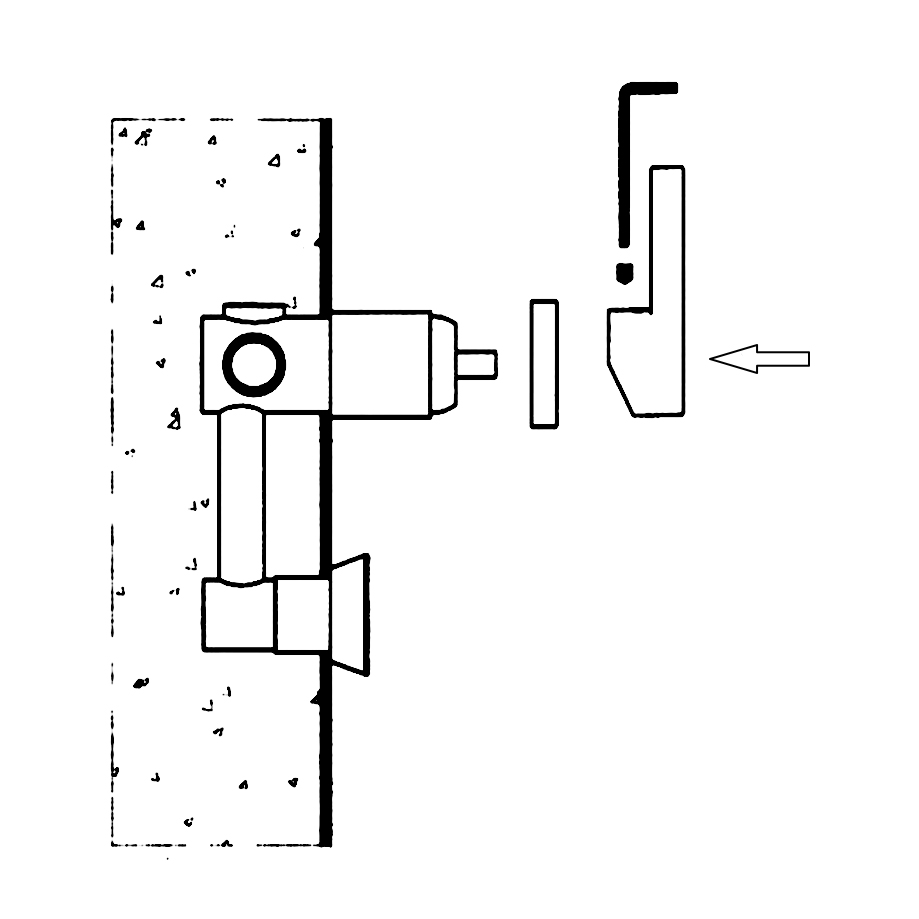
Before you begin, please read the installation instructions below. Observe all local building and safety codes.
- Unpack and inspect the product for any shipping damages. If you find damages, do not install.
- Please note all showers must be installed by a professional and certified plumber otherwise warranty might be voided.
|
faucet
|
|

|