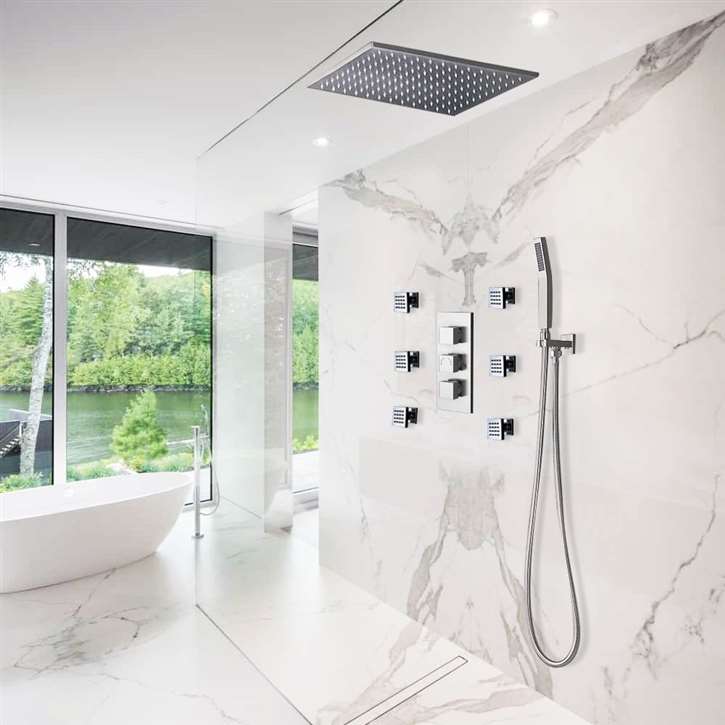
Fontana Rainfall & Mist Shower Head Set With Shower Body Sprays
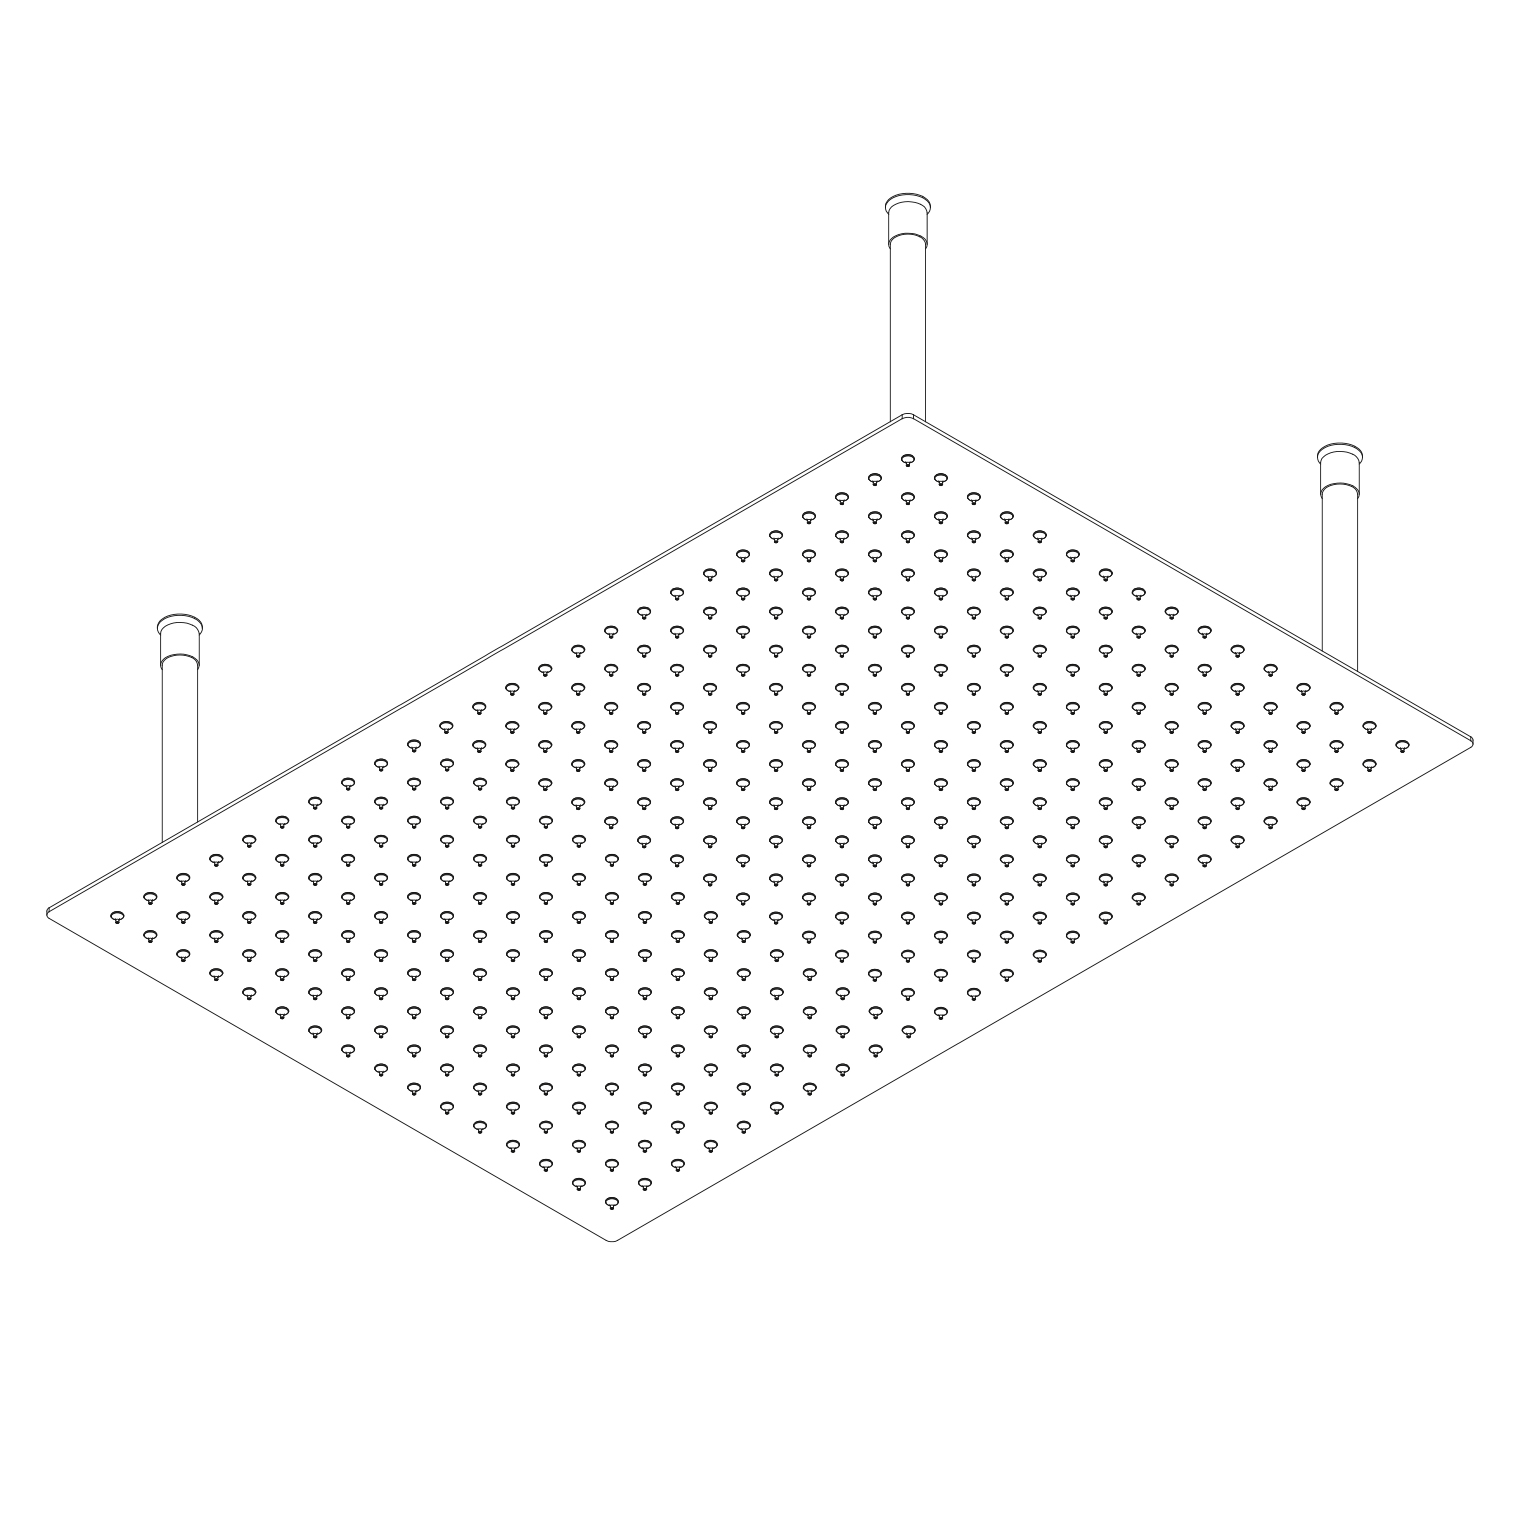
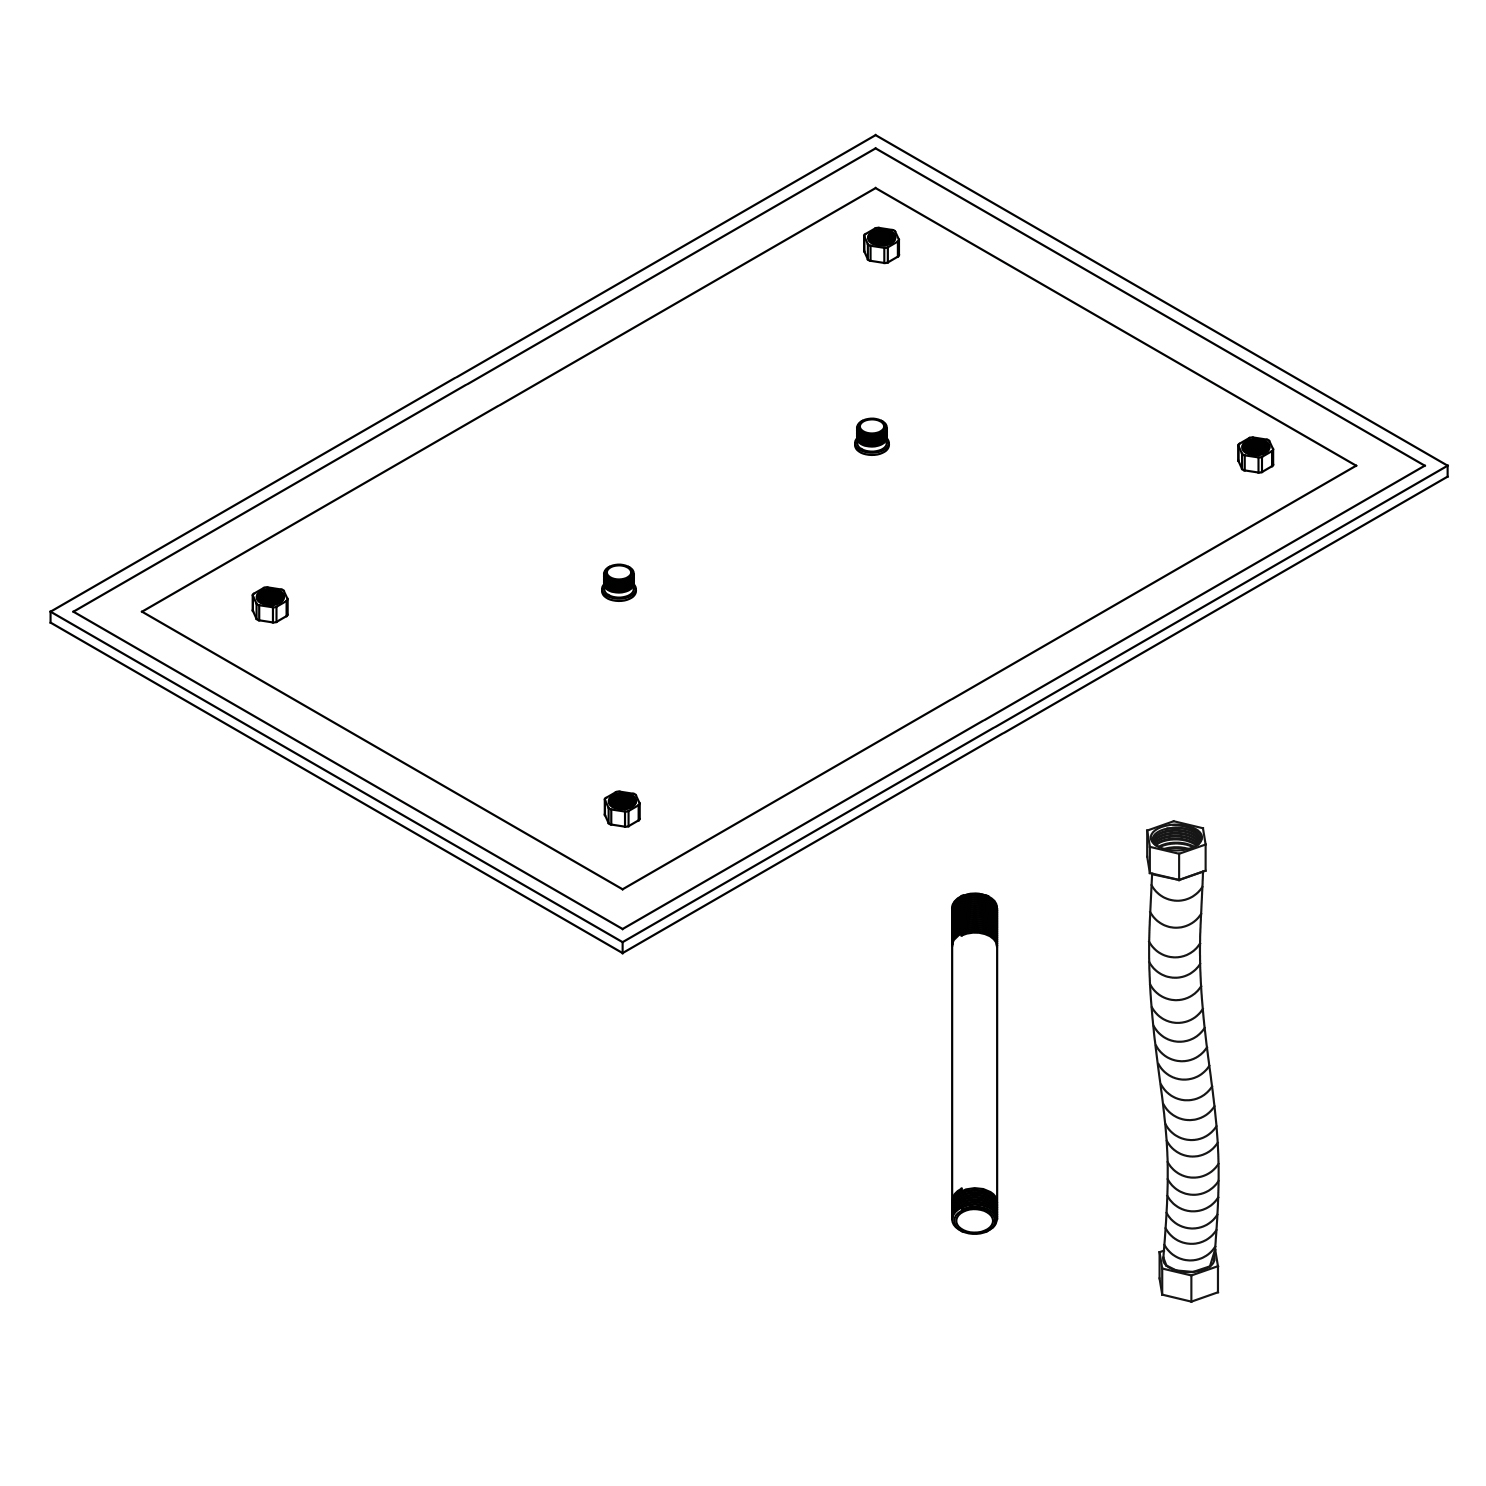
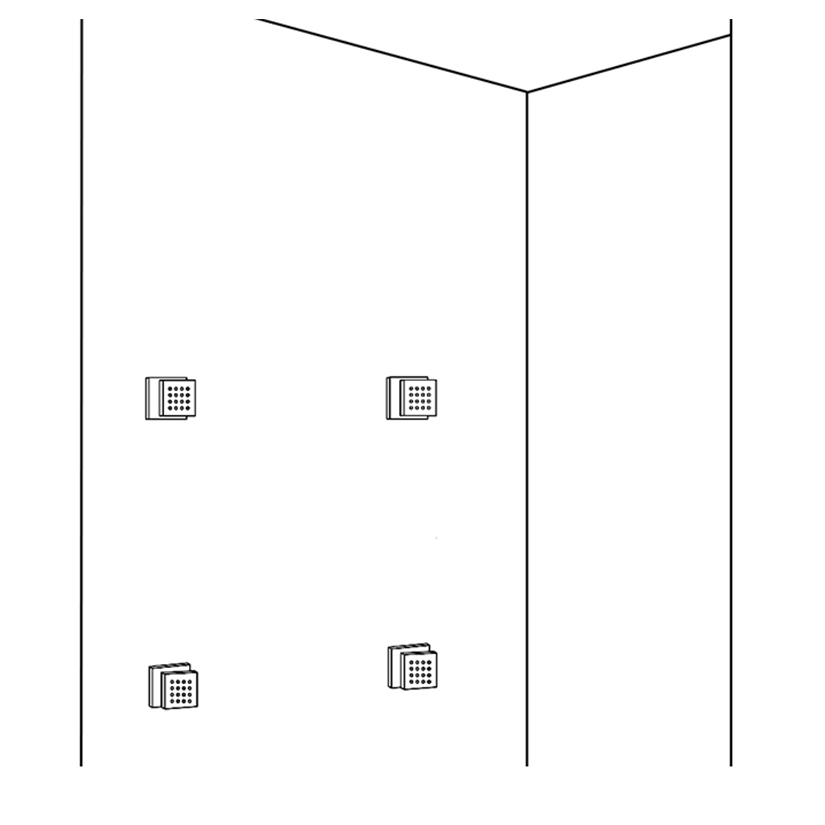
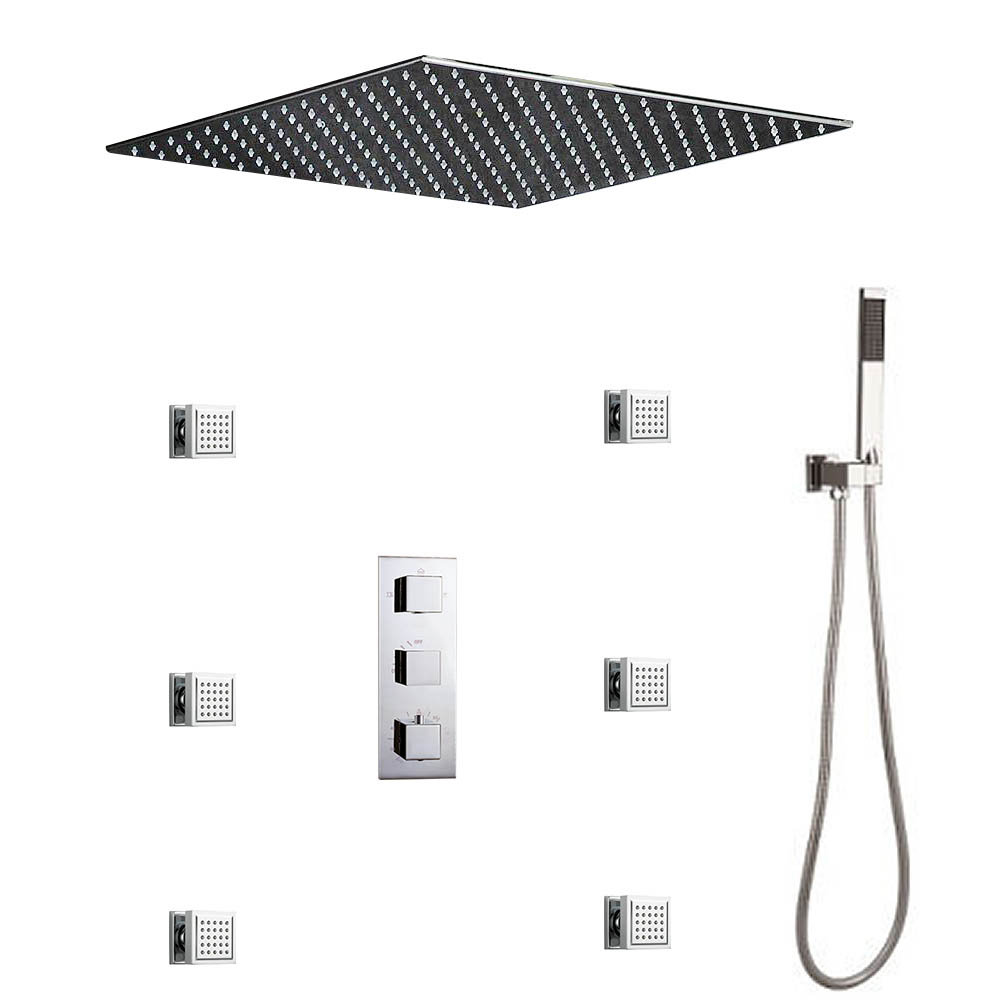
This generous 20" x 20" ceiling mounted shower head provides rainfall and mist options to enhance your showering experience. Three handle mixer includes water divider, on/off and thermostatic temperature control. Six body massage jets come in two sizes to choose from. Hand held shower provides additional massaging coverage where you need it most. Built-in hydro-powered device powers the LED lights, which provide visual shower temperature cues to reduce water waste. The lights will dim and brighten when you lower and raise the pressure so you can set the perfect mood, water, and lighting. When water temperature is ≤89 °F (≤32 °C), Blue color will show automatically. When water temperature is between 97 to 107 °F (36-42 °C), Green color will show automatically. When water temperature is between 109 to 122 °F (43-50 °C), Red color will show automatically. When water temperature is above 122 °F (>50 °C), Red color will flash immediately.
Fontana Rainfall & Mist Shower Head Set With Shower Body Sprays Features:
|
Brand Name: FontanaShowers
Model Number: FS-7209M
Type: Bathroom Shower System
Water Flow Rate: 18 (L/Min) 4.8 GPM
Ceiling mounted arm length range: 10.5"- 16"
Inlet and Outlet: G1/2" x G1/2"
Shape: Square
Material: Stainless Steel
Finish: Chrome
Materials: Solid Brass
|
|
FontanaShowers®Product Warranty Information
- Before you begin, please read the installation instructions below. Observe all local building and safety codes.
- Unpack and inspect the product for any shipping damages. If you find damages, do not install.
- Please note all showers must be installed by a professional and certified plumber otherwise warranty might be voided.
|
shower
|
|
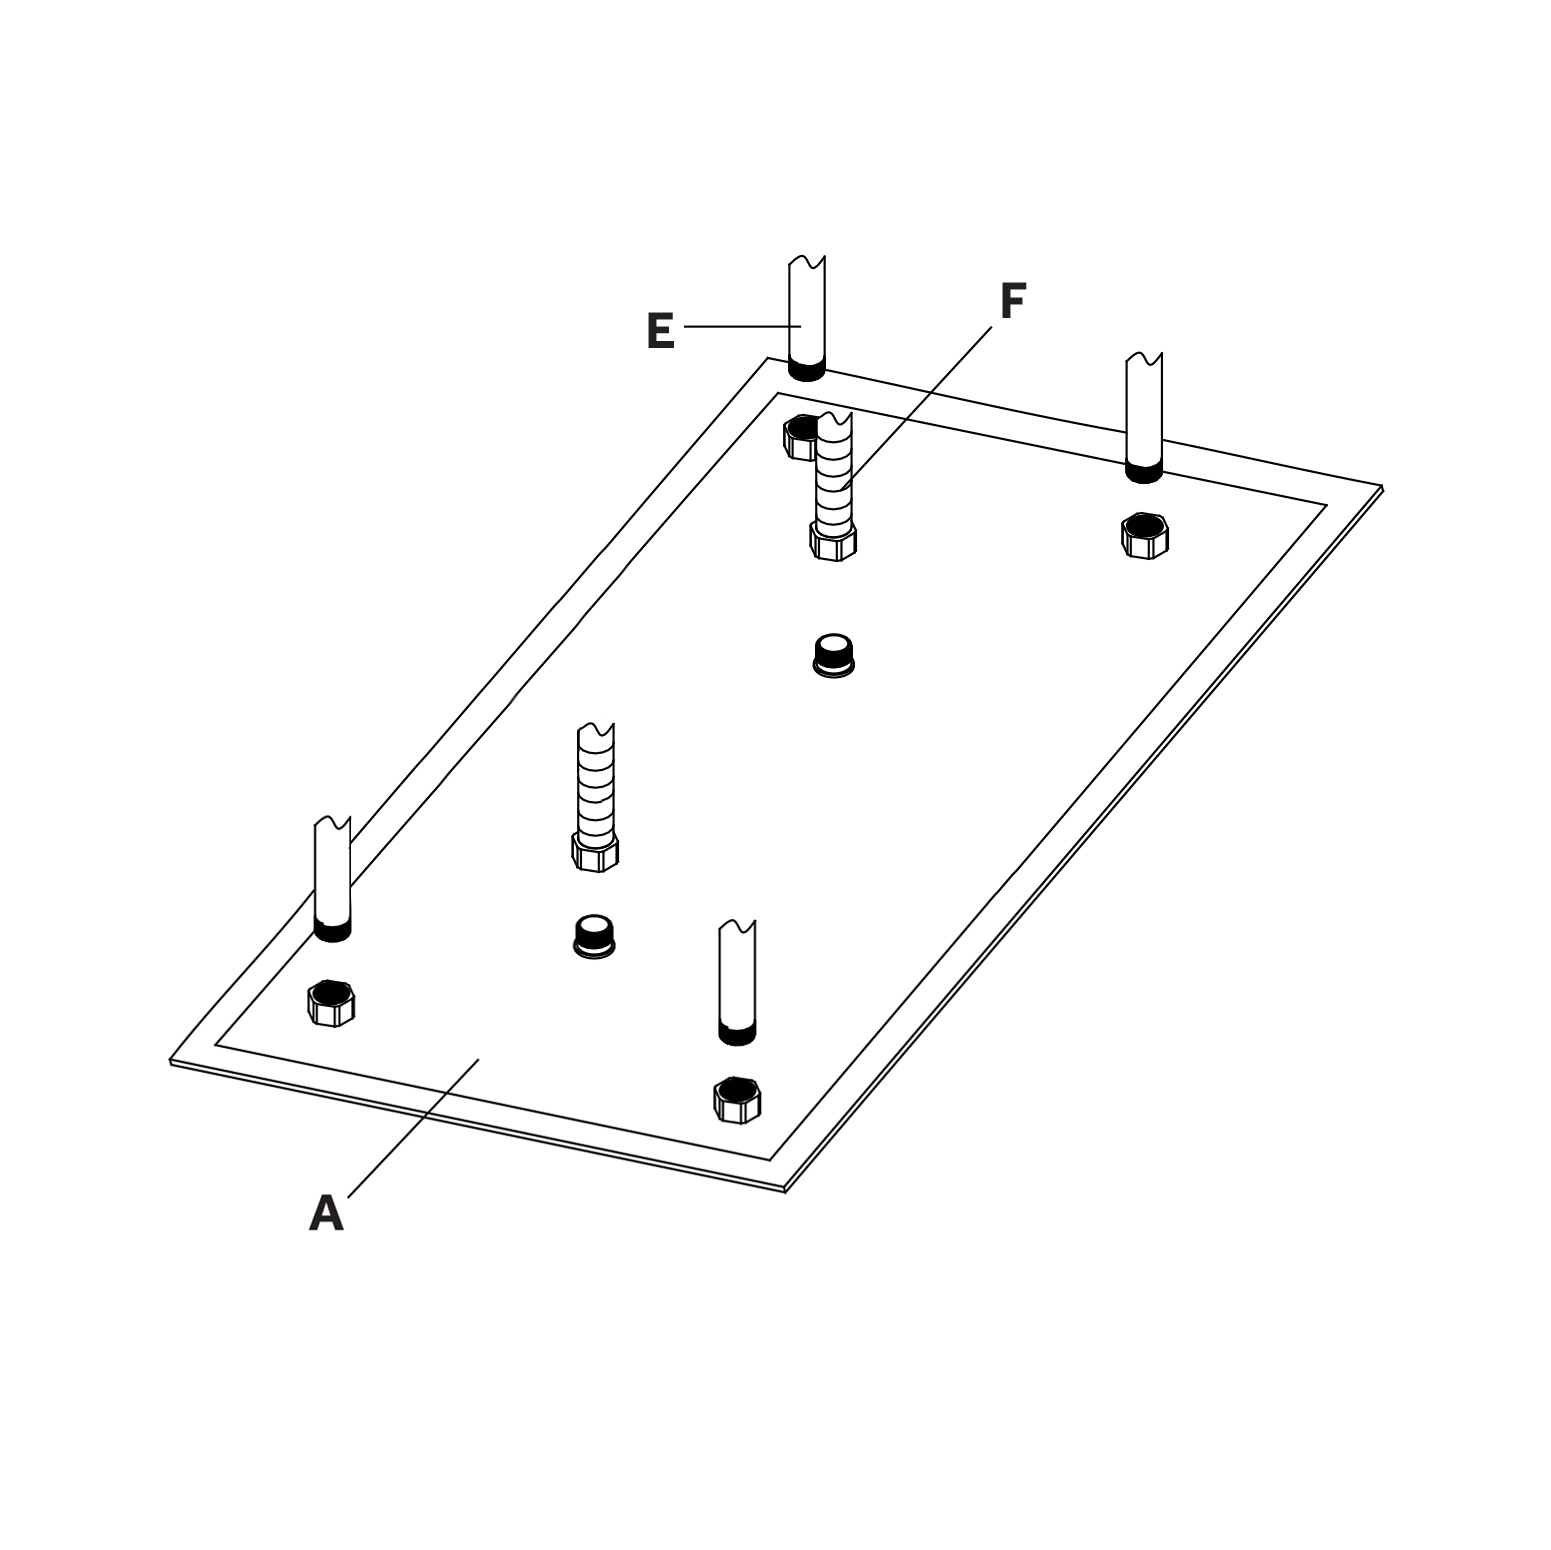
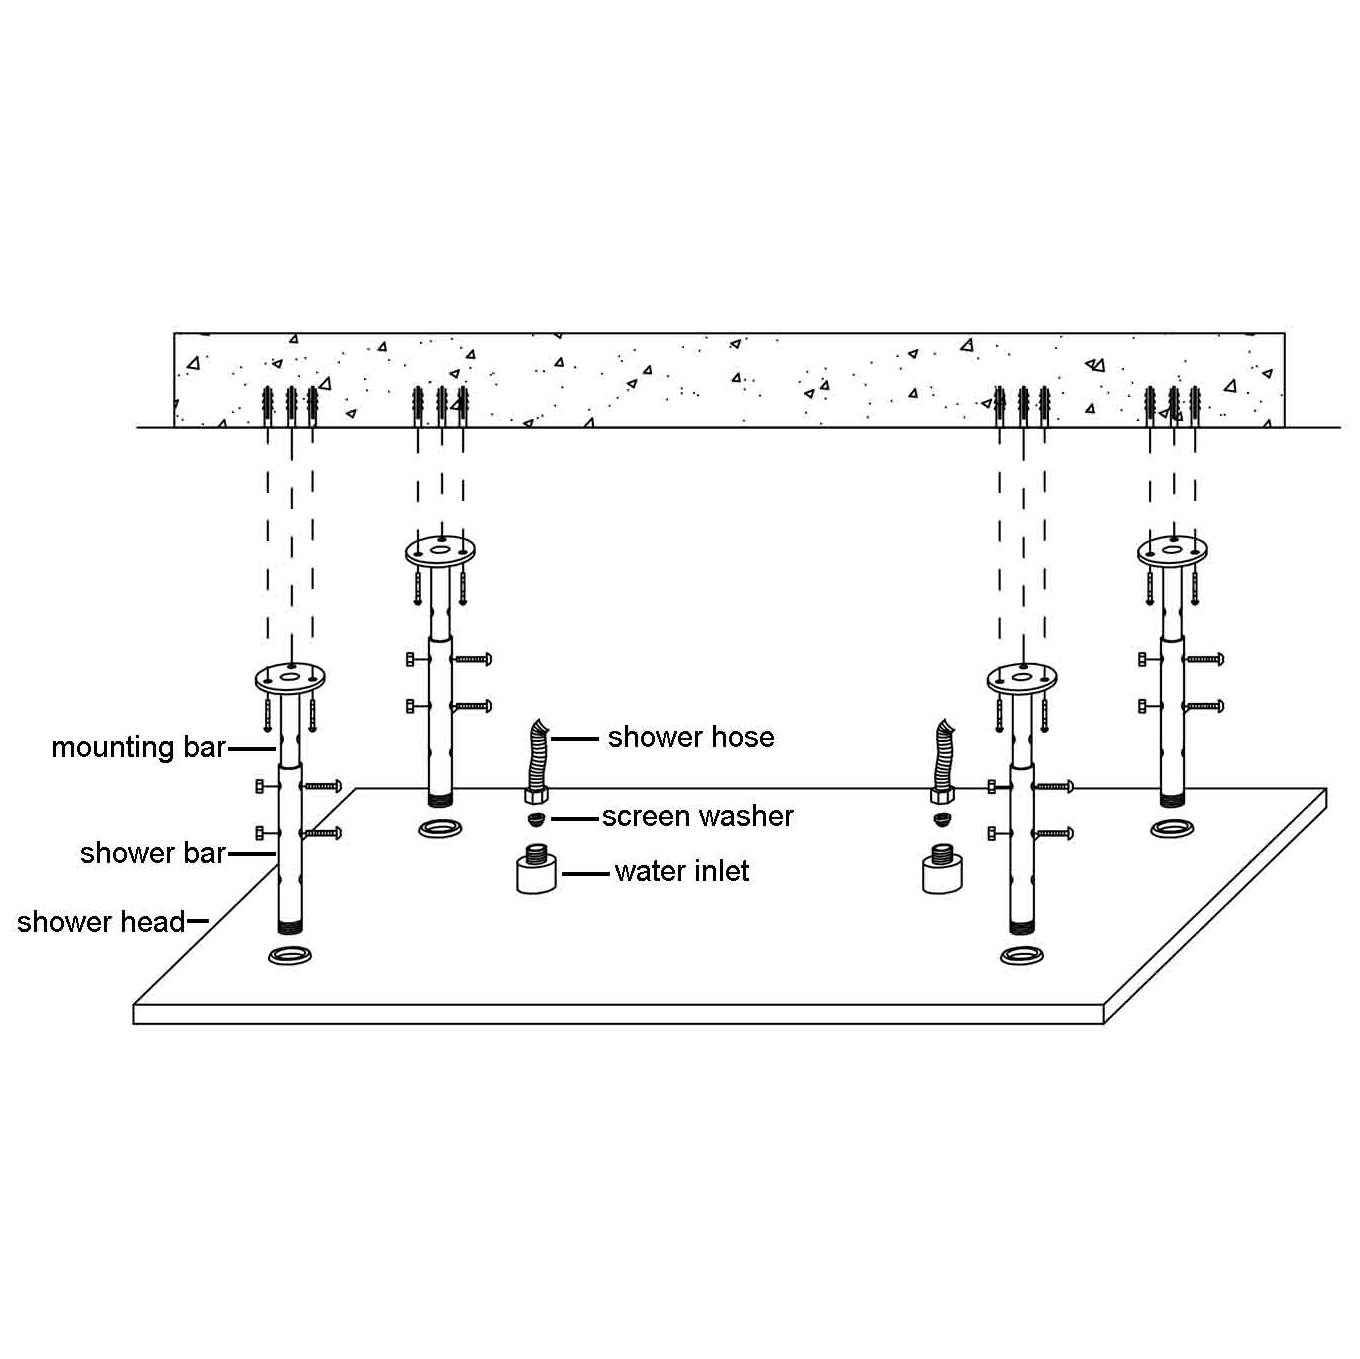
SHOWER HEAD INSTALLATION INSTRUCTIONS
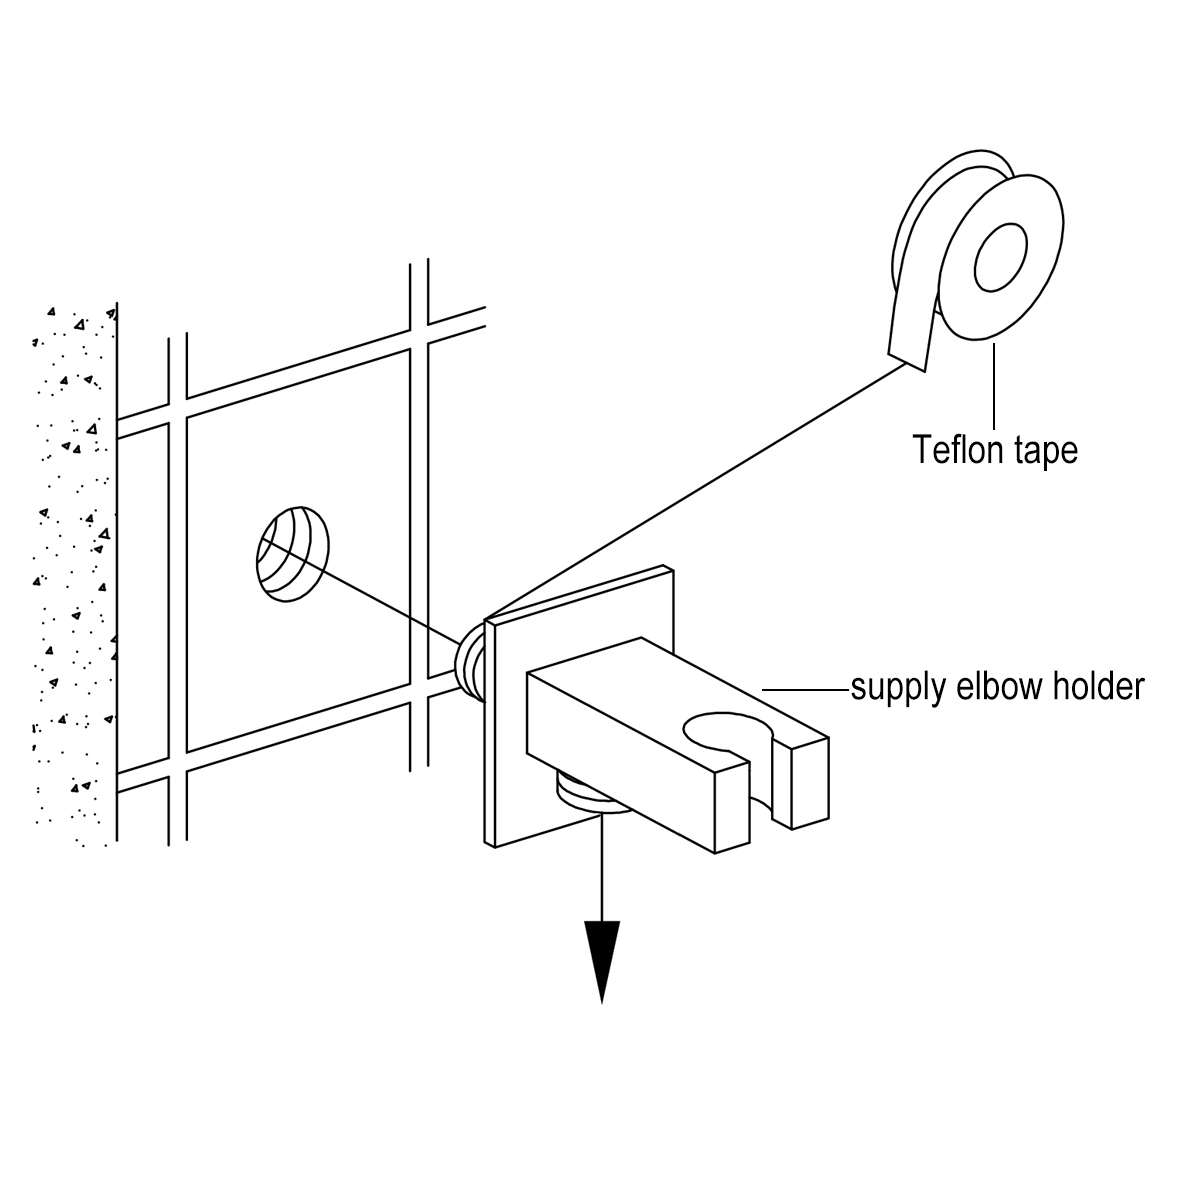
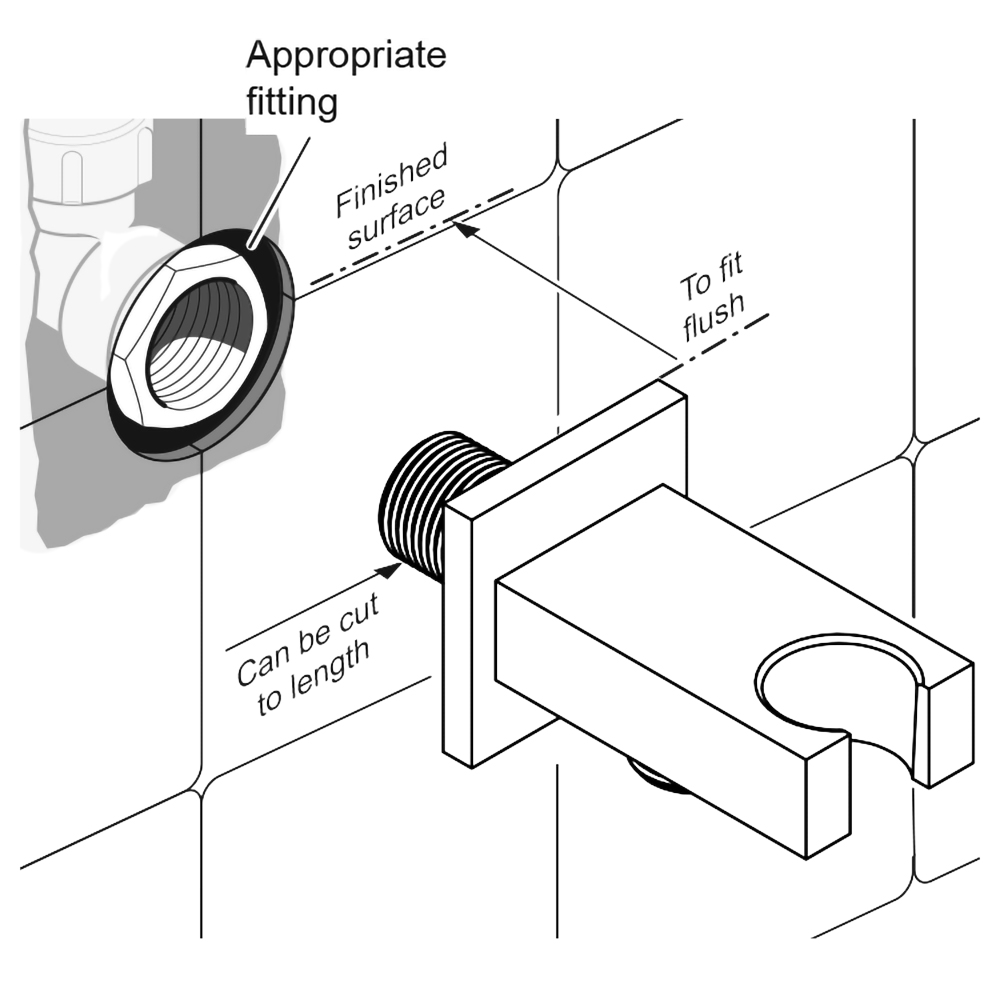
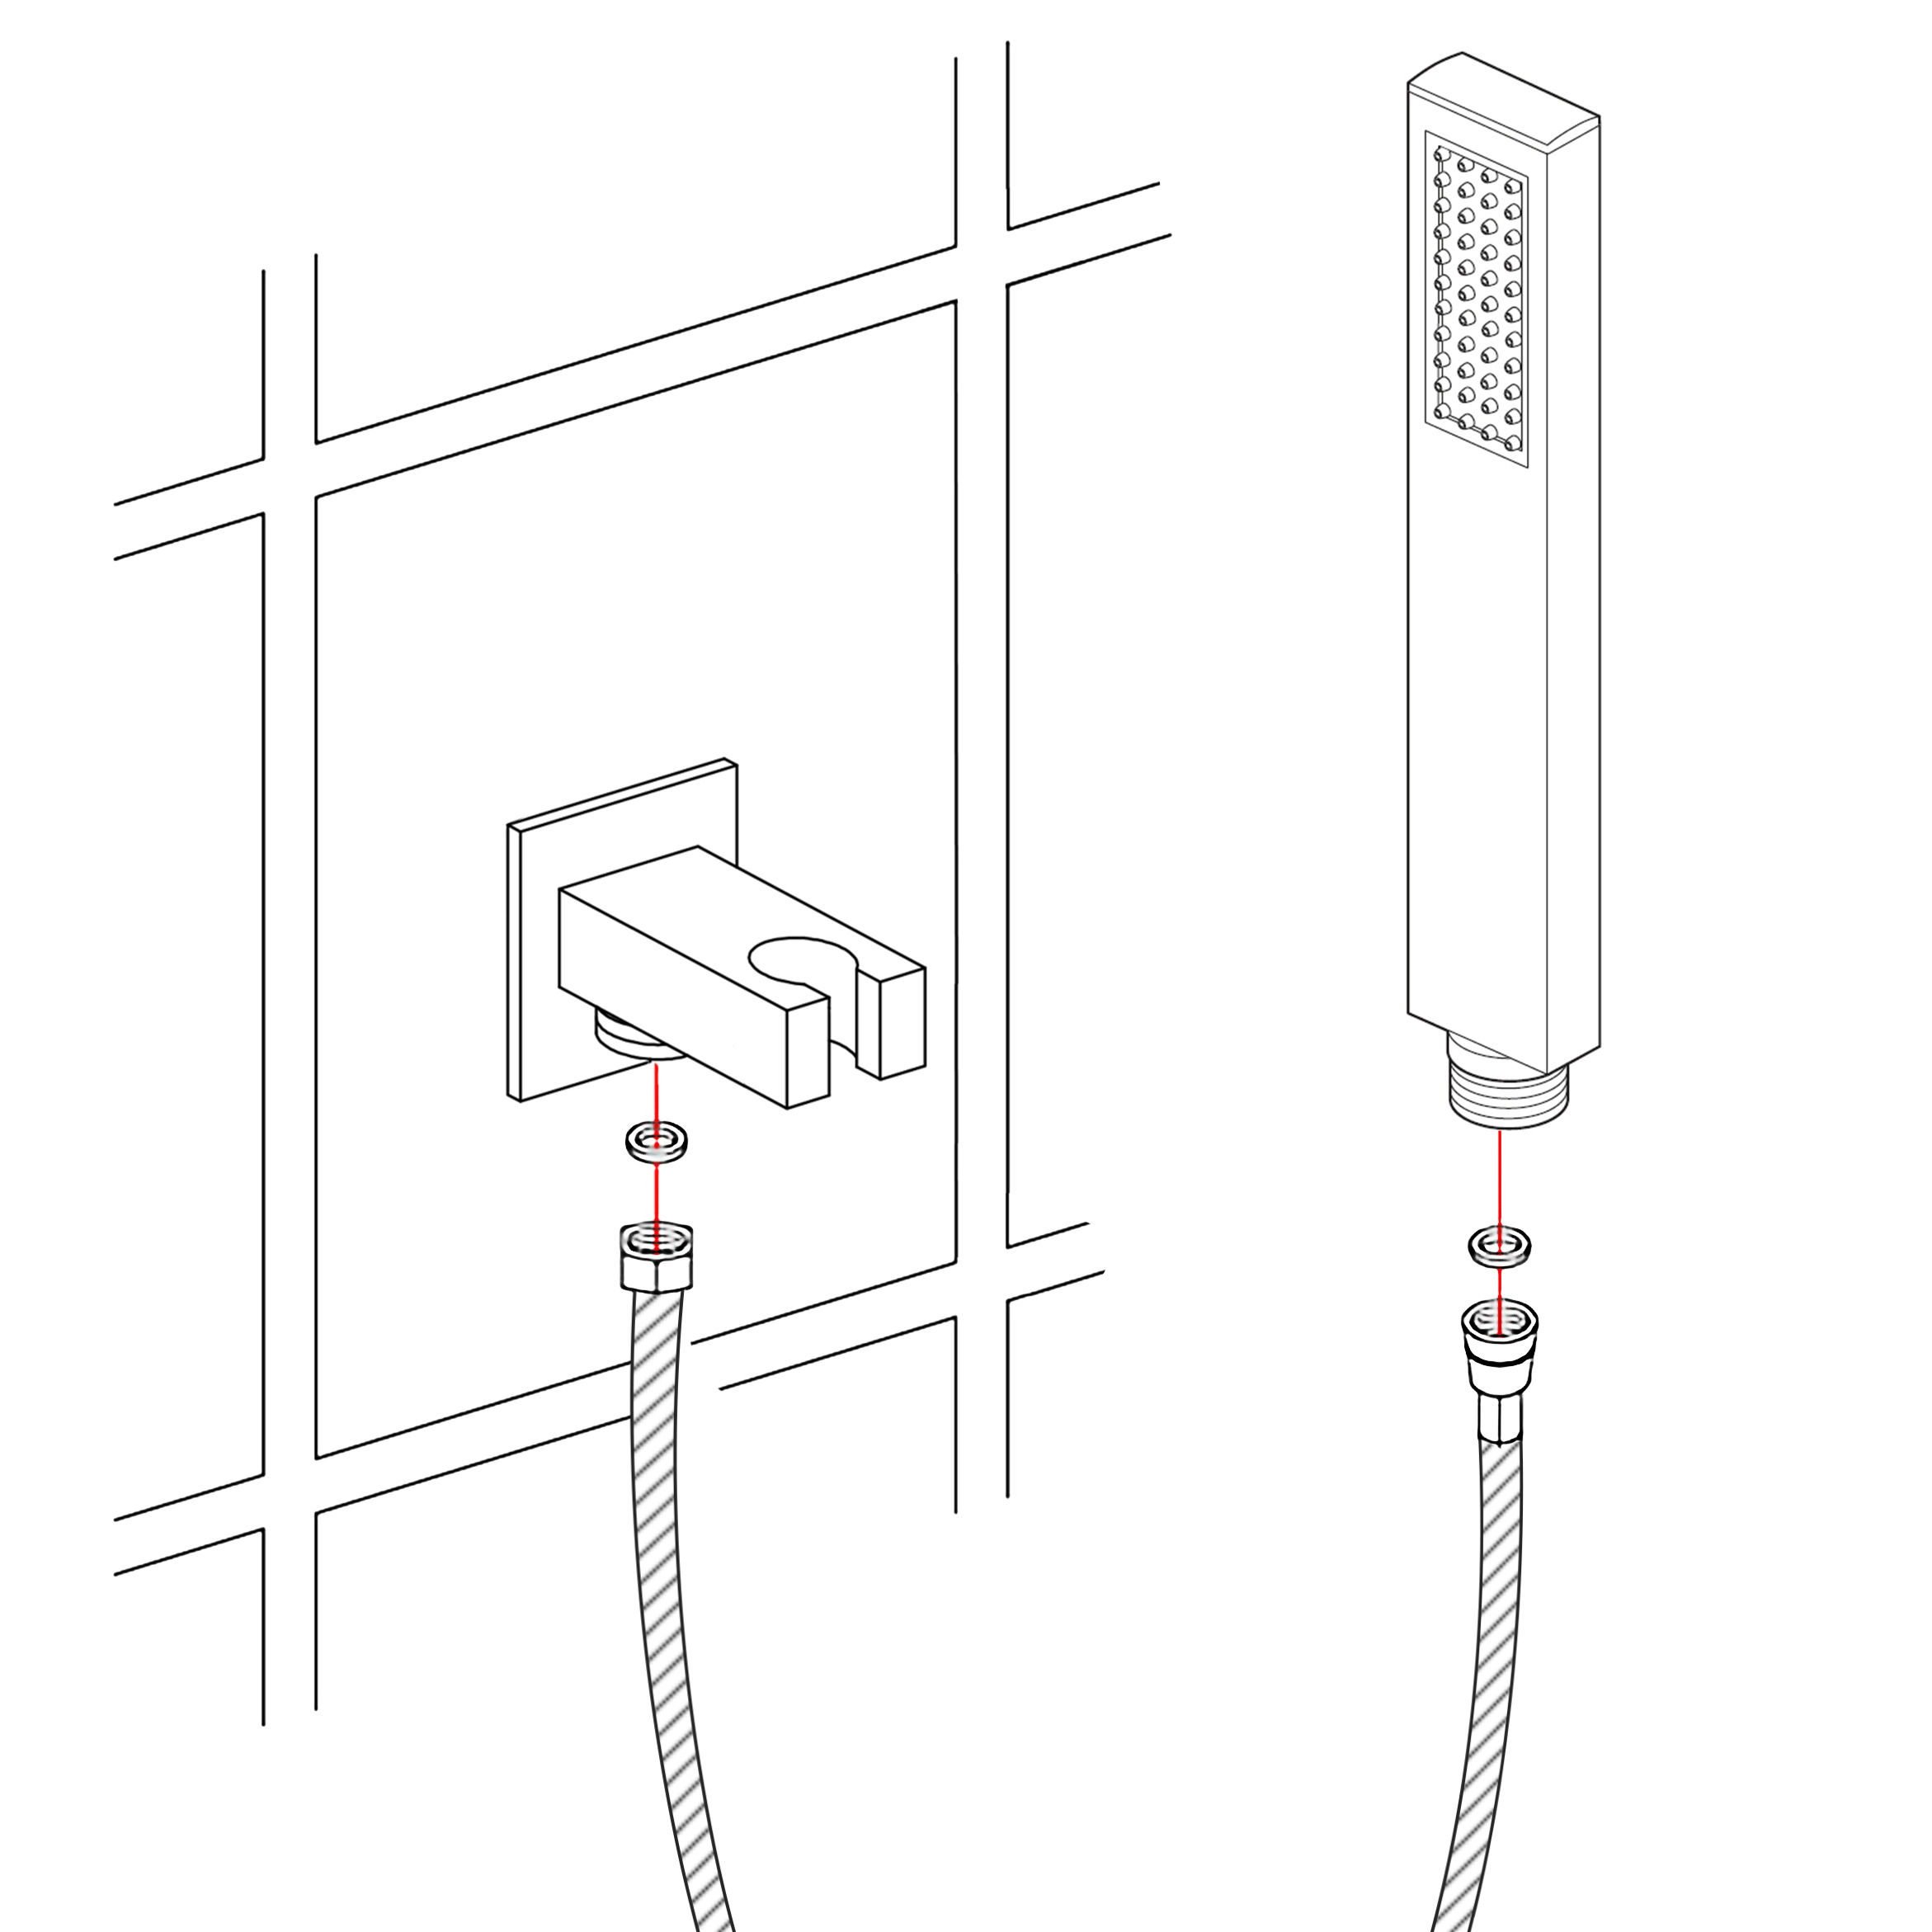
HAND-HELD SHOWER INSTALLATION INSTRUCTIONS
|
Step 1:
|
|
Step 2:
|
|
|
|
Hand
Held
Shower
|
|
Hand
Held
Shower
|
|
|
Handheld Shower
|
|
|
|
|
|
Step 3:
|
|
|
|
|
|
|
|
|
|
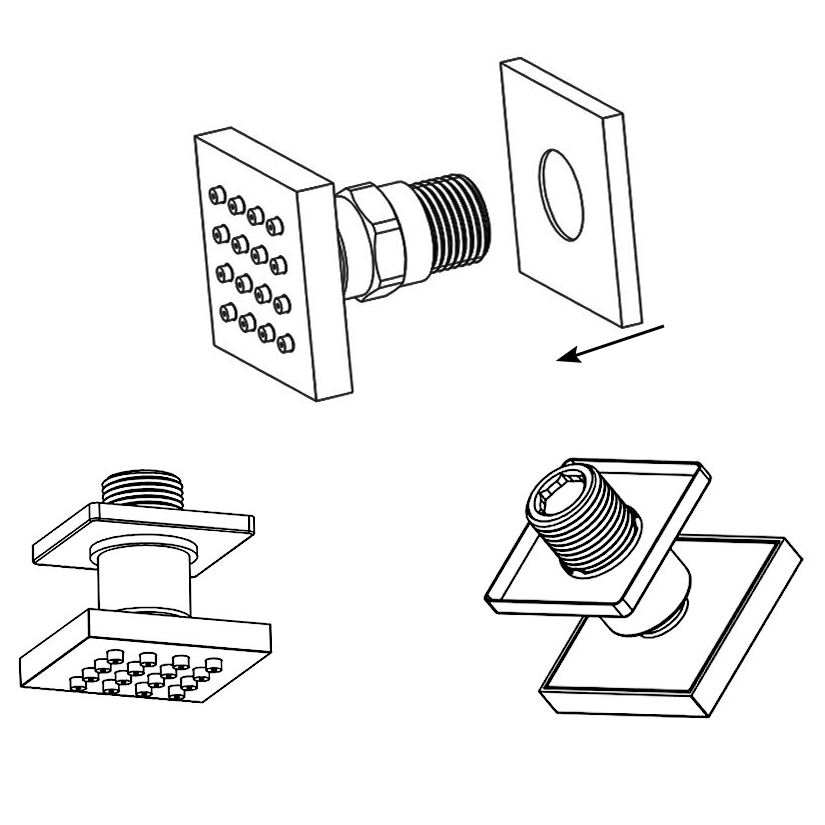
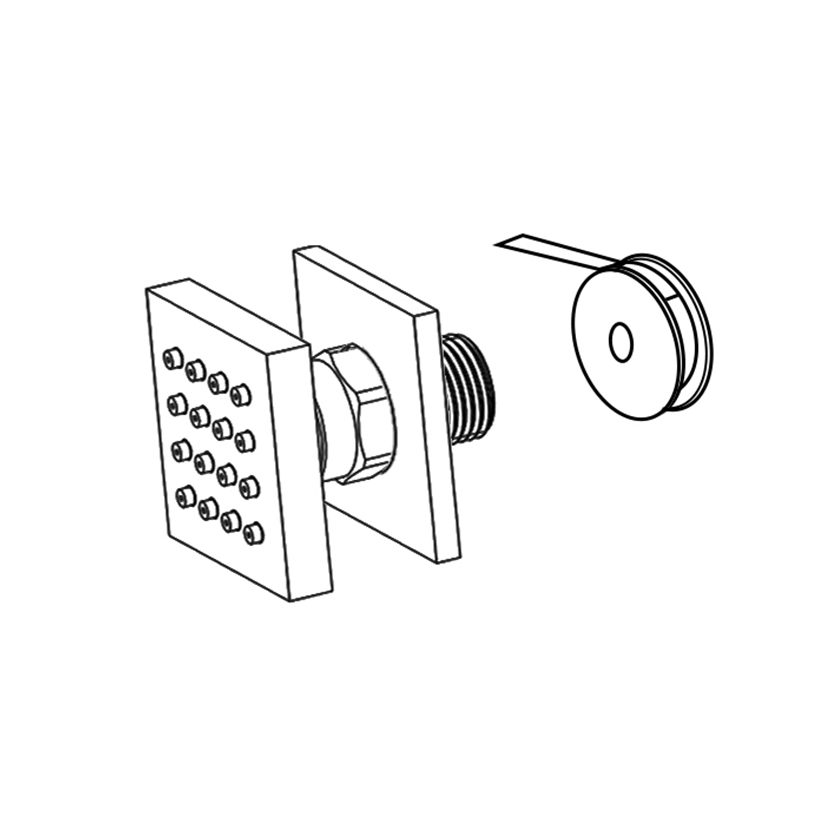
SHOWER BODY JETS INSTALLATION INSTRUCTIONS
Body Sprays Installation Instructions
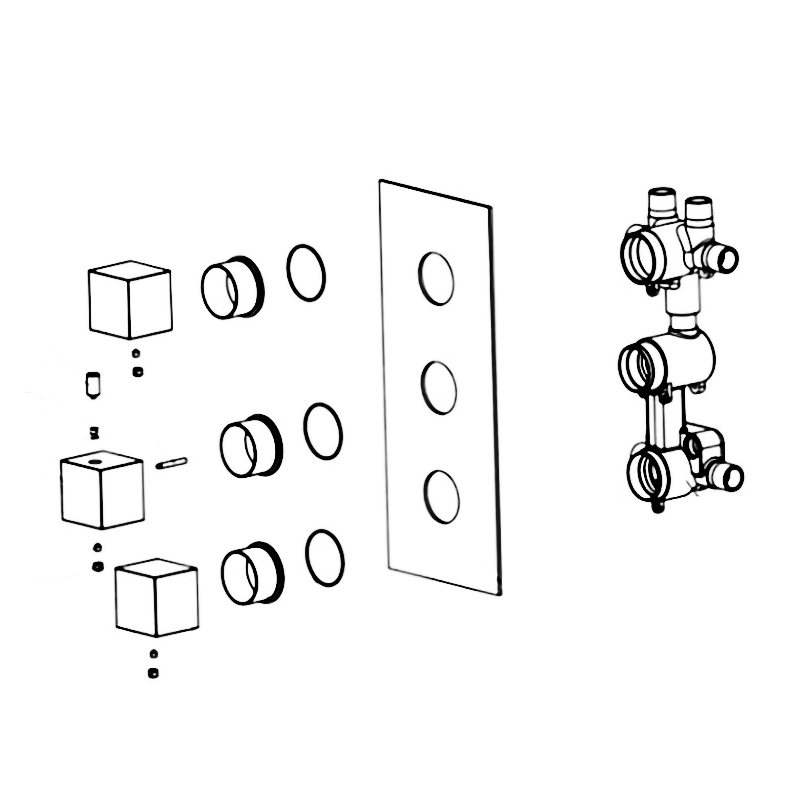
THERMOSTATIC MIXER INSTALLATION INSTRUCTIONS
Shower
Mixer
|
|
|
|
Shower
Mixer
|

|
Shower
Mixer
|
|
|
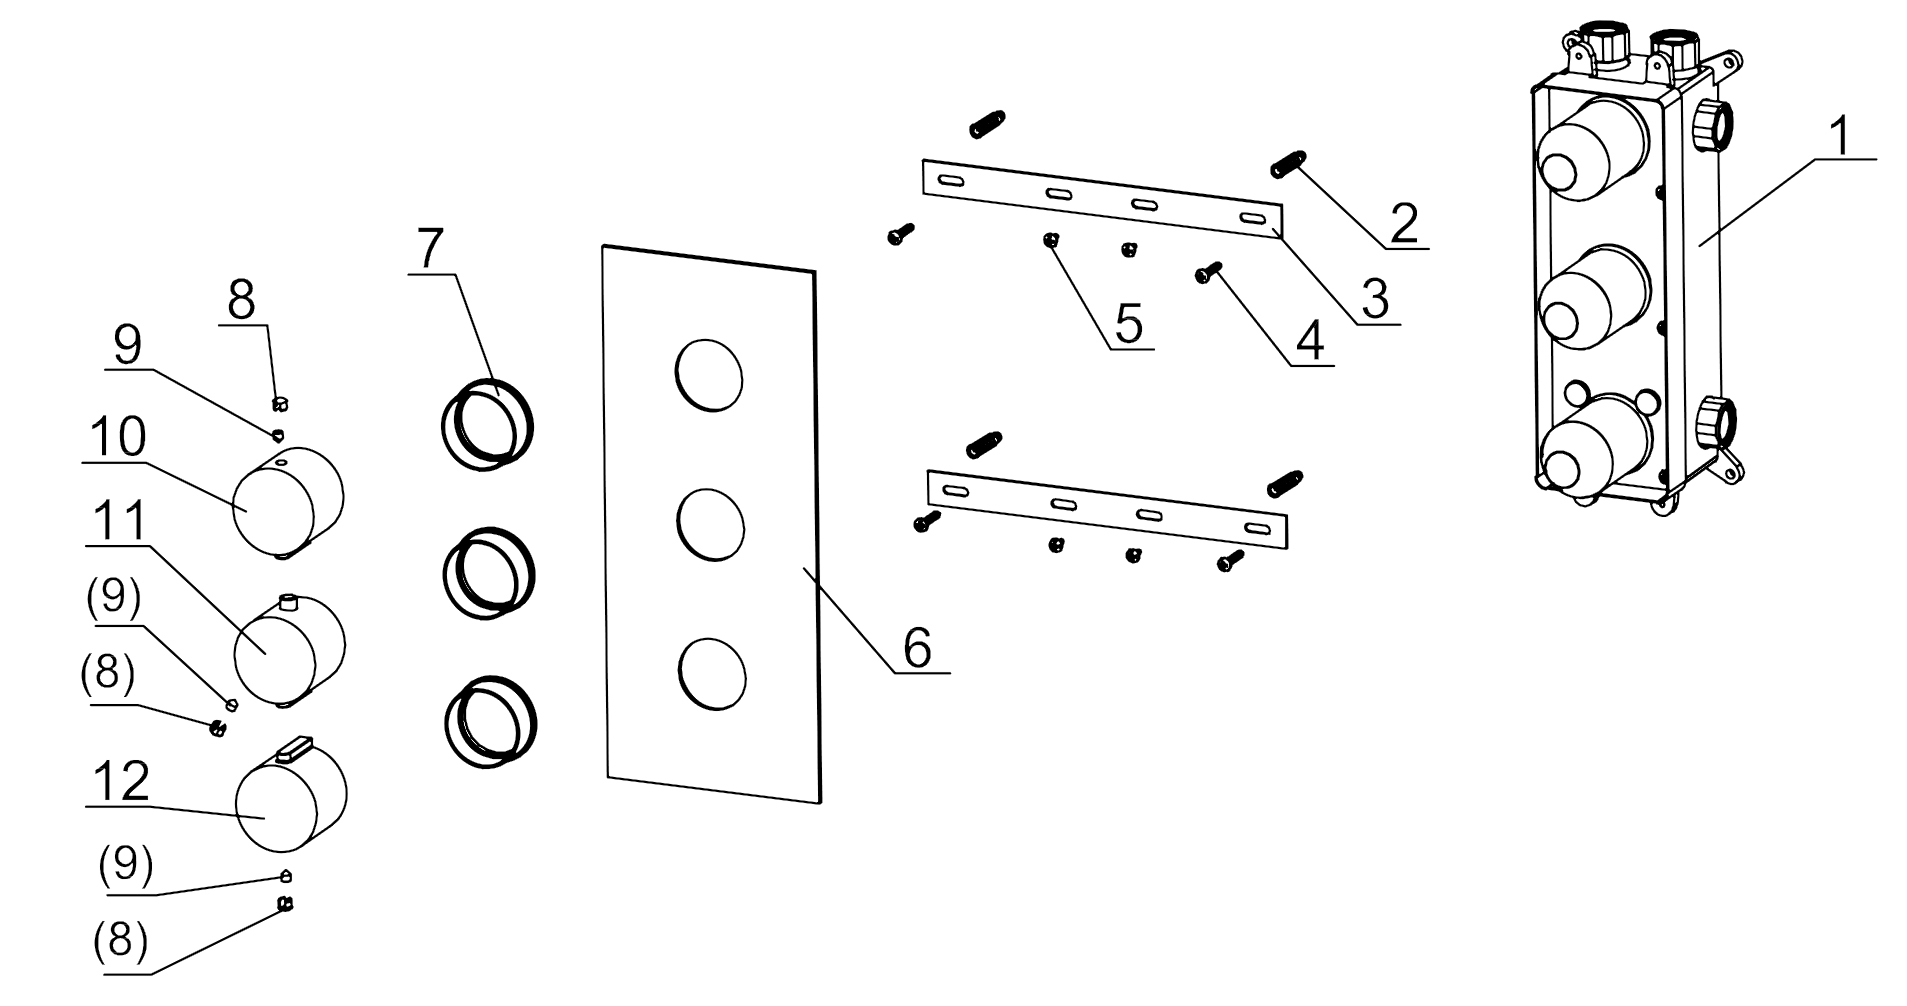
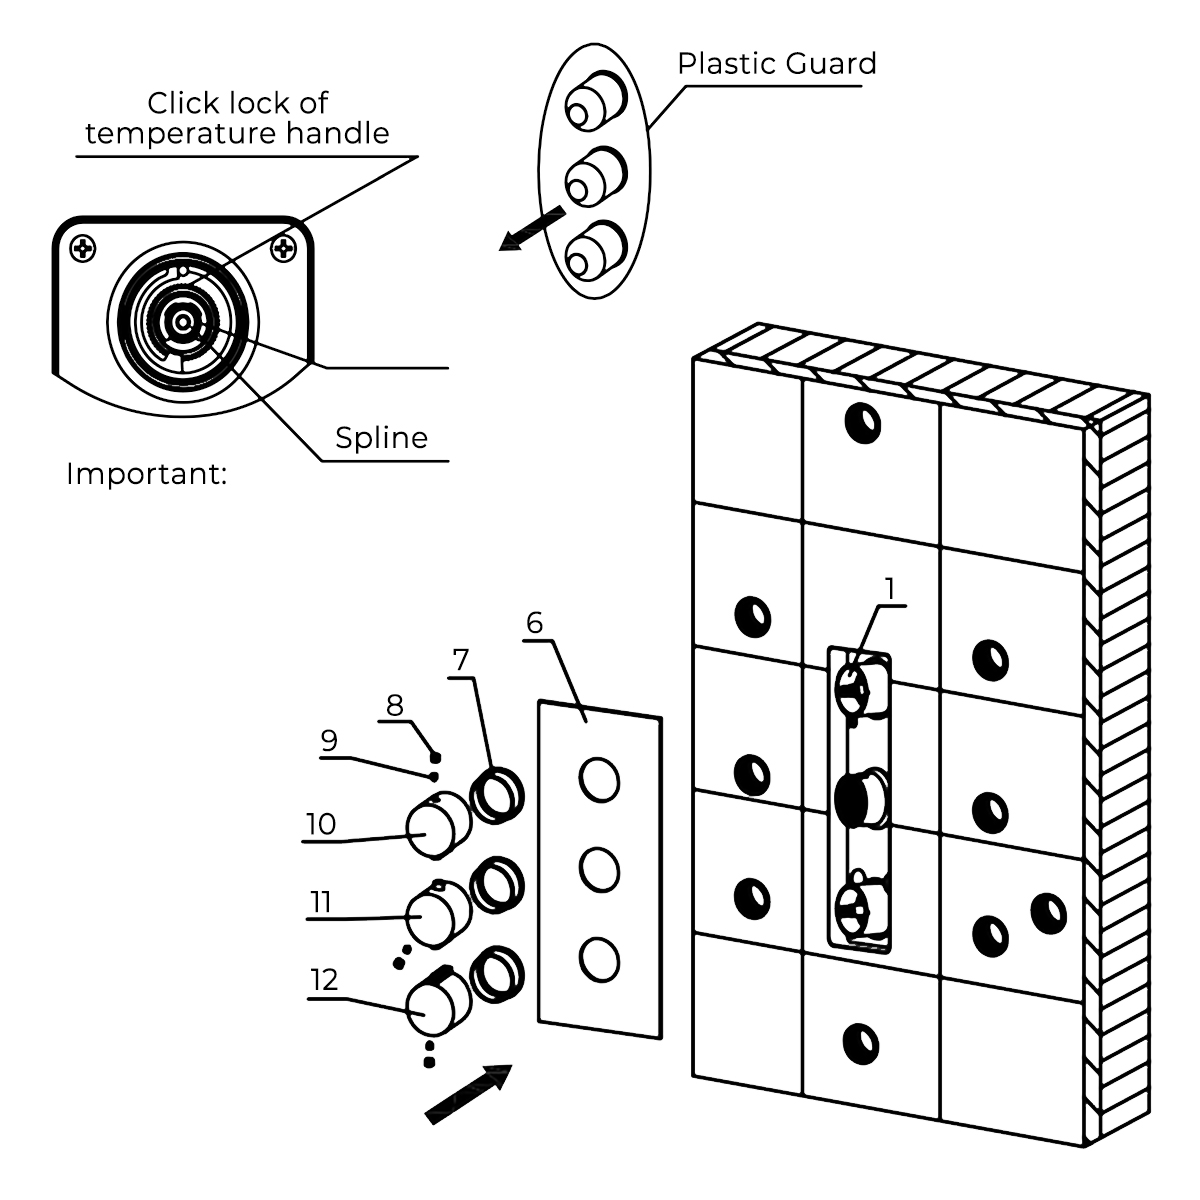
Parts:
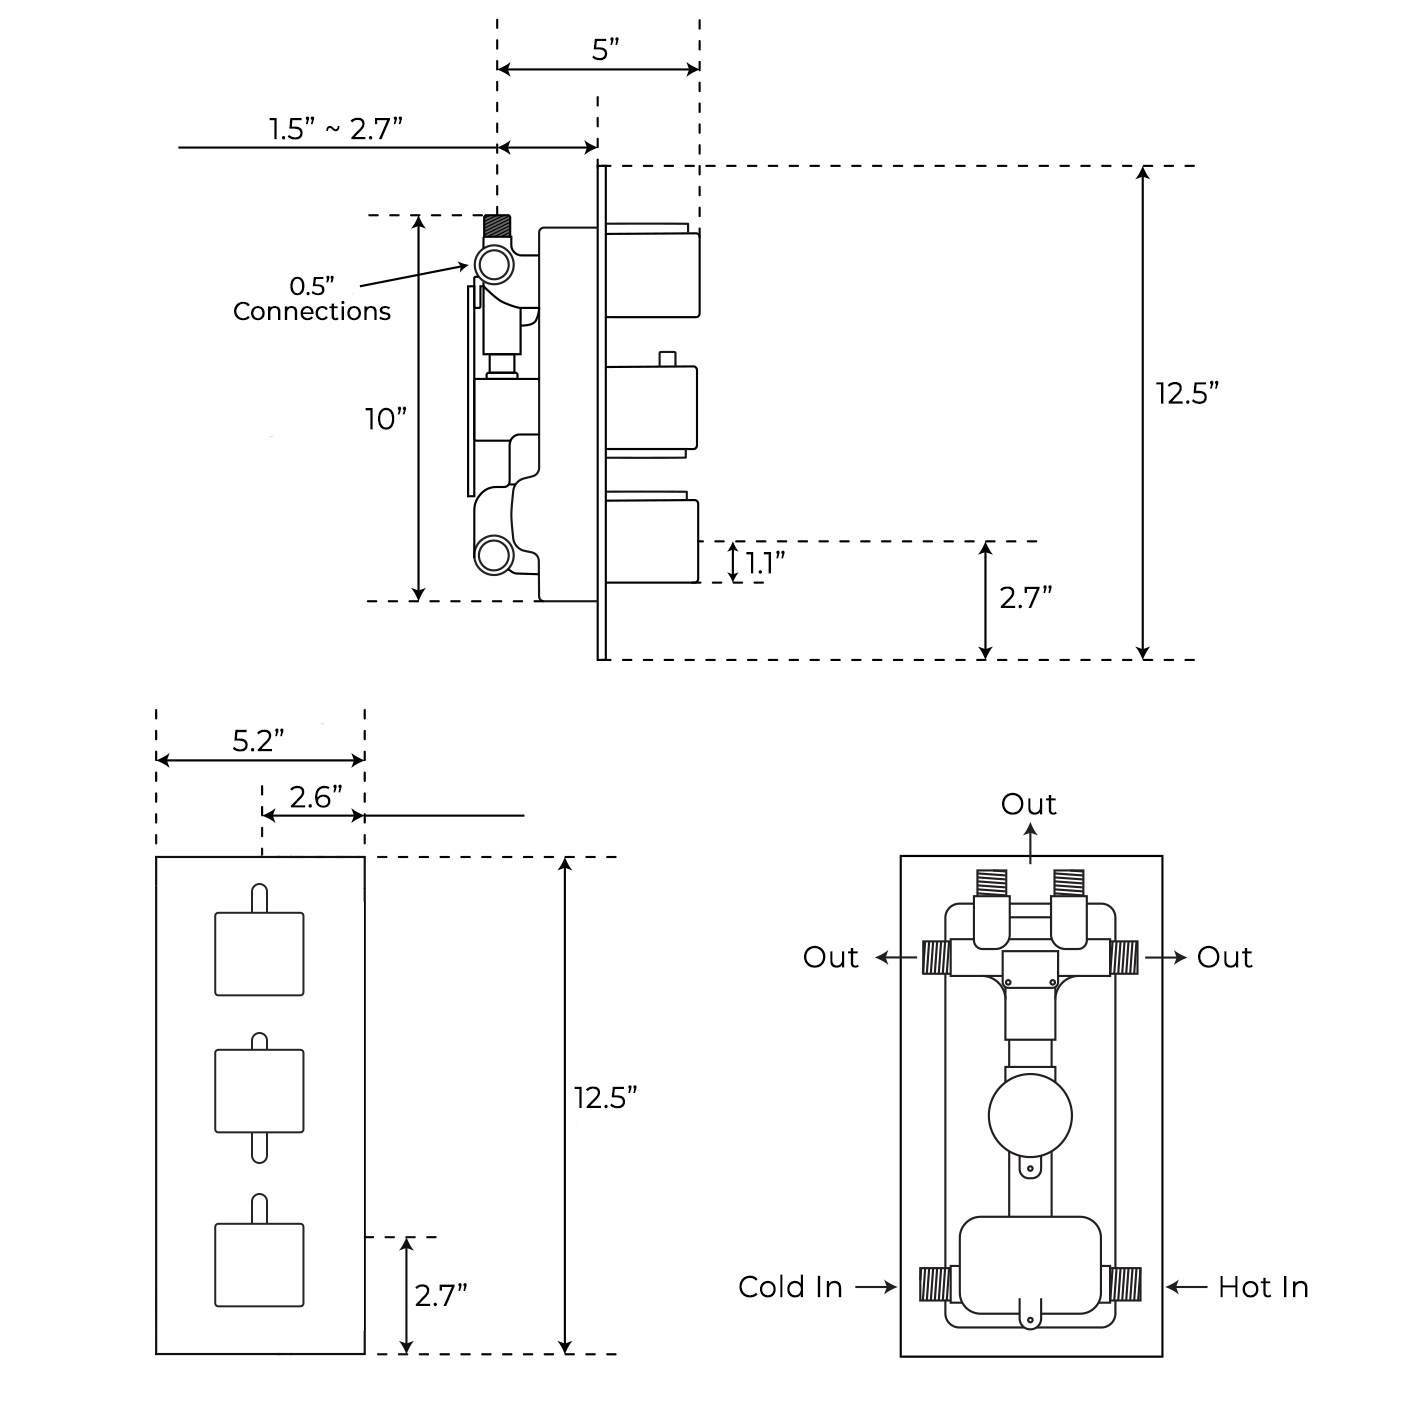
1. Rough-In Body x1
2. Anchor x4
3. Positioning Bar x2
4. Tapping Screw 1 x4
5. Tapping Screw 2 x4
6. Plate x1
7. Cover x3
8. Button x3
9. Screw 1 x3
10.Diverter Handle x1
11. Temperature Handle x1
12. Volume Handle x1
|
Shower
Mixer
|
|
|
|
|
|
|
Step 1:
|
|
Step 2:
|
|
|
Shower
Mixer
|
|

|
|
|
|
|
|
Shower Valve Mixer Installation Instructions
|
|
|
|
|
Step 3:
|
|
Step 4:
|
|
|
|

|
|
|
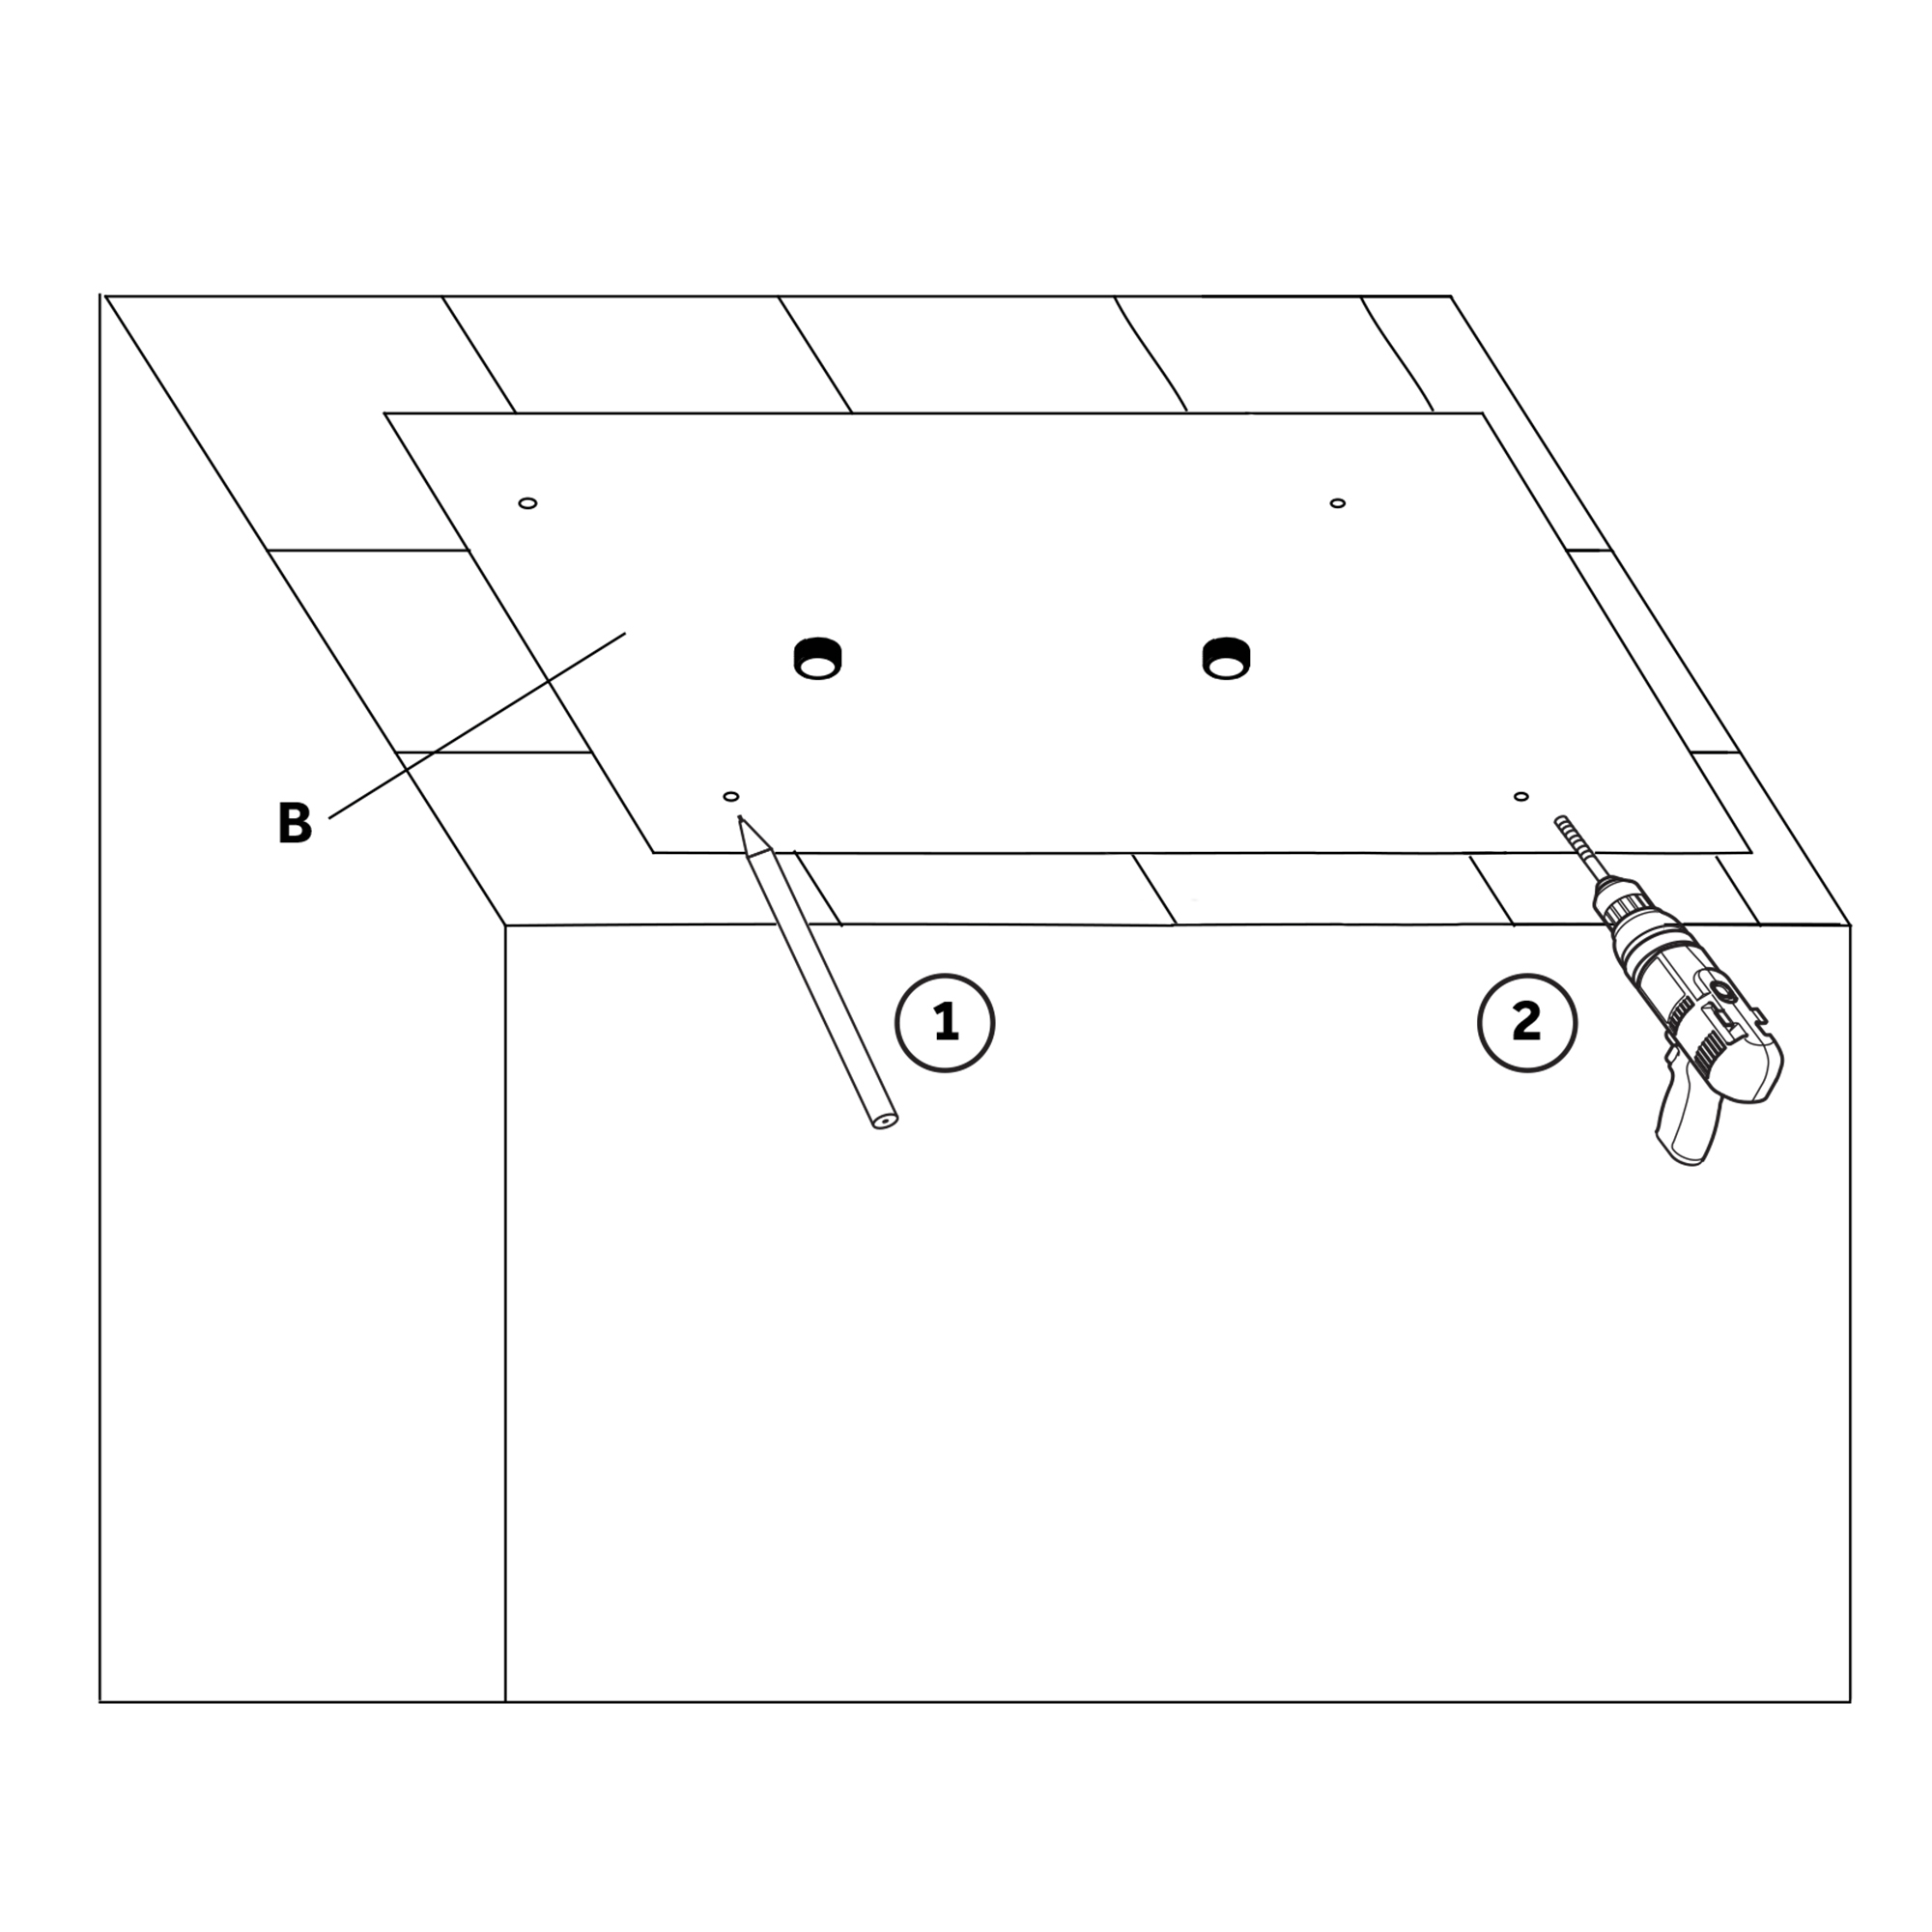
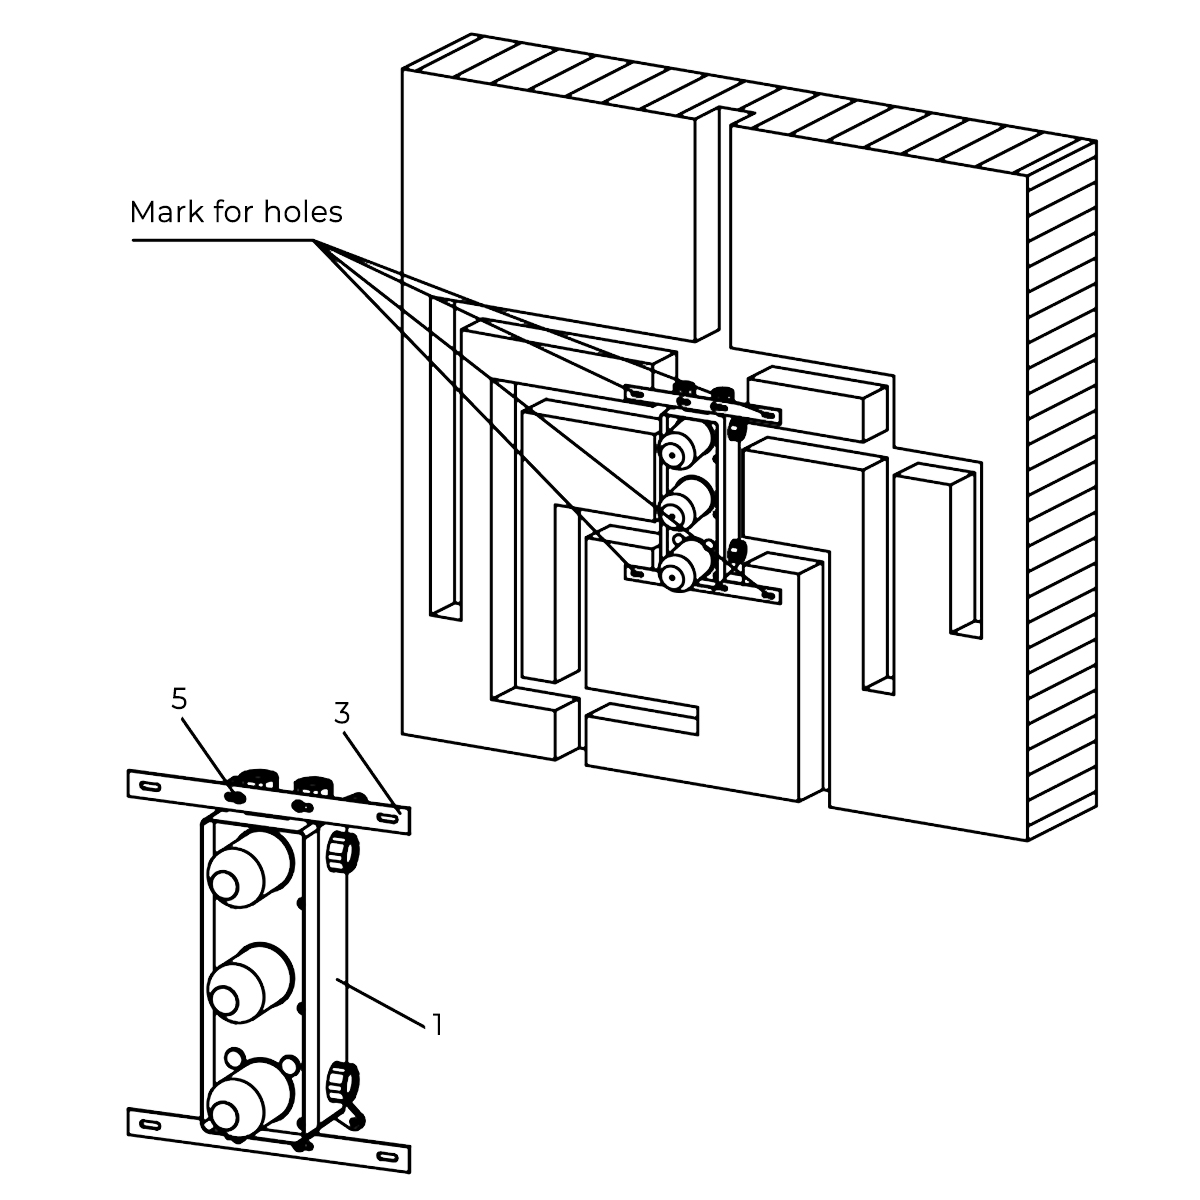
Attach the positioning bar to the rough-in body (4,5) with tapping screws. Mark the location of the mounting holes.
|
|
Remove the rough-in body and drill pilot holes at the locations marked in the previous step. Insert anchors.
|
|
|
Shower Valve Mixer Installation Instructions
|
|
|
|
|
Step 5:
|
|
Step 6:
|
|
|
|
|
|
|
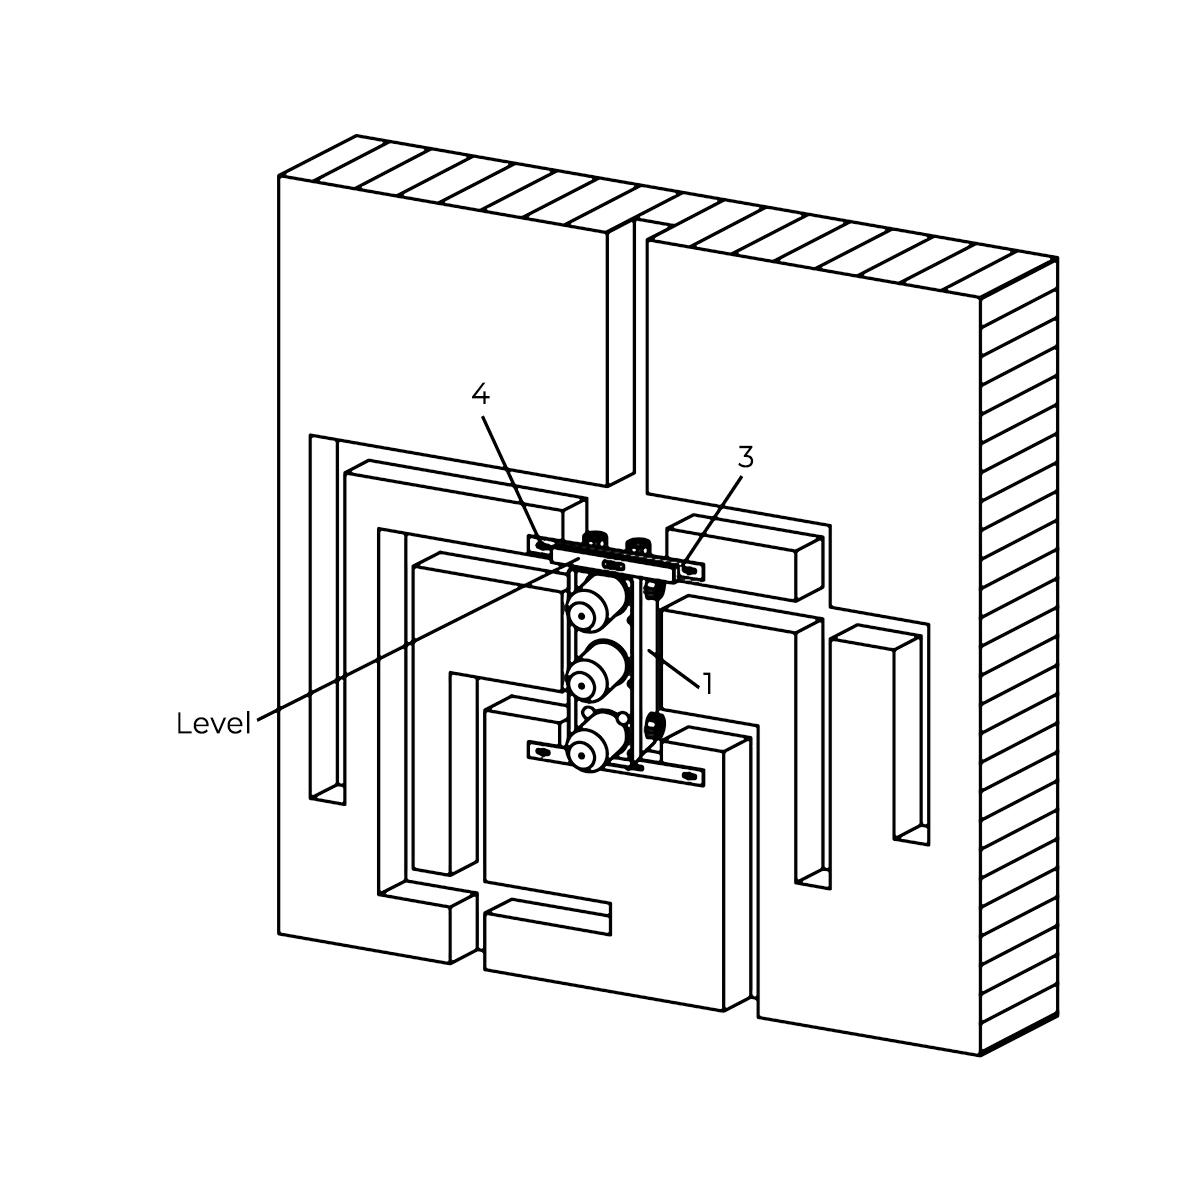
Attach the rough-in body to the wall.
|
|
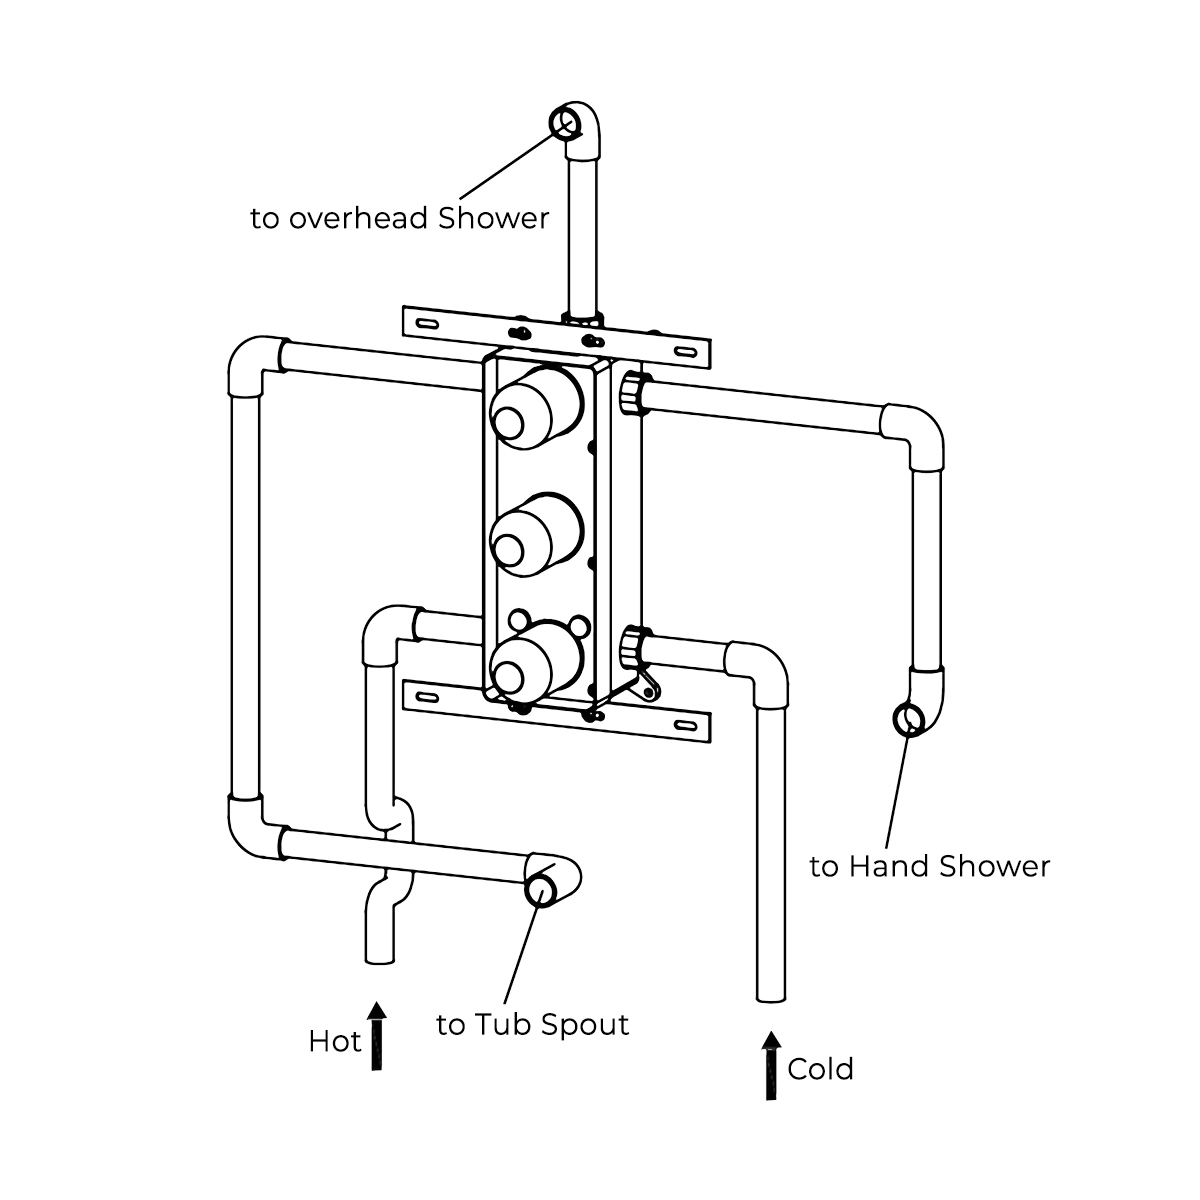
Connect the rough-in body to the water supply pipes according to the diagram.
|
|
|
Shower Valve Mixer Installation Instructions
|
|
|
|
|
Step 7:
|
|
Step 8:
|
|
|
|
|
|
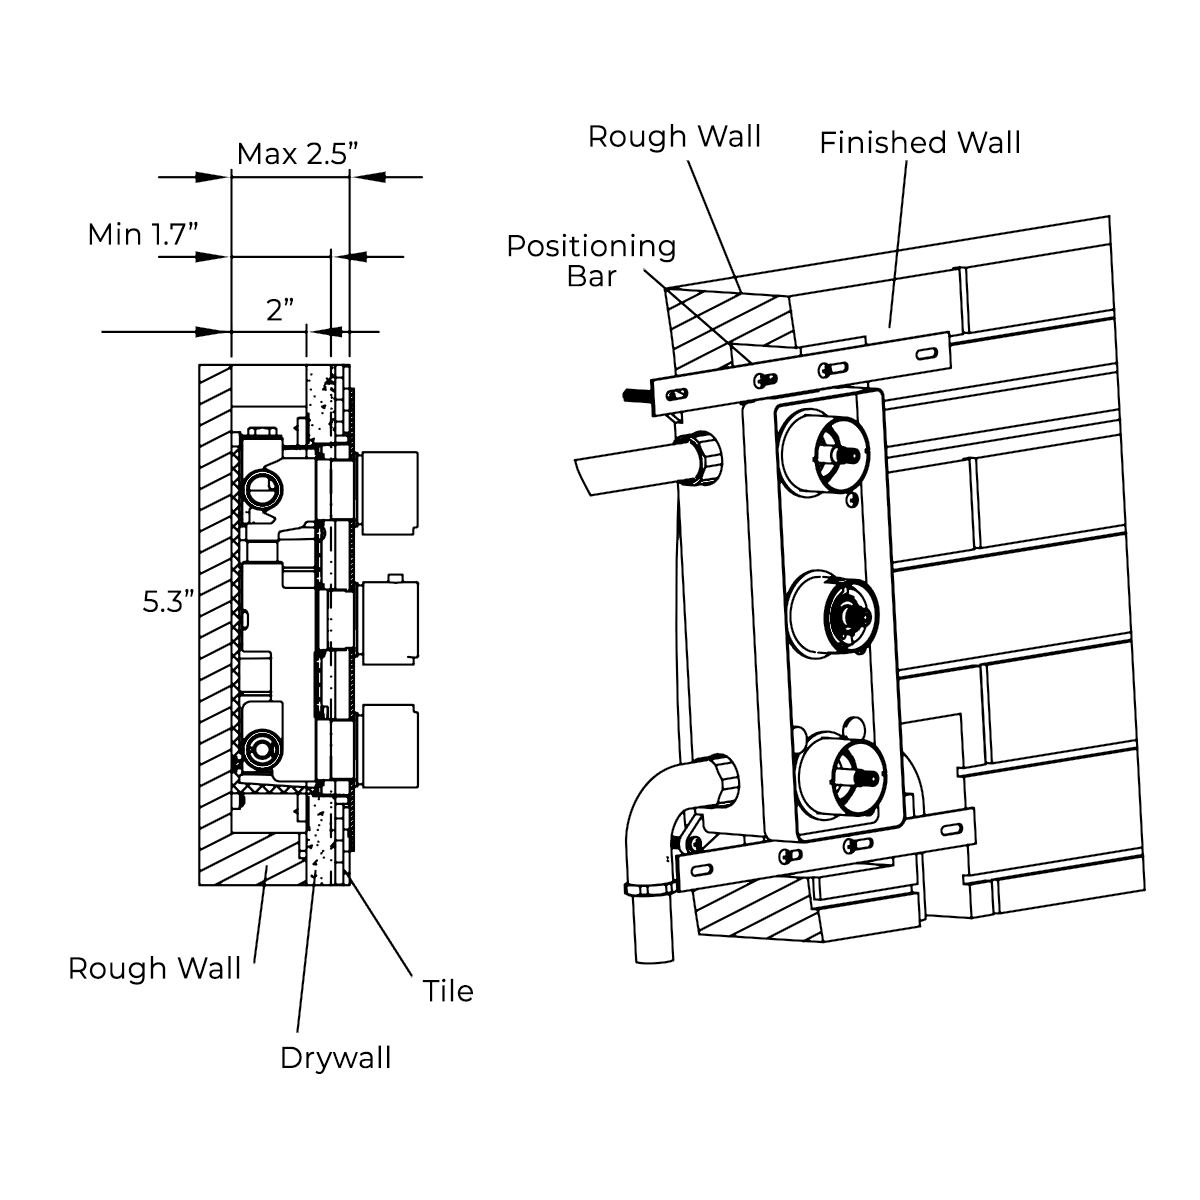
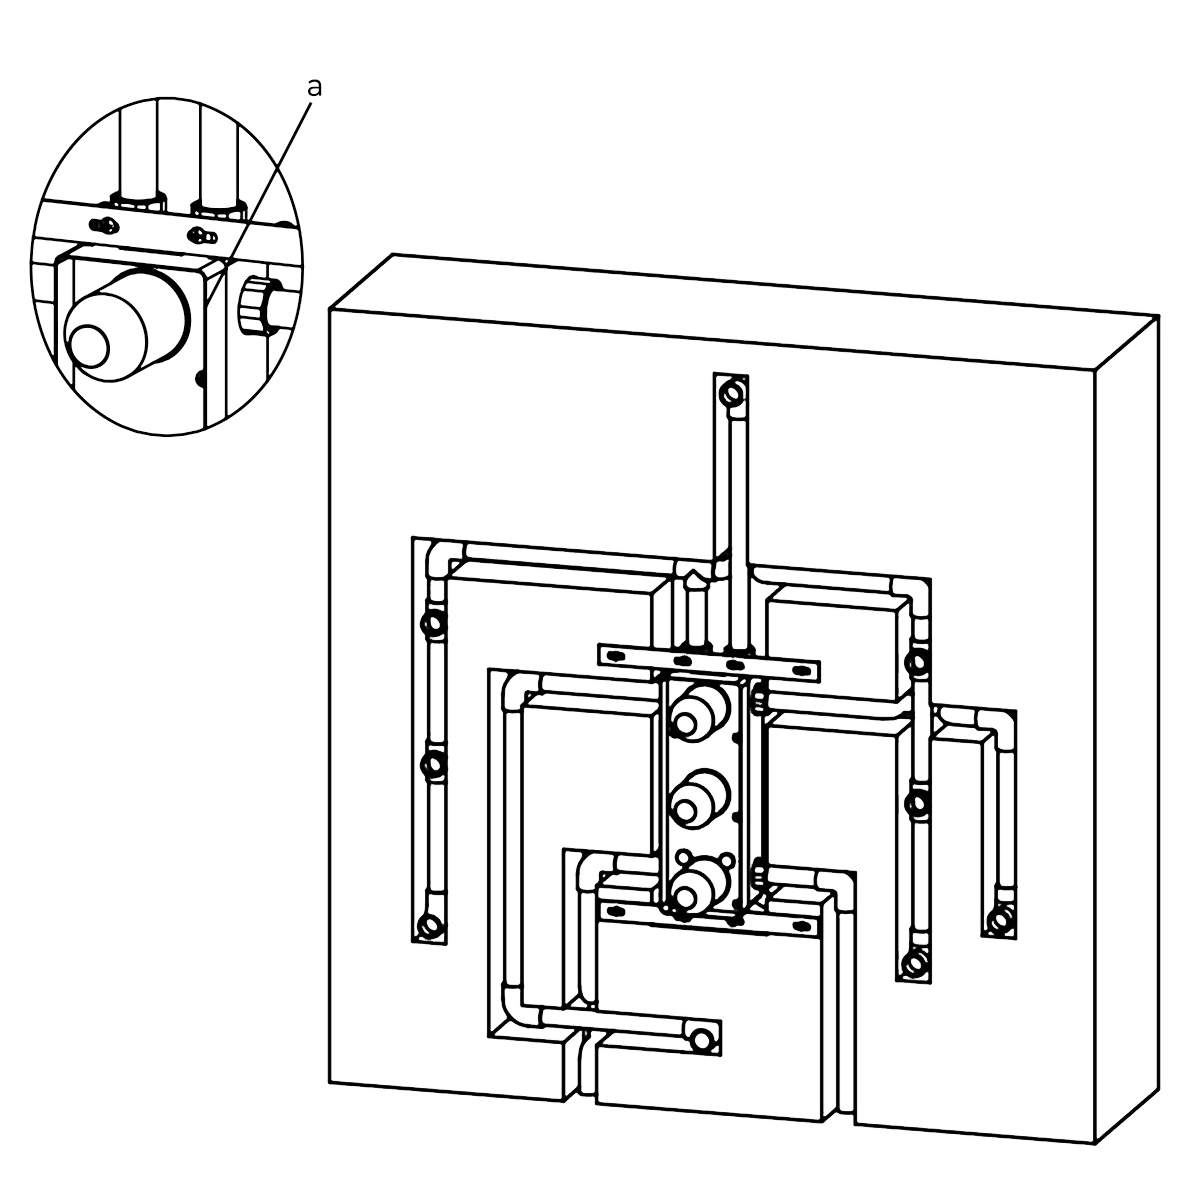
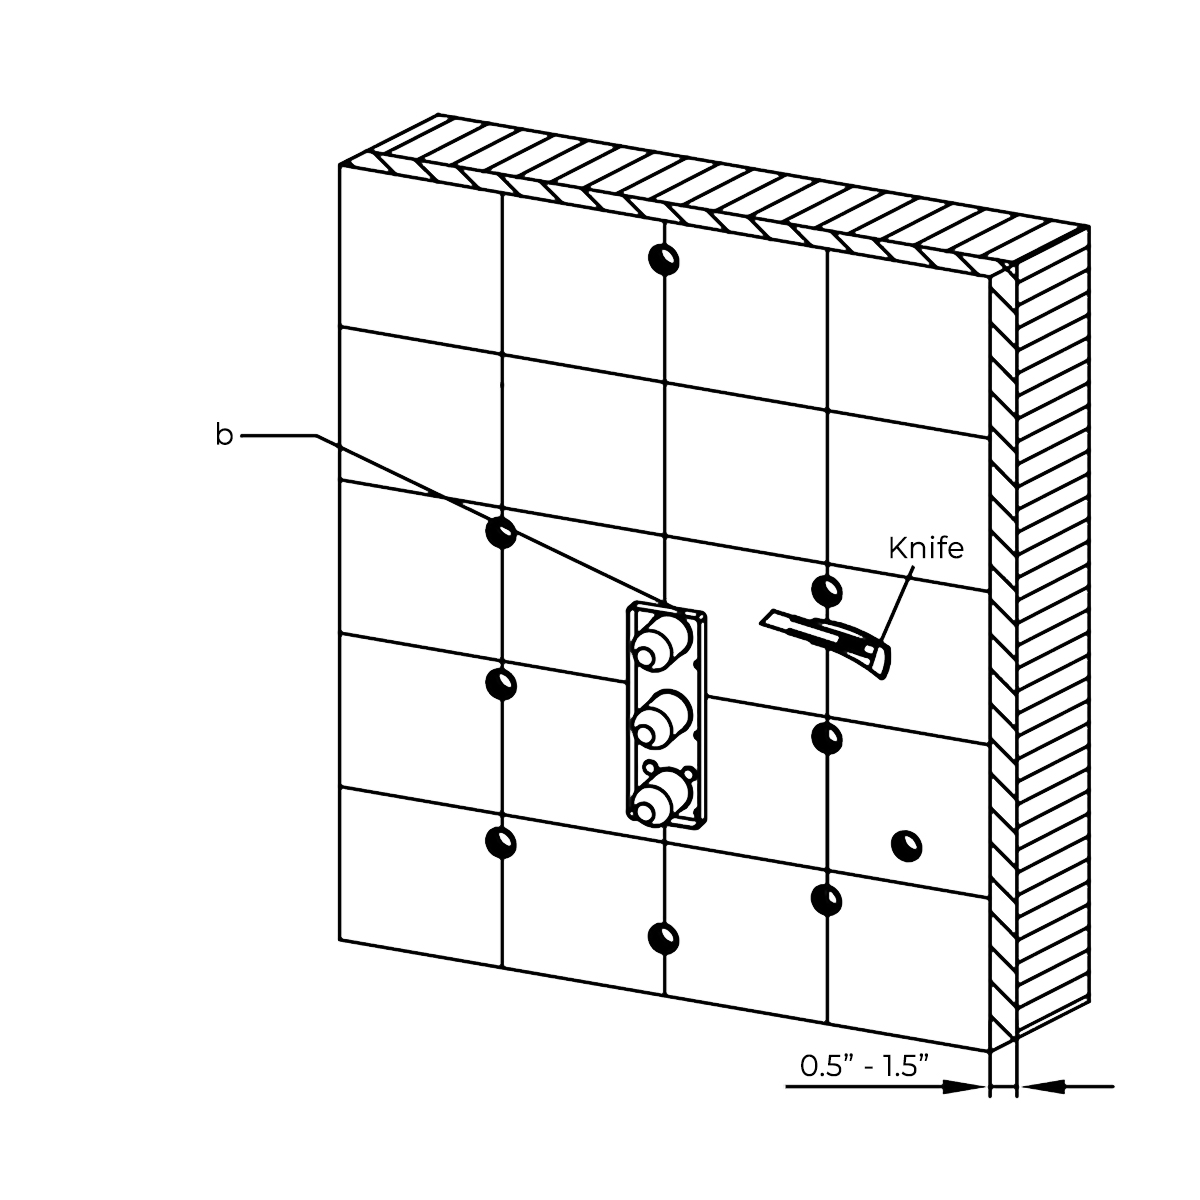
Finish the wall surrounding the shower with a thickness of 1/2"-1-1/2".
a) Finished wall surface should not exceed the upper edge of the installation box.
|
|
If the tile exceeds the edges of the installation box, trim the tile as necessary to install the trim plate.
b) Trim the tile around the installation box as necessary.
|
|
|
Shower Valve Mixer Installation Instructions
|
|
|
|
|
Step 9:
|
|
|
|
|
|
|
|
|
Remove the plastic guard and place the trim plate over the installation box. Install the screws covers, handles and buttons.
|
|
|
|
|
Shower Valve Mixer Installation
|
How to install the Shower Set with Wall Mount Showerhead, Hand Held Shower and Shower Mixer
|
|
Fontana Rainfall and Mist Shower Installation
Plan the Multi-Outlet Shower System
Coordinate the ceiling showerhead, rainfall and mist functions, six body sprays, handheld shower and thermostatic mixer.
Installation HubCeiling ShowerheadBody SpraysMixer and HandheldCommissioningProject Resources
Rainfall and Mist Shower Installation Questions
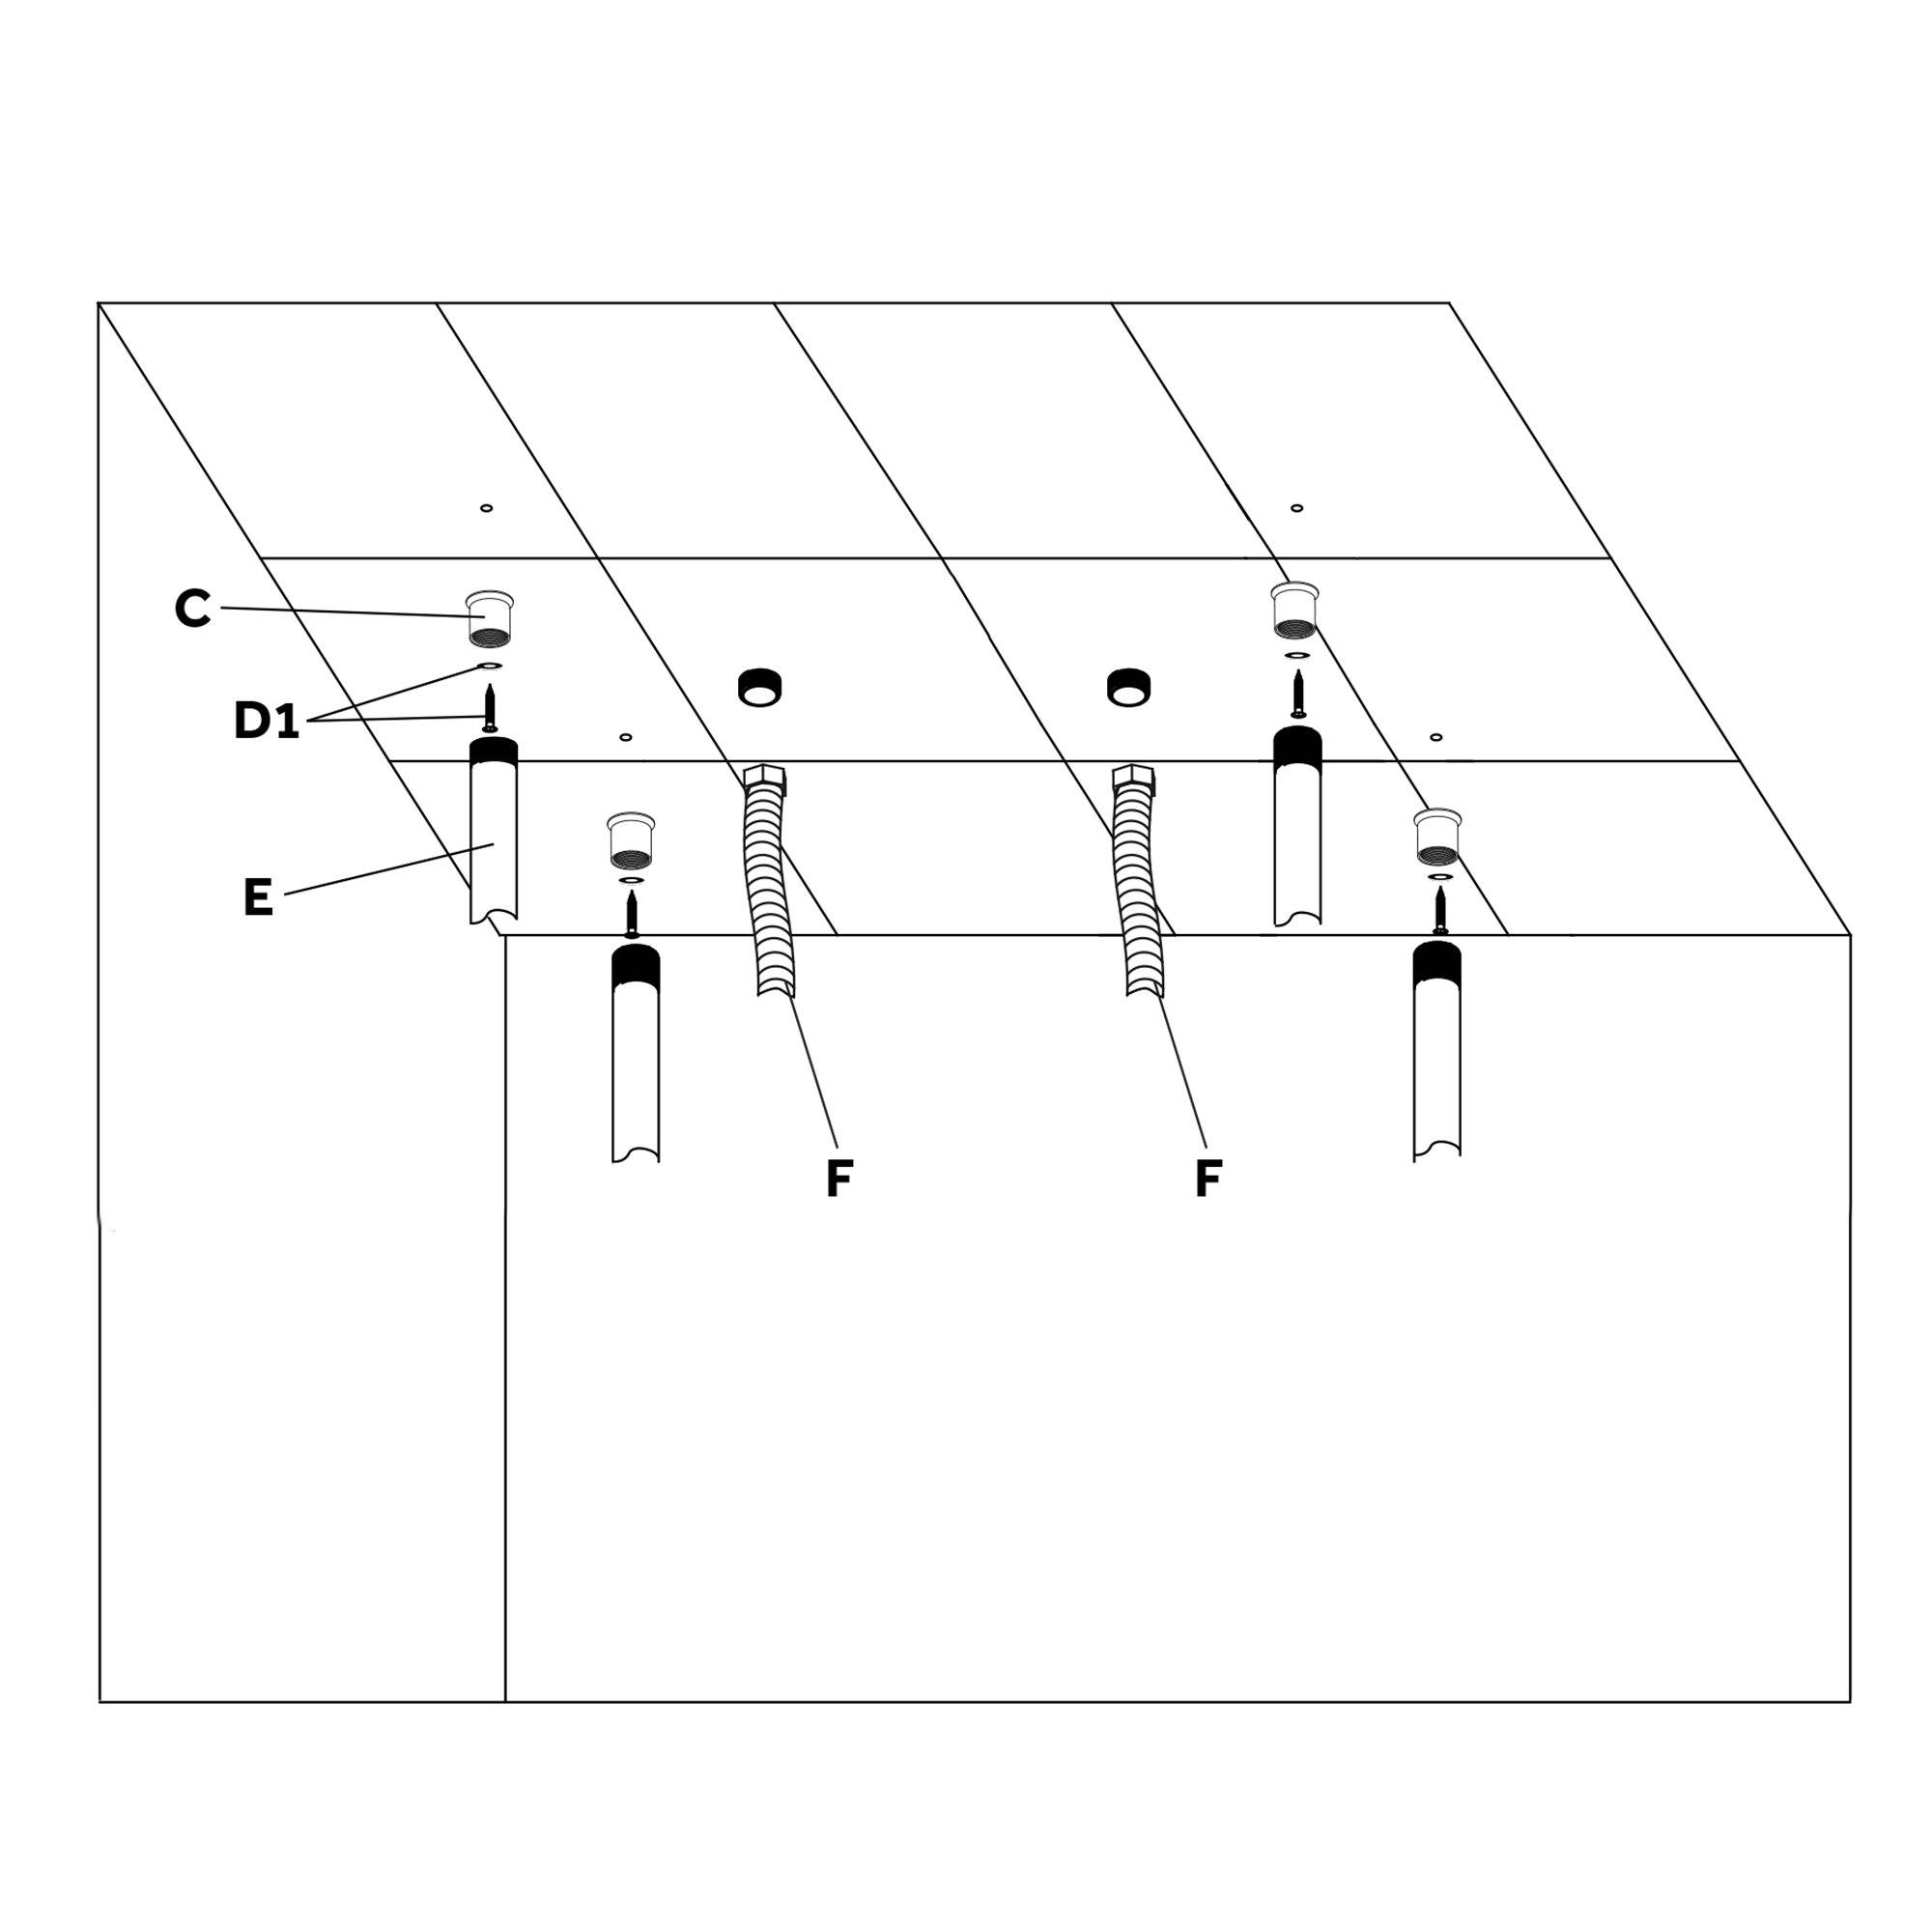
What must be coordinated before rough-in?Coordinate the 20-inch ceiling showerhead, mounting brackets, rainfall and mist supplies, body-jet branches, handheld outlet and mixer depth.
Open Product Guide Why must combined flow demand be reviewed?Rainfall, mist, six body sprays and the handheld can create substantial demand. Confirm approved combinations, supply capacity and drainage.
Review System Requirements When should concealed branches be tested?Flush and pressure-test the mixer, ceiling supplies and all six body-spray branches before waterproofing and finish work.
View Body-Jet Guide Where are the related installation guides?The main installation hub connects this page with ceiling, mixer, body-jet and handheld resources.
Open Installation Hub

|
|
|