Explore Installation Guides by Fixture Type
Find focused setup guidance for touchless faucets, bathroom faucets, shower systems, mixers, body jets and handheld showers.
Installation Hubs
Touchless Faucets
Bathroom Faucets
Shower Components
Project Resources
Product Categories
Frequently Asked Questions
How should I use this installation resource center?
Select the fixture category first, then open the guide that matches the mounting method and components shown on the exact product page. VIEW INSTALLATION GUIDES
Which document takes priority when installation details differ?
Follow the installation sheet supplied with the exact SKU. Product-specific valve, power and rough-in requirements take priority over general guidance.
Where should a project team begin before rough-in?
Confirm the selected SKU, mounting surface, connection locations, service access and approved submittal documents before walls or counters are closed.
Are these guides a substitute for professional installation?
No. Installation should follow applicable codes, the product-specific instructions and the work of a qualified installer.
Fontana Touchless Faucet Installation Center
Plan a Touchless Faucet Installation
Navigate sensor-faucet setup guidance by mounting method, controls, power, commissioning and project documentation.
Start Here
Mounting
Fixture Type
Product Selection
Specifications
All Installation Help
Frequently Asked Questions
What should be confirmed before installing a touchless faucet?
Match the faucet, control box, power supply, hoses and mounting hardware to the exact SKU, then verify clearances and service access. OPEN TOUCHLESS INSTALLATION GUIDE
When should power and sensor testing occur?
Complete water connections and flushing first, then energize the unit and perform the product-specific sensor commissioning procedure.
Why is basin geometry important for sensor-faucet setup?
The spout position, basin depth and reflective surfaces can affect splash control and the intended activation zone. Confirm the specified mounting relationship before drilling.
Where can architects and contractors find project files?
Use the BIM and Revit library for available design files, then confirm current installation documents on the selected product page.
Fontana Sensor Faucet Setup Guide
Install a Touchless Bathroom Faucet
Follow the core sequence for mounting, water connections, power setup, flushing and sensor commissioning.
Installation Sequence
Diagrams
Mounting Planning
Related Faucets
Project Files
Installation Hub
Frequently Asked Questions
What is the correct touchless-faucet installation order?
Verify the rough-in, mount the faucet and control components, connect and flush the water lines, connect power, then commission the sensor. VIEW TOUCHLESS DIAGRAMS
Should supply lines be flushed before connecting the faucet?
Yes. Flush debris from the supply lines before final connection so sediment does not enter filters, valves or the solenoid.
Where should the control box be mounted?
Place it in the product-specified orientation within hose and cable reach, protected from standing water and accessible for future service.
How is the activation zone checked after installation?
Follow the exact model instructions, test repeated hand approaches from normal use positions and confirm reliable shutoff without basin-triggered activation.
Fontana Touchless Faucet Technical Guide
Review Sensor Faucet Diagrams and Connections
Use installation diagrams to coordinate faucet mounting, control-box placement, water routing, power and final testing.
Core Guide
Field Setup
Wall Mount
Related Guides
Design Files
Main Hub
Frequently Asked Questions
How should a touchless faucet diagram be used in the field?
Use it to coordinate component relationships, but confirm dimensions, connector types and power requirements against the sheet for the exact SKU. OPEN STEP-BY-STEP SETUP
What must remain accessible after installation?
Keep the control box, shutoffs, filters, power connection and serviceable valve components reachable without destructive removal.
Can cables and hoses be extended automatically?
Do not assume they can. Use only approved components and remain within the routing and length limits stated for the selected model.
What should be documented during commissioning?
Record the installed SKU, power arrangement, leak test, flushing completion and sensor-response check for project closeout.
Fontana Hands-Free Faucet Installation
Coordinate a Hands-Free Faucet Setup
Plan the mounting, water supply, power, sensor field and accessible service components for dependable hands-free operation.
Installation Guide
Technical Diagrams
Wall-Mount Planning
Related Installation
Product Category
All Guides
Frequently Asked Questions
What makes hands-free faucet installation different from a manual faucet?
A hands-free system adds sensor positioning, a control valve or solenoid, power coordination and commissioning to the normal mounting and water-connection work. EXPLORE TOUCHLESS INSTALLATION
How can false activation be reduced?
Maintain the specified relationship between the spout, basin and sensor field, then test for reflections and unintended targets during commissioning.
Should the faucet be powered before flushing?
Follow the model instructions; generally, supply piping should be cleared of debris before the valve and sensor system enter normal operation.
What should facility staff receive at handover?
Provide the model documentation, power information, shutoff location, service access details and the results of the functional test.
Fontana Bathroom Faucet Installation Center
Find the Right Bathroom Faucet Installation Guide
Navigate conventional, three-piece, wall-mounted and touchless faucet installation resources by configuration.
Faucet Configuration
Touchless Faucets
Technical Diagrams
Shower Faucets
Project Files
All Categories
Frequently Asked Questions
How do I choose the correct bathroom faucet guide?
Match the guide to the faucet configuration: single-piece or widespread, deck-mounted or wall-mounted, and manual or sensor-operated. VIEW ALL INSTALLATION CATEGORIES
What dimensions should be checked before drilling?
Confirm hole count, hole diameter, center spacing, deck thickness, spout reach and clearance for connections below the mounting surface.
When is the wall-mount clearance guide needed?
Use it before rough-in whenever the faucet body or spout is wall-mounted and must coordinate precisely with the basin rim and drain.
What should be checked before project handover?
Verify secure mounting, correct hot and cold orientation, leak-free connections, intended flow and access to shutoffs and serviceable parts.
Fontana Three-Piece Faucet Installation
Plan a Three-Piece Bathroom Faucet Installation
Coordinate the spout, hot and cold valves, deck openings, flexible connections and service access before final mounting.
Primary Guidance
Mounting Layout
Touchless Alternative
Related Plumbing
Design Resources
Installation Directory
Frequently Asked Questions
What defines a three-piece bathroom faucet?
The spout and the two control handles mount as separate deck components and connect below the surface. OPEN FAUCET INSTALLATION HUB
What should be measured before cutting the counter or sink deck?
Verify the product-specific hole diameters, center spacing, deck thickness and the clear area needed for valves and connections below.
How should the hot and cold valves be positioned?
Follow the product markings and installation sheet, maintain the specified orientation and keep each connection accessible for inspection and service.
What final checks are important?
Confirm aligned trim, secure mounting, correct handle operation, proper spout flow and leak-free connections under operating pressure.
Fontana Wall-Mounted Faucet Planning
Coordinate Faucet Height, Reach and Basin Clearance
Plan the rough-in relationship between the wall-mounted spout, finished wall, basin rim, drain and usable handwashing area.
Faucet Installation
Touchless Wall Mount
Shower Coordination
Mixer Coordination
Project Files
All Guides
Frequently Asked Questions
Is there one universal wall-mounted faucet height?
No. The correct rough-in depends on the selected faucet, spout reach, basin geometry, finished wall build-up and applicable accessibility requirements. VIEW FAUCET INSTALLATION HUB
Where should the water stream land in the basin?
Coordinate the spout projection so the stream reaches a usable washing area near the drain without striking the rim or causing excessive splash.
Why must finished-wall thickness be known early?
The valve and spout rough-in are referenced to the final surface; tile, stone, backing and waterproofing can change the usable installation depth.
What should be mocked up before final rough-in?
Confirm the faucet centerline, spout outlet, basin rim, drain location and normal hand position using the actual dimensions of the specified fixtures.
Fontana Shower Installation Center
Explore Shower Faucet and Component Installation Guides
Coordinate shower controls, mixers, body jets and handheld components through focused installation resources.
Shower Controls
Body Sprays
Handheld Showers
Faucet Planning
Product Category
All Installation Help
Frequently Asked Questions
What should be coordinated before a shower wall is closed?
Confirm the exact valve, outlet locations, mounting depths, supply routing, blocking, waterproofing transitions and future service access. OPEN SHOWER MIXER GUIDE
Why must the product-specific rough-in sheet be used?
Valve depth, port arrangement and trim adjustment range vary. The exact sheet governs installation for the selected shower system.
When should the system be pressure-tested and flushed?
Test and flush the rough plumbing before finishes conceal it, following applicable codes and the specified installation sequence.
How should multiple shower outlets be planned?
Verify the mixer and diverter configuration, simultaneous-use intent, available pressure and flow, and the routing to each selected outlet.
Fontana Shower Mixer Installation
Coordinate the Shower Mixer and Valve Rough-In
Plan supply connections, valve depth, outlet routing, trim alignment and access before closing the shower wall.
Main Shower Guide
Connected Outlets
Wall Planning
Shower Systems
Project Resources
All Guides
Frequently Asked Questions
How is the correct shower-mixer rough-in depth established?
Measure from the finished wall plane and follow the minimum and maximum depth markings supplied for the exact valve and trim. VIEW SHOWER INSTALLATION HUB
What should be checked before connecting shower outlets?
Confirm port functions, flow direction, diverter operation and which outlets are intended to run independently or simultaneously.
Why is solid valve support important?
Secure support helps keep the valve at the specified depth and prevents movement that can compromise trim alignment or connected piping.
What testing is needed before tiling?
Flush the lines, pressure-test all concealed connections and verify valve and diverter operation according to the product instructions and applicable codes.
Fontana Shower Body Jet Installation
Plan Shower Body Jet Placement and Plumbing
Coordinate spray height, spacing, supply routing, pressure balance, waterproofing and access for a multi-outlet shower.
Shower Installation
Mixer and Controls
Related Outlet
Wall Coordination
Product Category
All Guides
Frequently Asked Questions
How should shower body-jet heights be selected?
Base placement on intended user coverage, the number and spray pattern of the selected jets, and project accessibility needs rather than using one universal height. OPEN SHOWER INSTALLATION HUB
How can flow be balanced across several body jets?
Follow the specified piping arrangement, maintain appropriate pipe sizing and verify that the selected valve and available supply can support the intended simultaneous flow.
What must be coordinated with waterproofing?
Each concealed connection and wall penetration needs the approved mounting depth, sealing detail and interface with the project waterproofing system.
When should body jets be tested?
Pressure-test concealed piping before wall finishes, then test direction, coverage and leak-free operation after trim installation.
Fontana Handheld Shower Installation
Coordinate the Hand Shower, Outlet and Holder
Plan mounting height, hose reach, water connection, support and controls for convenient handheld-shower operation.
Shower Installation
Mixer and Diverter
Related Outlets
Wall Planning
Product Category
All Guides
Frequently Asked Questions
How should handheld-shower mounting height be determined?
Coordinate the holder or slide bar with intended users, hose reach, shower controls and applicable accessibility requirements. VIEW SHOWER INSTALLATION HUB
What should be checked before locating the wall outlet?
Confirm the hose length, holder position, spray-head parking position and that the hose will not kink or rest where it creates a trip or damage risk.
Does the wall outlet require structural support?
Provide the mounting and backing required by the selected fitting and wall construction, and coordinate its sealed penetration through the finished surface.
What should be tested after installation?
Check the hose and outlet for leaks, verify diverter operation, confirm the spray head seats securely and test the full intended reach without binding.
corrected-12-installation-cluster-sections.htmlHTMLOpen file
NO DO ONE BY ONE FOR THE FOLLOWING PAGES:
https://www.fontanashowers.com/Installing-an-Outdoor-Shower-s/7527.htm
https://www.fontanashowers.com/Installation-Requirements-for-Waterfall-and-Rain-Shower-Hea-s/8497.htm
https://www.fontanashowers.com/large-bathroom-sink-installation-guide-s/12100.htm
https://www.fontanashowers.com/Installation-Instructions-Bathroom-Fixtures-for-Architects-s/7588.htm
https://www.fontanashowers.com/Ease-of-Installation-and-Maintenance-s/8480.htm
https://www.fontanashowers.com/category-s/9801.htm
https://www.fontanashowers.com/Ceiling-Mounted-Installation-Detail-s/12768.htm
https://www.fontanashowers.com/Recessed-Ceiling-Rough-In-Layout-s/12770.htm
https://www.fontanashowers.com/Thermostatic-Valve-Rough-In-Detail-s/12788.htm
https://www.fontanashowers.com/wall-rough-in-dimensions-s/12742.htm
https://www.fontanashowers.com/touchless-faucet-soap-dispenser-countertop-installation-s/12799.htm
https://www.fontanashowers.com/countertop-faucet-soap-dispenser-plumbing-rough-in-s/12804.htm
https://www.fontanashowers.com/ada-touchless-faucet-soap-dispenser-installation-s/12811.htm
https://www.fontanashowers.com/touchless-faucet-soap-dispenser-engineering-installation-s/12818.htm
https://www.fontanashowers.com/Chrome-Wall-Mount-Sensor-Faucet-Installation-Guide-s/12859.htm
https://www.fontanashowers.com/category-s/12860.htm
https://www.fontanashowers.com/deck-mounted-sensor-faucet-installation-section-detail-s/12767.htm
I found one important SEO issue before producing the sections:
/Chrome-Wall-Mount-Sensor-Faucet-Installation-Guide-s/12859.htm
/category-s/12860.htm
Both currently have the same page title and appear to contain the same content. They should not both receive optimized sections. The descriptive /12859.htm URL should be retained as the canonical page, while /category-s/12860.htm should normally be 301-redirected to it. Optimizing both could worsen duplication and cannibalization.
Page 1 of 17
Installing an Outdoor Shower
Fontana Outdoor Shower Installation Resources
Plan Your Outdoor Shower Installation
Explore related guidance for outdoor shower planning, plumbing, drainage, controls, shower outlets and long-term service access.
Installation Hub
Shower Controls
Shower Outlets
Wall Rough-In
Project Planning
Maintenance
Frequently Asked Questions
What should be evaluated before selecting an outdoor shower location?
Confirm privacy, access to the water supply, drainage, prevailing weather exposure, the mounting structure and a safe walking surface. Local plumbing, drainage and zoning requirements should be reviewed before construction begins.
Explore Installation Resources
How should drainage be planned for an outdoor shower?
Drainage must prevent standing water and direct discharge to an approved location. Soil conditions, surface slope, expected use and local rules determine whether a connected drain, permeable base or another approved system is appropriate.
What plumbing components need protection in cold climates?
Supply piping, valves and exposed fixtures may require insulation, shutoff provisions and a method for complete seasonal drainage. The exact freeze-protection strategy should be established by the project plumber for the local climate.
When should the outdoor shower plumbing be tested?
Flush and pressure-test concealed piping before walls, paving or enclosure materials restrict access. After fixture installation, verify drainage, temperature control, water delivery and leak-free operation.

SEO controls applied: no self-link, eight contextual internal links, two major installation hubs, no unrelated touchless-faucet links, unique outdoor-installation FAQs, and no unsupported universal dimensions.
I DO NOT WANT YOU TO STOP YOU SHOULD CONTINUE ONE AFTER ANOTHER IS THIS CLEAR?
Yes, completely clear.
I will continue through every remaining page automatically, one after another, in the exact order provided. I will not pause or wait for you to say “next.”
For each page, I will:
Identify the exact destination URL.
Provide its complete HTML section separately.
Preserve your HTML structure and CSS classes.
Use page-specific copy and FAQs.
Link to the appropriate installation hub and related guides.
Avoid self-links, excessive links, duplicate FAQ copy and keyword stuffing.
Track image reuse so no image exceeds three appearances.
Continue immediately to the following page.
The duplicate /category-s/12860.htm page will be treated as an SEO correction rather than receiving competing content: /12859.htm should remain the preferred descriptive URL, and /12860.htm should redirect or canonicalize to it.
OK
Page 8 of 17:
Recessed Ceiling Rough-In Layout
Fontana Recessed Ceiling Shower Planning
Plan the Recessed Ceiling Rough-In
Coordinate the ceiling opening, mounting support, supply routing, finished elevation and service access before enclosure.
Installation Hub
Ceiling Mount
Shower Head
Controls
Wall Rough-In
Project Guidance
Frequently Asked Questions
What determines a recessed shower head’s ceiling opening?
Use the cutout and mounting dimensions for the exact SKU—not nominal shower-head dimensions. Coordinate tolerances with the finished-ceiling material. Open Ceiling Detail
When should the finished ceiling elevation be confirmed?
Confirm it before fixing supports or connections because the fixture must align with the final surface, not the unfinished framing.
What should remain accessible above the ceiling?
Preserve access to serviceable connections and components where required by the product documents and applicable codes.
When should the recessed assembly be tested?
Test concealed piping before enclosure and verify alignment, flow, spray coverage and leak-free operation after final installation.
Page 9 of 17:
Thermostatic Valve Rough-In Detail
Fontana Thermostatic Valve Installation
Coordinate the Thermostatic Valve Rough-In
Plan valve depth, supply orientation, outlet routing, structural support and access before closing the shower wall.
Installation Hub
Mixer
Wall Rough-In
Ceiling Outlet
Body Jets
Hand Shower
Frequently Asked Questions
How is thermostatic-valve rough-in depth established?
Measure from the finished wall plane and stay within the installation range specified for the exact valve and trim. Review Mixer Installation
Why must hot and cold supply orientation be verified?
Incorrect supply orientation can prevent proper temperature control. Follow the port markings and product-specific piping diagram.
What should be tested before closing the wall?
Flush the supplies, pressure-test concealed connections and verify valve and diverter operation according to the installation instructions.
Does the valve require future service access?
Maintain the access specified for cartridges, filters, stops and other serviceable components without obstructing the finished trim.
Page 10 of 17:
FS8014ORB Wall Rough-In Dimensions
Fontana FS8014ORB Installation Coordination
Review the Wall Rough-In Dimensions
Coordinate product-specific mounting depth, connection locations, finished-wall buildup and trim alignment.
Primary Guide
Valve
Ceiling
Body Jets
Hand Shower
All Guides
Frequently Asked Questions
Are these wall rough-in dimensions universal?
No. This detail is associated with FS8014ORB. Confirm the exact SKU before using its dimensions on a project. Open Shower Installation Hub
Which wall plane governs mounting depth?
Use the completed finished-wall plane, including backing, waterproofing, tile or stone and setting materials.
When should trim alignment be checked?
Check the permitted depth and alignment during rough-in and again before permanently closing the wall.
What must be tested before enclosure?
Flush and pressure-test concealed piping and confirm that every connection and outlet matches the product diagram.
Page 11 of 17:
Touchless Faucet and Soap Dispenser Countertop Installation
Fontana Coordinated Touchless Installation
Plan the Countertop Fixture Layout
Coordinate faucet and dispenser spacing, basin alignment, deck openings, control components and service access.
System Hub
Plumbing
Engineering
Accessibility
Sensor Faucet
Project Files
Frequently Asked Questions
What should determine faucet and soap-dispenser spacing?
Use the exact fixture dimensions, basin geometry, user reach, deck structure and clear space required below for controls and reservoirs. Review Plumbing Rough-In
Should holes be drilled from nominal dimensions?
No. Confirm the approved SKU-specific cutout dimensions and countertop conditions before drilling.
What space is needed below the counter?
Reserve unobstructed space for mounting hardware, hoses, control boxes, power supplies and soap-delivery components.
What should be tested at commissioning?
Check leaks, water delivery, soap dosing, sensor response, shutoff behavior and access to all serviceable components.
Page 12 of 17:
Countertop Faucet and Soap Dispenser Plumbing Rough-In
Fontana Countertop Plumbing Coordination
Coordinate the Faucet and Dispenser Rough-In
Plan water, soap, power and service components below the counter before fabrication and final fixture installation.
Installation Hub
Countertop
Engineering
Accessibility
Deck Mount
System Diagrams
Frequently Asked Questions
What services must be coordinated below the countertop?
Coordinate water supplies, shutoffs, drain components, faucet controls, power and the specified soap reservoir or feed system. Open Engineering Guide
Why must cabinet obstructions be reviewed?
Drawer boxes, supports and waste piping can conflict with hoses, control boxes, reservoirs and future service access.
Should power components be placed near standing water?
No. Follow the product instructions and electrical requirements for protected placement, routing and access.
When should rough plumbing be flushed?
Flush supply piping before final connection so construction debris does not enter faucet filters or solenoid components.
Page 13 of 17:
ADA Touchless Faucet and Soap Dispenser Installation
Fontana Accessible Touchless Installation
Coordinate an Accessible Faucet and Dispenser
Plan fixture reach, basin clearances, operable space, sensor performance and accessible service components.
Installation Hub
Countertop
Plumbing
Engineering
Sensor Detail
Project Guidance
Frequently Asked Questions
Does specifying a touchless fixture automatically make a lavatory ADA compliant?
No. Compliance depends on the complete installed condition, including clear floor space, reach, knee and toe clearance, basin height and protruding objects. Review Engineering Guidance
How should the dispenser be positioned for accessible use?
Coordinate its operating location and sensor zone with applicable reach requirements and the actual counter and basin geometry.
Can below-counter components obstruct knee clearance?
Yes. Control boxes, reservoirs, piping and protective enclosures must be coordinated outside required clearances.
Who verifies accessibility compliance?
The project design team and authority having jurisdiction should evaluate the complete installation under the applicable adopted requirements.
Page 14 of 17:
Touchless Faucet and Soap Dispenser Engineering Installation
Fontana Touchless Systems Engineering
Coordinate the Touchless System Installation
Integrate fixture layout, plumbing, power, controls, accessibility, commissioning and maintenance access.
Installation Hub
Countertop
Plumbing
Accessibility
Sensor Faucets
BIM Files
Frequently Asked Questions
Which disciplines should coordinate a touchless handwashing system?
Architectural, plumbing, electrical, accessibility and millwork requirements should be coordinated using the exact approved products. Open BIM Resources
What should the engineering submittal identify?
Identify SKUs, dimensions, flow requirements, power, connections, control components, soap delivery and service clearances.
Why must basin geometry be reviewed?
Spout reach, water-stream location, sensor field and dispenser placement depend on the actual basin and counter relationship.
What belongs in the commissioning record?
Record flushing, leak tests, power configuration, sensor response, faucet shutoff, soap dosing and installed component locations.
Page 15 of 17:
Chrome Wall-Mount Sensor Faucet Installation Guide
Fontana Wall-Mount Sensor Faucet Installation
Install a Chrome Wall-Mounted Sensor Faucet
Coordinate wall rough-in, basin alignment, sensor coverage, concealed controls, power and service access.
Installation Hub
Wall Placement
Touchless Setup
Countertop Systems
Engineering
Product Category
Frequently Asked Questions
How is wall-mounted sensor-faucet height determined?
Coordinate the exact spout projection with the basin rim, drain, water-stream location and sensor field; do not use one universal height. Review Height and Clearance
Where should concealed controls be located?
Install them within approved hose and cable reach, protected from water and accessible for commissioning and service.
Does the chrome finish change the plumbing rough-in?
Finish alone normally does not determine rough-in, but the complete model and SKU must still match the approved installation documentation.
What should be checked during commissioning?
Confirm secure trim, leak-free connections, intended stream placement, reliable activation and shutoff without basin-triggered operation.
Page 16 of 17 — do not add another section
Duplicate category URL
This page currently duplicates page 15’s subject and title. Adding another optimized section would reinforce duplication and possible cannibalization.
Recommended action:
Keep /Chrome-Wall-Mount-Sensor-Faucet-Installation-Guide-s/12859.htm as the preferred URL.
Add a permanent 301 redirect from /category-s/12860.htm to /Chrome-Wall-Mount-Sensor-Faucet-Installation-Guide-s/12859.htm.
If Volusion prevents a redirect, add a canonical from /12860.htm to /12859.htm and remove /12860.htm from internal links and the XML sitemap.
Do not publish another cluster block on /12860.htm.
Page 17 of 17:
Deck-Mounted Sensor Faucet Installation Section Detail
Fontana Deck-Mounted Sensor Faucet Installation
Coordinate the Deck-Mounted Sensor Faucet
Plan faucet placement, basin alignment, deck opening, below-counter controls, power and service access.
Installation Hub
Step-by-Step
Countertop
Plumbing
Accessibility
Engineering
Frequently Asked Questions
What should be verified before drilling for a deck-mounted sensor faucet?
Confirm the exact cutout, deck thickness, spout reach, basin geometry and unobstructed space required below the counter. Review Countertop Layout
How should the faucet align with the basin?
The stream should reach a practical washing area without striking the basin wall or creating excessive splash.
Where should the sensor-faucet control box be mounted?
Place it within approved hose and cable reach, protected from standing water and accessible for adjustment and service.
What commissioning checks are required?
Verify flushing, leak-free connections, power, repeated sensor activation, automatic shutoff and correct water-stream placement.
Completed continuously through all 17 listed pages. Page 16 was intentionally handled as a duplication correction instead of creating competing content.
XXXXXXXXXXXXXXXXXXXXXXXXXXXXXXXXXXXXXXXXXXXXXXXXXXXXXXXXXXXXXXXXXXXXXXXXXXXXXX
Section 1 of 7 — Approved page 4 of 24
Page: Fontana Lima Brass In-Wall Mixer Valve Installation
Fontana Lima Mixer Installation Resources
Install the Lima In-Wall Mixer Valve
Coordinate valve depth, supply orientation, shower outlets, finished-wall alignment and service access.
Installation Hub
Mixer Guides
Valve Rough-In
Wall Planning
Body Jets
Hand Shower
Frequently Asked Questions
How should the Lima mixer rough-in depth be established?
Measure from the completed finished-wall plane and use the installation range specified for the exact Lima valve and trim. Review Valve Rough-In
Why must the mixer ports be identified before piping?
Correct inlet orientation and outlet routing are required for proper mixing, flow control and operation of the connected shower functions.
What should be completed before closing the wall?
Secure the valve, flush the supplies, pressure-test concealed connections and confirm the finished-wall allowance.
What should be checked during final commissioning?
Verify leak-free operation, temperature response, flow control, outlet selection and access to serviceable components.
Section 2 of 7 — Approved page 5 of 24
Page: Venice Single-Handle Kitchen Faucet Installation
Fontana Venice Faucet Installation Resources
Install the Venice Pull-Down Kitchen Faucet
Coordinate the deck opening, mounting hardware, supply connections, pull-down hose and under-sink clearance.
Installation Hub
Faucet Guides
Deck Mount
Clearance
Project Guidance
Maintenance
Frequently Asked Questions
What should be verified before installing the Venice kitchen faucet?
Confirm the product-specific opening, deck thickness, spout clearance, supply connections and unobstructed space for the pull-down hose. Open Installation Hub
What can interfere with the pull-down hose?
Drain piping, stored items, cabinet partitions and supply lines can obstruct hose travel or prevent the spray head from retracting properly.
When should the water supplies be flushed?
Flush both supply lines before final faucet connection so construction debris does not enter the cartridge or spray head.
What final installation checks are required?
Verify secure mounting, smooth handle movement, full hose travel, spray-function operation and leak-free connections.
Section 3 of 7 — Approved page 6 of 24
Page: Fontana Shower Arm for LED Shower Head Installation
Fontana LED Shower Head Installation
Install the Fontana LED Shower Arm
Coordinate the wall connection, structural support, arm alignment, shower-head weight and leak testing.
Installation Hub
Shower Heads
Wall Rough-In
Mixer Controls
Thermostatic Valve
Project Guidance
Frequently Asked Questions
What should be checked before installing the LED shower arm?
Confirm the connection type, arm projection, wall support and compatibility with the exact shower head. Open Shower Installation Hub
Can the finished wall support the shower arm by itself?
The connection and backing must support the actual arm and shower-head assembly; decorative wall finishes should not be treated as structural support.
When should the connection be leak-tested?
Test the concealed connection before access is restricted and inspect it again after the arm and shower head are installed.
What should be checked after mounting?
Verify alignment, secure support, leak-free operation, intended spray position and proper LED function under water flow.
Section 4 of 7 — Approved page 7 of 24
Page: Bronze Square LED Shower Installation
Fontana Bronze LED Shower Installation
Install the Bronze Square LED Shower
Coordinate mounting support, water delivery, mixer compatibility, finished-wall alignment and LED operation.
Installation Hub
LED Shower
Shower Head
Mixer
Rough-In
Maintenance
Frequently Asked Questions
What should be confirmed before installing the bronze square LED shower?
Verify the mounting method, structural support, connection, valve compatibility and water requirements for the exact model. Review Shower Requirements
Does every LED shower use an electrical connection?
No. Power arrangements vary, so installers must follow the documentation supplied for the exact LED shower model.
When should concealed piping be tested?
Flush and pressure-test the piping before closing the wall or ceiling and before installing sensitive fixture components.
What should final commissioning include?
Verify secure mounting, leak-free operation, intended spray coverage, control response and proper LED performance.
Section 5 of 7 — Approved page 8 of 24
Page: Fontana L’Aquila Brass Shower Installation
Fontana L’Aquila Shower Installation
Install the L’Aquila Brass Shower
Coordinate shower mounting, supply routing, mixer controls, finished surfaces and functional testing.
Installation Hub
Shower Head
Mixer
Rough-In
Hand Shower
Maintenance
Frequently Asked Questions
What should be verified before installing the L’Aquila brass shower?
Confirm the exact components, mounting locations, valve arrangement, connections and finished-surface requirements. Open Shower Installation Hub
Should rough-in dimensions be taken from another shower model?
No. Use the product-specific L’Aquila documentation because mounting and connection dimensions can differ between systems.
What should be tested before closing the wall?
Flush the supplies, pressure-test concealed connections and confirm that the valve and outlet routing match the approved layout.
What should be checked after installing the trim?
Verify alignment, secure mounting, leak-free operation, temperature response and proper operation of every shower outlet.
Section 6 of 7 — Approved page 9 of 24
Page: Fontana Shower Panel Installation
Fontana Shower Panel Installation Resources
Install the Fontana Shower Panel
Coordinate wall support, mounting brackets, supply connections, shower functions and maintenance access.
Installation Hub
Panel Overview
Massage Panel
Mixer
Body Jets
Maintenance
Frequently Asked Questions
What should be confirmed before mounting the Fontana shower panel?
Verify panel dimensions and weight, bracket positions, wall support, supply locations and service access. Open Panel Installation Guide
What wall support does the panel require?
Use backing, anchors and fasteners appropriate for the actual panel weight and wall construction.
When should water connections be tested?
Flush supplies before connection and test all joints before the mounted panel limits access.
What should panel commissioning include?
Test mounting security, temperature control and every overhead, handheld, waterfall or body-spray function included with the panel.
Section 7 of 7 — Approved page 10 of 24
Page: Fontana Massage Shower Panel Installation
Fontana Massage Shower Panel Installation
Install the Fontana Massage Shower Panel
Coordinate panel support, water connections, massage jets, hand shower, controls and service access.
Installation Hub
Panel Overview
Body Jets
Mixer
Hand Shower
Maintenance
Frequently Asked Questions
What should be verified before mounting the massage shower panel?
Confirm panel weight, bracket locations, wall support, supply positions and clearance for all controls and connections. Open Panel Installation Guide
How should massage-jet performance be coordinated?
Confirm that available pressure and flow support the exact panel and intended outlet operation before installation.
When should the concealed connections be inspected?
Flush and test the supplies before hanging the panel, while the hoses and connections remain fully accessible.
What should be tested after mounting?
Check secure support, leaks, mixer response and the operation and spray direction of every massage jet, shower head and hand shower.
Section 1 of 7 — Approved page 11 of 24
Page: Fontana Waterfall Shower with Body Jets Installation
Fontana Waterfall Shower Installation
Install the Waterfall Shower with Body Jets
Coordinate water delivery, valve controls, shower-head support, body-jet piping and service access.
Installation Hub
Shower Head
Body Jets
Mixer
Valve Rough-In
Hand Shower
Frequently Asked Questions
What should be confirmed before installing the waterfall shower system?
Verify the exact outlets, mounting arrangement, structural support, flow demand, valve capacity and supply routing. Open Shower Installation Hub
How should multiple body jets be piped?
Follow the product-specific balanced piping arrangement and confirm that the available supply supports the intended simultaneous operation.
When should concealed piping be tested?
Flush and pressure-test every concealed connection before wall or ceiling finishes restrict access.
What should final commissioning include?
Test leaks, temperature control, outlet selection, waterfall delivery, body-jet balance and access to serviceable components.
Section 2 of 7 — Approved page 12 of 24
Page: Fontana FS1761MT Three-Dial Three-Way Mixer Installation
Fontana FS1761MT Mixer Installation
Install the Three-Dial Three-Way Mixer
Coordinate valve depth, three-way outlet routing, supply orientation, trim alignment and servicing.
Installation Hub
Mixer Guides
Valve Rough-In
Wall Planning
Body Jets
Hand Shower
Frequently Asked Questions
How should the FS1761MT rough-in depth be established?
Measure from the completed finished-wall plane and use the installation range supplied for the exact valve and trim. Review Valve Rough-In
How should the three outlets be assigned?
Match each valve outlet to the approved shower-system diagram and label the concealed piping before wall closure.
What should be tested before installing the trim?
Flush supplies, pressure-test concealed connections and verify correct flow through each selected outlet.
What should final commissioning include?
Verify temperature response, individual outlet selection, shutoff, trim alignment and leak-free operation.
Section 3 of 7 — Approved page 13 of 24
Page: Fontana Tagress LED Shower Installation
Fontana Tagress LED Shower Installation
Install the Tagress Color-Changing Shower
Coordinate mounting, water delivery, controls, LED operation, finished surfaces and service access.
Installation Hub
LED Shower
Digital Control
Shower Head
Mixer
Rough-In
Frequently Asked Questions
What should be confirmed before installing the Tagress LED shower?
Verify the exact shower head, controller, valve, connections, mounting arrangement and service requirements. Open Shower Installation Hub
How is the Tagress LED system powered?
Power arrangements can vary. Follow the documentation supplied for the exact Tagress configuration rather than assuming an electrical or flow-powered system.
When should the concealed components be tested?
Test plumbing, valves, cables and approved power components before walls or ceilings restrict access.
What should final commissioning include?
Verify water delivery, temperature control, outlet operation, display or controller response and color-changing LED performance.
Section 4 of 7 — Approved page 14 of 24
Page: Fontana Bronze Temperature-Control Faucet Installation
Fontana Temperature-Control Installation
Install the Bronze Temperature-Control Faucet
Coordinate supply orientation, valve depth, temperature control, trim alignment and accessible servicing.
Installation Hub
Mixer Guides
Thermostatic Valve
Rough-In
Wall Planning
Maintenance
Frequently Asked Questions
What should be verified before installing the bronze temperature-control faucet?
Confirm its exact valve configuration, hot and cold inlet orientation, mounting depth, outlet routing and trim requirements. Open Thermostatic Mixer Guide
Does the bronze finish change the rough-in?
Finish alone does not establish the rough-in, but the complete SKU must match the approved installation documentation.
What should be tested before wall closure?
Flush the supplies, pressure-test the concealed connections and verify the permitted trim-depth range.
What should commissioning include?
Verify temperature response, limit settings, flow control, shutoff and leak-free operation.
Section 5 of 7 — Approved page 15 of 24
Page: Fontana Shower System Digital Display Installation
Fontana Digital Shower Installation
Install the Shower System Digital Display
Coordinate the display, controller, valve, power, cable routing, shower outlets and service access.
Installation Hub
Digital Shower
Mixer
Valve Rough-In
Ceiling Mount
Project Guidance
Frequently Asked Questions
What should be coordinated before installing the digital display?
Confirm display location, controller compatibility, valve configuration, power requirements, cable routes and access. Open Shower Installation Hub
Can the digital display be paired with any valve?
No. Use only the controller, valve and connections specified for the exact shower-system configuration.
What components must remain accessible?
Maintain access to the controller, power connection, valve components and other serviceable equipment identified in the instructions.
What should digital-shower commissioning include?
Verify display response, temperature control, outlet selection, shutoff behavior, saved settings where applicable and leak-free operation.
Section 6 of 7 — Approved page 16 of 24
Page: Fontana Lima Rainfall and Waterfall Shower Installation
Fontana Lima Shower Installation
Install the Lima Rainfall and Waterfall Shower
Coordinate shower-head support, dual spray functions, valve capacity, wall rough-in and final testing.
Installation Hub
Shower Head
Lima Mixer
Valve Rough-In
Body Jets
Hand Shower
Frequently Asked Questions
What should be verified before installing the Lima shower?
Confirm the exact mounting arrangement, shower-head support, valve configuration, flow requirements and outlet routing. Review Shower Requirements
Can rainfall and waterfall functions operate together?
That depends on the exact valve and system configuration. Confirm simultaneous-operation capability and available flow before rough-in.
When should concealed connections be tested?
Flush and pressure-test all concealed supply and outlet piping before closing the wall or ceiling.
What should final testing include?
Verify mounting security, leaks, temperature response, function selection and consistent rainfall and waterfall delivery.
Section 7 of 7 — Approved page 17 of 24
Page: Fontana Oil-Rubbed Bronze Three-Way LED Shower Installation
Fontana Three-Way LED Shower Installation
Install the Oil-Rubbed Bronze LED Shower
Coordinate three-way controls, LED shower components, outlet routing, valve rough-in and commissioning.
Installation Hub
Three-Way Mixer
LED Shower
Digital Control
Valve Rough-In
Shower Head
Frequently Asked Questions
What should be coordinated before installing this three-way LED shower?
Confirm the controller, valve, three outlet assignments, shower components, power arrangement and service access. Review Three-Way Mixer Installation
Does the oil-rubbed bronze finish affect the rough-in?
Finish alone does not define the rough-in, but every concealed and exposed component must match the approved system SKU.
When should the three shower outlets be tested?
Test concealed piping before enclosure and verify each outlet independently and in any approved simultaneous-use mode.
What should final commissioning include?
Verify temperature control, outlet selection, water delivery, LED operation, automatic shutoff where applicable and leak-free performance.
Section 1 of 8
Page: Fontana Light Oil-Rubbed Bronze Three-Way Digital LED Shower
Fontana Digital LED Shower Installation
Install the Three-Way Digital LED Shower
Coordinate digital controls, three shower outlets, valve rough-in, LED components, power and service access.
Installation HubDigital ControlThree-Way MixerLED ShowerValve Rough-InShower Head
Frequently Asked Questions
What should be coordinated before installing this digital LED shower?Confirm the exact controller, valve, outlet assignments, power arrangement, cable routes and access. Review Digital Display Installation Does the light oil-rubbed bronze finish change the rough-in?Finish alone does not determine rough-in requirements; verify the complete model and approved installation documents. When should concealed components be tested?Test plumbing, valves, cables and approved power components before walls or ceilings restrict access. What should commissioning include?Verify display response, temperature control, outlet selection, LED operation, shutoff and leak-free performance.
Section 2 of 8
Page: Fontana Milan Hot-and-Cold Thermostatic Shower
Fontana Milan Thermostatic Installation
Install the Milan Thermostatic Shower
Coordinate hot and cold supplies, valve depth, shower outlets, trim alignment and temperature commissioning.
Installation HubThermostatic MixerValve Rough-InWall Rough-InShower MixerHand Shower
Frequently Asked Questions
How should the Milan valve rough-in depth be established?Measure from the completed wall surface and follow the approved depth range for the exact valve and trim. Review Valve Rough-In Why must hot and cold orientation be verified?The thermostatic cartridge requires the specified inlet arrangement for correct temperature regulation. What should be tested before wall closure?Flush supplies, pressure-test concealed joints and verify the routing and flow of every shower outlet. What should commissioning include?Verify temperature response, limit calibration, flow control, outlet selection and leak-free operation.
Section 3 of 8
Page: Fontana Lima Wall-Mounted Rainfall Shower
Fontana Lima Rainfall Shower Installation
Install the Lima Wall-Mounted Rainfall Shower
Coordinate wall support, shower-head projection, mixer rough-in, outlet routing and spray coverage.
Installation HubRain ShowerLima MixerWall Rough-InValveHand Shower
Frequently Asked Questions
What should be confirmed before installing the Lima wall-mounted shower?Verify the head weight, wall support, arm projection, connection, valve configuration and intended spray location. Review Rain Shower Requirements How should rainfall-head projection be selected?Coordinate the actual arm and head dimensions with the intended standing area and enclosure boundaries. When should concealed piping be tested?Flush and pressure-test the supply and outlet connections before the finished wall restricts access. What should final testing include?Verify secure mounting, leak-free operation, temperature response and even rainfall coverage.
Section 4 of 8
Page: Fontana Lima Light Oil-Rubbed Bronze Shower
Fontana Lima Shower Installation
Install the Light Oil-Rubbed Bronze Lima Shower
Coordinate shower mounting, valve controls, water connections, finished-wall alignment and commissioning.
Installation HubLima MixerRain ShowerValve Rough-InBody JetsHand Shower
Frequently Asked Questions
What should be verified before installing this Lima shower?Confirm the exact components, mounting locations, valve arrangement, connections and finished-wall requirements. Review Lima Mixer Installation Does the finish determine the rough-in?No. Use the complete product configuration and SKU-specific documents rather than finish alone. What should be tested before enclosure?Flush supplies, pressure-test concealed joints and verify routing to every shower outlet. What should final testing include?Verify trim alignment, leaks, temperature response, outlet selection and intended spray coverage.
Section 5 of 8
Page: Fontana Lima Rainfall Thermostatic Shower
Fontana Lima Thermostatic Shower Installation
Install the Lima Rainfall Thermostatic Shower
Coordinate rainfall and waterfall outlets, thermostatic controls, valve depth, flow and service access.
Installation HubLima MixerThermostatic ValveValve Rough-InShower HeadWall Planning
Frequently Asked Questions
How should the Lima thermostatic-valve depth be established?Measure from the finished-wall plane and follow the approved range for the exact valve and trim. Review Valve Rough-In Can rainfall and waterfall outlets operate together?Confirm this using the exact valve configuration, available pressure and flow, and product documentation. What should be tested before wall closure?Flush supplies, pressure-test concealed connections and verify flow through every intended outlet. What should commissioning include?Verify temperature calibration, outlet selection, rainfall and waterfall delivery, shutoff and leak-free operation.
Section 6 of 8
Page: Fontana Balsamo Gold In-Wall Mixer Installation
Fontana Balsamo Mixer Installation
Install the Balsamo Gold In-Wall Mixer
Coordinate valve placement, supply orientation, outlet routing, trim alignment and service access.
Installation HubMixer GuidesThermostatic ValveRough-InWall PlanningConnected Outlets
Frequently Asked Questions
How should the Balsamo mixer rough-in depth be established?Measure from the finished wall and follow the installation range for the exact concealed valve and trim. Open Mixer Installation Guides Does the gold finish change the concealed plumbing?Finish alone does not establish the rough-in; verify the complete Balsamo configuration and approved documents. What should be tested before enclosure?Flush supplies, pressure-test every concealed joint and verify outlet routing and trim-depth allowance. What should final testing include?Verify temperature and flow control, outlet selection, secure trim and leak-free operation.
Section 7 of 8
Page: Fontana Mugla 22-Inch LED Waterfall Shower
Fontana Mugla LED Shower Installation
Install the Mugla 22-Inch LED Waterfall Shower
Coordinate the large shower head, thermostatic controls, waterfall and rainfall functions, body sprays and hand shower.
Installation HubShower HeadThermostatic ValveBody SpraysHand ShowerValve Rough-In
Frequently Asked Questions
What should be verified before installing the Mugla shower?Confirm shower-head support, valve capacity, outlet routing, available flow and the exact LED-system requirements. Review Shower Requirements Can all Mugla shower outlets run simultaneously?Confirm approved simultaneous use from the product documentation and available pressure and flow before rough-in. When should concealed piping be tested?Flush and pressure-test the shower-head, body-spray and hand-shower piping before enclosure. What should commissioning include?Verify temperature control, outlet selection, spray balance, waterfall and rainfall delivery, LED operation and leaks.
Section 8 of 8
Page: Fontana Mugla 22-Inch Brushed Nickel LED Shower
Fontana Mugla Brushed Nickel Installation
Install the Mugla 22-Inch LED Shower
Coordinate shower-head support, thermostatic controls, water delivery, LED operation and connected shower outlets.
Installation HubMugla SystemShower HeadThermostatic ValveBody SpraysHand Shower
Frequently Asked Questions
What should be confirmed before installing the brushed nickel Mugla shower?Verify the exact components, head support, valve configuration, outlet routing, flow requirements and LED arrangement. Review Related Mugla Installation Does the brushed nickel finish change rough-in dimensions?Finish alone does not establish the rough-in; verify the complete SKU and approved installation sheet. What should be tested before enclosure?Flush supplies, pressure-test concealed connections and confirm water delivery to every intended outlet. What should final commissioning include?Verify secure mounting, temperature control, outlet selection, spray coverage, LED operation and leak-free performance.
All six live pages are valid and match their requested installation topics.
Page 2135 — Lano 22-Inch Contemporary Chrome LED Shower
Fontana Lano LED Shower Installation Resources
Plan the Lano 22-Inch Shower Installation
Explore the related installation guides for the ceiling showerhead, digital controller, concealed mixer, supply connections and shower outlets.
Installation Hub
Showerhead
Controls
Project Checks
System Components
Professional Resources
Lano Shower Installation Questions
What must be coordinated before installing the Lano showerhead?
Confirm the mounting structure, hot and cold supplies, outlet routing and finished-ceiling dimensions before closing the wall or ceiling. Follow the measurements supplied for the exact product configuration.
View Ceiling Detail
When should the concealed connections be pressure-tested?
Flush the supply piping and test every concealed connection before tile, stone or ceiling finishes prevent access. Correct leaks and verify outlet operation before completing the enclosure.
Review Rough-In Guidance
Does the LED showerhead require batteries?
The page identifies the showerhead lighting as water-powered. The digital controller and related control equipment must still be installed according to the product-specific power and connection instructions.
Review Lano Instructions
Who should install this concealed shower system?
A qualified plumbing professional should complete the installation while observing the product instructions and applicable plumbing, electrical, building and waterproofing requirements.
Open Installation Hub
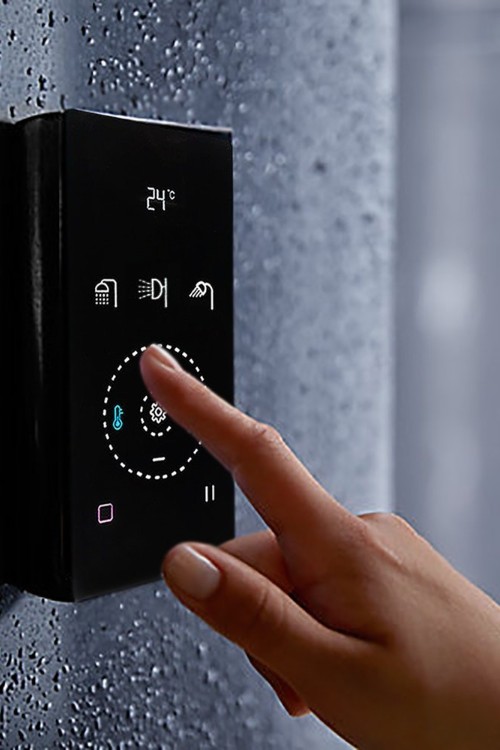
Page 2136 — Fontana Modena Gold LED Waterfall and Rainfall Shower
Fontana Modena Gold LED Shower Installation
Coordinate the Modena Shower Installation
Connect this product guide with the relevant rainfall, waterfall, concealed-valve, ceiling rough-in and professional installation resources.
Installation Hub
Showerhead
Valve and Mixer
Installation Checks
Shower Outlets
Specification
Modena Shower Installation Questions
What should be verified before installing the Modena shower?
Verify the ceiling structure, showerhead position, supply routing, valve depth, service access and finished-surface measurements against the exact Modena instructions.
Open Modena Guide
Why should the supply piping be flushed before connection?
Flushing removes construction debris that could obstruct internal waterways, cartridges, check valves or showerhead nozzles. Complete flushing before connecting the finished components.
Review Shower Requirements
When should concealed plumbing be tested?
Pressure-test the supplies, valve and outlet connections before installing tile or closing the ceiling. Confirm that every selected function operates without leakage.
View Valve Rough-In
Where is the main Fontana installation library?
The installation hub organizes setup guides by fixture and installation type. Always prioritize the instructions supplied with the exact product.
Open Installation Hub
Page 2137 — Fontana Macau Thermostatic Rainfall Shower
Fontana Macau Thermostatic Shower Installation
Plan the Macau Rainfall Shower System
Explore related guidance for rainfall showerheads, thermostatic valves, concealed rough-ins, handheld showers and complete system commissioning.
Installation Hub
Rainfall Shower
Thermostatic Control
System Testing
Outlets
Project Resources
Macau Shower Installation Questions
How should the Macau thermostatic valve be positioned?
Set the valve at the product-specified depth relative to the finished wall and preserve access to serviceable components. Do not establish valve depth from generic measurements.
View Thermostatic Rough-In
Must hot and cold supplies enter the correct valve ports?
Yes. Confirm the marked hot and cold inlets before connection. Reversed supplies can prevent proper thermostatic operation and require corrective plumbing work.
Review Mixer Installation
When should temperature calibration be completed?
Calibrate and verify the mixed-water temperature after the system has been flushed, connected and pressure-tested. Follow the exact product instructions and applicable safety requirements.
Open Macau Guide
Where can contractors find related shower instructions?
Use the main installation hub to locate guidance for the mixer, showerhead, handheld outlet and other connected components.
Open Installation Hub
Page 2138 — Fontana Lyon Bronze Rainfall Shower Set
Fontana Lyon Bronze Shower Installation
Coordinate the Lyon Rainfall Shower Set
Find connected guidance for the rainfall showerhead, concealed mixer, wall rough-in, handheld shower and system testing.
Installation Hub
Rain Shower
Concealed Plumbing
Commissioning
Components
Documentation
Lyon Shower Installation Questions
What should be coordinated before the Lyon rough-in begins?
Confirm the showerhead location, mixer depth, outlet arrangement, supply routing, blocking and finished-wall dimensions from the exact Lyon documentation.
Open Lyon Guide
How can the bronze trim be protected during construction?
Keep finished trim protected and install it after dusty construction work is complete. Use nonabrasive cleaning materials and follow the product care instructions.
Review Maintenance Guidance
Should the shower be tested before the wall is closed?
Yes. Flush the piping, pressure-test concealed connections and operate every outlet before tile or wall finishes eliminate access.
Review Wall Rough-In
Where is the primary installation hub?
The Fontana installation hub connects shower-set instructions with component-specific rough-in and setup resources.
Open Installation Hub
Page 2139 — Fontana Royal Oil-Rubbed Bronze Digital LED Shower
Fontana Royal Digital LED Shower Installation
Plan the Royal LED Shower System
Explore installation resources for the digital controls, LED rainfall showerhead, concealed mixer, rough-in connections and connected shower outlets.
Installation Hub
Rainfall System
Controls
Commissioning
Shower Components
Project Files
Royal Digital Shower Installation Questions
What additional planning does a digital shower require?
Coordinate the controller, control box, cables, power provisions, water connections and service access before closing the wall or ceiling. Follow the exact Royal wiring and plumbing diagrams.
Open Royal Instructions
Should electronic connections remain accessible?
Yes. Preserve the access required by the product instructions for the controller, power components and serviceable connections. Electrical work must follow applicable codes.
View Project Guidance
When should the digital controls be commissioned?
Commission the controls after flushing and pressure-testing the plumbing. Verify temperature response, outlet selection, water flow and all displayed functions before handover.
Review Commissioning Resources
Where can installers find related component instructions?
The central installation hub provides related guides for showerheads, mixers, handheld showers, body jets and concealed rough-ins.
Open Installation Hub
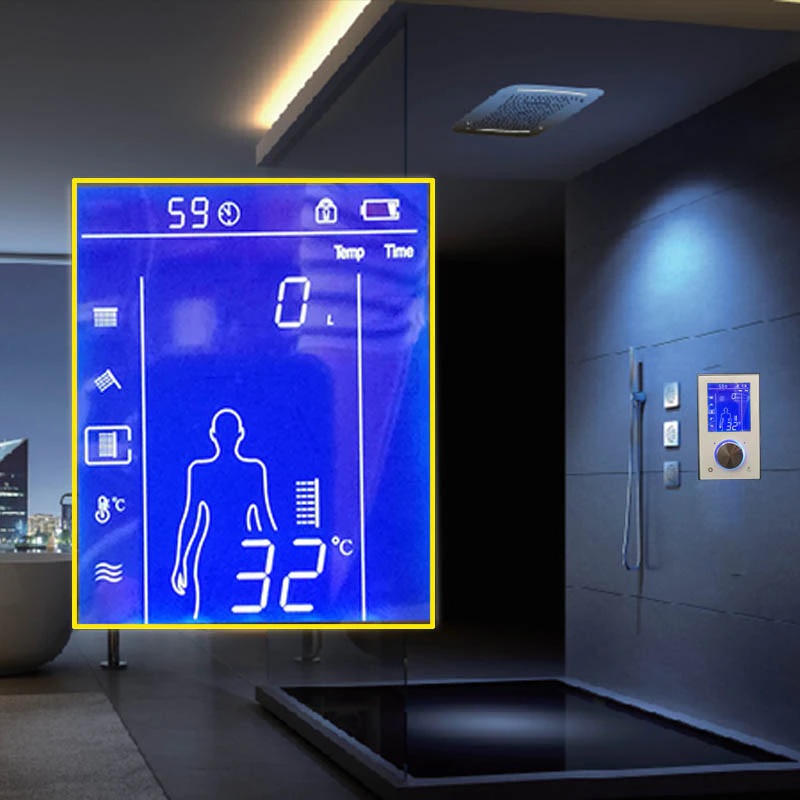
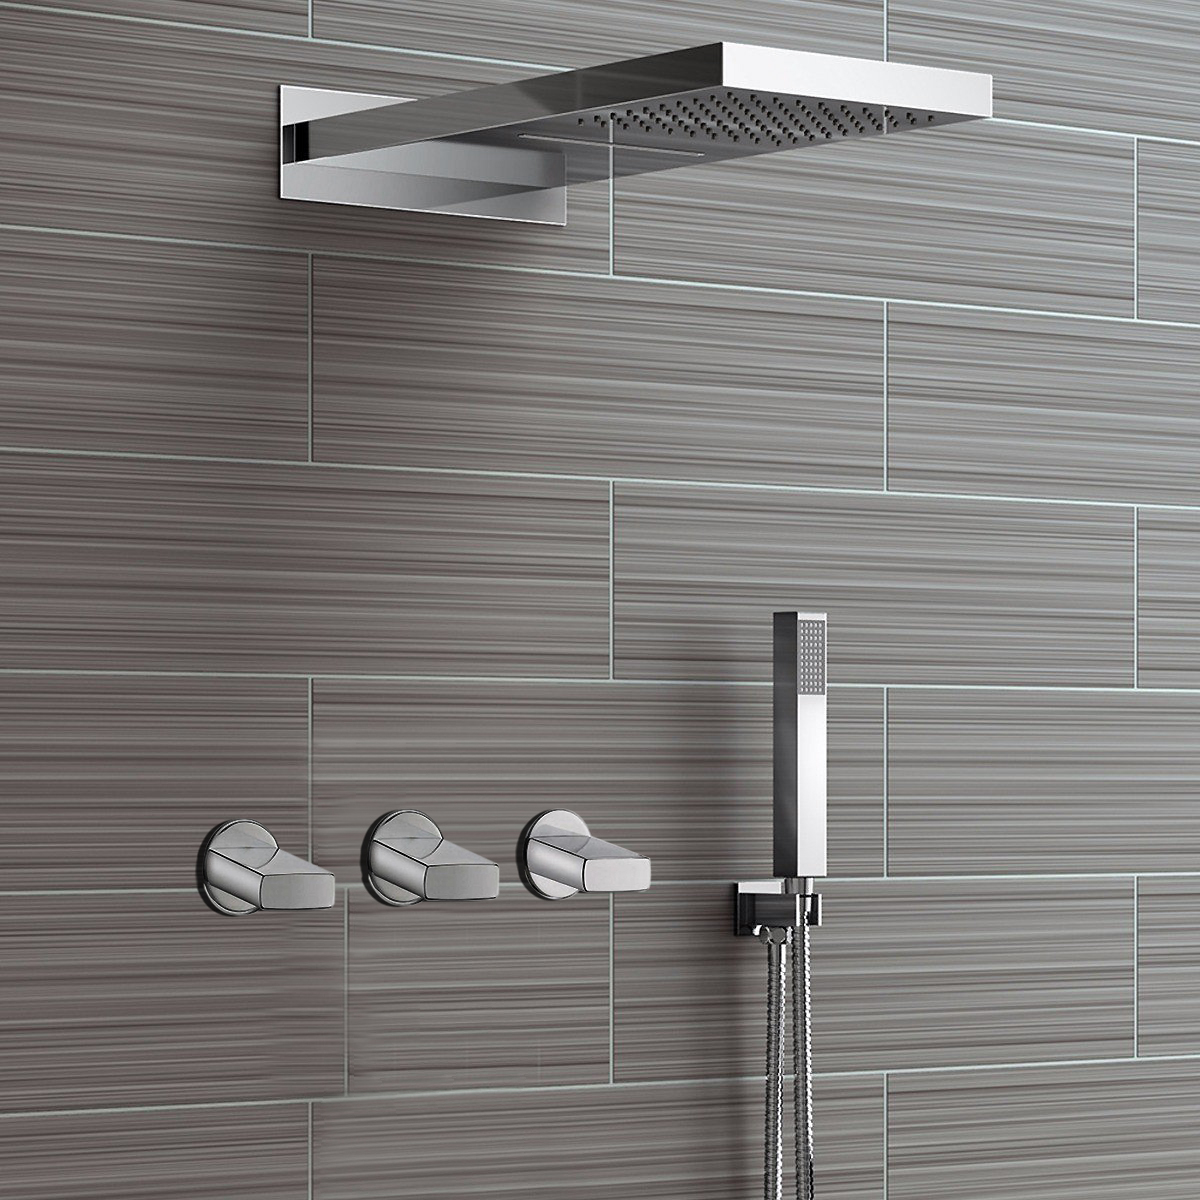
Page 2140 — Fontana Saint Denis Chrome LED Shower with Body Jets
Fontana Saint Denis Shower Installation
Coordinate the LED Shower and Body Jets
Connect the Saint Denis guide with related body-jet, handheld, rainfall showerhead, mixer and concealed rough-in installation resources.
Installation Hub
Showerhead
Body Jets
Mixer
Other Components
Specification
Saint Denis Installation Questions
How should multiple body jets be planned?
Position the jets for the intended users and follow the product-specific supply layout. Maintain consistent rough-in depth, secure each fitting and coordinate the wall penetrations before waterproofing.
View Body-Jet Guide
Why is available flow important for a multi-outlet shower?
Simultaneous outlets can increase total flow demand. Confirm that the supply piping, pressure, water-heating capacity, valve and drainage are suitable for the approved operating configuration.
Review Shower Requirements
When should the body-jet connections be tested?
Flush and pressure-test the body-jet branches and all other concealed connections before waterproofing and finished wall materials restrict access.
Review Wall Rough-In
Where can installers find the complete Saint Denis instructions?
Use the product-specific page for its installation sequence and connect it with the component guides in the main installation library.
Open Saint Denis Guide
OK GOOD NOW LETS CONTINUE THIS APPROACH WITH ALL PREVIOUS COMMANDS AND DO THE NEXT PATCH:
https://www.fontanashowers.com/install-fontana-verona-temp-controlled-led-s/2141.htm
https://www.fontanashowers.com/install-fontana-emilia-chrome-thermo-led-s/2142.htm
https://www.fontanashowers.com/How-to-Install-Recessed-Large-LED-Waterfall-Shower-System-s/8201.htm
https://www.fontanashowers.com/How-to-Install-Recessed-Large-LED-Waterfall-Shower-System-s/8168.htm
https://www.fontanashowers.com/How-to-Install-Recessed-Large-LED-Waterfall-Shower-System-s/8199.htm
https://www.fontanashowers.com/How-to-Install-Recessed-Large-LED-Waterfall-Shower-System-s/5747.htm
https://www.fontanashowers.com/install-fontana-recessed-large-led-waterfall-s/2143.htm
https://www.fontanashowers.com/install-fontana-diadema-30x40-led-shower-s/2144.htm
https://www.fontanashowers.com/install-fontana-sicily-40x40-chrome-led-rain-s/2145.htm
Page 2145 was skipped because the live URL returned an internal error. The eight valid pages follow.
Page 2141 — Fontana Verona Temperature-Controlled LED Shower
Fontana Verona LED Shower Installation
Plan the Verona Shower System
Connect the Verona instructions with related ceiling-mount, thermostatic mixer, handheld shower and concealed rough-in resources.
Installation Hub
Showerhead
Valve and Mixer
Components
Project Checks
Professional Resources
Verona Shower Installation Questions
What should be confirmed before installing the Verona shower?
Verify the ceiling structure, mounting points, inlet location, valve depth and handheld outlet position against the exact Verona drawings before closing the wall or ceiling.
Open Verona Instructions
When should the concealed mixer be pressure-tested?
Flush the supplies and test the valve, piping and outlet connections before concrete, tile or other finished materials restrict access.
View Valve Rough-In
Does the Verona LED showerhead require batteries?
The Verona page identifies the LED lighting as hydro-powered. Installers should nevertheless follow the exact product documentation for every supplied control and connection.
Review Product Details
Where are the related component guides?
The main installation hub connects the Verona page with guides covering thermostatic mixers, handheld showers, showerheads and concealed rough-ins.
Open Installation Hub
Page 2142 — Fontana Emilia Chrome Thermostatic LED Shower
Fontana Emilia Digital Shower Installation
Coordinate the Emilia Shower System
Explore connected guidance for the digital controller, thermostatic mixer, rainfall showerhead, handheld outlet and concealed plumbing.
Installation Hub
Rain Shower
Thermostatic Control
Components
Documentation
Project Resources
Emilia Shower Installation Questions
What requires early coordination on the Emilia system?
Coordinate the controller location, thermostatic valve depth, outlet routing, showerhead support and any required service access before finished construction begins.
Open Emilia Guide
Why must the valve depth follow the product drawing?
The finished trim must connect correctly with the concealed valve. Wall buildup, waterproofing, tile and setting materials must all be included when establishing rough-in depth.
View Thermostatic Detail
When should the digital system be commissioned?
Commission it after flushing and pressure-testing the plumbing. Verify temperature control, outlet selection, display operation and water delivery before handover.
Review Commissioning Guidance
Where are related installation details organized?
Use the main installation hub for related showerhead, mixer, handheld and rough-in resources while retaining the Emilia instructions as the product-specific reference.
Open Installation Hub
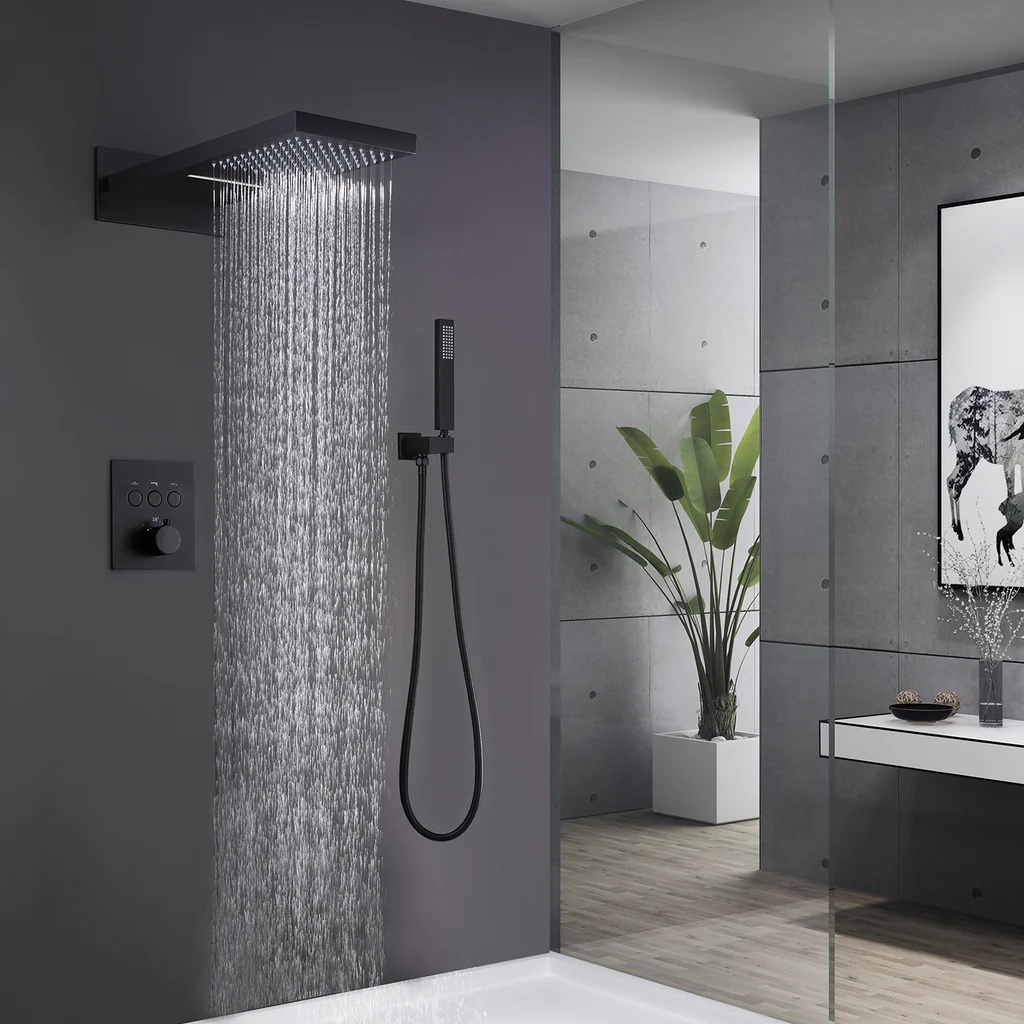
Page 8201 — Recessed Large LED Waterfall Shower System
Recessed LED Waterfall Shower Installation
Plan the Complete Recessed Shower System
Coordinate the recessed showerhead, six body jets, handheld shower, concealed mixer, structural support and rough-in connections.
Installation Hub
Recessed Ceiling
Water Controls
Shower Outlets
Technical Files
Project Planning
Recessed Shower Installation Questions
What must be planned before recessing the showerhead?
Confirm the recess dimensions, structural support, supply connections, drainage capacity and service strategy from the exact system drawings before framing and ceiling work.
View Recessed Rough-In
How should six body jets be coordinated?
Set each jet at the planned elevation, maintain consistent rough-in depth and route the branches according to the approved system diagram.
Open Body-Jet Guide
When should the concealed system be tested?
Flush and pressure-test every supply, valve, showerhead and body-jet connection before waterproofing or finished surfaces restrict access.
Open System Instructions
Where is the main installation library?
The central installation hub connects this system page with component-specific ceiling, mixer, body-jet and handheld guidance.
Open Installation Hub
Page 8168 — Recessed Showerhead and Structural Rough-In
Recessed Showerhead Rough-In Resources
Coordinate the Ceiling Installation
Use this guide with related structural mounting, recessed-ceiling, water-supply and concealed-system installation resources.
Installation Hub
Ceiling Detail
Water Delivery
Connected Outlets
Testing
Project Resources
Recessed Ceiling Installation Questions
How is the required ceiling opening determined?
Use the measurements supplied for the exact showerhead rather than estimating from its nominal size. Include the mounting assembly and finished-ceiling buildup.
Open Installation Page
Does the ceiling require structural support?
The showerhead must attach to suitable framing or blocking capable of supporting the complete assembly. Do not rely solely on decorative ceiling material.
View Ceiling Detail
When should the overhead connections be inspected?
Inspect and pressure-test all concealed overhead connections before closing the ceiling. Retain service access wherever the product documents require it.
Review Rough-In Layout
Where can installers find connected system guides?
Use the installation hub for related mixer, showerhead, body-jet, handheld and maintenance resources.
Open Installation Hub
Page 8199 — Six-Body-Jet Shower Installation Coordination
Six-Body-Jet Shower Installation Resources
Plan the Body-Jet Water Distribution
Coordinate body-jet elevations, branch piping, rough-in depth, available flow and concealed connection testing.
Installation Hub
Body Jets
Water Controls
Overhead Shower
Commissioning
Documentation
Body-Jet Installation Questions
How should six body jets be positioned?
Use the approved installation drawing and intended user range to determine elevations and spacing. Keep all jet fittings level and at the specified finished-wall depth.
Open Body-Jet Guide
Why must flow demand be reviewed?
A showerhead, handheld and multiple jets can create substantial combined demand. Confirm suitable pressure, supply sizing, water-heater capacity and drainage.
Review System Requirements
When should jet branches be tested?
Flush and pressure-test the complete distribution assembly before waterproofing and tile. Inspect every fitting while it remains accessible.
Open System Guide
Where are the remaining component guides?
The main installation hub provides related instructions for mixers, overhead showers, handheld outlets and concealed rough-ins.
Open Installation Hub
Page 5747 — Handheld and Multi-Outlet Shower Installation
Multi-Outlet Shower Installation Resources
Coordinate the Handheld and Shower Outlets
Connect the recessed LED shower instructions with handheld, body-jet, mixer and concealed rough-in guidance.
Installation Hub
Handheld Shower
Other Outlets
Valve
Testing
Project Resources
Handheld Shower Installation Questions
Where should the handheld outlet be positioned?
Position the outlet and holder for comfortable reach while preventing hose interference. Follow the product drawing and applicable accessibility requirements.
Open Handheld Guide
How is the handheld integrated with other functions?
Connect it to the designated valve outlet shown in the system diagram. Confirm which functions may operate together before sizing supplies and routing branches.
Review Mixer Installation
Should the wall outlet be tested before tiling?
Yes. Flush and pressure-test the outlet and concealed branch before waterproofing and tile. Confirm its projection will suit the finished wall.
Open System Instructions
Where are all related installation guides?
The main installation hub organizes the connected showerhead, mixer, body-jet, handheld and maintenance resources.
Open Installation Hub
Page 2143 — Fontana Recessed Large LED Waterfall Shower
Fontana Recessed LED Shower Installation
Complete the Recessed Waterfall Rough-In
Explore coordinated guidance for recessed ceiling mounting, waterfall delivery, body jets, handheld showers and concealed controls.
Installation Hub
Recessed Showerhead
Controls
Other Outlets
Technical Files
Professional Resources
Recessed LED Shower Installation Questions
What must be finalized before ceiling construction?
Finalize the showerhead opening, support points, inlet routing, finished-ceiling elevation and required service provisions using the exact product drawings.
View Ceiling Rough-In
Why should simultaneous outlet demand be checked?
The waterfall, rainfall, handheld and body jets may create significant combined demand. Confirm pressure, supply sizing, hot-water capacity and drainage.
Review Shower Requirements
When should the installation be leak-tested?
Flush and test all concealed piping, valve connections, jet branches and overhead connections before waterproofing or closing the ceiling.
Open Product Guide
Where are the related component instructions?
Use the main installation hub for connected mixer, body-jet, handheld and showerhead installation resources.
Open Installation Hub
Page 2144 — Fontana Diadema 30 × 40-Inch LED Rain Shower
Fontana Diadema LED Shower Installation
Plan the 30 × 40-Inch Rain Shower
Coordinate the large showerhead support, overhead plumbing, concealed controls, finished surfaces and system commissioning.
Installation Hub
Large Showerhead
Valve and Mixer
Connected Components
Technical Files
Project Resources
Diadema Shower Installation Questions
What support is required for the large Diadema showerhead?
Provide suitable framing or structural blocking for the complete showerhead and mounting assembly. Do not support it from decorative ceiling material alone.
View Ceiling Detail
How should the ceiling location be established?
Coordinate the spray coverage with the shower enclosure and drain while following the exact mounting dimensions and inlet locations shown for the Diadema model.
Open Diadema Guide
When should overhead connections be tested?
Flush and pressure-test the overhead piping and all concealed connections before closing the ceiling or installing inaccessible finish materials.
Review Rain Shower Requirements
Where can contractors find the complete installation cluster?
The installation hub connects the Diadema page with related ceiling, mixer, rough-in and maintenance resources.
Open Installation Hub
All eight live pages are valid and match their installation topics.
Page 2146 — Fontana Lima Smart Digital Rainfall Waterfall Shower
Fontana Lima Smart Digital Shower Installation
Plan the Lima Multi-Outlet Shower
Explore related guidance for the recessed rainfall and waterfall showerhead, digital thermostatic mixer, body jets and handheld shower.
Installation Hub
Recessed Showerhead
Digital Mixer
Shower Outlets
Technical Files
Project Resources
Lima Digital Shower Installation Questions
What must be coordinated before installing the Lima system?
Coordinate the recessed showerhead, mixer, controller, six body jets, handheld outlet, supply branches and service access before closing the walls or ceiling.
Open Lima Instructions
Why should combined water demand be reviewed?
Simultaneous rainfall, waterfall, handheld and body-jet operation can create substantial demand. Confirm the approved functions, pressure, pipe sizing, hot-water capacity and drainage.
Review Shower Requirements
When should the concealed installation be tested?
Flush the supplies and pressure-test the mixer, overhead connections, body-jet branches and handheld outlet before waterproofing or finish work restricts access.
View Body-Jet Guidance
Where are the connected installation guides?
The central installation hub organizes the related ceiling, mixer, body-jet, handheld and commissioning resources.
Open Installation Hub
Page 5978 — Fontana Dijon Thermostatic Ceiling LED Shower
Fontana Dijon Ceiling Shower Installation
Coordinate the Dijon LED Shower Set
Connect the Dijon guide with ceiling mounting, thermostatic valve, handheld shower, tub spout and concealed rough-in resources.
Installation Hub
Ceiling Showerhead
Thermostatic Mixer
Other Outlets
Commissioning
Project Resources
Dijon Shower Installation Questions
What should be established before installing the Dijon shower?
Establish the showerhead location, structural support, thermostatic valve depth, handheld outlet and spout connection from the exact Dijon drawings.
Open Dijon Instructions
How should the thermostatic valve depth be determined?
Measure from the finished wall plane and include the complete waterproofing and finish buildup. Use only the allowable depth shown for the supplied valve.
View Thermostatic Detail
When should the system be temperature-tested?
Flush and pressure-test the plumbing first. Then calibrate the thermostatic control and verify the delivered temperature and outlet selection before handover.
Review Mixer Installation
Where are all related shower installation resources?
The installation hub connects the Dijon page with ceiling, mixer, handheld and rough-in guidance.
Open Installation Hub
Page 6232 — Fontana Le Havre LED Touch-Controlled Showerhead
Fontana Le Havre LED Shower Installation
Plan the Large Touch-Controlled Showerhead
Coordinate the large overhead showerhead, touch panel, concealed control equipment, mounting support and water-supply connections.
Installation Hub
Large Showerhead
Touch Control
System Testing
Other Components
Project Files
Le Havre Installation Questions
What must be coordinated for the touch panel?
Coordinate the panel opening, control connections, power provisions and service access with the exact Le Havre instructions before closing the wall.
Open Le Havre Guide
Does the large showerhead require structural support?
Yes. Secure the complete assembly to suitable framing or blocking and follow the specified mounting-point layout. Decorative ceiling material is not structural support.
View Ceiling Detail
When should the control system be commissioned?
Commission it after the plumbing has been flushed and pressure-tested. Verify touch response, temperature control and every available shower function.
Review Commissioning Guidance
Where is the central installation library?
The installation hub organizes related ceiling, mixer, rough-in and maintenance guidance for coordinated shower systems.
Open Installation Hub
Page 2147 — Fontana Luigi Remote-Controlled LED Shower
Fontana Luigi LED Shower Installation
Coordinate the Remote-Controlled Shower
Explore connected guidance for the LED showerhead, remote-control components, brass mixer, concealed connections and system commissioning.
Installation Hub
LED Showerhead
Mixer and Controls
Other Outlets
Commissioning
Professional Resources
Luigi Shower Installation Questions
What should be checked before installing the Luigi controls?
Confirm the supplied control equipment, required connections, operating range and service access from the exact Luigi documentation before closing construction.
Open Luigi Instructions
How should the concealed mixer be installed?
Orient the hot, cold and outlet ports correctly, maintain the specified finished-wall depth and preserve access to serviceable parts.
View Mixer Guidance
When should remote and LED operation be verified?
Verify all controls after plumbing connections have been flushed and tested. Check shower functions, lighting response and control operation before handover.
Review Commissioning Guidance
Where are the connected installation resources?
The installation hub provides related showerhead, mixer, ceiling and concealed rough-in guidance.
Open Installation Hub
Page 2148 — Fontana Agra Multi-Function Recessed Shower
Fontana Agra Recessed Shower Installation
Plan the Agra Multi-Function System
Coordinate the recessed showerhead, multiple water functions, concealed mixer, ceiling structure and connected shower outlets.
Installation Hub
Recessed Ceiling
Water Controls
Shower Components
System Testing
Documentation
Agra Shower Installation Questions
What should be finalized before the Agra ceiling rough-in?
Finalize the showerhead opening, structural support, inlet locations, ceiling elevation and service provisions using the exact Agra drawings.
Open Agra Instructions
Why must the approved function combinations be checked?
Function combinations determine total flow demand. Confirm the permitted operation, available pressure, supply sizing, hot-water capacity and drainage.
Review Shower Requirements
When should concealed connections be tested?
Flush and pressure-test every concealed branch and fitting before waterproofing or ceiling finishes make the system inaccessible.
View Recessed Rough-In
Where can installers find related component guides?
Use the installation hub for related ceiling, mixer, body-jet, handheld and maintenance guidance.
Open Installation Hub
Page 5826 — Fontana Valence Hot and Cold LED Ceiling Shower
Fontana Valence LED Shower Installation
Coordinate the Valence Ceiling Shower
Explore installation resources for the LED ceiling showerhead, hot and cold mixer, concealed piping and connected shower outlets.
Installation Hub
Ceiling Showerhead
Hot and Cold Mixer
Other Components
Testing
Project Resources
Valence Shower Installation Questions
What should be checked before installing the Valence shower?
Confirm the ceiling mounting points, water inlets, mixer depth, outlet routing and final surface dimensions from the Valence installation documentation.
Open Valence Instructions
Must the hot and cold supplies enter the correct ports?
Yes. Confirm the marked inlet orientation before connection and flush both supplies to remove construction debris before connecting the mixer.
Review Mixer Installation
When should the concealed plumbing be tested?
Test all concealed supplies, mixer connections and overhead piping before the wall or ceiling is closed and before finished materials are installed.
View Ceiling Detail
Where are the related installation guides?
The installation hub connects the Valence page with showerhead, mixer, handheld and concealed rough-in resources.
Open Installation Hub
Page 2149 — Fontana Livorno Recessed Rainfall LED Shower
Fontana Livorno Recessed Shower Installation
Plan the Livorno LED Rainfall System
Coordinate the recessed showerhead, ceiling opening, concealed mixer, water connections and system commissioning.
Installation Hub
Recessed Showerhead
Mixer
Components
Commissioning
Project Resources
Livorno Shower Installation Questions
What must be finalized before cutting the ceiling opening?
Verify the exact showerhead dimensions, mounting assembly, inlet locations, structural support and finished-ceiling elevation before creating the opening.
Open Livorno Guide
How should the recessed showerhead be supported?
Secure the mounting assembly to suitable structural framing or blocking. Do not depend on gypsum board, tile or another decorative finish for support.
View Recessed Rough-In
When should overhead piping be pressure-tested?
Flush and test the overhead piping and concealed mixer connections before closing the ceiling or installing inaccessible finishes.
Review Shower Requirements
Where are the connected installation resources?
The central installation hub provides related ceiling, mixer, rough-in and maintenance guidance.
Open Installation Hub
Page 5987 — Fontana Toulouse Thermostatic LED Ceiling Shower
Fontana Toulouse LED Shower Installation
Coordinate the Toulouse Shower System
Explore related installation guidance for the ceiling showerhead, thermostatic valve, handheld shower, body jets and tub spout.
Installation Hub
Ceiling Showerhead
Thermostatic Valve
Shower Outlets
Testing
Professional Resources
Toulouse Shower Installation Questions
What must be coordinated for the Toulouse system?
Coordinate the ceiling showerhead, thermostatic mixer, handheld outlet, body jets, spout, supply branches and finished-surface depths before construction is closed.
Open Toulouse Guide
How should the body-jet branches be installed?
Follow the Toulouse distribution diagram, maintain consistent finished-wall depth and secure every fitting before waterproofing and tile.
Open Body-Jet Guide
When should temperature calibration be completed?
Calibrate the thermostatic control after flushing and pressure-testing. Verify safe delivered temperature and correct operation of every approved outlet.
View Thermostatic Detail
Where are the related installation guides?
The installation hub connects the Toulouse instructions with ceiling, mixer, handheld, body-jet and maintenance resources.
Open Installation Hub
All eight pages are live and correctly match their installation subjects.
Page 2150 — Fontana Valencia Rainfall and Mist LED Shower
Fontana Valencia LED Shower Installation
Plan the Rainfall and Mist Shower System
Coordinate the recessed rainfall and mist showerhead, thermostatic mixer, handheld shower, ceiling support and concealed plumbing.
Installation Hub
Recessed Showerhead
Thermostatic Mixer
Shower Outlets
Technical Files
Project Resources
Valencia Shower Installation Questions
What must be coordinated before installing the Valencia shower?
Confirm the recessed showerhead opening, four mounting pipes, water connections, valve depth and handheld position from the exact Valencia drawings.
Open Valencia Guide
Why should rainfall and mist demand be checked?
Confirm that available pressure, supply piping, hot-water capacity and drainage support the permitted rainfall, mist and handheld operating combinations.
Review Shower Requirements
When should the thermostatic system be tested?
Flush and pressure-test the concealed system before closing construction. Calibrate the temperature control and verify every function before handover.
View Valve Rough-In
Where are the related component guides?
The main installation hub connects this page with ceiling, mixer, handheld and rough-in resources.
Open Installation Hub
Page 4045 — Fontana Balsamo Gold In-Wall Shower
Fontana Balsamo Gold Shower Installation
Plan the In-Wall Mixer Installation
Connect the Balsamo instructions with concealed mixer, finished-wall depth, showerhead and professional installation resources.
Installation Hub
In-Wall Mixer
Showerhead
Other Components
Documentation
Project Resources
Balsamo Shower Installation Questions
How should the Balsamo mixer depth be established?
Measure from the final wall surface and include waterproofing, tile and setting materials. Follow the allowable depth specified for the supplied valve.
Open Balsamo Guide
Must serviceable valve parts remain accessible?
Yes. Install the valve so its cartridge and other serviceable parts can be reached through the trim opening or specified access arrangement.
Review Mixer Installation
When should the concealed valve be tested?
Flush the supplies and pressure-test the valve and outlet connections before waterproofing or finished wall materials are installed.
View Wall Rough-In
Where are the related installation guides?
The main installation hub connects the Balsamo page with mixer, showerhead, handheld and rough-in resources.
Open Installation Hub
Page 5995 — Aurélie Antique Brass Wall-Mount Shower Set
Fontana Aurélie Wall-Mount Shower Installation
Coordinate the Antique Brass Shower Set
Explore related guidance for wall mounting, mixer connections, showerhead support, handheld placement and installation testing.
Installation Hub
Wall Mount
Mixer
Components
Technical Files
Project Resources
Aurélie Shower Installation Questions
What should be confirmed before wall mounting the Aurélie set?
Confirm the inlet spacing, wall support, showerhead height, handheld position and finished-wall projection using the exact product instructions.
Open Aurélie Guide
How should exposed connections be aligned?
Keep the supplies level and at the specified spacing so the mixer and decorative covers seat evenly against the finished wall.
Review Wall Rough-In
How should the antique brass finish be protected?
Protect finished components during construction, avoid abrasive tools and cleaners, and follow the product-specific care instructions.
Review Maintenance Guidance
Where are the related installation resources?
The installation hub connects this wall-mounted set with mixer, handheld and showerhead guidance.
Open Installation Hub
Page 6278 — Fontana Atlanta RV Exterior Shower Box
Fontana Atlanta RV Shower Installation
Plan the Exterior Shower Box Installation
Coordinate the wall opening, mounting flange, hot and cold supplies, exterior sealing and winterization access.
Installation Hub
Exterior Installation
Wall Opening
Water Connections
Maintenance
Documentation
RV Exterior Shower Installation Questions
How should the wall opening be sized?
Use the actual shower-box dimensions and supplied template. Check the wall cavity for wiring, framing and other services before cutting.
Open RV Shower Guide
How should the exterior flange be sealed?
Use a compatible exterior-grade sealing method around the mounting flange while preserving drainage paths and following the vehicle or enclosure manufacturer’s requirements.
Review Outdoor Installation
When should the water connections be tested?
Test the hot and cold connections before final fastening and again after installation. Confirm that hoses cannot kink or rub against sharp surfaces.
Review Connection Guidance
Does the exterior shower require winterization?
In freezing climates, follow the vehicle plumbing system’s winterization procedure and ensure water is drained from the shower box, hose and connected lines.
View Maintenance Resources
Page 3881 — Oil-Rubbed Bronze Showerhead and Hand Shower
Fontana Bronze Shower System Installation
Coordinate the Showerhead and Hand Shower
Explore related guidance for wall mounting, concealed mixer connections, handheld placement and complete system testing.
Installation Hub
Showerhead
Mixer
Hand Shower
Technical Files
Project Resources
Bronze Shower System Installation Questions
What should be coordinated before rough-in?
Confirm the mixer depth, shower-arm position, handheld outlet, holder elevation and water-supply routing using the exact system drawing.
Open Product Guide
Where should the handheld holder be mounted?
Position it for comfortable reach without allowing the hose to interfere with controls or rest on the shower floor.
View Handheld Guidance
How should the bronze finish be protected?
Install finished trim after dusty construction, protect it from tools and use only cleaning methods approved for the finish.
Review Maintenance Guidance
Where is the complete installation library?
The installation hub connects this shower system with mixer, showerhead, handheld and rough-in resources.
Open Installation Hub
Page 3922 — Brushed Nickel Thermostatic Rain Shower
Fontana Brushed Nickel Shower Installation
Plan the Thermostatic Rain Shower
Coordinate the wall-mounted rain shower, single-handle thermostatic valve, handheld outlet and concealed rough-in.
Installation Hub
Rain Shower
Thermostatic Valve
Hand Shower
Technical Files
Project Resources
Thermostatic Rain Shower Installation Questions
How should the valve depth be established?
Measure from the finished wall surface and include waterproofing, tile and setting material when positioning the concealed valve.
Open Product Guide
Must hot and cold supplies enter the correct ports?
Yes. Confirm the marked inlet orientation and flush both supply lines before connecting the thermostatic valve.
View Valve Rough-In
When should temperature calibration be completed?
Calibrate the thermostatic control after flushing and leak testing. Confirm safe delivered temperature and correct outlet operation.
Review Mixer Installation
Where are related installation resources?
The main installation hub connects this guide with showerhead, mixer, handheld and rough-in resources.
Open Installation Hub
Page 4385 — LED Brushed Nickel Rainfall Shower Set
Fontana LED Brushed Nickel Shower Installation
Coordinate the Square Rainfall Shower
Explore related guidance for the wall-mounted LED showerhead, single-handle valve, supply rough-in and system testing.
Installation Hub
LED Showerhead
Control Valve
Other Components
Maintenance
Project Resources
LED Rain Shower Installation Questions
What should be checked before installing the shower arm?
Confirm that the wall outlet is securely supported, level, properly sealed and positioned at the required height and projection.
Open Product Guide
Does the LED showerhead require separate power?
Check the exact product instructions before rough-in. Never assume the power method from the appearance of the showerhead or another model’s specifications.
Verify LED Requirements
When should the wall connections be tested?
Flush and pressure-test the valve and shower-arm connection before installing inaccessible finishes and again after attaching the showerhead.
Review Wall Rough-In
Where are related shower guides organized?
The installation hub connects this guide with mixer, showerhead and concealed rough-in resources.
Open Installation Hub
Page 4713 — Thermostatic Valve Installation Detail
Fontana Thermostatic Valve Installation
Complete the Concealed Valve Rough-In
Connect this valve-focused guide with finished-wall depth, supply orientation, rain shower and handheld installation resources.
Installation Hub
Valve Rough-In
Mixer Installation
Connected Outlets
Commissioning
Project Resources
Thermostatic Valve Installation Questions
Why is finished-wall depth critical?
The trim and controls must engage the concealed valve correctly. Calculate depth from the finished surface, including waterproofing and tile buildup.
Open Valve Guide
How should the hot and cold supplies be connected?
Connect the supplies to their marked ports and flush both lines before installation. Reversed connections can prevent correct thermostatic operation.
View Rough-In Detail
When should the valve be calibrated?
Calibrate after flushing, pressure testing and connecting the outlets. Verify safe temperature control under normal operating conditions.
Review Mixer Installation
Where are related shower installation guides?
The installation hub connects this valve detail with showerhead, handheld, mixer and wall rough-in resources.
Open Installation Hub
All eight pages are valid. Page 2151 has a generic browser title, but its live H1 and installation content correctly match the Fontana Flavia brushed-nickel LED shower, so it was not skipped.
Page 3883 — Luna Rose Gold Swan Vanity Faucet
Fontana Luna Swan Faucet Installation
Plan the Deck-Mount Faucet Installation
Connect the Luna guide with faucet mounting, countertop preparation, supply connections and professional installation resources.
Installation Hub
Deck Mount
Countertop
Project Checks
Technical Files
Product Guide
Luna Faucet Installation Questions
What should be checked before mounting the Luna faucet?
Verify the mounting-hole diameter, countertop thickness, clearance below the sink and access for the mounting hardware and supply lines.
Open Luna Guide
How should the faucet be secured?
Seat the O-ring correctly, align the faucet with the basin and tighten the mounting washer and nut evenly without damaging the countertop.
Review Faucet Installation
When should supply connections be tested?
Flush the supplies before final connection, then open the stops gradually and inspect every connection for leakage.
View Deck-Mount Guidance
Where are the related installation guides?
The main installation hub connects this page with faucet, sink, countertop and maintenance resources.
Open Installation Hub
Page 3932 — RV Travel Hand Shower
Fontana RV Hand Shower Installation
Plan the Compact Wall-Mount Installation
Coordinate the wall opening, hot and cold mixer, handheld hose, mounting hardware and winterization access.
Installation Hub
RV Installation
Wall Opening
Components
Maintenance
Project Resources
RV Hand Shower Installation Questions
What opening is required for the RV hand shower?
The live guide identifies a 9 × 4.6-inch fitting opening. Verify the supplied unit and available cavity before cutting.
Open RV Guide
How should the hot and cold lines be connected?
Flush both lines, connect them to their marked mixer inlets and arrange the hoses so they cannot kink or contact sharp surfaces.
Review Mixer Guidance
Does an RV shower require winterization?
In freezing conditions, follow the vehicle plumbing system’s winterization procedure and drain the mixer, hose and connected water lines.
View Maintenance Resources
Where are related shower instructions?
Use the installation hub for related handheld, mixer, outdoor shower and setup guidance.
Open Installation Hub
Page 2151 — Fontana Flavia Brushed Nickel LED Shower
Fontana Flavia LED Shower Installation
Coordinate the Wall-Mount Rainfall Shower
Explore guidance for the shower arm, hydro-powered LED showerhead, handheld outlet, concealed mixer and wall rough-in.
Installation HubLED ShowerheadMixerHandheld ShowerTechnical FilesProduct Guide
Flavia Shower Installation Questions
Does the Flavia LED showerhead require external power?The live page identifies the LED lighting as powered by water flow, so no separate lighting power supply is described.
Open Flavia Guide How should the shower arm be installed?Seal the threads, protect the finish while tightening and confirm the wall fitting is secure before attaching the showerhead.
Review Wall Rough-In When should the connections be leak-tested?Test the shower-arm, handheld outlet and mixer connections before sealing escutcheons and again after final assembly.
View Mixer Guidance Where are related shower guides?The installation hub connects the Flavia guide with mixer, handheld, showerhead and maintenance resources.
Open Installation Hub
Page 3882 — Verona Gold Swan Vanity Faucet
Fontana Verona Swan Faucet Installation
Plan the Gold Vanity Faucet Installation
Connect the Verona guide with deck mounting, countertop preparation, supply connections and sink installation resources.
Installation HubDeck MountCountertopMaintenanceTechnical FilesProduct Guide
Verona Faucet Installation Questions
What clearances should be confirmed?Check the faucet hole, countertop thickness, basin relationship and clearance for mounting hardware and water lines.
Open Verona Guide How should the faucet be aligned?Center the spout over the basin’s usable area and hold the faucet in position while tightening the mounting hardware below.
Review Faucet Installation How should the gold finish be protected?Protect it during installation, avoid toothed tools on finished surfaces and use only approved nonabrasive cleaning methods.
View Maintenance Guidance Where is the faucet installation hub?The main installation library connects this page with deck-mount, countertop and sink installation guidance.
Open Installation Hub
Page 4644 — Renalto Oil-Rubbed Bronze LED Square Shower
Fontana Renalto LED Shower Installation
Coordinate the Square Wall-Mount Shower
Explore related guidance for the LED showerhead, single-handle mixer, handheld shower, wall rough-in and finish protection.
Installation HubLED ShowerheadControl ValveHand ShowerTechnical FilesProduct Guide
Renalto Shower Installation Questions
What should be coordinated before rough-in?Confirm the shower-arm outlet, valve depth, handheld location and finished-wall buildup using the exact Renalto instructions.
Open Renalto Guide How should the shower arm be supported?Connect the arm to a secure wall fitting and verify its alignment and projection before attaching the square showerhead.
Review Wall Rough-In When should the system be tested?Flush and pressure-test concealed connections before closing the wall, then verify showerhead, handheld and control operation after assembly.
View Mixer Guidance Where are related installation guides?The main installation hub connects the Renalto page with mixer, handheld and showerhead resources.
Open Installation Hub
Page 4017 — Fontana Vienna Oil-Rubbed Bronze Rain Shower
Fontana Vienna Rain Shower Installation
Plan the Exposed Shower Riser System
Coordinate the rigid supply connections, offset connectors, exposed mixer, adjustable riser, rain showerhead and handheld shower.
Installation HubExposed ShowerMixer and RiserHand ShowerTechnical FilesProfessional Resources
Vienna Shower Installation Questions
How should the supply connectors be aligned?Prepare two rigid half-inch connections, place hot water on the left and adjust the offset connectors so the mixer is level.
Open Vienna Guide How is the exposed riser supported?Level the riser, mark its upper mounting bracket and anchor the bracket to appropriate wall structure before final tightening.
Review Wall Guidance When should the pipework be flushed?Flush the pipework before installing the mixer, then test the completed assembly for leakage and correct hot and cold operation.
View Mixer Guidance Where is the main installation cluster?The installation hub connects the Vienna page with exposed shower, mixer, handheld and maintenance resources.
Open Installation Hub
Page 4082 — Fontana Mendoza Intelligent Chrome Shower
Fontana Mendoza Digital Shower Installation
Coordinate the Intelligent Shower System
Explore related guidance for the digital display, concealed controls, shower outlets, wall rough-in and system commissioning.
Installation HubDigital ControlsShowerheadOther OutletsCommissioningProject Resources
Mendoza Shower Installation Questions
What requires early coordination?Coordinate the digital display, concealed control equipment, water supplies, outlet routing and service access before closing the wall.
Open Mendoza Guide Should control equipment remain accessible?Yes. Preserve the access required by the product instructions for serviceable controls, connections and power components.
View Project Guidance When should the display be commissioned?Commission it after flushing and pressure testing. Verify display response, temperature indication and every approved shower function.
Review Commissioning Where are related installation guides?The main installation hub connects the Mendoza page with mixer, showerhead, outlet and rough-in guidance.
Open Installation Hub
Page 4083 — Fontana Renaldo Chrome LED Shower
Fontana Renaldo LED Shower Installation
Plan the Temperature-Controlled Shower
Coordinate the color-changing LED showerhead, temperature control, concealed mixer, shower outlets and installation testing.
Installation HubLED ShowerheadTemperature ControlOther ComponentsCommissioningProject Resources
Renaldo Shower Installation Questions
What must be coordinated before installation?Confirm the showerhead mounting, mixer depth, temperature-control components, outlet routing and finished-surface dimensions.
Open Renaldo Guide How should temperature control be verified?Flush and pressure-test the system, then calibrate the control and verify the delivered temperature under normal operating conditions.
View Thermostatic Detail When should LED operation be checked?Check the lighting only after completing the product-specified plumbing and power connections and establishing normal water flow.
Review Commissioning Where are related installation guides?The main installation hub connects the Renaldo guide with showerhead, valve, outlet and maintenance resources.
Open Installation Hub
Page 2154 was skipped because the live URL returned an internal error. The other eight pages are valid.
Page 5876 — RV White Travel Exterior Hand-Shower Kit
Fontana RV Exterior Shower Installation
Plan the RV Shower Box Installation
Coordinate the exterior wall cutout, mounting orientation, hot and cold connections, weather sealing and winterization access.
Installation HubRV InstallationExterior MountingWater ConnectionsMaintenanceProduct Guide
RV Exterior Shower Installation Questions
What cutout is required for this RV shower kit?The live guide lists an approximate cutout of 231 × 118 mm, or 9.09 × 4.65 inches. Verify the supplied enclosure before cutting.
Open RV Guide Can the enclosure be installed horizontally or vertically?The product page permits either orientation. Confirm door clearance, hose storage, supply routing and drainage before selecting the position.
Review RV Installation How should the exterior opening be sealed?Use a compatible exterior sealing method around the flange while following the vehicle or enclosure manufacturer’s weatherproofing requirements.
View Outdoor Guidance Does the shower need winterization?In freezing climates, drain and winterize the enclosure, mixer, hose and connected lines as part of the vehicle plumbing system.
View Maintenance Resources
Page 2153 — Fontana Sita Platinum LED Showerhead
Fontana Sita LED Shower Installation
Coordinate the Platinum Showerhead
Explore related showerhead mounting, supply connection, wall rough-in, mixer and commissioning resources.
Installation HubLED ShowerheadRough-InWater ControlsMaintenanceProject Resources
Sita Shower Installation Questions
What should be verified before installing the Sita showerhead?Confirm the mounting type, supporting structure, connection size, inlet location and required clearance from the exact Sita instructions.
Open Sita Guide Should the LED power method be confirmed?Yes. Use the exact product documentation to determine whether the supplied lighting is water-powered or requires separate electrical components.
Verify Product Requirements When should the supply connection be tested?Flush and test the supply before completing inaccessible finishes, then inspect the final showerhead connection during commissioning.
Review Shower Requirements Where are related shower installation guides?The installation hub connects the Sita guide with mounting, mixer, rough-in and maintenance resources.
Open Installation Hub
Page 2155 — Fontana Versilia LED Shower with Body Jets
Fontana Versilia LED Shower Installation
Plan the Showerhead, Body Jets and Mixer
Coordinate the LED showerhead, concealed mixer, body-jet branches, finished-wall depths and complete system testing.
Installation HubLED ShowerheadBody JetsMixerCommissioningProject Resources
Versilia Shower Installation Questions
How should the body jets be positioned?Use the exact Versilia layout and intended user range to establish jet elevations, spacing and finished-wall depth.
Open Versilia Guide Why should combined water demand be reviewed?Operating the showerhead and multiple body jets can increase demand. Confirm pressure, supply sizing, heating capacity and drainage.
View Body-Jet Guidance When should concealed branches be tested?Flush and pressure-test the mixer, showerhead supply and every body-jet branch before waterproofing and tile.
Review Mixer Installation Where are related installation resources?The installation hub connects this guide with showerhead, mixer, body-jet and rough-in resources.
Open Installation Hub
Page 3289 — Fontana Reno Three-Way Digital Shower Mixer
Fontana Reno Digital Mixer Installation
Coordinate the Three-Way Shower Control
Explore related guidance for the digital mixer, three outlet branches, finished-wall depth, electrical coordination and commissioning.
Installation HubDigital MixerWall Rough-InOutlet ComponentsCommissioningProject Resources
Reno Digital Mixer Installation Questions
What must be identified before connecting the mixer?Identify the hot and cold inlets and all three outlet ports from the exact Reno diagram before installing concealed piping.
Open Reno Guide Why is finished-wall depth important?The digital trim must connect correctly to the concealed mixer. Include waterproofing, tile and setting materials when establishing depth.
Review Wall Rough-In When should the digital mixer be commissioned?Commission it after flushing and pressure testing. Verify temperature, display response and correct selection of all three outlets.
Review Commissioning Where are related mixer guides?The installation hub connects this digital mixer with valve, outlet and rough-in resources.
Open Installation Hub
Page 2156 — Oil-Rubbed Bronze Square LED Rain Shower
Fontana Bronze LED Shower Installation
Plan the Square Rain Shower System
Coordinate the square color-changing showerhead, supporting structure, concealed mixer, connected outlets and leak testing.
Installation HubLED ShowerheadMixerWall and CeilingCommissioningProject Resources
Square LED Shower Installation Questions
What should be checked before mounting the showerhead?Verify the mounting type, supporting structure, inlet position, spray coverage and connection dimensions from the exact product guide.
Open Installation Guide Does the LED system require separate power?Confirm the power method from the exact product instructions rather than relying on specifications from another LED shower model.
Verify LED Requirements When should concealed connections be tested?Flush and pressure-test the mixer and showerhead supply before closing the wall or ceiling and again after final assembly.
Review Mixer Installation Where are related installation resources?The installation hub connects this system with showerhead, mixer, wall and ceiling rough-in guidance.
Open Installation Hub
Page 2157 — Fontana Bluetooth Three-Function Thermostatic Shower
Fontana Bluetooth Shower Installation
Coordinate the Three-Function Smart Shower
Plan the Bluetooth components, thermostatic mixer, three outlet connections, power requirements and final commissioning.
Installation HubSmart ControlsThree FunctionsRough-InCommissioningProject Resources
Bluetooth Shower Installation Questions
What requires early coordination?Coordinate the Bluetooth module, speakers or related components, power provisions, thermostatic mixer, three outlets and service access.
Open Bluetooth Guide Should electronic components remain accessible?Yes. Follow the product instructions for service access and keep electrical components within their specified environmental and installation requirements.
View Project Guidance When should the system be commissioned?After flushing and pressure testing, verify temperature calibration, all three water functions, Bluetooth pairing and audio operation.
Review Commissioning Where are related smart-shower guides?The installation hub connects this page with mixer, valve, outlet and concealed rough-in resources.
Open Installation Hub
Page 2158 — Bravat Oil-Rubbed Bronze Valve
Bravat Bronze Shower Valve Installation
Complete the Concealed Valve Rough-In
Coordinate the valve orientation, hot and cold supplies, finished-wall depth, outlet connections and temperature commissioning.
Installation HubValve Rough-InMixerConnected OutletsCommissioningProject Resources
Bravat Valve Installation Questions
How should the valve orientation be confirmed?Identify the marked hot, cold and outlet ports and install the valve in the orientation shown in the exact Bravat diagram.
Open Bravat Guide Why is finished-wall depth important?Correct depth allows the decorative panel and handles to engage the concealed valve after waterproofing and tile are installed.
Review Wall Rough-In When should the valve be tested?Flush the supplies and pressure-test the valve and all connected branches before closing the wall. Calibrate temperature after final assembly.
View Valve Detail Where are related valve resources?The installation hub connects this guide with mixer, showerhead, handheld and wall rough-in resources.
Open Installation Hub
Page 2160 — Conto Sensor Faucet
Conto Sensor Faucet Installation
Plan the Touchless Faucet Installation
Coordinate faucet mounting, sensor clearance, solenoid placement, power, supply connections and final activation testing.
Installation HubSensor FaucetDeck MountPlumbingProject FilesProduct Guide
Conto Sensor Faucet Installation Questions
What should be checked before mounting the Conto faucet?Verify the faucet hole, countertop thickness, basin geometry, sensor clearance and available space for the solenoid and power components.
Open Conto Guide Where should the solenoid and control components be installed?Mount them in the orientation and location shown by the product instructions while preserving dry, accessible space for inspection and service.
Review Touchless Installation When should sensor operation be tested?Flush the supply before connecting the faucet, inspect for leaks and then test activation, shutoff timing and water-stream alignment with the basin.
View Clearance Guide Where are related touchless installation guides?The installation hub connects the Conto page with sensor faucet, countertop, sink and technical-document resources.
Open Installation Hub
Page 6014 was skipped because the live URL returned an internal error. The ten valid sections follow.
Page 2161 — Fontana Trialo Thermostatic Shower
Fontana Trialo Shower Installation
Plan the Built-In Thermostatic Shower
Coordinate the wall-mounted showerhead, built-in thermostatic mixer, handheld shower and concealed rough-in.
Installation HubThermostatic MixerWall Rough-InHandheld ShowerTechnical FilesProduct Guide
Trialo Shower Installation Questions
What should be coordinated before installing the Trialo system?Confirm the showerhead height, mixer depth, hot and cold inlets, handheld position and finished-wall dimensions.
Open Trialo Guide Why is valve depth important?Correct depth allows the trim and handles to engage the concealed valve after waterproofing and tile are installed.
View Valve Rough-In When should temperature calibration be completed?Calibrate after flushing and pressure testing, then verify safe temperature control and correct outlet selection.
Review Mixer Installation Where are related installation guides?The installation hub connects the Trialo page with mixer, handheld, showerhead and wall rough-in resources.
Open Installation Hub
Page 2162 — Fontana Ebikon Square Bronze Shower
Fontana Ebikon Shower Installation
Coordinate the Square Wall-Mount Shower
Plan the rainfall showerhead, shower arm, concealed mixer, handheld outlet and oil-rubbed bronze finish protection.
Installation HubWall-Mount ShowerMixerHandheld ShowerTechnical FilesProduct Guide
Ebikon Shower Installation Questions
What should be verified before rough-in?Confirm the shower-arm outlet, valve depth, handheld location and finished-wall buildup using the exact Ebikon drawings.
Open Ebikon Guide How should the shower arm be supported?Connect it to a secure wall fitting and verify alignment and projection before installing the square rainfall showerhead.
Review Wall Rough-In How should the bronze finish be protected?Protect finished components during construction and avoid abrasive tools, pads and cleaners.
View Maintenance Guidance Where is the installation hub?The hub connects this page with showerhead, mixer, handheld and wall rough-in guidance.
Open Installation Hub
Page 2163 — Fontana Reno Bluetooth Musical Shower
Fontana Reno Bluetooth Shower Installation
Plan the LED Musical Shower System
Coordinate the ceiling showerhead, Bluetooth audio components, lighting, water controls, power and service access.
Installation HubCeiling ShowerheadSmart ControlsShower ComponentsCommissioningProject Resources
Reno Bluetooth Shower Installation Questions
What requires early electrical coordination?Coordinate the lighting, Bluetooth receiver, speakers, power supply, cable routes and service access from the exact Reno documentation.
Open Reno Guide Should electronic components remain accessible?Yes. Preserve product-specified access and use appropriately qualified professionals for electrical work in wet locations.
View Project Guidance When should Bluetooth operation be tested?Test pairing, sound, lighting and shower functions after plumbing and electrical commissioning but before final handover.
Review Commissioning Where are related installation guides?The installation hub connects this page with ceiling, mixer, outlet and maintenance resources.
Open Installation Hub
Page 2164 — Fontana Rustic Oil-Rubbed Bronze Shower
Fontana Rustic Bronze Shower Installation
Coordinate the Rustic Rain Shower Set
Plan the showerhead, wall connections, mixer, handheld shower and oil-rubbed bronze finish protection.
Installation HubRain ShowerMixerHandheld ShowerTechnical FilesProduct Guide
Rustic Shower Installation Questions
What should be checked before rough-in?Confirm the inlet locations, showerhead height, mixer depth and handheld placement using the exact product drawings.
Open Rustic Shower Guide When should concealed connections be tested?Flush and pressure-test all supplies and outlets before closing the wall and before applying finished materials.
Review Mixer Guidance How should the bronze finish be protected?Install decorative components after dusty work and avoid abrasive cleaners or exposed metal tools on finished surfaces.
View Maintenance Guidance Where is the installation hub?The hub connects this shower with mixer, handheld, showerhead and rough-in guidance.
Open Installation Hub
Page 2165 — Fontana Chicago Bronze Ceiling Shower
Fontana Chicago Ceiling Shower Installation
Plan the Bronze Rainfall Showerhead
Coordinate the ceiling supports, showerhead connections, concealed plumbing, finish protection and final flow testing.
Installation HubCeiling MountRain ShowerConnected ComponentsCommissioningProduct Guide
Chicago Shower Installation Questions
What support does the ceiling shower require?Secure the mounting assembly to appropriate framing or blocking rather than decorative ceiling material alone.
Open Chicago Guide When should overhead piping be tested?Flush and pressure-test the overhead connections before closing the ceiling or installing inaccessible finishes.
View Ceiling Detail How should the bronze finish be protected?Protect the finished showerhead during construction and use only nonabrasive cleaning methods approved for the finish.
View Maintenance Guidance Where are related ceiling-shower guides?The installation hub connects this page with ceiling, mixer and showerhead resources.
Open Installation Hub
Page 6015 — Fontana Sierra Thermostatic Rain Shower with Faucet
Fontana Sierra Shower Installation
Coordinate the Thermostatic Shower and Faucet
Plan the rainfall showerhead, thermostatic valve, faucet outlet, handheld shower and concealed supply connections.
Installation HubRain ShowerThermostatic ValveOther OutletsTechnical FilesProduct Guide
Sierra Shower Installation Questions
What must be coordinated before rough-in?Confirm the valve depth, showerhead, faucet outlet, handheld connection and approved piping arrangement.
Open Sierra Guide Why should outlet combinations be confirmed?The approved operating combinations determine flow demand and how the diverter outlets must be connected.
Review Mixer Guidance When should temperature calibration occur?Calibrate after flushing and leak testing, then verify safe temperature and correct operation of each outlet.
View Valve Detail Where is the installation hub?The hub connects the Sierra guide with valve, showerhead, handheld and wall rough-in resources.
Open Installation Hub
Page 2167 — Fontana Round Thermostatic LED Shower
Fontana Round LED Shower Installation
Plan the Thermostatic Mixer Shower
Coordinate the round LED showerhead, thermostatic mixer, wall rough-in, connected outlets and temperature commissioning.
Installation HubLED ShowerheadThermostatic MixerOther OutletsCommissioningProduct Guide
Round LED Shower Installation Questions
What should be confirmed before installing the system?Confirm the showerhead mounting, mixer depth, inlet orientation and outlet routing using the exact product instructions.
Open Product Guide Should the LED power method be verified?Yes. Confirm the model-specific lighting and power requirements before closing the ceiling or wall.
Verify LED Requirements When should the mixer be calibrated?Calibrate after flushing and pressure testing, then verify temperature control and all connected shower functions.
View Valve Rough-In Where are related installation guides?The installation hub connects this guide with mixer, showerhead, outlet and commissioning resources.
Open Installation Hub
Page 2170 — Fontana Versilia Gold LED Shower with Body Jets
Fontana Versilia Gold Shower Installation
Coordinate the LED Shower and Body Jets
Plan the gold LED showerhead, body-jet branches, concealed mixer, available flow and finish protection.
Installation HubGold LED ShowerheadBody JetsMixerCommissioningProduct Guide
Versilia Gold Installation Questions
How should the body jets be positioned?Use the Versilia layout and intended user range to establish jet elevations, spacing and finished-wall depth.
Open Versilia Guide Why should combined flow demand be reviewed?Confirm the supply piping, pressure, water-heating capacity and drainage support the permitted showerhead and body-jet combinations.
View Body-Jet Guidance How should the gold finish be protected?Protect finished components during construction and avoid abrasive cleaning products and exposed metal tools.
View Maintenance Guidance Where is the main installation hub?The hub connects this page with body-jet, mixer, showerhead and rough-in resources.
Open Installation Hub
Page 2171 — Rio Ceiling-Mount Multifunction Shower
Rio Multifunction Shower Installation
Plan the Ceiling-Mounted Shower System
Coordinate the multifunction showerhead, structural mounting, water connections, concealed controls and final system testing.
Installation HubCeiling MountWater FunctionsOther ComponentsCommissioningProduct Guide
Rio Shower Installation Questions
What must be finalized before ceiling installation?Finalize the mounting points, structural support, water inlets, finished-ceiling elevation and service provisions.
Open Rio Guide Why must function combinations be confirmed?Approved simultaneous functions determine the required supply pressure, pipe sizing, hot-water capacity and drainage.
Review Shower Requirements When should overhead connections be tested?Flush and pressure-test all overhead piping before closing the ceiling or installing inaccessible finishes.
View Ceiling Detail Where are related installation guides?The installation hub connects the Rio page with ceiling, mixer, outlet and maintenance resources.
Open Installation Hub
Page 2172 — Fontana Gold Rain Shower System
Fontana Gold Rain Shower Installation
Coordinate the Complete Rain Shower System
Plan the gold showerhead, concealed mixer, wall or ceiling mounting, connected outlets and finish protection.
Installation HubRain ShowerheadMixerRough-InCommissioningProduct Guide
Gold Rain Shower Installation Questions
What should be coordinated before rough-in?Confirm the mounting type, showerhead location, mixer depth, supply routing and connected outlets using the exact product guide.
Open Gold Shower Guide When should the concealed system be tested?Flush and pressure-test the mixer, supplies and showerhead connection before closing walls or ceilings.
Review Mixer Installation How should the gold finish be protected?Protect finished components from construction debris and use only approved nonabrasive cleaning methods.
View Maintenance Guidance Where are related installation resources?The installation hub connects this page with showerhead, mixer, mounting and rough-in resources.
Open Installation Hub
Page 2179 was skipped because the live URL returned an internal error. The ten valid sections follow.
Page 2173 — Rainfall and Mist Shower with Body Sprays
Fontana Rainfall and Mist Shower Installation
Plan the Multi-Outlet Shower System
Coordinate the ceiling showerhead, rainfall and mist functions, six body sprays, handheld shower and thermostatic mixer.
Installation HubCeiling ShowerheadBody SpraysMixer and HandheldCommissioningProject Resources
Rainfall and Mist Shower Installation Questions
What must be coordinated before rough-in?Coordinate the 20-inch ceiling showerhead, mounting brackets, rainfall and mist supplies, body-jet branches, handheld outlet and mixer depth.
Open Product Guide Why must combined flow demand be reviewed?Rainfall, mist, six body sprays and the handheld can create substantial demand. Confirm approved combinations, supply capacity and drainage.
Review System Requirements When should concealed branches be tested?Flush and pressure-test the mixer, ceiling supplies and all six body-spray branches before waterproofing and finish work.
View Body-Jet Guide Where are the related installation guides?The main installation hub connects this page with ceiling, mixer, body-jet and handheld resources.
Open Installation Hub
Page 2174 — Agra Recessed Thermostatic Shower
Fontana Agra Thermostatic Shower Installation
Coordinate the Recessed Shower System
Plan the recessed multifunction showerhead, thermostatic mixer, ceiling opening, supply branches and service access.
Installation HubRecessed CeilingThermostatic MixerShower OutletsCommissioningProduct Guide
Agra Thermostatic Installation Questions
What must be finalized before cutting the ceiling?Finalize the exact opening, structural supports, water inlets, ceiling elevation and service provisions from the Agra drawings.
Open Agra Guide How should valve depth be established?Measure from the finished wall and include waterproofing, tile and setting material when positioning the thermostatic valve.
View Valve Rough-In When should the system be tested?Flush and pressure-test the overhead supplies, valve and outlet branches before closing the ceiling or wall.
View Recessed Rough-In Where are related installation guides?The installation hub connects this page with ceiling, valve, mixer and outlet resources.
Open Installation Hub
Page 6272 — Fontana Deauville Chrome Ceiling Shower
Fontana Deauville Ceiling Shower Installation
Plan the LED Shower and Massage Jets
Coordinate the ceiling showerhead, LED components, handheld shower, massage body jets, mixer and concealed piping.
Installation HubCeiling ShowerBody JetsMixer and HandheldCommissioningProduct Guide
Deauville Shower Installation Questions
What structural support is required?Secure the ceiling shower assembly to suitable framing or blocking using the exact product mounting layout.
Open Deauville Guide How should massage jets be coordinated?Establish jet elevations and finished-wall depth before piping, waterproofing and tile installation.
View Body-Jet Guide When should concealed piping be tested?Flush and pressure-test every ceiling, mixer, handheld and body-jet connection before closing construction.
View Ceiling Detail Where is the main installation cluster?The installation hub connects this page with ceiling, body-jet, mixer and handheld guidance.
Open Installation Hub
Page 2175 — Bravat Shower System
Bravat Shower System Installation
Coordinate the Complete Shower System
Connect the Bravat guide with showerhead, mixer, valve, handheld, body-jet and concealed rough-in resources.
Installation HubShowerheadValve and MixerOther ComponentsCommissioningProduct Guide
Bravat Shower Installation Questions
Which instructions should be followed first?Begin with the exact Bravat model instructions and use the component guides only as supporting installation references.
Open Bravat Guide What should be coordinated before closing the wall?Verify valve depth, inlet orientation, outlet routing, supports and access to serviceable components.
Review Mixer Guidance When should the system be pressure-tested?Flush and test the complete concealed system before waterproofing, tile or ceiling finishes restrict access.
View Rough-In Guidance Where are related installation guides?The installation hub connects Bravat systems with mixer, valve, showerhead and outlet resources.
Open Installation Hub
Page 6290 — Oil-Rubbed Bronze Four-Way LED Shower
Fontana Four-Way LED Shower Installation
Plan the Multi-Function Shower System
Coordinate the four-way shower control, LED showerhead, handheld shower, concealed branches and finish protection.
Installation HubLED ShowerheadFour-Way ControlHandheld ShowerCommissioningProduct Guide
Four-Way Shower Installation Questions
What must be identified before connecting the valve?Identify the hot and cold inlets and all outlet ports from the exact four-way system diagram.
Open Product Guide Why should simultaneous functions be checked?Permitted function combinations affect supply sizing, pressure, water-heating capacity and drainage demand.
Review System Requirements When should all four outlets be tested?Test every outlet after flushing and pressure testing but before finished construction restricts access.
View Mixer Guidance Where are related guides?The installation hub connects this page with mixer, showerhead, handheld and rough-in resources.
Open Installation Hub
Page 2176 — Bravat Gold Wall Valve
Bravat Gold Valve Installation
Complete the Wall Valve Rough-In
Coordinate the valve orientation, supply connections, finished-wall depth, outlet piping and gold trim installation.
Installation HubValve Rough-InMixer InstallationConnected OutletsCommissioningProject Resources
Bravat Gold Valve Installation Questions
How should valve orientation be confirmed?Identify the marked hot, cold and outlet ports and install the valve in the exact orientation shown.
Open Bravat Guide Why is wall depth critical?Correct depth ensures the decorative plate and controls fit after waterproofing, tile and setting material are installed.
Review Wall Rough-In When should the valve be tested?Flush and pressure-test the valve and outlet branches before closing the wall, then test temperature and controls after trim installation.
View Valve Detail Where are related valve guides?The installation hub connects this valve with mixer, showerhead, handheld and rough-in resources.
Open Installation Hub
Page 2177 — Fontana Sierra Bronze Multicolor LED Shower
Fontana Sierra LED Shower Installation
Plan the Showerhead, Body Jets and Mixer
Coordinate the multicolor LED showerhead, adjustable body jets, mixer, concealed branches and bronze finish protection.
Installation HubLED ShowerheadBody JetsMixerCommissioningProduct Guide
Sierra LED Shower Installation Questions
How should the adjustable body jets be positioned?Establish the jet elevations and spacing for the intended user range while following the exact Sierra rough-in layout.
Open Sierra Guide Why should flow demand be verified?Confirm pressure, pipe sizing, heating capacity and drainage for the approved showerhead and body-jet operating combinations.
View Body-Jet Guidance When should LED operation be checked?Verify lighting after the product-specified power or water-flow requirements have been completed and normal flow is available.
Review Commissioning Where is the installation hub?The hub connects this page with showerhead, body-jet, mixer and rough-in resources.
Open Installation Hub
Page 2178 — Bronze Wall Valve Mixer
Bronze Wall Valve Mixer Installation
Complete the Concealed Mixer Rough-In
Coordinate the valve orientation, finished-wall depth, hot and cold supplies, outlet branches and bronze trim.
Installation HubWall Rough-InMixerConnected OutletsCommissioningProject Resources
Bronze Valve Mixer Installation Questions
How should the mixer orientation be confirmed?Identify the hot, cold and outlet ports and follow the directional markings shown in the exact installation diagram.
Open Valve Guide How is the correct wall depth determined?Measure from the final wall plane and account for waterproofing, tile and setting material.
Review Wall Rough-In When should the mixer be tested?Flush and pressure-test it before closing the wall, then verify control movement and outlet operation after trim installation.
View Mixer Guidance Where are related valve guides?The installation hub connects this mixer with valve, showerhead, handheld and wall rough-in resources.
Open Installation Hub
Page 2182 — Fontana Bathtub Faucet
Fontana Bathtub Faucet Installation
Plan the Tub Faucet Setup
Coordinate the faucet configuration, tub-deck or wall openings, hot and cold supplies, spout alignment and leak testing.
Installation HubBathtub FaucetRough-InComponentsTechnical FilesProduct Guide
Bathtub Faucet Installation Questions
What should be checked before drilling the tub deck?Verify the exact component spacing, deck thickness, below-deck clearance, supply routing and access for future service.
Open Bathtub Faucet Guide How should the tub spout be aligned?Position the spout so water clears the tub rim and lands inside the basin without contacting the deck.
Review Faucet Details When should the faucet be tested?Flush the supplies, test all concealed connections before access is restricted and inspect the completed faucet under operating flow.
Review Faucet Installation Where are related faucet guides?The installation hub connects this page with bathtub, deck-mount, handheld and plumbing rough-in resources.
Open Installation Hub
Page 2184 — Fontana Lima Nickel Shower Set
Fontana Lima Nickel Shower Installation
Coordinate the Complete Shower Set
Plan the showerhead, mixer, handheld outlet, concealed plumbing, finished-wall depths and final commissioning.
Installation HubShowerheadMixerOther ComponentsCommissioningProduct Guide
Lima Nickel Installation Questions
What should be coordinated before rough-in?Confirm the showerhead mounting, valve depth, supply orientation, outlet routing and handheld placement from the exact Lima drawings.
Open Lima Guide Why is finished-wall depth important?The mixer trim must engage the concealed valve after waterproofing, tile and setting materials are installed.
Review Wall Rough-In When should the system be tested?Flush and pressure-test all concealed plumbing before closing the wall, then verify every shower function after trim installation.
View Mixer Guidance Where are related installation guides?The main installation hub connects the Lima page with showerhead, mixer, handheld and rough-in resources.
Open Installation Hub
Page 1 — Shower Thermostatic Mixer Valve Installation
https://www.fontanashowers.com/How-to-Install-Shower-Thermostatic-Mixer-Valve-s/5786.htm
FontanaShowers Thermostatic Mixer Installation Resources
Plan a Thermostatic Shower Mixer Installation
Review concealed-valve rough-in planning, mixer connections, temperature calibration and related shower installation resources.
Installation Guides
Mixer Planning
Installation
Coordination
Technical Resources
Project Support
Thermostatic Mixer Installation Questions
What must be confirmed before installing the concealed mixer body?
Confirm the product-specific rough-in depth, finished-wall allowance, hot and cold inlet orientation, outlet assignments and service access before closing the wall. Review Valve Rough-In
Should the supply lines be flushed before connecting the valve?
Yes. Flush both supply lines before final connection so construction debris does not obstruct the cartridge, filters or check valves.
When should the temperature limit be calibrated?
Calibrate the temperature stop after the water heater is operating normally and the finished trim is installed. Verify the outlet temperature with a reliable thermometer.
Where can I find the broader mixer-installation cluster?
Use the shower mixer hub for related valve, diverter and thermostatic installation references. Open Mixer Installations
Page 2 — Skipped
https://www.fontanashowers.com/Install-Fontana-Shower-Mixer-Temperature-Valve-s/3314.htm
Skipped because the live URL returned an empty plain-text response rather than a valid installation page.
Page 3 — Fontana Milan 20-Inch Wall Shower
Fontana Milan Wall Shower Installation Resources
Plan the Milan 20-Inch Thermostatic Shower Installation
Coordinate wall mounting, concealed mixer depth, rainfall-head placement and handheld connections before finishing the shower enclosure.
Installation Guides
Wall Mount
Thermostatic Mixer
Components
Technical Files
Project Support
Milan Wall Shower Installation Questions
What should be established before roughing in the Milan wall shower?Establish the finished-wall plane, shower-head centerline, mixer position, user reach and outlet locations from the model-specific drawing before routing pipework. How should the 20-inch rainfall head be supported?Anchor the wall arm or mounting assembly to suitable structural blocking. Do not rely on finished tile or wallboard to carry the fixture load. When should the concealed connections be pressure-tested?Pressure-test and inspect all concealed joints before waterproofing and wall closure, following the applicable plumbing code and project requirements. Where are related wall-shower details located?Use the wall rough-in and shower-installation resources to coordinate clearances and concealed components. Review Wall Rough-In Details
Page 4 — Fontana Warsaw Waterfall and Rainfall LED Shower
Fontana Warsaw LED Shower Installation Resources
Coordinate a Waterfall and Rainfall LED Shower
Plan water delivery, valve outlets, structural support, LED connections and access before the Warsaw shower system is enclosed.
Installation GuidesWater FunctionsMixerMountingTechnical FilesProject Support
Warsaw LED Shower Installation Questions
Do rainfall and waterfall outlets require separate planning?Yes. Verify the diverter outlet assignments, pipe sizes and available flow for simultaneous or individual functions. Review Water-Delivery Requirements When should the LED system be tested?Test the LED function and every water outlet before final enclosure. Follow the supplied model instructions for any electrical or controller connections. What support is required for the shower head?Provide rigid backing appropriate to the head, arm and connection assembly so neither tile nor waterproof board carries the load. Should the installation follow a generic diagram alone?No. Use the exact Warsaw specification and supplied instructions because outlet count, controls and connection requirements can vary by configuration.
Page 5 — Bravat Gold Shower Set
Bravat Gold Shower Installation Resources
Plan the Bravat Gold Shower Set Installation
Coordinate concealed plumbing, mixer placement, shower outlets and finish protection for a precise gold shower-set installation.
Installation GuidesShower MixerWall InstallationComponentsSpecificationMaintenance
Bravat Gold Shower Installation Questions
How should the gold finish be protected during installation?Keep protective coverings in place where practical, use non-abrasive tools and avoid harsh cleaners, metal contact and construction residue on exposed trim. What determines the mixer’s finished position?The valve’s approved rough-in range and the final tile buildup determine whether the trim seats correctly. Review Valve Rough-In Should concealed joints be accessible?Provide service access wherever required by the product design or local code, especially for controls, cartridges and connection points needing future maintenance. What should be checked during commissioning?Check every function, inspect for leakage, confirm control direction and verify stable temperature before handing over the shower.
Page 6 — Bravat G Shower Set
Bravat G Set Installation Resources
Coordinate the Bravat G Shower Set
Review valve rough-in, outlet routing, wall preparation and commissioning resources for the Bravat G shower configuration.
Installation GuidesMixer & ValveWall PlanningAccessoriesProject FilesSupport
Bravat G Set Installation Questions
What information should be transferred to the wall before installation?Transfer the valve centerline, finished-wall depth, outlet positions and fixture heights from the exact product drawing before drilling or routing pipe. Why must the hot and cold supplies be identified?Reversed supplies can prevent thermostatic controls from regulating correctly. Mark and verify both feeds before connecting the concealed valve. When is waterproofing completed?Complete pressure testing first, then integrate penetrations and mounting points into the approved waterproofing system before installing exposed trim. Where can installers compare related shower details?The main shower-installation page connects valve, outlet and accessory guidance. Open Shower Details
Page 7 — Bravat Bronze Shower Set
Bravat Bronze Shower Installation Resources
Plan the Bravat Bronze Shower Set Installation
Coordinate concealed plumbing, fixture support, control placement and bronze-finish protection throughout installation.
Installation GuidesBronze ShowerWater DeliveryComponentsSpecificationCare
Bravat Bronze Shower Installation Questions
How can the bronze finish be protected?Handle trim with clean gloves, use protected tools and remove residue with a soft cloth and finish-approved cleaner rather than abrasive compounds. What should be tested before the wall is closed?Test hot and cold feeds, valve connections, outlet piping and diverter routing for leakage and correct operation before enclosure. Can the trim correct an incorrectly positioned valve?No. The concealed body must remain within its specified rough-in range relative to the finished surface so the trim and controls fit correctly. Where is the main installation directory?Use the central guide to locate shower, faucet, mixer and component installation resources. View All Installation Guides
Page 8 — Dark Oil-Rubbed Bronze Square Shower
Dark Bronze Square Shower Installation Resources
Install a Square Oil-Rubbed Bronze Shower System
Align square trim, prepare concealed plumbing and protect the dark bronze finish through testing and final commissioning.
Installation GuidesSquare LayoutValveComponentsTechnical FilesFinish Care
Square Bronze Shower Installation Questions
How are square components kept visually aligned?Establish common centerlines and use a level before fixing brackets, outlets and trim. Small rough-in errors are especially visible with square fixtures. Should trim be installed before construction is complete?Install exposed bronze components after dusty or abrasive work is complete whenever possible to reduce the risk of scratching and chemical damage. What must be verified at the mixer?Verify supply orientation, valve depth, outlet routing, handle clearance and access before waterproofing and tiling. Which resource covers concealed wall dimensions?Use the dedicated wall rough-in reference while confirming all dimensions against the exact model documentation. Open Wall Rough-In Details
Page 9 — Fontana Milan Jetted LED Shower
Fontana Milan Jetted LED Shower Resources
Coordinate the Milan Jetted LED Shower System
Plan the rainfall head, body jets, handheld outlet, mixer capacity and LED function as one coordinated installation.
Installation GuidesBody JetsWater FunctionsMixerTechnical FilesCommissioning
Milan Jetted LED Shower Installation Questions
How should multiple body jets be piped?Follow the product layout and use balanced piping where specified so the jets receive consistent pressure and flow. Review Body-Jet Installation Must available water capacity be calculated?Yes. Confirm supply pressure, pipe sizing, hot-water capacity and the combined demand of functions intended to operate together. When should the LED and diverter functions be checked?Test the lighting behavior, diverter sequence and every outlet before final closure and again during commissioning. How should body-jet heights be selected?Coordinate heights with intended users, bench locations and spray overlap while preserving access and avoiding direct alignment with sensitive areas.
Page 10 — Fontana Lima 20-Inch LED Chrome Shower
Fontana Lima LED Chrome Shower Resources
Plan the Lima 20-Inch LED Shower Installation
Coordinate the large shower head, mixer rough-in, LED operation and chrome trim for a clean, serviceable installation.
Installation GuidesLarge Shower HeadMixerComponentsTechnical FilesCare
Lima LED Chrome Shower Installation Questions
What support does a 20-inch shower head require?Use rigid structural backing and the specified mounting hardware. The finished wall surface should not serve as the primary support. How is satisfactory rainfall coverage achieved?Confirm available pressure, supply sizing and the head’s intended position before installation. Review Rain-Shower Requirements How should the chrome finish be cleaned after installation?Remove construction residue promptly with a soft cloth and a compatible mild cleaner. Avoid abrasive pads, harsh chemicals and metal tools. What should the final test include?Confirm leakage-free connections, stable temperature, correct diverter operation, uniform spray and proper LED response under normal flow.
Page 11 — Brushed-Nickel Ceiling-Mount Shower Set
FontanaShowers Ceiling Shower Installation Resources
Plan a Ceiling-Mount Thermostatic Shower Set
Coordinate overhead support, recessed services, mixer rough-in, body jets and handheld plumbing before the ceiling and walls are closed.
Installation GuidesCeiling MountThermostatic ValveShower ComponentsWater PlanningProject Resources
Ceiling Shower Set Installation Questions
What must be coordinated above the ceiling?Coordinate structural support, supply routing, connection space, finished-ceiling depth and service access before framing is finalized. Review Ceiling Details Why is a recessed rough-in plan important?It establishes the opening, support and connection zones so the shower head finishes level with the intended ceiling plane. How should the jet-spray system be commissioned?Flush the branches, test balanced flow, inspect every concealed connection and adjust the jet directions only after the finish surfaces are protected. When is the thermostat calibrated?Calibrate it after the completed system has normal hot and cold supplies, then verify the delivered temperature with a thermometer.
|
|
Fontana Installation Resource Center
Explore Installation Guides by Fixture Type
Find focused setup guidance for touchless faucets, bathroom faucets, shower systems, mixers, body jets and handheld showers.
Installation Hubs
Touchless Faucets
Bathroom Faucets
Shower Components
Project Resources
Product Categories
Frequently Asked Questions
How should I use this installation resource center?
Select the fixture category first, then open the guide that matches the mounting method and components shown on the exact product page.
VIEW INSTALLATION GUIDES
Which document takes priority when installation details differ?
Follow the installation sheet supplied with the exact SKU. Product-specific valve, power and rough-in requirements take priority over general guidance.
Where should a project team begin before rough-in?
Confirm the selected SKU, mounting surface, connection locations, service access and approved submittal documents before walls or counters are closed.
Are these guides a substitute for professional installation?
No. Installation should follow applicable codes, the product-specific instructions and the work of a qualified installer.
FontanaShowers Installation Resource Center
Find Installation Guides by Product Type
Explore installation instructions, rough-in requirements, mounting details, component guides and project documentation for FontanaShowers fixtures and systems.
Product Type
Shower Components
Touchless Systems
Mounting & Rough-In
System Technology
Project Resources
Installation Planning Questions
Where should I begin when looking for a FontanaShowers installation guide?
Begin with the installation category matching the fixture type, then open the guide for the exact model or system configuration. Product-specific instructions should control whenever their dimensions or connections differ from a general guide.
Open Installation Hub
Which installation details should be confirmed before walls or ceilings are closed?
Confirm valve placement, supply connections, mounting depth, access requirements, finished-surface thickness and the relationship between the fixture and surrounding construction. Recessed and ceiling-mounted systems require particular attention during rough-in.
Review Ceiling Rough-In
Where can architects and contractors find coordinated project documentation?
Use the architect installation guide for project coordination, then consult the BIM and Revit library for available model resources. Confirm all dimensions, connection details and documents against the exact product being specified.
Open BIM / Revit Library
How should compliance documentation be coordinated with installation instructions?
Use the installation drawing to coordinate the physical work and the compliance library to confirm the documentation available for the selected fixture. Certifications, flow options and accessibility requirements must be verified for the exact SKU and project conditions.
Open Compliance Records

|
|
|


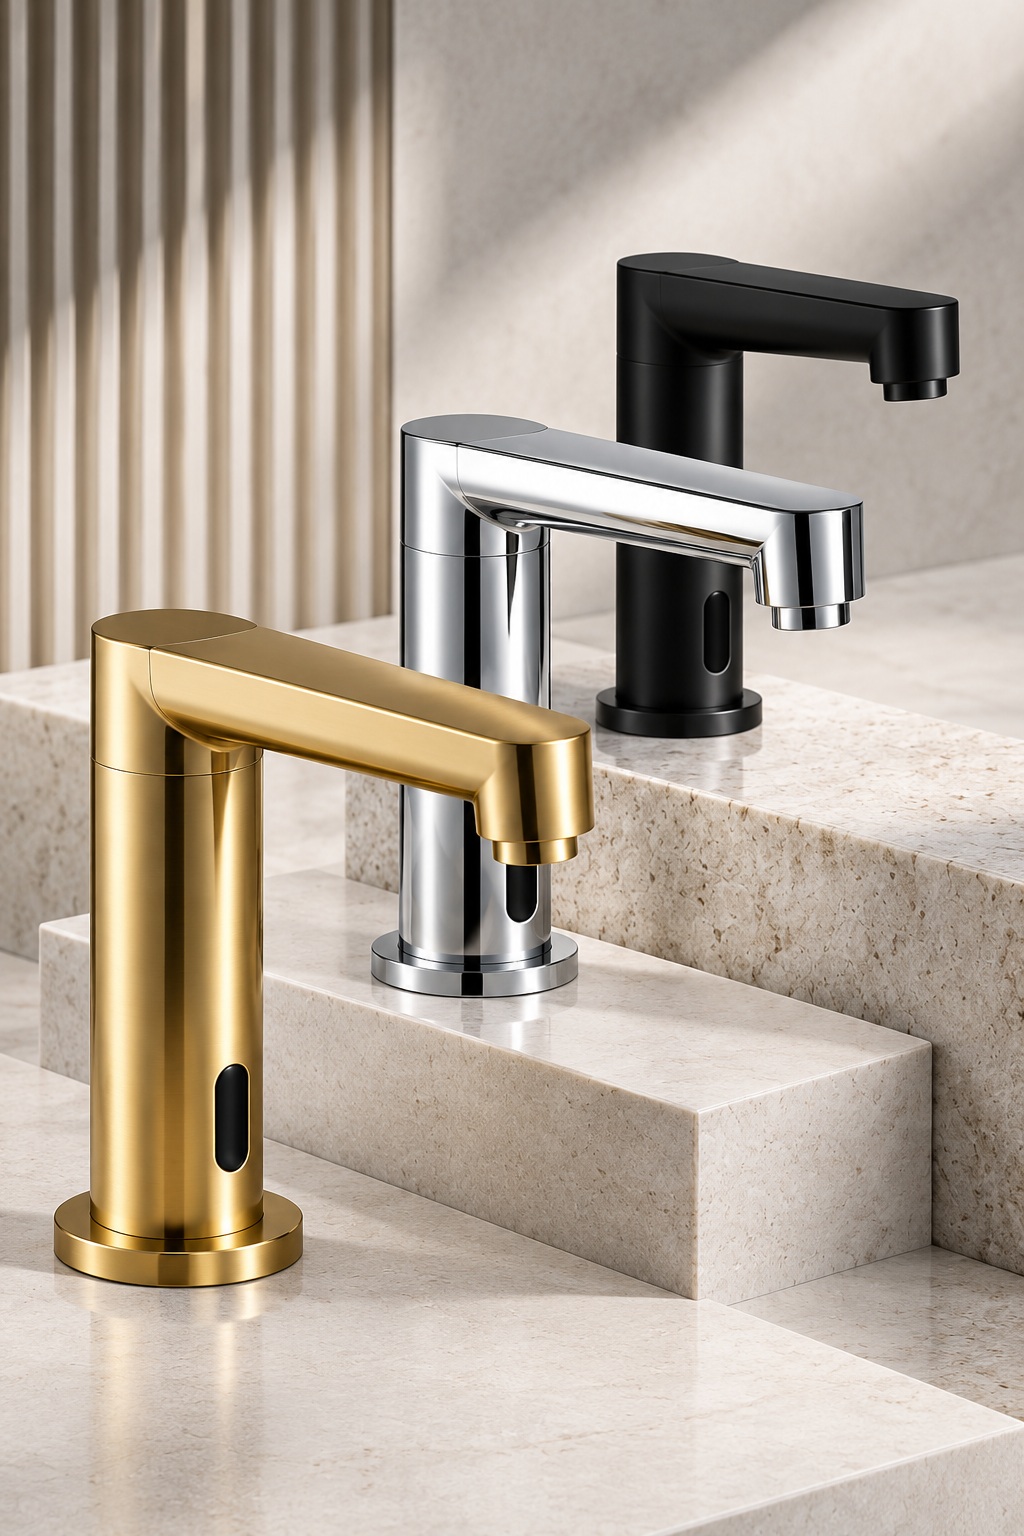
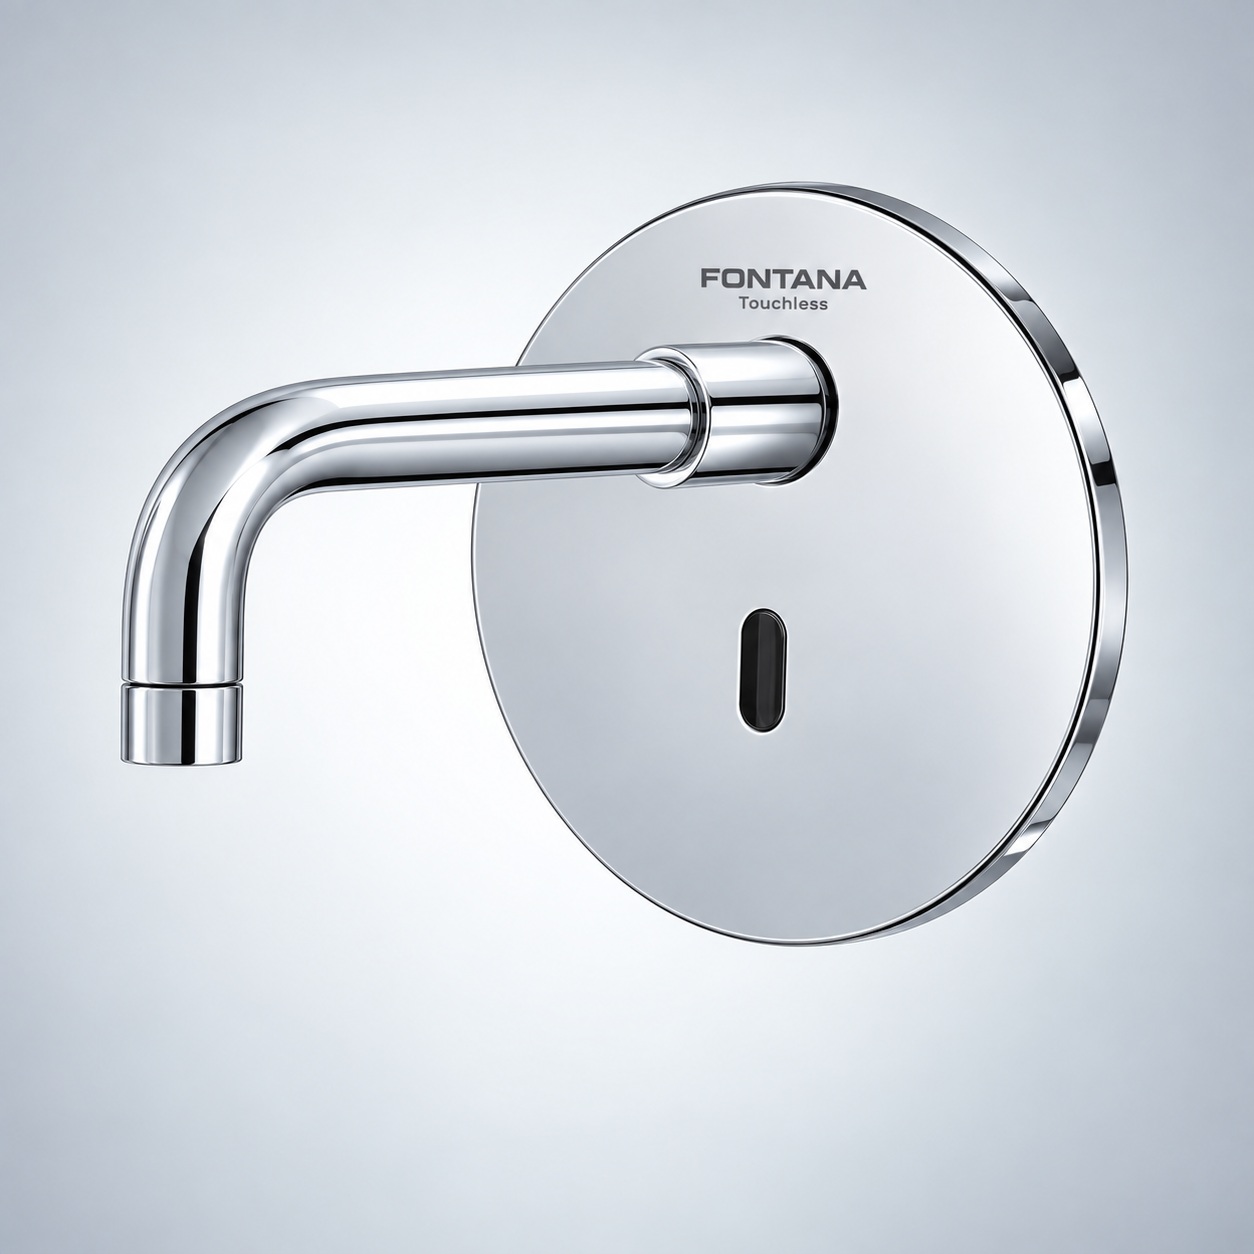
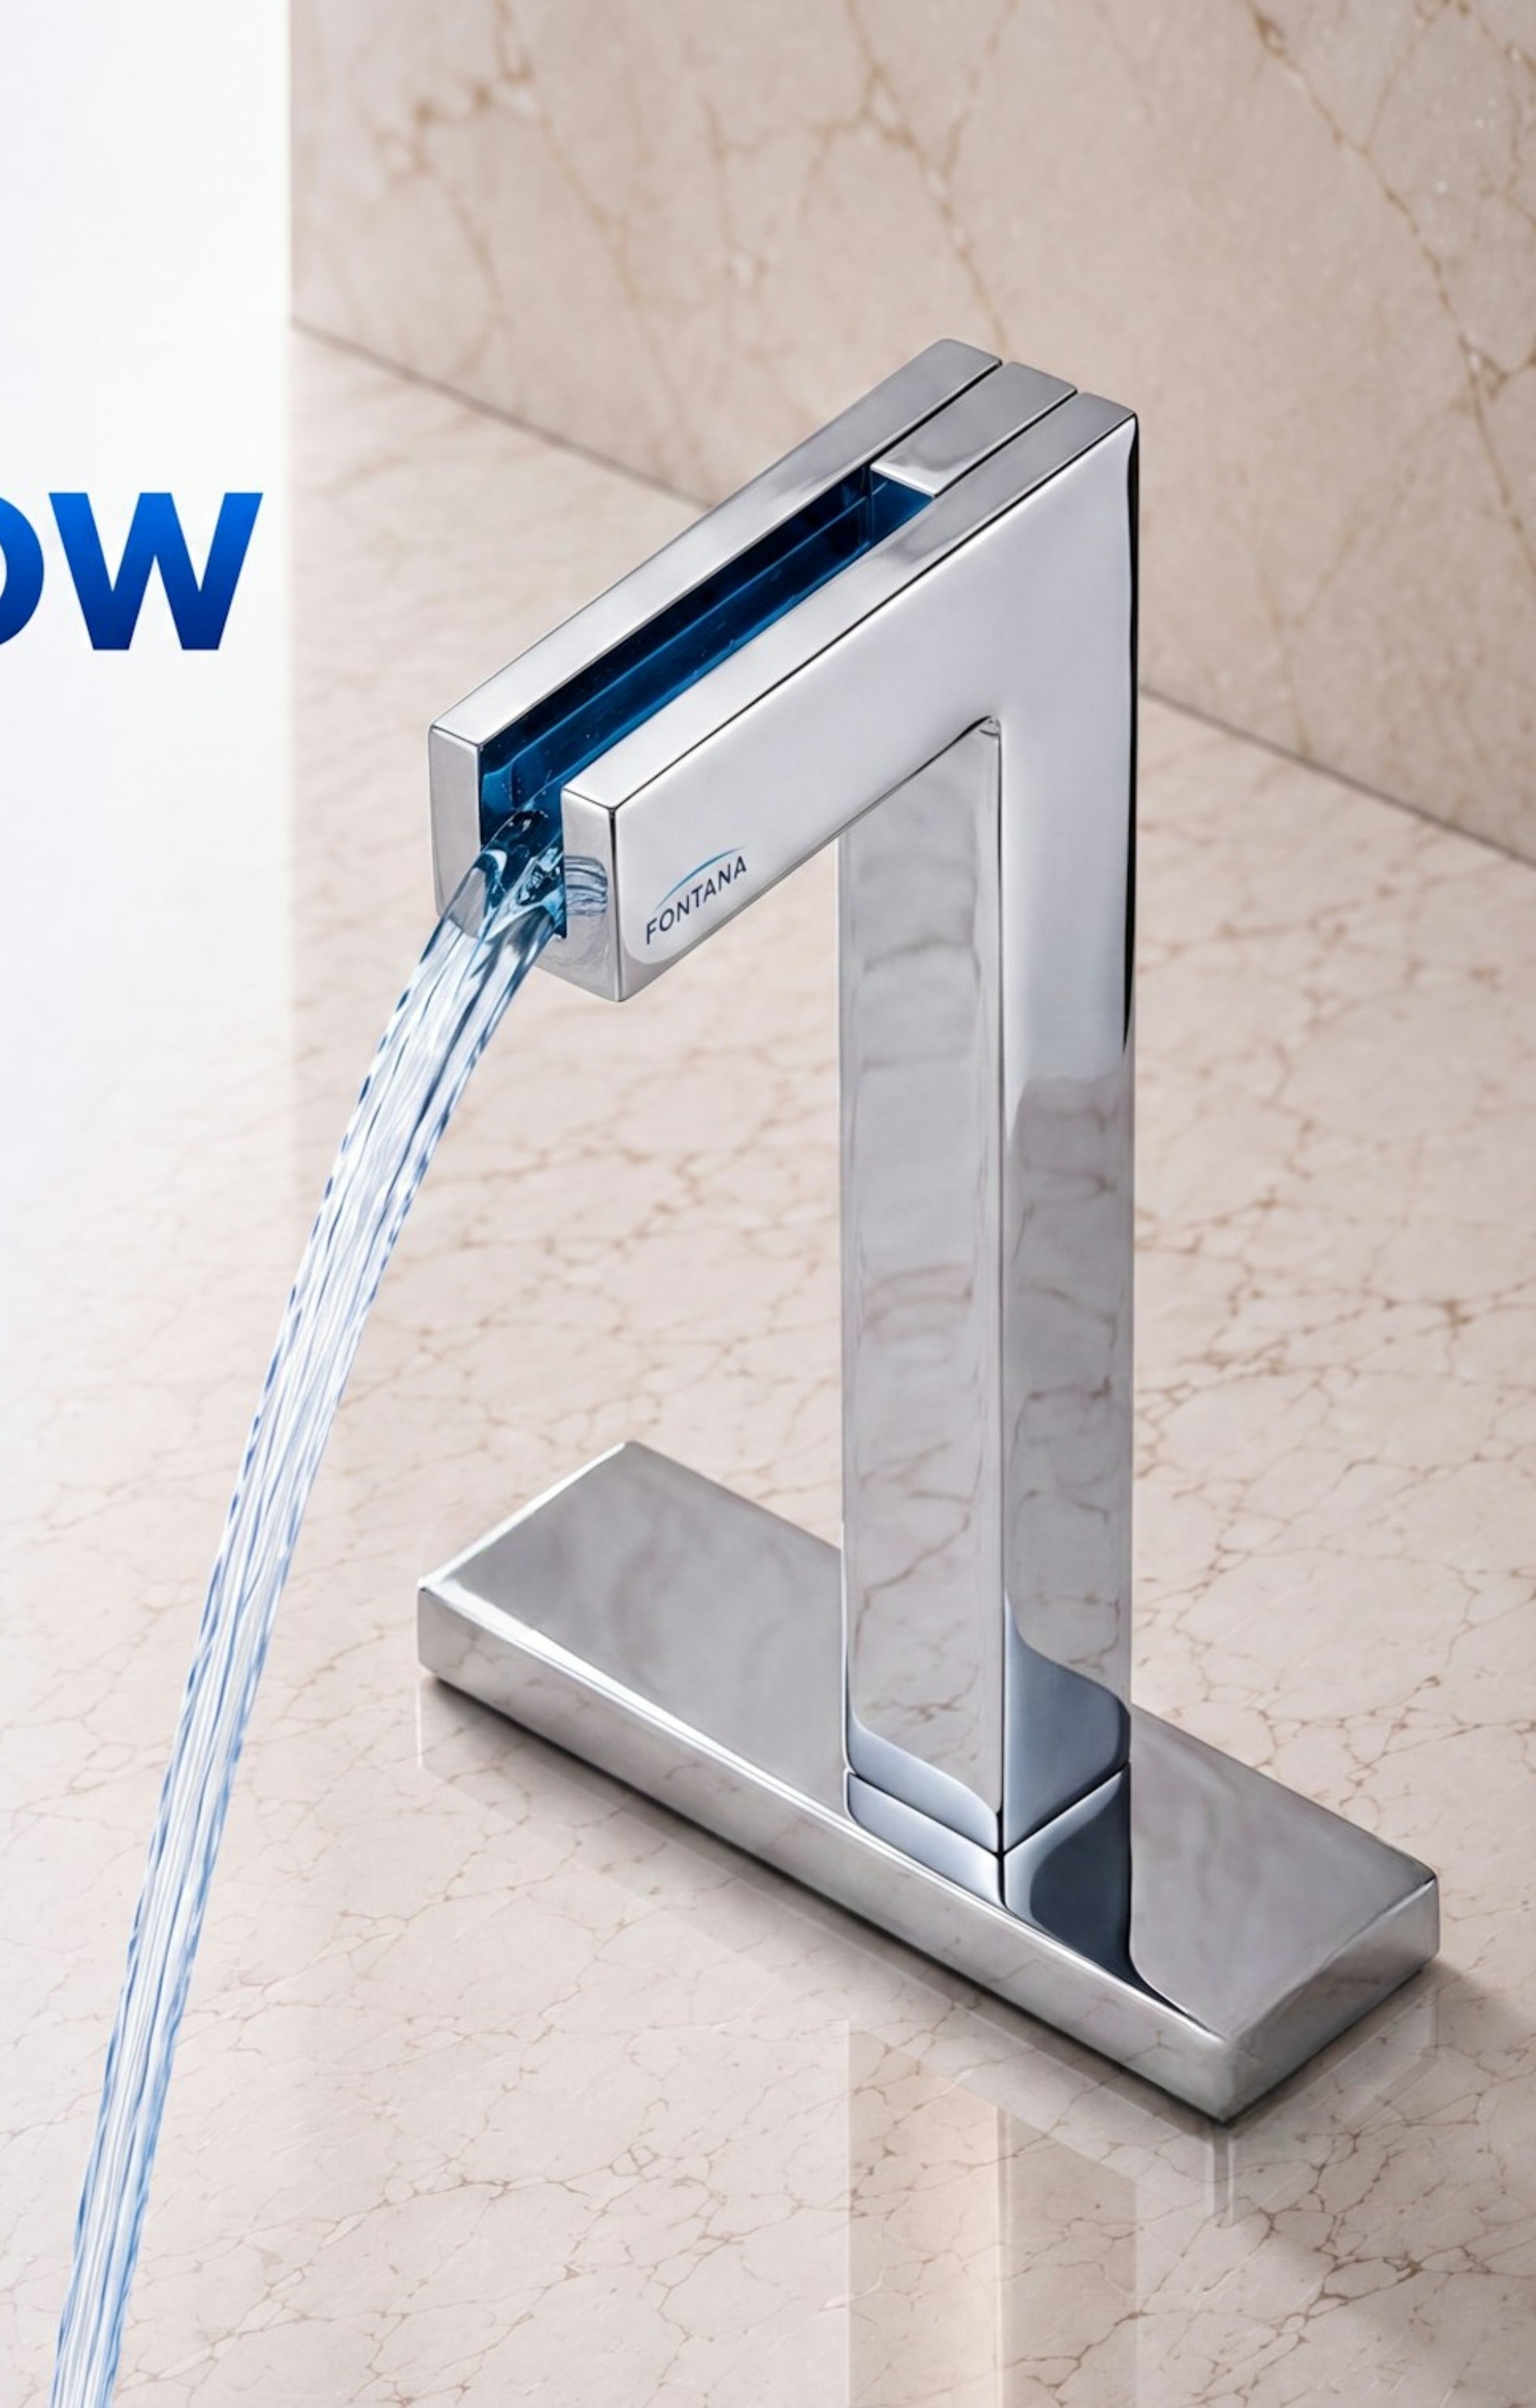

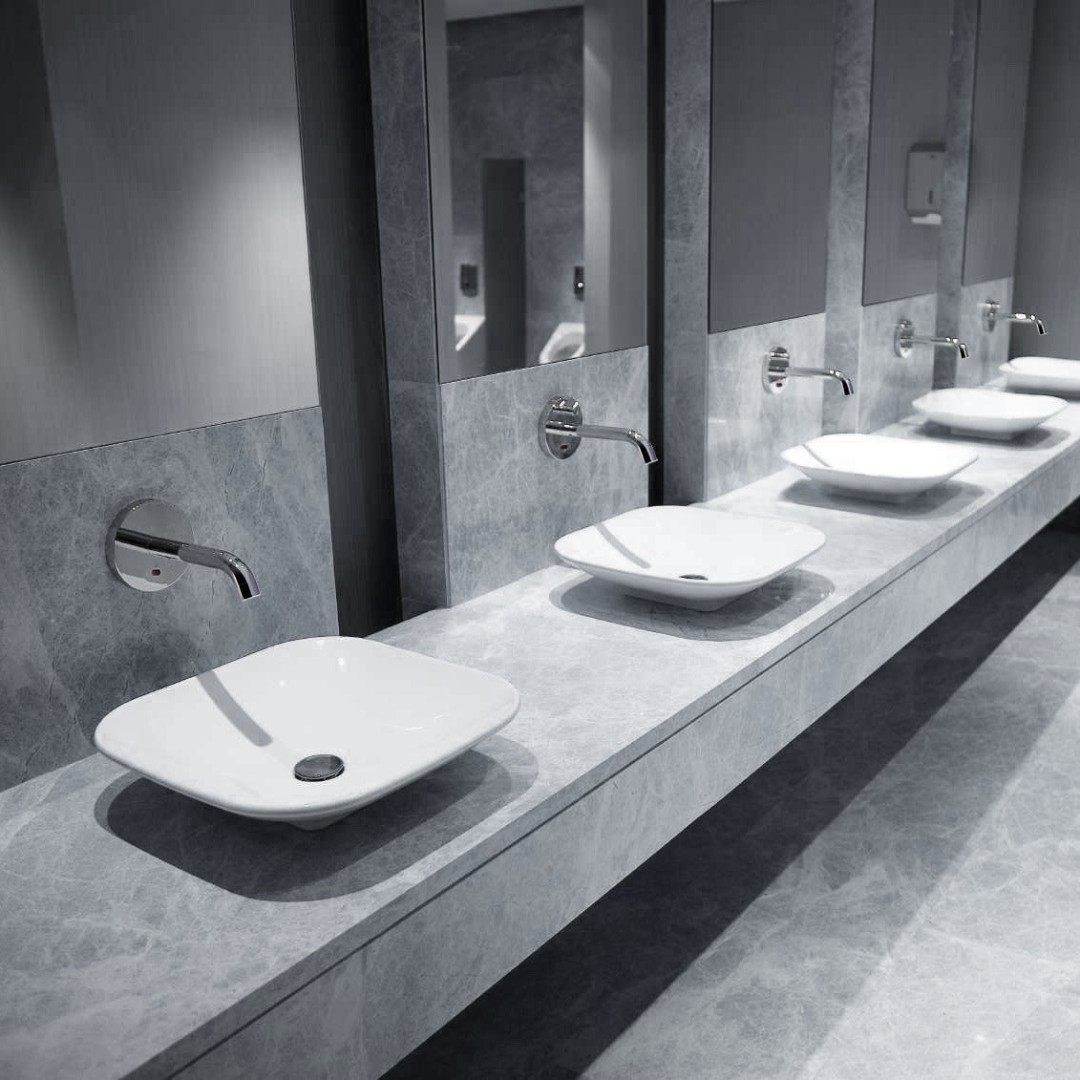
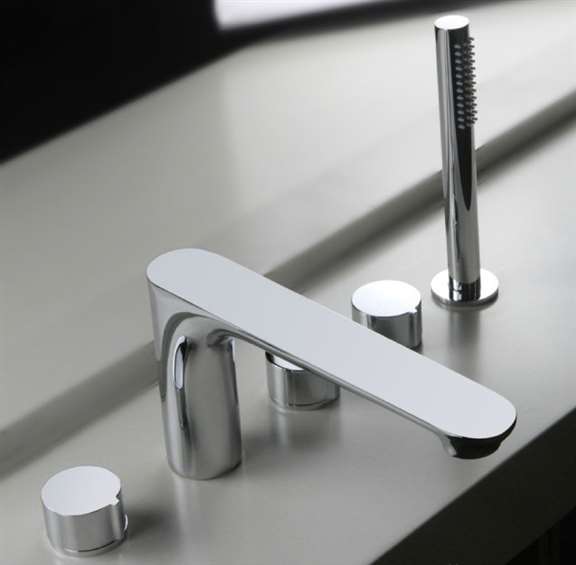
.jpg)
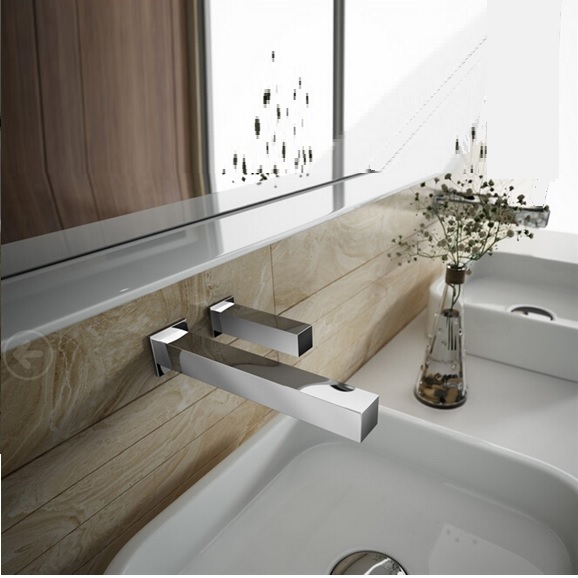
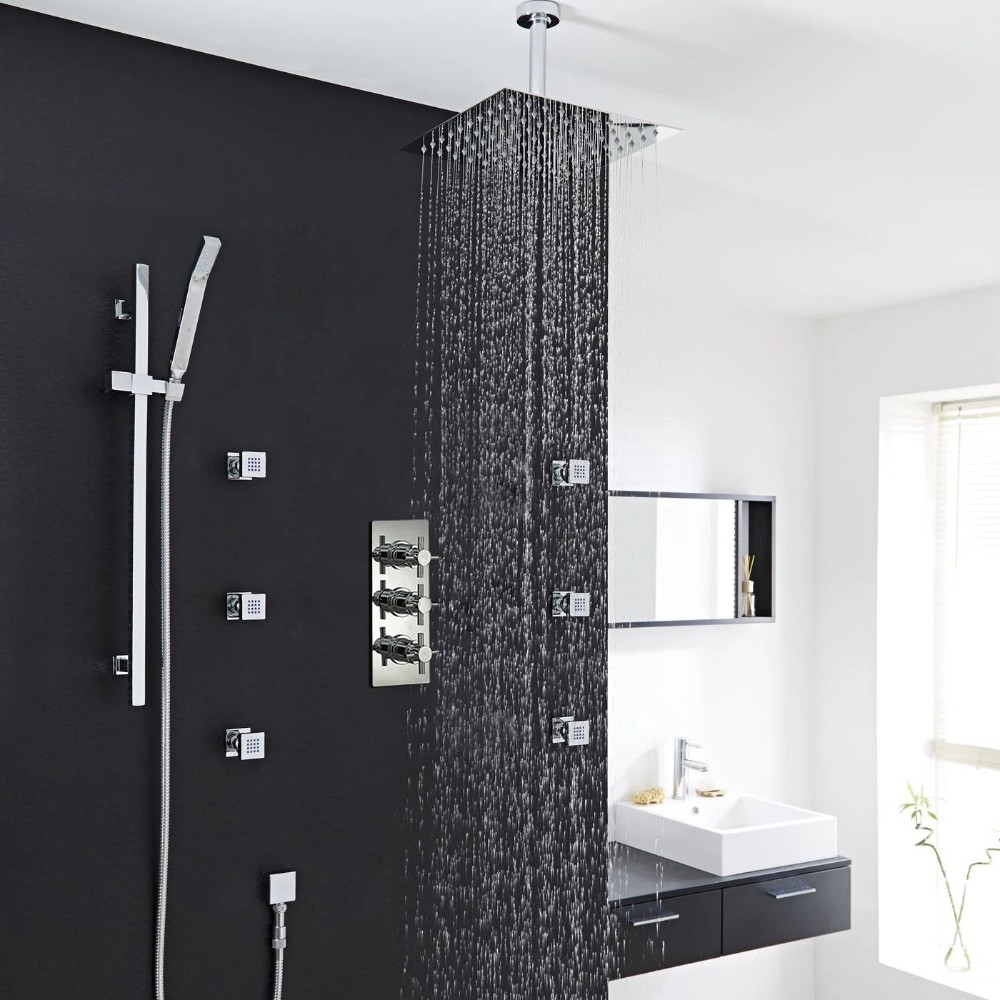

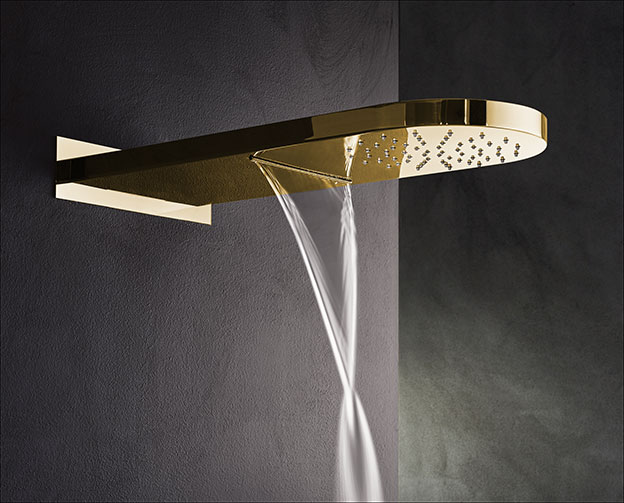
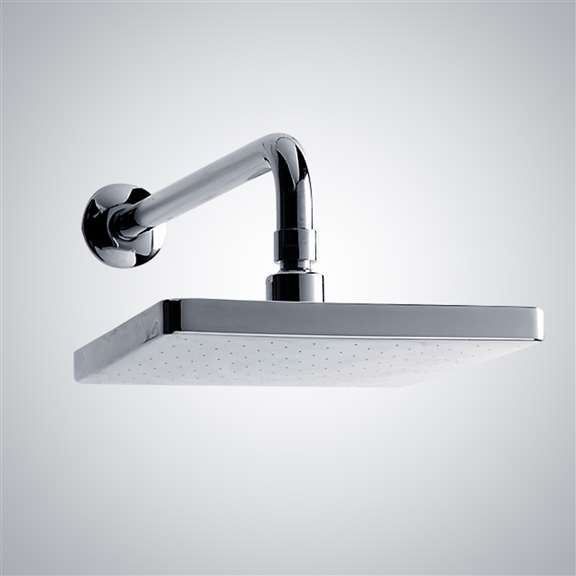
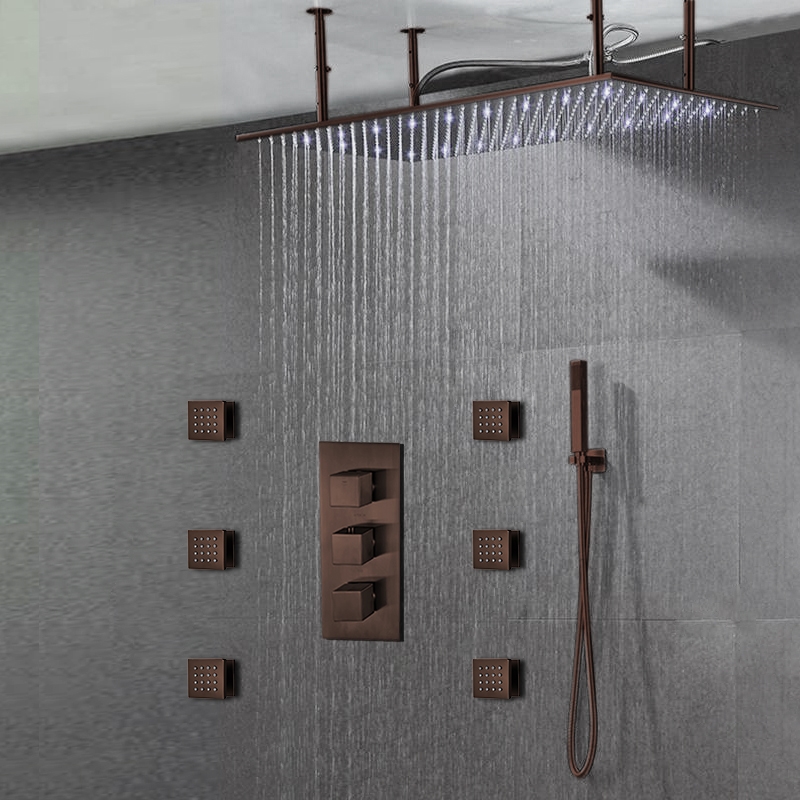



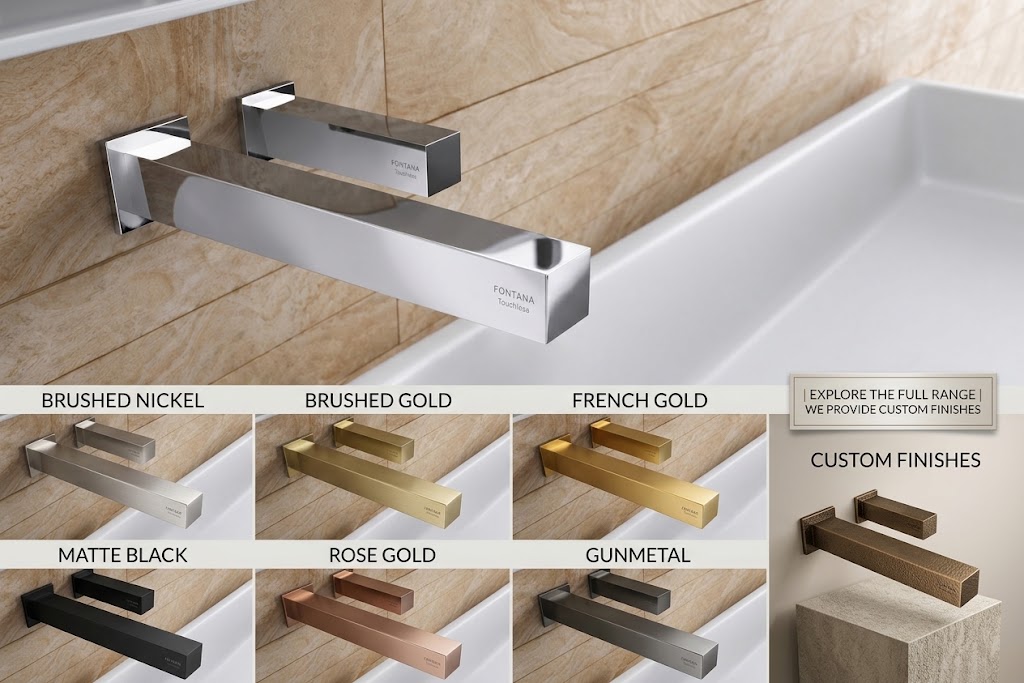
.jpg)






.jpg)

.jpg)












