|
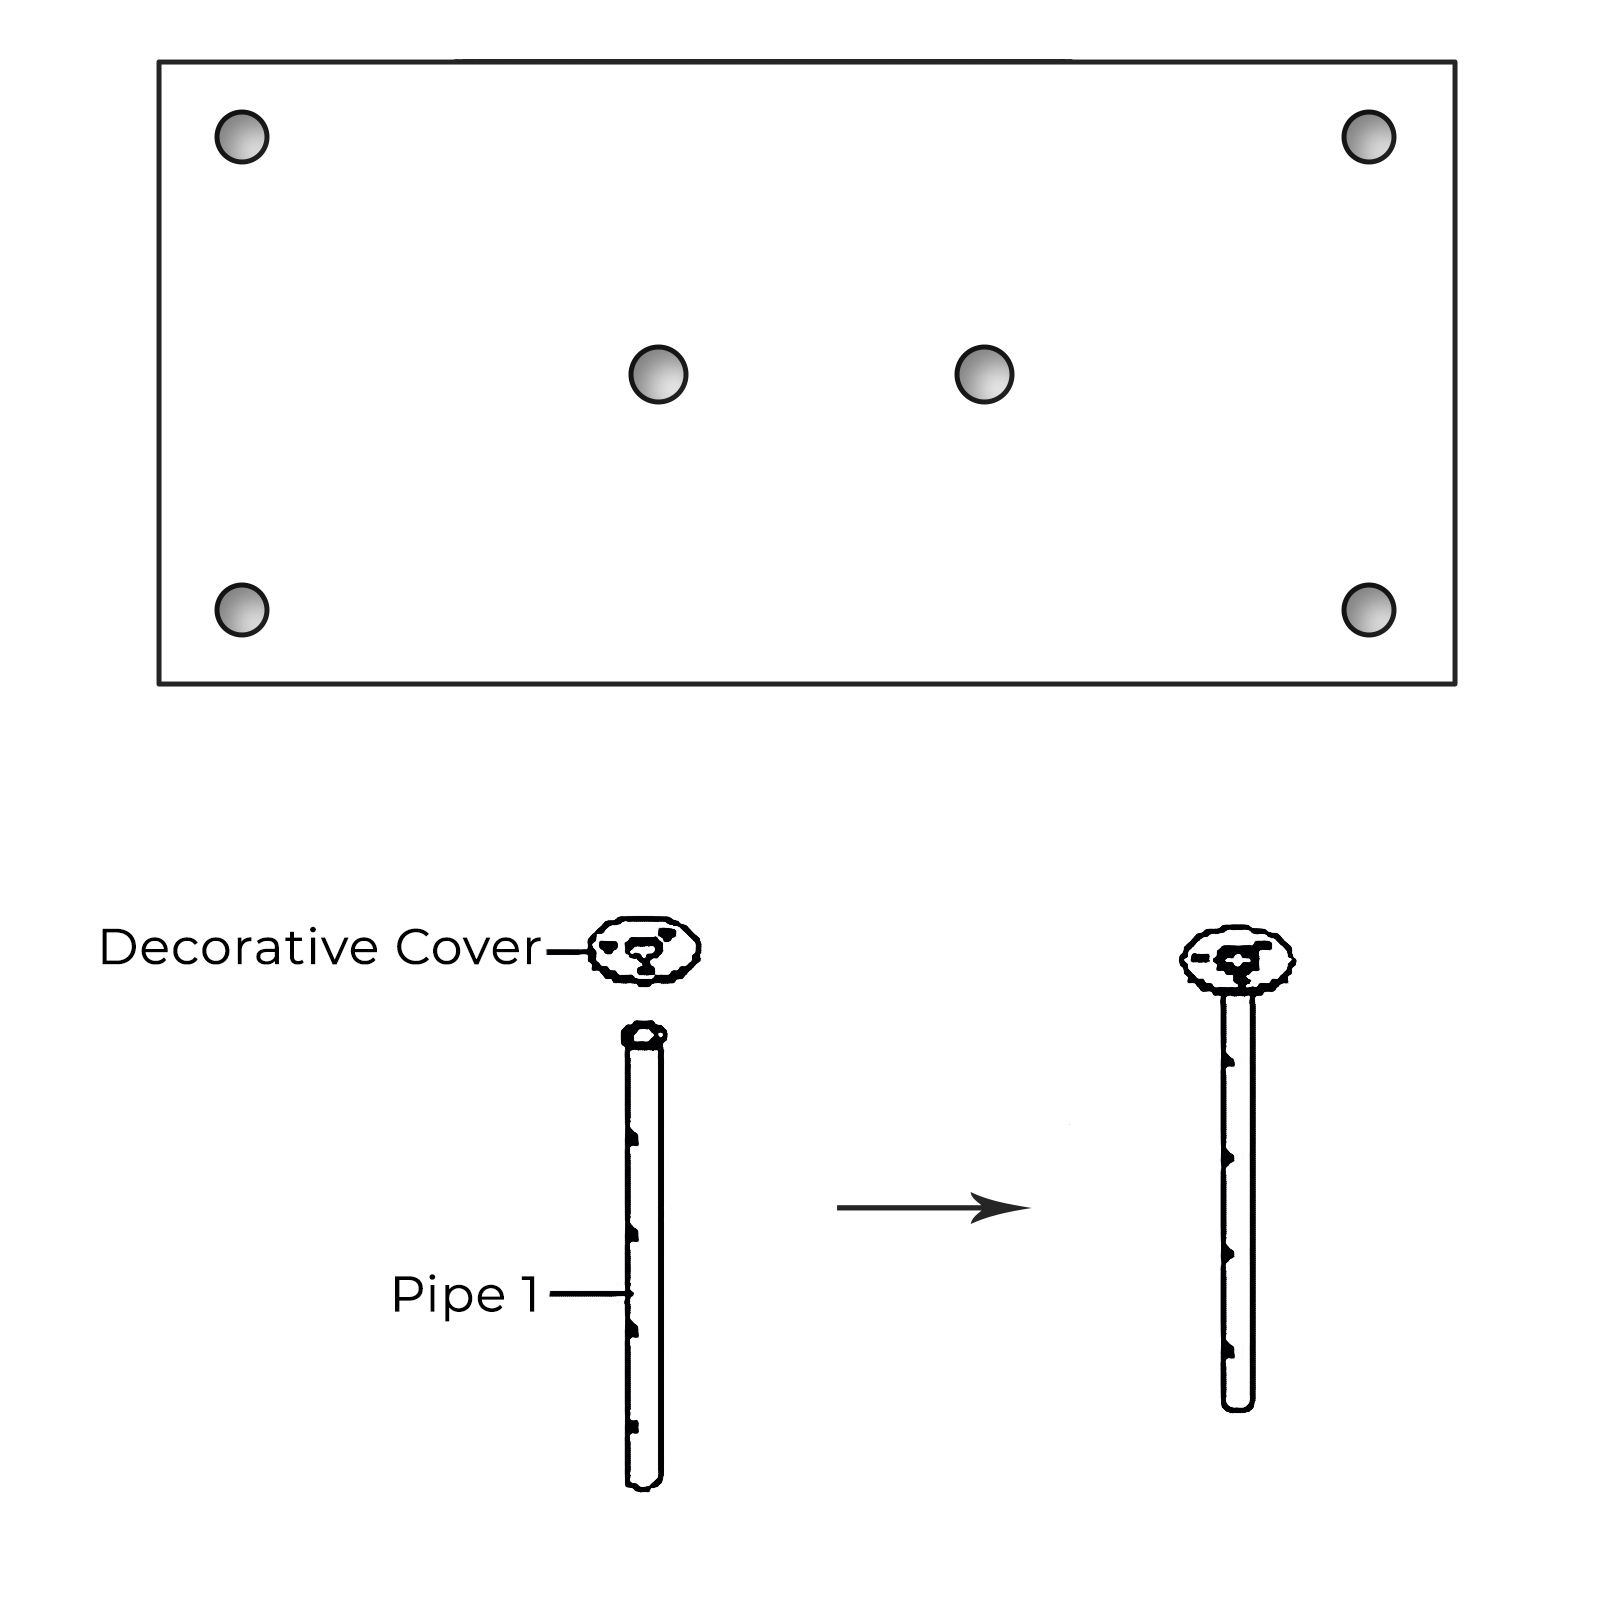
Step 1:
|
|
Step 2:
|
|
|
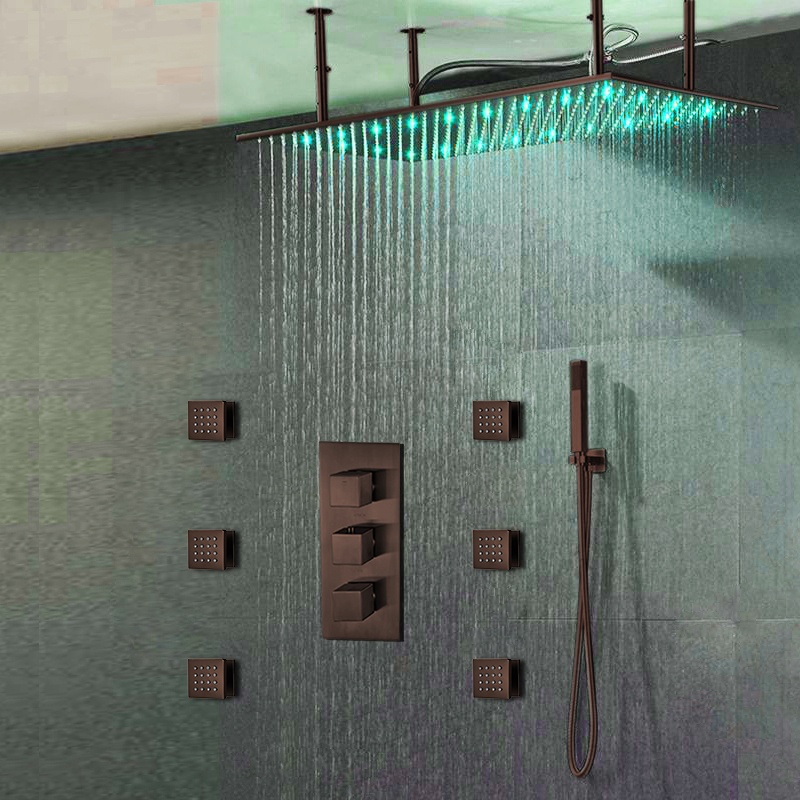
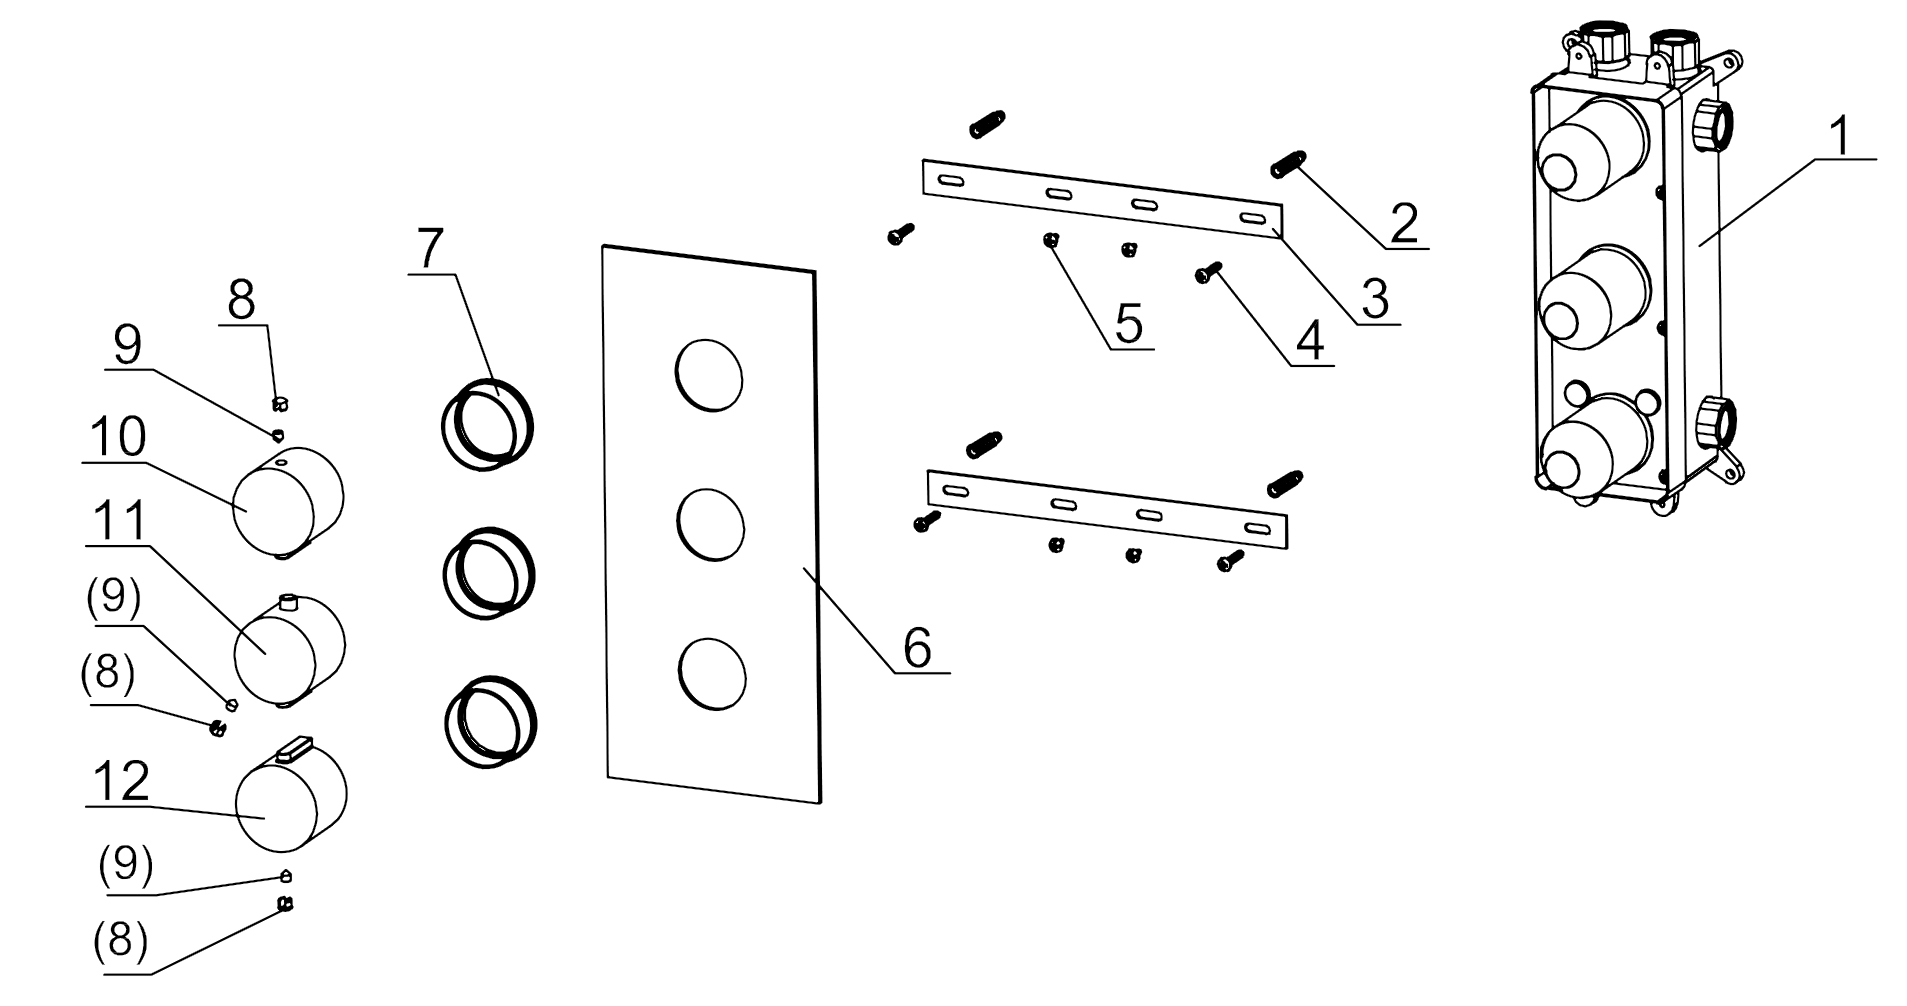
Shower
Mixer
|
|

|
|
|
|
|
|
Shower Valve Mixer Installation Instructions
|
|
|
|
|
Step 3:
|
|
Step 4:
|
|
|
|

|
|
|
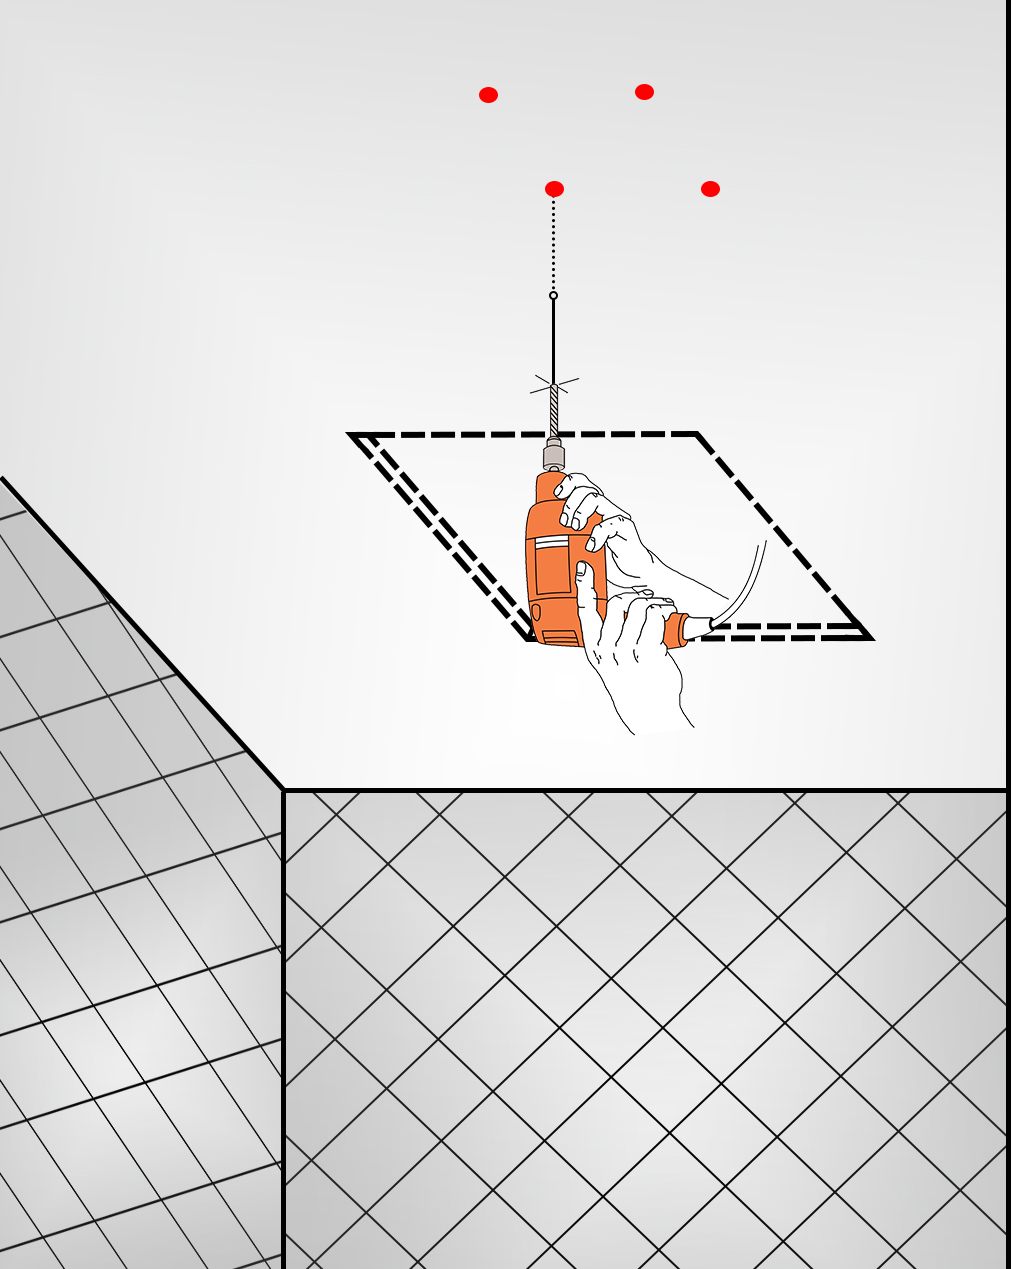
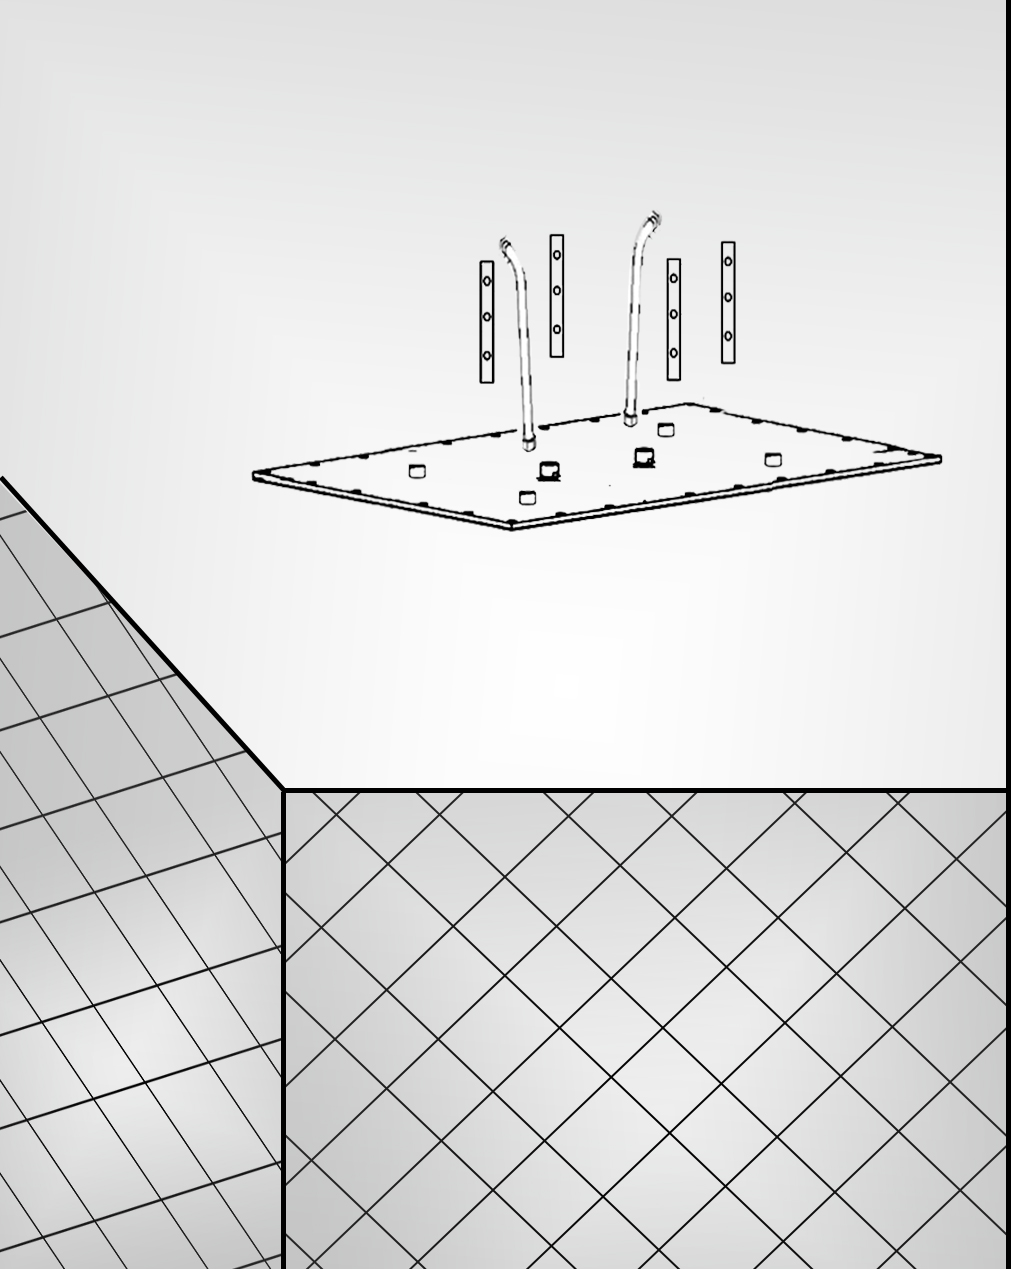
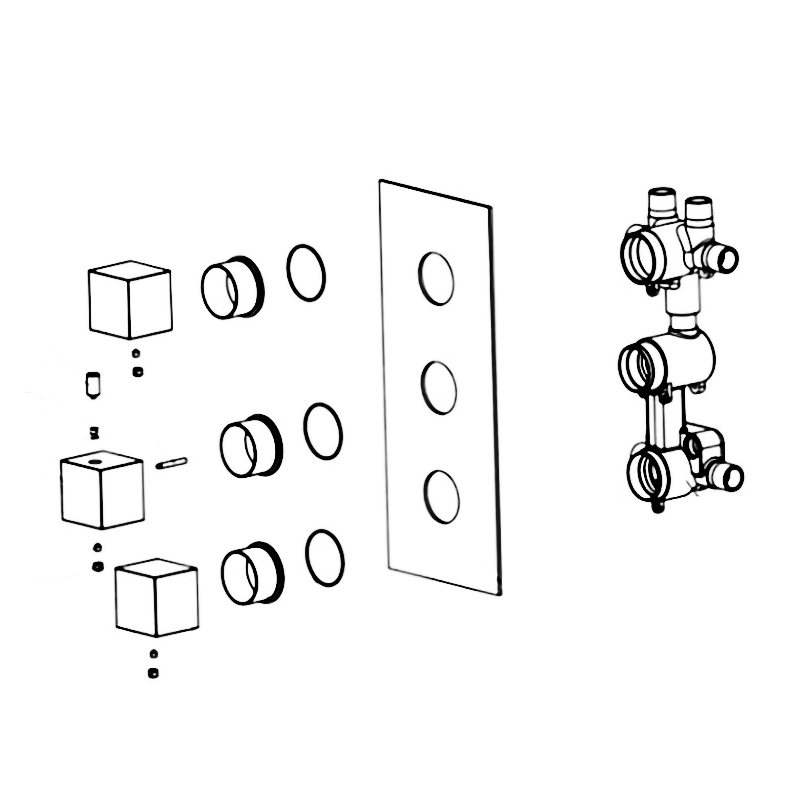
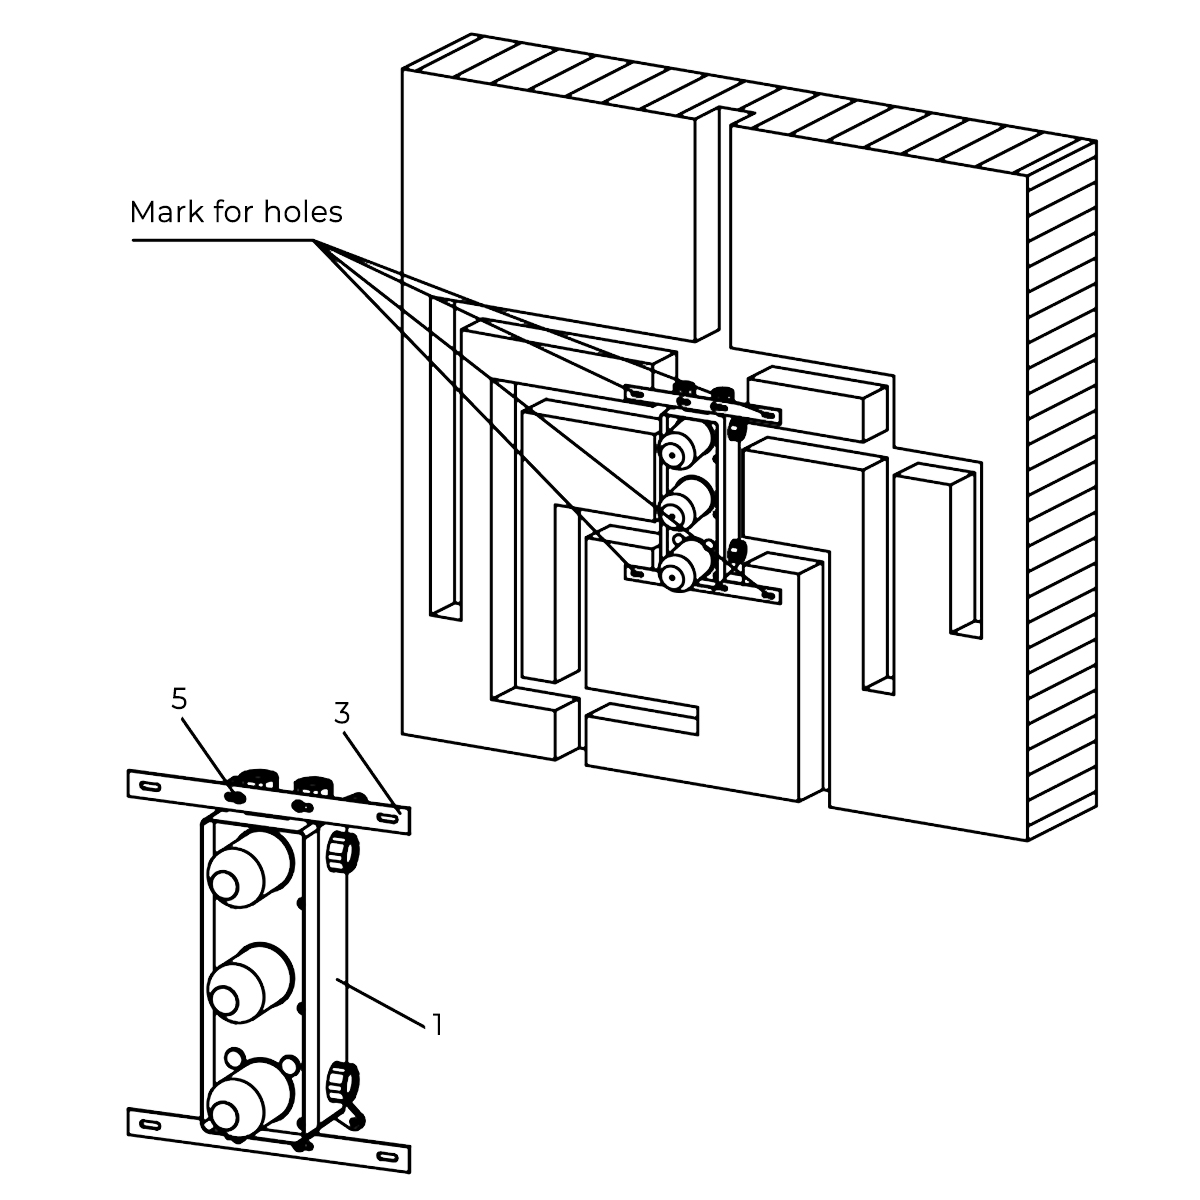
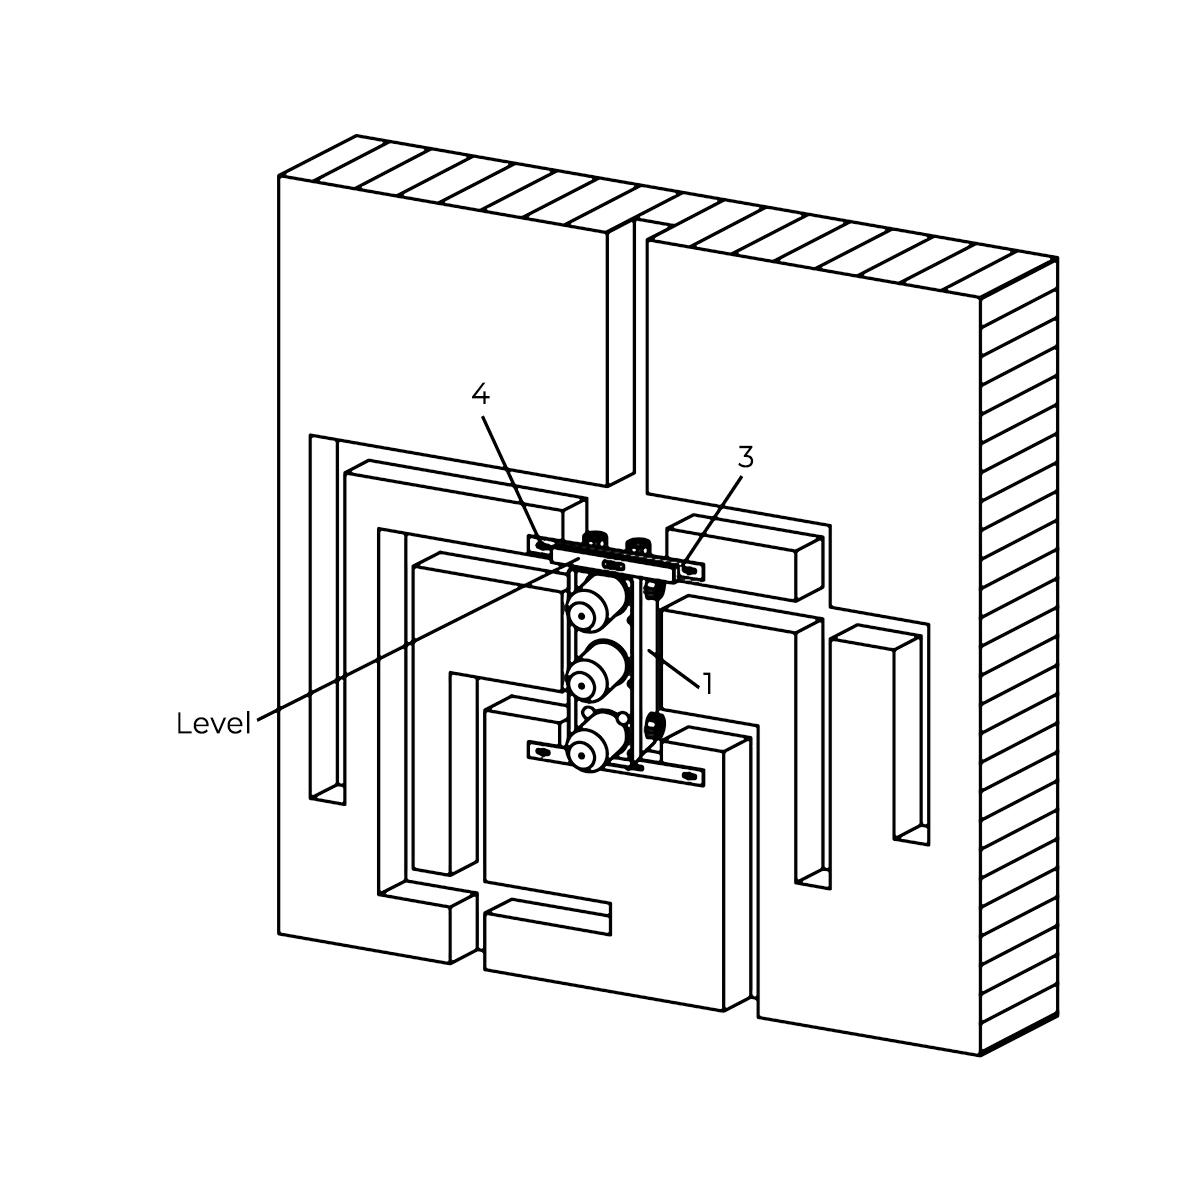
Attach the positioning bar to the rough-in body (4,5) with tapping screws. Mark the location of the mounting holes.
|
|
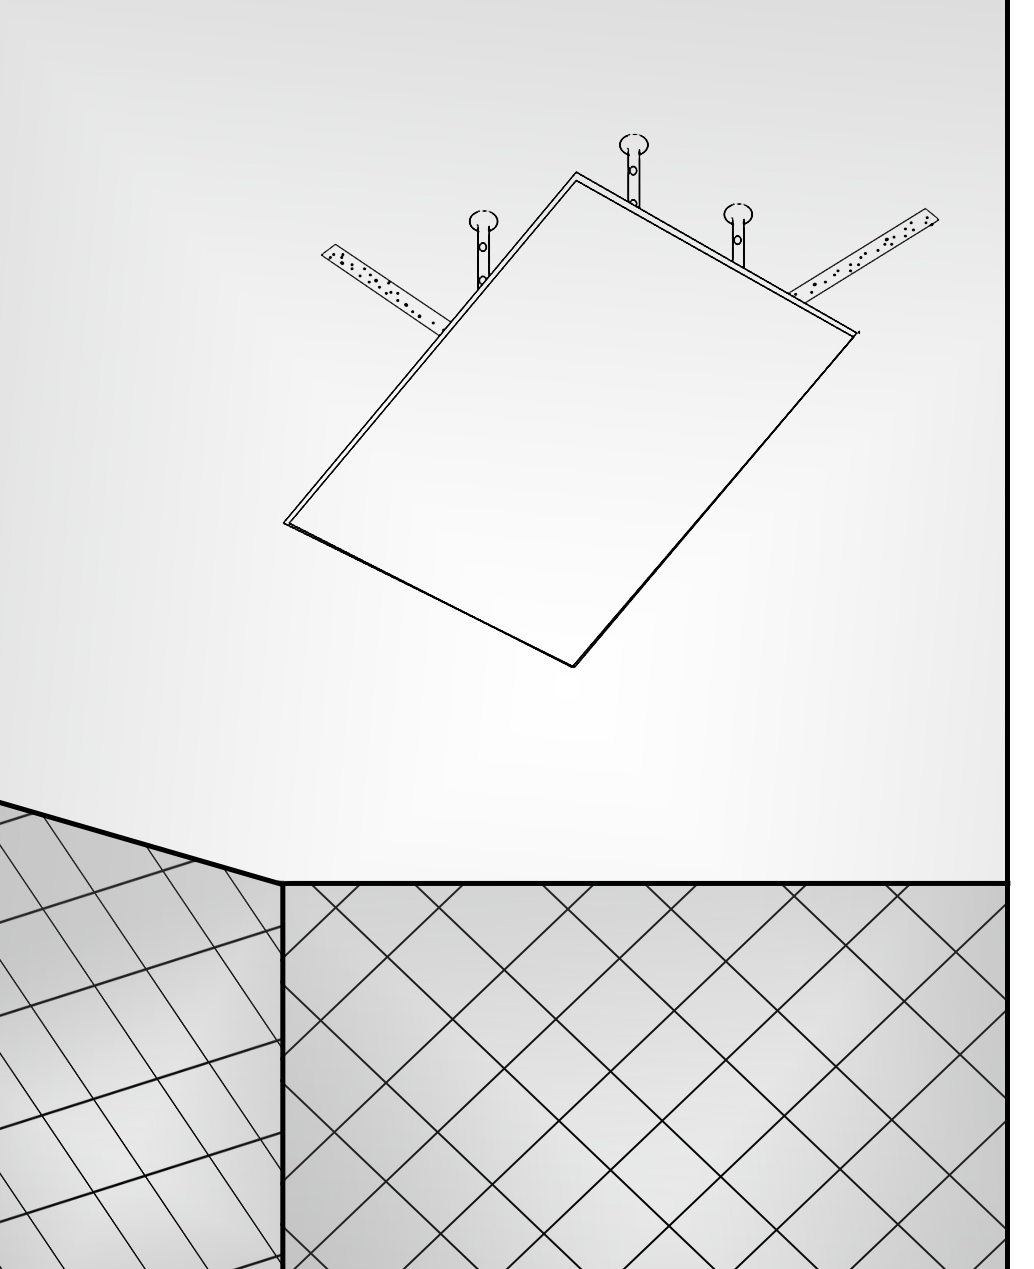
Remove the rough-in body and drill pilot holes at the locations marked in the previous step. Insert anchors.
|
|
|
Shower Valve Mixer Installation Instructions
|
|
|
|
|
Step 5:
|
|
Step 6:
|
|
|
|
|
|
|
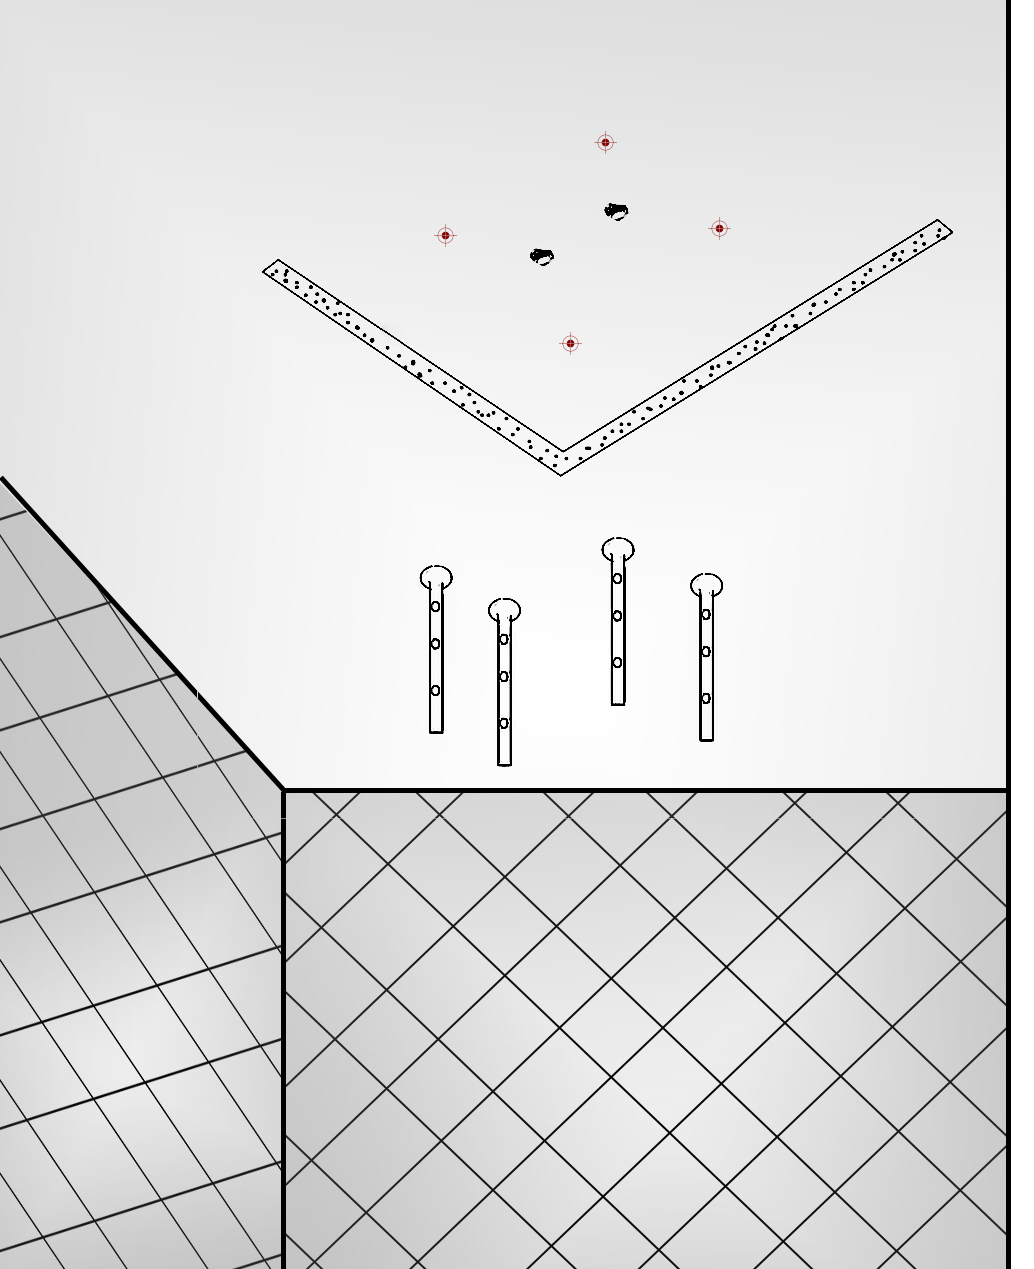
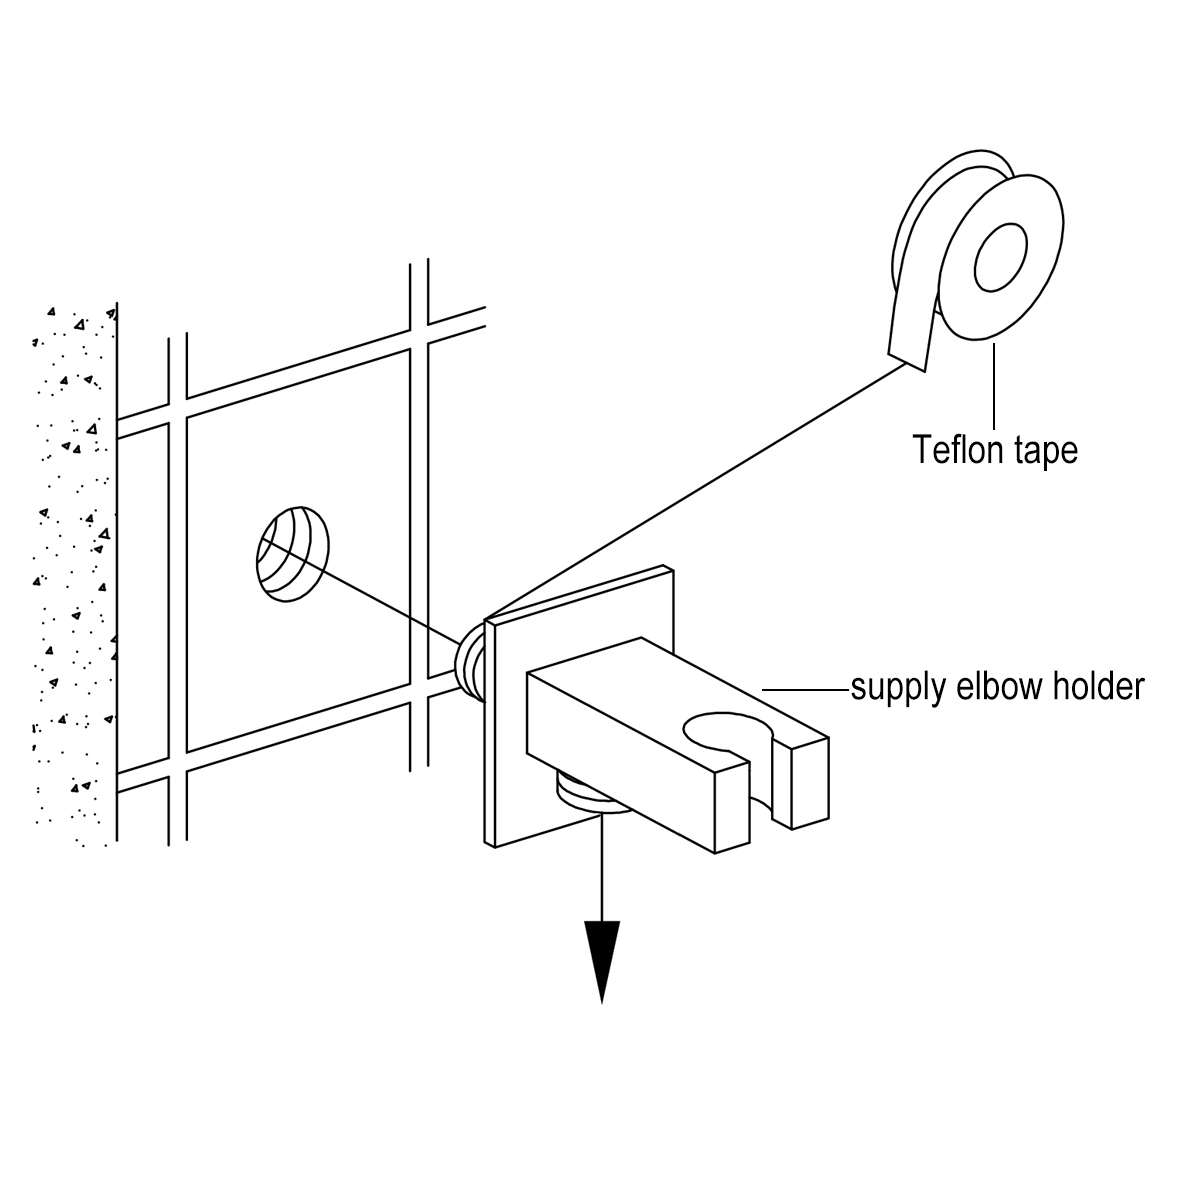
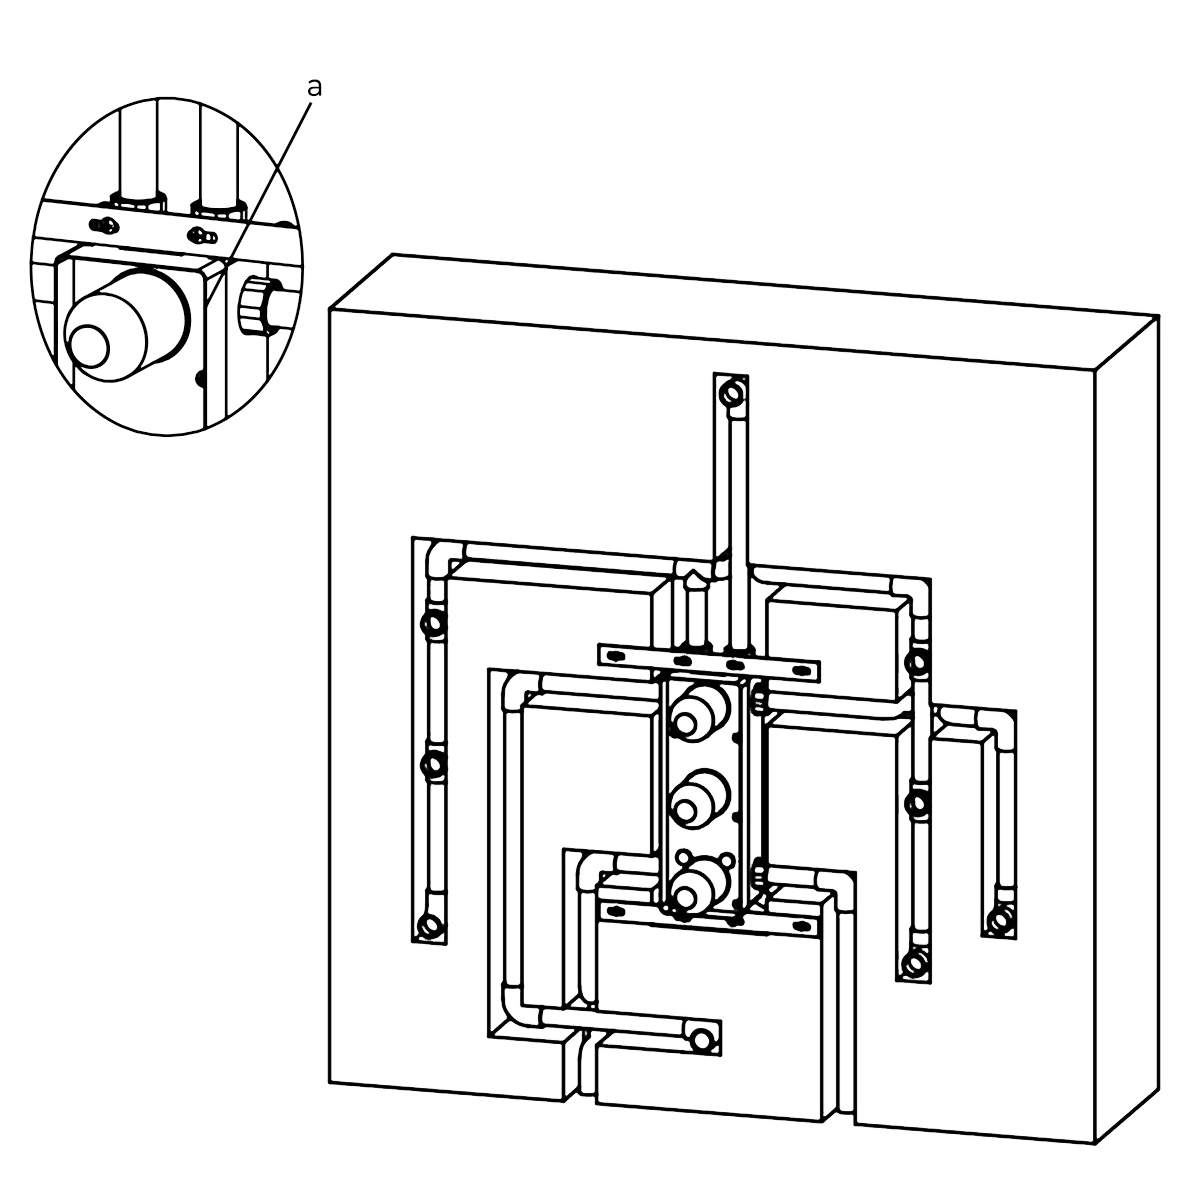
Attach the rough-in body to the wall.
|
|
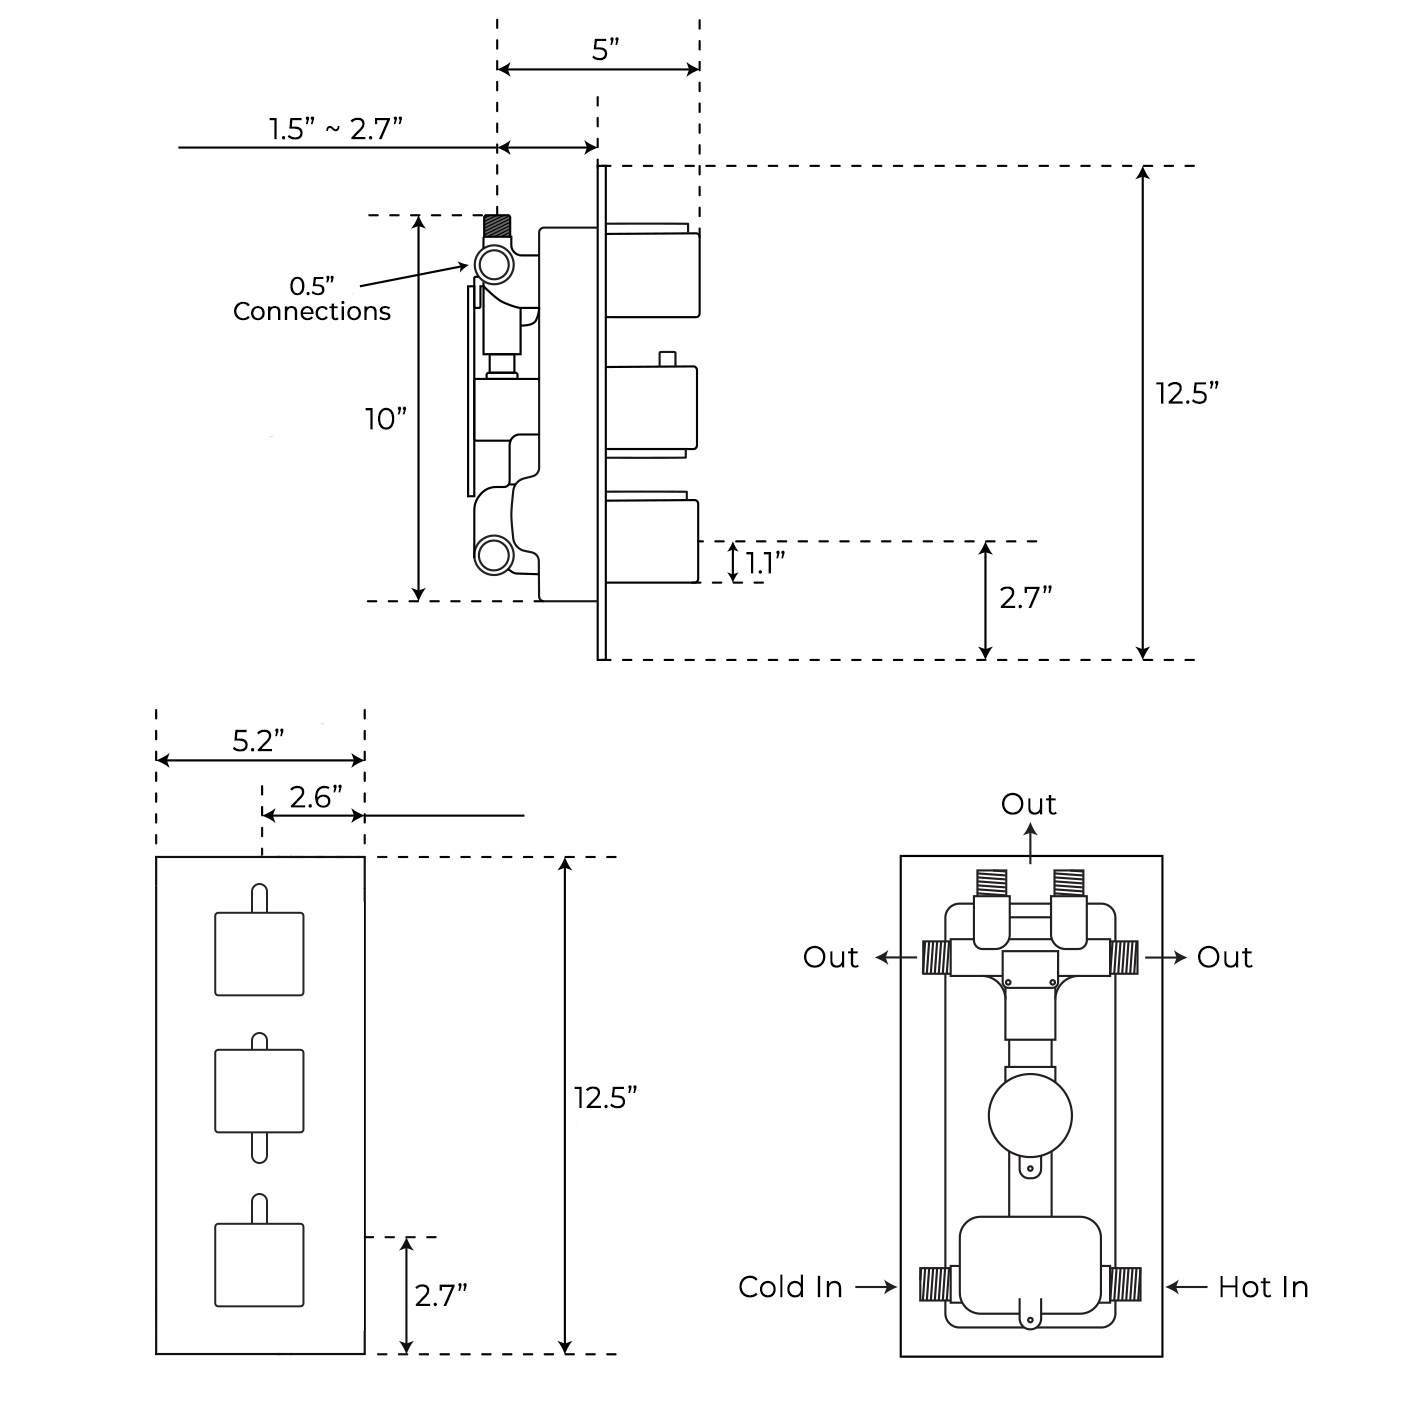
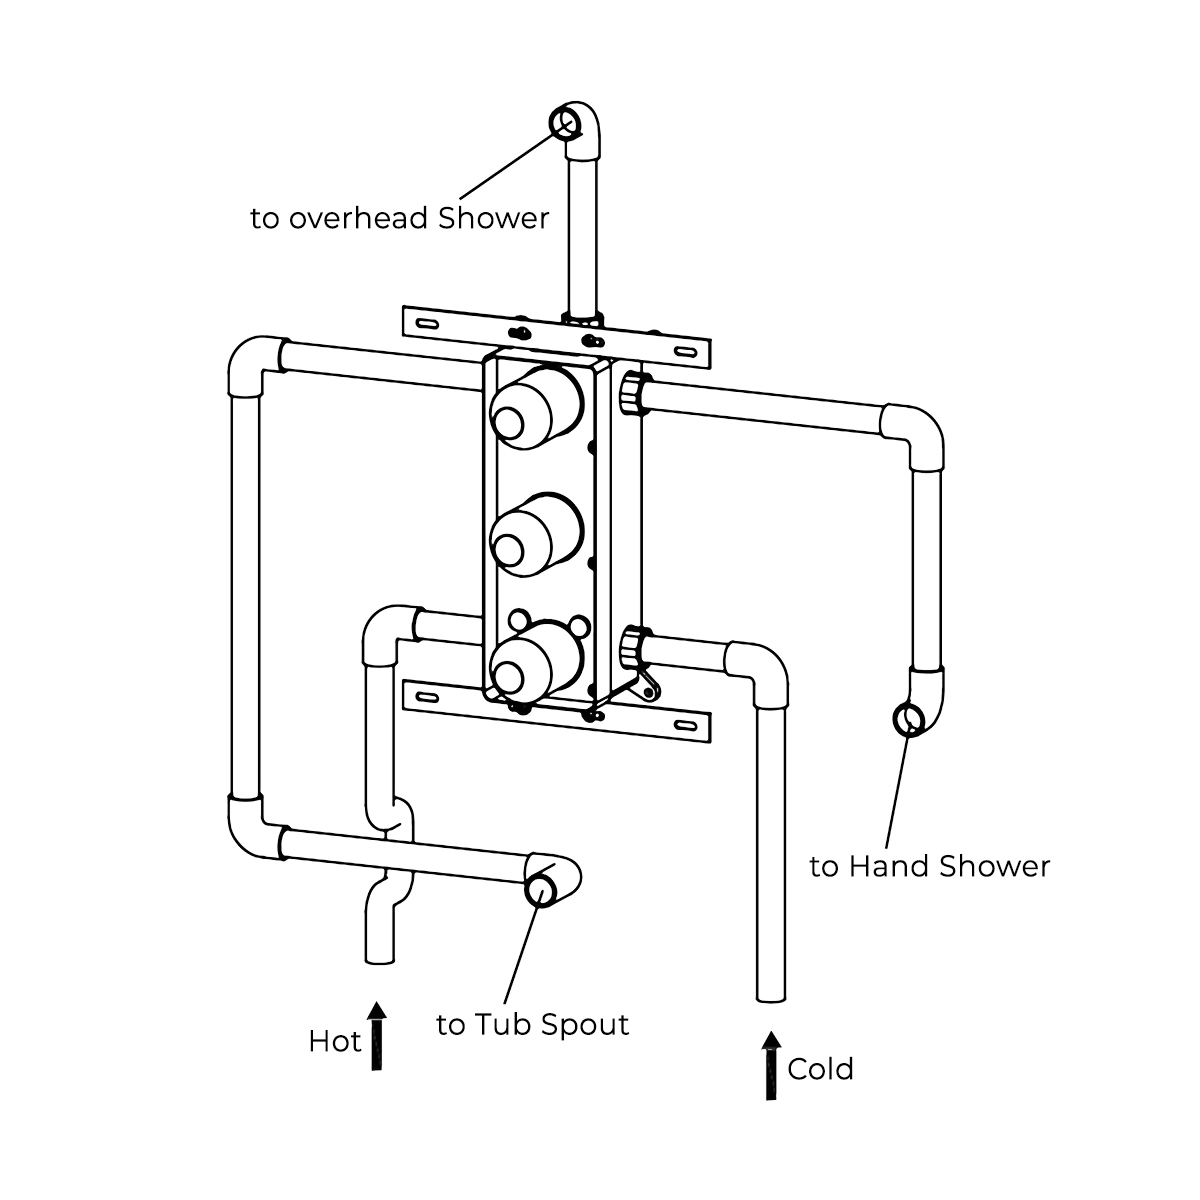
Connect the rough-in body to the water supply pipes according to the diagram.
|
|
|
Shower Valve Mixer Installation Instructions
|
|
|
|
|
Step 7:
|
|
Step 8:
|
|
|
|
|
|
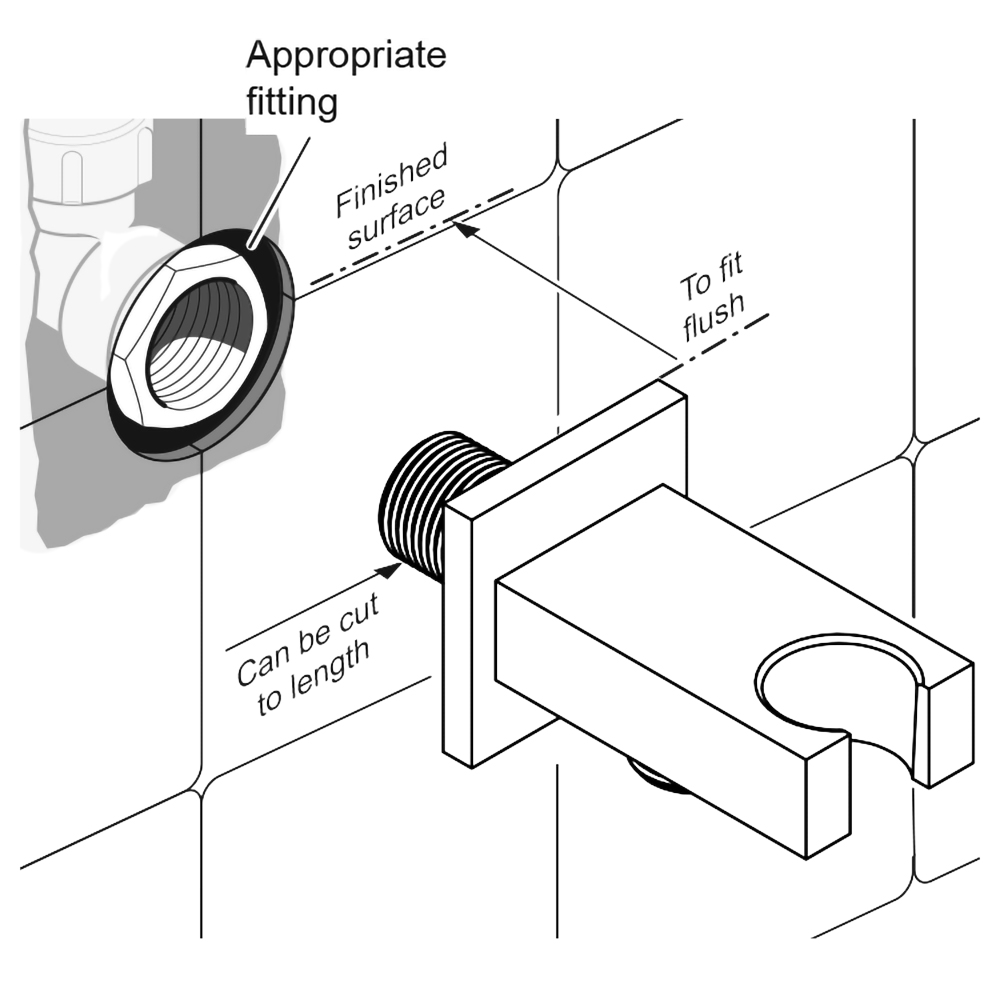
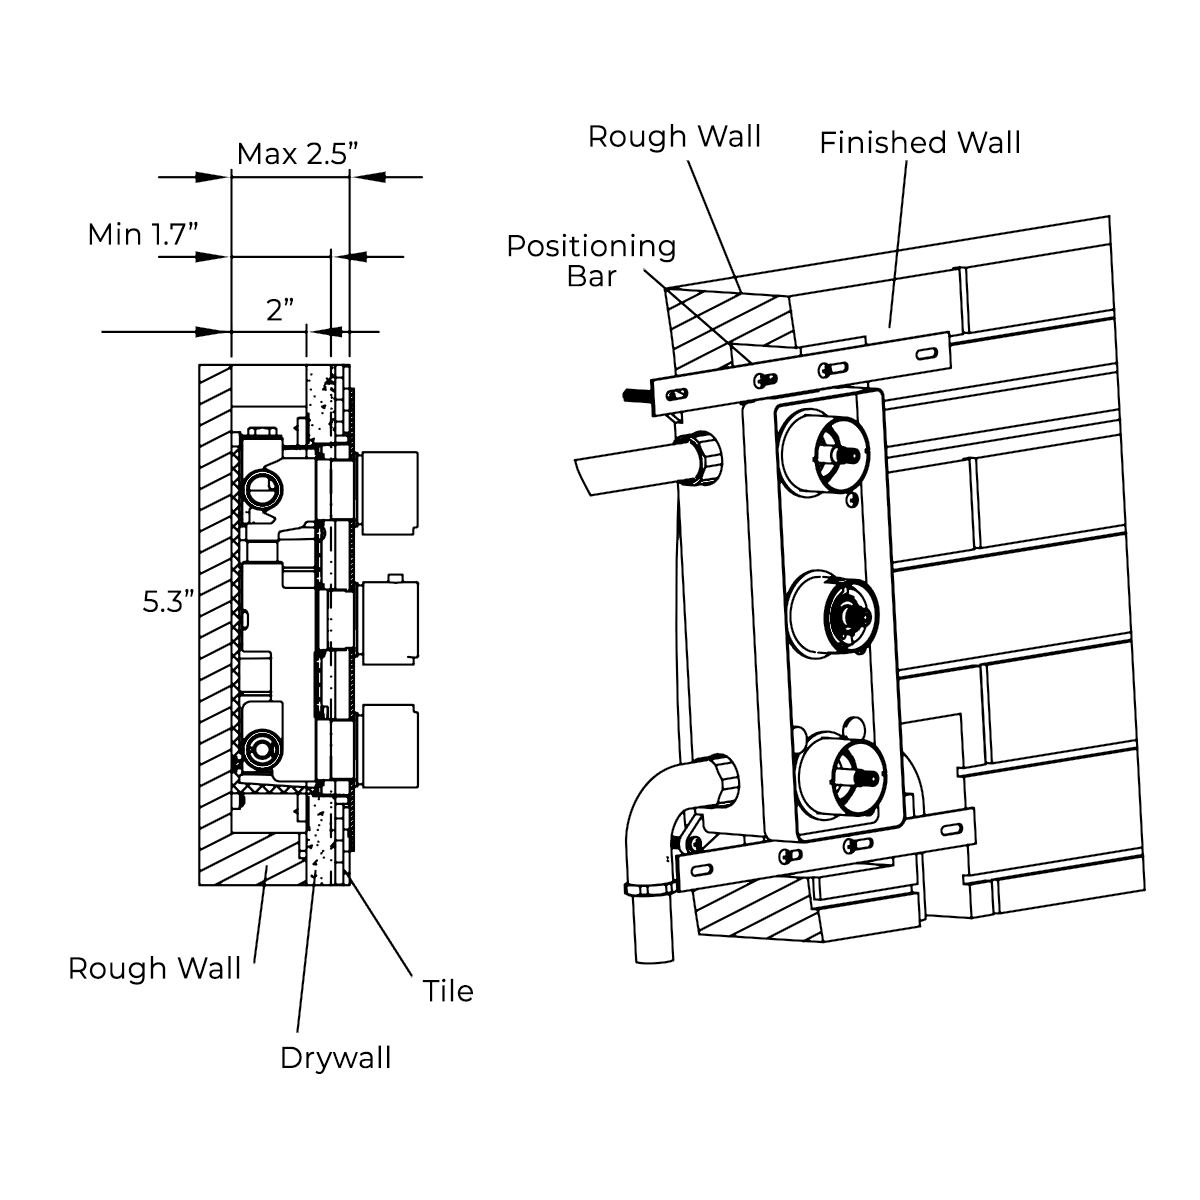
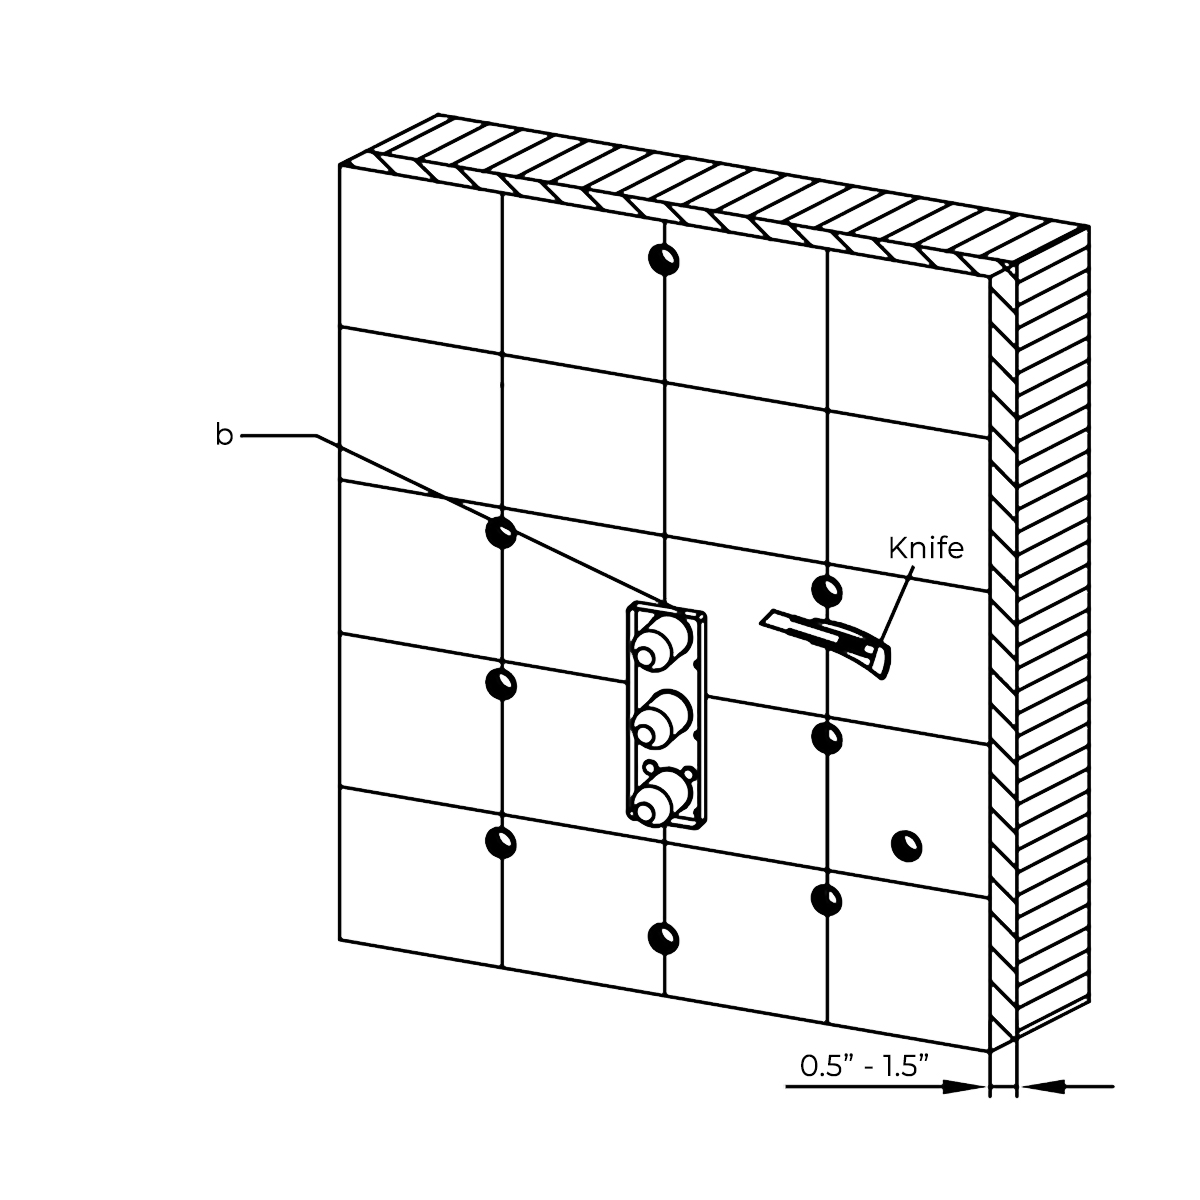
Finish the wall surrounding the shower with a thickness of 1/2"-1-1/2".
a) Finished wall surface should not exceed the upper edge of the installation box.
|
|
If the tile exceeds the edges of the installation box, trim the tile as necessary to install the trim plate.
b) Trim the tile around the installation box as necessary.
|
|
|
Shower Valve Mixer Installation Instructions
|
|
|
|
|
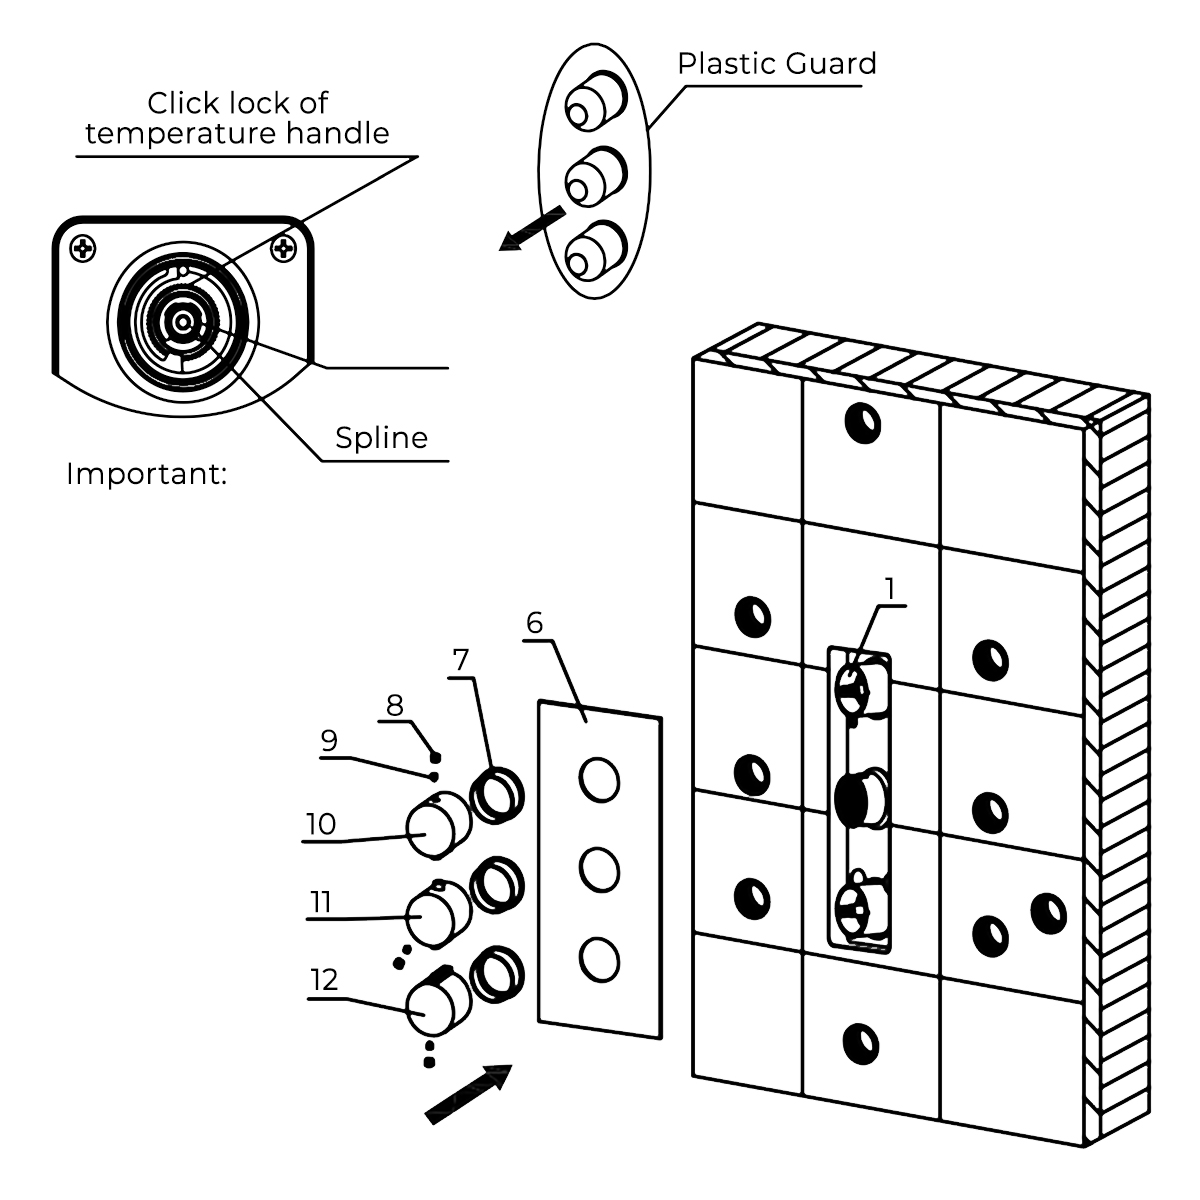
Step 9:
|
|
|
|
|
|
|
|
|
Remove the plastic guard and place the trim plate over the installation box. Install the screws covers, handles and buttons.
|
|
|
|
|
Shower Valve Mixer Installation
|