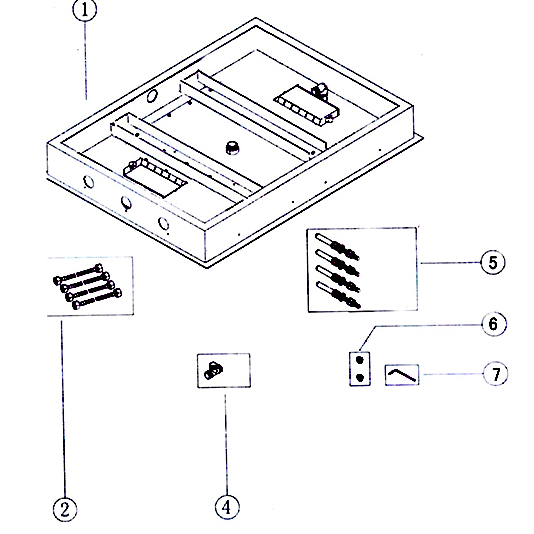
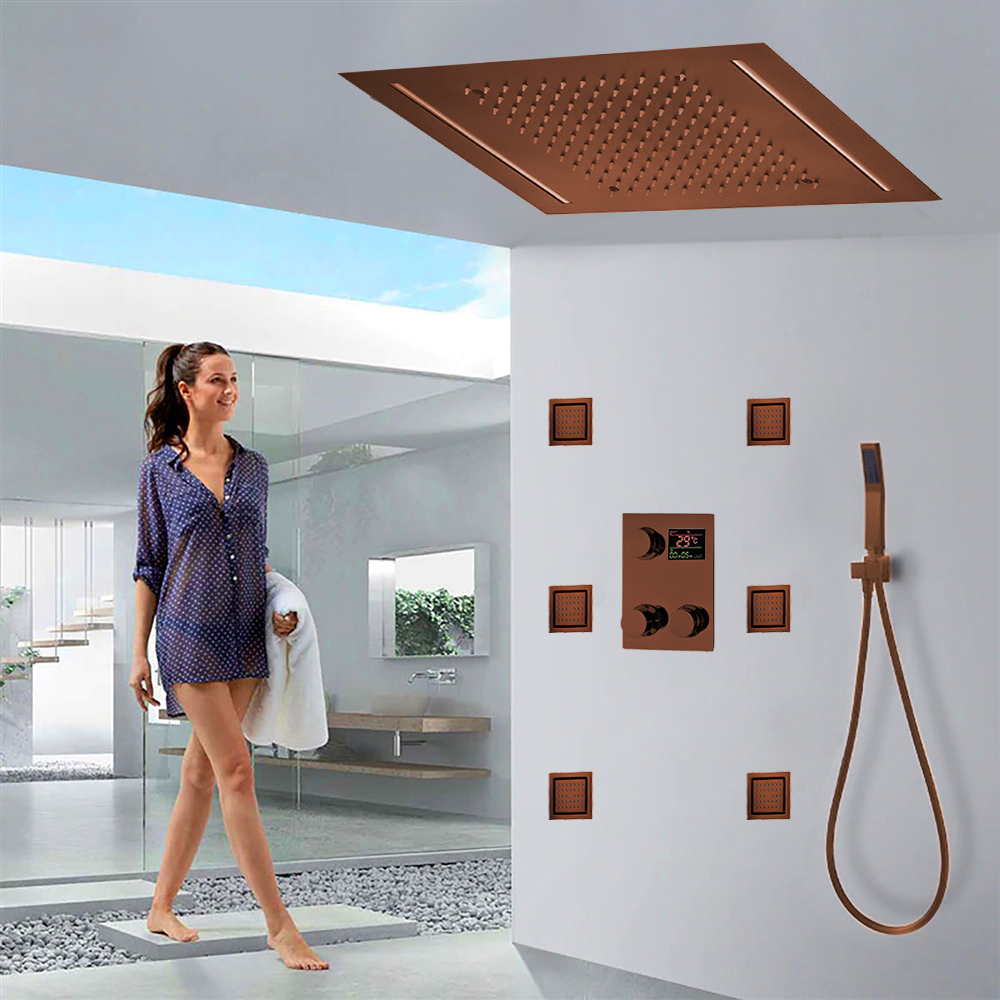
Fontana Light Oil Rubbed Bronze Lima Smart Digital Rainfall Waterfall Shower System
Warm light oil-rubbed bronze tones will compliment your bathroom decor. Gorgeously sized recessed Rainfall Waterfall LED showerhead provides maximum coverage that is enhanced by six body massage jets and handheld shower. A digital thermostatic mixer ensures the water temperature and pressure you desire. LED optional. Turn your shower into a water and light show with this LED Digital Shower System. Adding a touch of elegance to your bathroom, the LED lights will provide a visual water temperature indicator. Built-in hydro-powered device powers the LED lights, which provide visual shower temperature cues to reduce water waste. The lights will dim and brighten when you lower and raise the pressure so you can set the perfect mood, water, and lighting. When the water temperature is ≤89 °F (≤32 °C), the Blue color will show automatically; When the water temperature is between 97 to 107 °F (36-42 °C), the Green color will show automatically; When the water temperature is between 109 to 122 °F (43-50 °C), Red color will show automatically; When the water temperature is above 122 °F (>50 °C), Red color will flash; When water temperature is above 122 °F (>50 °C), Red color will flash immediately.
Fontana Light Oil Rubbed Bronze Lima Smart Digital Rainfall Waterfall Shower System Features:
- Brand Name: FontanaShowers
- Model Number: FS-892RBD
- Material: Solid Brass
- Showerhead Finish: Light Oil Rubbed Bronze
- Style: Contemporary Rain Showerhead
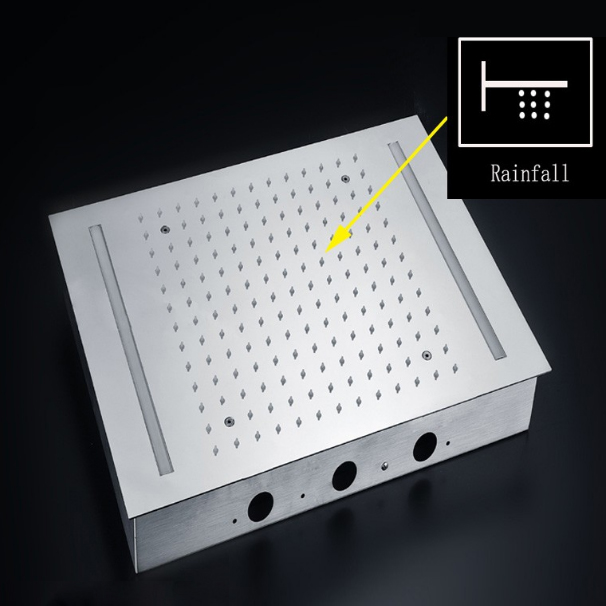
- Showerhead Height (thickness): 0.33"
- Showerhead Width: 14"
- Showerhead Length: 20"
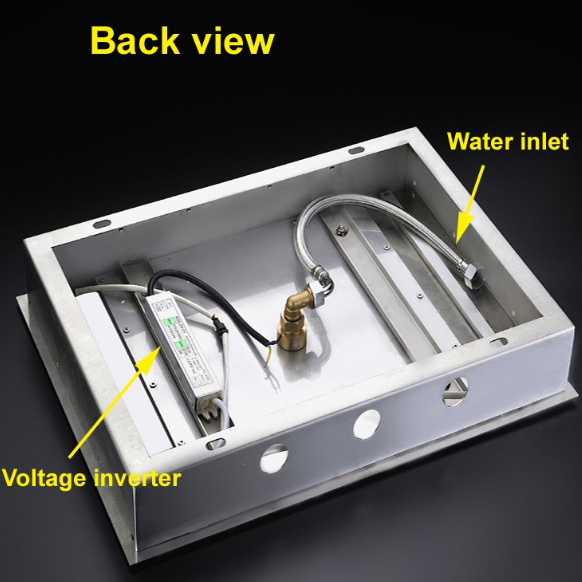
- LED Power Source: Water Flow
- LED Color: Available without color-changing or with LED colors Blue, Green, Red
- Mount Method: Recessed Ceiling Mount
- Connection: 1/2" US standard (included)
- Body Jets: 360° Adjustable Body Jets
- Body Jets size: 5" x 5"
|
|
FontanaShowers®Product Warranty Information
- Before you begin, please read the installation instructions below. Observe all local building and safety codes.
- Unpack and inspect the product for any shipping damages. If you find damages, do not install.
- Please note all showers must be installed by a professional and certified plumber otherwise warranty might be voided.
|
shower
|
|
Shower Head Installation Instructions
|
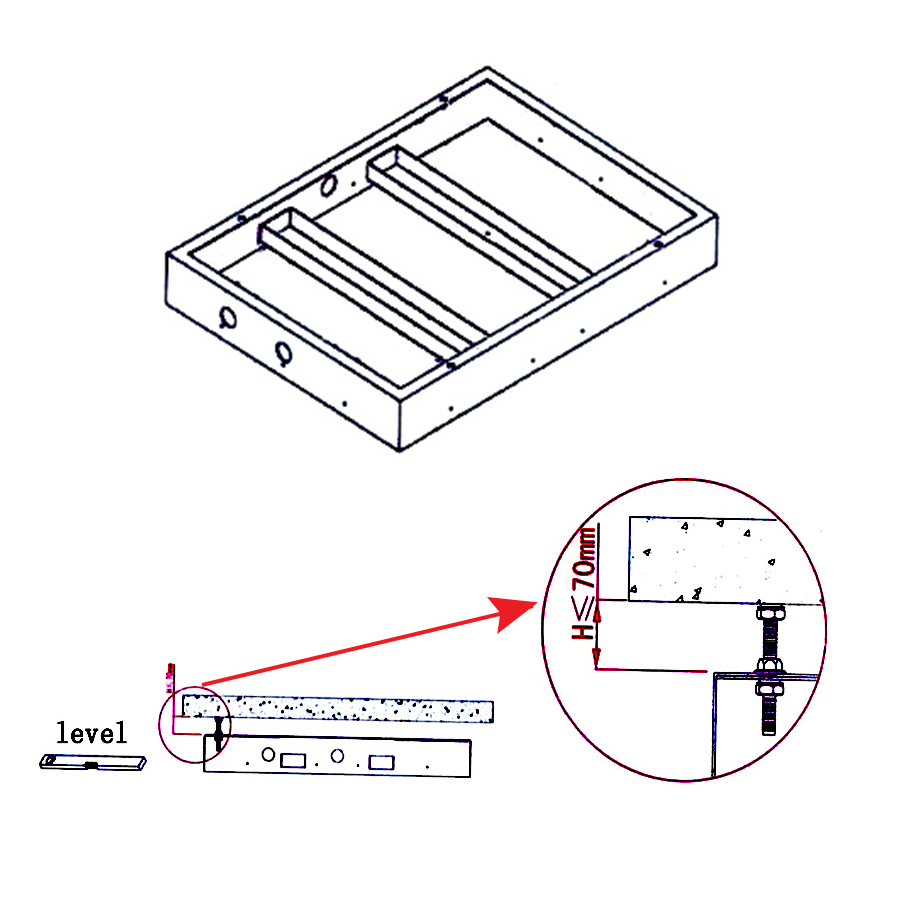
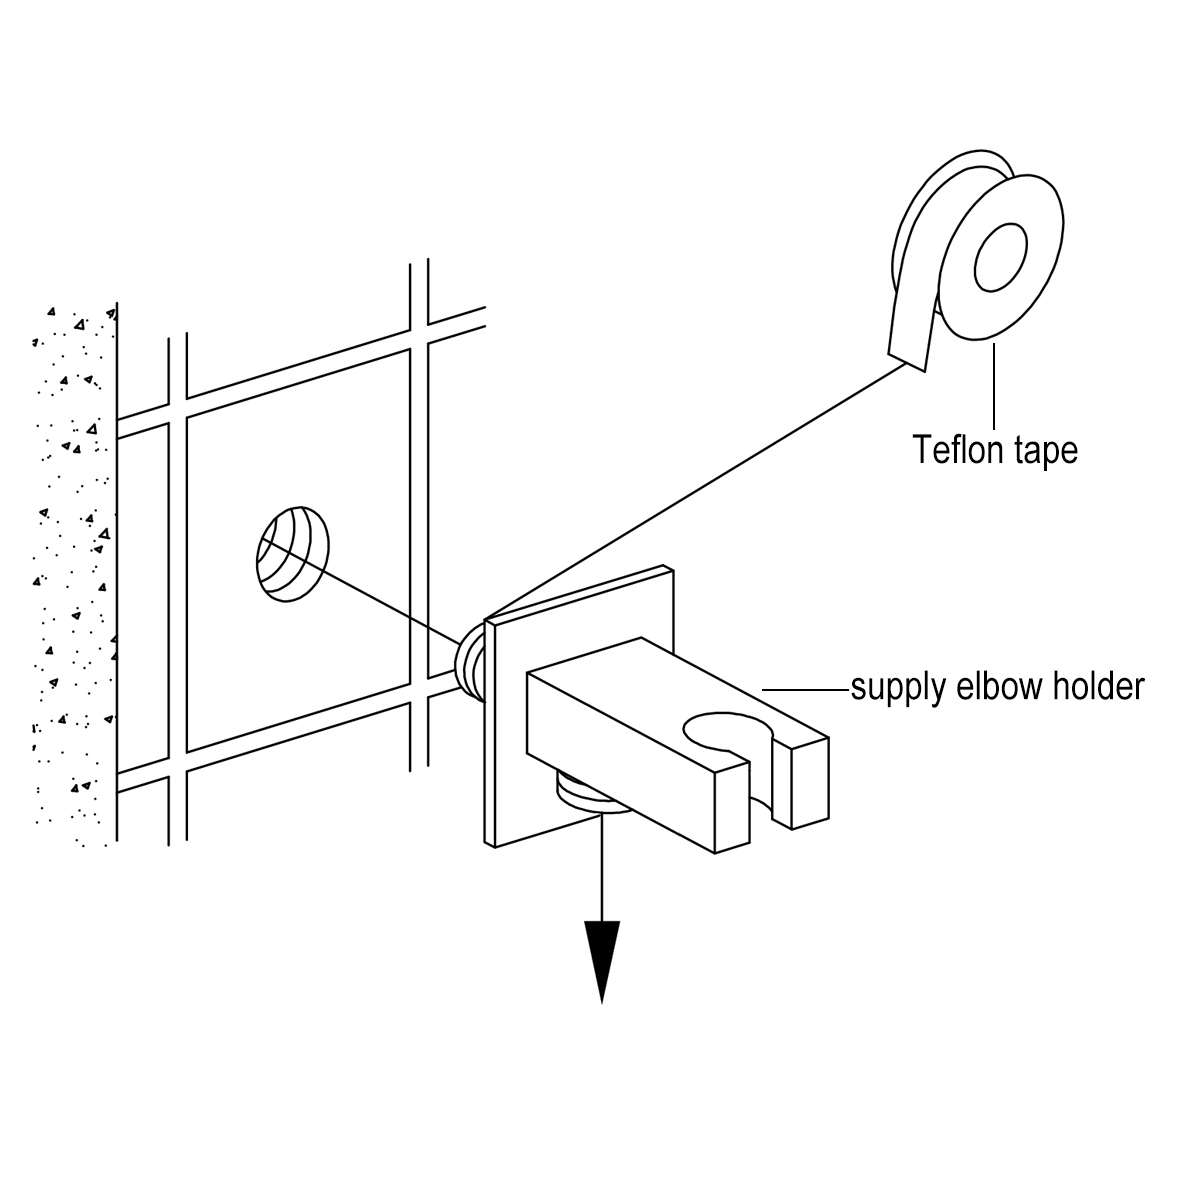
1. Attach the upper wall support to the shower wall using a drill and the mounting hardware provided. Use a level to ensure that the shower riser is perfectly straight.
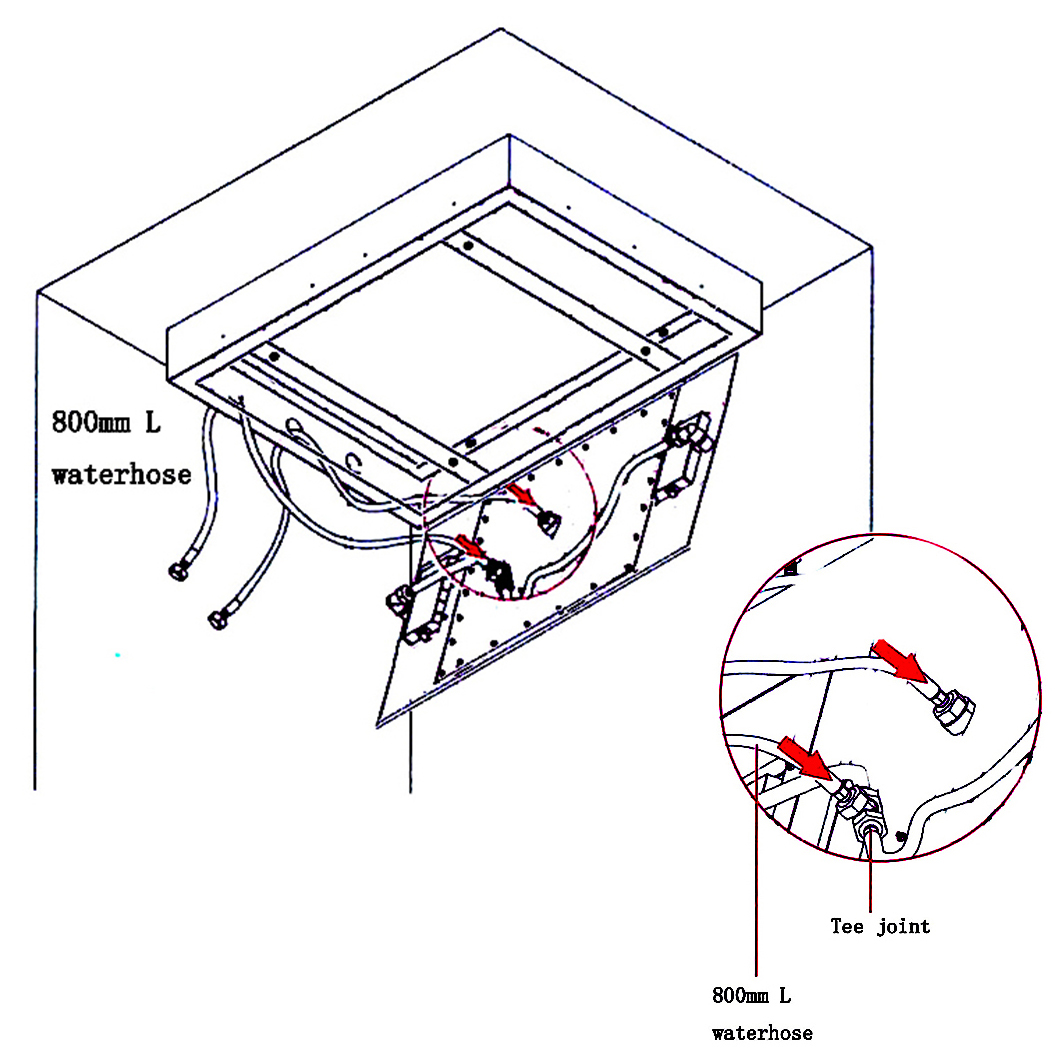
2. Place thread sealant on the ½” pipe threads on the shower wall and thread on the mounting nuts. Allow the sealant to cure for 24 hours before use.
3. Attach the hot and cold valve bodies and decorative escutcheons (if included) directly to the pipe threads. Tighten with an adjustable wrench to secure.
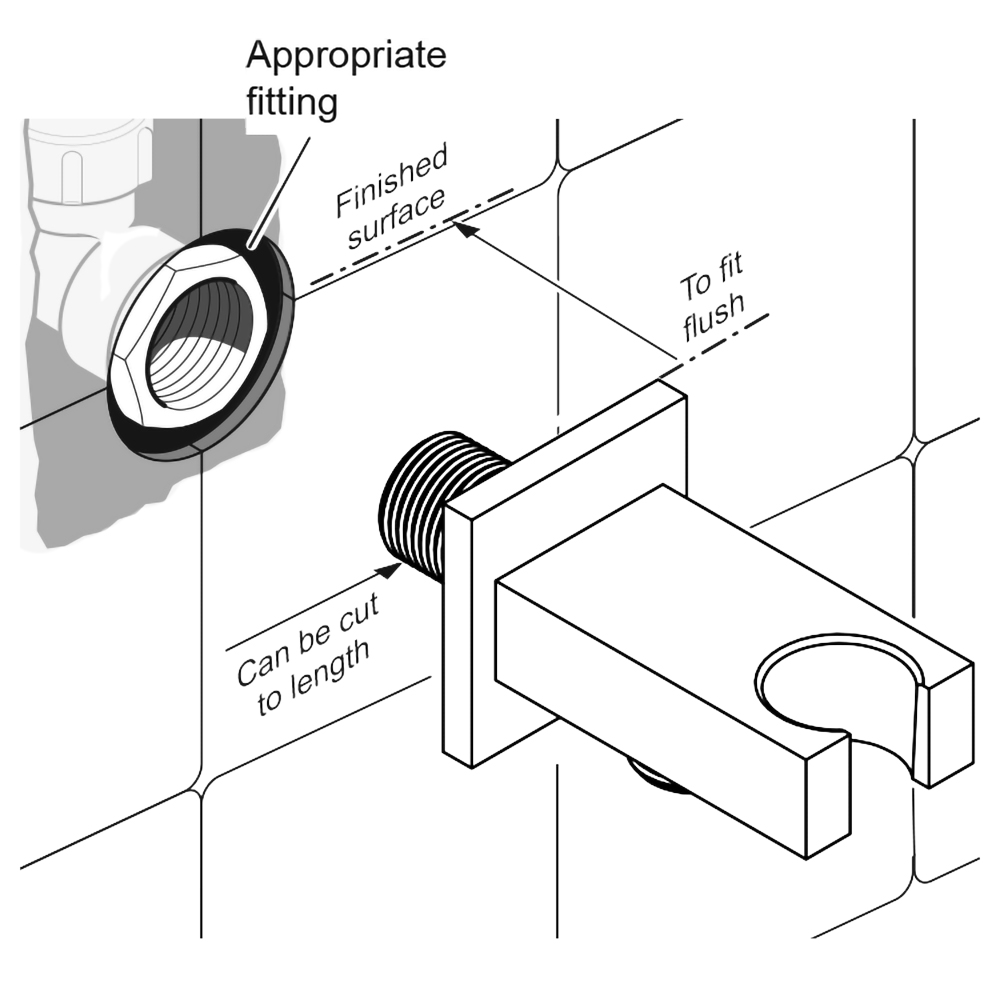
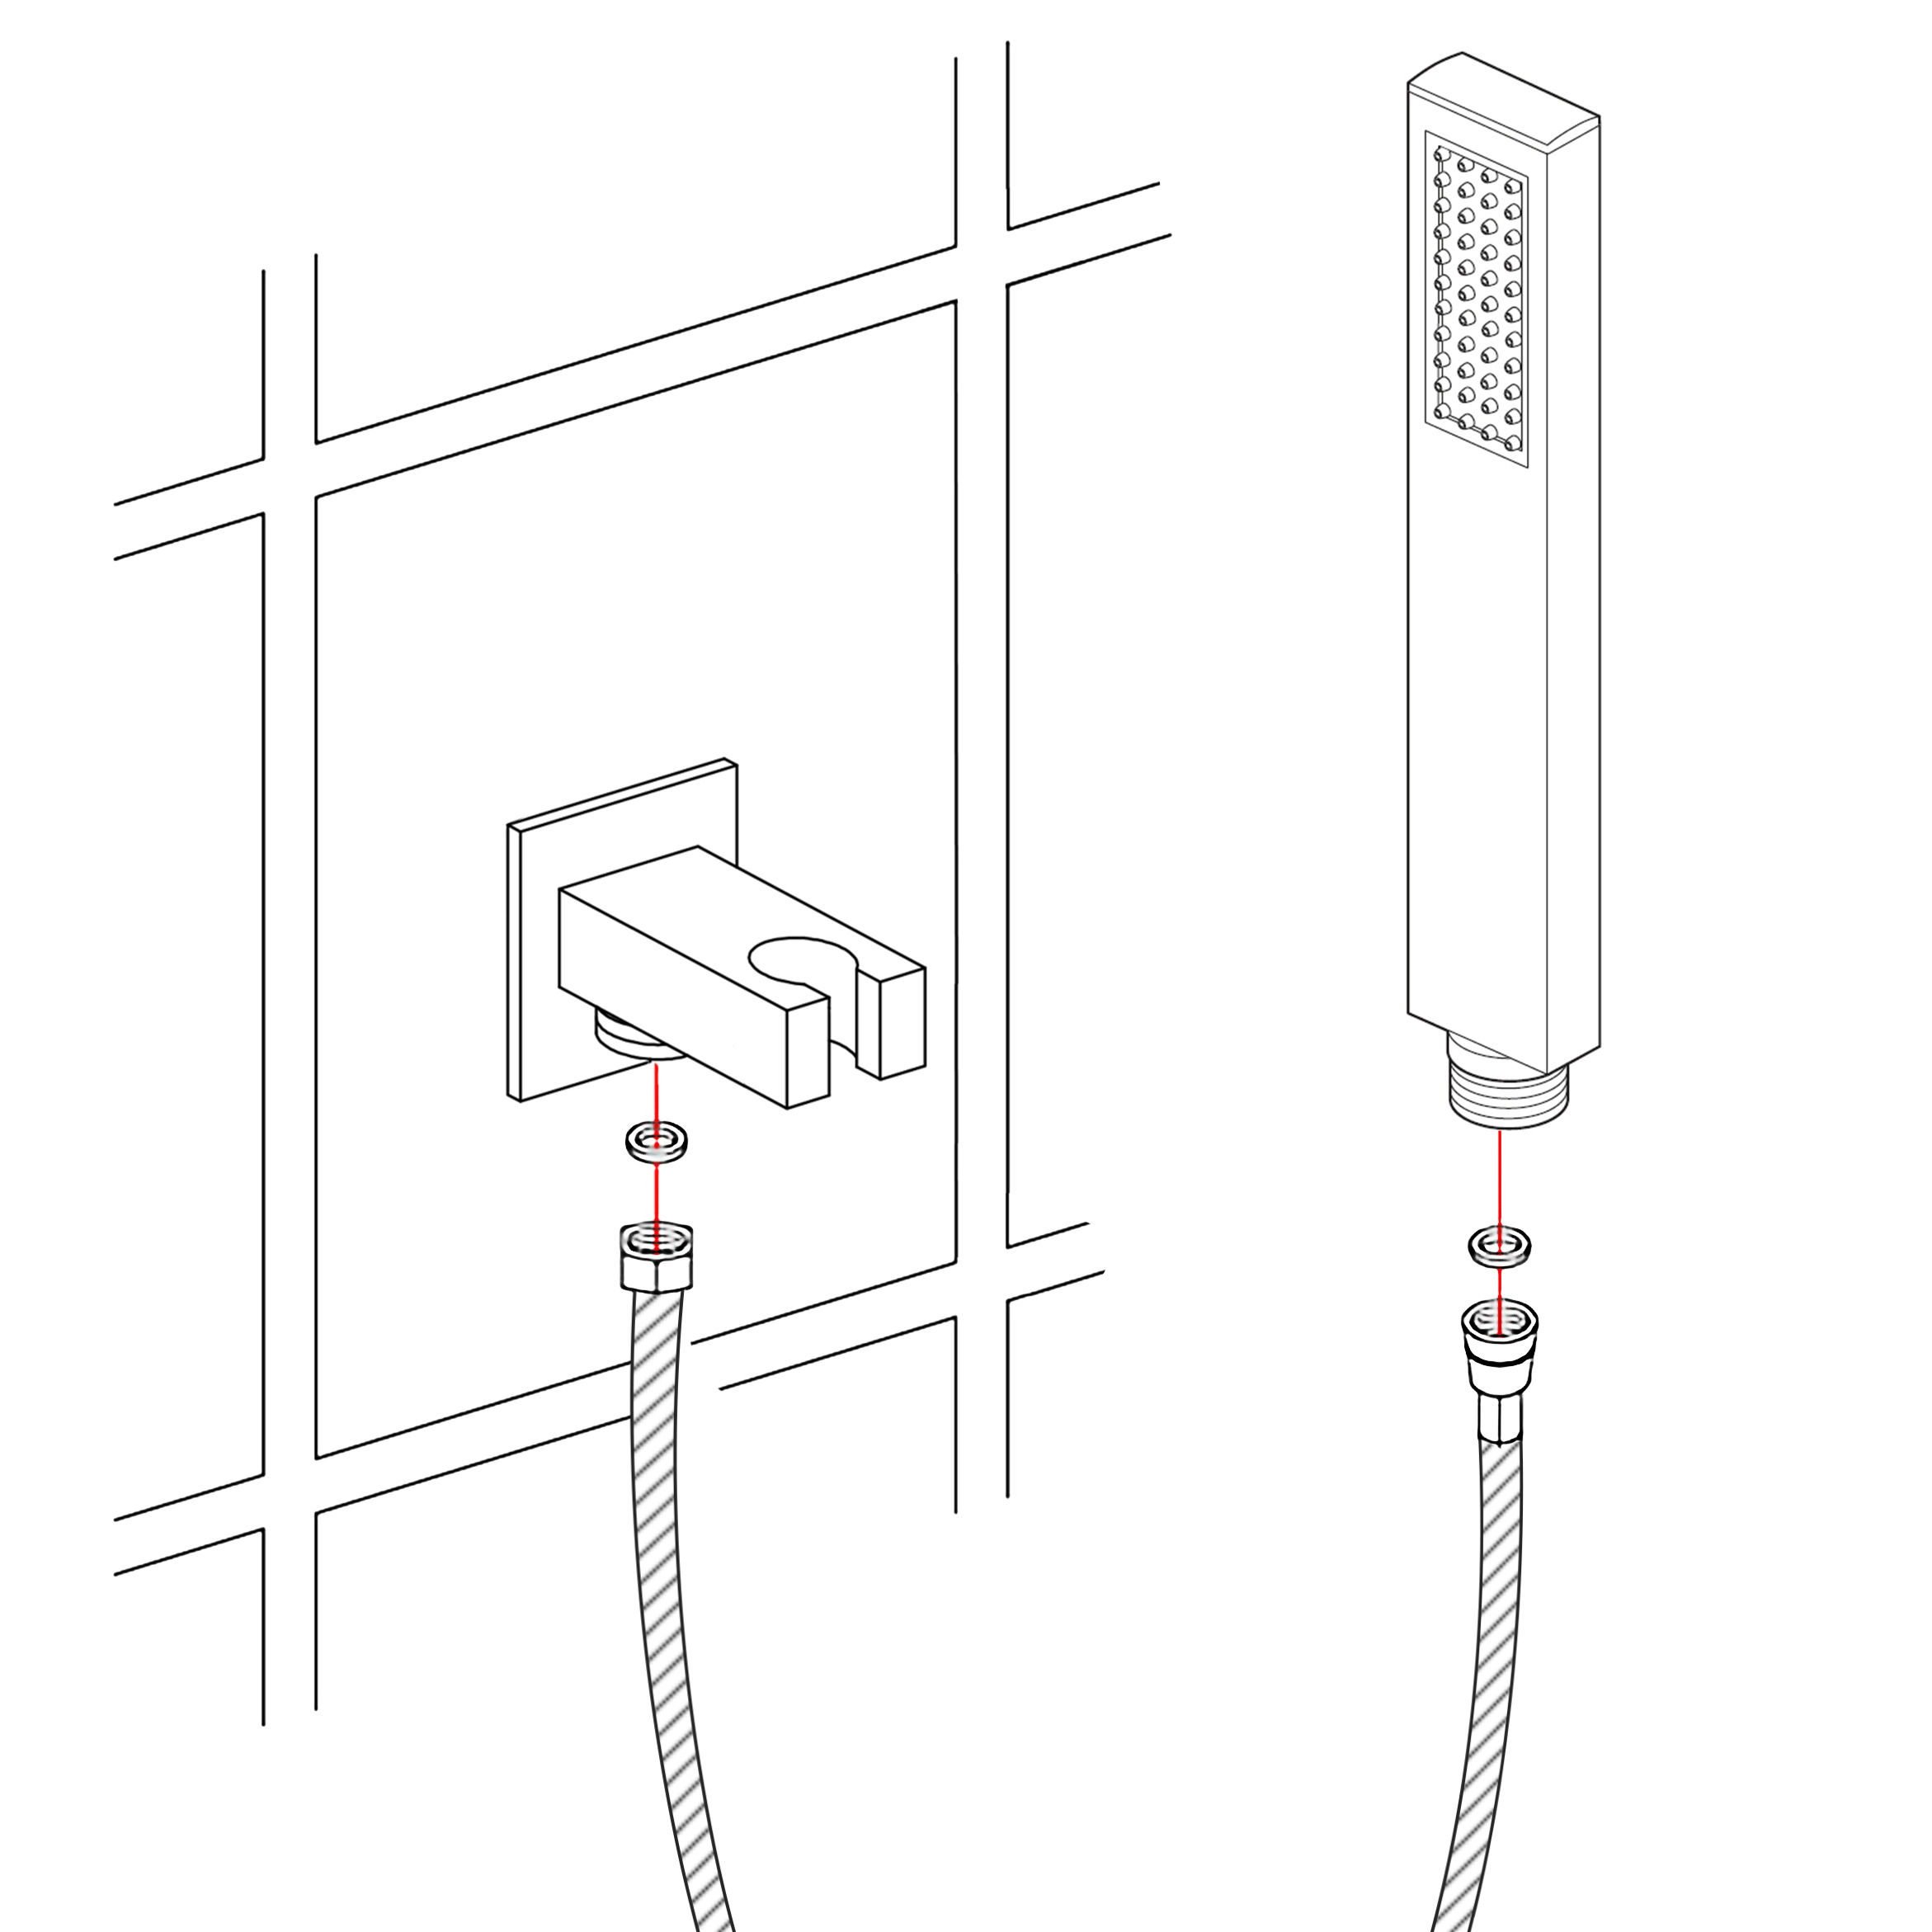
4. To install a hand-held shower, mount the cradle at a suitable height for the user with the hardware provided. Attach the hose to the faucet with any rubber washers or sealing gaskets included. If your system does not feature a hand-held shower move on to the next step.
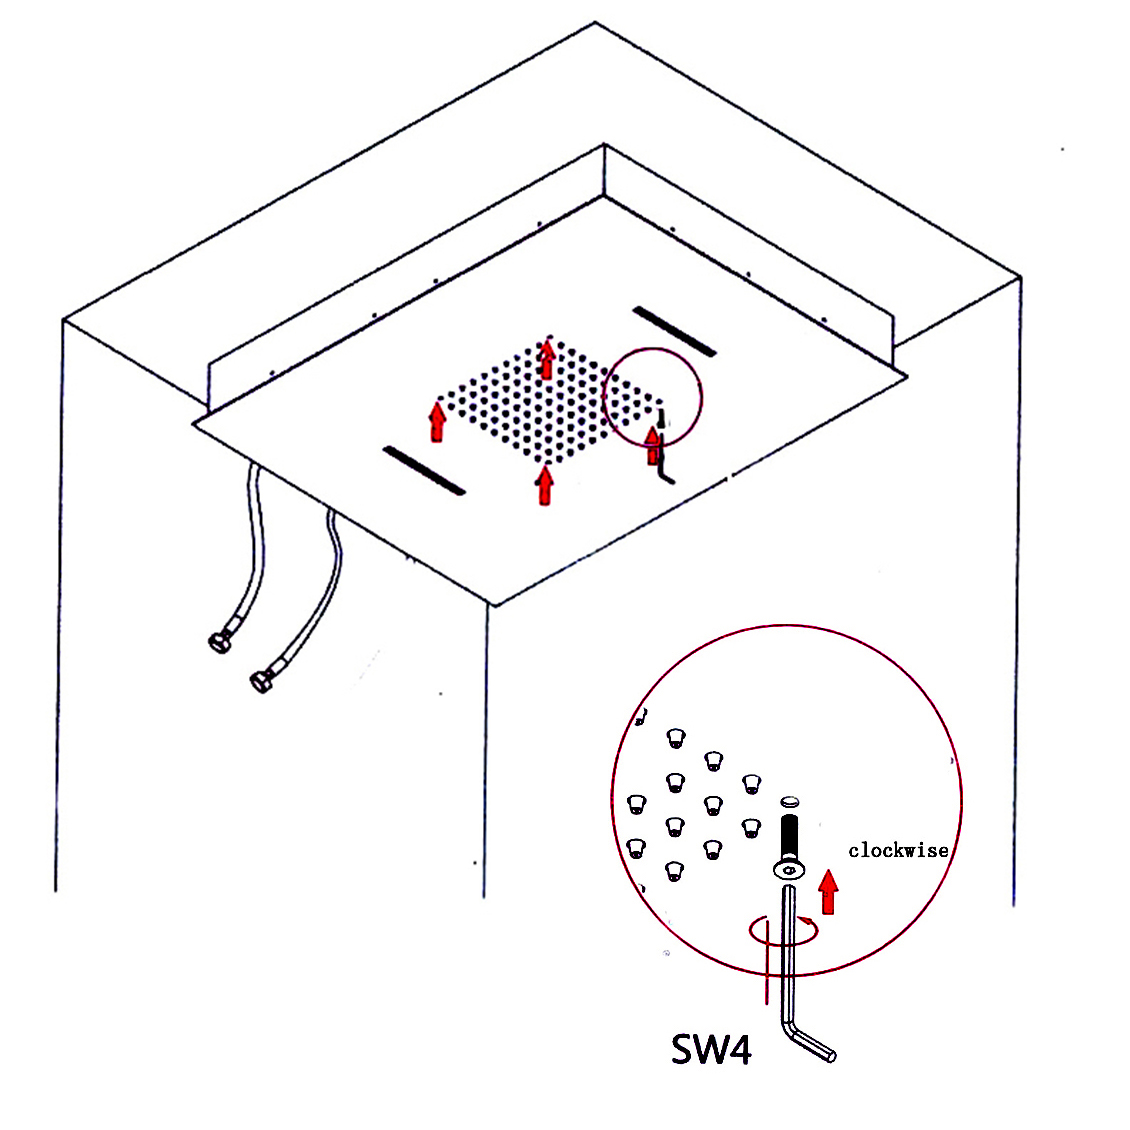
5. Attach the showerhead to the top of the riser and tighten with a smooth jaw wrench. Do not tighten more than ¼ turn beyond hand tight.
6. Turn on the water supply and open the faucet valves. Check for any leaks and verify that the hot and cold supplies are working correctly. Let the water flow through the riser pipe and shower hose for approximately 30 seconds to clear out debris and dirt.
Note: If leakage occurs, tighten connections with your adjustable wrench as necessary. If problems persist, contact Customer Service.
Attention
1. Open packages, check all the goods whether everything is ok.
2. Check the size of the connector and the thread size of the water pipes connector in the wall.
3. Clean the water pipes before installing them.
4. At least 2 water electricians to install the showerhead.
5. Pay attention to the water temperature, not over 70 degrees.
6. Water pressure: 0.05 MPA - 0.5 MPA.
7. Adapter is 100-265 V to 12 V, insurance device rated current less than 30 MA.
|
|

|
|
|
|
|

Hand Held Shower Installation Instructions
|
Step 1:
|
|
Step 2:
|
|
|
|
Hand
Held
Shower
|
|
Hand
Held
Shower
|
|
|
Handheld Shower
|
|
|
|
|
|
Step 3:
|
|
|
|
|
|
|
|
|
|
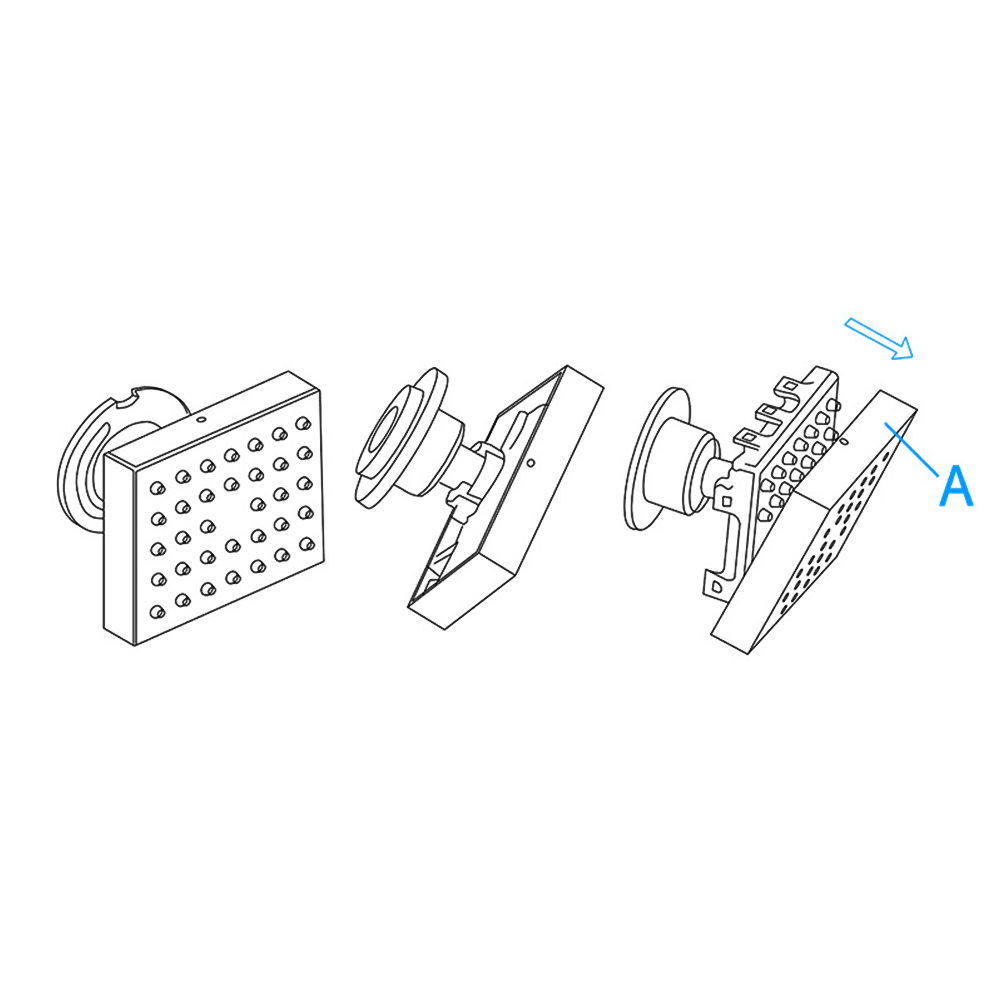
Shower Body Jets Installation Instructions
|
Step 1:
|
|
|
Step 2:
|
|
|
Body sprays
|
|
|

|
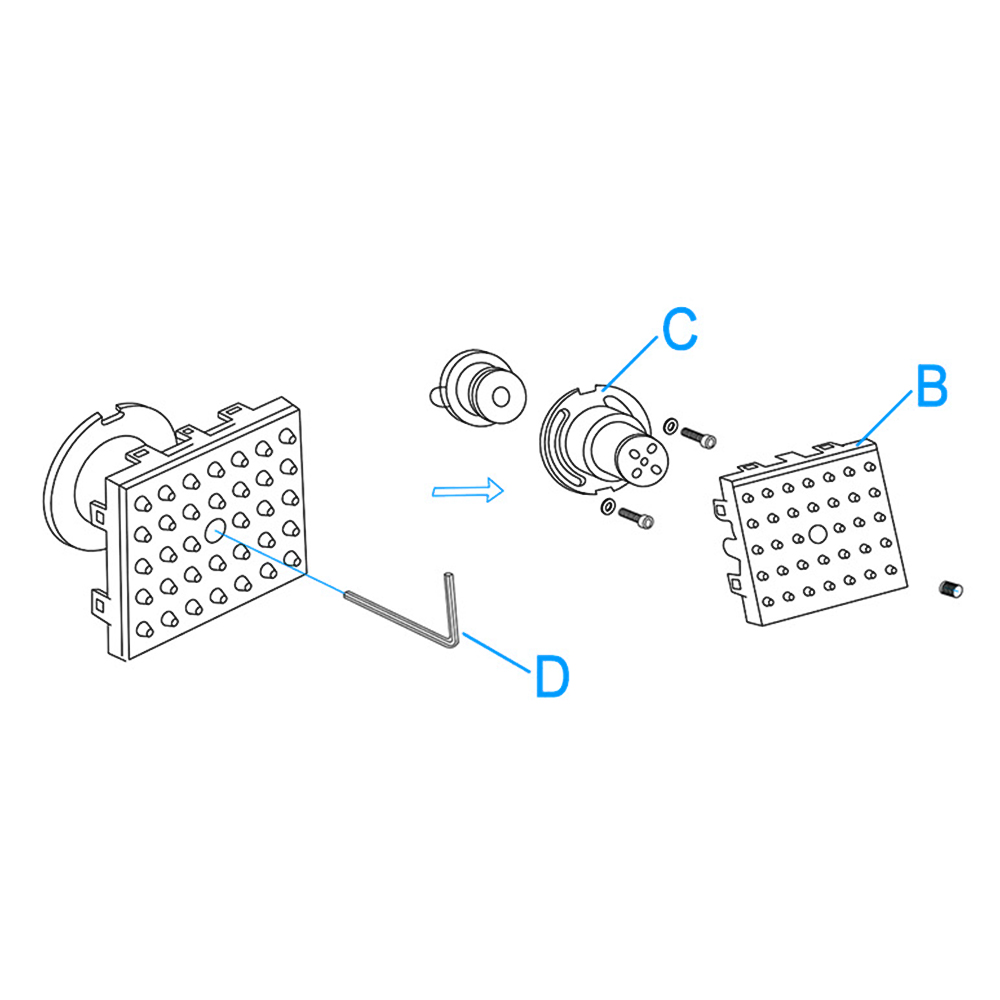
Remove the decorative plate (A) out of the body.
|
|
|
Remove the screws from the outlet face (B) and connector body (C) with the Allen key (D).
|
|
Body Spray Installation Instructions
|
|
|
|
|
|
Step 3:
|
|
|
Step 4:
|
|
|
|
|
|
|
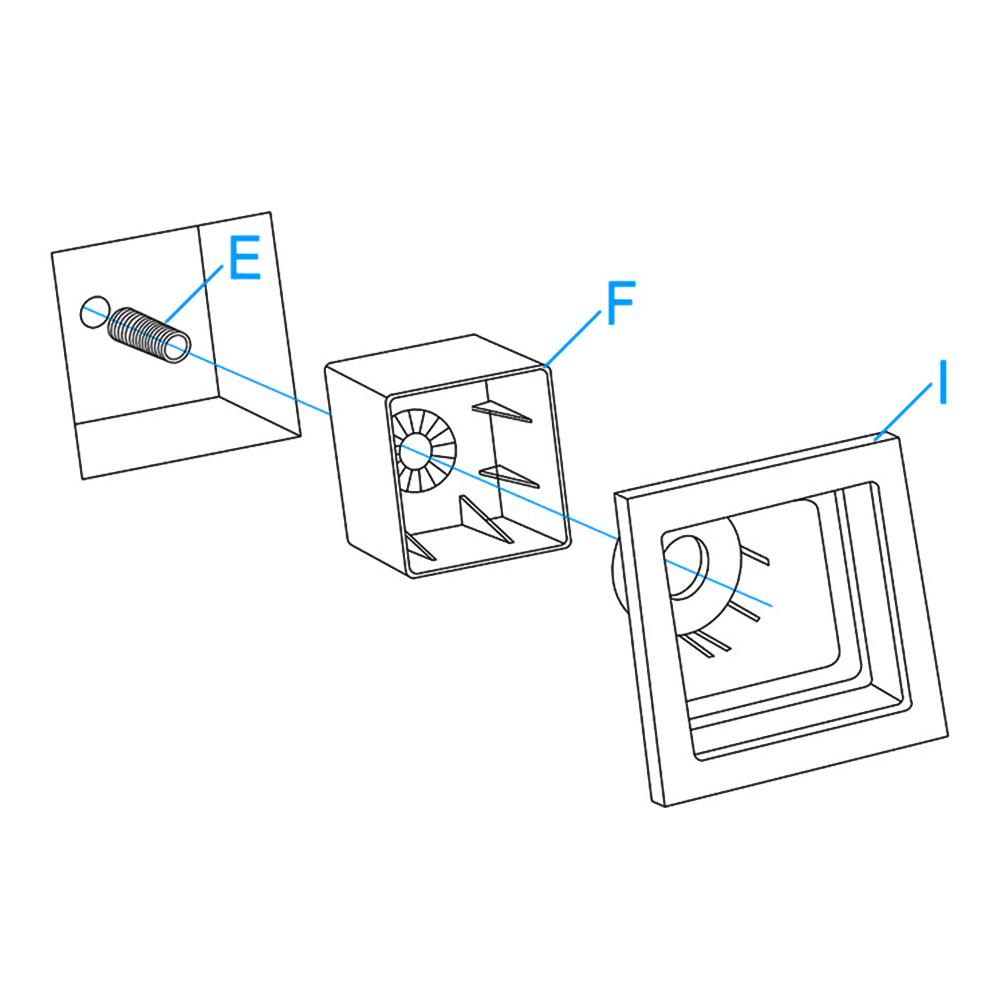
Screw the threaded pipe (E) to the water supply fittings. Push the plastic box (F) into the wall through the threaded pipe (E). Then, install the decorative plate (I) into the plastic box (F). Make sure the position is correct according to the diagram.
|
|
|
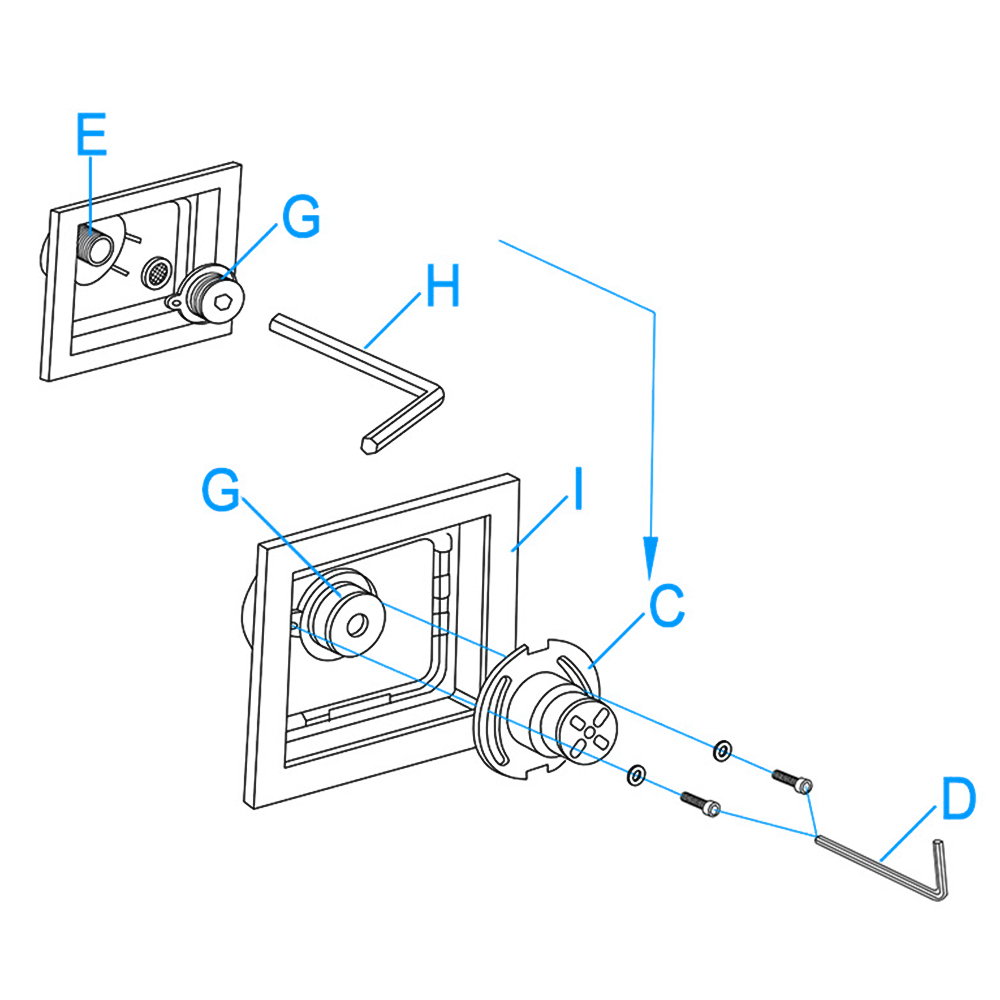
Screw the connector (G) into the threaded pipe (E) with the Allen key (H). Install the connector body (C) to the connector (G). When finish installation, please check to make sure the connection is completed. Then, fix the screws into the body (C) with Allen key (D) and make sure the body (C), connector (G) and decorative plate (I) are tightened. Make sure the one side with the bulge is in the top position.
|
|
|
Body Spray Installation Instructions
|
|
|
|
|
|
Step 5:
|
|
|
Step 6:
|
|
|
|
|

|
|
|
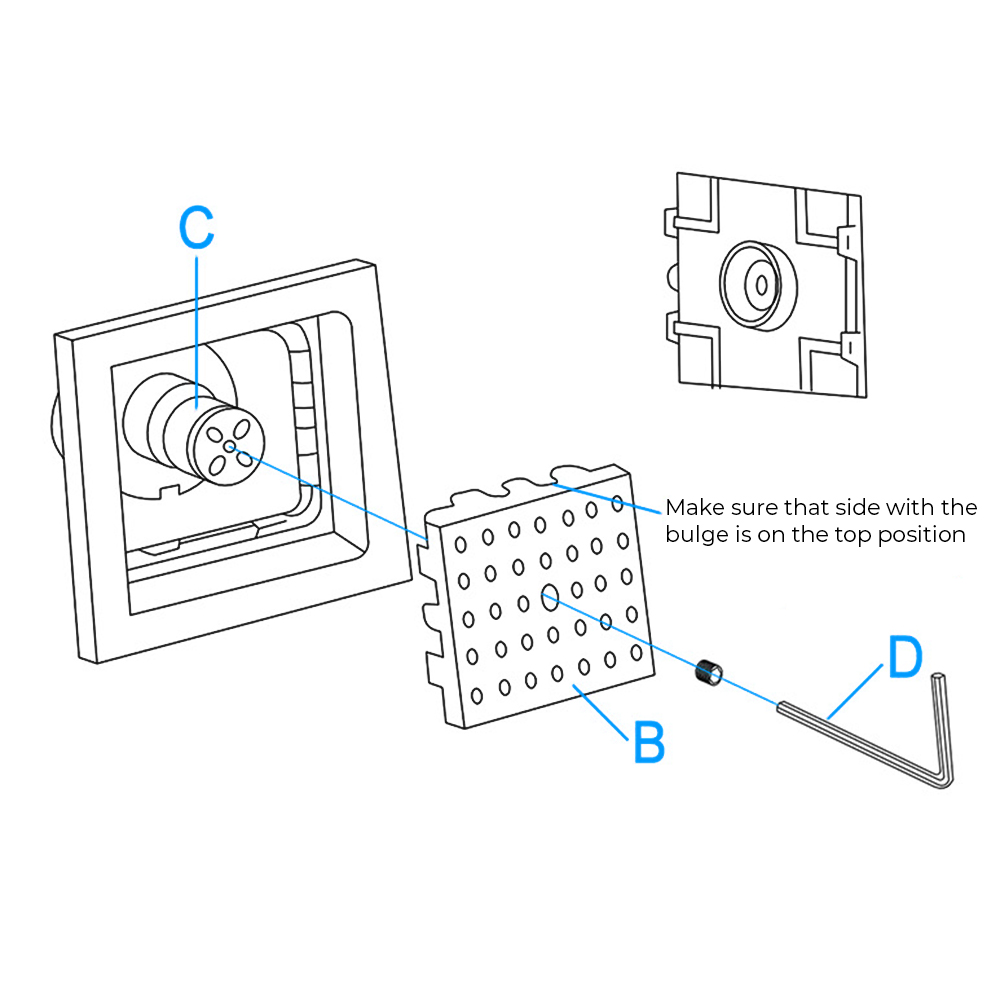
Install the outlet face (B) to the body (C). Make sure the connection of body (C) and outlet face (B) are completed. Tighten the screw through the outlet face (B) into the body (C) with the Allen key (D).
|
|
|
Install the decorative plate (A) into the outlet face (B) tightly. Make sure the hole and the raised dot are in the correct position when you push the decorative plate (A) into the outlet face (B).
|
|
|
Body Spray Installation Instructions
|
|
|
|
|
|
|
|
|
|
|
Shower Thermostatic Mixer Installation Instructions
How to install the Shower Set with Showerhead, Hand Held Shower, Body Jets and Shower Mixer
|