Home > Fontana Light Oil Rubbed Bronze Showers Smart & Intelligent LED Touch Control Rainfall Shower Head With Hand Shower

Installation Instructions for Fontana Light Oil Rubbed Bronze Showers Smart & Intelligent LED Touch Control Rainfall Shower Head With Hand Shower

  • Before you begin, please read the installation instructions below. Observe all local building and safety codes.
  • Unpack and inspect the product for any shipping damages. If you find damages, do not install.
  • Please note all showers must be installed by a professional and certified plumber otherwise warranty might be voided.
showerFontana Light Oil Rubbed Bronze Showers Smart & Intelligent LED Touch Control Rainfall Shower Head With Hand Shower


Shower Head Installation Instructions

Shower Parts
Showerhead lists:

Showerhead
11.8" shower hose
Tee joint
Expansion bolt
G1/2" filter net
H4 inner hexagon
Shower Head Installation Instructions
Step 1: shower Step 2:
Through the two hexagonal nuts adjust the distance between the mounting bracket and the ceiling, and keep the mounting bracket on the level. Use explosion screw fixed mounting bracket on the ceiling, pay attention to the explosion screw can adjust the height, and use level adjust the mounting bracket to level.
Shower Head Installation Instructions
Step 3: Step 4:
Connect 1 pcs water hose to 1 Tee Joints and G1/2, G1/2 joint in the middle, then put another side of the shower hose through the hole of shower head size. Install the decorative panel, use SW4 hexagon wrench tighten 4 screws.
Shower Head Installation Instructions
Step 5: Step 6:
Shower Head Installation Instructions
Step 7: Step 8:
Shower Head Installation Instructions
Step 9:
Shower Head Installation Instructions


1. Attach the upper wall support to the shower wall using a drill and the mounting hardware provided. Use a level to ensure that the shower riser is perfectly straight.
2. Place thread sealant on the ½” pipe threads on the shower wall and thread on the mounting nuts. Allow the sealant to cure for 24 hours before use.
3. Attach the hot and cold valve bodies and decorative escutcheons (if included) directly to the pipe threads. Tighten with an adjustable wrench to secure.
4. To install a hand-held shower, mount the cradle at a suitable height for the user with the hardware provided. Attach the hose to the faucet with any rubber washers or sealing gaskets included. If your system does not feature a hand-held shower move on to the next step.
5. Attach the showerhead to the top of the riser and tighten with a smooth jaw wrench. Do not tighten more than ¼ turn beyond hand tight.
6. Turn on the water supply and open the faucet valves. Check for any leaks and verify that the hot and cold supplies are working correctly. Let the water flow through the riser pipe and shower hose for approximately 30 seconds to clear out debris and dirt.
Note: If leakage occurs, tighten connections with your adjustable wrench as necessary. If problems persist, contact Customer Service.


Attention
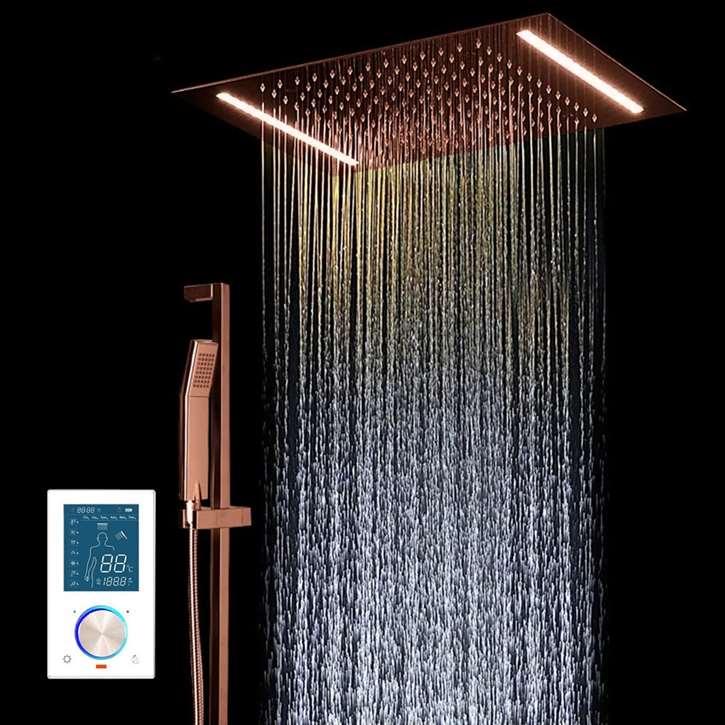
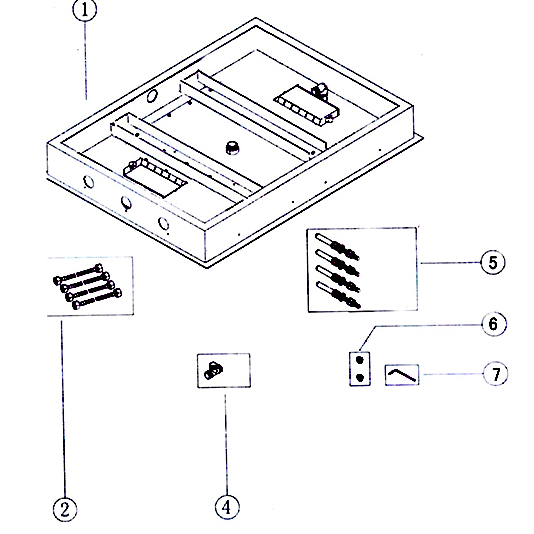
1. Open packages, check all the goods whether everything is ok.
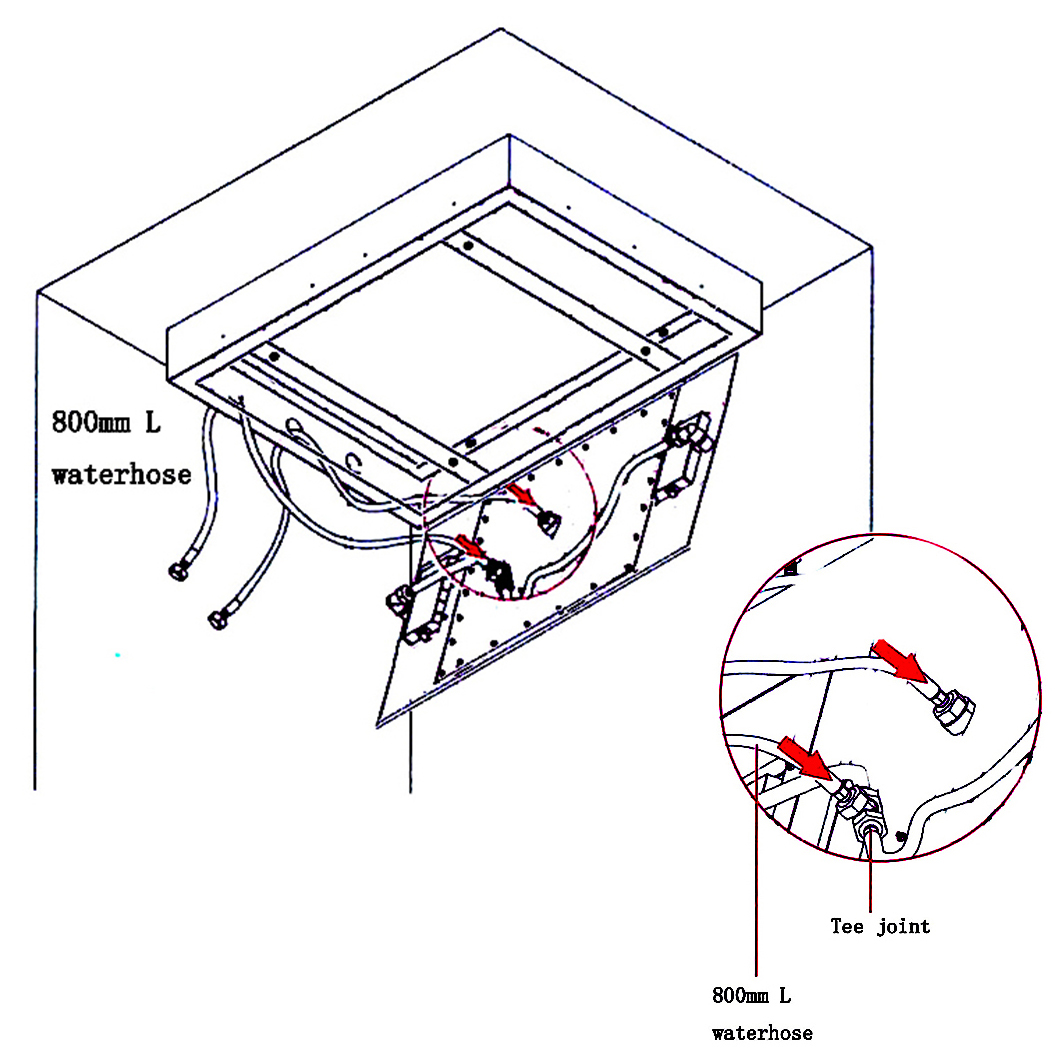
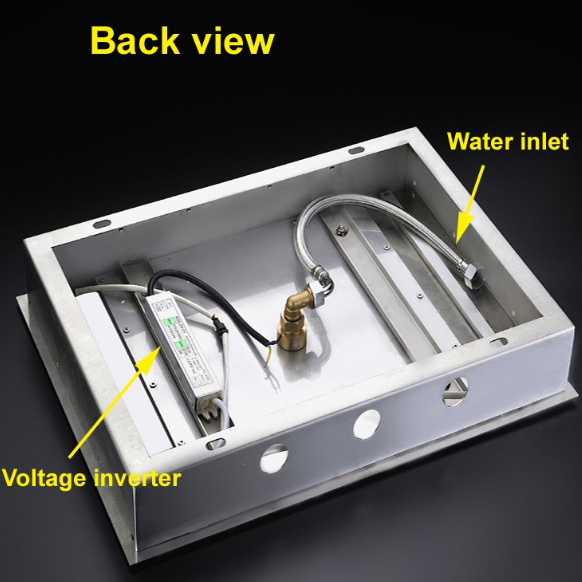
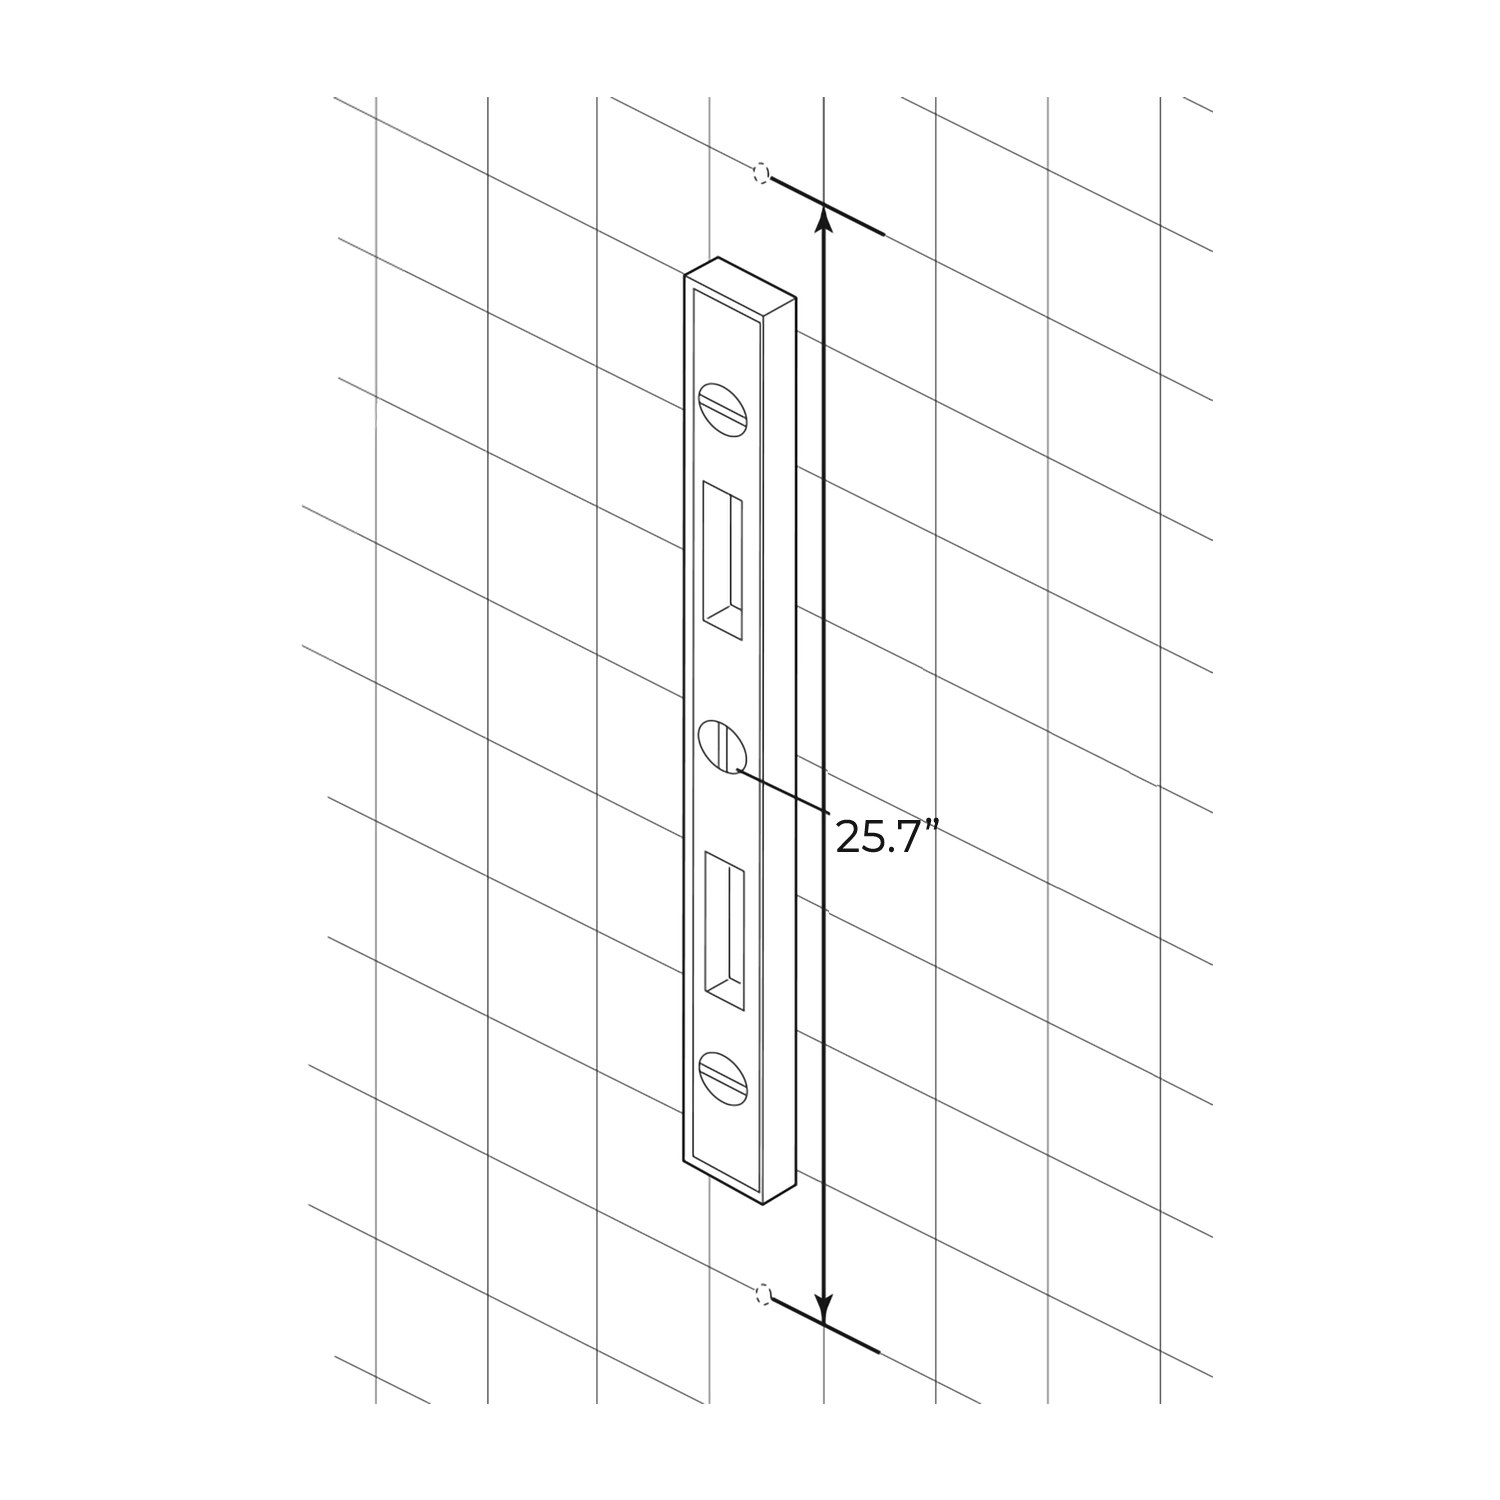
2. Check the size of the connector and the thread size of the water pipes connector in the wall.
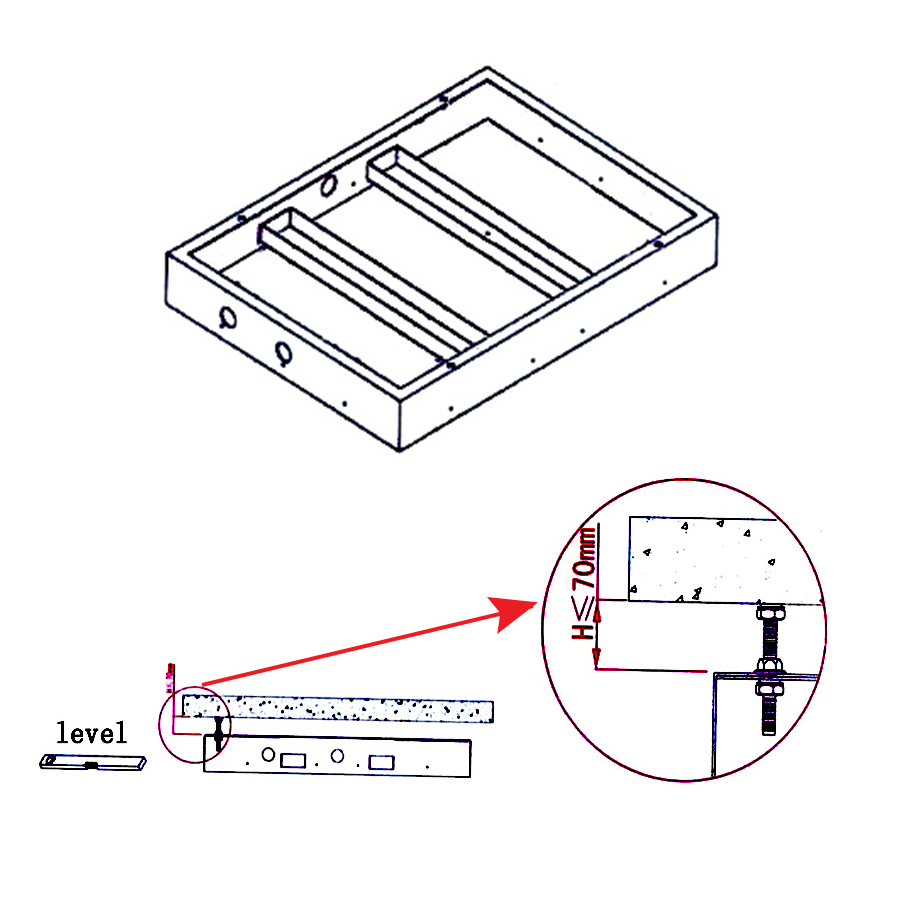
3. Clean the water pipes before installing them.
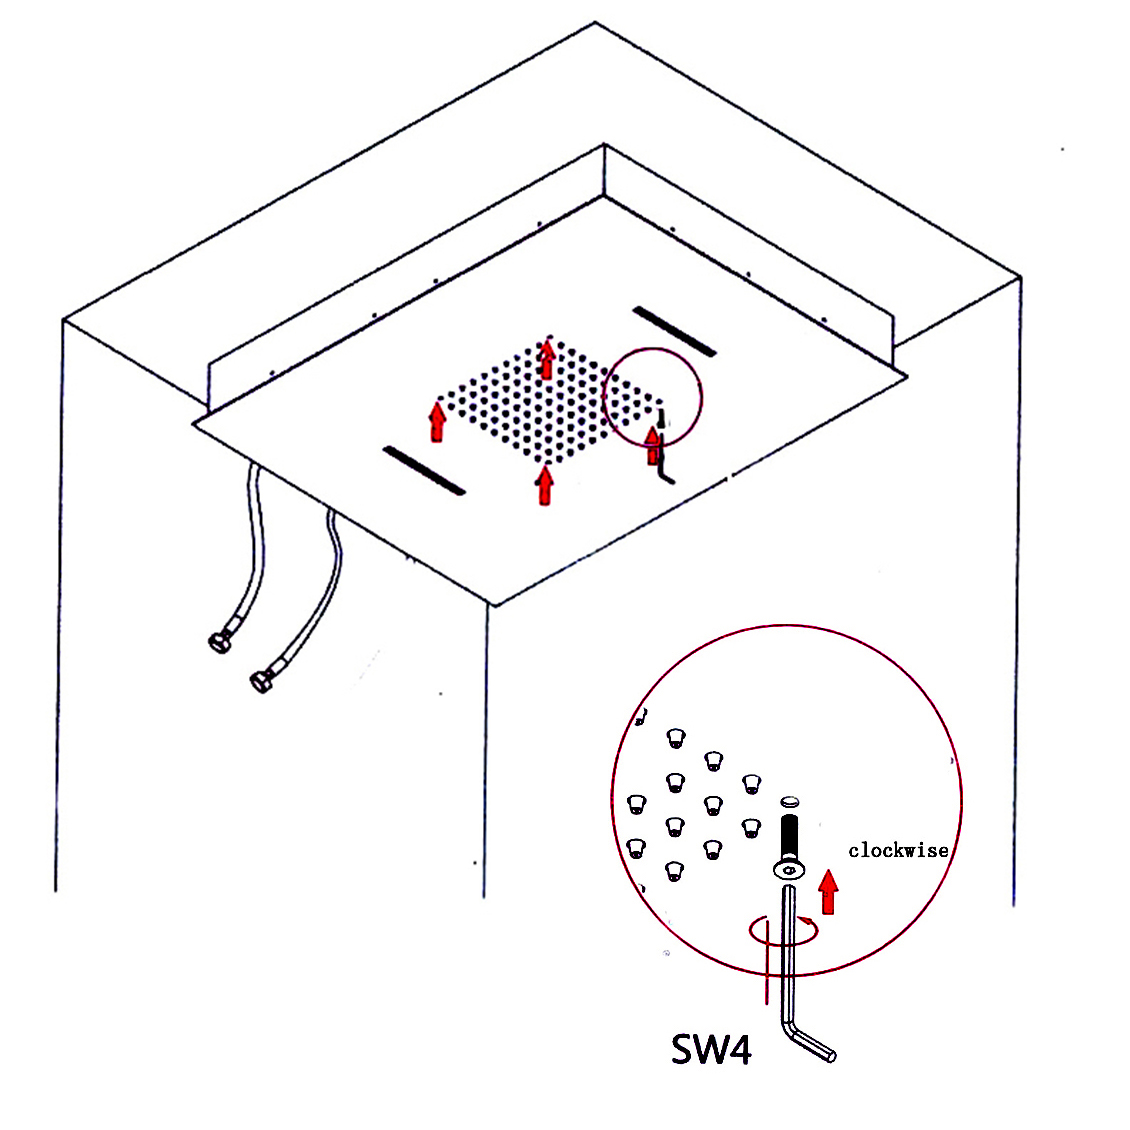
4. At least 2 water electricians to install the showerhead.
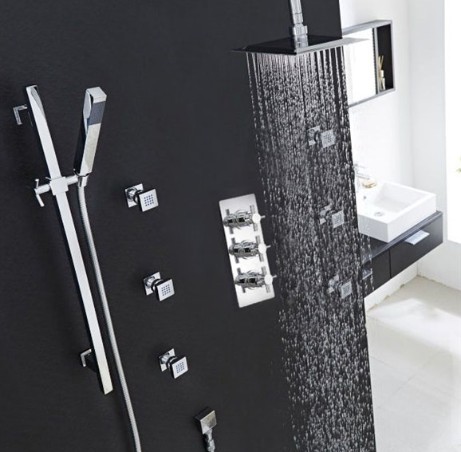
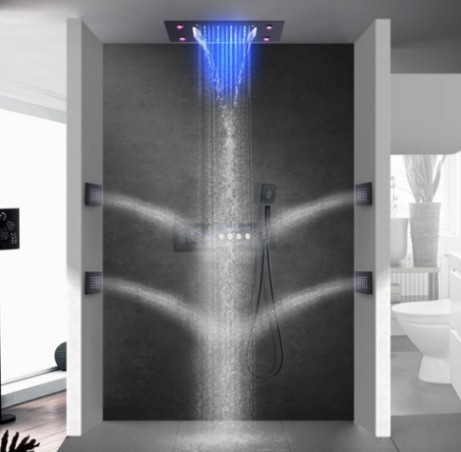
5. Pay attention to the water temperature, not over 70 degrees.
6. Water pressure: 0.05 MPA - 0.5 MPA.
7. Adapter is 100-265 V to 12 V, insurance device rated current less than 30 MA.


Hand-Held Shower Installation Instructions

Parts Included:

1. Wall Outlet
2. 60" Shower Hose with Gaskets
3. Complete Slide Bar with Mounting Parts / Posts, Screws & Anchors
4. Adjustable Shower Mount (attached to slide Bar)
5. Hand Held Shower


HandHeld Shower Installation Instructions
Supply Elbow Installation Wall Bar Installation
Step 1: Step 2:
hand
shower

installation


Apply plumber tape to threaded ends of 1/2" (13 mm) iron pipe nipple (not supplied) and thread into shower riser elbow so that nipple extends past the finished wall no more than 0.2" (4.8 mm) and no less than 1/16" (1.6 mm). Place the supplied installation gasket (1) behind the elbow (2). Screw the supply elbow onto the nipple making sure that the supply elbow outlet is in a downward facing position. Minimum diameter for hole is 1" (25 mm) with a maximum of 1½” (38 mm).

Caution: To avoid damage to the supply elbow or hose finish during installation, wrap with a cloth or tape and use only a smooth-jawed wrench. DO NOT OVERTIGHTEN CONNECTIONS.