Download PDF Installation Instructions
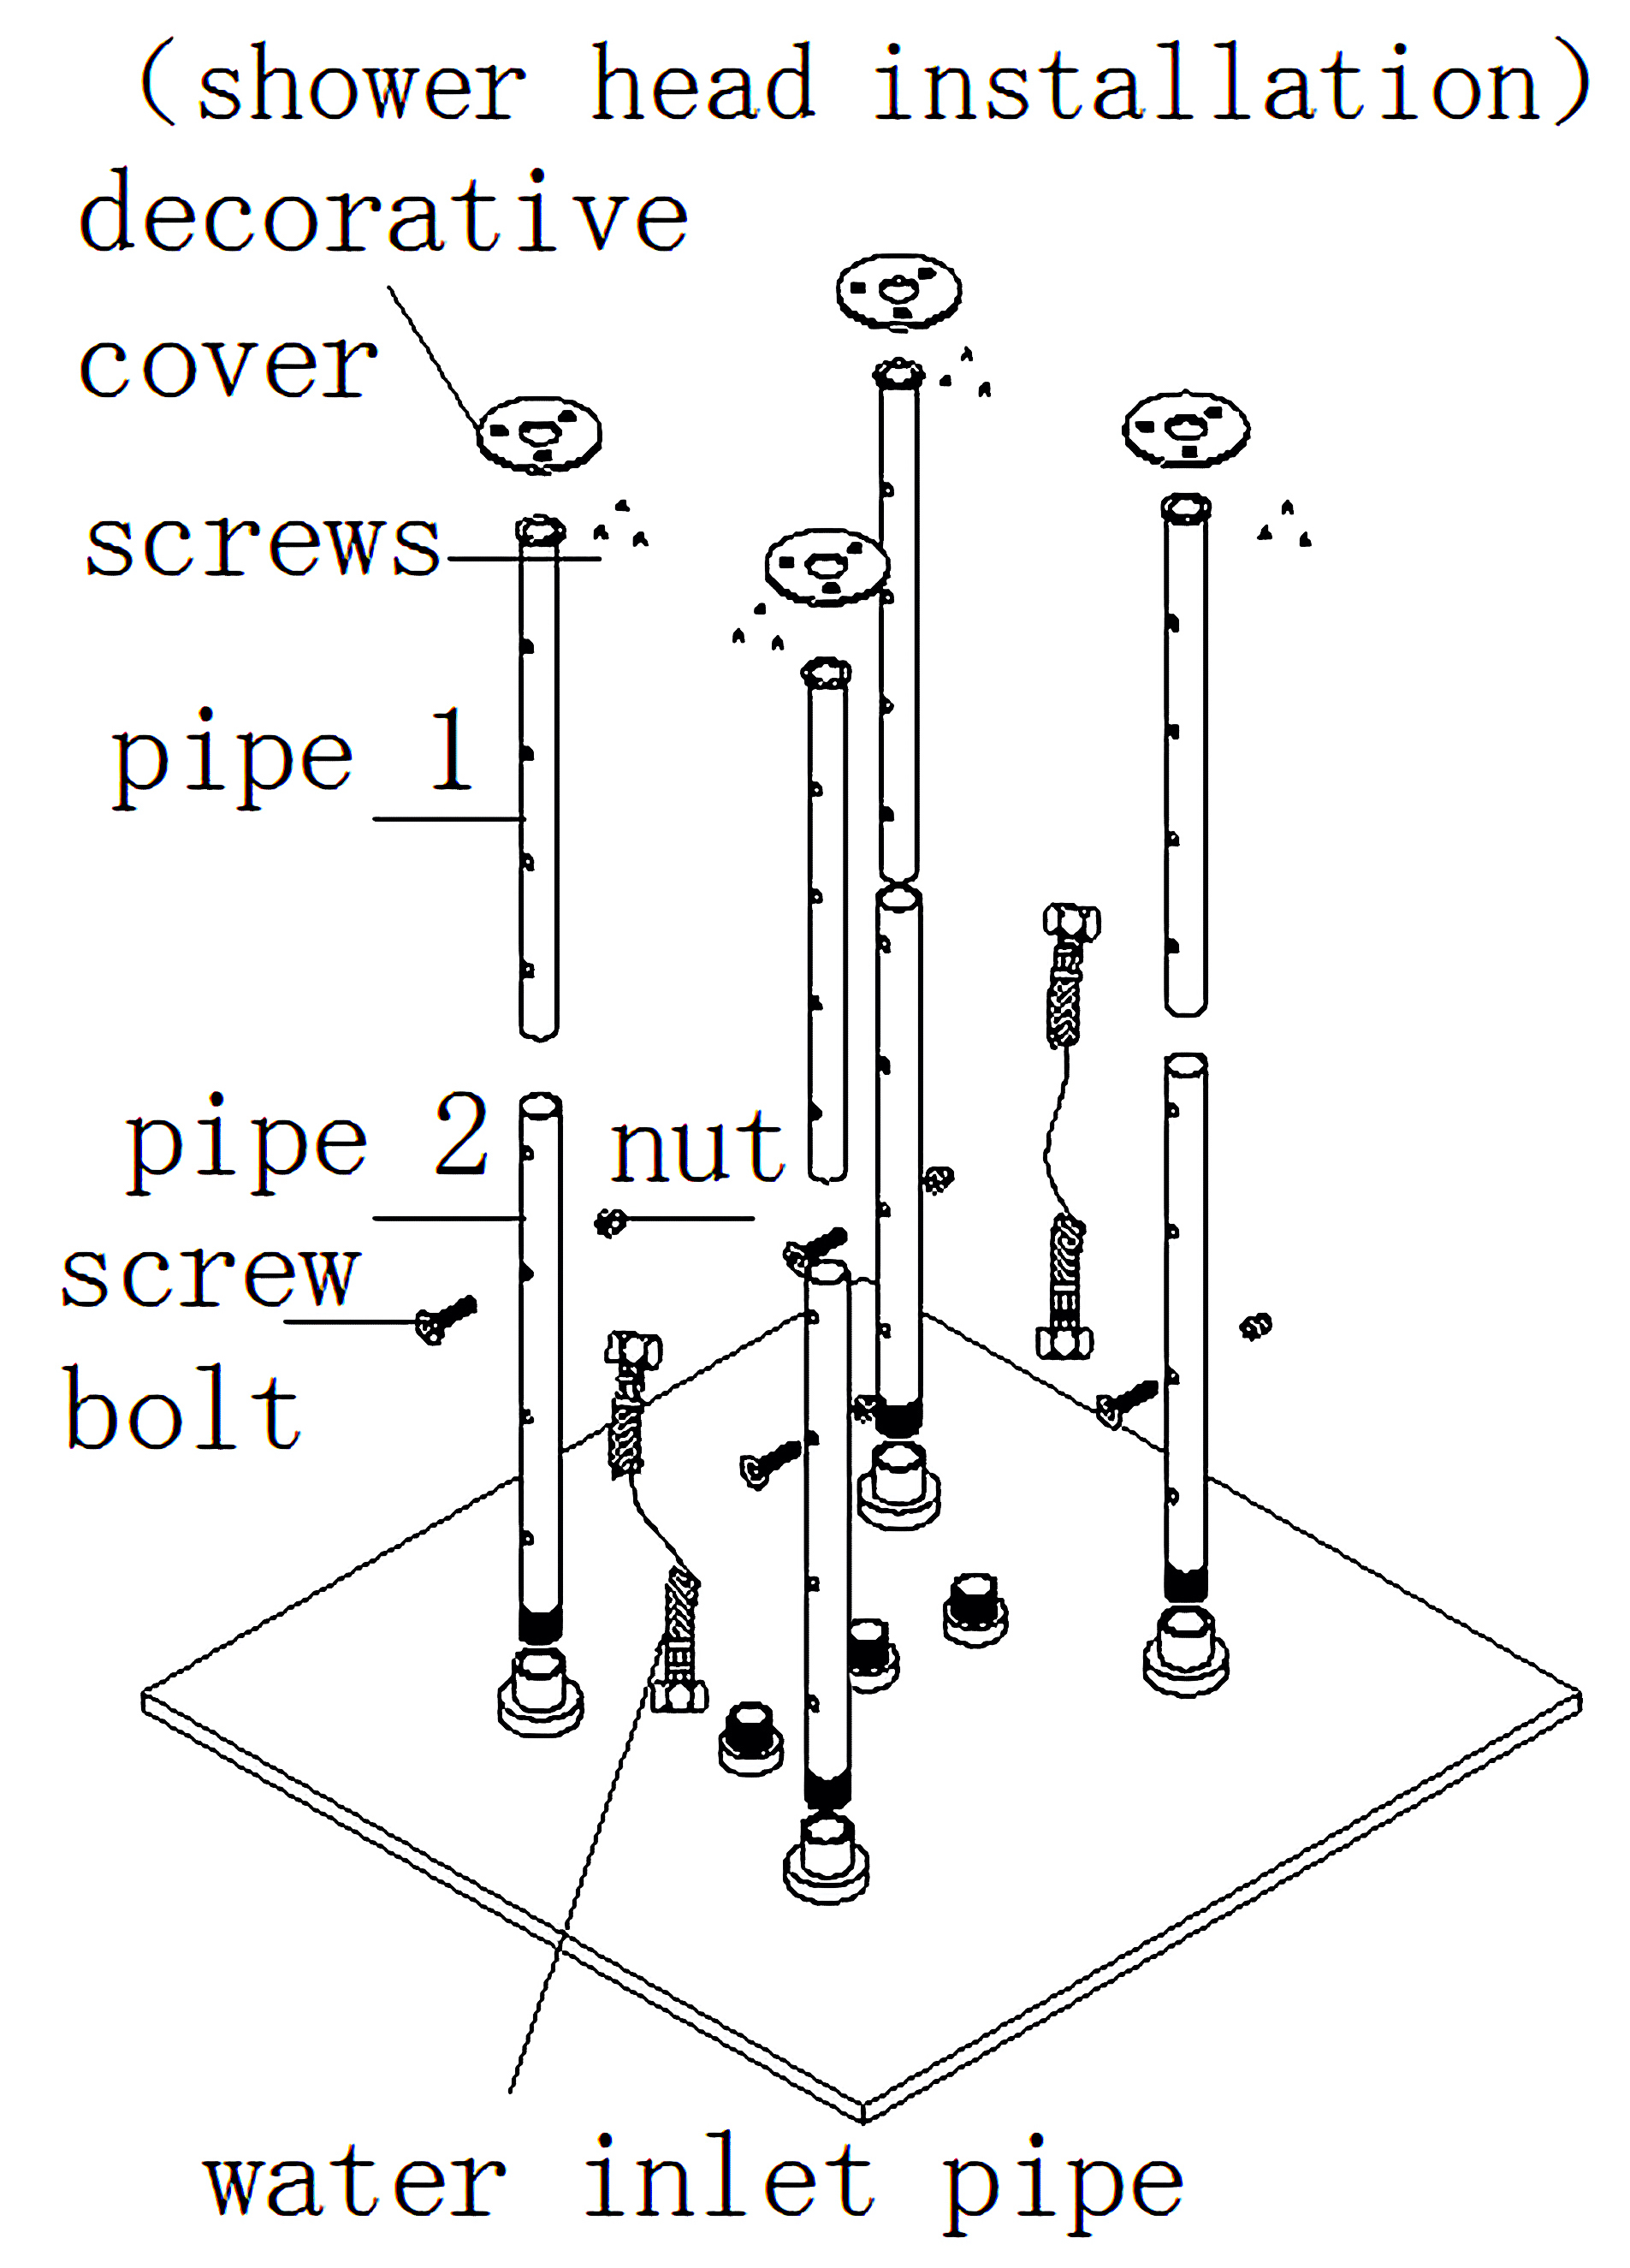
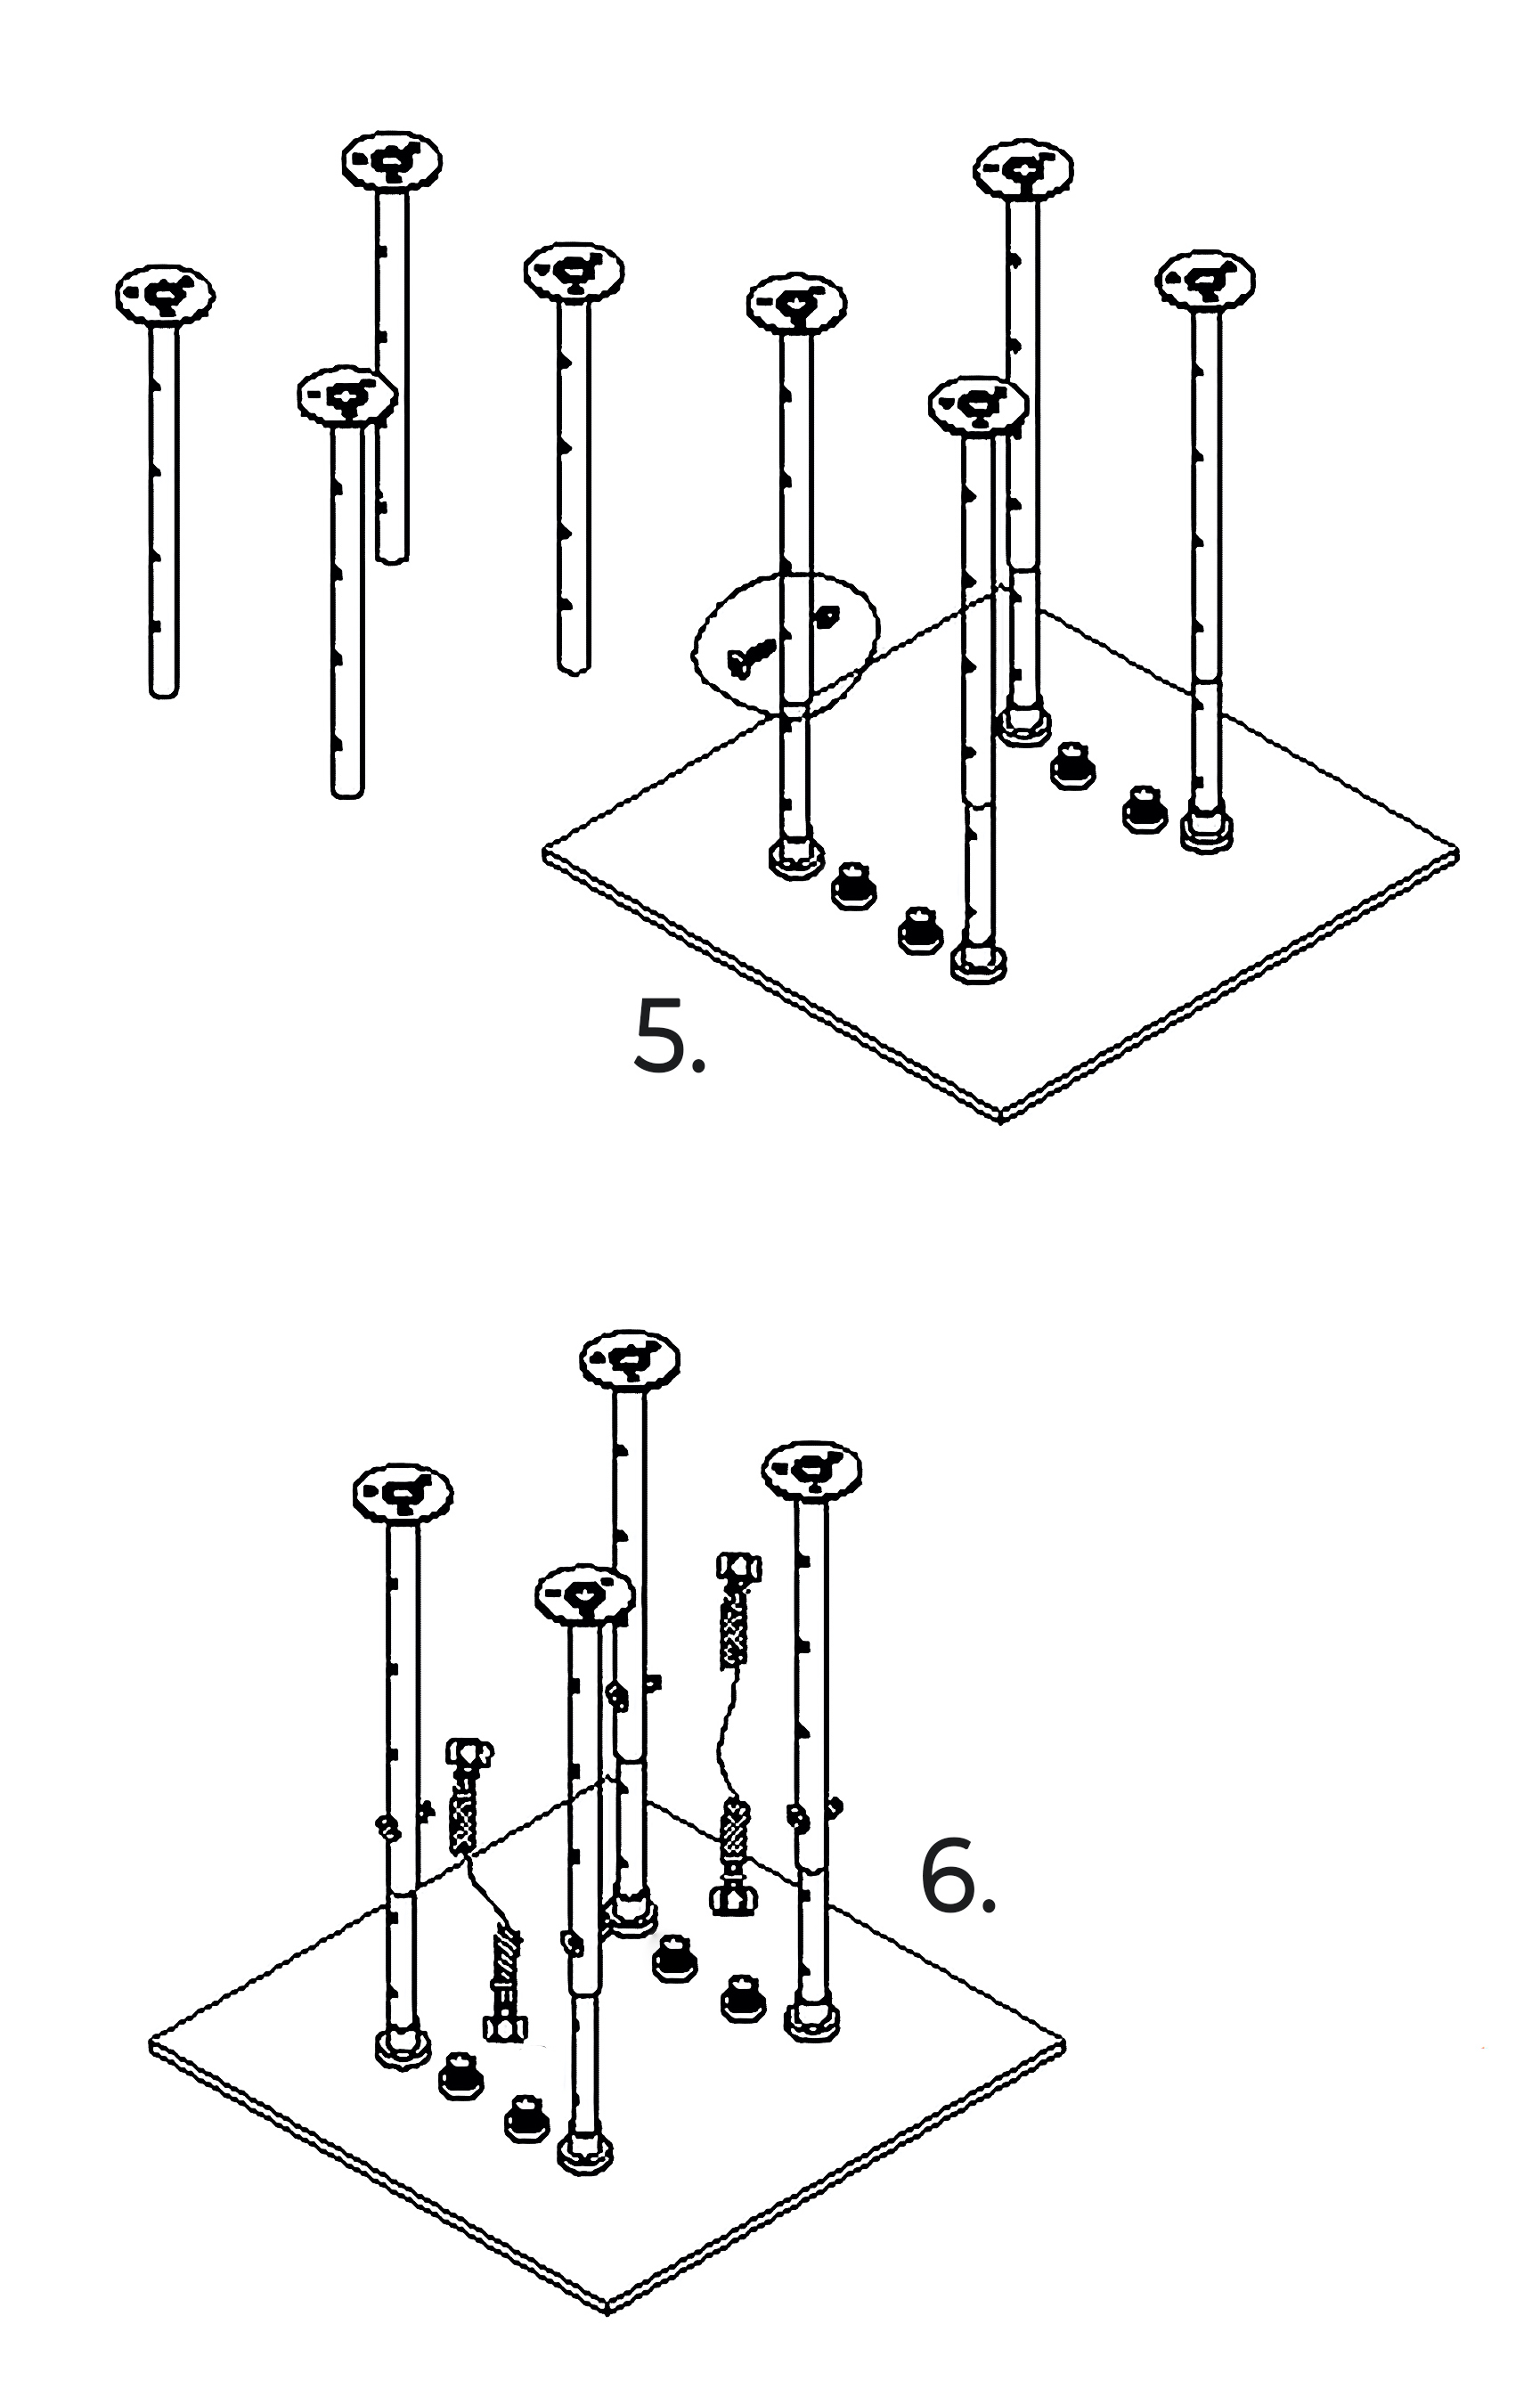
Remarks: Ceiling mounted shower head come with fixing bar installation
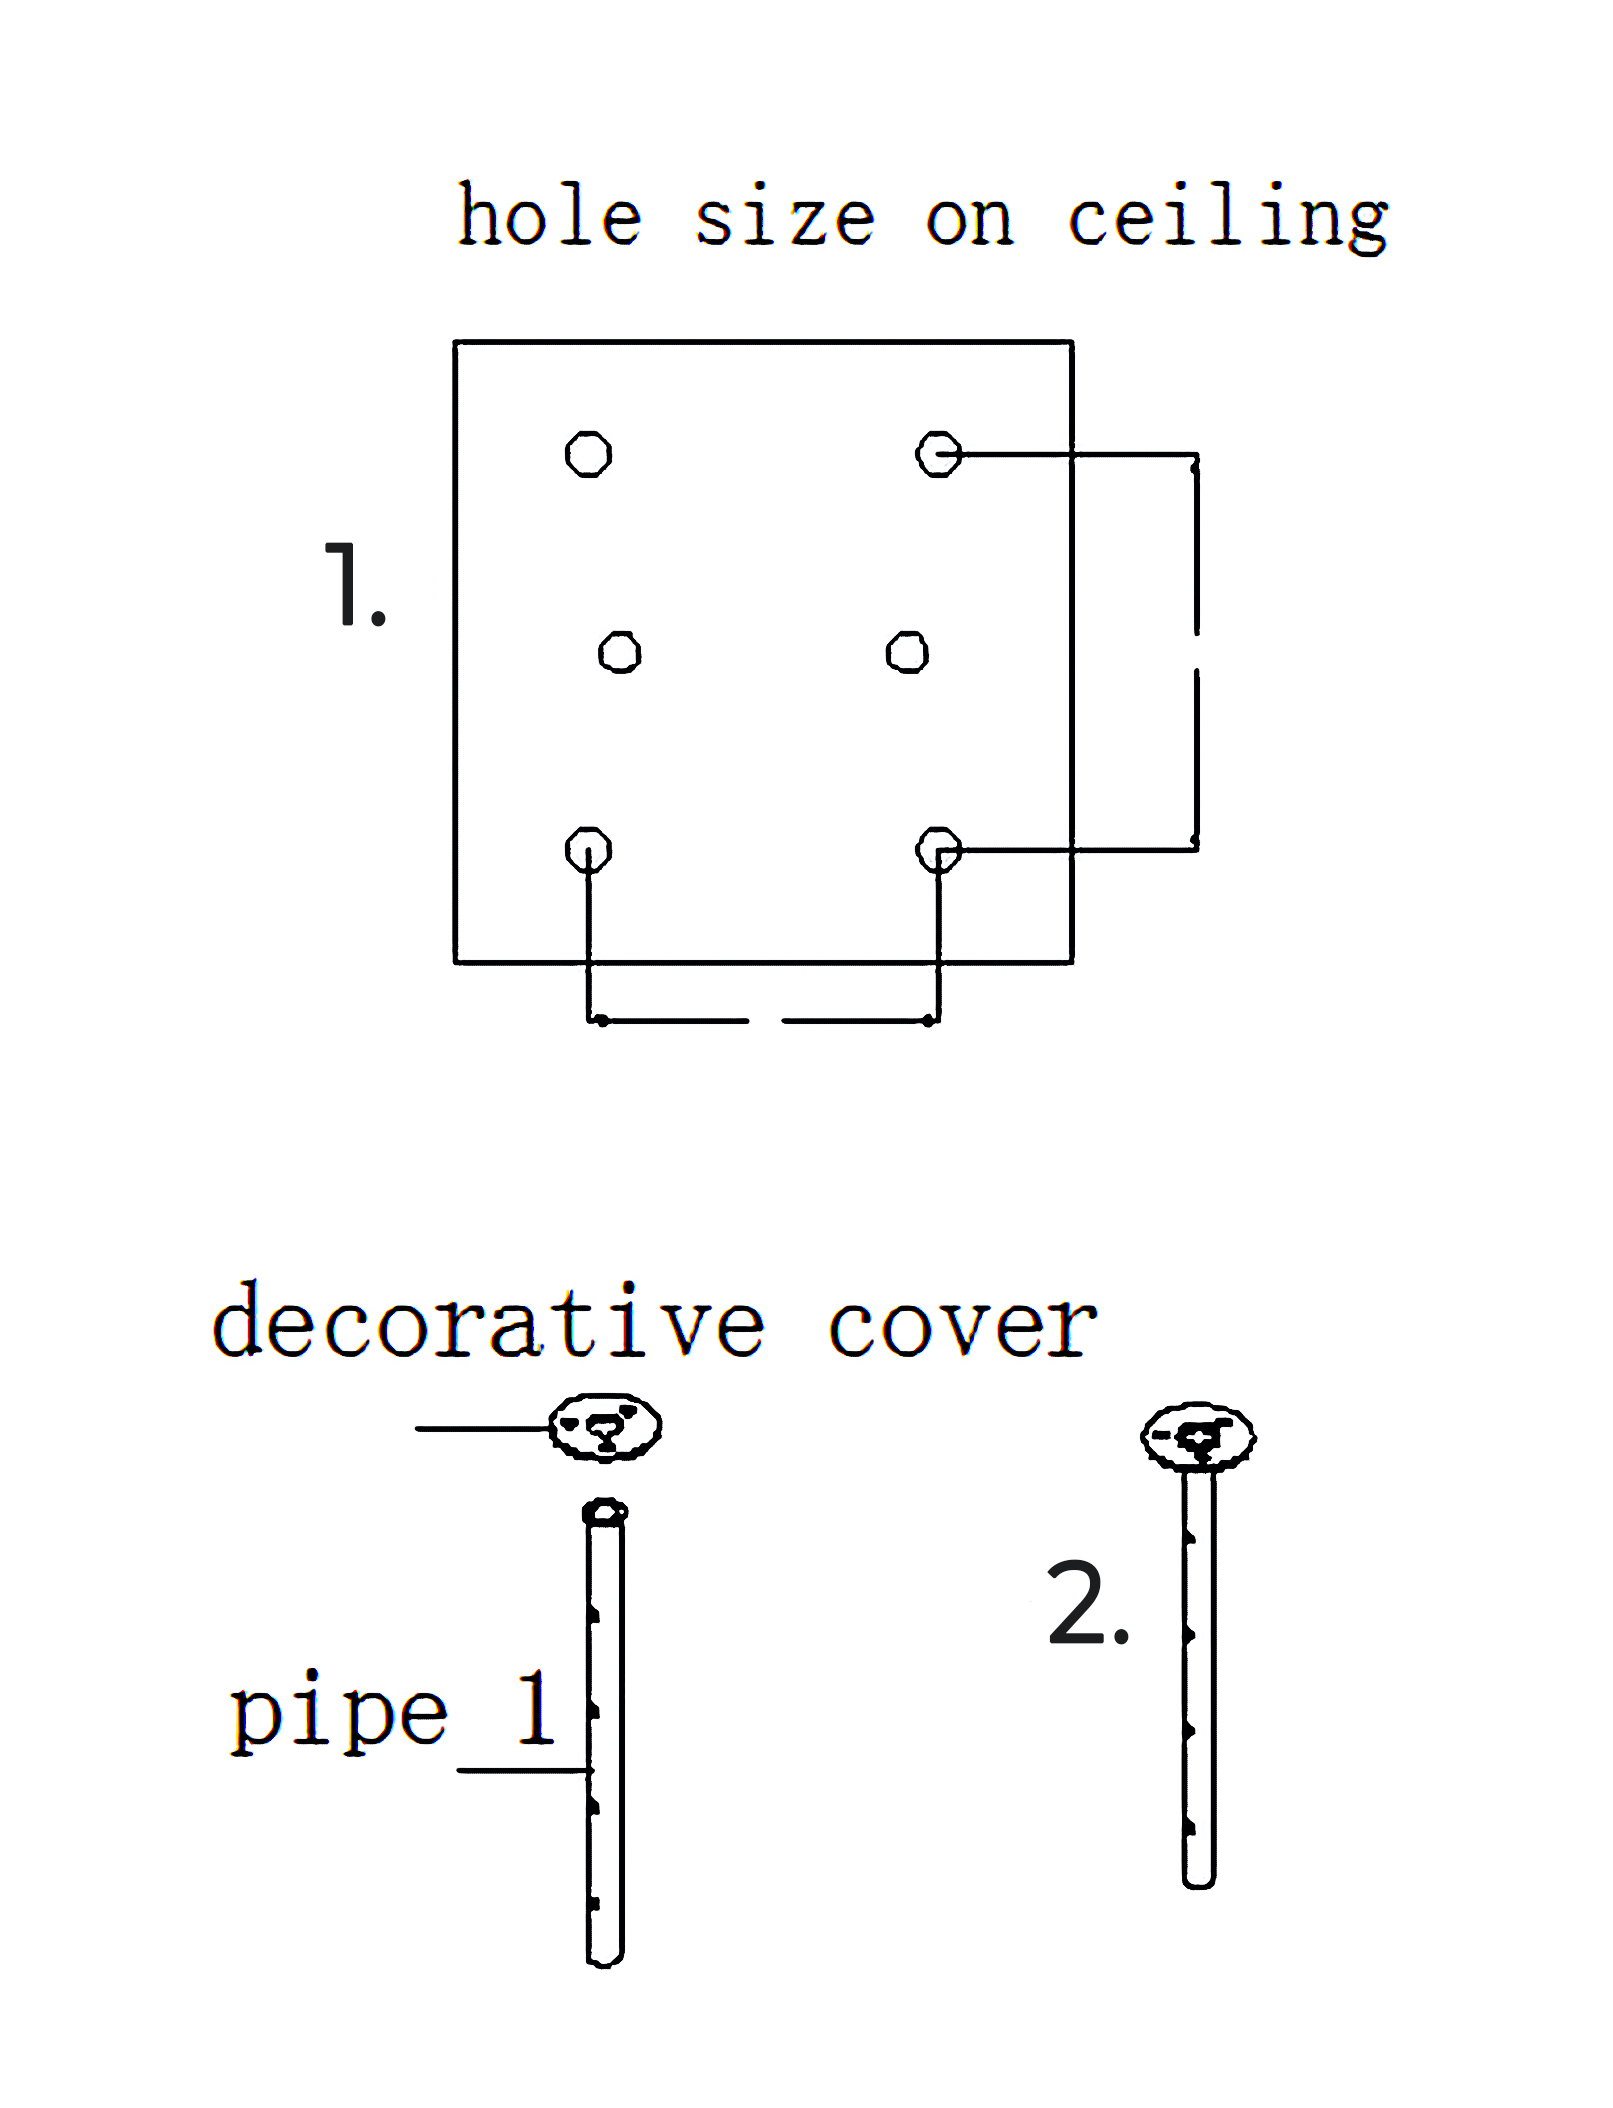
1. Draw size on ceiling
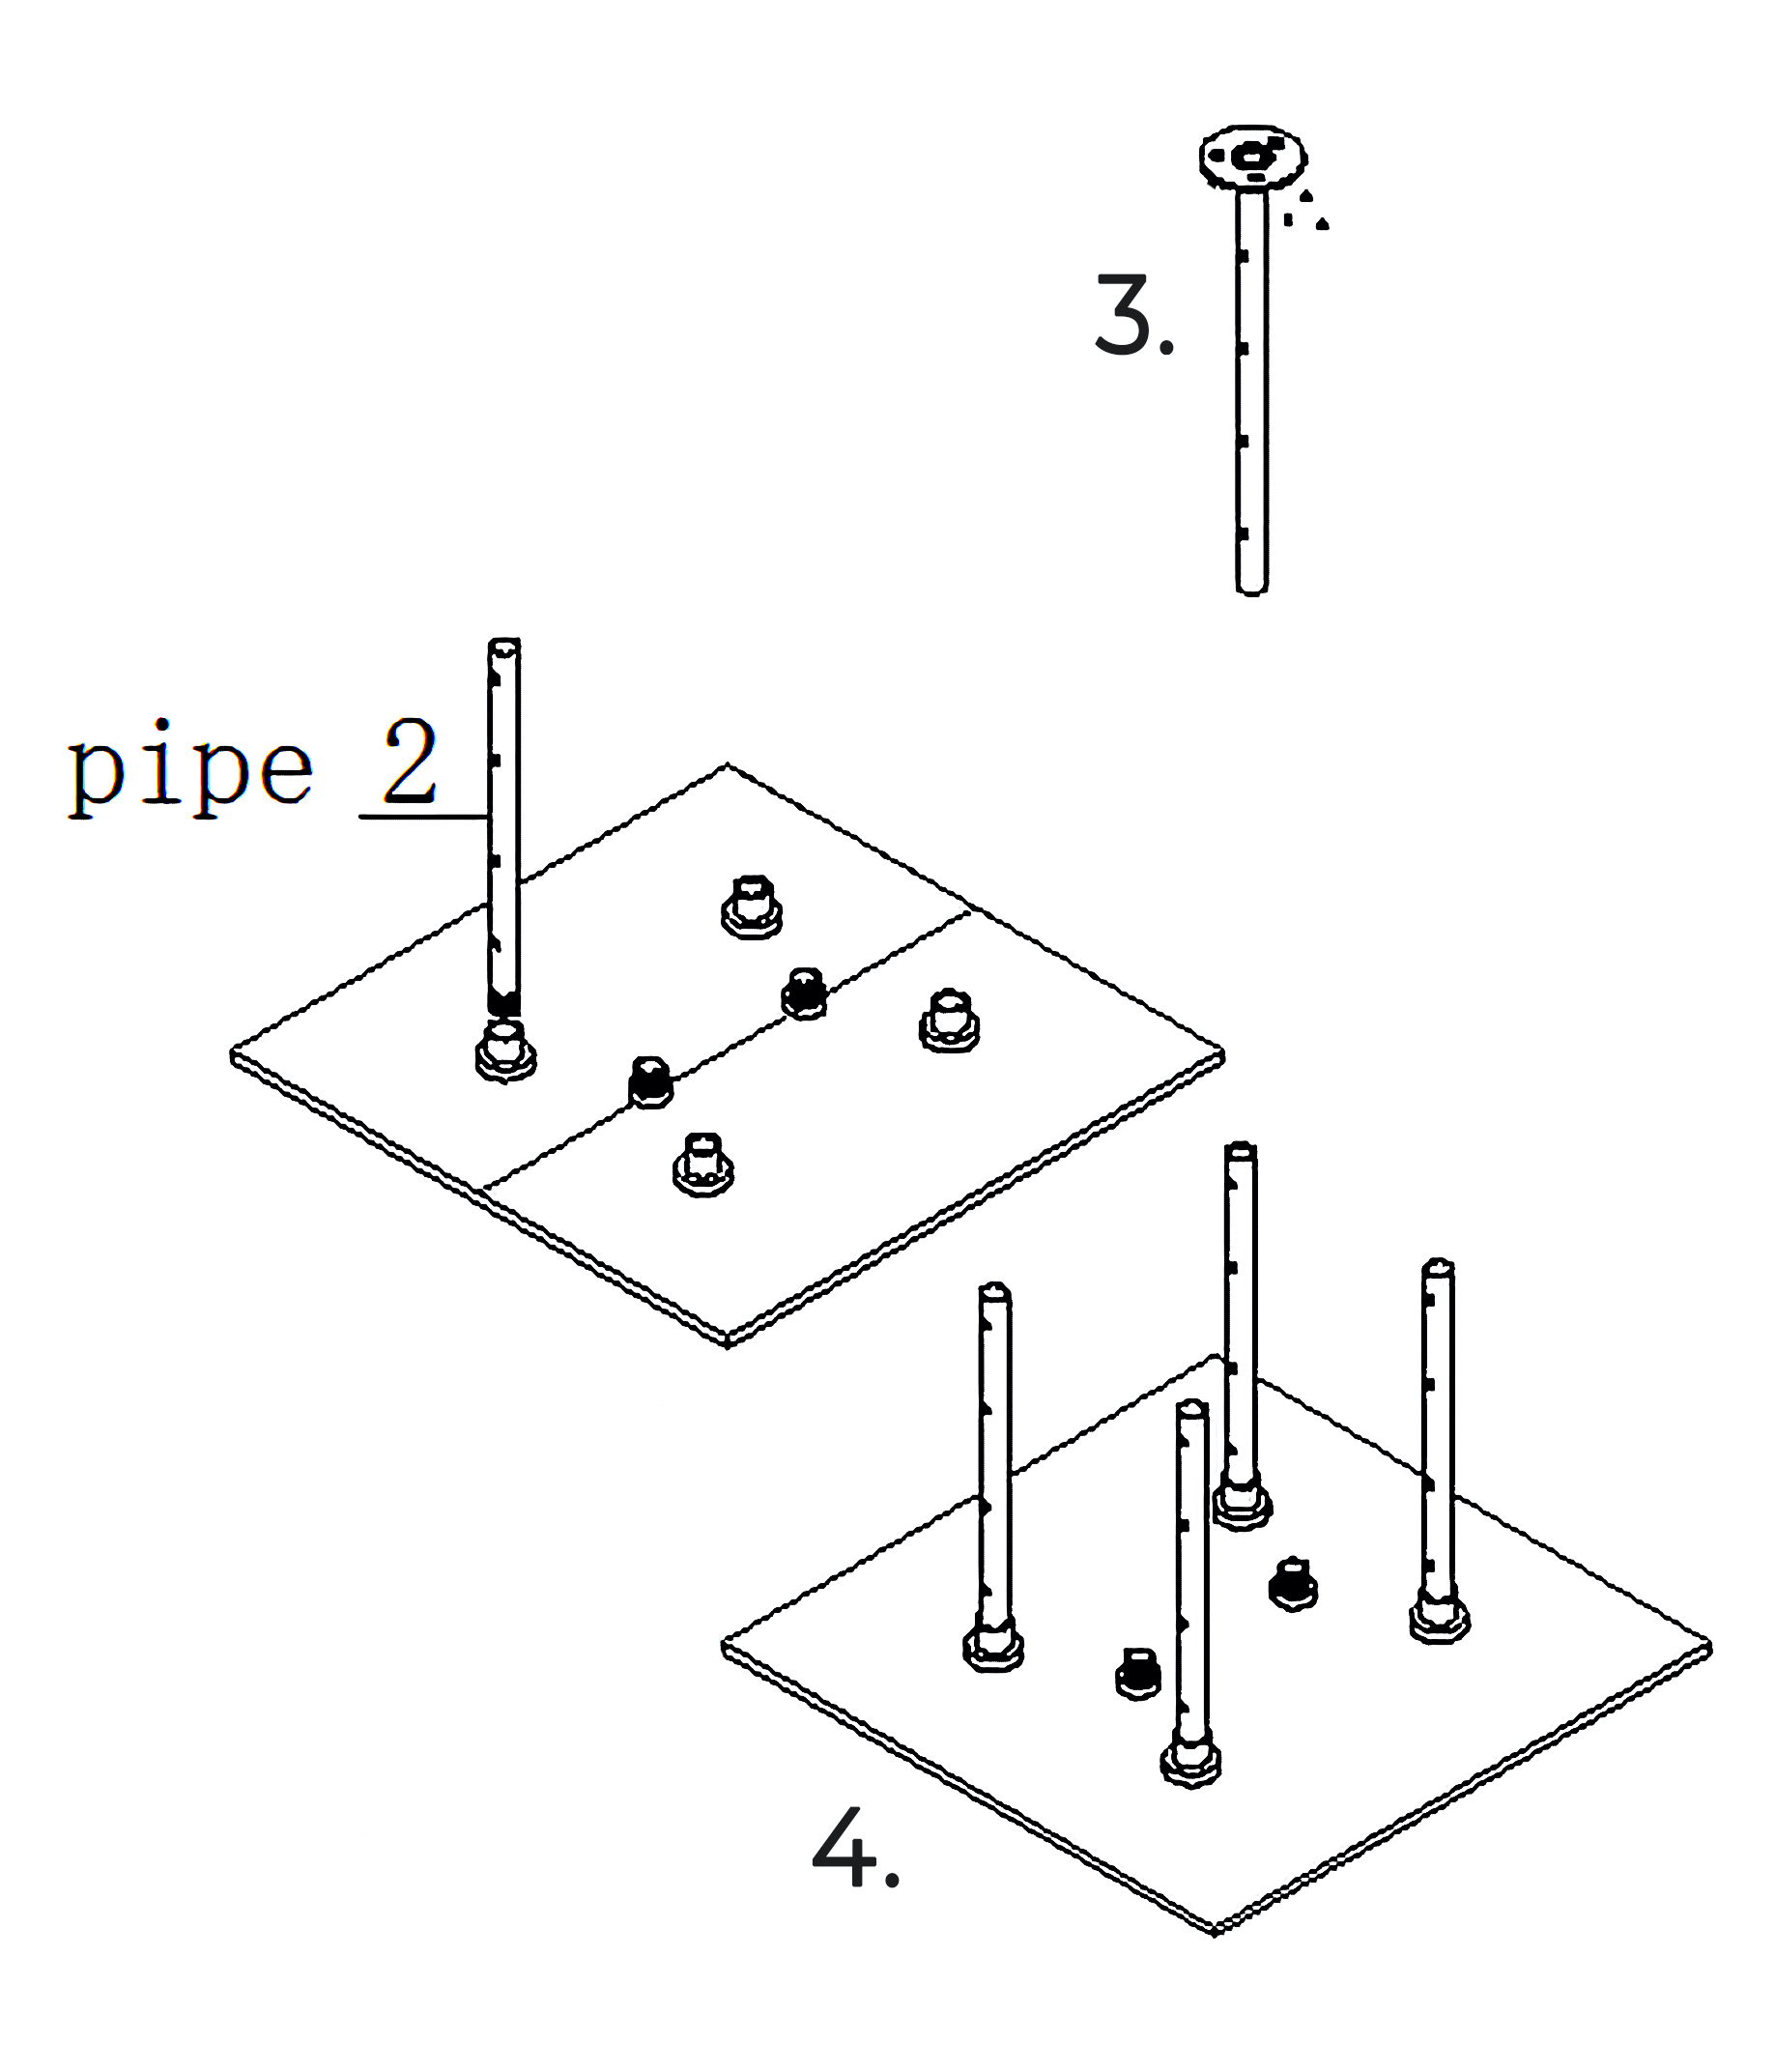
2. Install fixing bar on ceiling
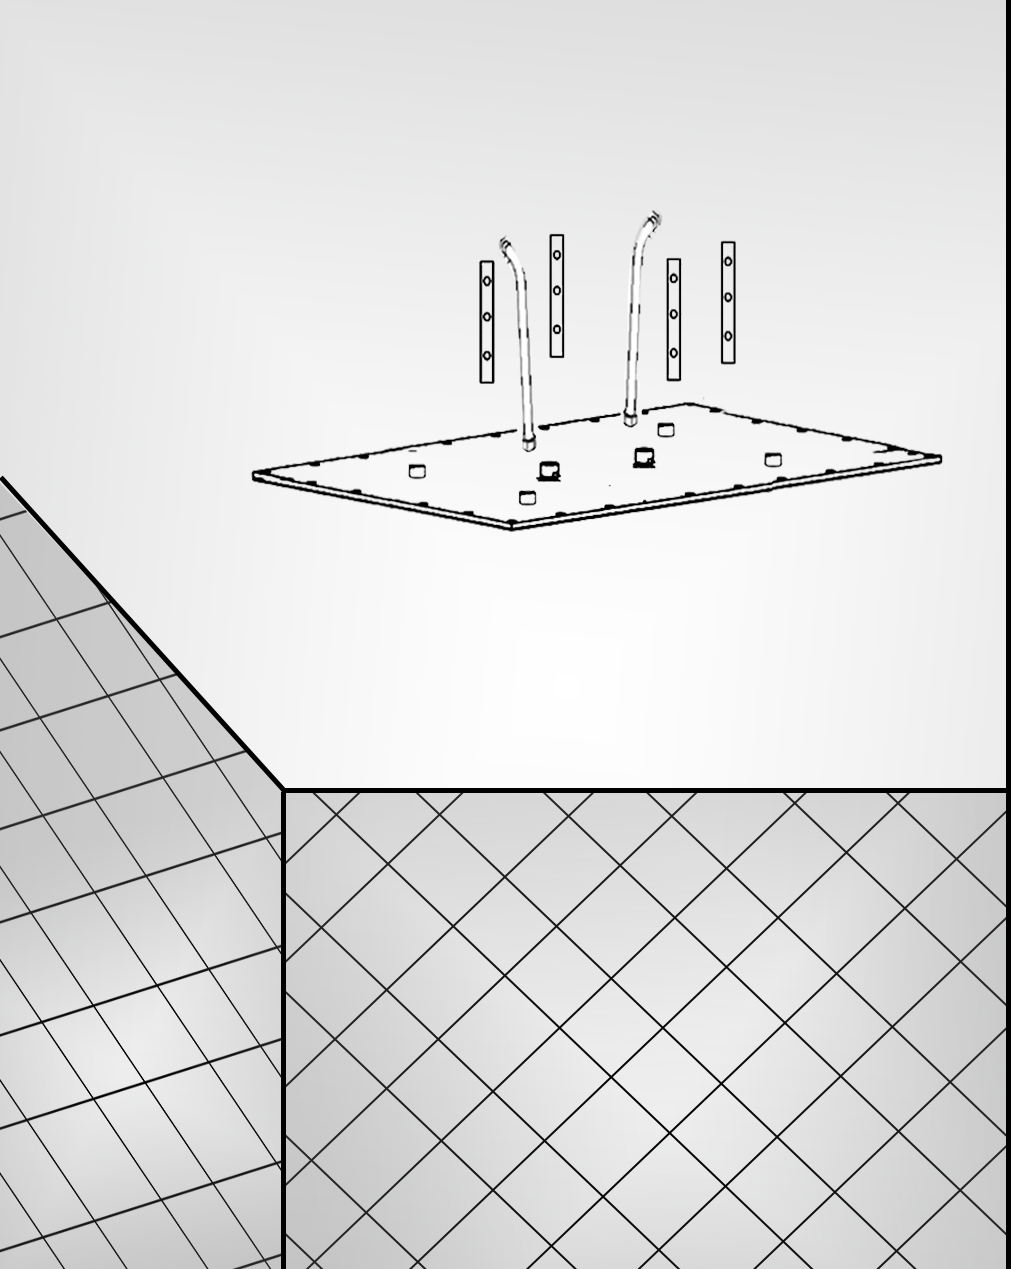
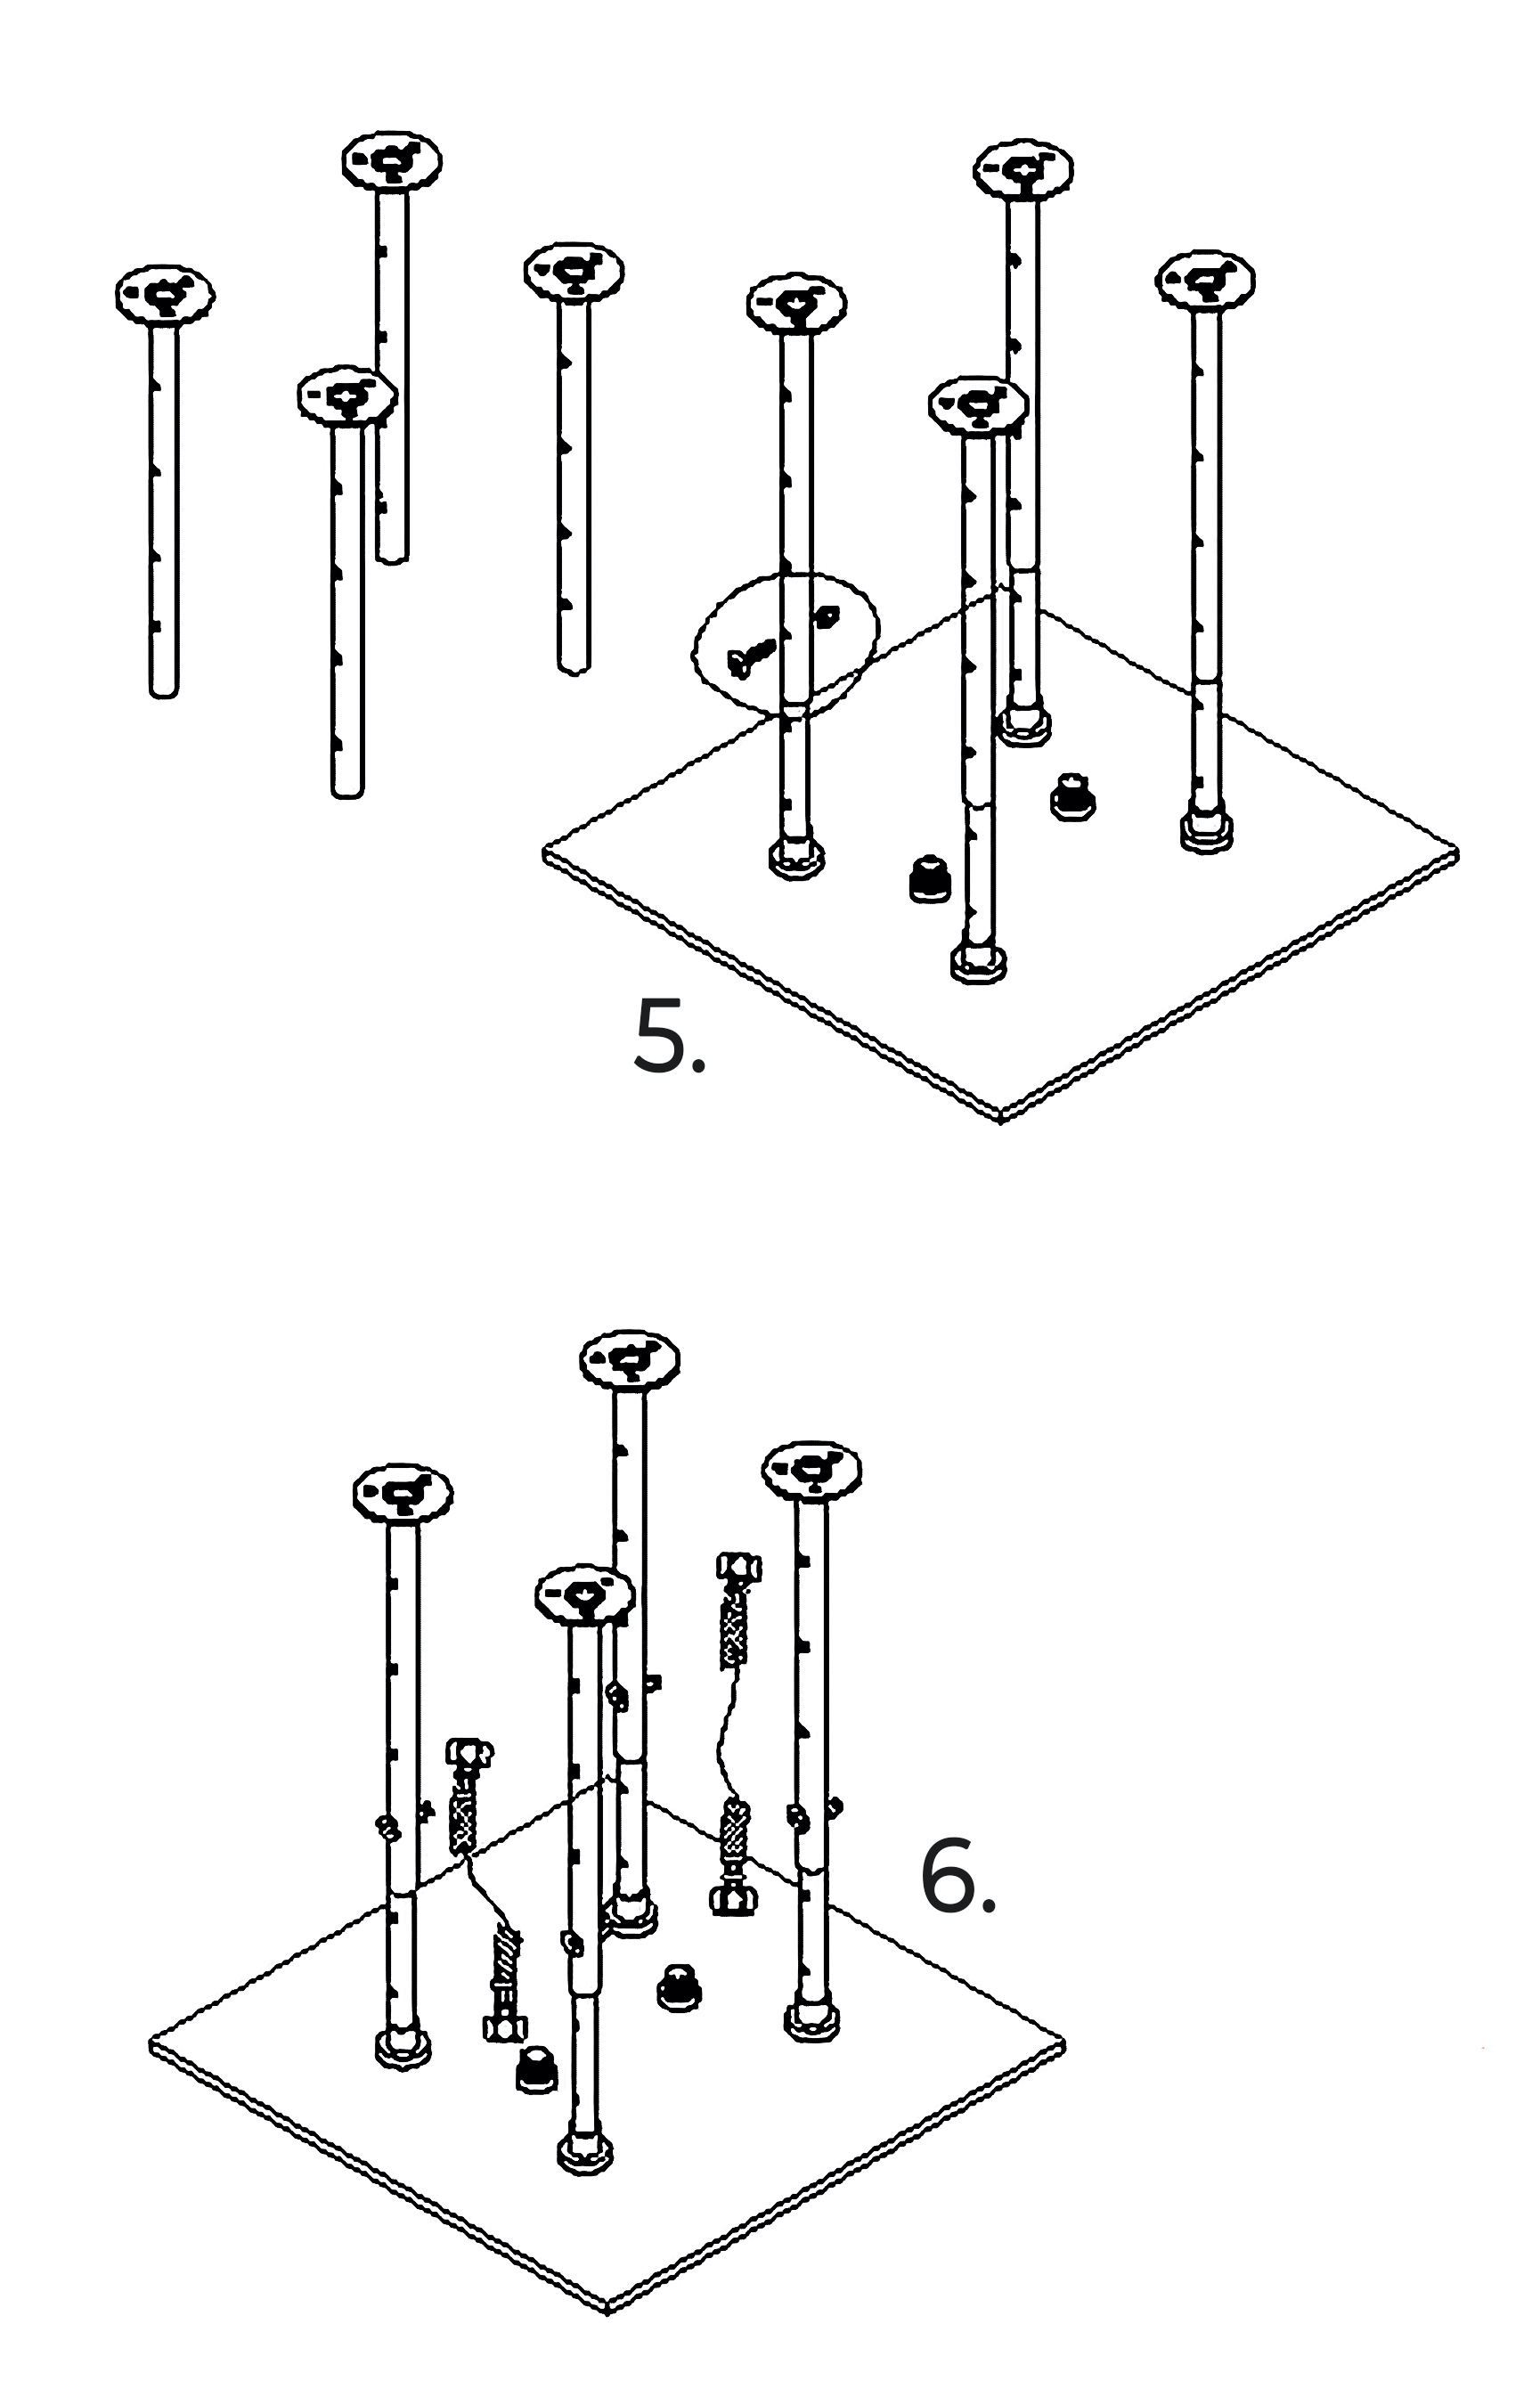
3. Install fixing bar on shower head
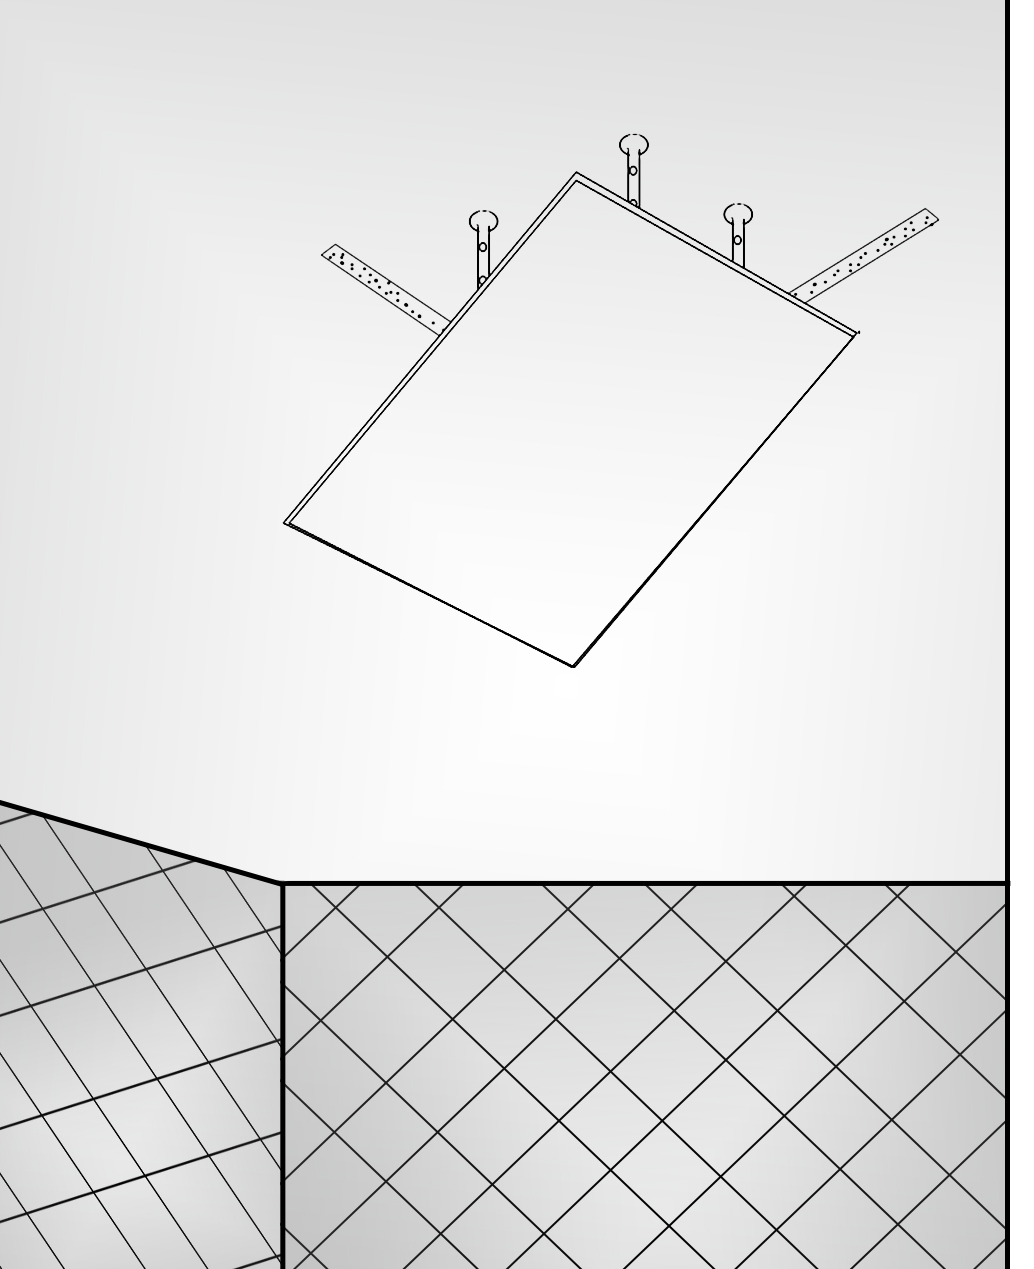
4. Put shower head bar on ceiling fixing bar.
The showerhead installation is now complete.
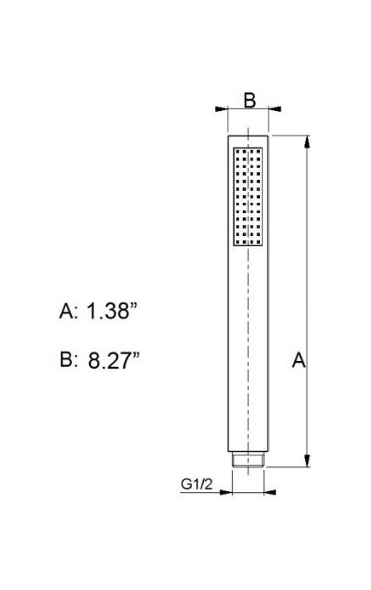
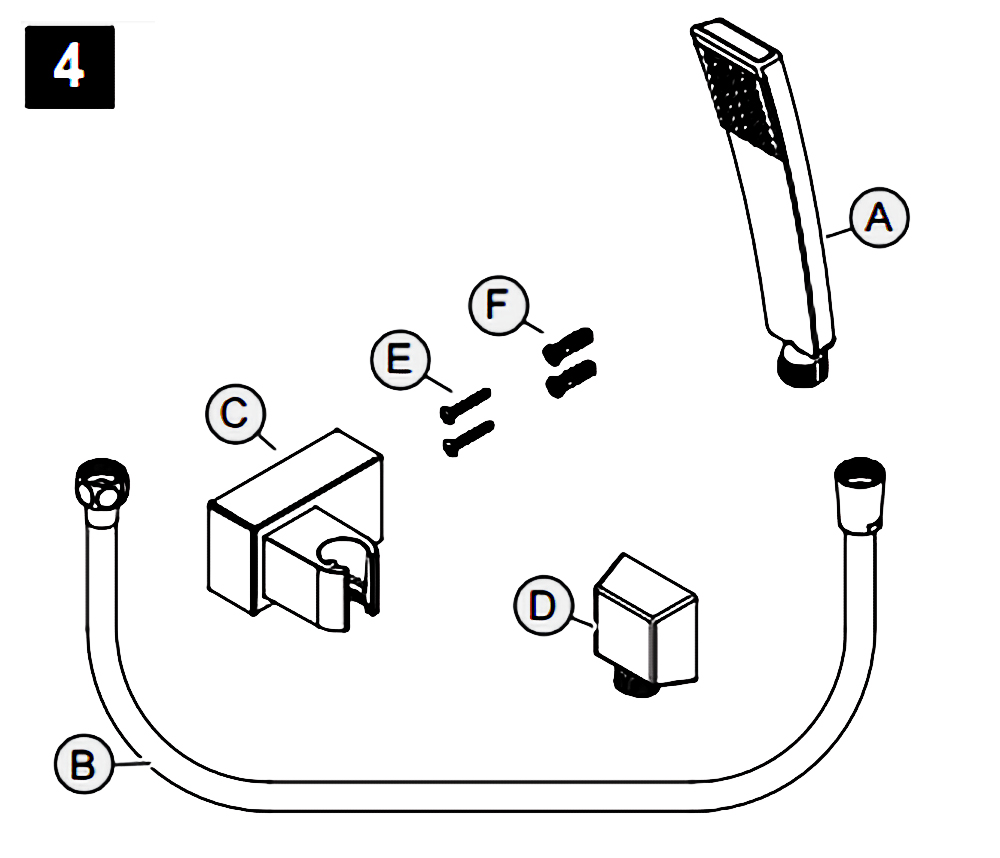
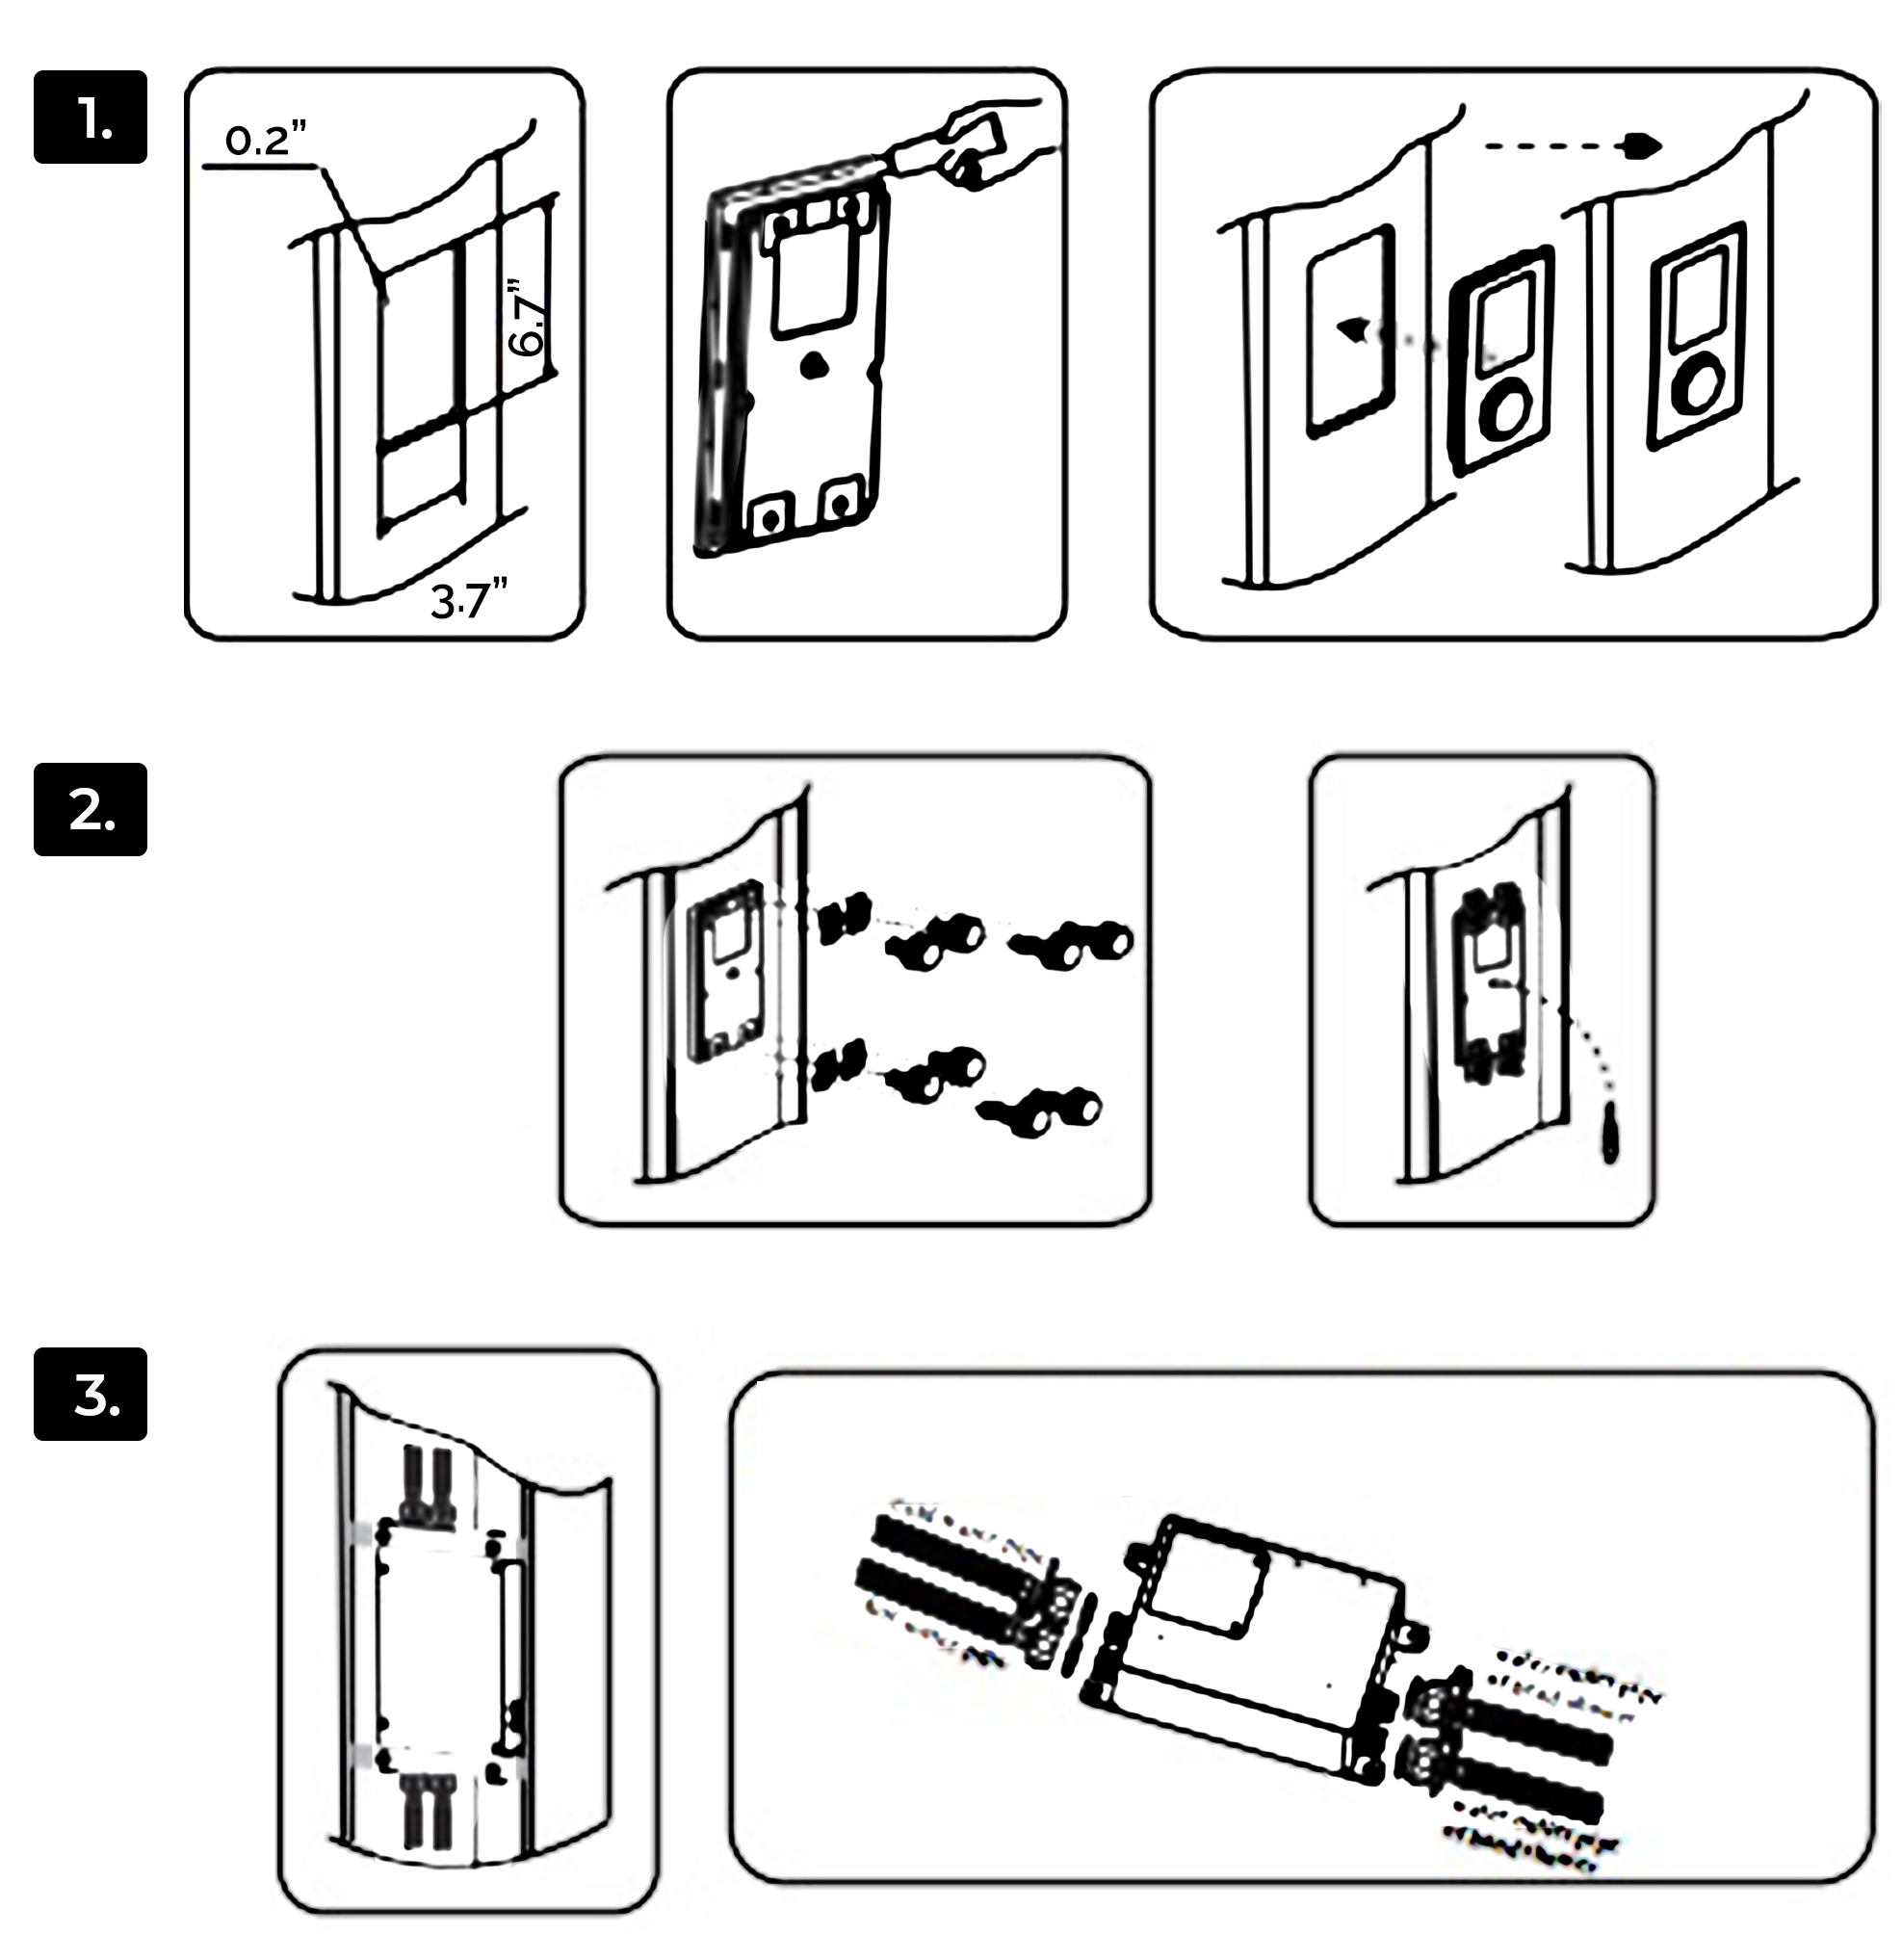
Hand-Held Shower Instructions
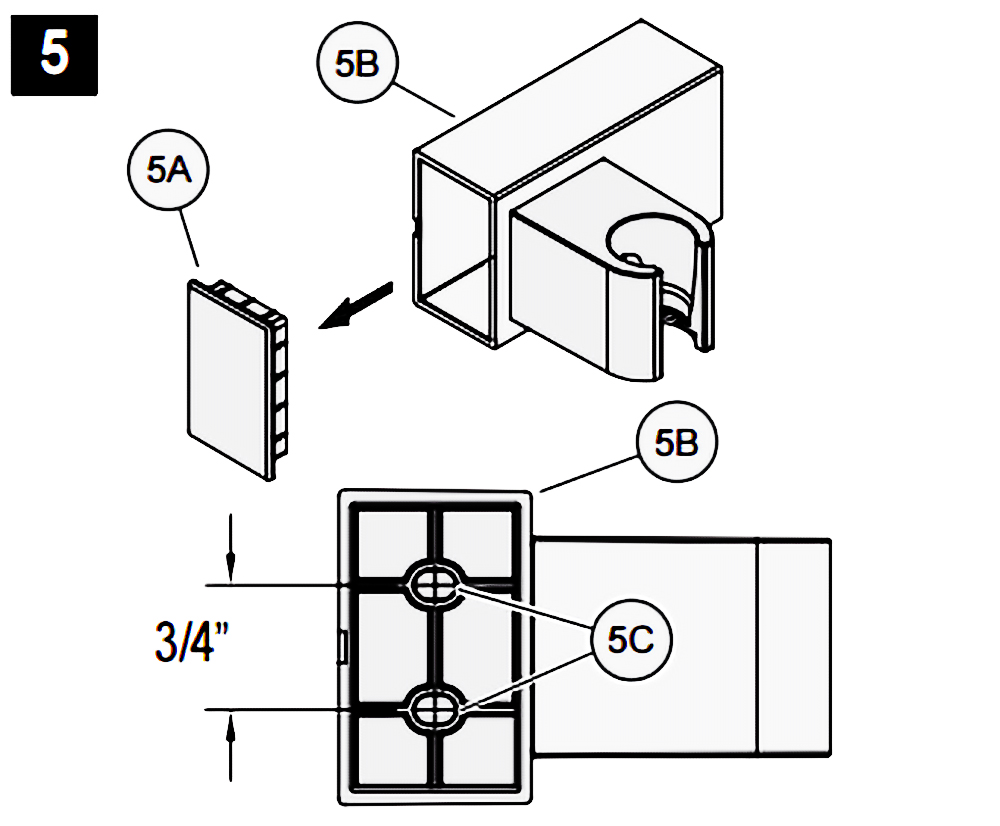
5. HOLE LOCATIONS FOR WALL MOUNT
Remove Front Cover (5A) from Wall Mount (5B). Use Wall Mount Screw Holes (5C) to place the desired location. Using a punch or awl, tap the screw hole locations. Holes must be vertically aligned.
6. ANCHOR INSTALLATION
Drill two 1/4” dia. Holes (6A). If installing into a studs drill two 1/8” dia. holes and do not use Anchors (6B). Insert Anchors (6B) into Holes (6A) and tap flush with wall.
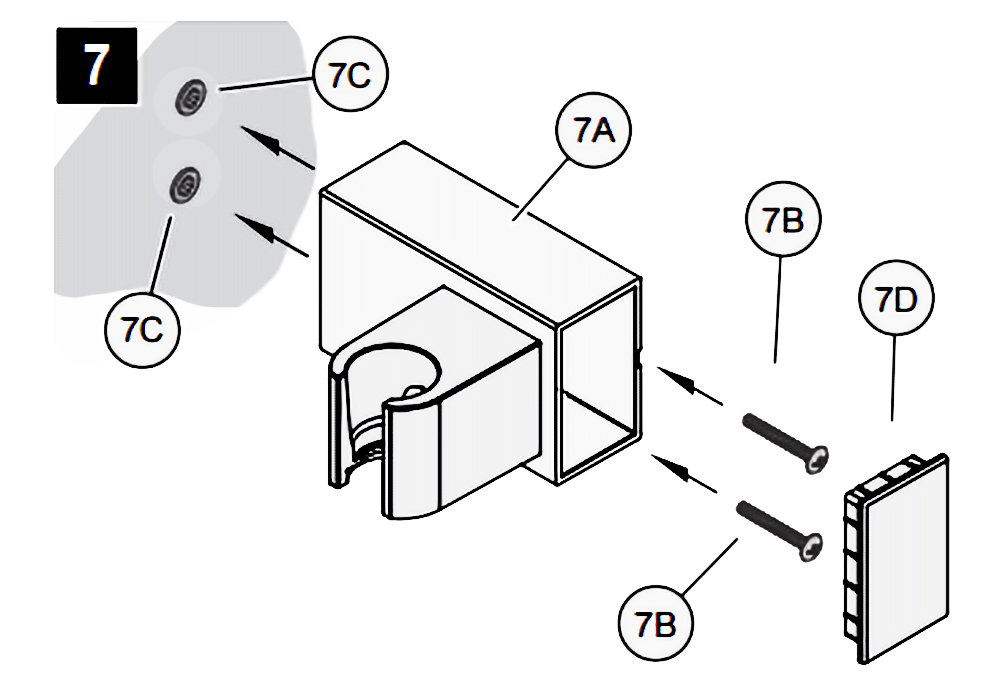
7. WALL MOUNT INSTALLATION
Place Wall Mount (7A) into wall and inset Mounting Screws (7B) through Wall Mount Holes (7C) and tighten until Wall Mount (7A) is flush with the wall. Do Not Over Tighten! Insert Front Cover (7D) into Wall Mount (7A)
8. DROP ELBOW & HOSE INSTALLATION
Apply PTFE plumbers tape on both ends of Pipe Nipple (8A) (not included). Screw Pipe Nipple (8A) into the elbow inside the wall. The Pipe Nipple (8A) is to project 1/4” – 3/4” from the finished wall. Screw Drop Elbow (8B) onto Pipe Nipple (8A) and tighten until Drop Elbow (8B) is property positioned and flush to the finished wall.
Place Rubber Seal (8C) inside Hex Hose Fitting (8D). Connect Hex Hose Fitting (8D) into Drop Elbow Outlet (8E) by turning Hex Hose Fitting (8D).
9. UNIT STARTUP
Turn on hot and cold water supplies, and check all connections for leaks.
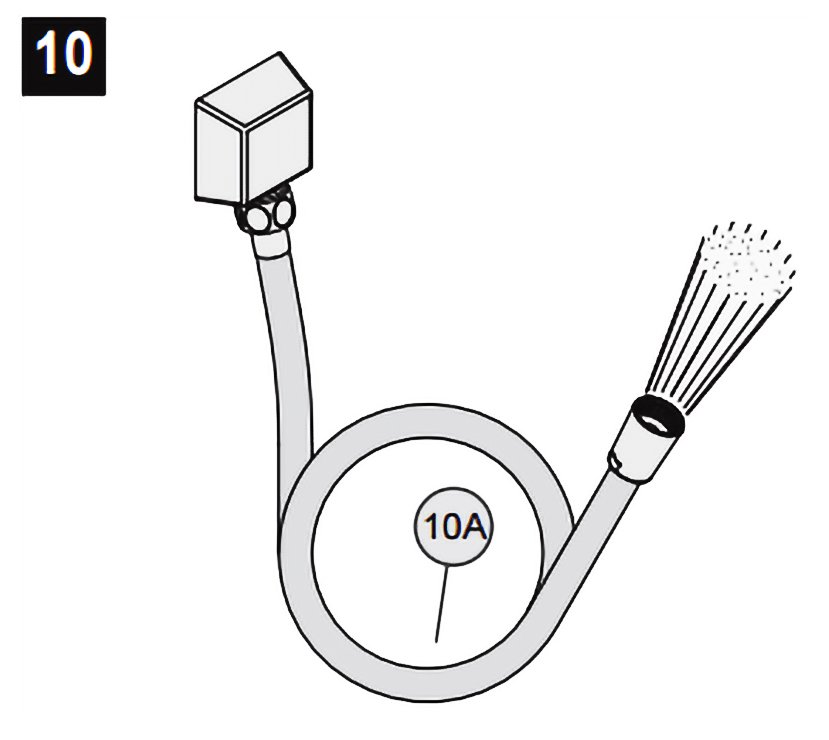
10. FINAL FLUSHING
For final flushing, turn the valve on and allow water to run through the Hose (10A) for several minutes. Allow water to run for several minutes until all foreign matter clears the line.
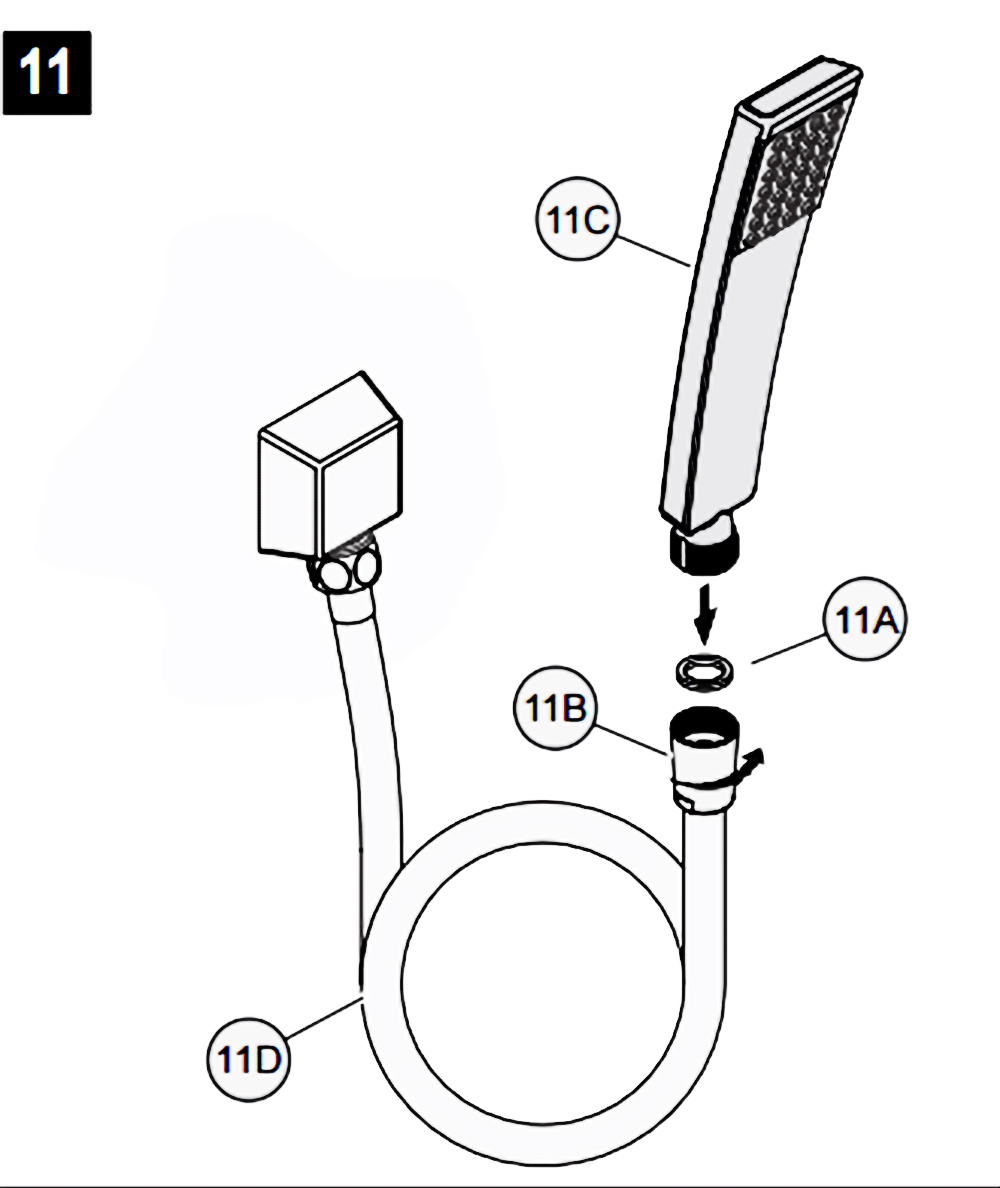
11. SHOWER ARM INSTALLATION
Place Rubber Seal (11A) inside Tapered Hose Fitting (11B). Conned Hand Shower (11C) to Hose (11D) by turning Tapered Hose Fitting (118) clockwise.
Digital Controller Installation
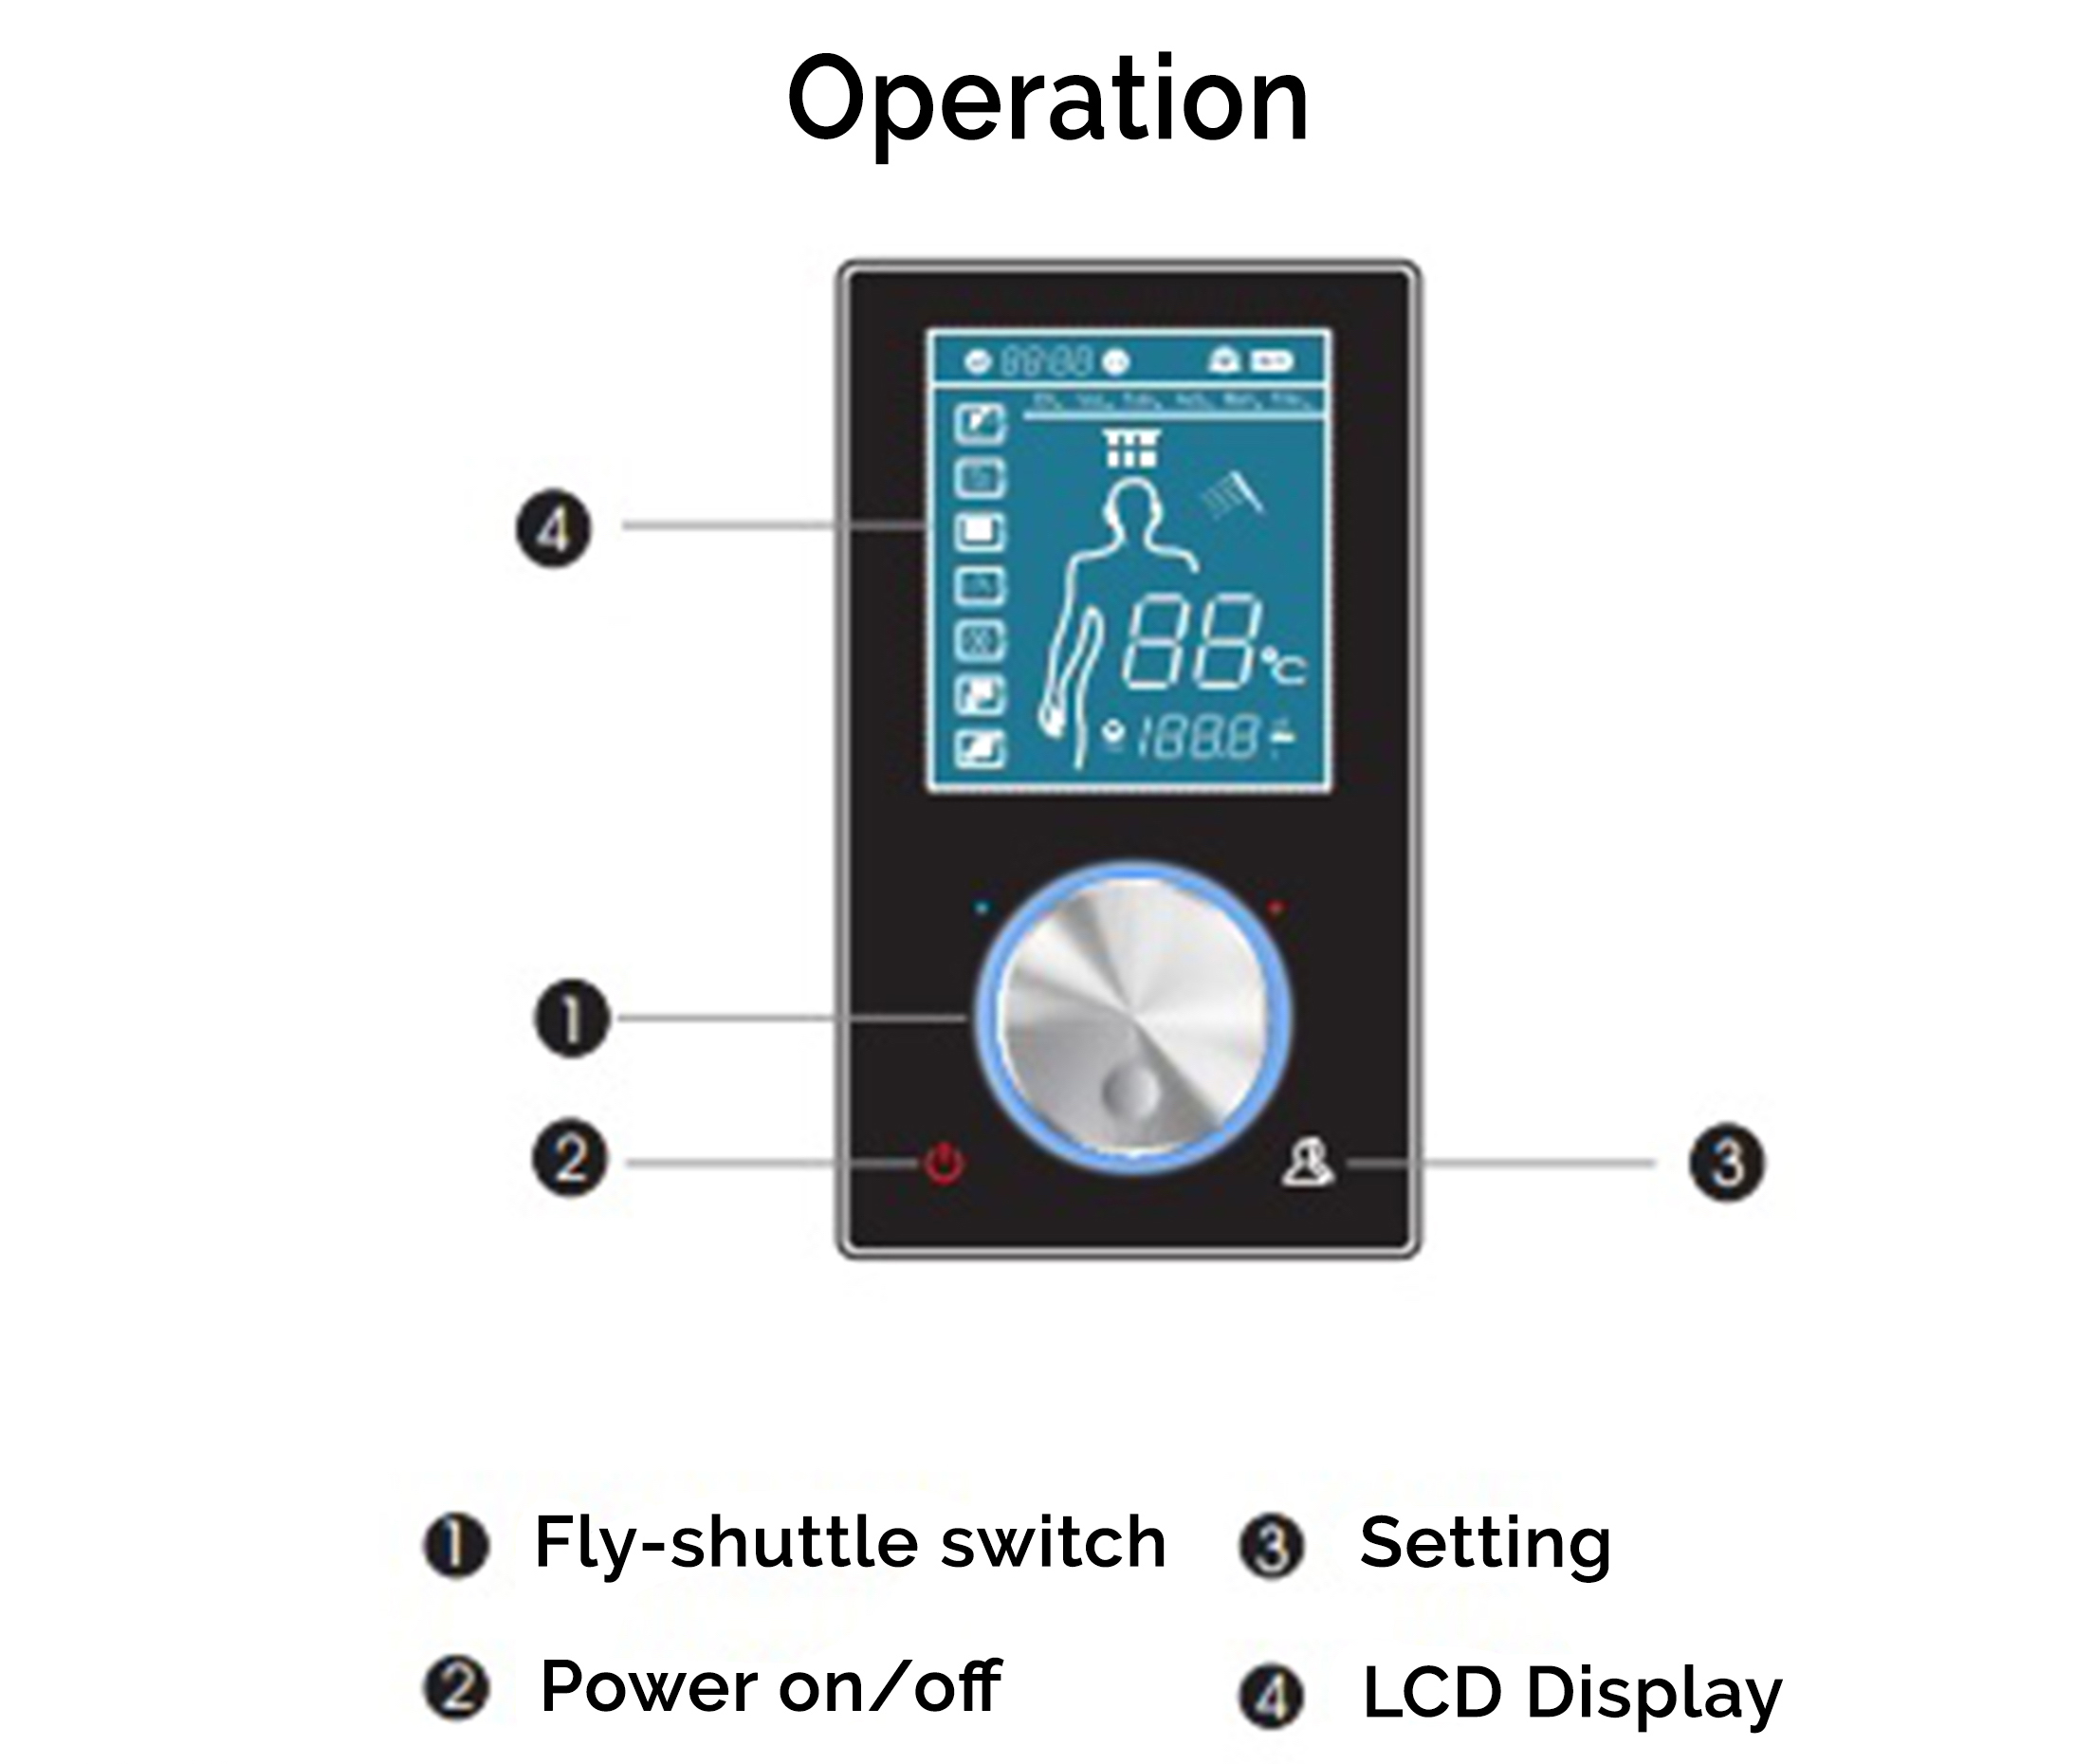
Operation
· Fly-shuttle switch
· Setting
· Power on/off
· LCD Display
Notice
1. The control panel is sensitive, when you install it, please avoid to let it face directly to the water from hand shower and the head shower because water will get it misoperation or lock the control panel.
2. The touch button is the best sensitive area.
3. The touch panel has water splash protection technology. When the system detects misoperation, no response, and need about 1 second to recover.
Function
1. Water TEMP adjust
2. Hand shower
3. Head Shower
4. Water flow adjust
Operation
1. Power on/off
Power on
After electrify, you can touch to make the system ON. When you hear buzzer sound, the fly-shuttle switch and the LCD panel would be lighting. Water TEMP and water flow will be the same as that you set last time. The cursor will be on the icon you using last time. The default working time is 60 minutes.
Power Off
When the system on, touch again to make the system OFF or the default working time is up, when you hear buzzer sound that means have close all the functions.
NOTE: (the background color of the fly-shuttle switch) LED show blue color when TEMP below 33° C
LED show orange color when water TEMP between 34° C- 41° C
LED show red color when water TEMP over 41° C
2. Hand shower and head shower switch
When system on, rotating the fly-shuttle button left or right. the cursor would move to icon, pressing the fly-shuttle button to open hand shower or head shower (hand shower and head shower are inter-locked, you can turn on only one time), the corresponding operation icon would brighten up on the LCD panel after turning on. The cursor could move to icon, pressing again the fly-shuttle button to close hand shower or head shower, the corresponding function icon would be dark.
Caution:
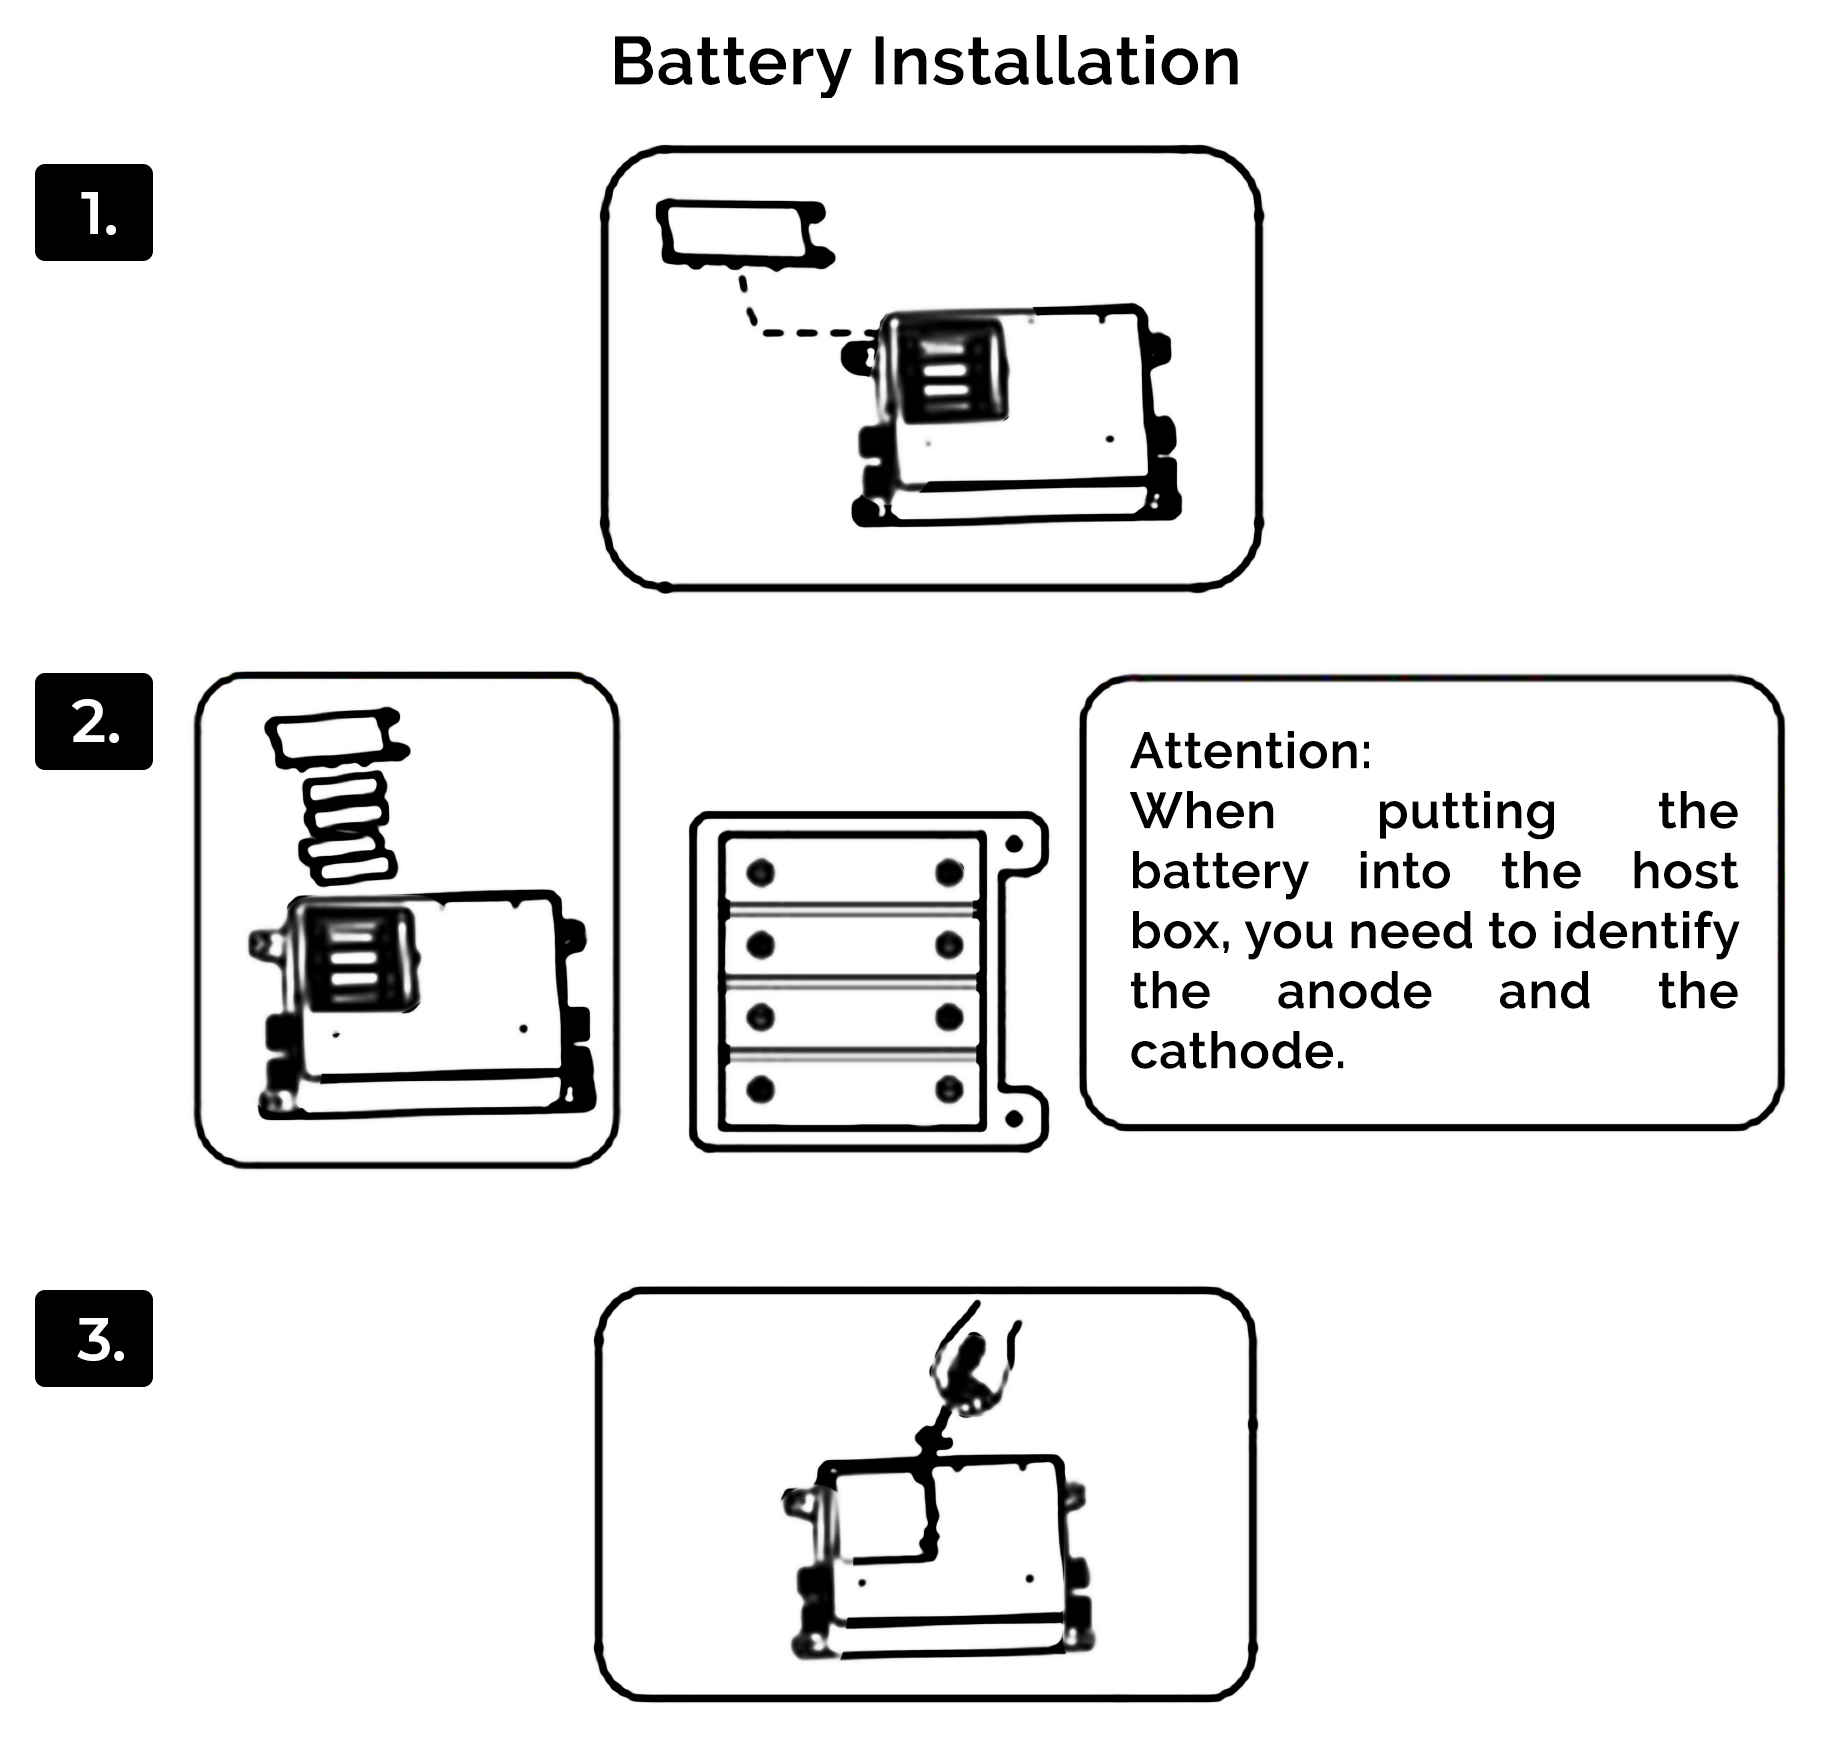
• Using rechargeable NI-MH battery [the 5#(AA) and the capacity is more than l000Mah).
• After electrify, forbid using the normal 5#(AA) battery. Otherwise, would cause the battery explosion.
• When the power cut, you can use the high quality normal 5#(AA) dry battery as the emergency measure. But you