Home > How to Install Lano 22" Contemporary CD Chrome Finish best rain showerhead

Lano 22" Contemporary Chrome Finish Water Powered Led Shower Head

With this two functions waterfall and rain shower head you can turn on the fun in your shower just by turning on the water, the LED lights will automatically light up and set the mood. They will even change colors automatically based on the water temperature. All this with no batteries, everything is self-powered by a built in dynamo that takes advantage of the water pressure to create the energy to light the bulbs. The Lano shower set comes with auto thermostatic digital shower valve., this is an anti scalding color digital display it does not require batteries to operate since it water powered.

Lano 22" Contemporary CD Chrome Finish Water Powered Led Shower HeadLano 22" Contemporary CD Chrome Finish Water Powered Led Shower Head

Chrome Finish Water Powered Led Shower Head Features:

  • Waterfall and Rain Shower head can work separately or combined.
  • This high tech rain shower head powers the LED lights using a built in hidden dynamo
  • The lights will automatically turn on when water pressure is turned on
  • The lights will dim and brighten when you lower and raise the pressure so you can set the perfect mood, water and light
  • The shower head will automatically change colors according to the temperature of the water so you always know how the water will feel on your skin just by looking at it
  • Never be scalded again by entering a shower that is just too hot
  • Modern stylish design completely made to match or stand out from your other bathroom fixtures
  • High quality this modern shower head is made out of stainless steel, so its made to last!
  • The flow rate is 2.5 GPM

Turn on the fun in your shower just by turning on the water, the LED lights will automatically light up and set the mood. They will even change colors automatically based on the water temperature. All this with no batteries, everything is self-powered by a built in dynamo that takes advantage of the water pressure to create the energy to light the bulbs.

Technical Specs

Height1.1"
Length22" (554 mm)
MaterialStainless Steel (304 US mirror)
Showerhead StyleLED Contemporary Rain Shower
Showerhead Length22"
Measured Width9" (230 mm)
FontanaShowers®Product Warranty InformationFontanaShowers Product Warranty
  • Before you begin, please read the installation instructions below. Observe all local building and safety codes.
  • Unpack and inspect the product for any shipping damages. If you find damages, do not install.
  • Please note all showers must be installed by a professional and certified plumber otherwise warranty might be voided.
Installation
Instructions

Shower Head Installation Instructions


Step 1: shower head Step 2:

Open the top cover and drill according to the marked position.
1. Mark by the position of the four holes.
2. Take care to avoid wires and pipes to prevent damage.
3. Be sure to confirm that the four holes are on the same horizontal line.
Remove the protective cover (F). Mark the positions and drill holes to suit the anchors (A). Install the anchors (A) and fix the rough-in valve (B) into the wall with screws. Use a level to ensure that the rough-in valve (B) is straight and level. (Important: Flush the water supply to remove any dirt and debris before installing the valve body).
Shower Head Installation Instructions
Step 3: Step 4:
Wrap Teflon tape around the pipe threads and connect water supply lines and in-wall pipes (not included) as desired to the rough-in valve (B). Turn on the water supply and open the cartridge to check for leakage. Then put on the protective cover and finish the wall surrounding the valve. (Note: Test the water pressure after the pipe connections have been made and before the finished wall material is installed). Two inlet fittings are connected to the pipe joint of the wall; then the nut, expansion screw, and inlet pipe are connected.


Shower Head Installation Instructions
Step 5: Step 6:

Reinstall the top cover.
Fix the escutcheon (D) to the showerhead (E) with screws (C).
Shower Head Installation Instructions

Step 7:
Remove the protective cover when the finished wall is completed. Then, install the showerhead (E) and press it against the finished wall.


Digital Controller Installation Instructions


Operation

· Fly-shuttle switch

· Setting

· Power on/off

· LCD Display


Notice

1. The control panel is sensitive, when you install it, please avoid to let it face directly to the water from hand shower and the head shower because water will get it misoperation or lock the control panel.

2. The touch button is the best sensitive area.

3. The touch panel has water splash protection technology. When the system detects misoperation, no response, and need about 1 second to recover.


Function
1. Water TEMP adjust

2. Hand shower

3. Head Shower

4. Water flow adjust


Operation

Power On

1. Power on/off
After electrify, you can touch to make the system ON. When you hear buzzer sound, the fly-shuttle switch and the LCD panel would be lighting. Water TEMP and water flow will be the same as that you set last time. The cursor will be on the icon you using last time. The default working time is 60 minutes.


Power Off

When the system on, touch again to make the system OFF or the default working time is up, when you hear buzzer sound that means have close all the functions.

NOTE: (the background color of the fly-shuttle switch) LED show blue color when TEMP below 33° C

LED show orange color when water TEMP between 34° C- 41° C

LED show red color when water TEMP over 41° C

2. Hand shower and head shower switch
When system on, rotating the fly-shuttle button left or right. the cursor would move to icon, pressing the fly-shuttle button to open hand shower or head shower (hand shower and head shower are inter-locked, you can turn on only one time), the corresponding operation icon would brighten up on the LCD panel after turning on. The cursor could move to icon, pressing again the fly-shuttle button to close hand shower or head shower, the corresponding function icon would be dark.


Caution:

• Using rechargeable NI-MH battery [the 5#(AA) and the capacity is more than l000Mah).

• After electrify, forbid using the normal 5#(AA) battery. Otherwise, would cause the battery explosion.

• When the power cut, you can use the high quality normal 5#(AA) dry battery as the emergency measure. But you must unplug the adapter.

• When you install the host box, please put the battery into it. If the product hasn't connected with the power in a long time. Please take out the battery from the host box. This way can avoid affecting the battery working life.

• If you want the battery with a longer working life, you can charge the battery every some months.


Installation of the Control Panel

There are two kinds of installation ways shower controller according to the installation site, one way is to recess mount into the wall. Another way is to build into the shower panel.


1. Build the control panel into the shower panel

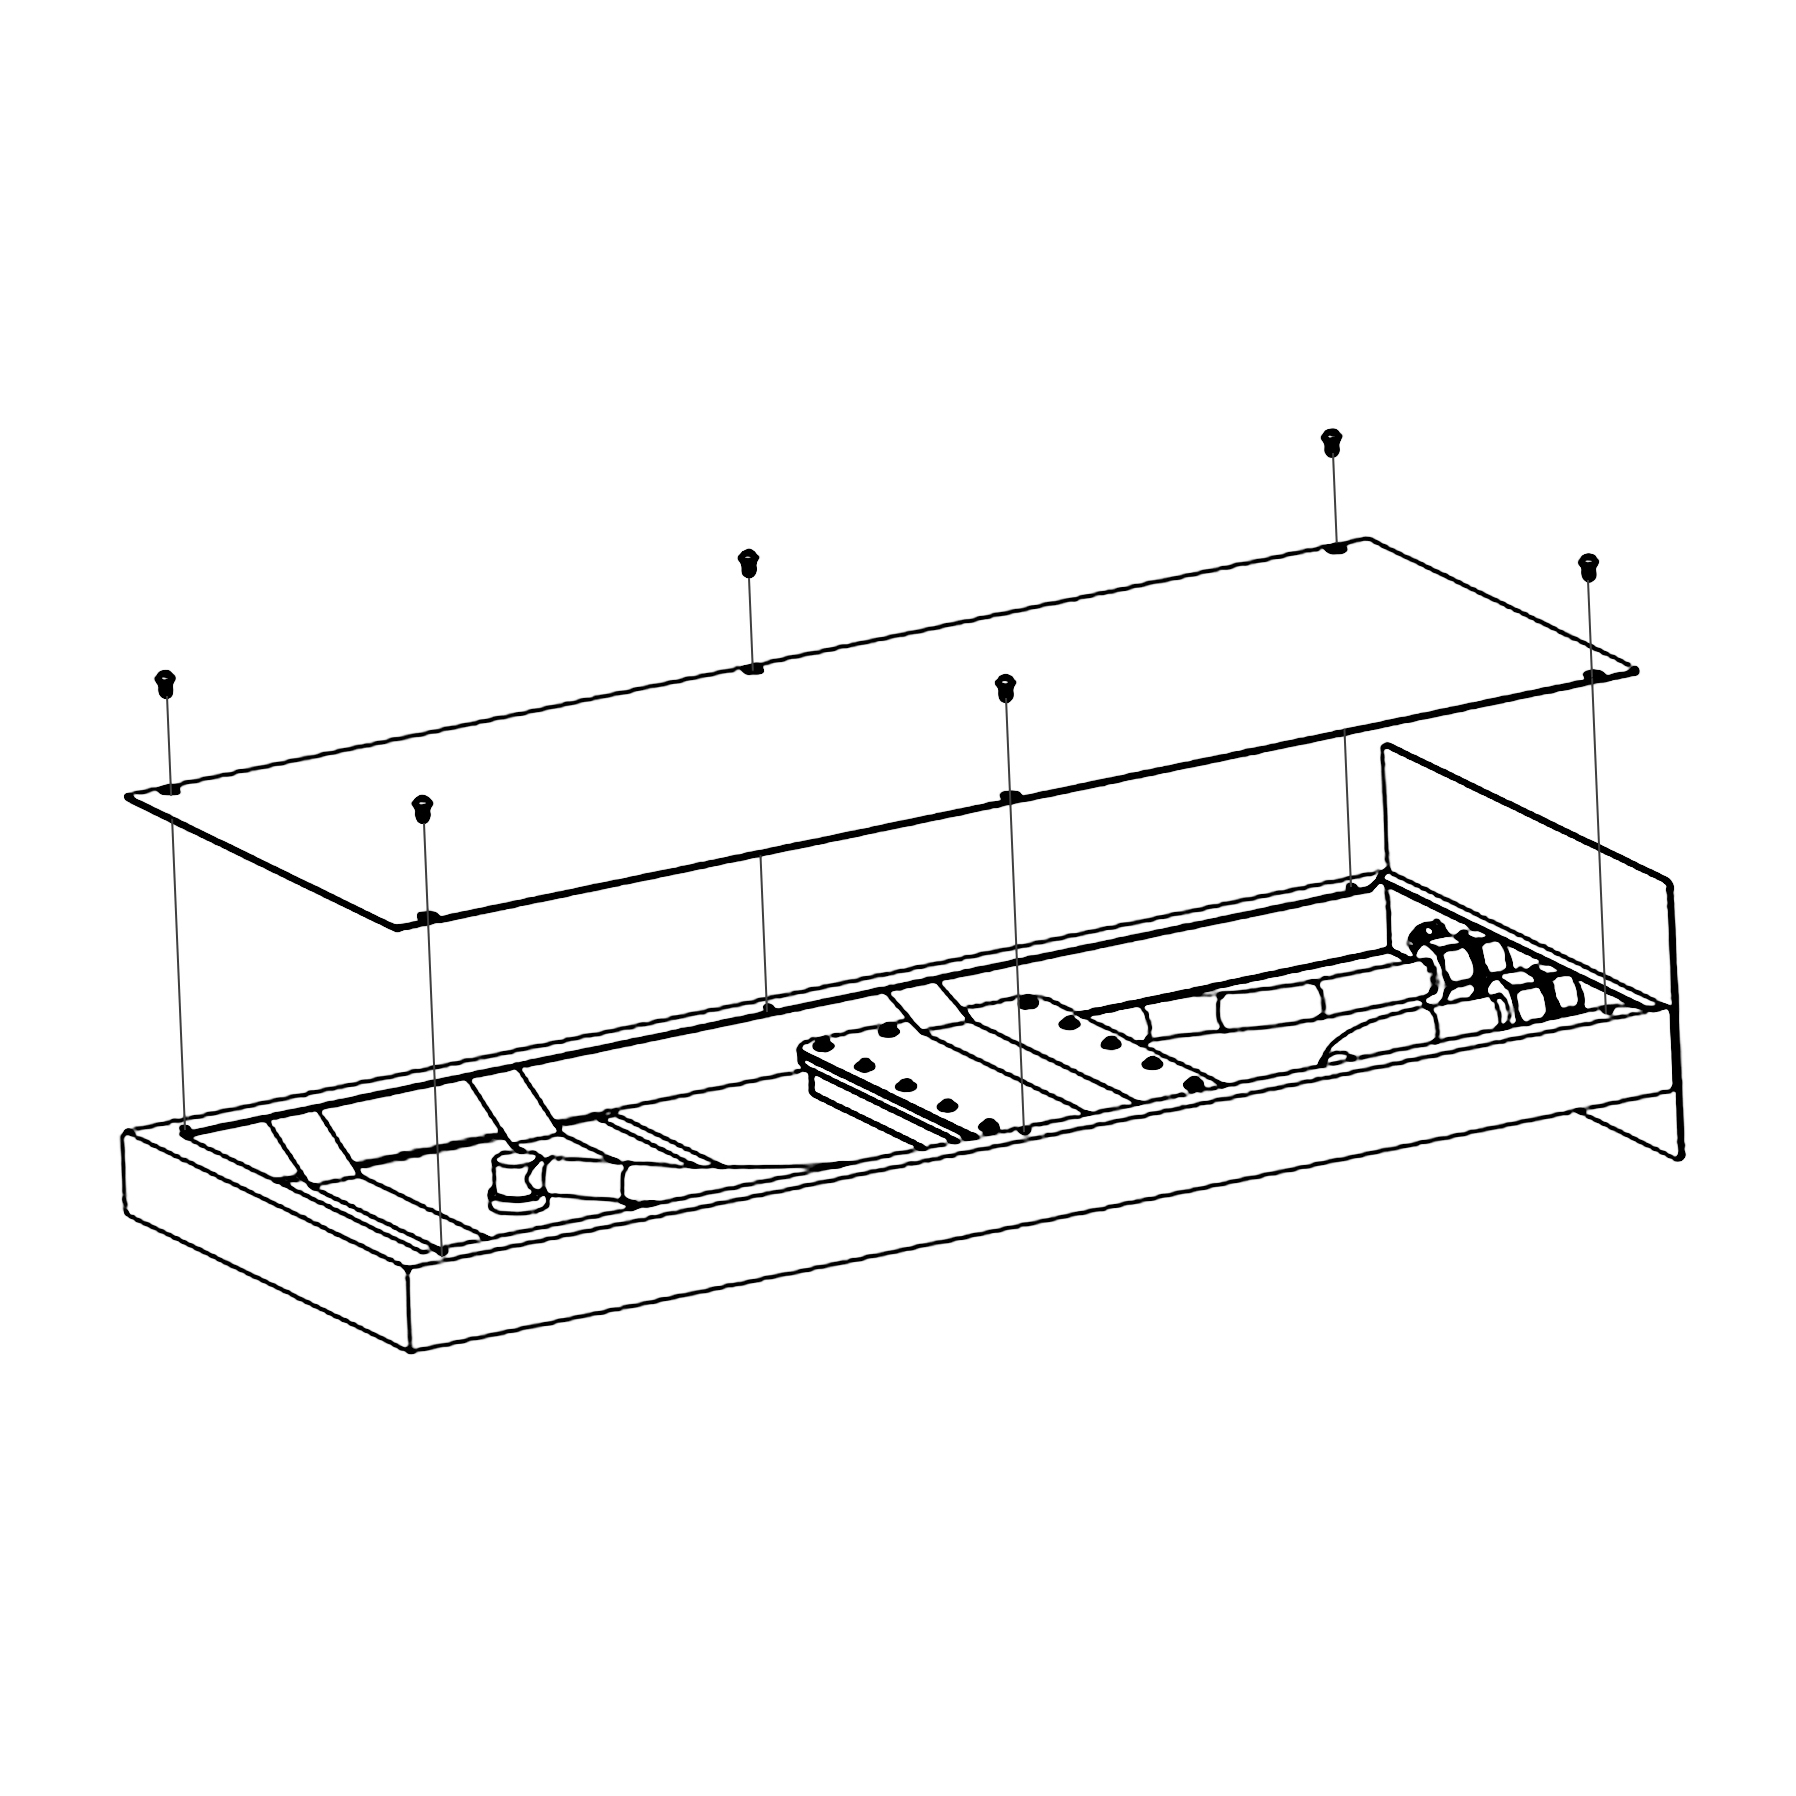
Step 1: Open a hole (6.7" X 3.7") on the shower panel, putting some glass cement around the back of the control panel and fit it in the hole of the shower panel as picture shown.

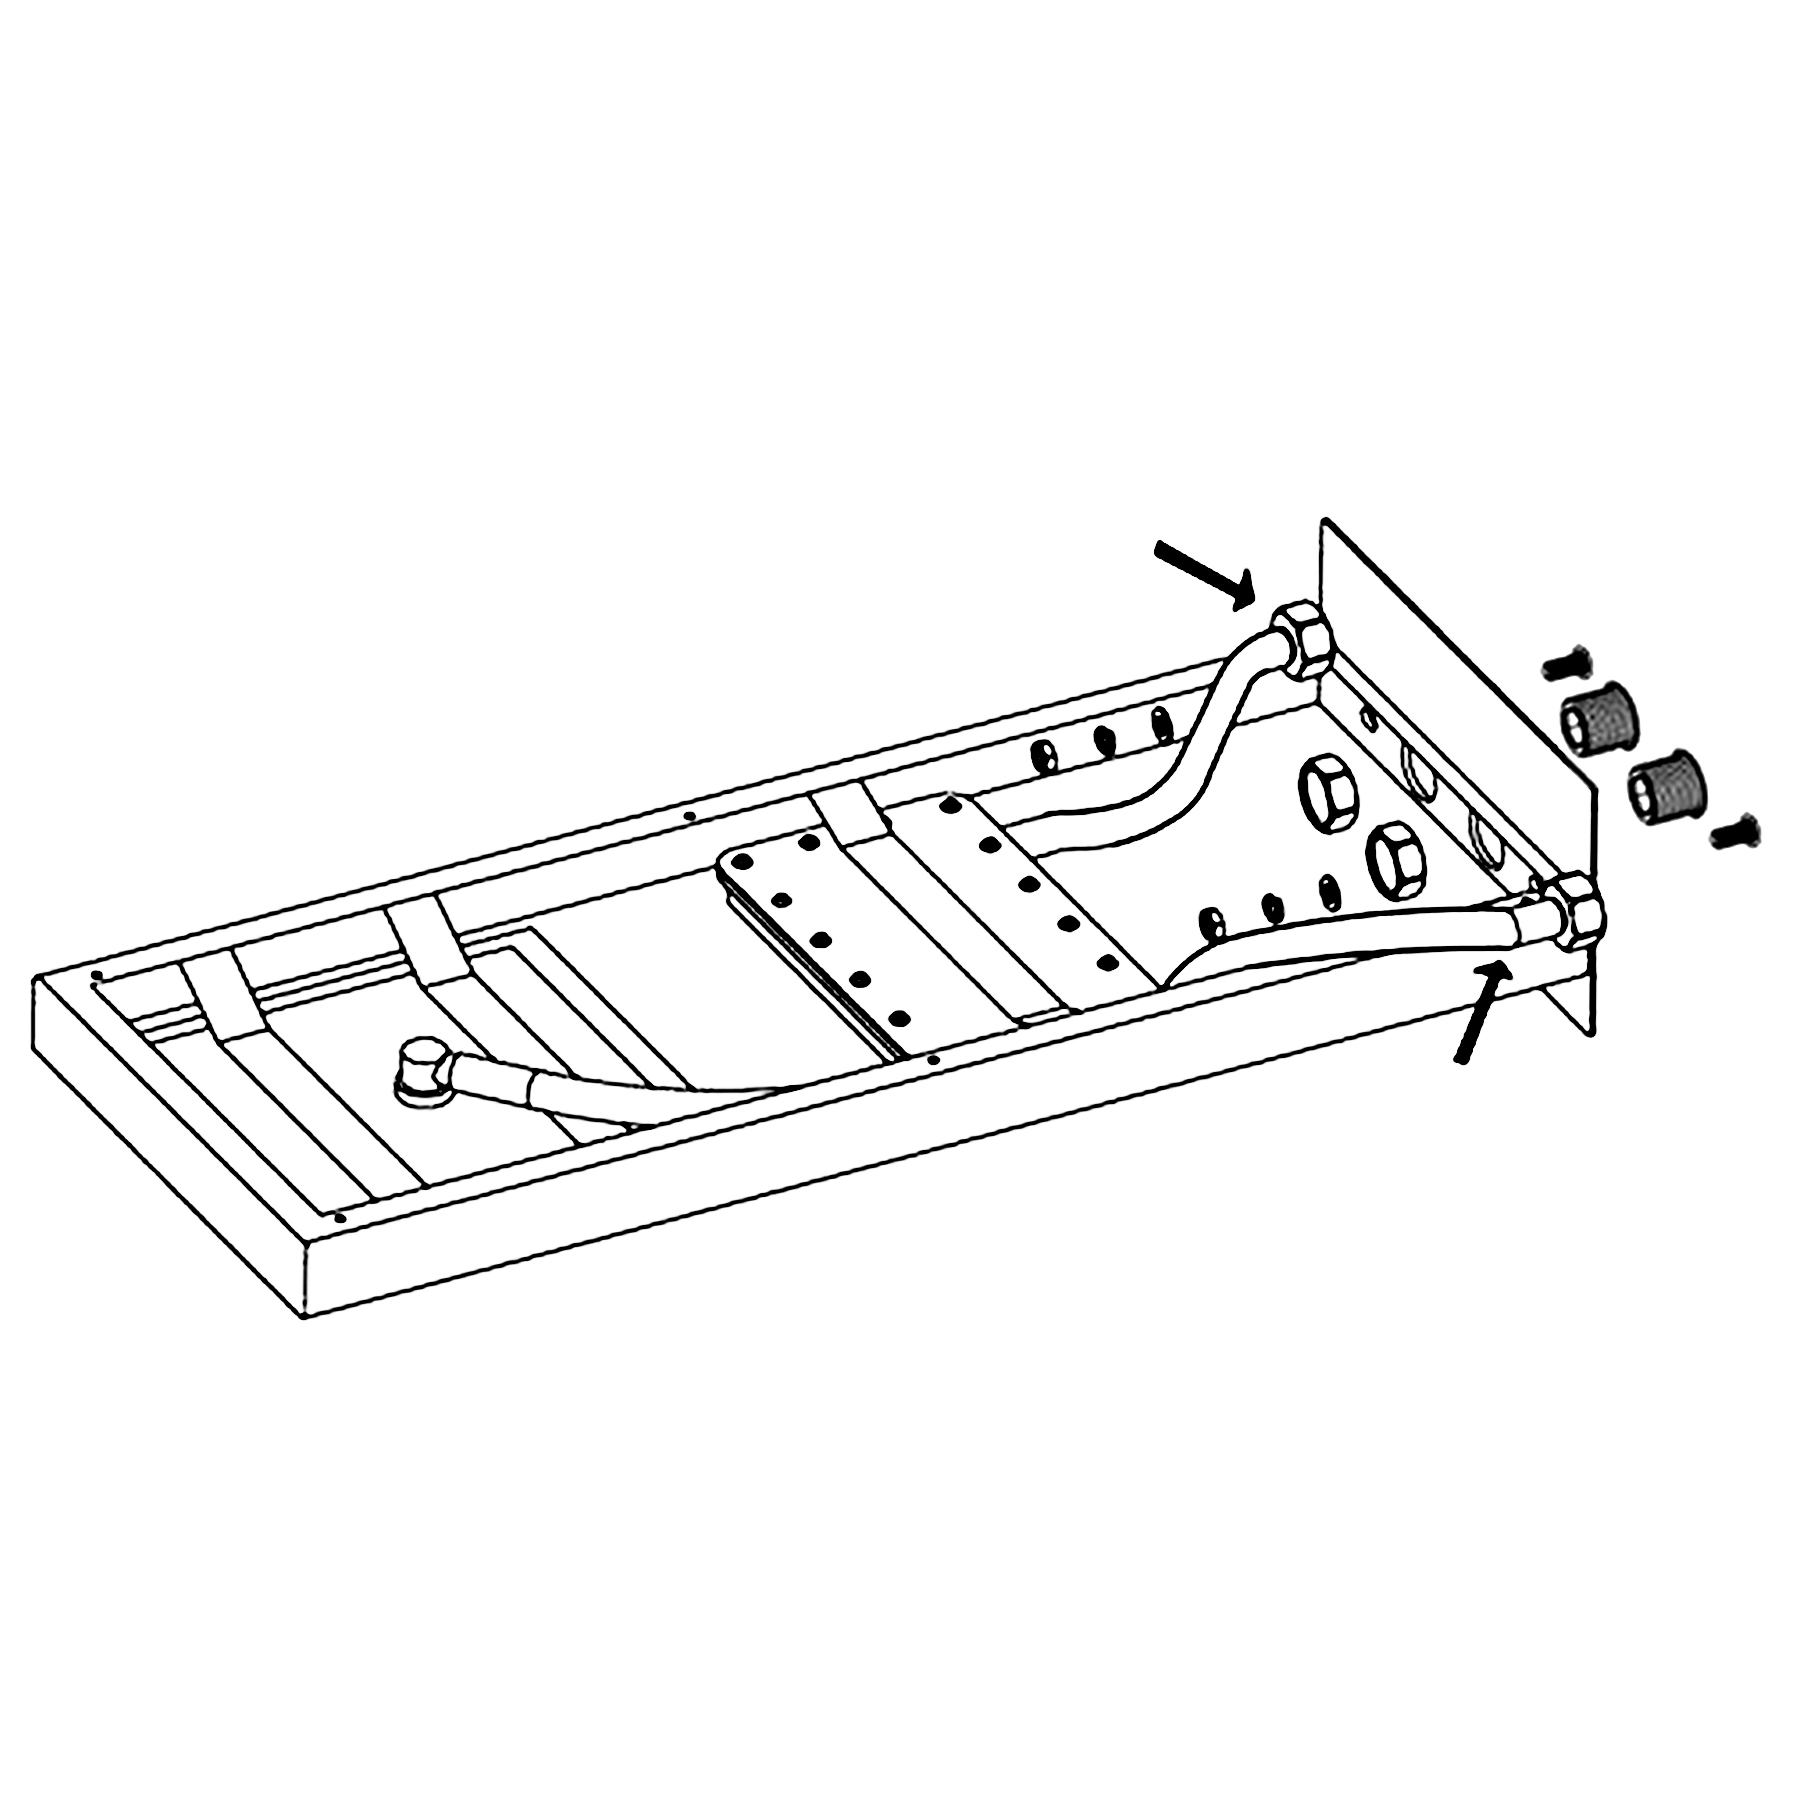
Step 2: Fasten the mounting bracket onto the back of the control panel by screws.

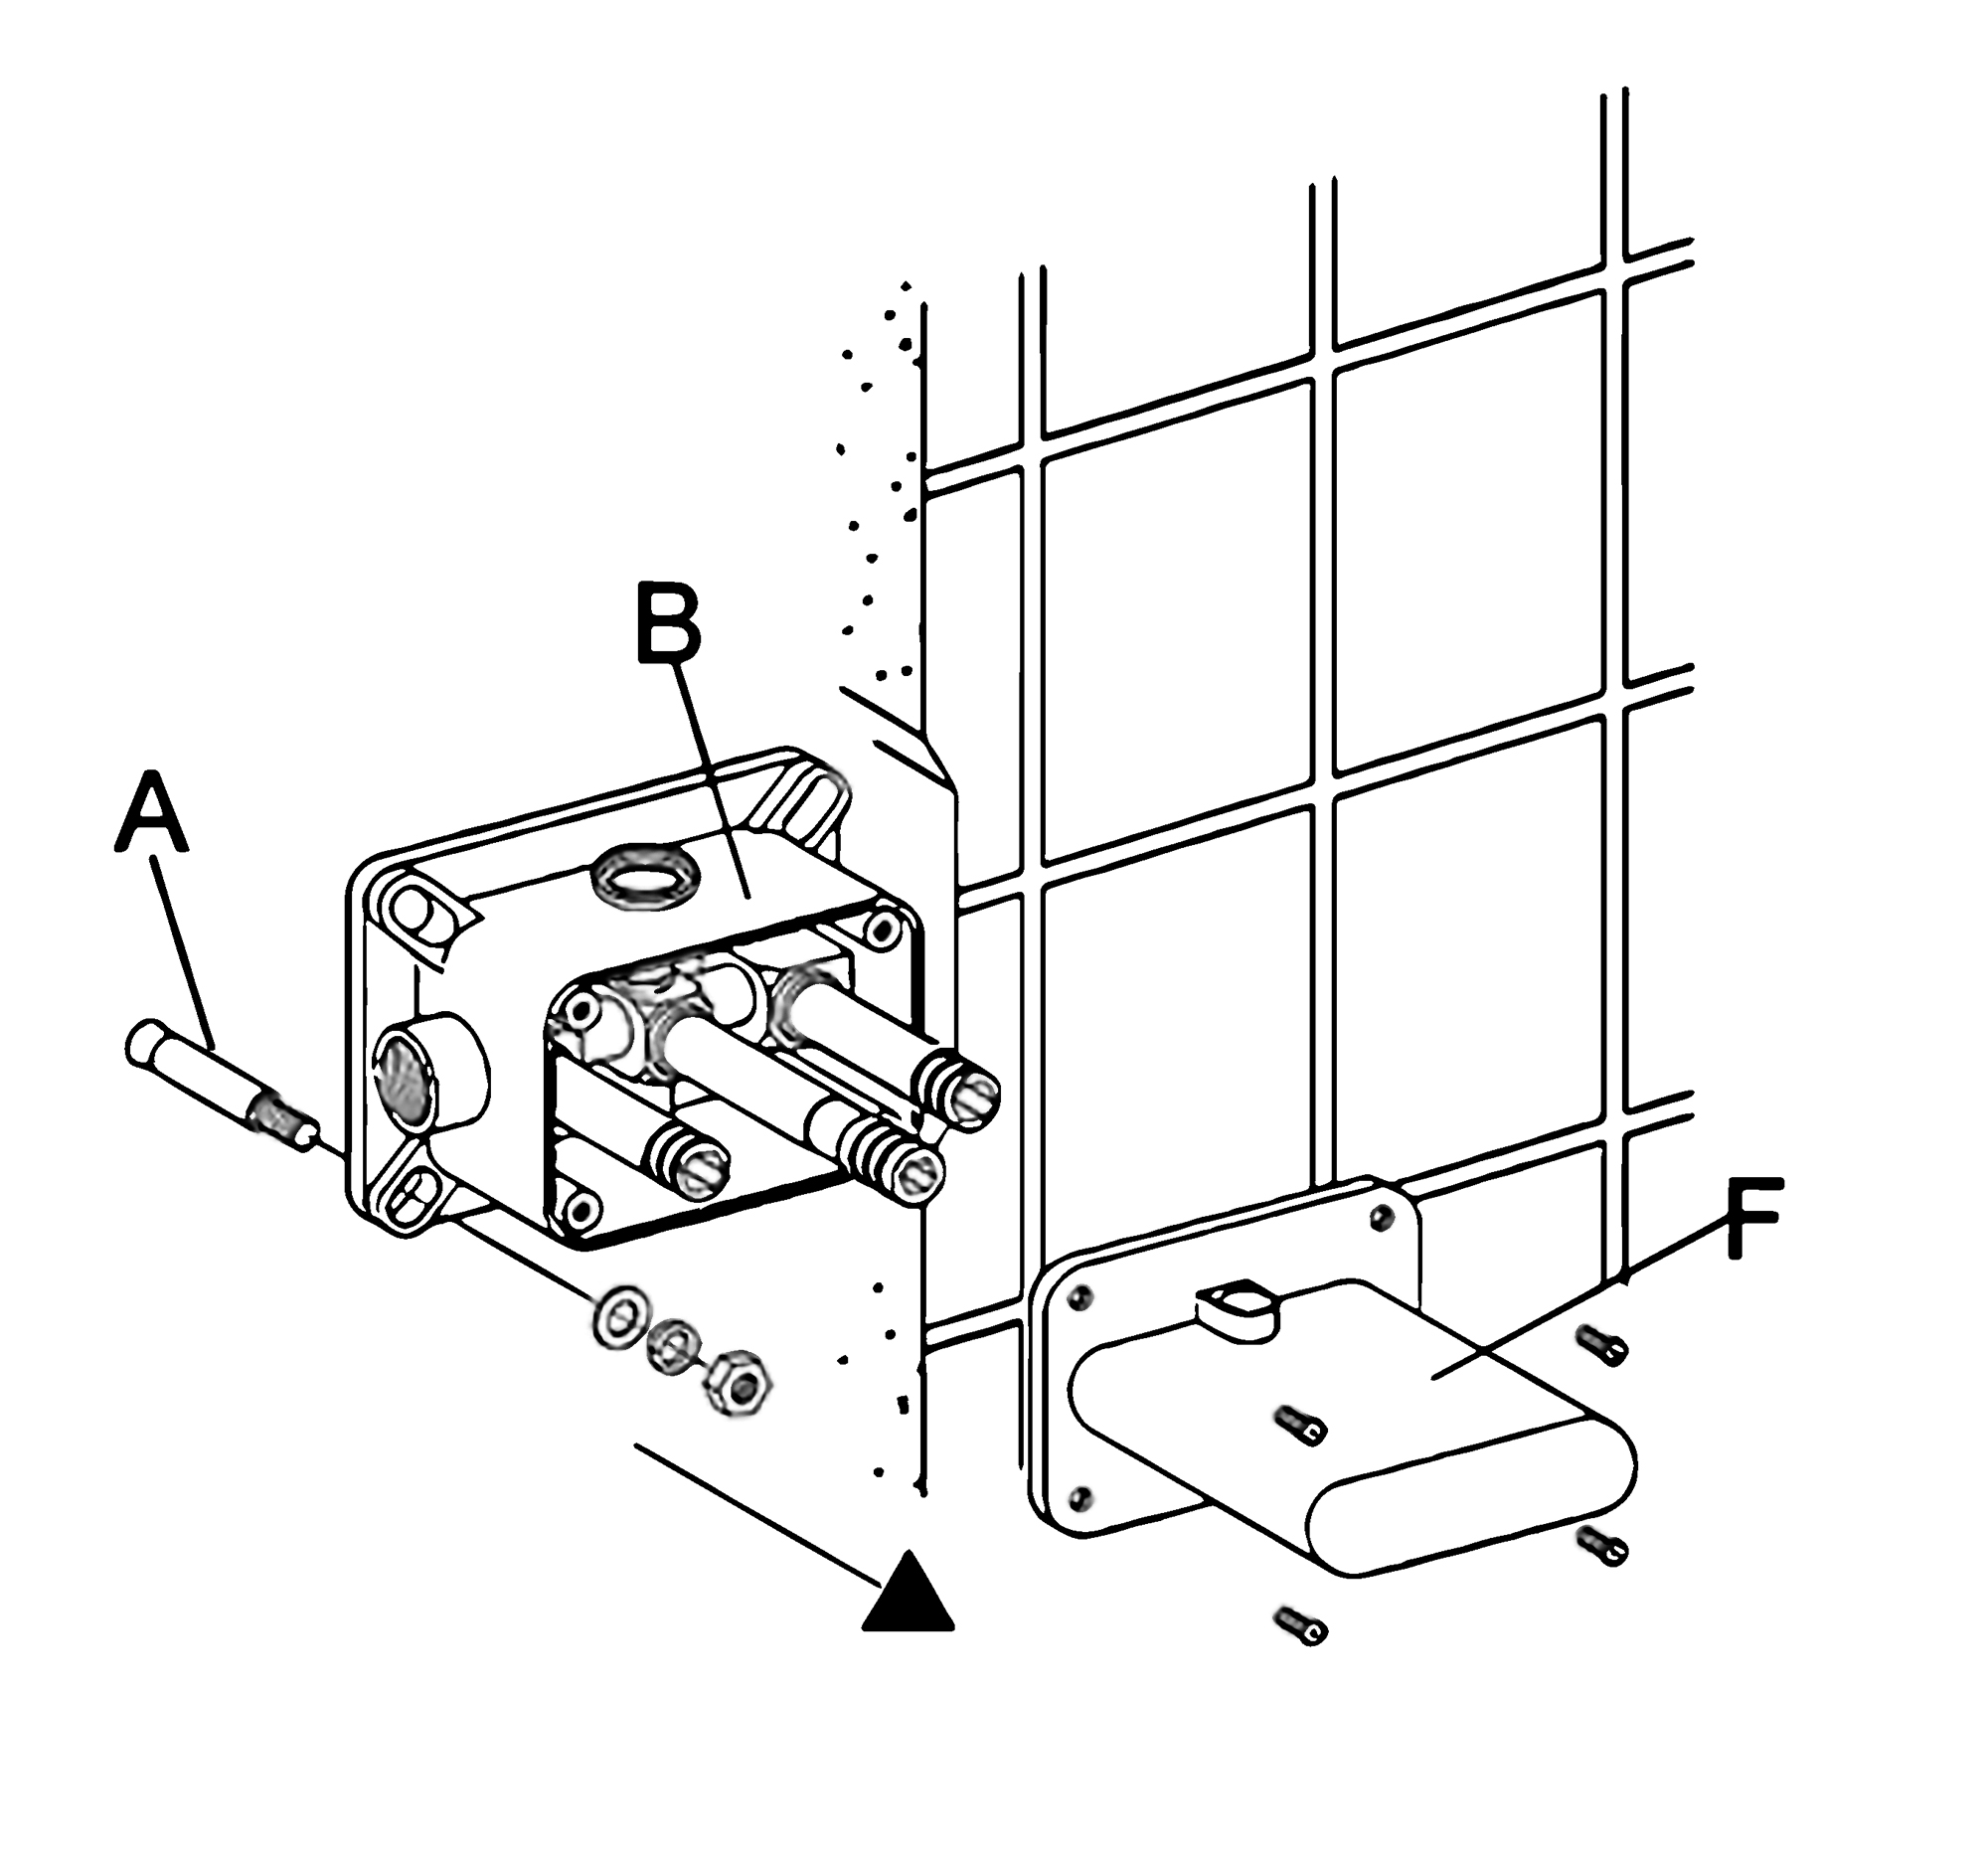
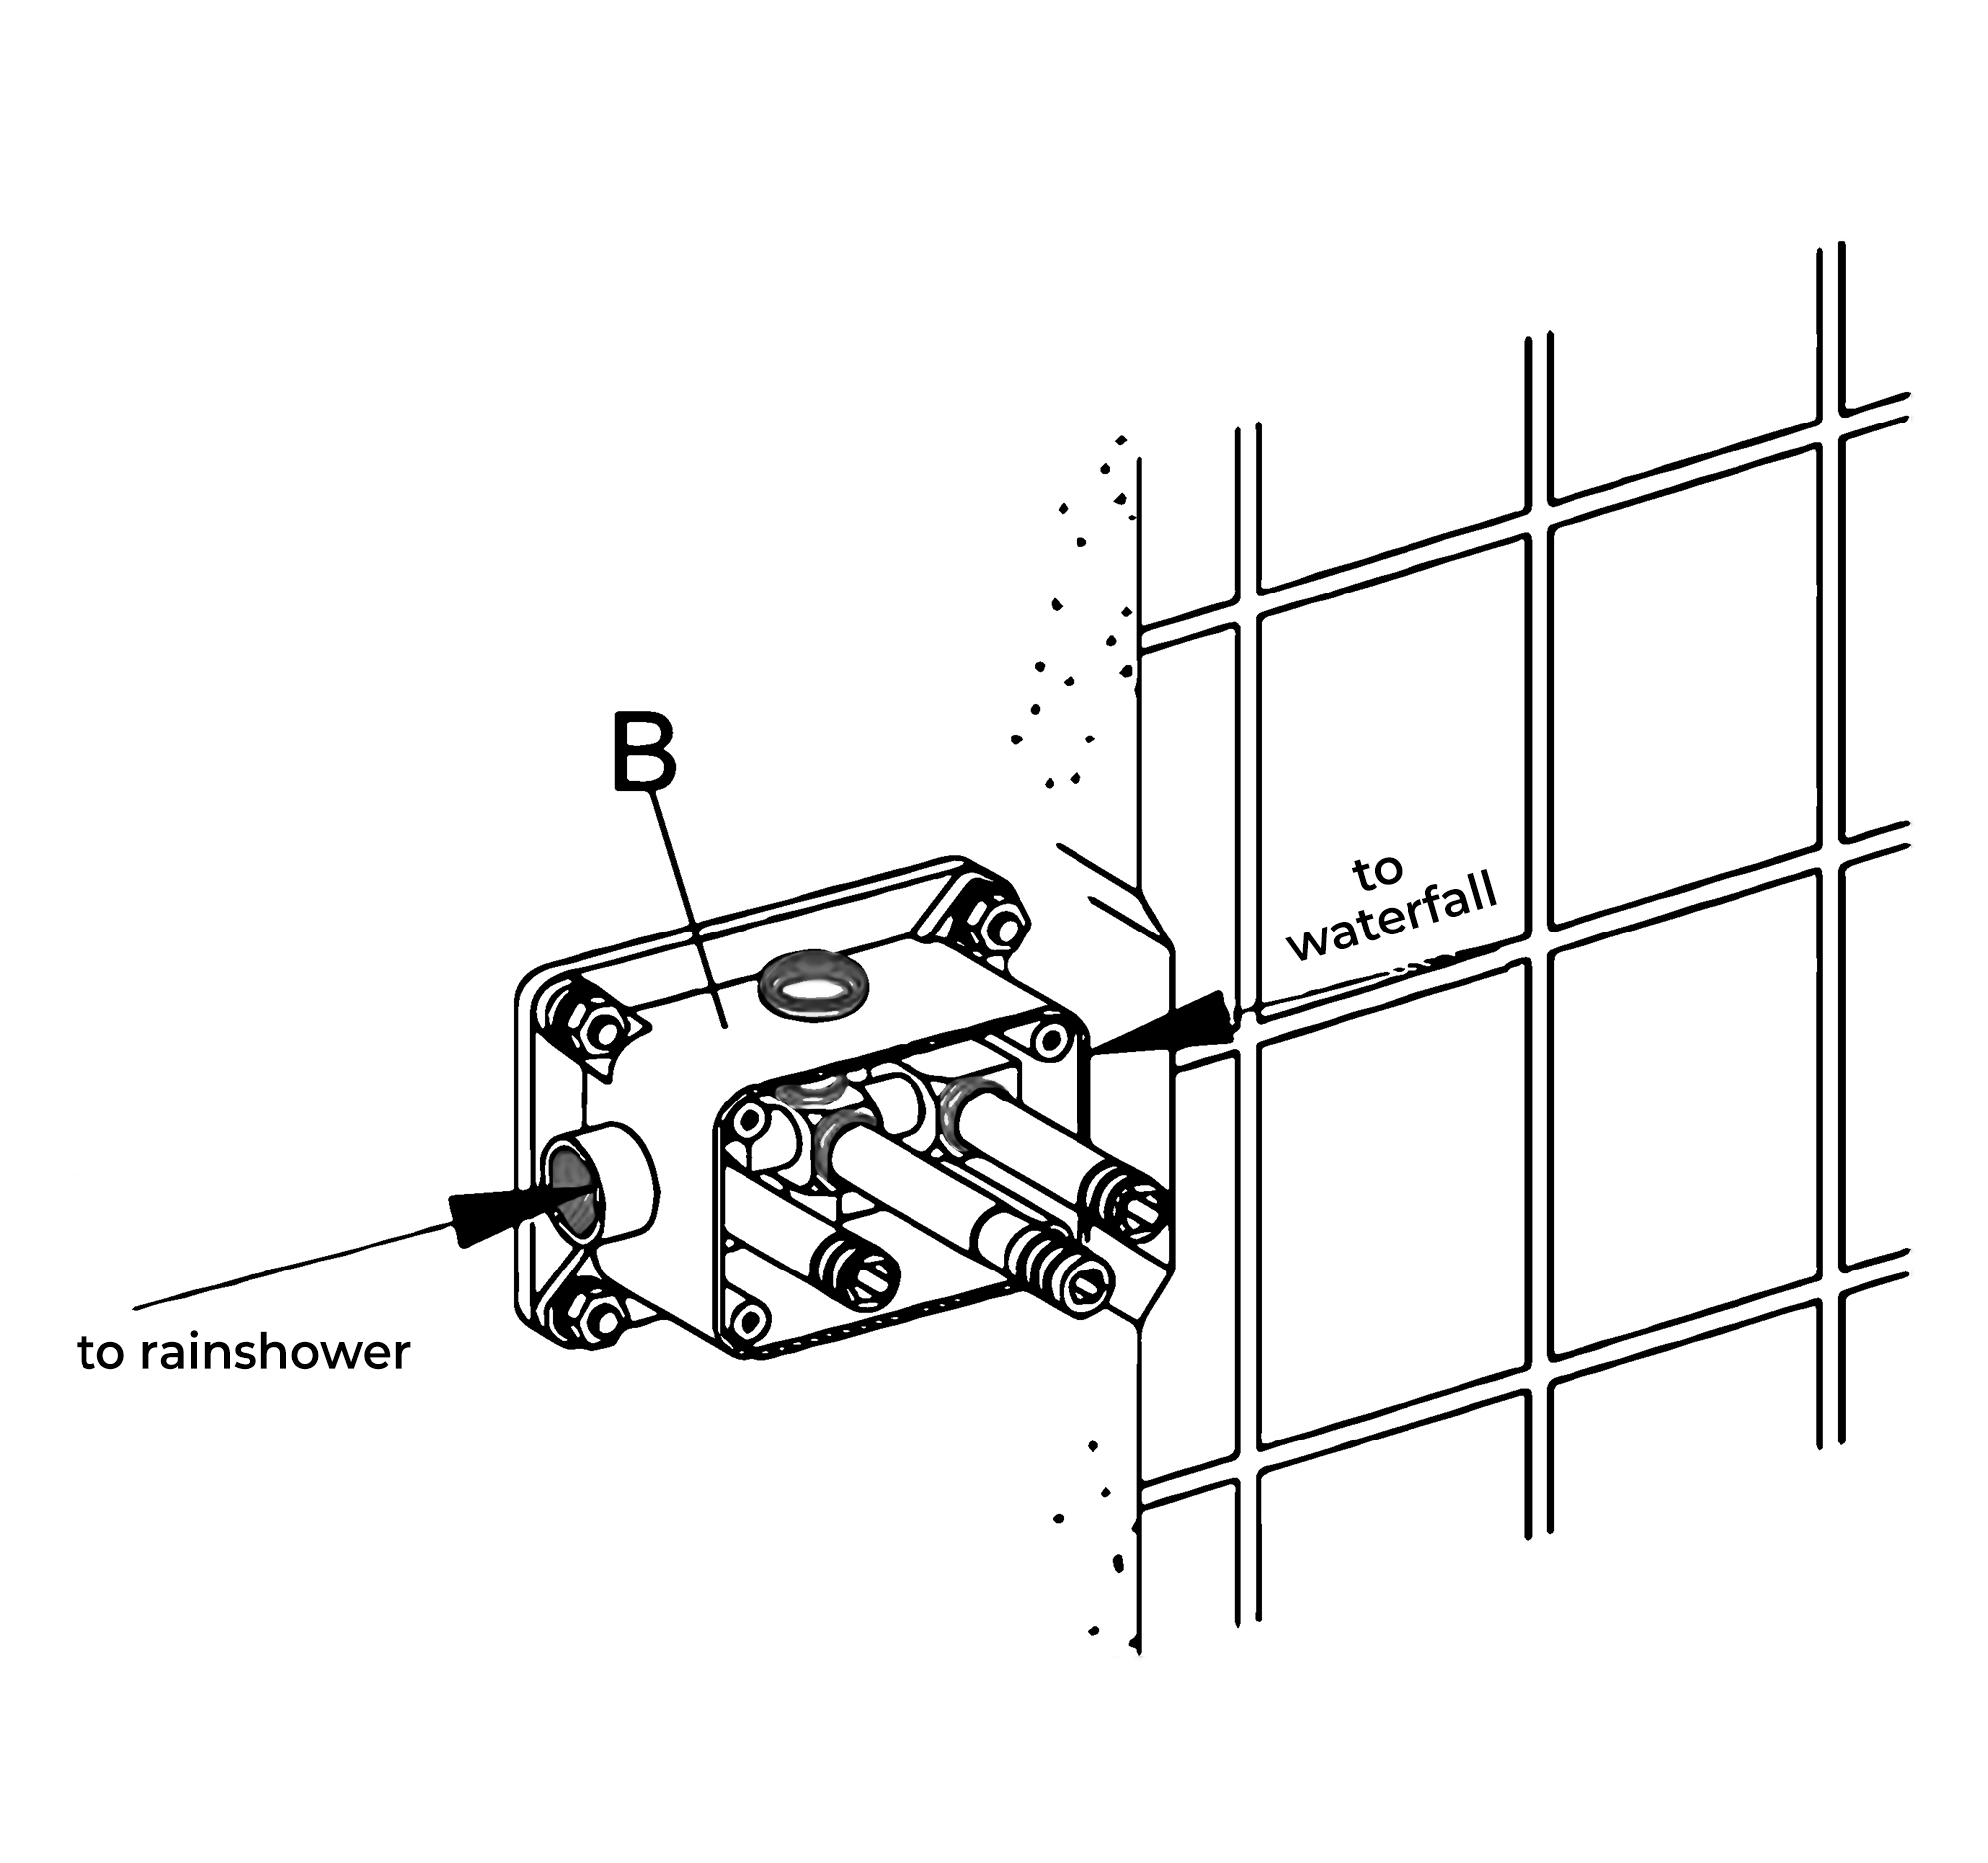
Step 3: Install the host box on the back of the shower panel, connect the cold water and hot water pipe, hand shower, and head shower's pipes.

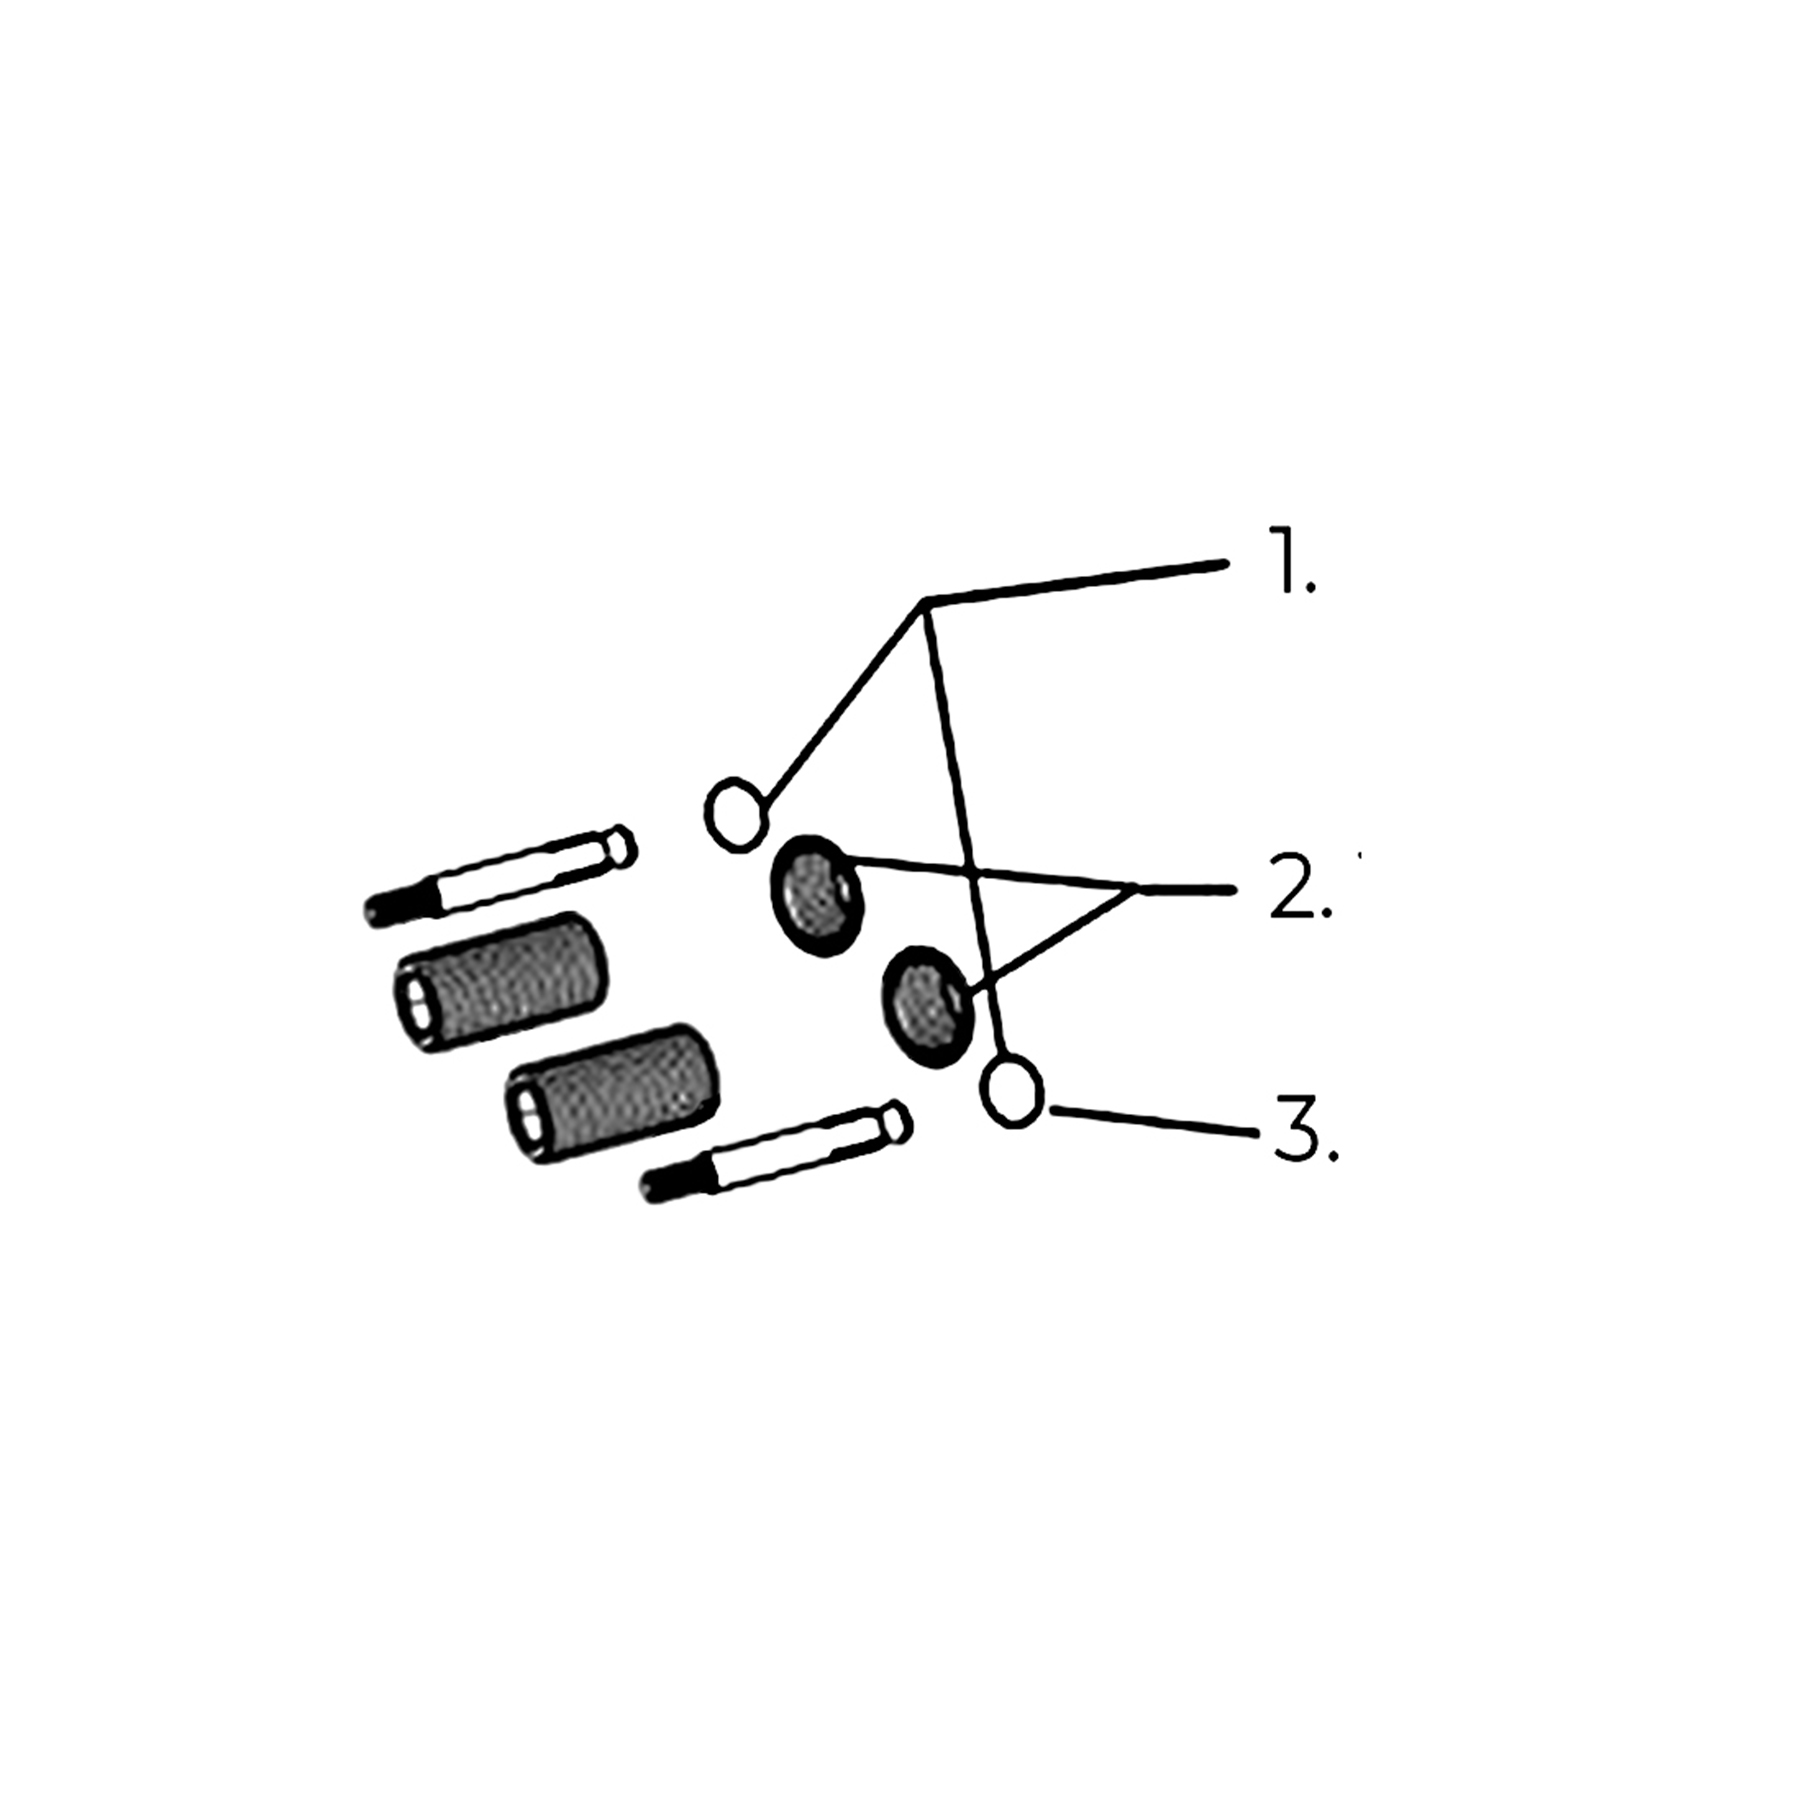
1. Connect the G1/2" hot and cold water inlet pipes to the host box, tighten it and make sure connection is well sealed (as the picture showed).

2. Connect the G1/2" water inlet pipe of the faucet to the water outlet pipe of the host box, tighten it and make sure connection is well seated (as the picture is shown).
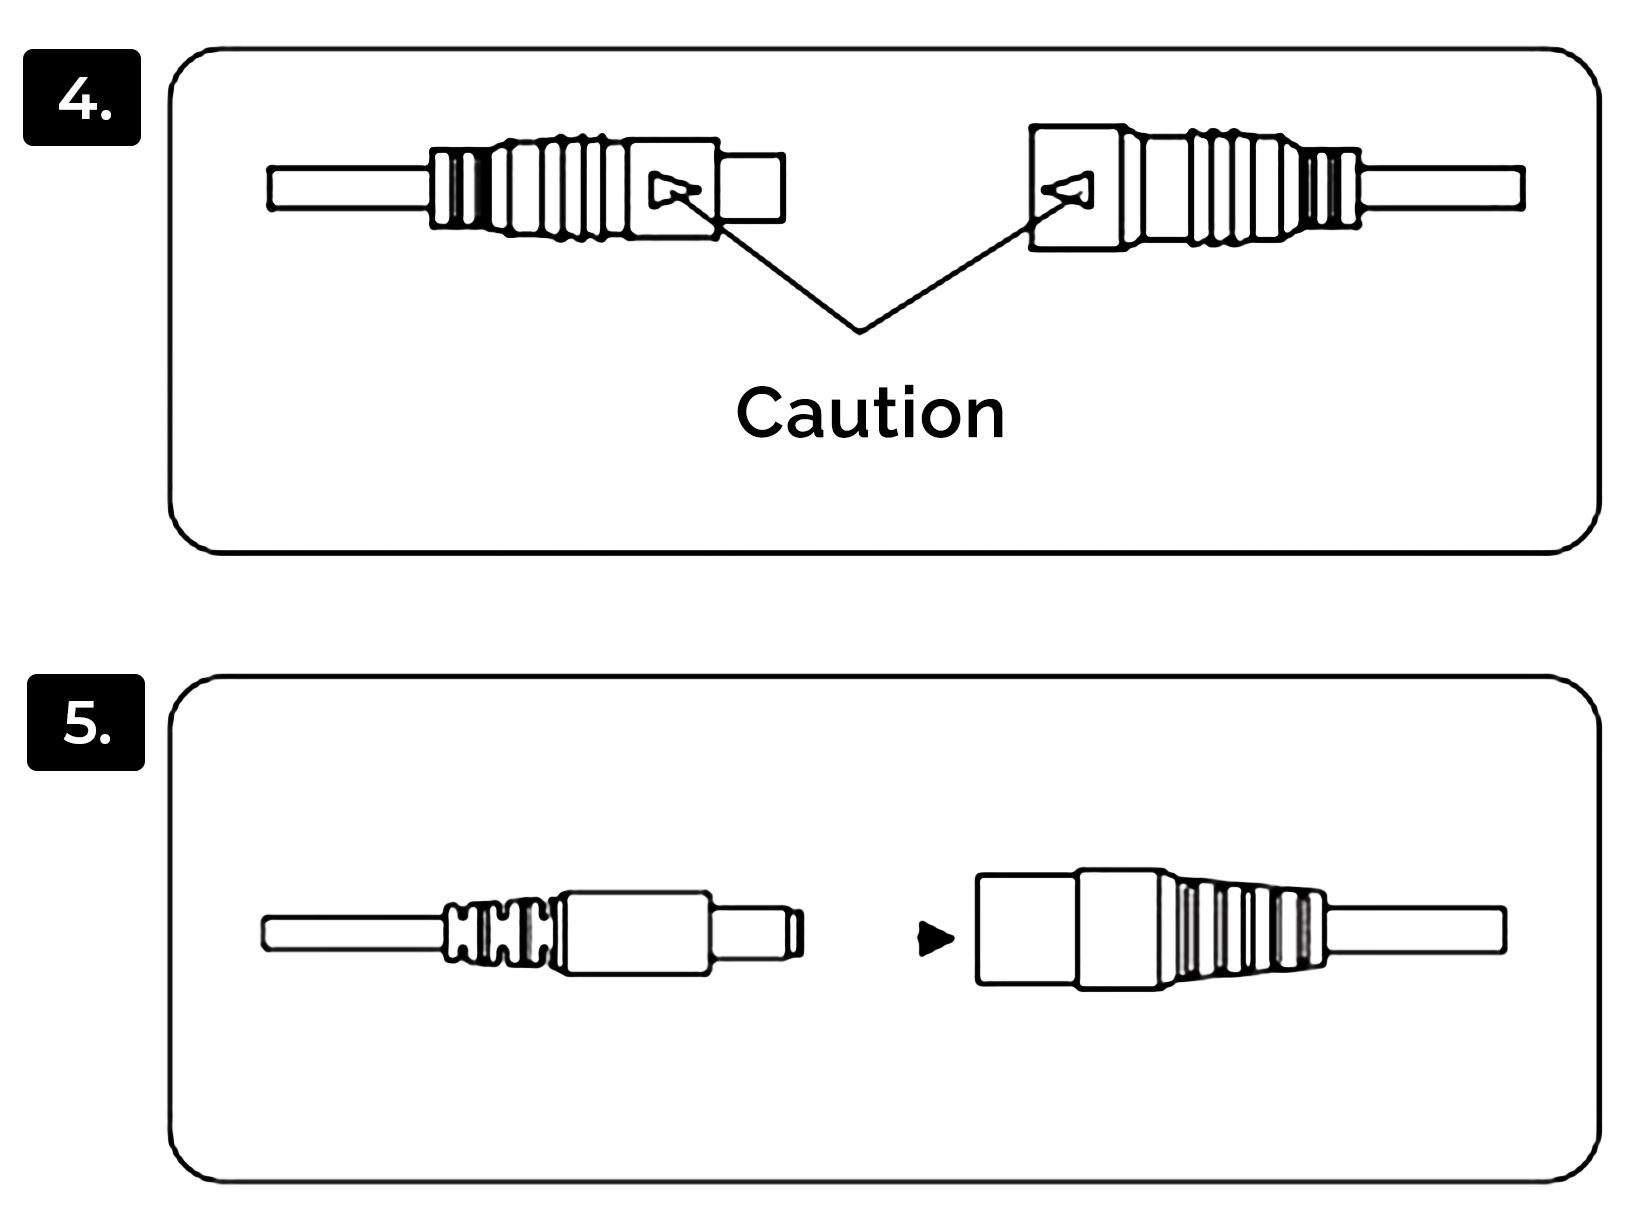

Caution:

• When installation, the hot water pipe, and the cold water pipe cannot mix up. Otherwise, the system cannot work.

• When you tighten the connector nut, torque should not exceed 8NM, GB 2.5NM is OK, otherwise, it will damage the connector of the mixing valve and lead to water leaking.


Step 4: Connect the host box control cable with the control cable of shower faucet as an arrow mark on the picture.

Caution: When connecting the two control cables, you must follow the arrow mark which is shown in the cable joint. If not, it will damage the cable joint.

Step 5: Connect the power supply cable of the host box with the adapter.


2. Recess mounted into wall

According to the wall thickness, you can choose installation method A or B.

Method A: If the wall is thin, the host box and the shower control panel can be installed in a different position.

Method B: If the wall is thick, the host box and the shower control panel can be installed in the same position.

Installation step of method A:

Step 1: Open two-hole in the wall, and reserve space for the pipes and adapter.


Step 2:
Dill four holes by 6mm diameter on the upside hole for install the wall bracket (as the picture) and put the plastic screw into the hole.

Step 3: Drill four holes by 8mm diameter on the downside hole for the host box installation and put the expansion screws into the hole.


Step 4:
Install the wall bracket of control panel and the host box in two holes, according to the pipe's position to set the host box position, adjust the screw of wall bracket to make sure it is concave the wall surface with a 0.5-1 mm difference.

Step 5: Connect the water pipe and the power supply cable of the host box, get water supply to make sure the pipe has no leak. Connect the host box control cable to the control panel hole and fasten it, using the cement to seal the wall and cover by the tiles.

Step 6: Connect the control cable between the host box and the control panel put some silicon on the back case of the control panel and put it on the wall bracket.


How to install the Shower Set with Showerhead and Thermostatic Shower Mixer


BathSelect Ancient Round Antique Rainfall Wall ShoweBathSelect Ancient Round Antique Rainfall Wall Shower Head Installation Instructions Head Installation Instructions