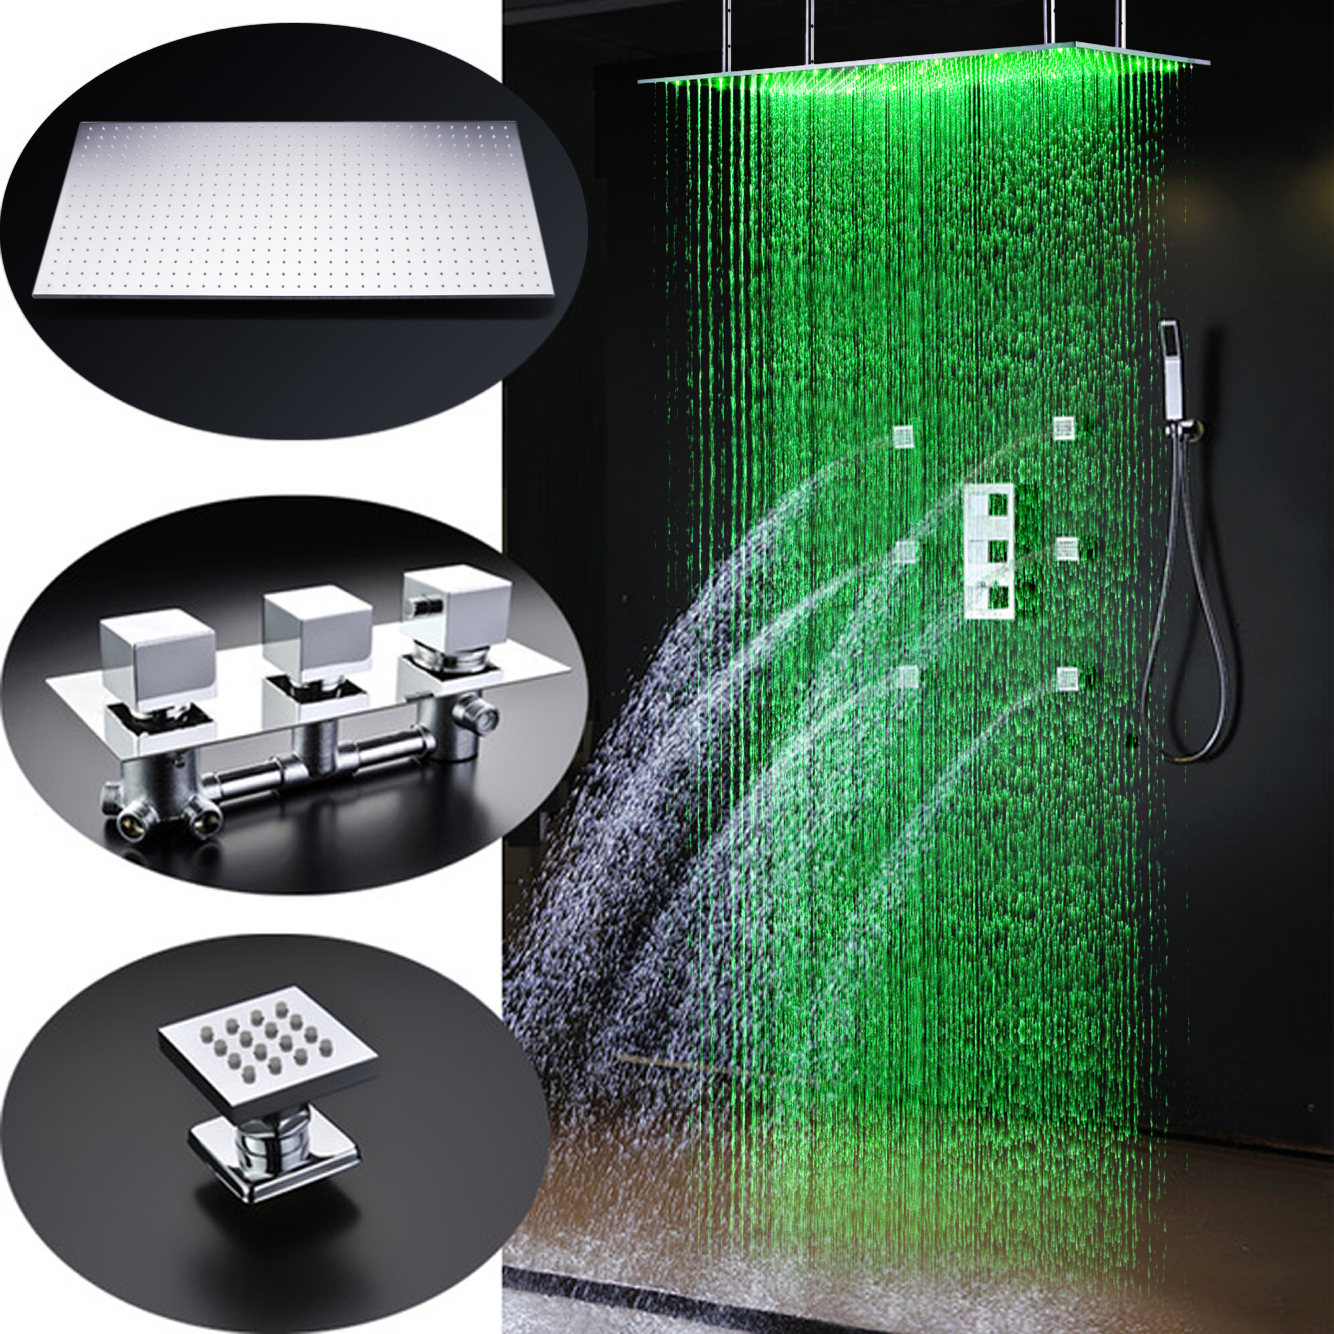
Fontana Saint Denis Large Chrome LED Rain Shower Head with Body Jets & Handheld Shower
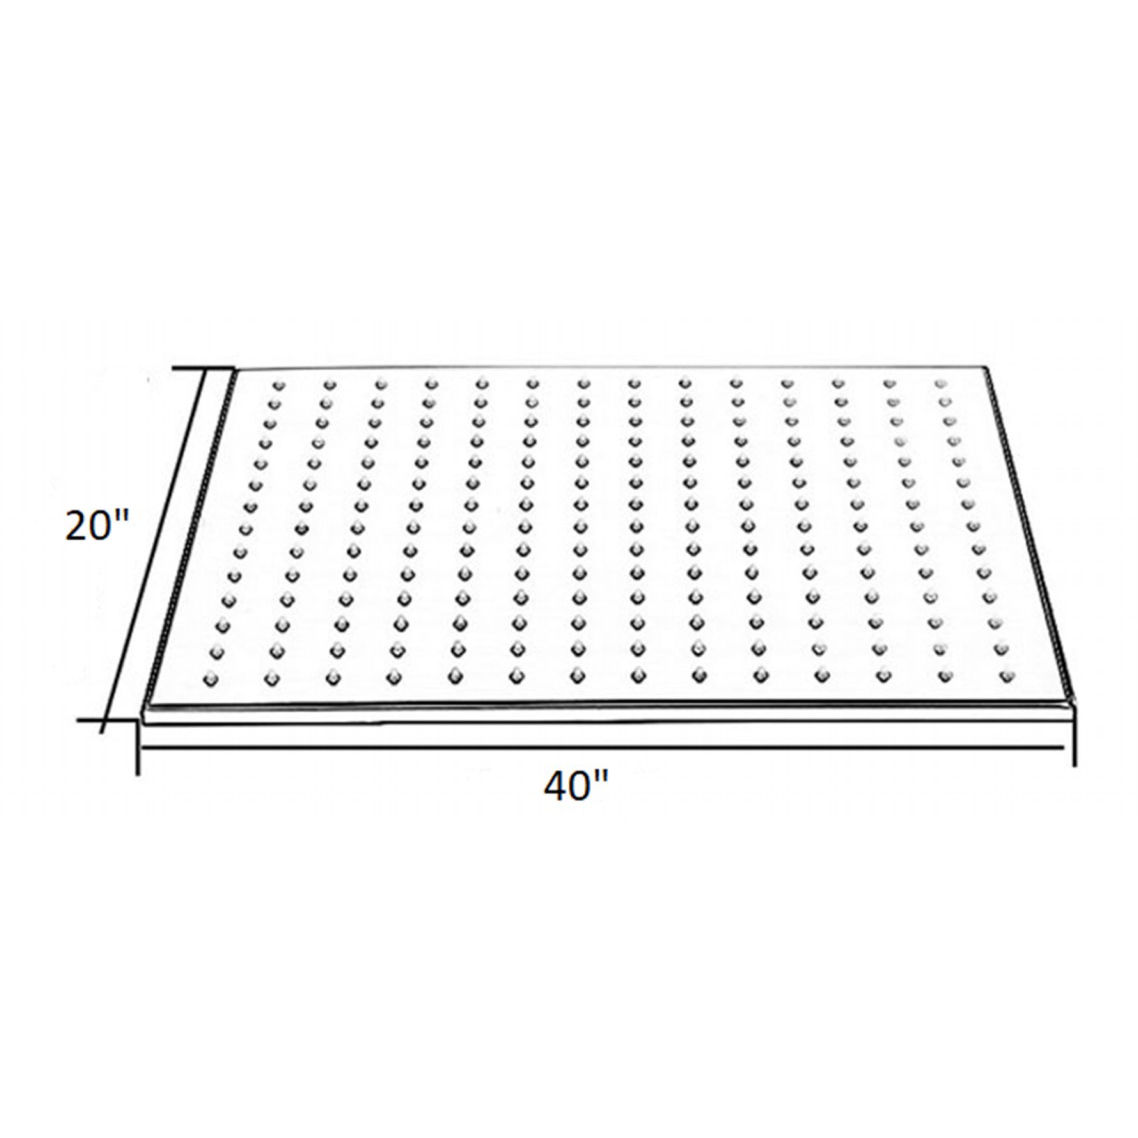
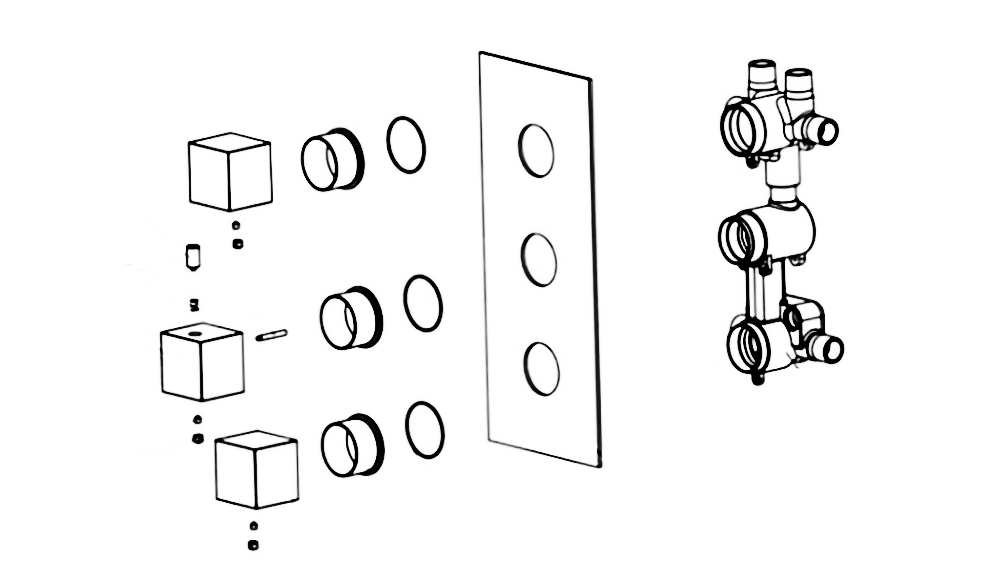
At 20" x 40" in size, this ceiling mount rainfall shower head provides maximum coverage. Six adjustable shower jets can provide massaging water to the areas you need it most. Handheld shower, hose, and 3 valve mixer included. Built-in hydro-powered device powers the LED lights, which provide visual shower temperature cues to reduce water waste. The lights will dim and brighten when you lower and raise the pressure so you can set the perfect mood, water, and lighting. When water temperature is ≤89 °F (≤32 °C), Blue color will show automatically. When water temperature is between 97 to 107 °F (36-42 °C), Green color will show automatically. When water temperature is between 109 to 122 °F (43-50 °C), Red color will show automatically. When water temperature is above 122 °F (>50 °C), Red color will flash immediately.
Fontana Saint Denis Large Chrome LED Rain Shower Head with Body Jets & Handheld Shower Features:
|
Brand Name: FontanaShowers
Model Number: FS9787
Material: Solid Brass
Finish: Chrome
Style: Contemporary
Shower Arm: Included
Showerhead Size: 20" x 40"
LED Power Source: Water Flow
LED Color: LED colors Blue, Green, Red
Showerhead Style: Rain Shower
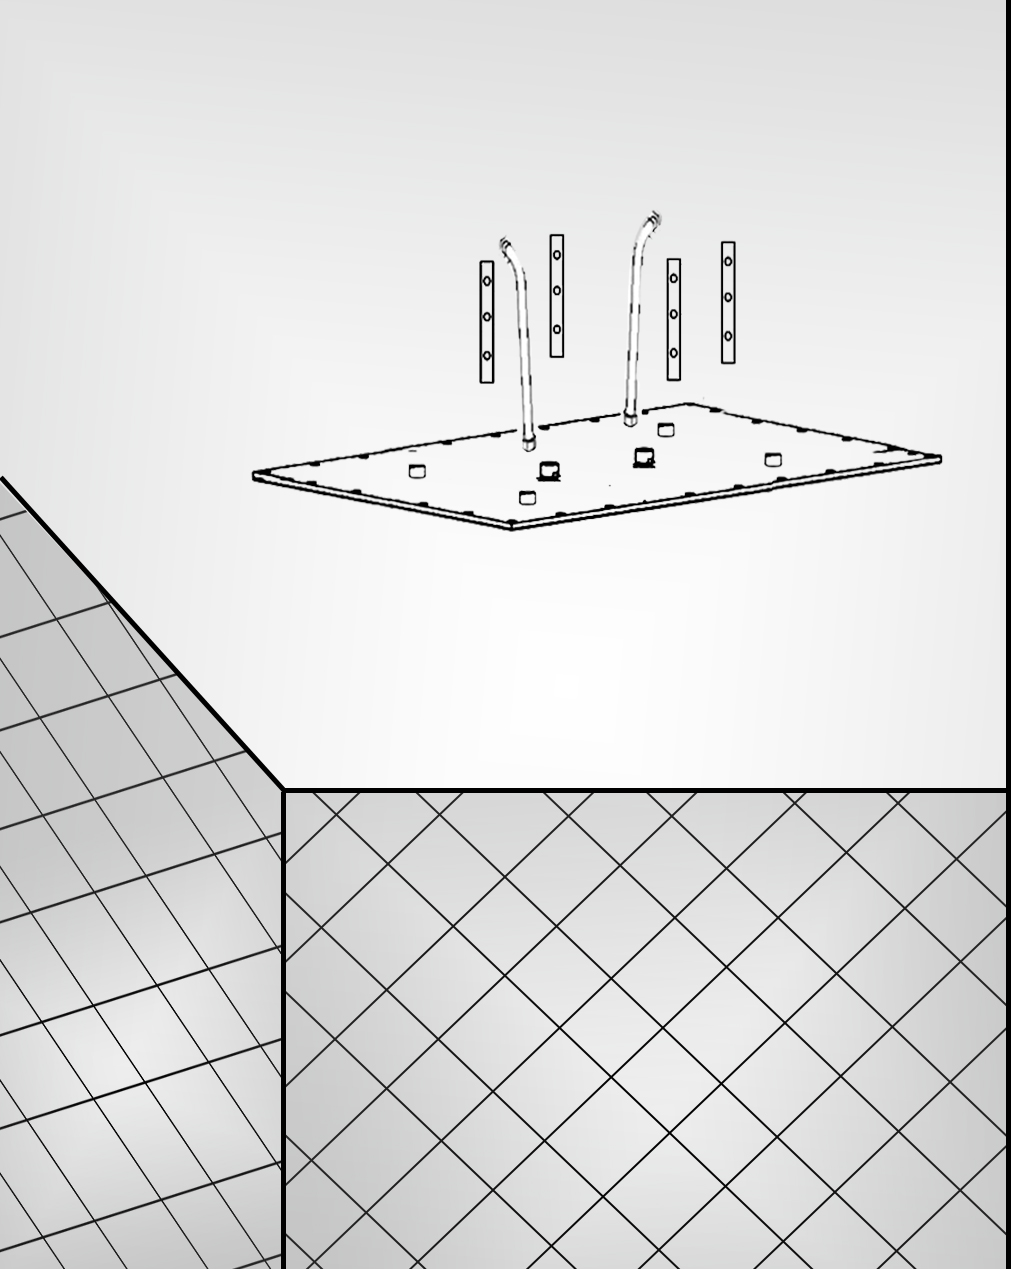
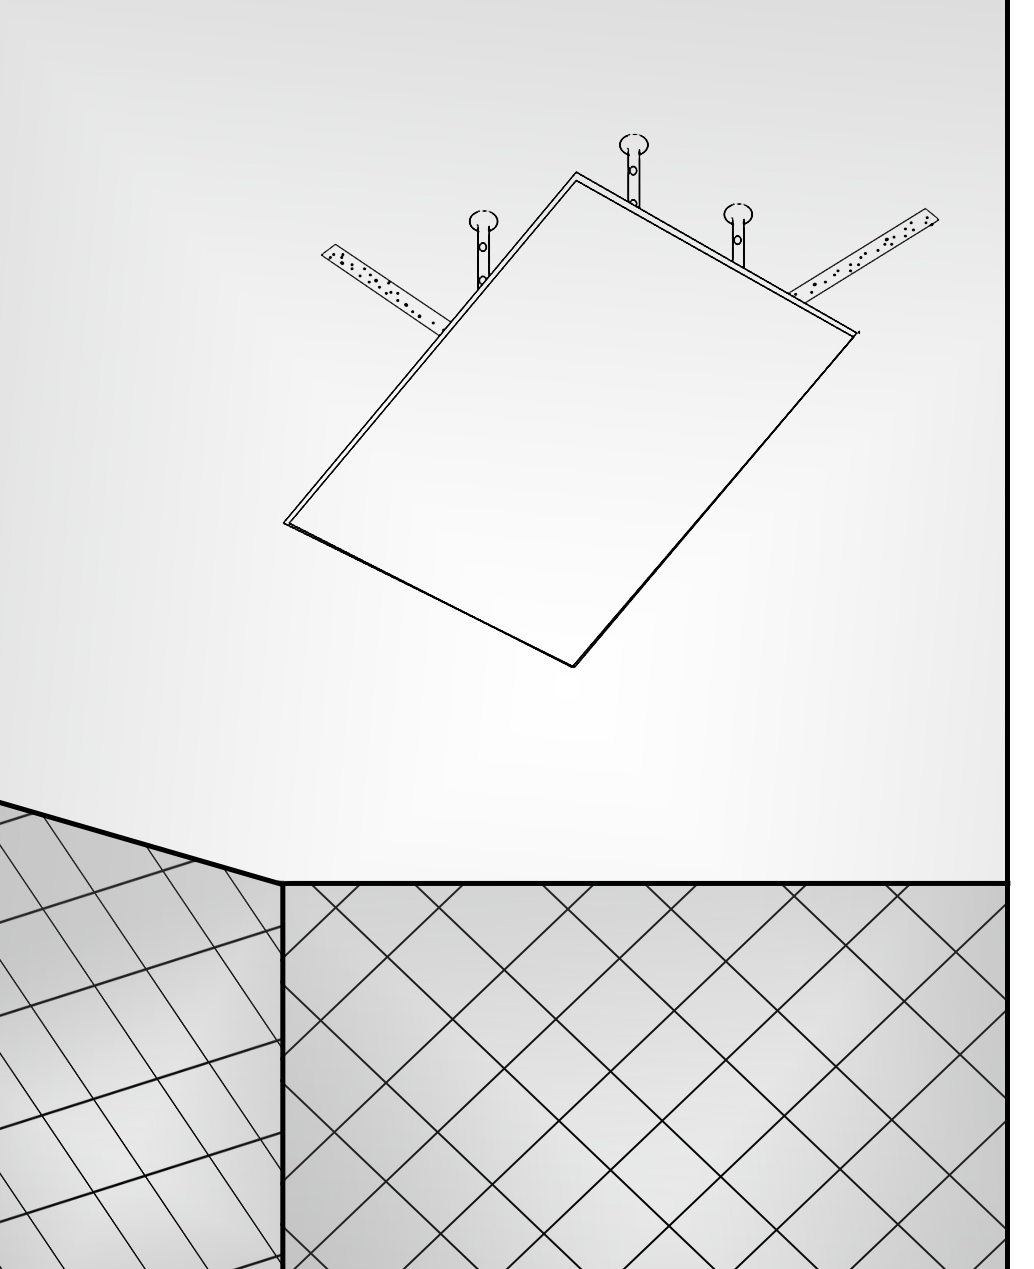
Mount Method: Ceiling Mount
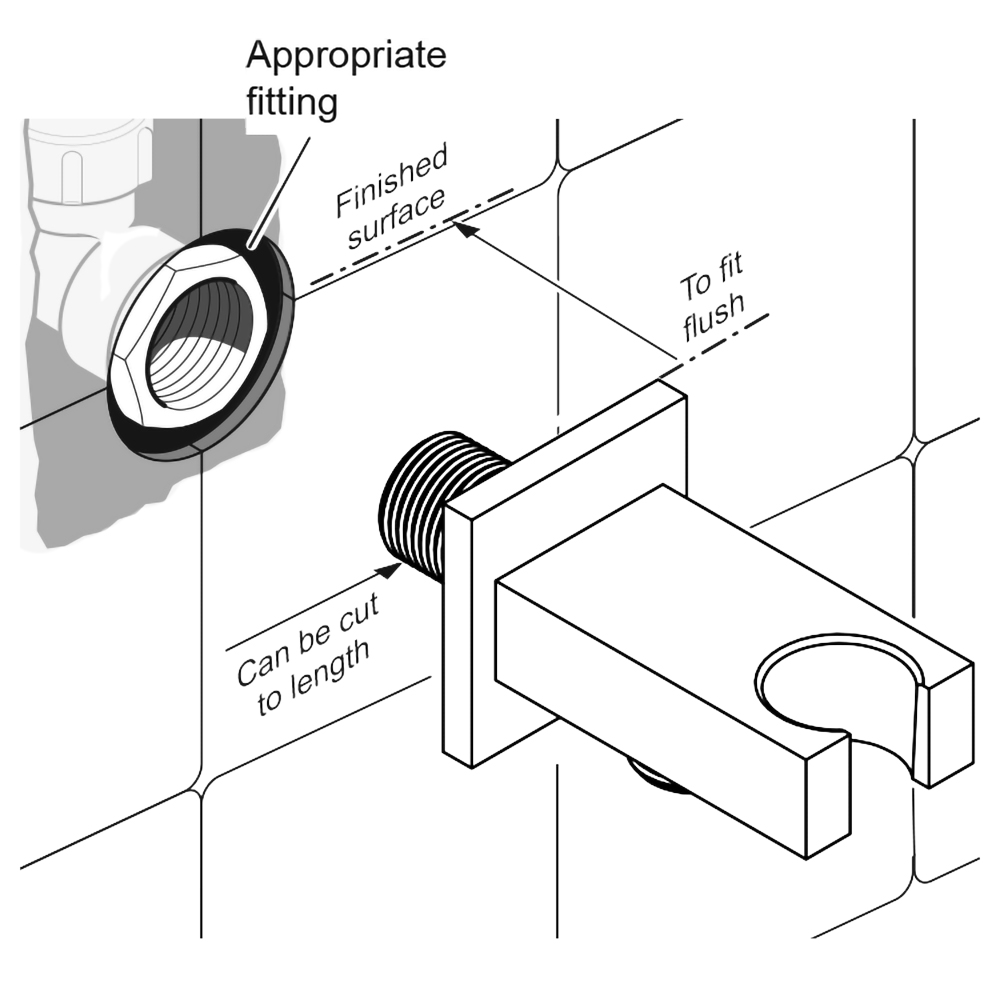
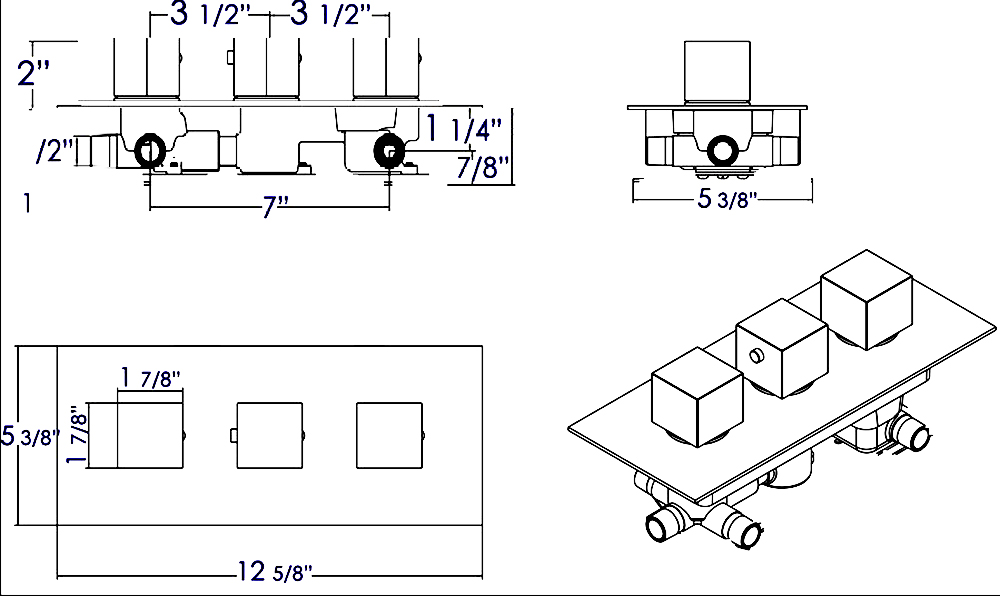
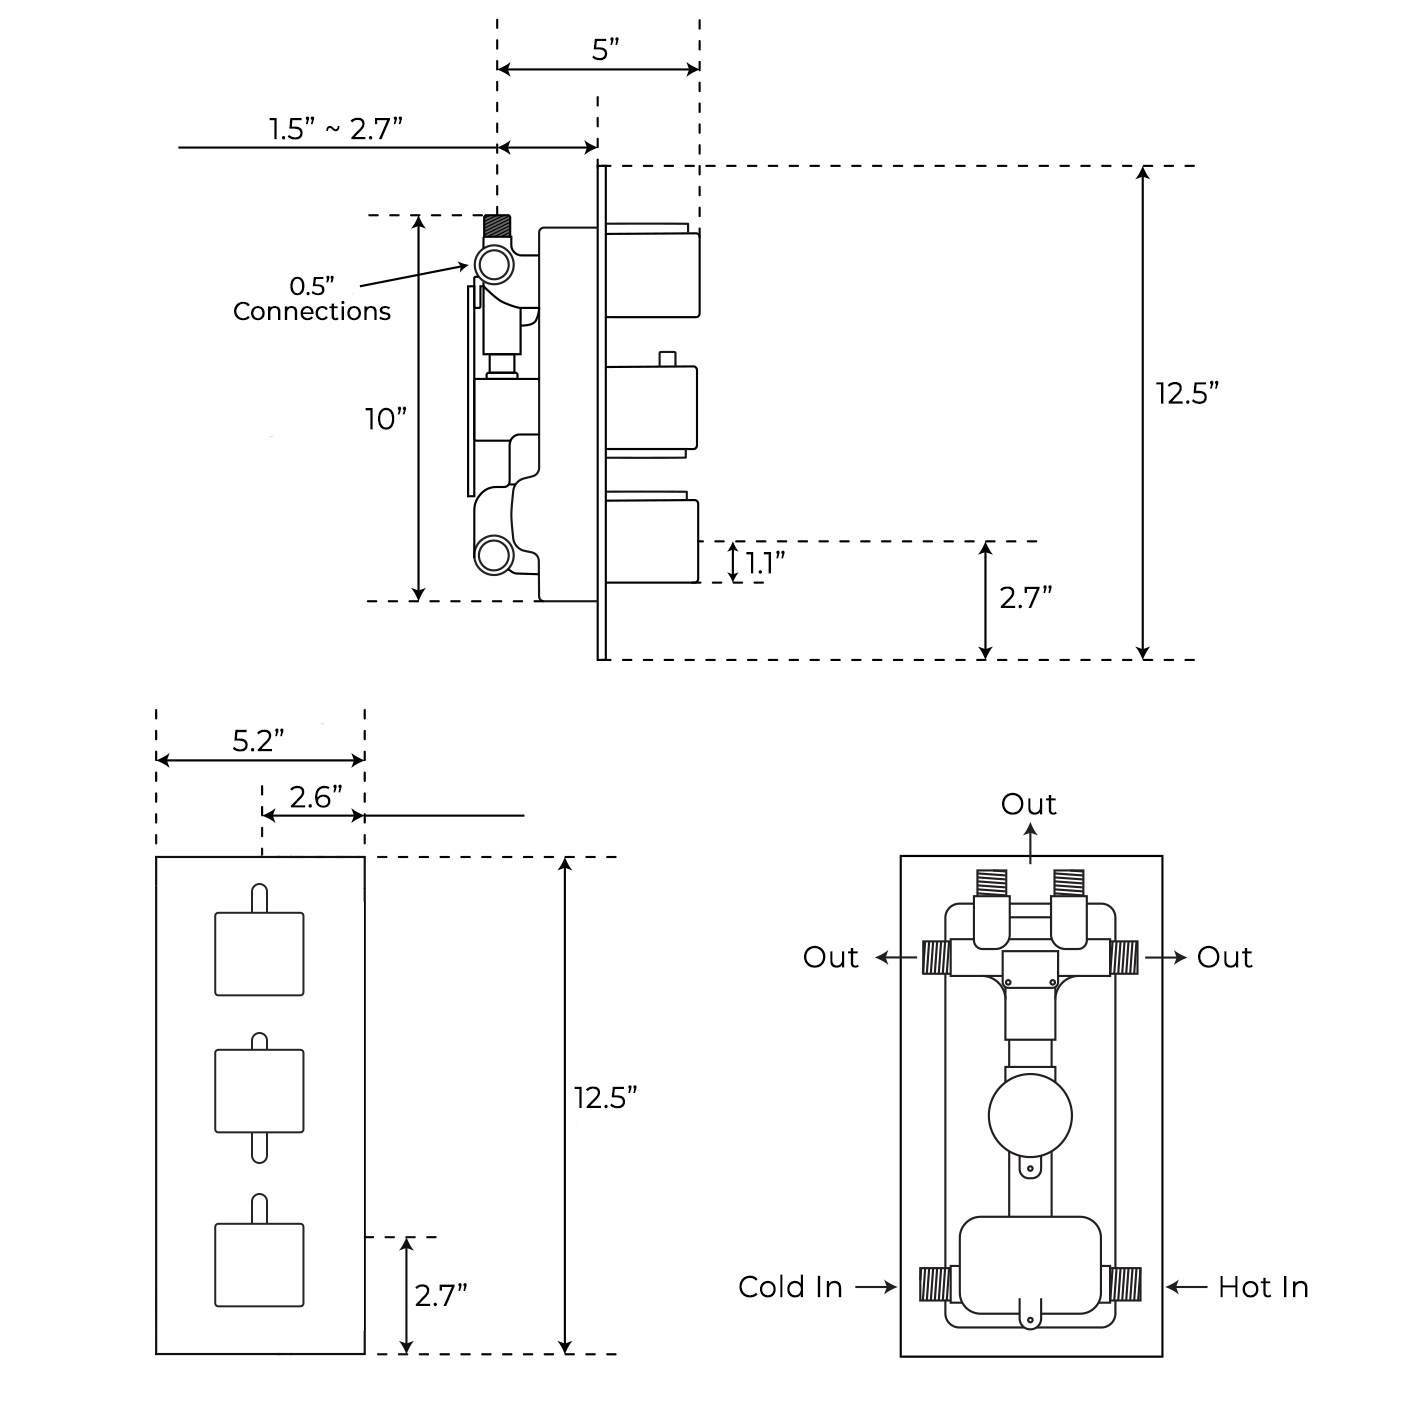
Connection: 1/2" US standard (included)
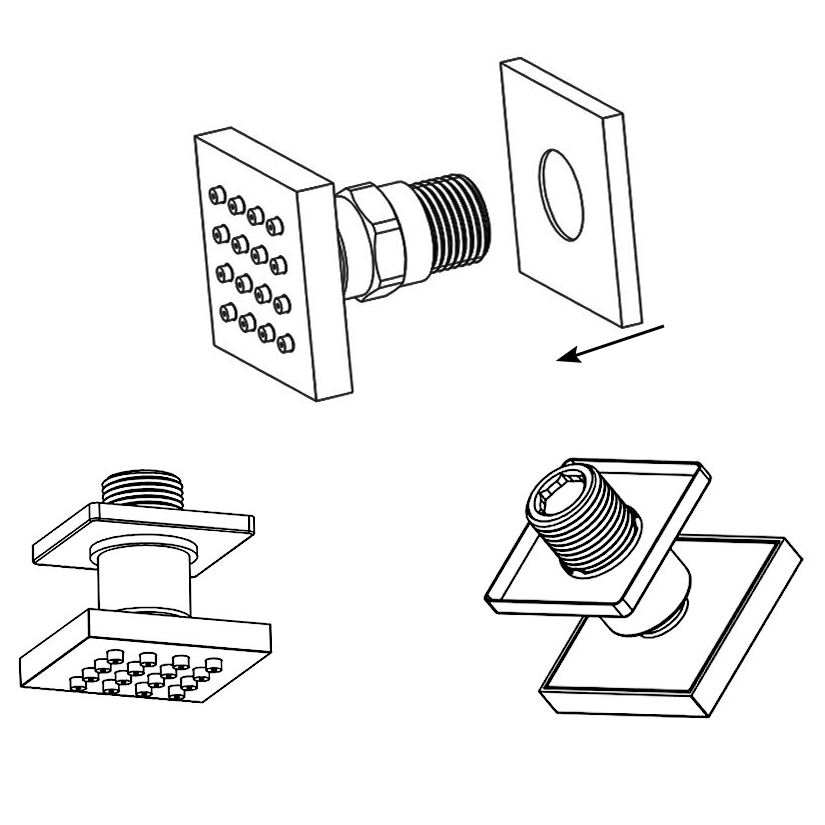
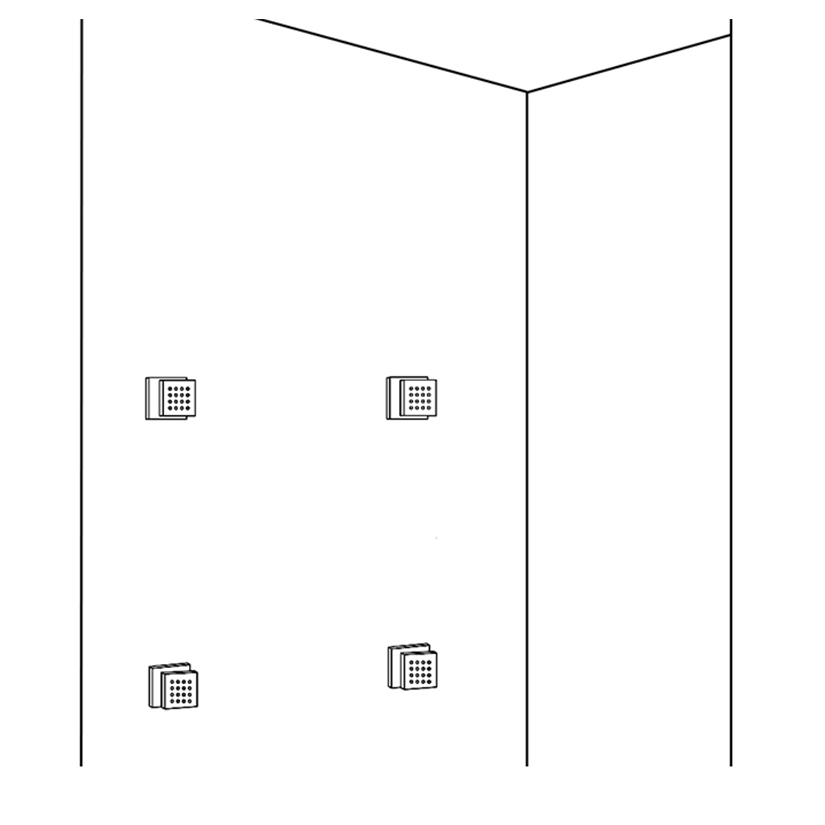
Body Jets: Solid Brass 360° adjustable Body Jets.
Flow Rate: 4.8 to 7.9 GPM
|
|
FontanaShowers® Product Warranty Information 
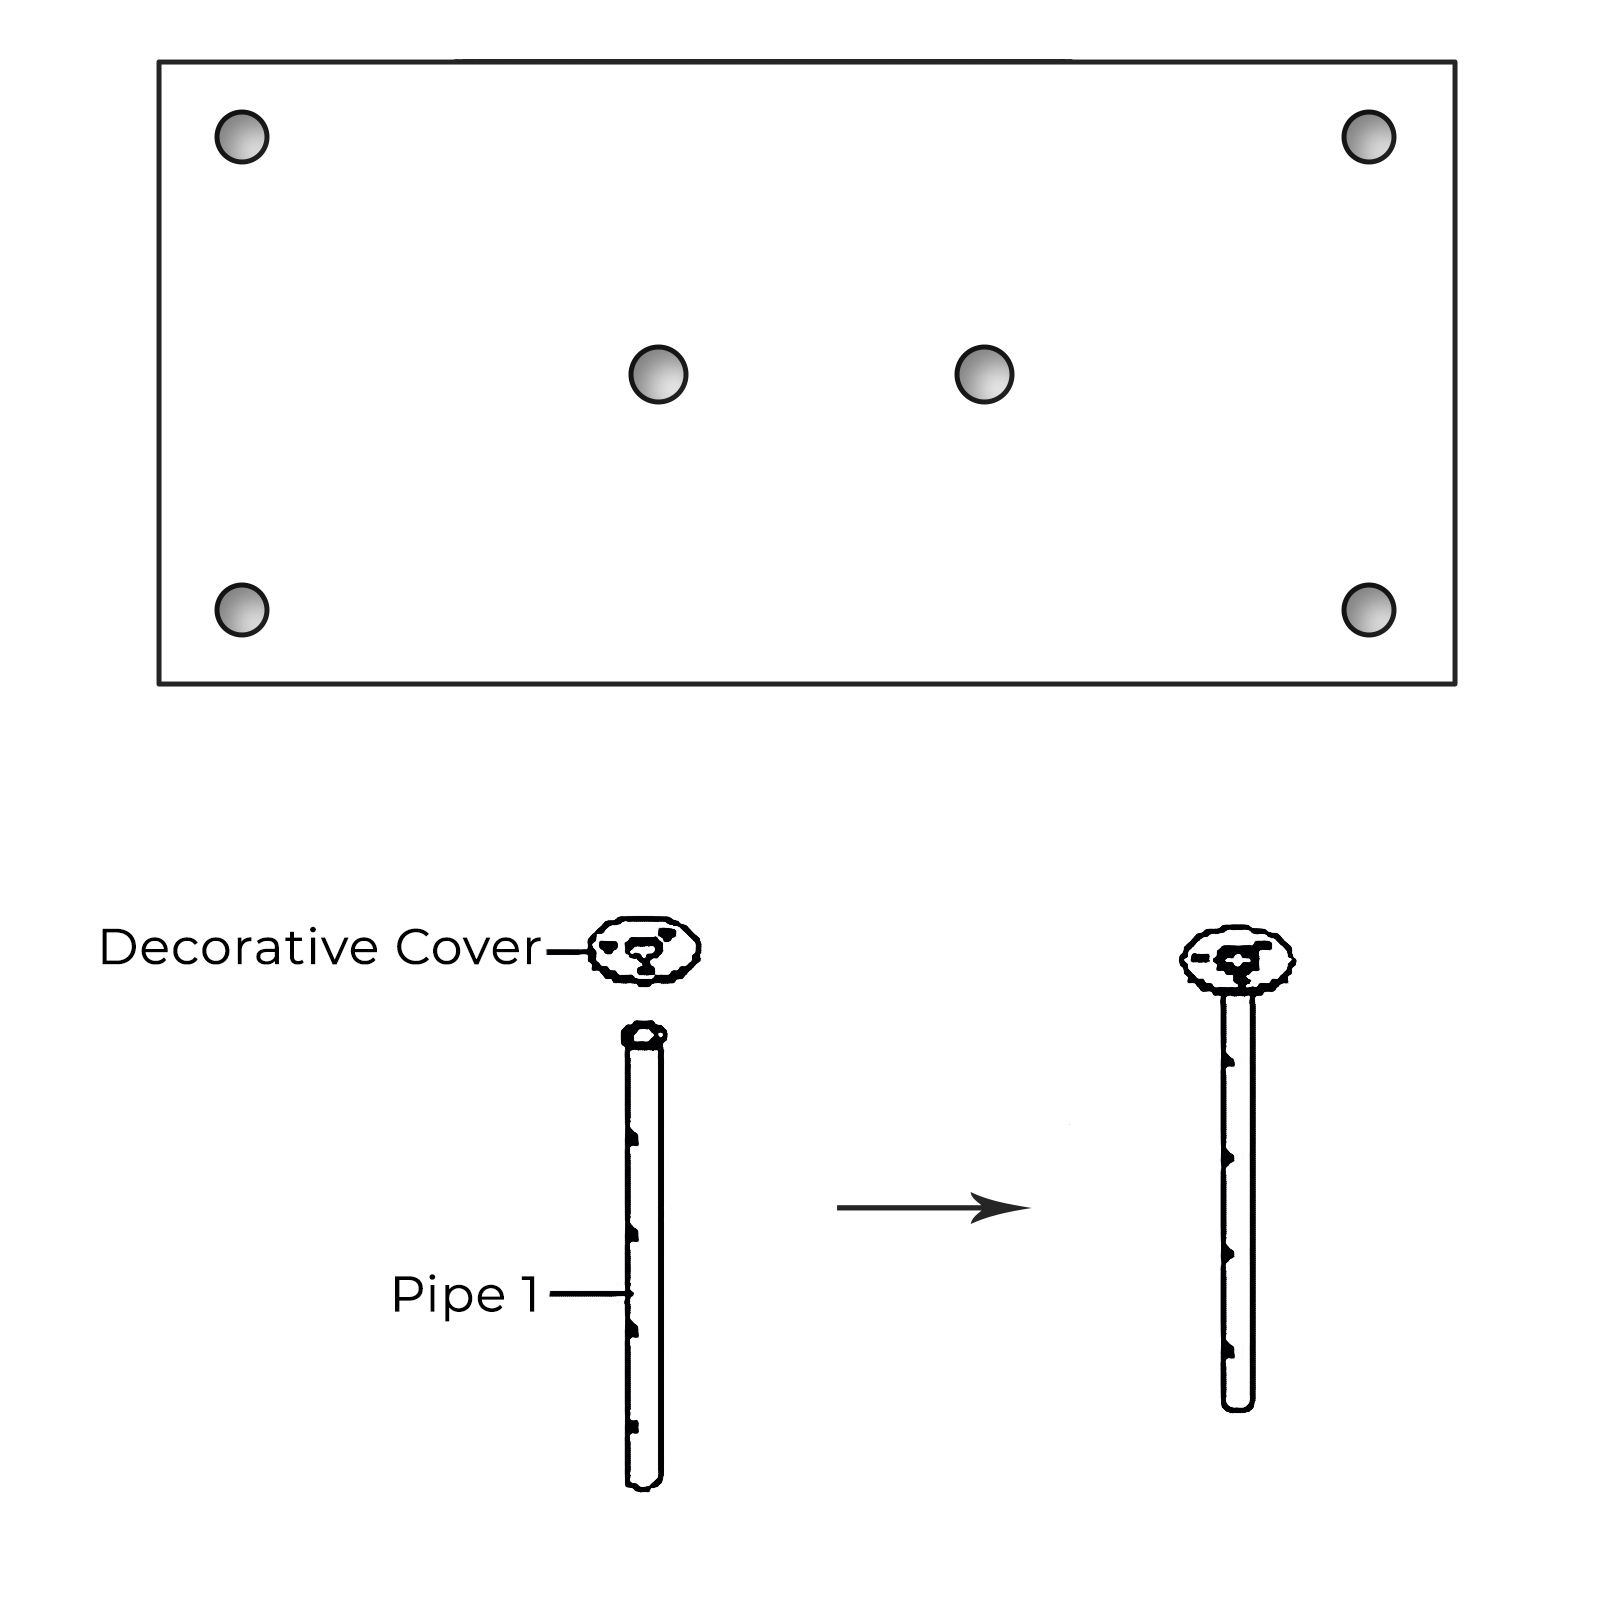
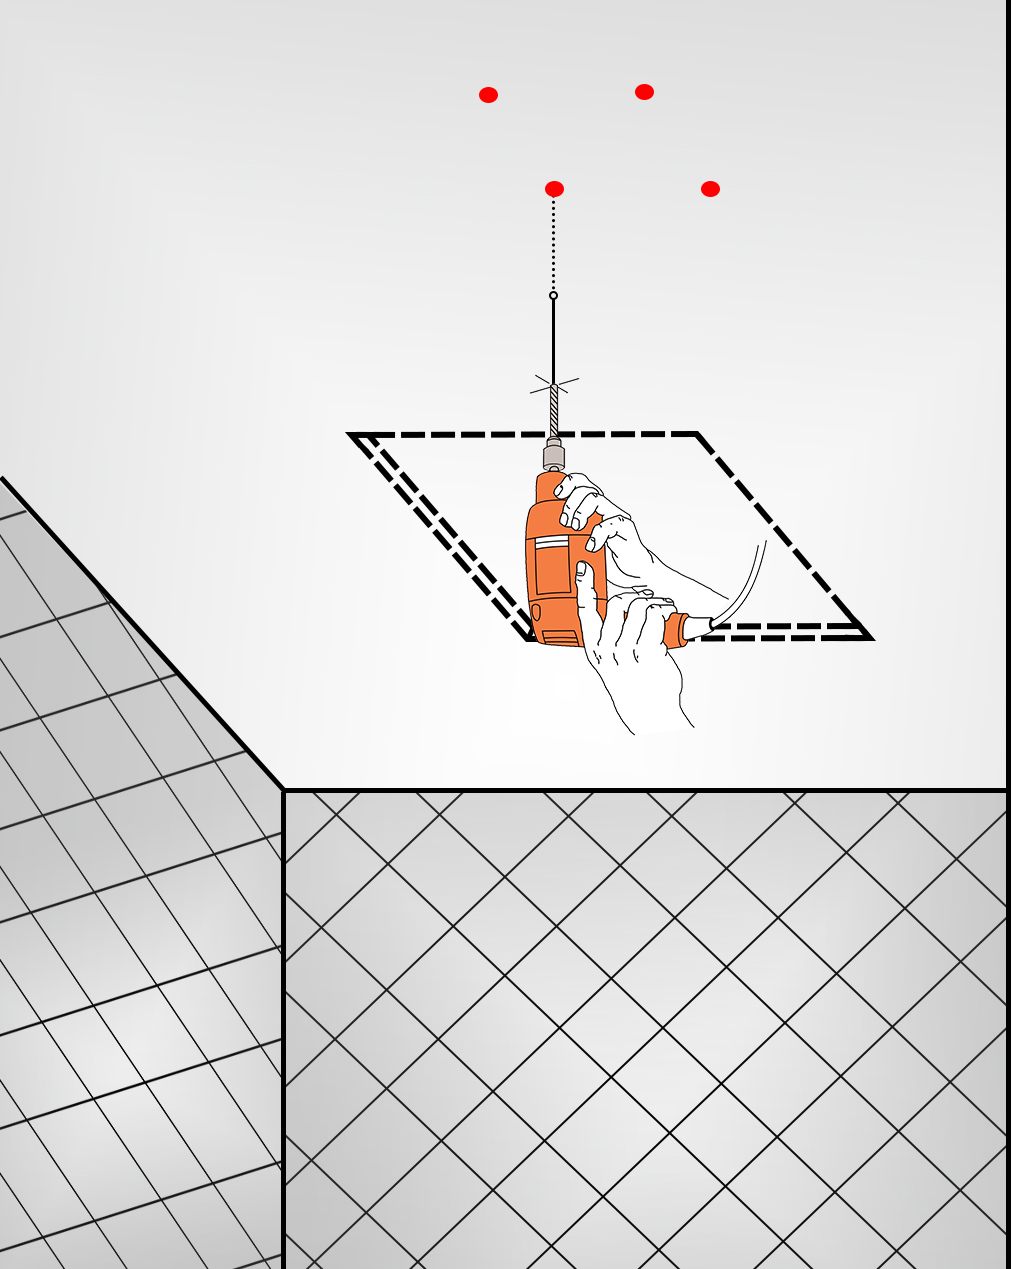
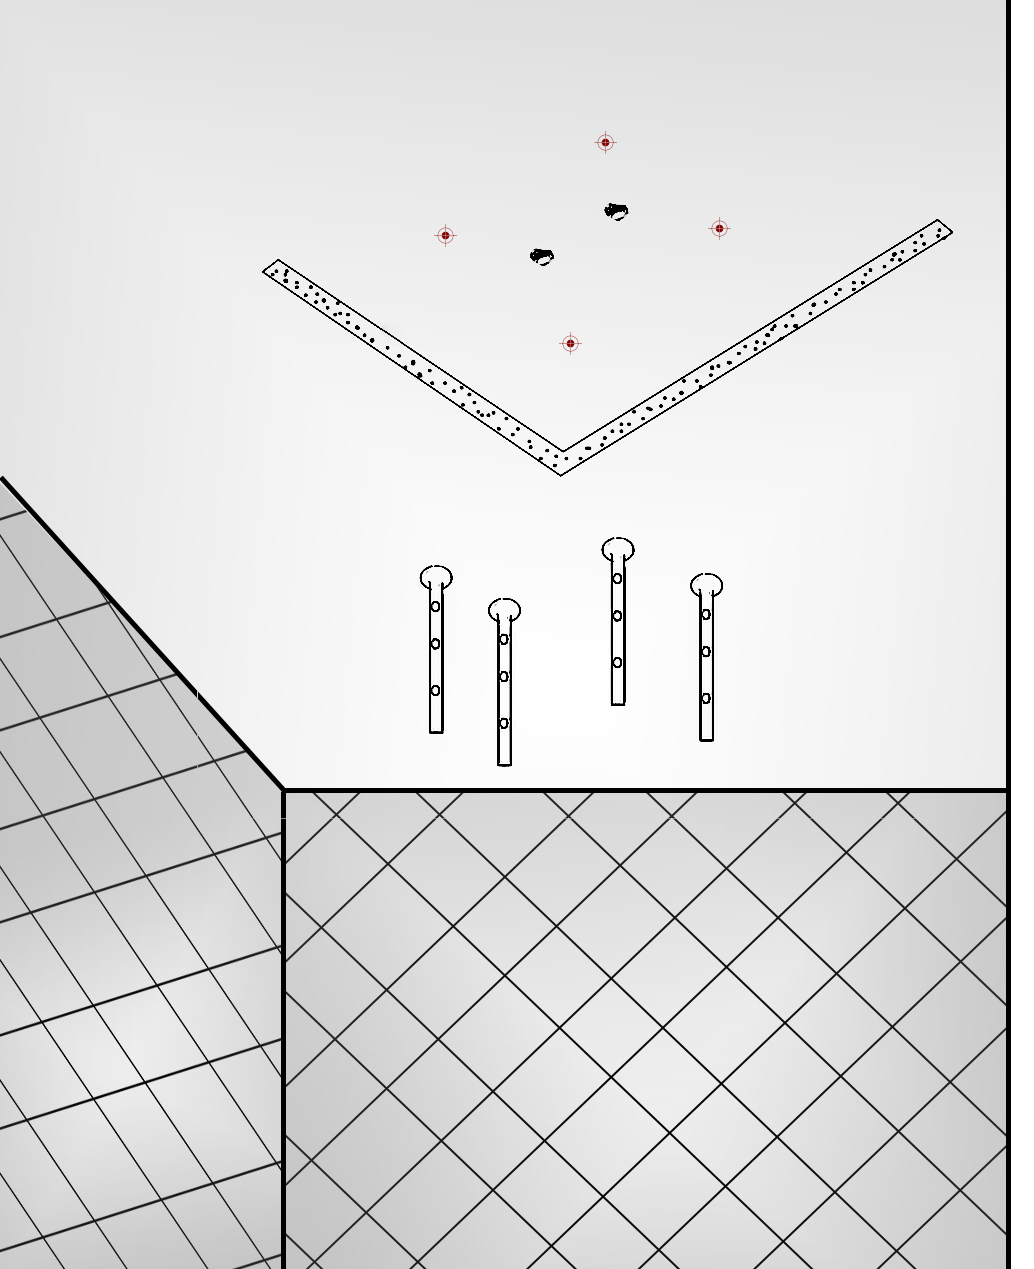
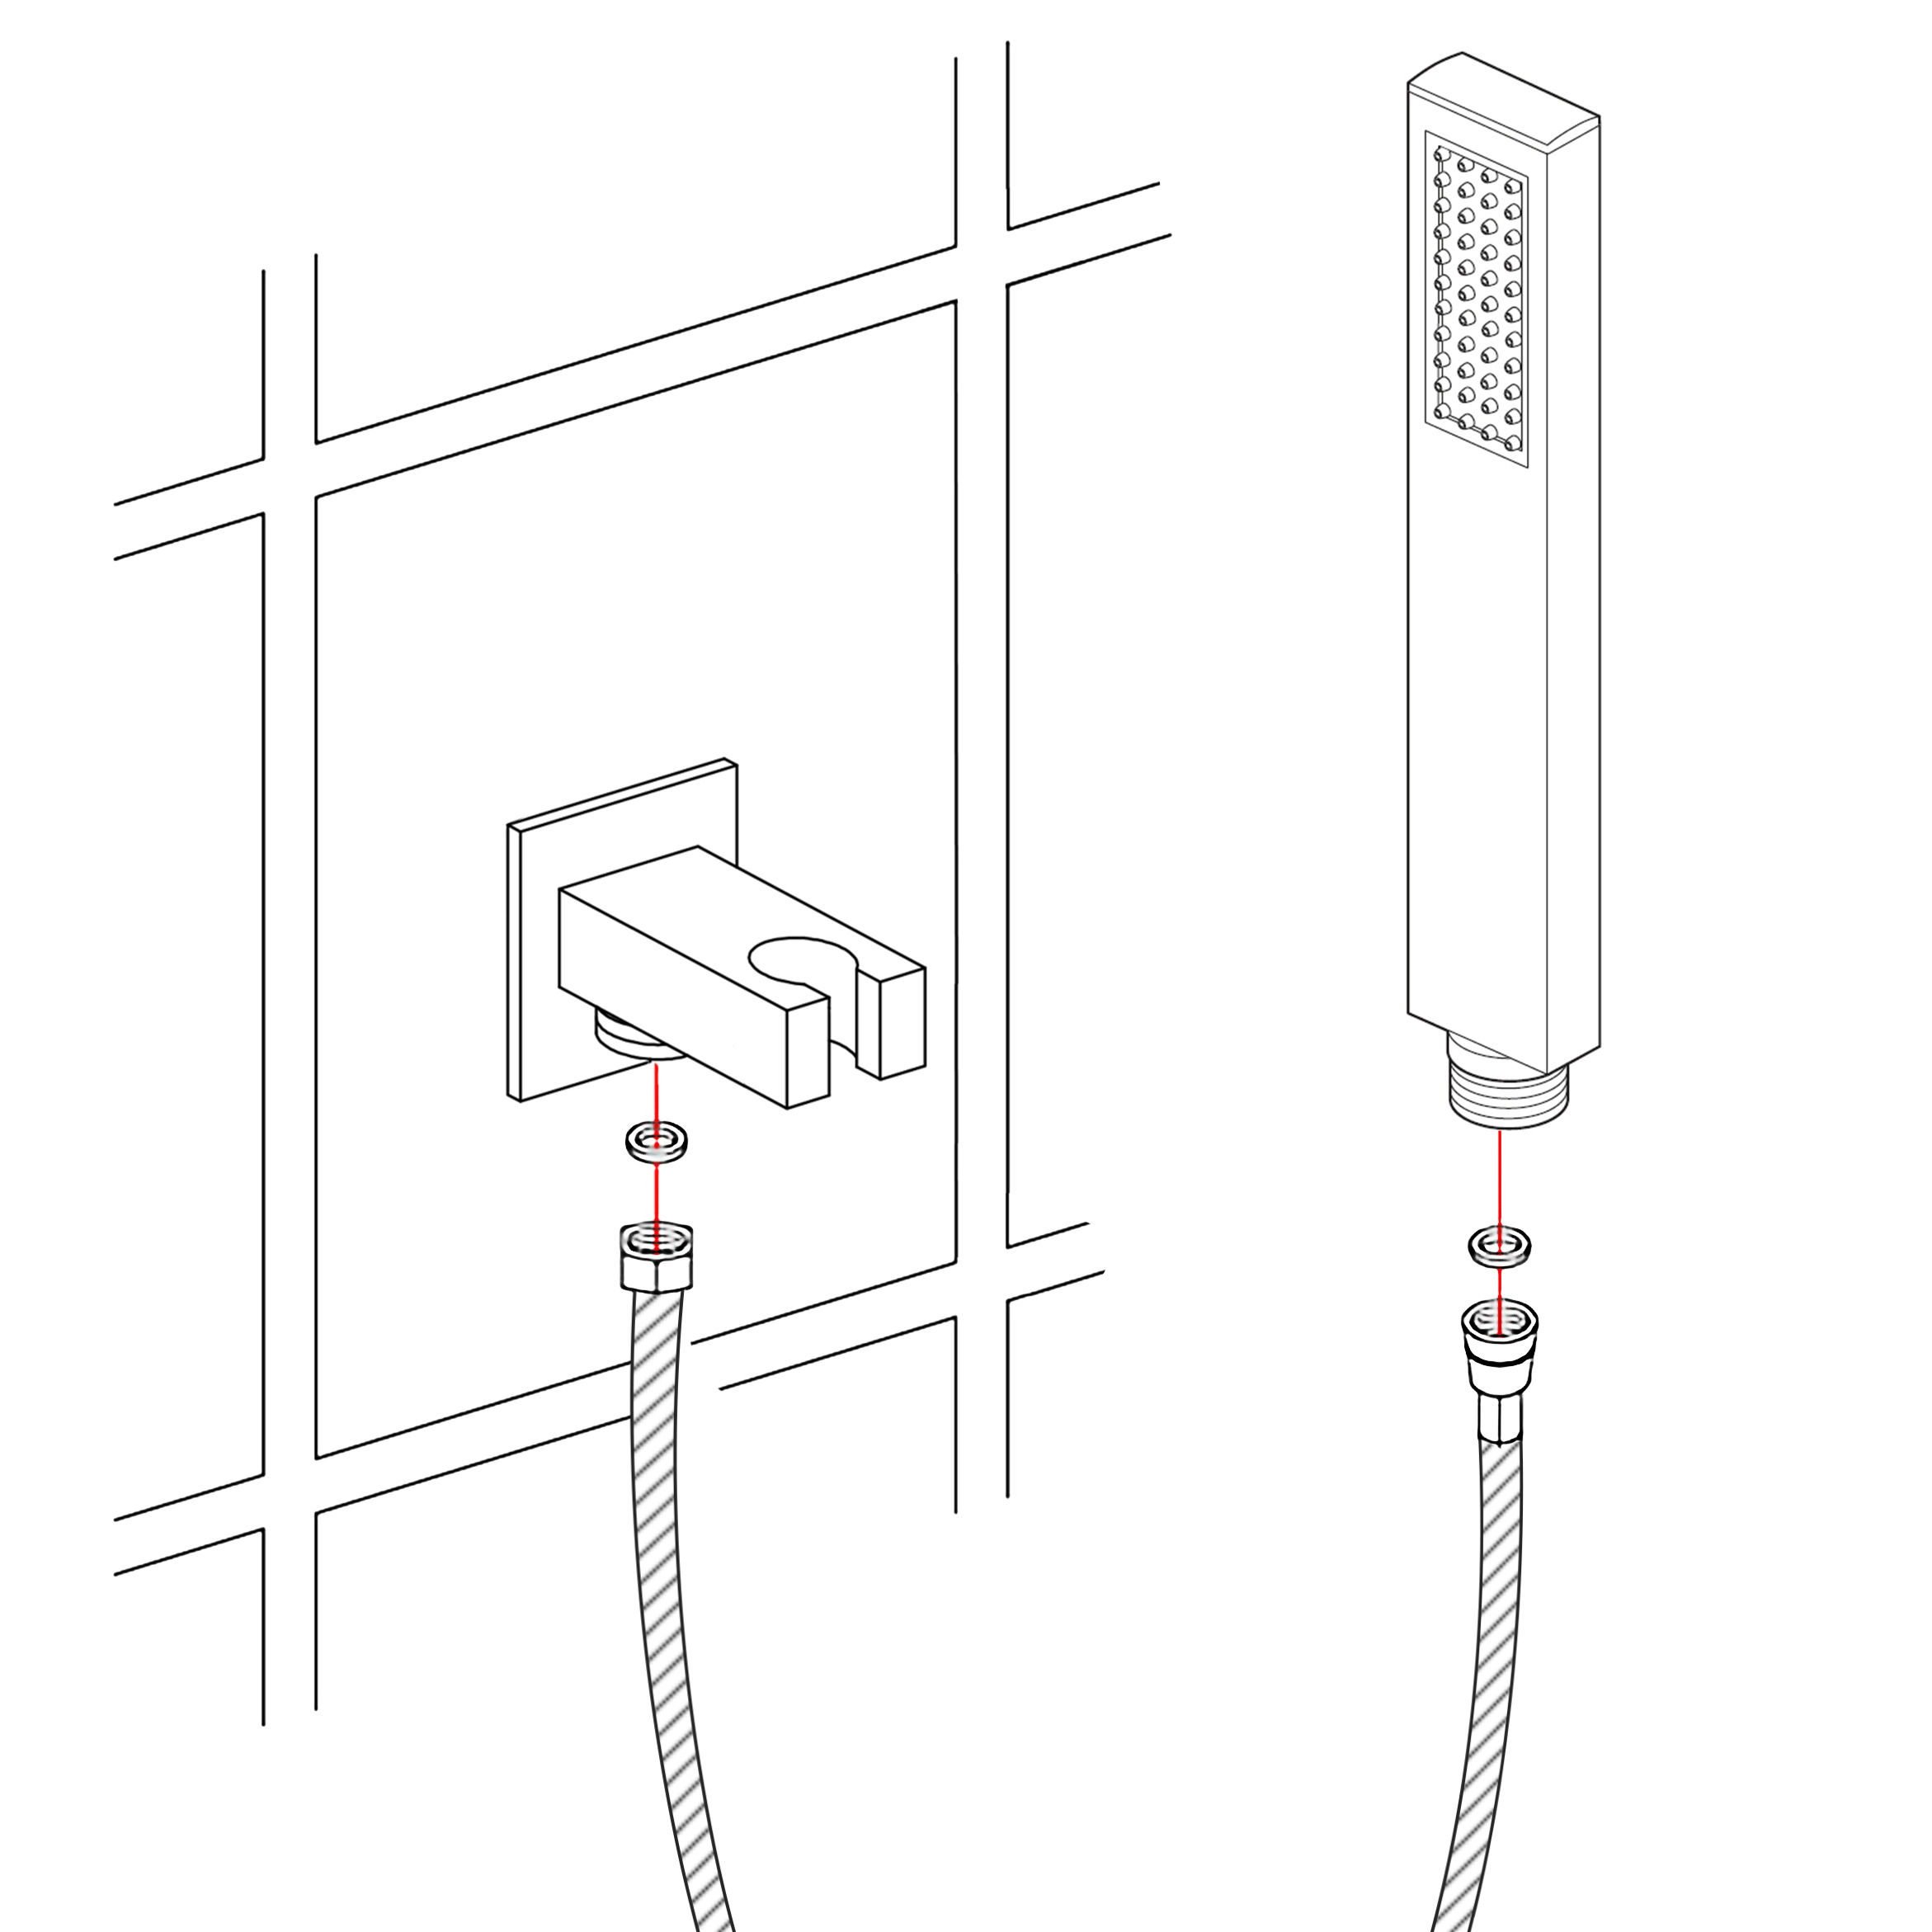
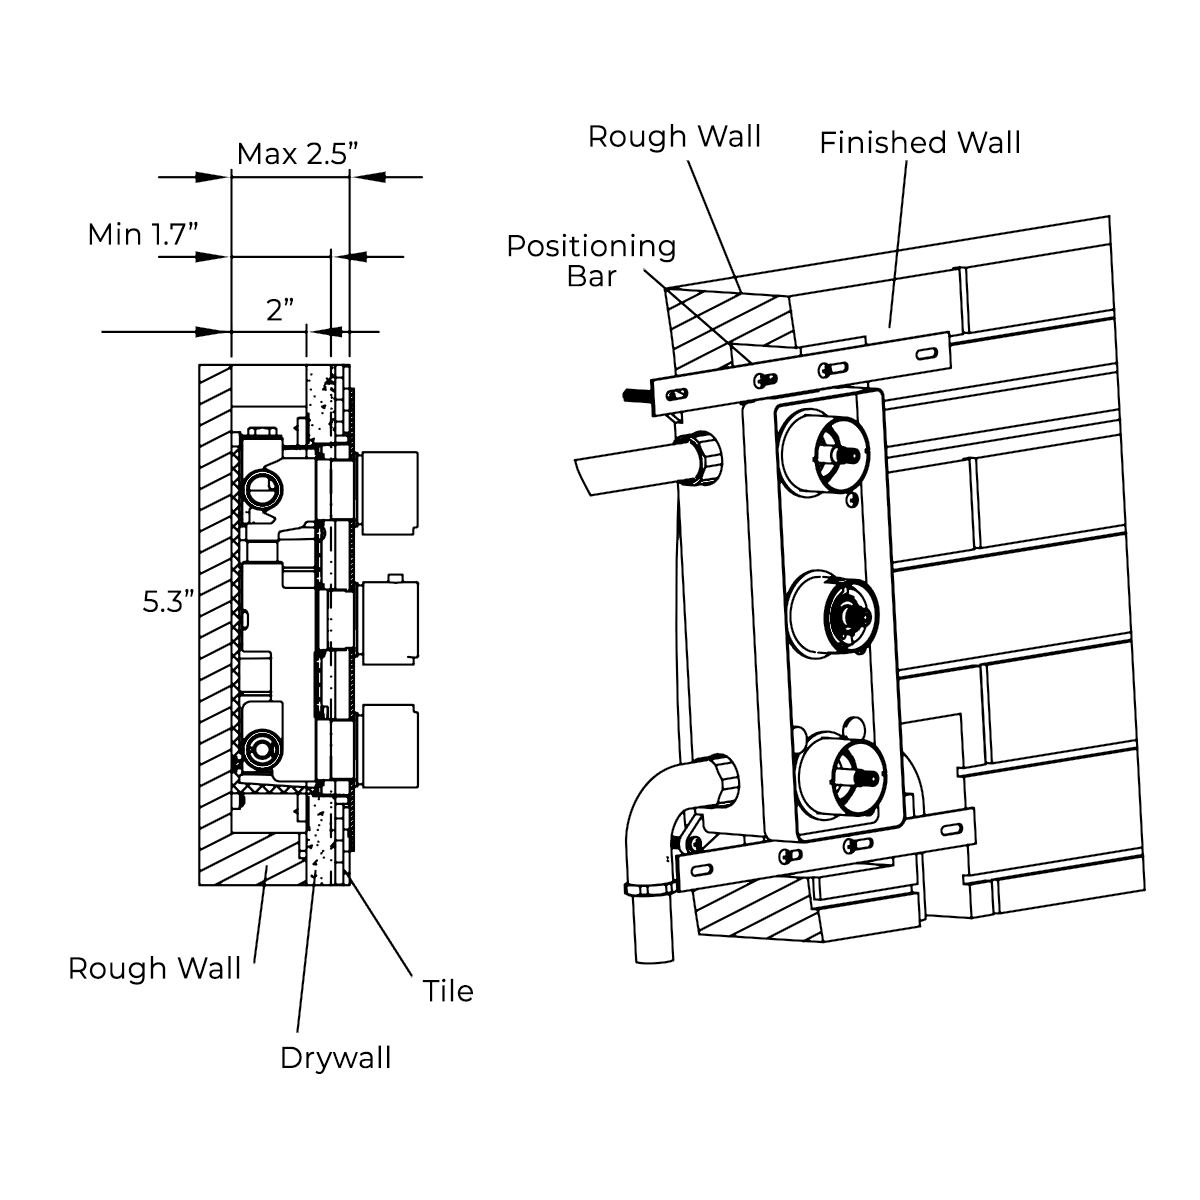
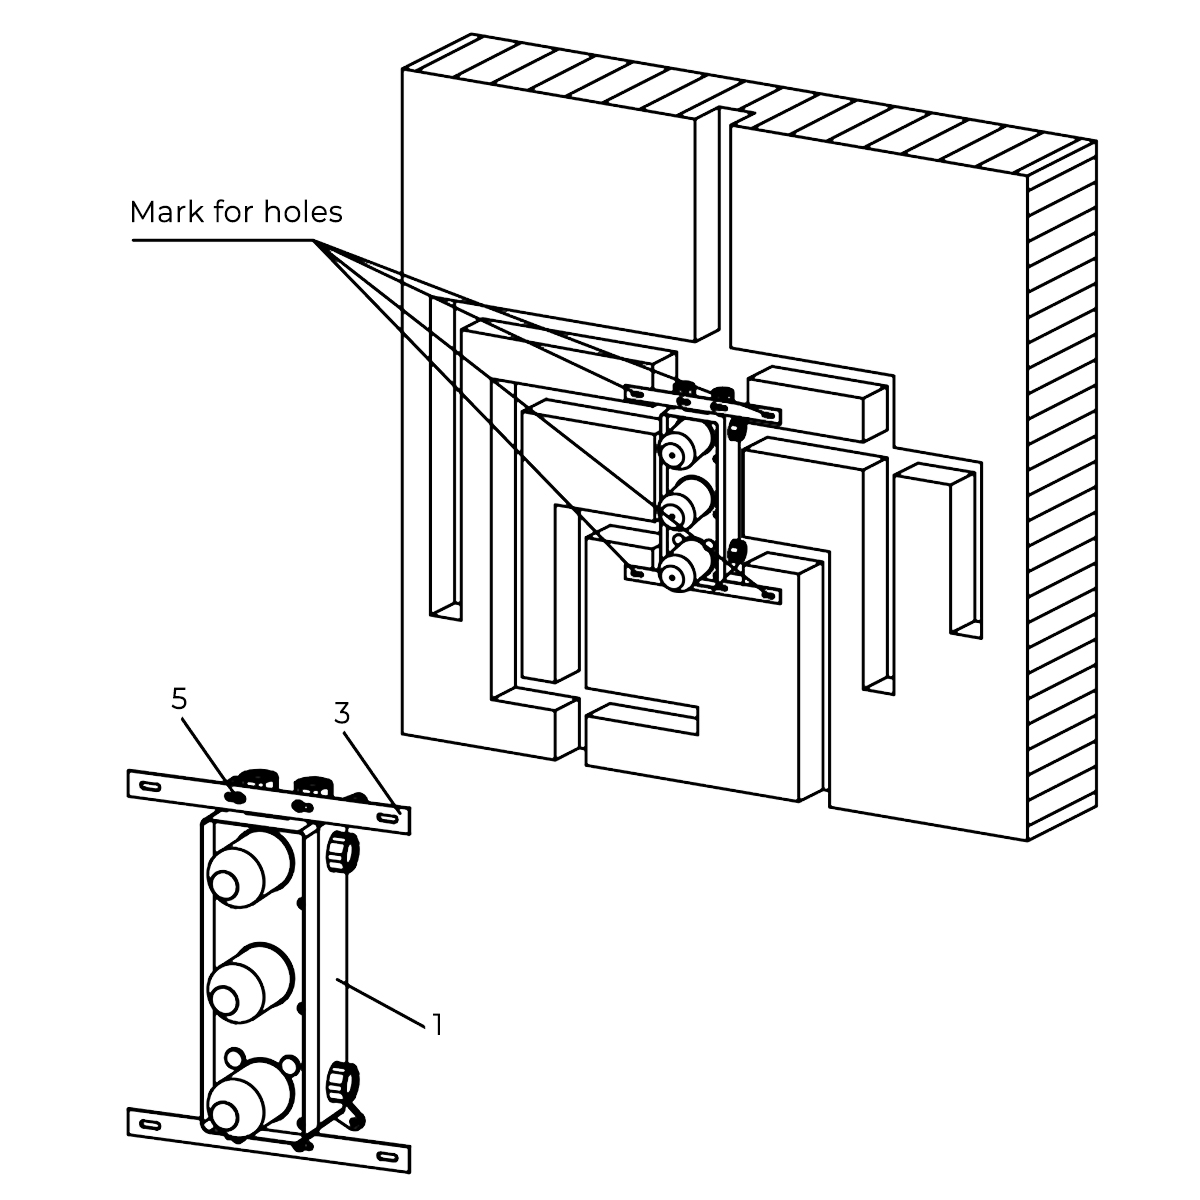
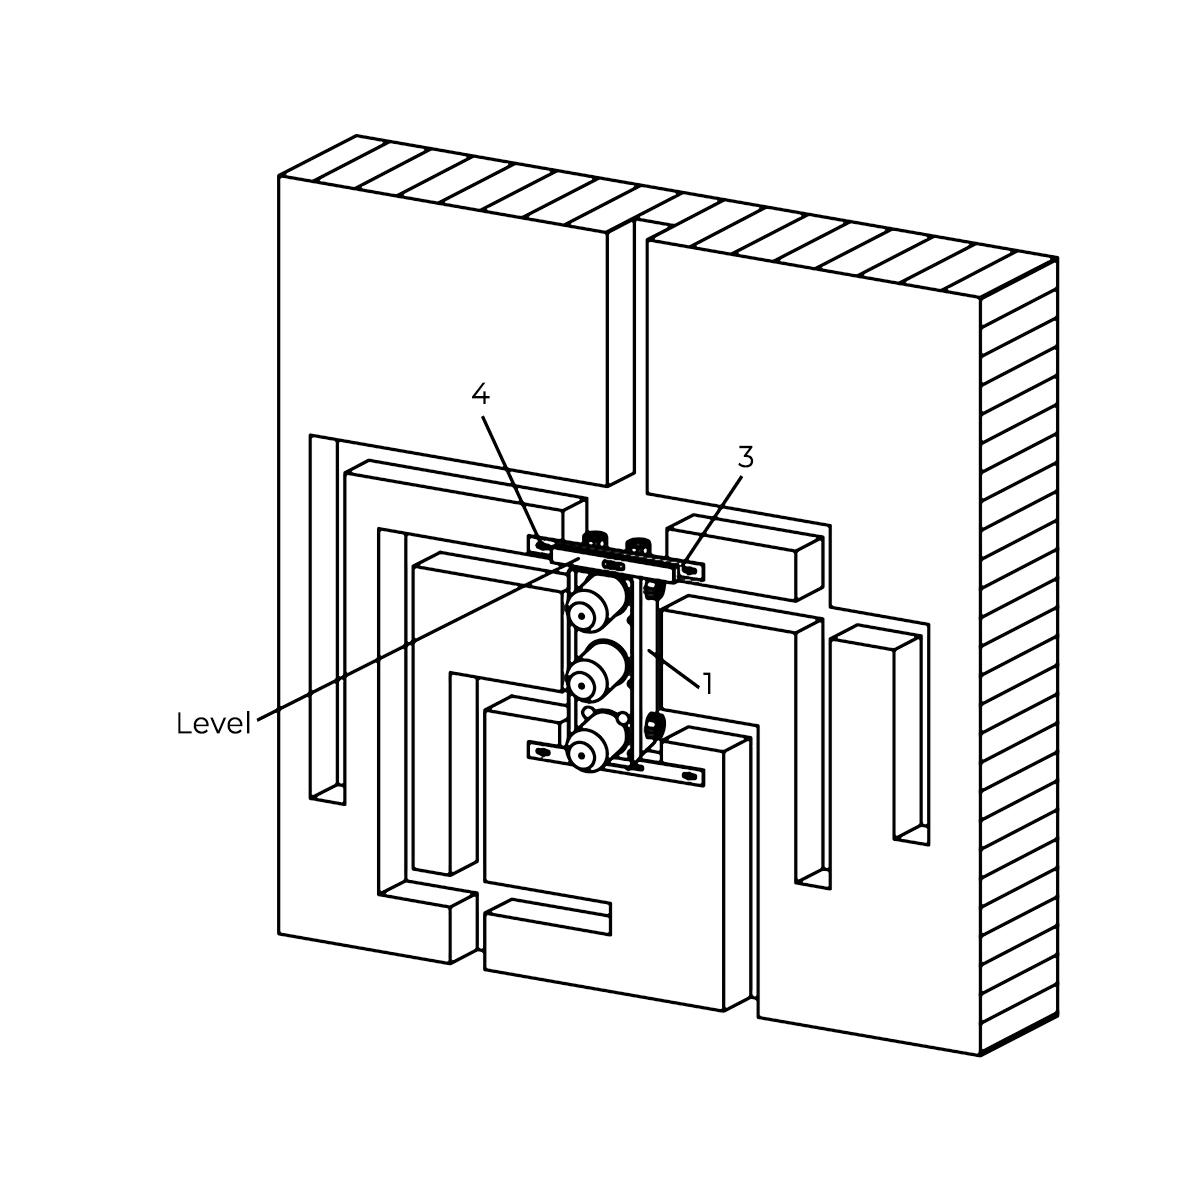
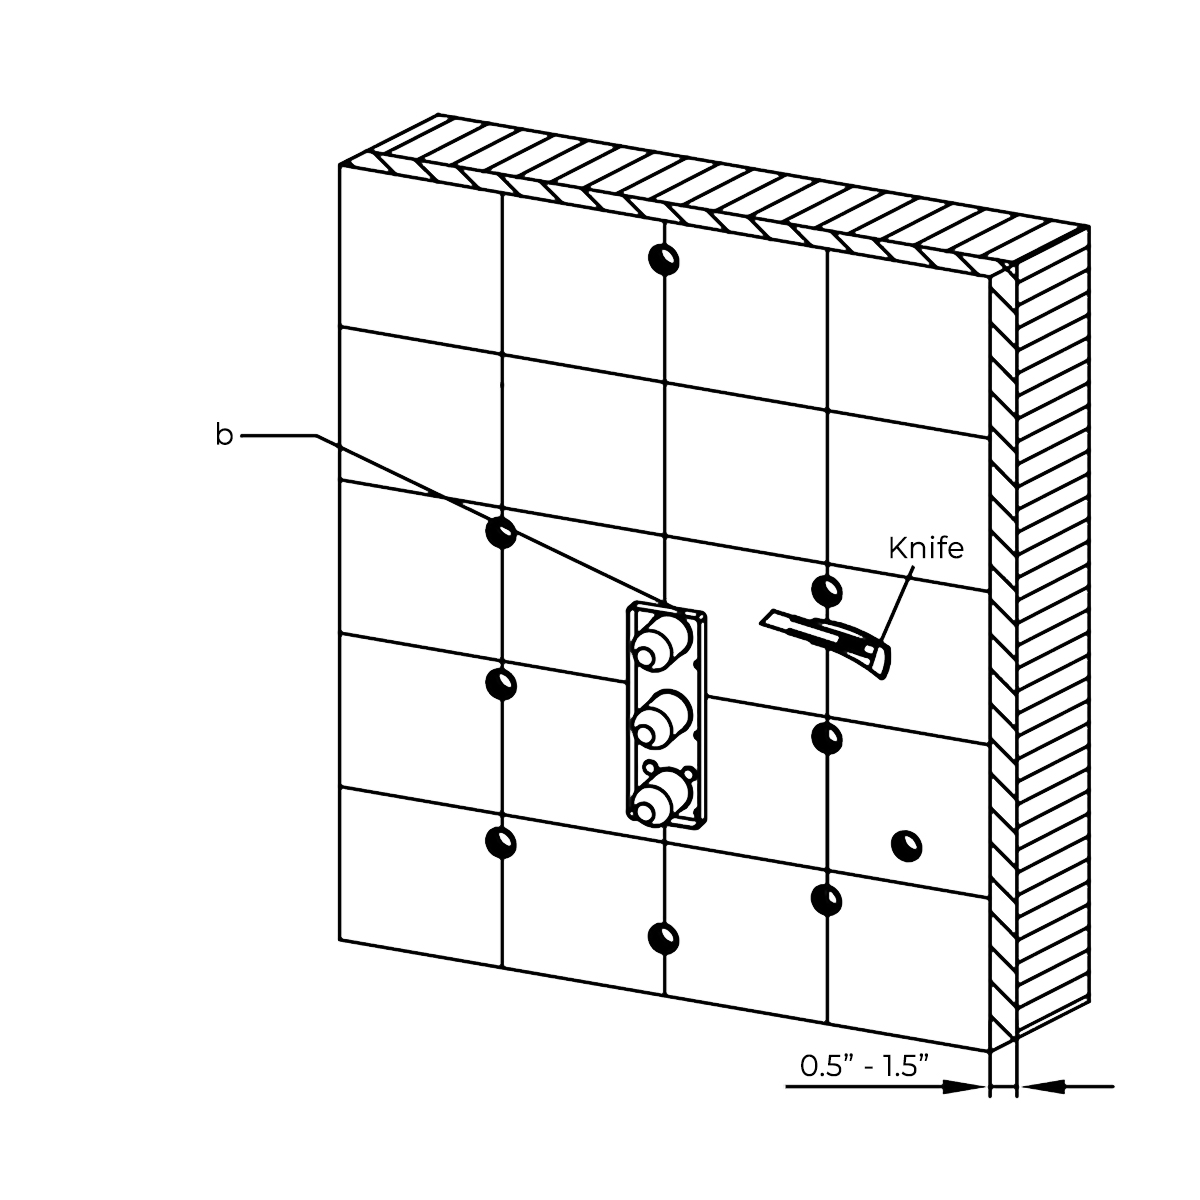
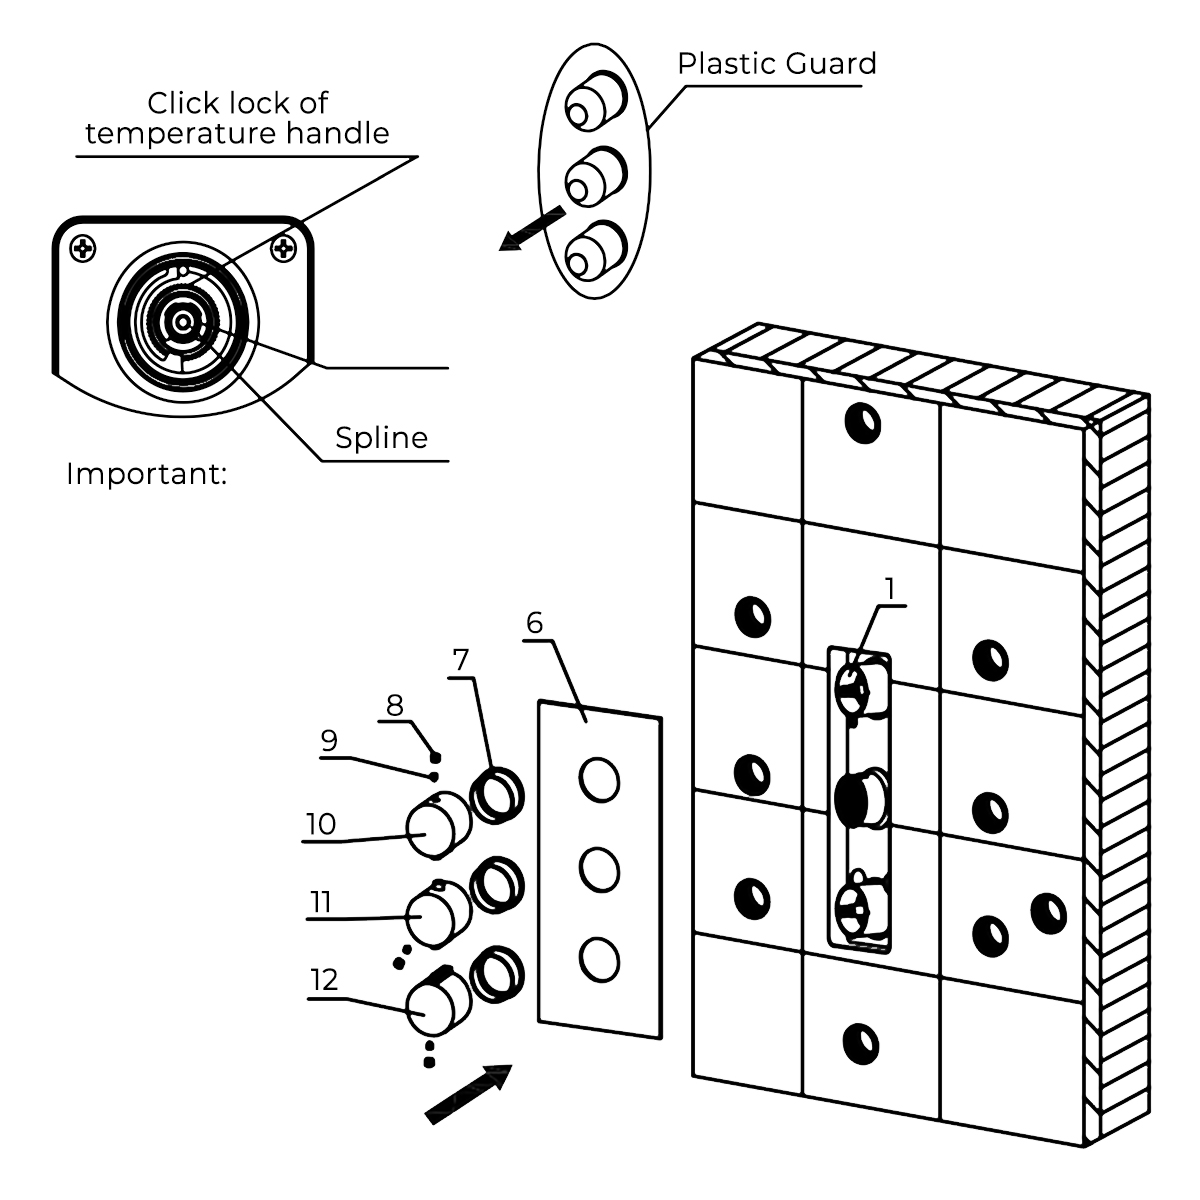
- Before you begin, please read the installation instructions below. Observe all local building and safety codes.
- Unpack and inspect the product for any shipping damages. If you find damages, do not install.
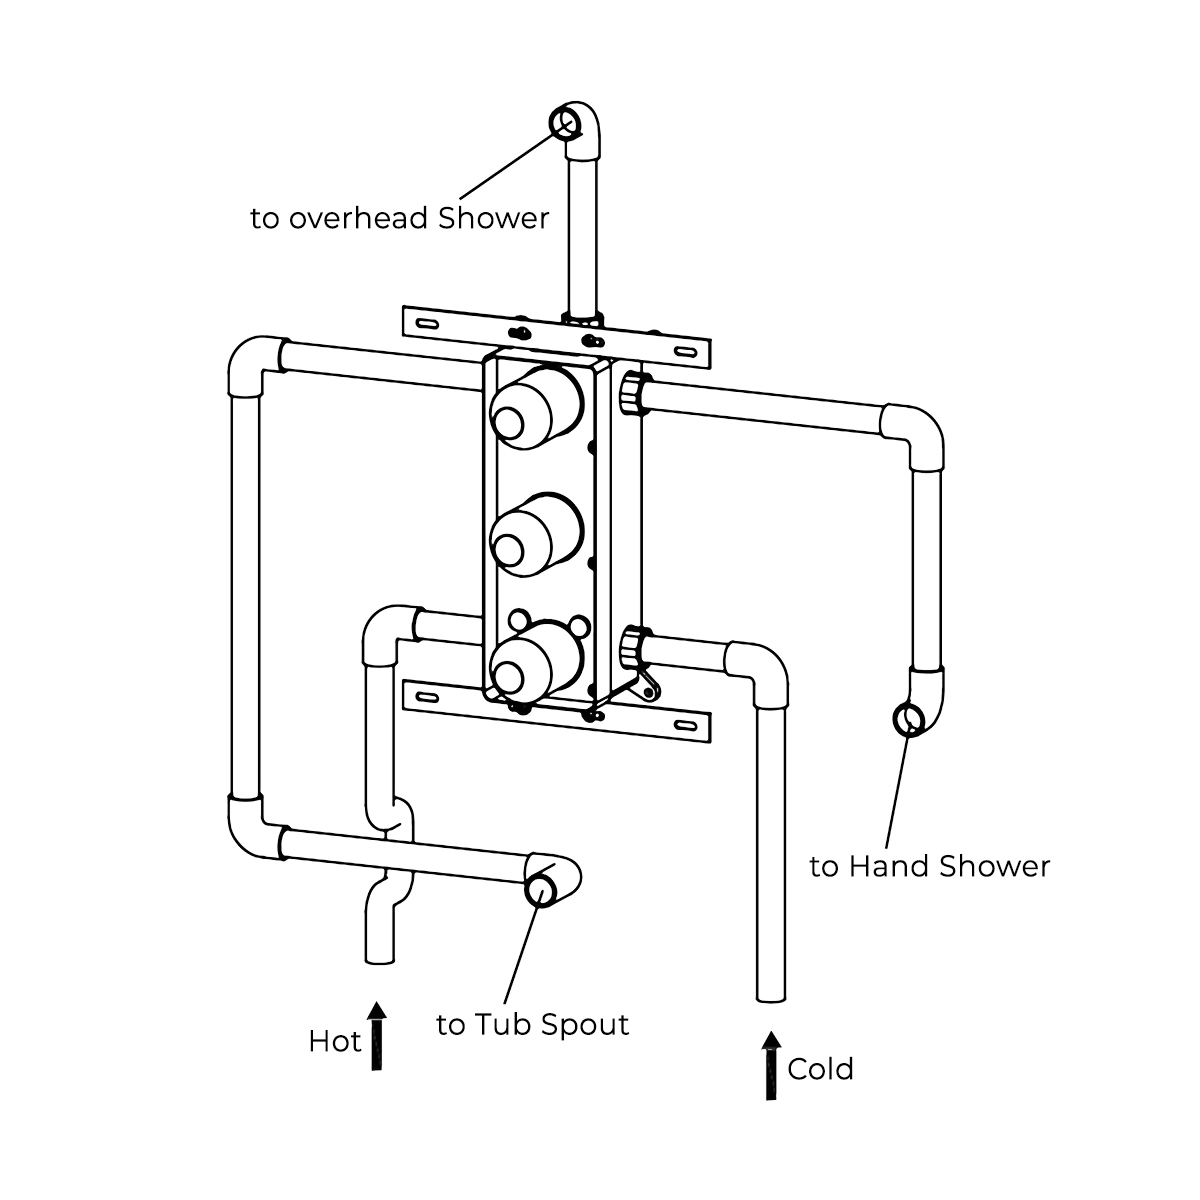
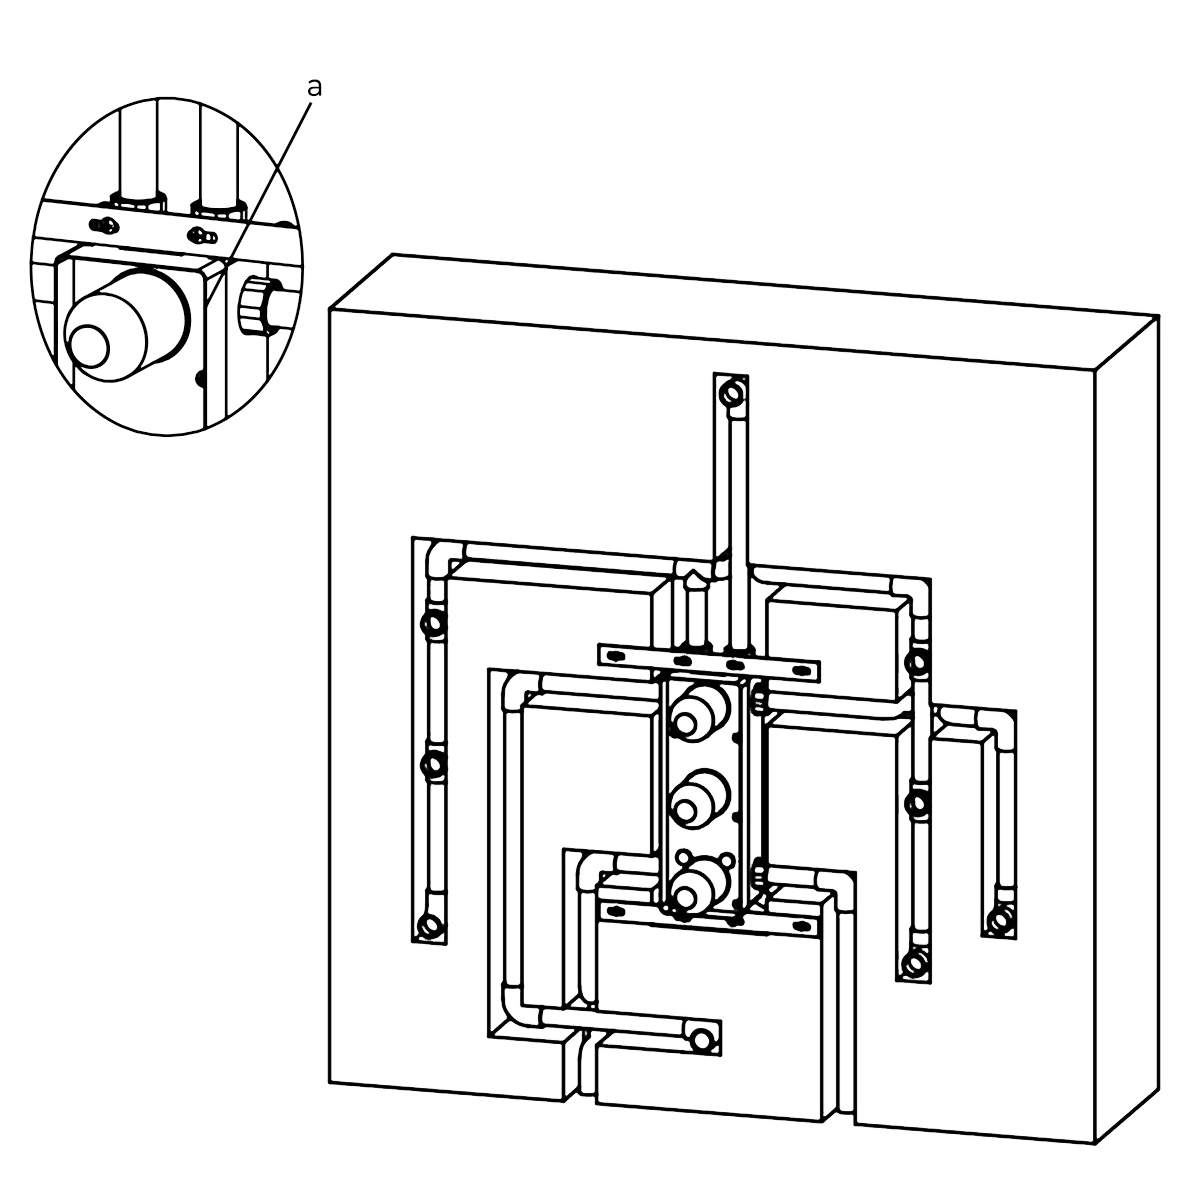
- Please note all showers must be installed by a professional and certified plumber otherwise warranty might be voided.
|
shower
|
|