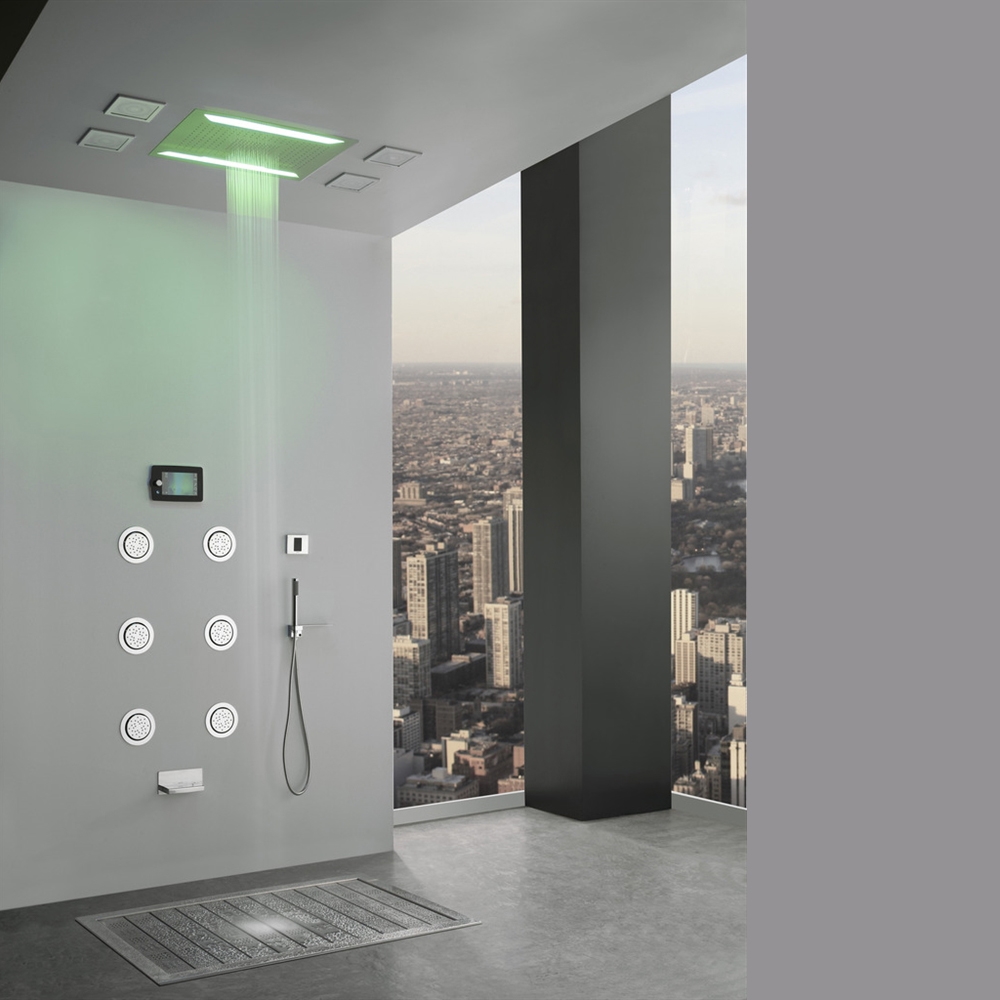
Step 1:
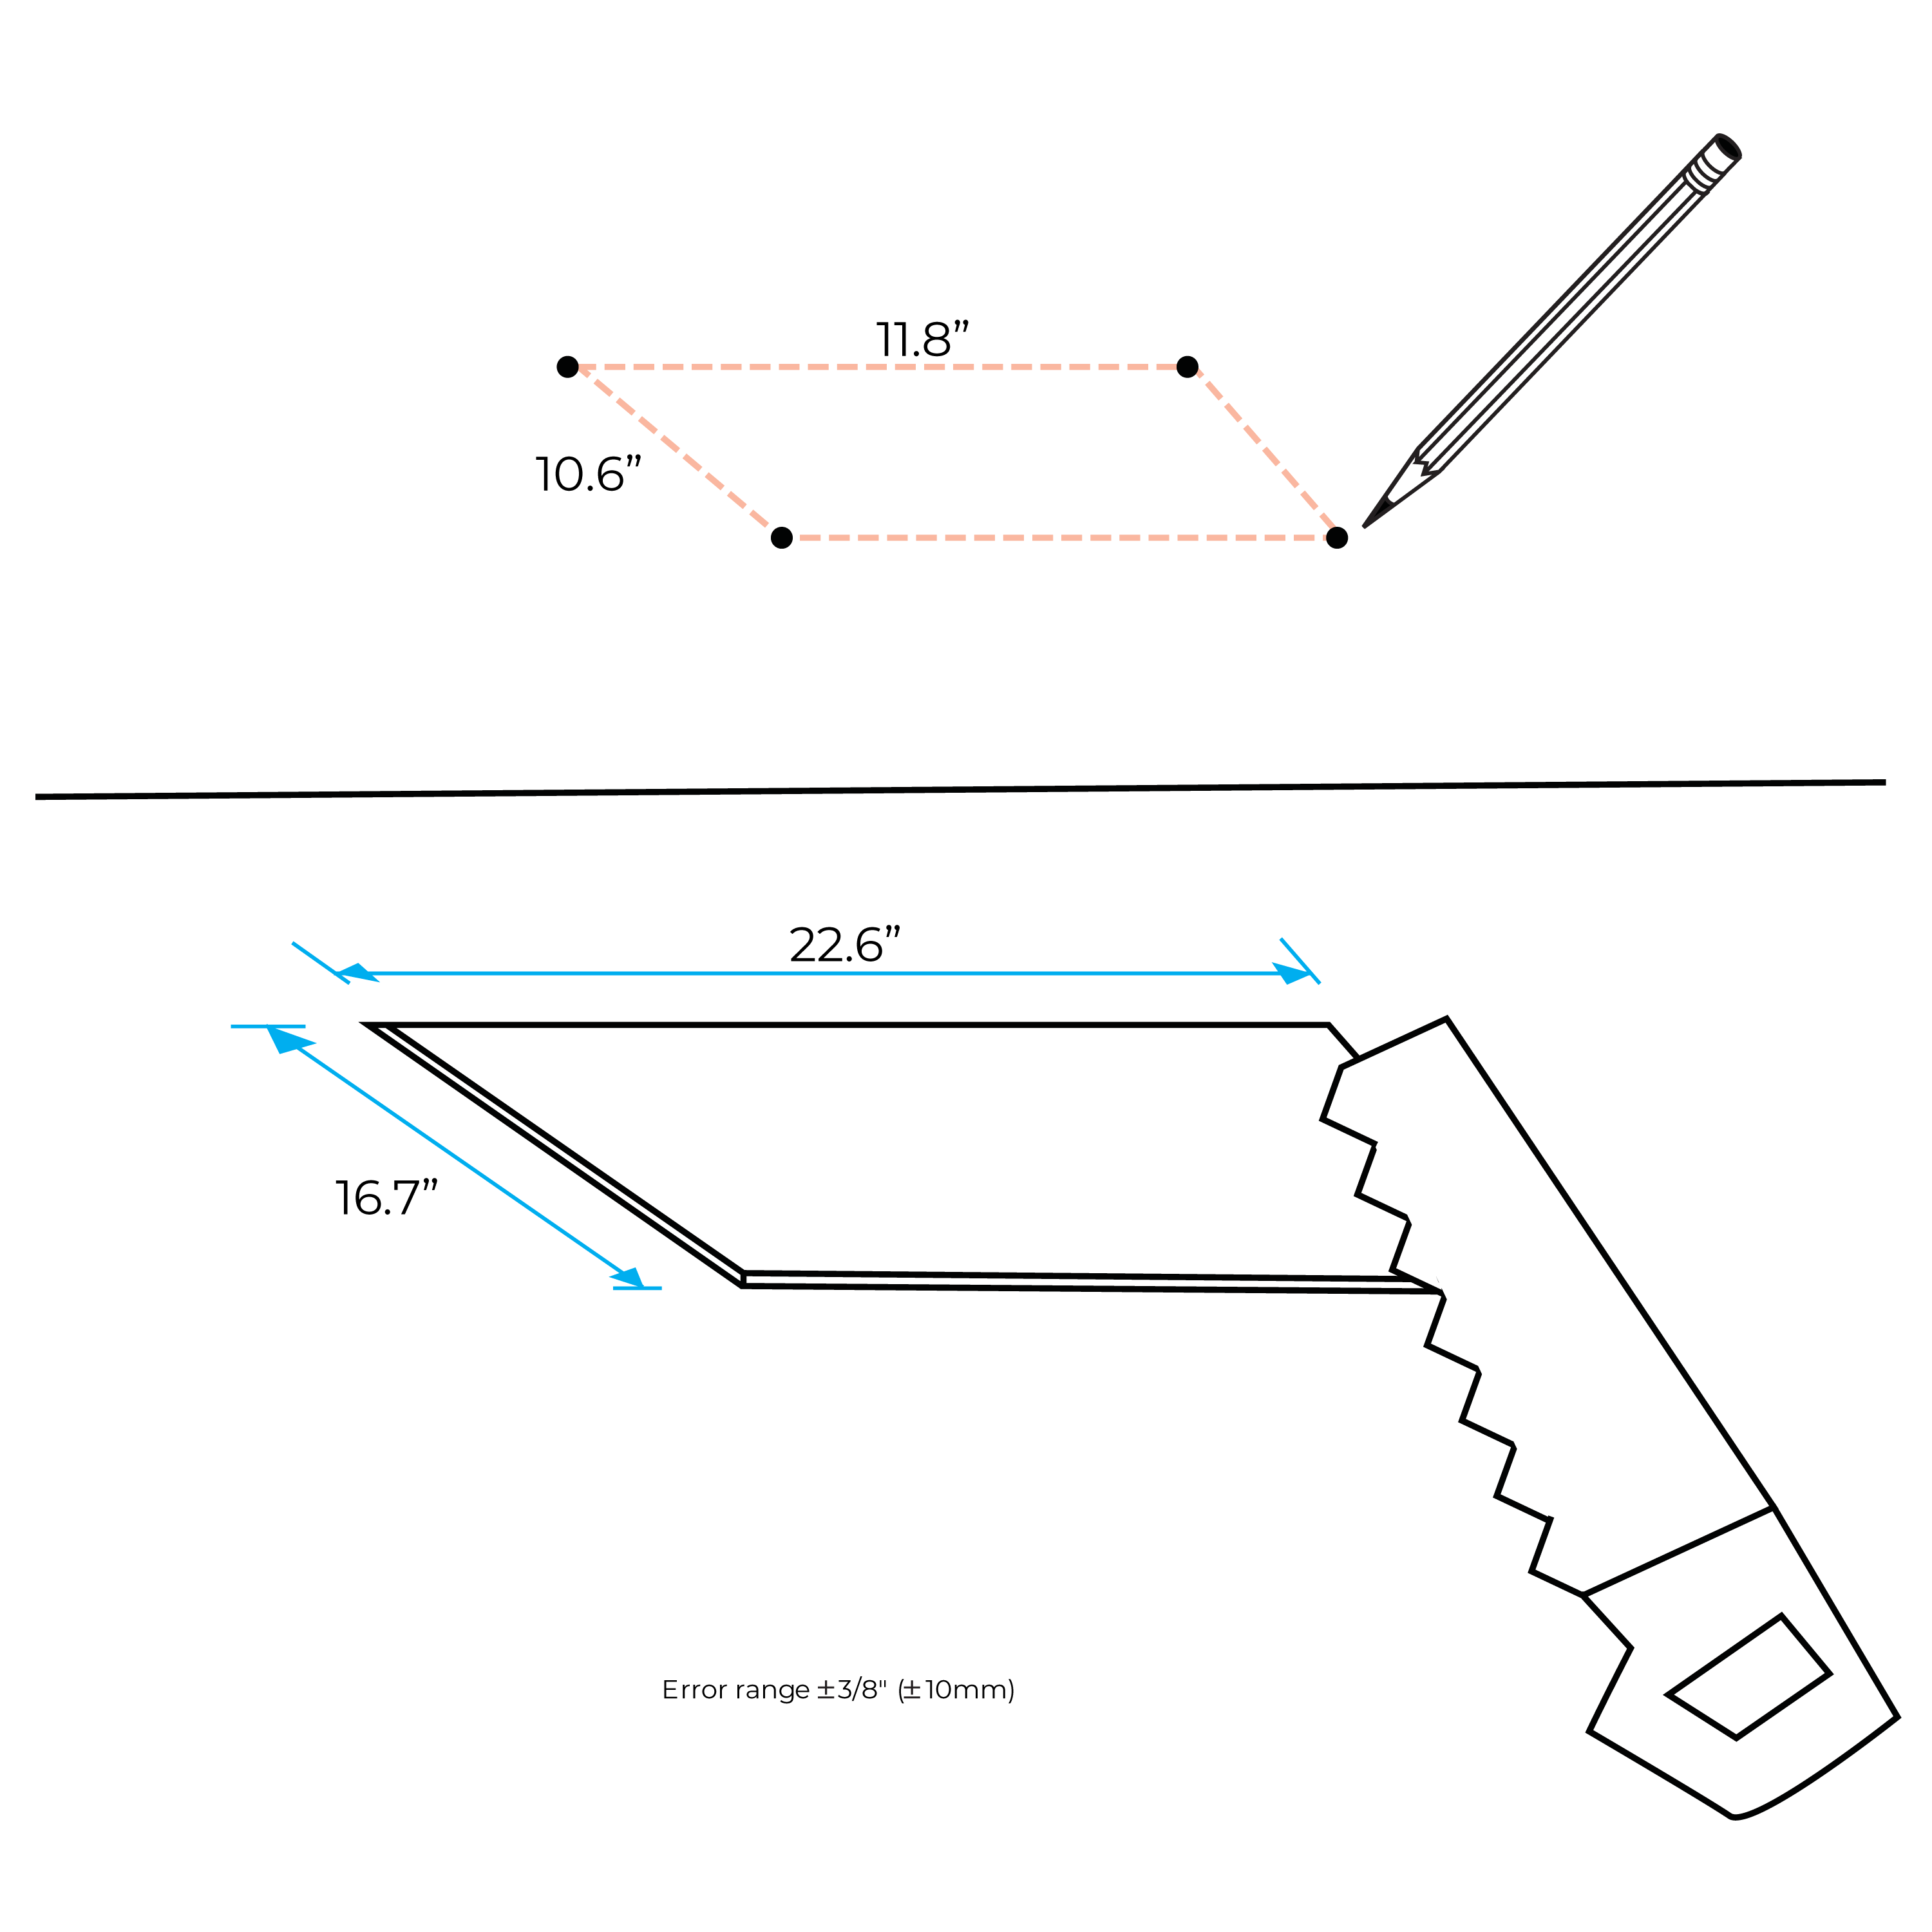
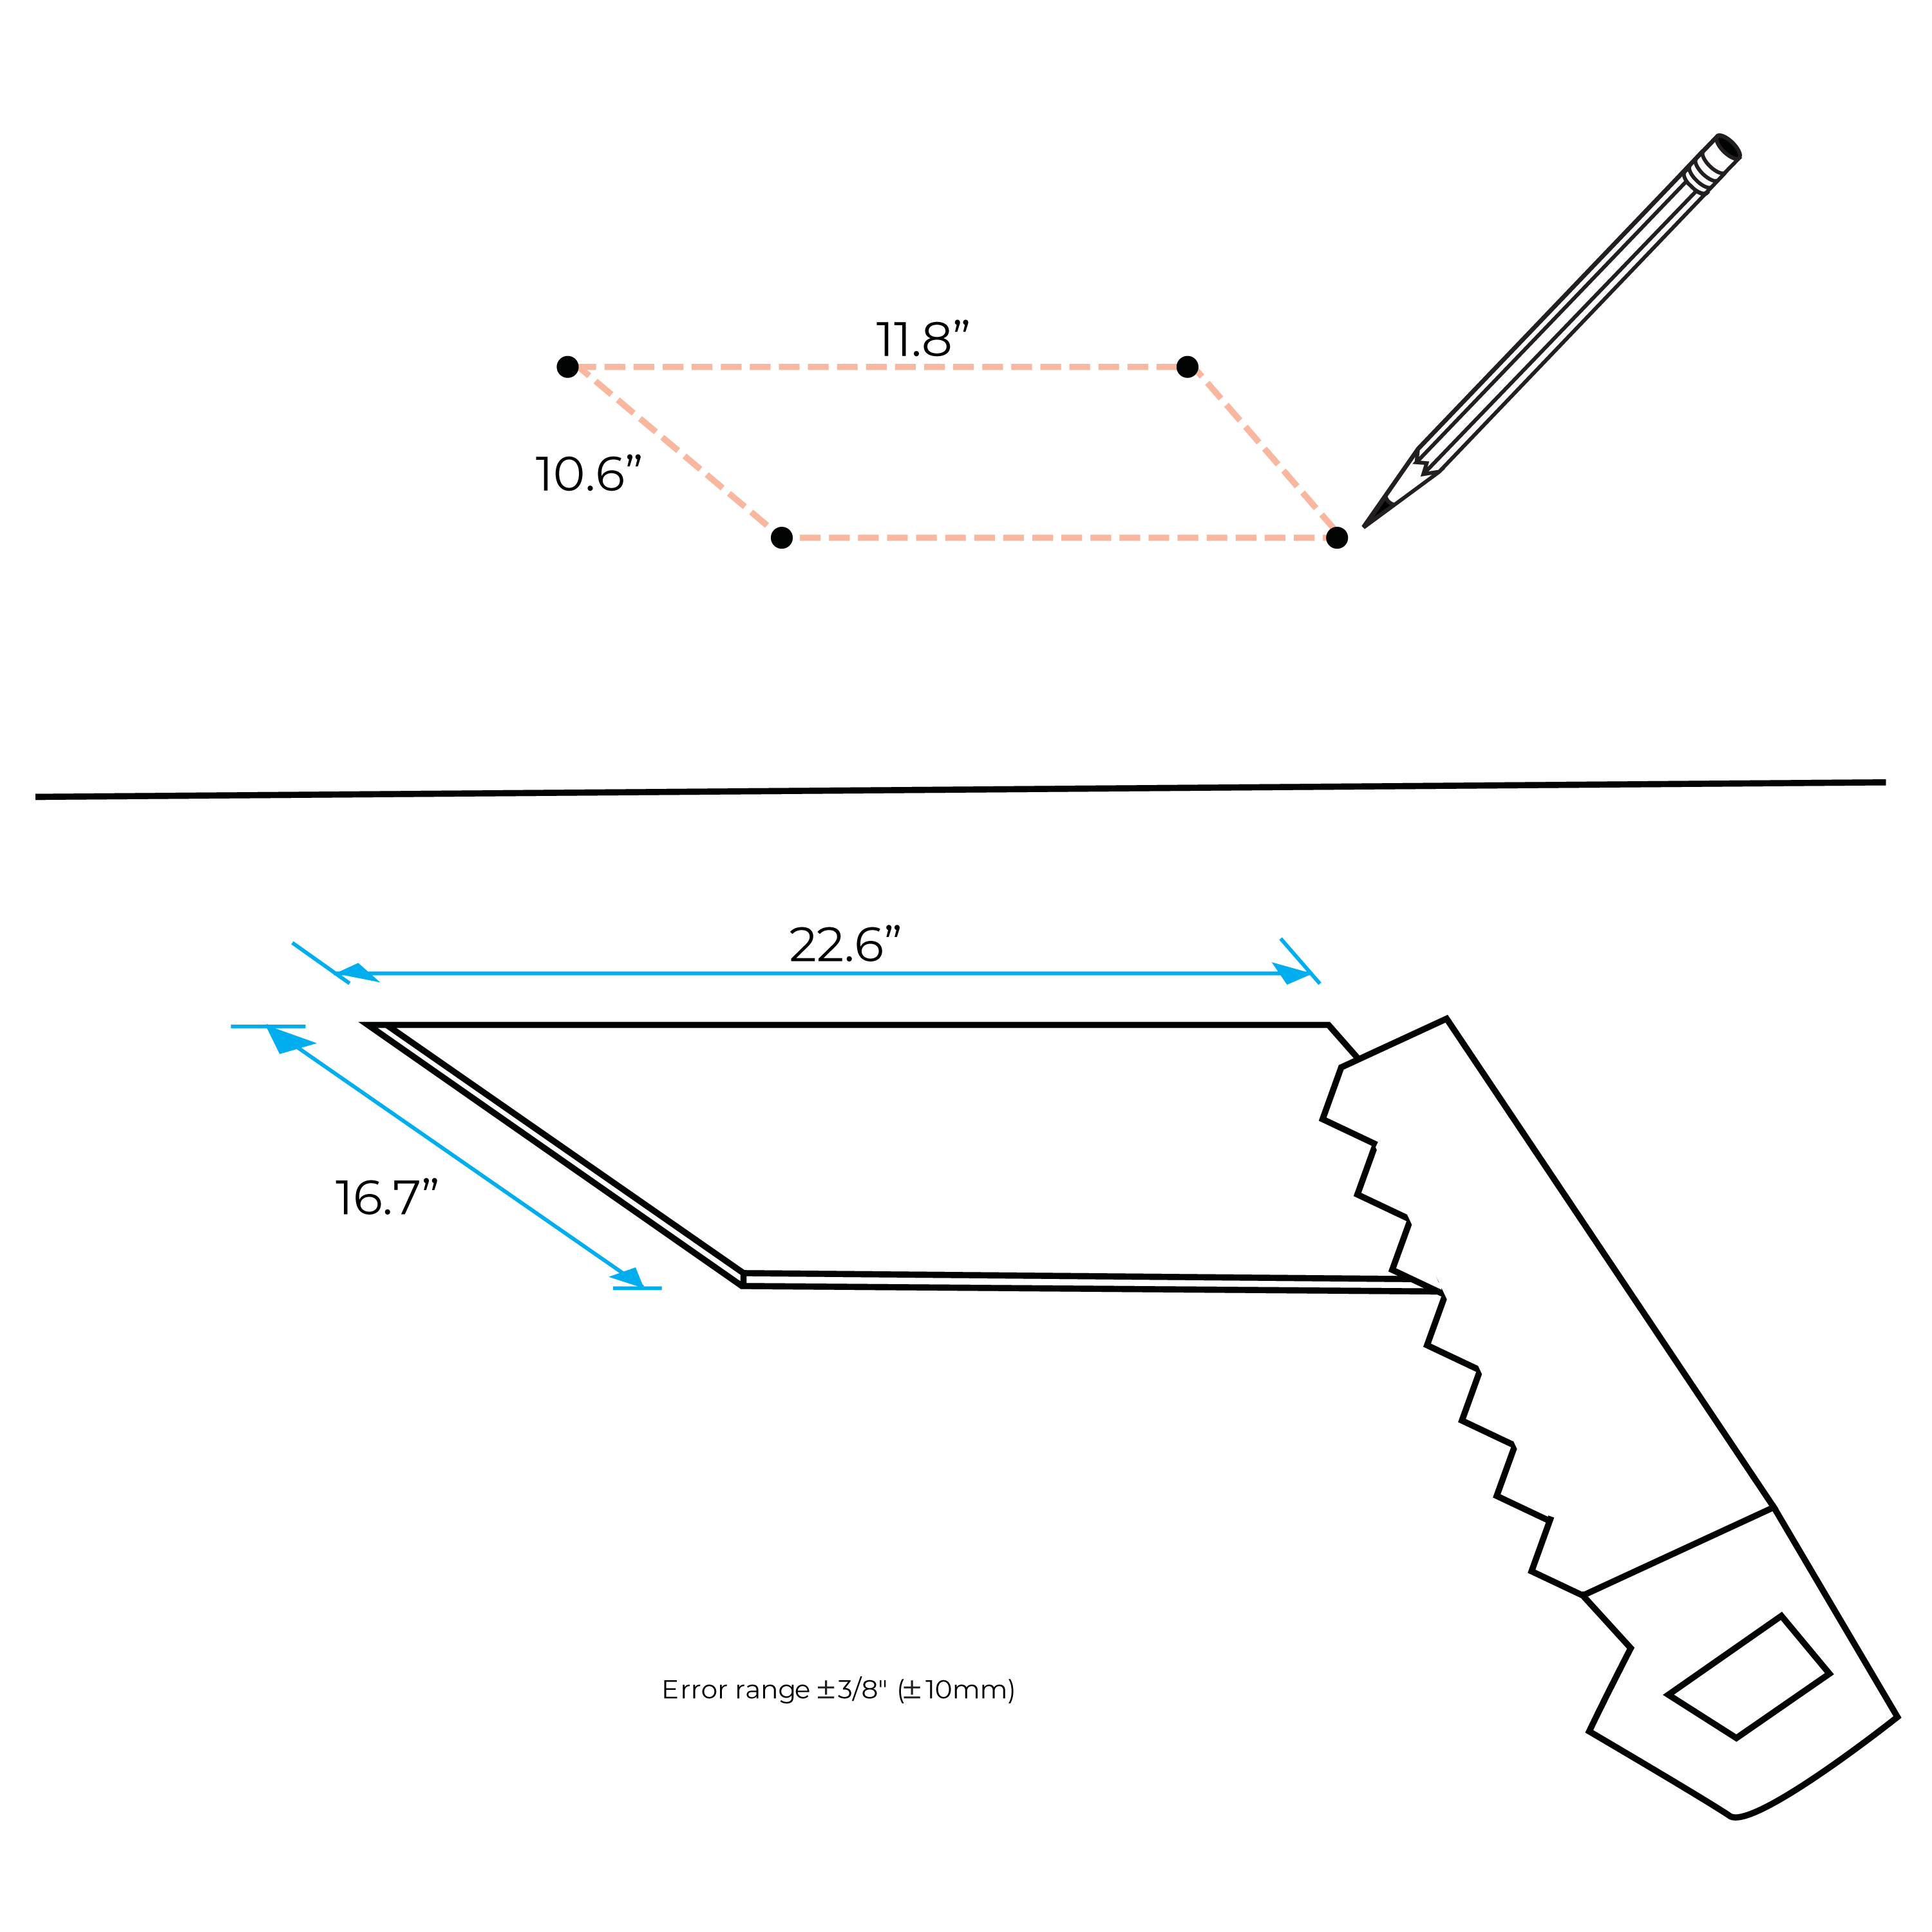
- Begin by cutting a hole in the suspended (false) ceiling to accommodate the fixture. Install the fixture securely and mark the locations on the ceiling for the mounting plugs.
|
shower
|
Step 2:
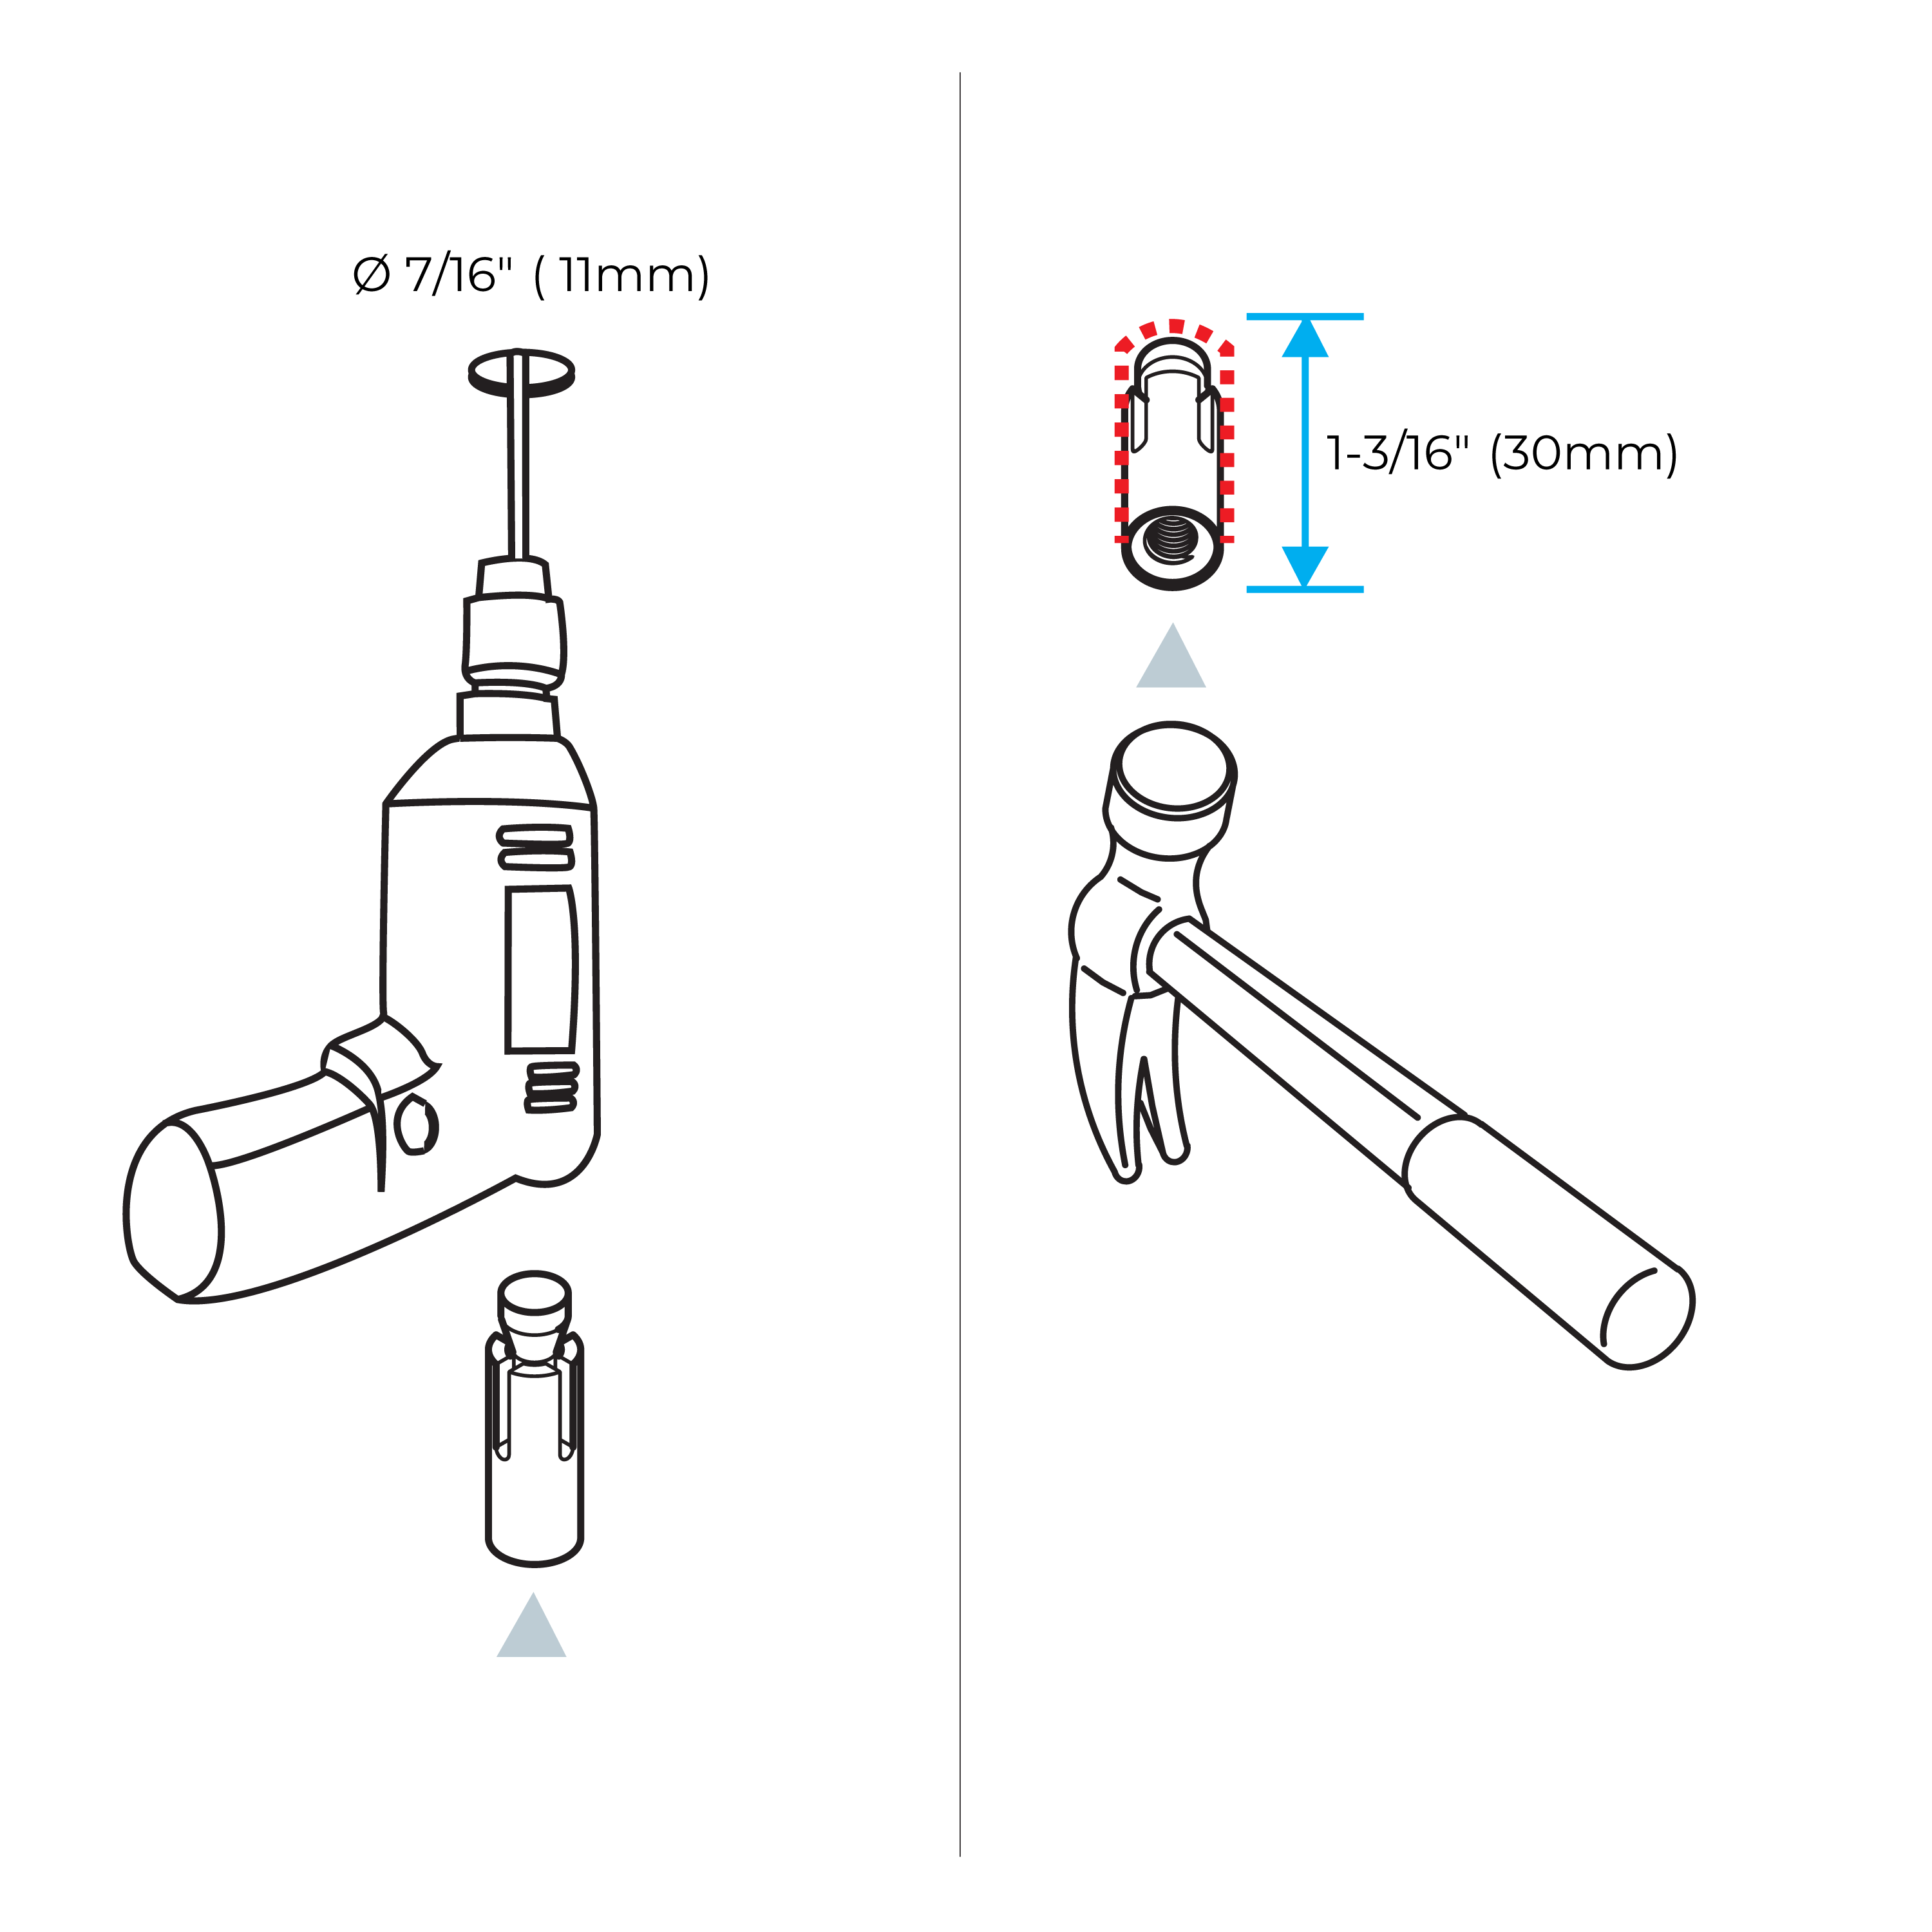
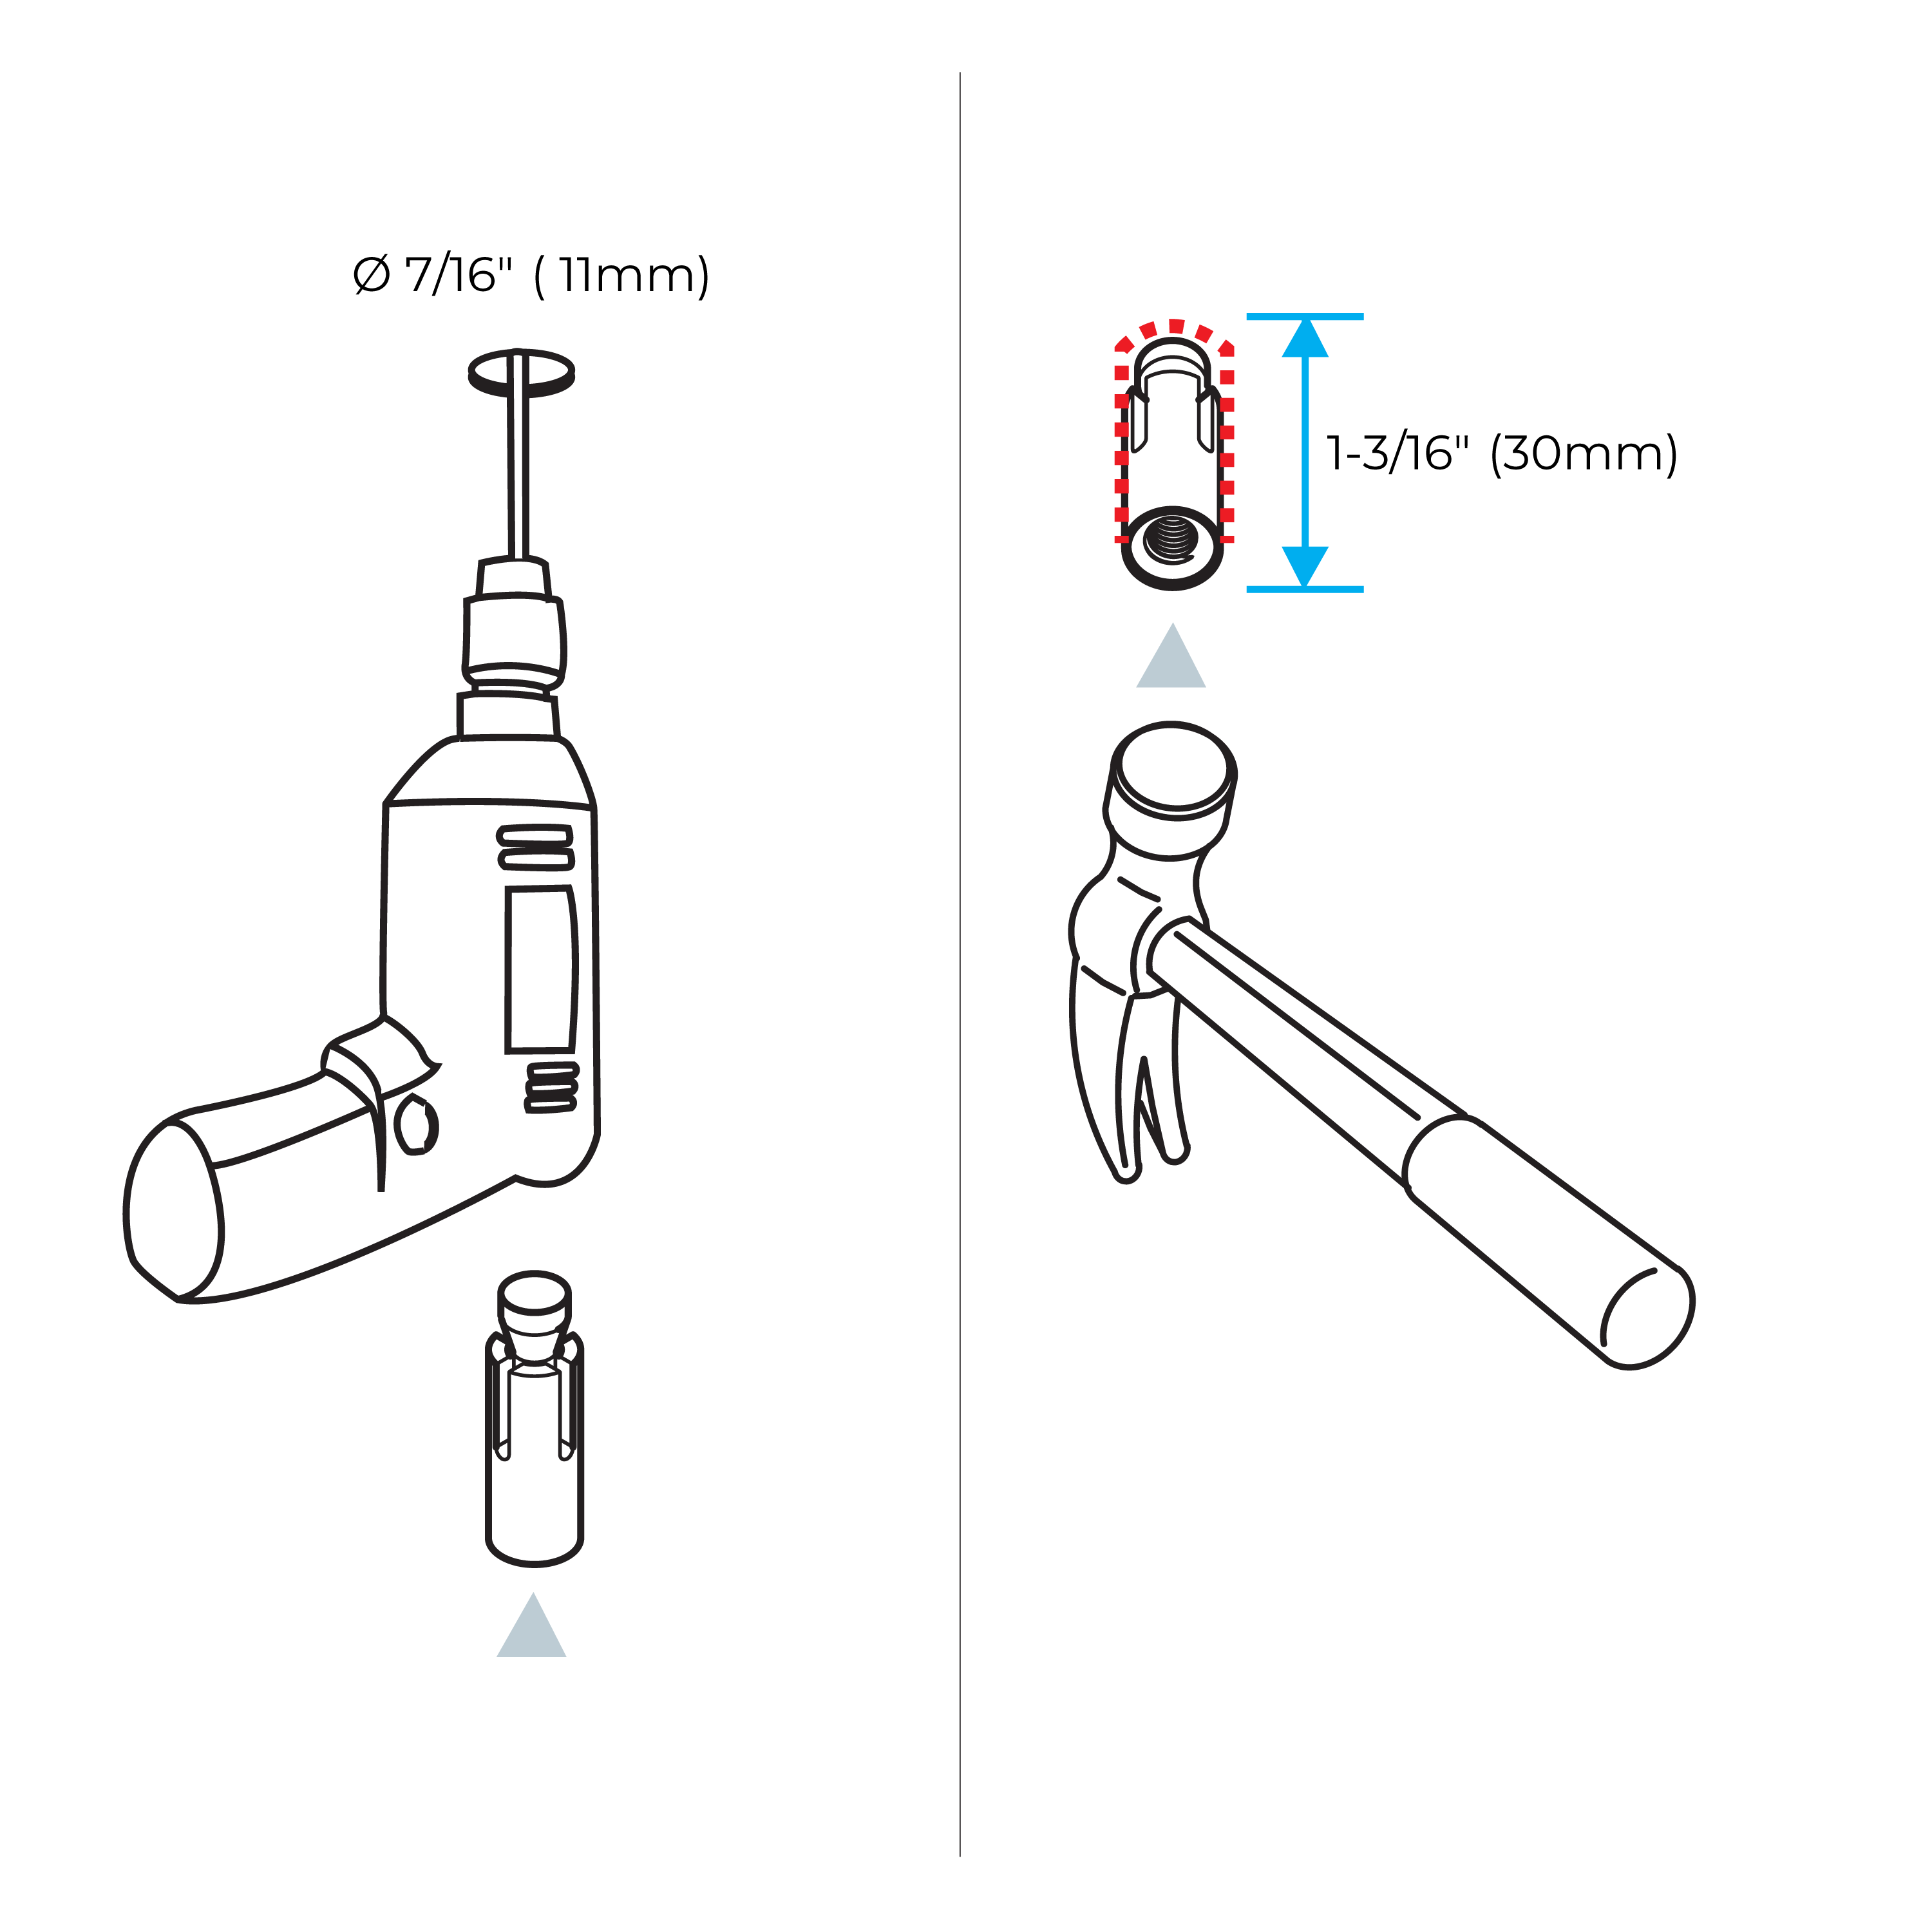
Next, create four Ø11 holes at the marked locations. Push the mounting plugs into each hole and firmly secure them in place using a hammer.
|
|
|
|
|
|
|
|
|
|
|
Step 3:
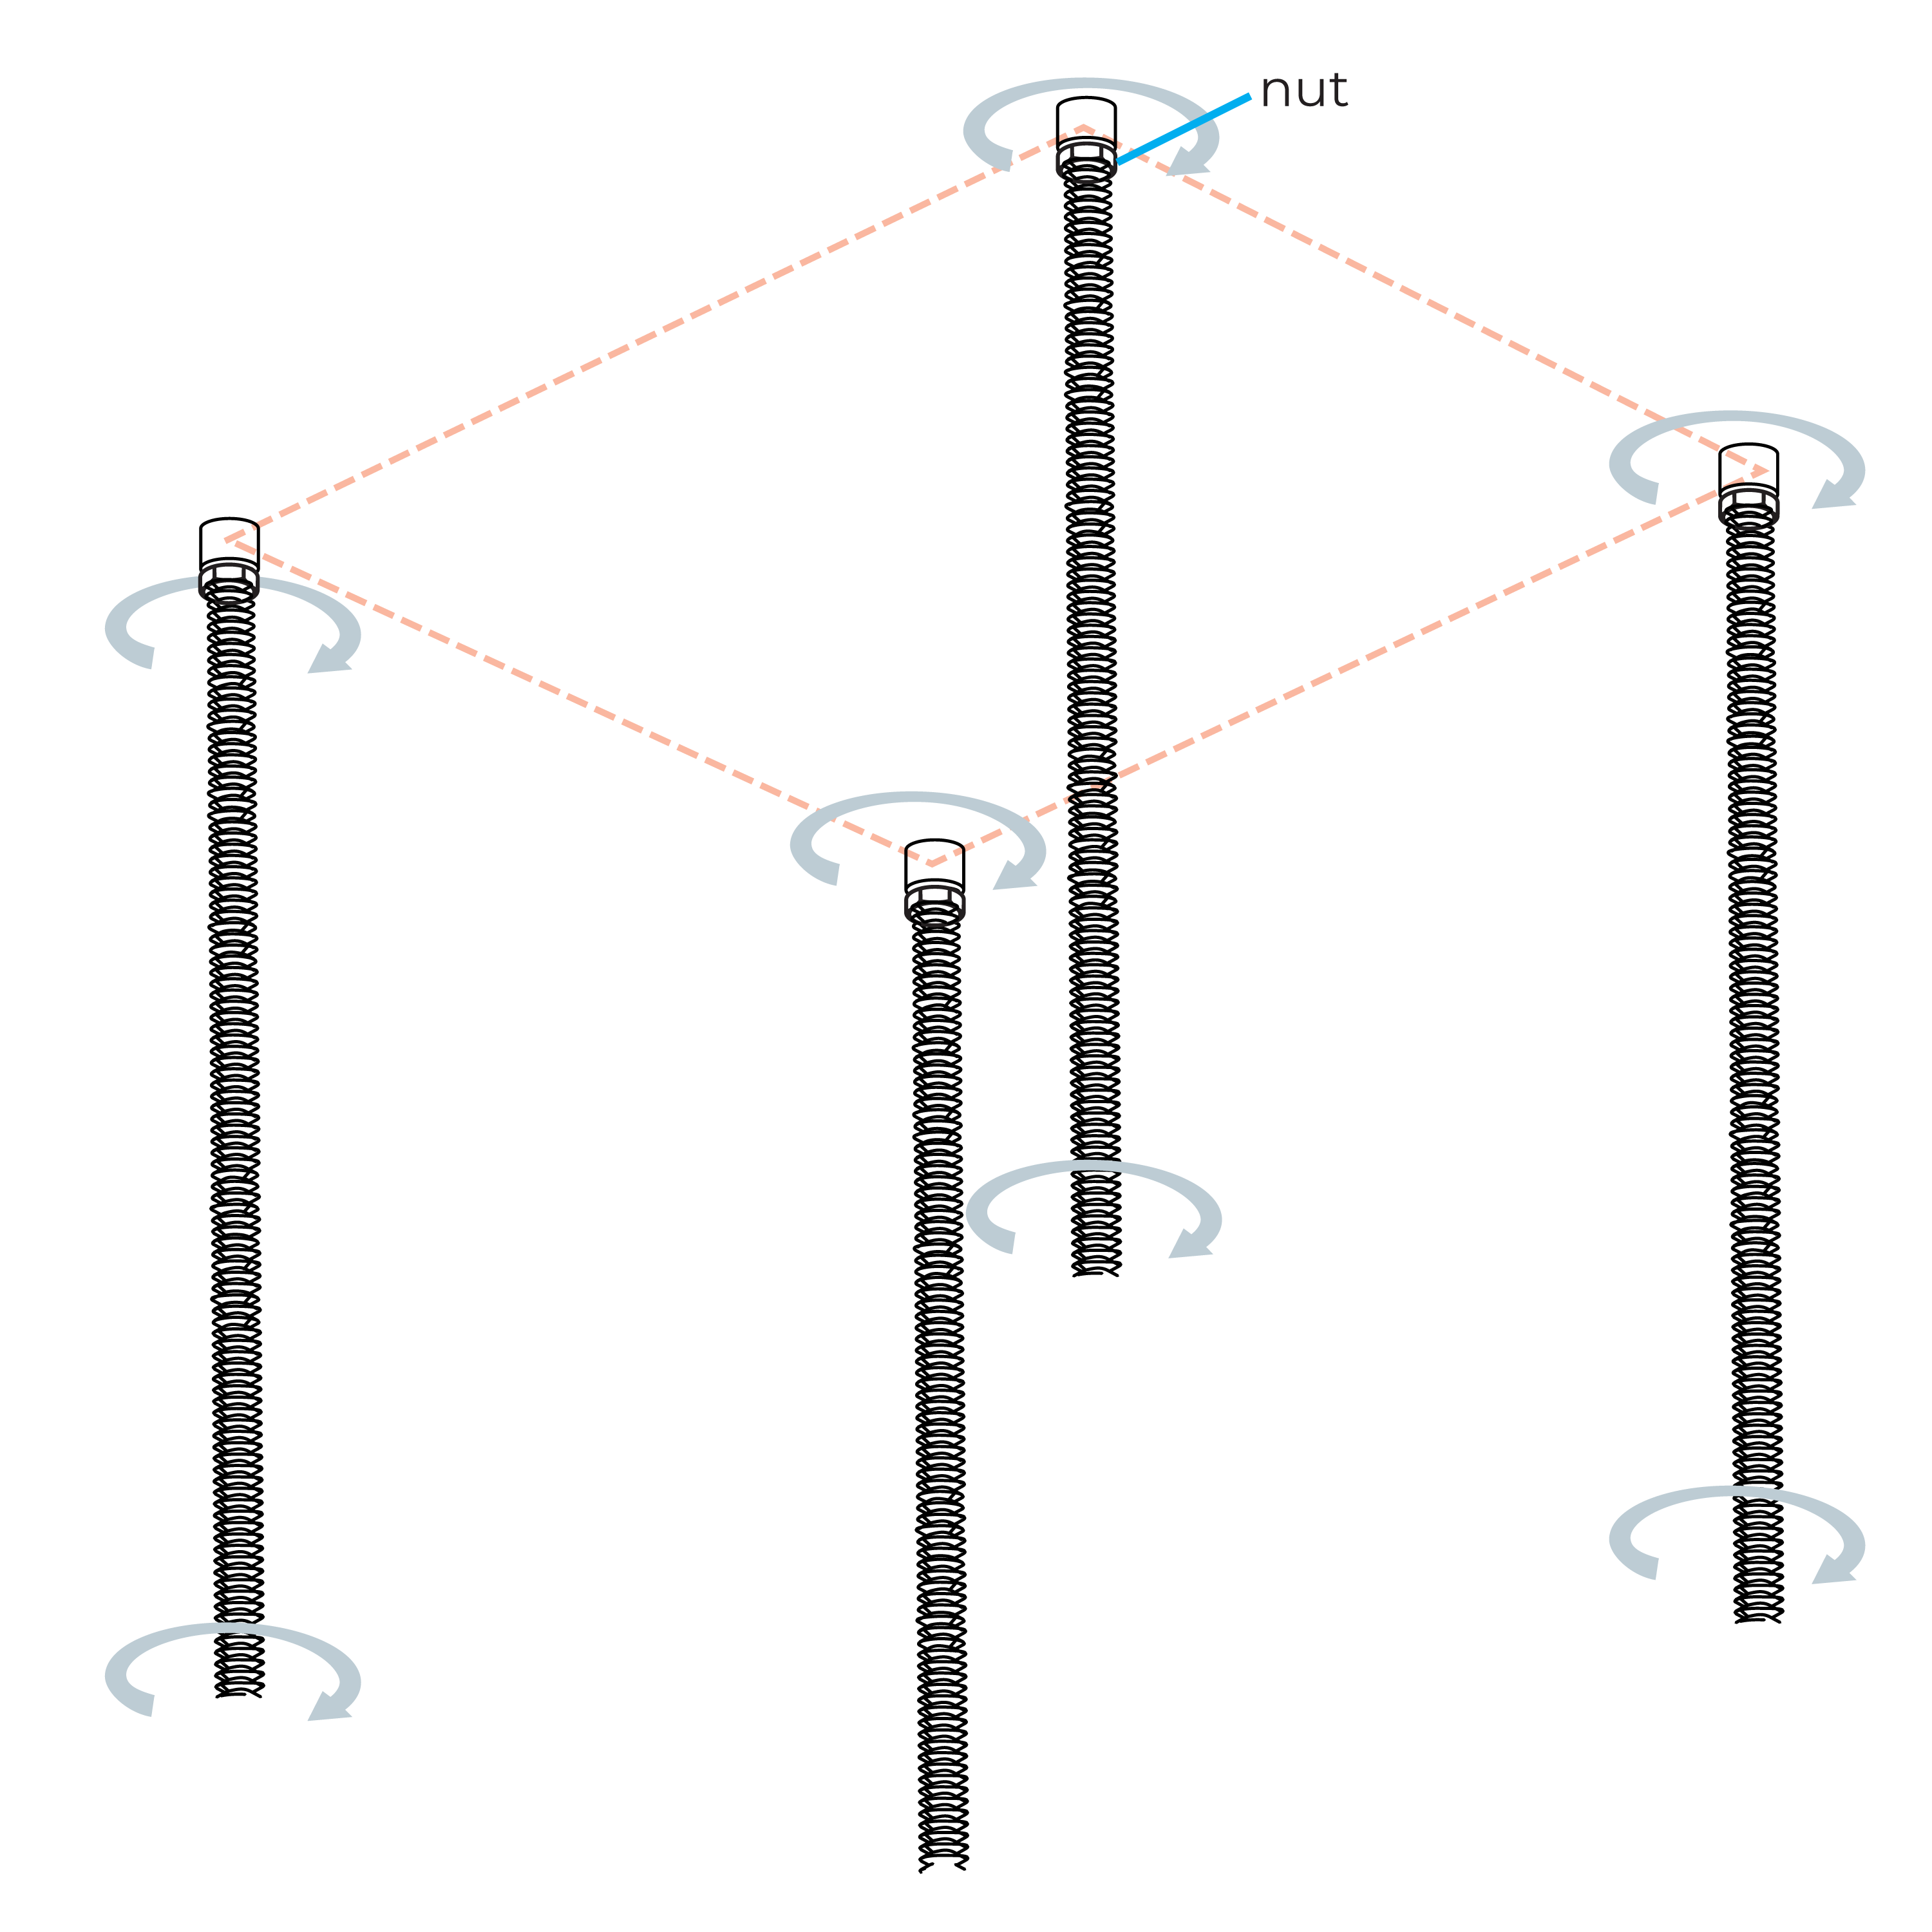
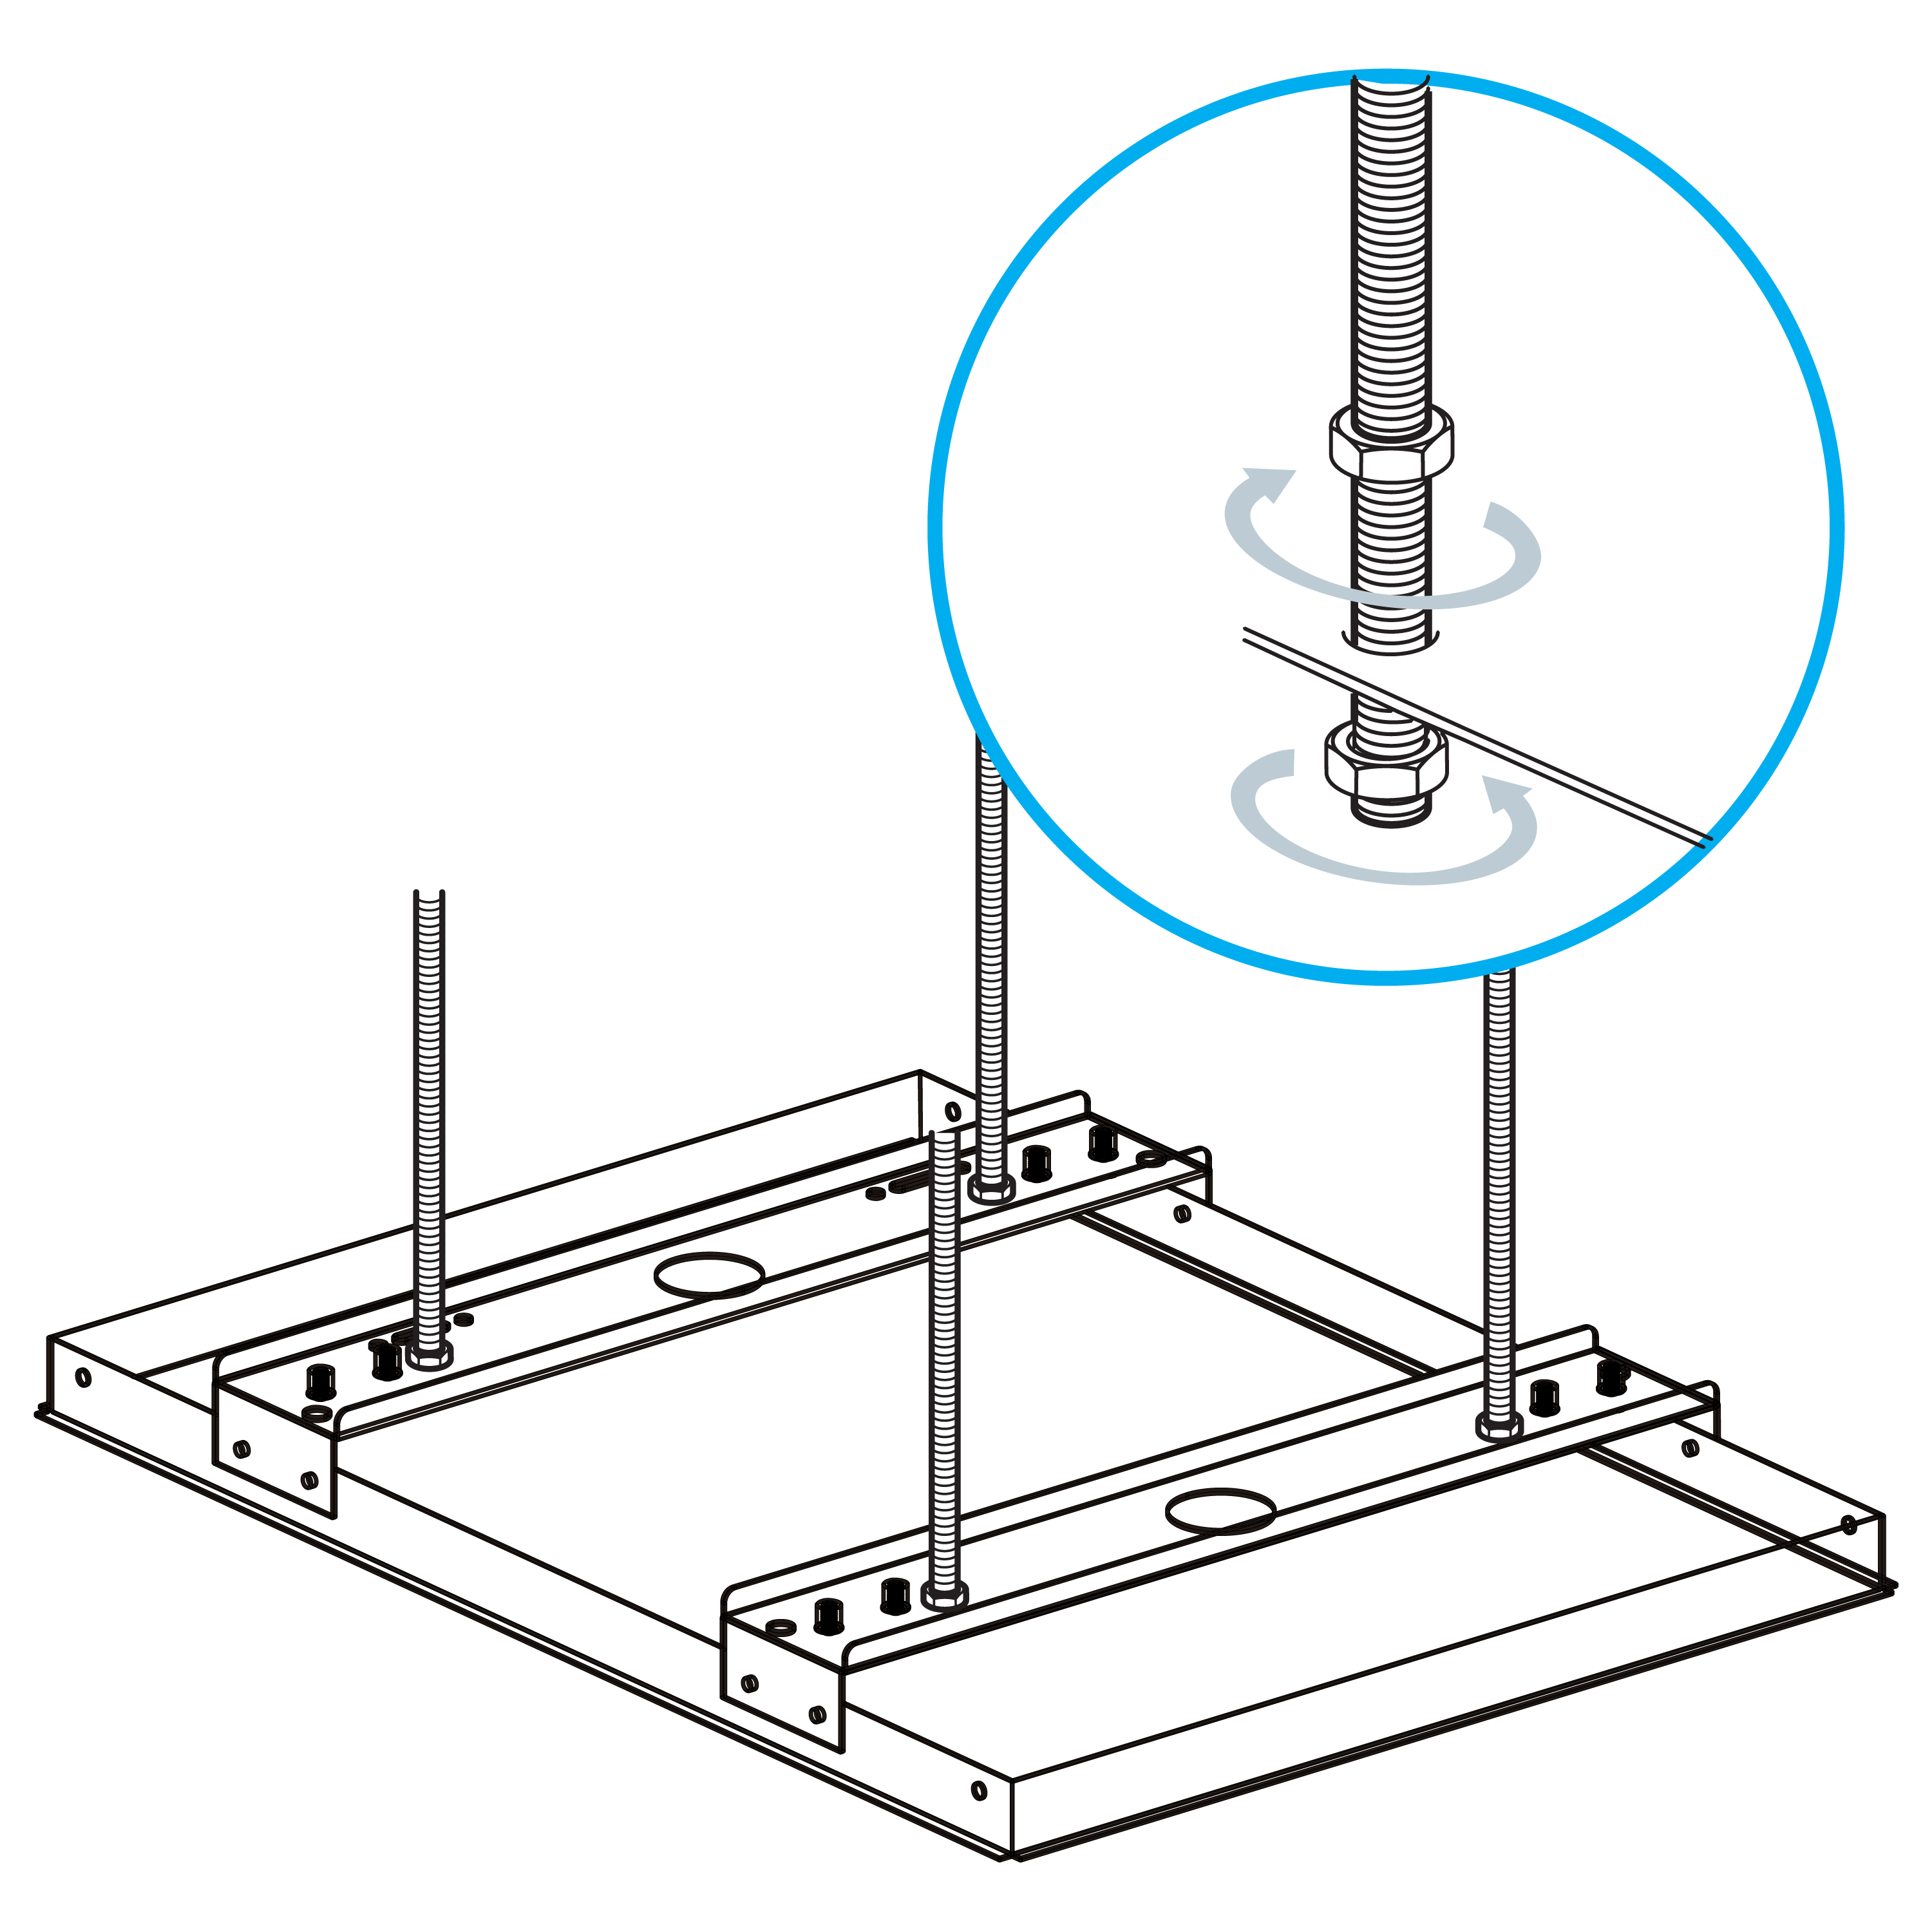
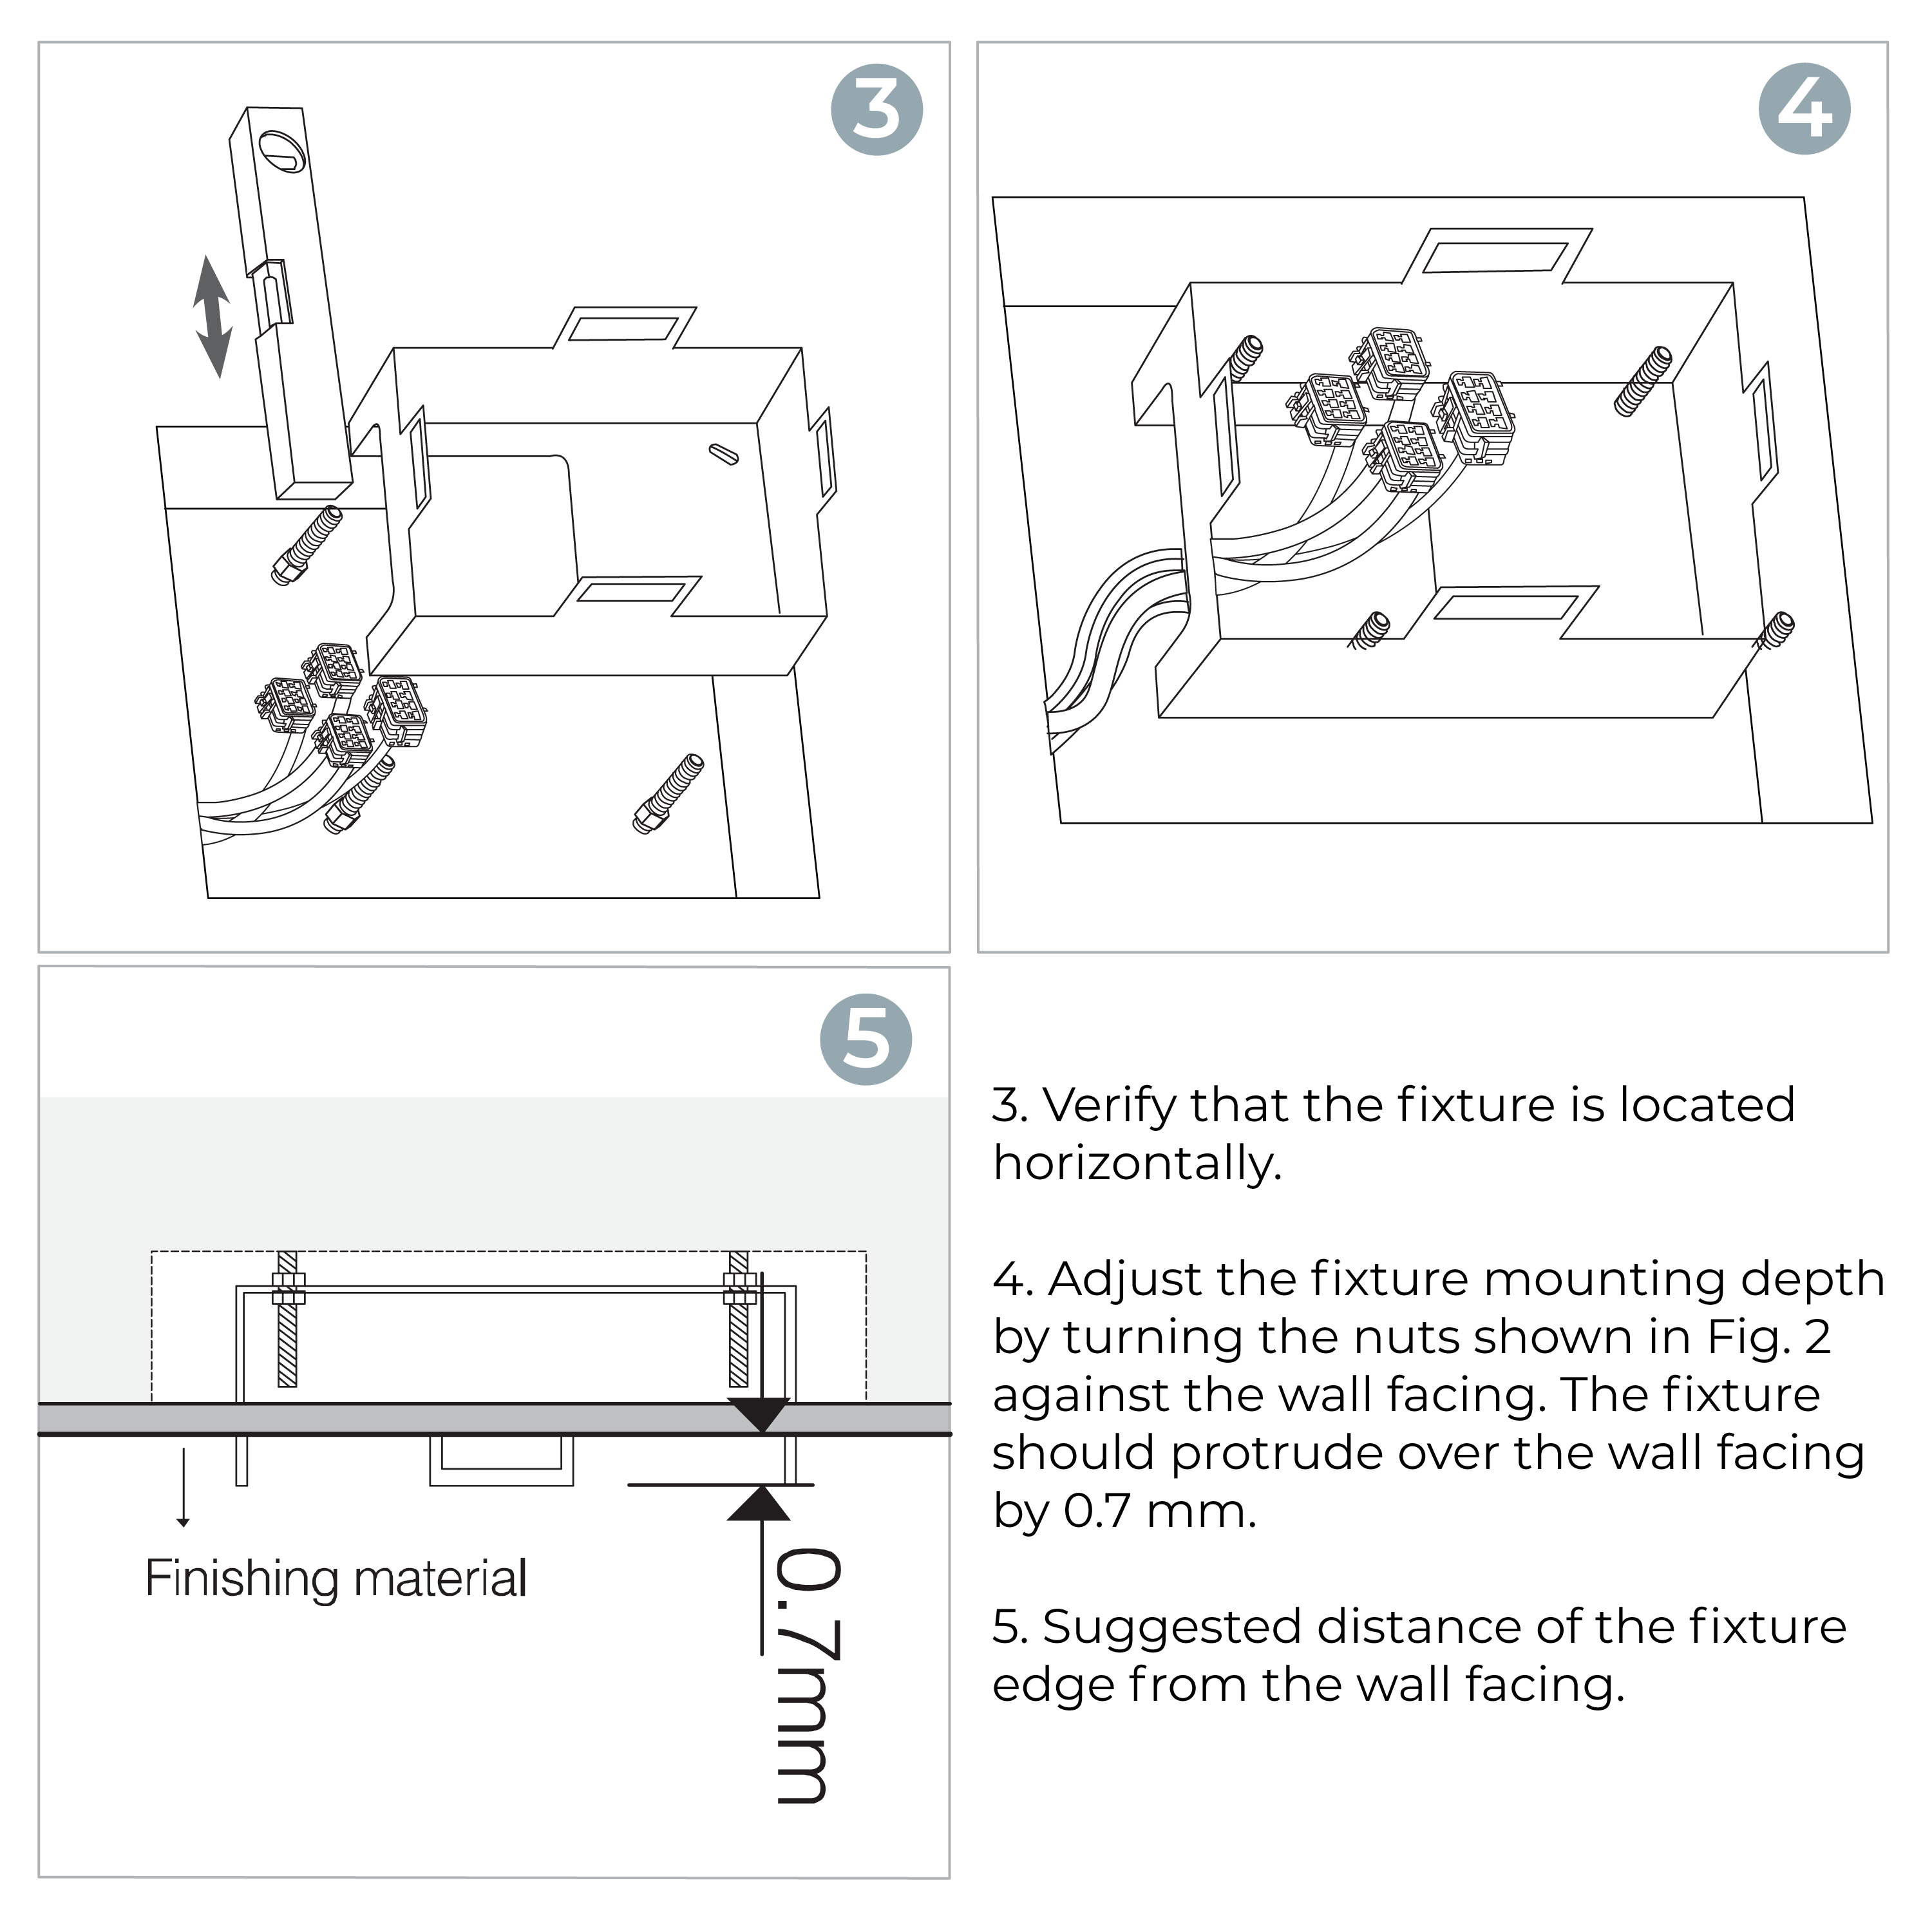
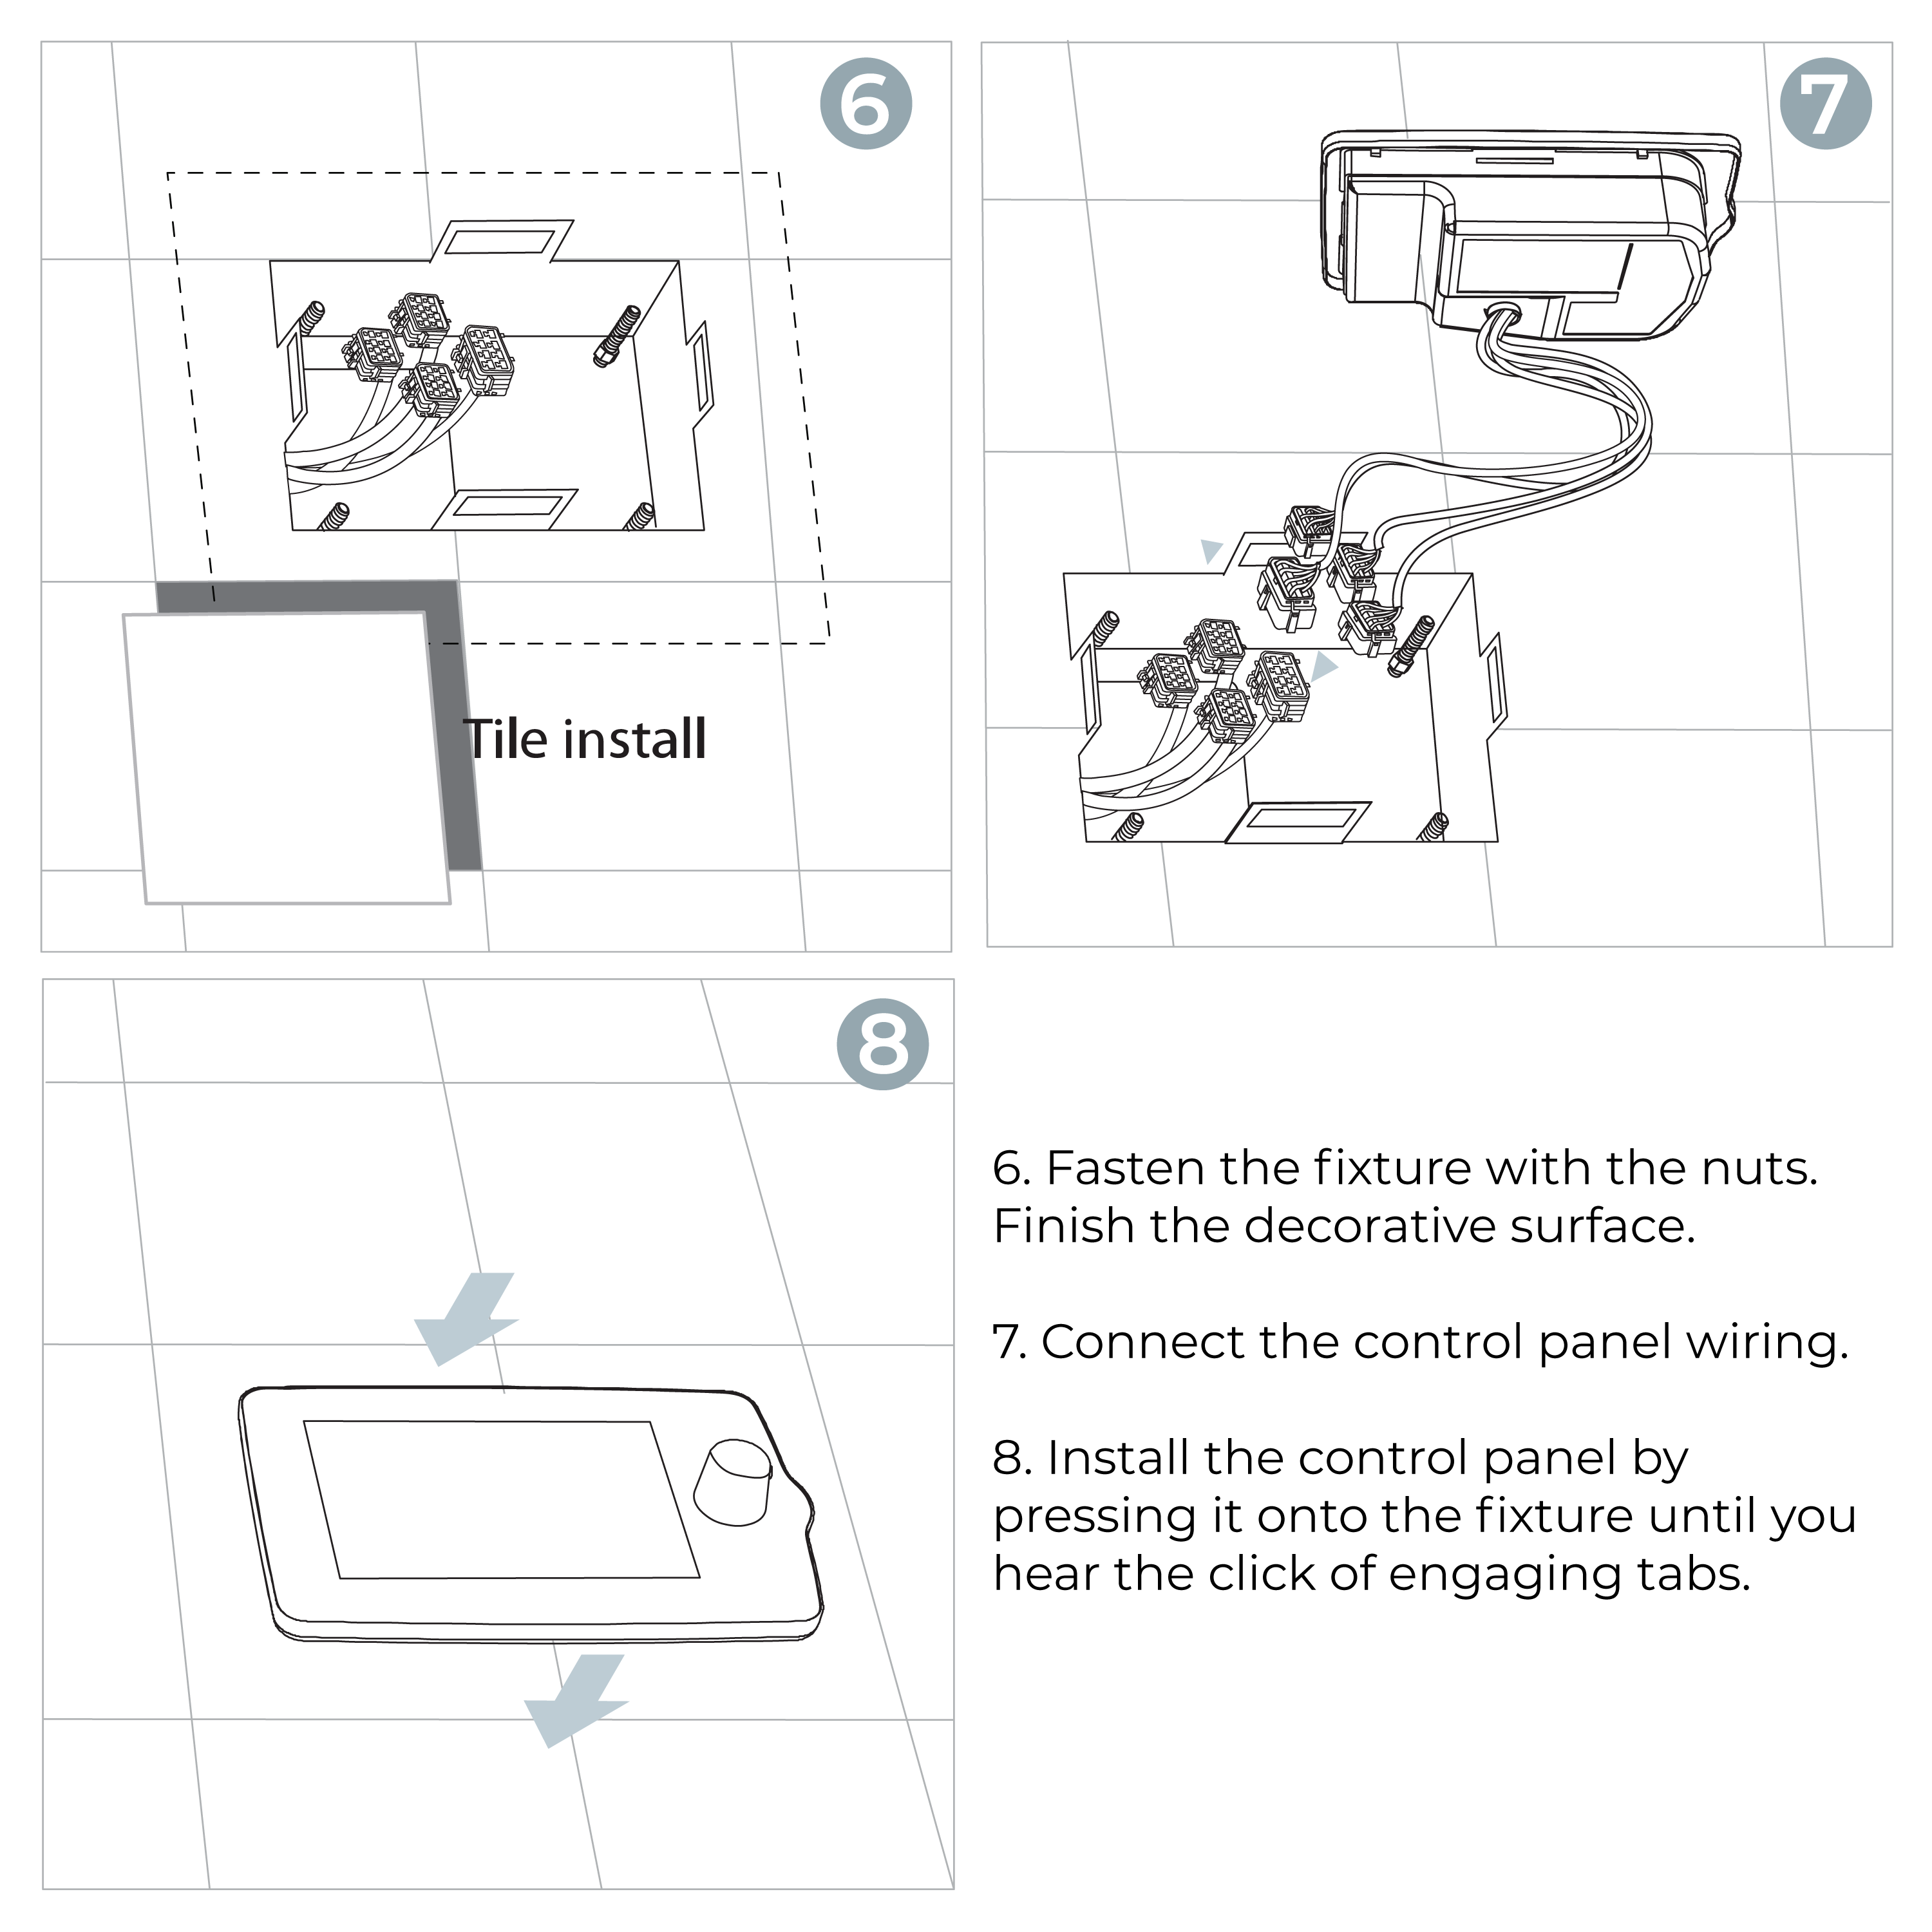
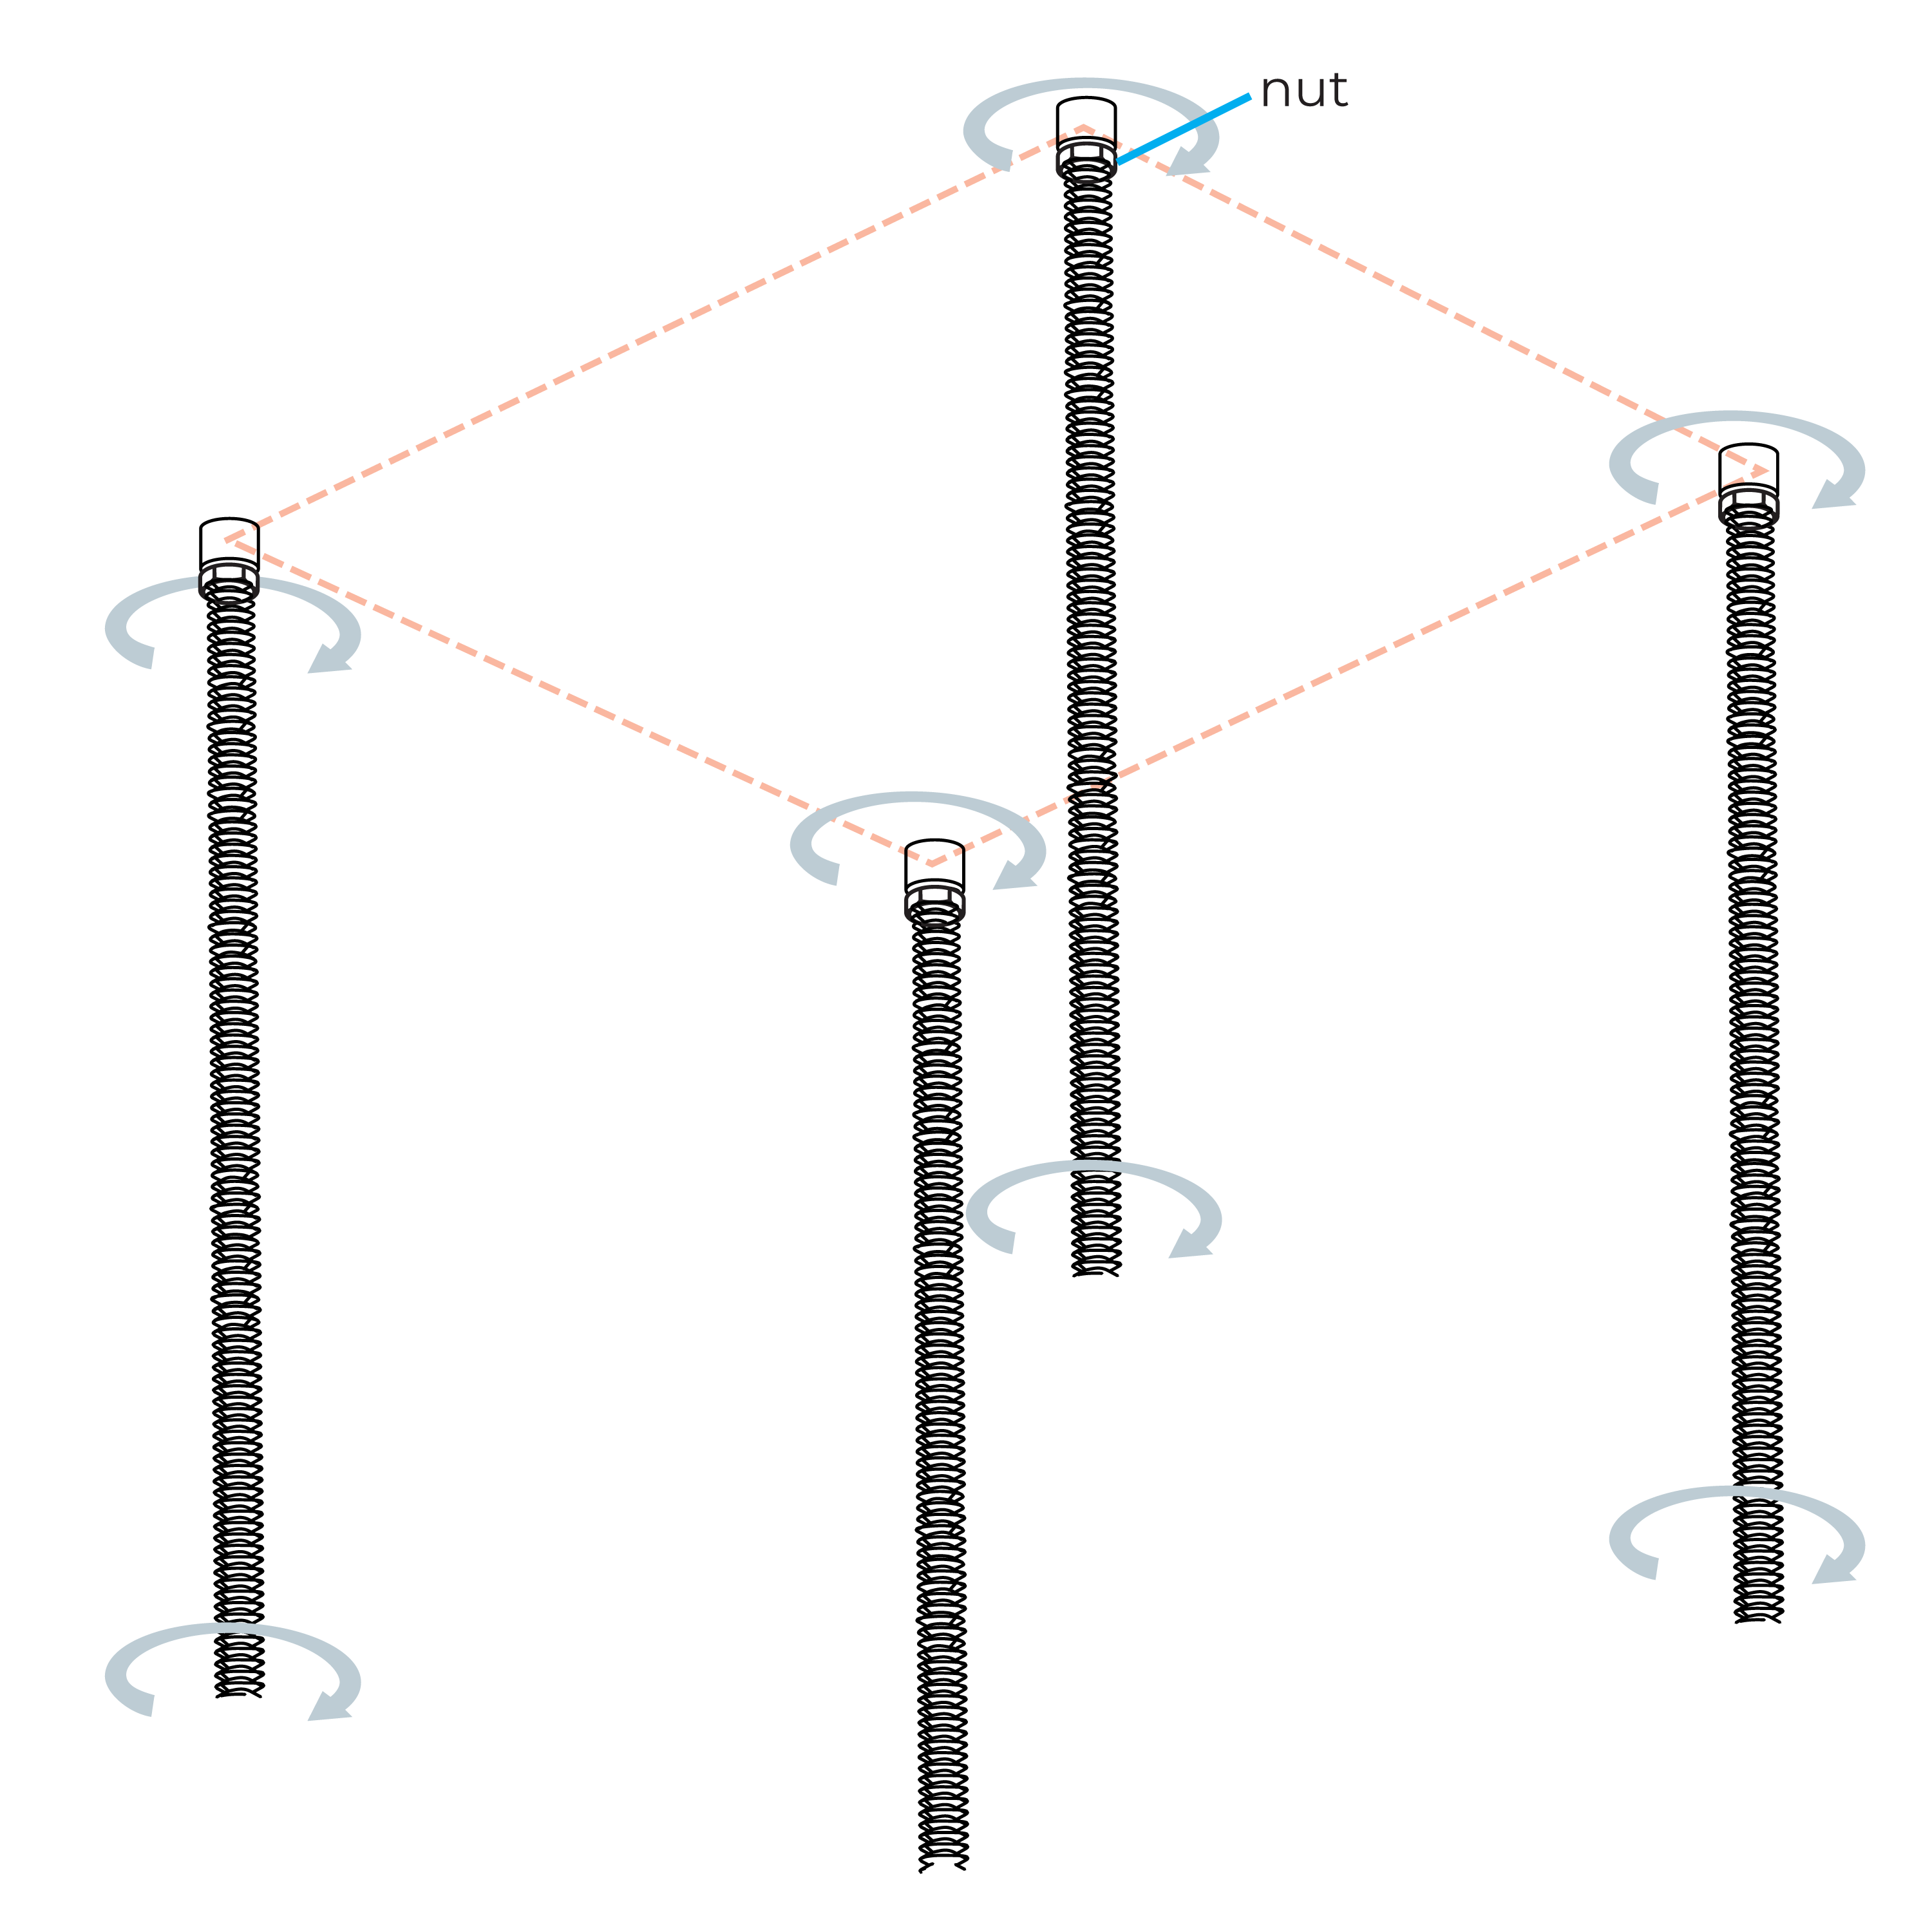
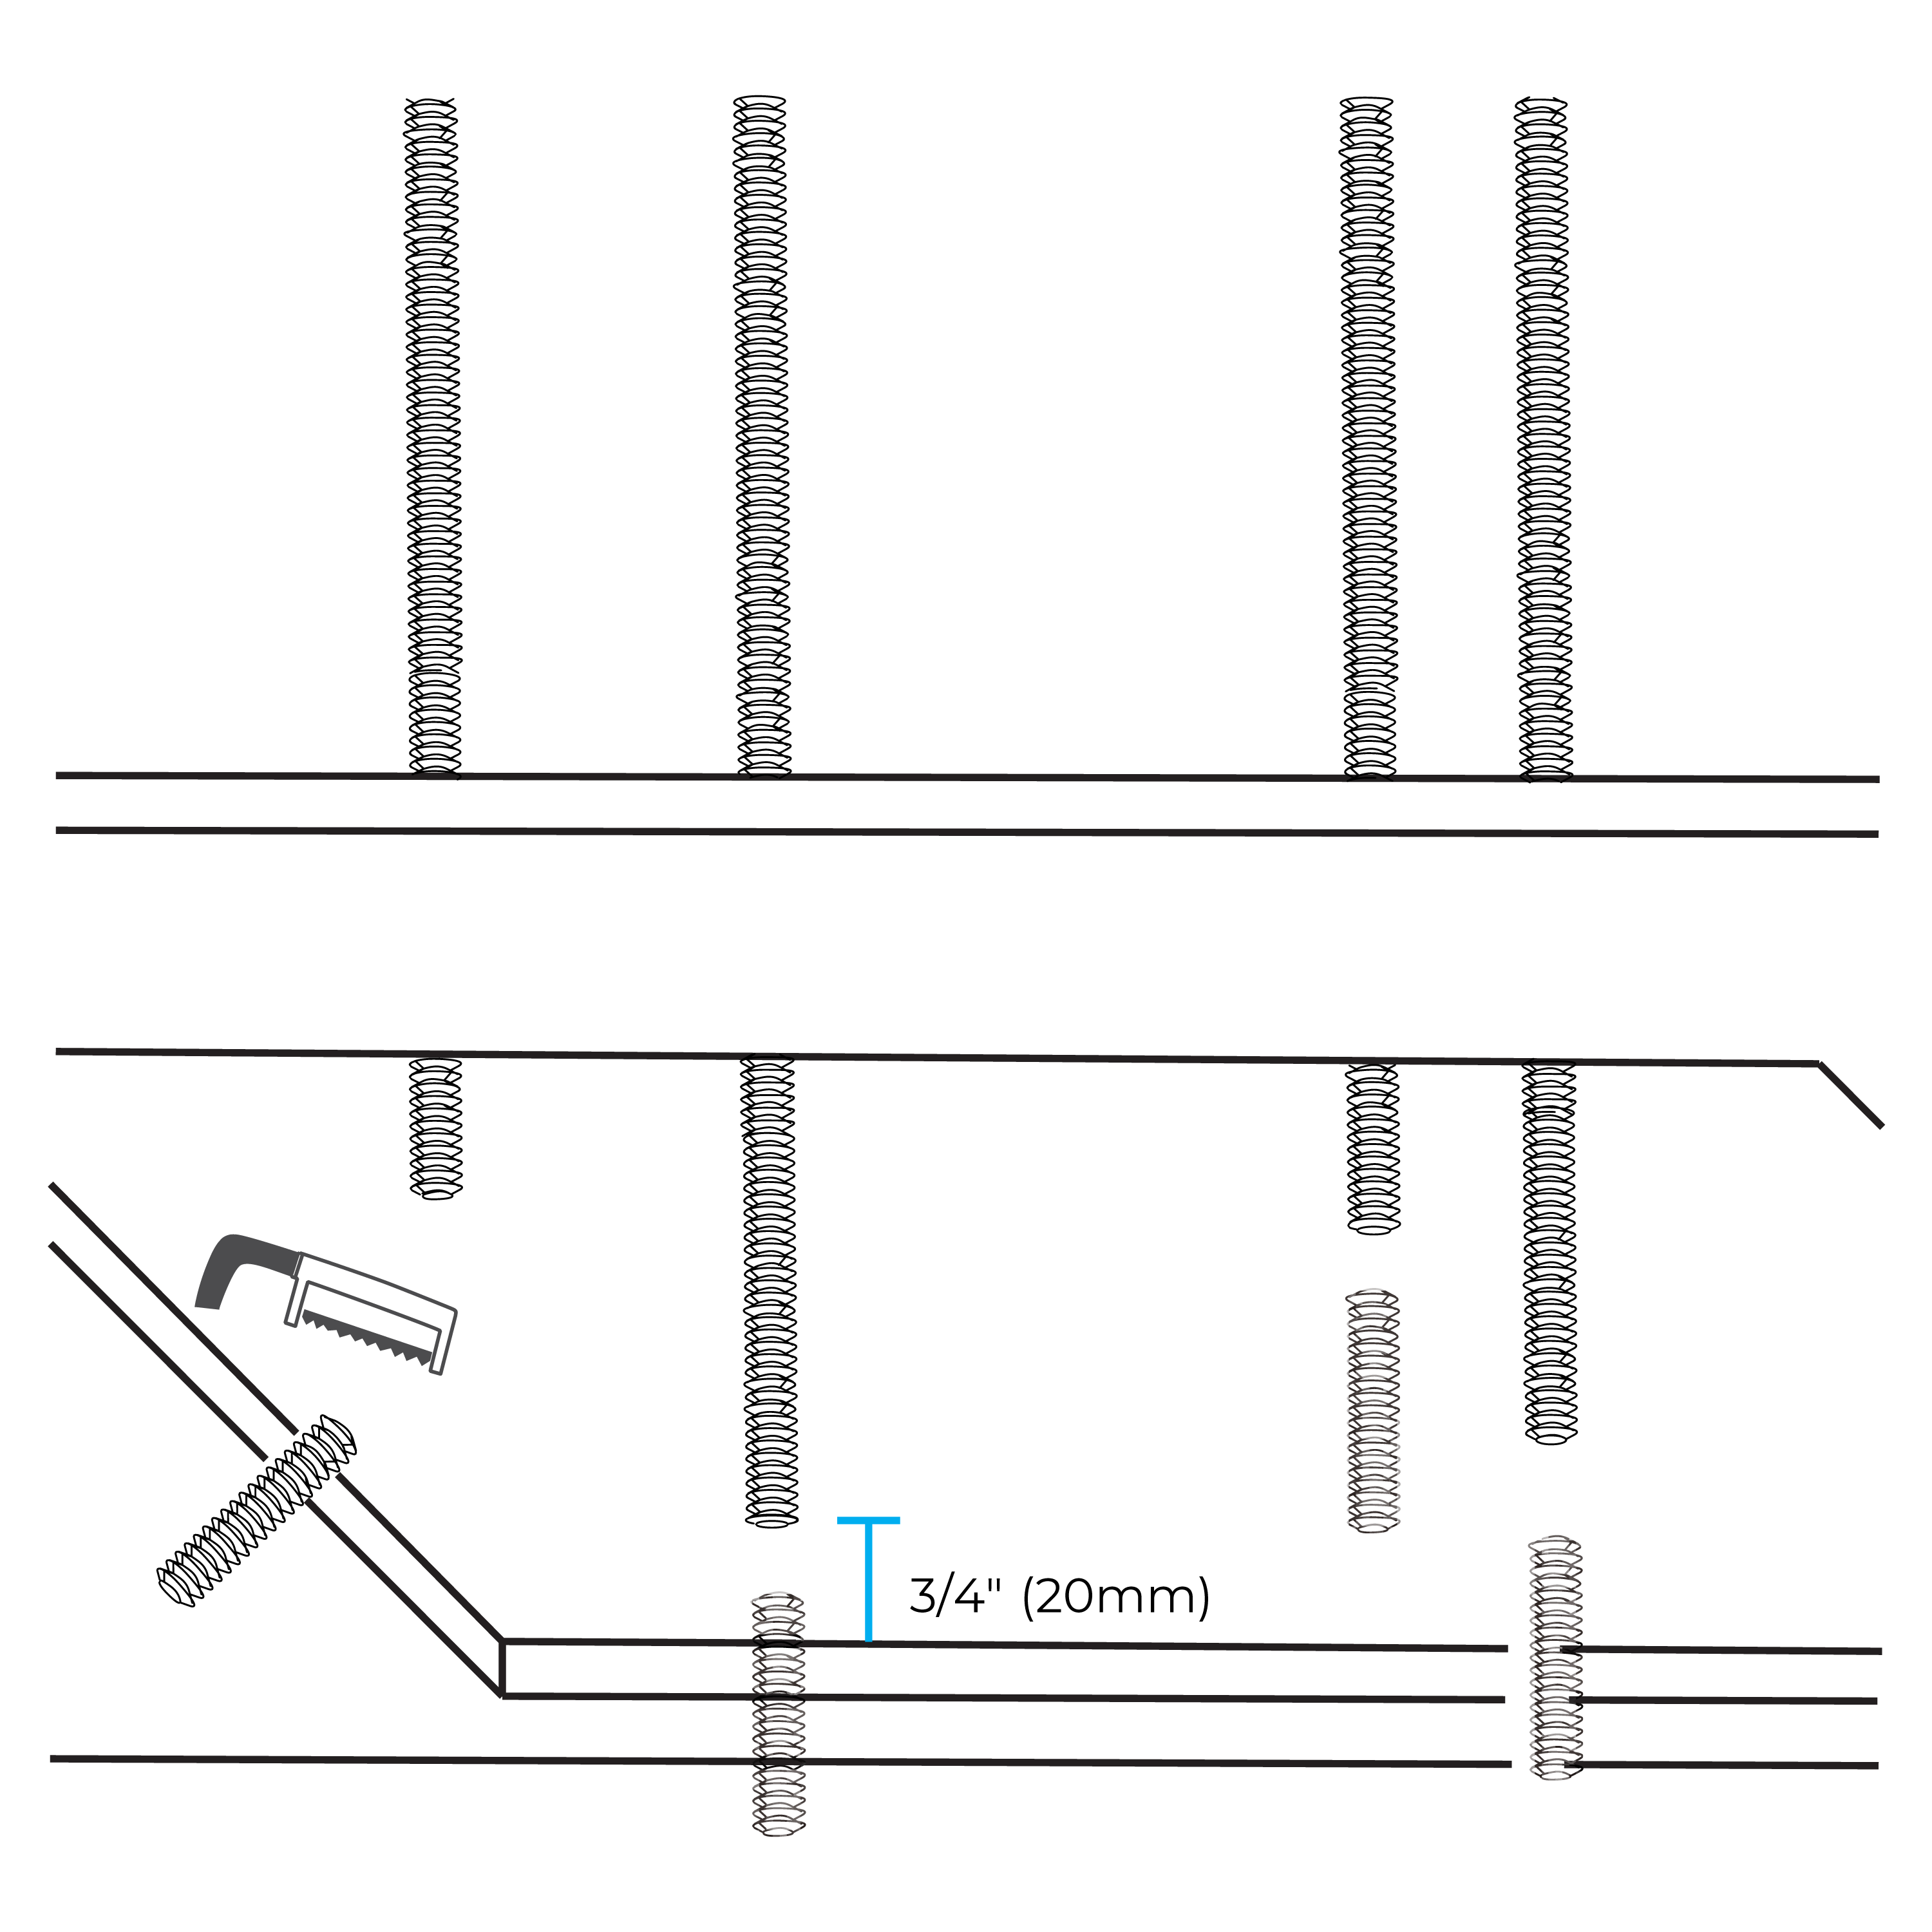
Screw four bolts into the plugs and fasten them securely with nuts.
|
|
Step 4:
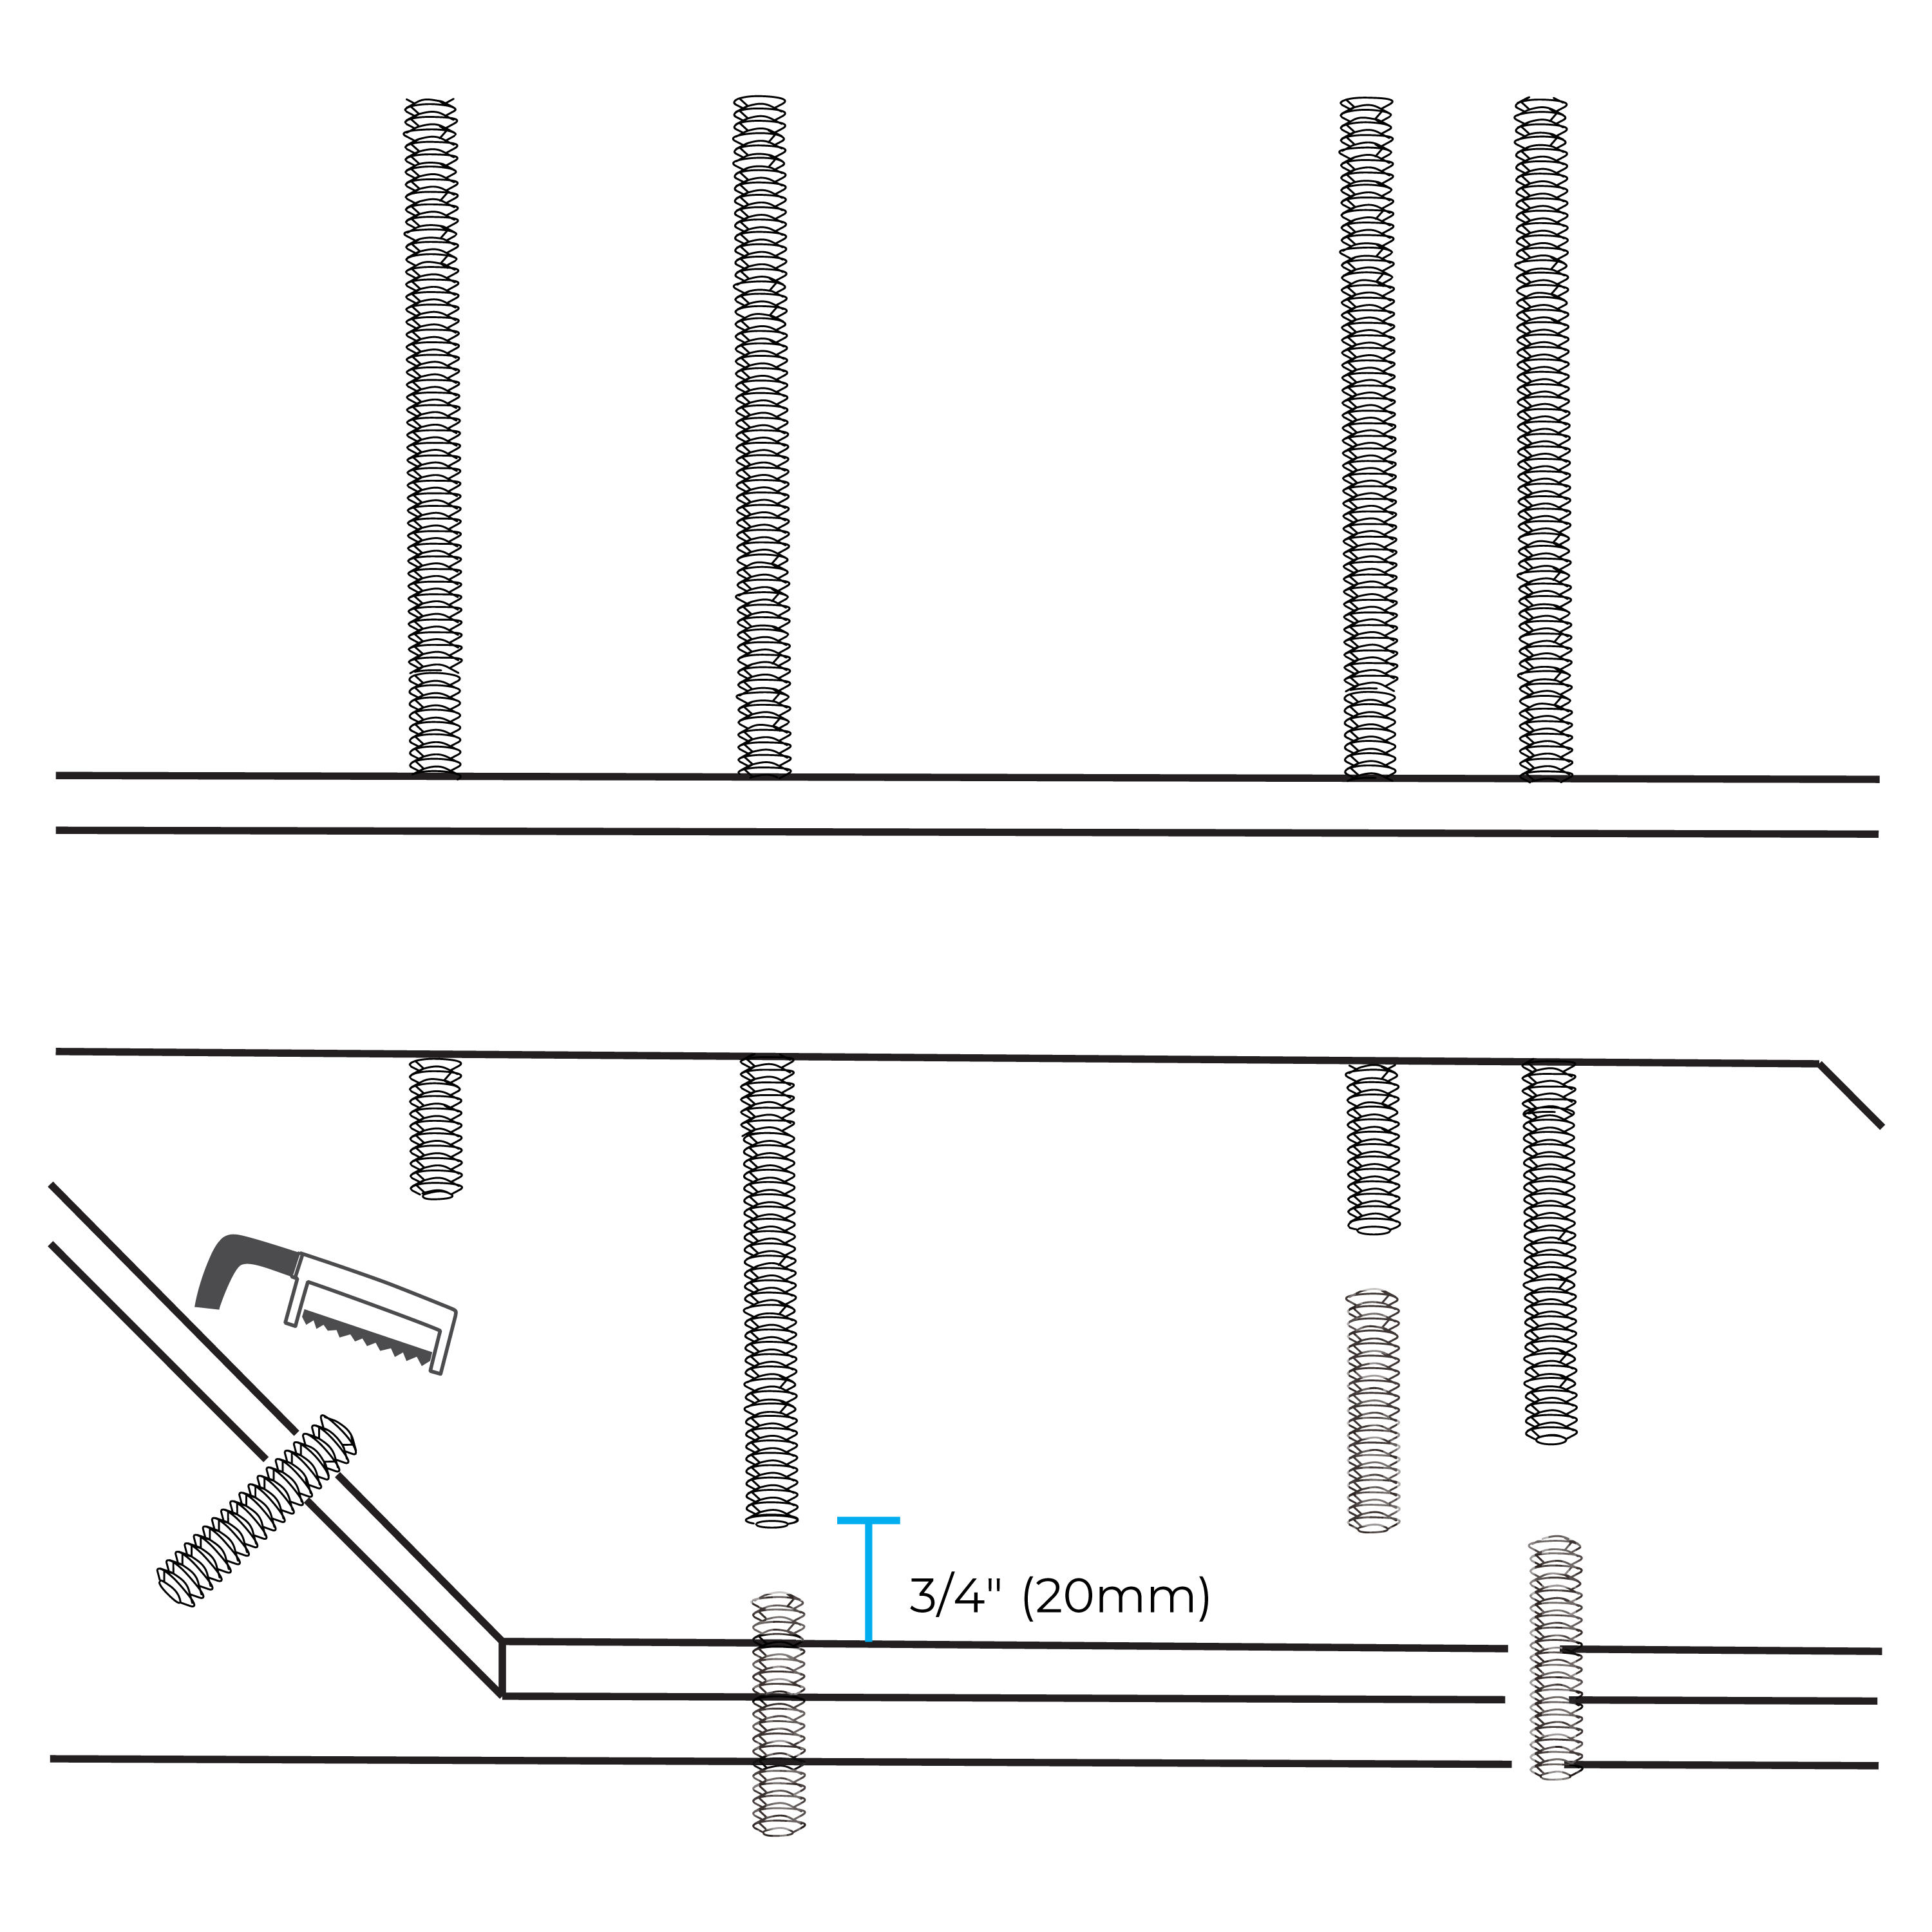
If necessary, trim the bolts to the required size as indicated in the provided drawing.
|
|
|
|
|
|
|
|
|
|
|
|
Step 5:
Carefully insert the fixture into the suspended ceiling hole, ensuring a snug fit.
|
|
Step 6:
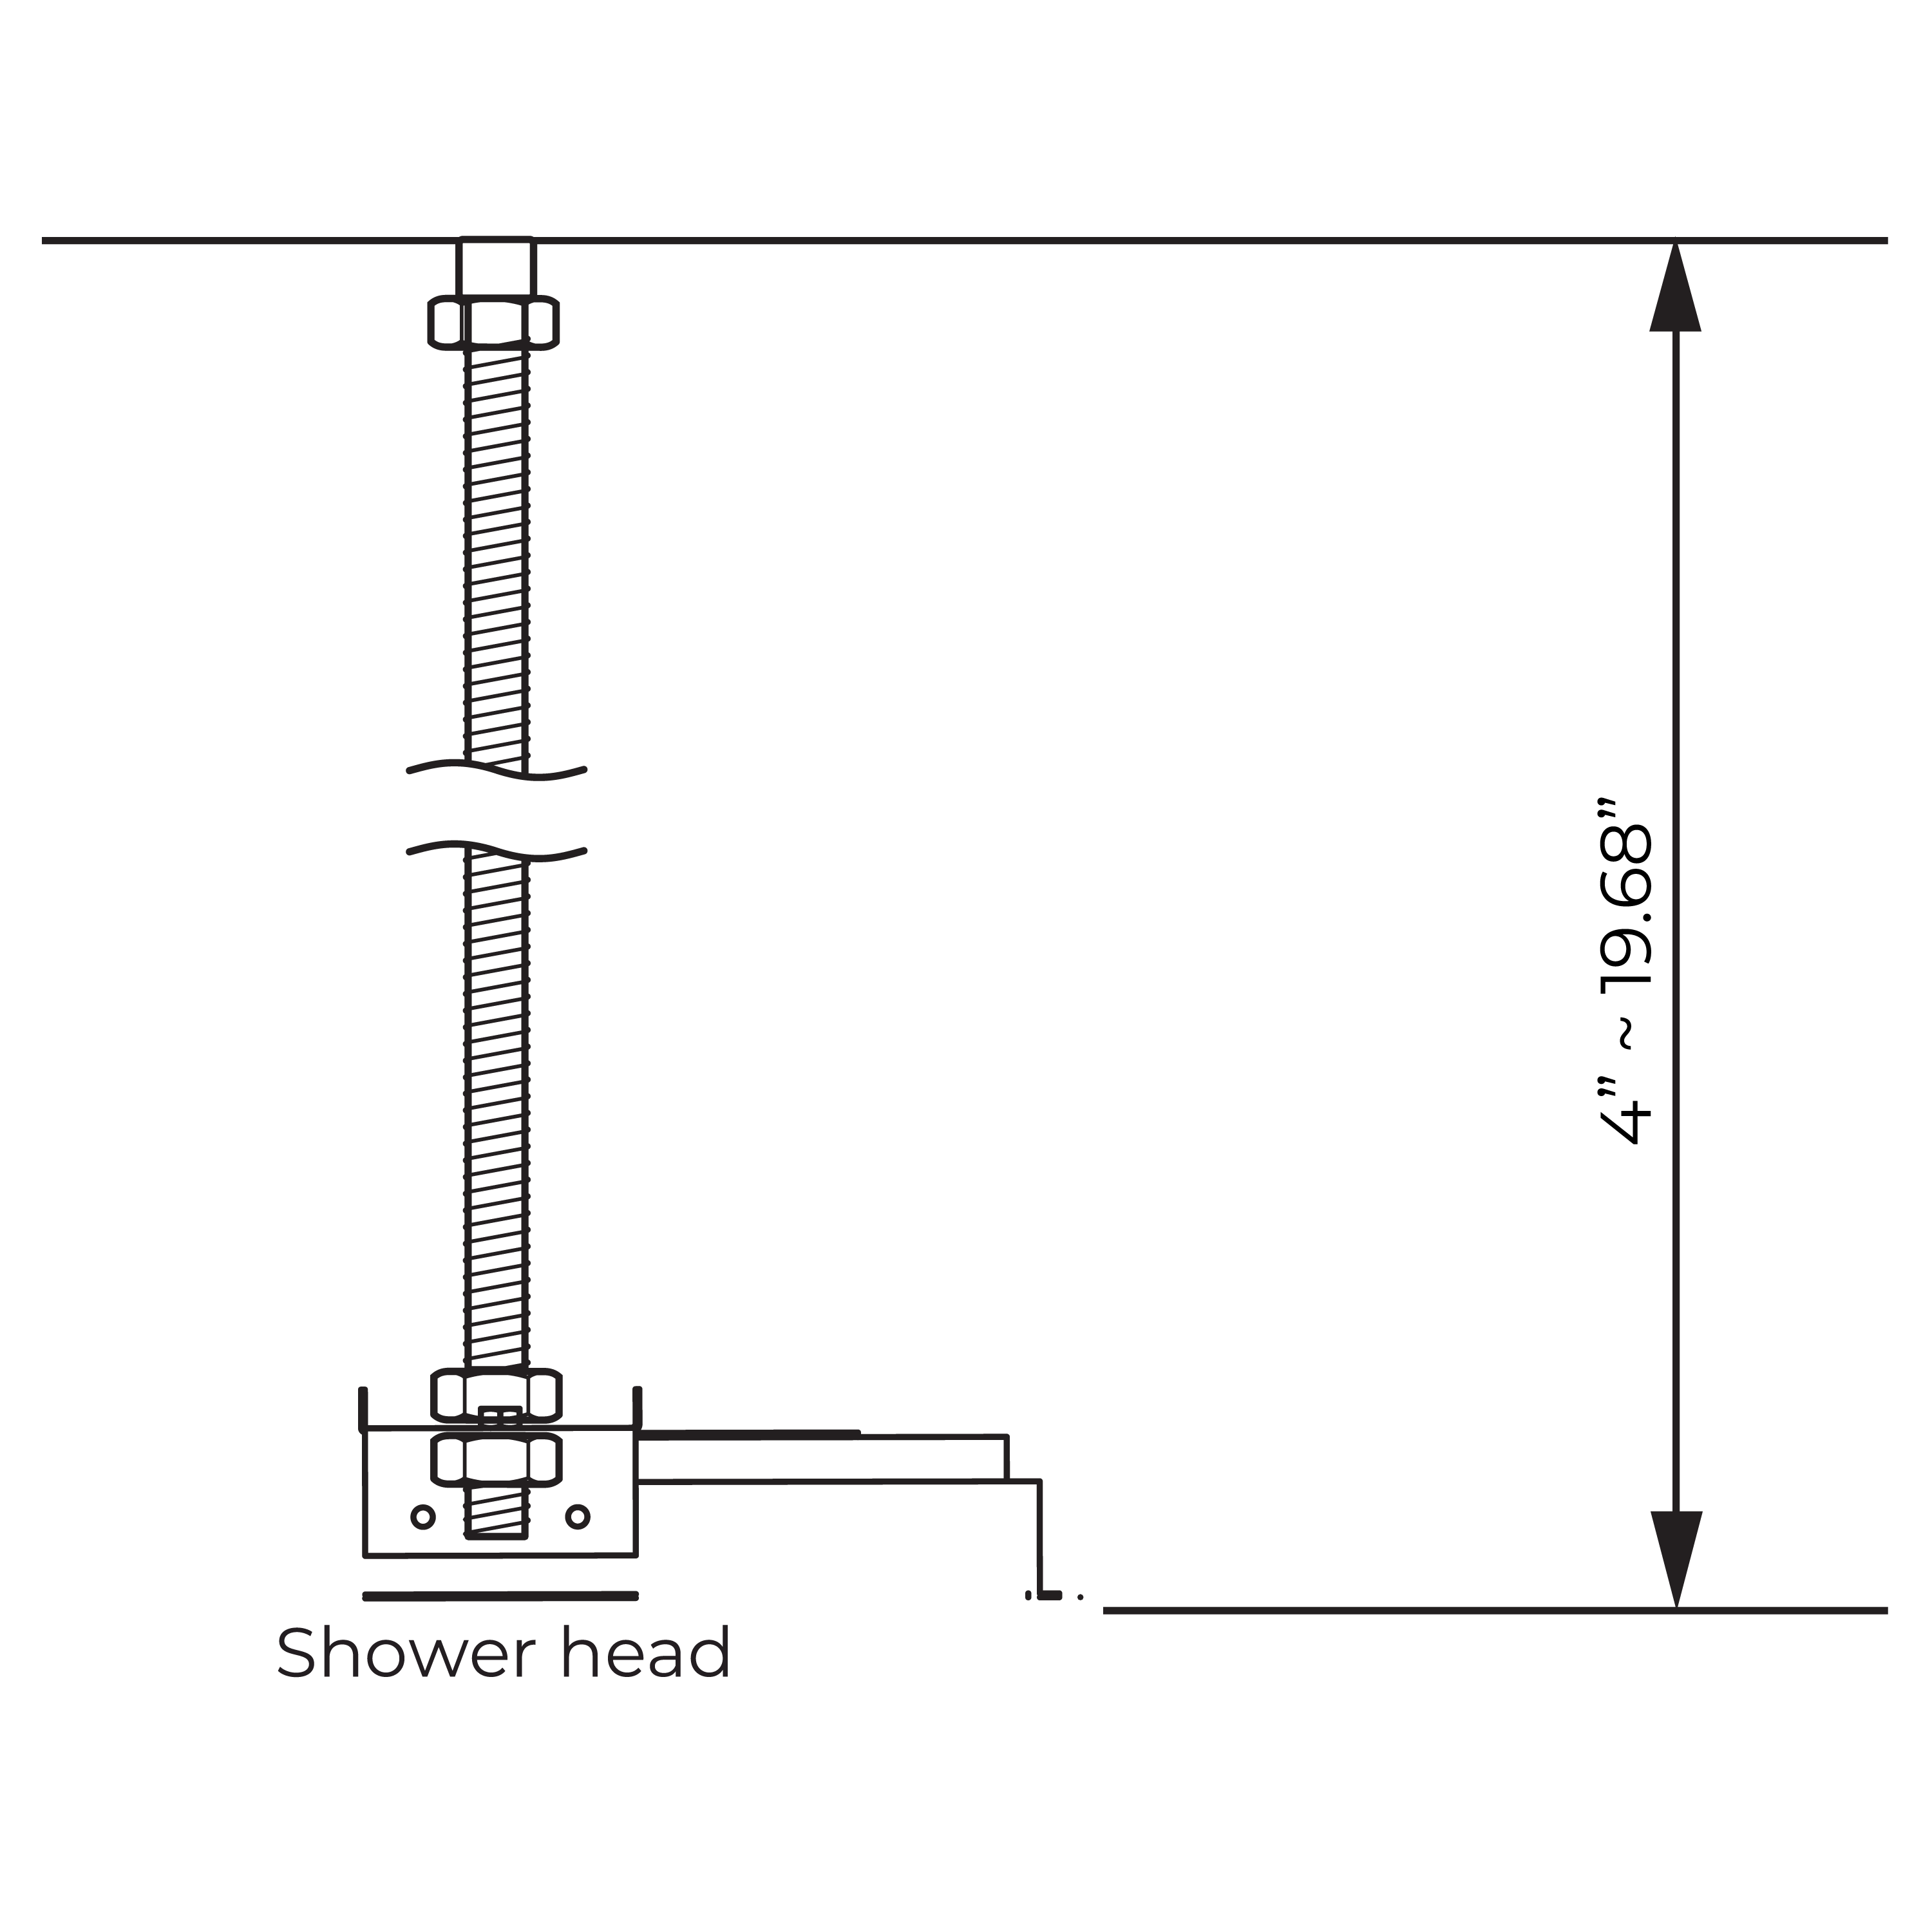
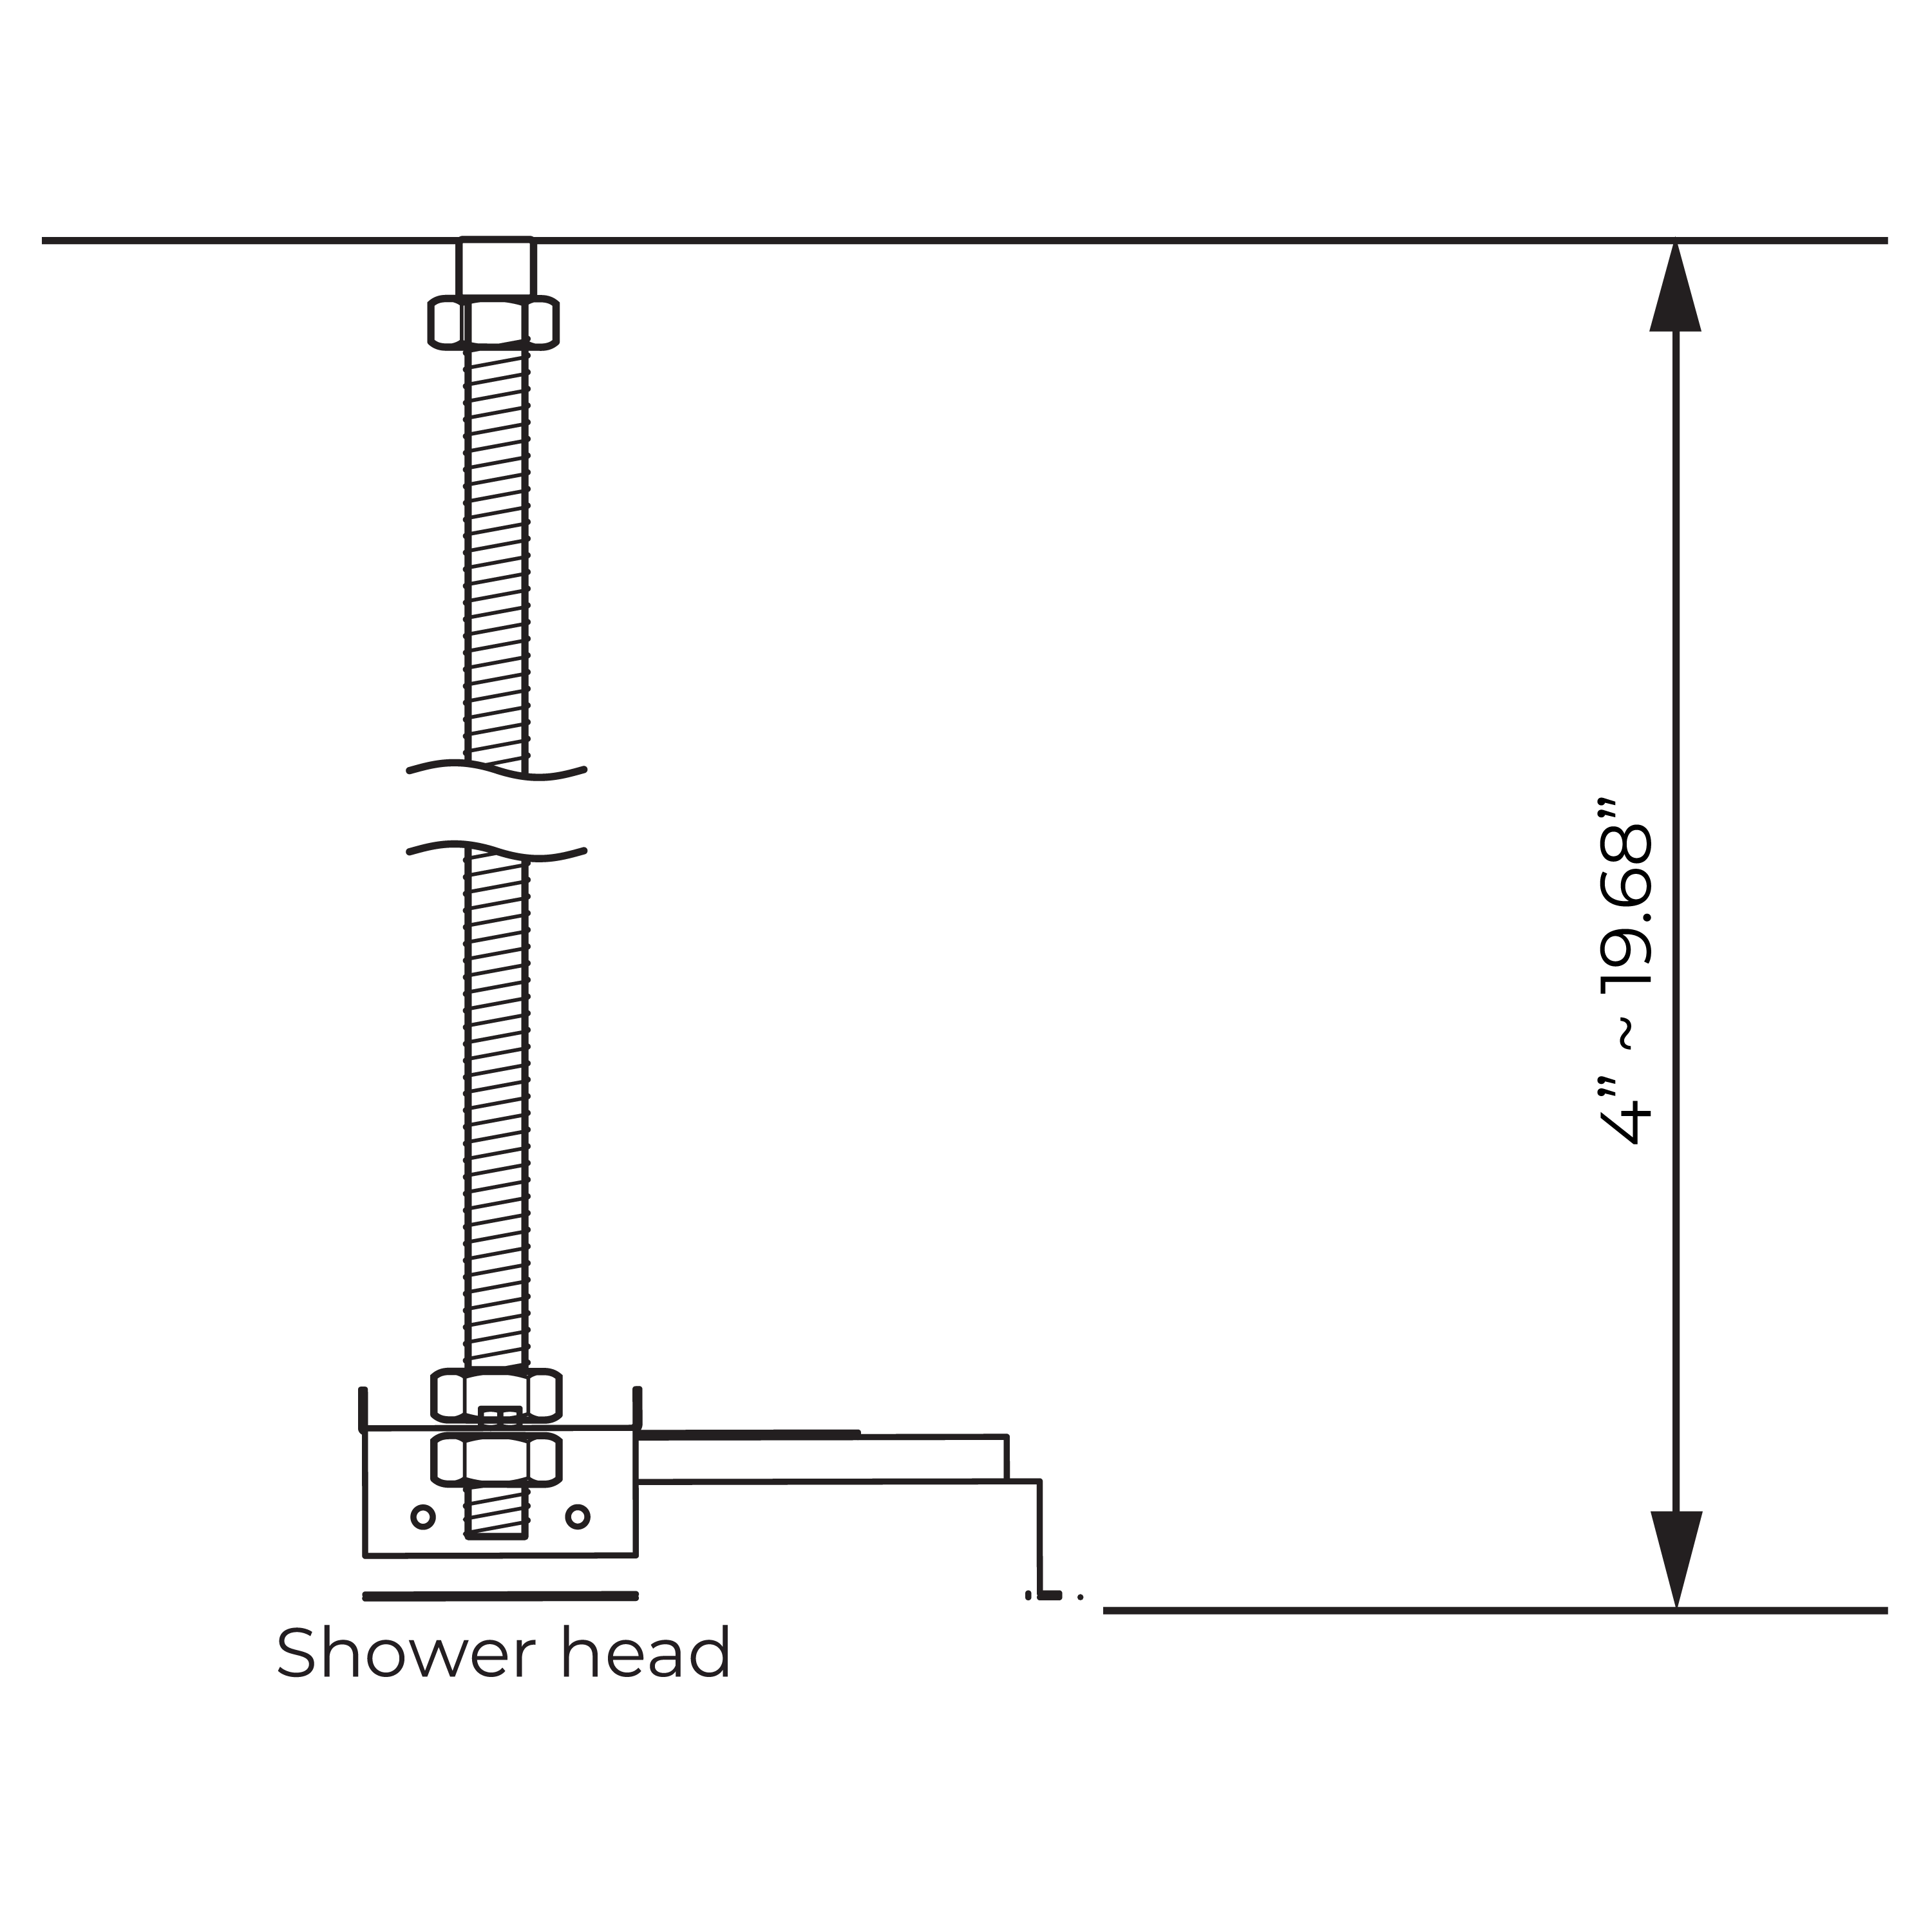
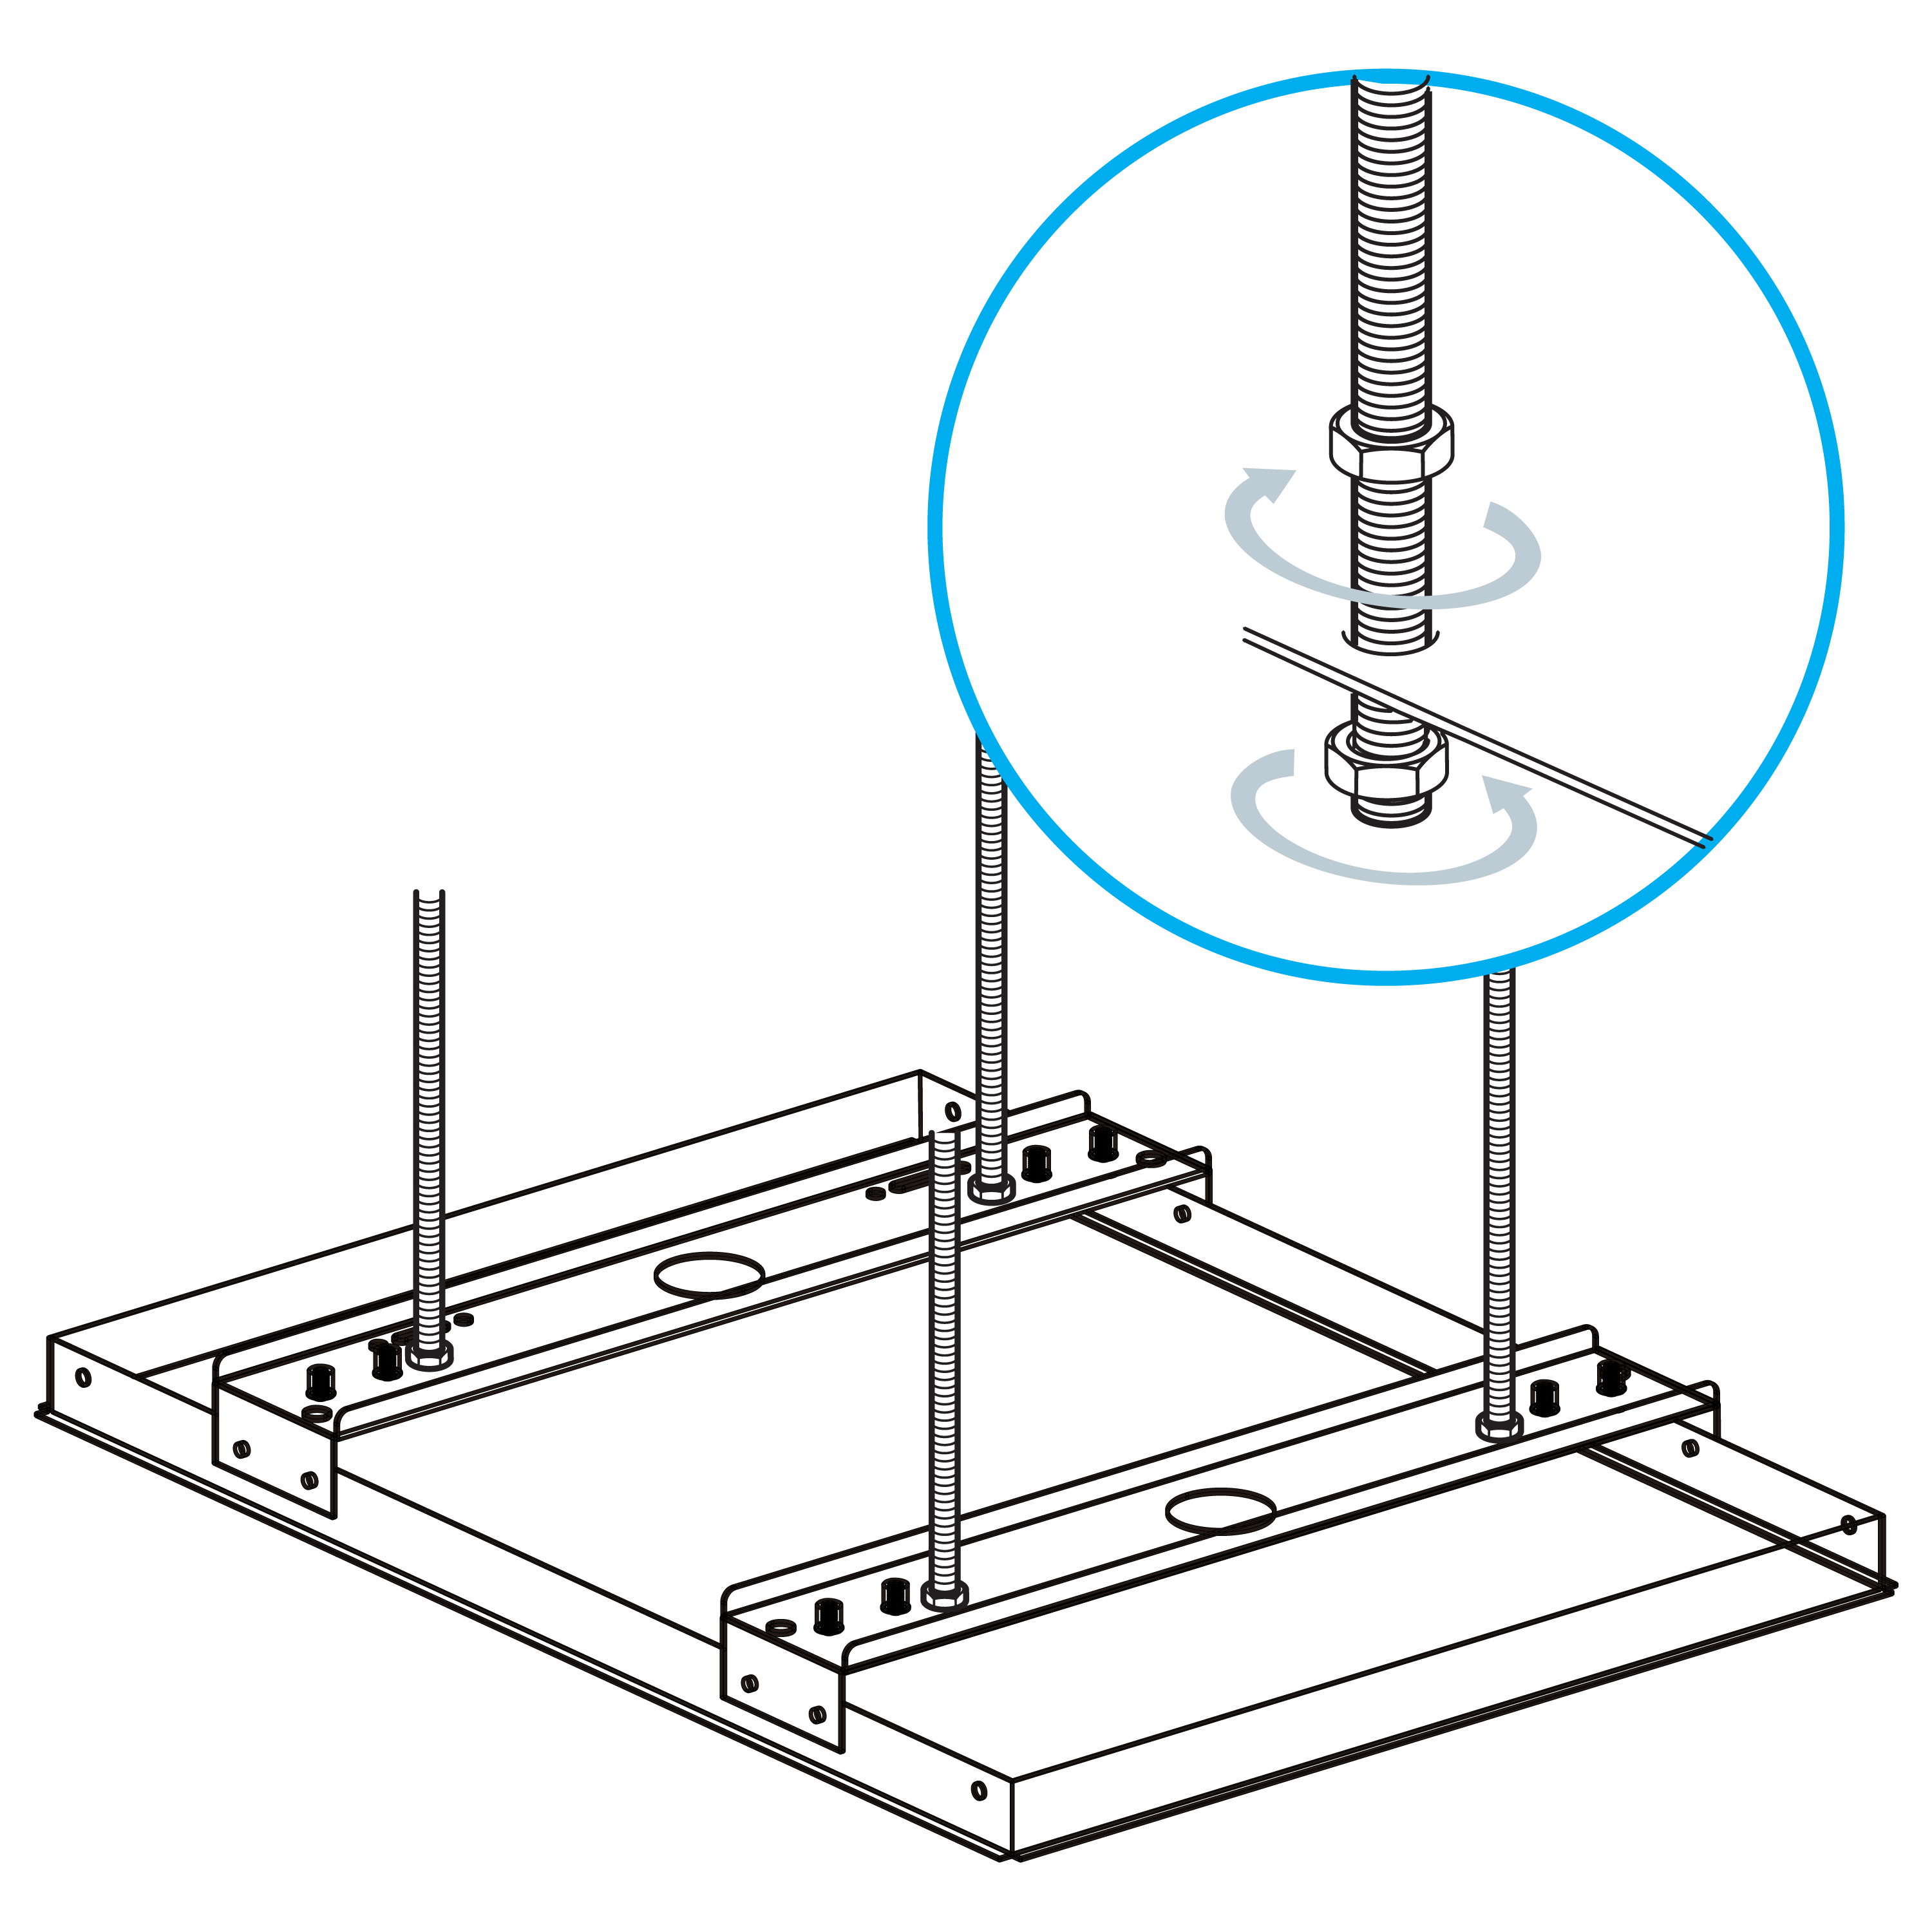
Adjust the installation height by rotating the nuts as needed.
|
|
|
|
|
|
|
|
Step 7:
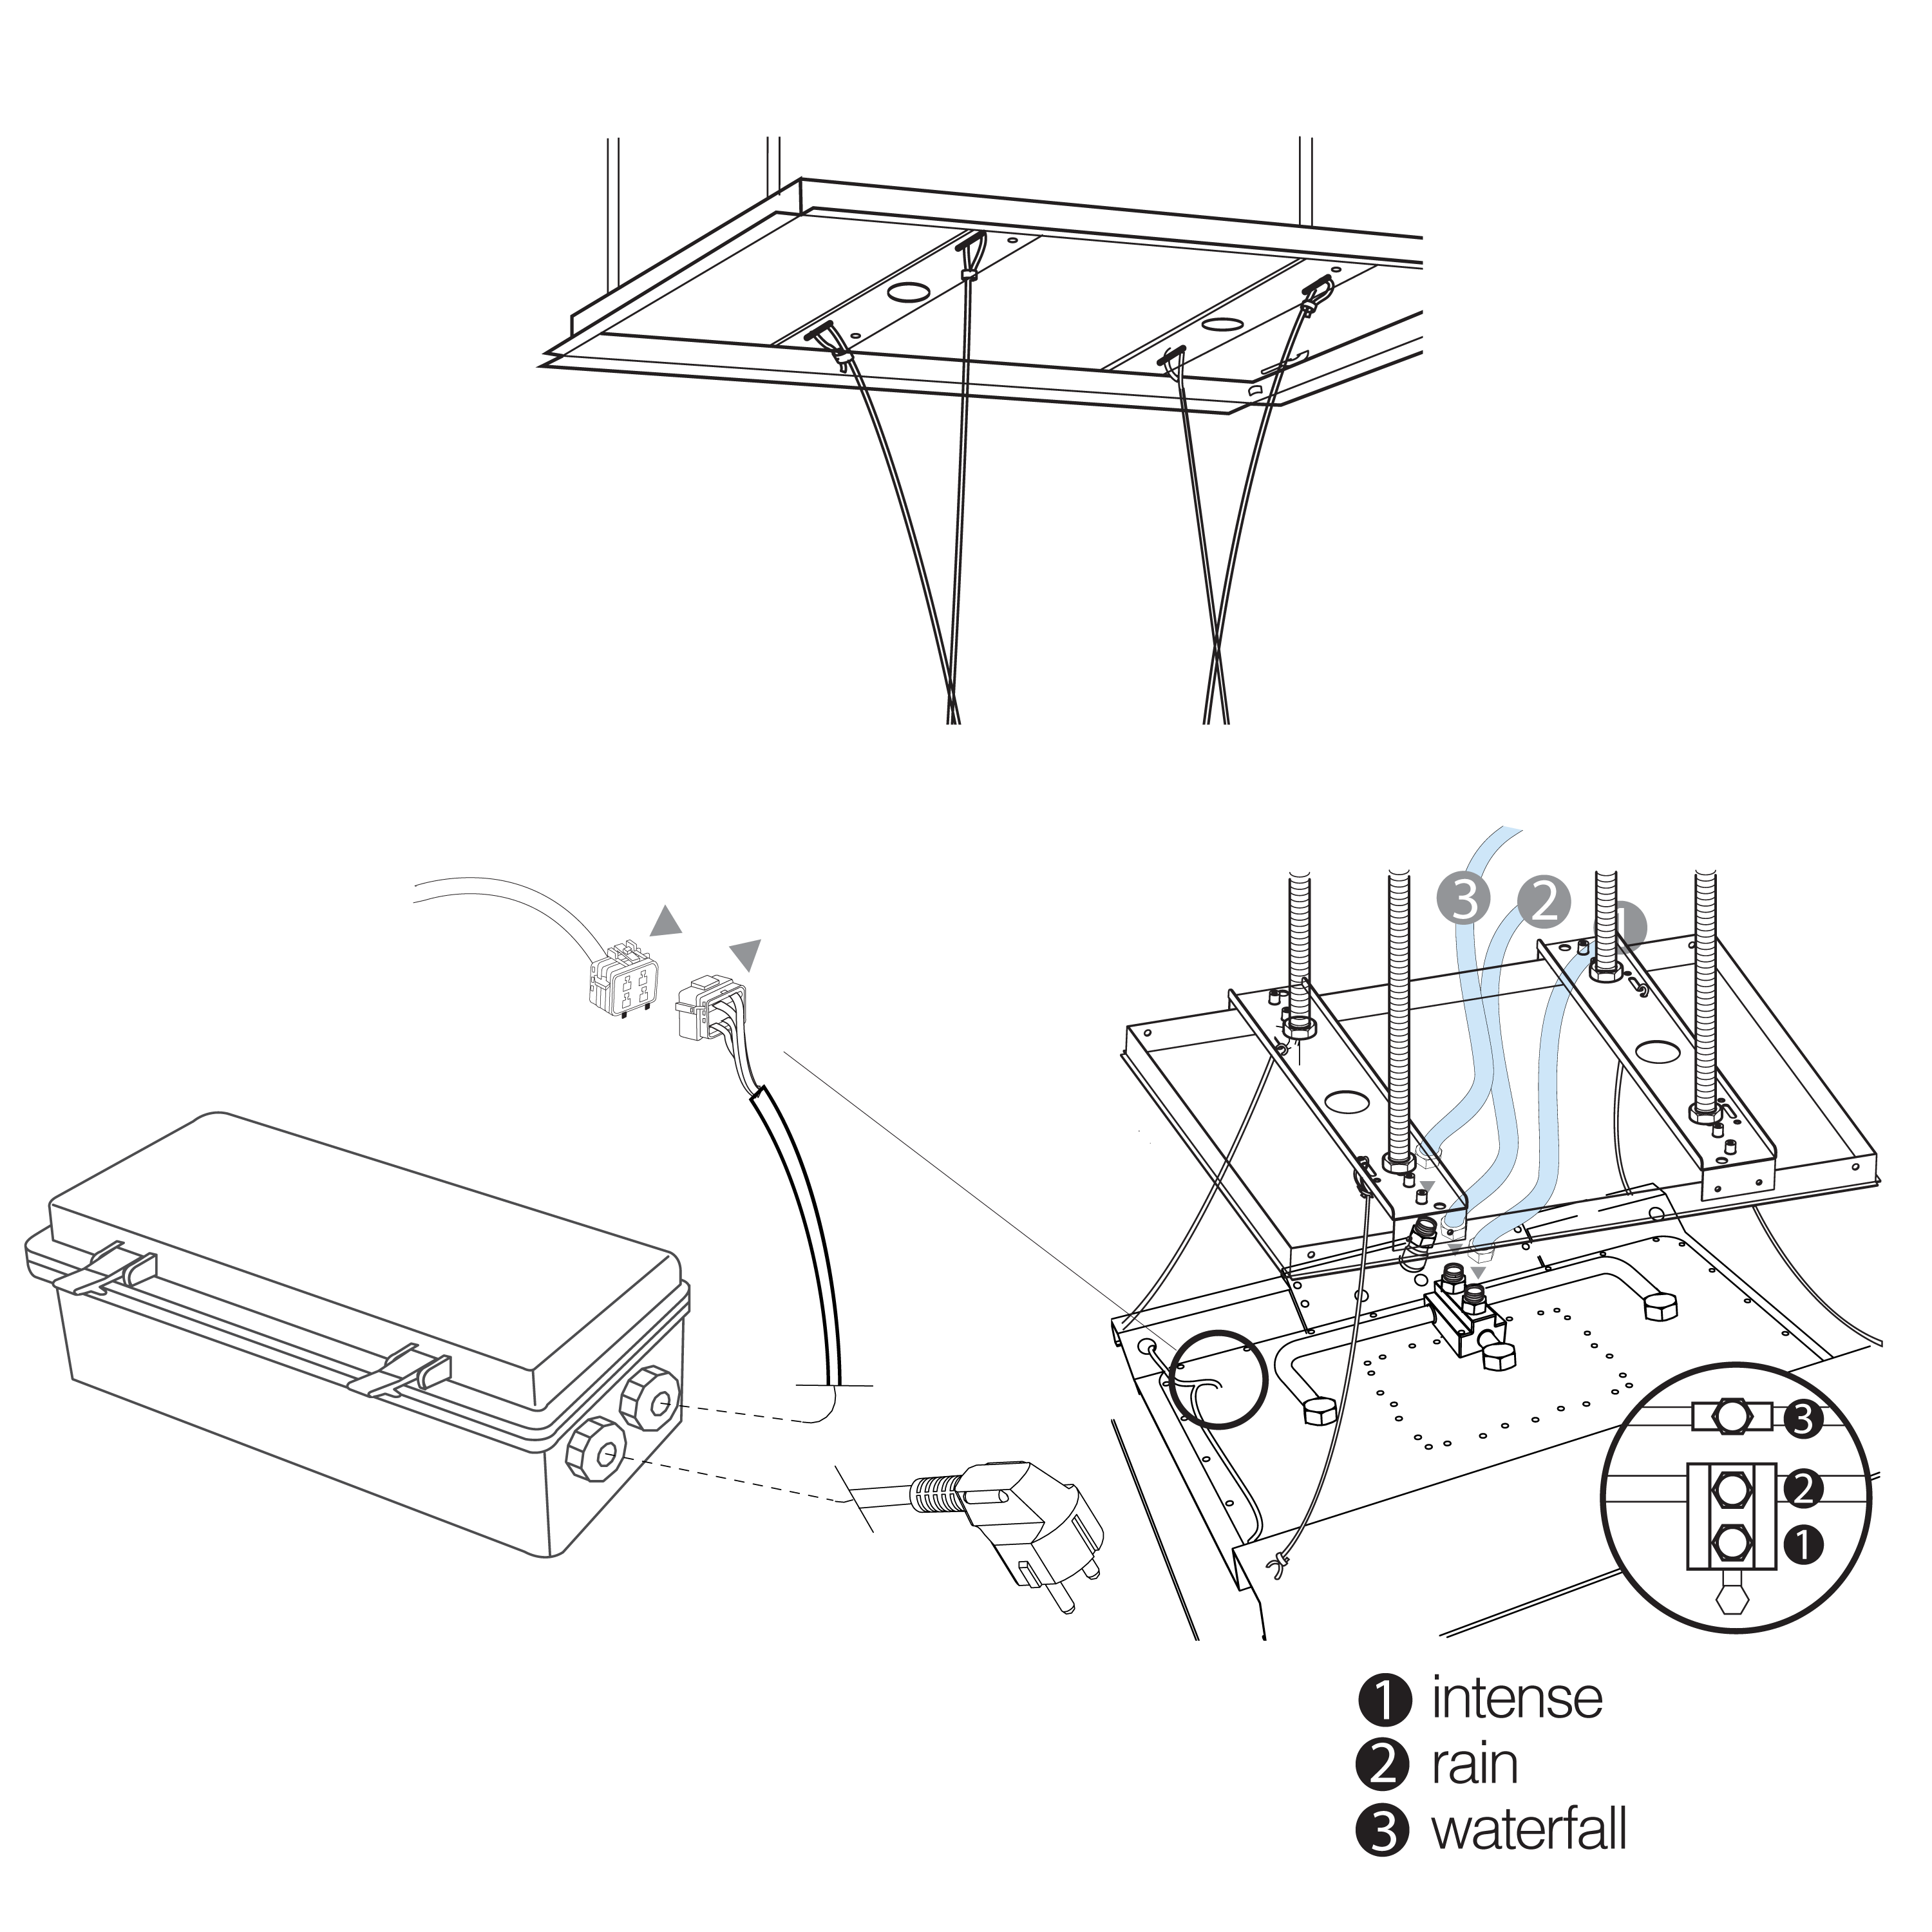
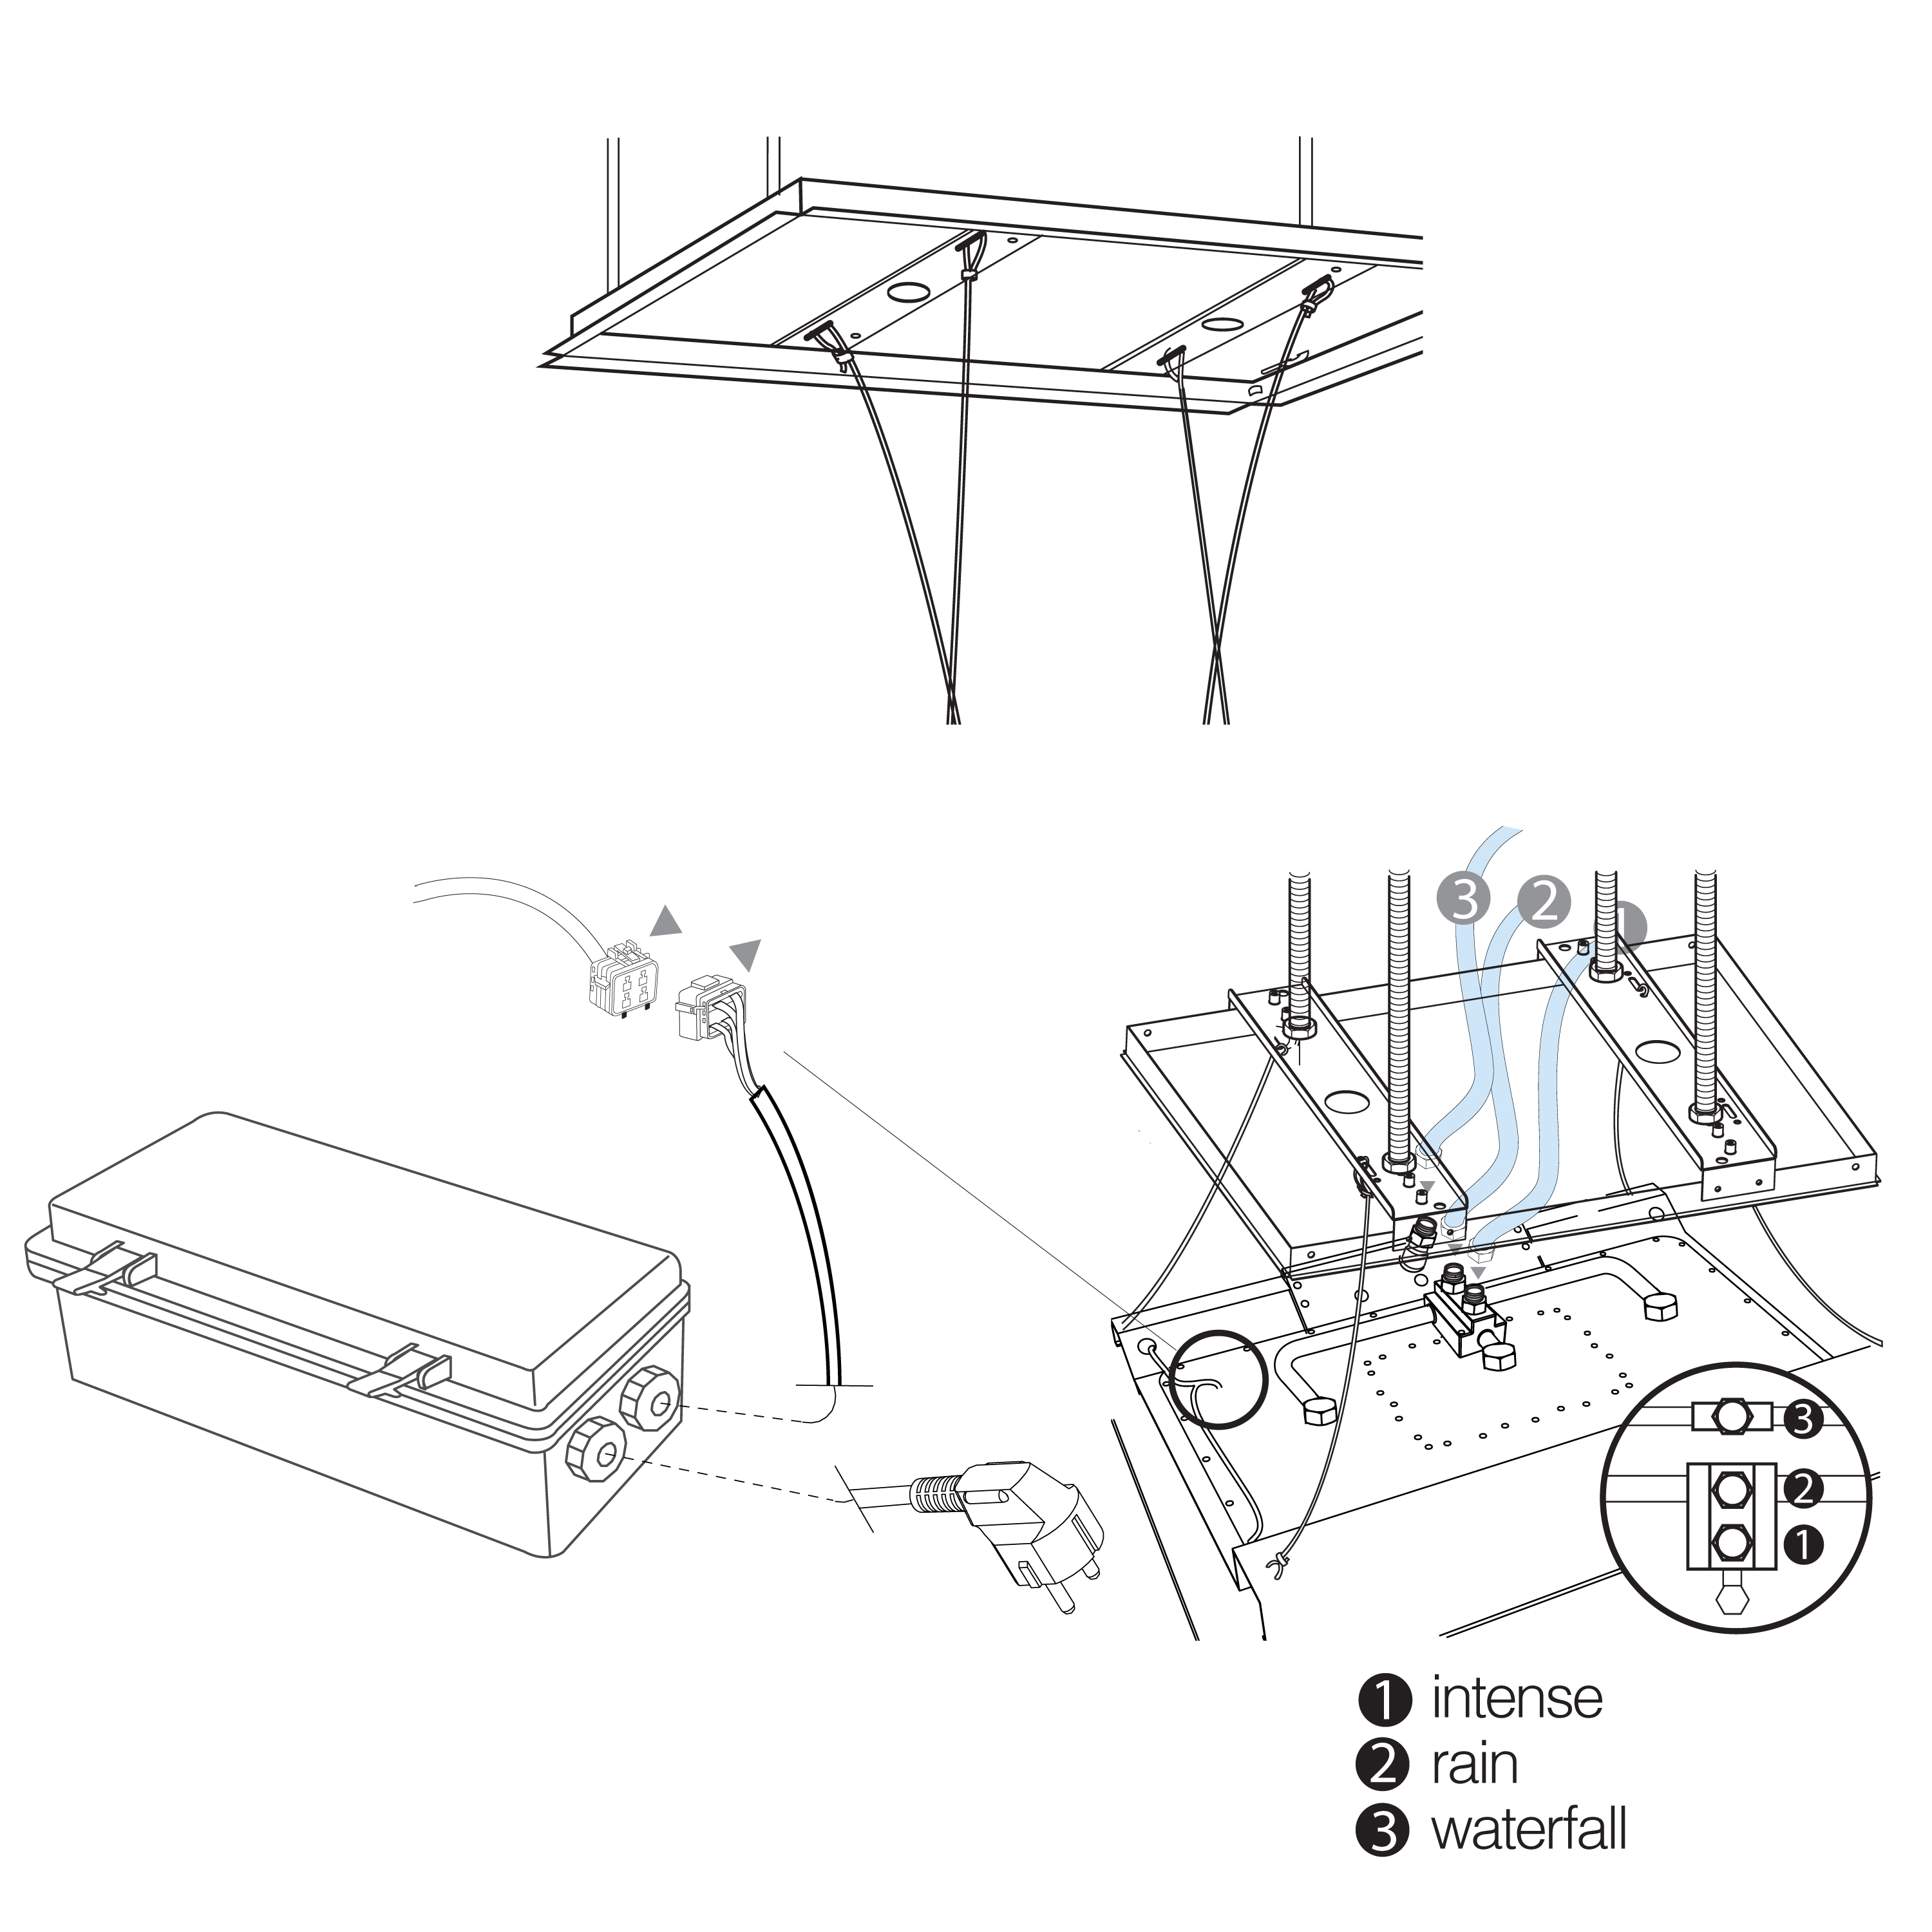
Lift the fastening cables into position.
|
|
Step 8:
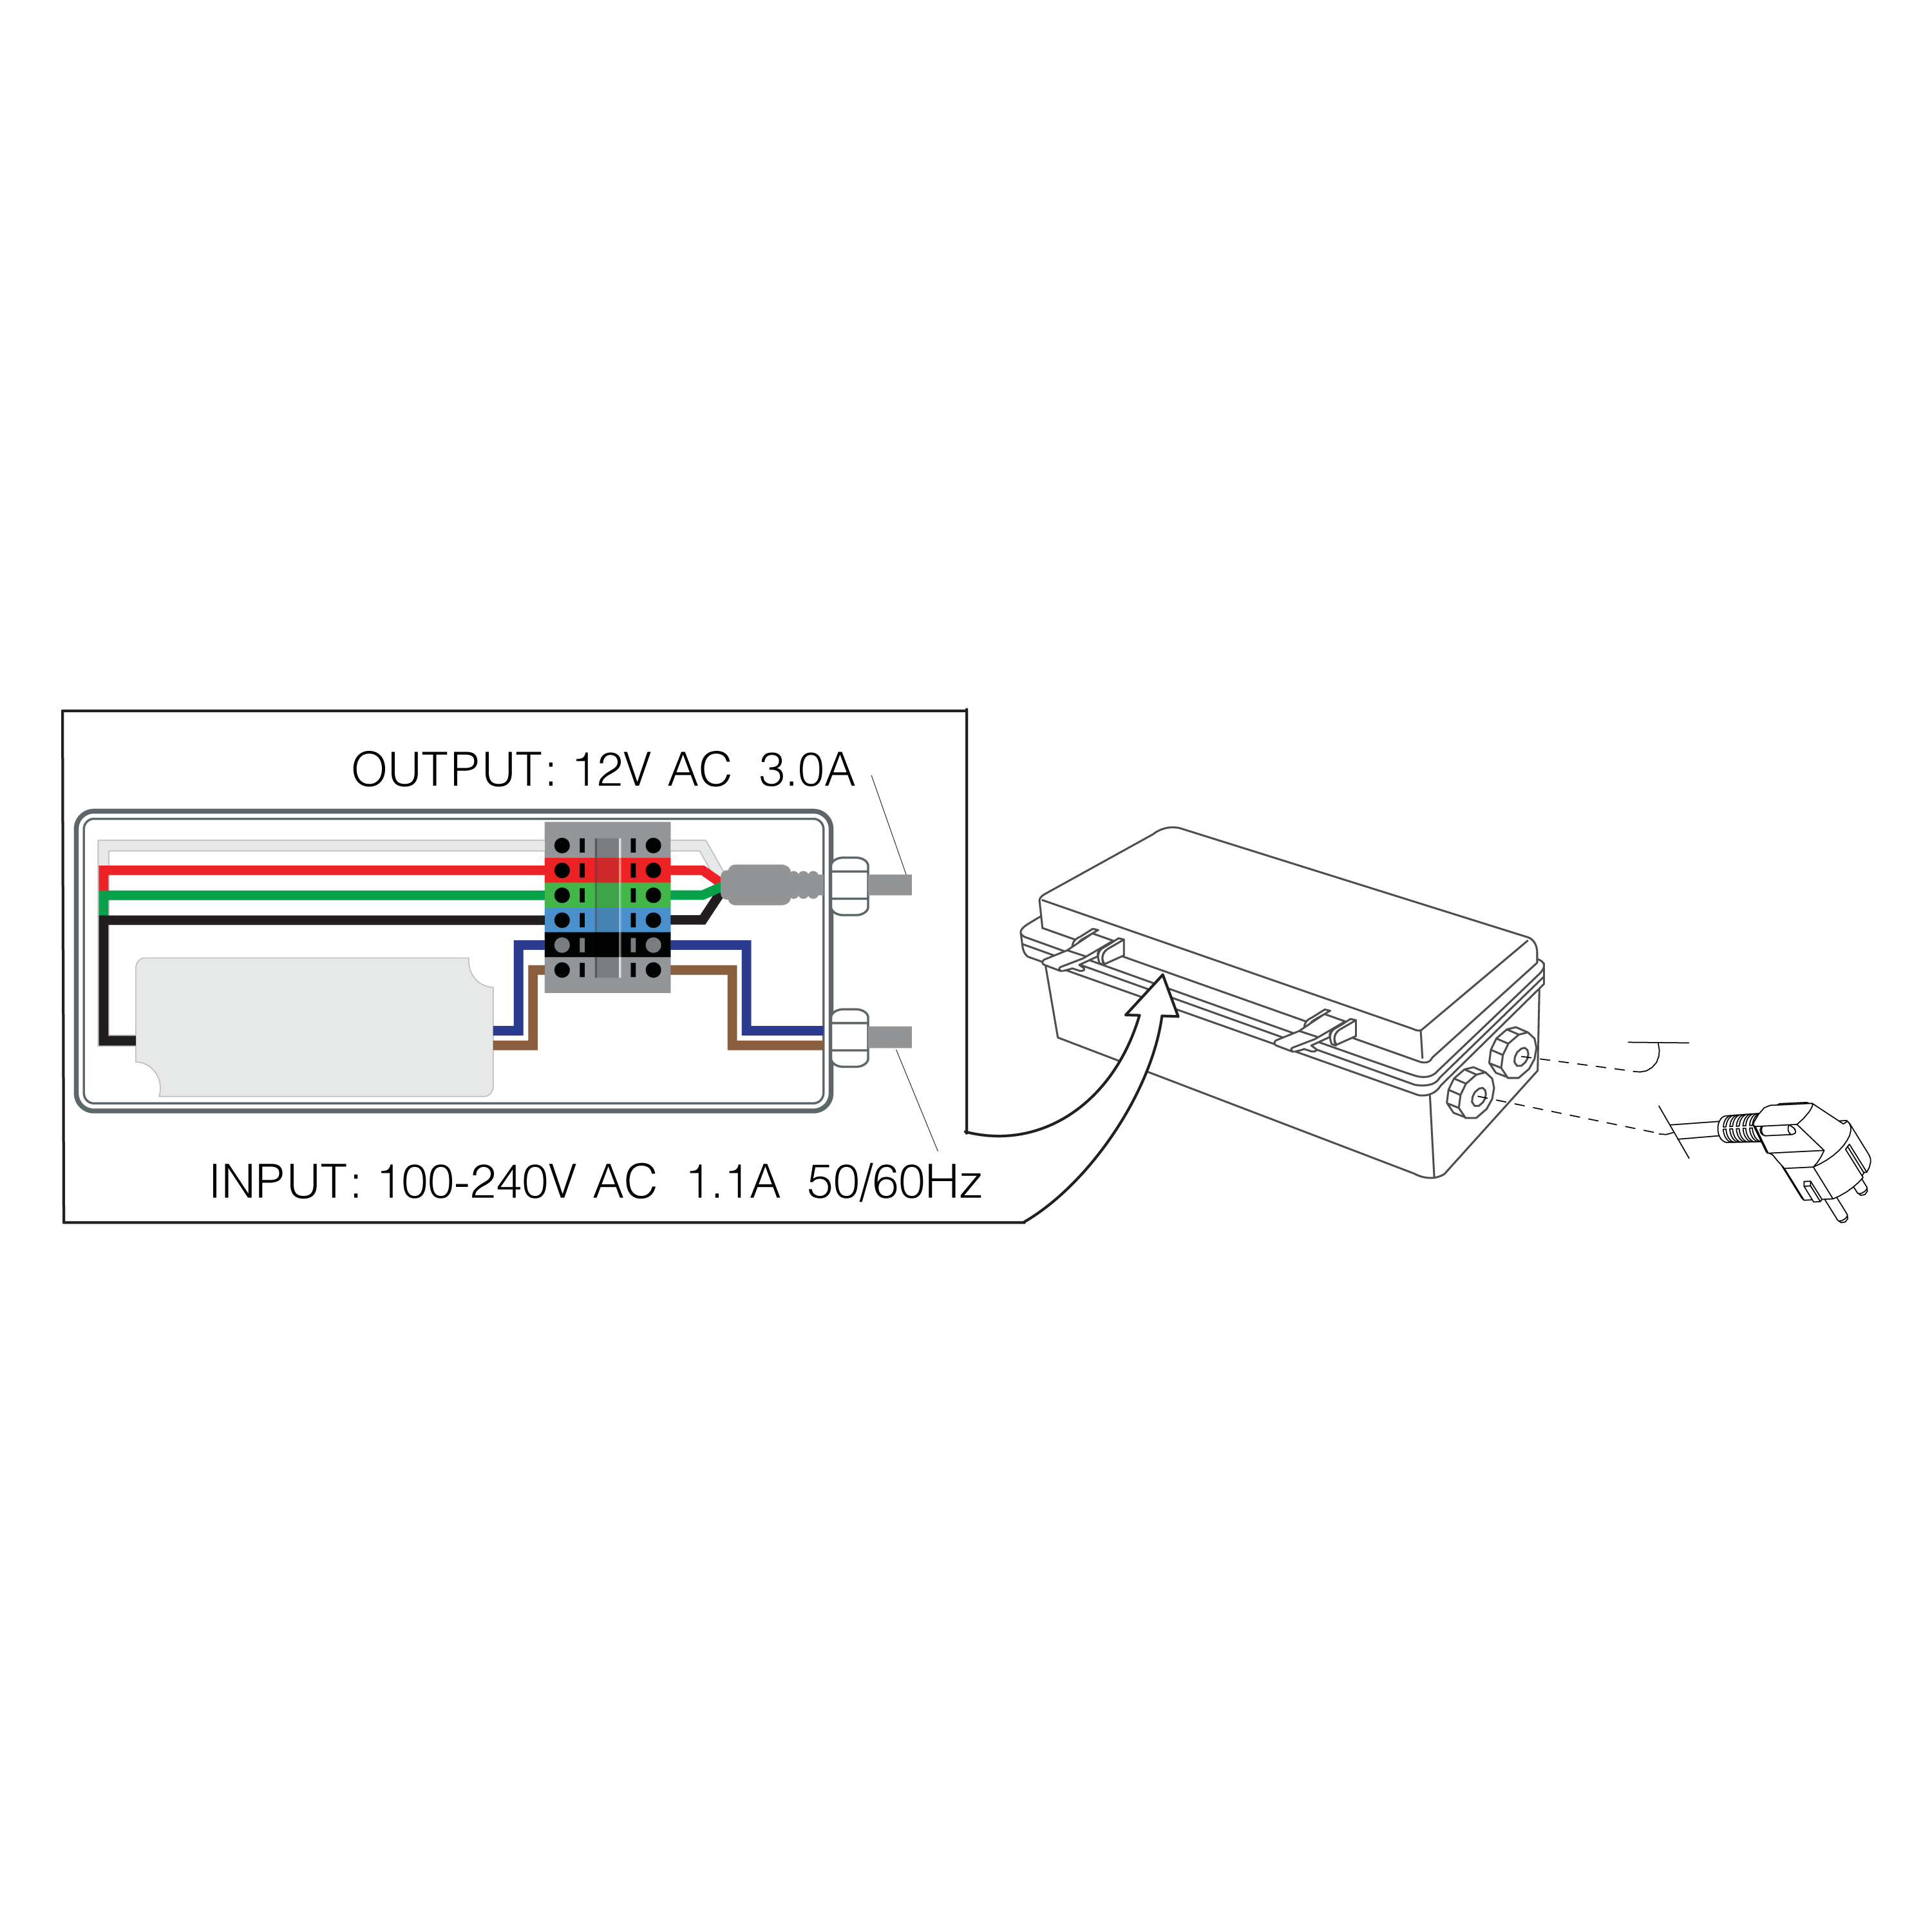
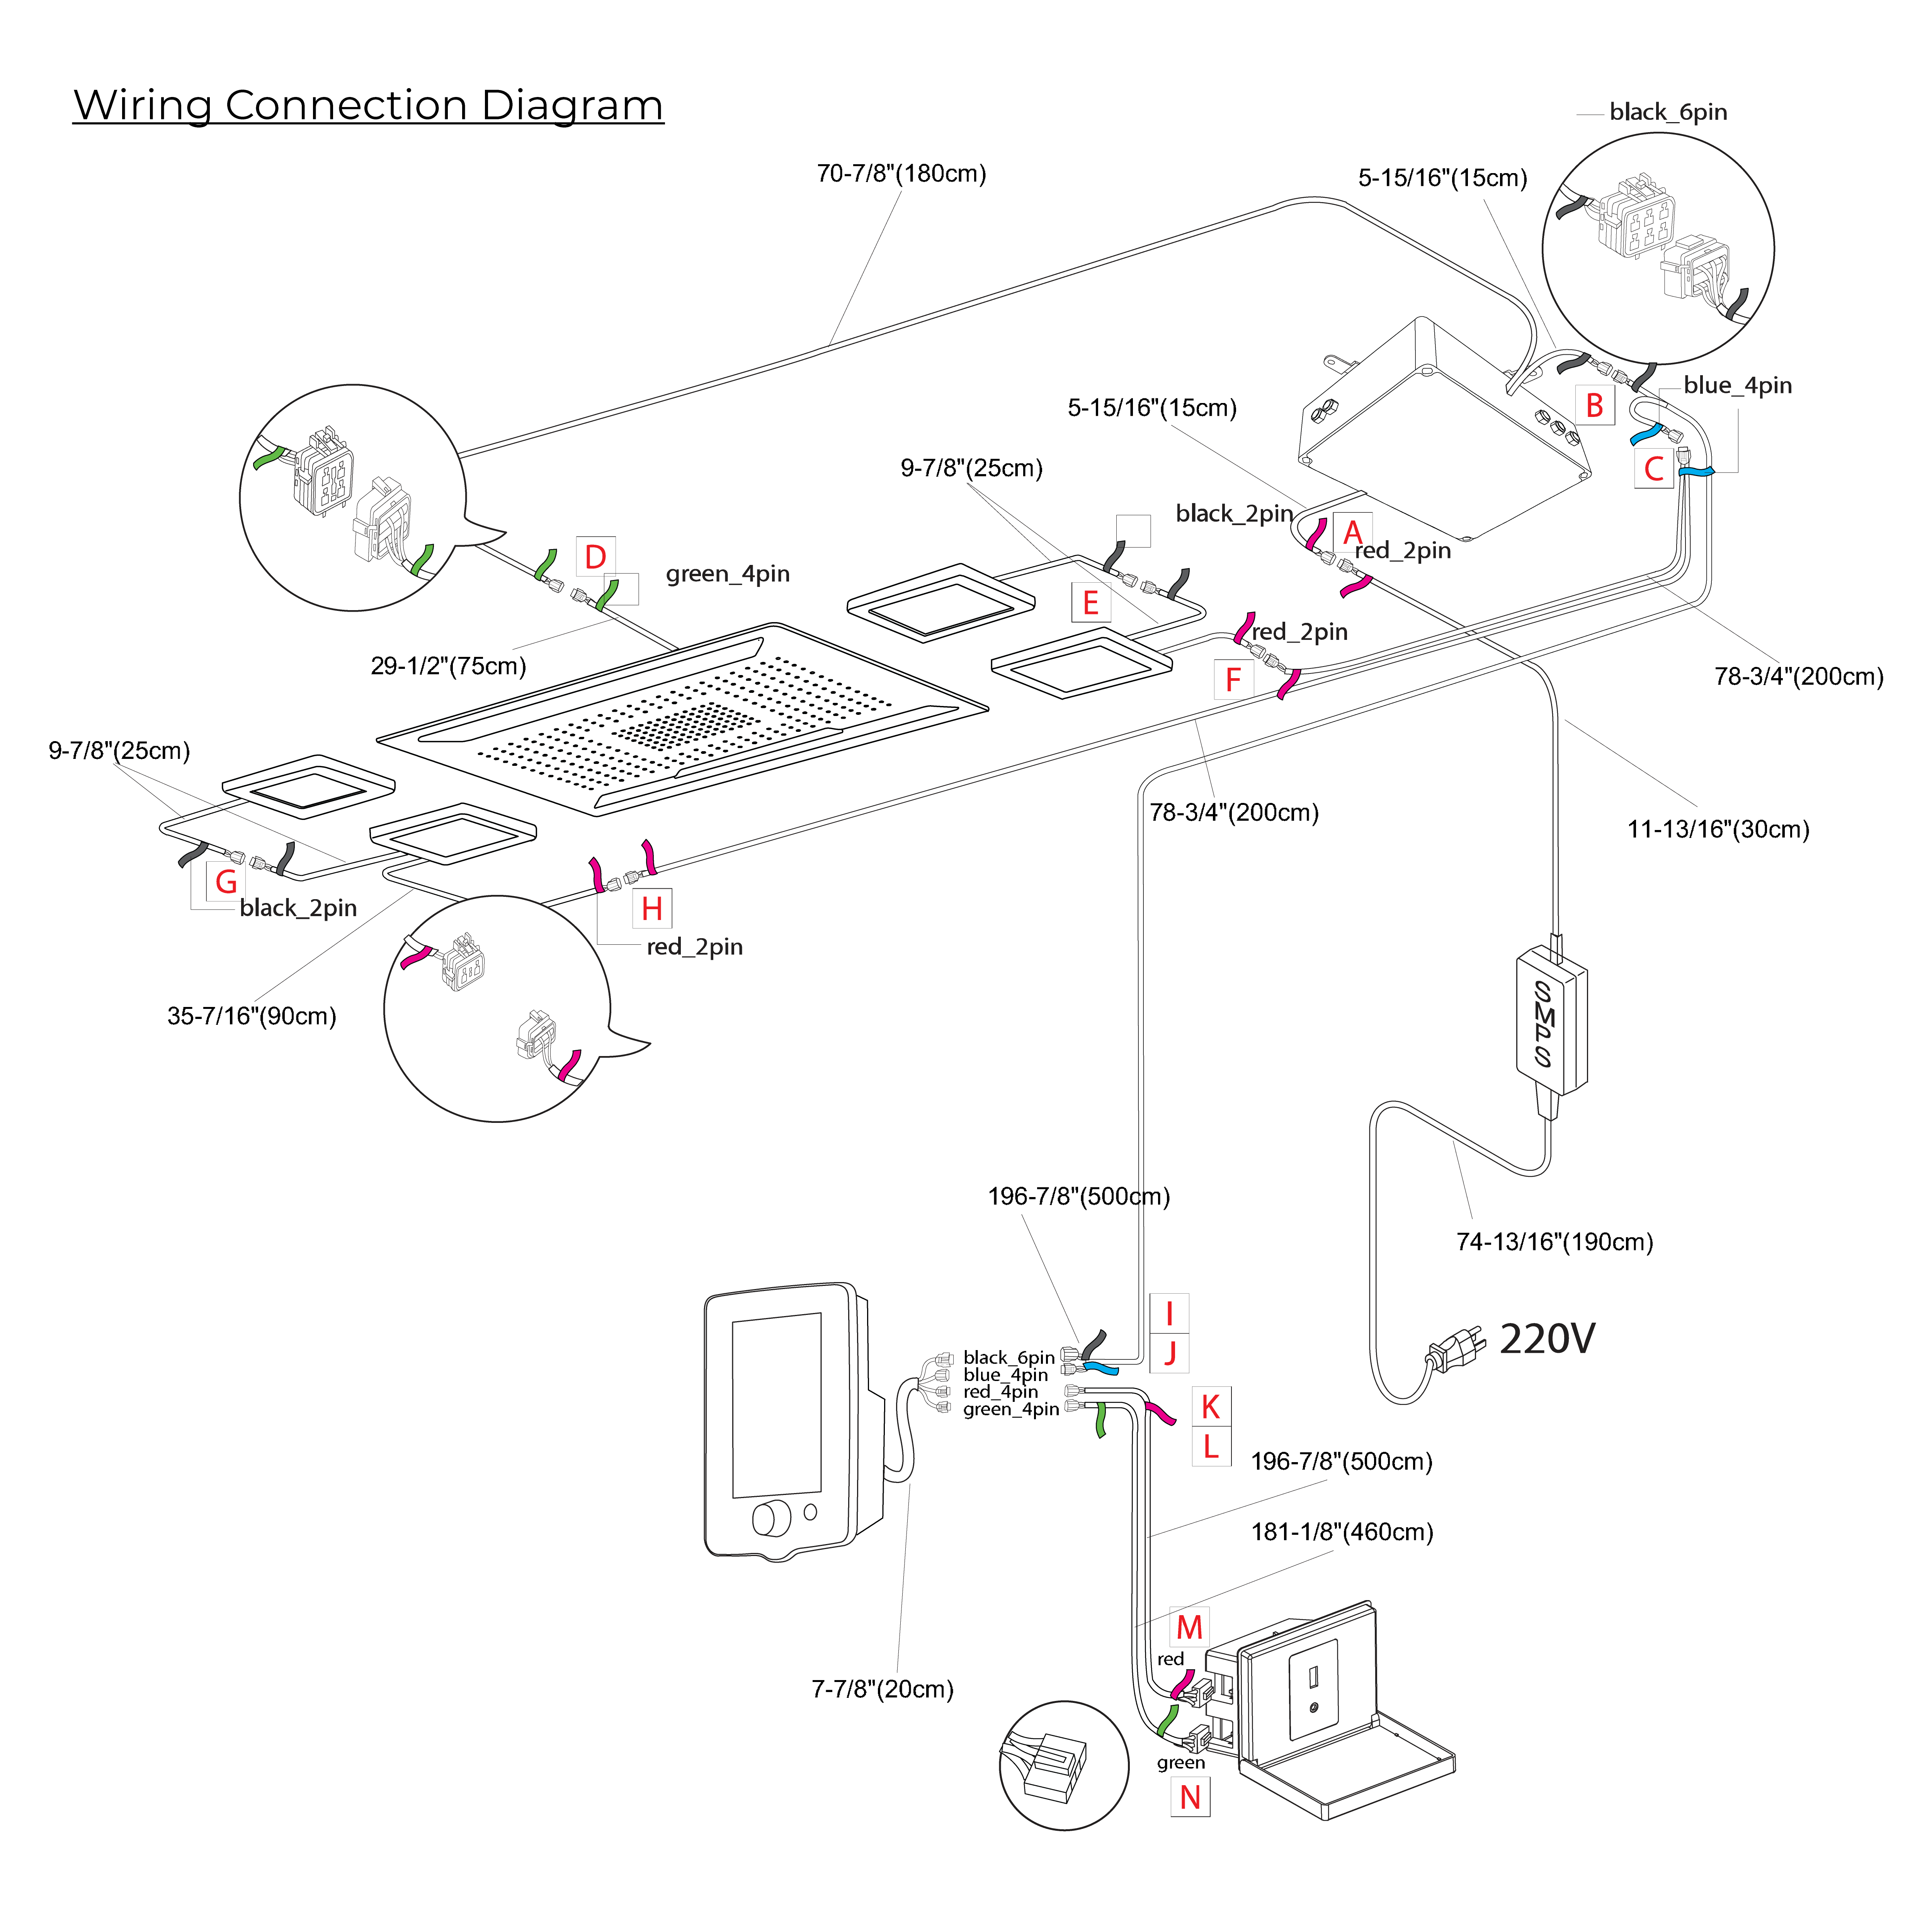
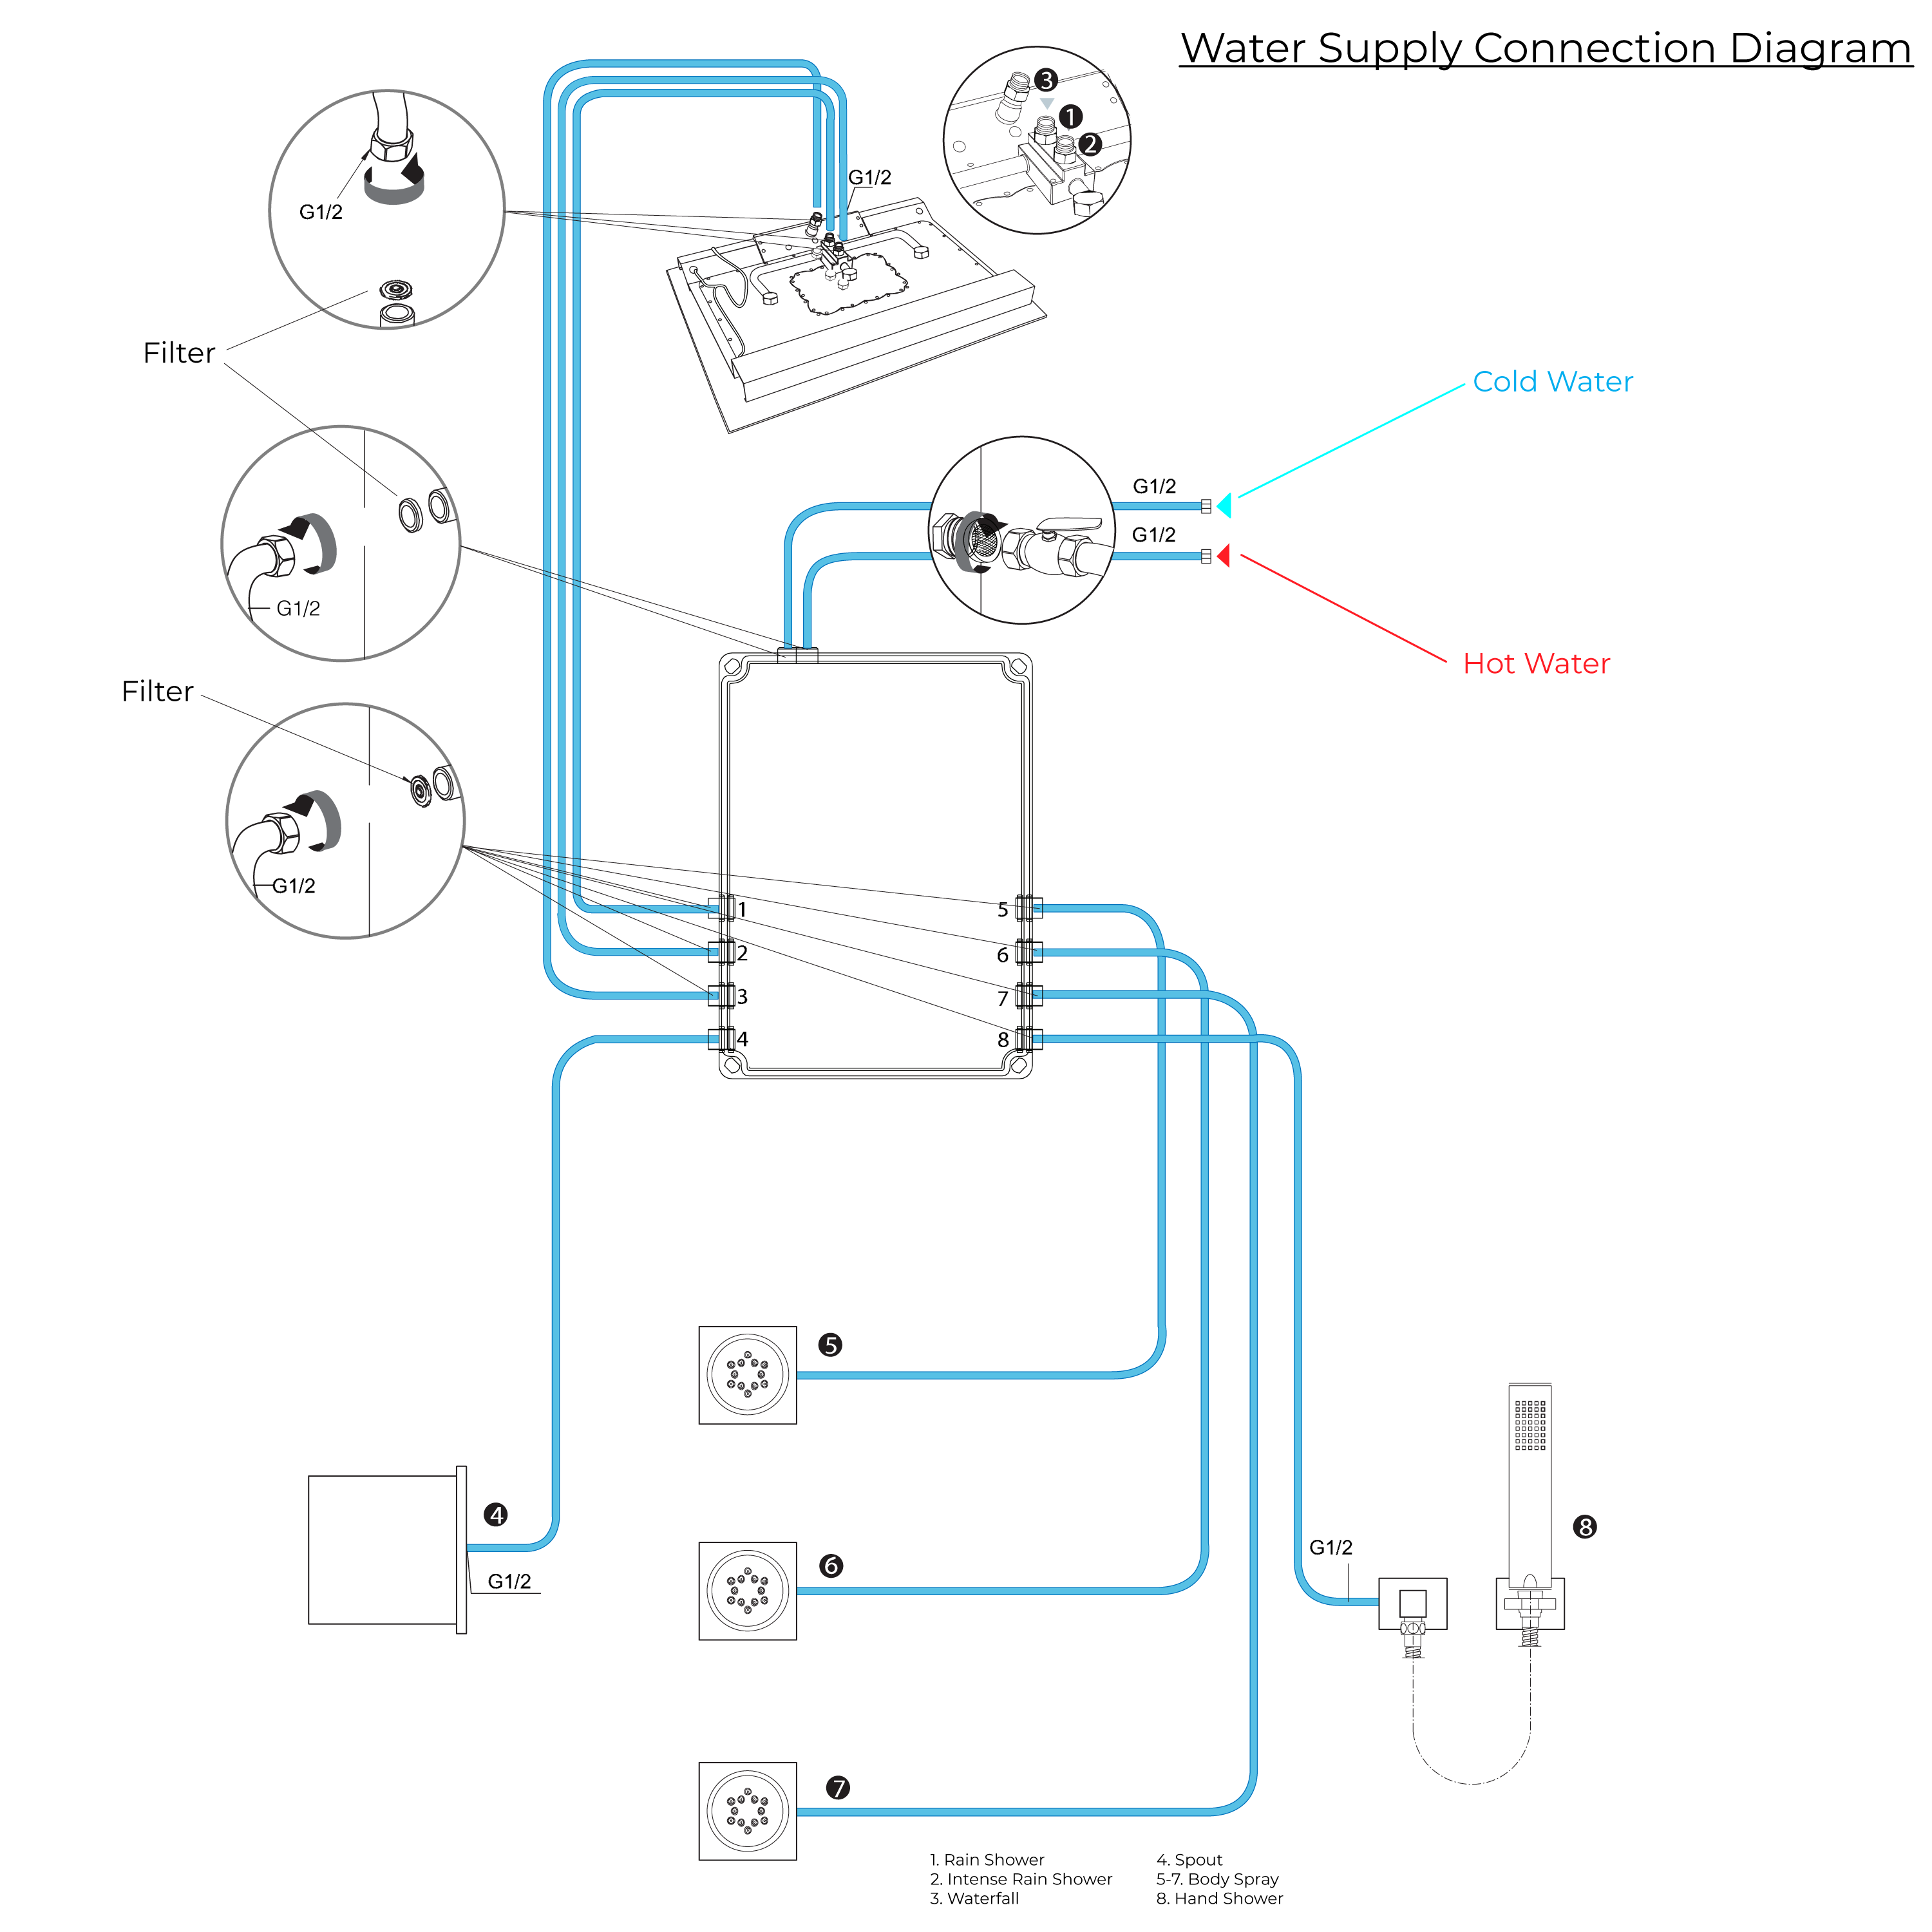
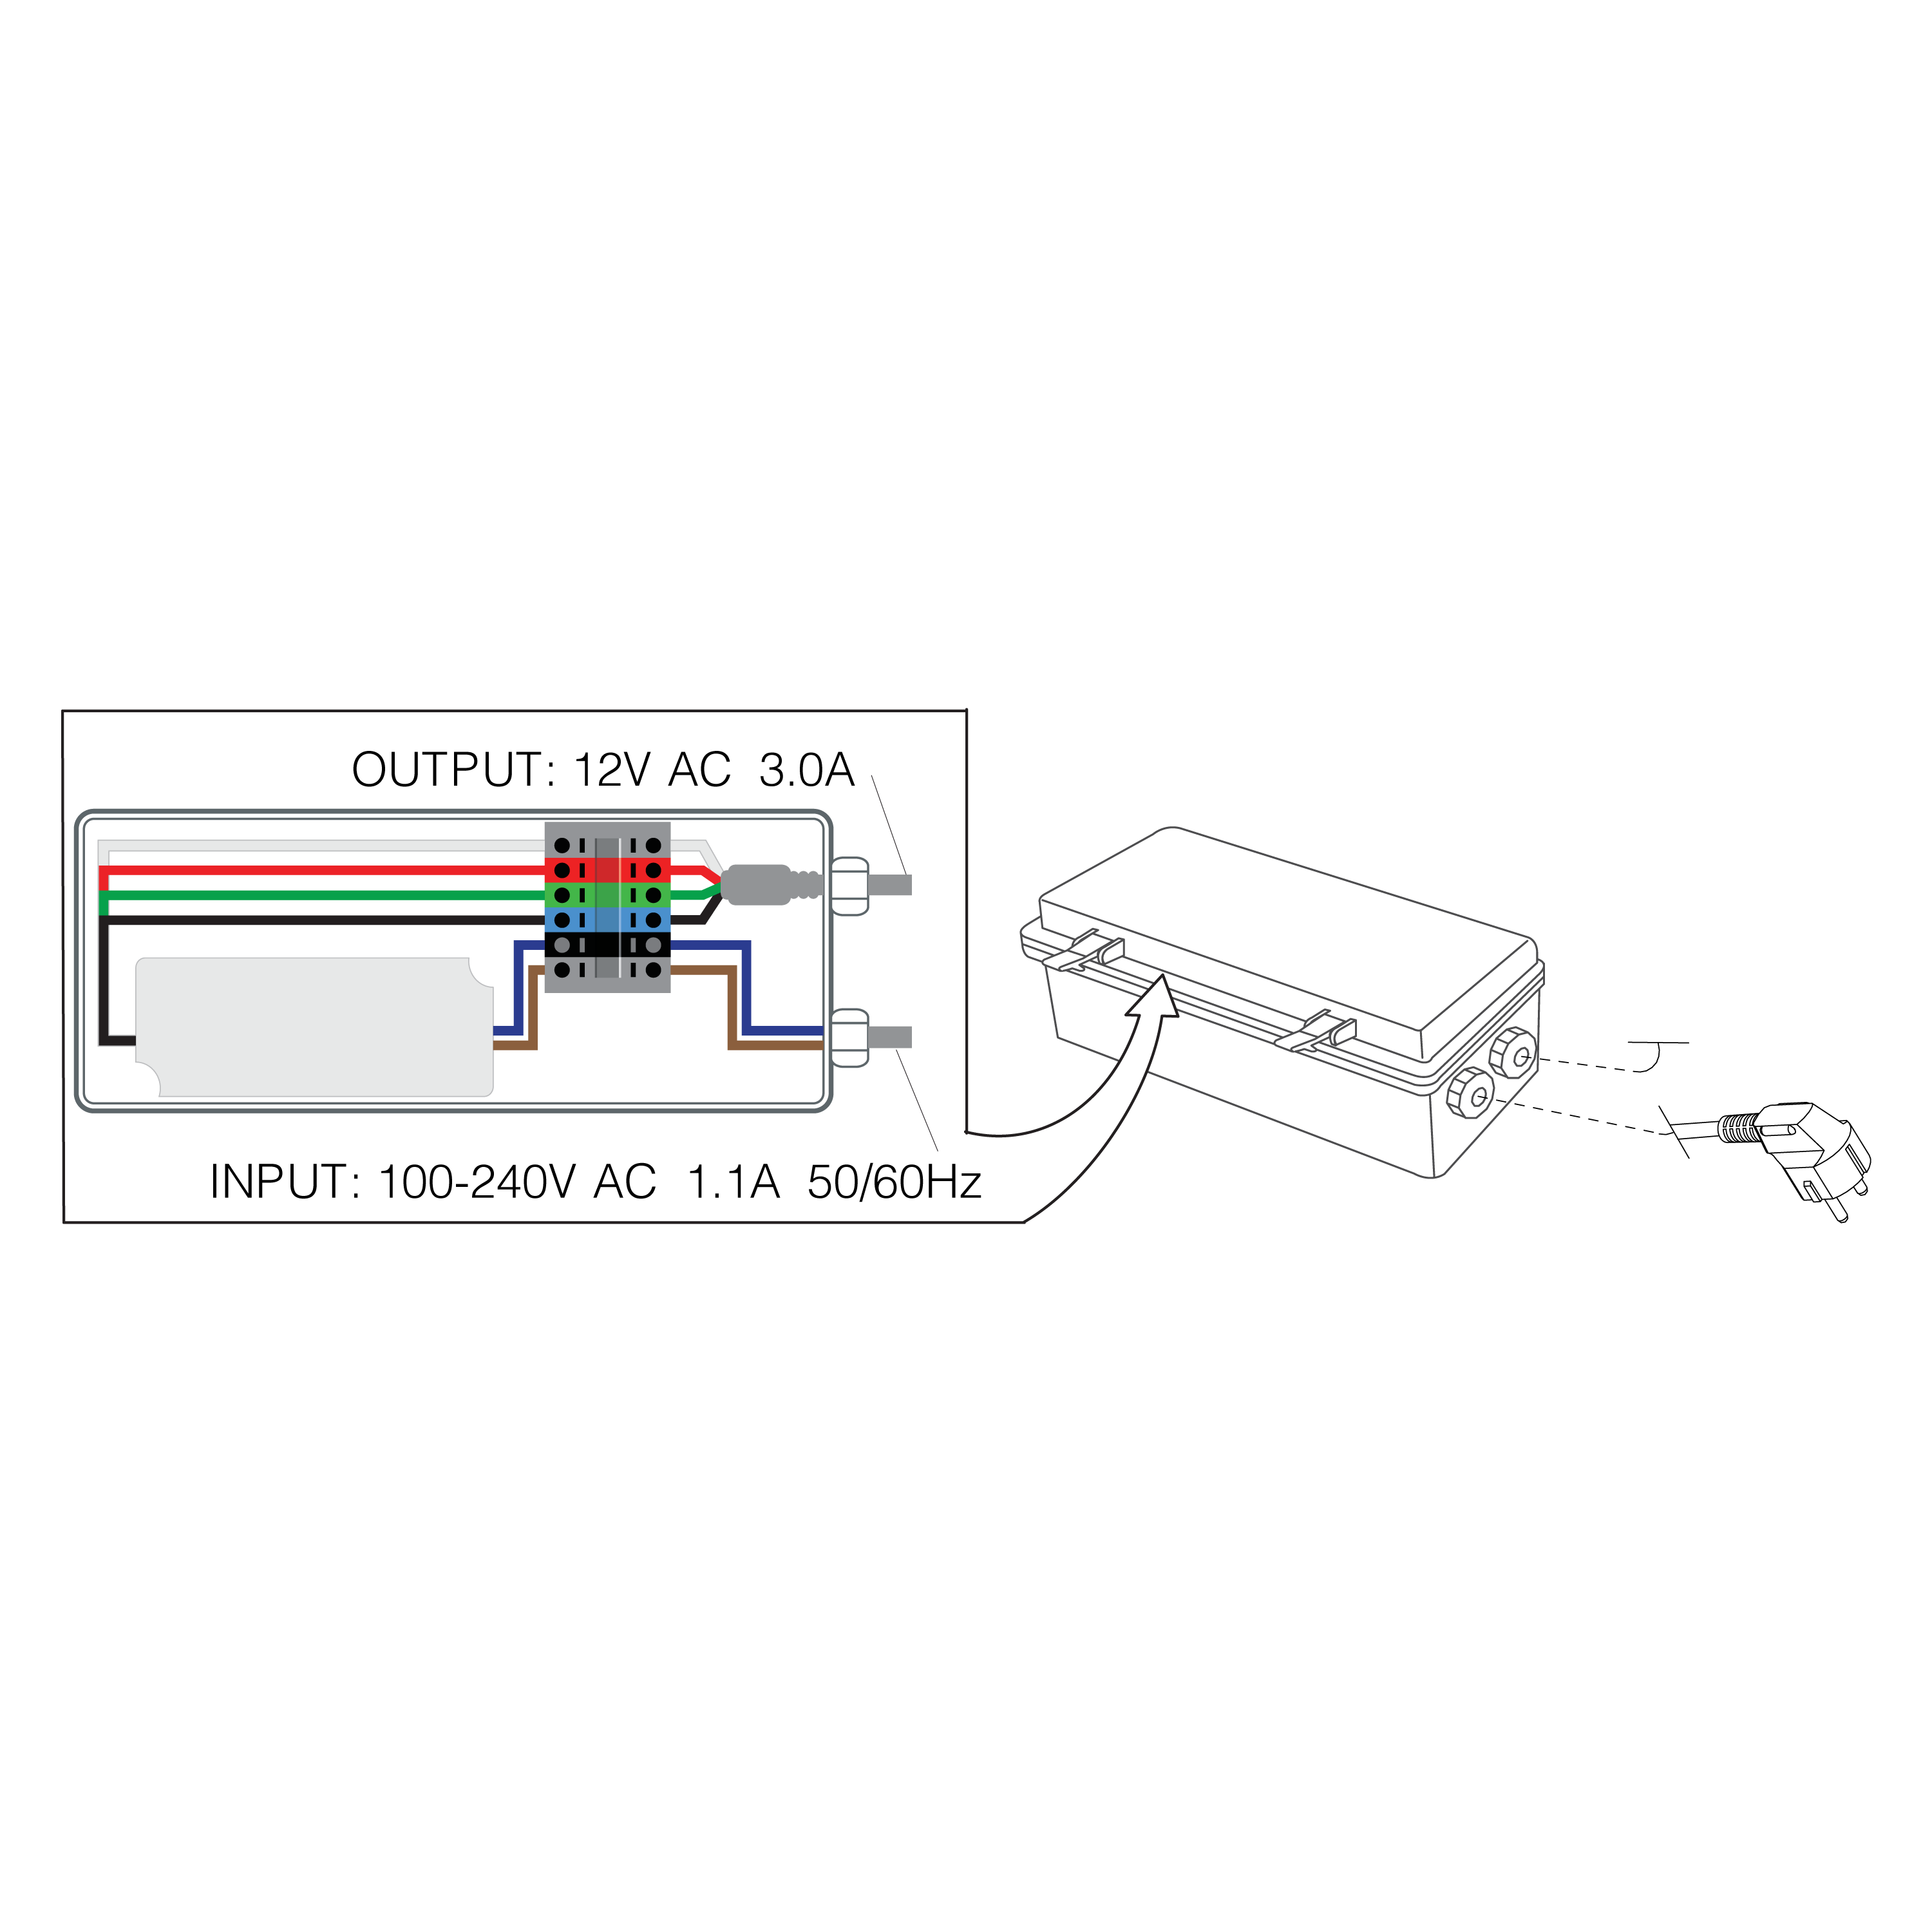
Connect the supply lines to ensure proper functionality.
|
|
|
|
|
|
|
|
Step 9:
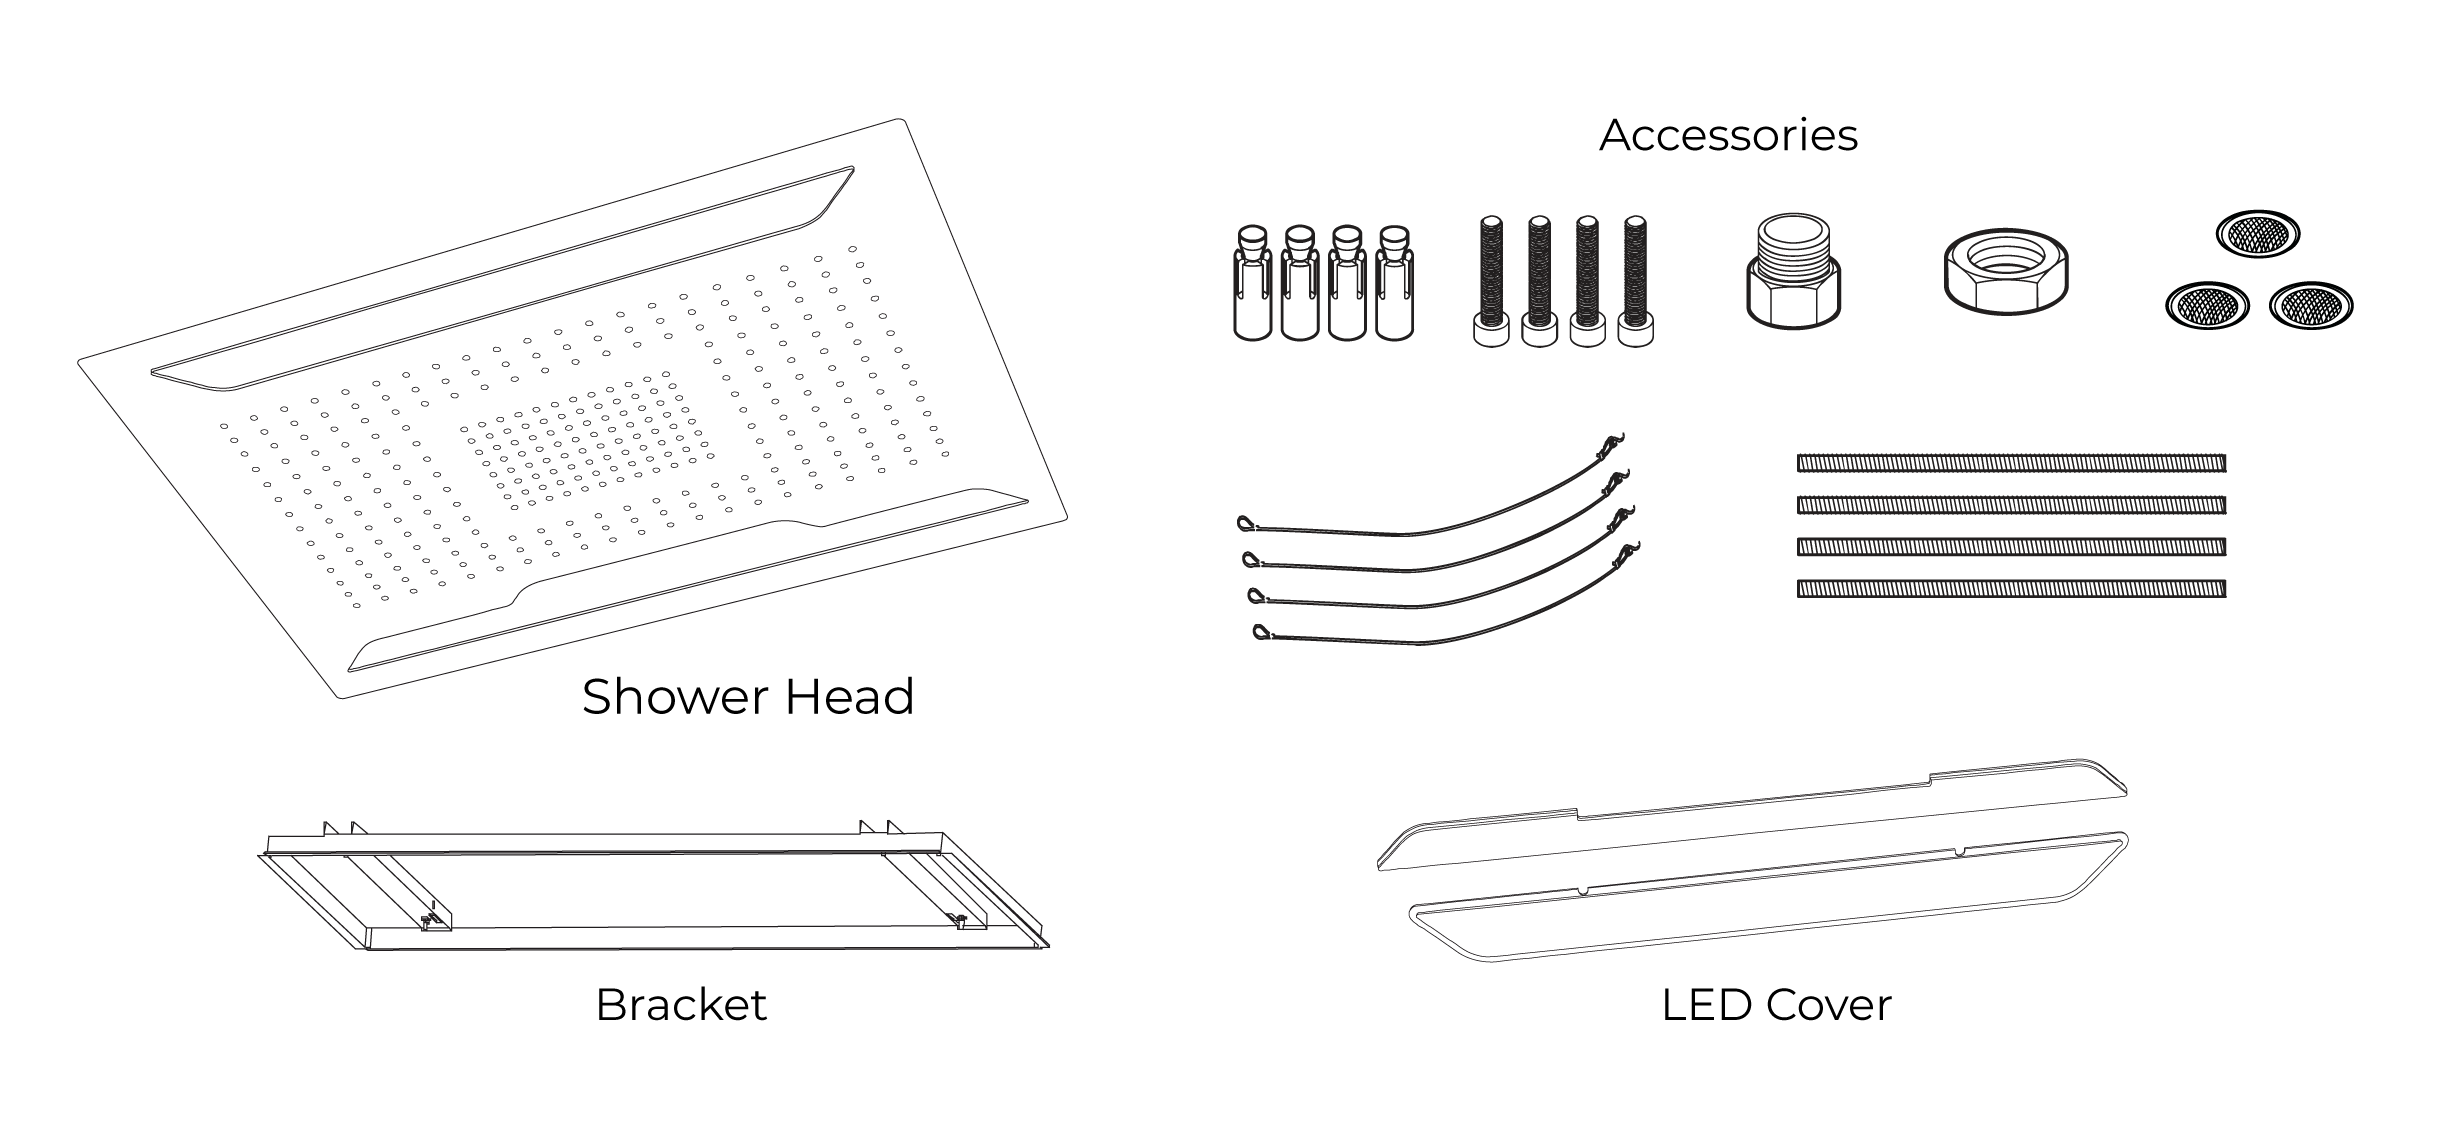
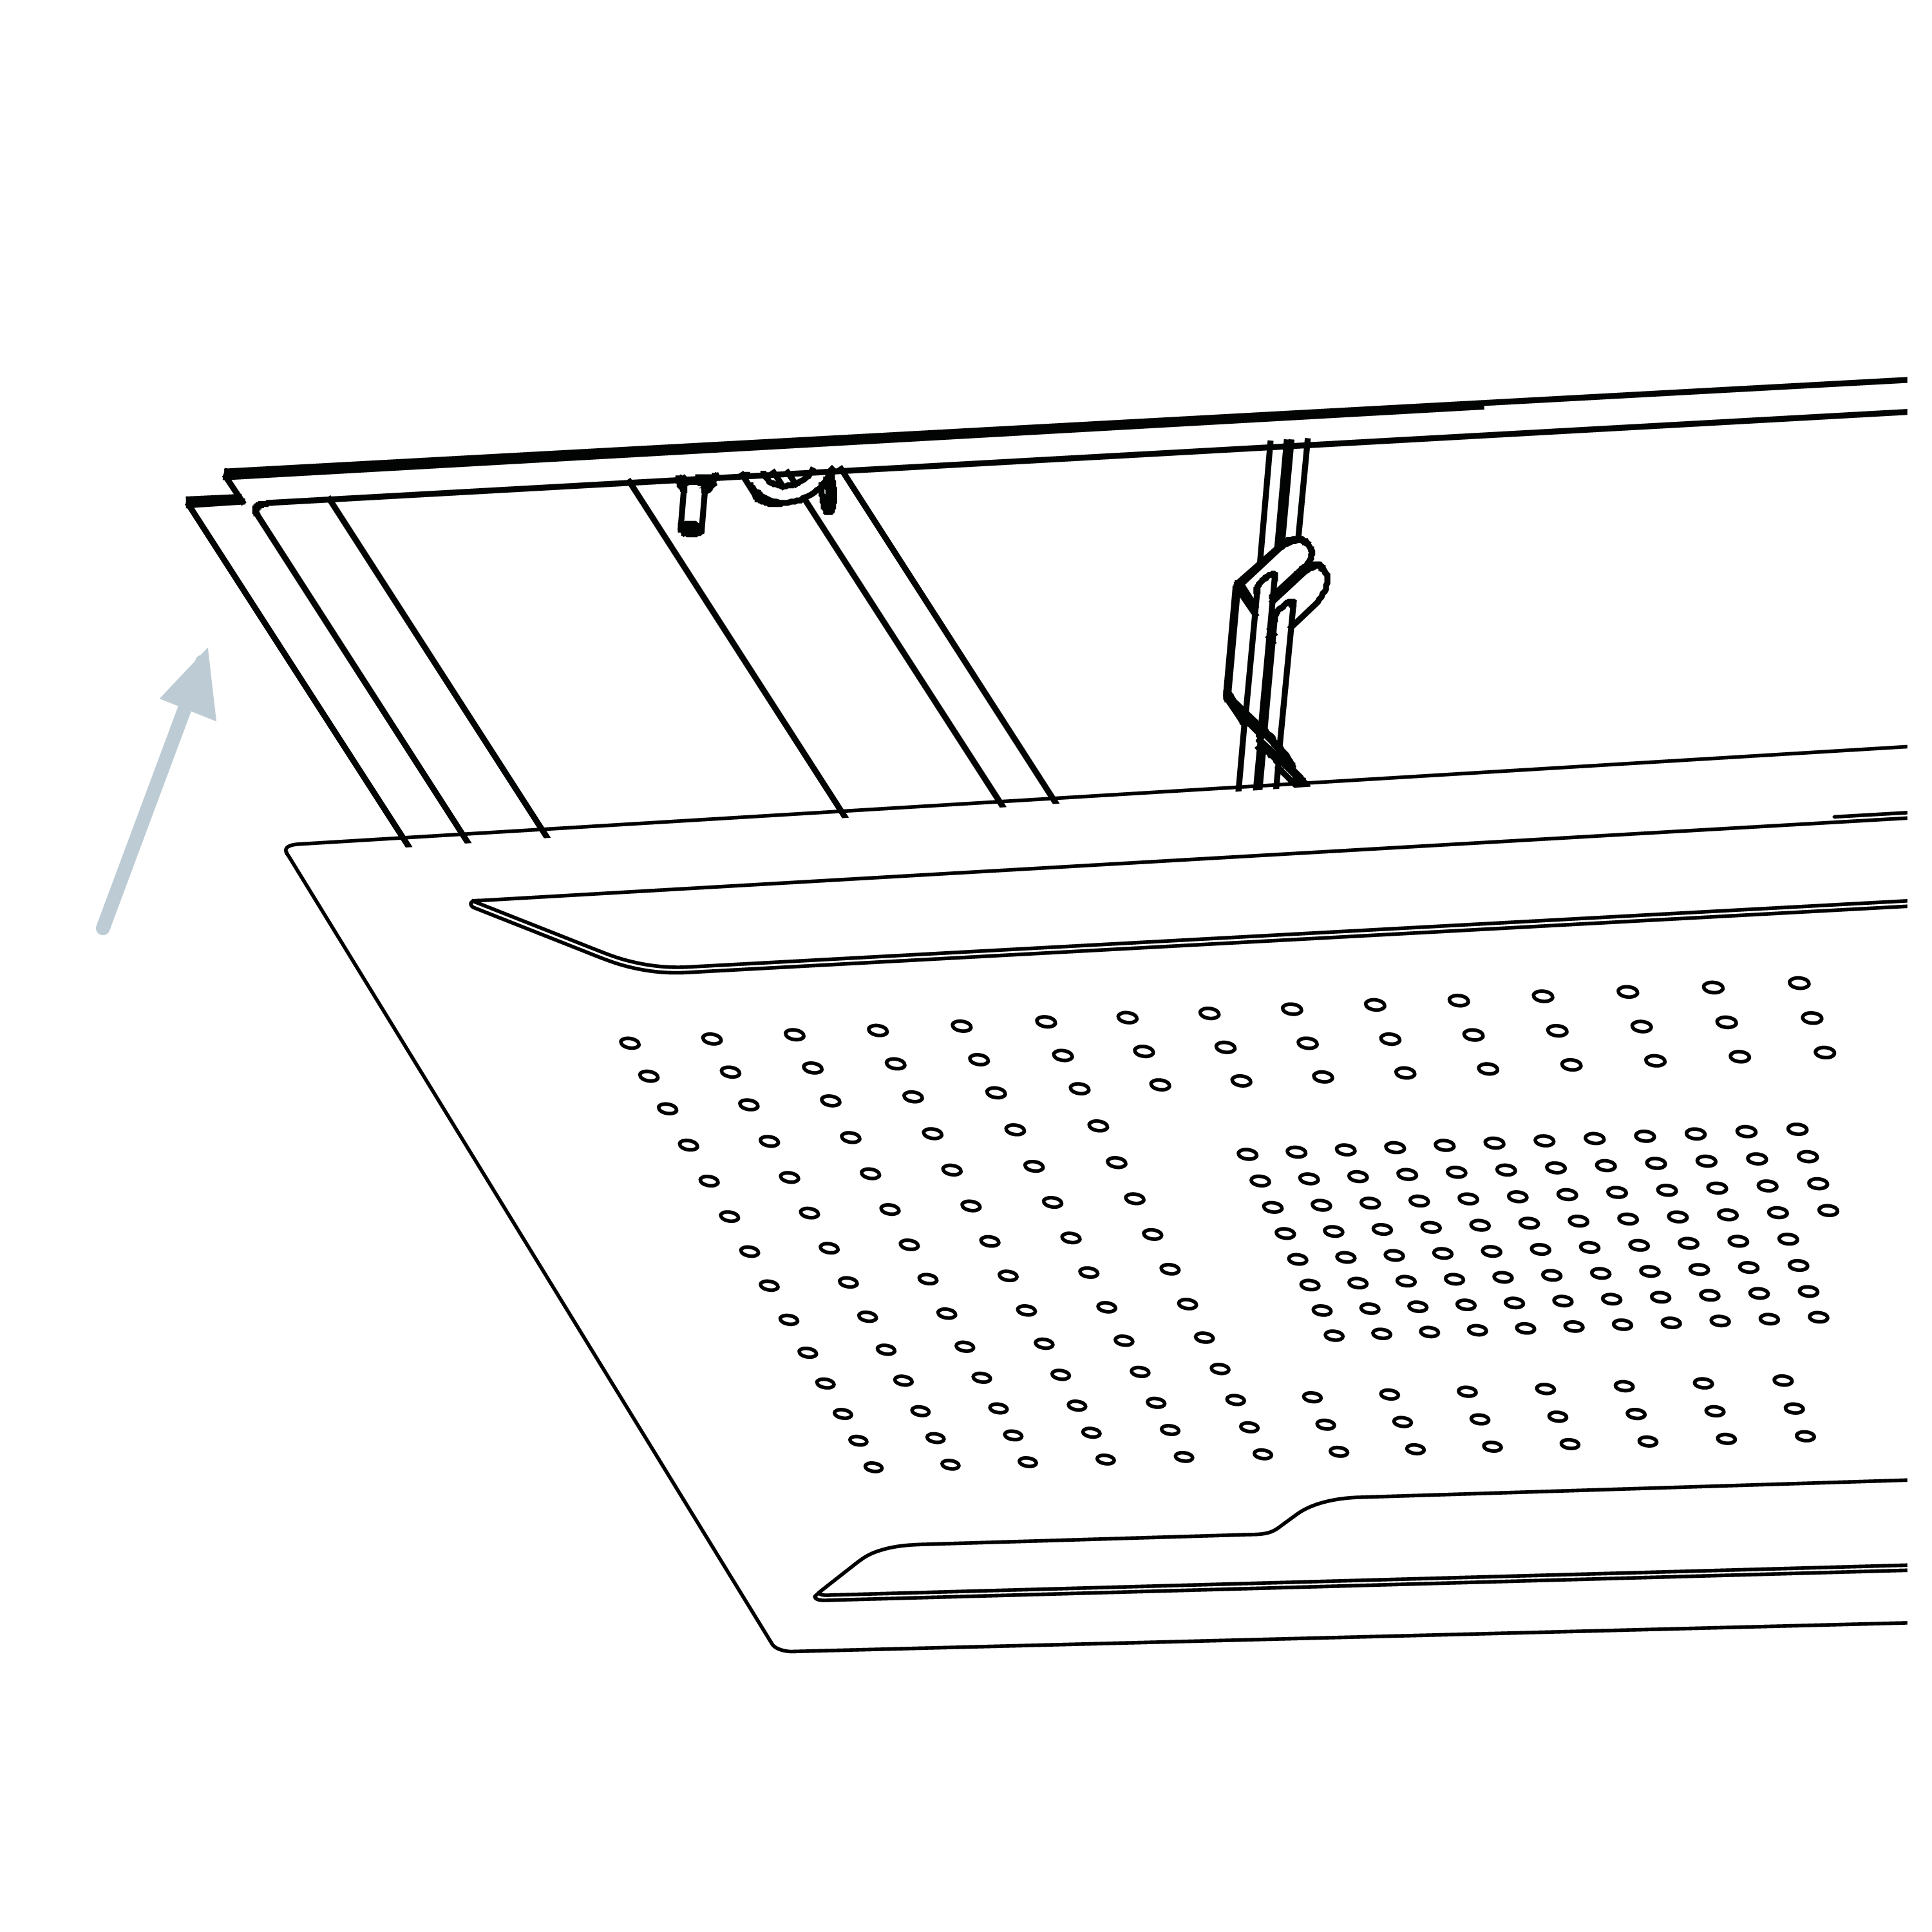
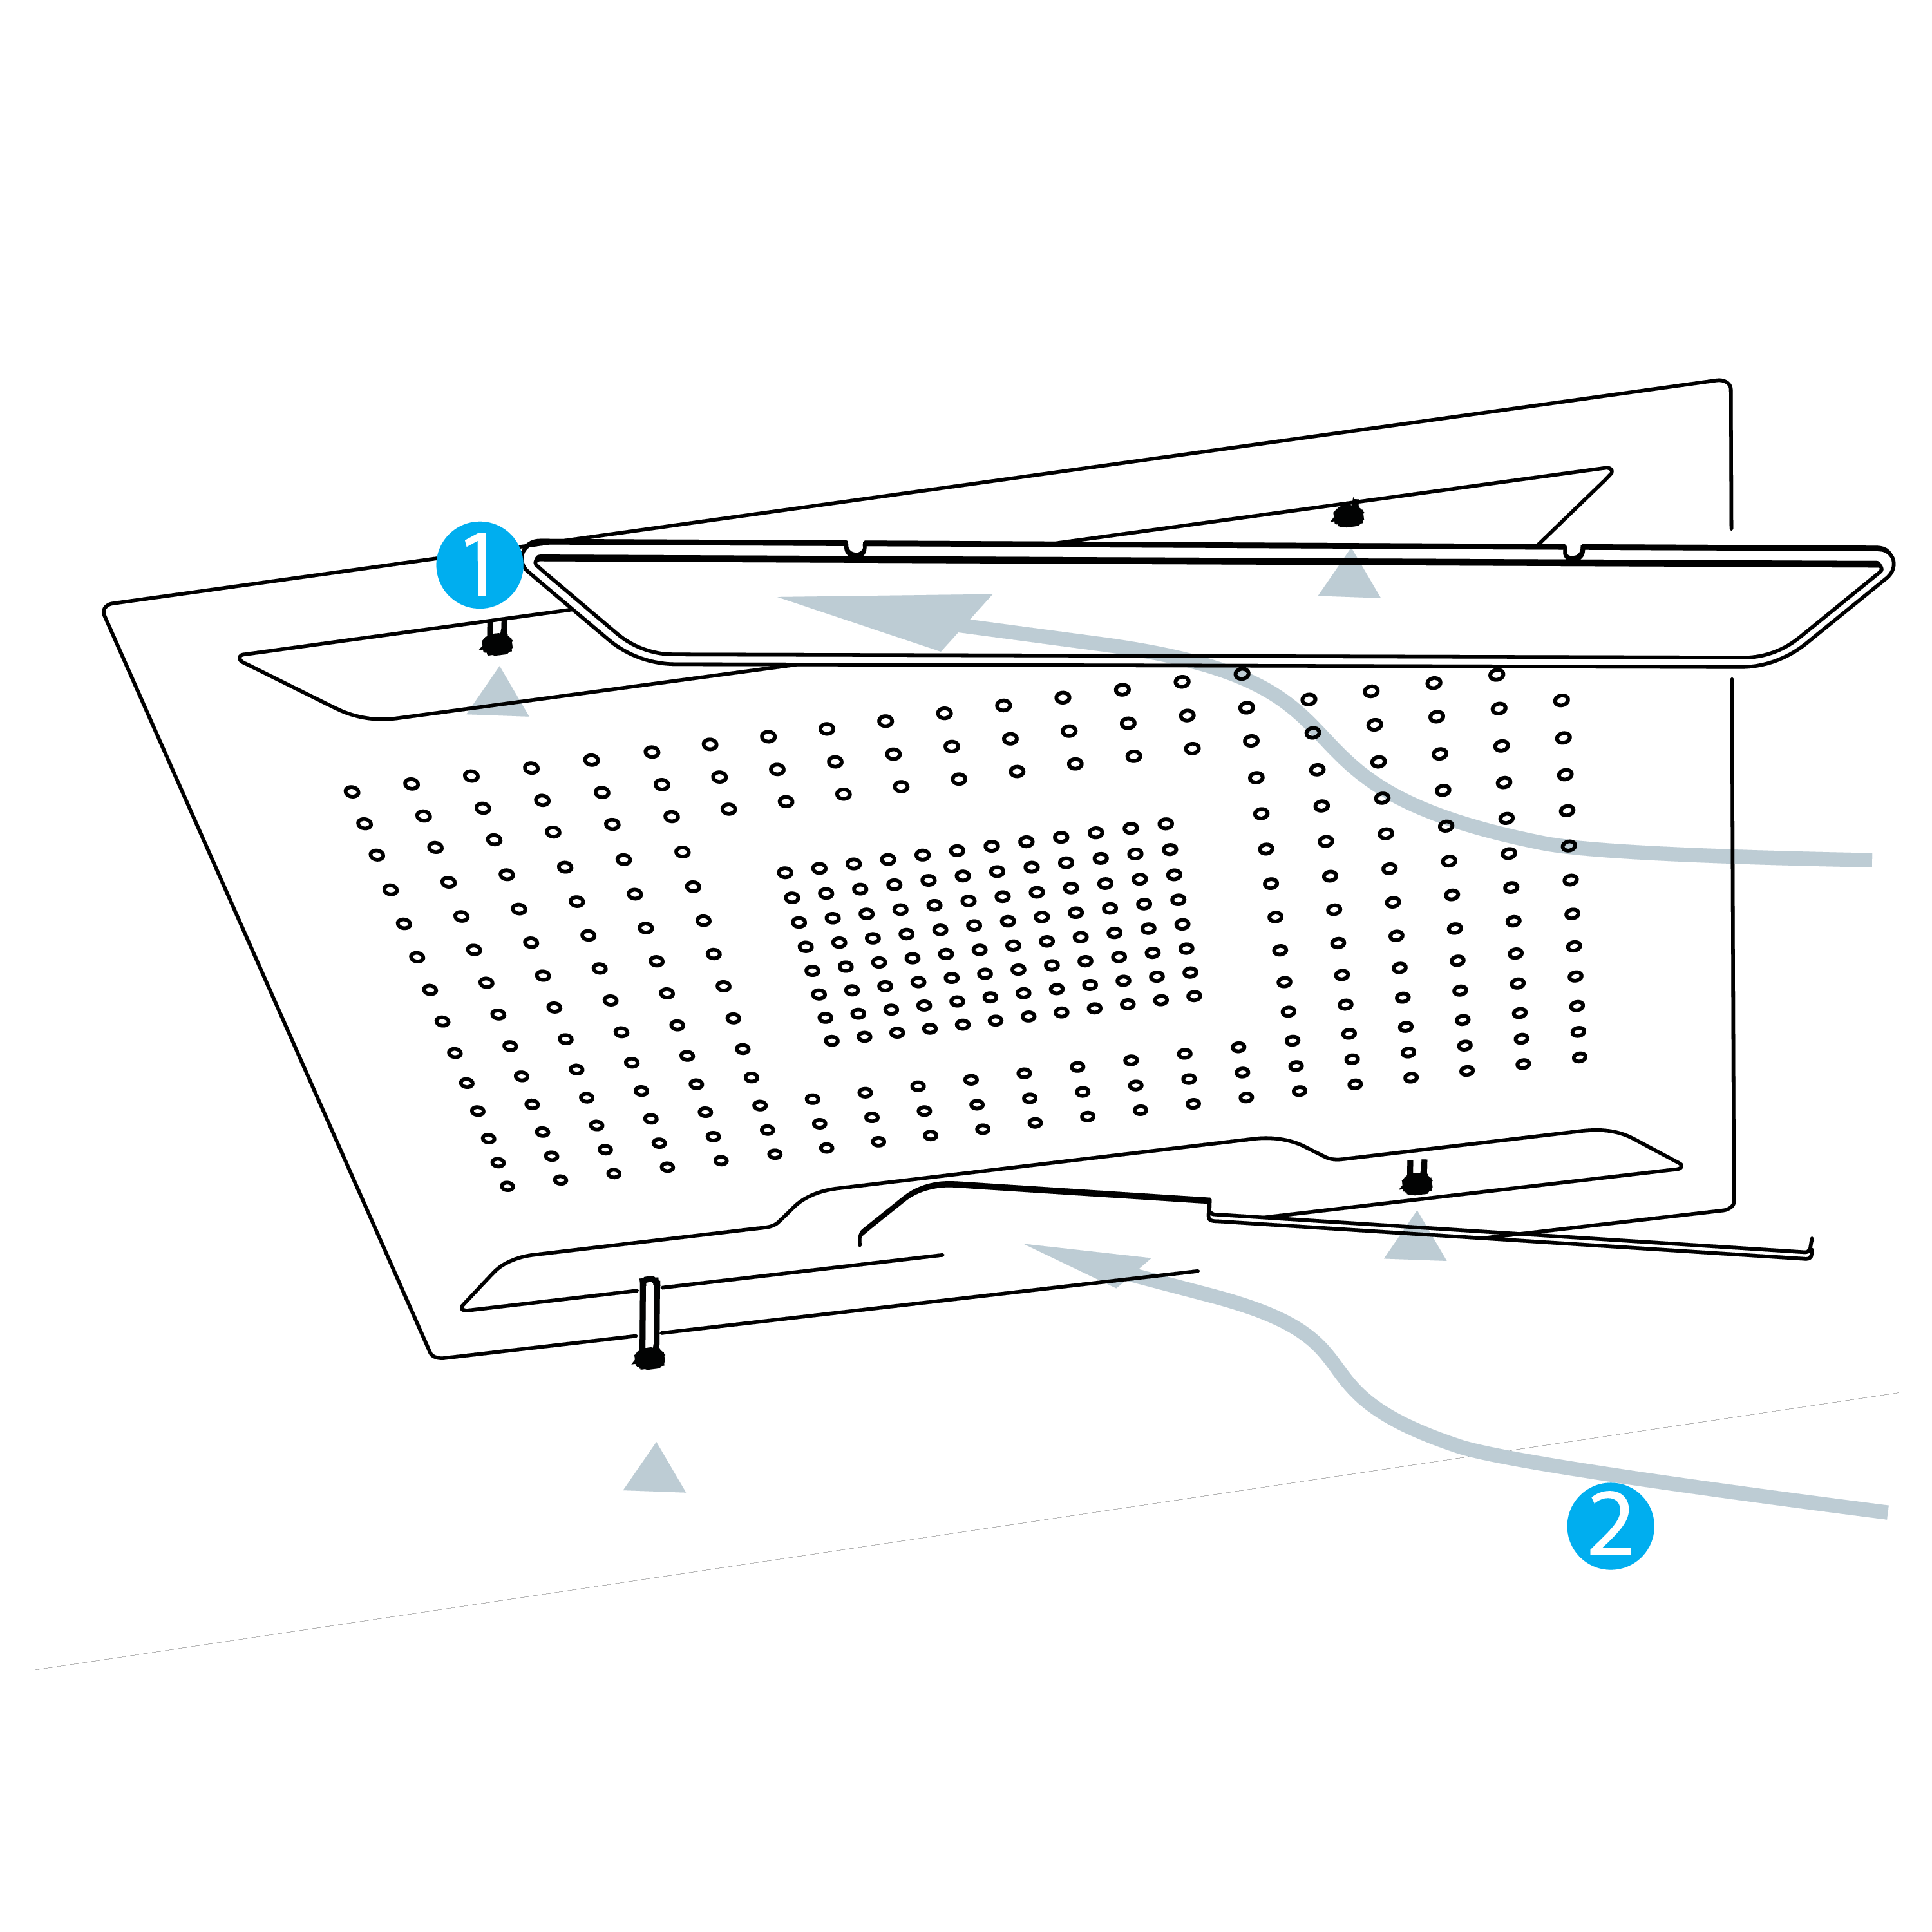
Insert the rain shower assembly into the fixture, aligning it correctly.
|
|
Step 10:
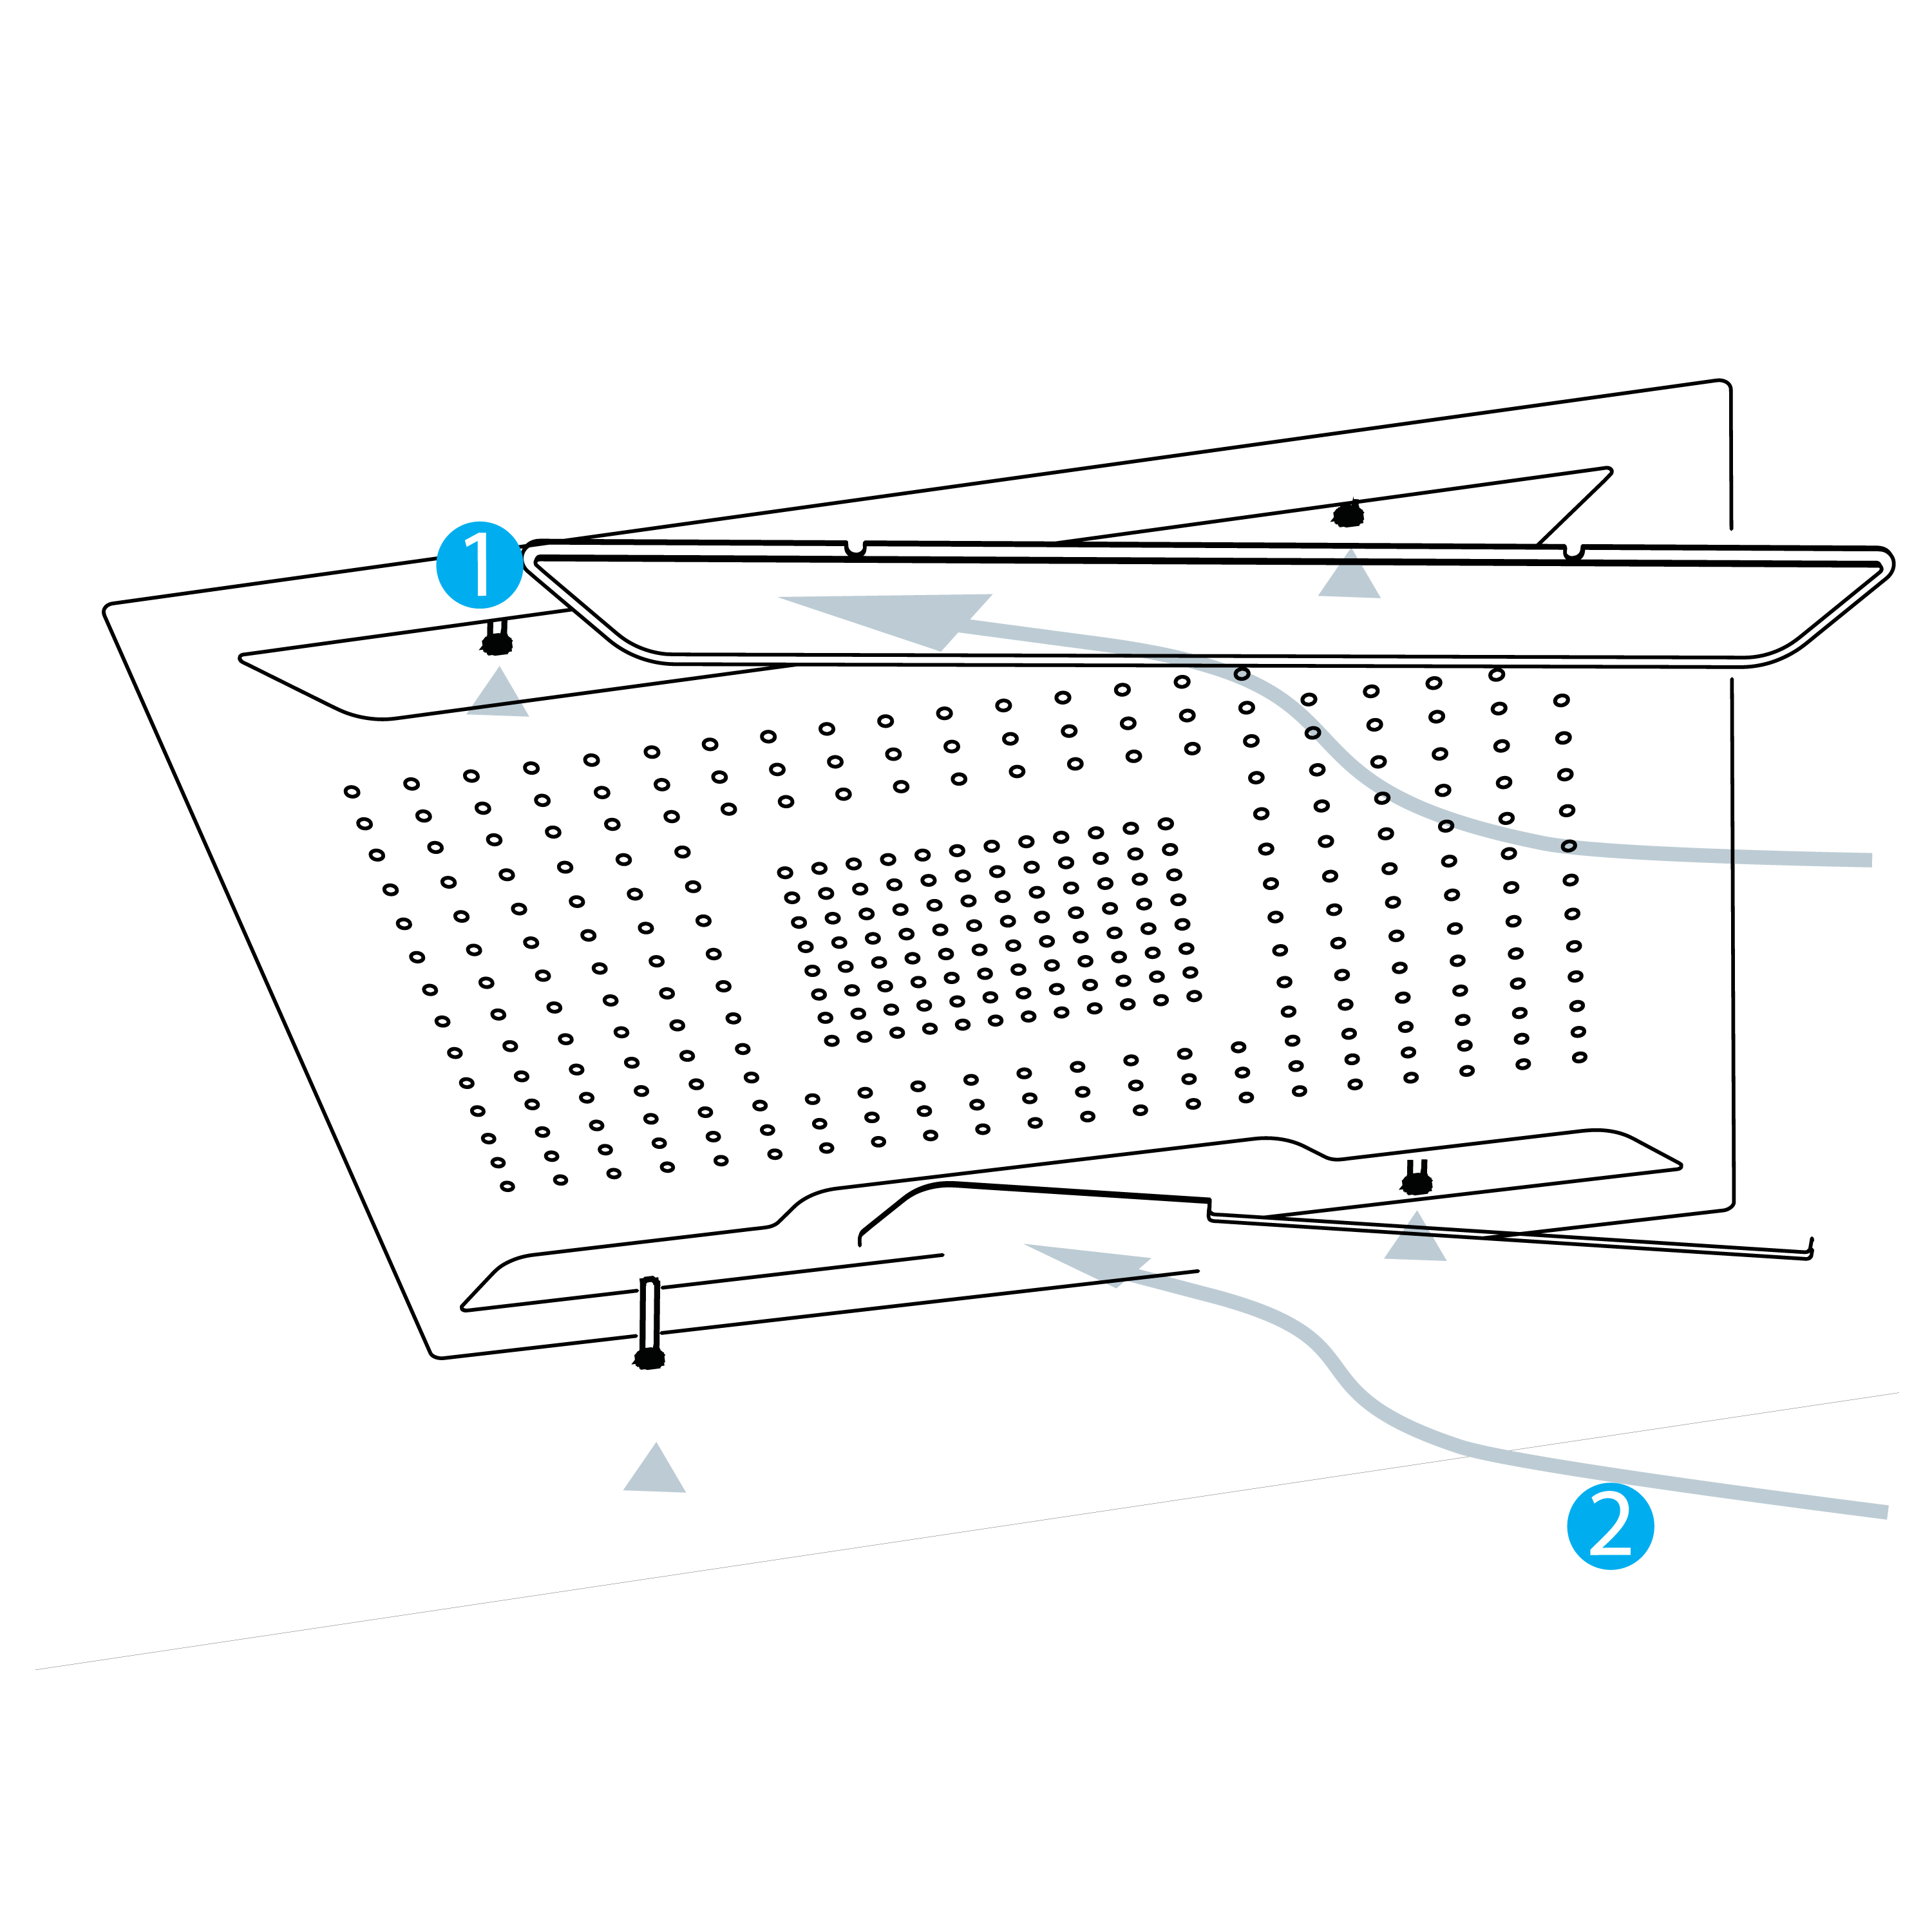
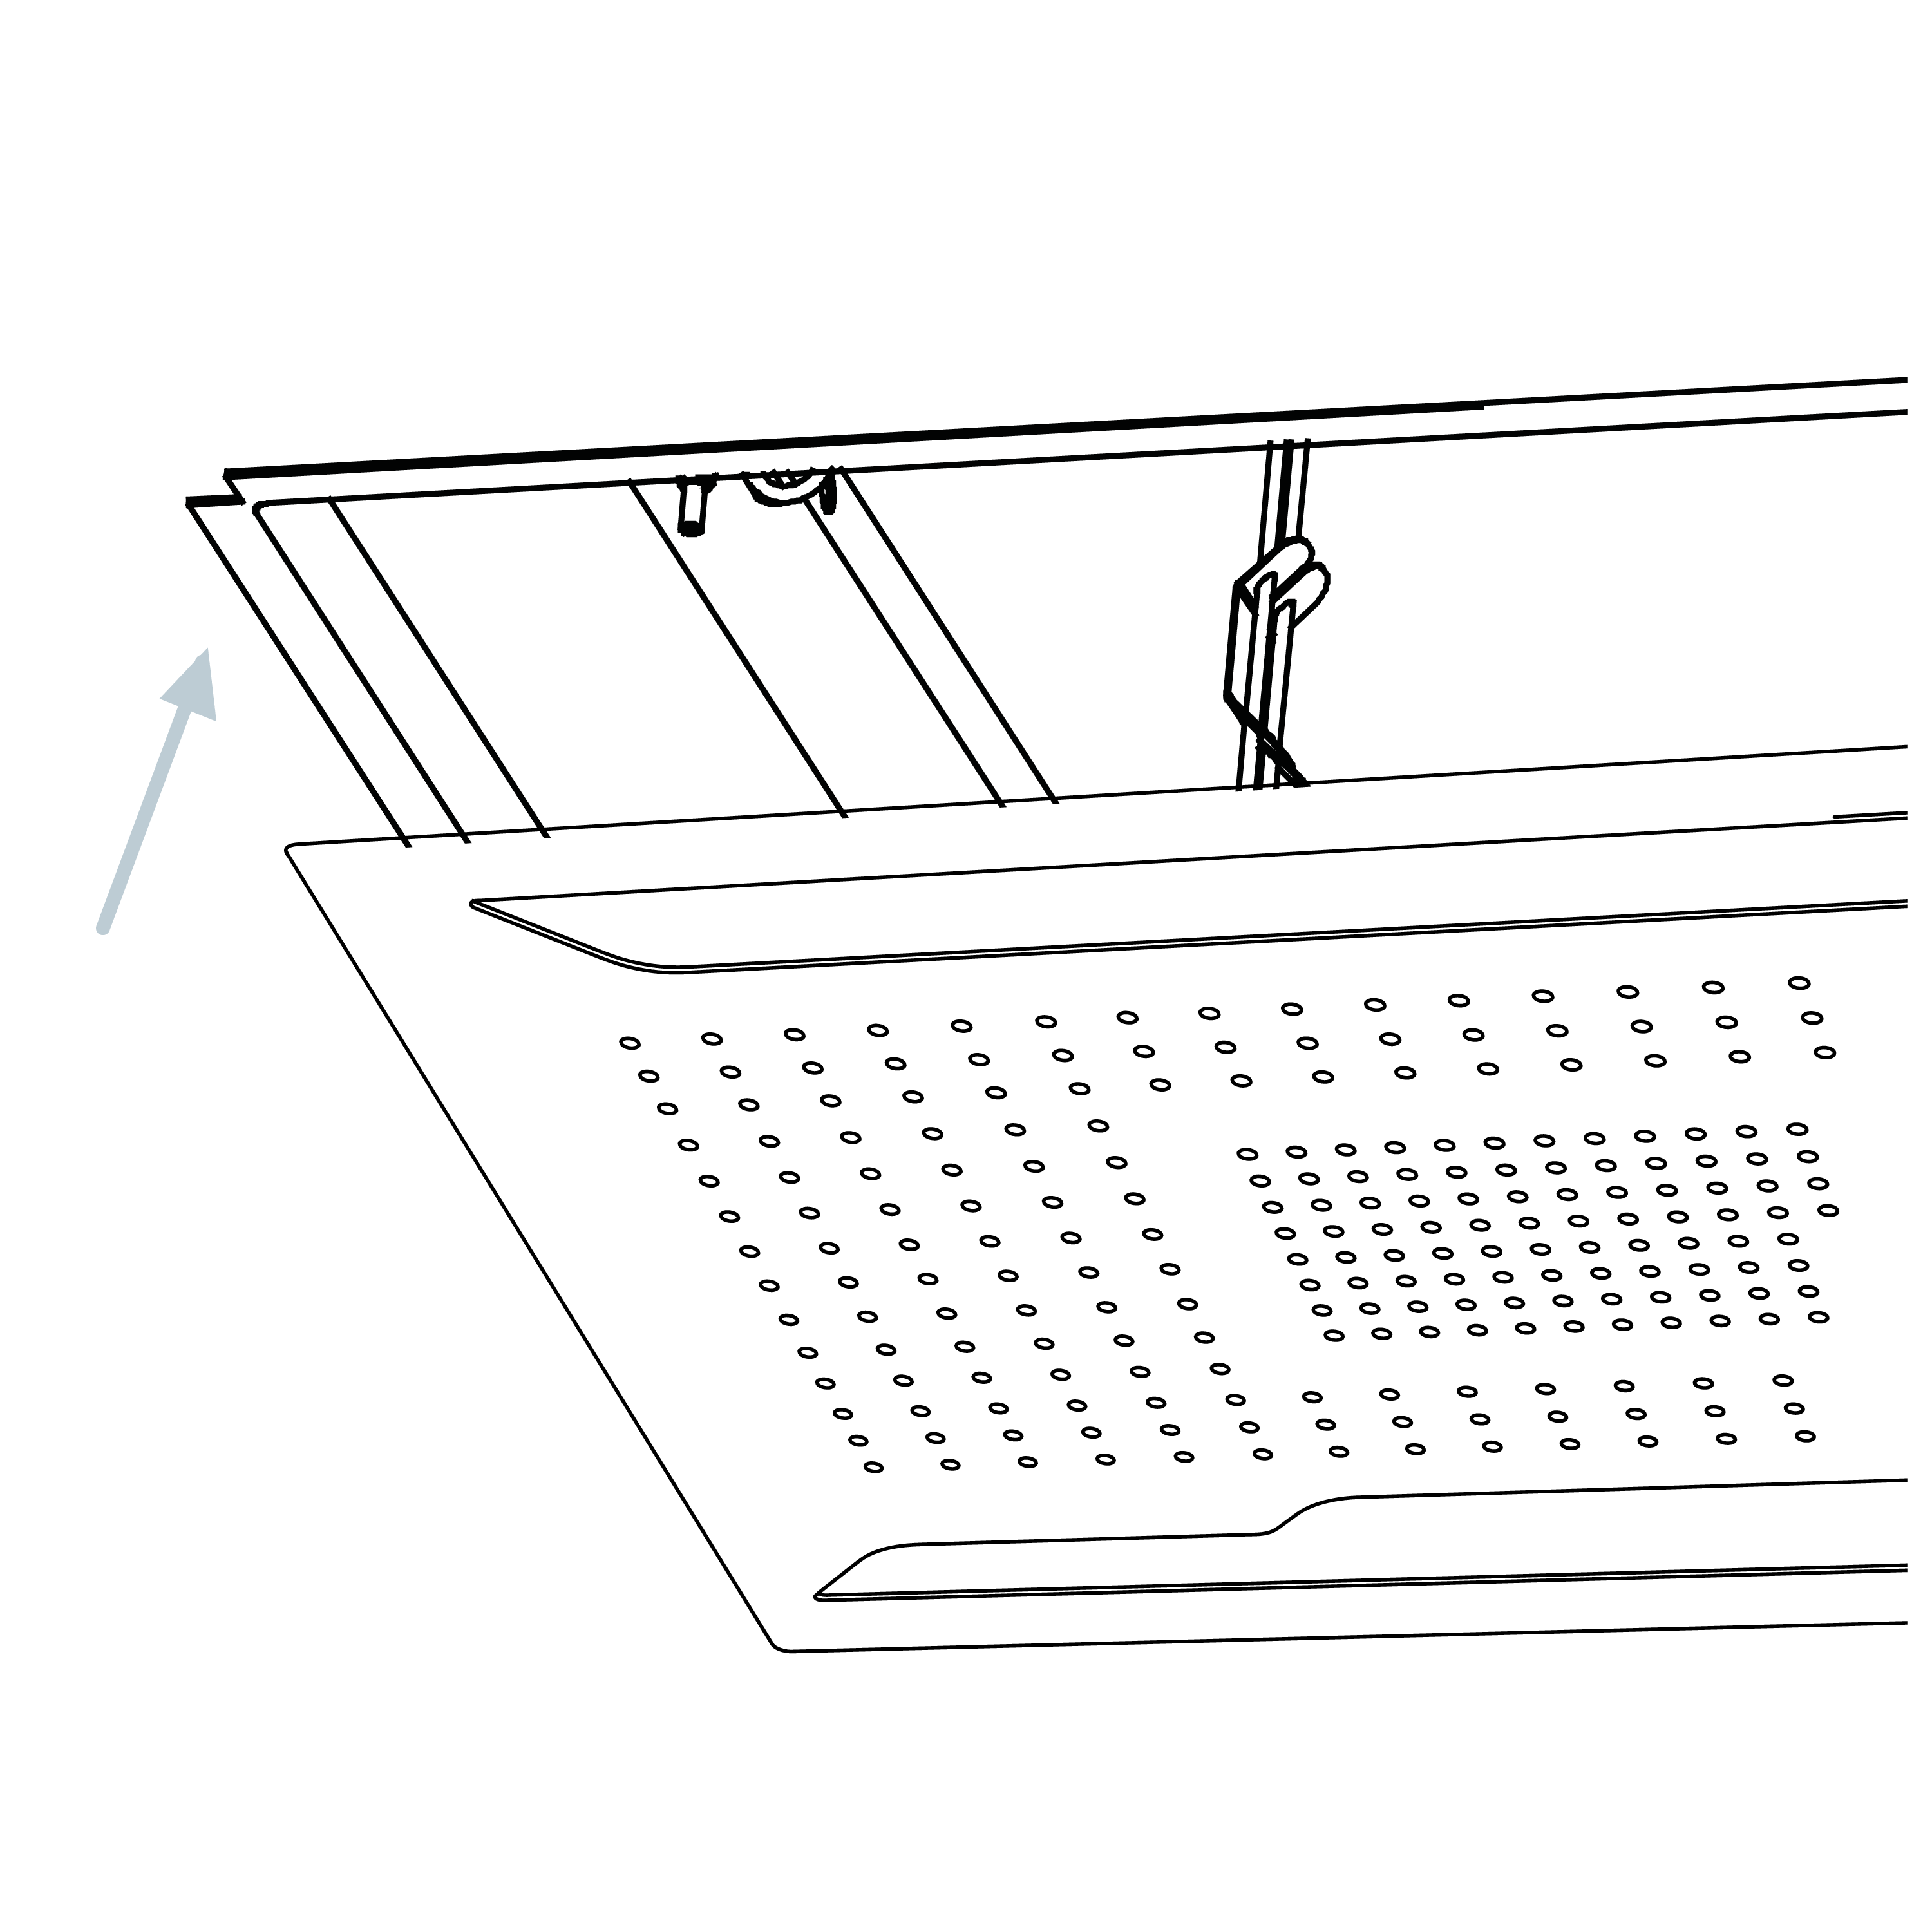
Finally, tighten the four mounting bolts securely and insert the LED shrouds to complete the installation process.
|
|
|
|
|
|
|
|