How to install Bravat Brushed Gold Wall Mounted Round Rainfall Shower Set With Valve Mixer 3-Way Concealed And Four Round Body Jets With Handheld Shower | FS1120
Installation Instructions for Bathroom Shower Set
Visit Product Page
Before you begin, please read the installation instructions below. Observe all local building and safety codes.
Unpack and inspect the product for any shipping damages. If you find damages, do not install.
Please note all products must be installed by a professional and certified plumber otherwise warranty might be voided.
shower
Shower Head Installation Instructions
Size
Step 1:
Round
Shower
Step 2:
Wall Mount Round Showerhead
Step 3:
Step 4:
Step 5:
Step 6:
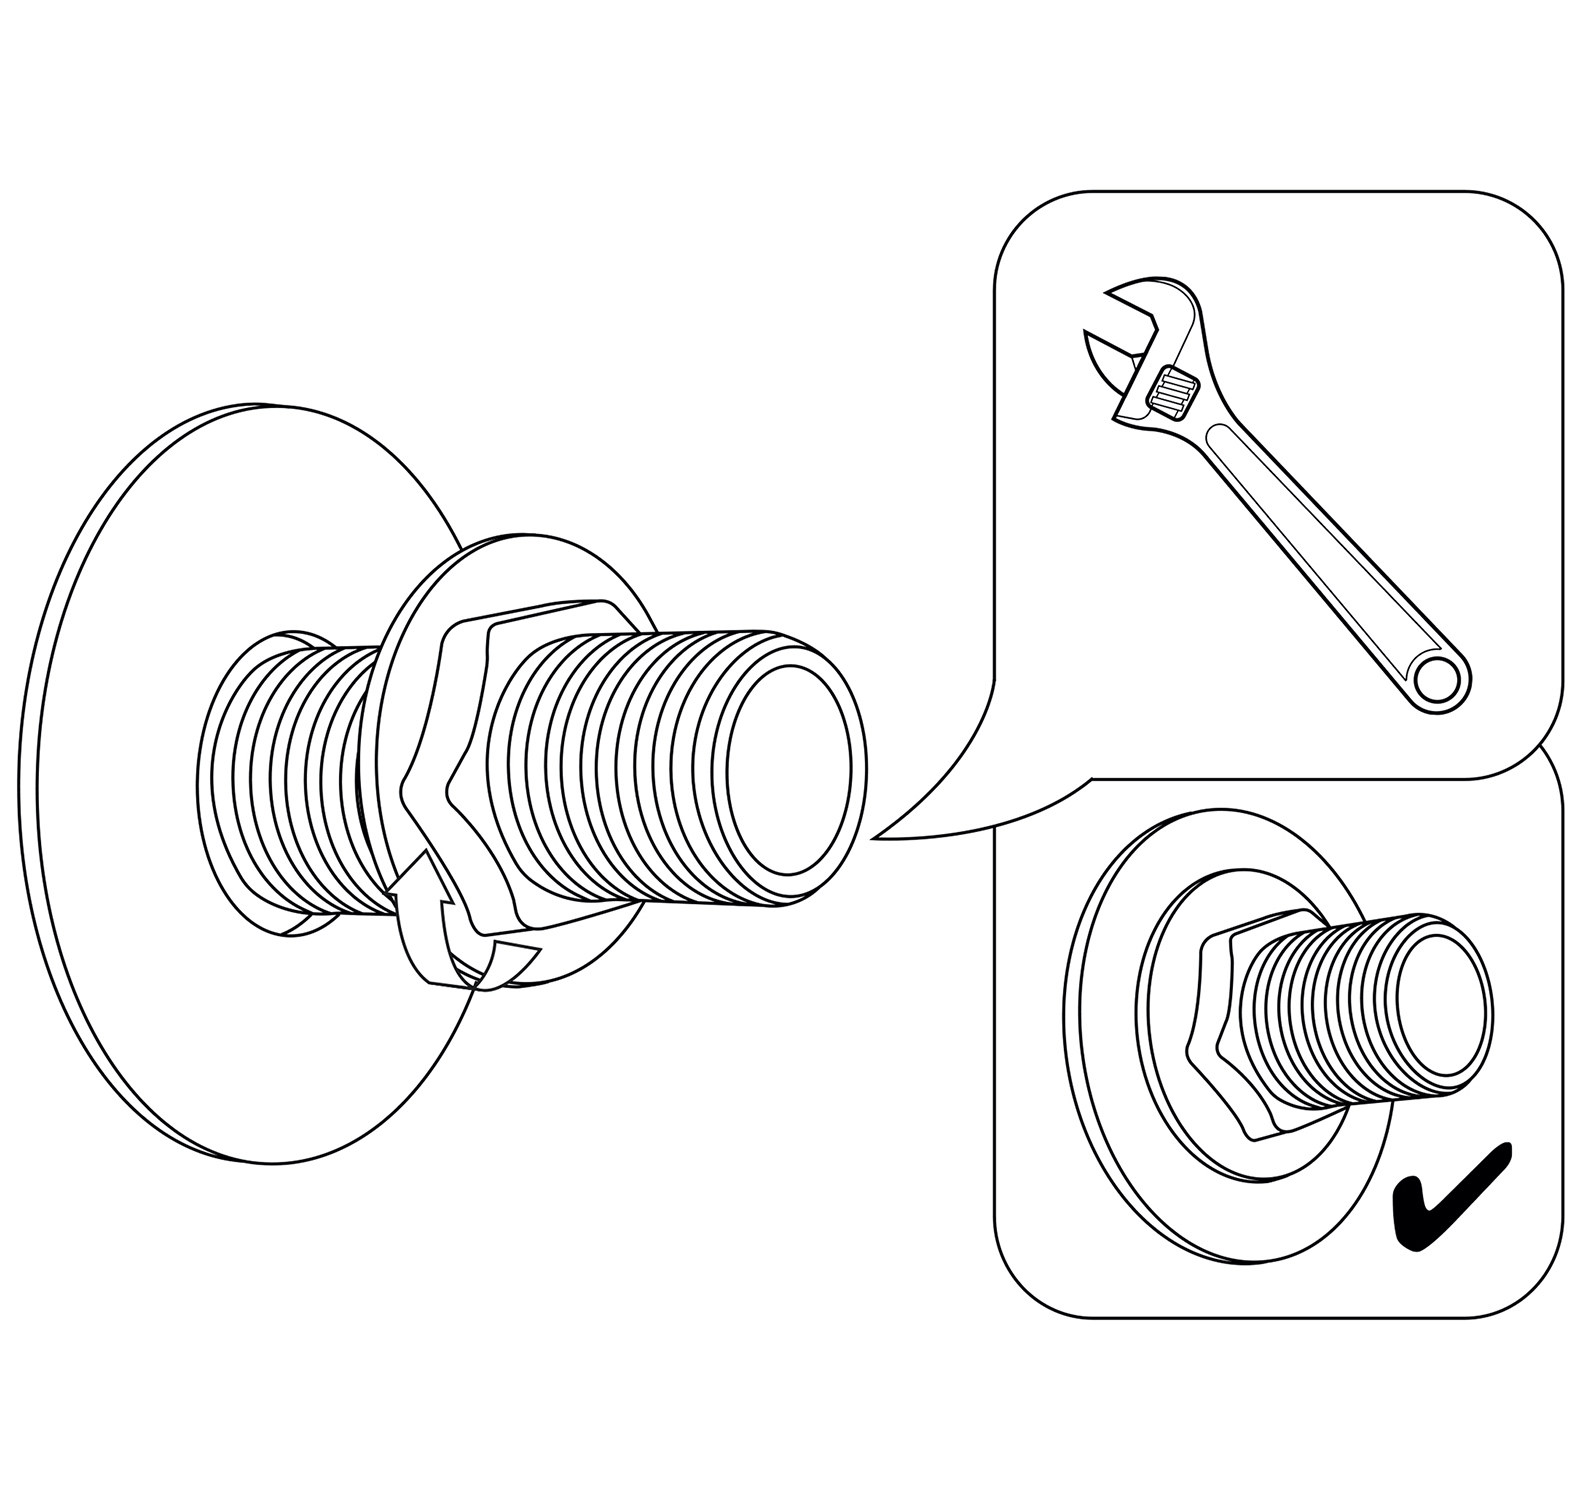
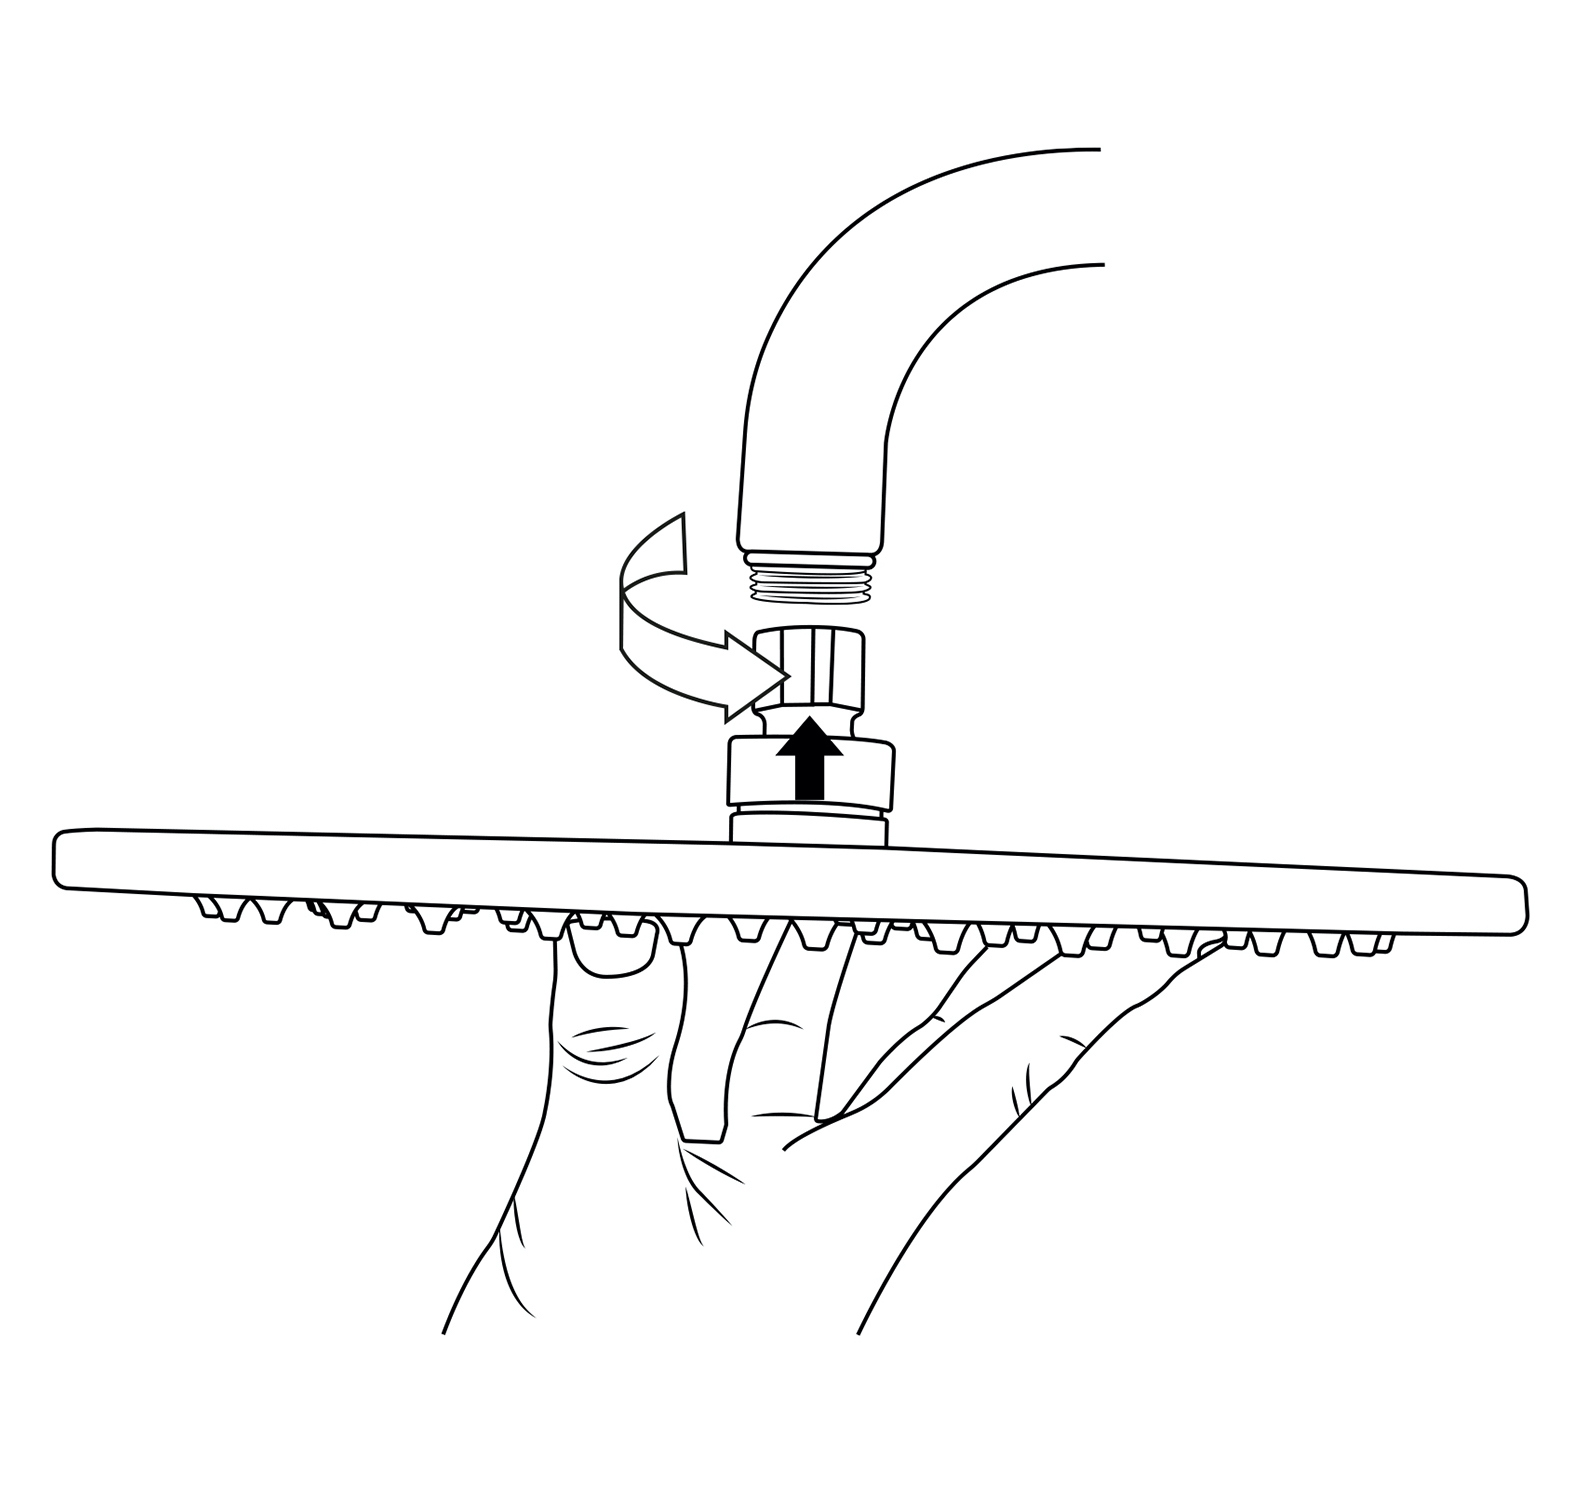
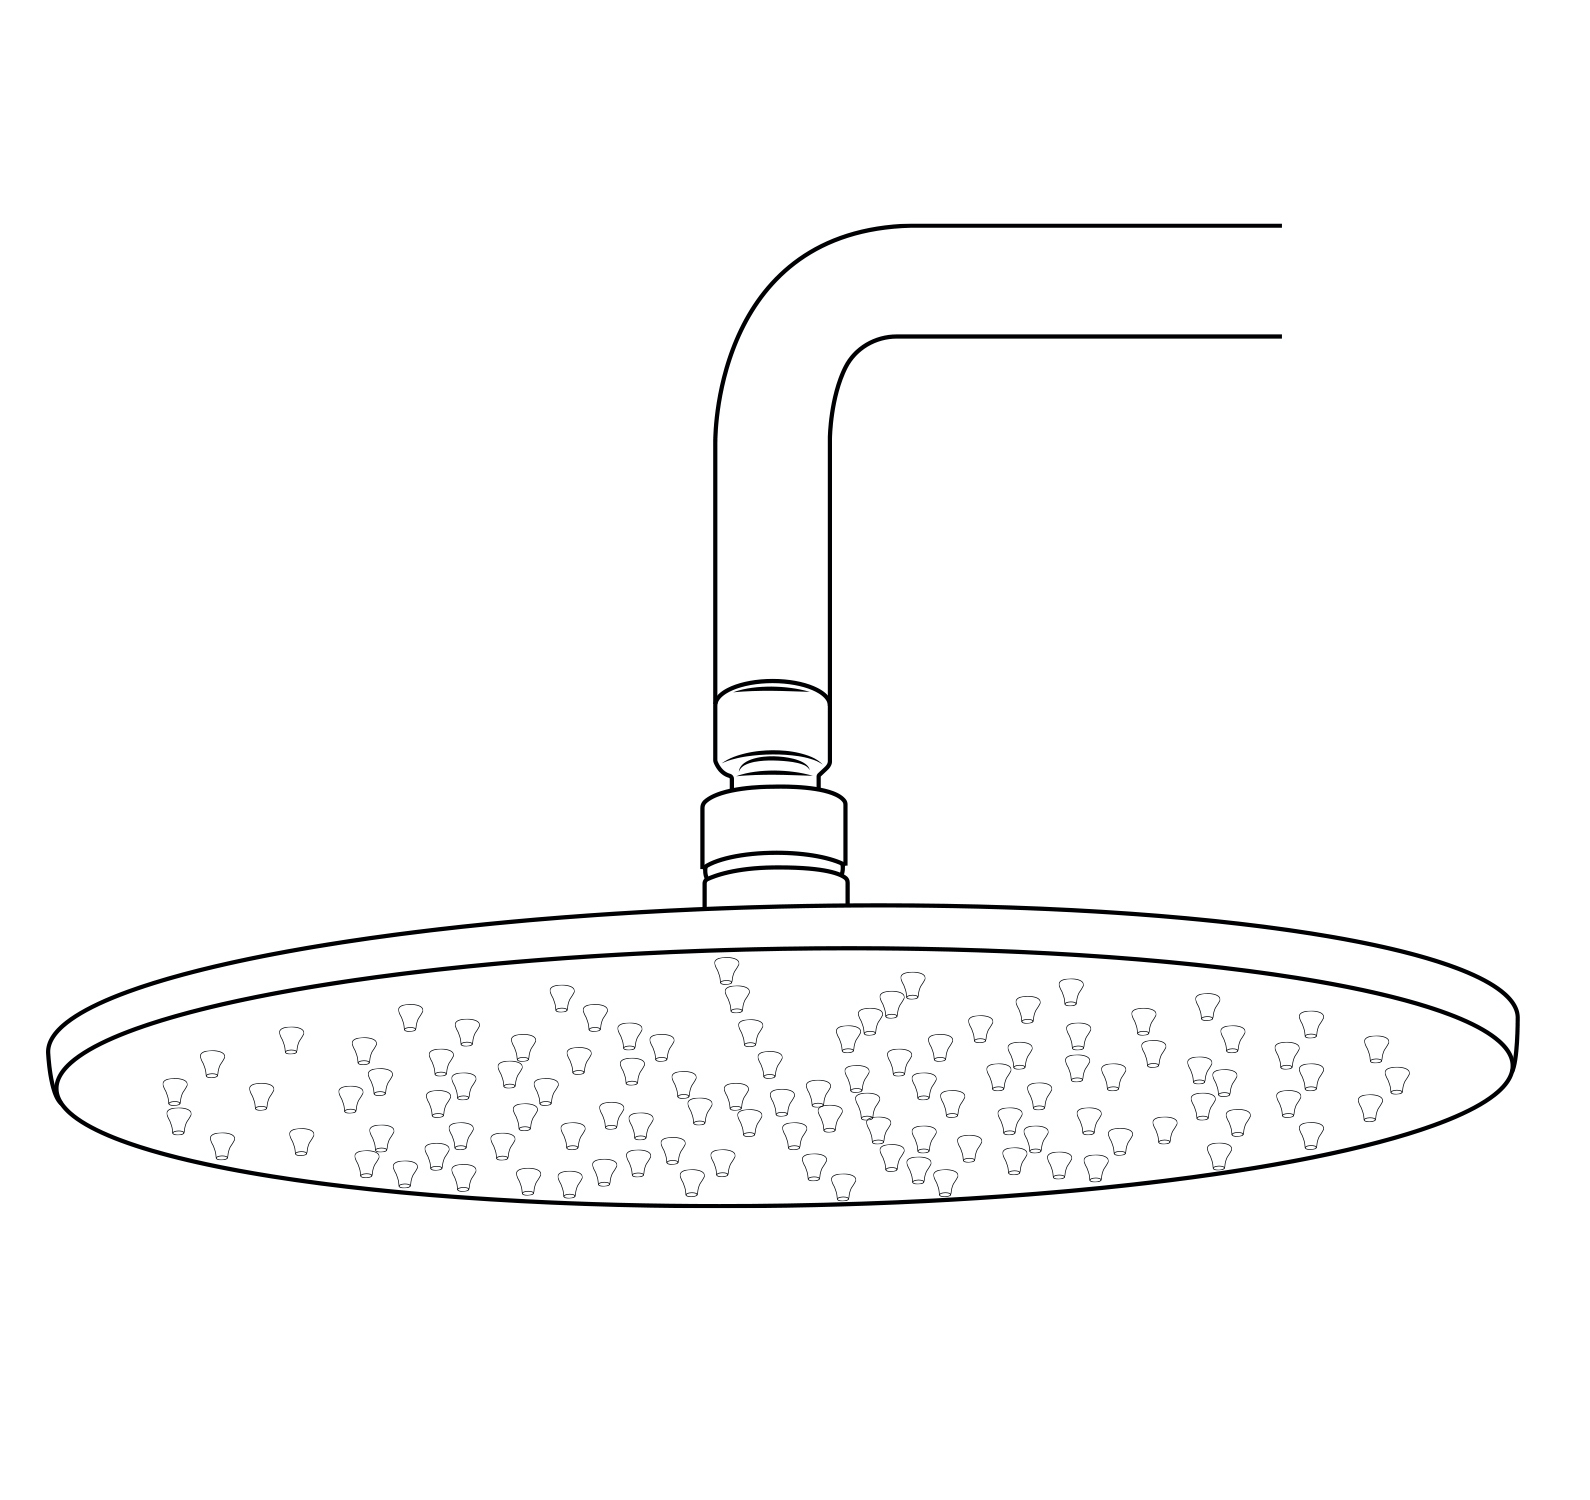
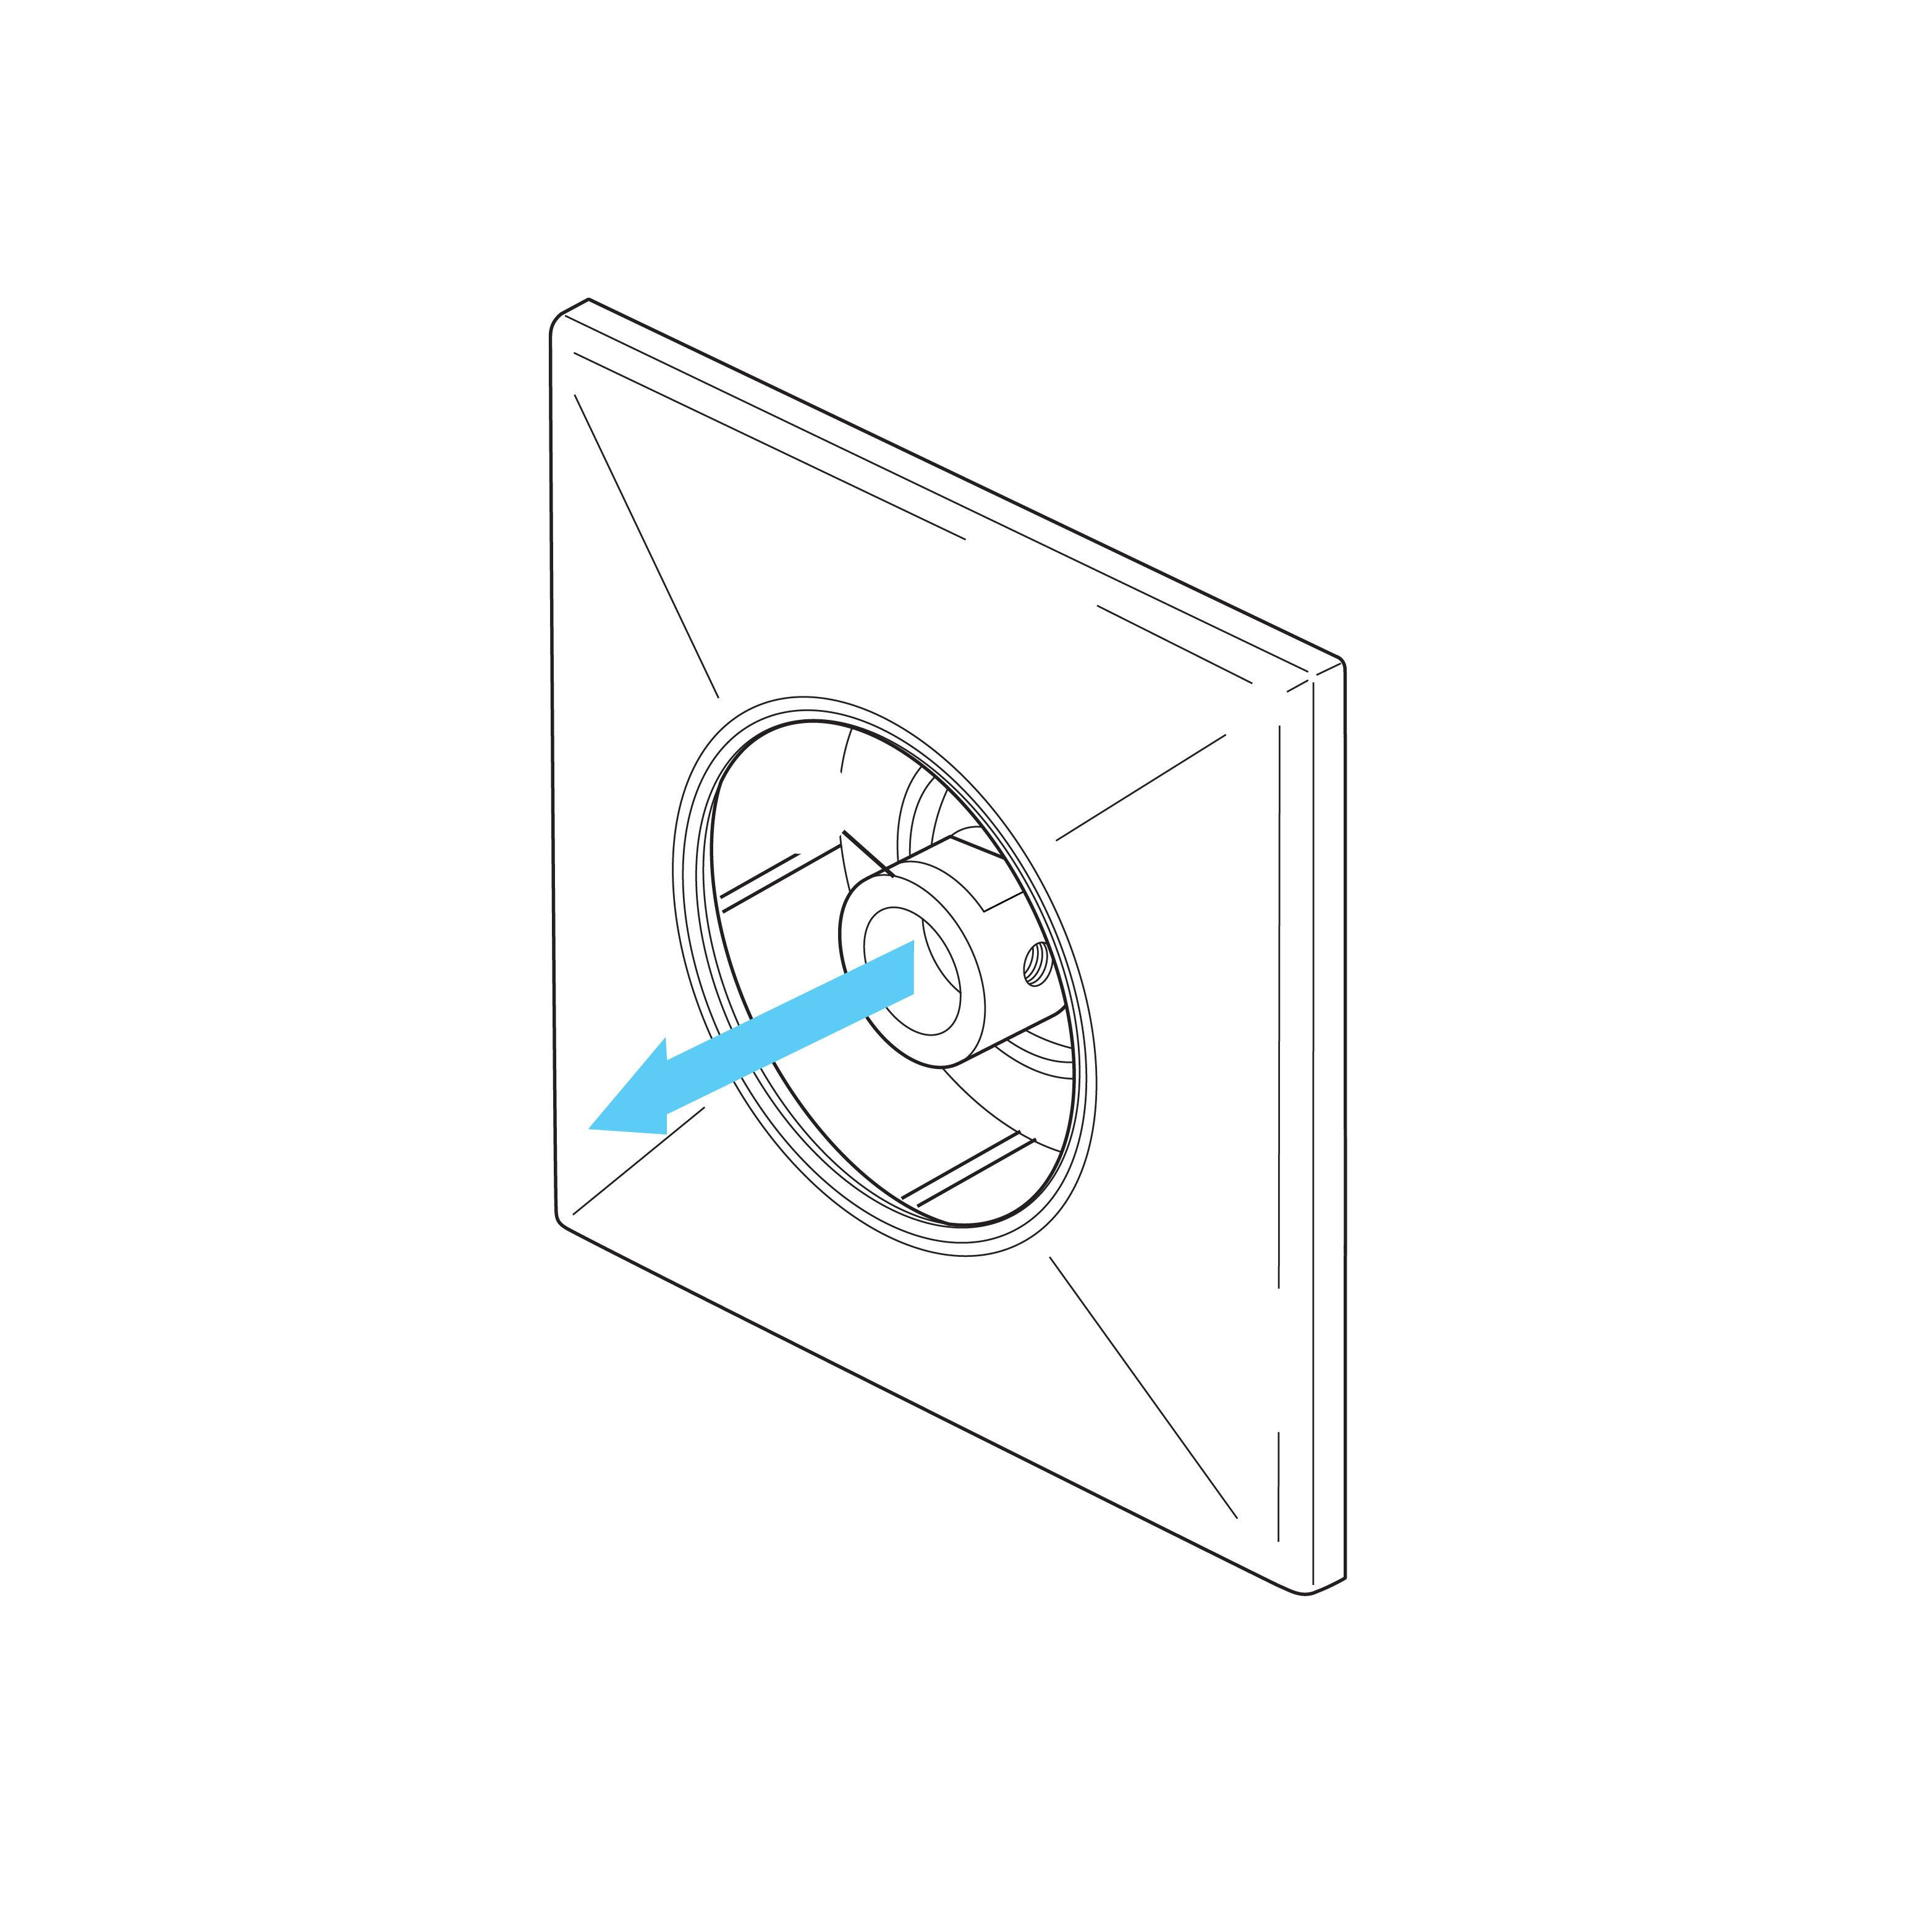
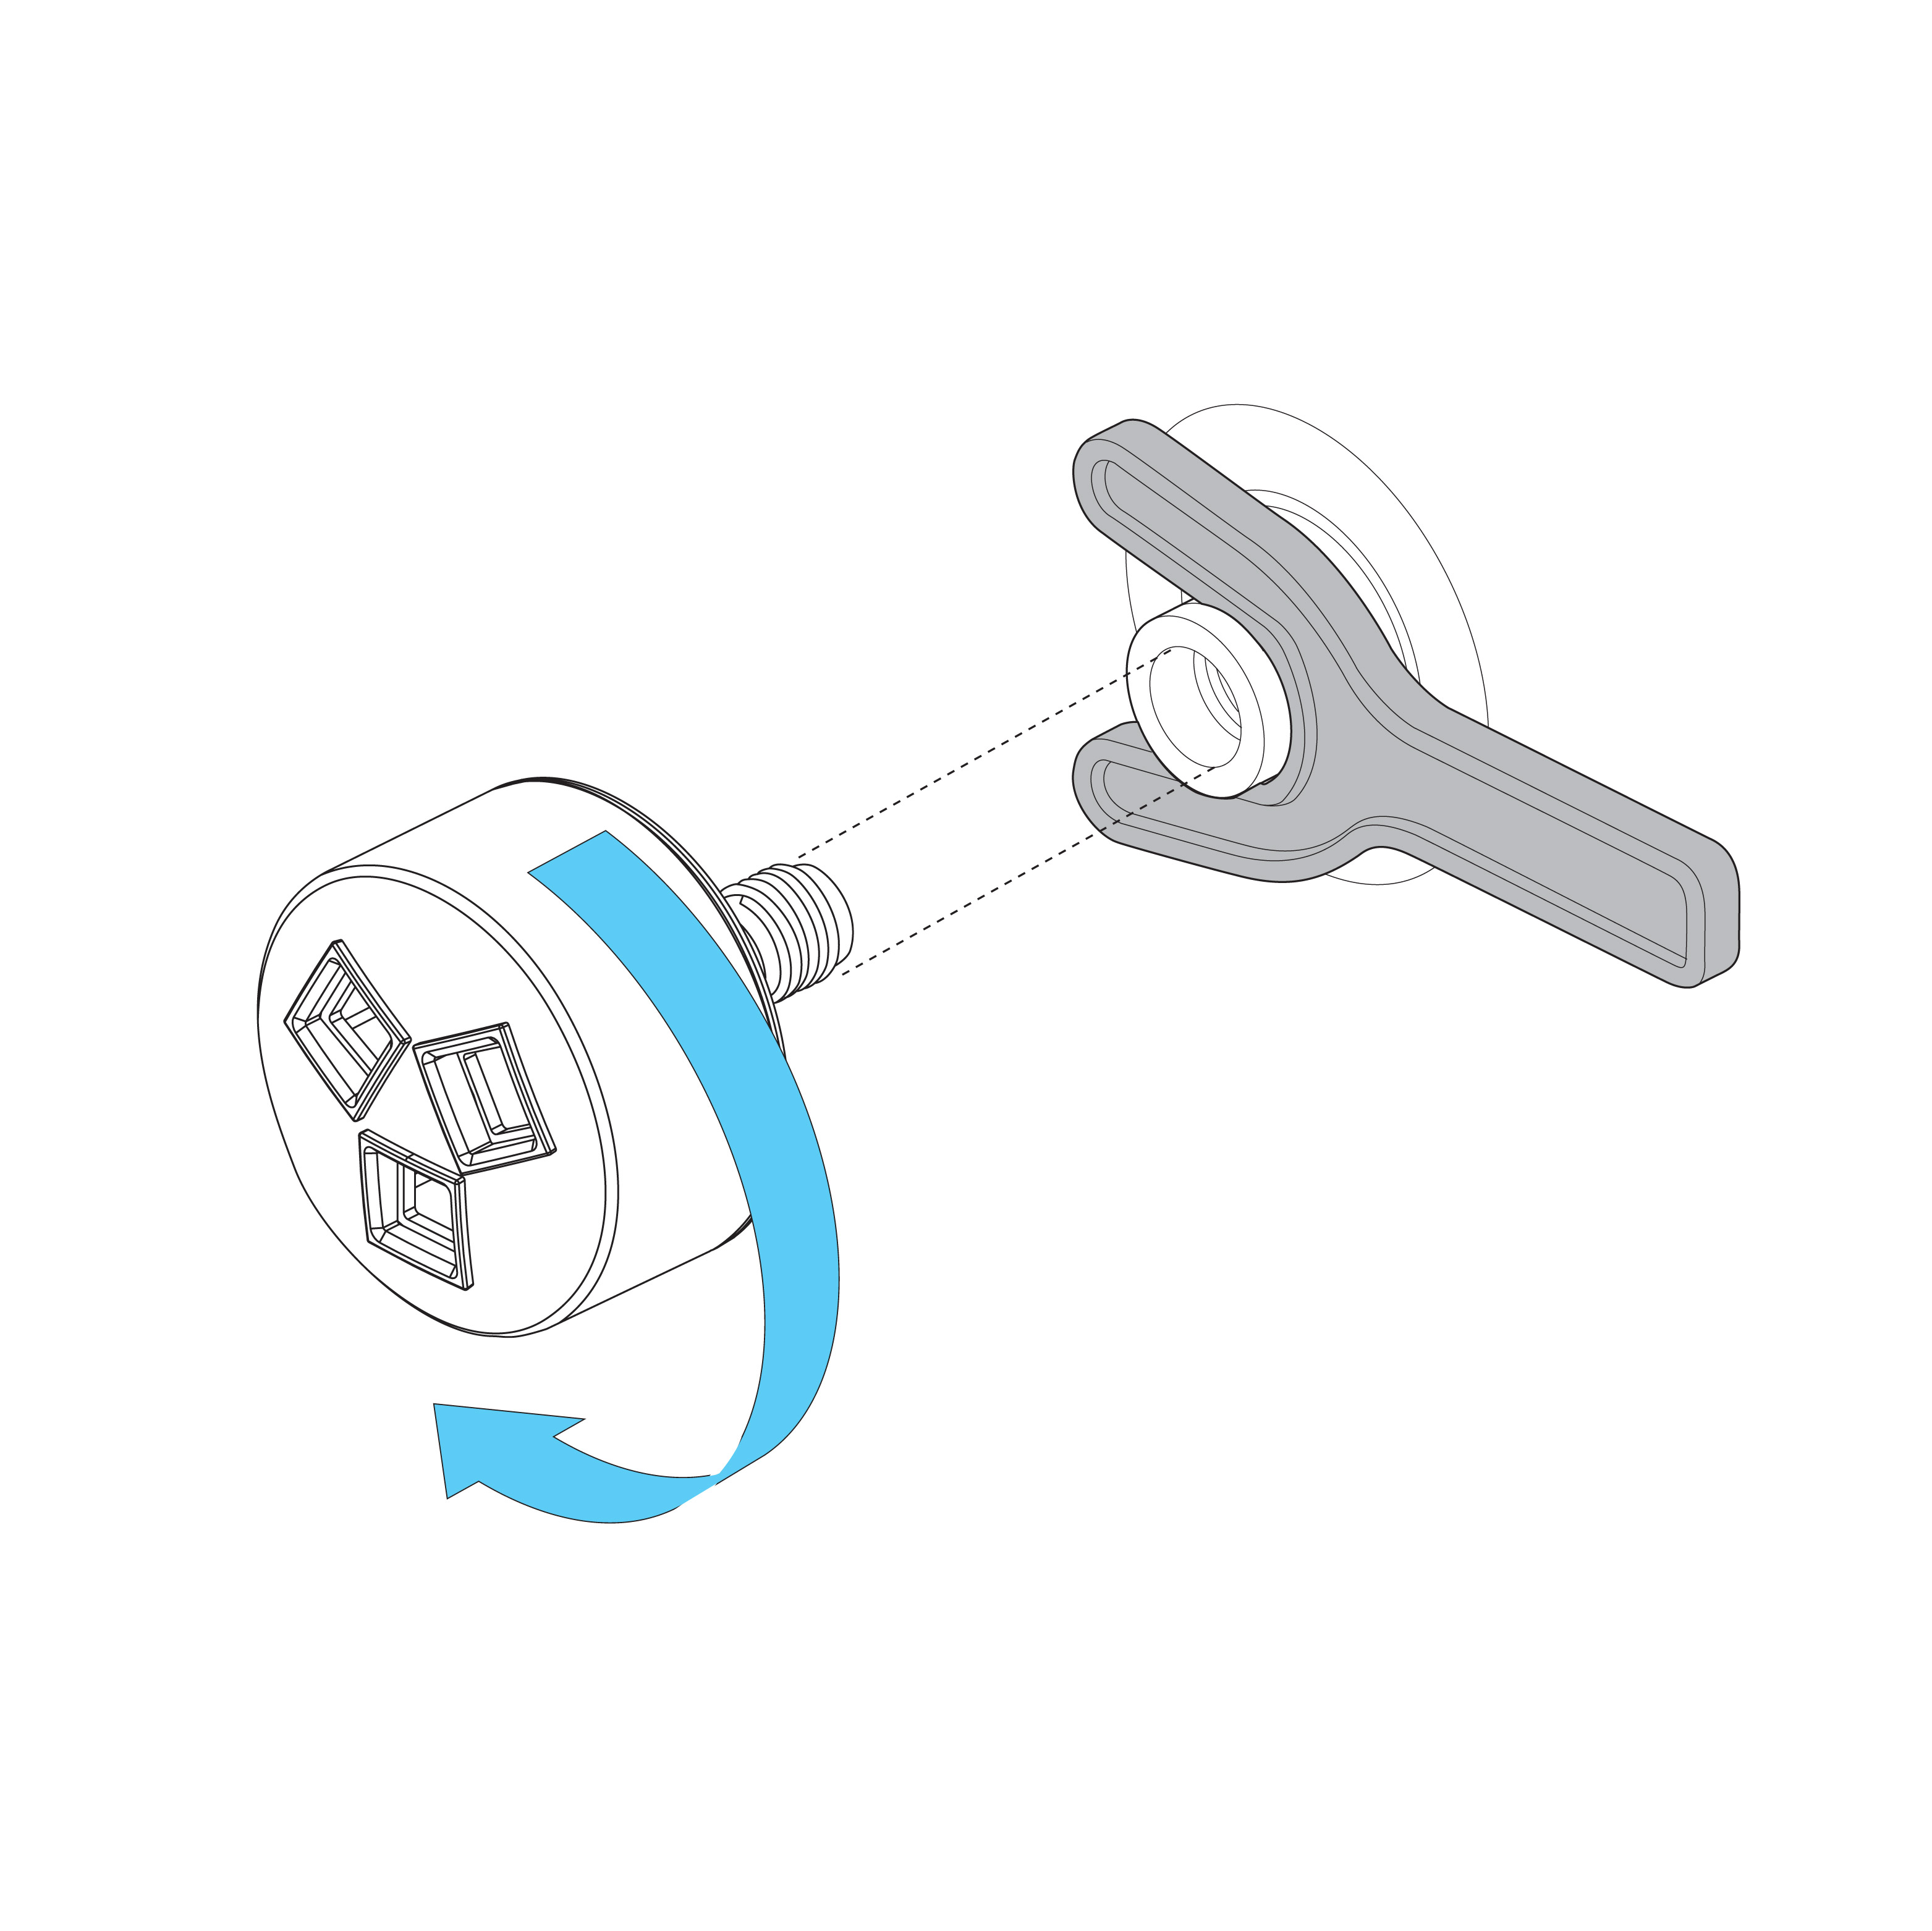
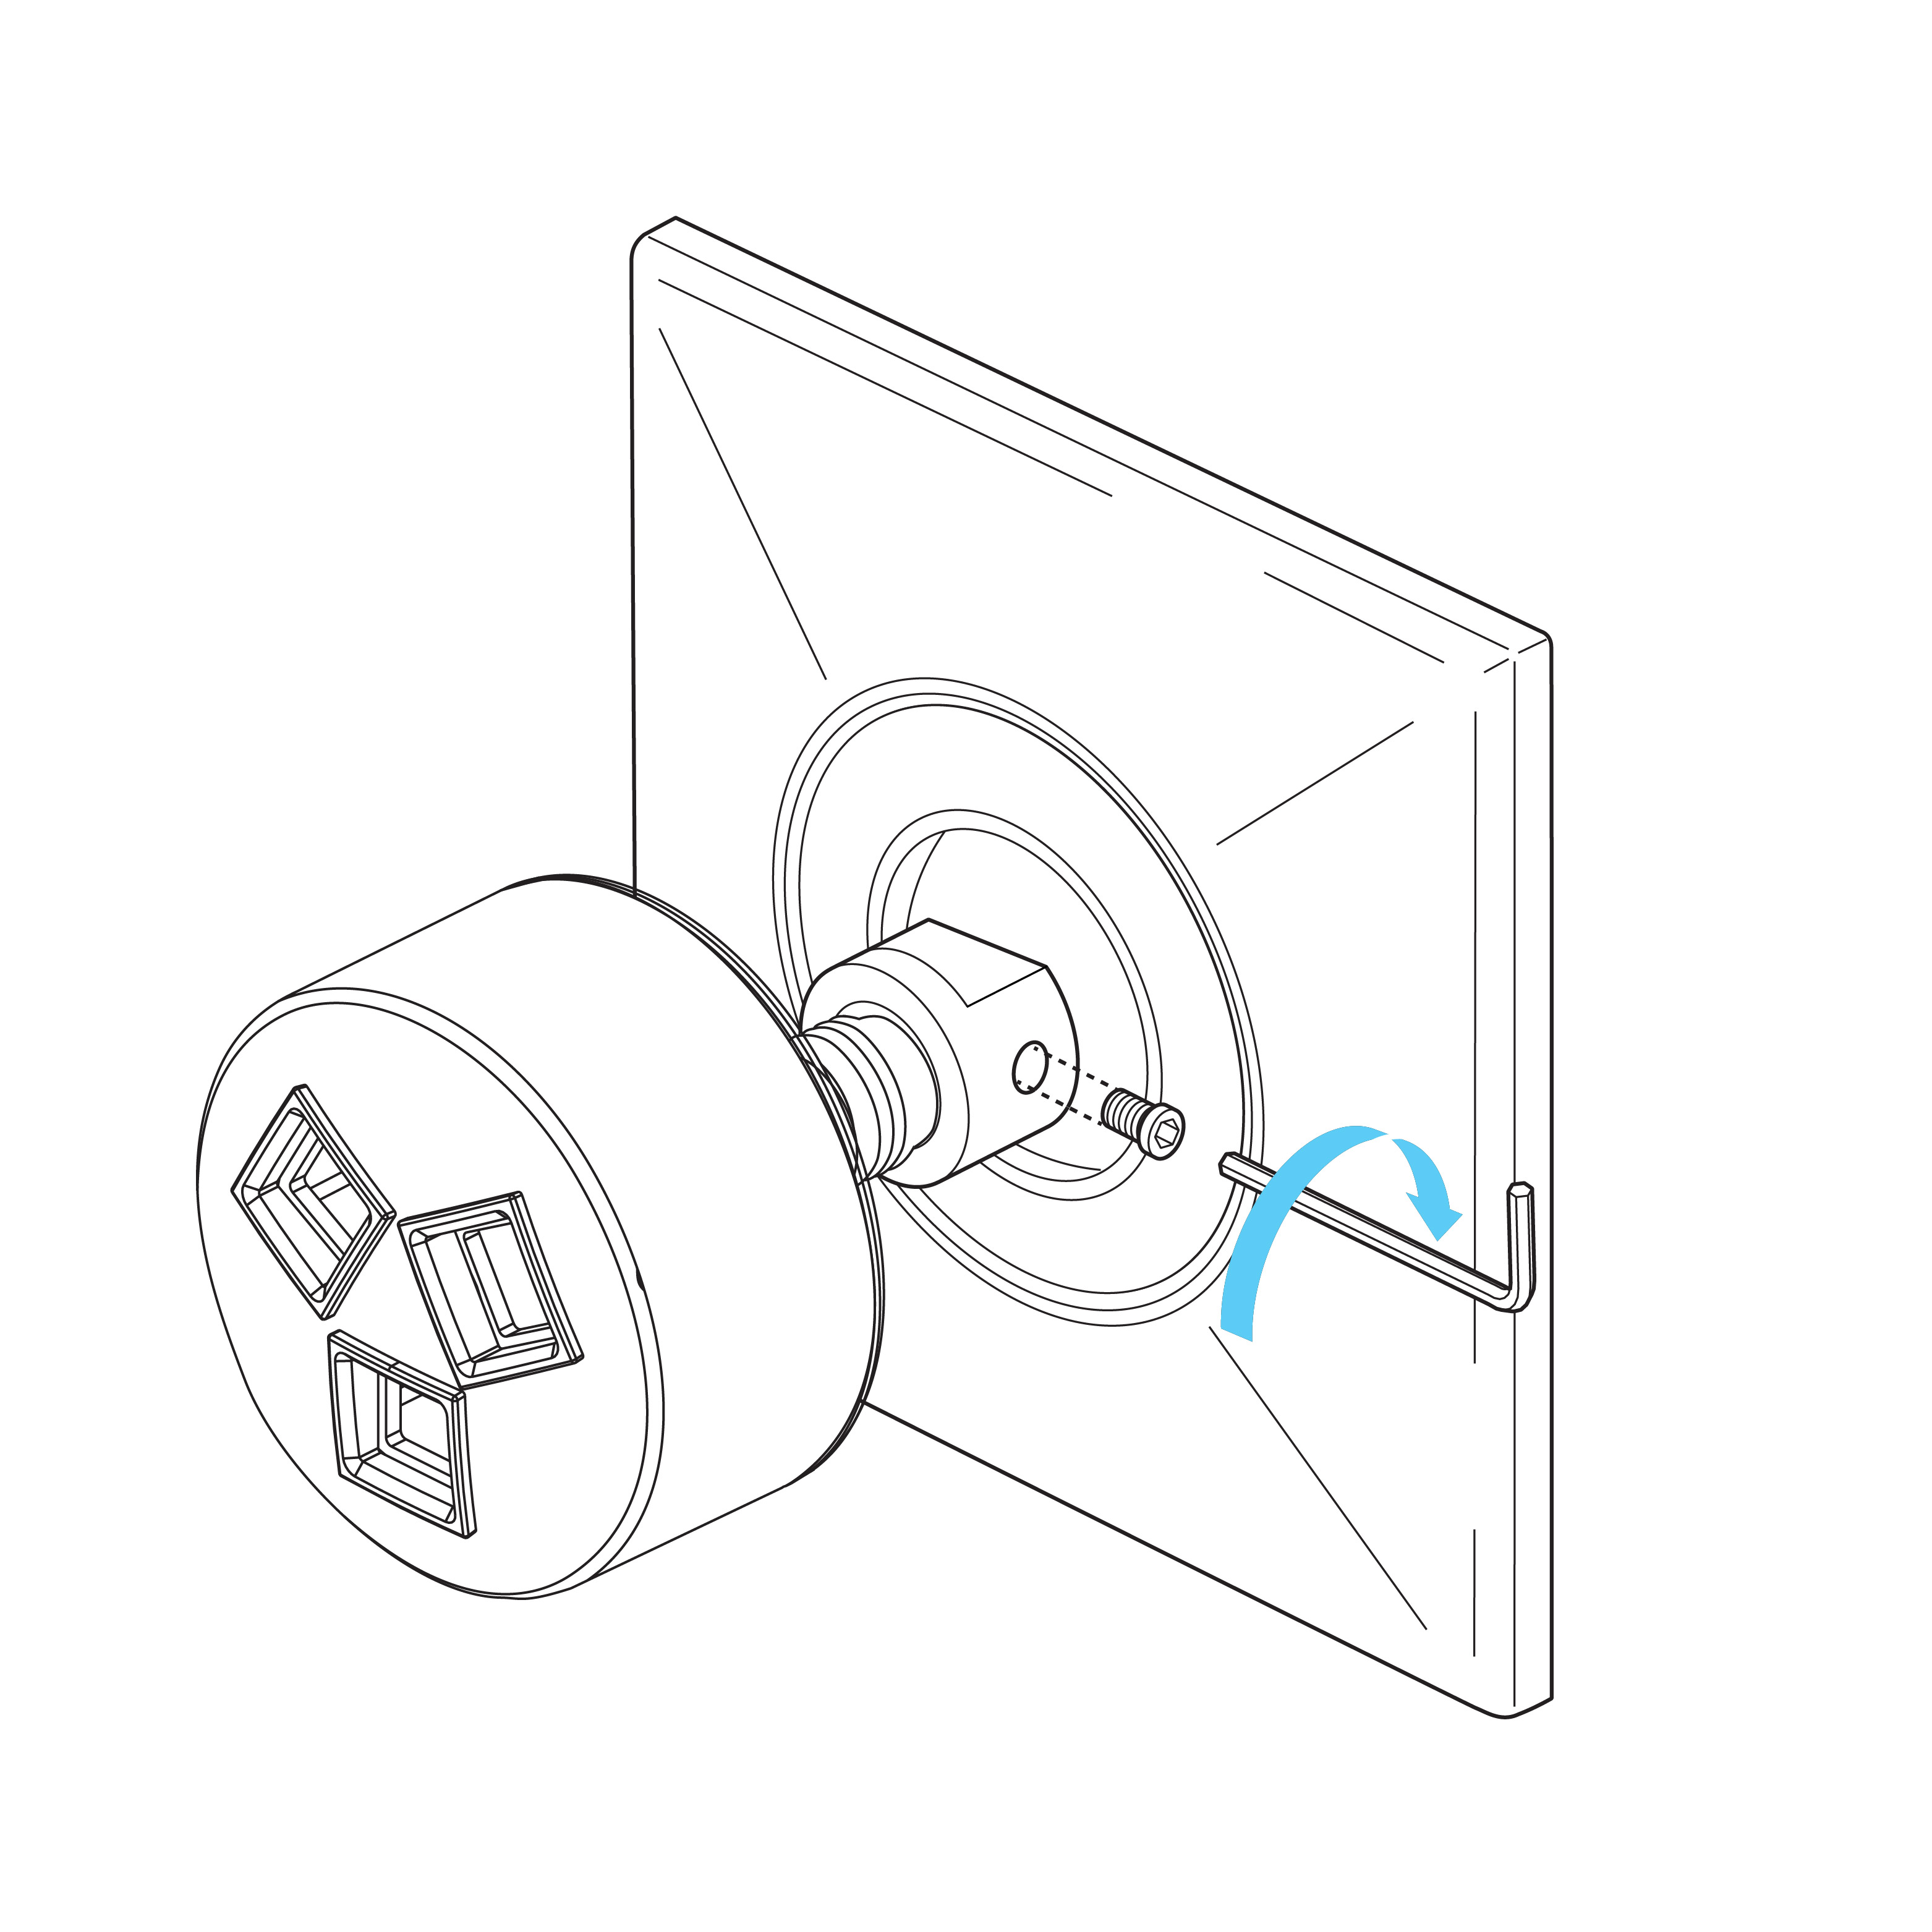
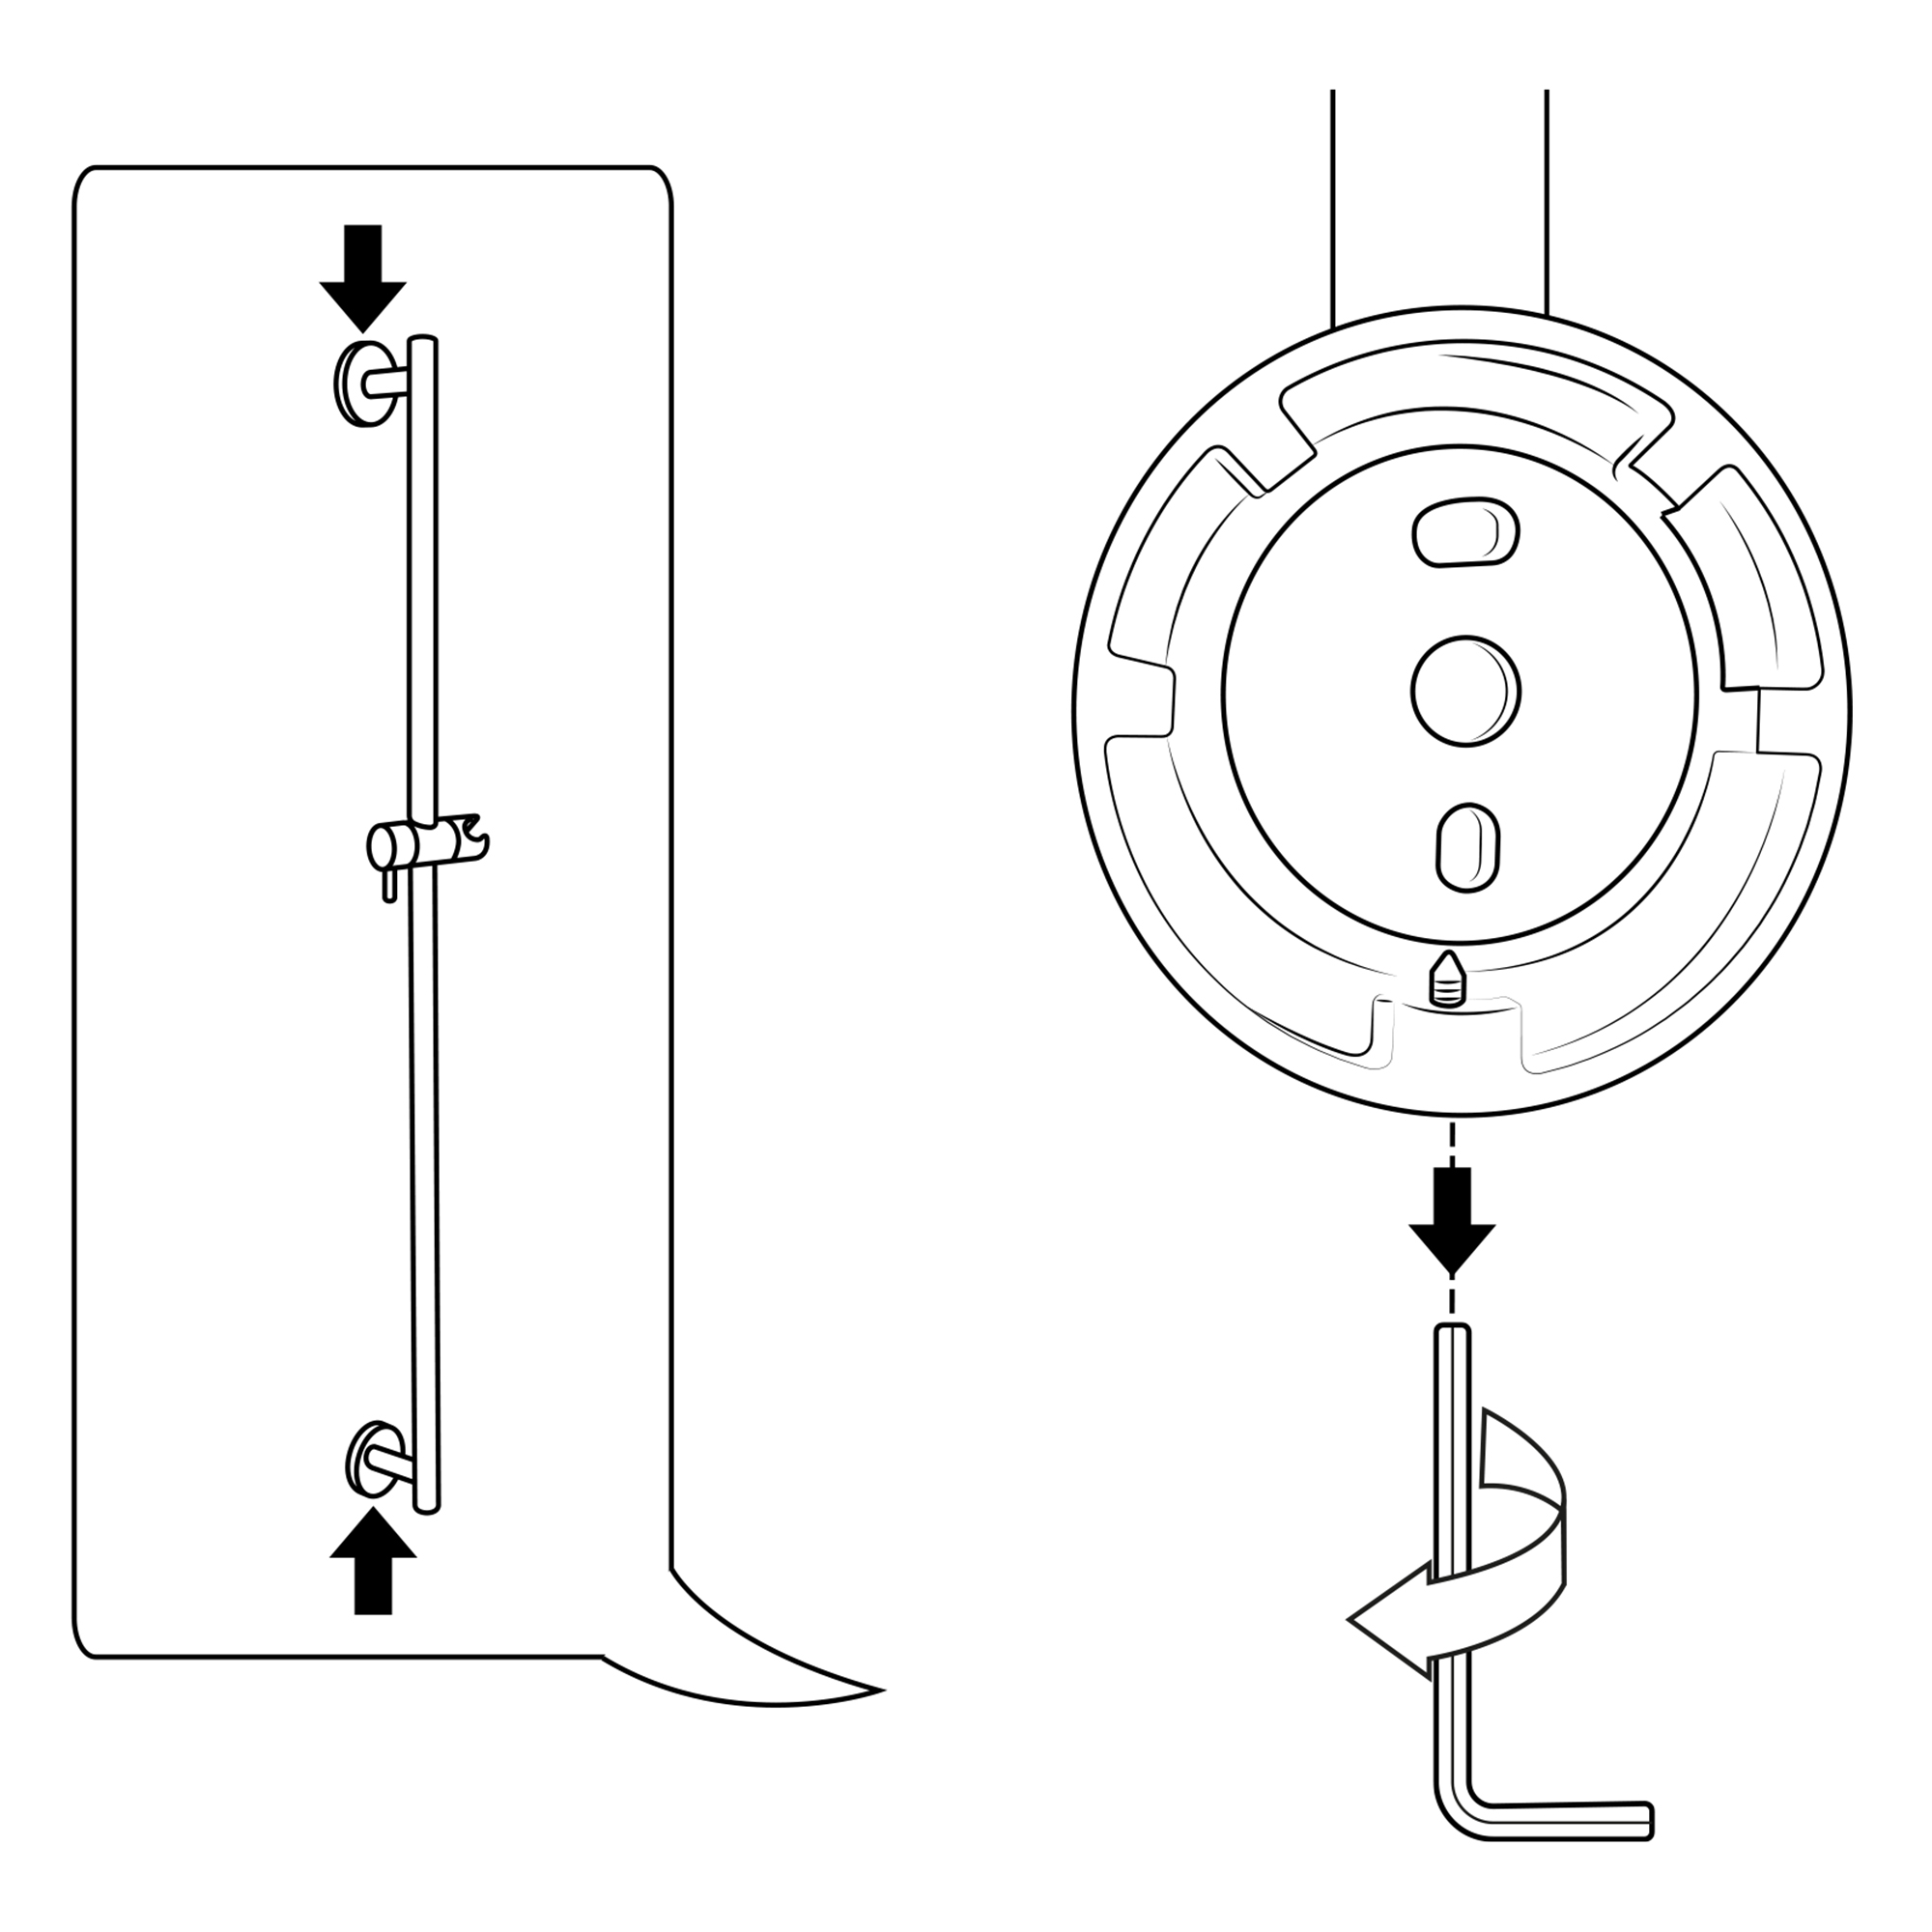
1. Remove the old shower head by using the channel lock pliers or monkey wrench. Be sure to turn the pliers counter-clockwise to loosen the old shower head. (Tip: Right is tight, left is loose.)
2. Remove the shower arm by turning it by hand counter-clockwise.Make sure you remember to apply putty or tape to the new arm. (Tip: Using teflon tape is less messy)
3. Apply teflon tape to the threading of the shower arm by wrapping it around the threads, go all the way around 3 or 4 times depending on the quality of the Teflon tape.
4. Install the new shower arm by going clockwise by hand until it is tight, then put painters tape around the arm and tighten the arm with the channel lock or monkey wrench.
5. Place Teflon tape around the threads on the shower head and then place the shower head onto the shower arm by turning the shower head clockwise after the shower arm is already in the wall.
Shower Body Sprays Installation Instructions
Step 1:
Step 2:
Body Sprays installation
Step 3:
Step 4:
Step 5:
Product Specifications:
Diameter: 1.75"
Depth: 1"
H2Okinetic: Yes
Flow Rate:1.00 gpm @ 80 psi, 3.8 L/min @ 550 kPa
Total Height:89 mm (3-1/2 inches)
1. Remove the test cap/plaster guard from the previously installed rough body and store for future use.
2. Pull the sliding pop-out mechanism out of the previously installed trim kit model until fully extended. Note: Depending on your trim kit and spray head model, the actual escutcheon and spray face may differ visually from instructional views.
3. Apply wrench to flats on pop-out mechanism, as shown, to stop rotation during spray head installation. Note: The wrench will only properly fit the flats in one direction. Insert and thread spray head into pop-out mechanism until threading stops. Note: Take care not to over tighten the spray head. Store wrench for future use.
4. Secure spray head with set screw using hex wrench. 5. Press the spray head back into the pop-out mechanism until flush with trim kit escutcheon.
Hand Held Shower Installation Instructions
Step 1: (Hand Shower Slide Rail Installation)
Step 2:
hand shower
Hand-Held Shower Installation Instructions
Step 3:
Step 4:
Hand-Held Shower Installation Instructions
Step 5:
Step 6:
Hand-Held Shower Installation Instructions
Step 7:
Step 8:
Hand-Held Shower Installation Instructions
Step 9:
Step 10:
Hand-Held Shower Installation Instructions
Step 11:
Step 12:
Hand-Held Shower Installation Instructions
Step 13:
Step 14:
Hand-Held Shower Installation Instructions
Step 15: (Hand Shower Elbow Installation)
Step 16:
Hand-Held Shower Installation Instructions
Step 17:
Step 18:
Hand-Held Shower Installation Instructions
Step 19:
Step 20:
Hand-Held Shower Installation Instructions
Step 21:
Step 22:
Open the closed cover of the shower holder and take out the screws.
Drill two holes size 0.2" (6mm) on the wall according to the hole position of the shower holder
Use a hammer to break 2 plastic wall plug into two holes. Tighten the screws with the plastic wall plug and locking with the shower holder.
Then install the closed cover
Connect the shower hose with the water outlet connection part and hand shower. Plug the hand shower in the shower holder.
Shower Mixer Installation Instructions
shower mixer
shower mixer
Step 1:
mixer
Step 2:
shower mixer
shower mixer
Step 3:
Step 4:
shower mixer
shower mixer
Step 5:
mixer
Step 6:
shower mixer
shower mixer
Step 7:
1) Fix the shower valve into the wall with screws. Use a level to ensure that the valve is straight and level. (Important: Flush the water supply pipes to remove any dirt and debris before installing the valve body)
2) Wrap Teflon tape around the pipe thread. Connect hot and cold water supply lines and all the in-wall pipes (not included) as desired to the valve. Turn on the water supply and open the cartridge to check for leaks. Then, put on the protective cover.
3) Remove the protective cover when the wall finished wall is completed. Install escutcheon onto the shower valve and press it against the finished wall. Then, install the handle and diverter knob to the valve and tighten set screws with the Allen key and put on the indication button.
Function: Check connections for leaks and check function of fitting. Flow is diverted automatically from shower outlet to bath inlet when the fitting is closed.
Hand Held Shower
Connection 1 :
Connection 2 :
Bravat Brushed Gold Wall Mounted Round Rainfall Shower Set With Valve Mixer 3-Way Concealed And Four Round Body Jets With Handheld Shower
The Bravat Brushed Gold Wall Mounted Round Shower Set With Valve Mixer 3-Way Concealed And Four Round Body Jets With Handheld Shower is one of the most trendiest finishes across decor styles in the bathroom. It has a contemporary style with a beautiful Brushed Gold finish. When it comes to new bathroom upgrades, FontanaShowers is offering shape, finishes and styles that you've looking for.