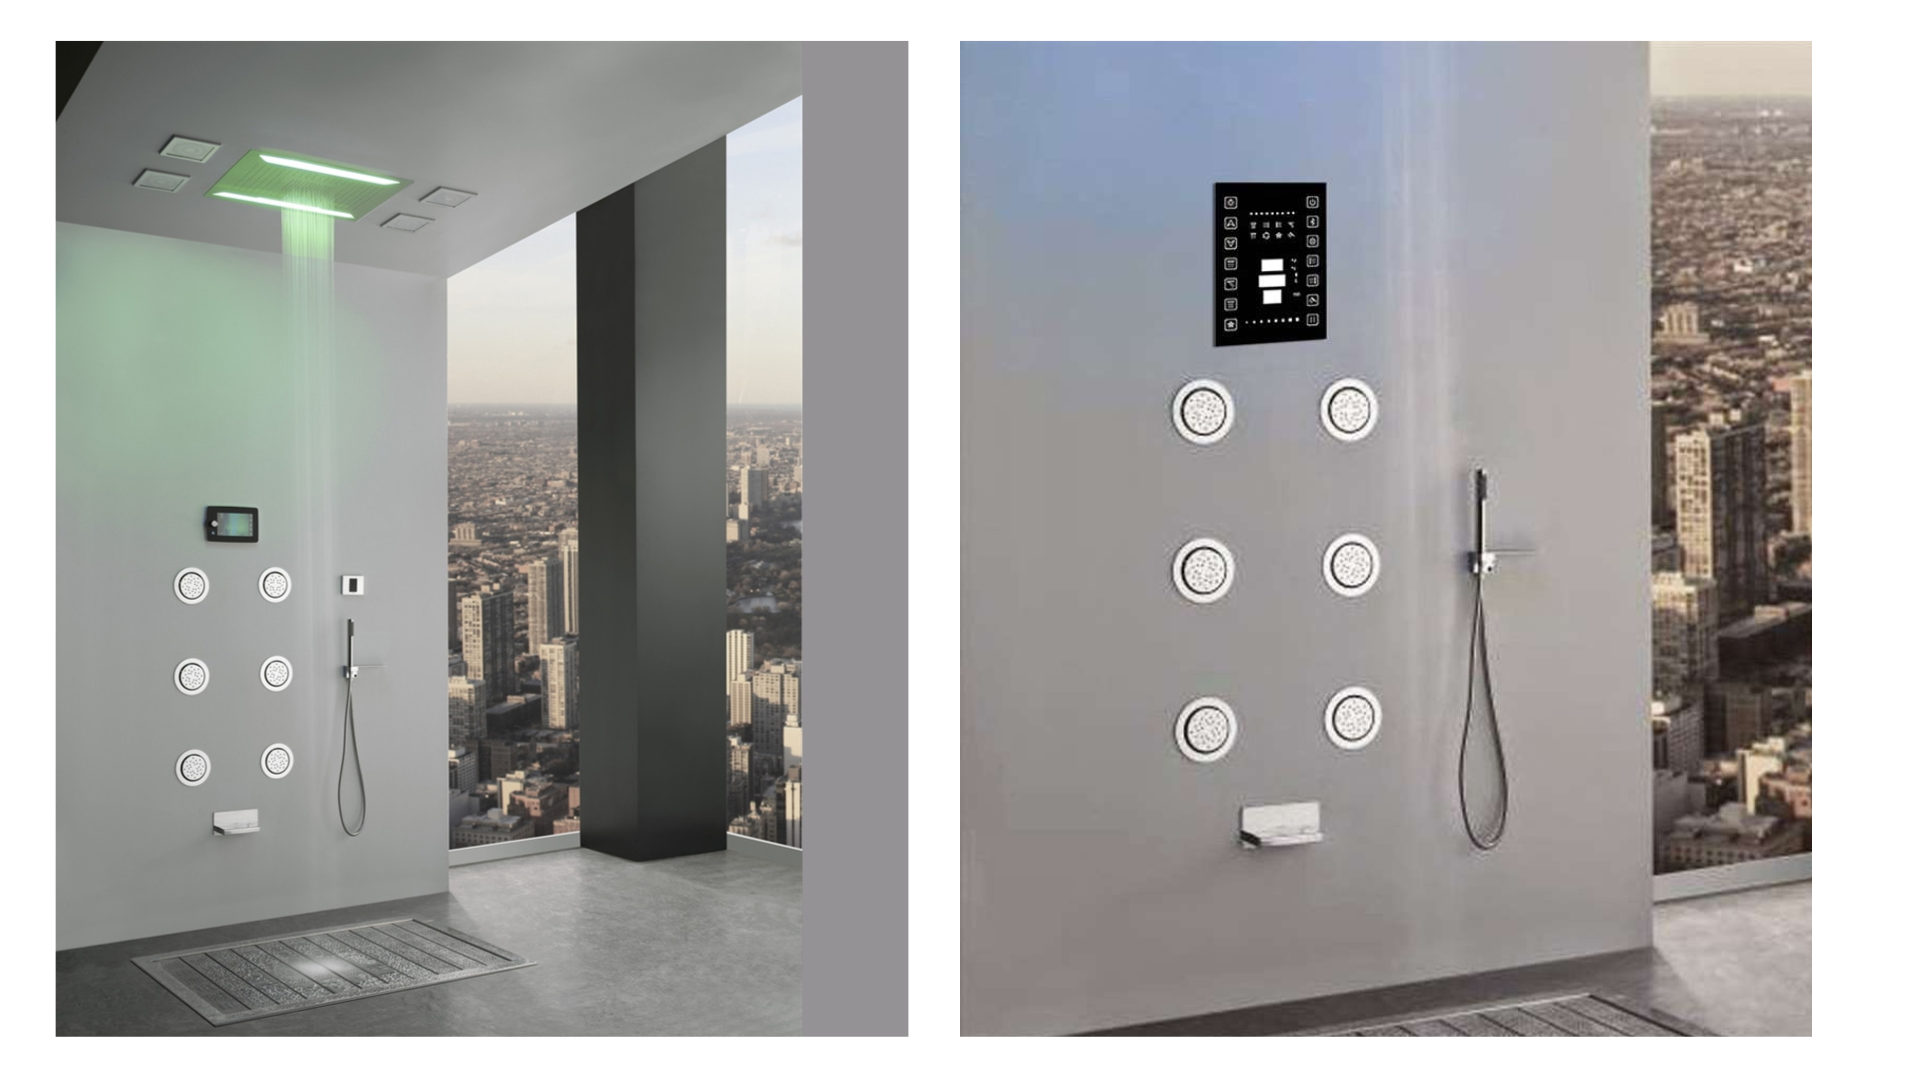
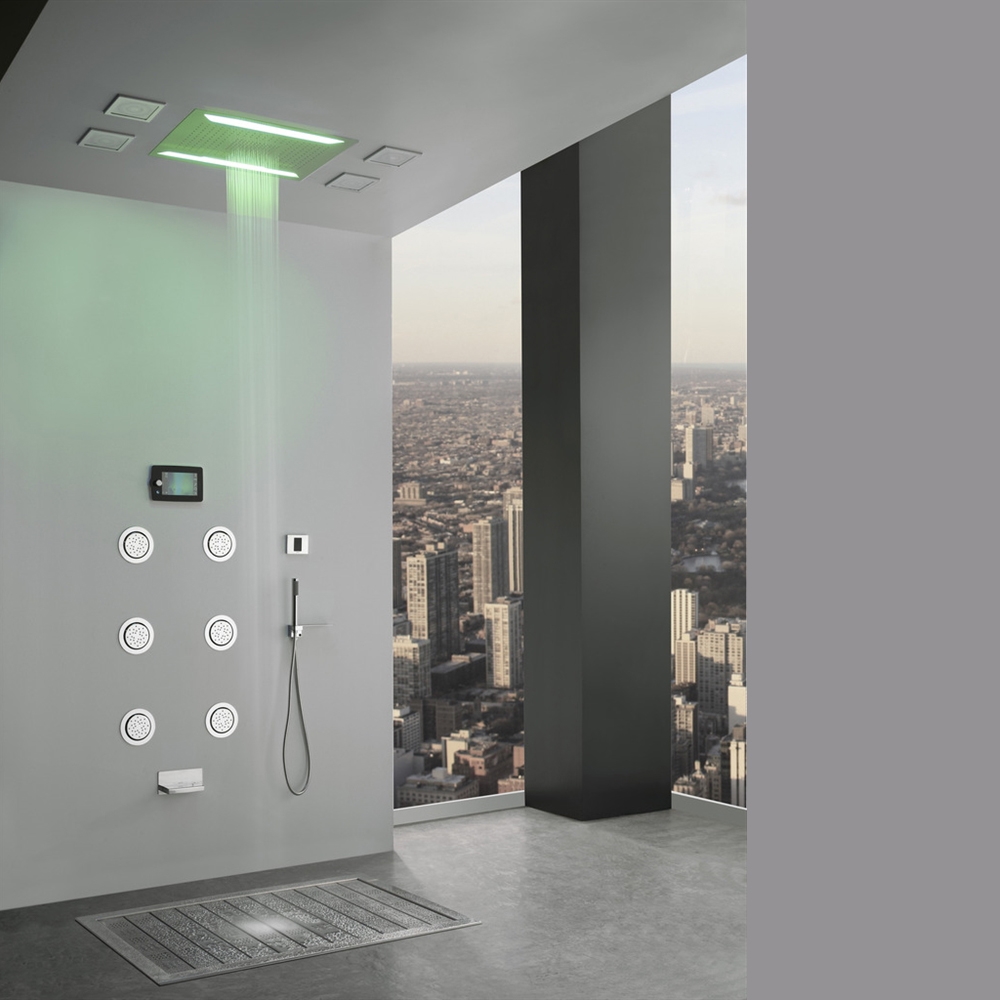
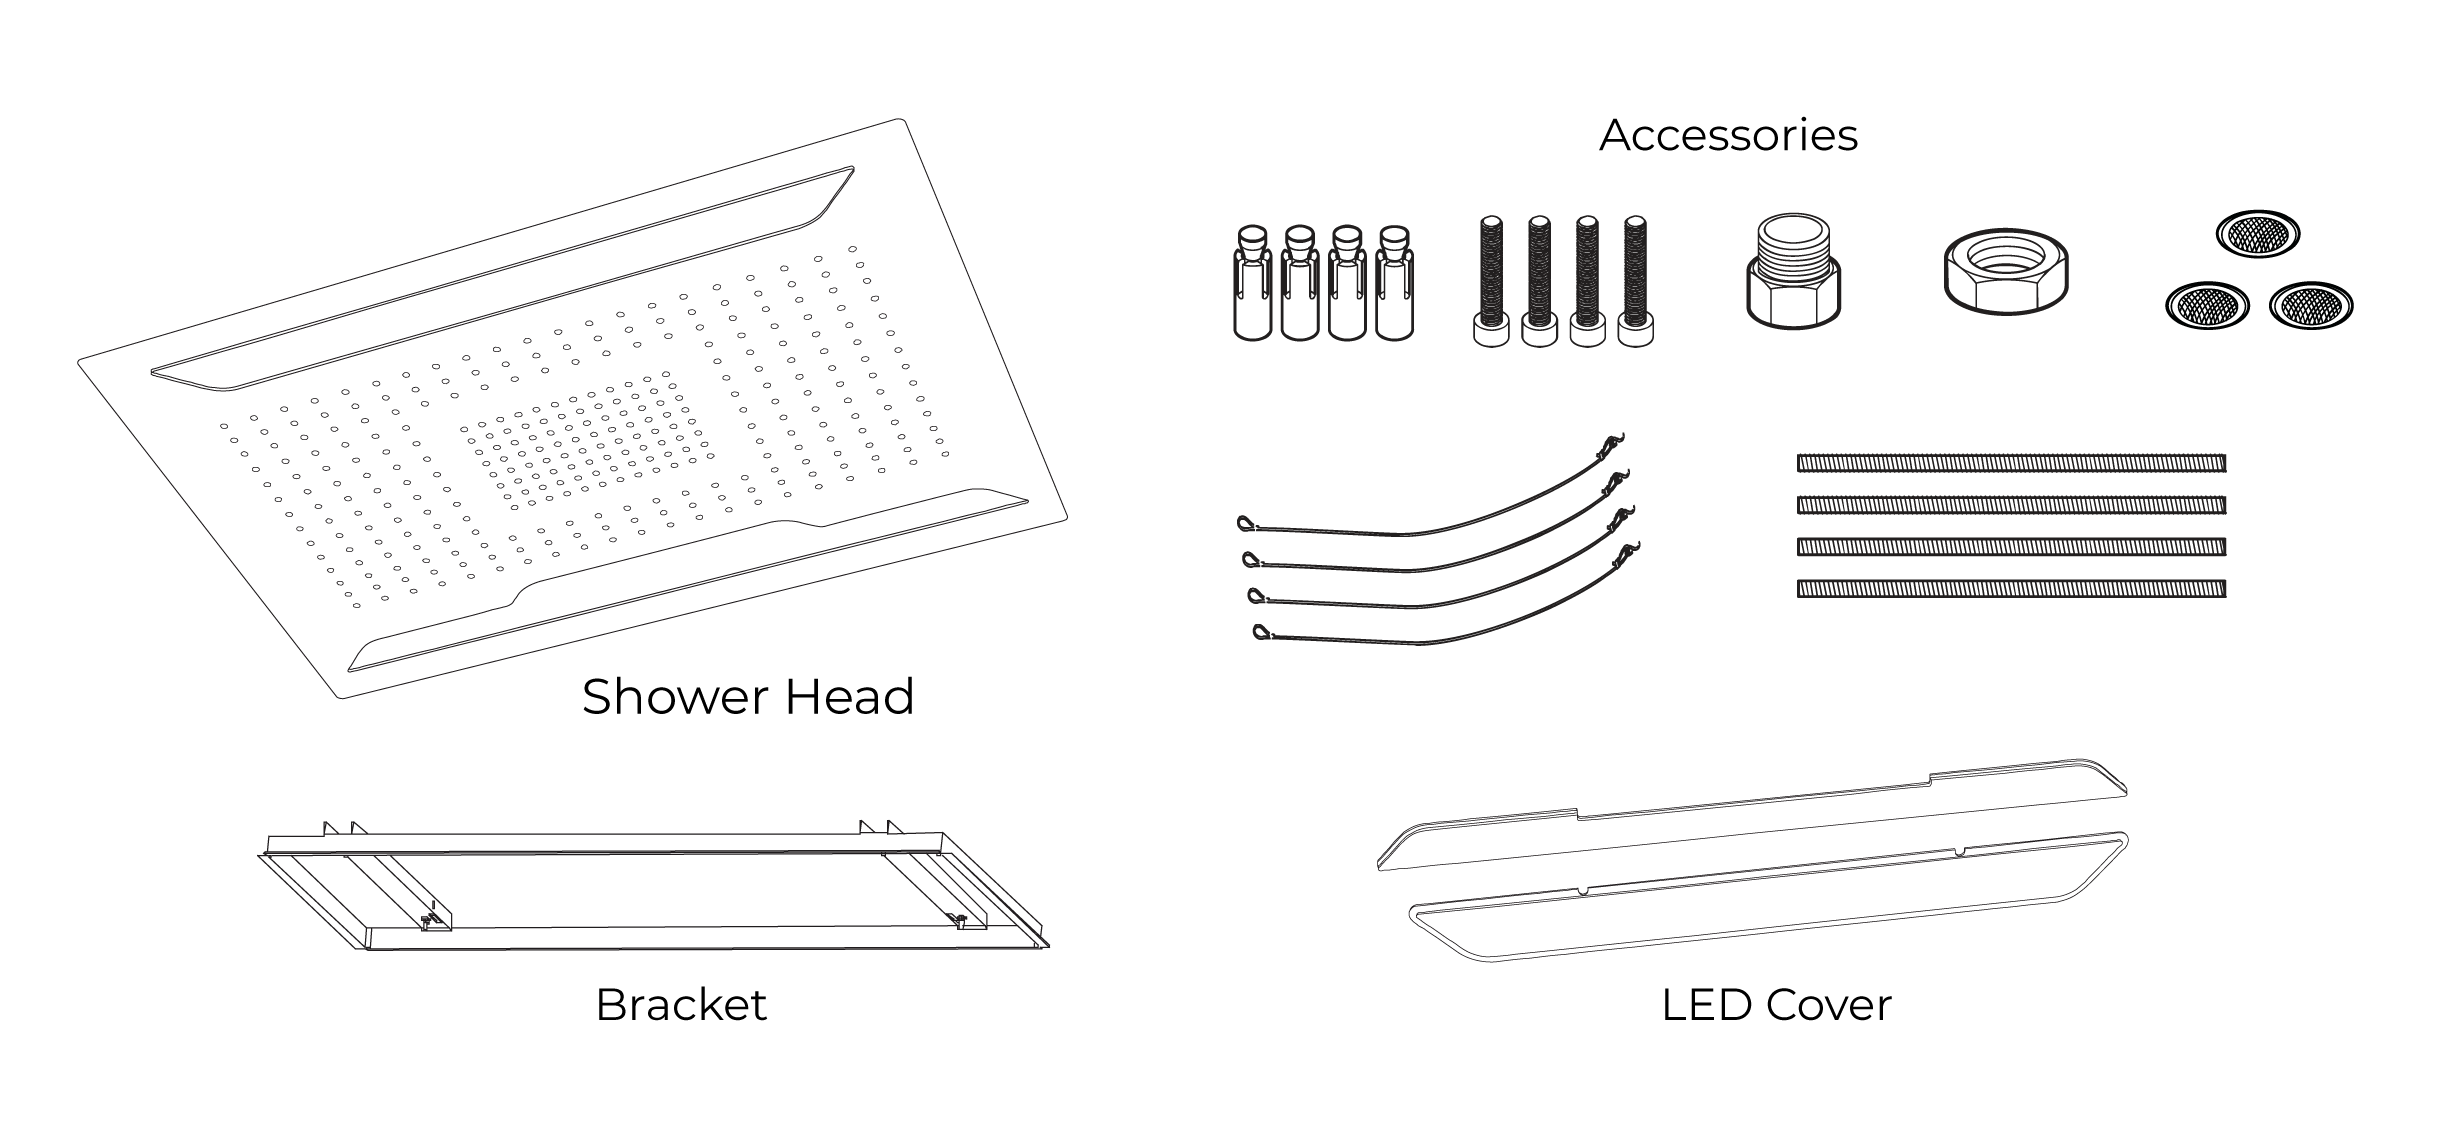
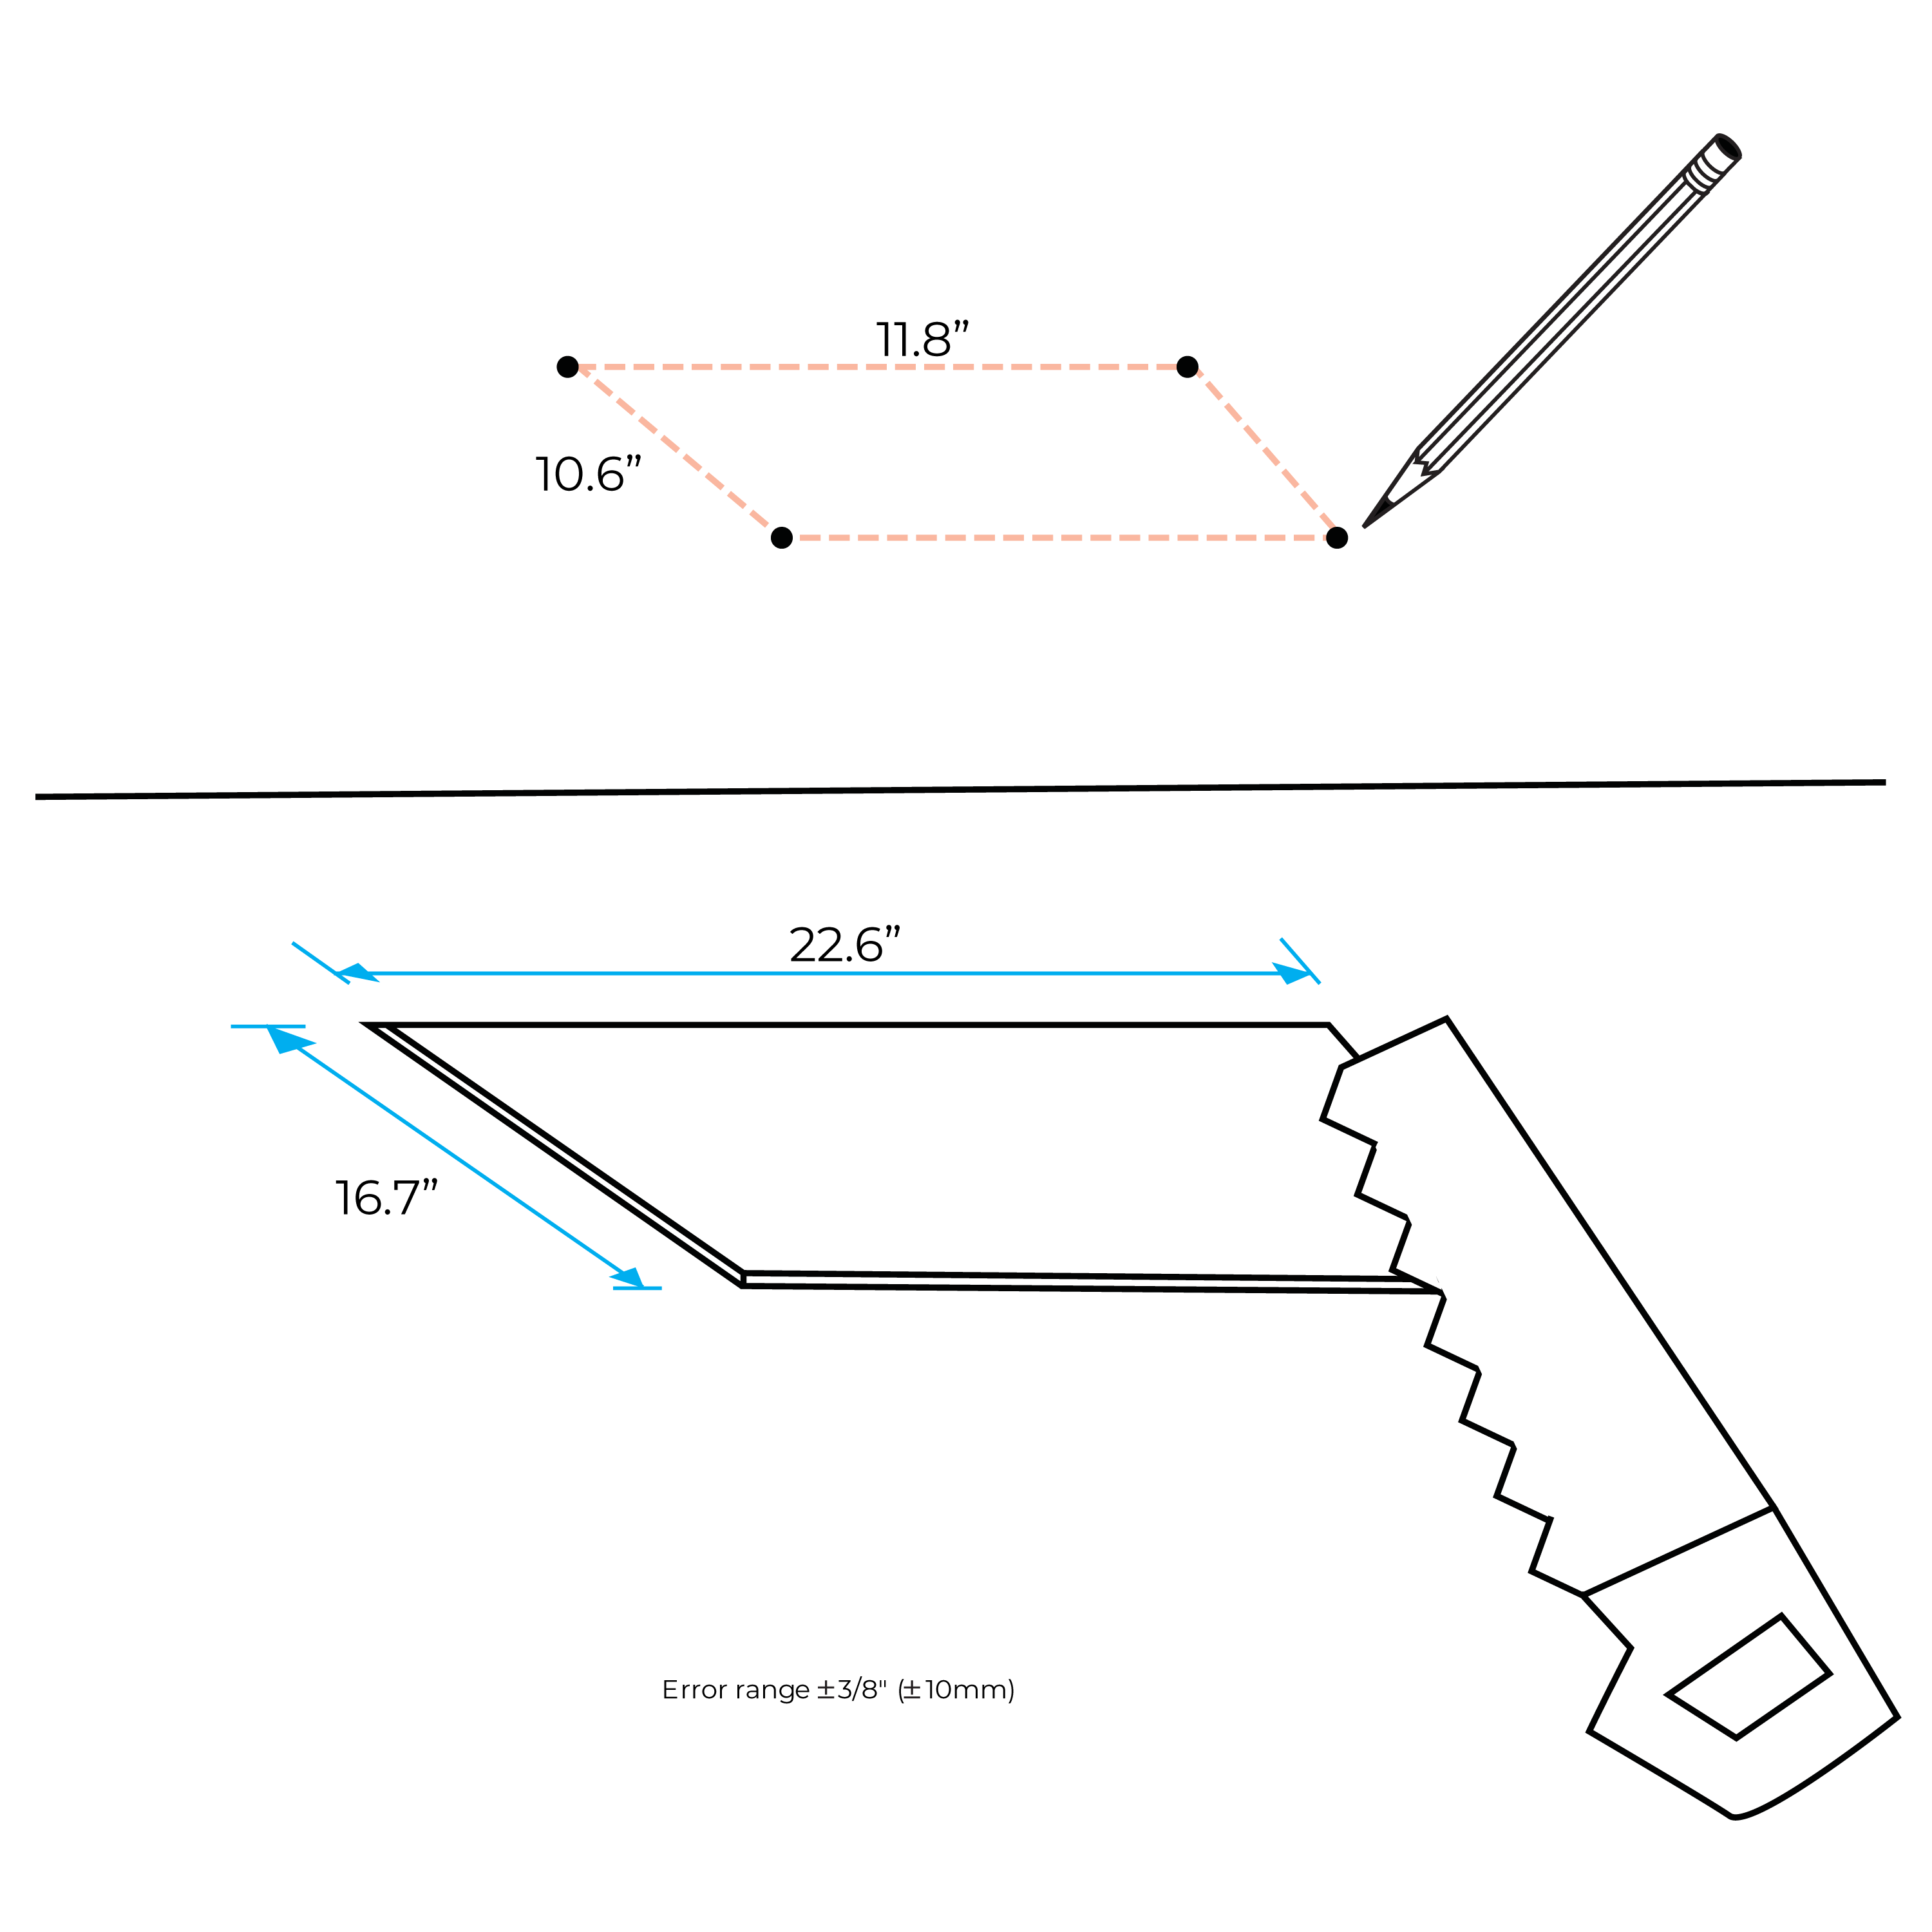
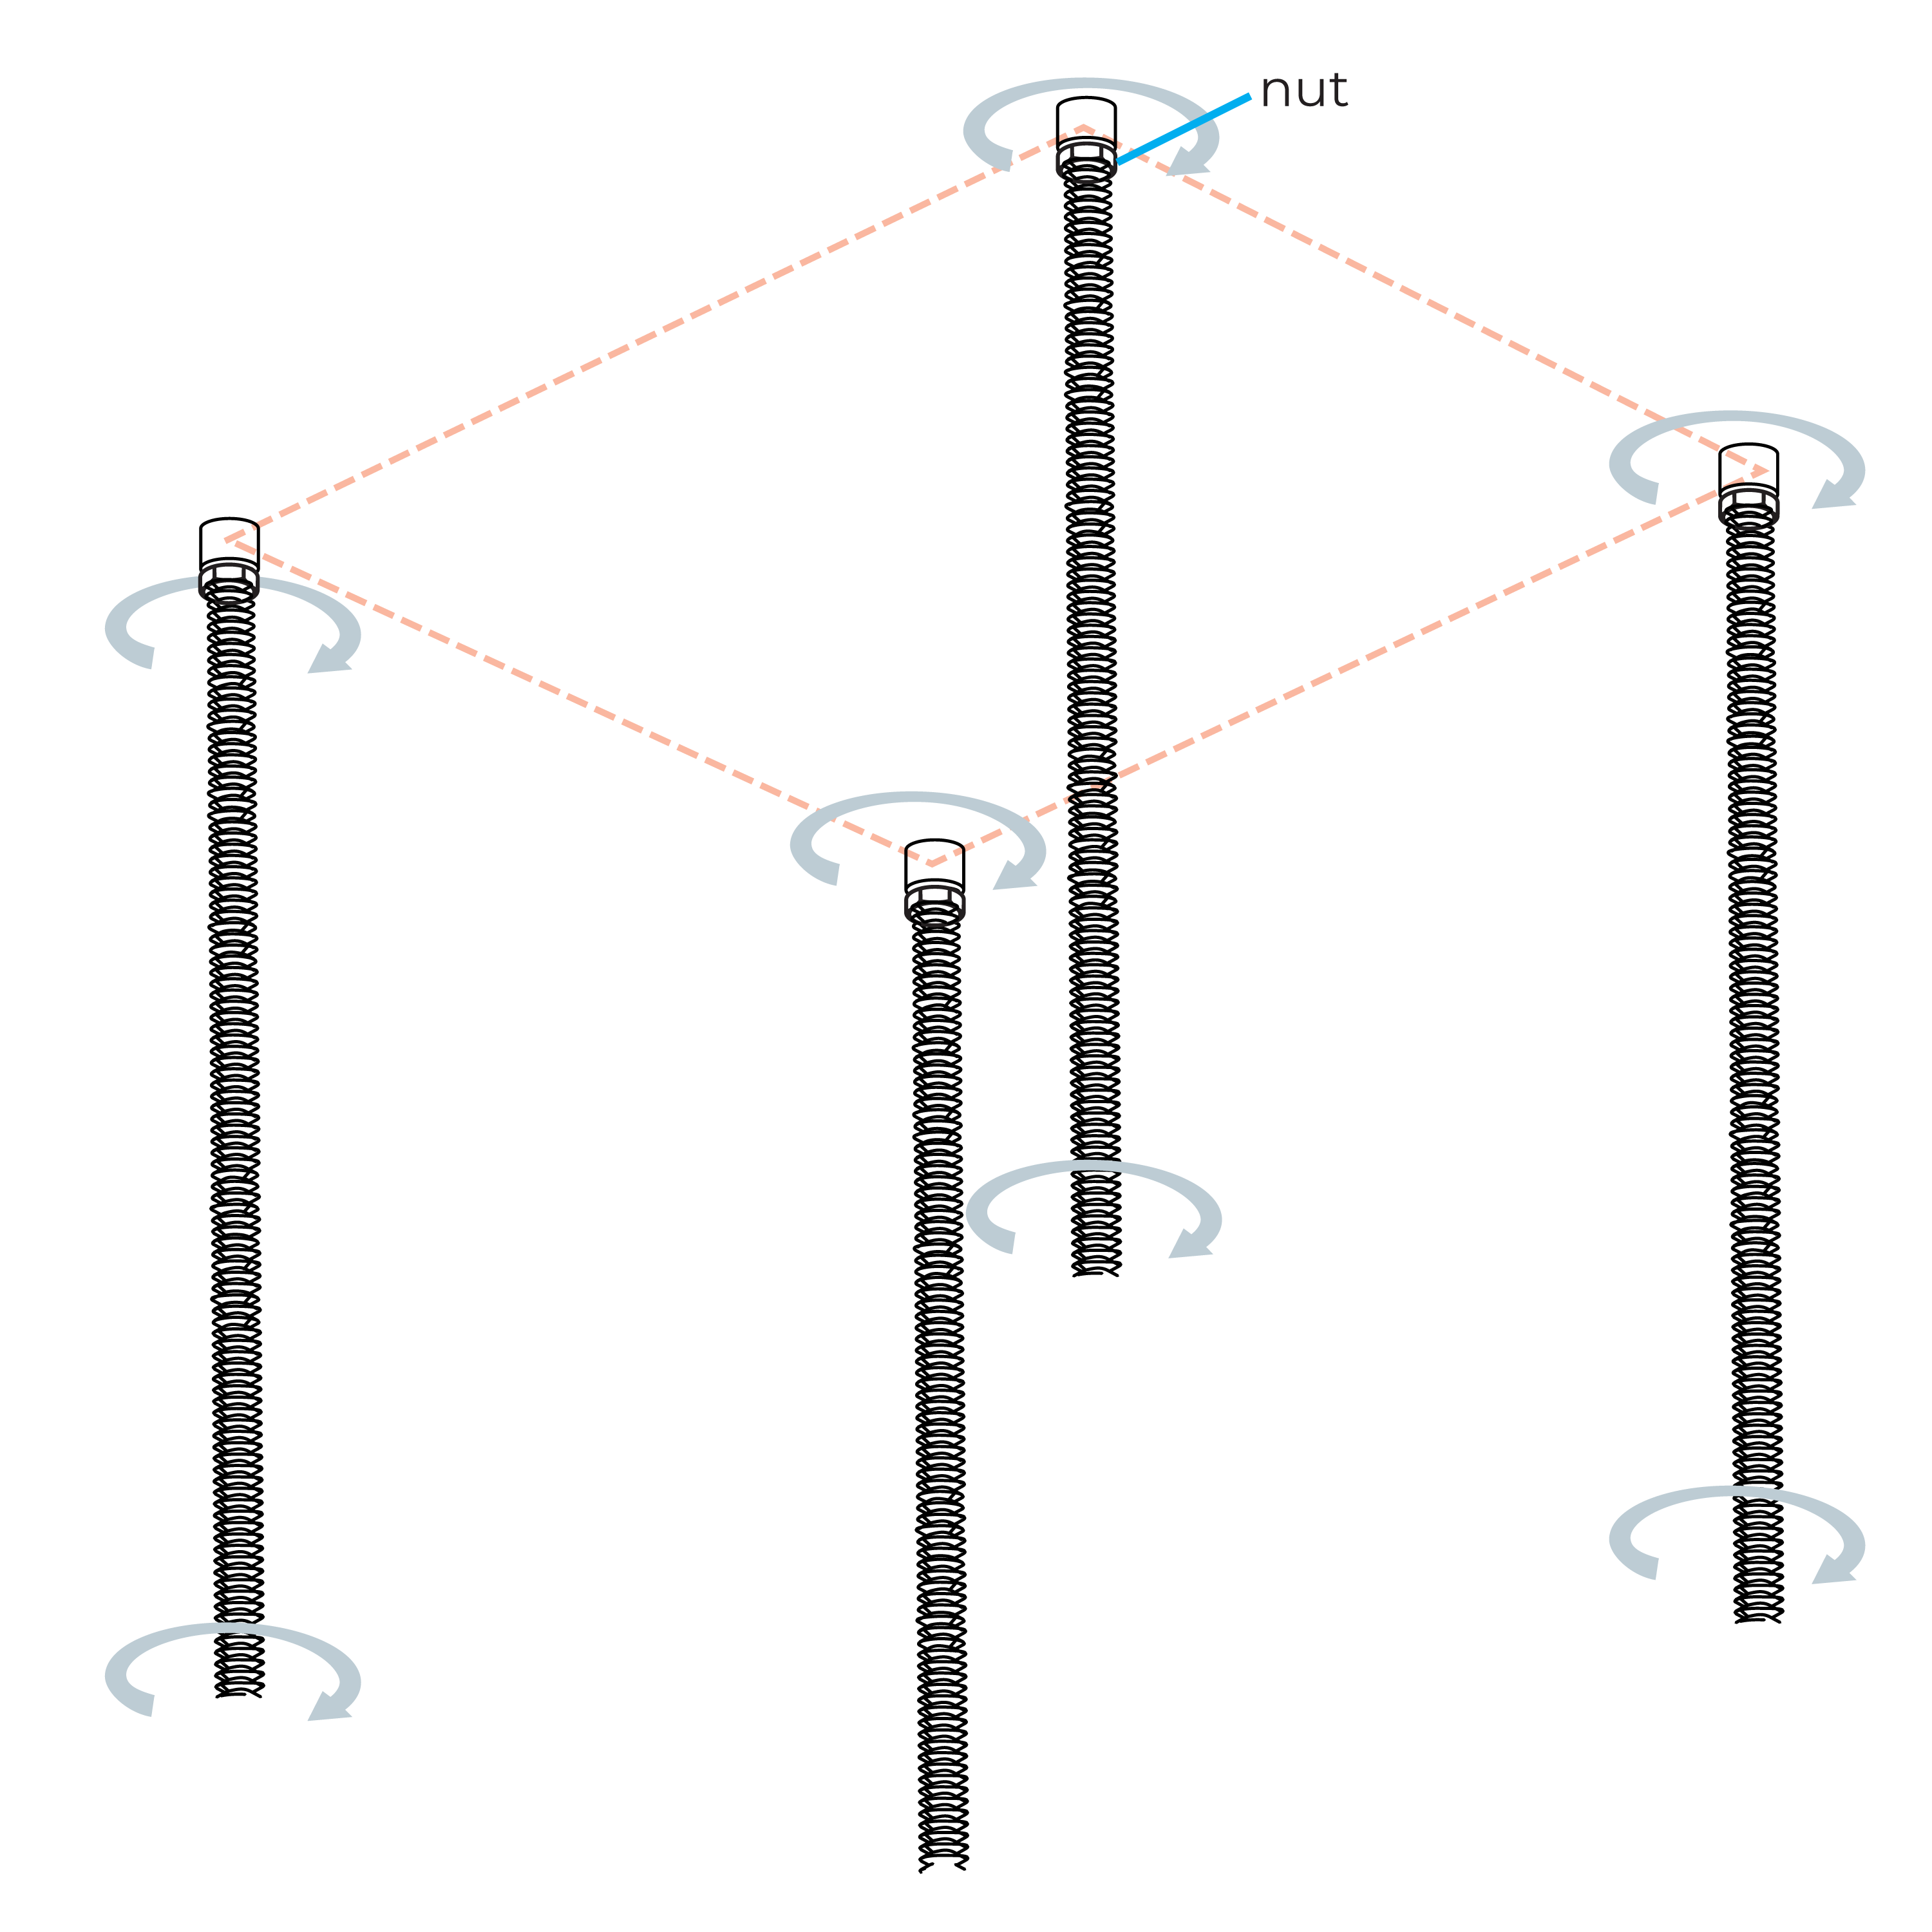
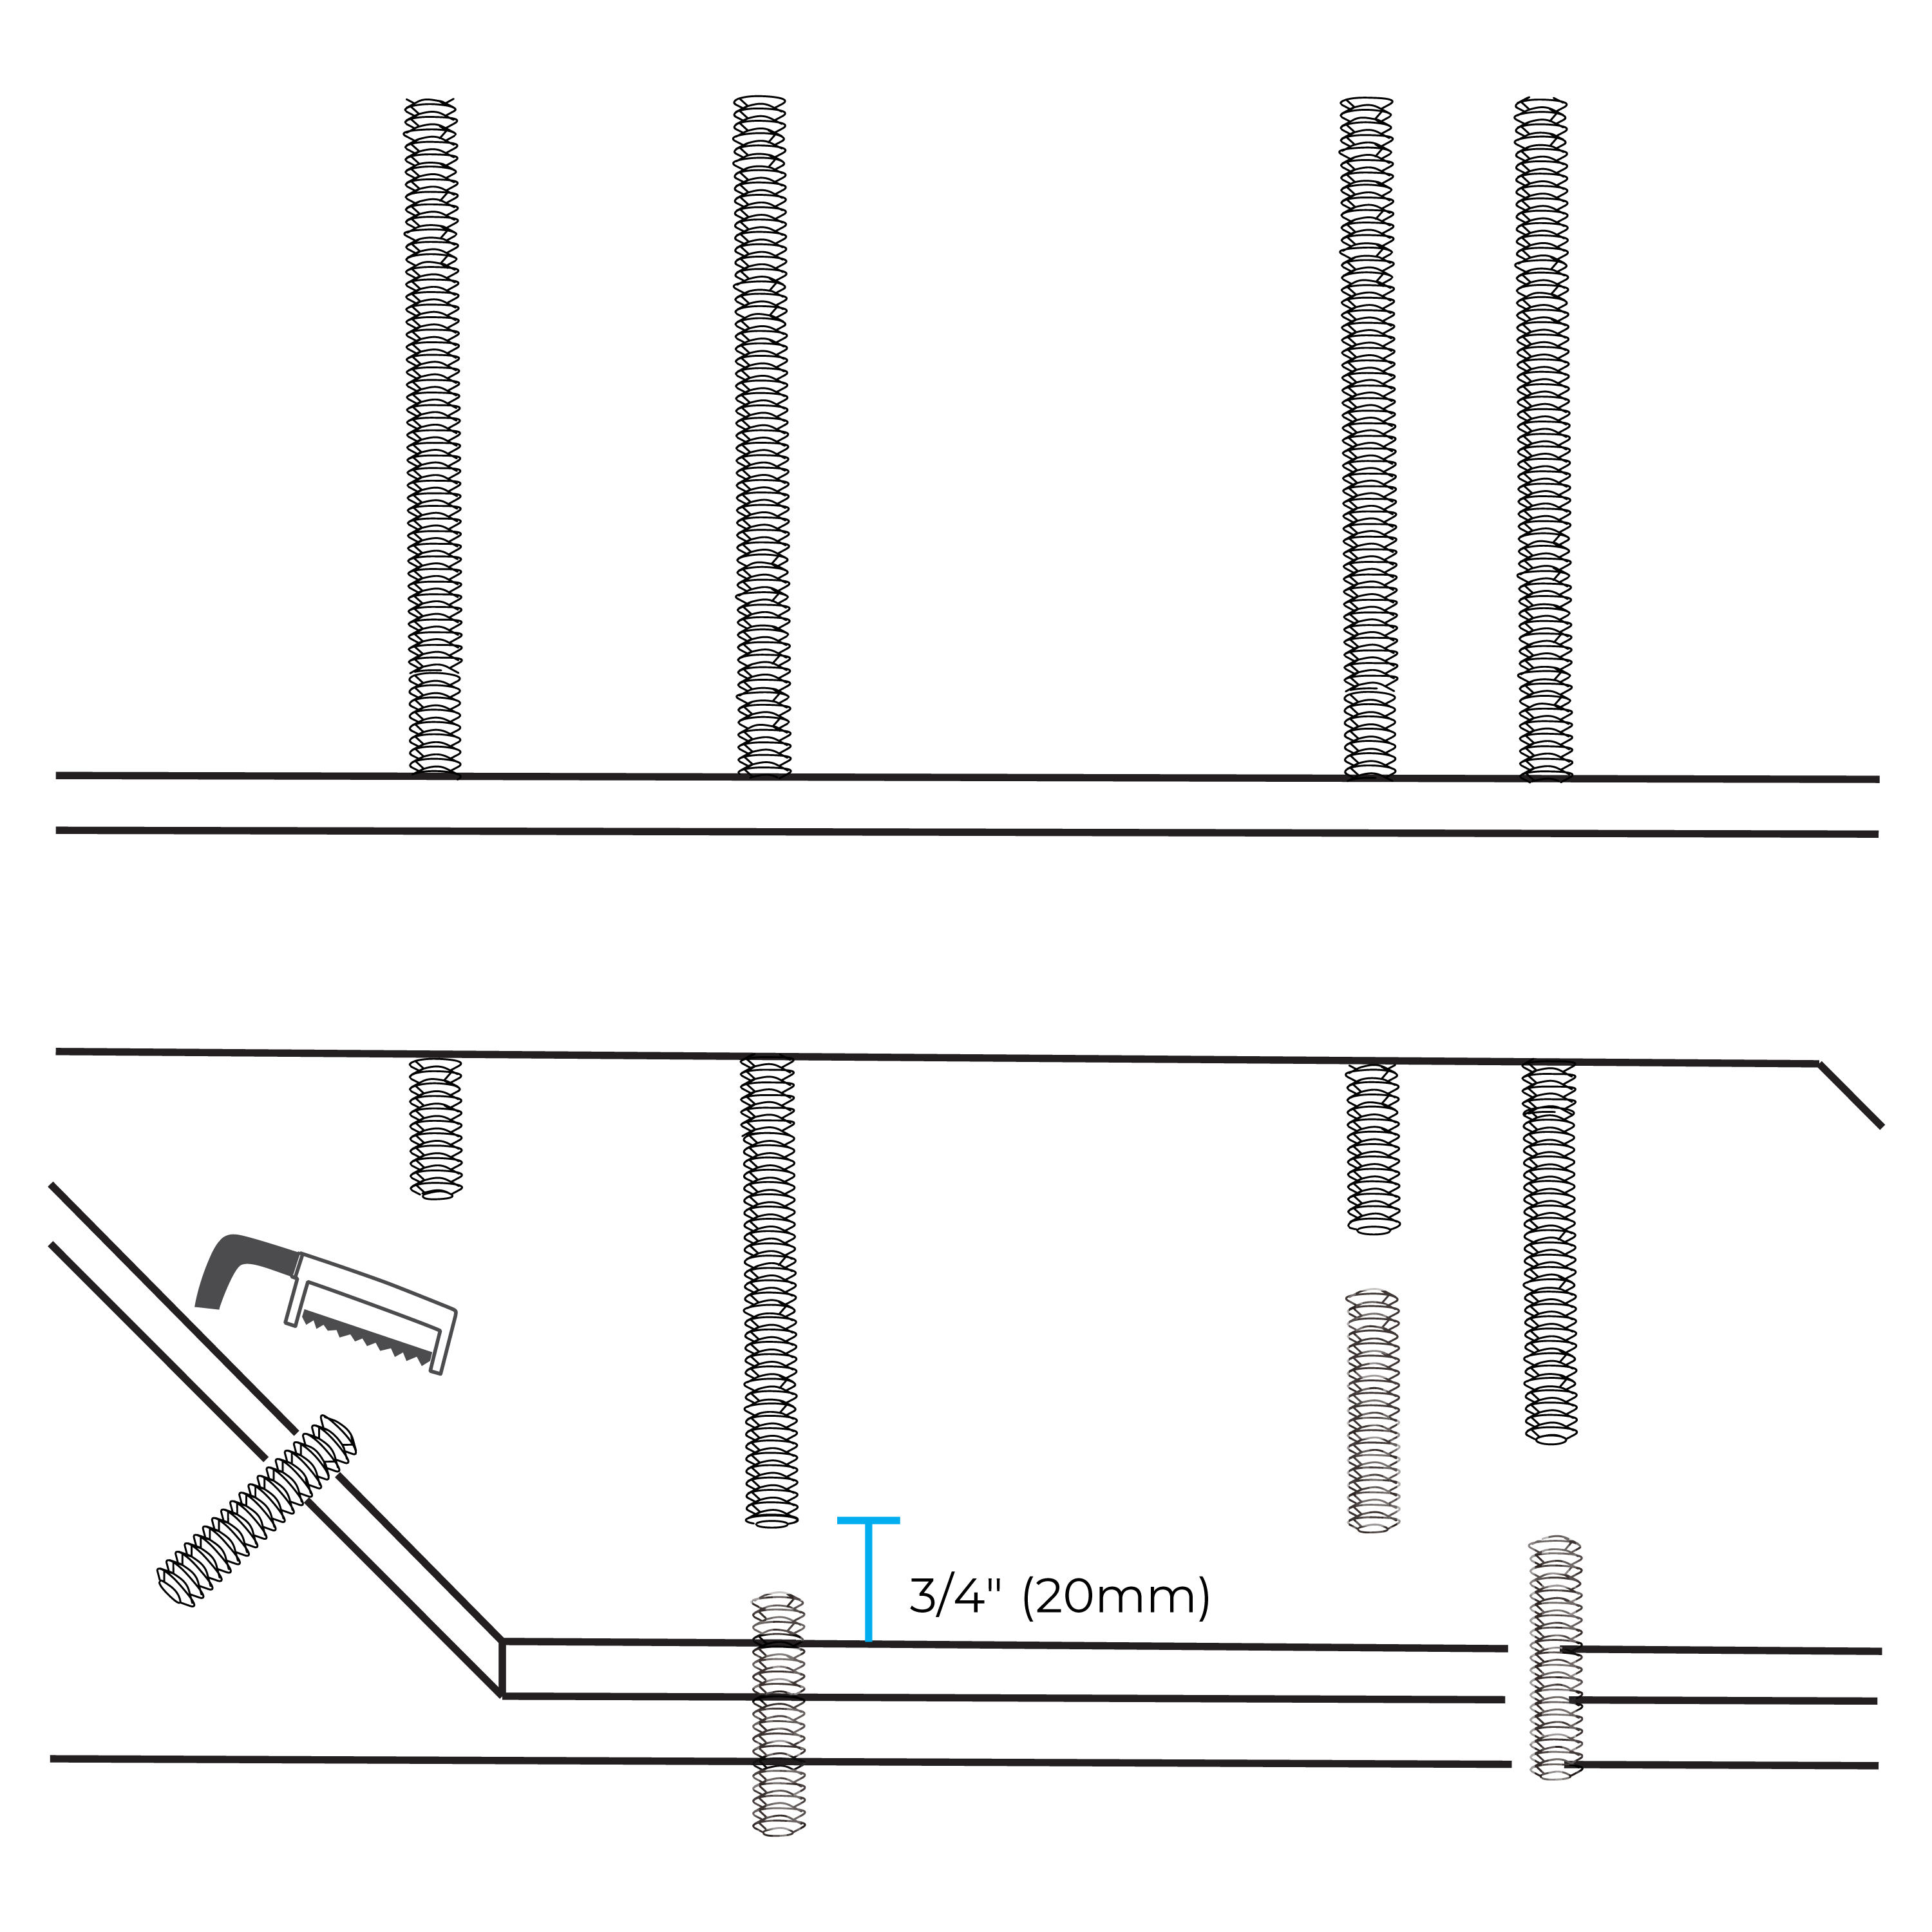
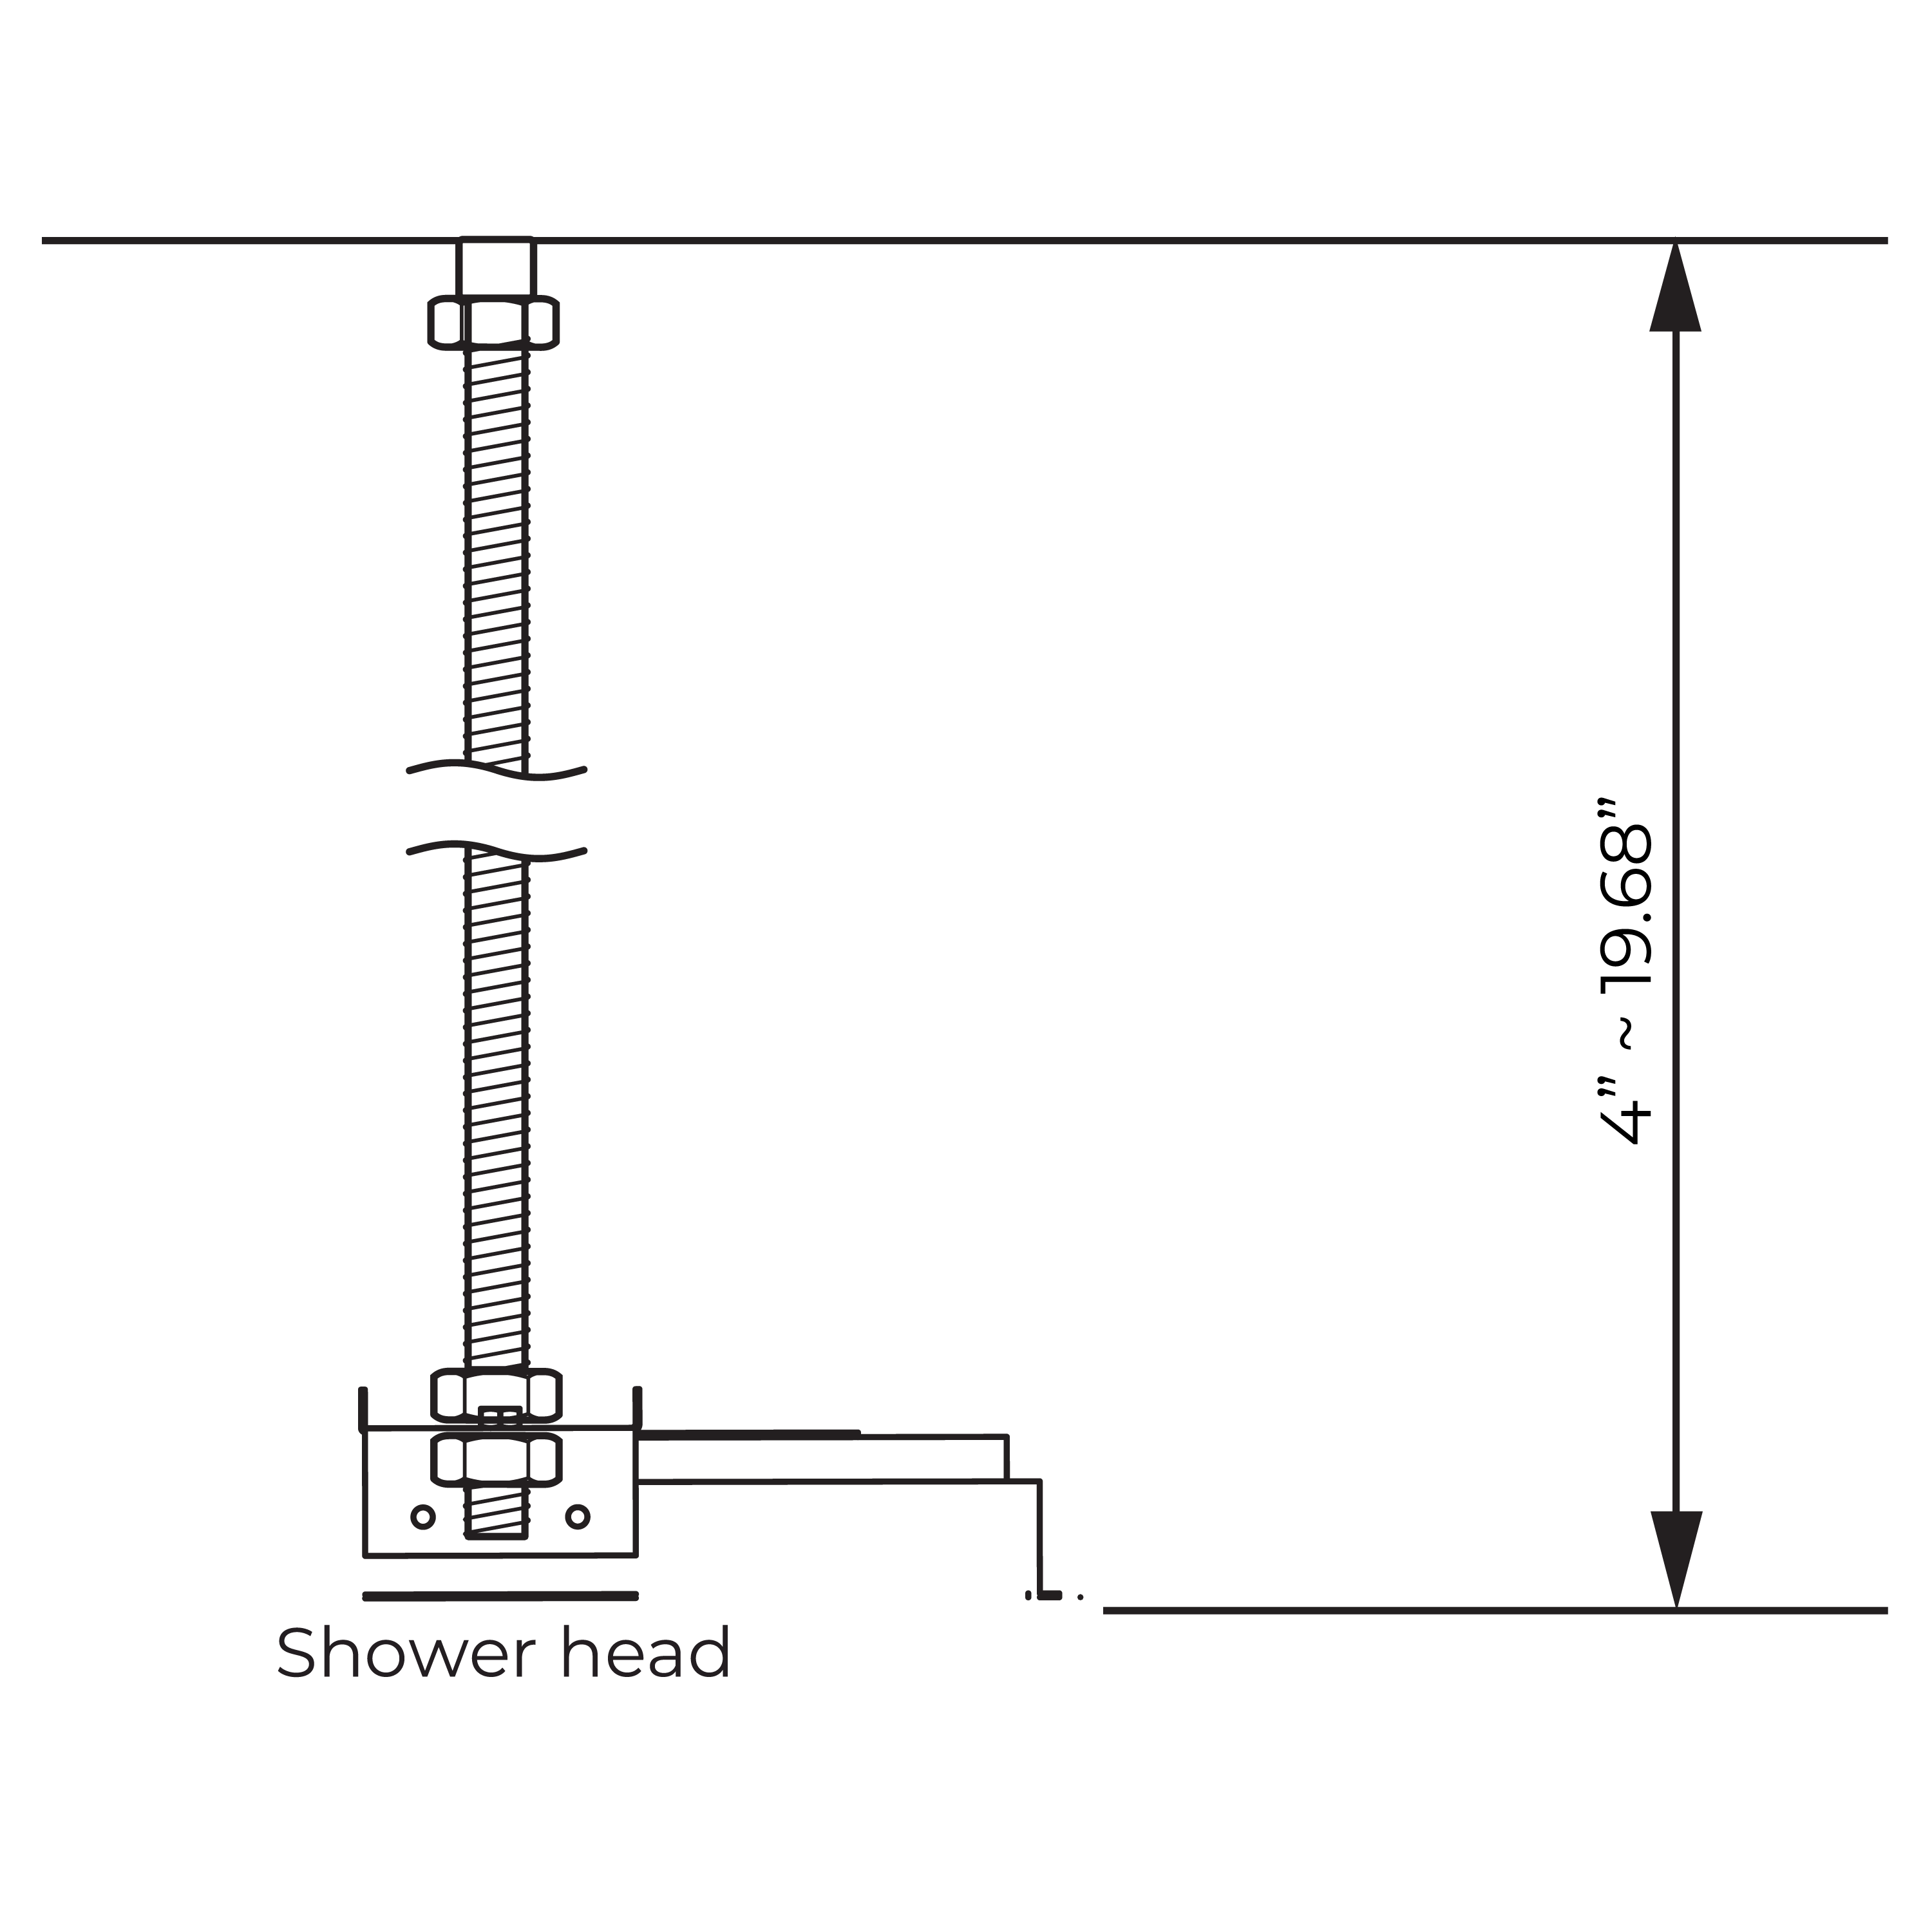
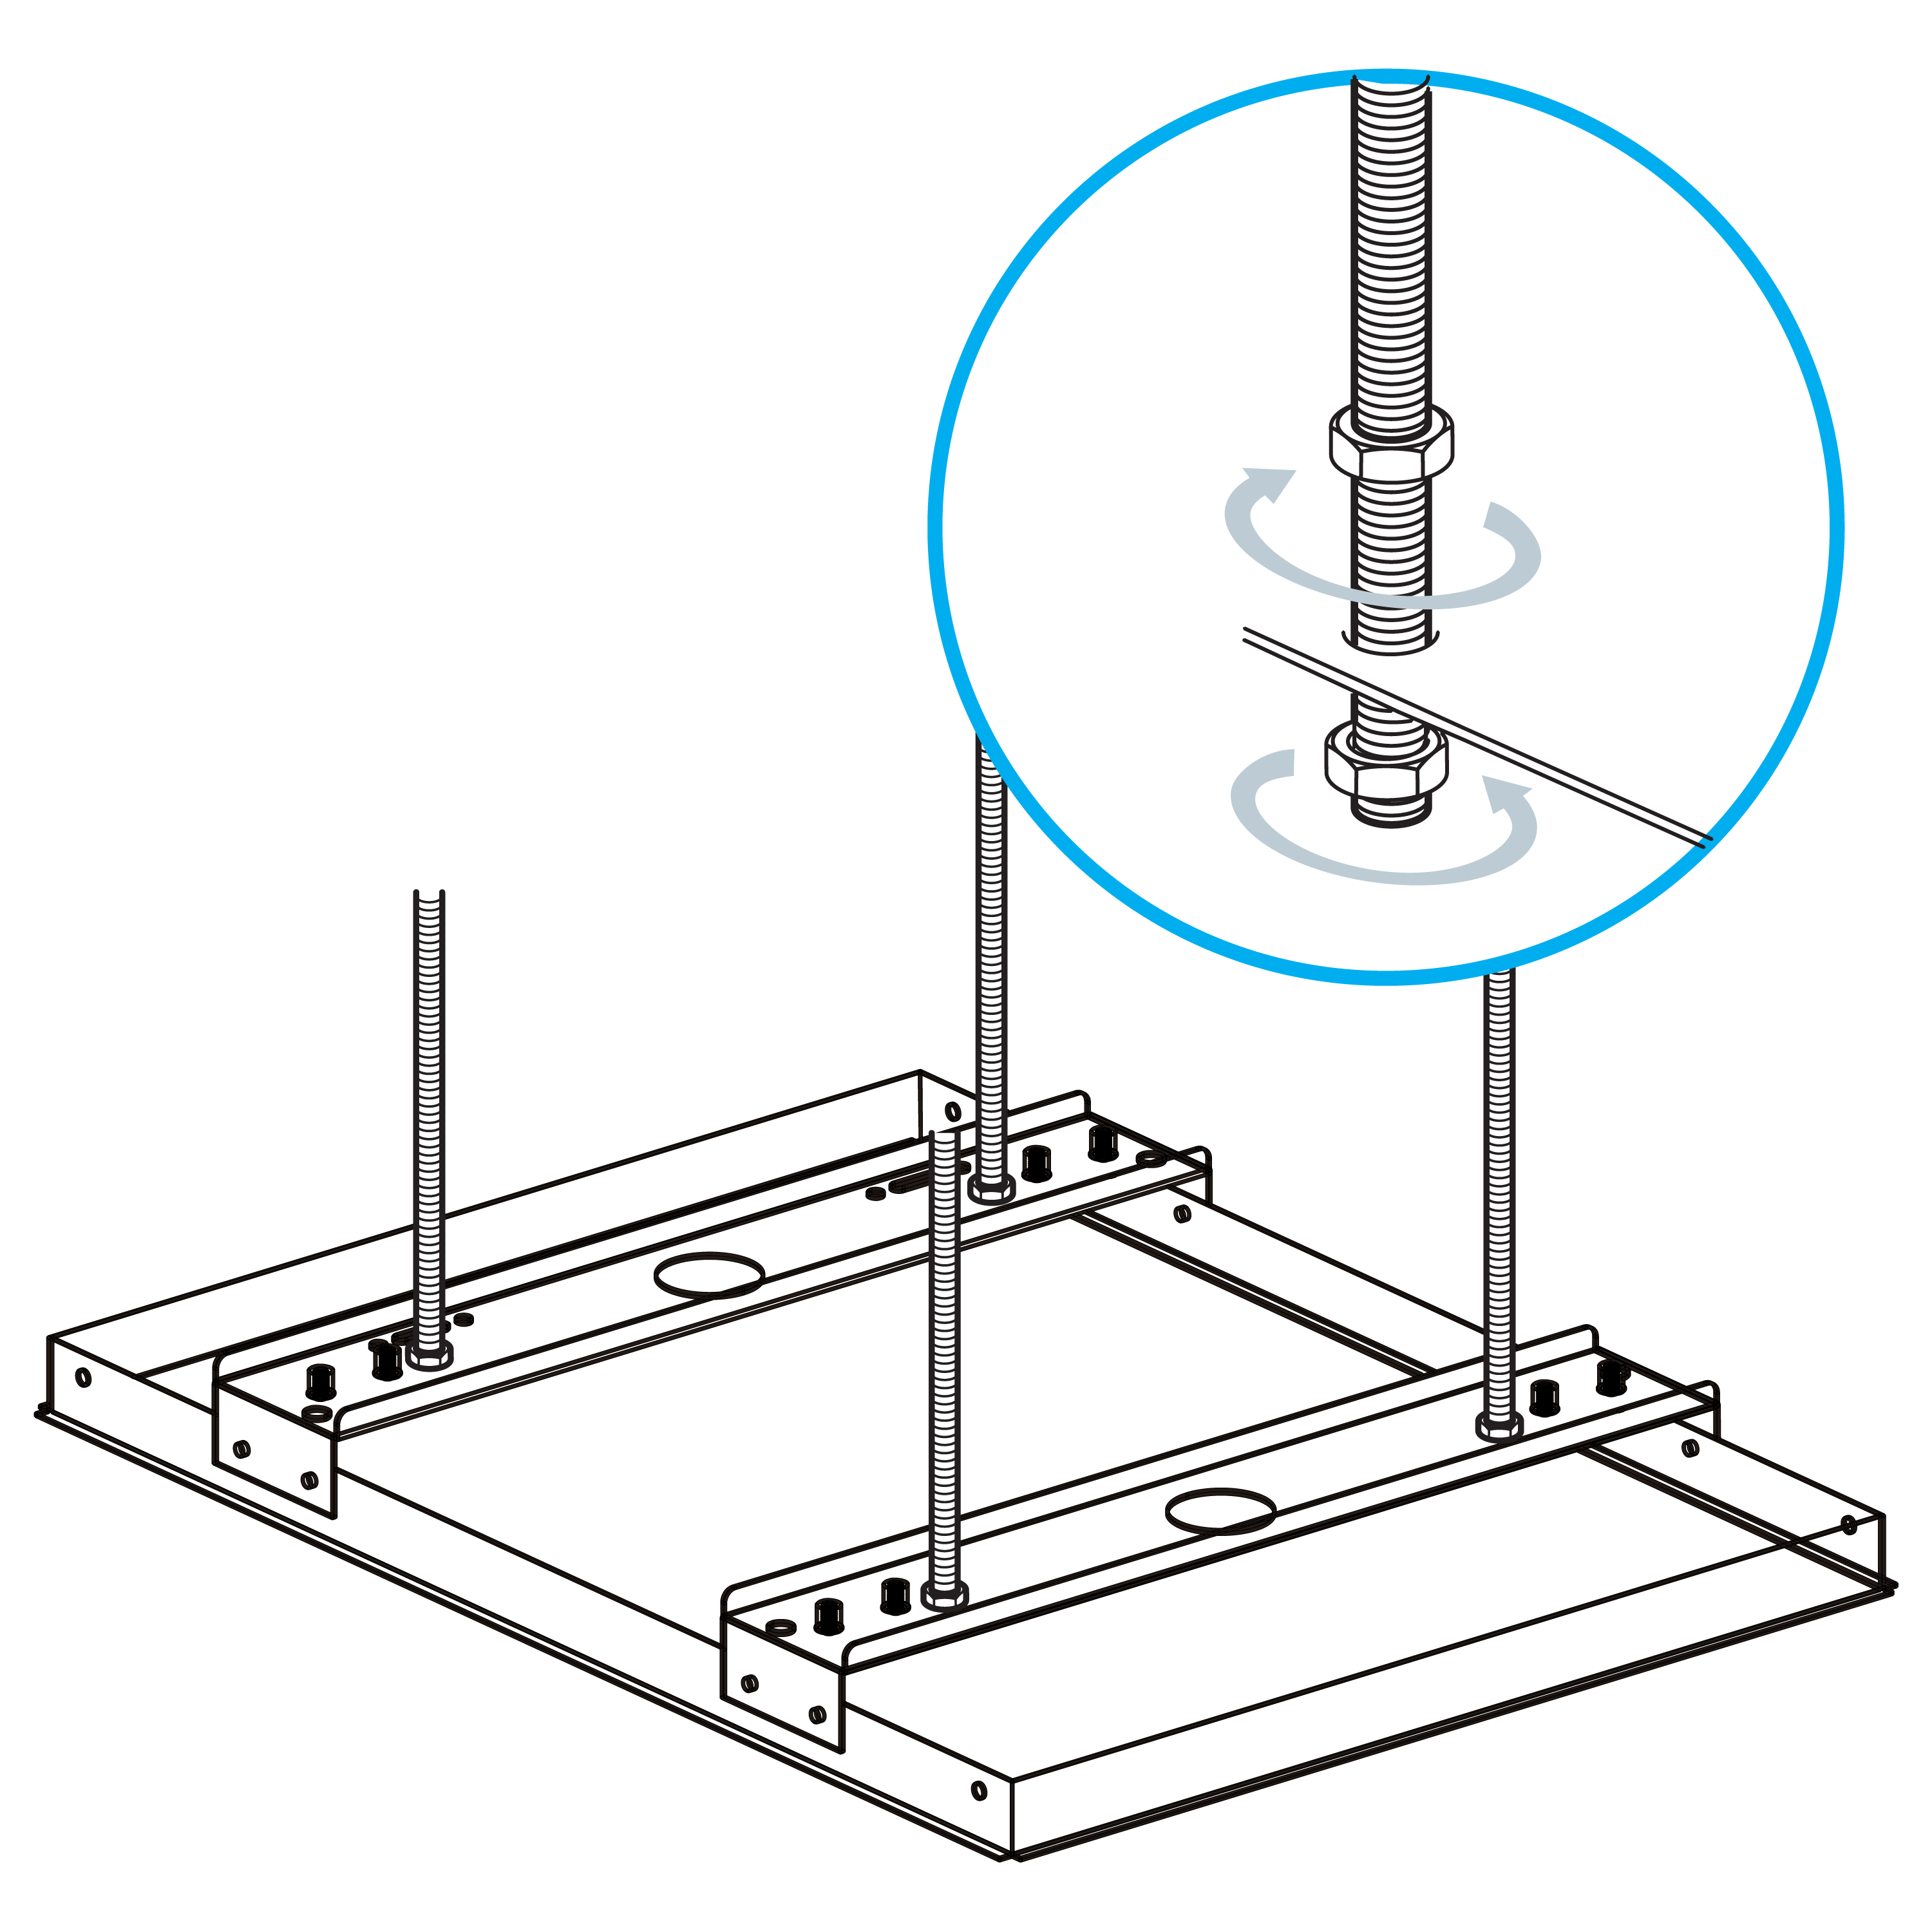
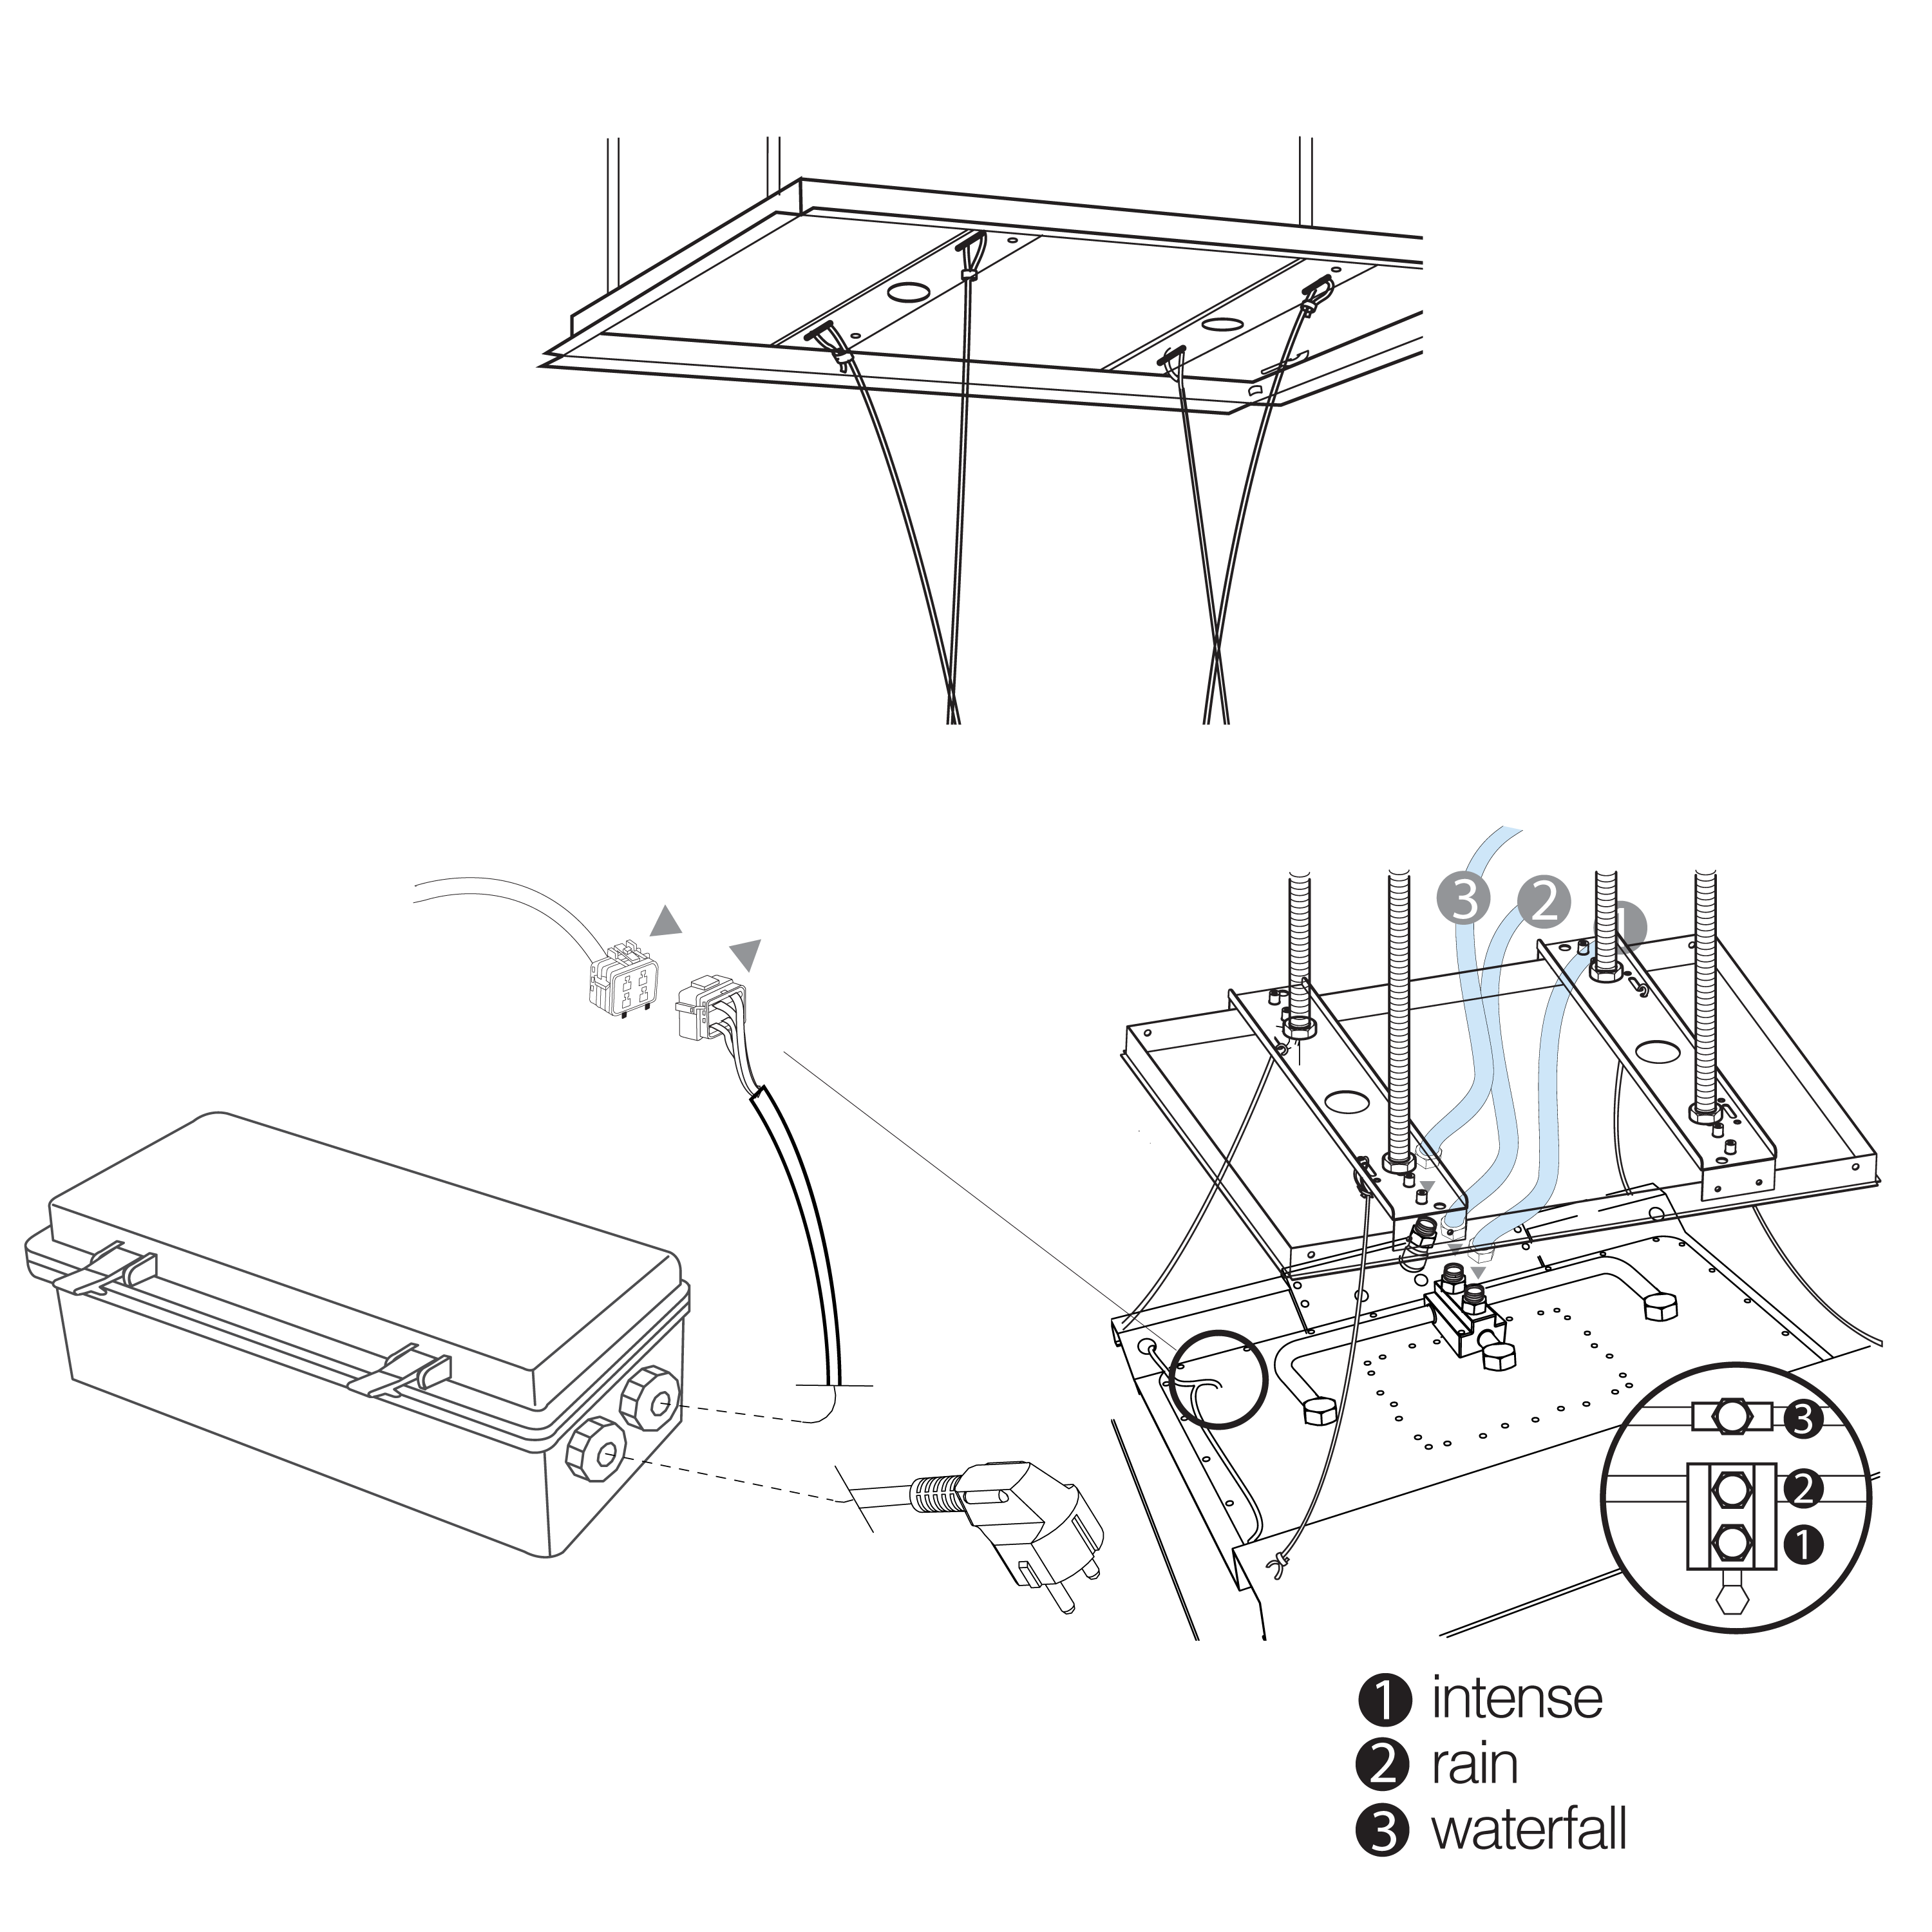
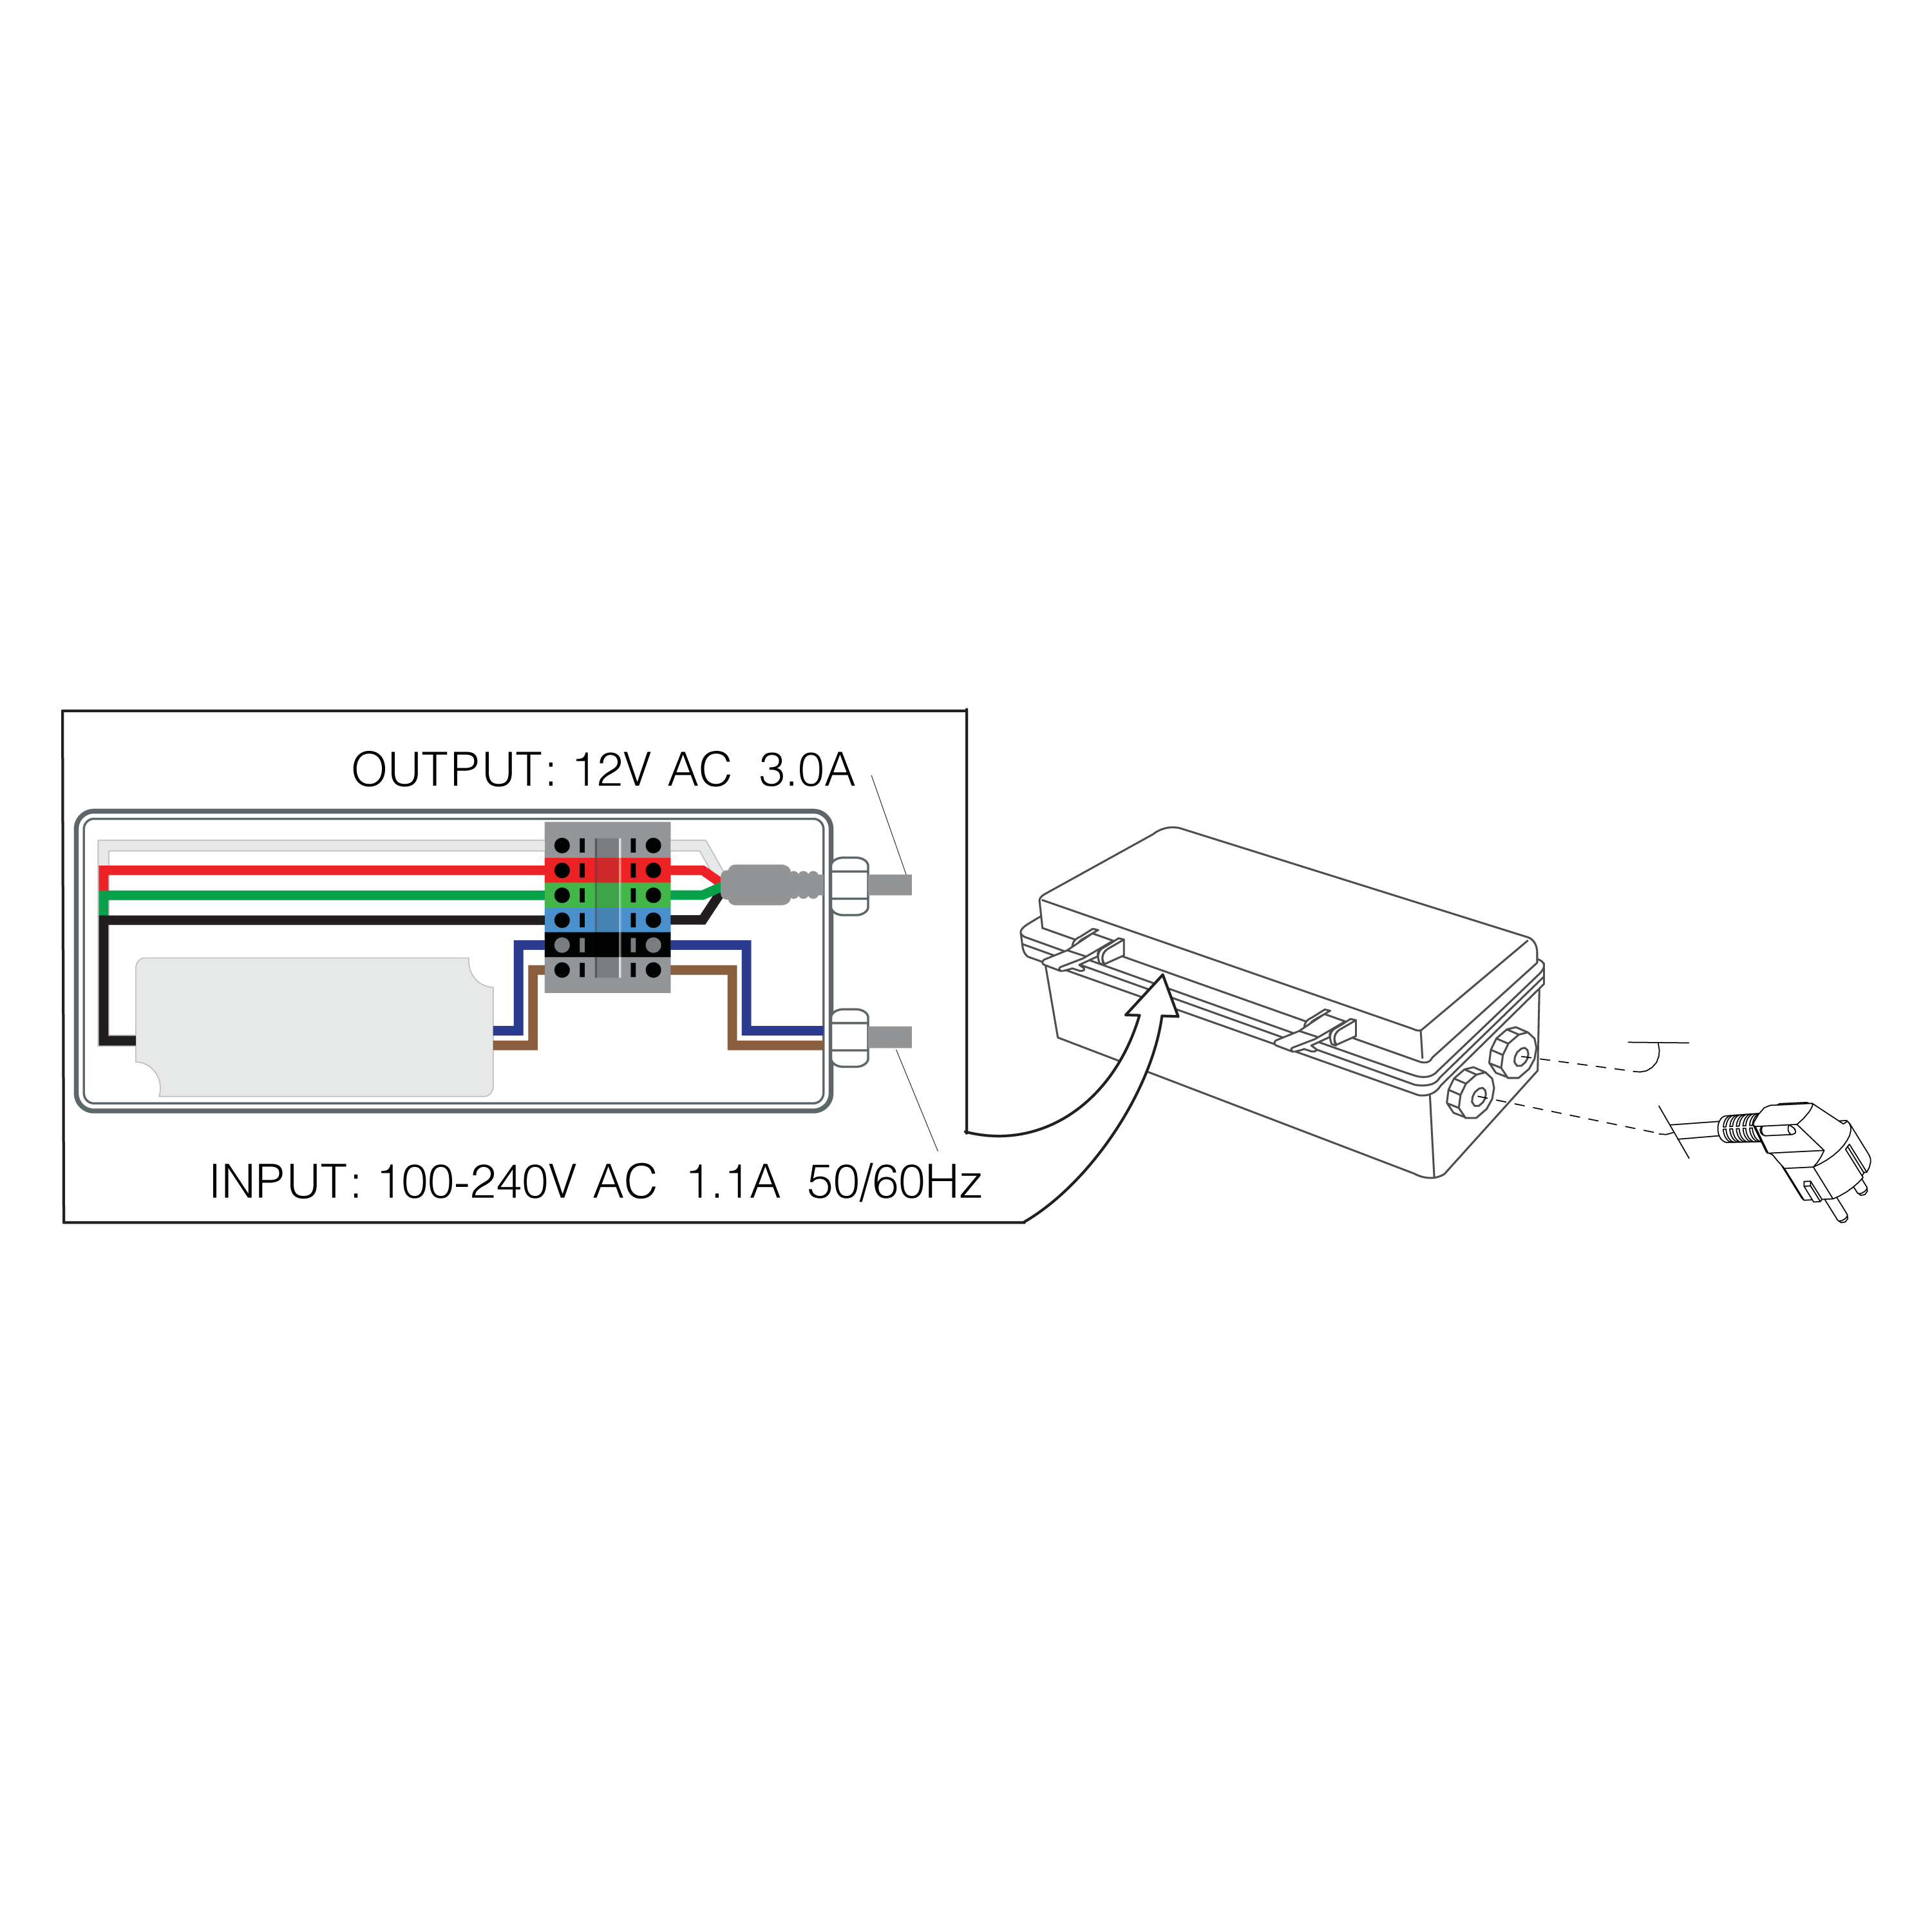
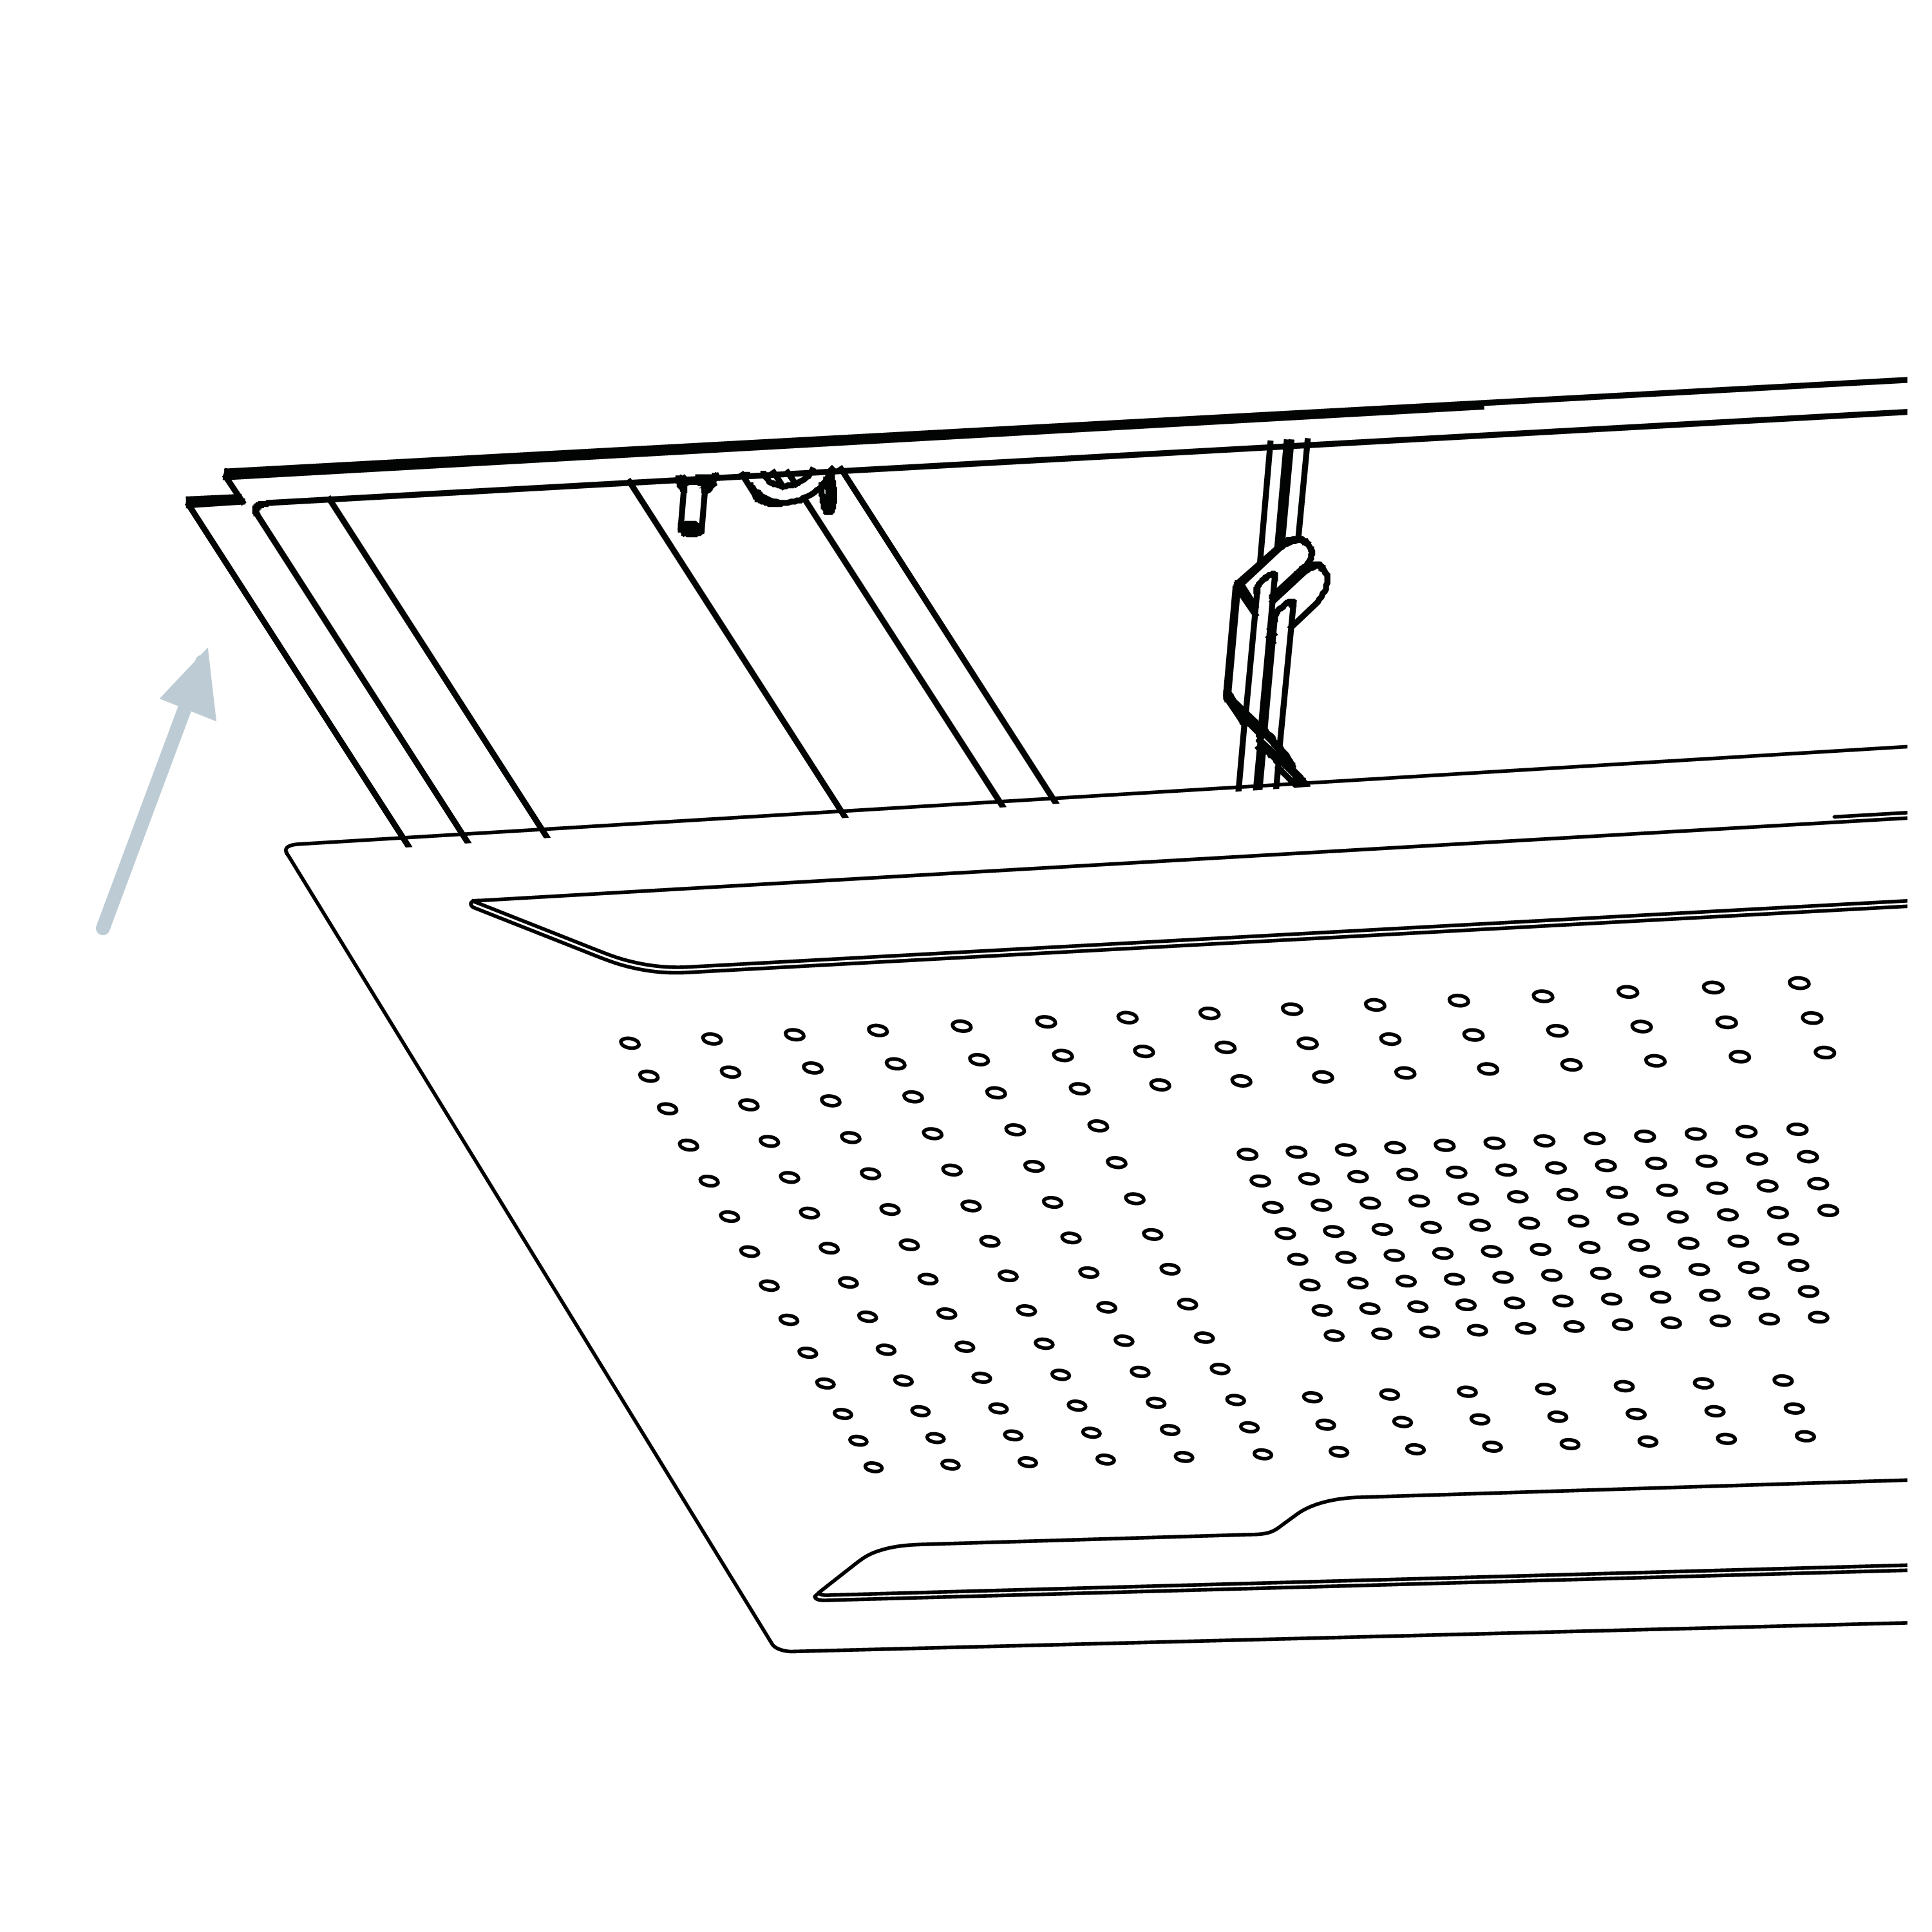
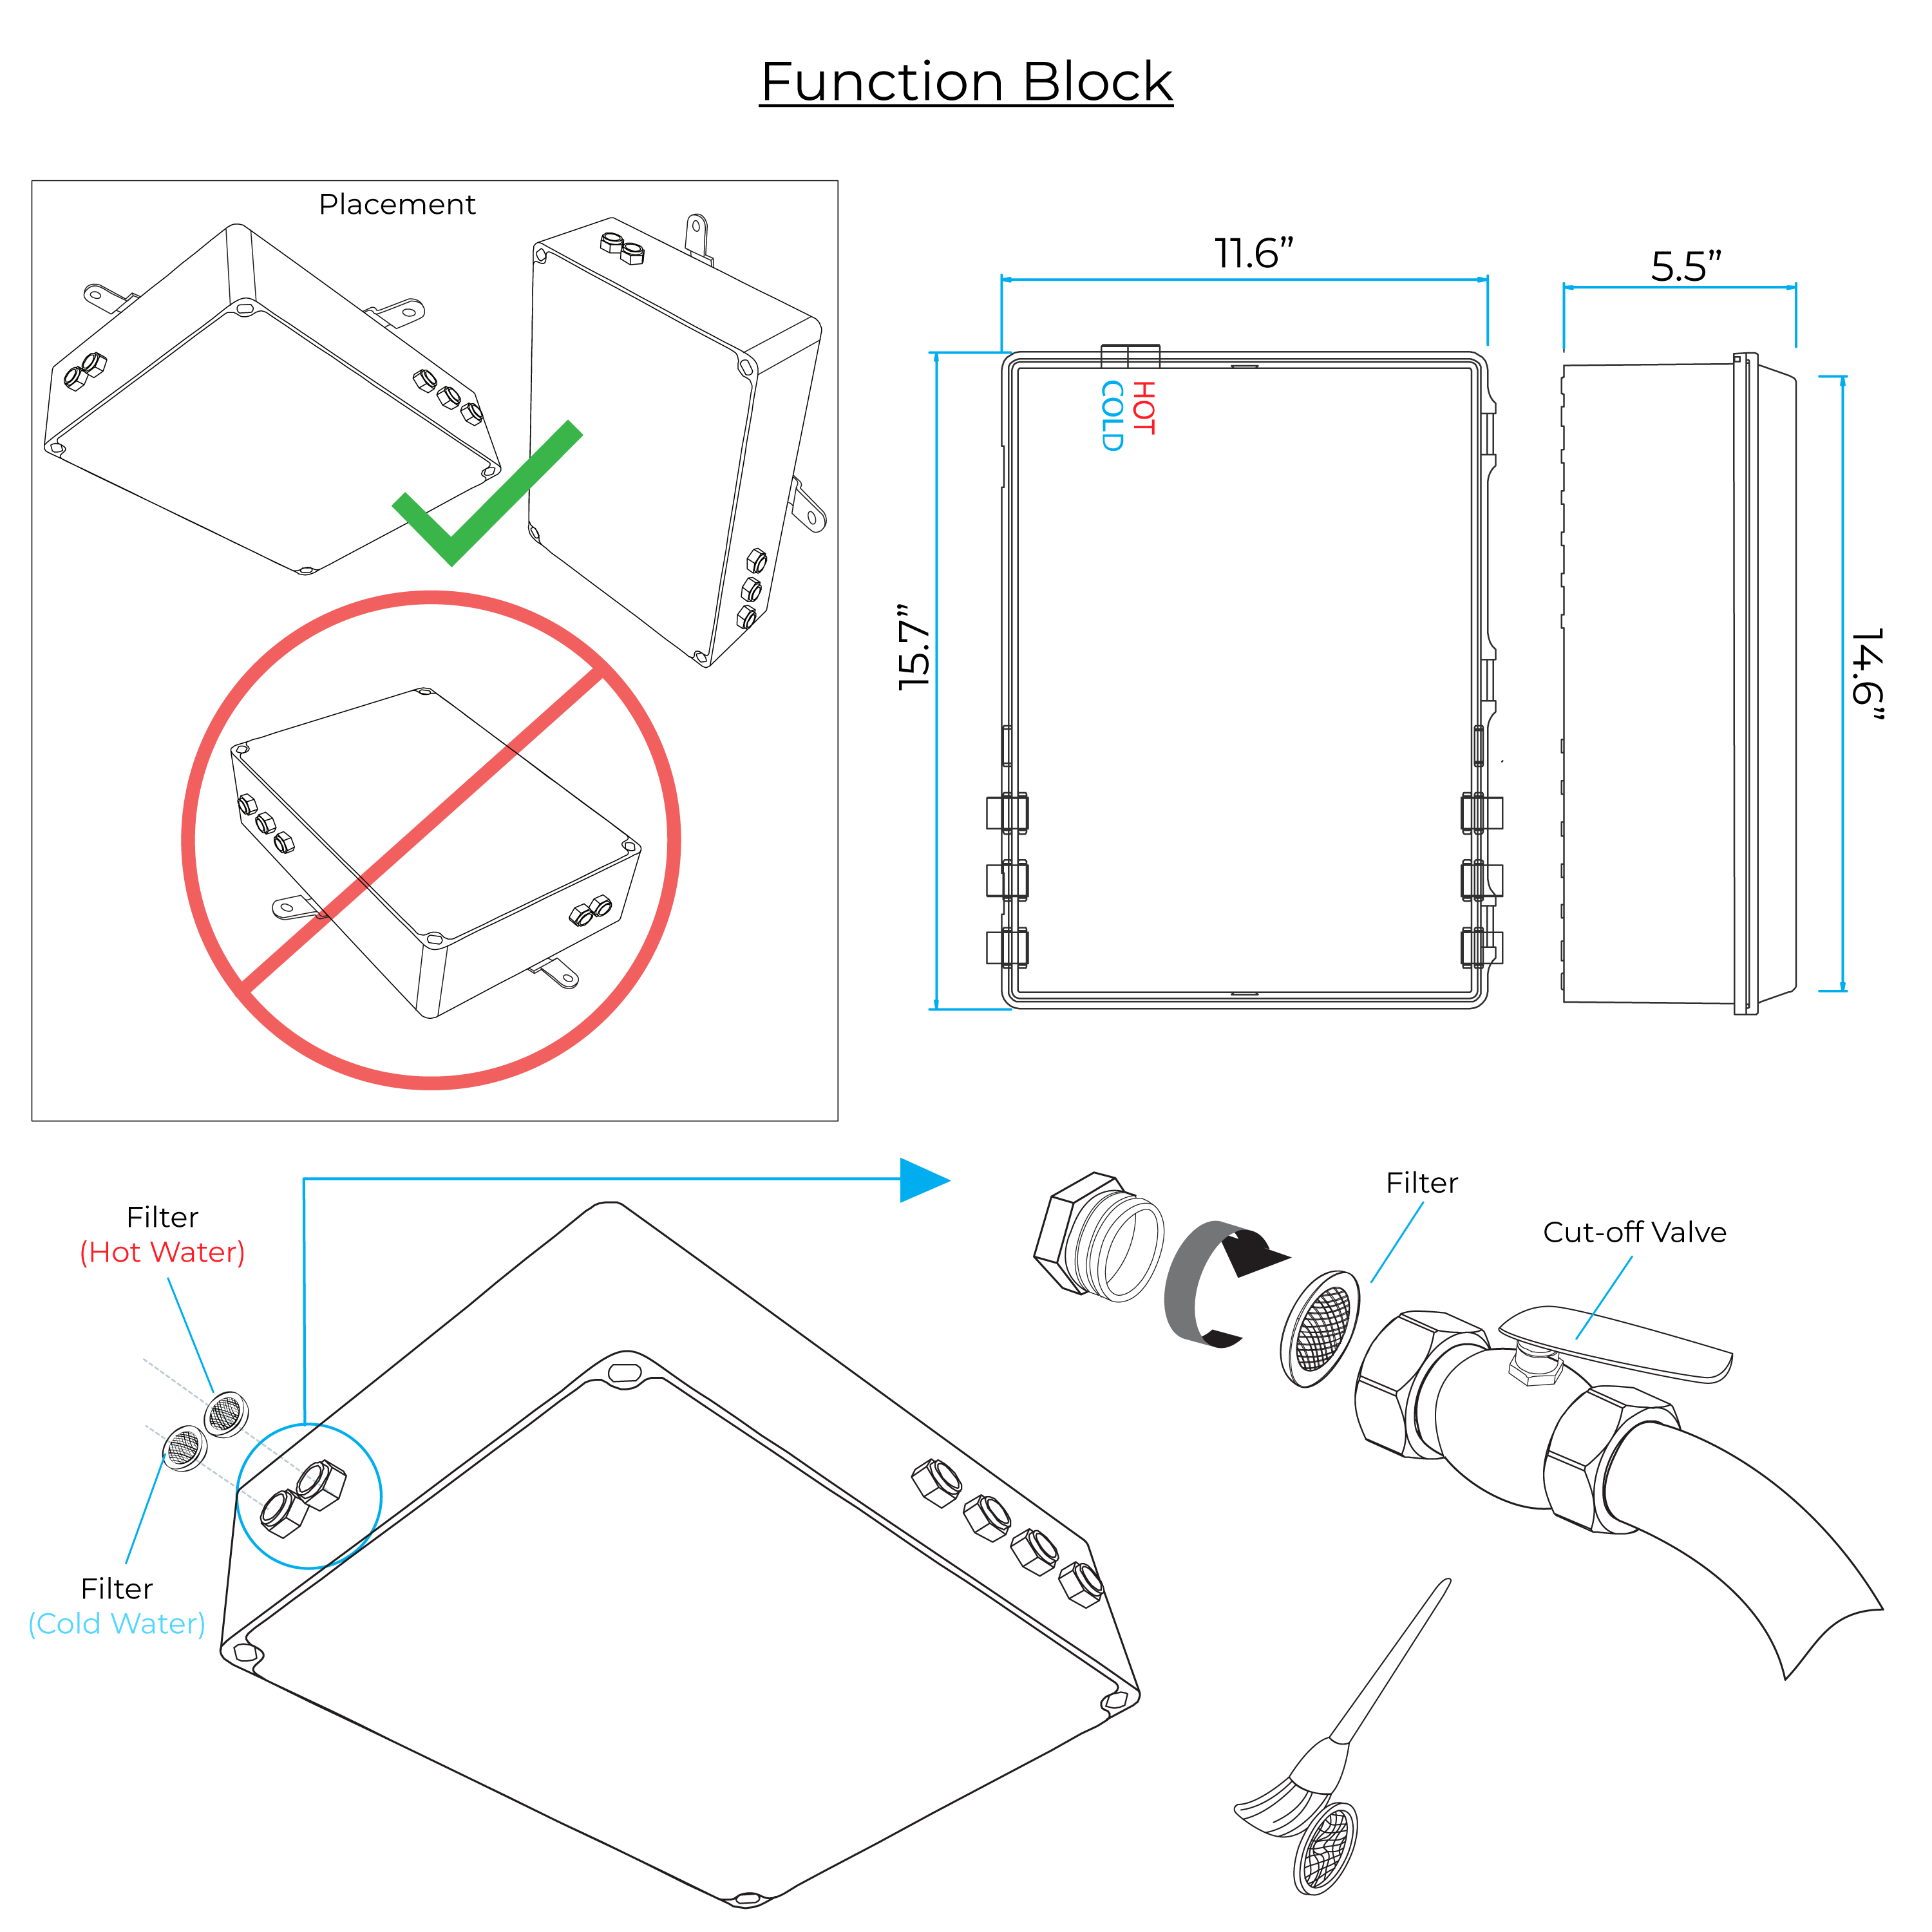
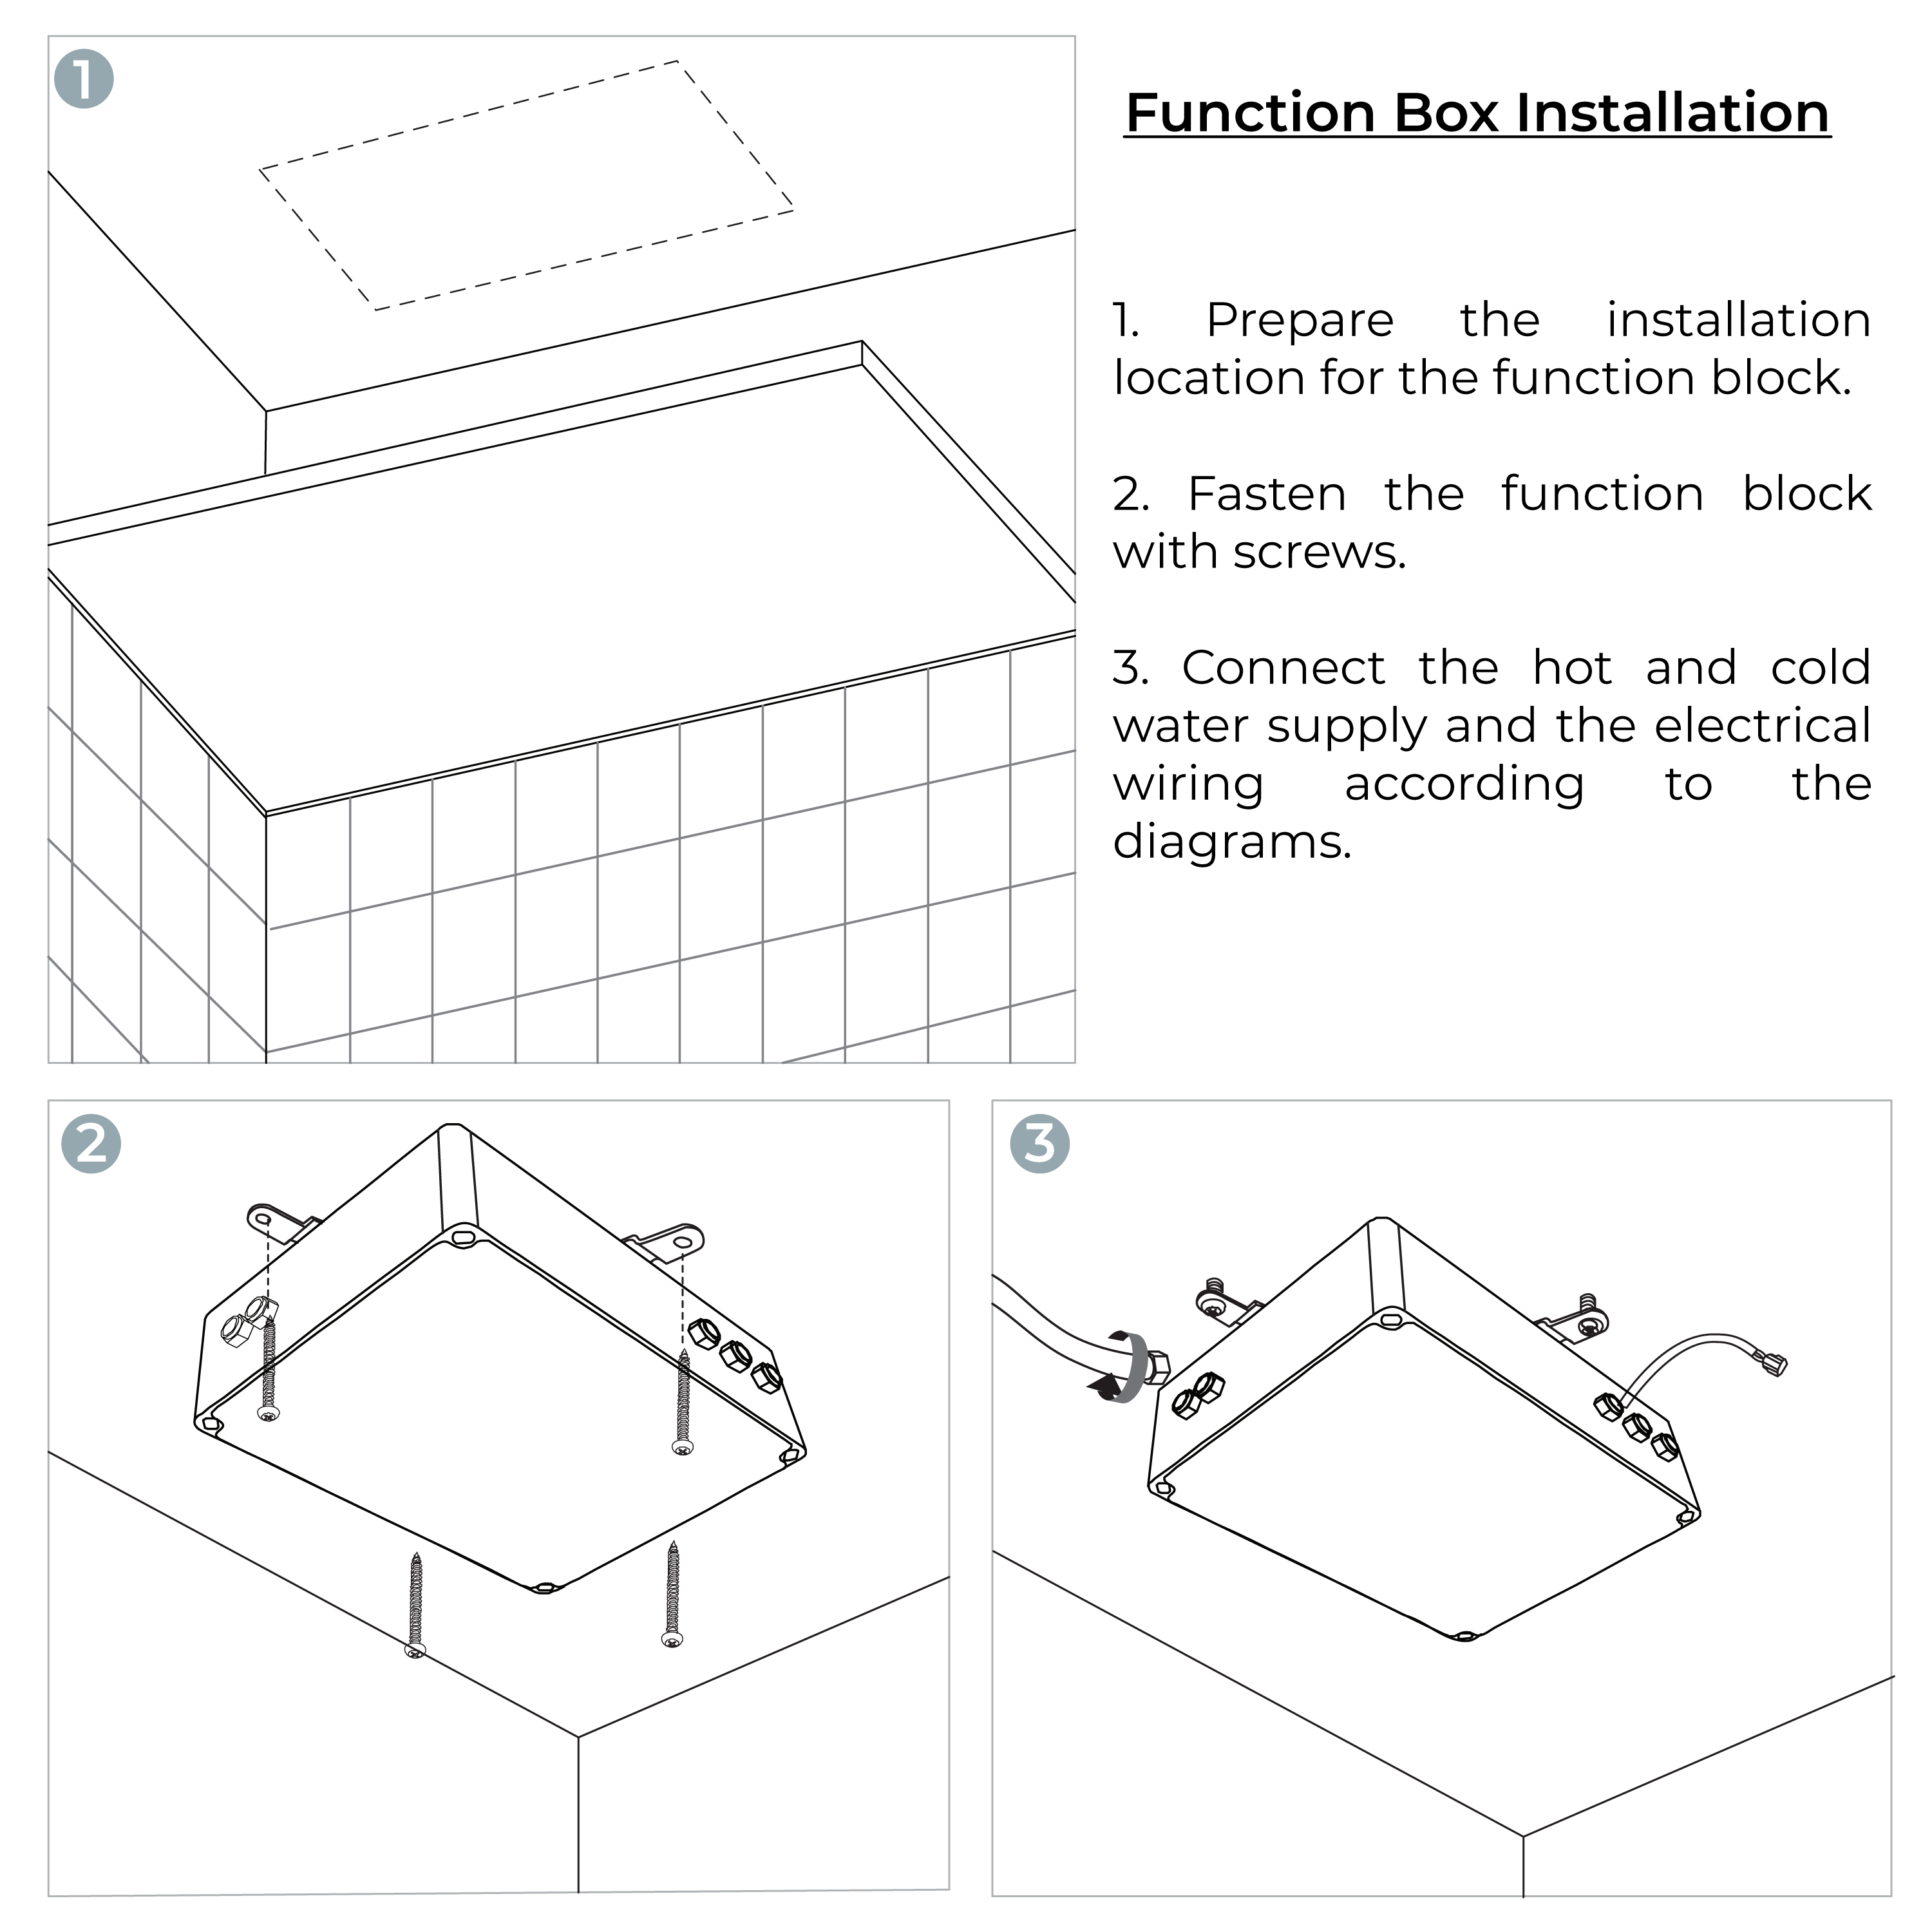
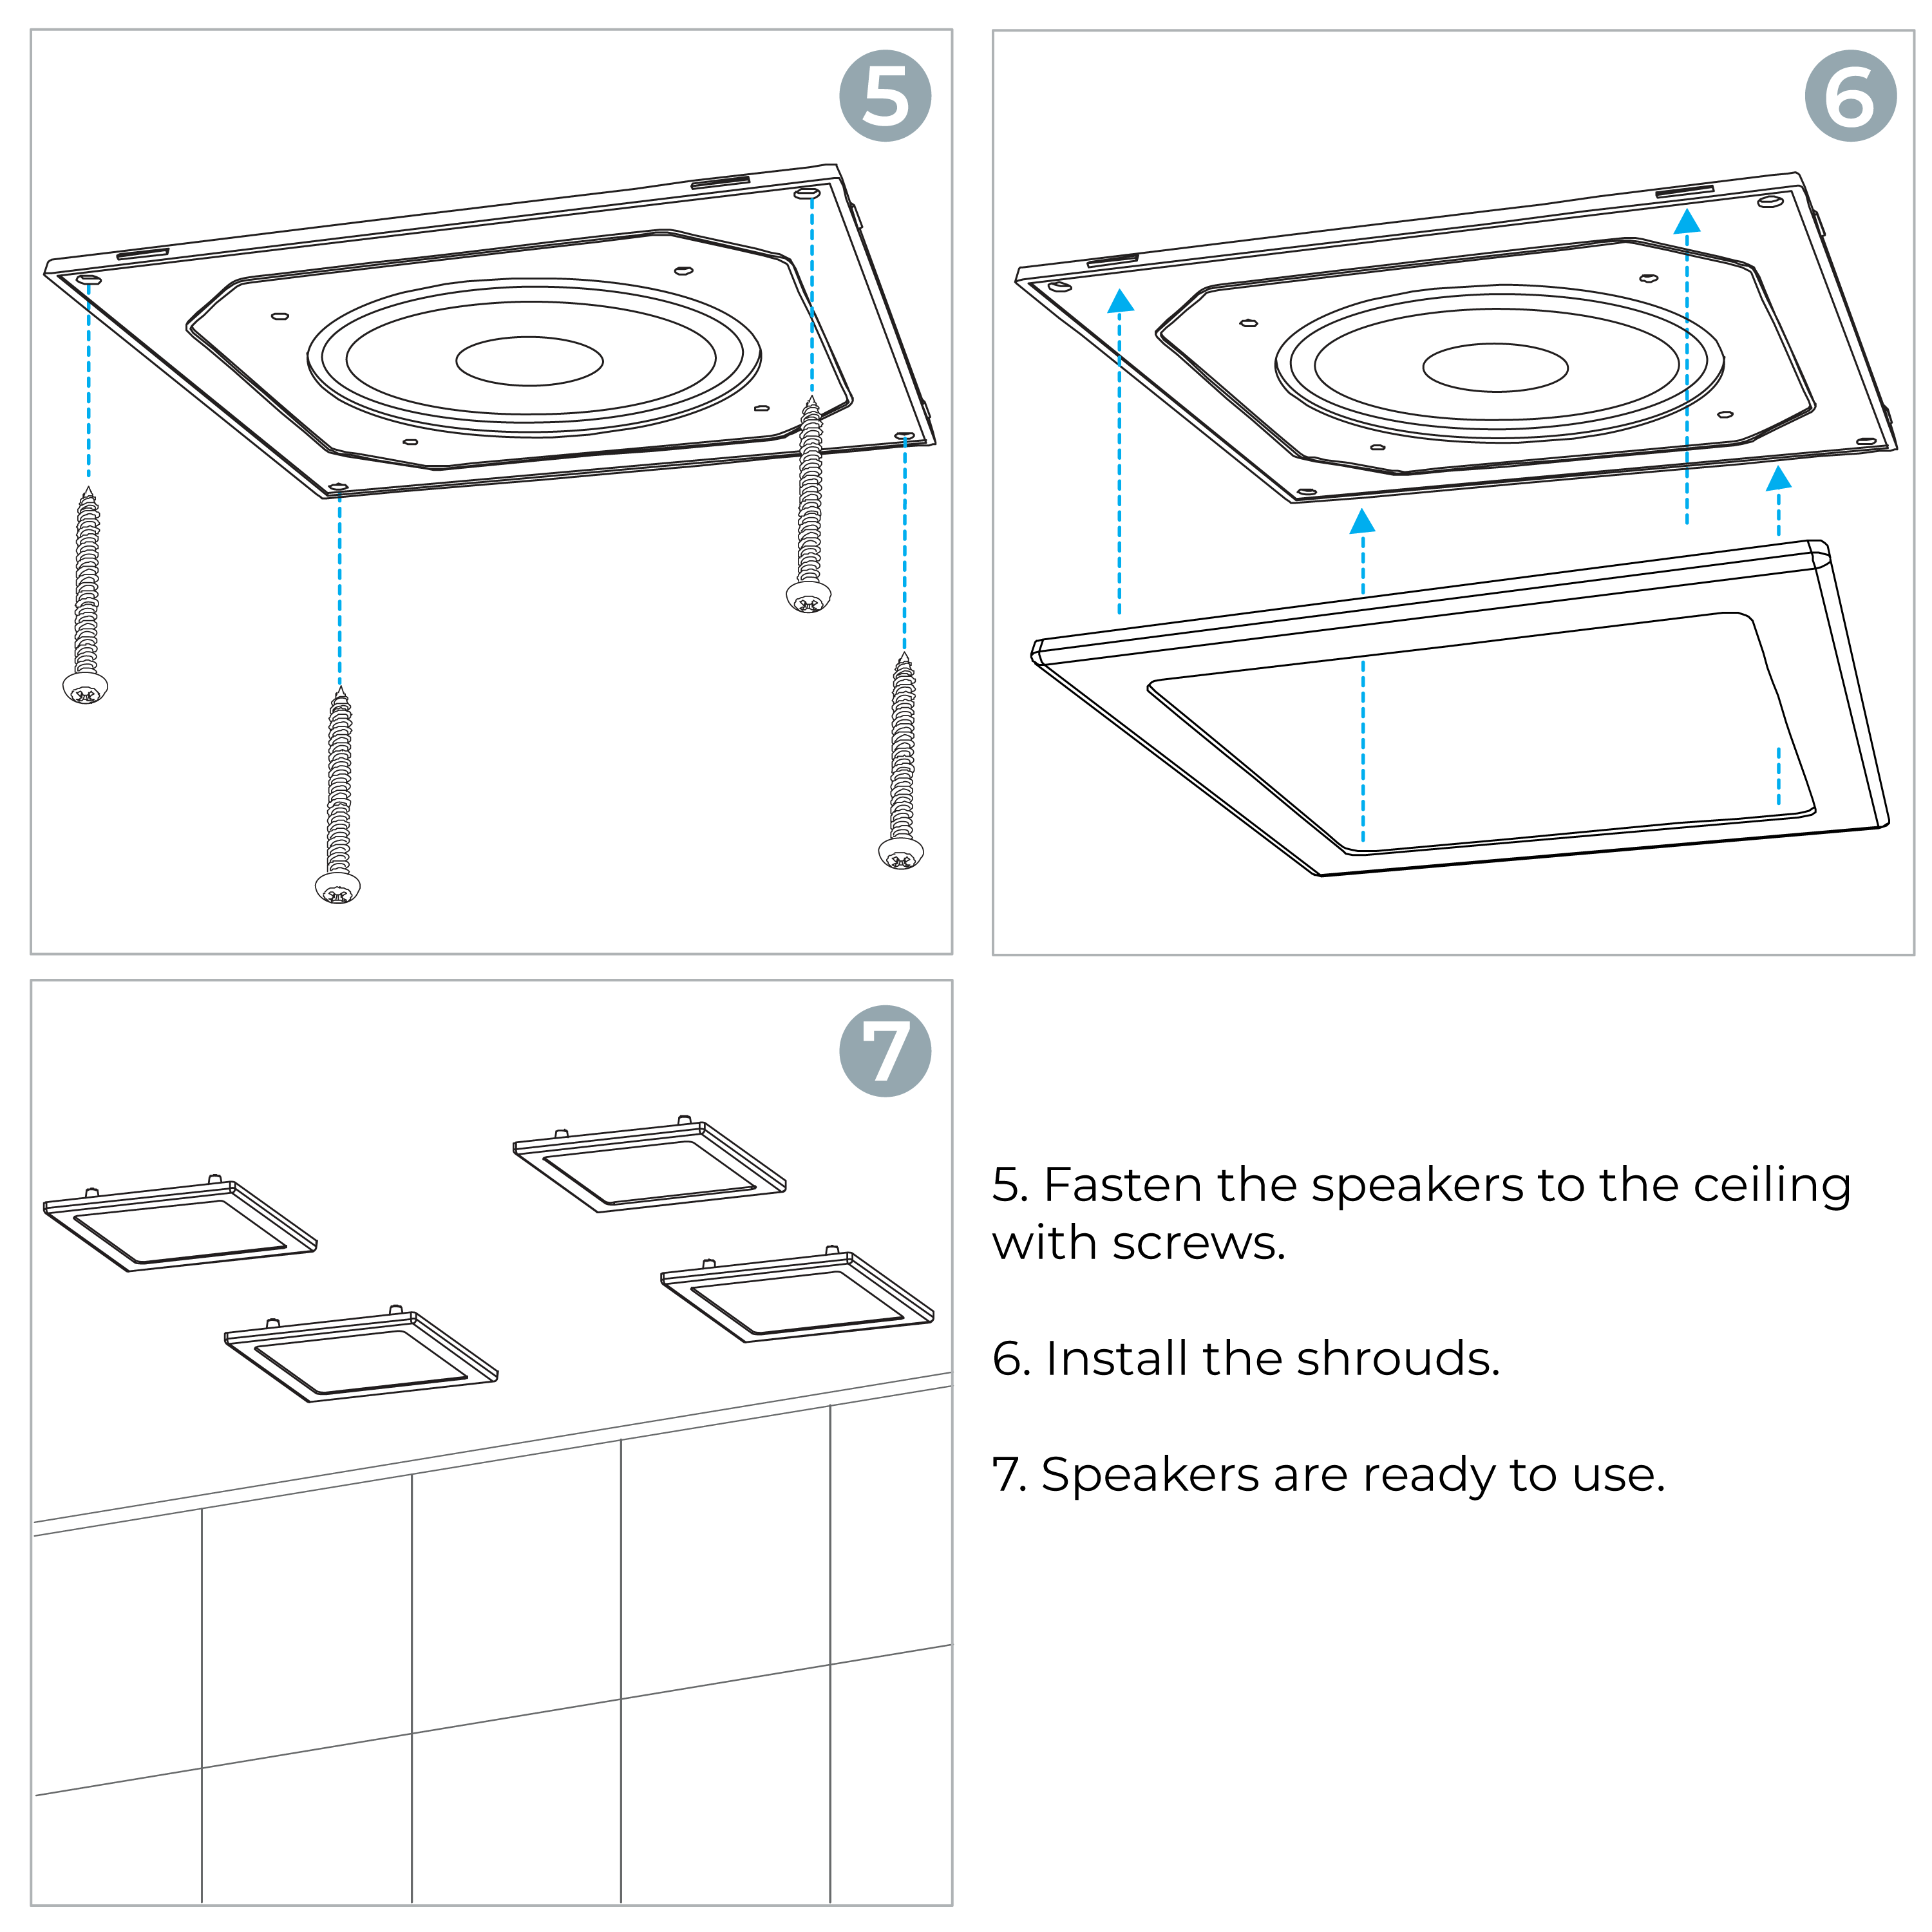
How To Install Fontana Luxurious Recessed Large LED Waterfall Rainfall Shower System With 6 Body Jets Hand Shower | FS7394
Visit Product Page 
|
|
|
Luxury Showers Systems
Creative Luxury Showers
FontanaShowers utmost priority has always been to provide our valued customers with an exceptional
luxury experience. We achieve this by offering top-quality design products and a wide range of
customizable options. Our collection of creative
luxury shower systems enables you to personalize your space according to
your unique taste and preferences.
View
Read More
Explore Luxury Shower
Systems By Type
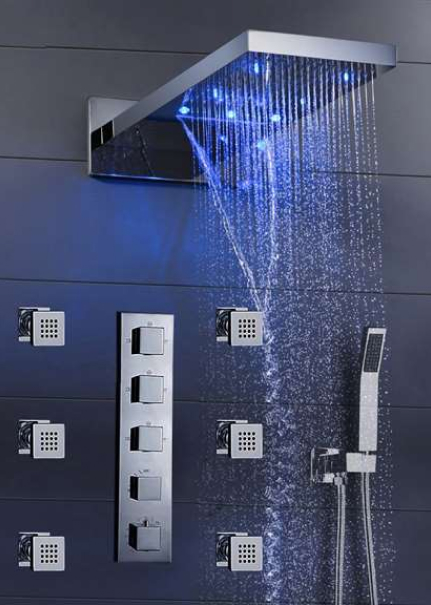
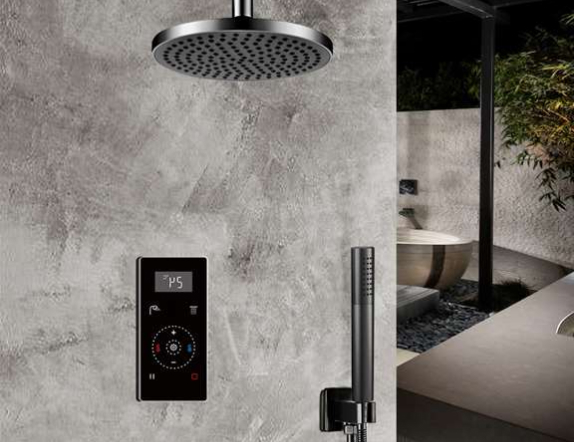
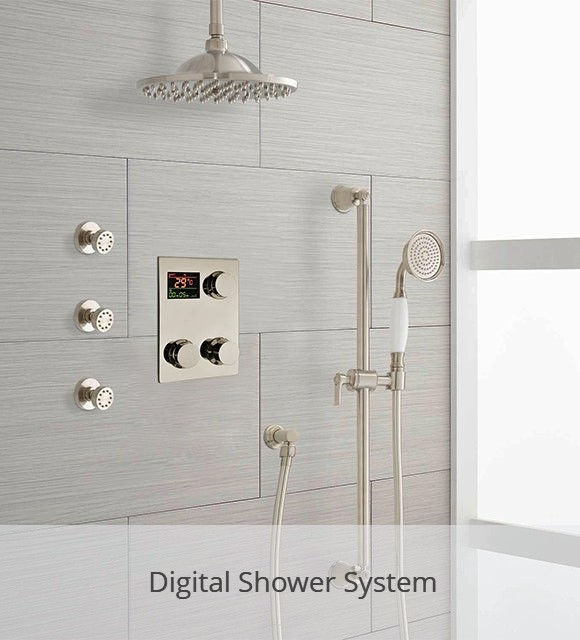
Luxury LED Shower
Systems
The LED light shower system offered by FontanaShowers presents an excellent solution for
upgrading your outdated and mundane shower system. Elevate your showering experience by
embracing the LED light shower system, designed to provide you with the utmost tranquility
and relaxation you've been seeking. With built-in LED lights, this shower system not only
illuminates your bathroom but also creates a captivating ambiance, promoting a sense of
serenity.
In addition to the visual enhancements, some of our LED light shower systems offer
additional features. Certain models indicate the water temperature through the LED lights,
ensuring a safe and comfortable showering experience. Moreover, select shower systems
provide the convenience of controlling LED colors through various methods such as touch
panel, remote control, or smartphone Bluetooth connection, granting you full customization
and control over your showering environment.
Discover the transformative power of our LED light shower systems from FontanaShowers and
redefine your showering routine with a touch of luxury and innovation.
View
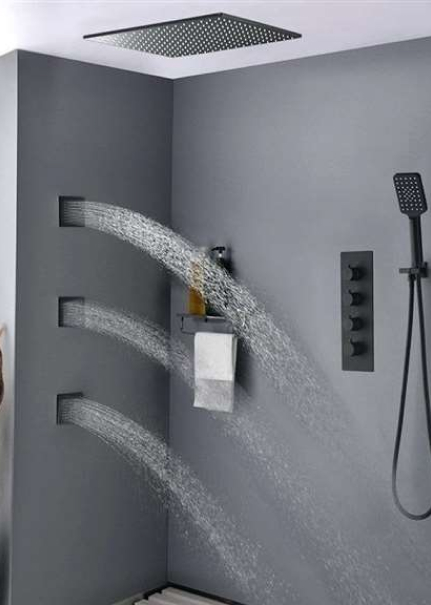
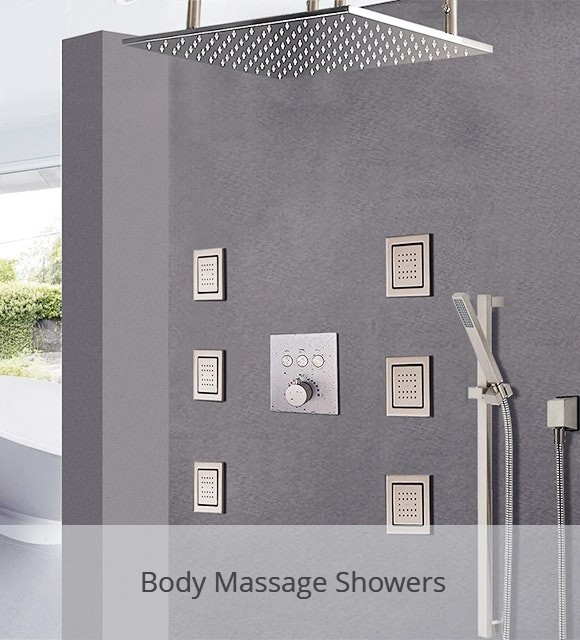
Luxury Body Massage
Showers
Good massage has the ability to alleviate stress, tension, and everyday aches, leaving you
feeling renewed and rejuvenated. Our massage shower sets are designed to provide users with
a soothing and invigorating massaging sensation. With a variety of functional shower heads
featuring different settings, you have the freedom to choose the type of massage you desire.
Whether you prefer a gentle, relaxing massage or a more invigorating experience, our shower
sets cater to your specific needs. FontanaShowers, provide customizable options for our
massage shower sets, including features like Bluetooth connectivity and LED showers. These
additions enhance your showering experience and bring therapeutic qualities to your routine.
Our massage shower system offers a convenient and effective way to promote overall
well-being while indulging in a truly personalized showering experience.
View
Explore Luxury Shower
Systems By Type
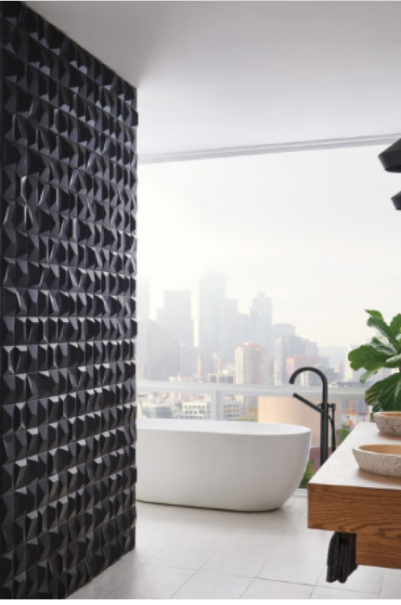
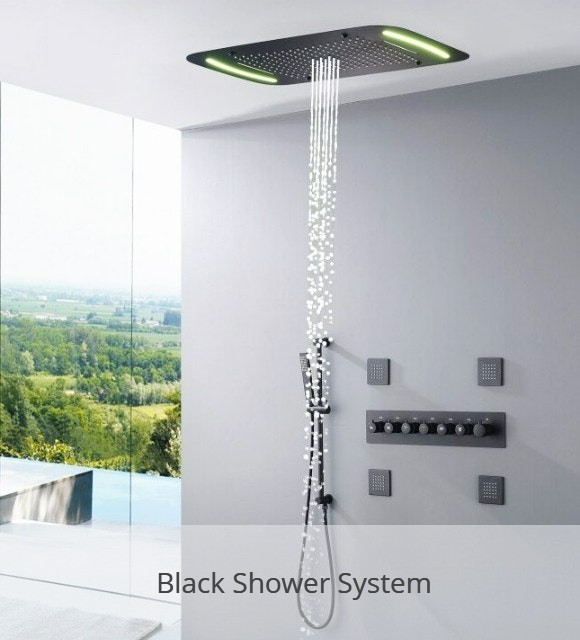
Luxury Black Shower
Systems
FontanaShowers offers a stunning matte black shower system, this sleek and versatile style
has gained popularity and is now a fast-growing trend in many homes. Bathroom design has
evolved significantly in recent years, with people transforming their bathrooms into
sanctuaries for relaxation and rejuvenation. This line of high-quality exceptional matte
black shower system boasts a range of features, functions, and options to enhance your
showering experience. It includes a luxurious rainfall shower head, a convenient handheld
shower, and invigorating body jets. Experience the sophistication and elegance of our Matte
Black Shower System, a perfect choice for those seeking a modern and stylish bathroom
upgrade. Transform your shower into a haven of tranquility and indulge in the ultimate
bathing experience with FontanaShowers.
View
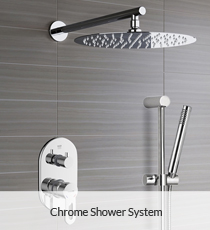
Chrome Luxury Shower
Systems
Our luxury shower systems in chrome offer an elegant and sophisticated addition to any
bathroom. Chrome plating is a process that encrusts a metal core with a layer of pure
chromium, which is known for its durability and resistance to wear and corrosion. Chrome
finishes are typically polished and highly reflective, adding a touch of shine to the shower
system. Chrome remains the most popular choice for shower finishes due to its clean and
classic look. Additionally, chrome finishes offer superior protection against corrosion and
wear, ensuring that your shower system lasts longer and maintains its shiny appearance.
View
Luxury Showers Systems
Explore our latest Multifunctional Showers, Massage Body Showers, Large Showers, Rainfall Waterfall
Mist Shower Systems, Luxury Shower systems, Luxury Multi Jet Shower Systems, Luxury Waterfall Rain
Shower systems with Body Sprays, and Smart Digital Multifunctional Luxury Shower Systems. Enjoy our
large selection on special sale of Luxury Showers; they are available in different functions,
finishes, sizes, and shapes. FontanaShowers ensures a hassle-free experience with our luxury showers
by providing comprehensive installation instructions. You can have peace of mind knowing that our
shower systems are fully supported by our warranty, guaranteeing lasting quality throughout their
lifespan.
We offer extensive range of luxury shower systems, including LED showers, multifunctional rainfall
and waterfall showers, and mist shower systems. Our collection also encompasses smart showers and
digital showers, providing advanced features for an enhanced showering experience. To ensure
compliance with new installation shower codes, all our luxury showers are equipped with a
thermostatic shower valve mixer, which is essential for maintaining precise and safe water
temperatures. Our luxury showers are available in a variety of finishes to suit your aesthetic
preferences. You can choose from chrome and brushed nickel options, while our bronze finish showers
come in both light bronze and matte black finishes. Additionally, we offer luxury showers in a gold
finish, with the choice of shiny gold or rich brushed gold.
With FontanaShowers, you can discover the perfect luxury shower that not only meets your functional
needs but also adds a touch of elegance to your bathroom design.
We also can customize the finish of any of our luxury showers all you have to do is check with any
one of our sales consultants and they will help you customize your dream shower function and select
the finish that best suite the project décor. FontanaShowers offers a wide selection of
luxury
shower systems
to enhance your bathroom experience.
We offer a range of options including multifunctional showers, massage body showers, large showers,
rainfall and waterfall mist shower systems, and smart digital multifunctional luxury shower systems.
Fontana provide a variety of different functions, finishes, sizes, and shapes to choose from, and
all of our
luxury
showers
come with complete, easy installation instructions and fully backed warranty. We
provide LED shower systems, multifunctional rainfall and waterfall, mist shower systems and smart
shower systems, all of which come with a thermostatic shower valve mixer, which is essential to meet
new installation codes. The luxury showers are available in chrome, brushed nickel, bronze, matte
black, gold and other finish options, and they also can be customized to suit project design
preference.
Creative Luxury Showers

Explore Luxury Shower System By Type
Browse our latest Multifunctional Showers
Explore Luxury Shower System By Finish
Browse our latest Multifunctional Showers
|
|
|


.jpg)
.jpg)
.jpg)
.jpg)
.jpg)


