How to install Platinum Commercial Automatic Temperature Control Thermostatic Sensor Tap With Matching Soap Dispenser | SENSOR-TAP-FB505B
|
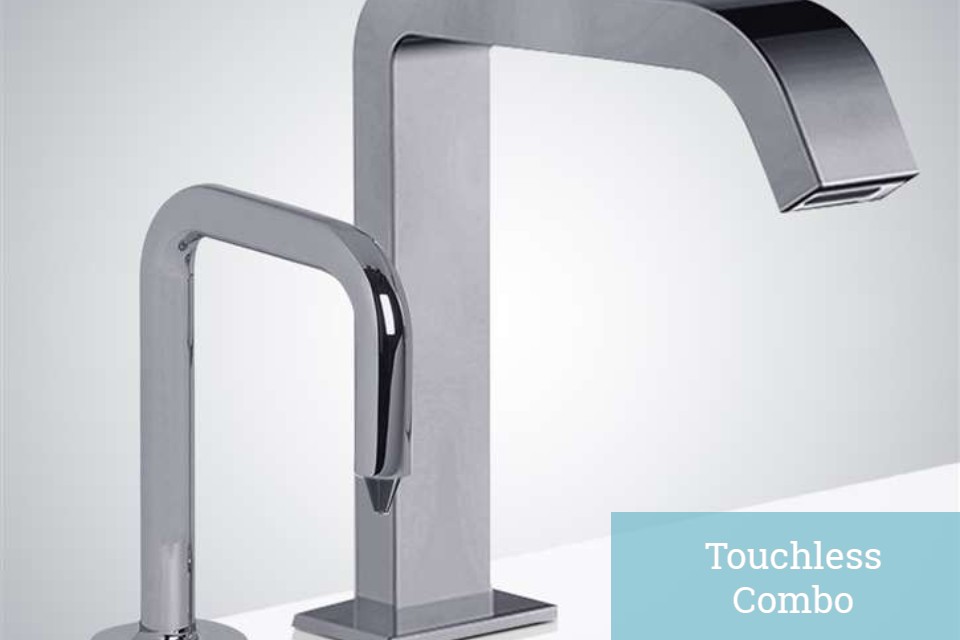
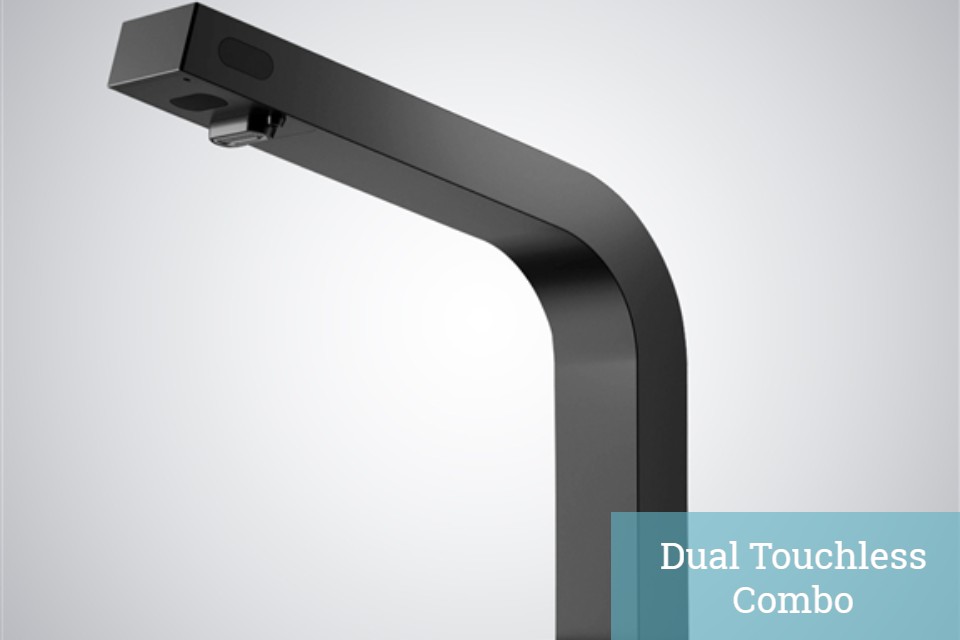
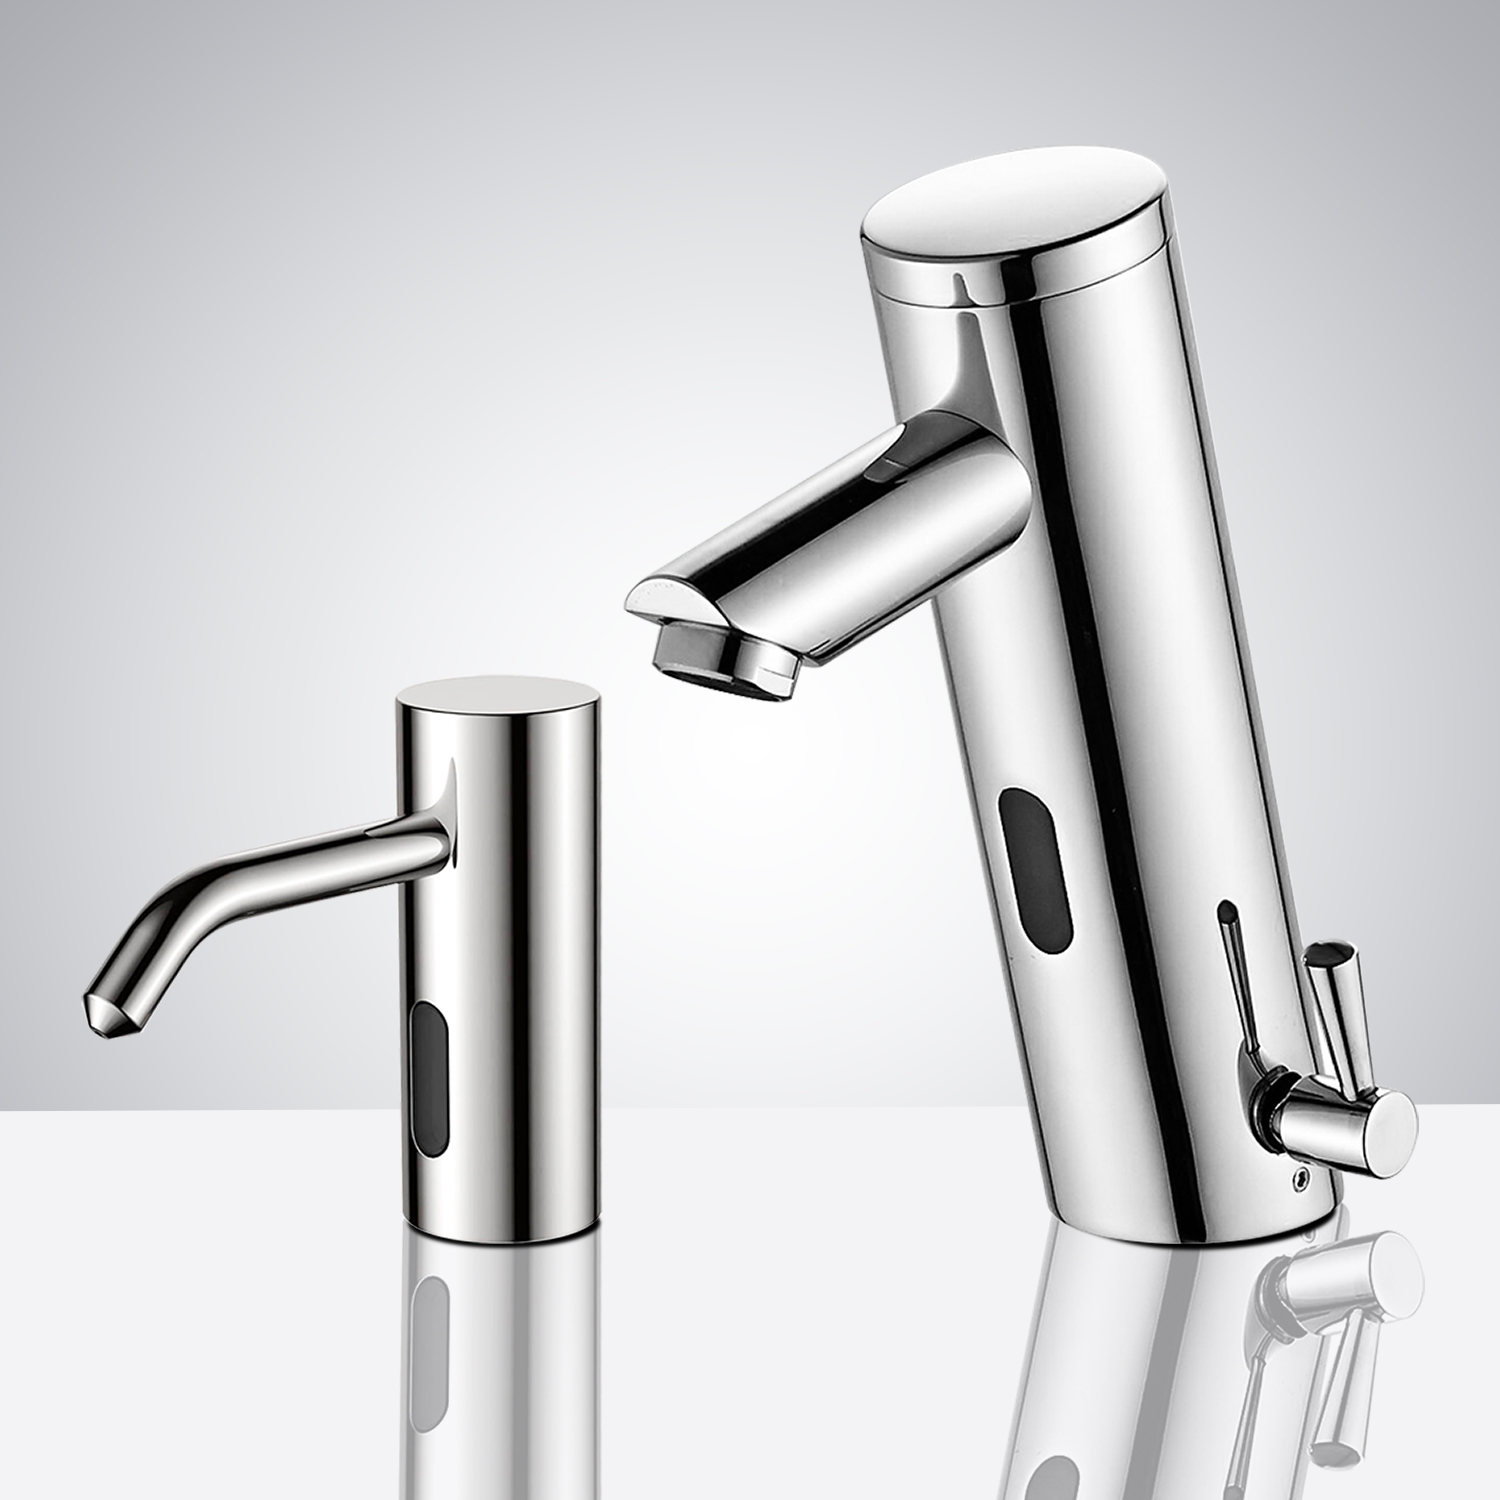
Easy step by steps installation instructions for Sensor Faucet Combo |
|
|
Visit Product Page 
|
- Before you begin, please read the installation instructions below. Observe all local building and safety codes.
- Unpack and inspect the products for any shipping damages. If you find damages, do not install.
- Please note all products must be installed by a professional and certified plumber otherwise warranty might be voided.
|
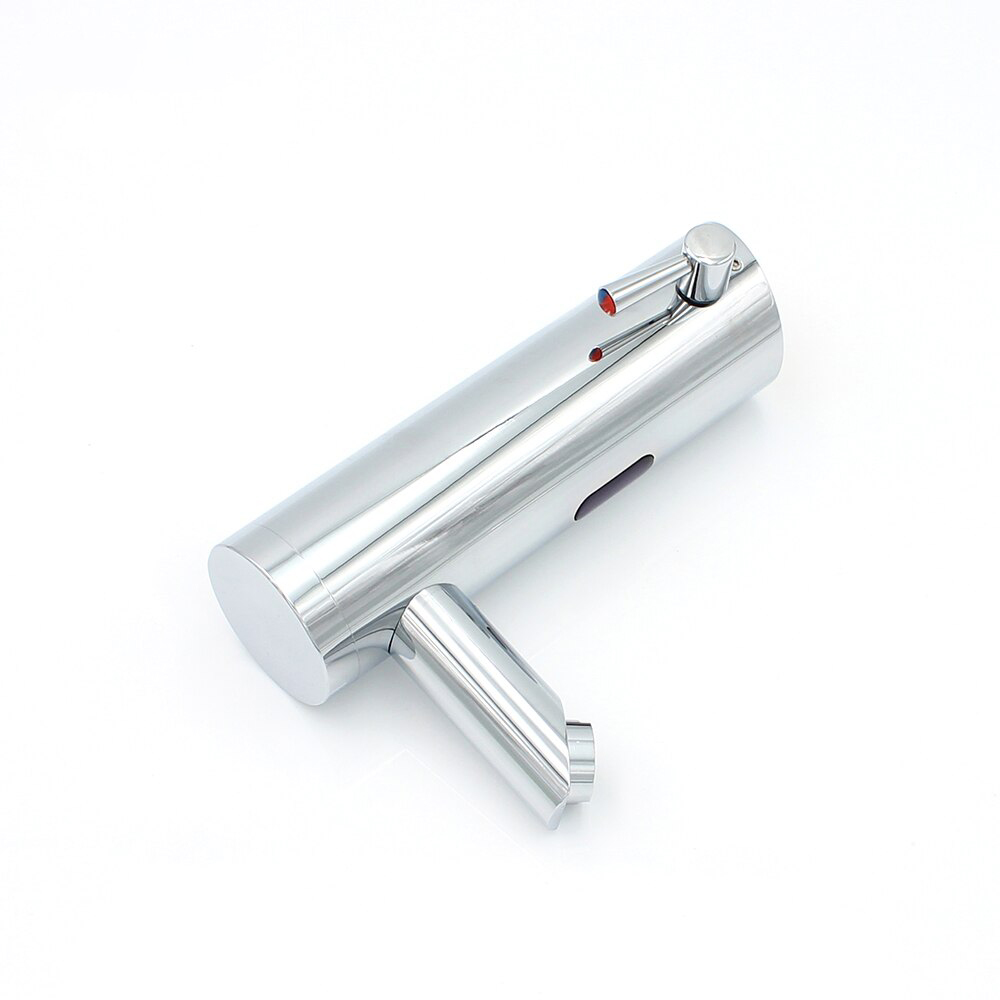
sensor
|
|
|
Sensor Faucet Installations Instructions
|
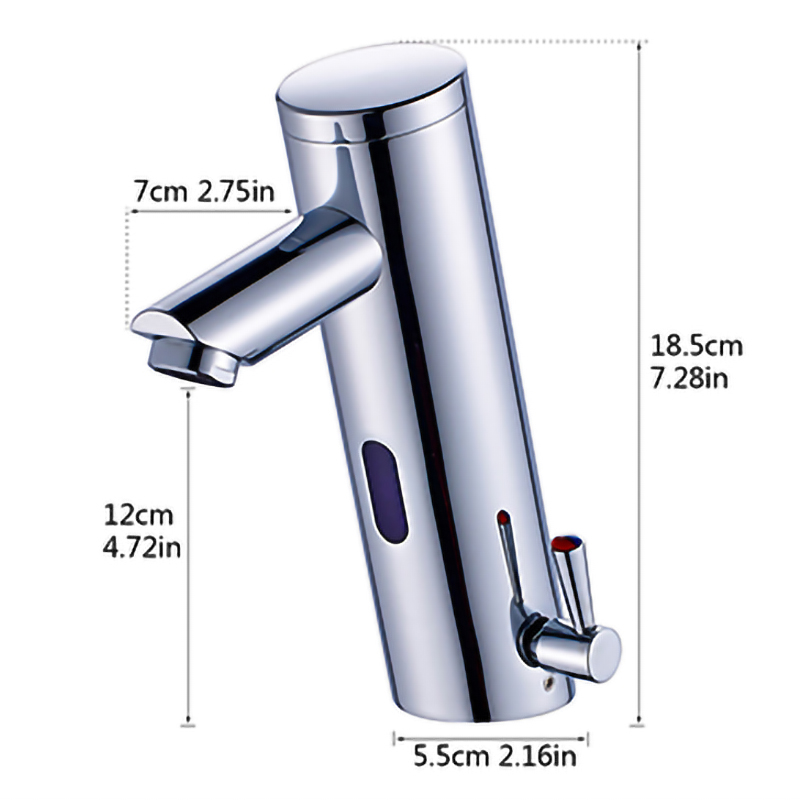
Size:
|
|
|
|
|
|
Features:
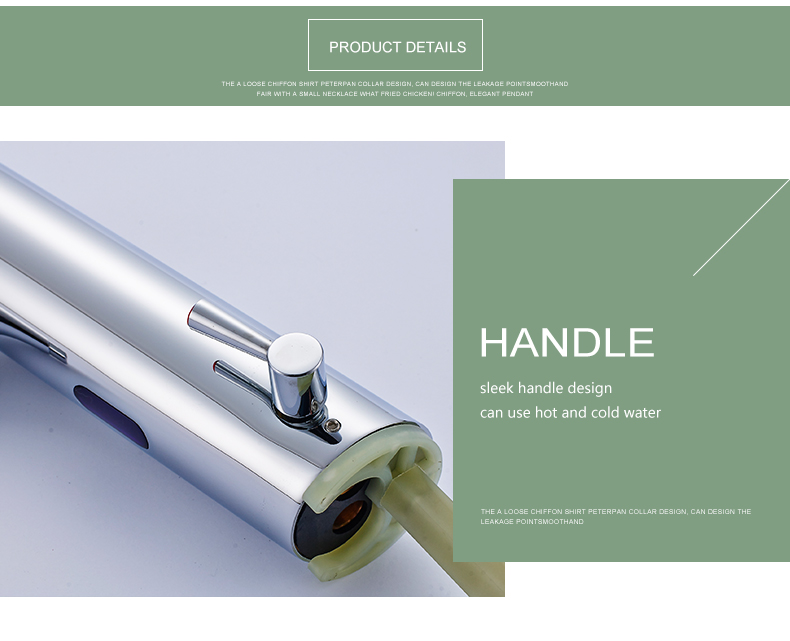
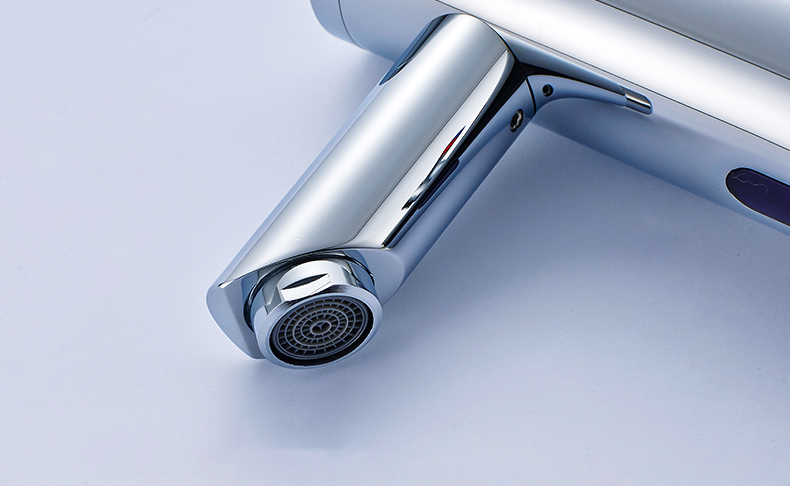
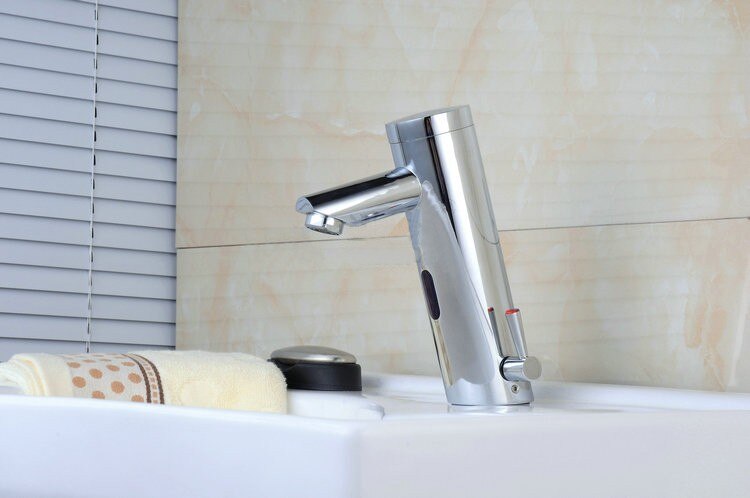
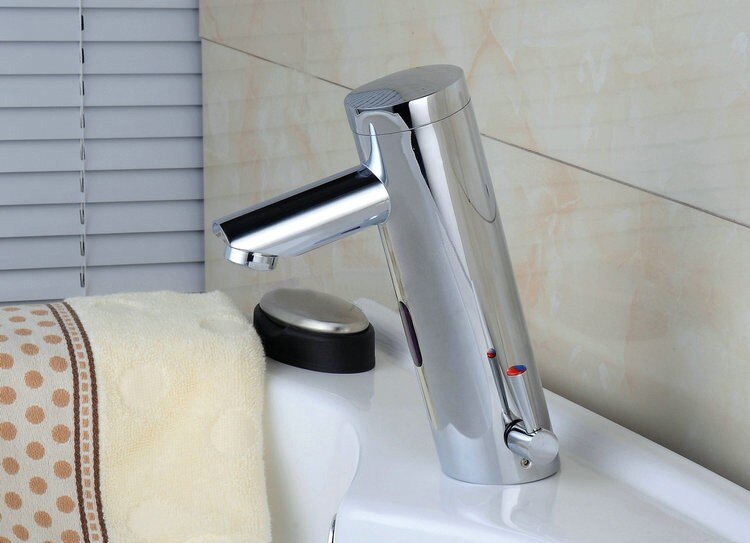
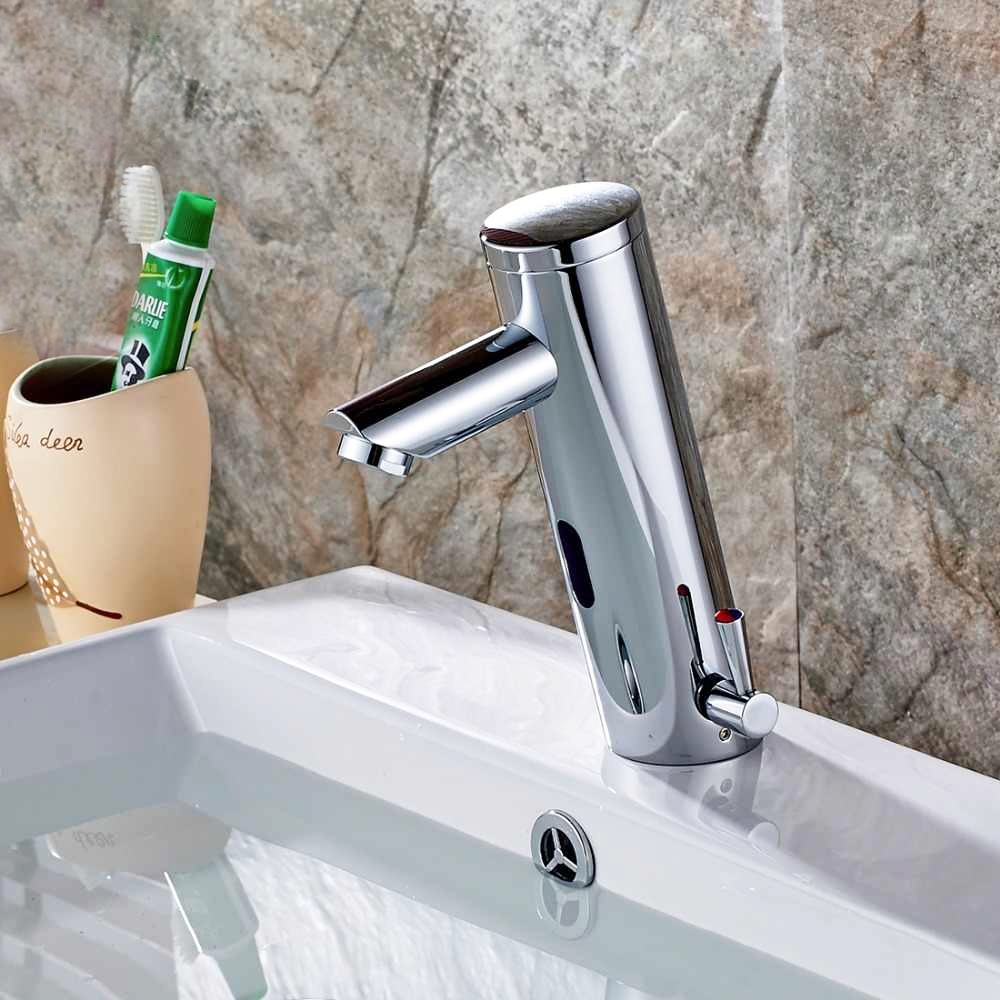
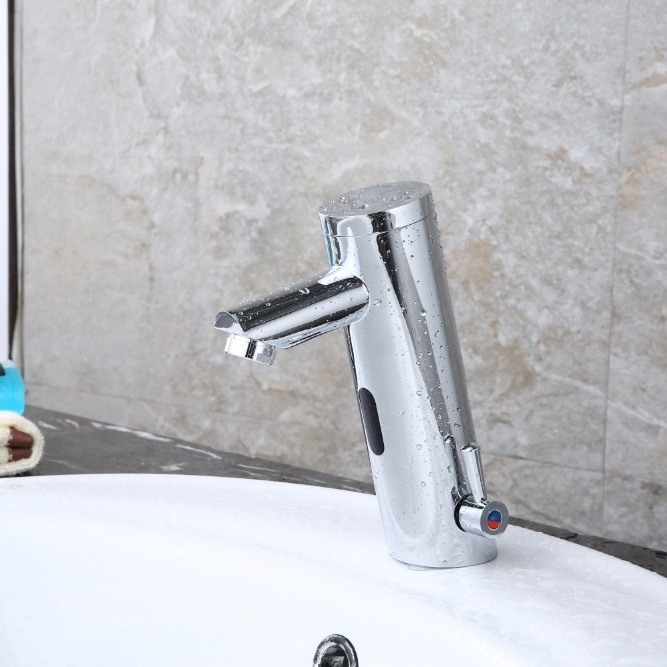
- Cold and Hot integration. It is a mixer with the cold water in the left turning and hot water in the right turning.
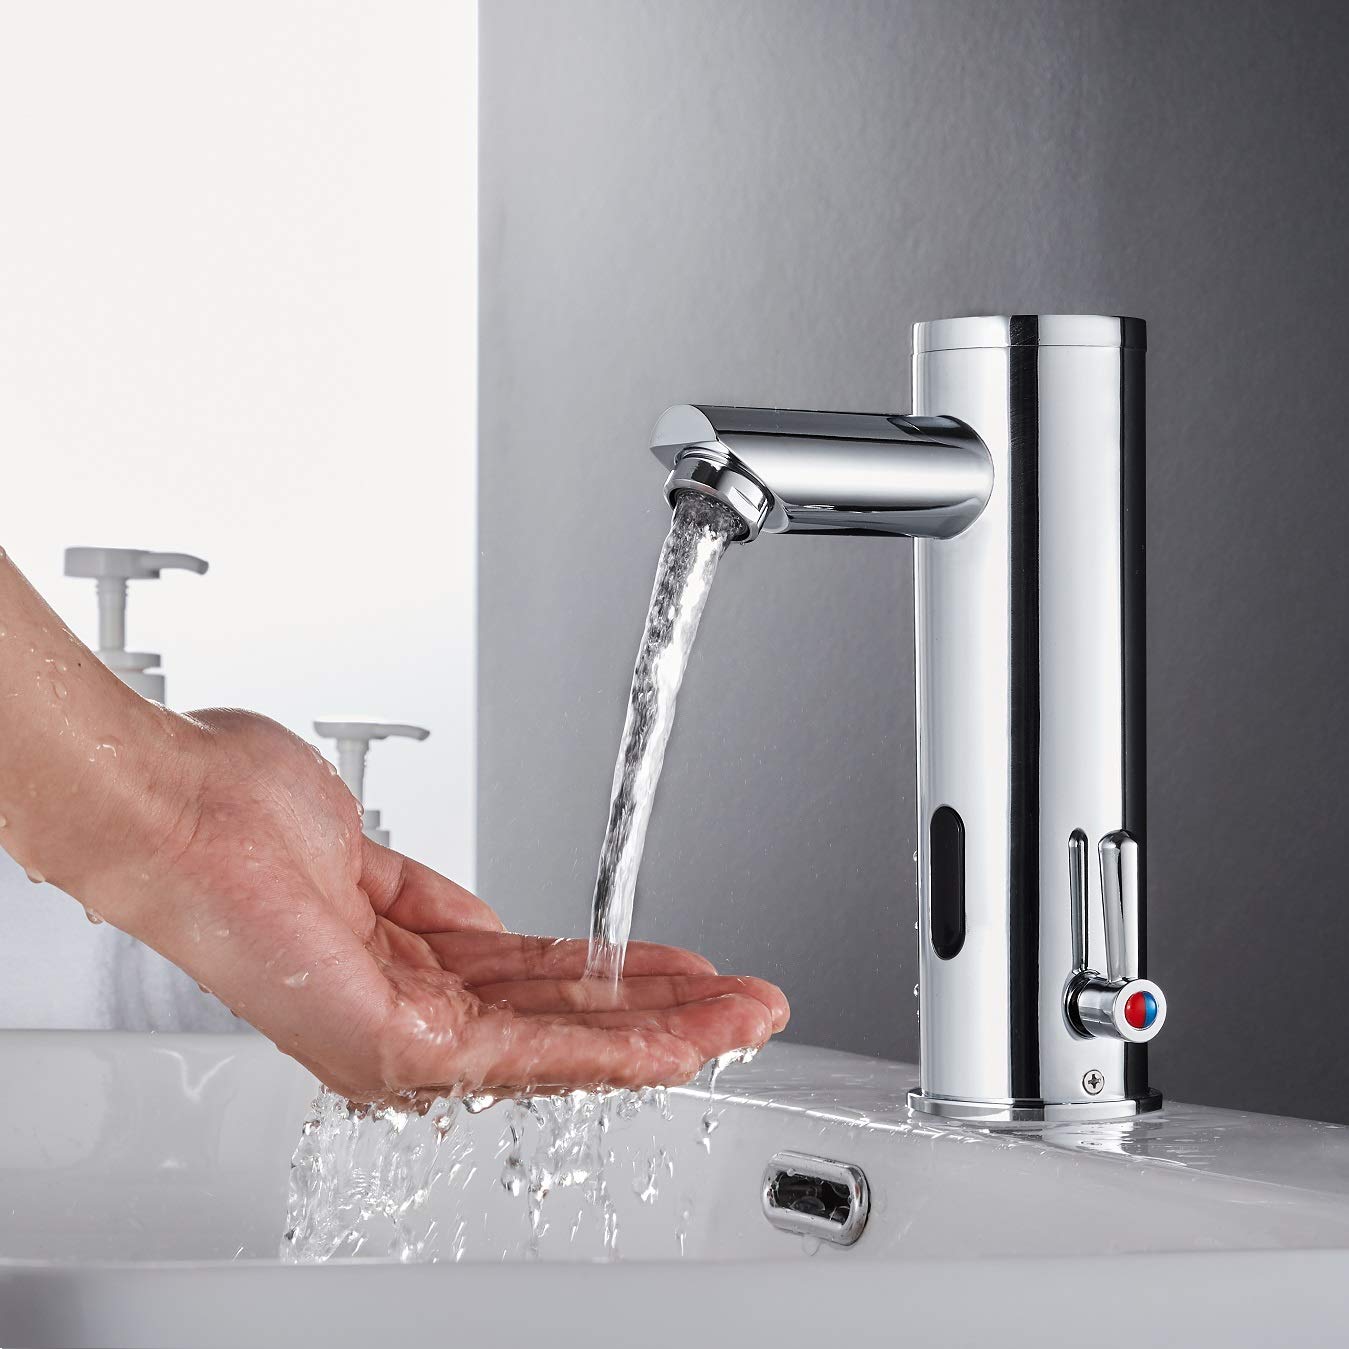
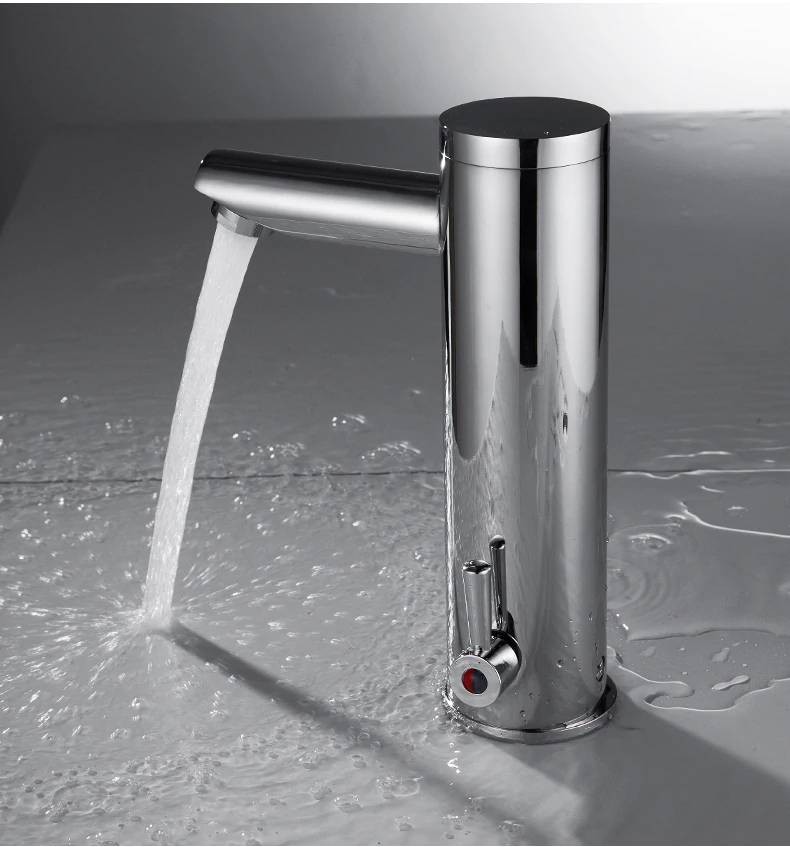
- Water saving: Water flows out when your hands approach the induction zone, and stop immediately once you draw back your hands.
- Low power,electricity-saving: For DC type, 4pcs AA batteries can be used for about 2 years, if the faucet working 200 times a day.
Specification:
- Installation Type: Deck Mounted
- Installation Holes: One Hole
- Flow Rate: 1.8 GPM (6.81 L/min)
- Valve Type: Ceramic Valve
- Suitable Water Pressure: 0.3-1.2 MPa
- Temperature of environment:1-45° C (Cold & Hot water )
- Electric Power: DC Dry Battery
- Dia of inlet pipe: G1/2"
- Dia of outlet pipe: G1/2"
- Power: DC6V (4AA Alkaline batteries)
- Power consumption in static: <0.5 mW
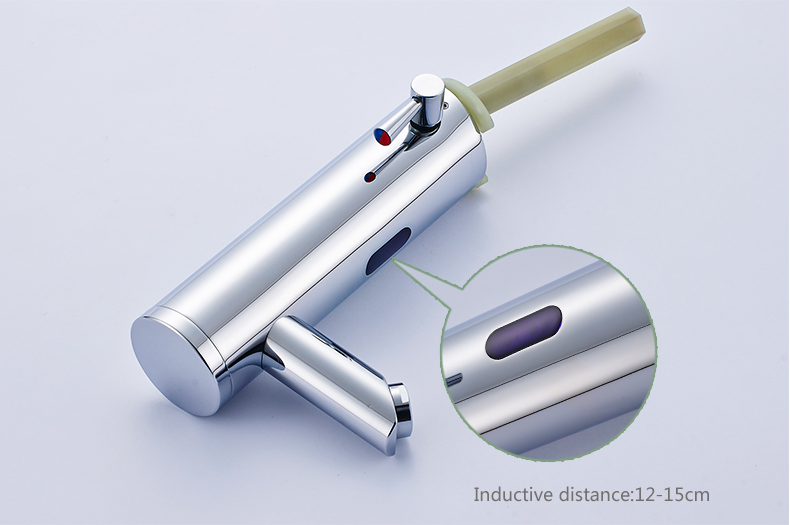
- Detection Zone: Factory set 30cm
- Protection degree: IP56
Smart infrared sensor automatically adjusts the distance according to the environment.
|
|

|
|
|
|
|
|
|
|
Step 1: Battery Box |
|
Step 2: |
 |
sensor
|
 |
|
|
|
|
|
|
|
Step 3:
|
|
Step 4:
|
 |
|
 |
|
|
|
|
|
|
|
|
Step 5:
|
|
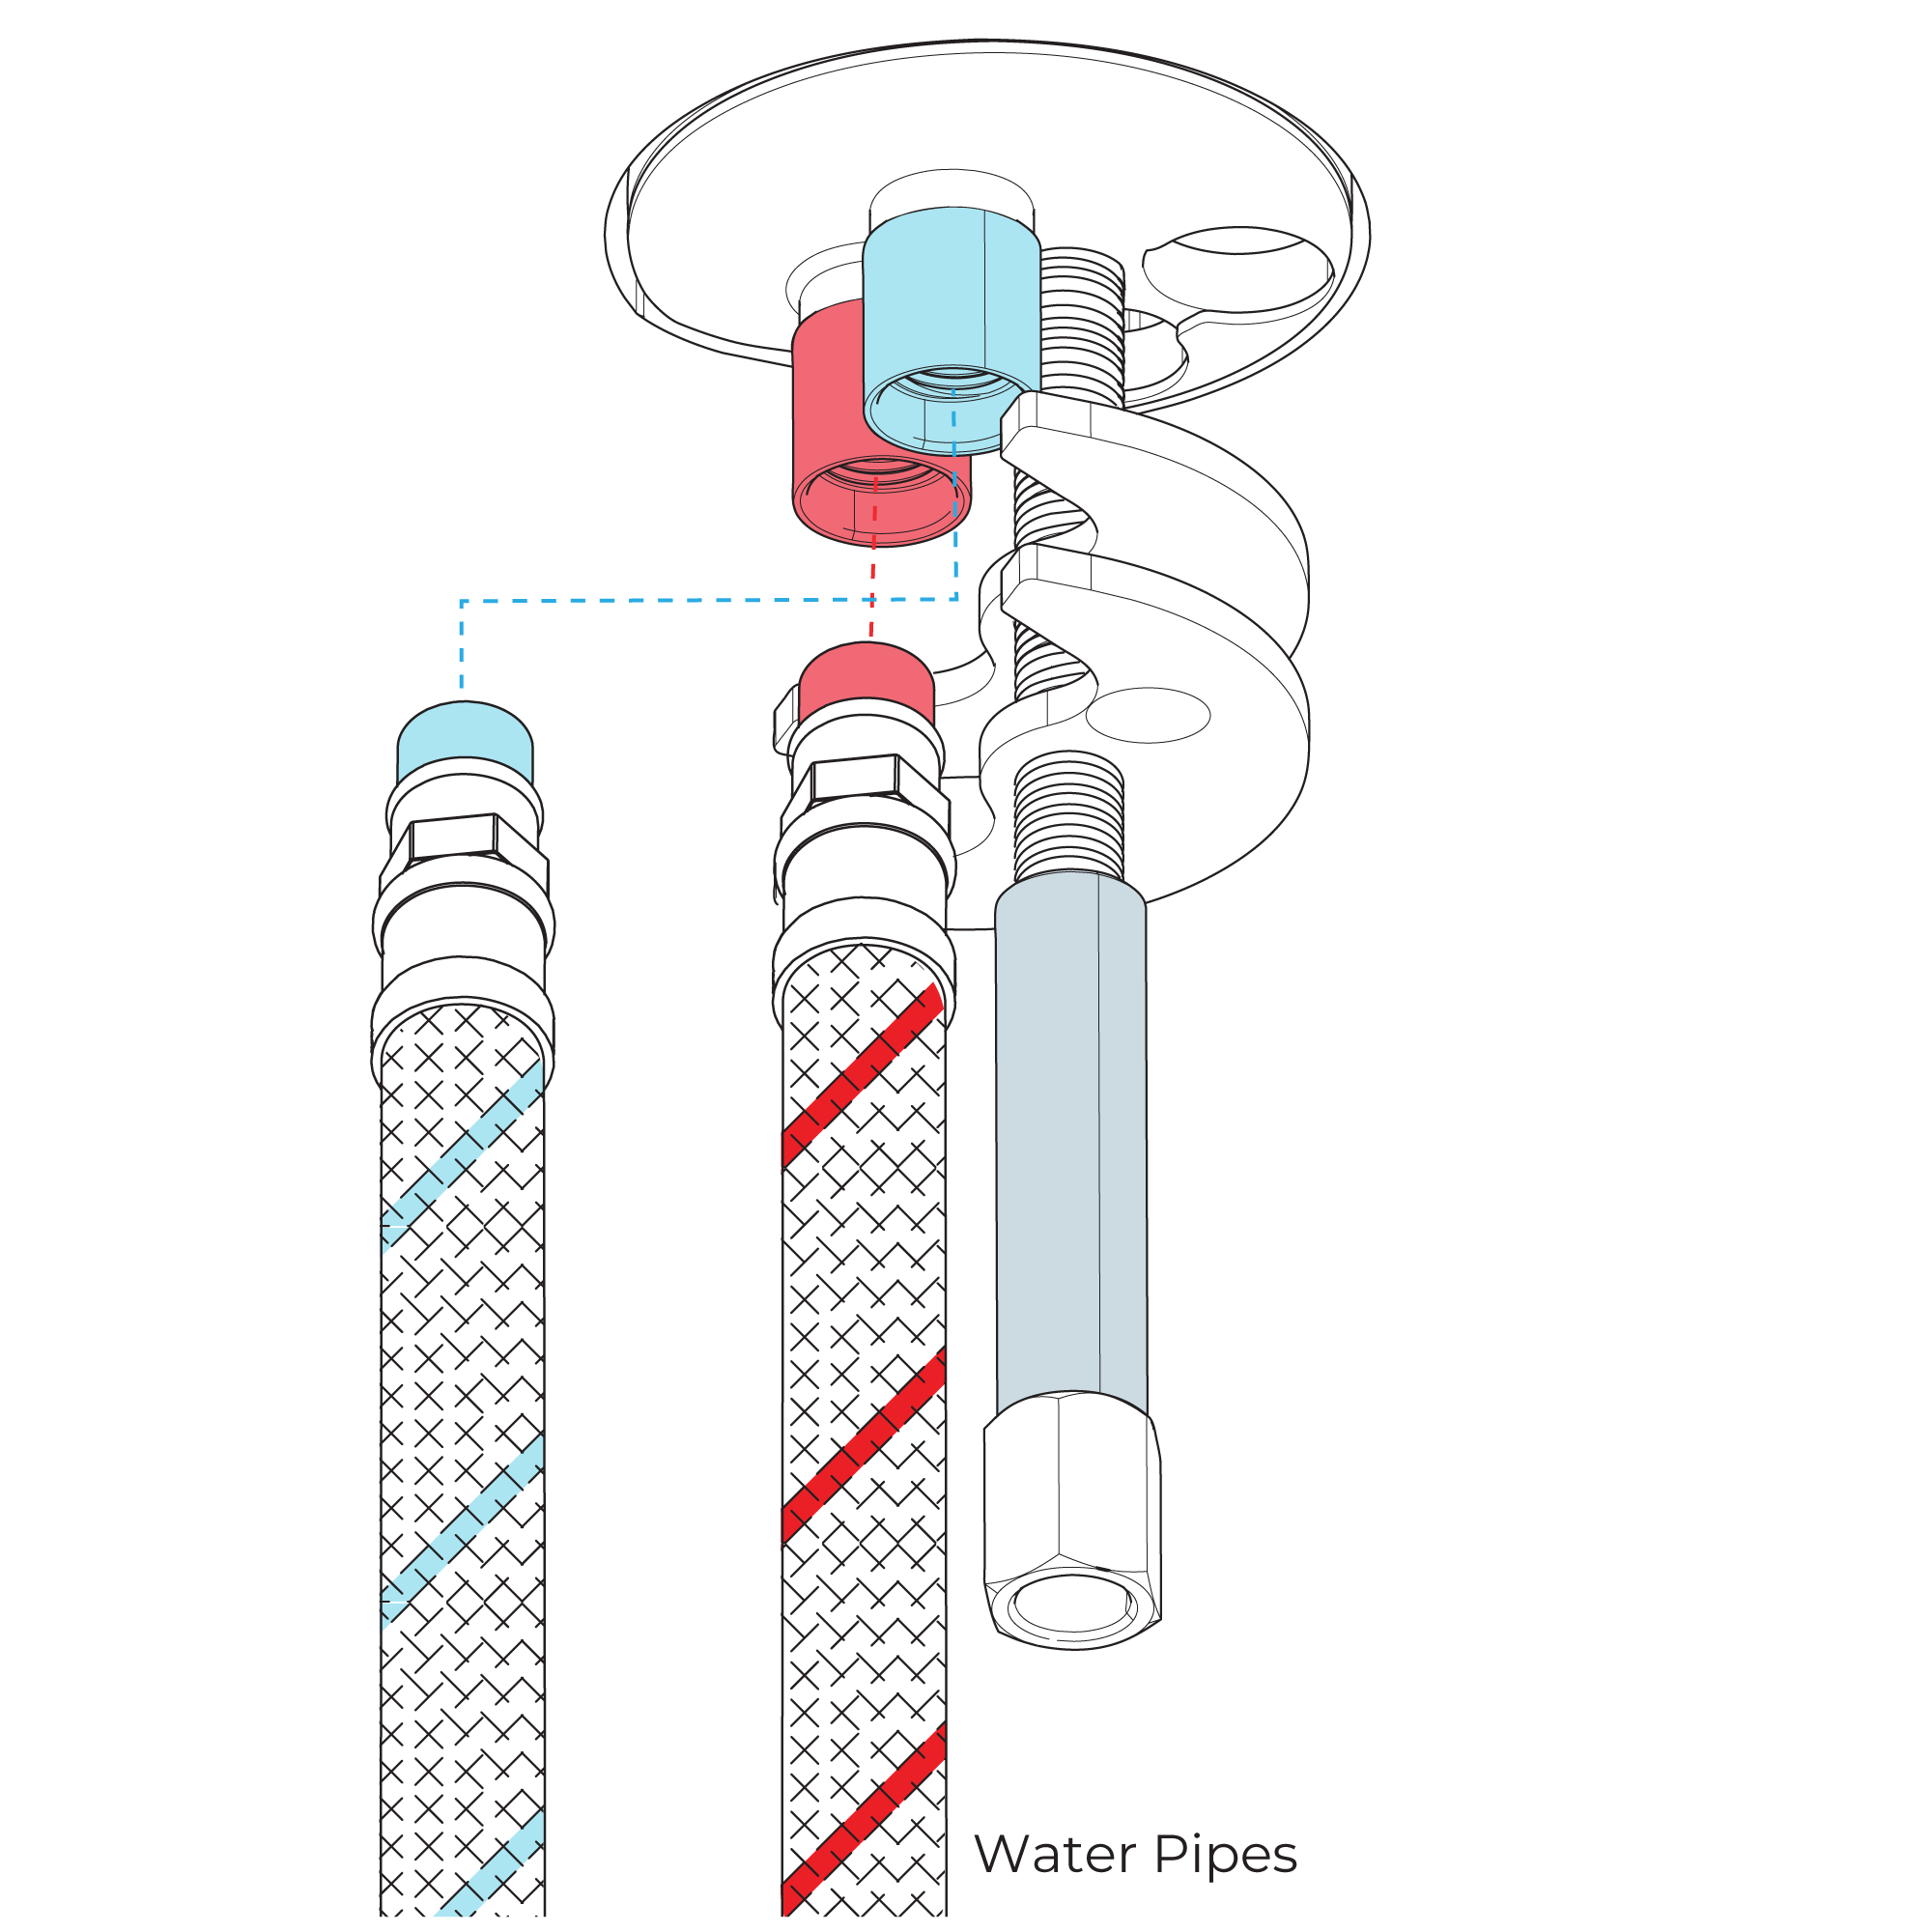
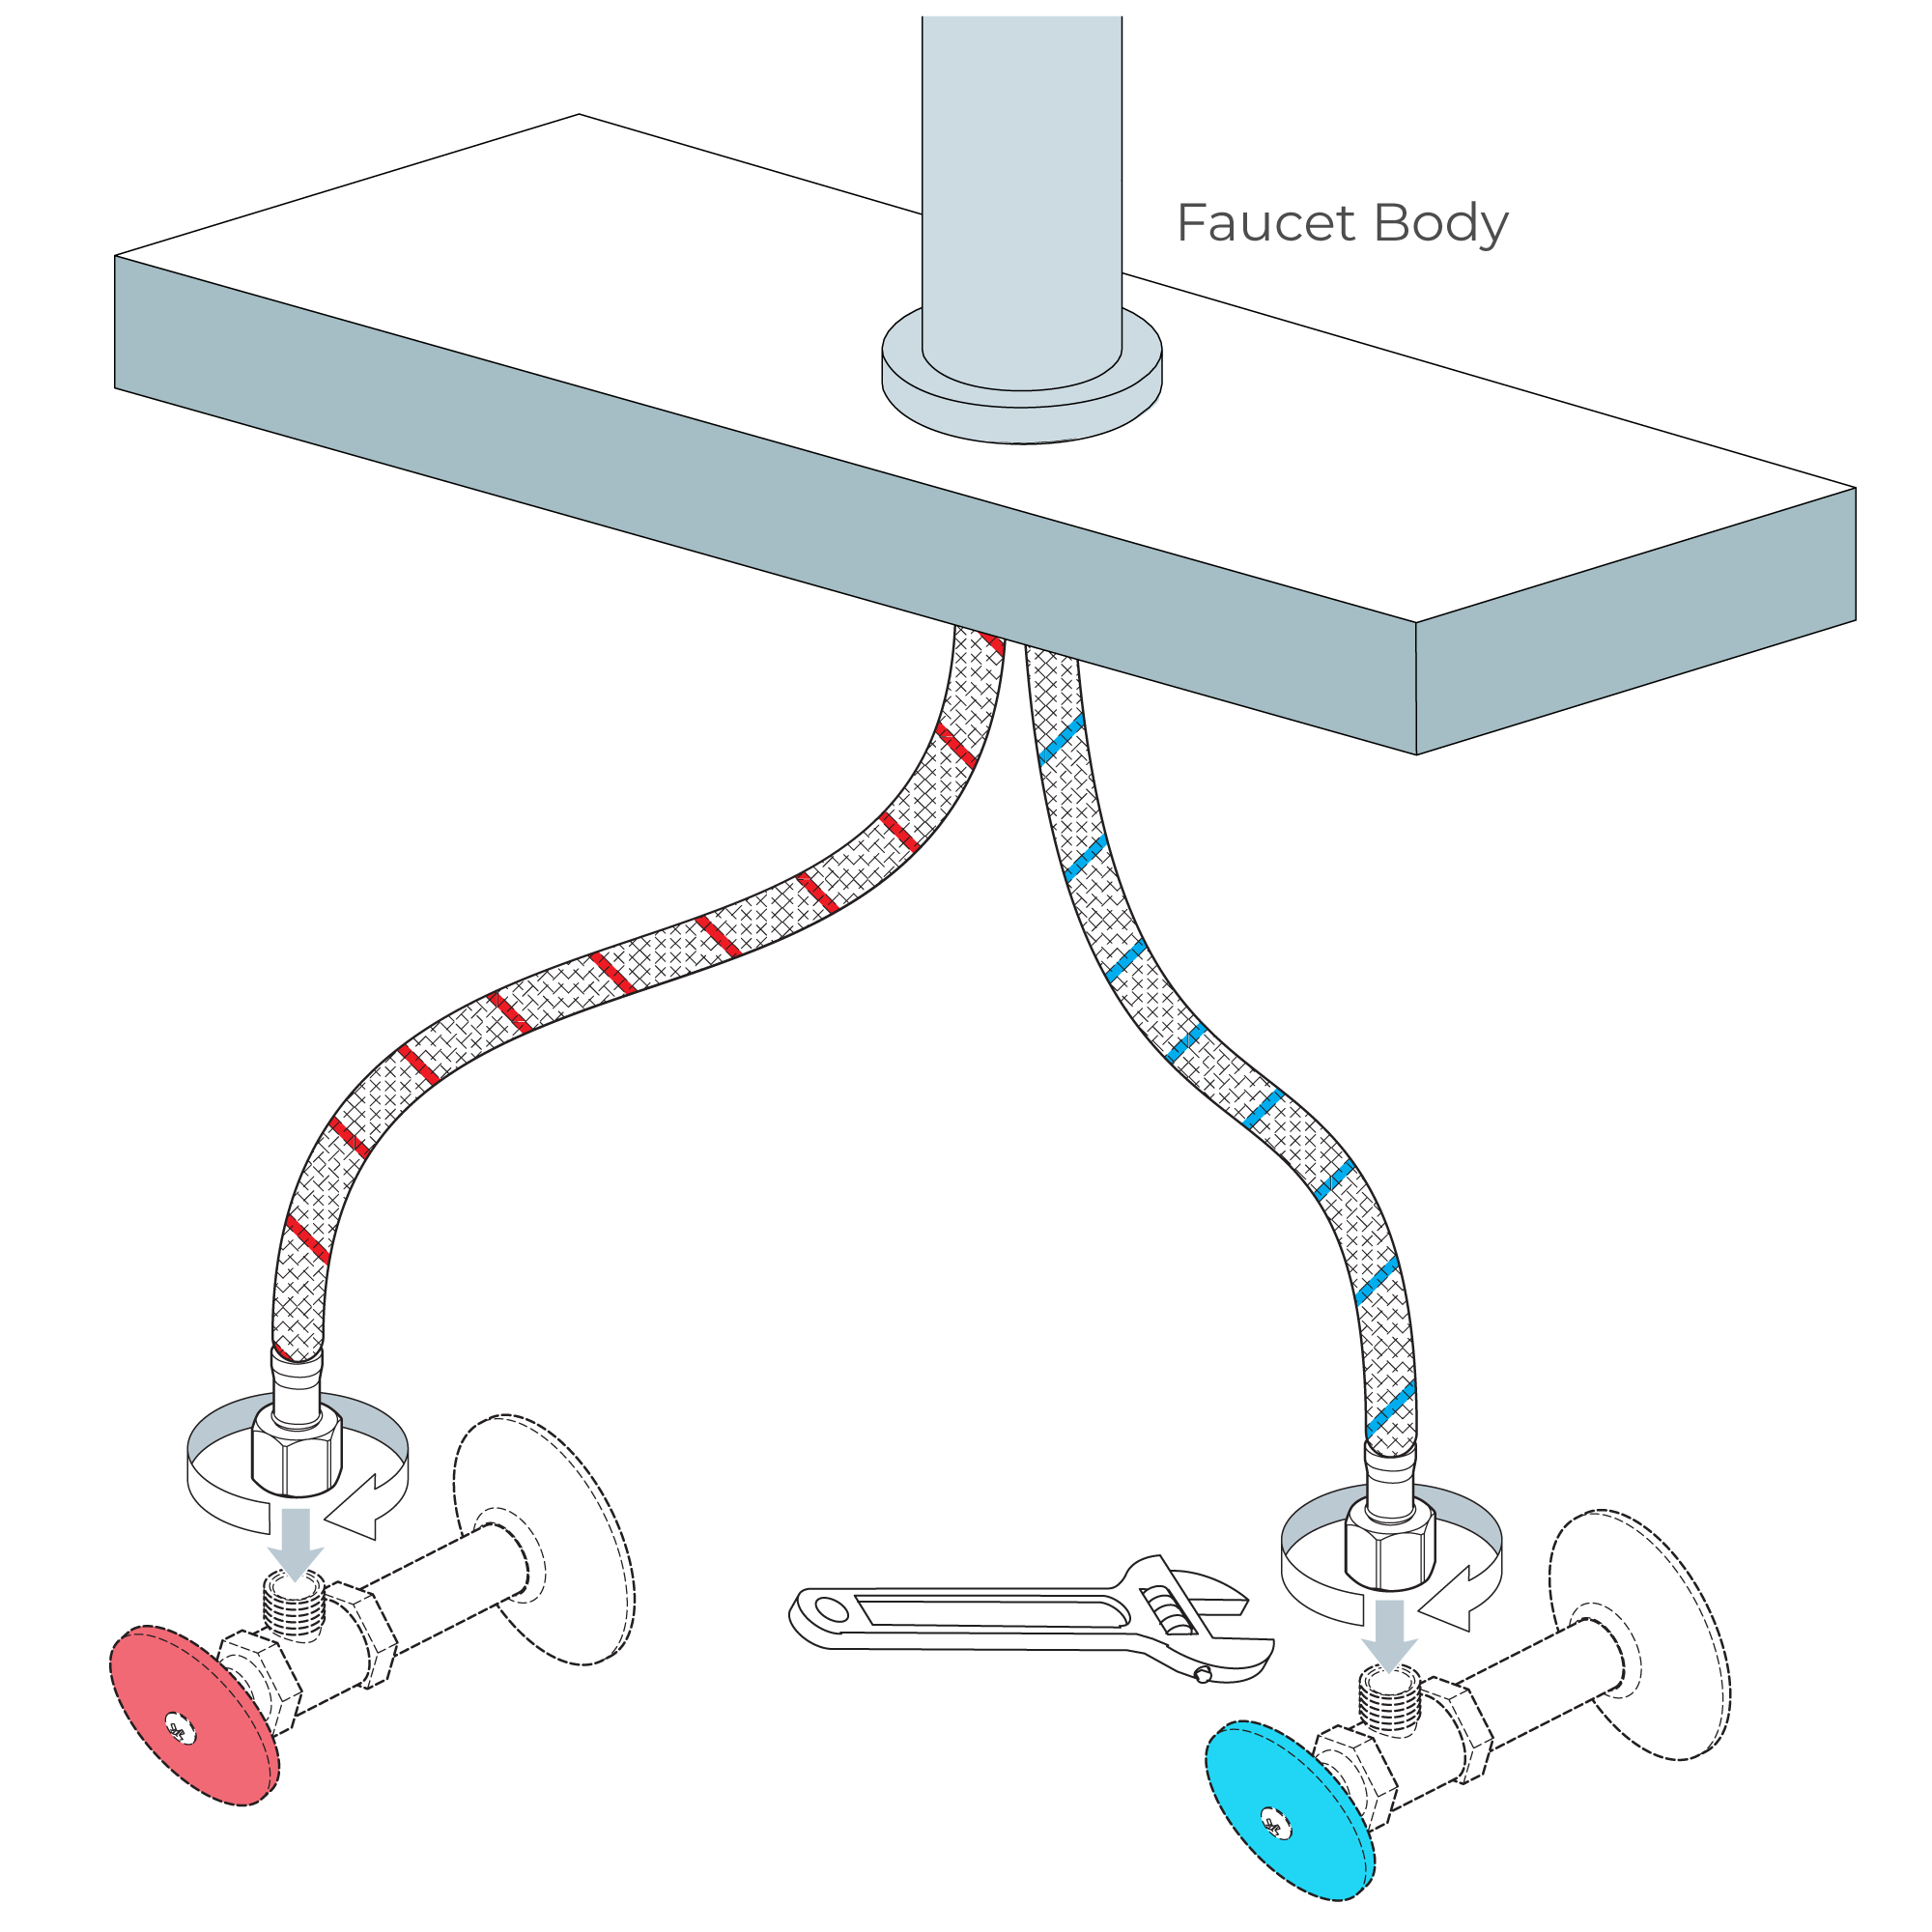
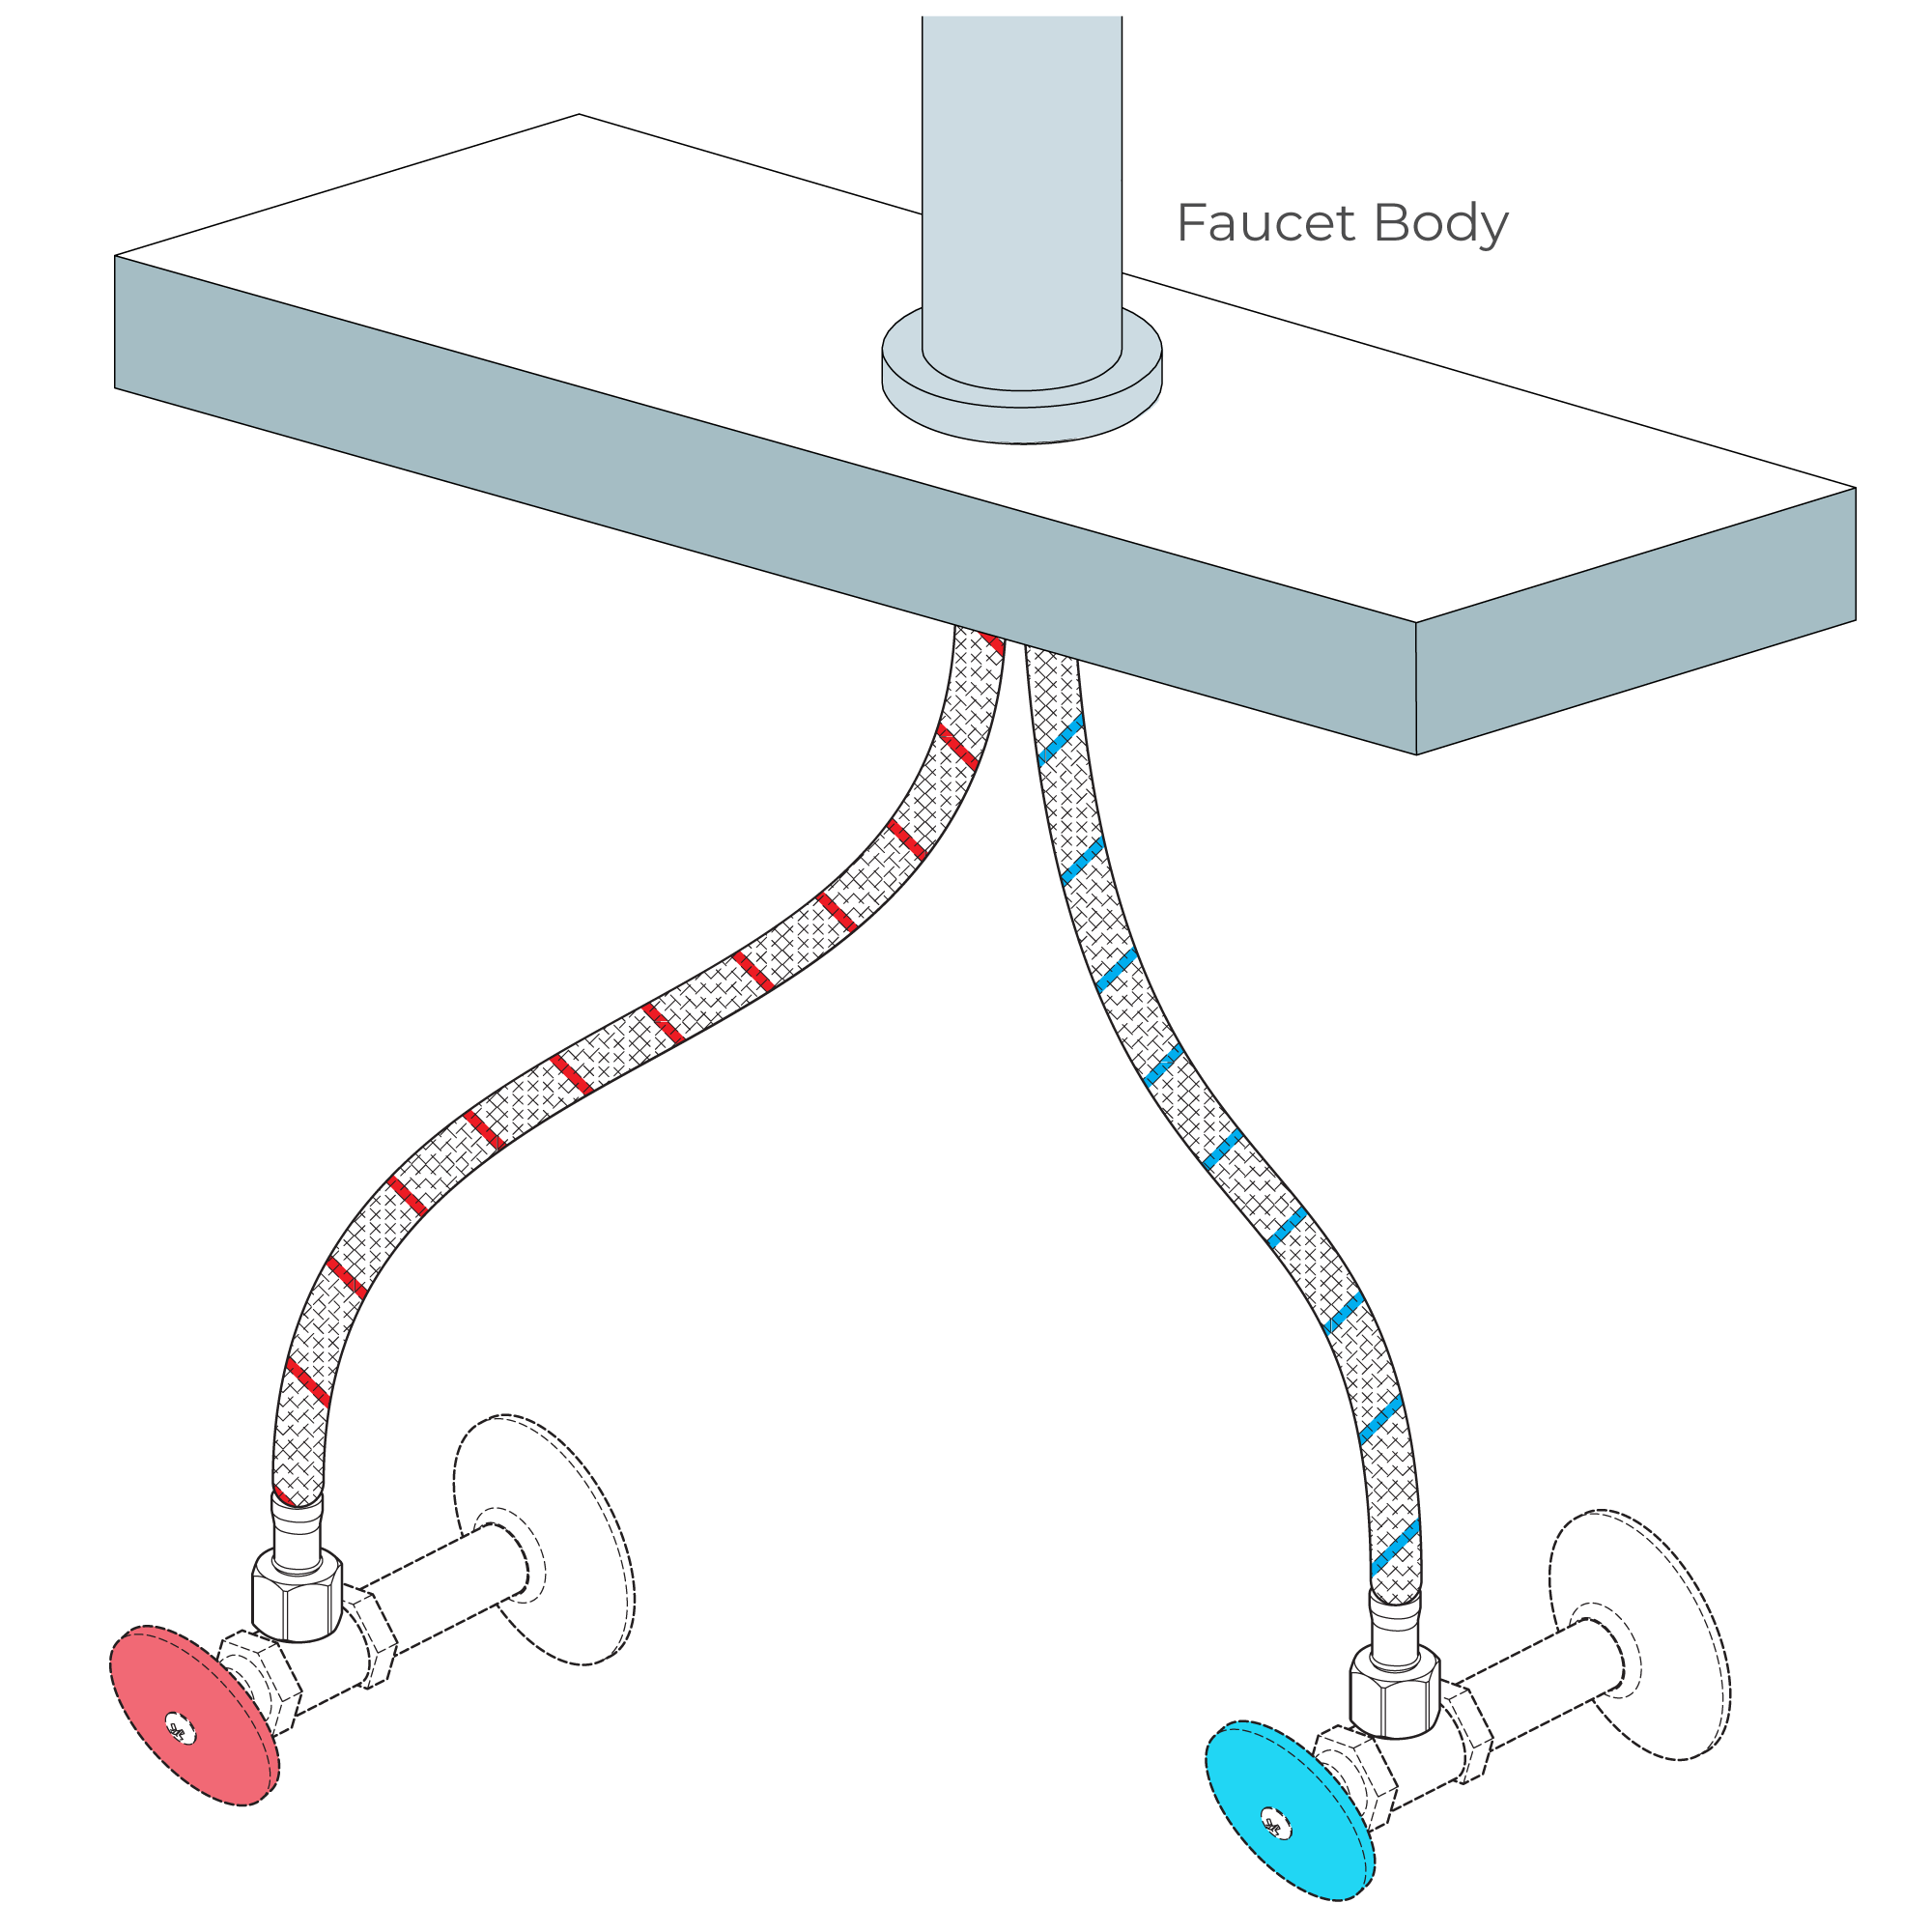
Step 6: Correct way for Hose
|
 |
|

|
|
|
|
|
|
|
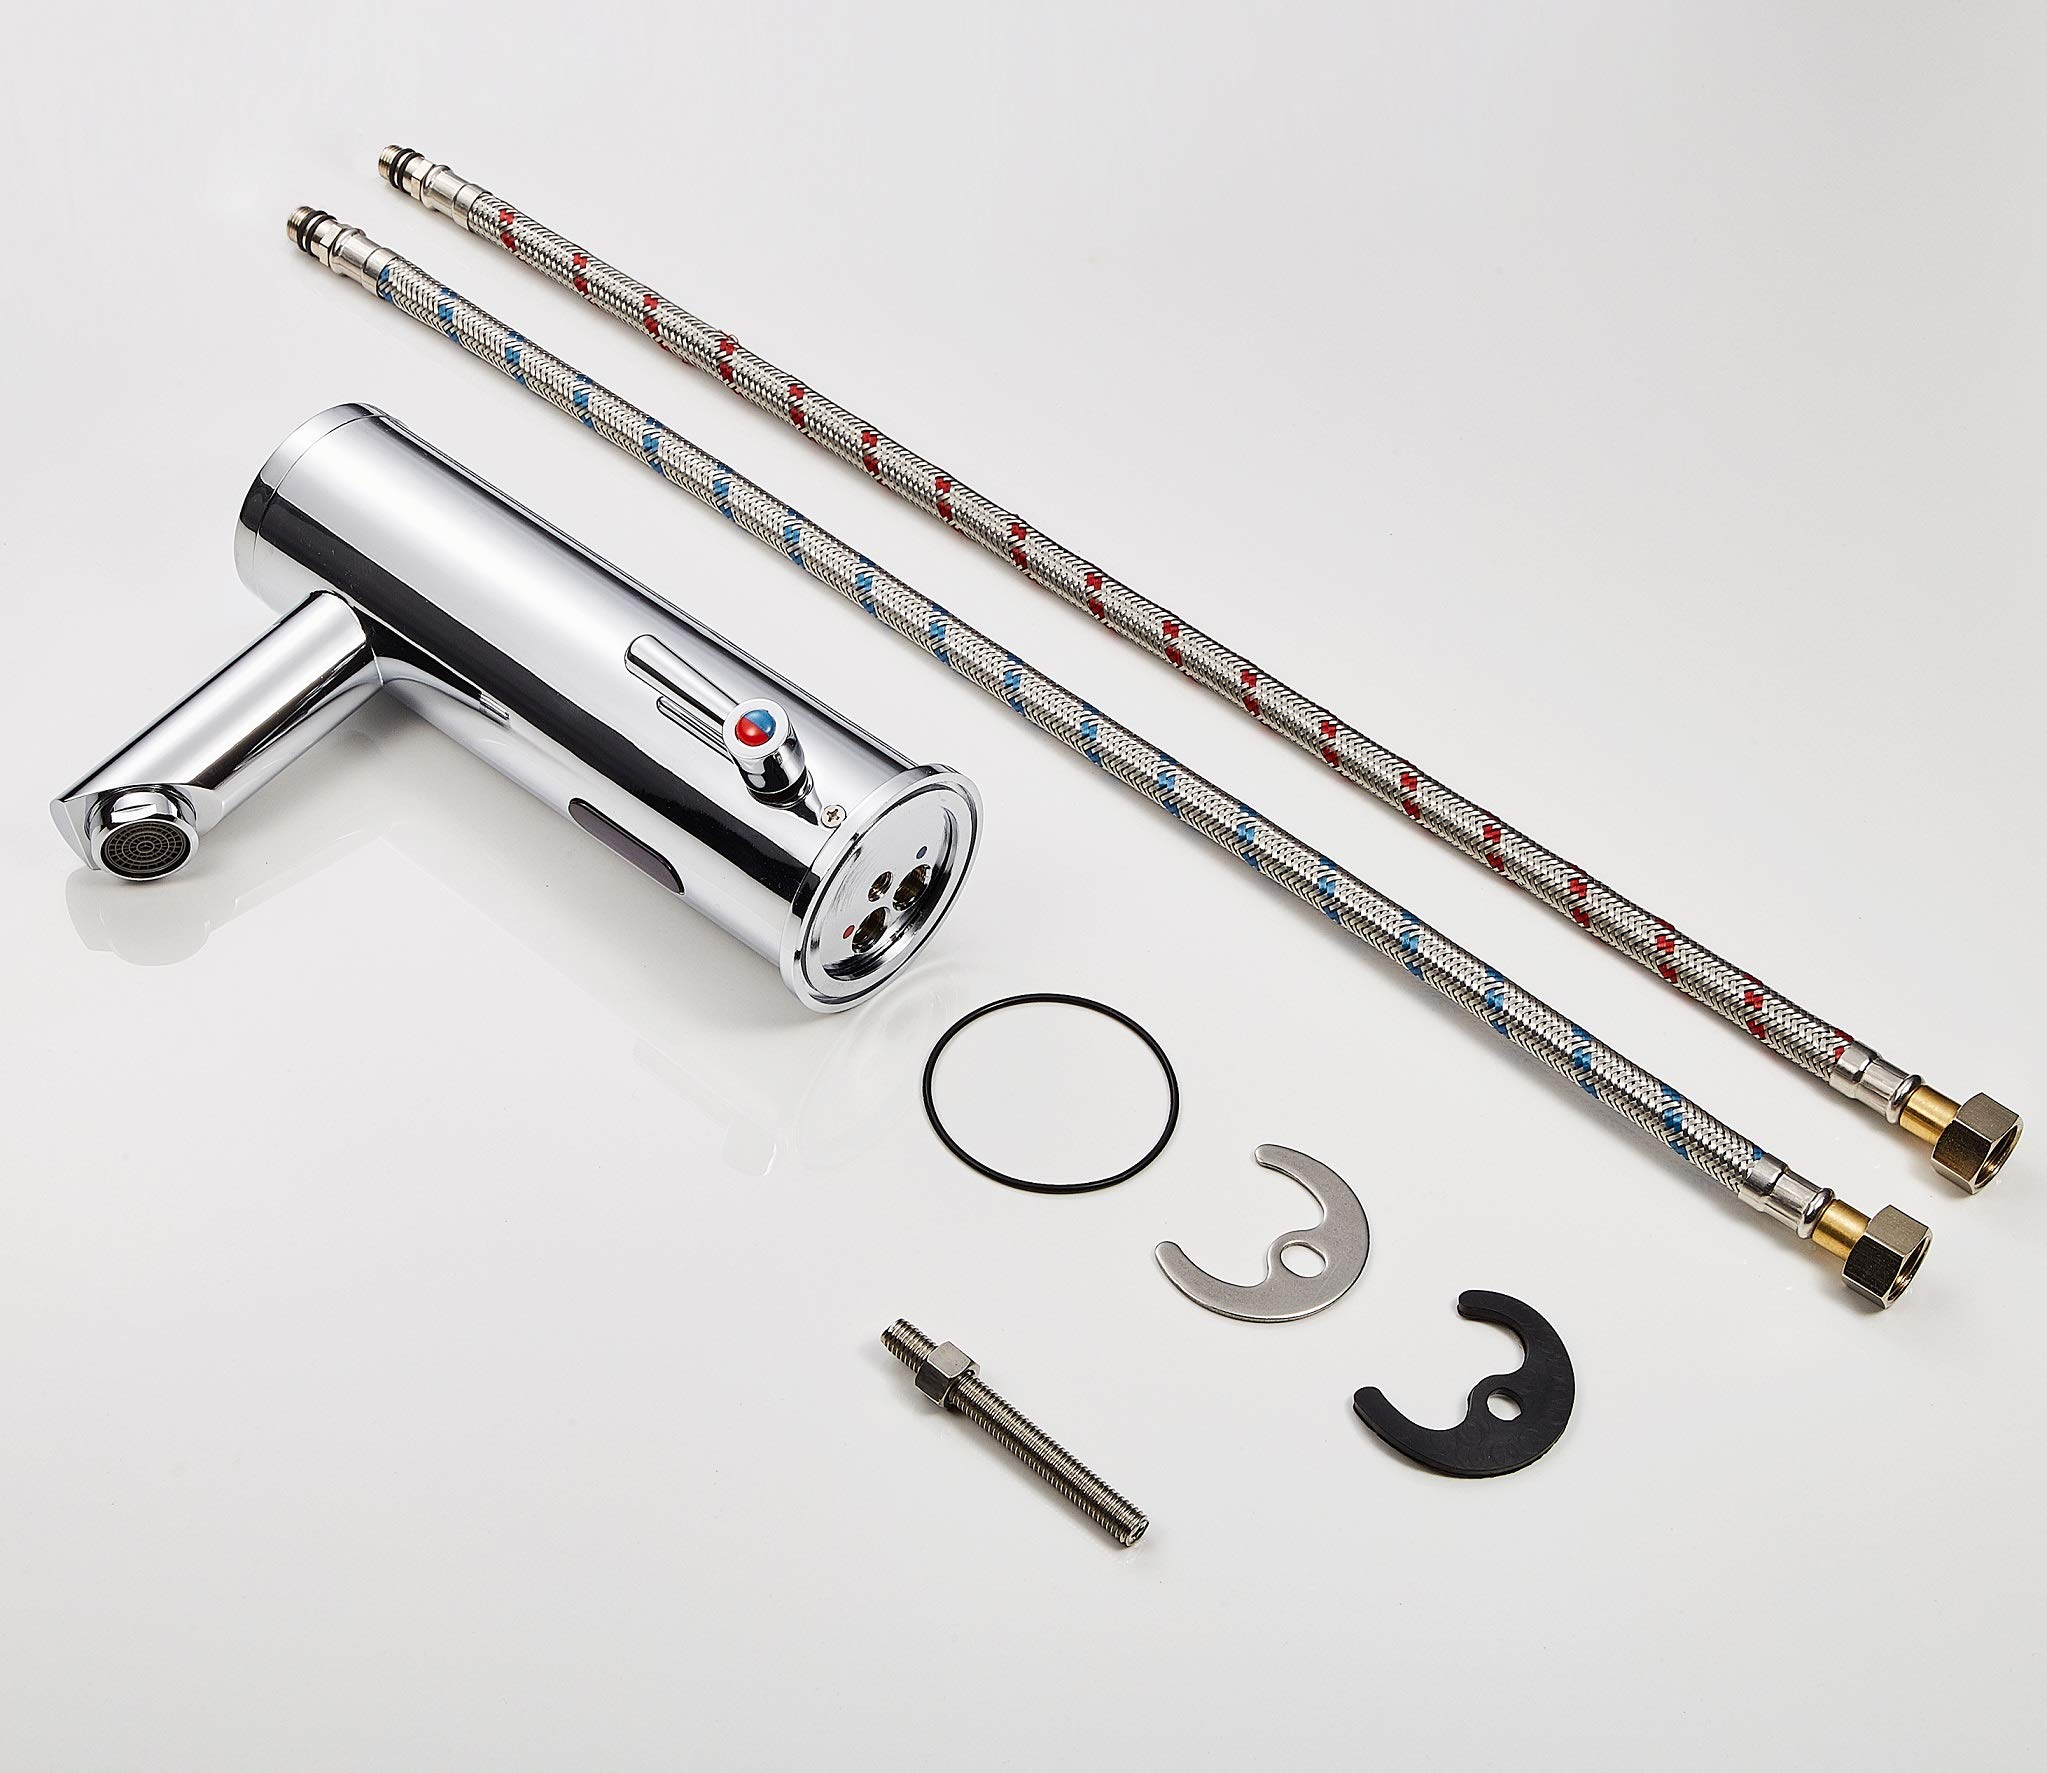
Before installing your new mixer, flush through the pipework to ensure removal of debris, turn off the water supply.
Ensure the ‘O’ ring is in place at the bottom of the mixer body.
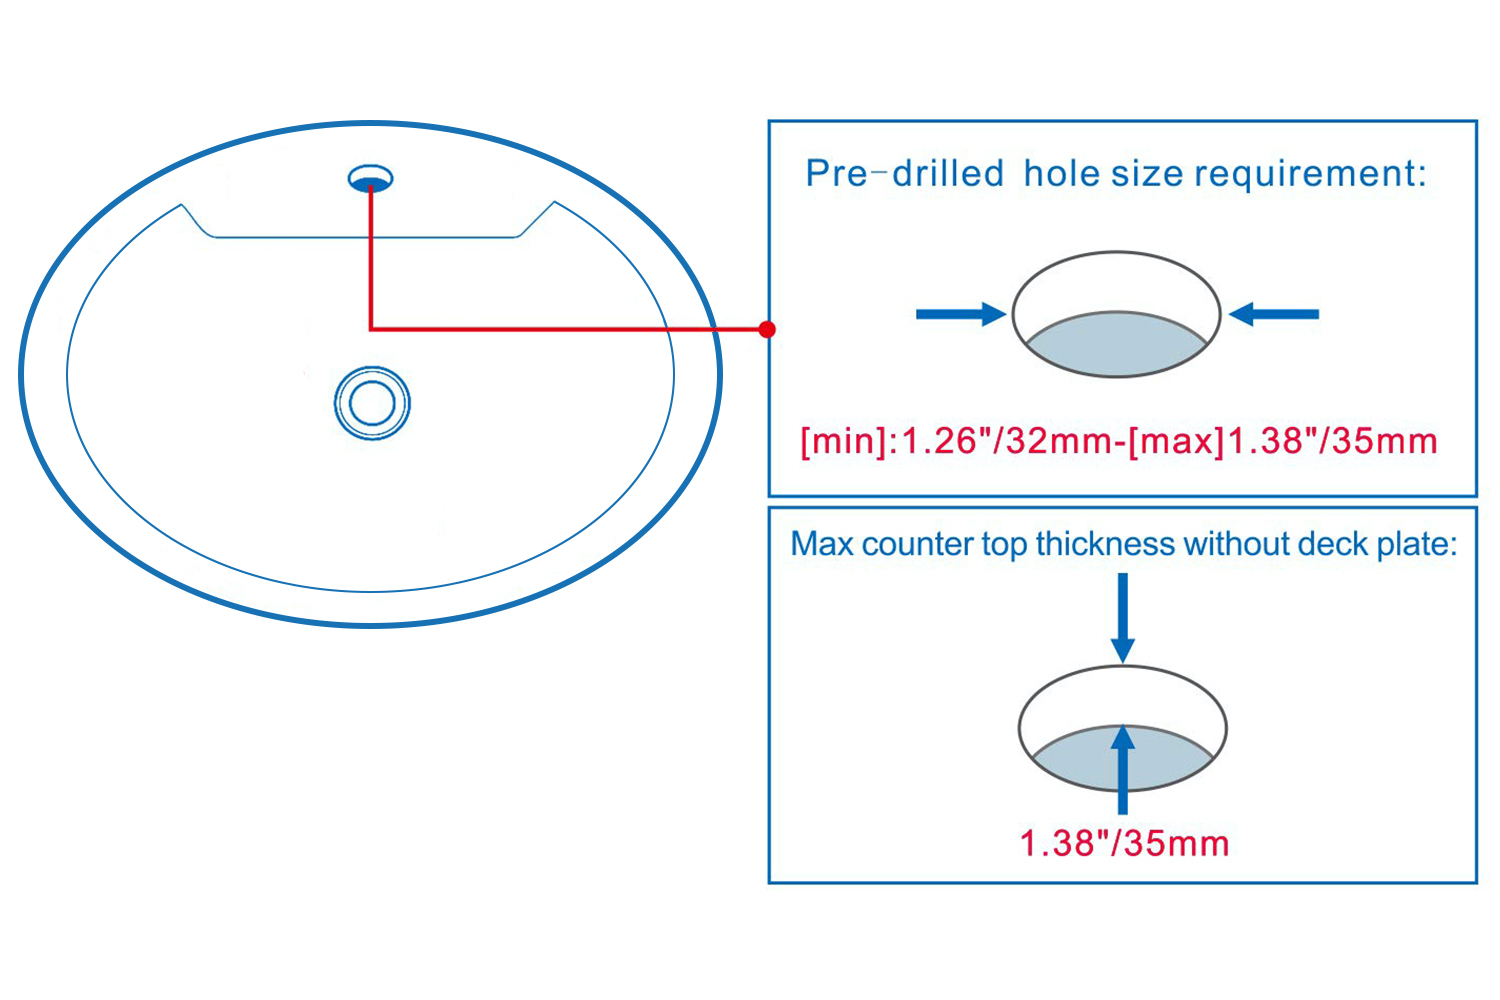
Push the control cable down through the hole and position the mixer on the basin. From the underside of the basin fit the rubber washer, metal washer onto the threaded tube followed by the nut. Tighten the nut to clamp the mixer to the basin. Tighten the 2 side screws up onto the washer.
CAUTION: Do not over tighten the nut/bolts as this may damage the basin.
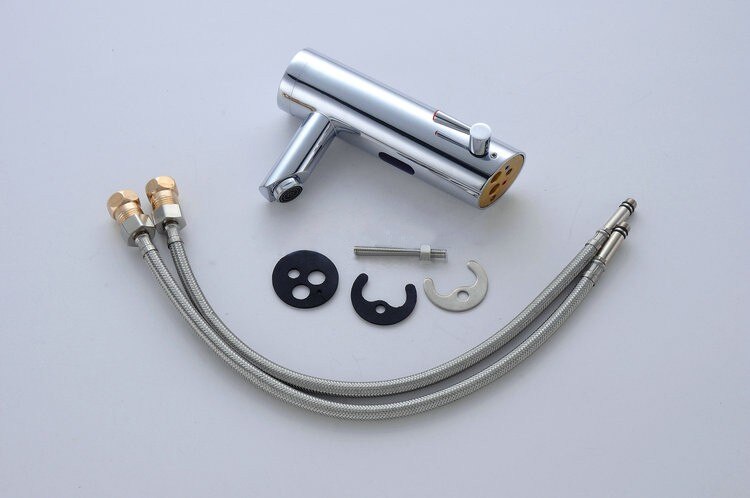
Screw the two flexible pipes to the mixer body, but do not over tighten, hand tighten only.
Connect the water supply to the inlet pipes.
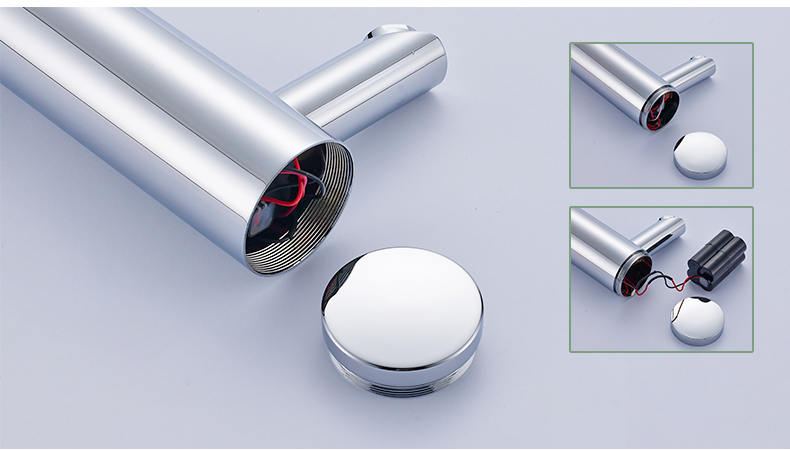
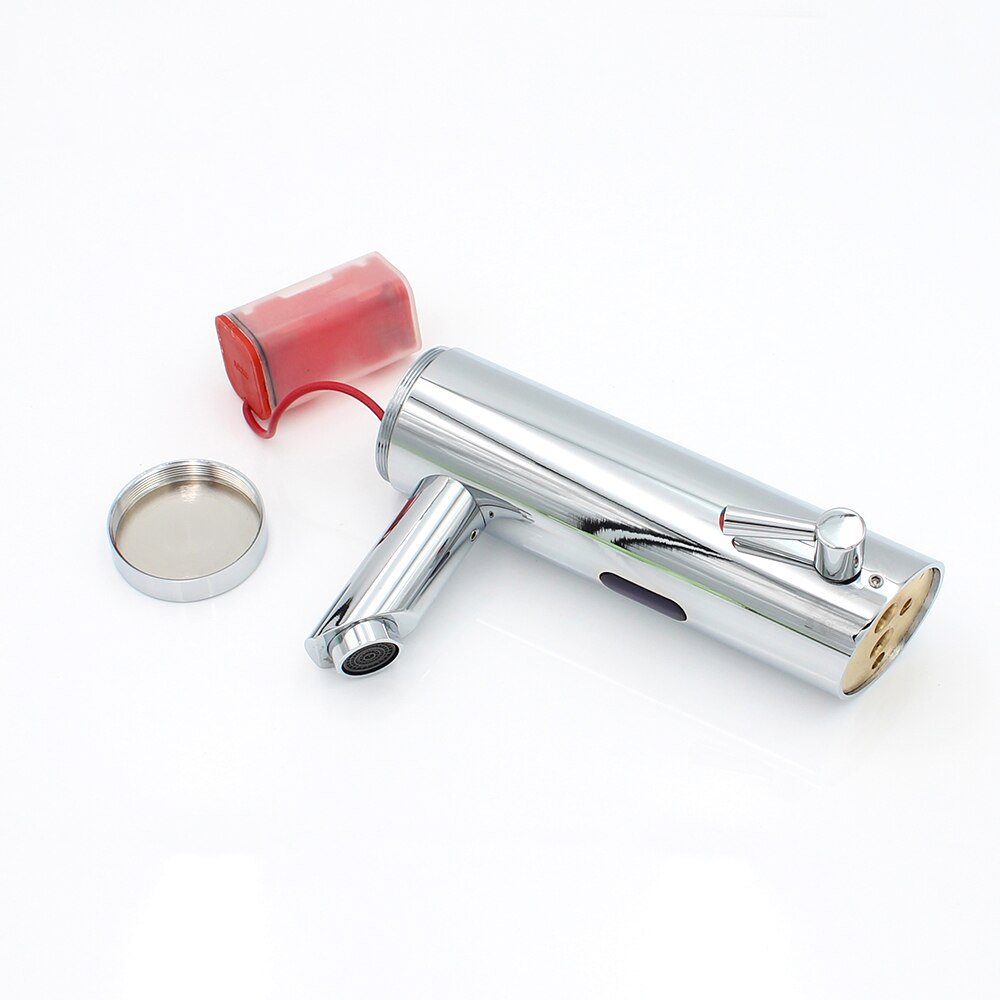
Battery installation and replacement
The unit is supplied with a battery backup. Should the mixer will still not function then the batteries may need replacing. Before installing the mixer fit the supplied batteries.
Unscrew the grub screw on the back of the mixer (do not remove) unscrew and remove the cover from the mixer and pull out the battery pack.
Undo the screw on the top of the battery pack and remove the lid. Insert the 4 batteries.
Place the battery pack back into the mixer, replace the cover and tighten the grub screw.
| | | Flexible Connecting Hose
Care must be taken when connecting the flexible connection hose from the power supply box to the spout to ensure it does not bend sharply and kink or twist.
See above for recommended ways to fit the flexible connecting hose.
Important: Failure to follow these guidelines may result in poor performance and damage to the flexible connection hose.
| | |
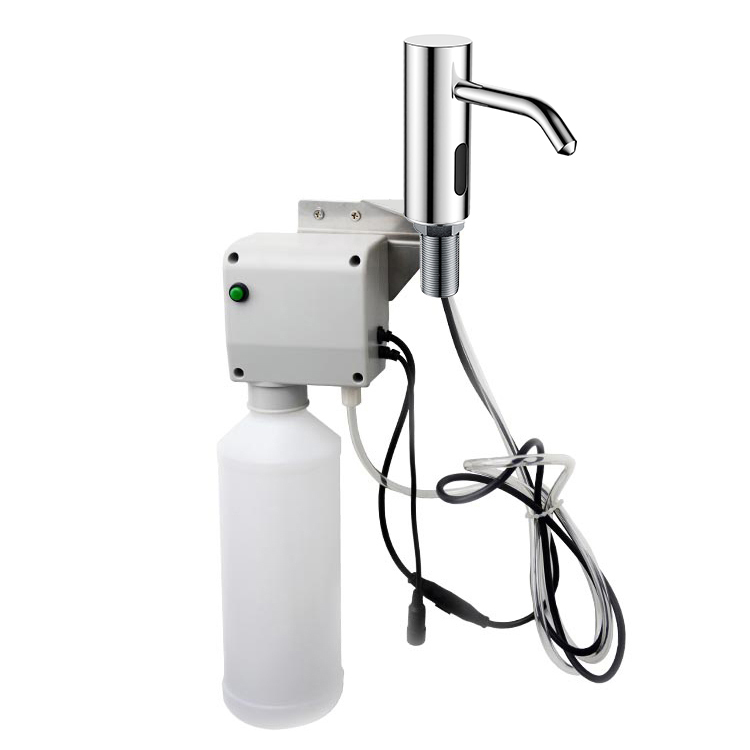
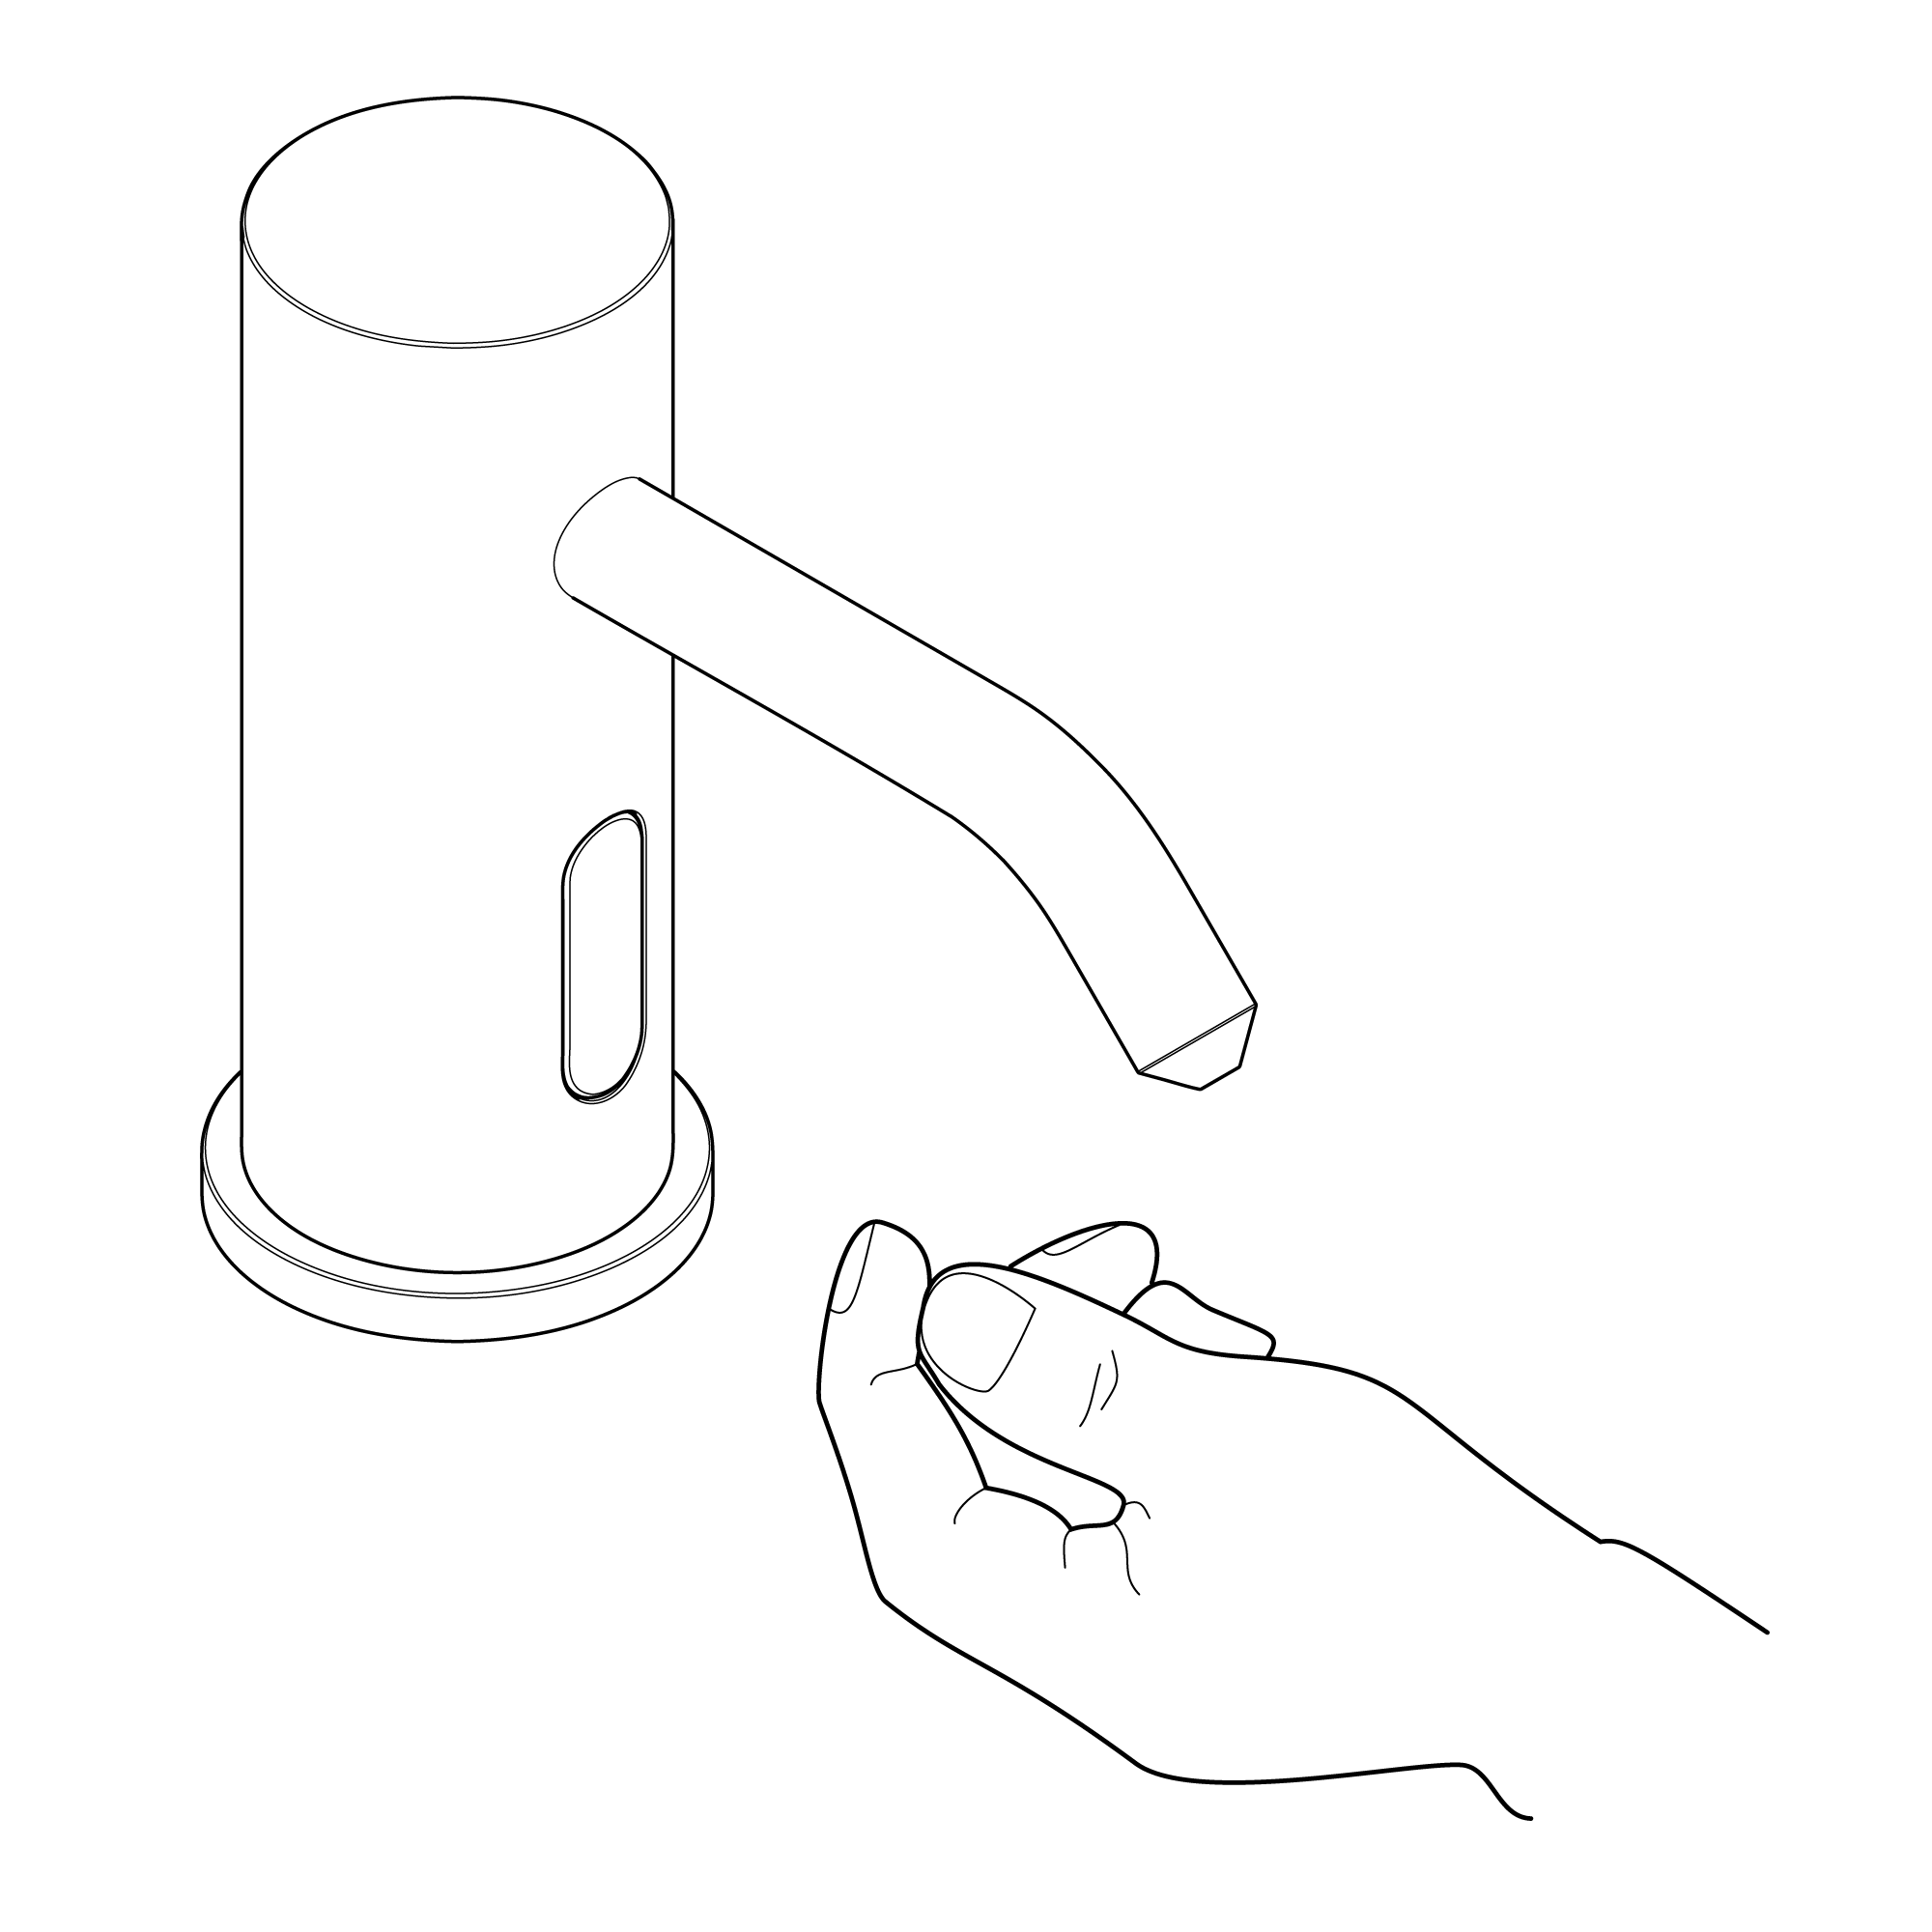
Automatic Soap Dispenser Installation Instructions
| auto soap
| Soap Bottle Size |
| |  | | | |  | |  |
| | |
| | |
| Step 1: | sensor | Step 2: | | 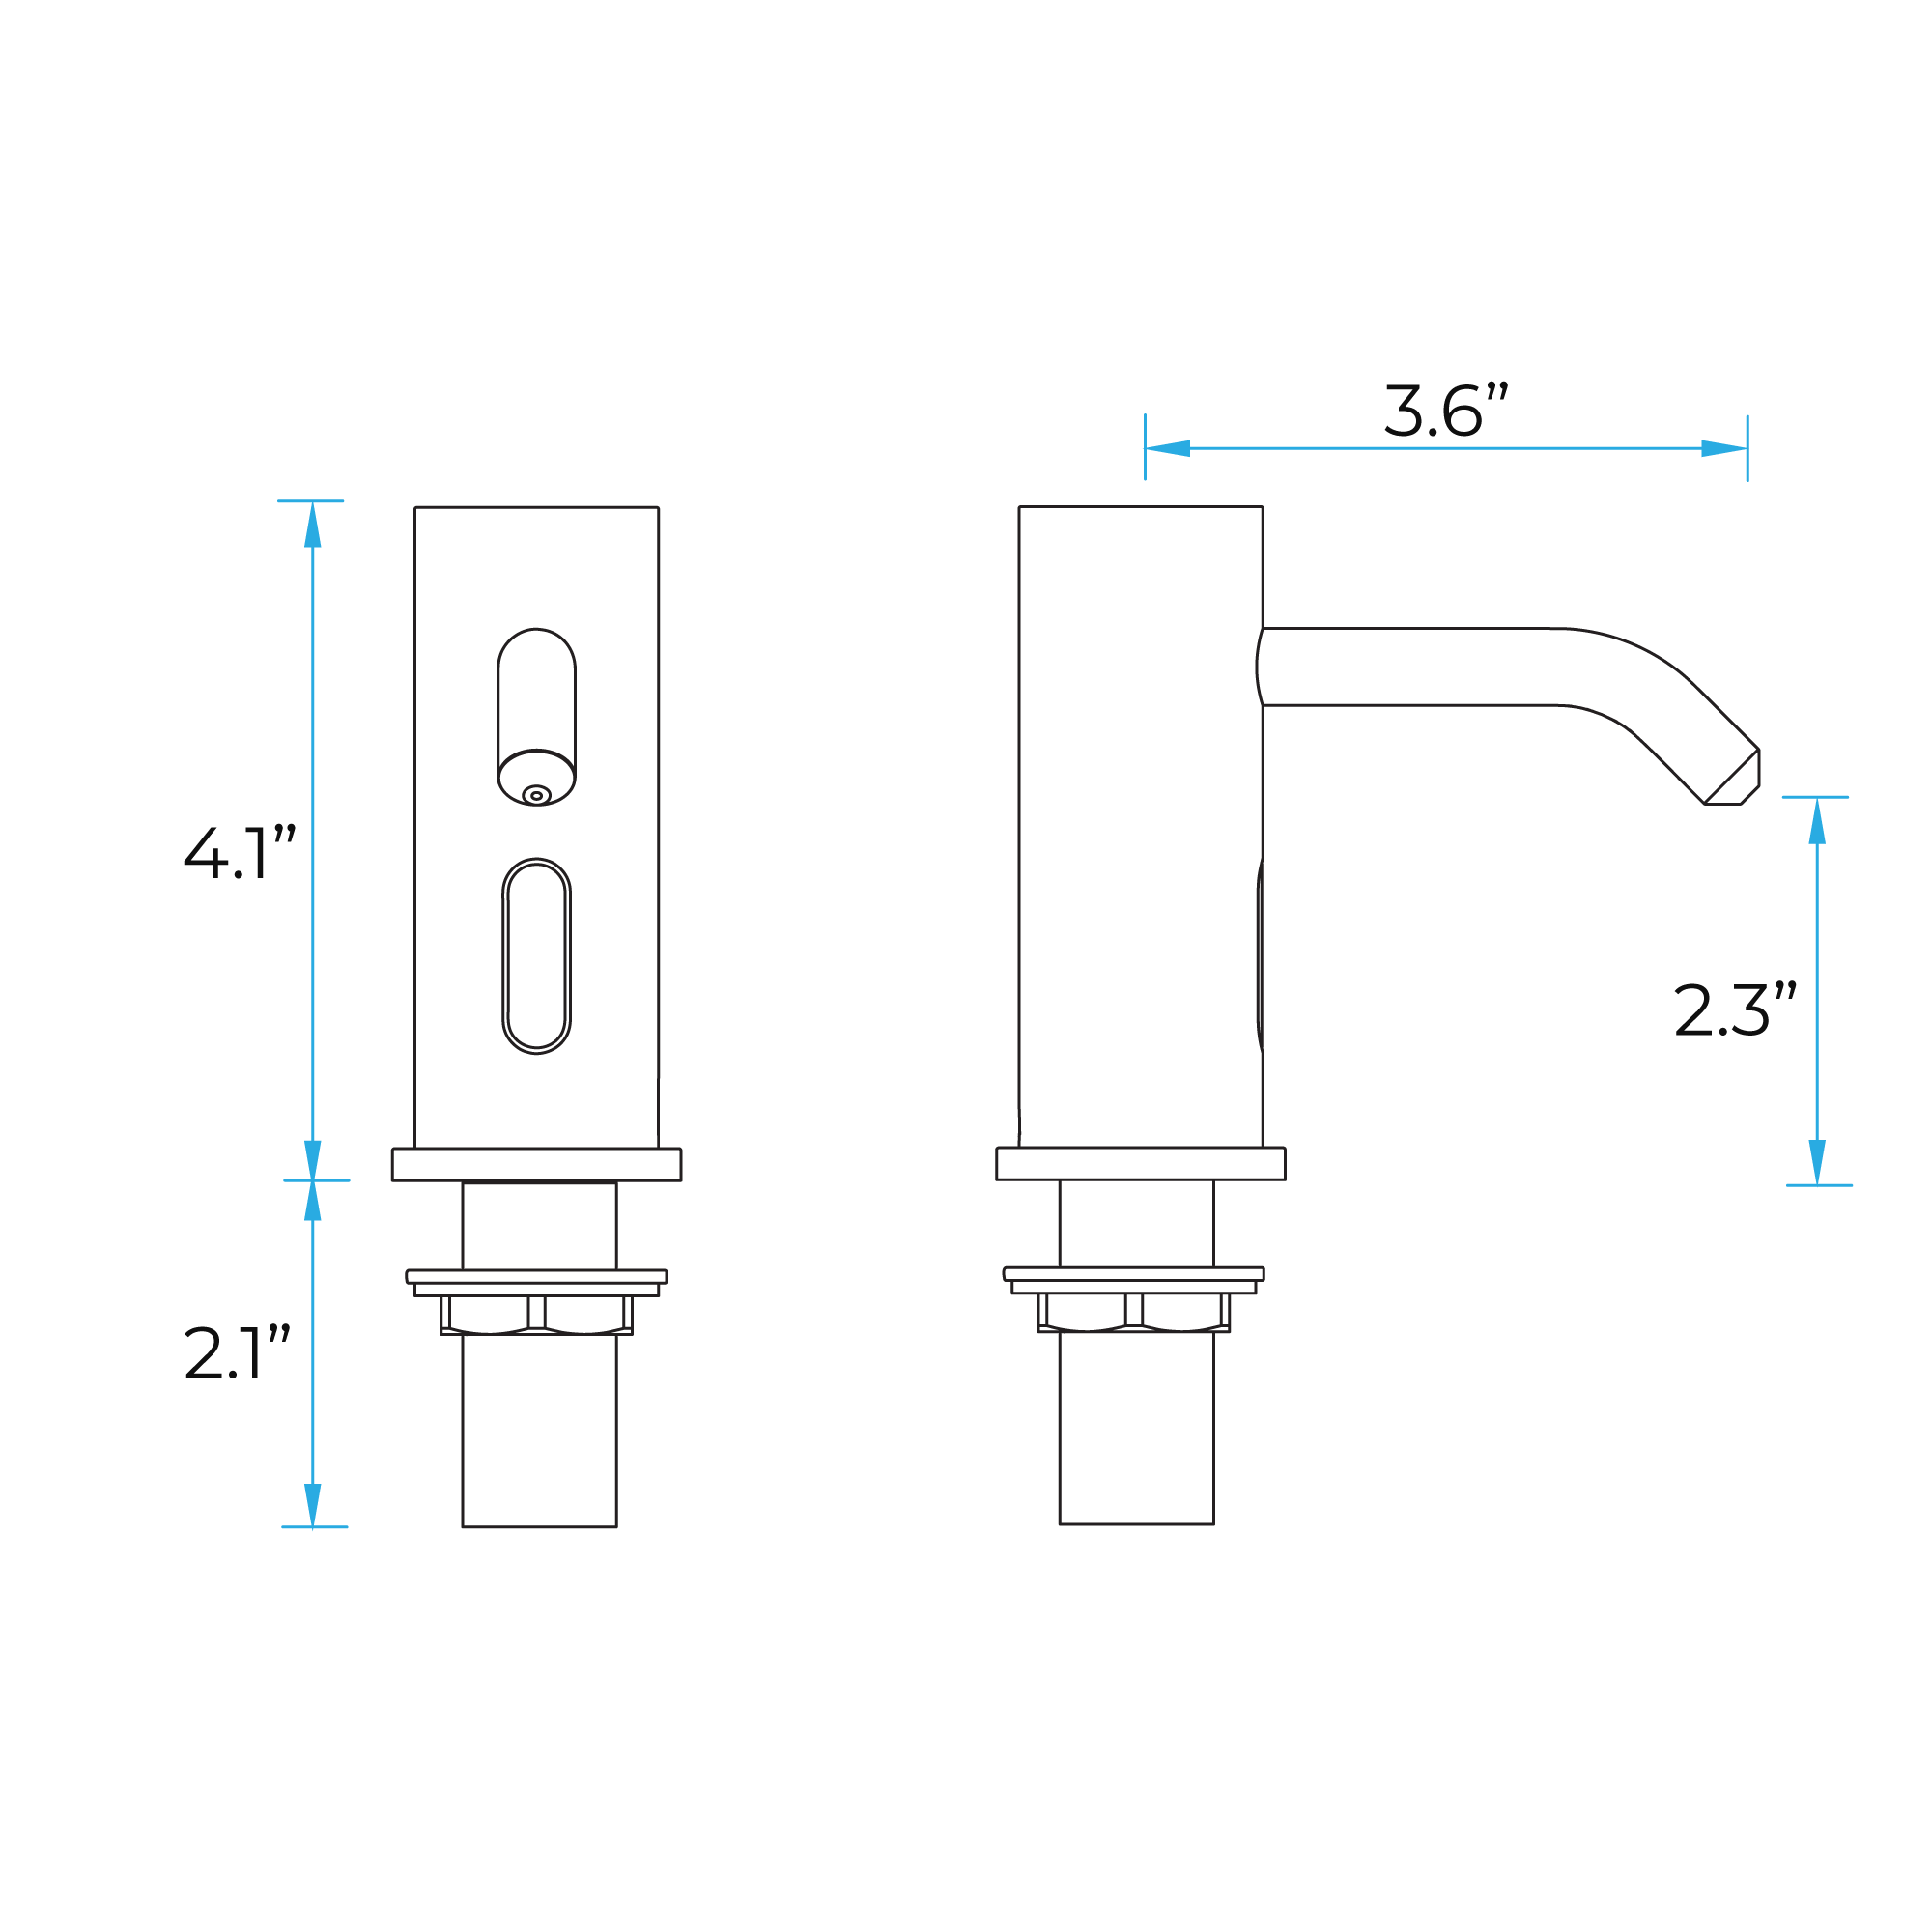 | |  |
|
| |
| | | Step 3: | | Step 4: | | 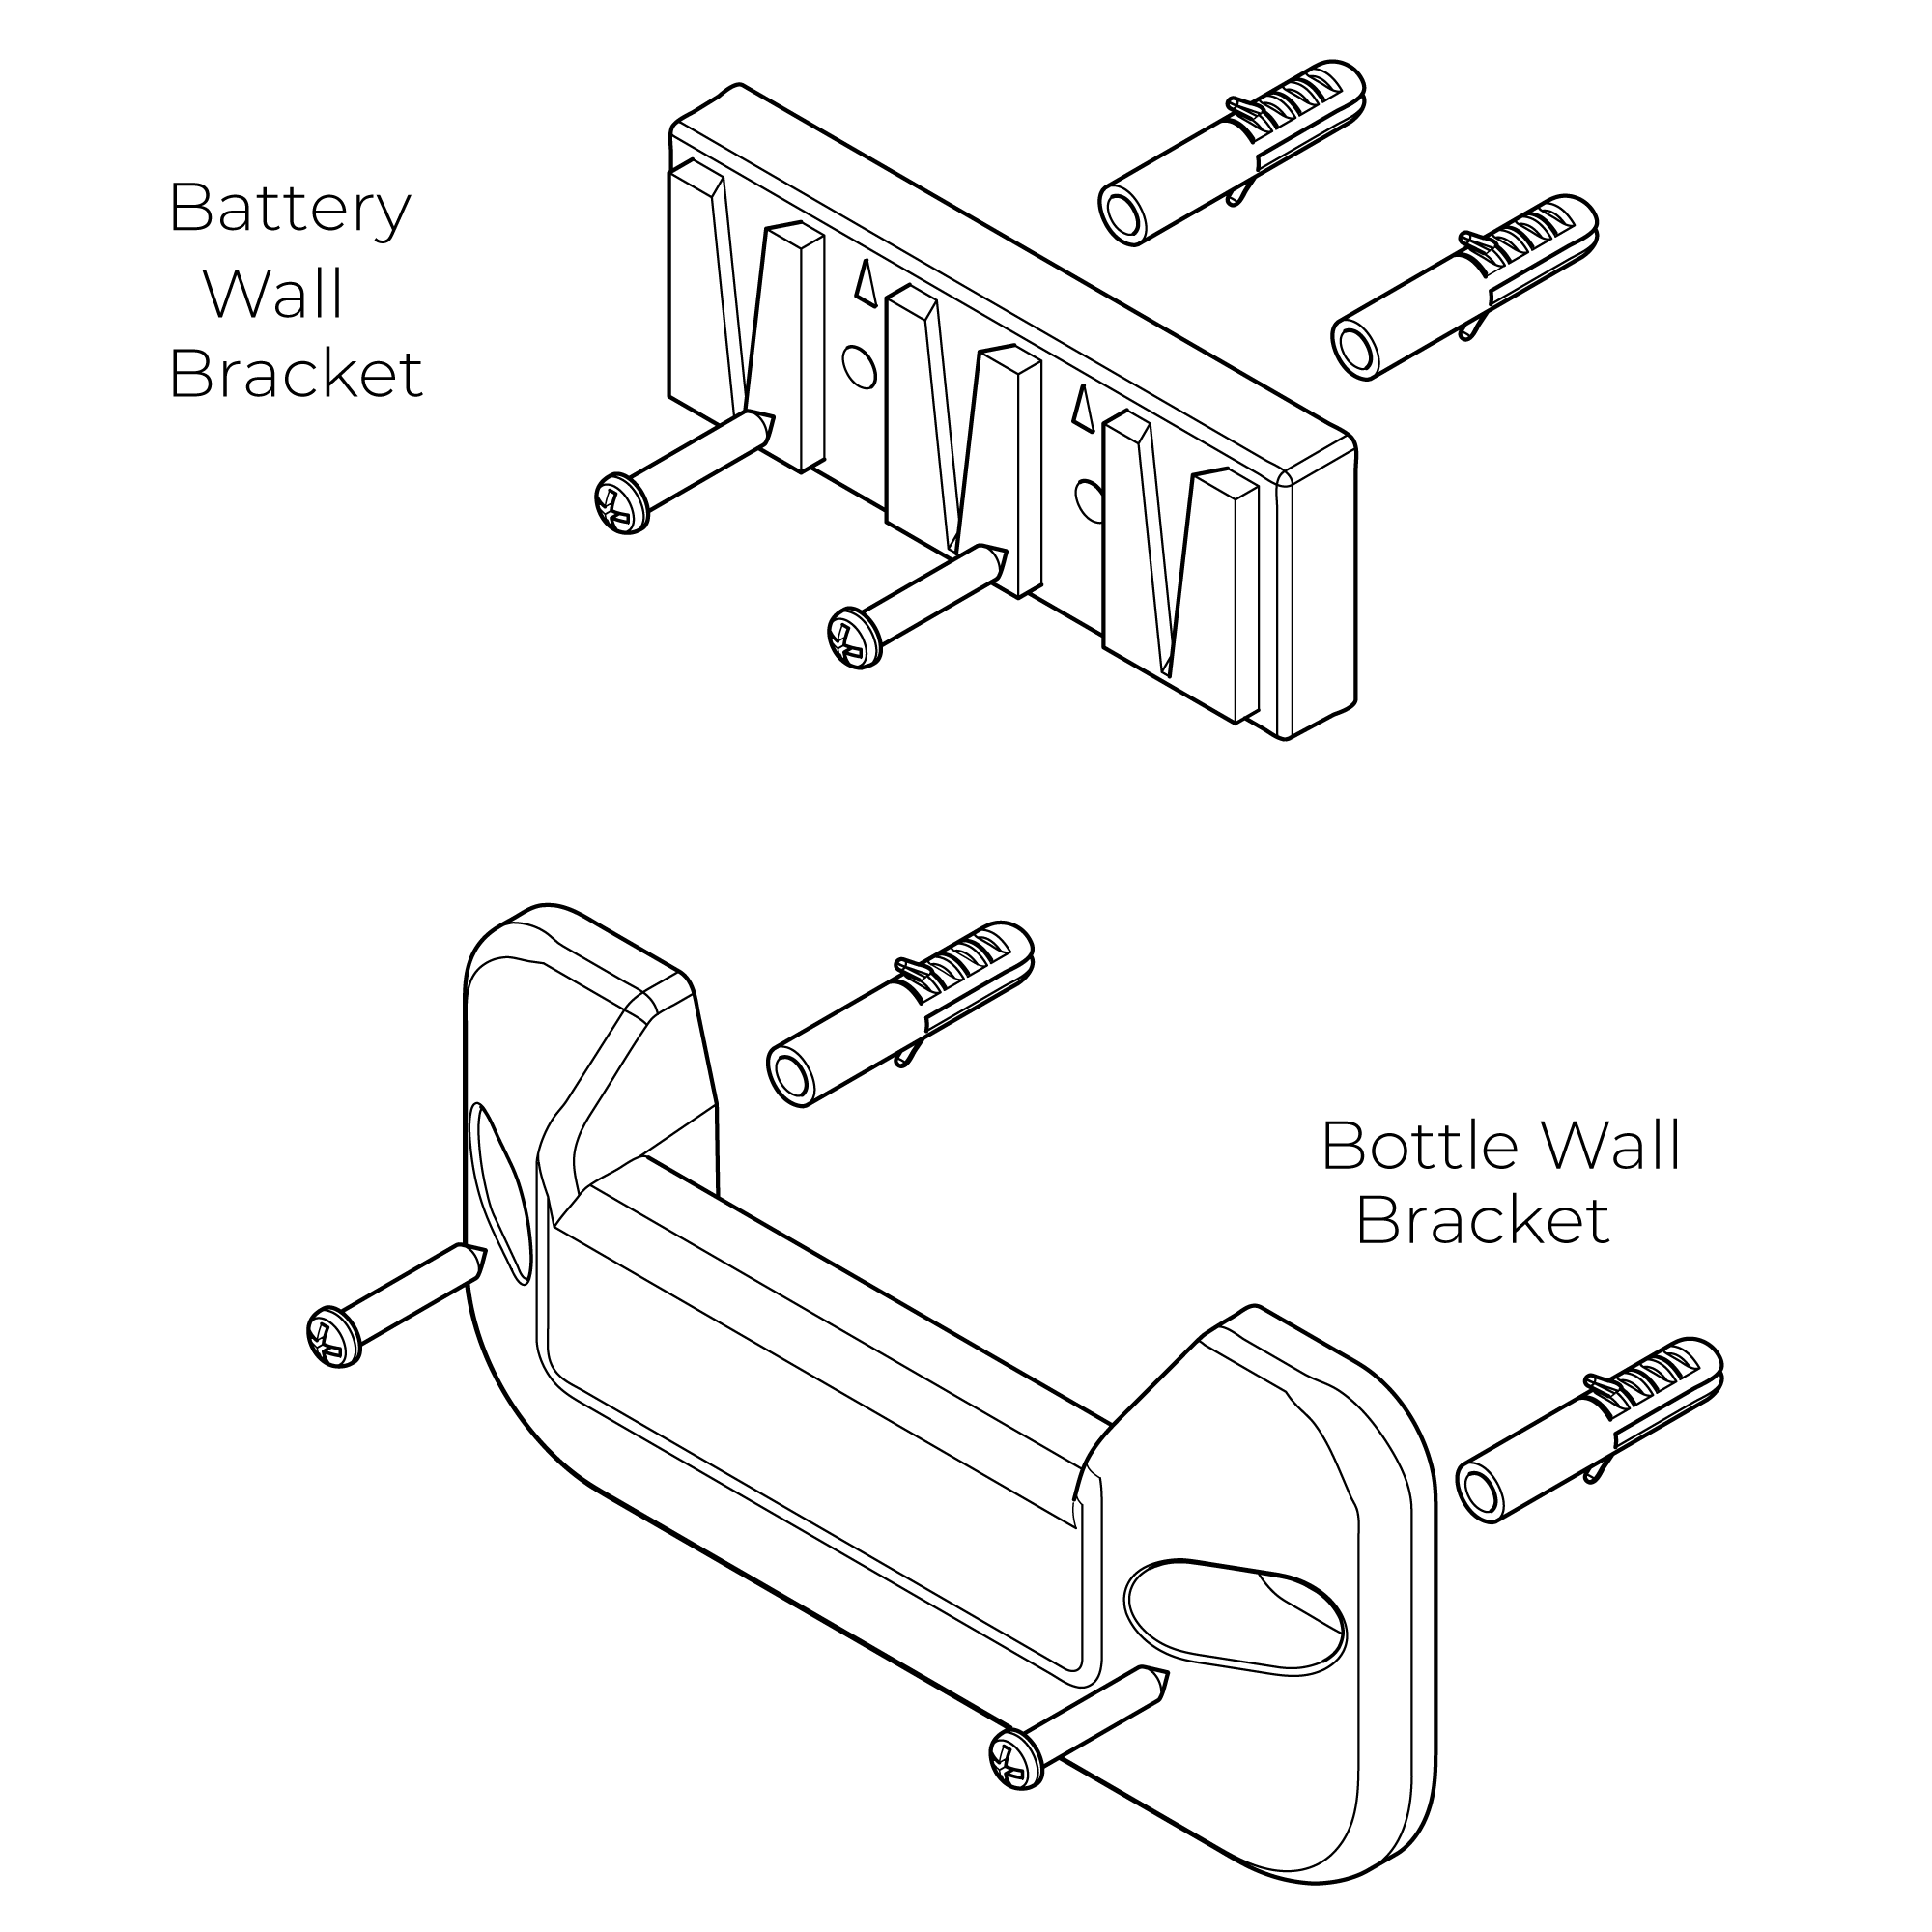 | | 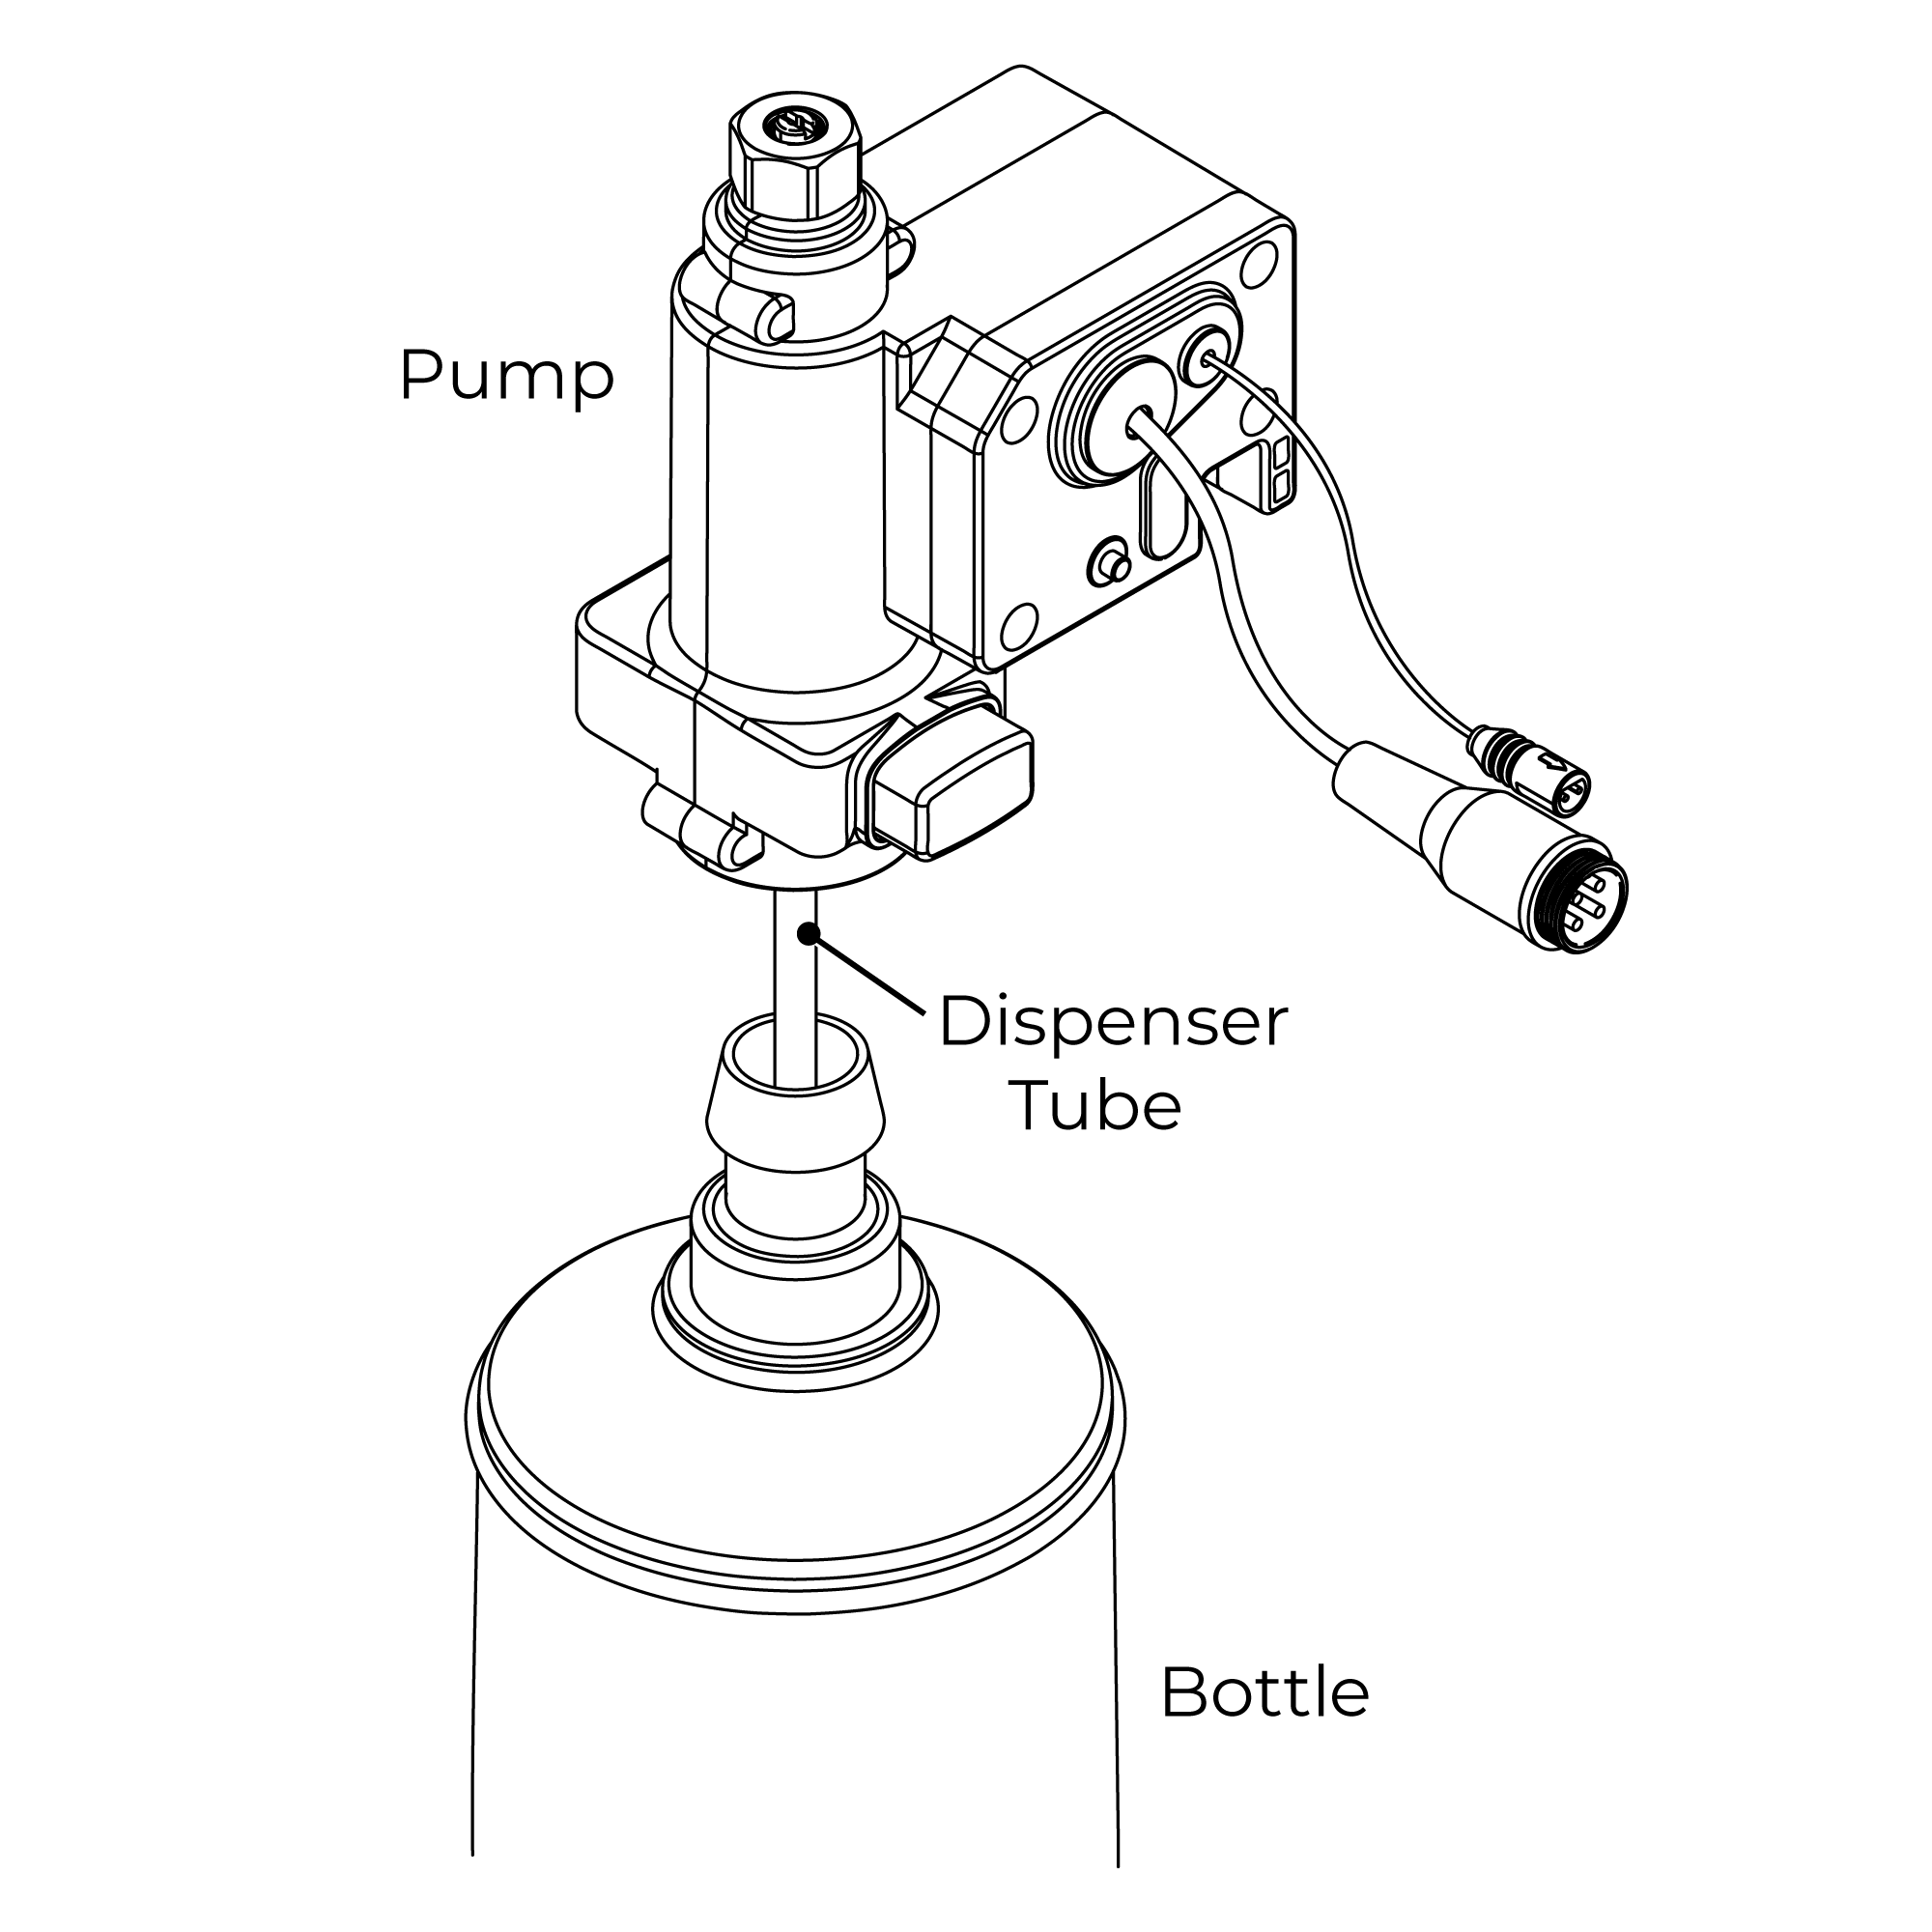 | |
| | | | | Step 5: | | Step 6: | | 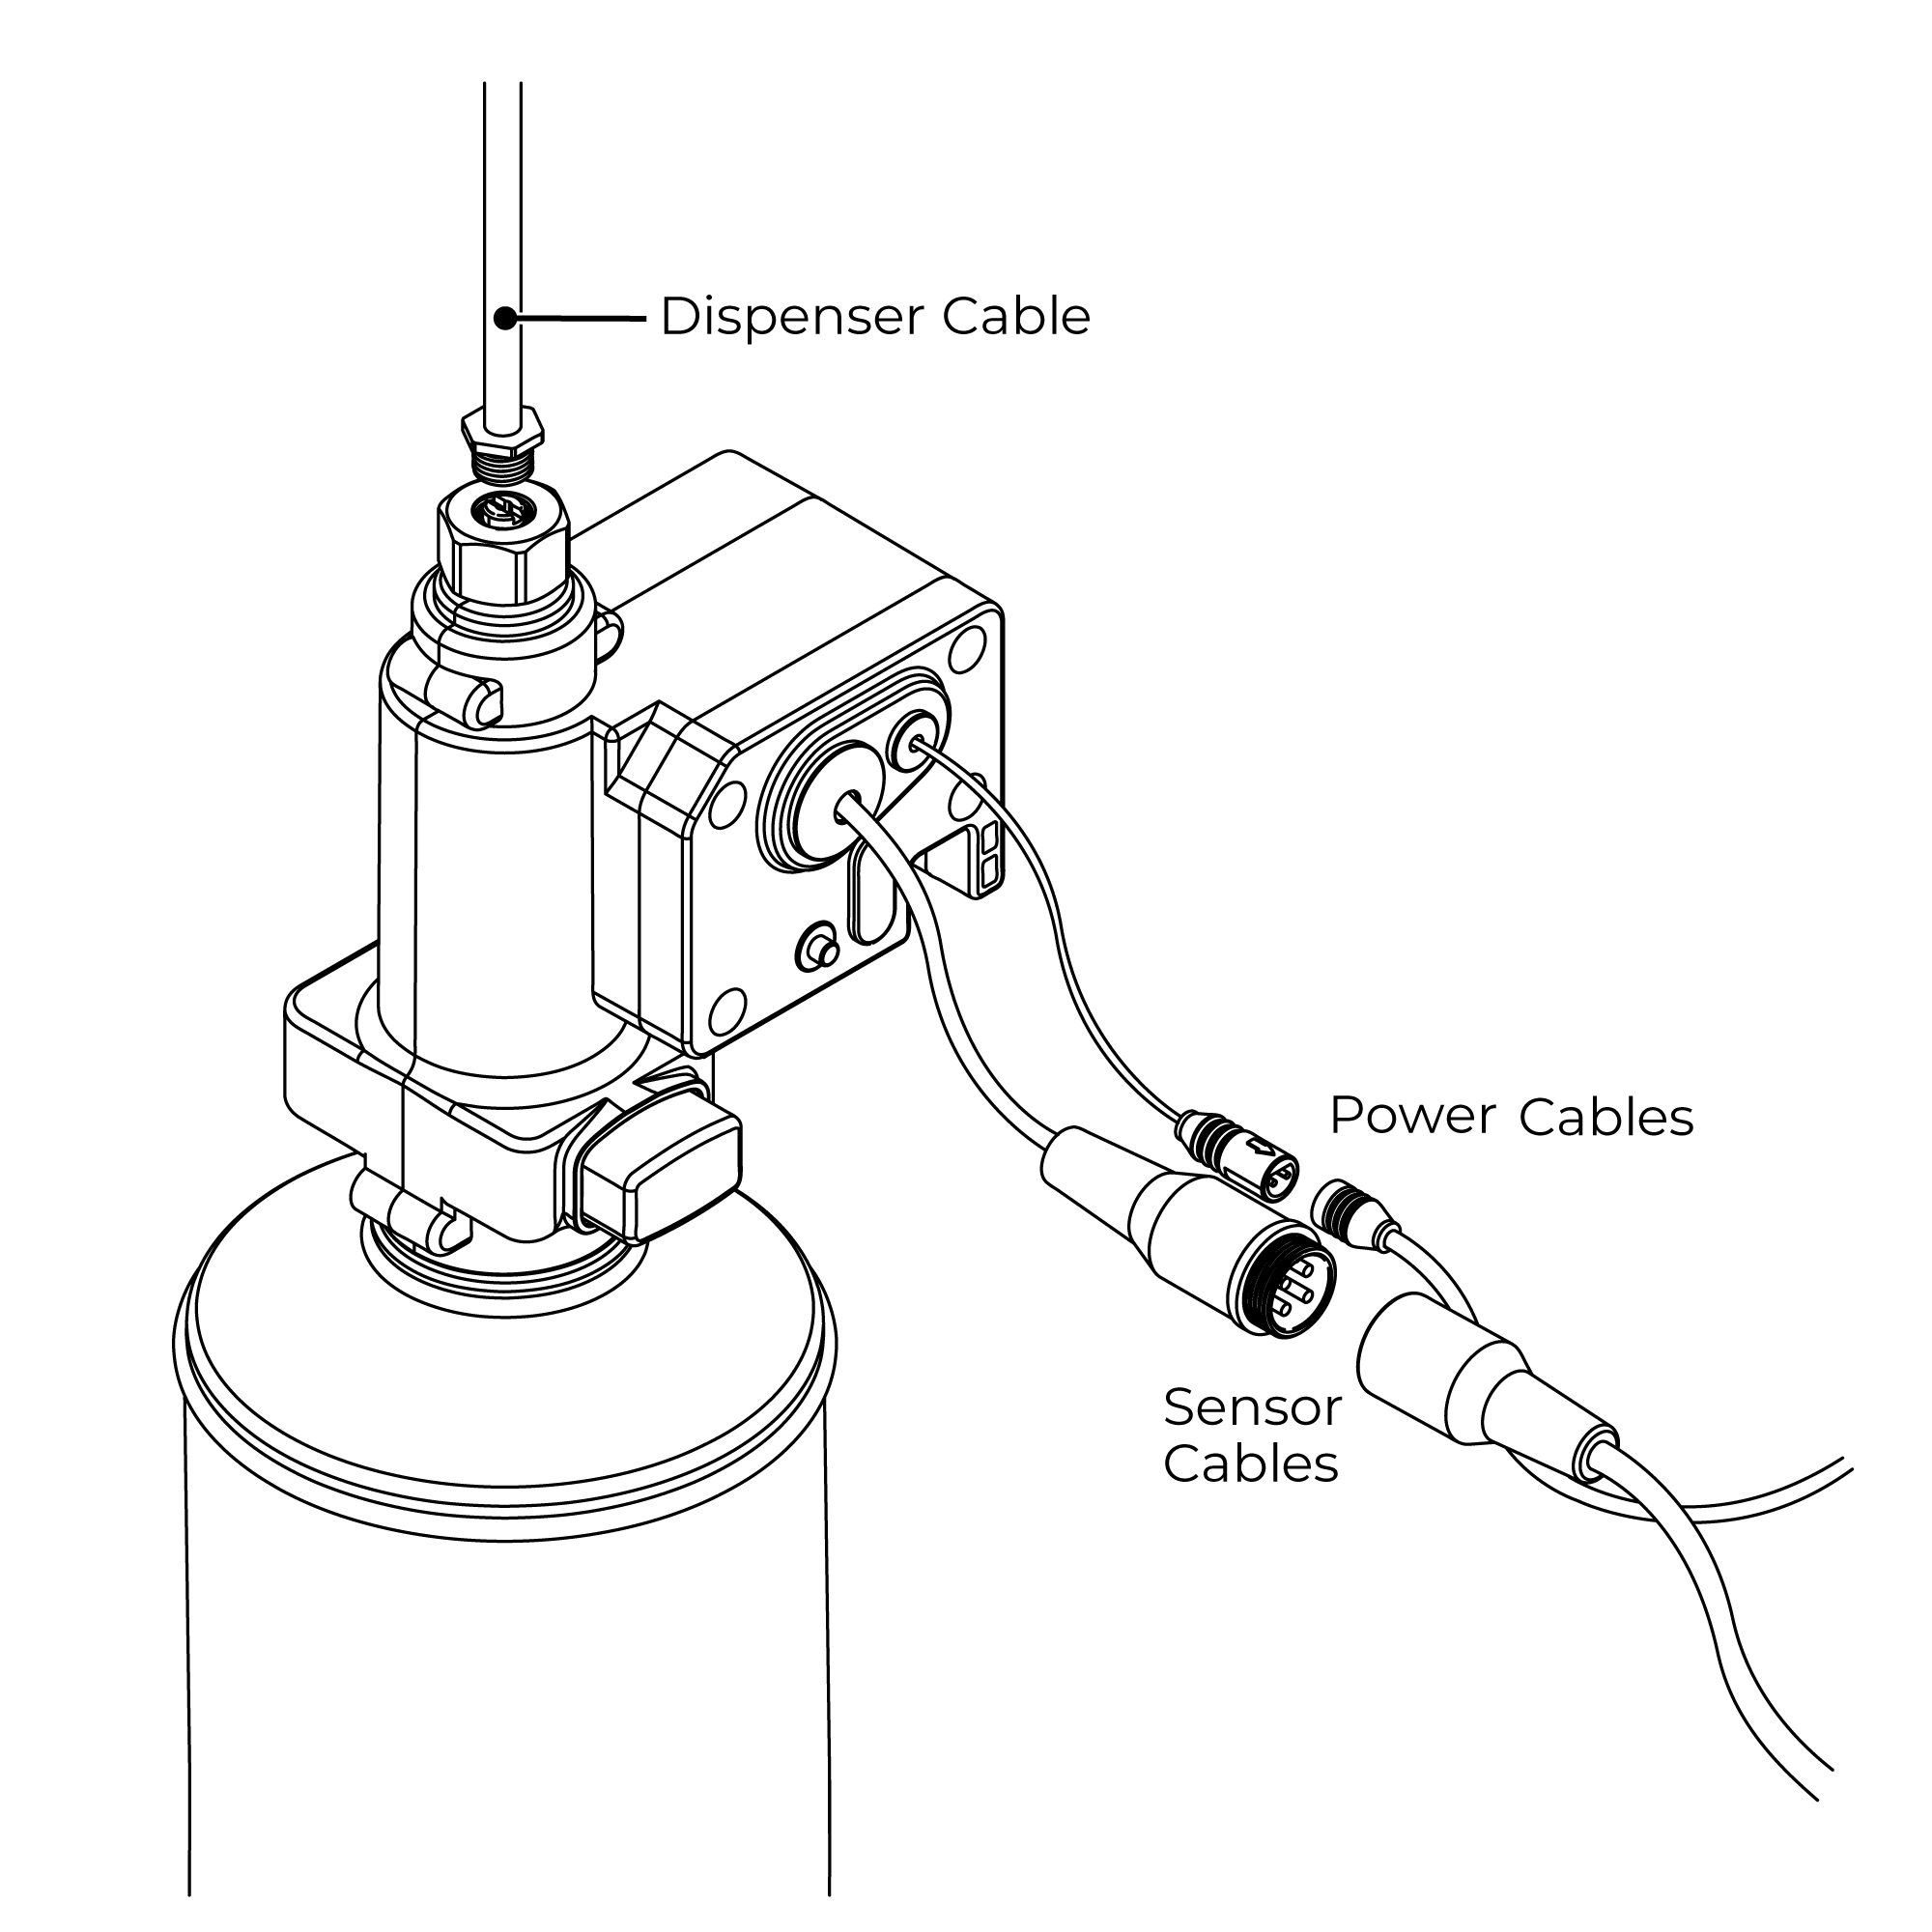 | | 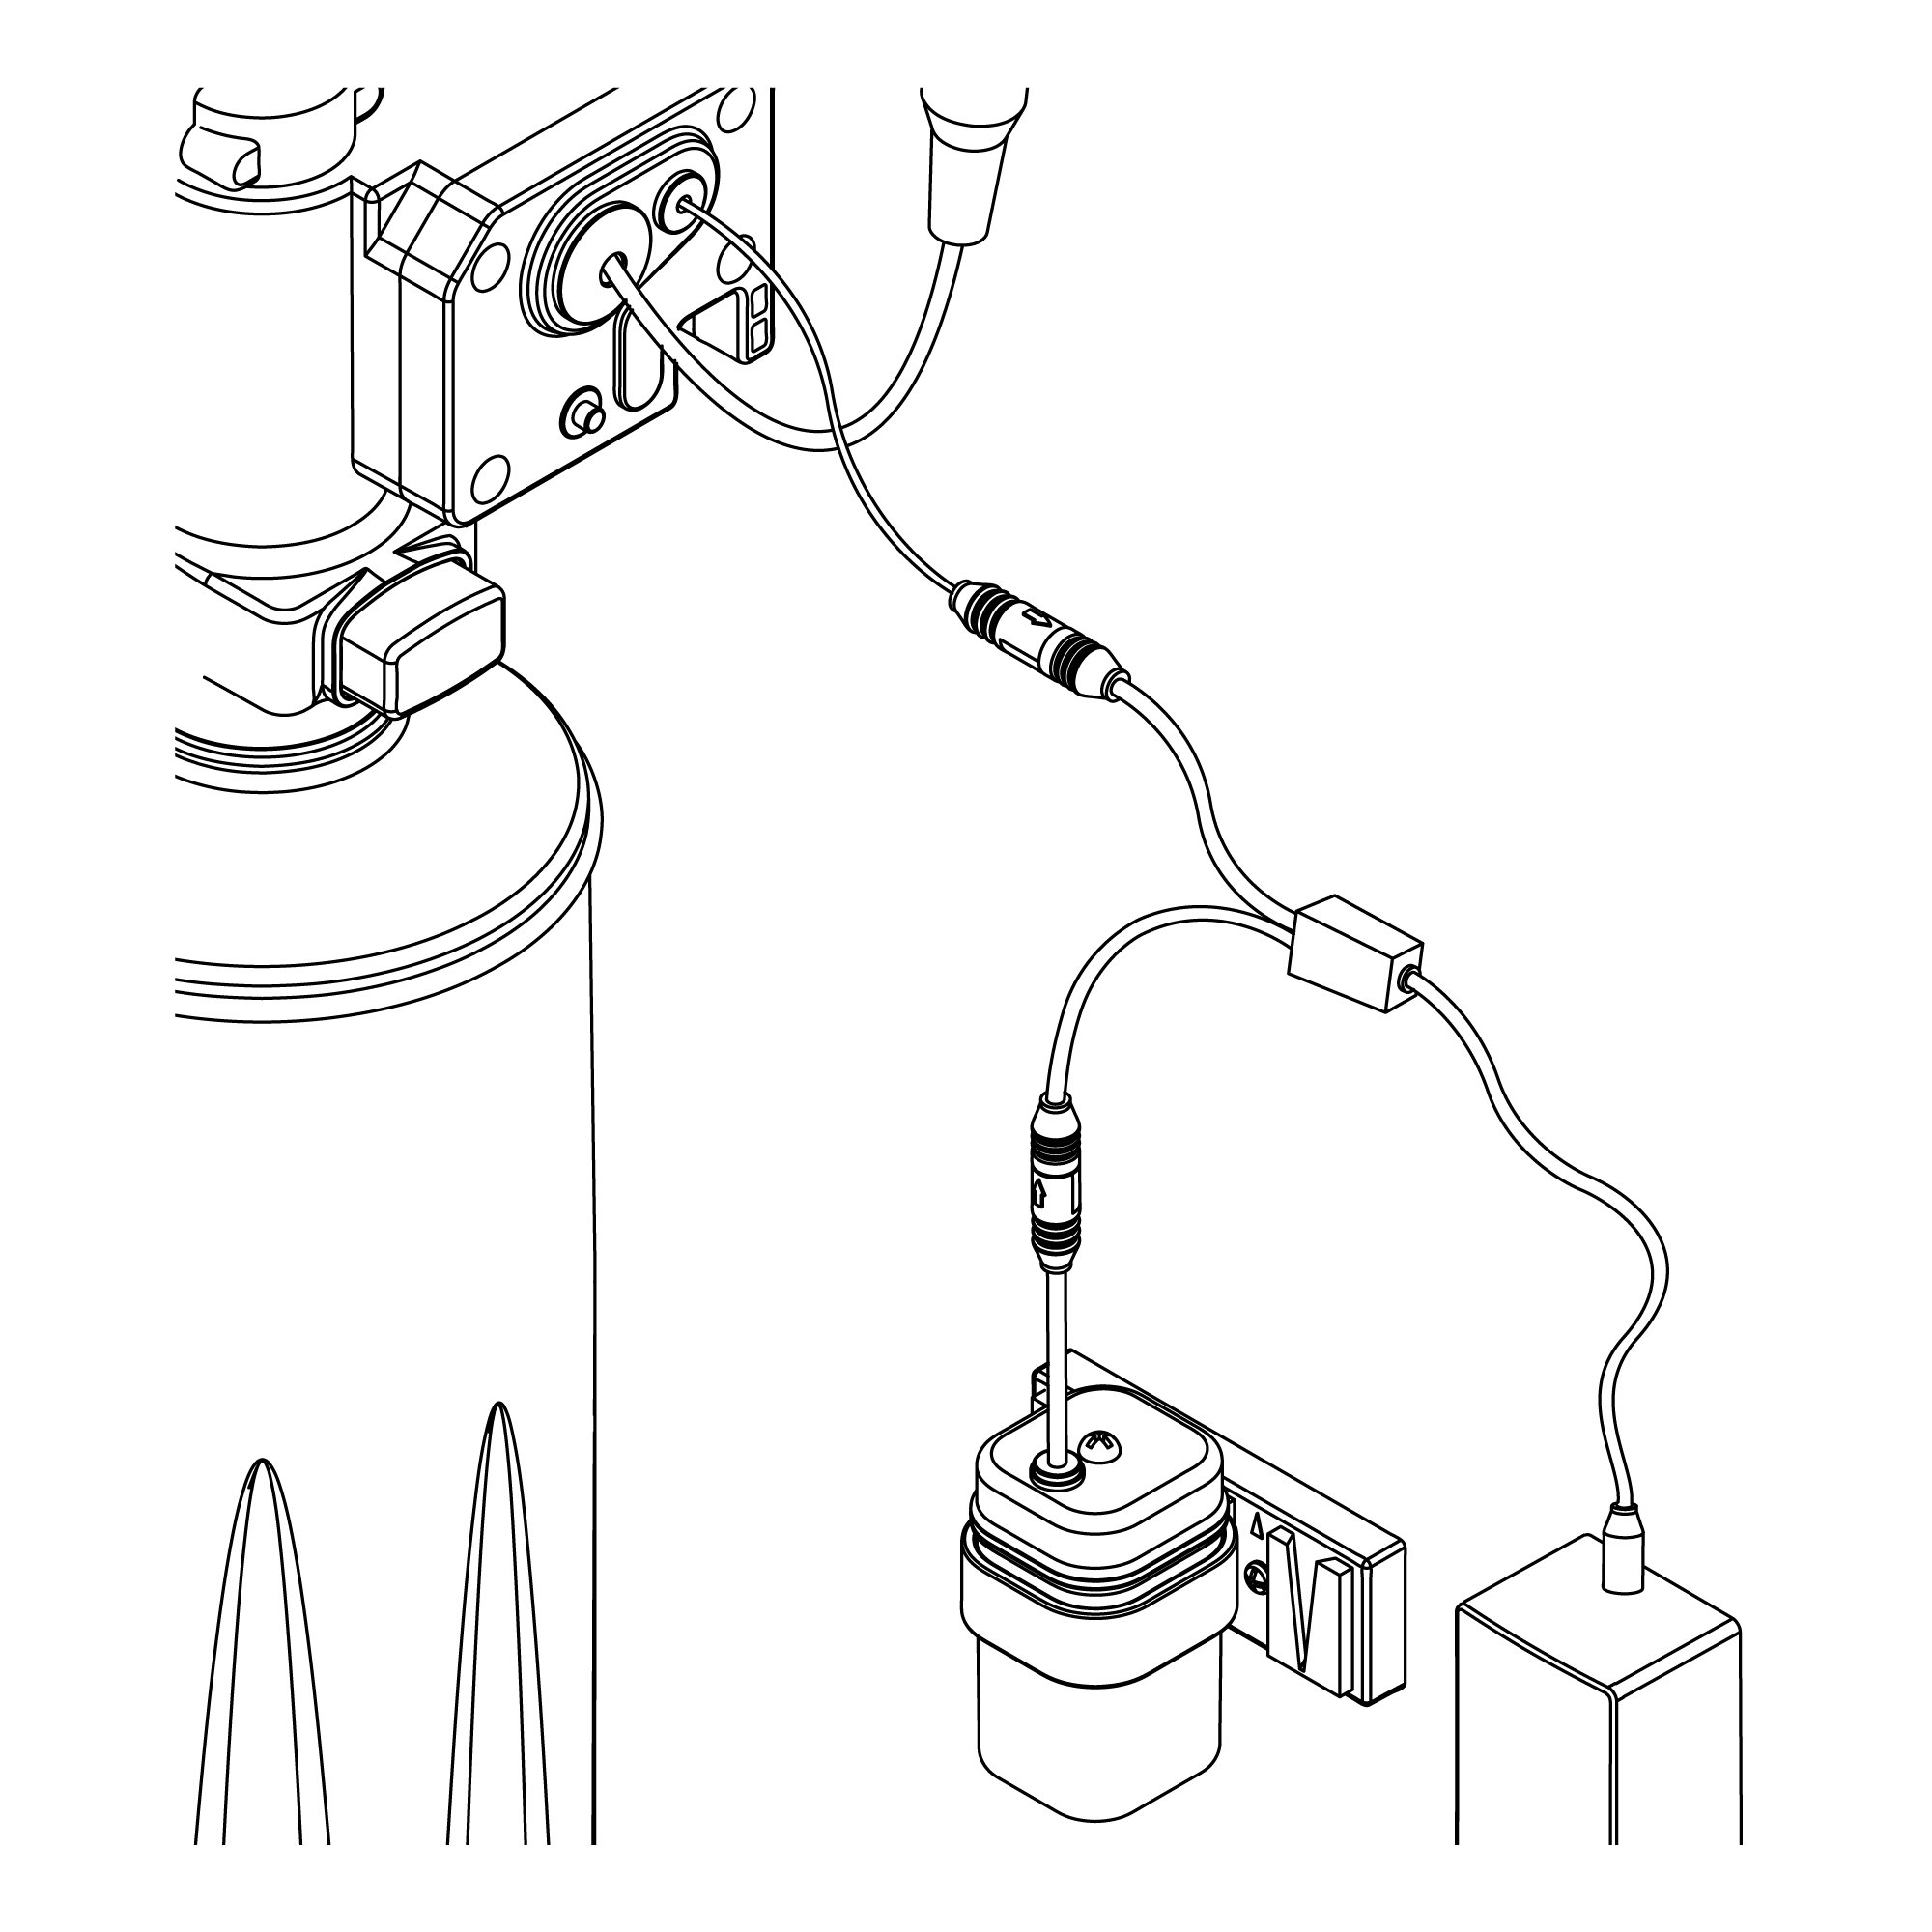 | |
| | | | | Step 7: | | Step 8: | | 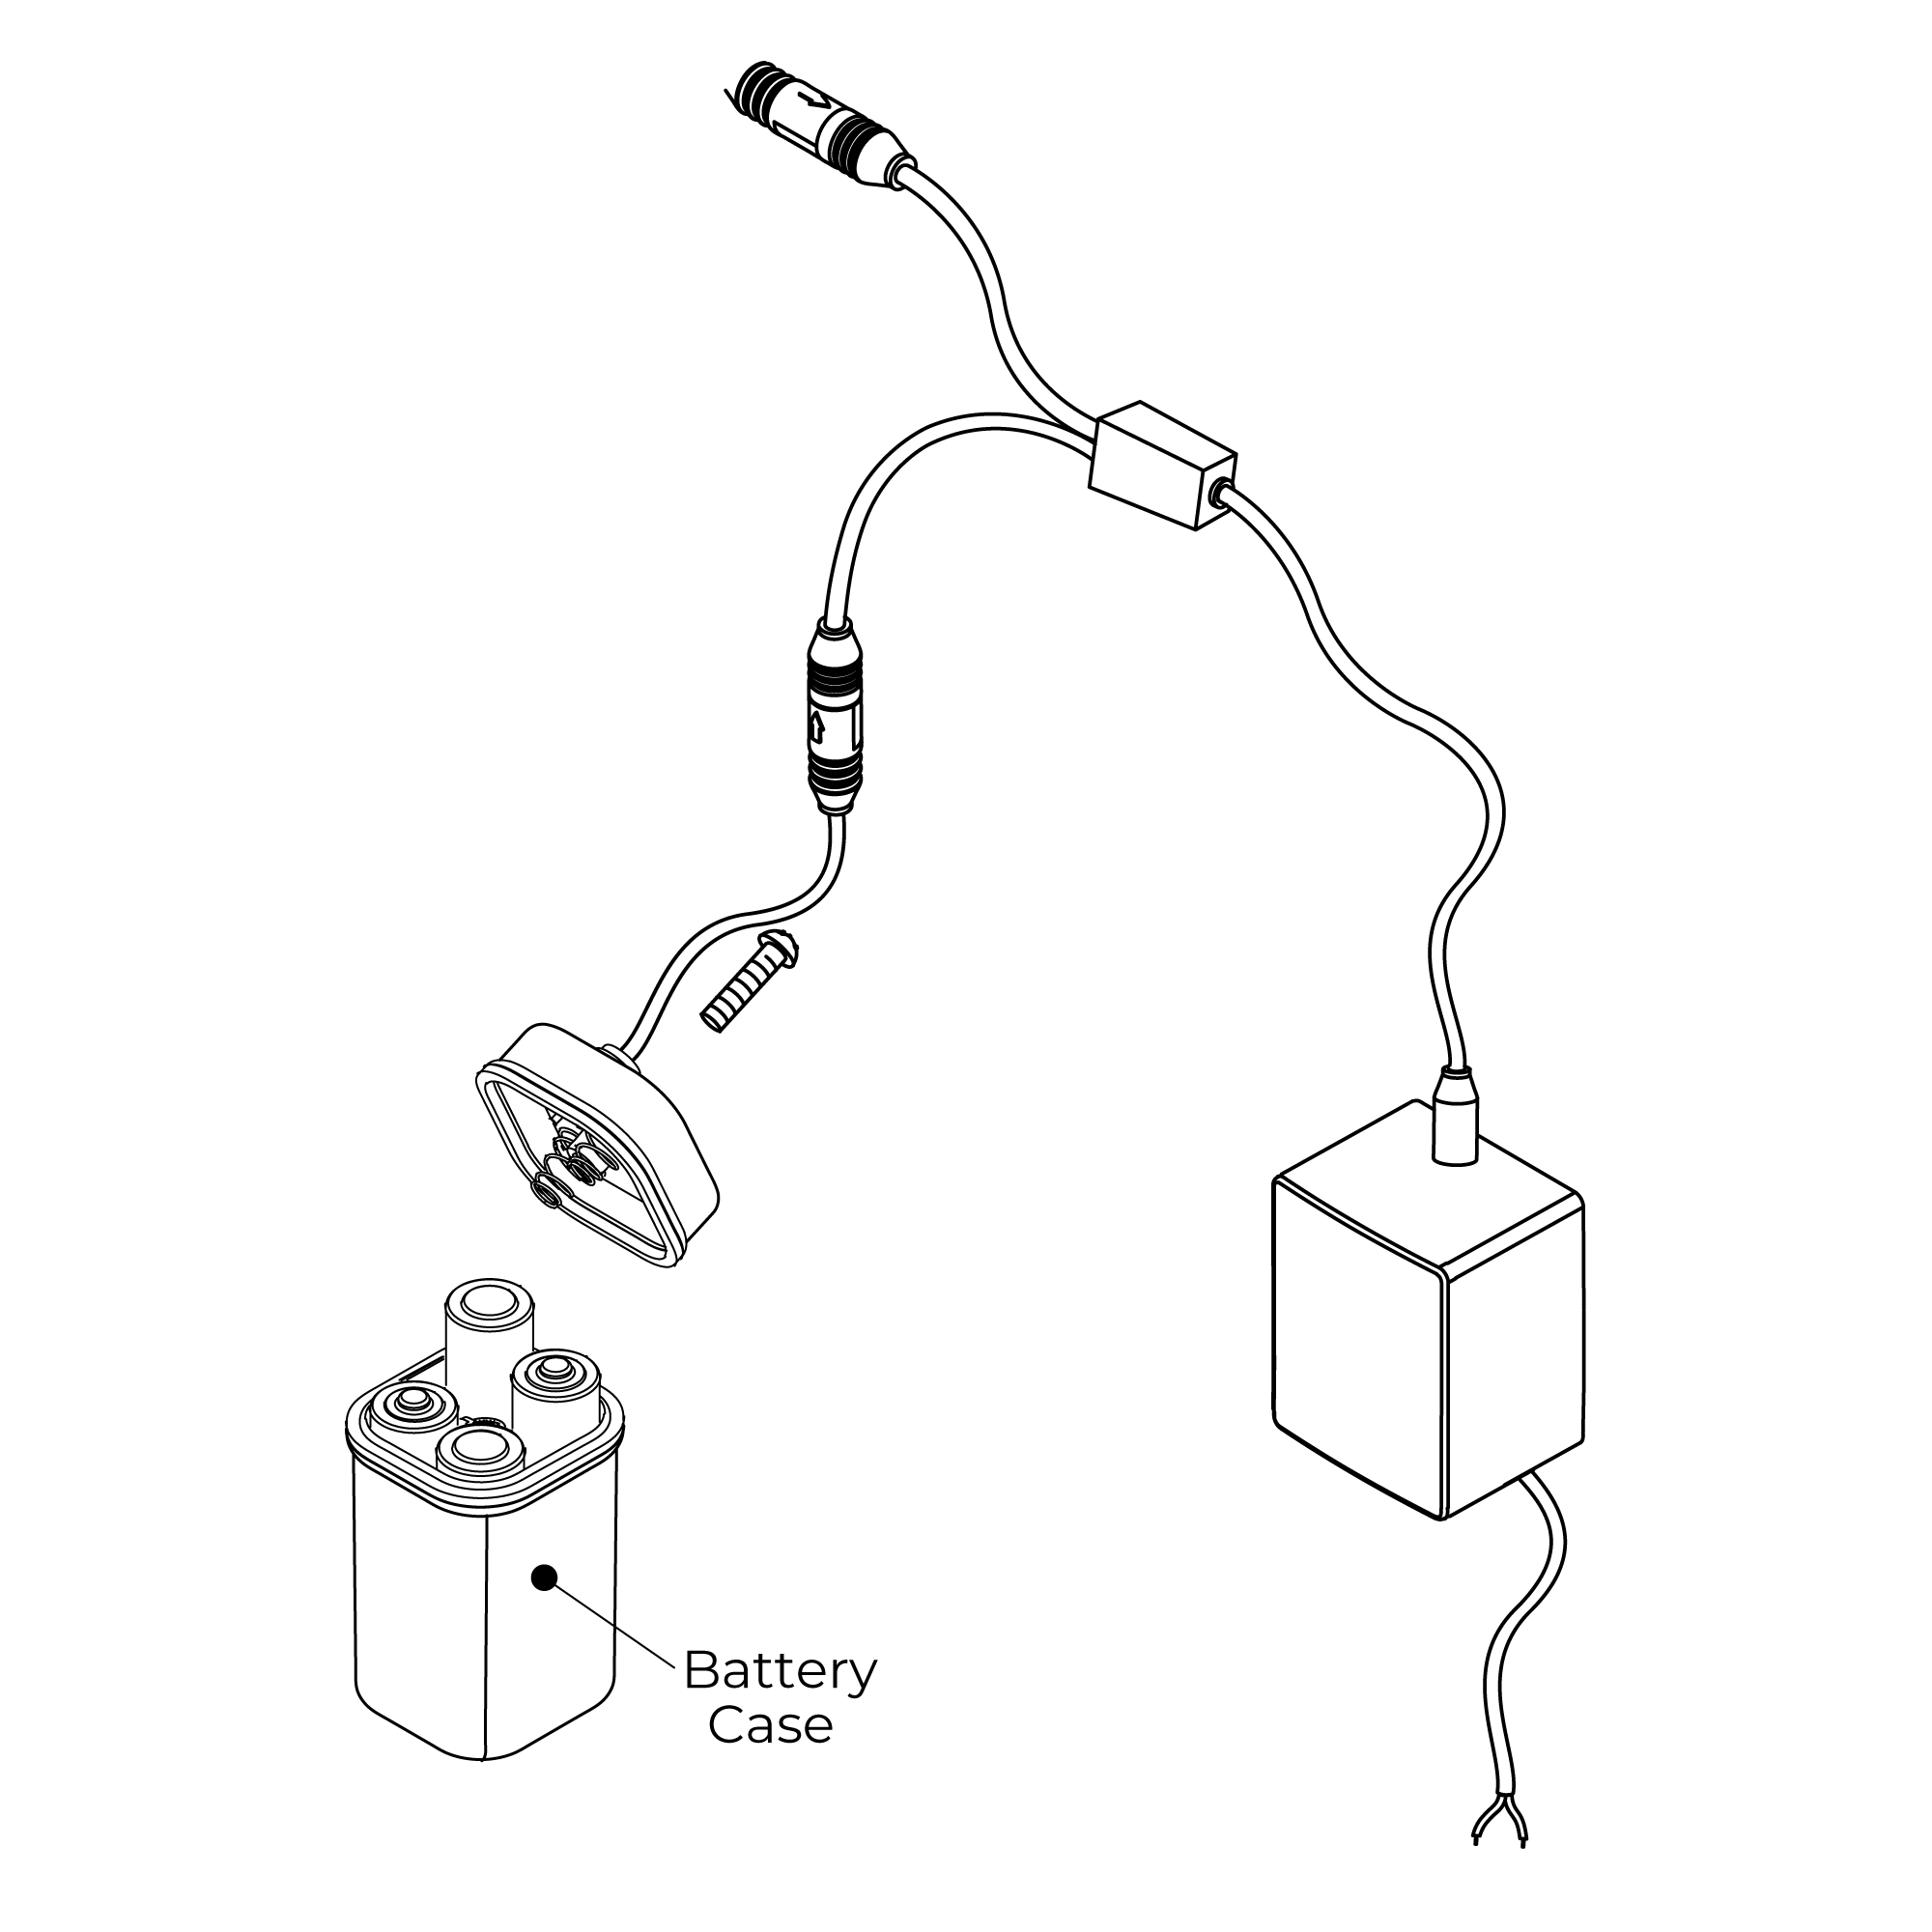 | | 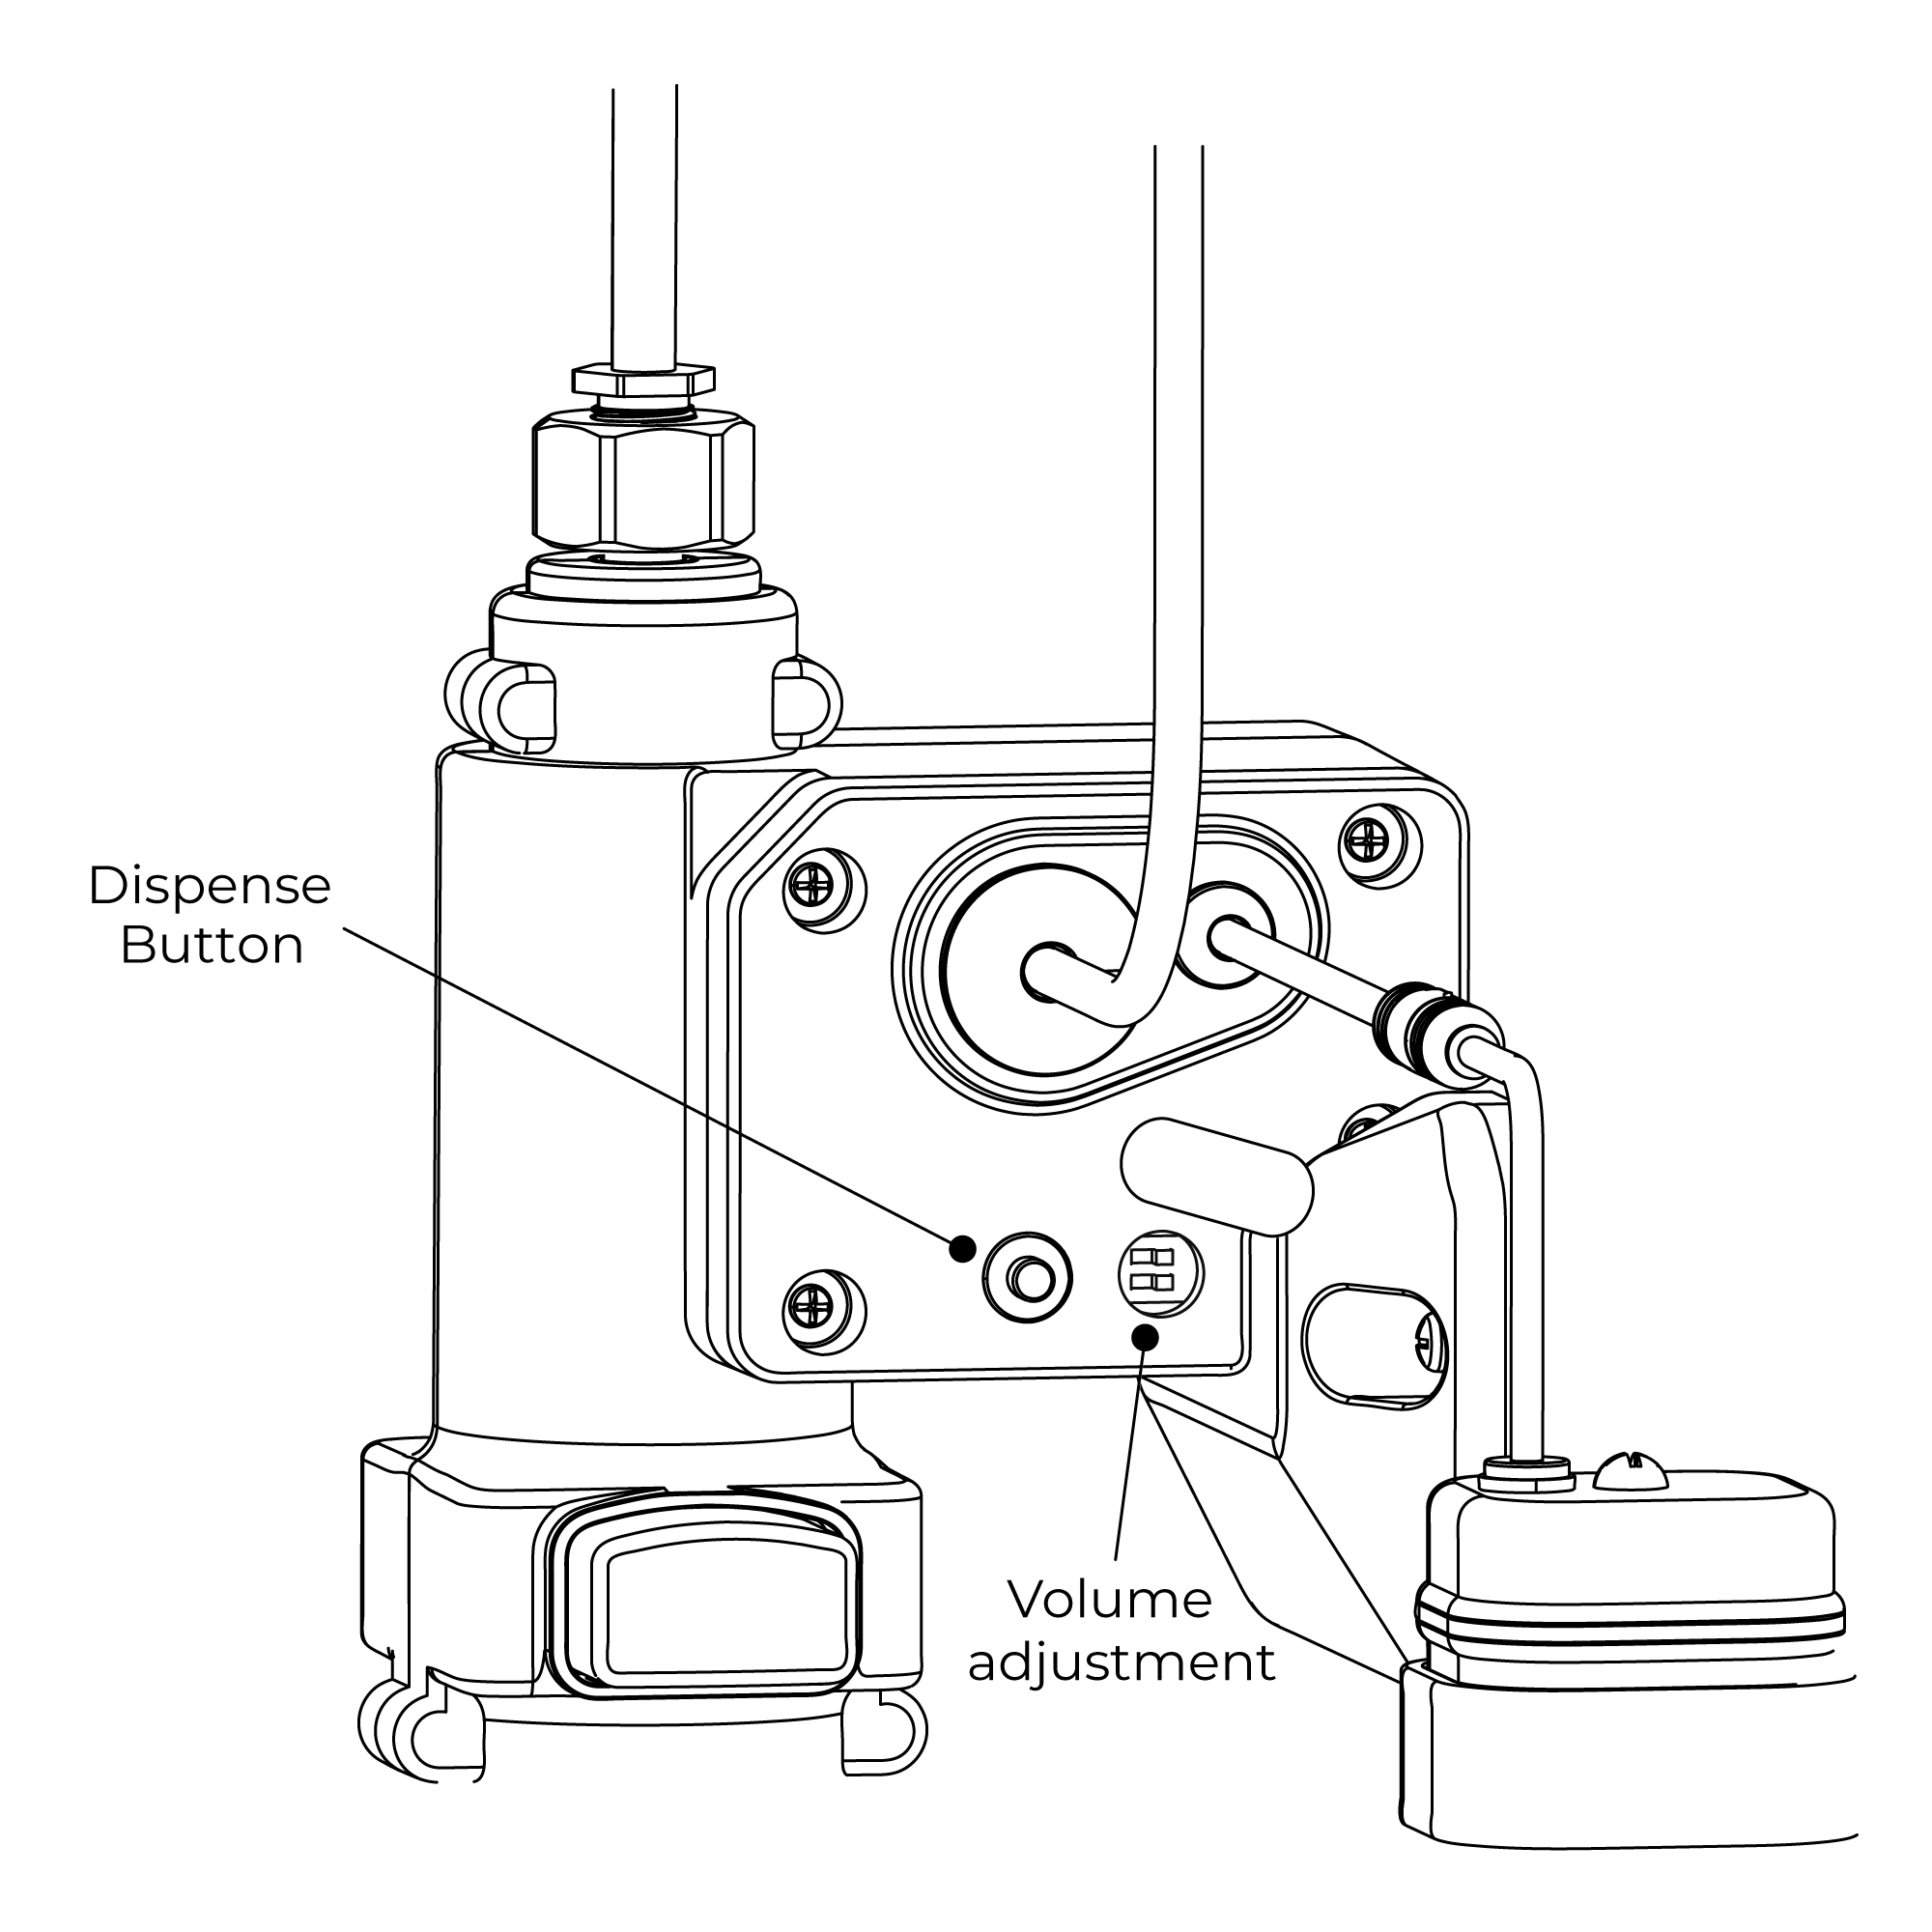 | | | Step 9: | |
| |  | |  | | | | | | | | | |
Features:
More Hygienic
The proximity sensor removes the need to touch the spout, reducing the spread of germs and reducing the chance of cross-infection.
Battery Override
Your infrared soap dispenser is supplied with a backup battery pack. In the event of a power failure, the product will automatically switch to battery-operated mode to ensure the spout continues to function.
Low Battery Warning
When the batteries run low and the power falls below 3.9V the sensor light will flicker to indicate the batteries are running low and need replacing.
When the batteries are exhausted the sensor light will not light up.
Installation1. Fit The Spout
Fit the spout to the sink/basin ensuring the dispensing cable and sensor cable are threaded through the hole in the sink/basin.
2. Secure Spout to Sink / Basin
Screw the metal back nut onto the thread of the spout upto the underside of the sink/basin.
Tighten backnut using a suitable spanner.
3. Fit Wall Brackets
Position the brackets onto the wall surface and mark the position of the fixing holes.
Remove the brackets and drill suitable holes for the wall plugs supplied.
Before drilling into walls, check that there are no hidden electrical wires, cables or water supply pipes. This can be checked with the aid of an electrical detector:
If power tools are used do not forget to:
- Wear eye protection
- Unplug equipment after use
Fit the wall plugs and position the brackets into position and secure using the screws provided.
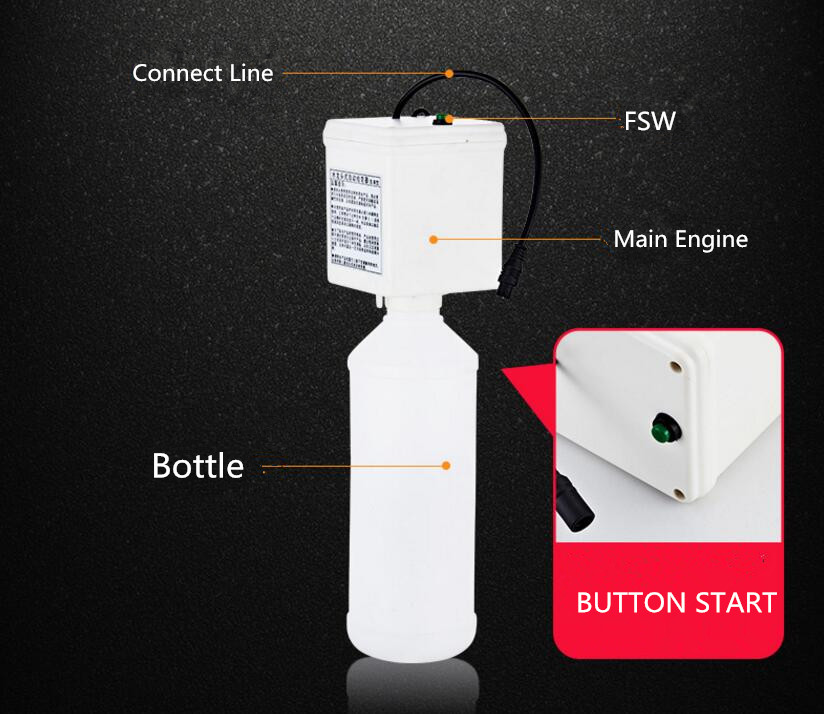
4. Attach Pump to Bottle
Ensure the dispenser tube is located inside the bottle and push the pump down firmly onto the bottle until a loud ‘click’ is heard.
To remove the pump from the bottle press the release button in on the side of the pump and pull the pump from the bottle.
5. Connect Sensor Cable and Dispenser Cable
Connect the sensor cable from the spout to the sensor cable on the pump. Push the two connections together and tighten the connecting ring to ensure the two connections are locked together.
Connect the dispensing cable from the spout into the top connection on the pump.
Push the threaded connection of the dispensing cable into the connection on the pump and tighten the nut ensuring it is fully tightened.
A suitable spanner may be used to tighten the nut.
6. Place Pump into Bracket
The pump has a cut-out section which the wall bracket slots into.
7. Connect Power Supply Cable
Before starting any electrical work ensure the power supply is isolated.
Wire the electrical power cable into a switched fused spur off the ring main.
The blue wire should be wired to the neutral connection and the brown wire should be connected to the live connection.
Important: The power lead must be permanently connected to the fixed wiring of the mains supply using the factory supplied power cable.
Plug the power cable into the power cable on the pump.
8. Inserting Batteries
Remove the battery cover by loosening the screw in the top of the cover.
Insert 4 batteries into the battery box ensuring they are inserted the correct way.
Replace the battery box cover and tighten the screw. Insert the battery box into the holder.
Push the holder into the battery box wall bracket.
CommissioningCommissioning Sequence
Before using the soap dispenser for the first time the following sequence must be carried out.
Fill the bottle full of soap.
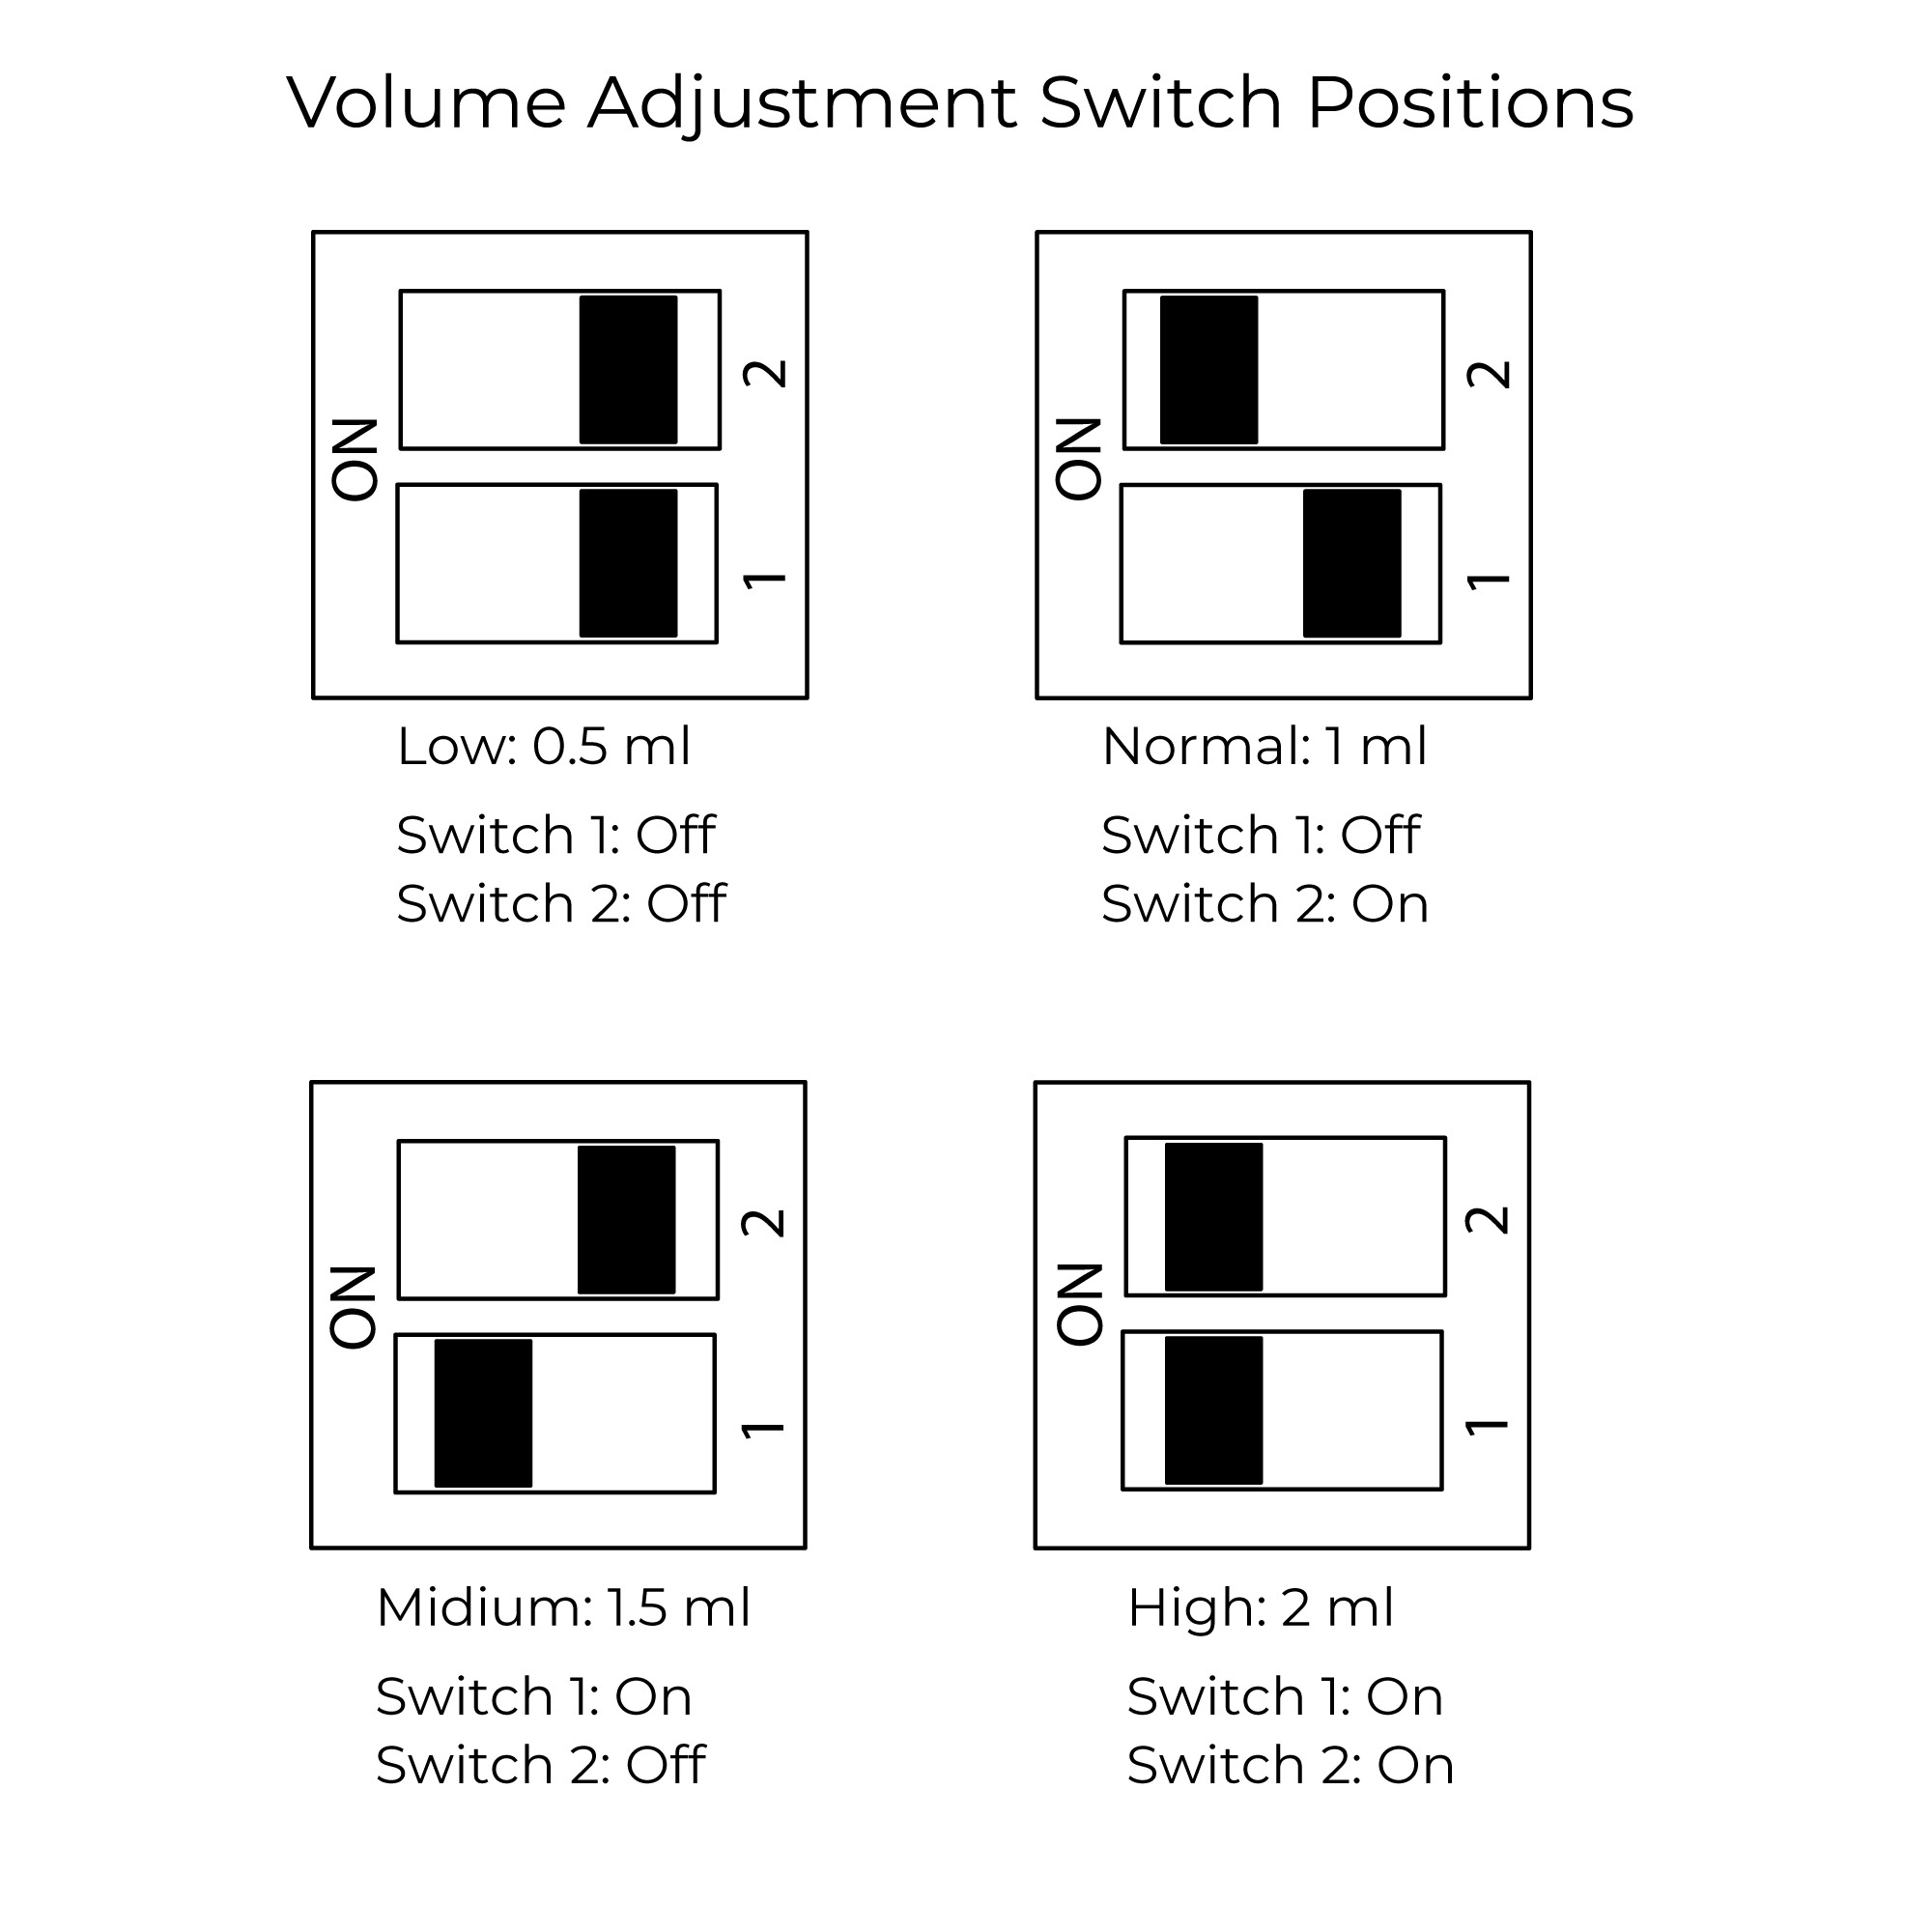
Locate the dispense button on the side of the pump. Press and hold the button until soap is dispensed from the spout. This will ensure the dispenser tube and cable are full of soap.
OperationUsing the Automatic Soap Dispenser
Place the hands under the spout within the sensing range.
Once the users' hands have been detected a small amount of soap will be dispensed from the spout into the users' hands.
| | |
| | |
Features: 1. Material: Brass faucet body, beauty & fashion. 2. Anti-blocking: Independent R&D soap pump, design multiple anti-blocking measures. 3. Impurity filter: Built-in filter unit,effectively filter the impurities and protect the soap pump, in this way can prolong the pump working life. 4. Button function: fast filling the soap bottle only pressing the button. 5. Saving resources: save 30% soap solution, and be easy to clean, save time and save water. 6. Hygienic: No touch the faucet body,effectively prevent us from mutual bacterial infections. 7. Moisture-proof seal: Electronic control unit is adopted professional moisture resistance sealant technology.
|