Home > Installation Instructions For Fontana Rivera LED Rain Shower Head

Fontana Rivera LED Rain Shower Head with Copper Finish


The Fontana Rivera Shower Set has a beautiful Copper Finish, it's available in 8", 10", 12" and 16" sizes. Rain shower head feature provides a unique bathing experience. Durable, dependable and with the luxury of a relaxing shower. Built-in hydro-powered device powers the LED lights when you turn on the water. The LED lights change colors through your water temperature. Water temperature is ≤89 °F (≤32 °C), Blue color will show automatically. Water temperature is between 97 to 107 °F (36-42 °C), Green color will show automatically. Water temperature is between 109 to 122 °F (43-50 °C), Red color will show automatically. Water temperature is above 122 °F (>50 °C), Red color will flash immediately. So you never scold yourself.

Fontana Rivera LED Rain Shower Head with Copper Finish Features:

  • Brand Name: FontanaShowers
  • Model Number: FS-9087C
  • Type: Shower Set
  • Shower Head Size: 8"; 10"; 12", 16".
  • Water Flow: 2.0 GPM
  • Style: Rain Shower Head
  • Valve Material: Brass
  • Control: Balance
  • Connection: Standard Plumbing
  • Minimum Pressure Required: 29 PSI
  • Maximum Pressure: 72 PSI
  • Technology: Ceramic Disc
  • Inlets and Outlets: ½"
  • Compatibility: Standard US
  • Fontana Rivera LED Rain Shower Head with Copper Finish
    FontanaShowers®Product Warranty InformationFontanaShowers Product Warranty


    Shower-Head Installation


    No tools required, ½ connector fits standard-sized shower plumbing.
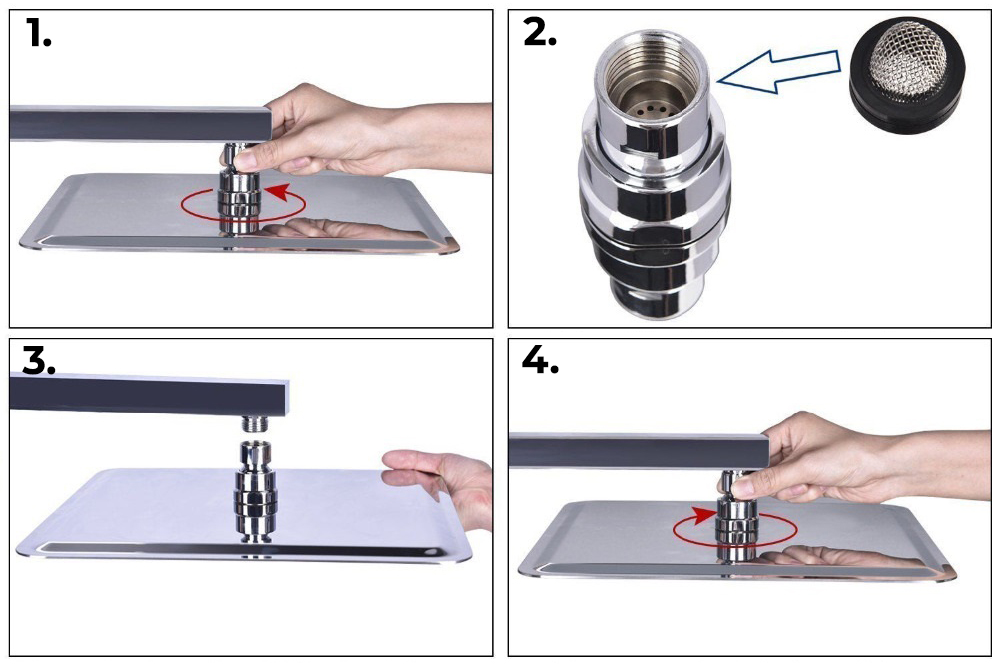
    1. Use your hands counterclockwise to unscrew the old showerhead and removed it.
    2. Take out the showerhead, make sure the shower filter is placed in the connector.
    3. Ensure the showerhead full horizontal alignment wall mounted shower arm thread.
    4. Use your hands clockwise to tighten showerhead.


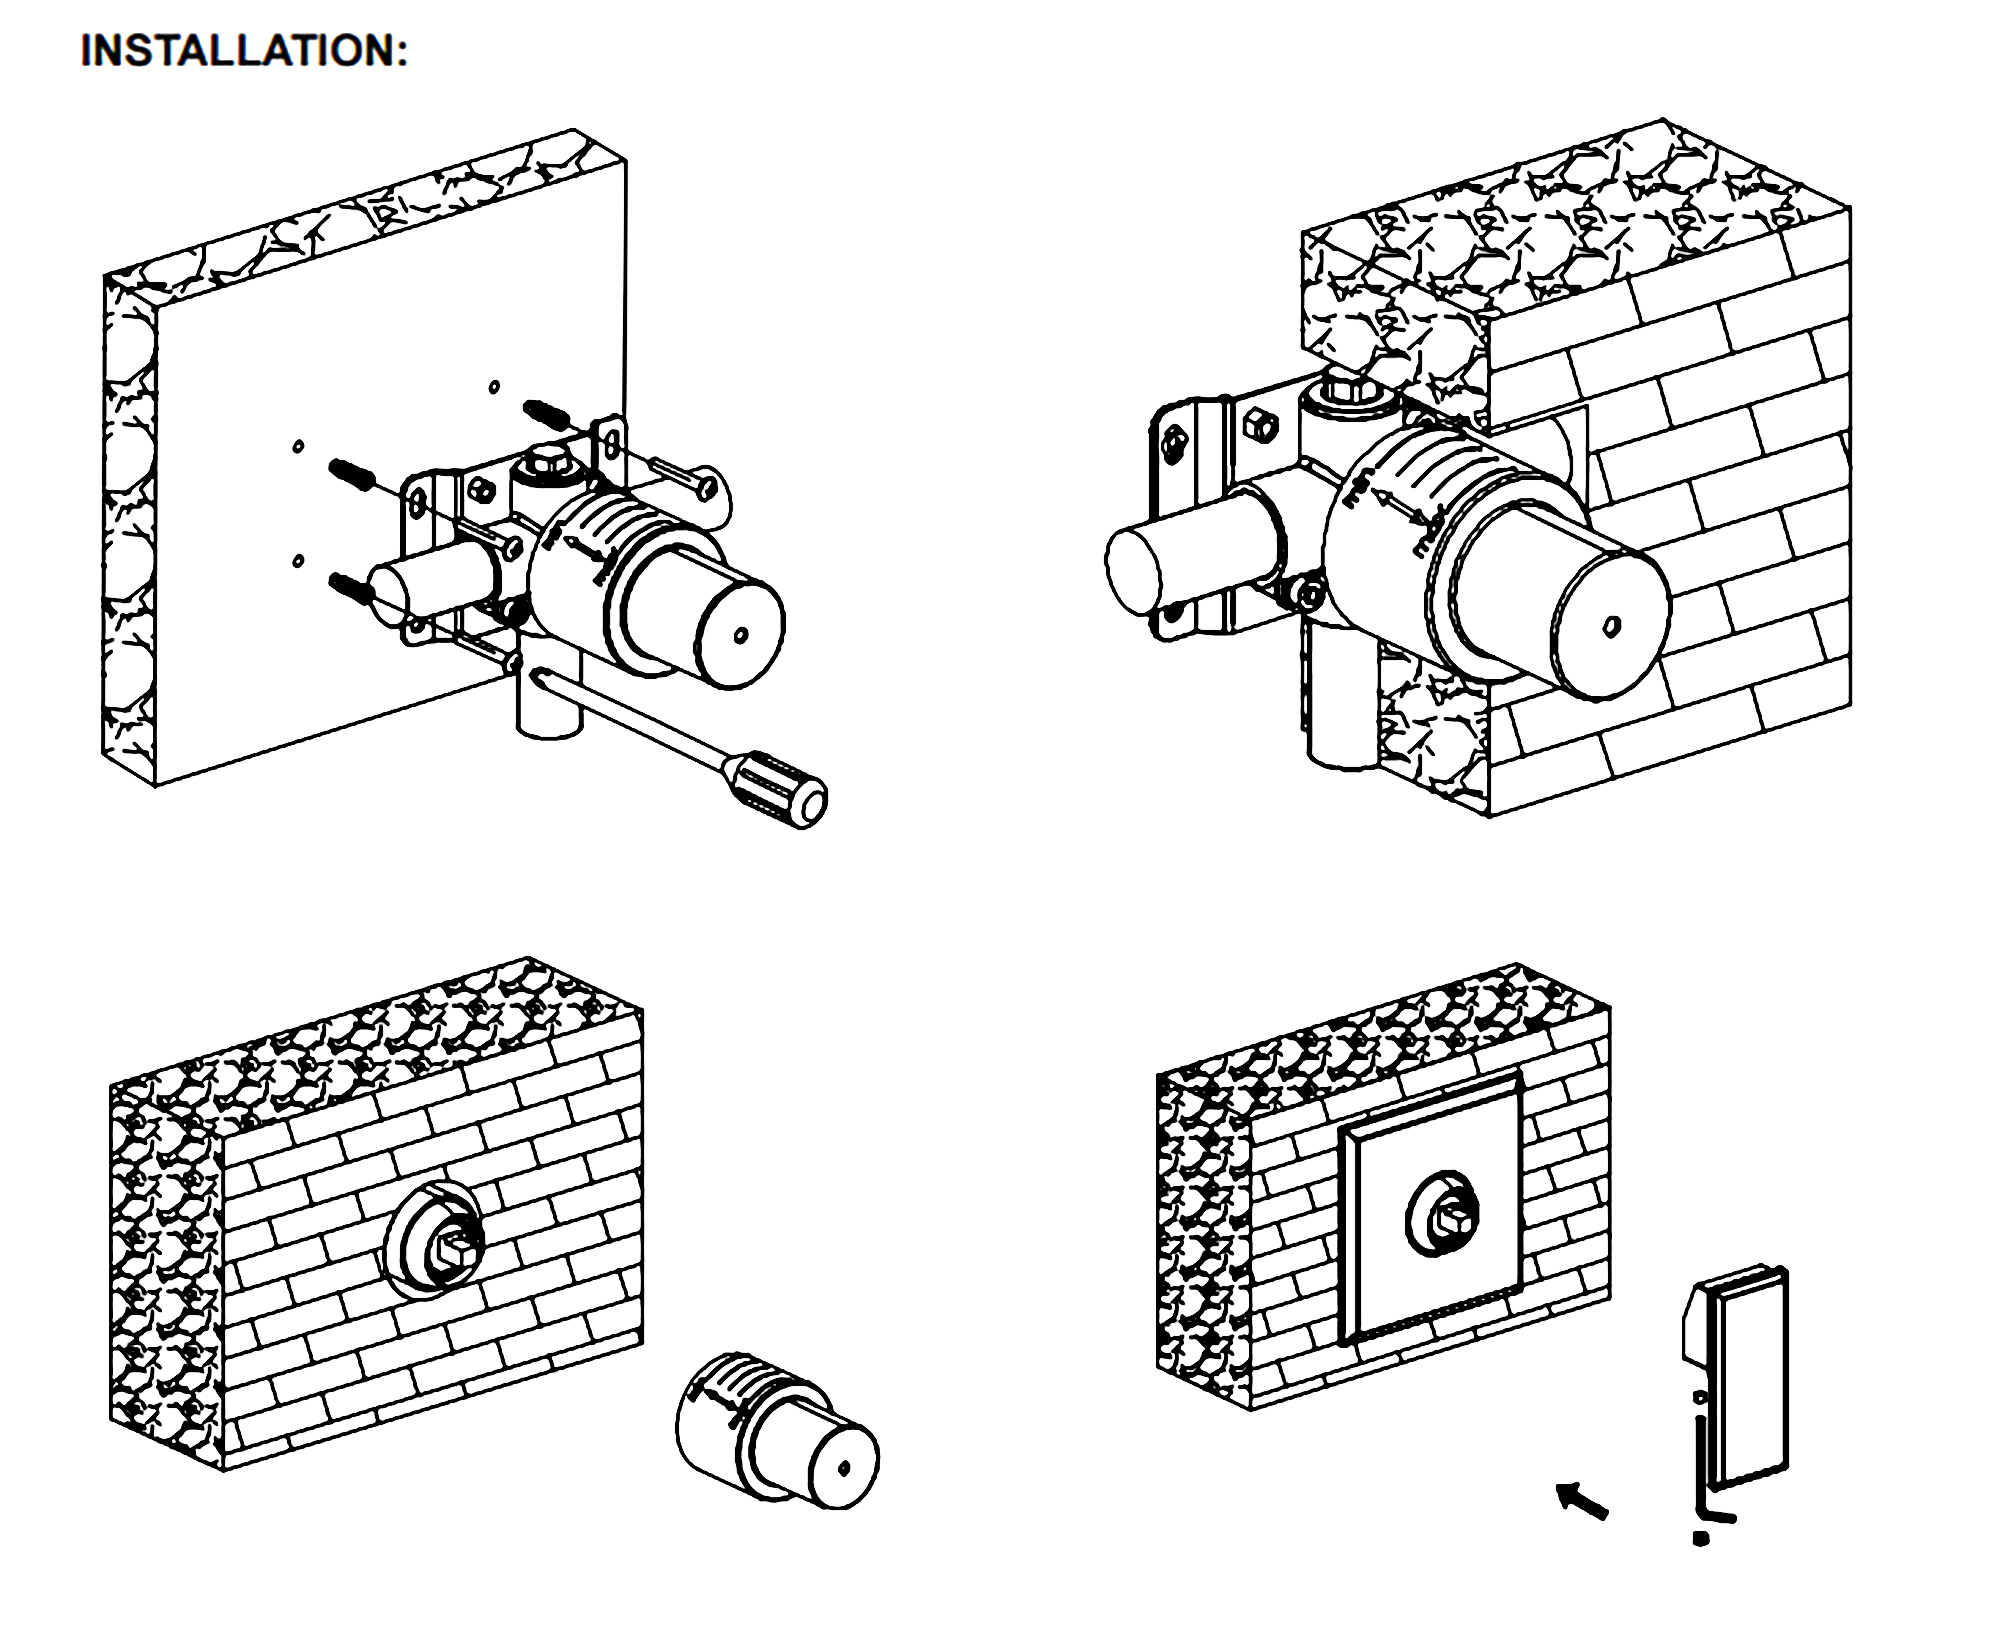
    1. Install the valve body. Wrap the threaded portion of the joints in Teflon tape and connect the water inlet and outlet.

    2. Put the protective cover on the valve body and finish the shower wall.

    3. When the finished wall is complete, remove the protective cover.

    4. Install the escutcheon, and handle. Tighten the set screw with an Allen wrench to secure.

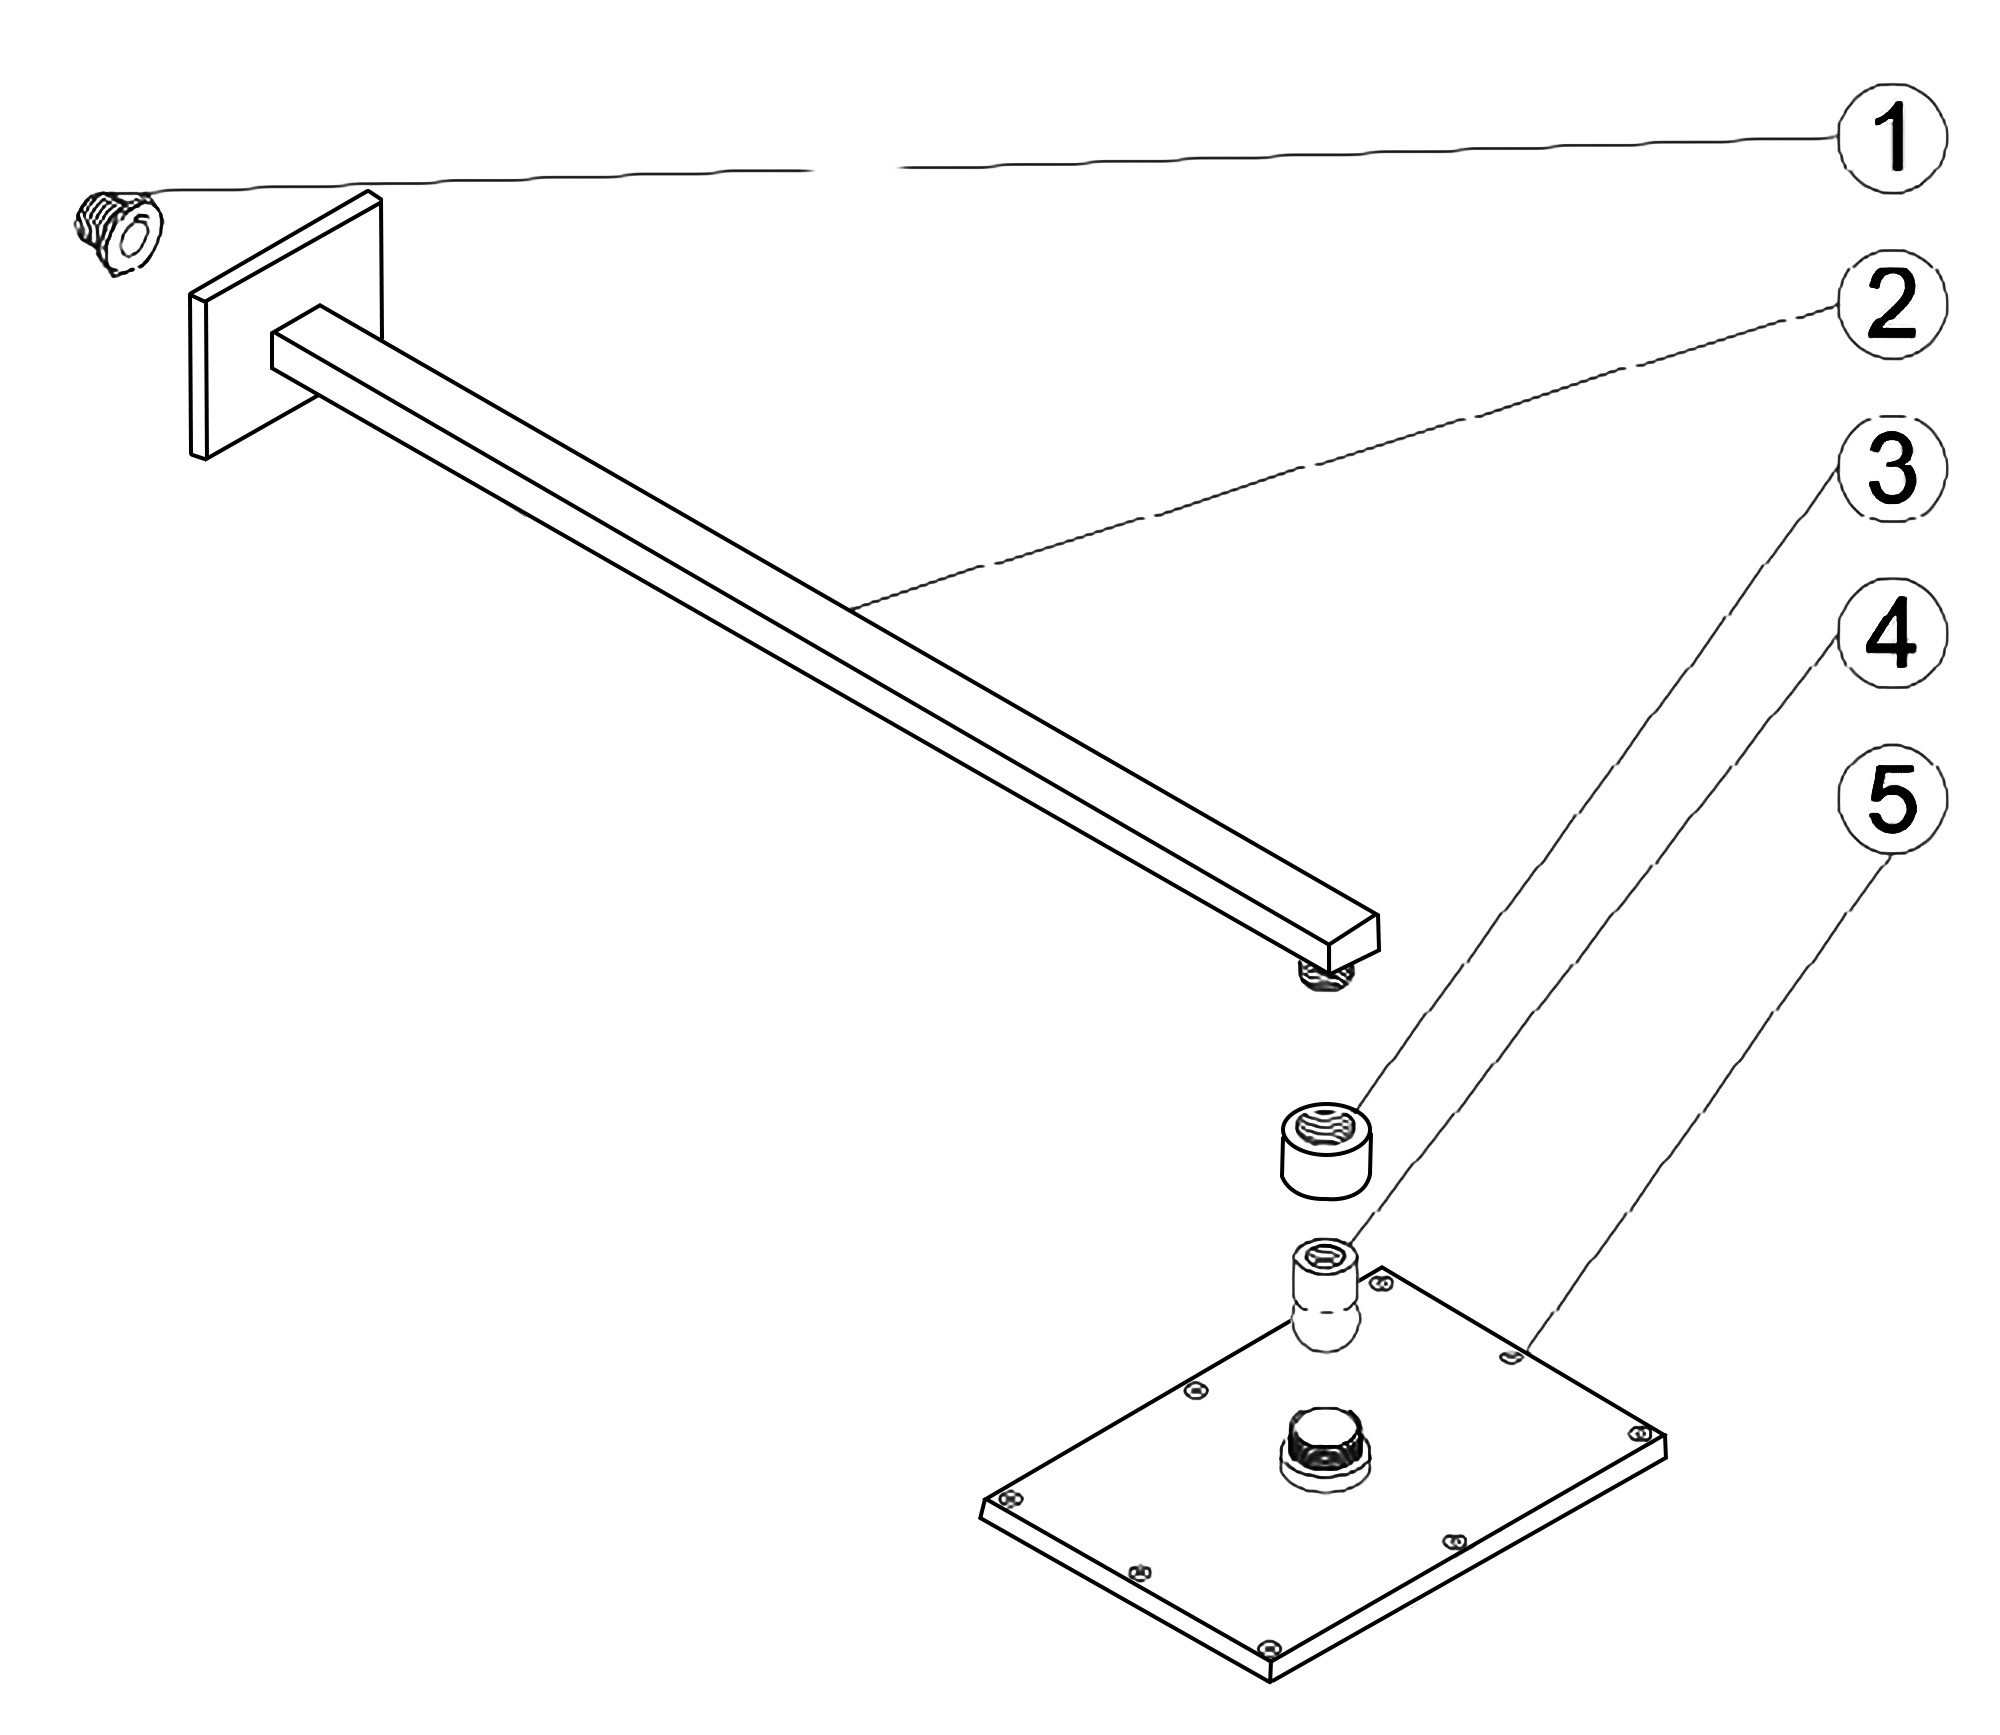
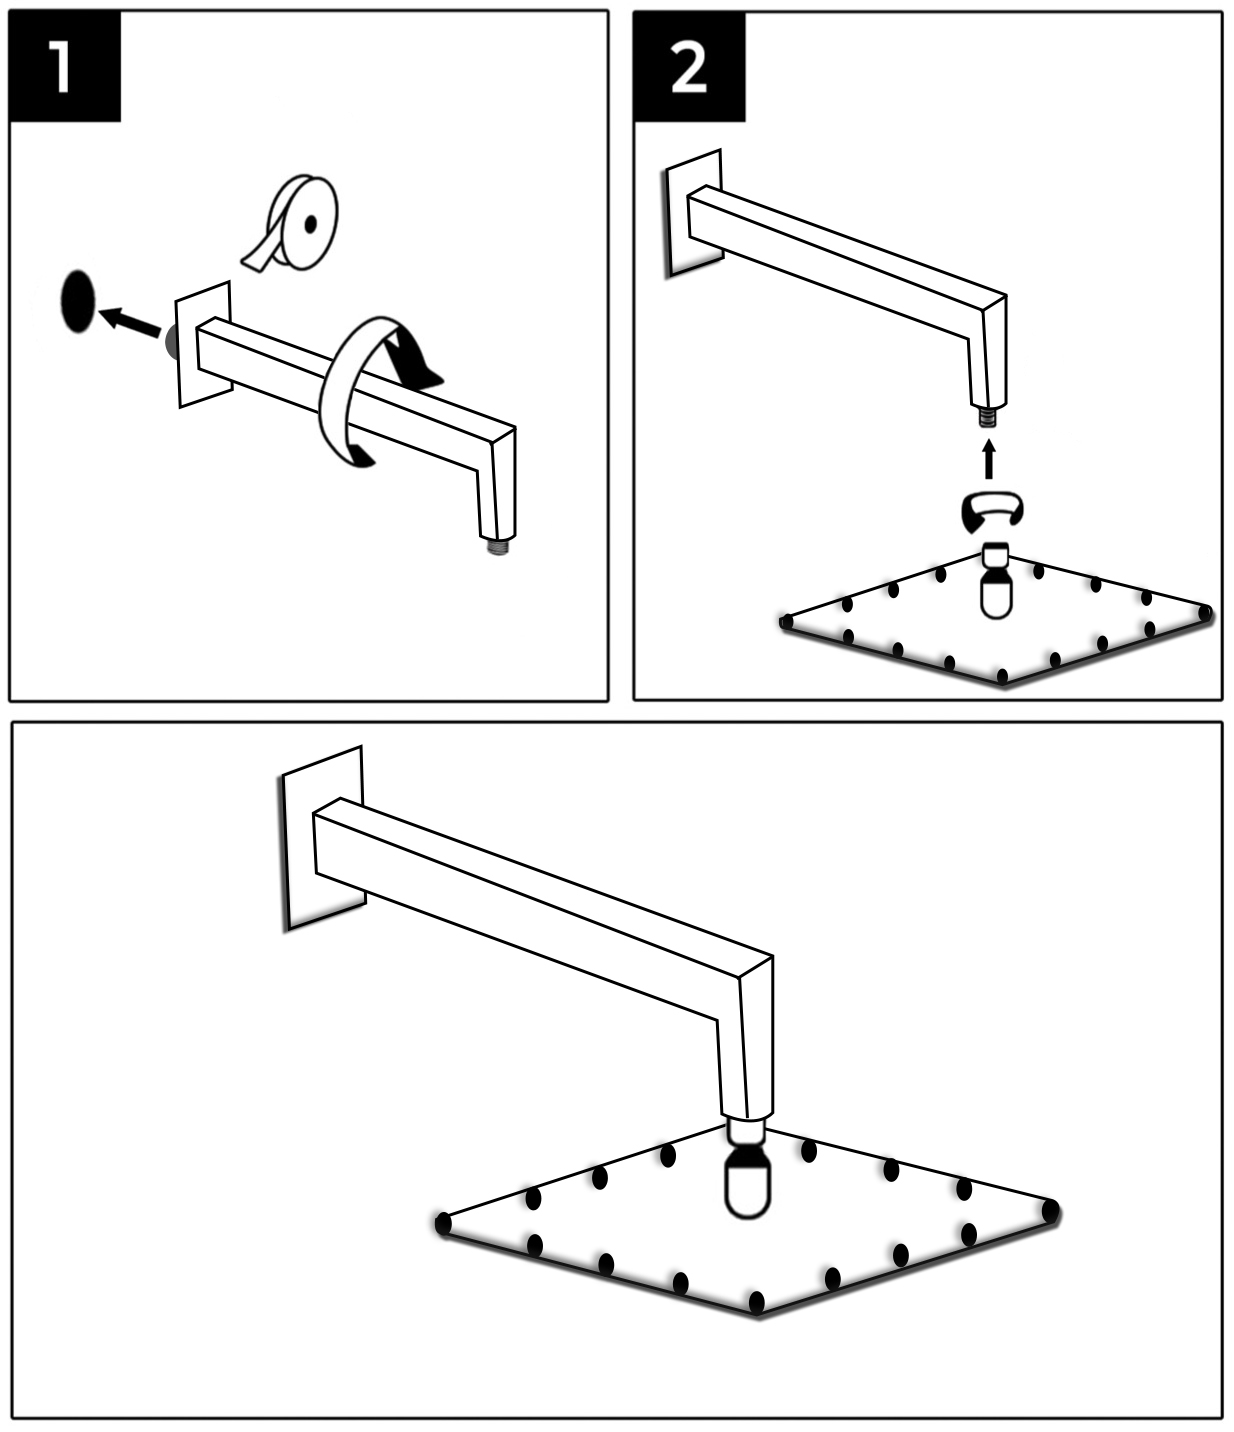
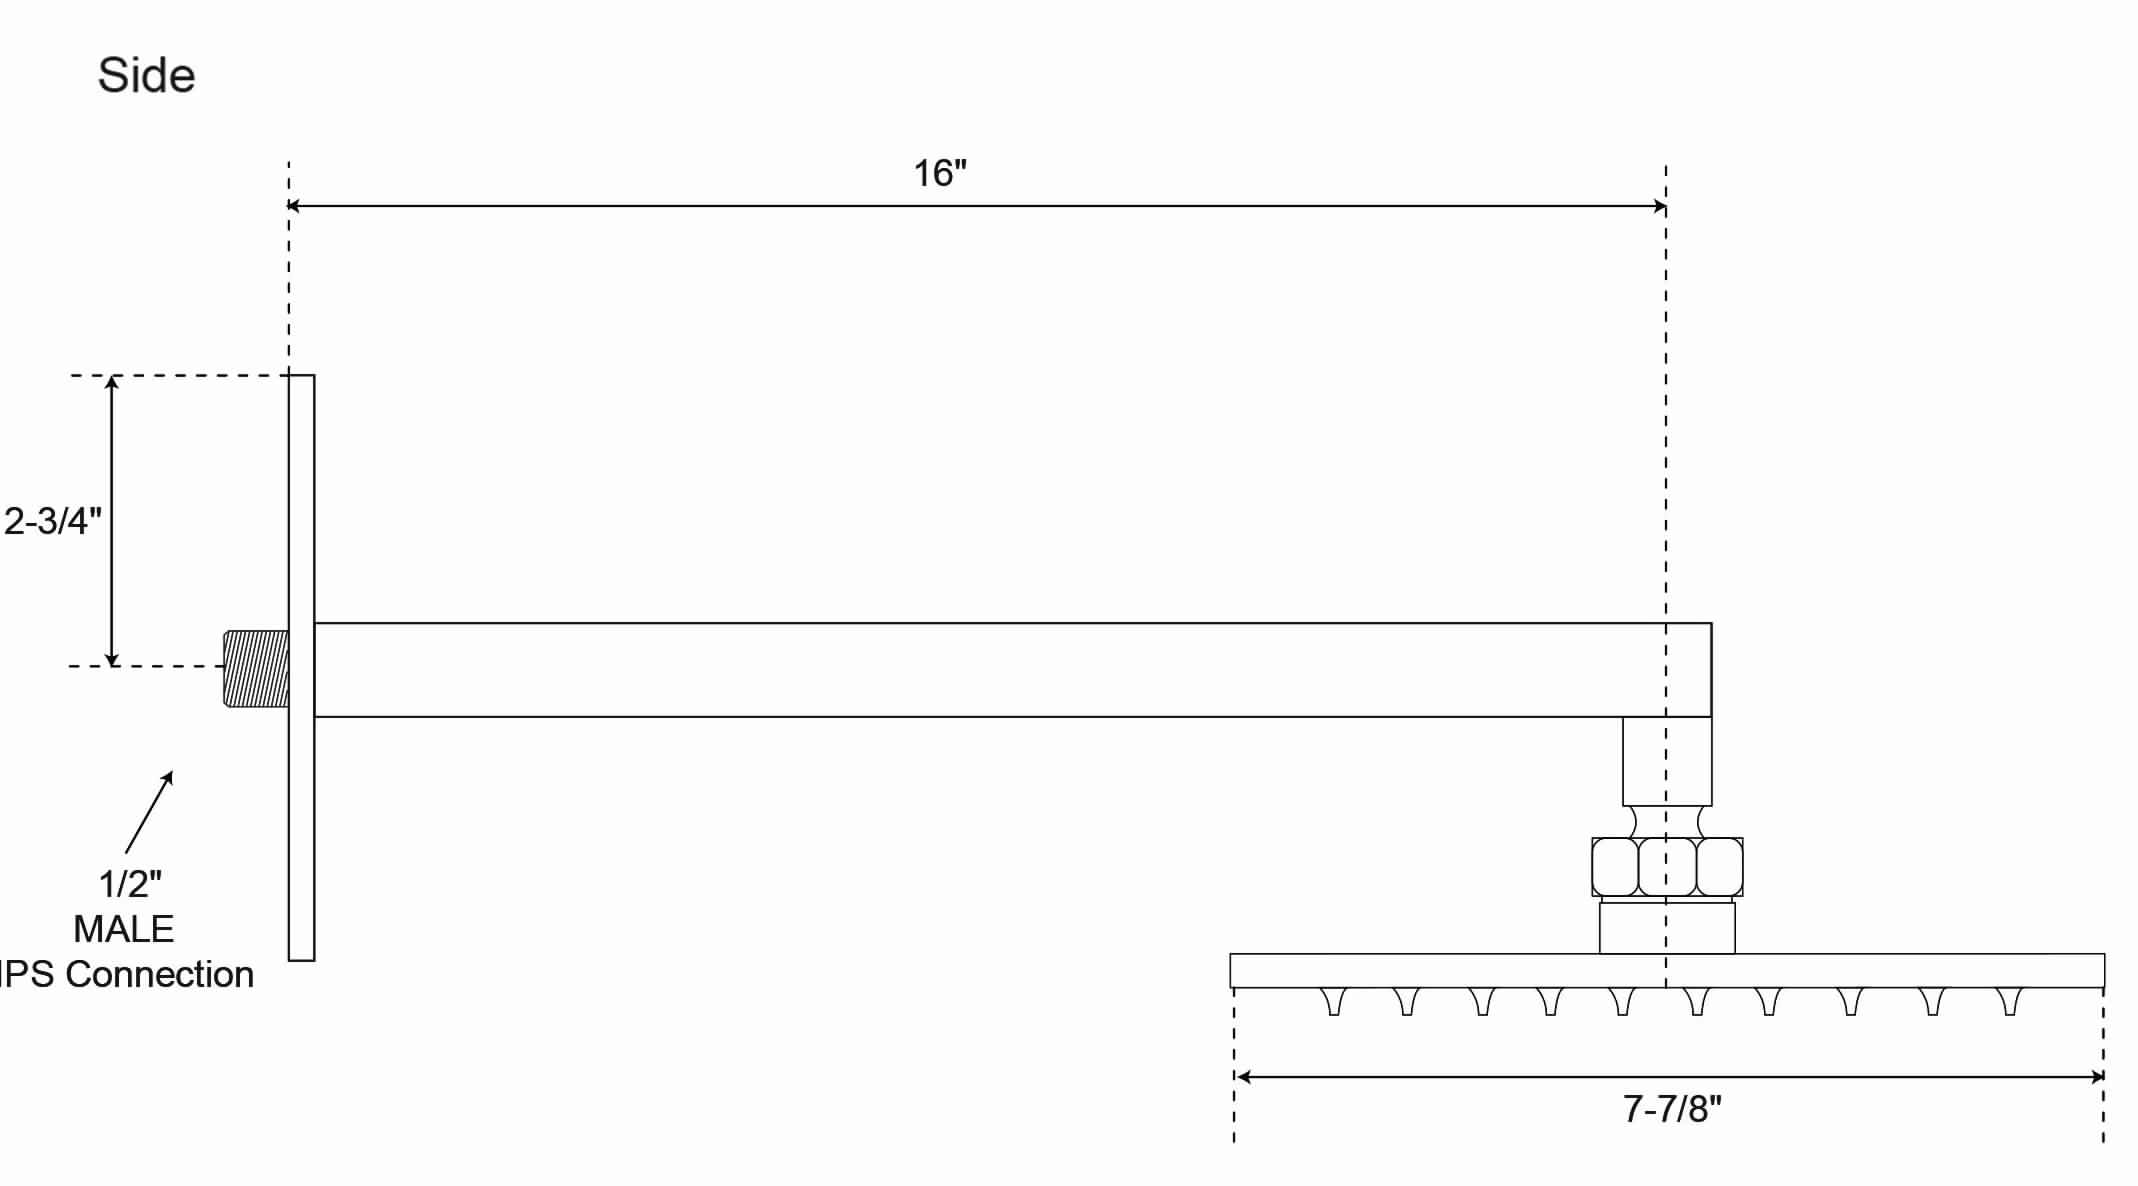
    5. Attach the shower arm escutcheon to the shower arm. Wrap the threaded portions of the shower arm with Teflon tape and connect the arm to the shower inlet. Adjust the direction of the water flow as needed. Attach the rainfall shower head to the shower arm.

    The installations & illustrations for Rivera LED Rain Shower Head are for informational purposes only.